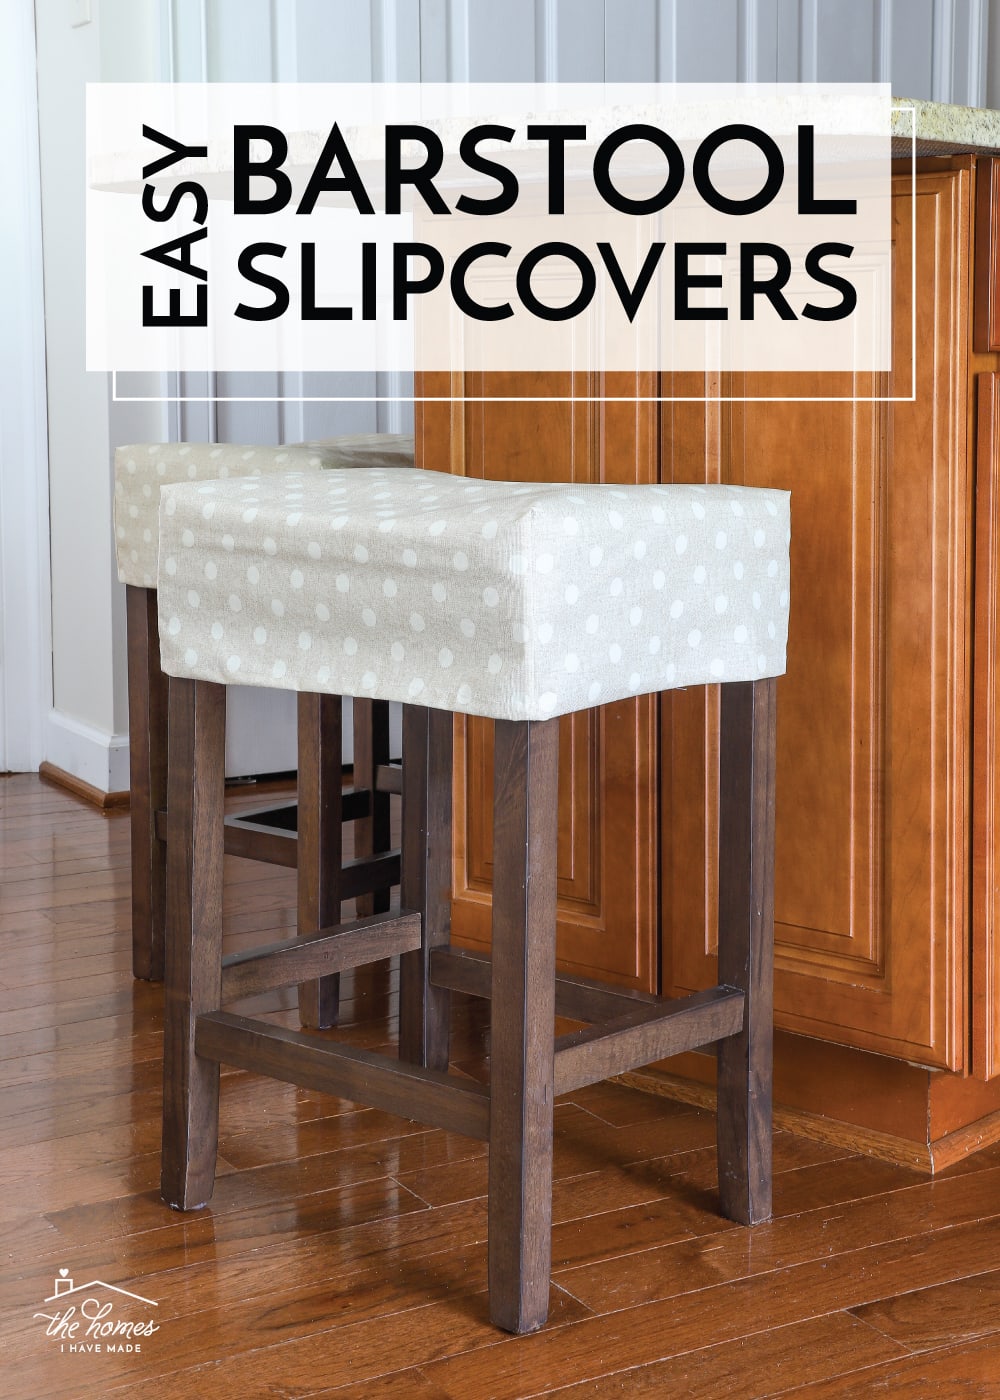
Easy DIY Barstool Slipcovers
Barstools are another one of those funny things for families that move a lot like we do. Not only are they super unique to each home (sometimes we need them, other times we don’t; sometimes we need 2, other times we need 3; sometimes we need counter height, other times we need bar height…you get the idea); but they also can’t be easily re-purposed into another room or function. You either have a place for them or you don’t. Over the years, we have purchased and gotten rid of several varieties of barstools…and since we now understand their relative non-permanence in our homes, we try to keep them as inexpensive as possible. This time around, I had a tough time finding a size and shape that worked for our kitchen island but were also suitable for a home with 3 young boys. For the sake of budget and accessibility, I chose stools that looked the way we wanted, knowing I could likely adjust the fabric to be more durable. I finally got around to making some really simple barstool slipcovers for them and wanted to show you this smart solution!
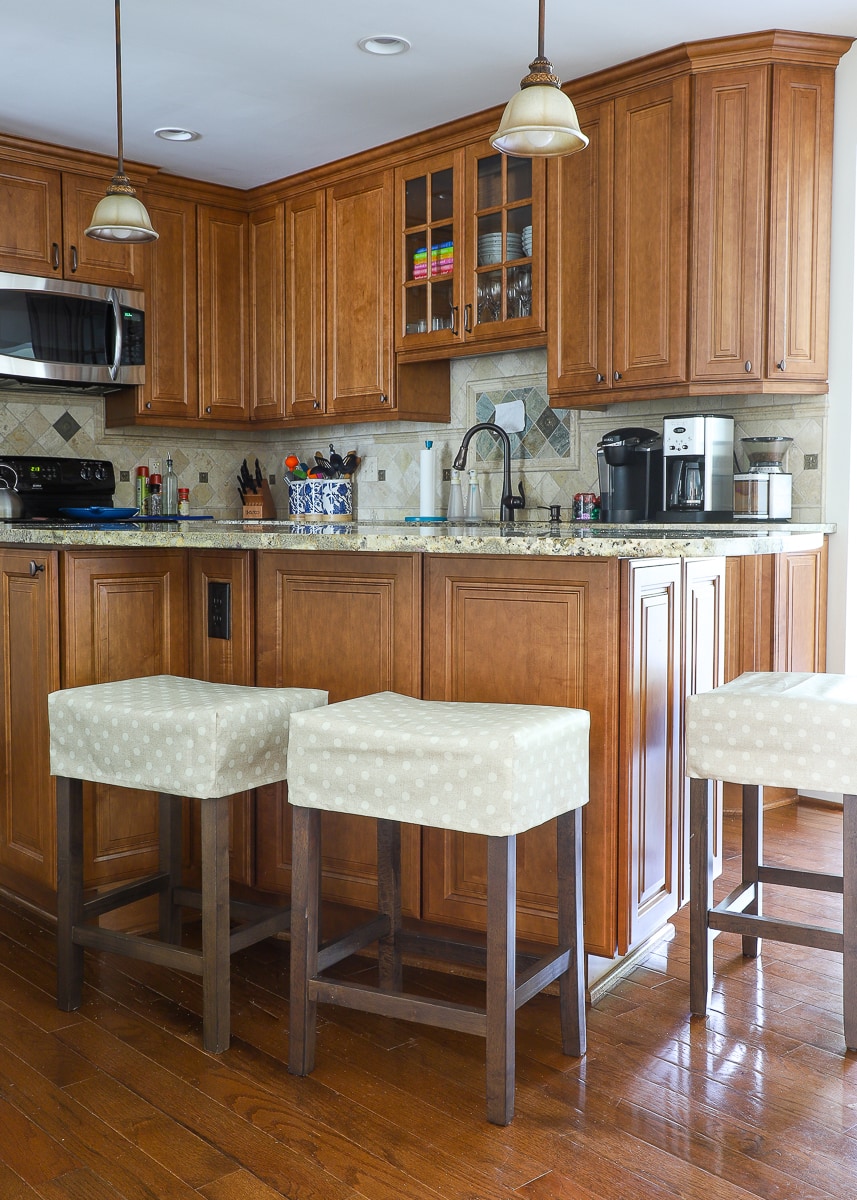
The designers of this home were clearly trying to get as big an island as possible in this space. I can’t say I mind…we looooooove this enormous island. But as a result of it taking up so much space of the floor plan, it means the walkways around the island are a bit tight. As such, we really wanted barstools that didn’t have a back and would fully tuck under the counter overhang. Sounds simple enough, but it actually turned out to be quite a tall order!
There are indeed countless stool options available, but we had a hard time finding good candidates. Not only did we have pretty specific size requirements, but we also wanted the style to work with the house and our existing furniture. Stools that were super modern, metal, or overly ornate all seemed wrong for this modern traditional space.
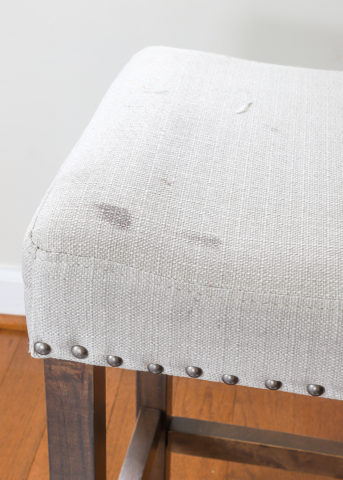
After hours and hours of hunting, I finally landed on these simple stools on Amazon. The size and shape were spot on; the colors work beautifully with other items we have in the adjoining rooms; and the price was reasonable. But the nailhead trim felt a bit formal for this comfortable space, and I knew the upholstered seats spelled trouble.
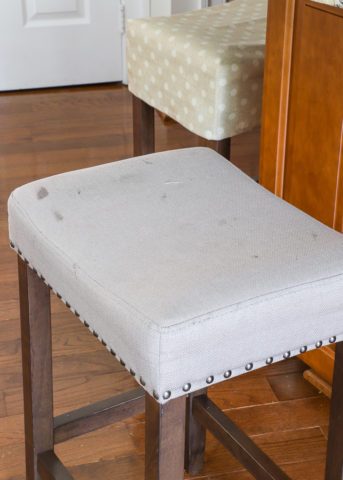
The boys and I eat almost every breakfast and lunch at the counter, so you can imagine it didn’t take long for these stools to look…um…rough. Despite my best attempts to wipe up stains as they happened, within a few months, they were embarrassingly dirty:
Why Not Reupholster The Stools?
What’s the phrase about repeating things, expecting different results, and insanity? Really, really, really long-time readers may remember back in North Carolina (4 houses ago!), we had a large upholstered ottoman in our family room. Like these barstools, it didn’t take long for it to become a smudgy, stained mess. Instead of re-doing the upholstery though, I made a snug-fitting slipcover that could be easily removed and washed as needed.
Although I repeated the same mistake of getting upholstered stools, I knew reupholstering them…even with something durable like Sunbrella fabric or oilcloth…wouldn’t perfectly solve my problem. Plus…reupholstering was a slightly bigger project than I had time for. I wanted something that could be easily pulled off and cleaned (since spills at a counter are inevitable) but was also quick and inexpensive to make. Barstool slipcovers, just like my trusty ottoman cover, were just the ticket!
Picking Fabric for the Barstool Slipcovers
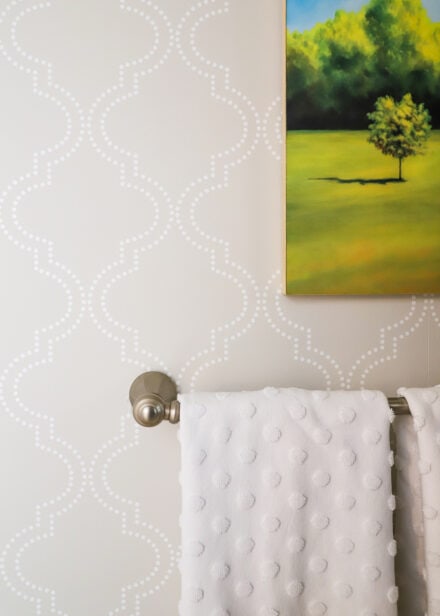
I wanted something really durable and washable for my slipcovers, but oilcloth can be a bit pricey (plus it’s not super easy to find in a wide array of colors and patterns). Instead, I started hunting around for a vinyl table cloth that I could easily cut apart and sew into slipcovers. This $25 tablecloth not only coordinated with our nearby powder room and couch pillows, but it was more than enough fabric to work perfectly for my intended purpose!
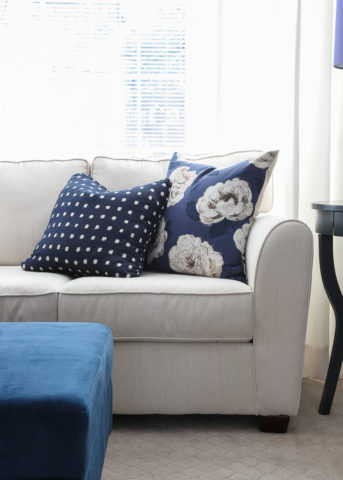
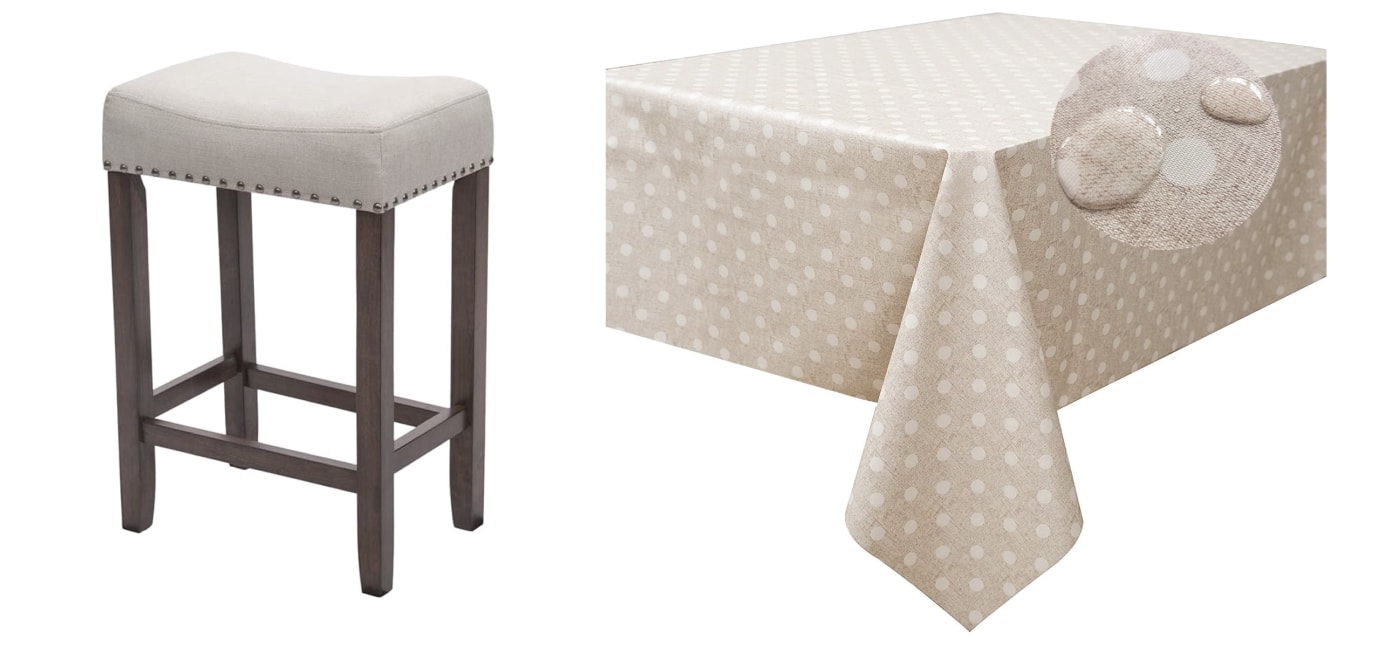
Bar Stools | Polka-Dot Vinyl Tablecloth
NOTE: Just a quick note about sewing the vinyl table cloth. This material isn’t lined, nor did it have a soft underside like some oilcloths do. As such, I found it a little “unforgiving” with the sewing machine needle. If I sewed over a particular area too many times, the vinyl would essentially tear (like a piece of paper) along the stitch line. I was able to successfully make these covers and they haven’t torn down the seams at all, but I did have to take care not to make any wrong or unnecessary seams that would “perforate” my vinyl too much.
How to Make Simple Barstool Slipcovers
(I am going to share an abridged step-by-step here because this project is actually an adaptation of my popular Boxed Corners tutorial.)
This tutorial is to make a basic box-style slipcover for any square or rectangle stool. For projects like this where you want the fit juuuust right, I highly recommend making a practice version before cutting into your “real” fabric.
To determine how much fabric you need and how big to cut each square, measure and cut your barstool top as follows: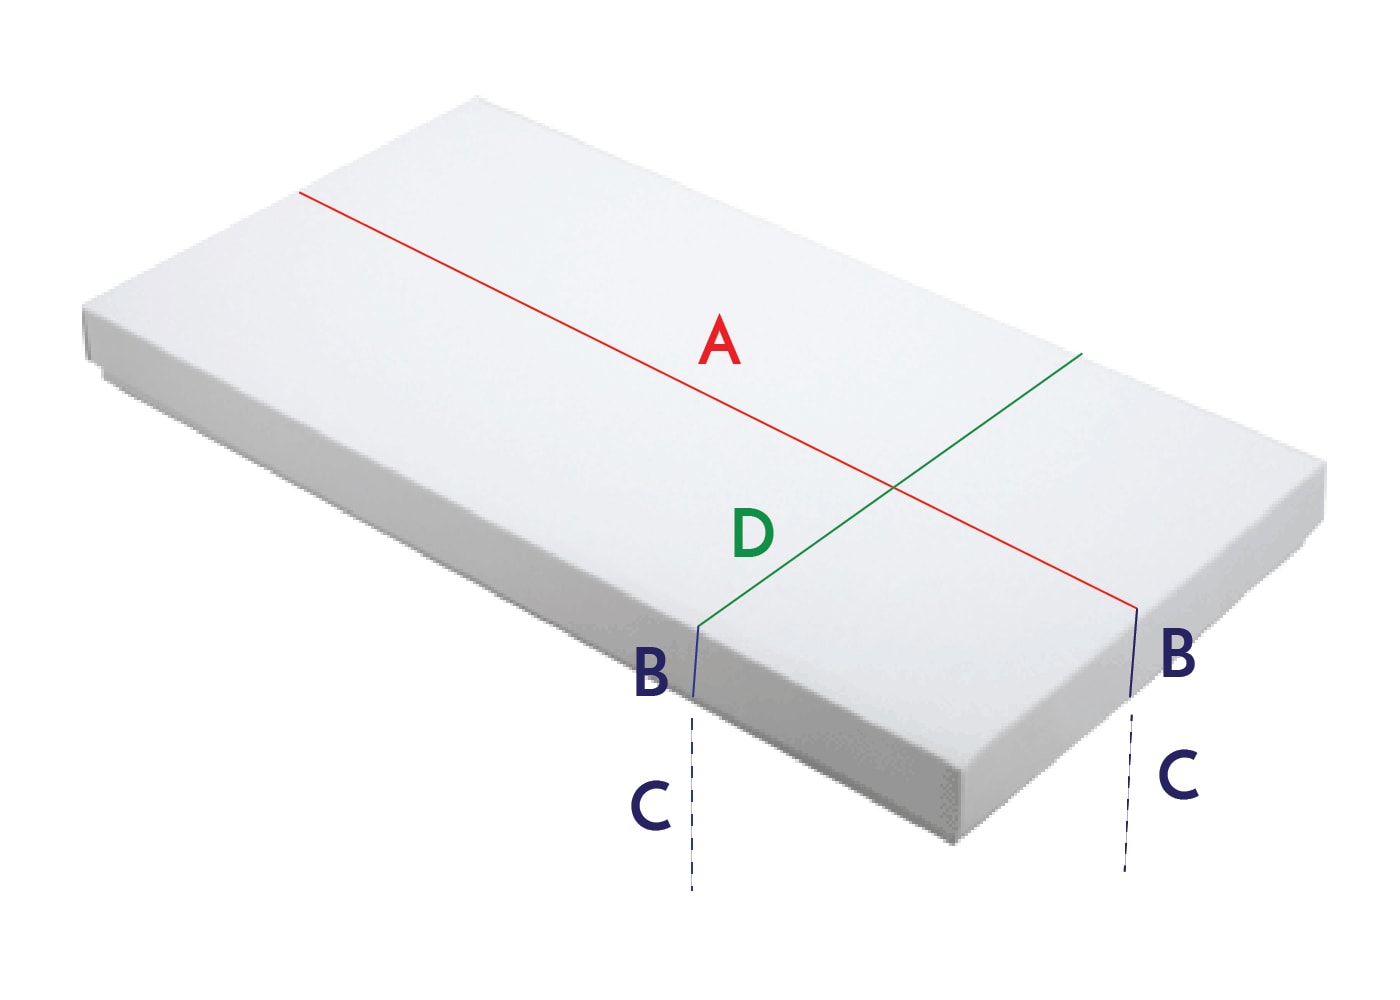
Want to save this post?
- A = Length of stool
- B = Height of stool
- C = Amount needed for hem
- D = Width of stool
With those measurements in hand, calculate and CUT your fabric as follows:
LENGTH X WIDTH
Length = A + [(B + C) x 2]
Width = D + [(B + C) x 2]
Your B + C measurement can be adjusted based on how long you want your slipcover to hang. For my ottoman, I wanted the slipcover to meet the edge of the ottoman so I didn’t add any additional length to the B + C measurement. However, I wanted my stool covers to hang longer than the upholstered 3″ top. As such, I used 7″ as my B + C measurement. With ~1″ for hem, my slipcovers hang about 6″ from the top of the stool to the hem.
Once you get your stool measured and your fabric cut, you will need to refer to the following tutorial for actually assembling your slipcovers: Boxed Corners Tutorial (I used the French Seam version so I had no frayed edges on the inside).
Dealing with Unique Stool Designs
I realize each and every barstool will likely have a different profile. For example, although these stools are indeed “boxes,” they have a “swoop” in the middle of the seat:
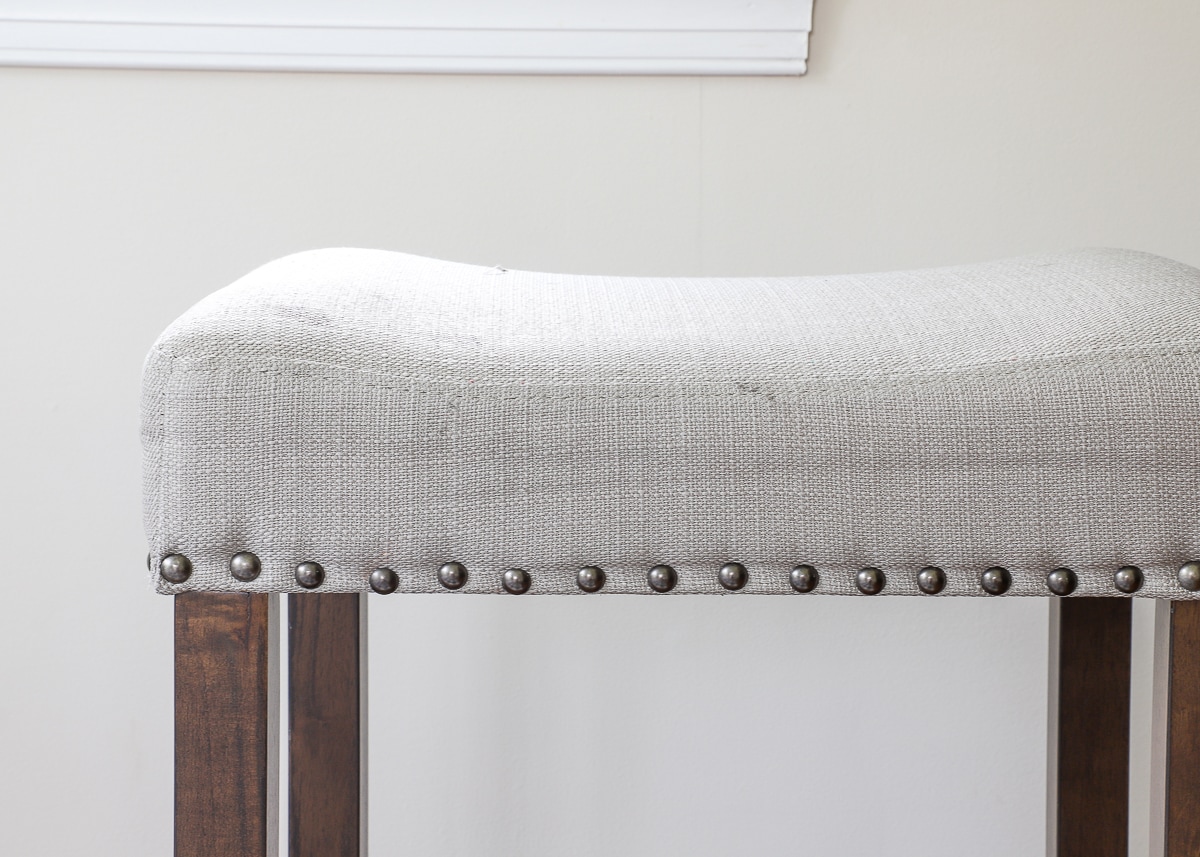
These specific slipcovers are designed to fit snugly on perfect box shapes, so as you might suspect, my covers are a touch “baggy” in the center of the stool:
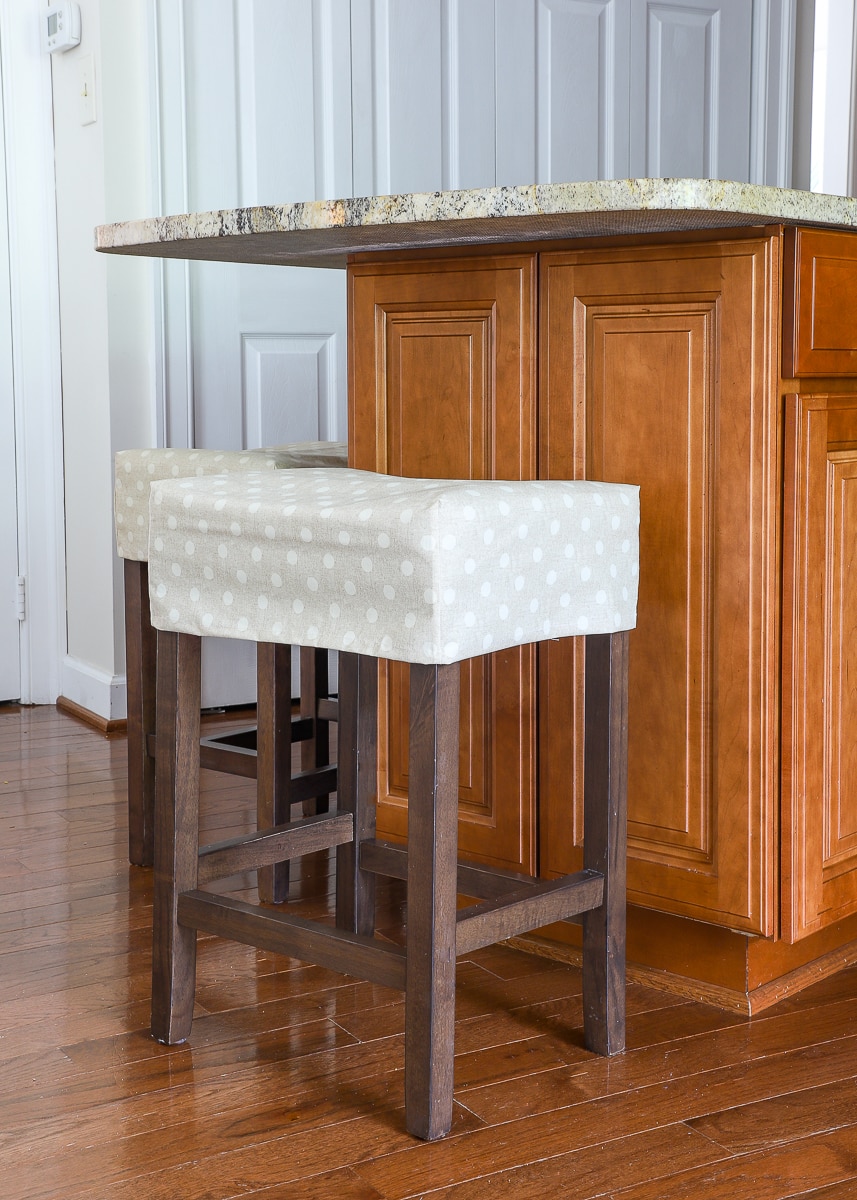
Originally, I was going to make a quick seam along that ridge (on the inside of the cover) to tighten it up and have it fit the stool’s profile perfectly. But as I mentioned above, this vinyl doesn’t have much give…and I worried with the boys jumping around on them, that seam would tear if it was too snug. Had I made these covers from fabric, I absolutely would have done so; but for now, we are fine with the little pucker along the sides.
My point: if your stools have a slightly unique profile, you can still use this tutorial. Just don’t hesitate to “tailor” them with additional seams after you get them sized and on the stools!

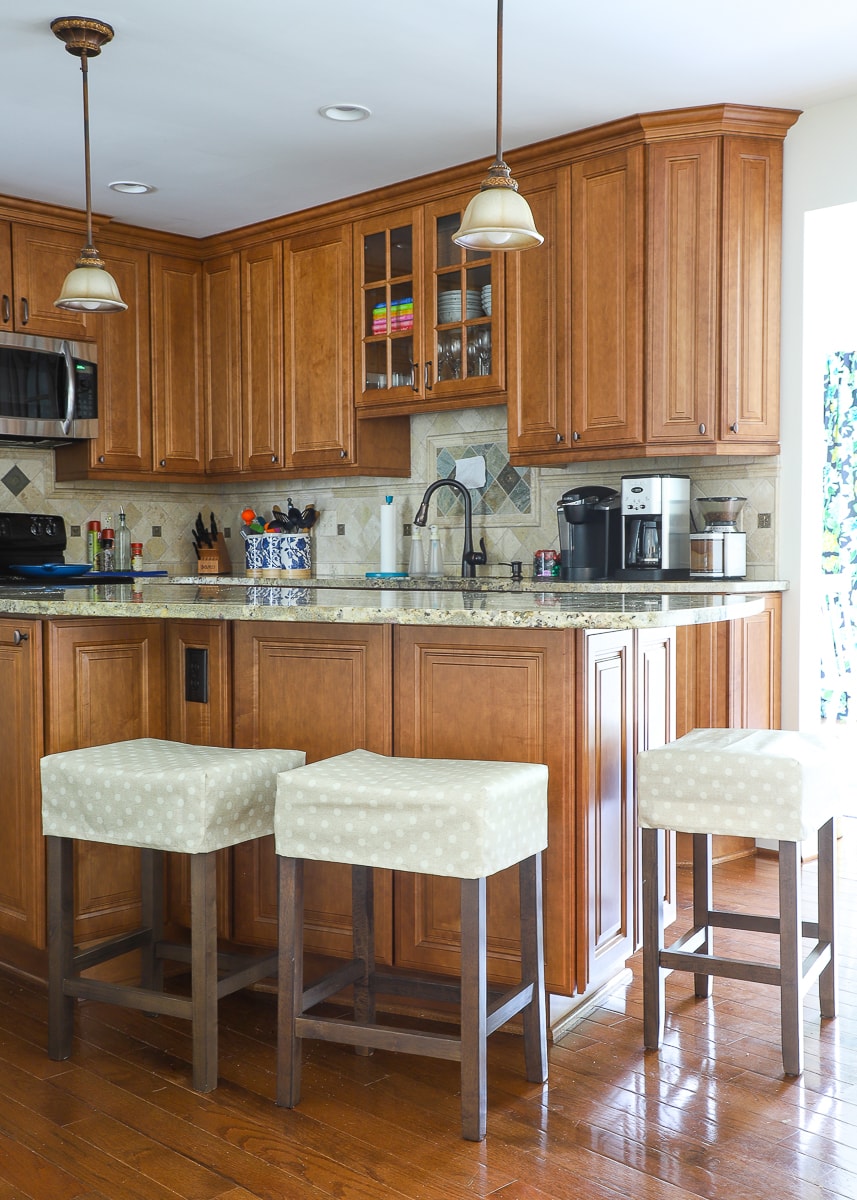
Each cover took me about 20 minutes from start-to-finish. And at less than $7 a cover, you better bet I wish I got around to them before the fabric on the stools were trashed. At least now, all the unsightly stains are hidden (I am no longer embarrassed to have guests sit on them), and we have adorable (and more importantly) removable covers that add a nice touch of whimsy to the kitchen! An hour well spent I think!
Other Easy Home Decor Sewing Projects
Ready to sew more projects for your home? Here are some other simple tutorials to try!


In this weekend’s newsletter, I’m chatting all about creating cohesion throughout your home…one example being how these stools pull together the couch pillows and powder room decor. I can’t wait to show you some other examples to try in your own home!
Megan
5 Comments on “Easy DIY Barstool Slipcovers”
Just wondering how durable these slipcovers will be? Since the seams will be a bit fragile.
Hi Linda!
Admittedly, I was a little worried too when I saw the seam tearing on my practice one. But so far, they haven’t had ANY issues! The boys jump around on them all the time, and I haven’t see any splitting. I think it’s partly because the seams are along the sides/legs…not along the seat in any way, where most of the stress would be.
I’ll keep you posted!Megan
Hi Megan,
Thank you so much for the DIY. I have been looking for DIY Saddle Stool covers for a while but its the round that is popular everywhere you look. Most DIY require stapling or the use of a sewing machine. Do you think I could try sewing glue to make the vinyl covers? I would really like something that does not require washing.
Hi Chan,
I am so glad you found this tutorial helpful. I have honestly never used “sewing glue” so I can’t say for sure. You can certainly give it a try, but since stool covers tend to get a lot of use, I’m not sure how well they’ll hold up.
If you try it, please let me know how it works!
I have 4 bar stools identical to yours about how many yards of material would I need?