Our Boys’ Shared Bedroom Reveal
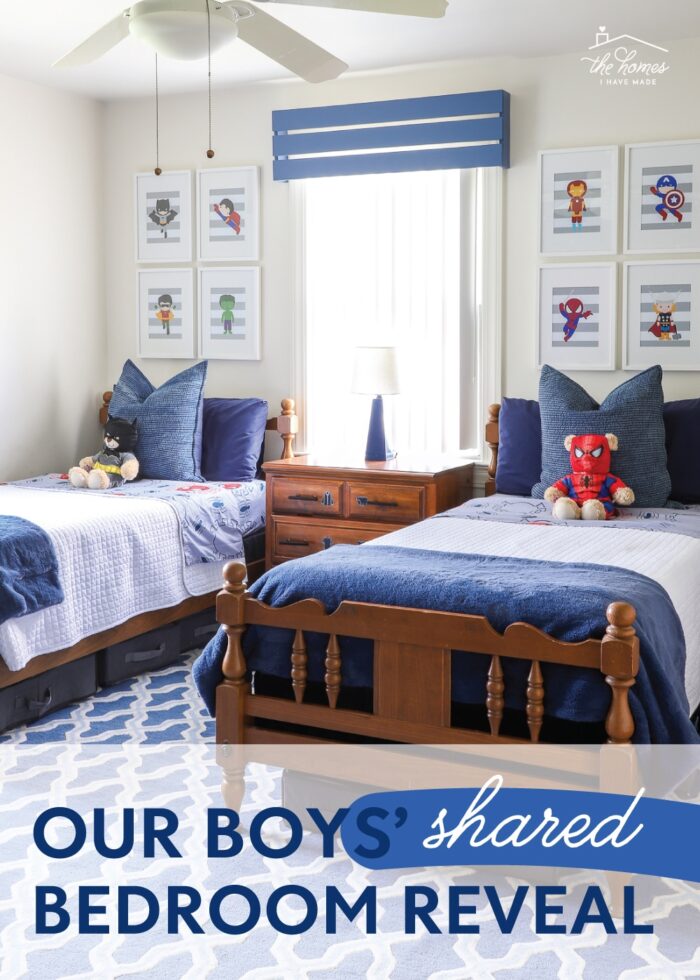
Even after all our homes and all the rooms I’ve decorated over the years, little kid spaces are still my favorites. Maybe it’s because I don’t have to hold back my natural inclination toward bold, fun, and whimsical! The bedroom my two youngest boys shared in North Carolina ranks among my favorite bedrooms ever. I love all the bold blues and fun patterns perfectly balanced out with a heavy dose of white and finished off with some super sleek organization solutions. This room was spacious, fun, AND functional…and my boys still miss it! Let me give you the full “final” tour!
Boys’ Shared Bedroom | Before & After
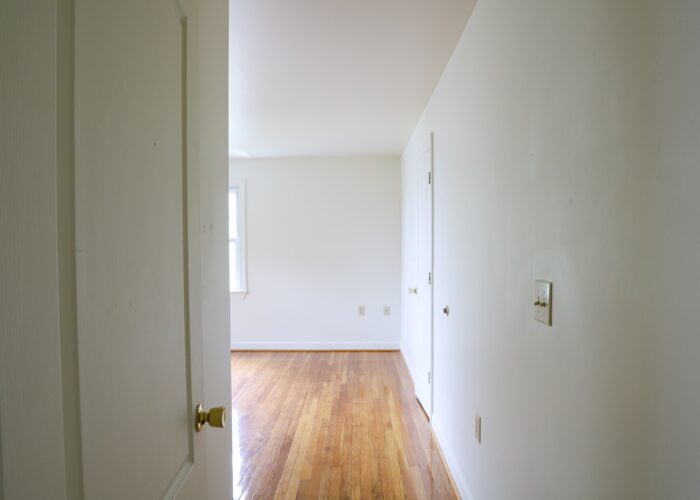
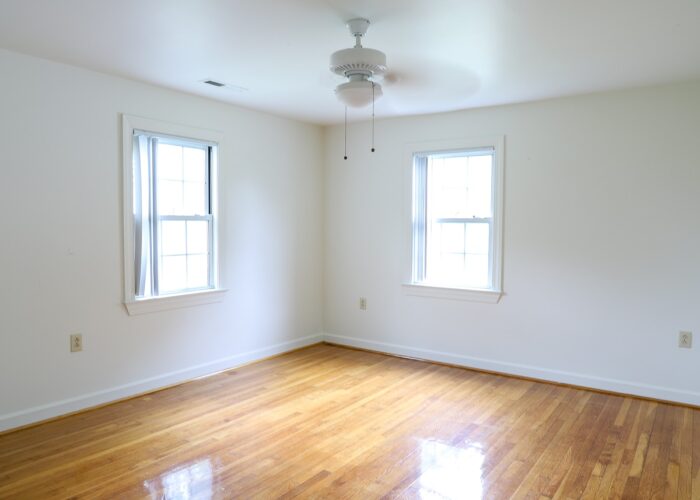
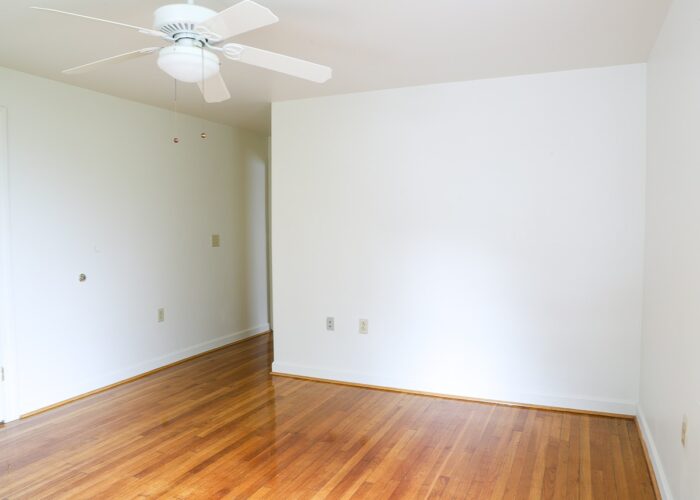
Before I dive into all the details, let’s do a quick Before/After, as a reminder of where we started when we first moved in.
This upstairs bedroom in our North Carolina home was quite large and bright, with a little tiny hallway that led into the space. The walls, doors, and trim were all painted the same light yellow-y white color, and the original pine floors stretched wall-to-wall and even into the closet.
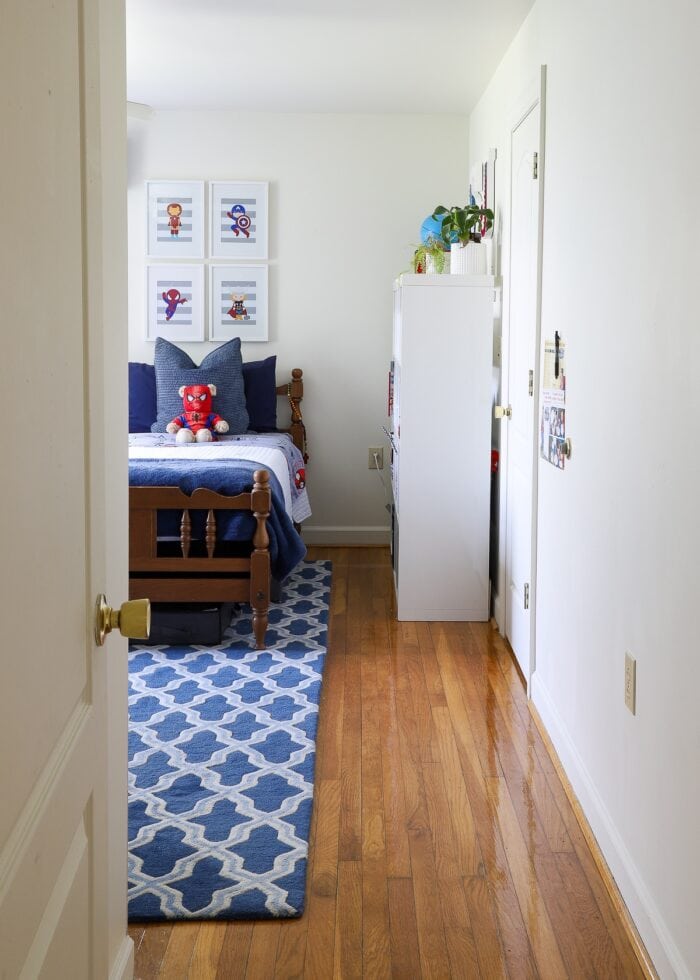
We actually didn’t do much to this room (compared to the rest of the house!) But a massive rug, fun wallpaper mural, vintage furniture, and easy window boxes all effortlessly came together to create one happy room.
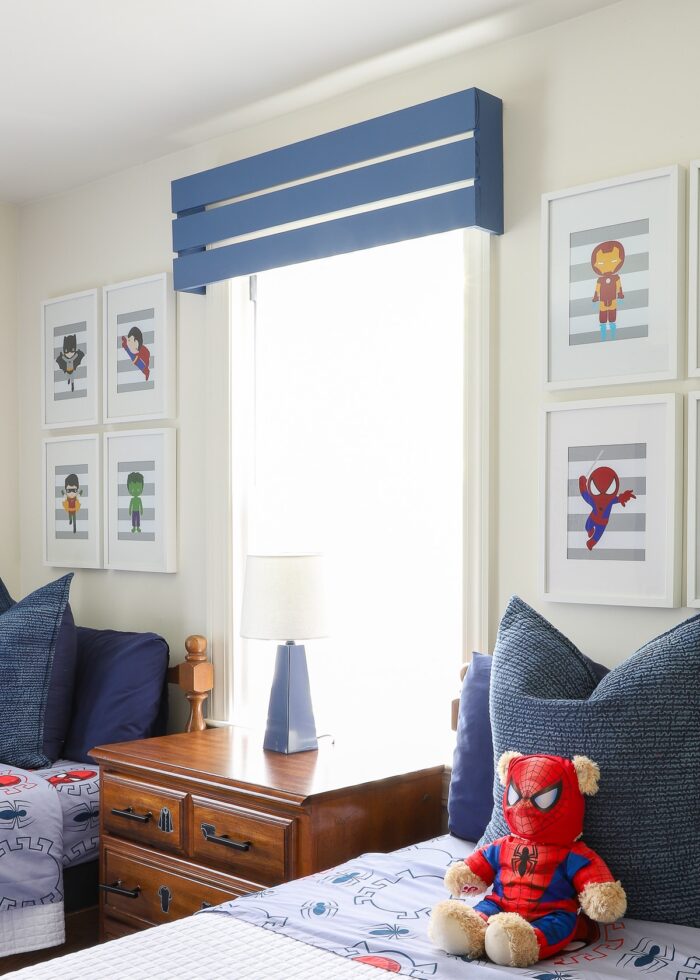
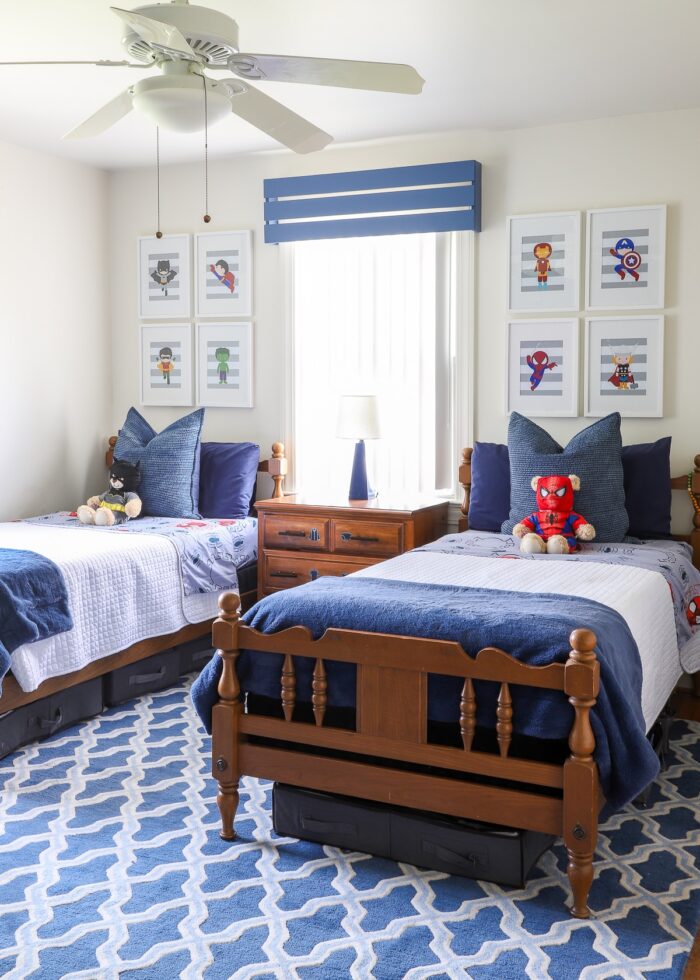
The Bed Wall
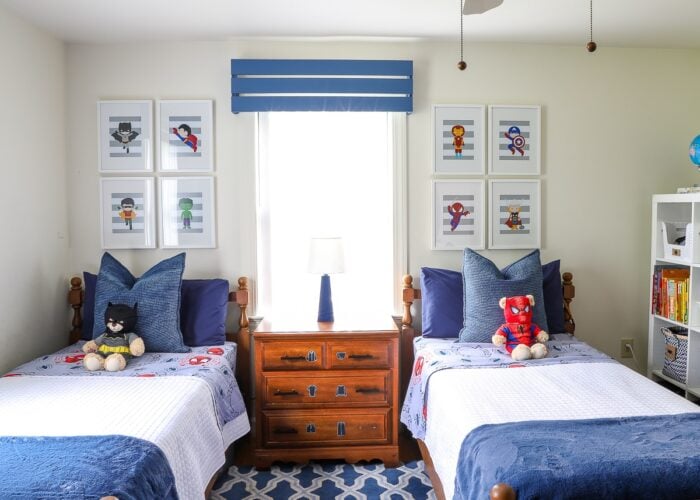
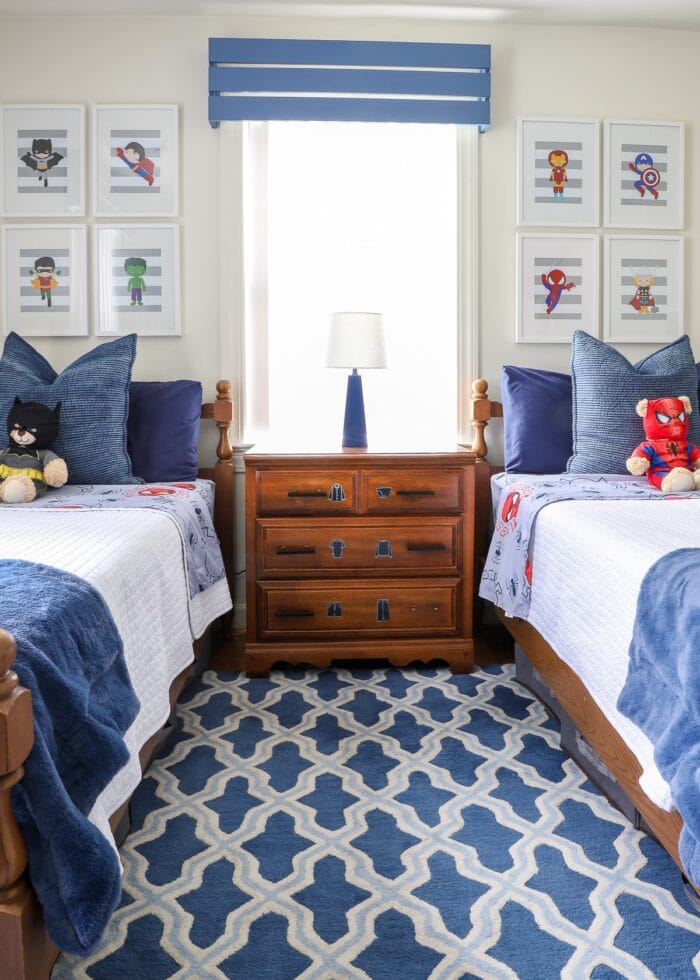
Both boys needed new beds as we were moving into this house. I snagged the “vintage” twin bed frames really cheap on Facebook Marketplace, and then we topped them with mattresses that came in boxes and build-your-own box springs (the things you can get delivered these days!)
I originally planned to paint the bed frames black; but as the room came together, the original color (of both the beds and the dressers from my childhood home) all seemed to work really well. I actually think it’s the old beds paired with the modern patterns in the room that make it all work so nicely!
Over the last few years, I’ve gotten some questions about how the “mattresses in a box” have held up. My conclusion after 3+ years is that they have been great for the kids. They were affordable, lightweight, and I didn’t have to endure a mattress store salesperson to get them. We’ve had some adult guests stay on them without complaint, but I’m not sure I’d want one myself. They do not have springs, so whenever I’m sitting on one (like during story time), I don’t feel super supported. That said, my boys sleep great on them, jump on them all the time, and have had no issues!
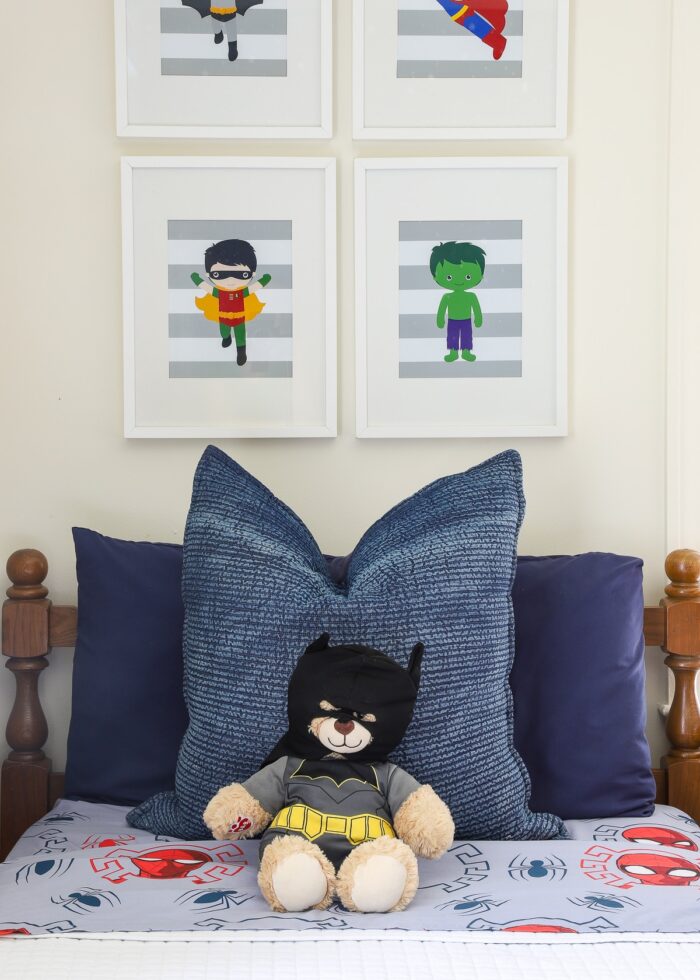
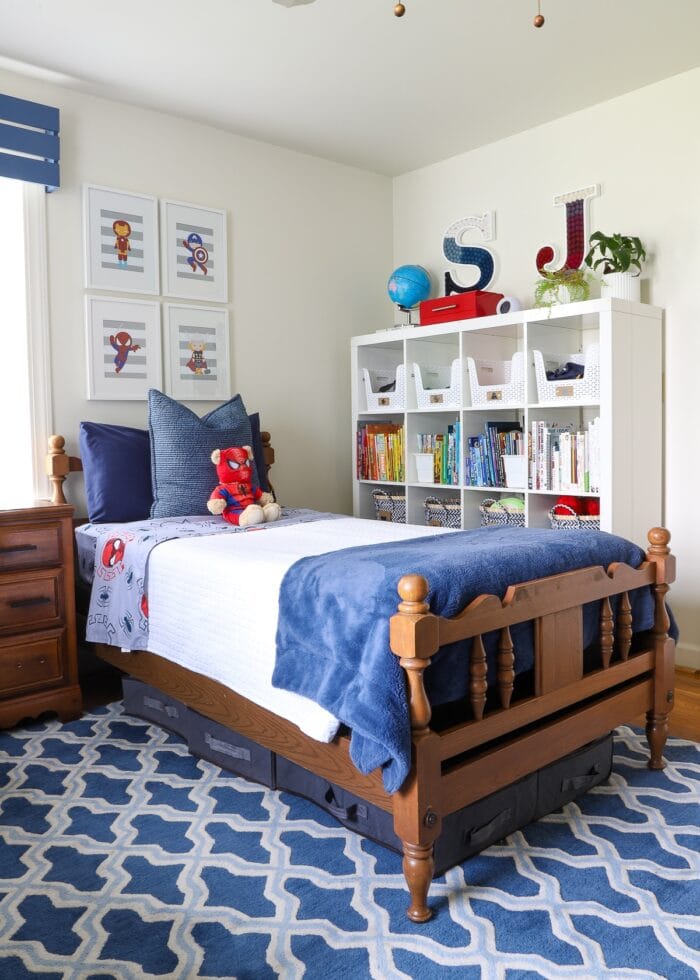
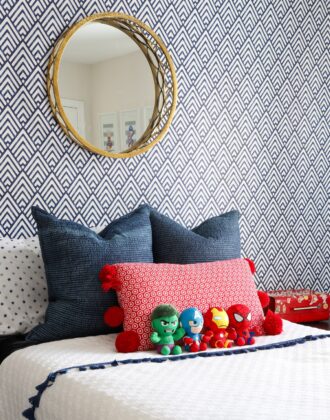
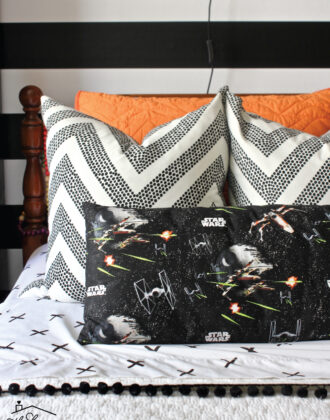
The beds are dressed in matching sets of Spider-Man sheets (because we are still big Spidey fans over here) and simple white bedspreads on top (we use the same bedspreads on all the beds throughout the house). I stumbled upon the fuzzy throw blankets at Marshalls and grabbed them because there were two matching ones (which never seems to happen!), and I was 99% sure the match was spot on with the rug and window boxes. Boy, was I right?!?
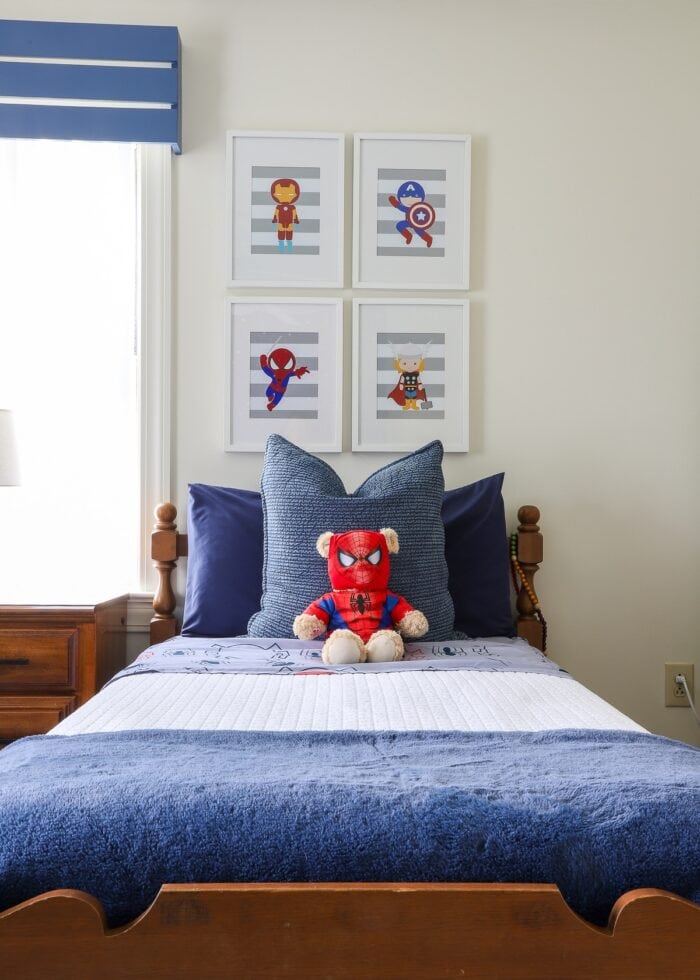
Putting pillows on twin beds can be a little tricky because there isn’t much space to work with. Over the years, I’ve found the combination of a King-size pillow plus a single throw pillow looks the most balanced and is pretty easy for the kids to maintain.
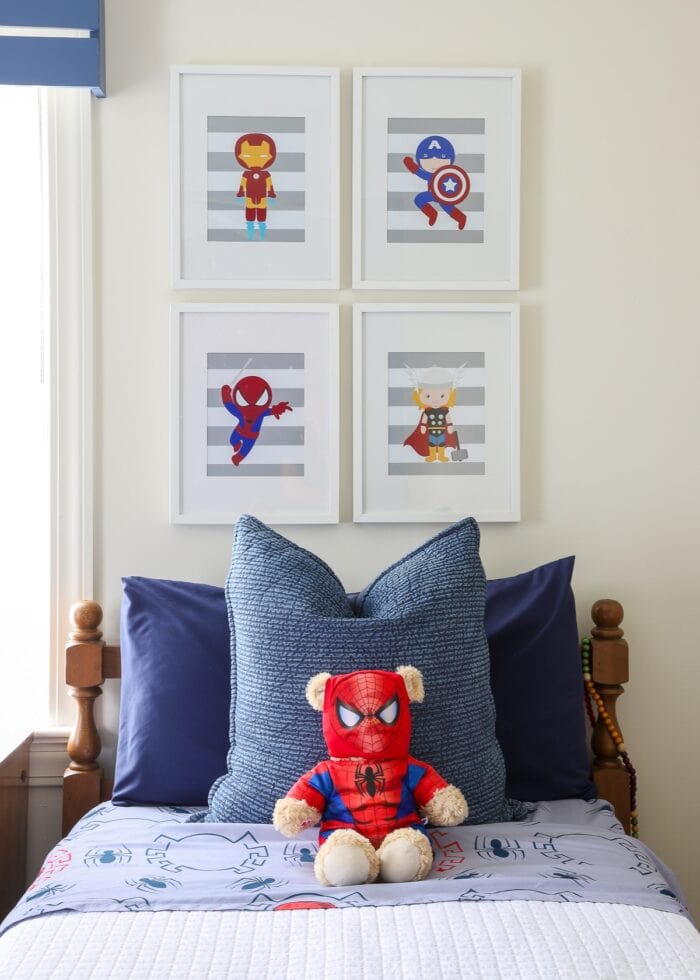
When it comes to adding a “theme” to a kids room, I’ve relied on a pretty trusty “formula” for a while now: themed sheets + themed wall art + and a few stuffies for fun. That way, when it’s (inevitably) time to move onto the next passion, it’s pretty easy (and fairly inexpensive) to switch out without having to re-design the whole room.
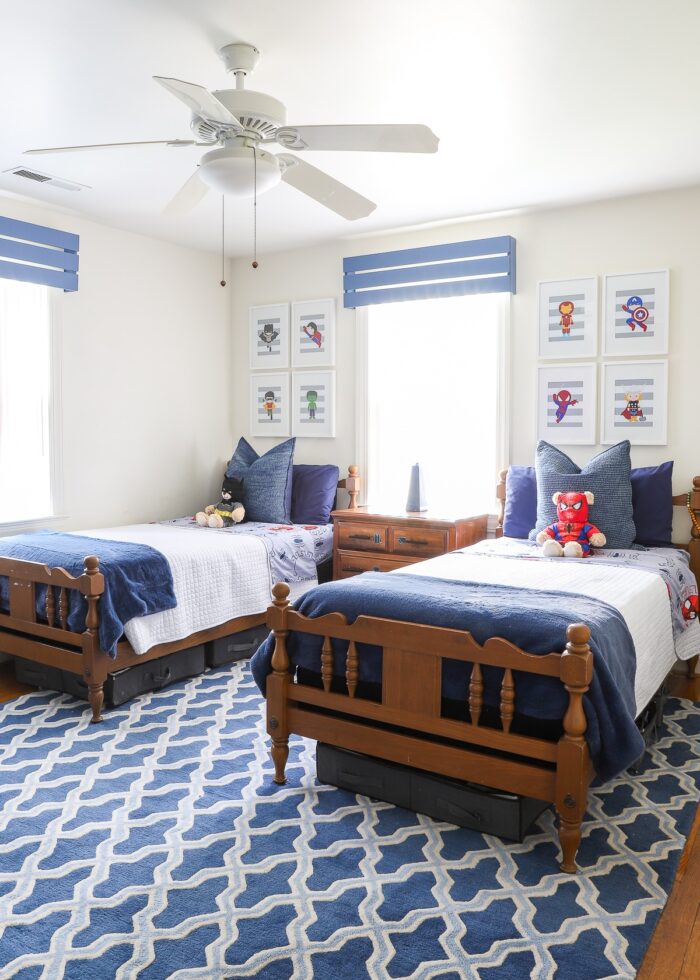
The beds sit atop a super durable 9×12′ wool rug that used to be in our Virginia playroom. It has just the right amount of pattern to keep this room feeling fun but not busy.
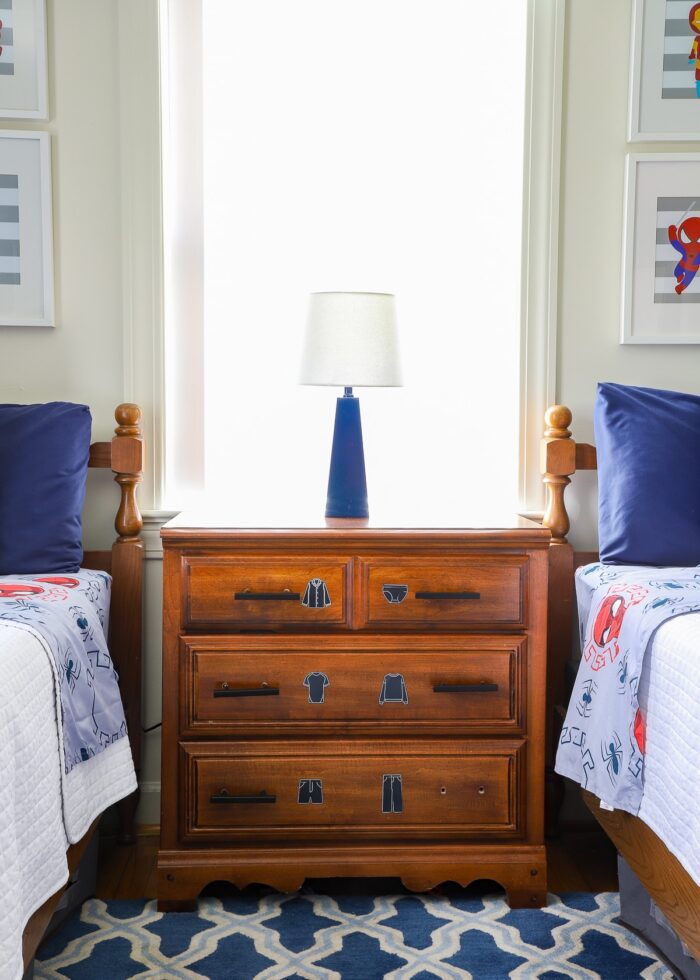
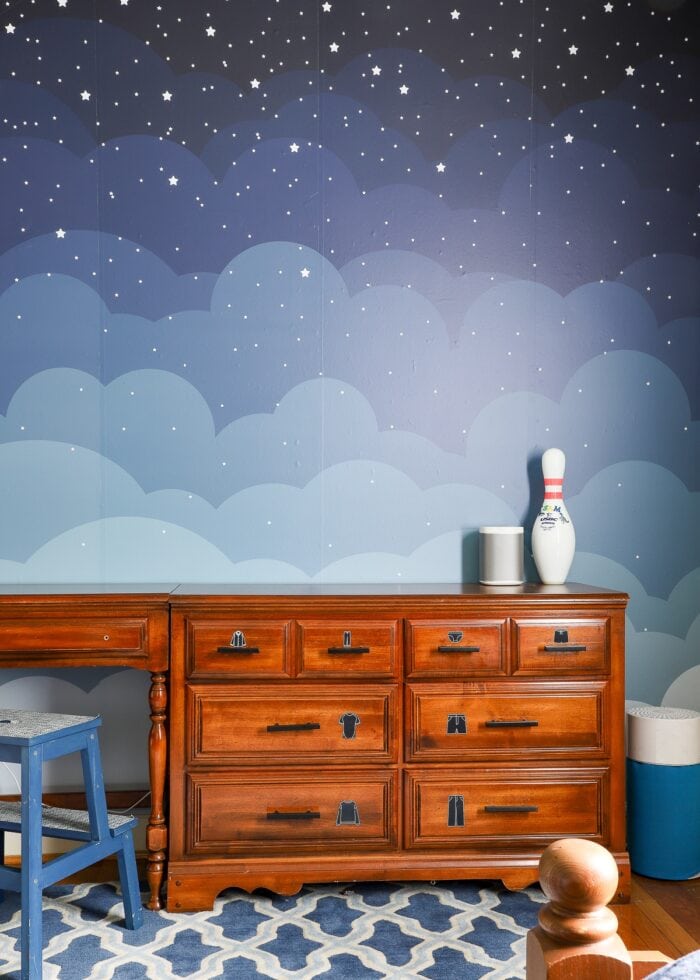
In between the beds is a mini dresser that hold’s one child’s clothes and a touch lamp on top.
Side Rant – I wish stylish touch lamps were easier to find because they are just SO great for kids! I bought this one ages ago and can’t find anything similar anymore!
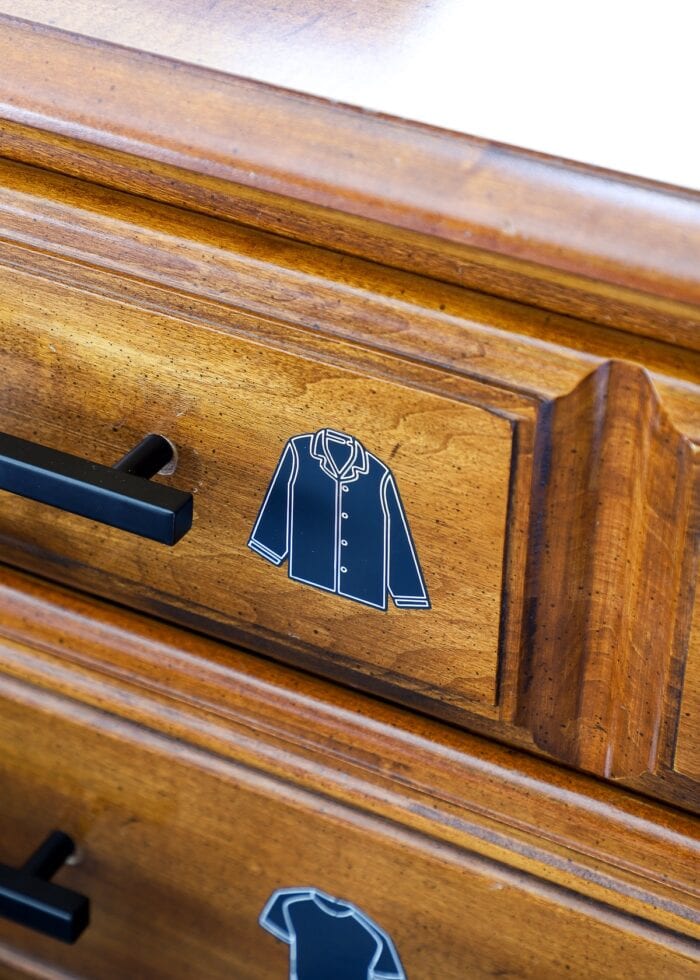
To help my kiddos out when we were just moving in and figuring out where everything went, I made these clothing labels with black writable vinyl, white pens, and my Cricut machine. They turned out to be so helpful, especially when the kids started putting away their own laundry!
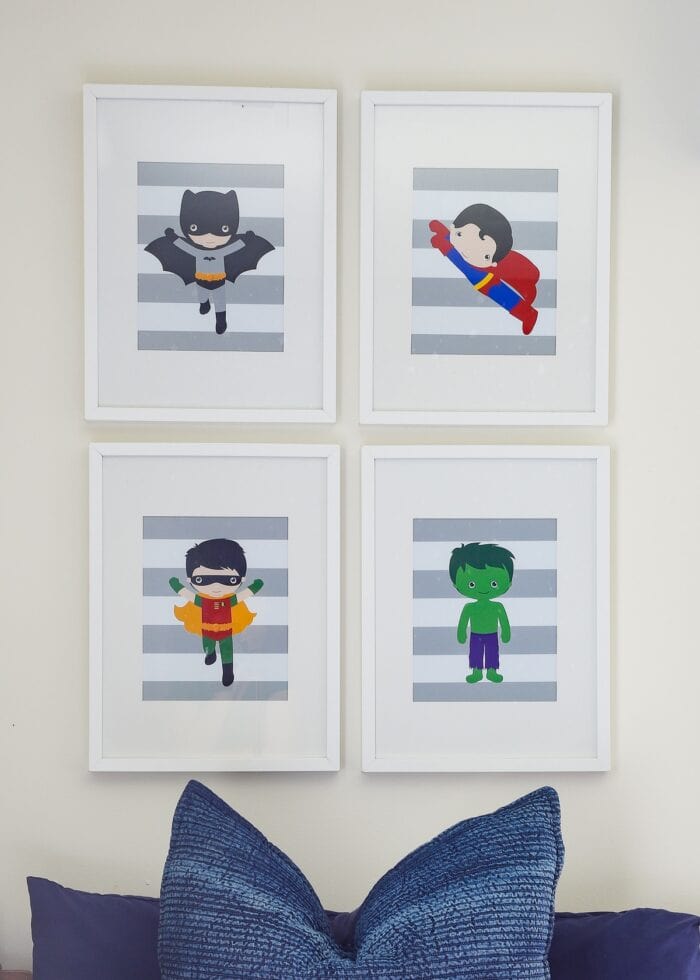
Lastly, above the beds hangs the “mini Super Hero” prints we’ve had since my middle son’s baby nursery. I have loved them and used them for soooo long, and splitting them above the two beds was a great way to add color and interest on this wall using items we already had.
The Book Storage
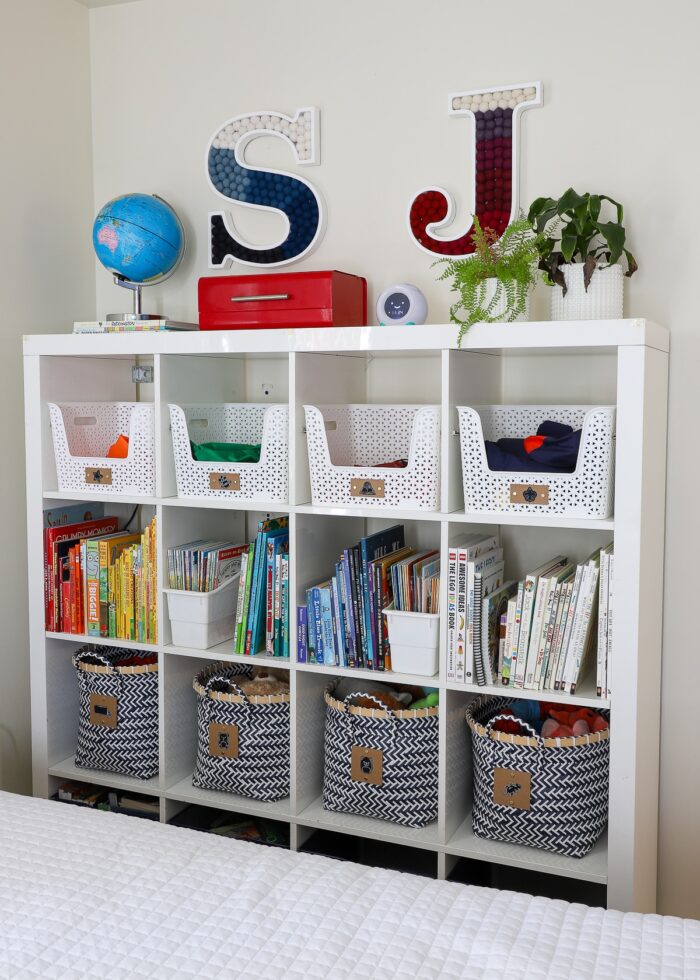
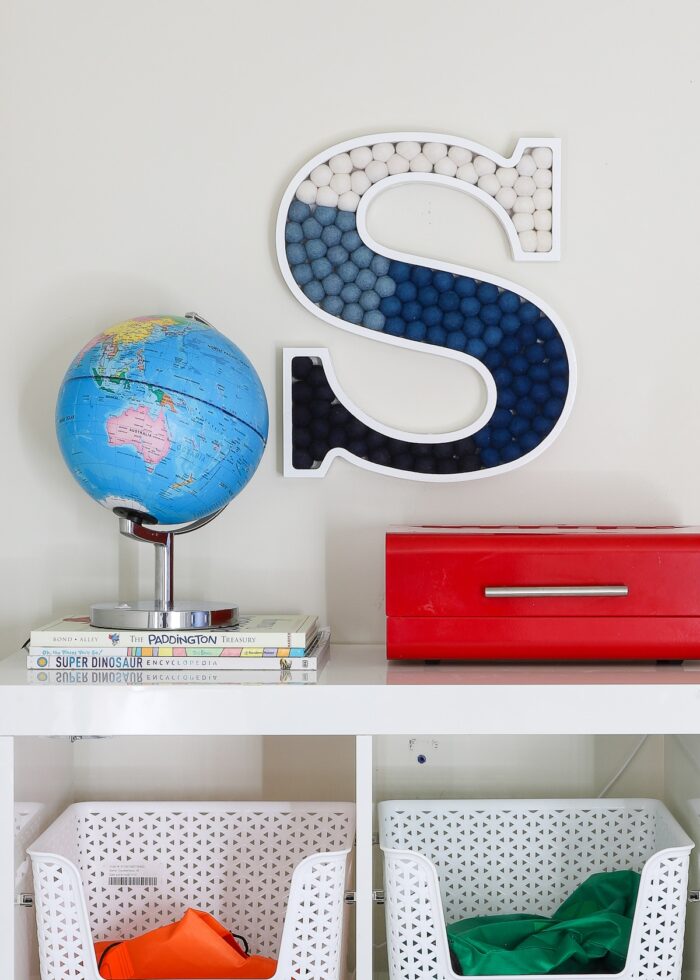
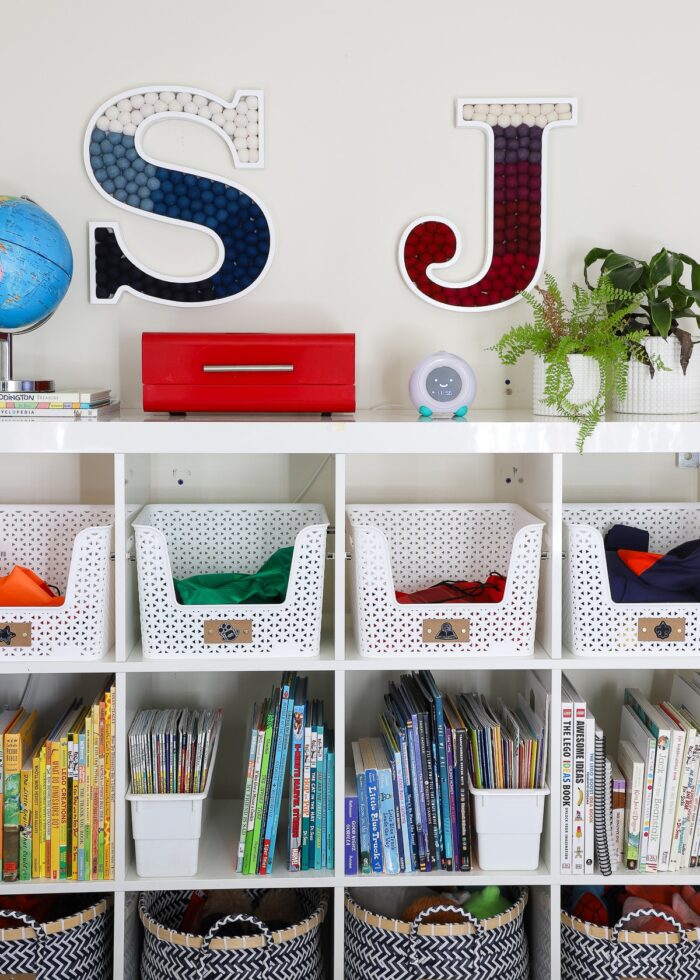
There was just enough room to the right of the beds for our 4×4 IKEA Kallax shelf.
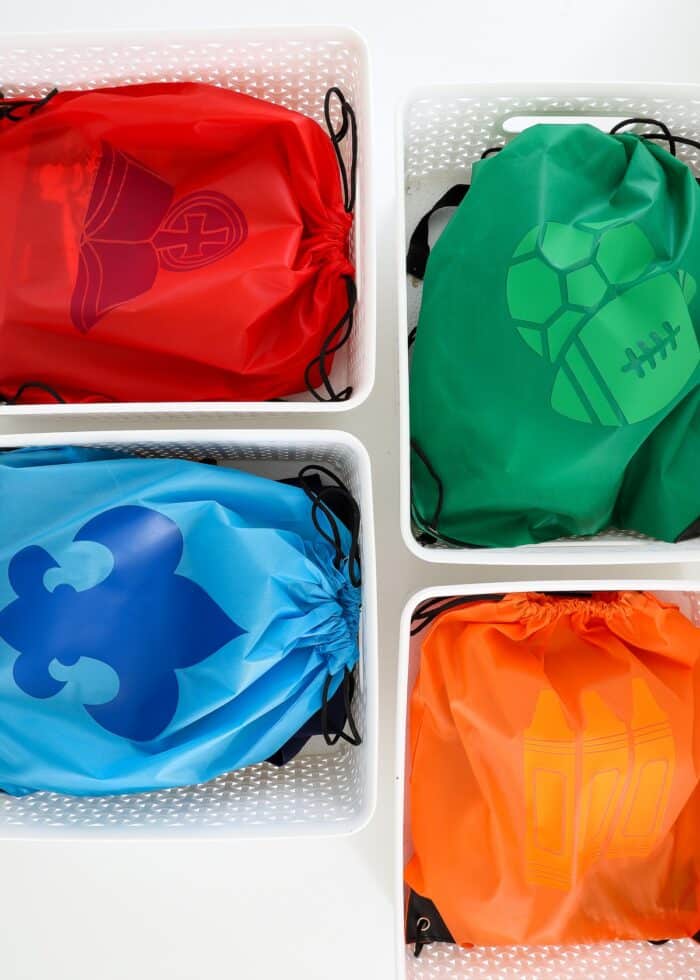
On it, we stored the kids’ books (at a height they could easily peruse and pick each night), some leftover toys (since we didn’t have a playroom downstairs) and their activity napsacks along the top shelf.
Want to save this post?
If you have kids in multiple activities, I can’t recommend this solution enough. Having a dedicated bag for each activity AND an assigned place to put them makes getting out the door with all the right gear so much less stressful!
This shelf was too high for the two little kids to see or use, so I styled it with some leftover books, toys, and the pom-pom letters I made for each of their names.
A lot was packed into this little corner of the room; but in the end, the storage all worked really well AND it stayed looking really nice (which is always a true victory in kid spaces)!
The Closet
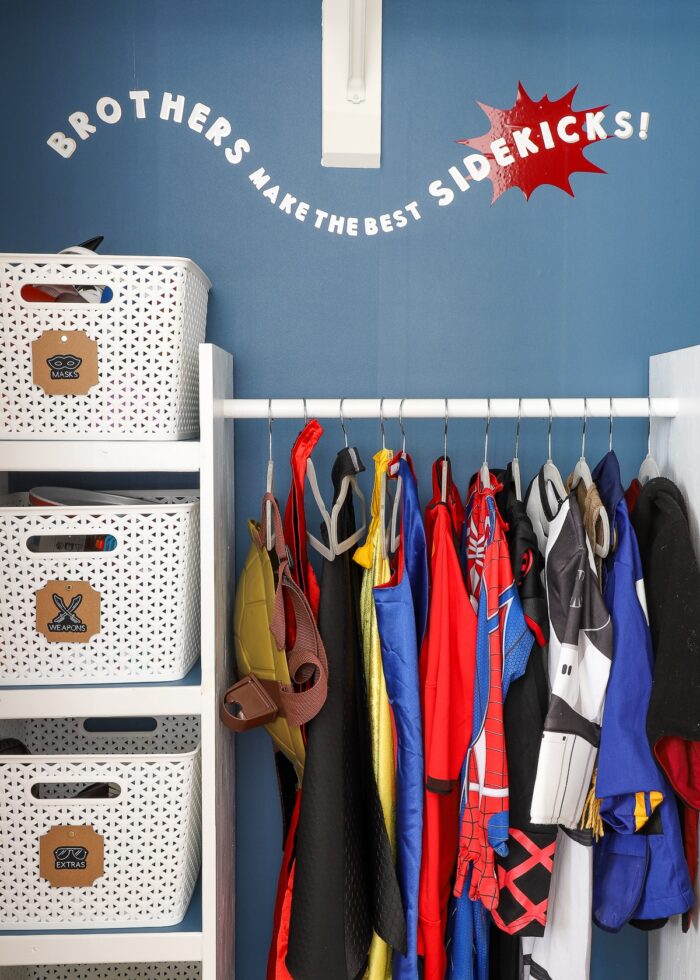
Just to the right of the bookshelf was the single closet in this room. My boys don’t have any hanging clothes, so I outfitted this as a dress-up station.
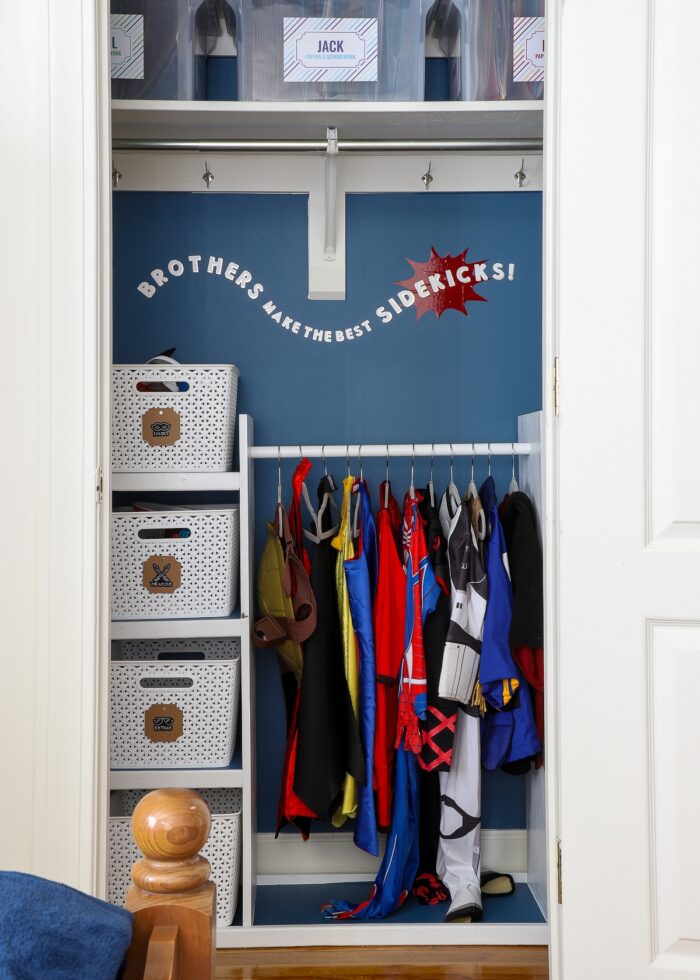
Honestly, this is probably one of the smartest solutions we implemented in this entire house. Our dress-up stuff never had a proper storage place (that they could easily access) and it always just landed everywhere! This compact storage shelf (that a neighbor made for her daughter and handed down to me) had just enough room for everything. The boys played with their dress up stuff so much more after we put this system in place!
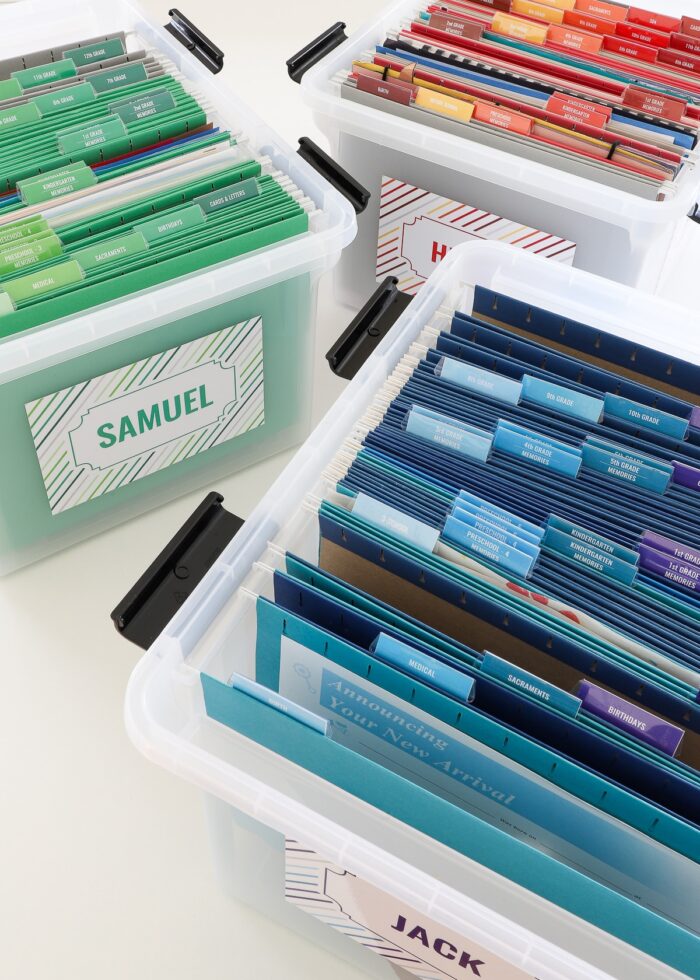
The top shelf of this closet held our boys’ memory and school work boxes.
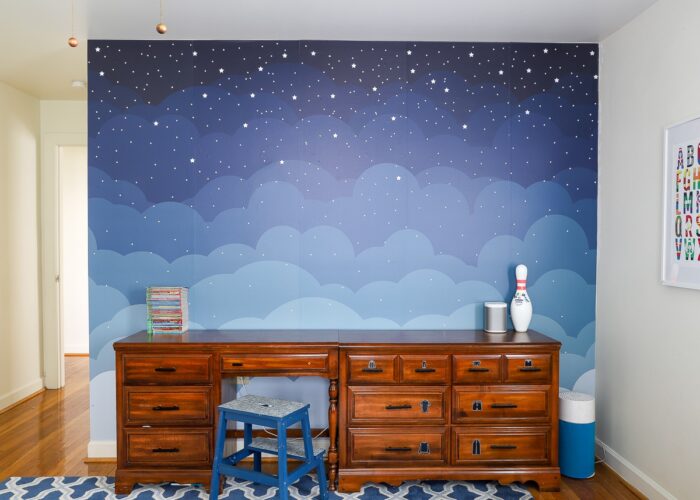
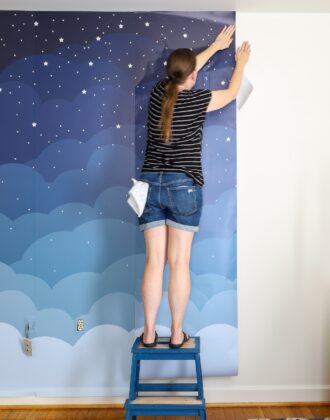
The Mural Wall
On the one solid, short wall, opposite the twin beds, I hung a gorgeous night sky mural. This was actually the very first project I ever did in this room, and it was definately a favorite of the boys (they still ask if their newest room will have one too!)
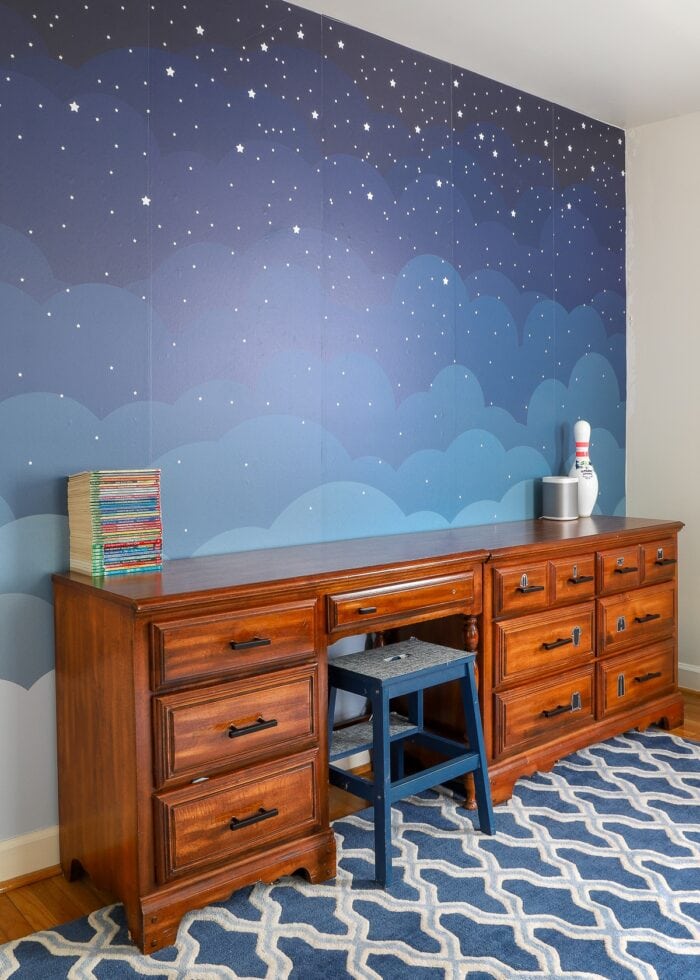
I’ve had a lot of people ask me why I hung the mural opposite the bed versus behind it, which is usually where I hang wallpaper in bedrooms (Examples 1 | 2 | 3).
Two reasons, primarily:
- The main reason for the mural placement was I liked the idea of the kids seeing the night sky image when they woke up and went to sleep. By placing it here, the boys got to look at it much more than if it were behind them.
- This wall was also windowless and several feet shorter than the bed wall. Murals are printed and priced by the exact size, so using this wall was a much cheaper option too!
The Windows
With so much color on both the floor and the short wall, the room really needed some saturated blue on the other walls to make it feel more balanced. I’ve had this “wooden valance” idea in my head for YEARS, and I knew this was the exact room to use it in!
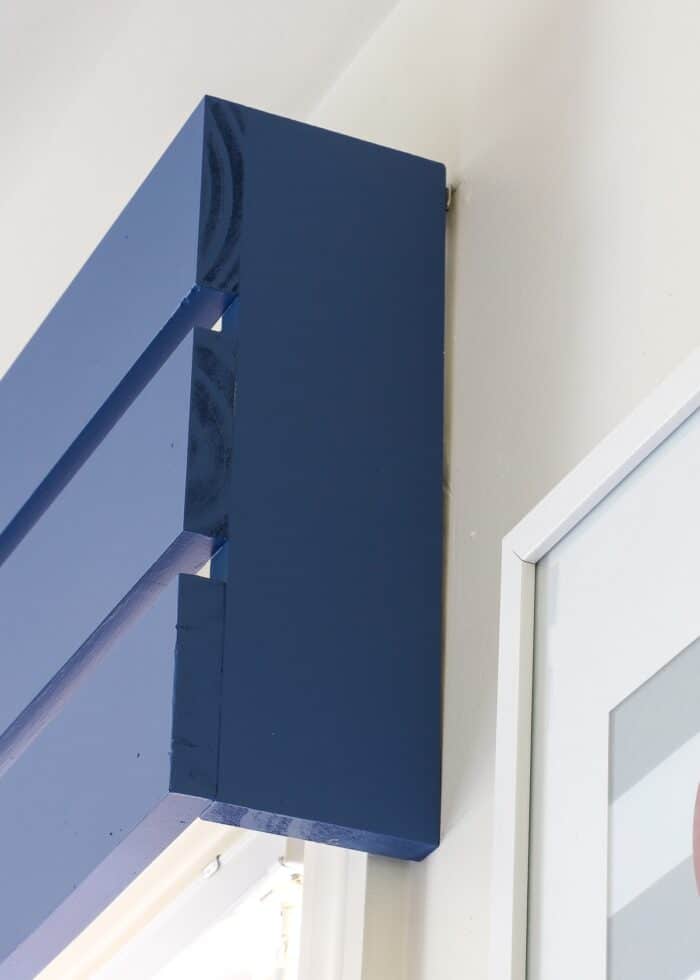
I loved both the assembly and the final look of these wood slat valances. The materials were inexpensive, they came together so nicely, and they looked so crisp and clean. They were the perfect “balancing touch” to everything else in this room. I rarely repeat ideas, but I’d definately do this one again!
Explore All the Projects In This Room
If you’re looking for more details about anything in the photos above, below are the in-depth posts for all the projects featured in this room:
- How to Hang a Wallpaper Mural | Tips & Tricks for Great Results
- Easy DIY Wood Valance (With a Modern Twist!)
- DIY Dresser Drawer Labels with a Cricut
- Setting Up a DIY Dress Up Station for Kids
- How to Make Your Own Pom Pom Letter Wall Art
- How to Assemble a School Memory Box (With Printable Labels)
- DIY Custom Drawstring Backpacks for Kids’ Sports & Activities
- Why Color Sort Your Books (& A Few Other Things Too!)
Tour More of Our NC Rental
Want to explore the other room makeovers from our NC Rental home? Tour the entire home in the following posts:
- Full Before Tour
- The Kitchen
- The Family Room
- The Dining Room
- The Laundry Room
- The Office/Craft Room
- The Master Bedroom
- Our Teens Tiny Bedroom
- Shared Little Boys' Bedroom
- The Garage
- The Final Home Tour

I love working on project-heavy room transformations. But I love it even more when spaces come together, fairly effortlessly and organically, with just some simple DIYs and lucky finds. Sure, there was some DIYing in here (the mural, the valances, the closet); but otherwise, this room’s subtle “magic” is really due to basic items combining in a pretty lovely way. You better bet, it’s taking all my willpower to not just “copy and paste” it for the boys again and again and again (especially since they loved it so)!
Megan


One Comment on “Our Boys’ Shared Bedroom Reveal”
This space is so cozy – I am not surprised your boys loved it so much. The dress up closet is inspired, and the mural must have been so peaceful for them. Lucky kids!