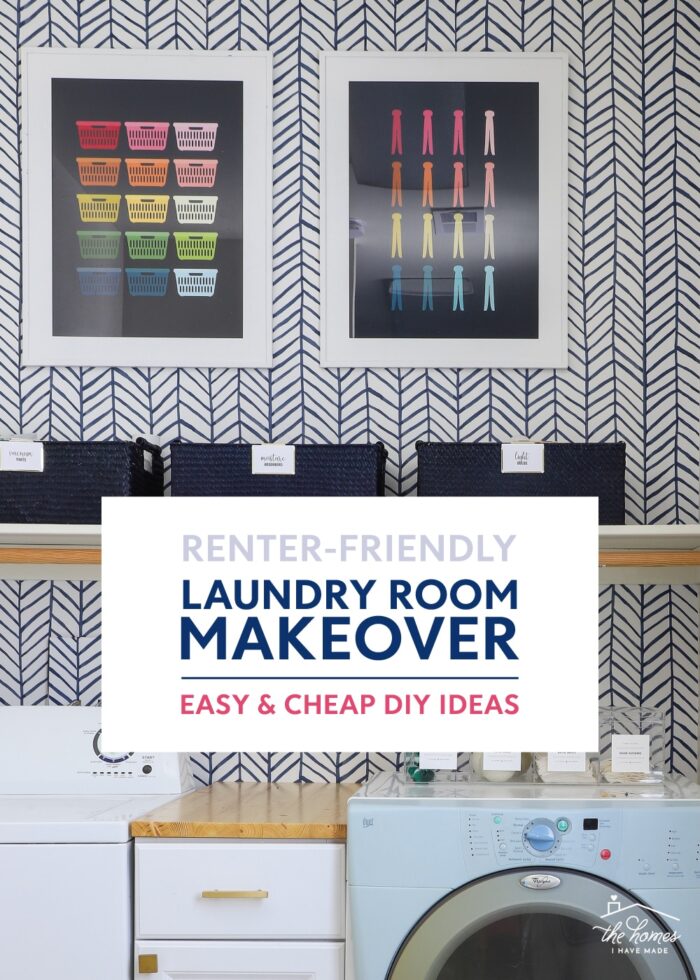
Renter-Friendly Laundry Room Makeover with Easy DIYs
When setting up and decorating a home, having a cute laundry room is likely not at the top of your list. (Who really sees it anyway?) But I’m here to tell you that having an organized, cohesive, and even stylish laundry space can make a world of difference in how you feel about laundry and your home as a whole. Today, I’m giving a tour of our newly completed laundry room makeover…a simple space full of really easy and budget-friendly DIY projects. Let me show you around!
Our Laundry Room | Before & After
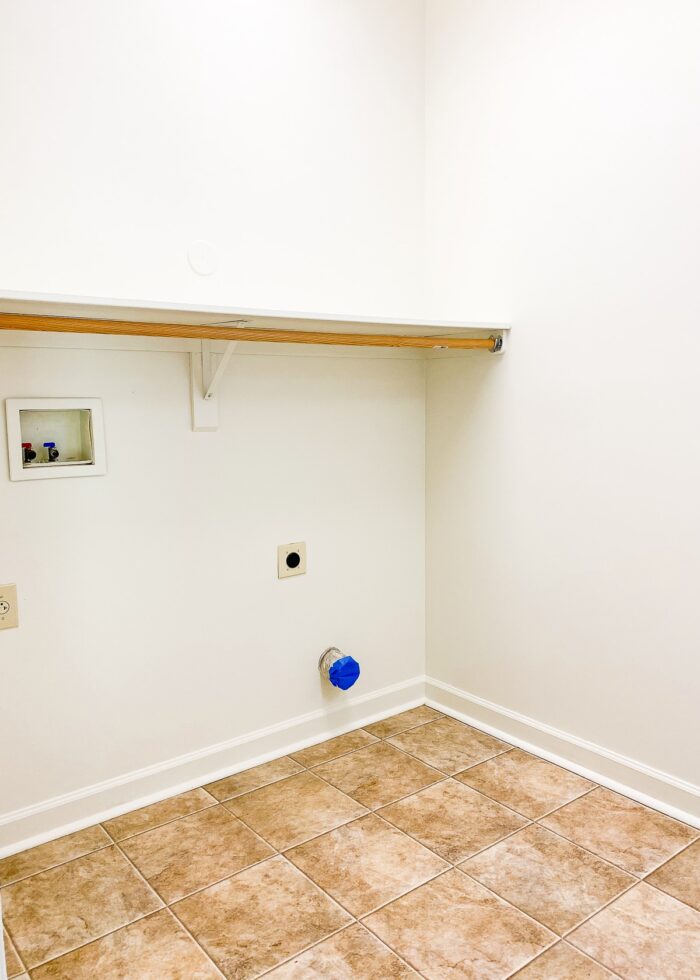
It’s a bit of a misnomer to call our current laundry room a “small space.” In fact, it’s a pretty sizable room with really tall ceilings.
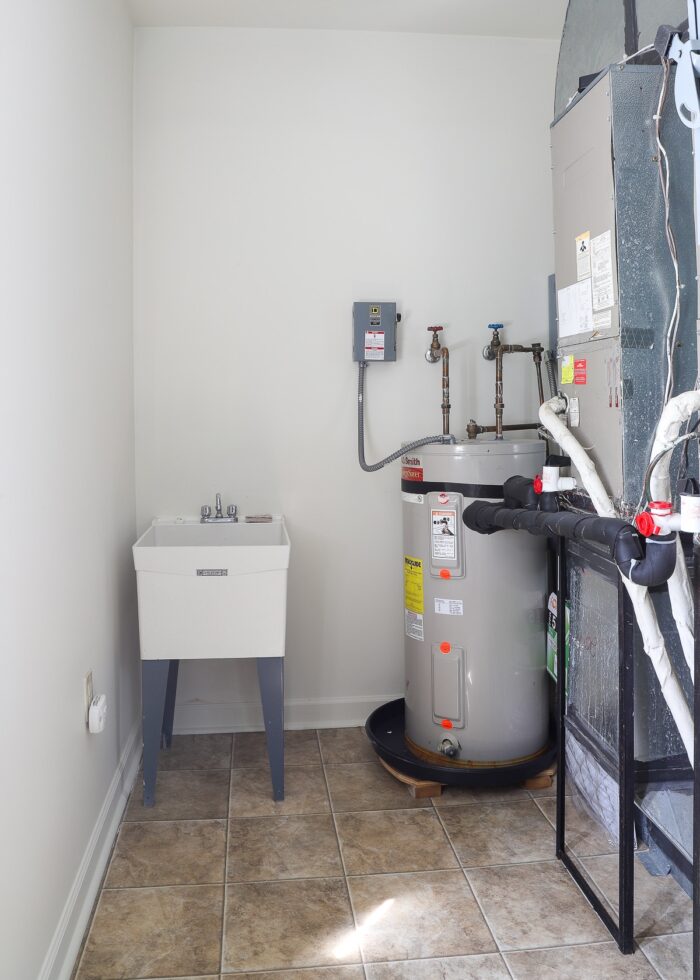
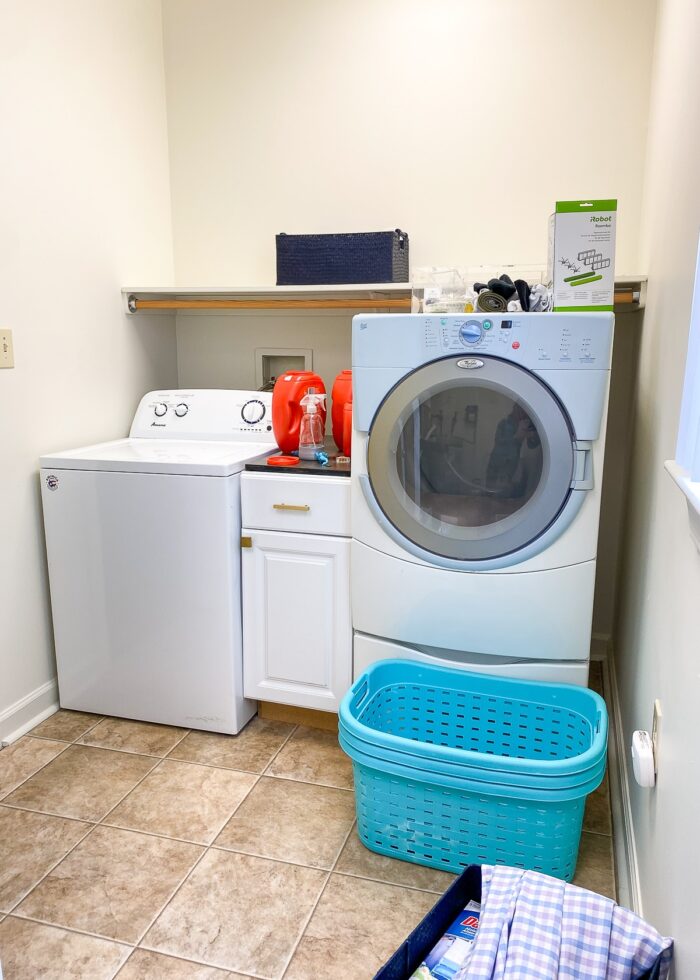
But in reality, the “laundry” part of this room is just a single wall, as the other half of the room is mostly occupied by a utility sink and our HVAC equipment. Here’s the room the day we moved in:
And for most of the last year, it has looked like this: mismatched appliances and a dumping ground for random things that got placed here and then forgotten about.
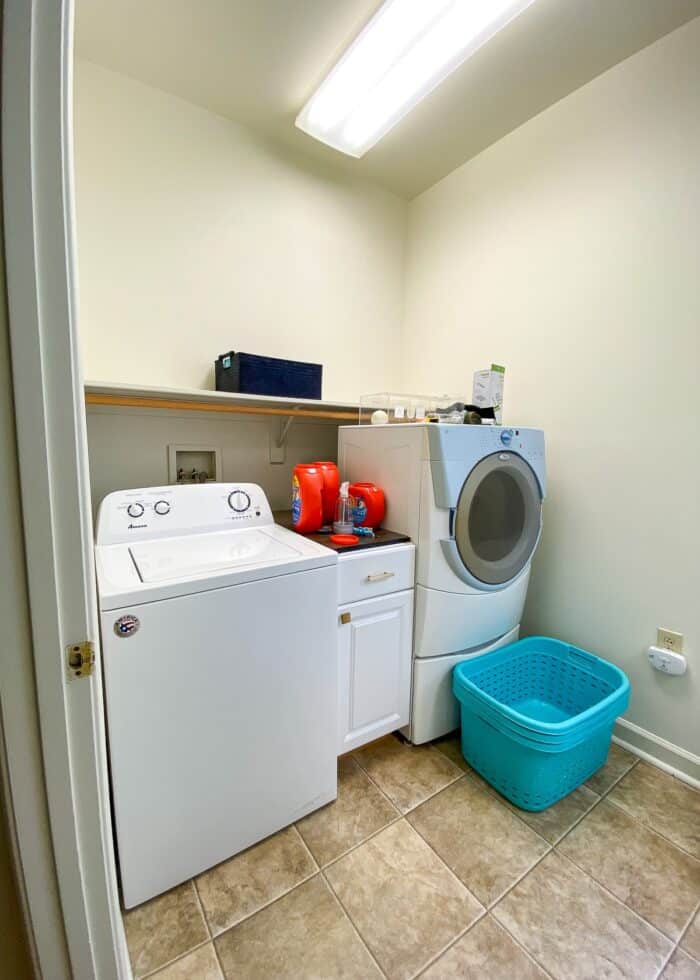
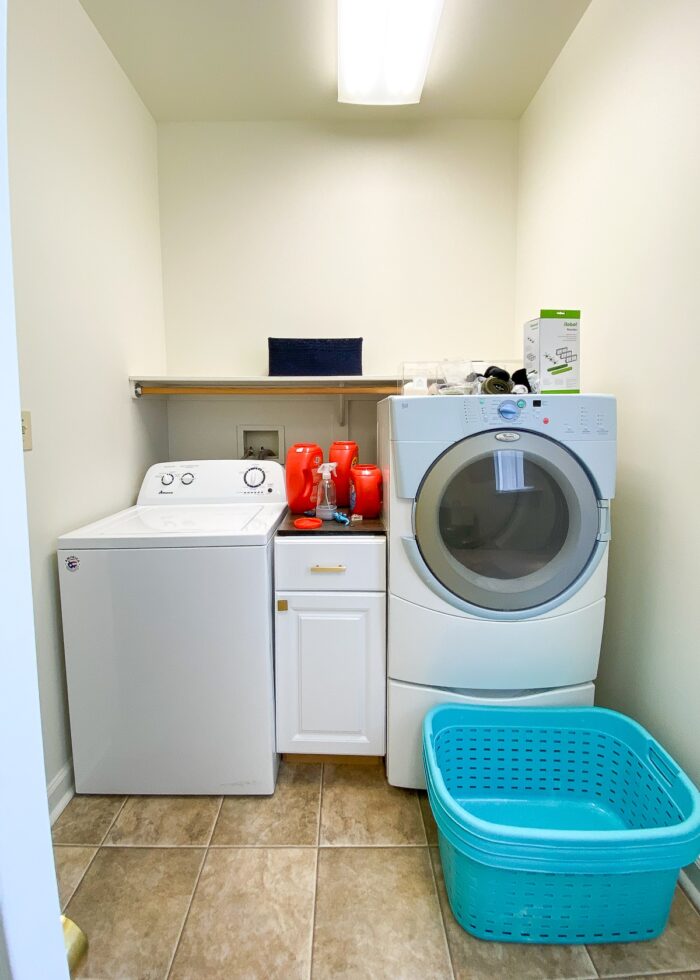
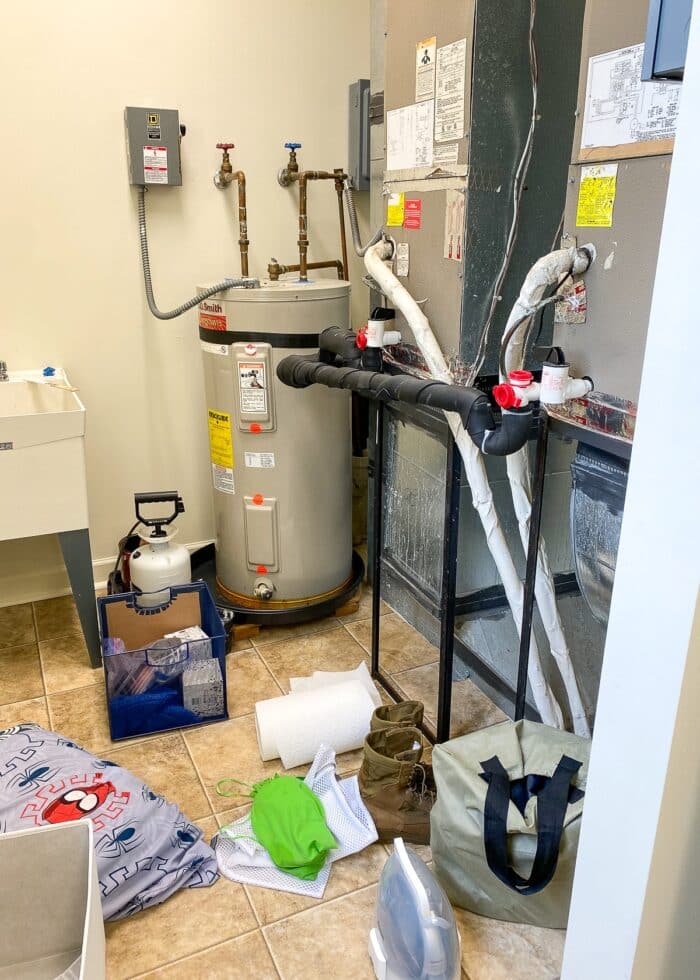
As much as the clutter and mess of this room bothered me week after week, I knew pulling it into a cohesive, usable space wouldn’t require that much effort.
So once most of our downstairs projects were complete, I set aside a weekend to organize and decorate this room. And sure enough, with just a few really easy but super impactful projects, this laundry nook quickly became one of my favorite spots in our home!
Video Tour
In this short 3-minute video, you can watch the laundry room go from dysfunctional and cluttered to organized and stylish! (Video not loading for you? You can watch it HERE!)
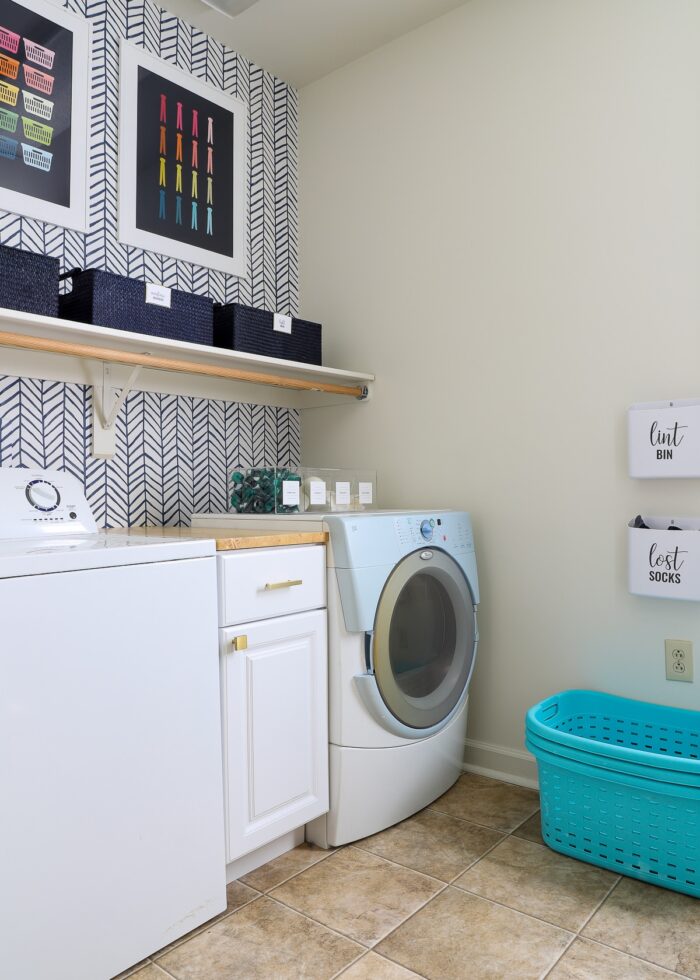
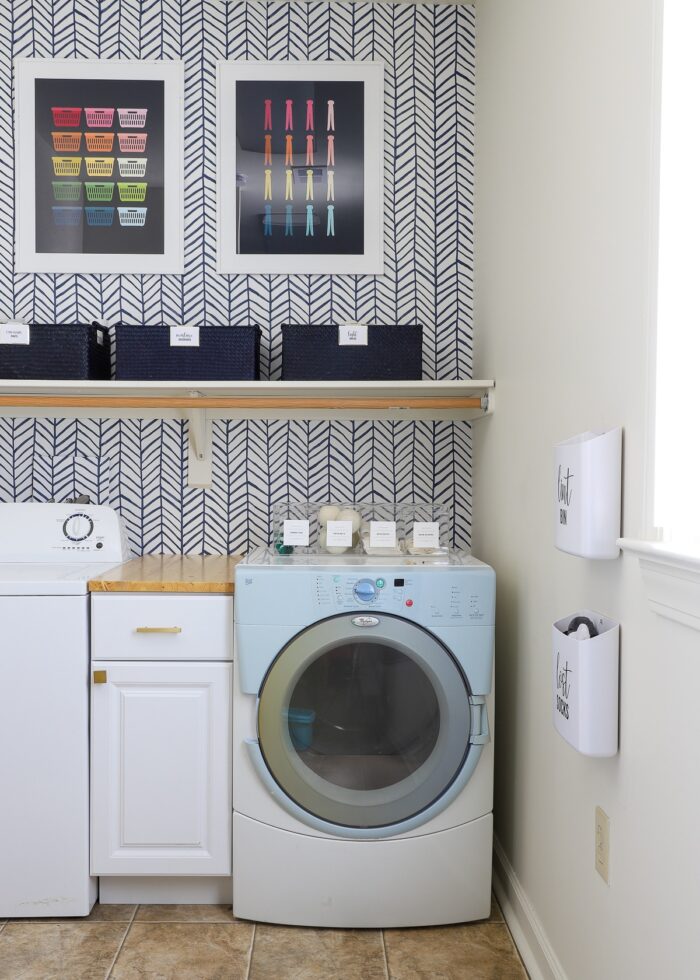
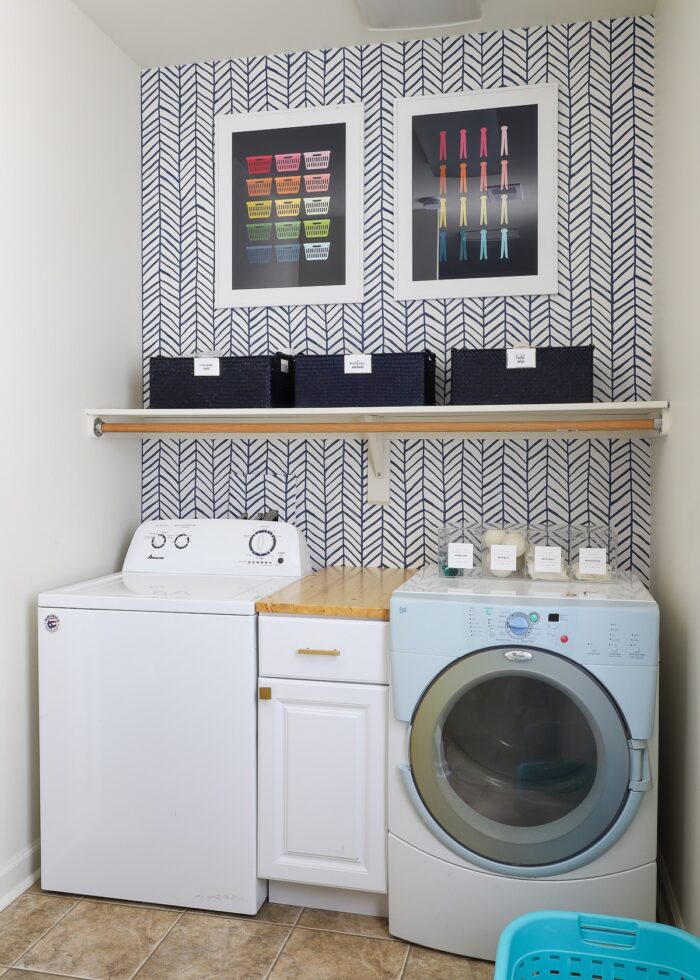
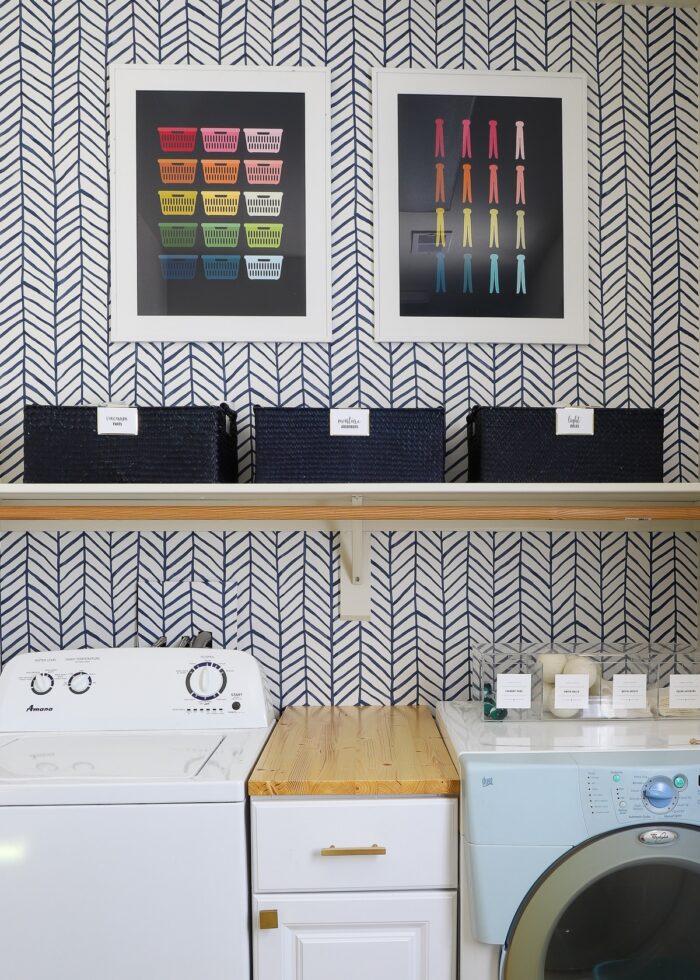
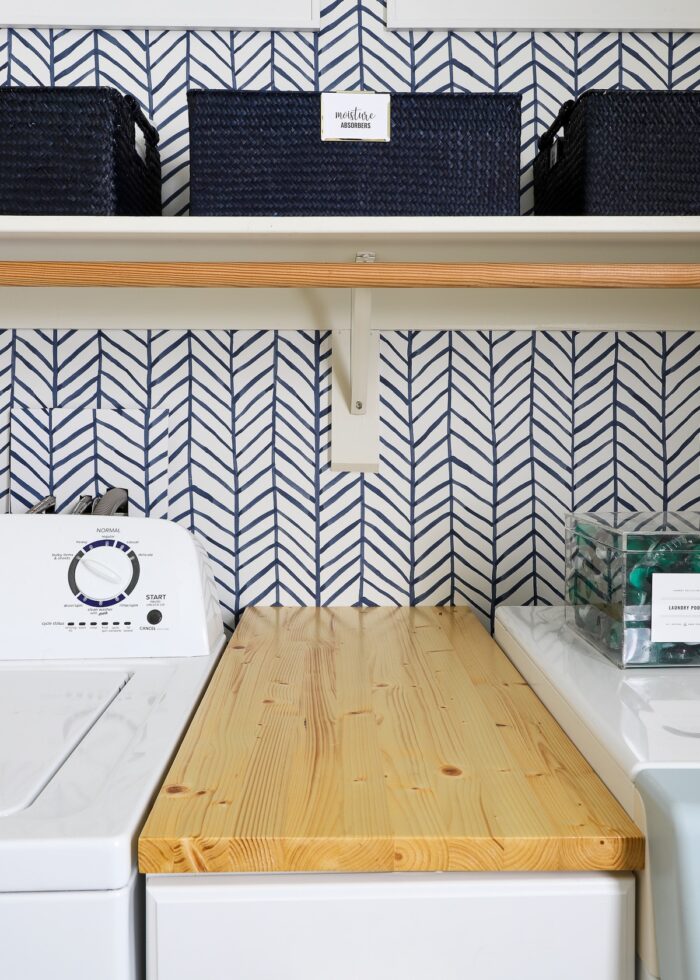
The Laundry Room Wall
The Wallpaper
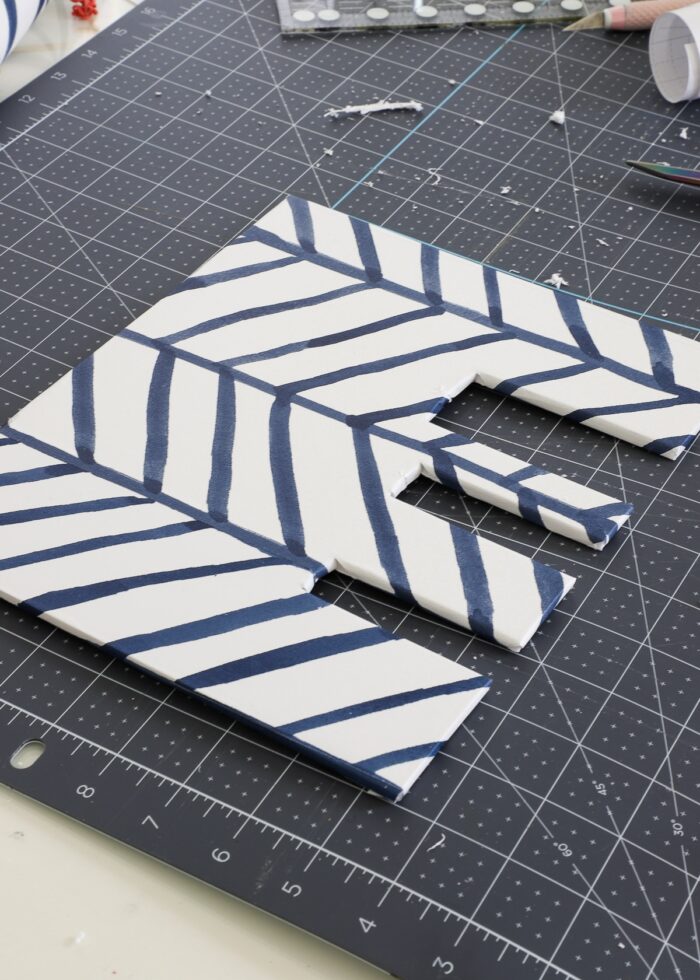
I’m a sucker for a great accent wall, and this extra-tall room was screaming out for a fun wallpaper treatment. I actually bought this wallpaper for our master bedroom; but when it was a bit too much pattern with our bed, I quickly pivoted to the laundry room. It’s such a fun and fresh pattern, and I could not love it more in here!
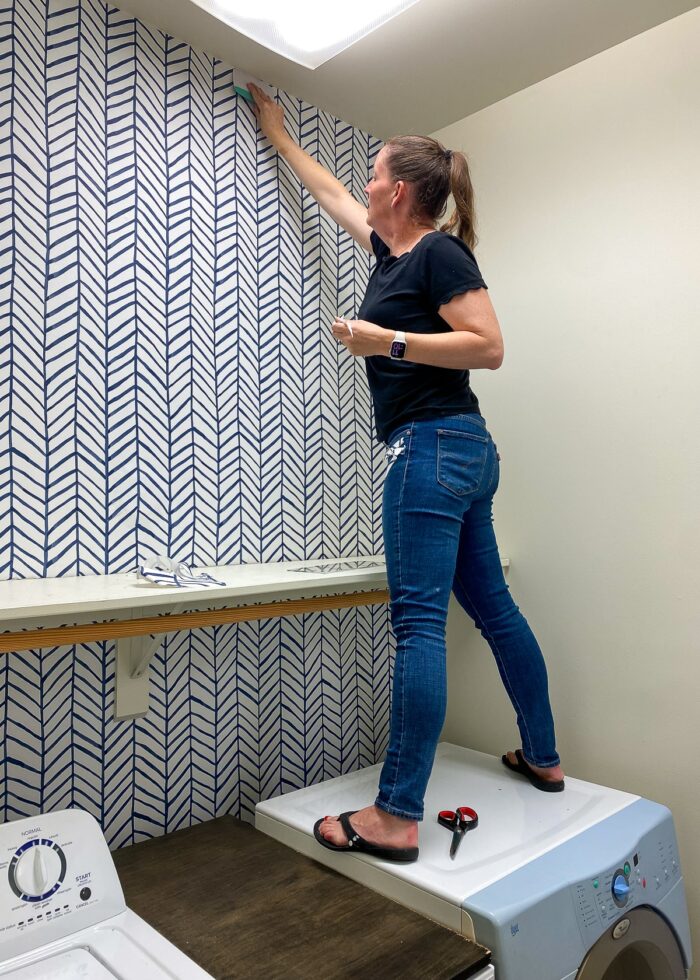
I’ve hung a lot of peel-and-stick wallpapers by now, and I have to say: this wallpaper is one of the easiest papers I’ve ever, ever hung (second only to this one).
Why? The pattern itself is very imprecise: the lines are jagged and curvy and random. As such, it’s so incredibly easy to line up each panel with the previous one, and it leaves practically no paper waste.
Just a word of caution though: if you have to split a shelf (like I did), make sure you pay attention to which way the chevrons are pointing. Notice in the picture below, my top panels and bottom panels are pointing in opposite directions, making the pattern not at all seamless. Thankfully, I caught my mistake before I did the entire backsplash area, so I only had to replace two panels!
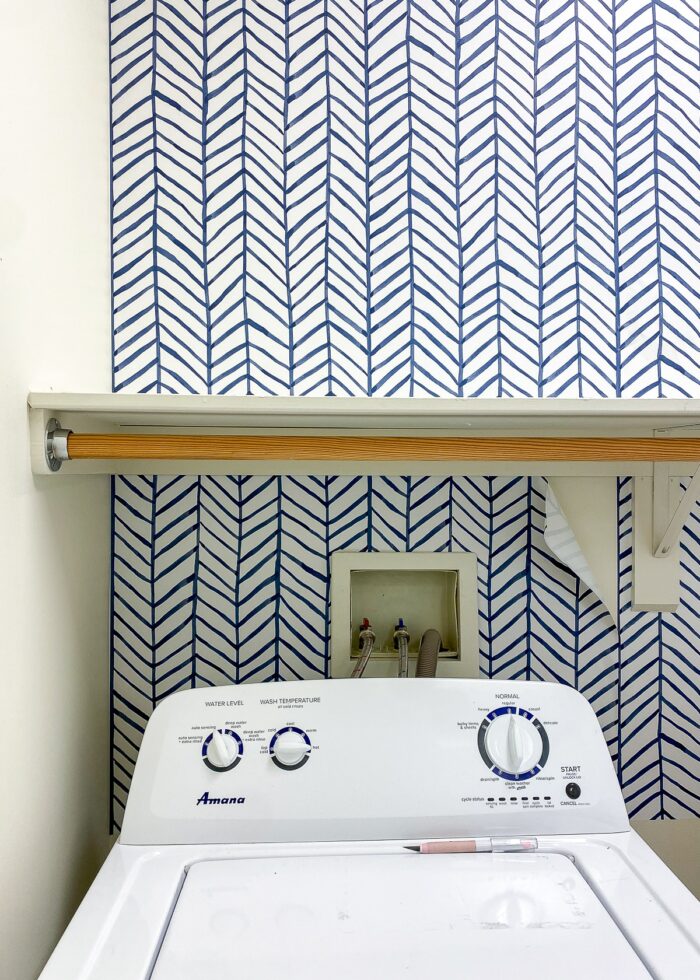
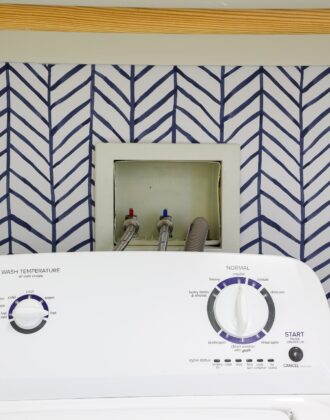
Covering the Washer Hookup
I loved the bright white paper on the wall; but unfortunately, it made the ugly washer hookup extra noticeable.
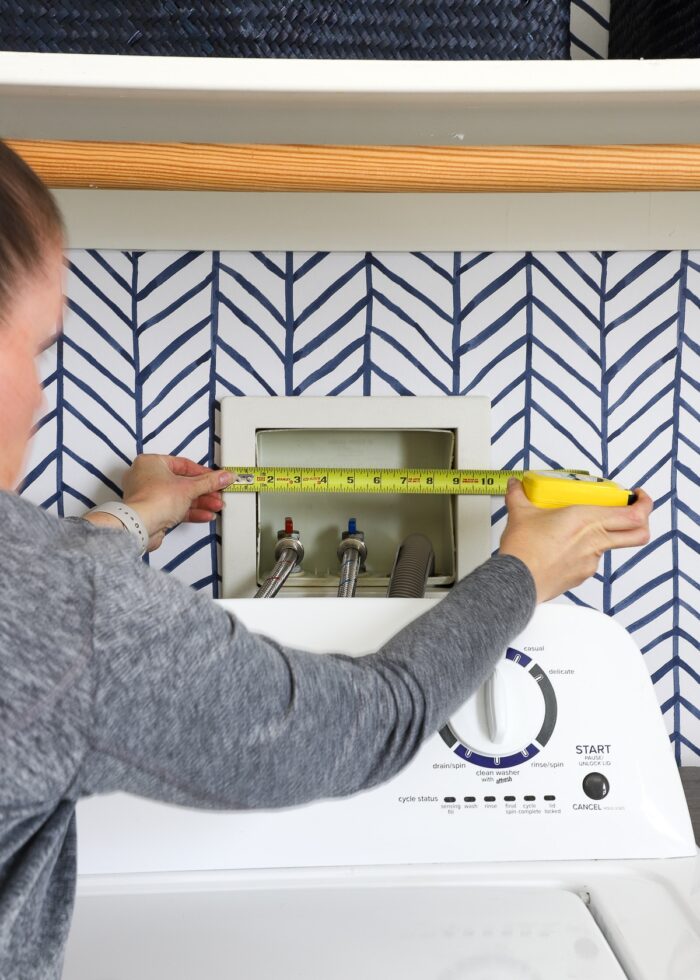
Thankfully, covering it up was a quick project that used some foam core board and leftover wallpaper. See the full tutorial here: How to Hide That Ugly Washer Hookup | Quick, Cheap, Easy!

The Laundry Artwork
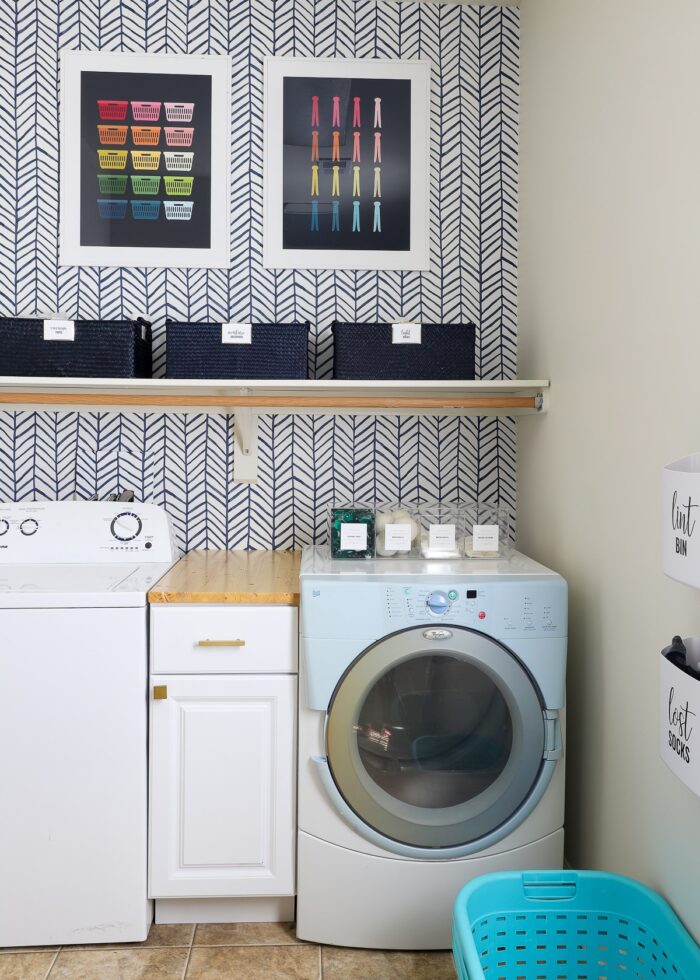
Since the ceiling in this room is so incredibly high, I had to figure out a way to fill up the visual space above the washer/dryer and shelf. Adding more open shelves was my first thought, but we really didn’t need more storage in this room (plus, you’d have to use a ladder to reach them).
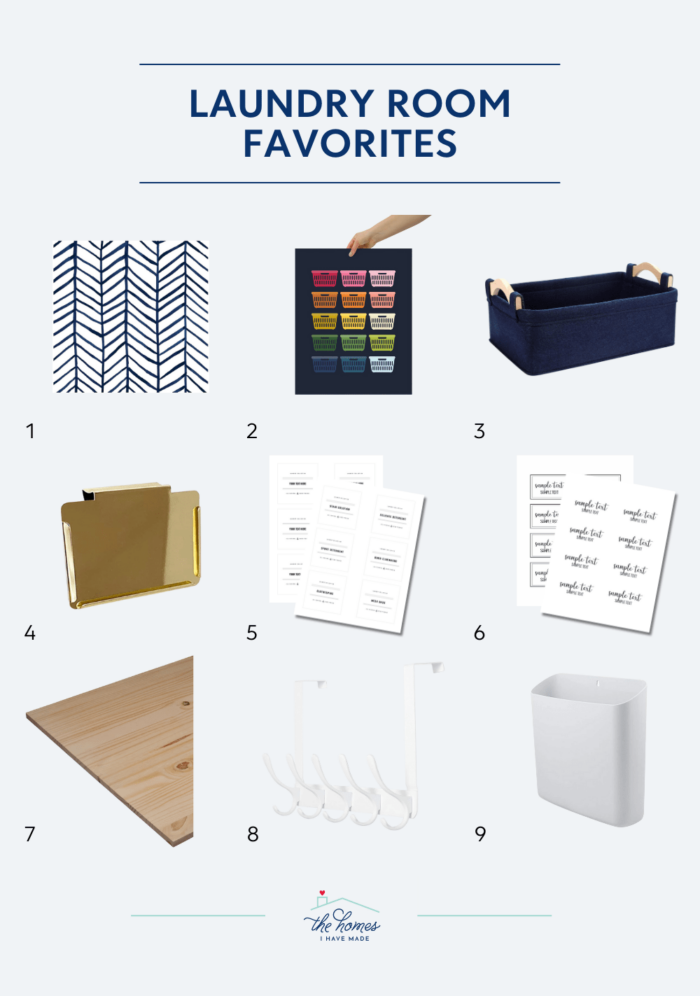
Once I realized some old 25×30″ frames filled this space perfectly, I immediately ordered these colorful laundry room prints. I’ve had my eye on them for forever, and I knew the navy background and colorful icons would be just enough to tie the entire space together while also adding a splash of fun.
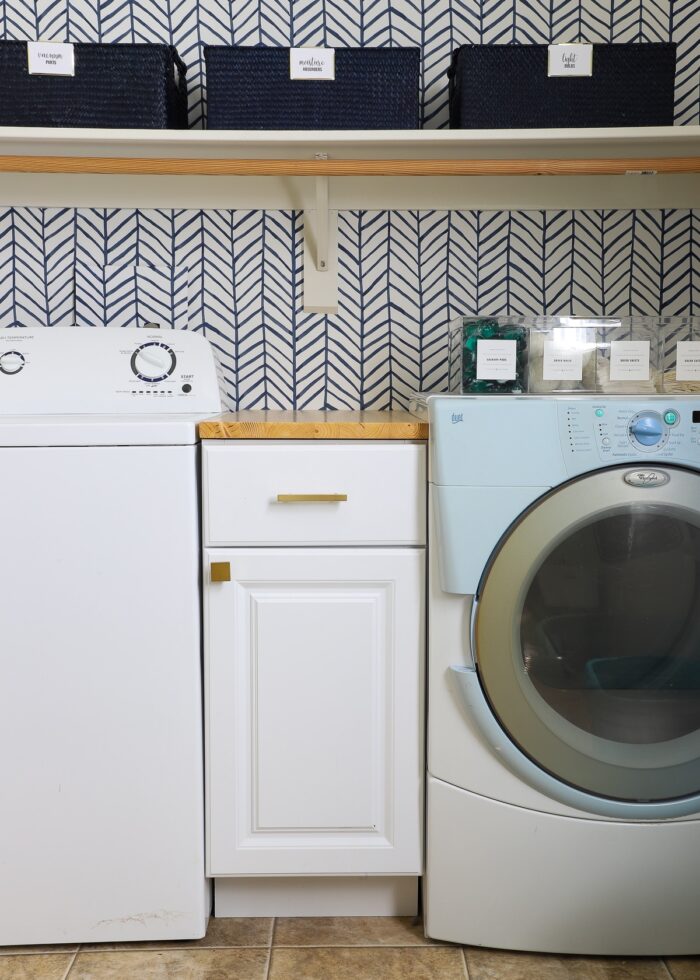
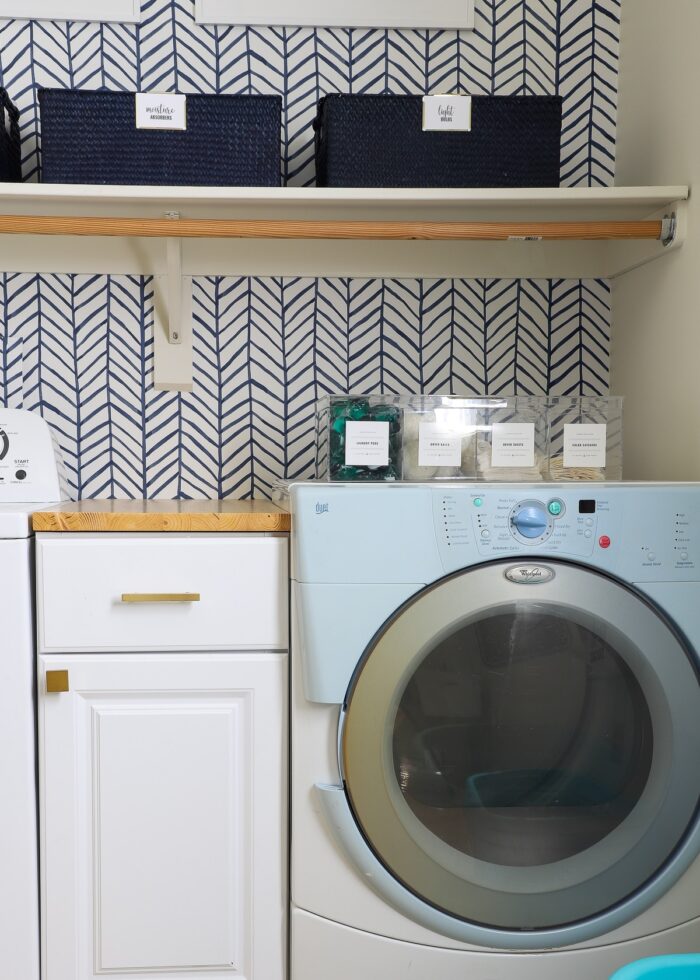
Making Sense of the Mis-Matched Washer & Dryer
One of the most annoying things about moving in and out of military housing is having to buy/sell washer and dryer units (most on-base homes don’t have them, while many rental homes do). Our last two rentals already had a washer and dryer, so we long ago sold our original (matching) set.
Upon moving into this home, we were offered a set for free. While super excited to save the $700-1000 purchase, I was rather bummed to discover the two units didn’t match…at all. Different brands aside, they were also different colors and different heights. Further, the dryer had a drawer installed underneath, making the height difference even more dramatic.
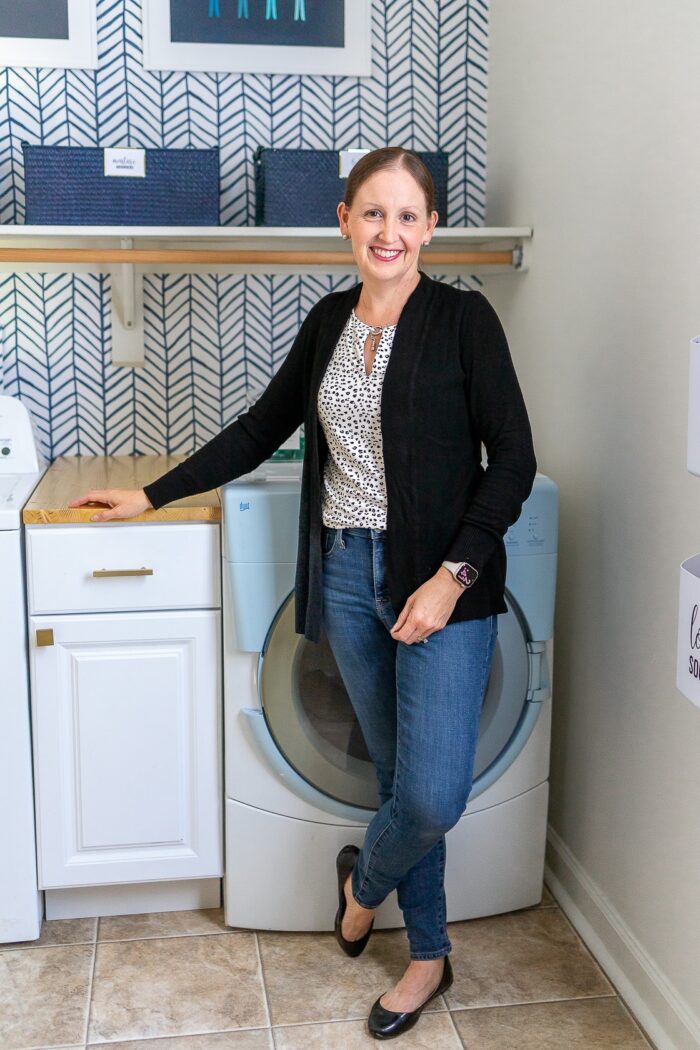
One of my biggest priorities in this laundry room makeover was to help the mismatched washer and dryer appear as though they were a set. And while there wasn’t much I could do about the color, shape, and dials, I could fix the height disparity.
We didn’t need the added storage in the dryer drawer, so we removed that right away. And while much improved, the washer and dryer still looked awkward sitting right next to each other.
The skinny lower cabinet that you see below is originally from my craft room counter setup. It doesn’t fit in my current office arrangement, so it was in the garage, unused. By placing the cabinetry between the mismatched washer and dryer, the height difference and overall layout felt and looked much better. Plus, we got a little bit of more-useful storage space!
NOTE: The cabinet is not really “installed.” It’s simply sitting on the linoleum tile floor between the two units; and the countertop is screwed directly to the cabinet via small L-brackets (not the wall).
Want to save this post?
The DIY Countertop
Since this skinny cabinet typically sits under a long stretch of white countertop in my craft room, we didn’t have a great topper solution for the cabinet here.
After exploring lots of different options that were all far too-expensive for this 14″ spot, we ultimately cut down a raw shelf board and sealed it with a few coats of oil-based polyurethane. Typically, I don’t love the yellow nature of oil-based products; but in this case, the counter ties in perfectly with the hanging rod above it and the knobs below it!
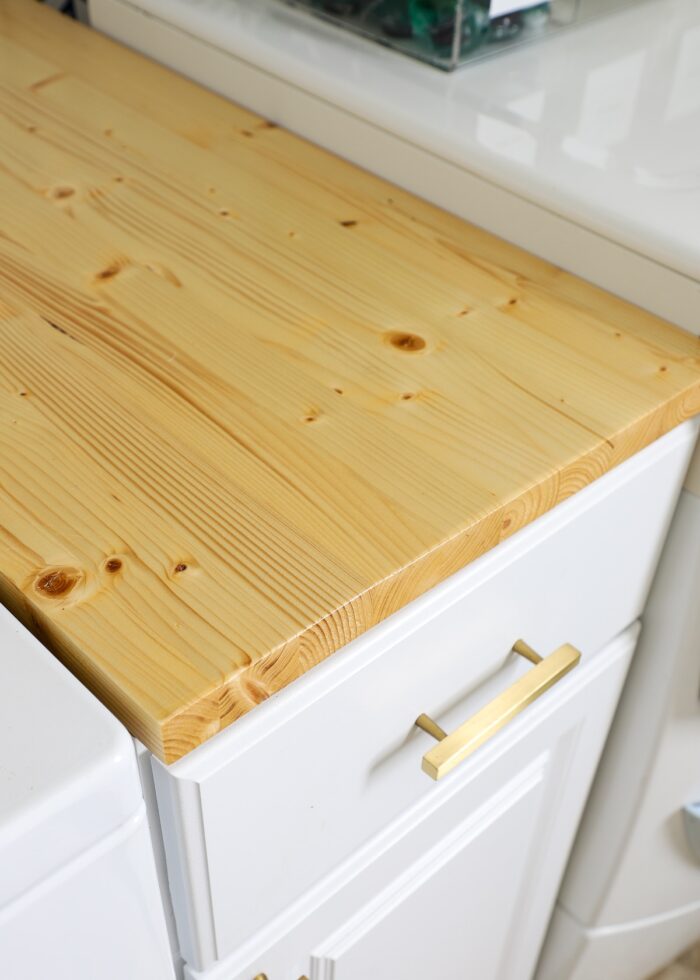
While the washer/dryer situation isn’t quite ideal, I’m pretty excited that I was able to make the entire arrangement look and function a whole lot better for just the cost of the wood (~$25).
Laundry Supply Organization
I’m usually quick to add as much storage space to a room as possible; but honestly, we didn’t need much in here. Between the skinny cabinet, floating shelf, and a few organizers, we were able to find great homes for pretty much everything we needed to store.
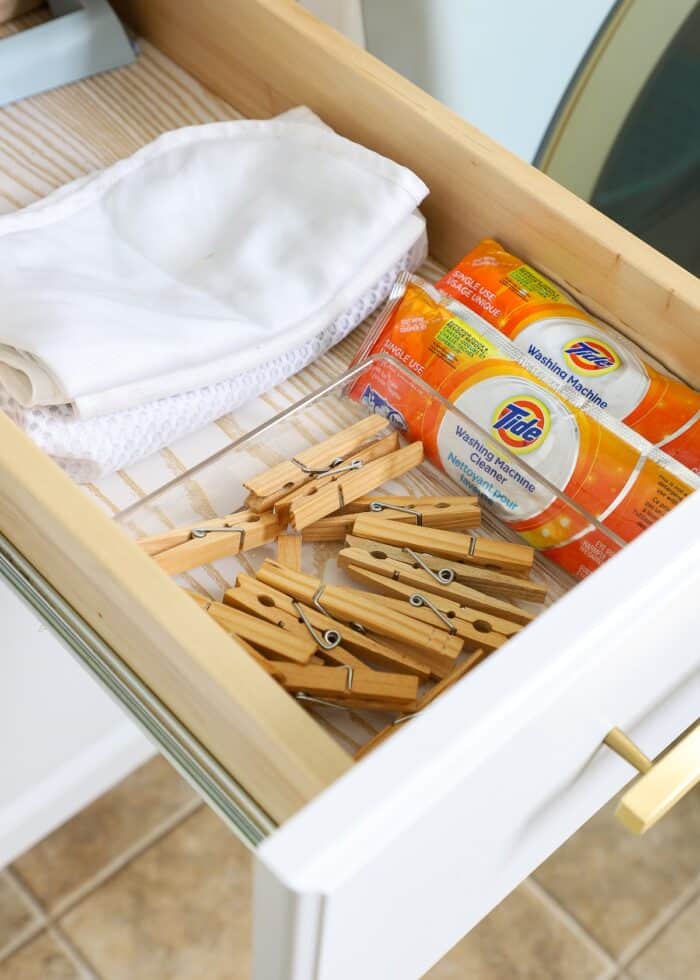
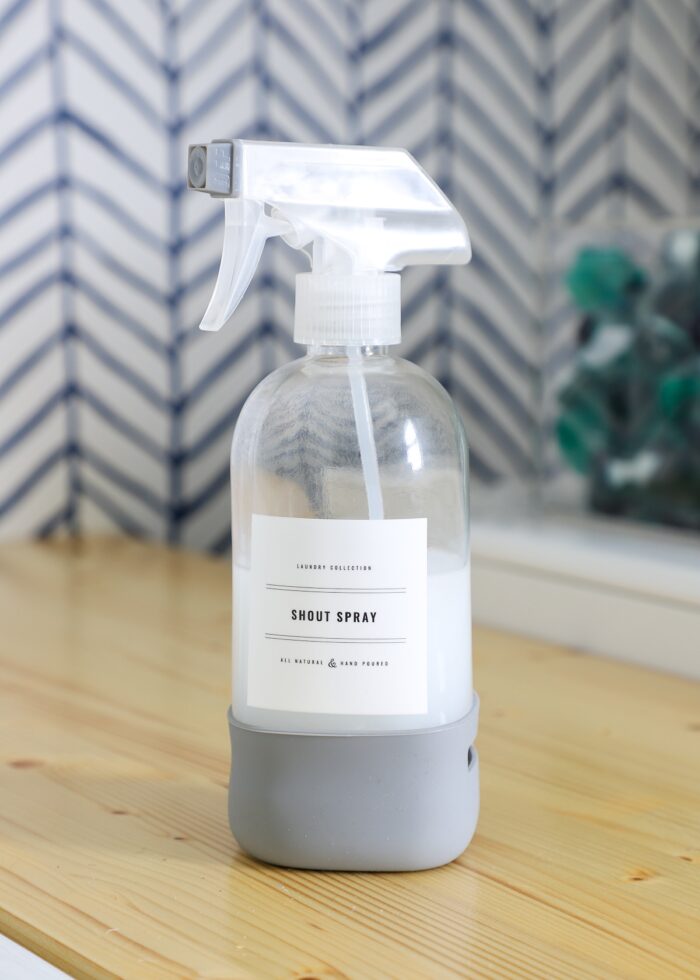
Inside the lower cabinet, we store our iron, Battery Kit, Picture Hanging Kit, and a refillable bottle of Shout Spray.

The drawer holds some clothespins, washing machine cleaner, and some small mesh bags.
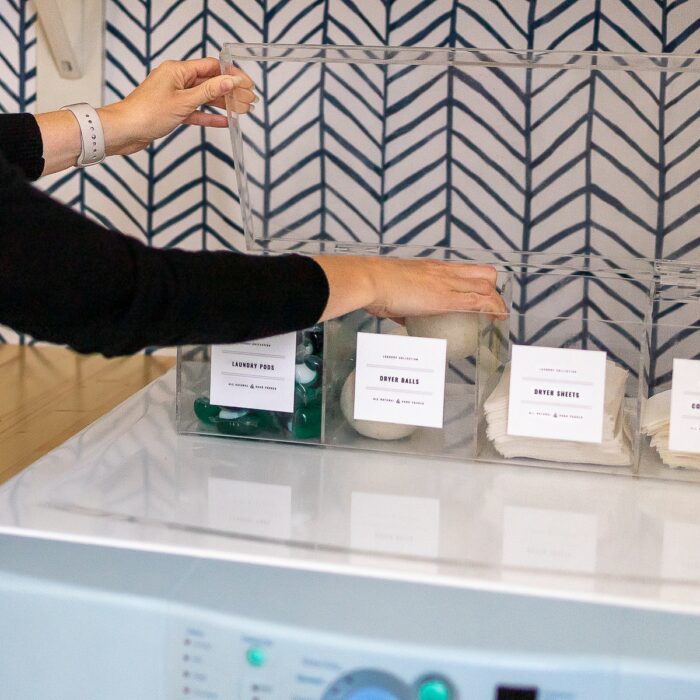
On top of the dryer sits a compartmentalized acrylic box that I scored at a thrift store ages ago.

We’ve used it to hold laundry supplies (e.g., laundry detergent pods, dryer balls, dryer sheets, color catchers) in several homes now. Lowering the dryer ultimately allowed us to keep this oh-so-handy solution in this home too!
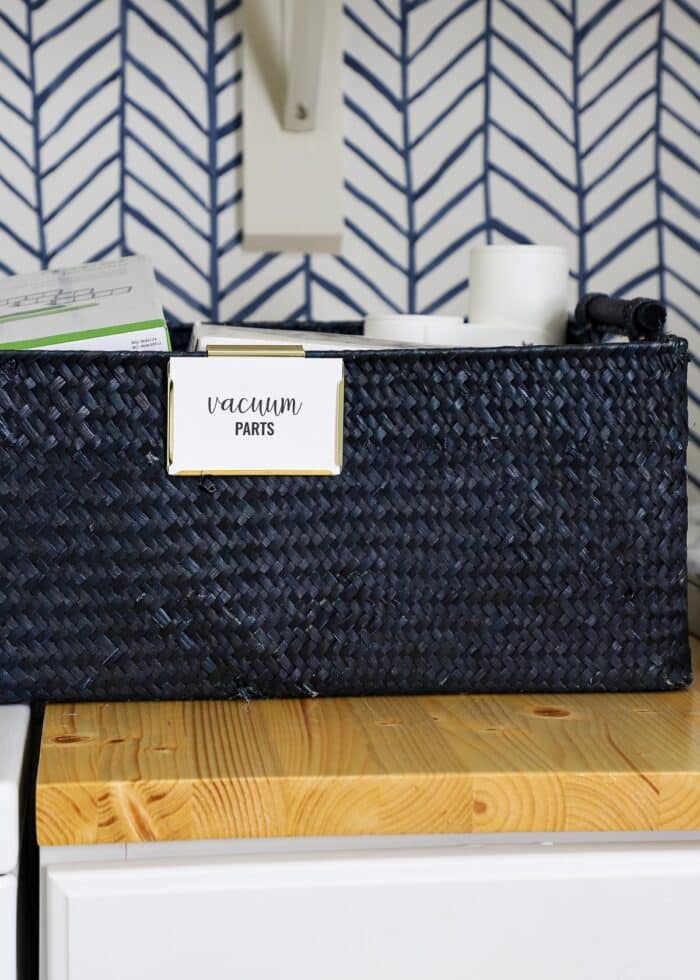
On the open shelving above the washer and dryer sit three blue woven baskets (that we’ve also had for ages). When choosing what to store here, I let necessity be my guide. We didn’t have logical places elsewhere in the home for our vacuum attachments, lightbulbs, and moisture absorbers. Since these items aren’t needed all the time, this high (and kind of hard-to-reach) shelf turned out to be a great solution!

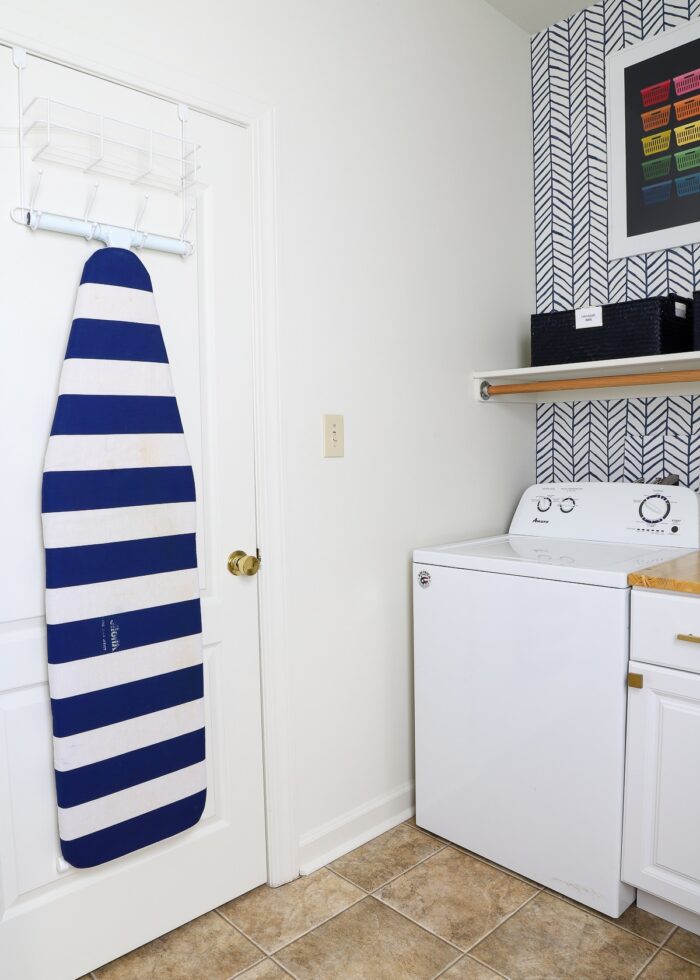
Behind the door is an over-the-door rack that perfectly holds our ironing board on the hooks. It’s out of the way but still accessible whenever we need it.
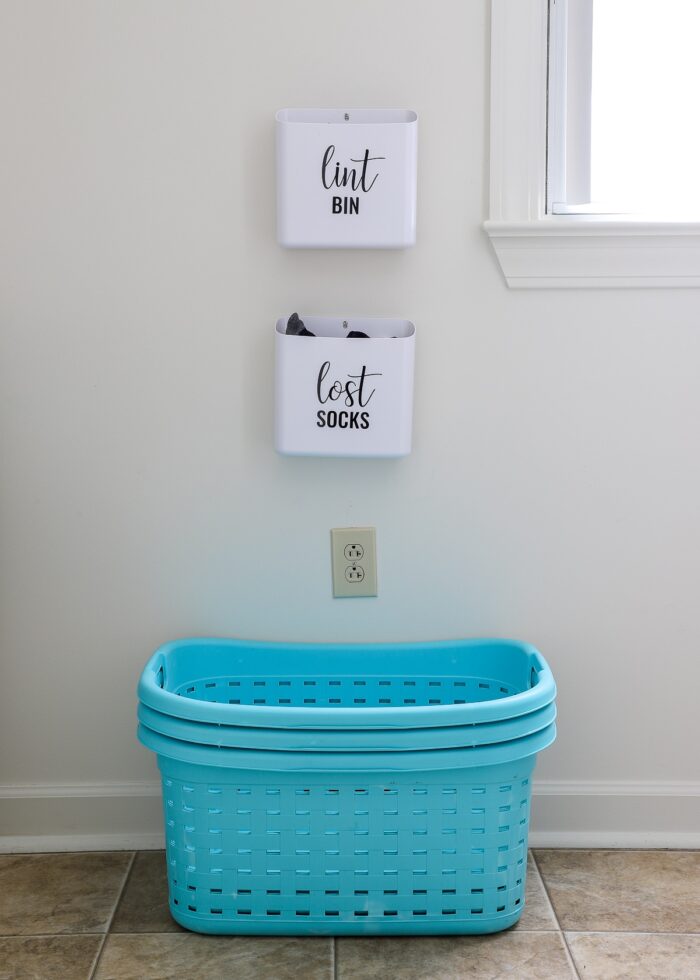
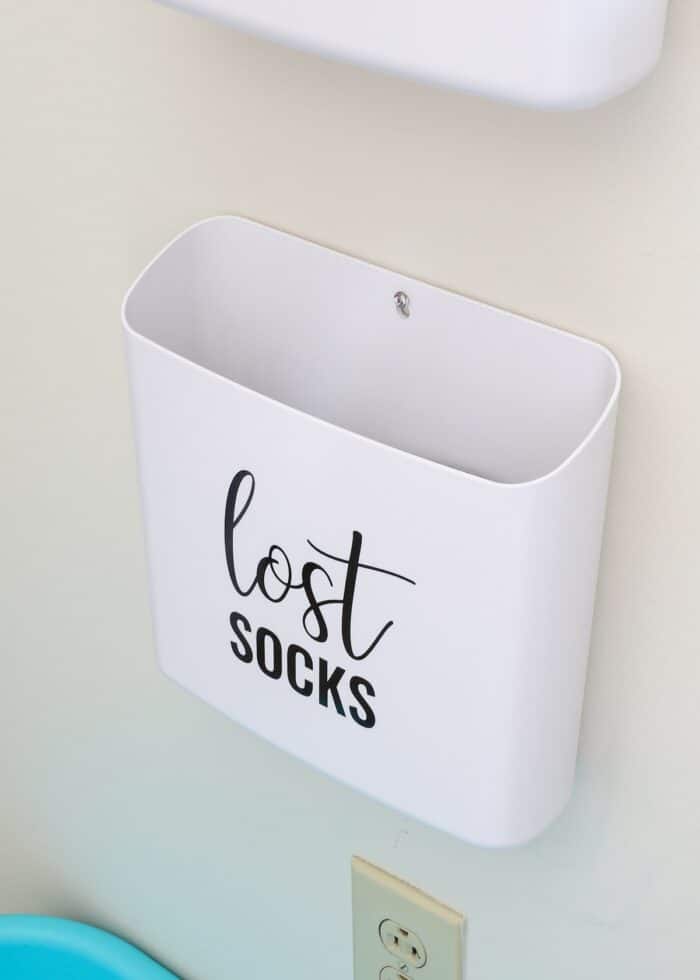
Finally, the two items I couldn’t easily find a home for within the existing baskets, cabinet, and shelf were lint and lost socks, so I scooped up these magnetized bins and added my own labels.
I love their generous size, super strong magnets, and customizability. But they felt a bit in-the-way on the front of the washing machine. I ultimately decided to hang them on the wall above the laundry baskets instead.
Curious why we keep lint? We use it to start our camp fires!
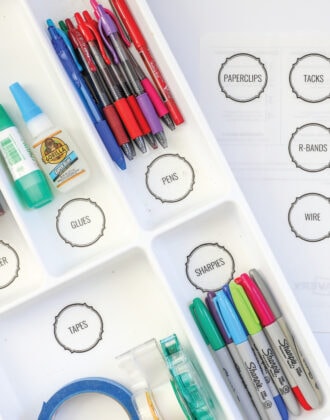
DIY Laundry Labels
No functional space is really complete without some labels. I really wanted to keep this space streamlined and clean, so I opted to use the black-and-white versions of my Cleaning and Laundry Labels.
Printed onto waterproof label paper and sealed with laminating sheets (exactly as I outline here), I was able to stick them directly to all our glass and plastic containers.
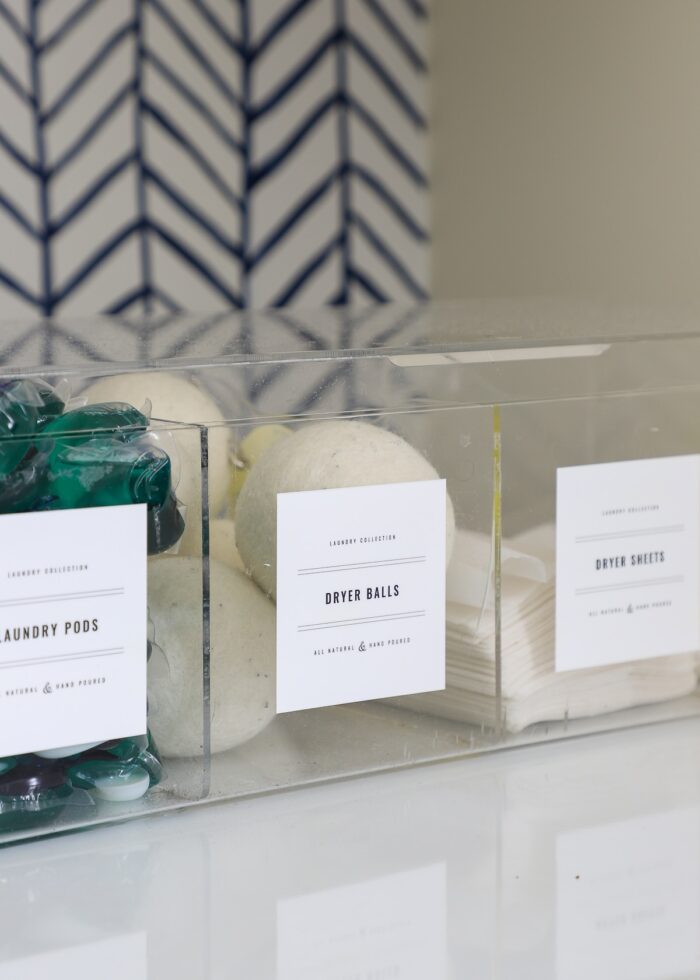
For the baskets, I printed these printable labels onto white cardstock and slid them into my trusty gold label holders.
For the hanging bins, I used matching fonts to make vinyl labels with my Cricut Joy, exactly as I show here: How to Make Vinyl Labels with a Cricut | A Comprehensive Guide
Coordinating the colors and fonts on all the various labels helps the entire space feel more cohensive and tidy!
Shop My Laundry Room
Admittedly, I used a lot of items I already had on hand for this laundry room makeover, only purchasing the wallpaper, art prints, wood countertop, and magnetic bins. But if you want to create a similar look in your home, below are my sources and some similar accessories!
When we move into a new home, my motivation eventually starts to wane; and I begin to think “Do I really need to decorate the laundry room?” After all, it’s pretty easy to just close the door and ignore it.
But even after all these years of makeovers, I was still surprised how much of a difference a few simple DIY decor projects make. This wasn’t a massive renovation, and the updates I did weren’t hard or expensive. But the transformation was no less dramatic; and now, walking in here to do laundry or grab a lightbulb or wash a paint brush makes me smile time and time and time again!
Tour More of Our NC Rental
Want to explore the other room makeovers from our NC Rental home? Tour the entire home in the following posts:
- Full Before Tour
- The Kitchen
- The Family Room
- The Dining Room
- The Laundry Room
- The Office/Craft Room
- The Master Bedroom
- Our Teens Tiny Bedroom
- Shared Little Boys' Bedroom
- The Garage
- The Final Home Tour

Megan

8 Comments on “Renter-Friendly Laundry Room Makeover with Easy DIYs”
I just love this and the video really showed the height of the room I couldn’t truly understand from pictures. I love love love this transformation. It makes me happy too living vicariously through your decorating!
Congratulations, it looks amazing!
The wallpaper is dreamy 🙂
I have to ask, do you miss having the drier higher up? We’re thinking about doing some changes to our laundry setup and rising our front loader is kind of high in my wish list …
Hi Isabel!
I’m so glad you asked this question!
When I first planned on changing the dryer height, the ease of loading/unloading the dryer didn’t even occur to me. Once I went to move laundry over for the first time, I was like “whoa!” Definitely a change.
Having the dryer up higher does make a huge difference in ease. But the height difference REALLY bothered me, so I don’t regret changing it. Plus I have these young, strapping boys who can move the laundry for me 😉
Hope that helps!Megan
I think it looks great! My question is do you ever think about “hiding/disguising” some of the utility items? Admittedly, the only thing I have done to our laundry room is hang a couple of canvases my kids made years ago. But I have my wheels turning now to shop my house a bit.
Hi Nicole!
My original plan was to hang curtains to hide all the ugly utility equipment or make some sort of tension rod screen. But I can’t overstate how high these ceilings are. I’m 99% certain even my 108″ curtains wouldn’t be long enough. So then it becomes a cost versus effort versus payoff situation.
That said, while it’s not on the project list at the moment…I might eventually get to it just to see what I can come up with. It’s all a matter of how much time I have left 😂
~Megan
It looks great!
I love the size & storage of our current laundry room, but it has… issues.
The house has flooding issues, and while it was de-molded when we moved it, anything I do needs to take that in to account. The floor is concrete, with the discolored remains of linoleum glue that was pulled up.
While I had things well organized not long after we moved in (a folding table, a hanging rack, shelving), it was only on the last few months that I made it feel welcoming.
The key? Am indoor/outdoor rug (5×7). I bought it on sale, with a kid’s room or back porch in mind. When it arrived, it felt too “outdoor” for the kid’s room, but it didn’t work on the back porch either.
When I tried it in the laundry room — perfect! It really makes the space feel intentional. We’ve had a small flood since putting it in, and pulling up the wet side to air out allowed it to dry quickly with no threat of mold.
With a large family, I spend a LOT of time in the laundry room, and this has made all the difference.
Thank you for sharing your journey and those fantastic ideas! Your attention to detail and creative projects have truly transformed your space. It’s incredible how a few simple changes can make such a big difference. Recently, I refreshed my laundry room by just painting the walls. We also added a laundry sink and it has been a game-changer. My wife finds it so much easier now, and she says it’s the best thing in the laundry room, so I have to recommend it to everyone! Your blog post has me thinking about redecorating again, especially with the wallpaper idea. It really does elevate the space. I loved all your ideas, but the wallpaper one really caught my eye, so I had to bring it up.😊
Thanks for replying to my email comment/question.
I read the article above where you indicated you use the baskets above the washer & dryer to hold vacuum parts and thought I’d let you know how I solved that problem/issue – because I could never figure out what went which vacuum (e.g., wet shop vacuum accessories, a stick vacuum, and small ORECK mini vacuum.
I used a small white net drawstring bag (like the kind used for produce) and then hung the bag in the closet where the vacuum was kept.
The size is dependent on how many accessories and whether there is a detachable hose or not.
My wet shop vacuum came with a little caddy that attached to the wet vac but would never stay attached nor would the items stay inside the caddy.