How to Cut Multiple Colors on a Single Cricut Mat
Today, I’m going to teach you a great time-saving trick when creating multi-color projects with a Cricut machine. Instead of loading and unloading mat after mat in order to cut color after color, you can easily have your machine cut everything all at one time. This isn’t hard (although it does require a little bit of focus), but it really can increase your efficiency and productivity. Let me show you exactly how to cut multiple colors all on a single Cricut mat!
Why Cut Multiple Colors at Once?
By default, Cricut Design Space pre-sorts any project onto different mats by color. And for good reason. It is most efficient to cut all the black elements together, then all the blue elements together, etc.
But this default setting also means that you are loading/unloading mats over and over, which can be both a hassle and time-consuming…especially if you have lots of colors and/or small designs.
But by pre-loading a single mat with all the different colors of material (and pre-arranging the right layers to cut on the right colors), you can load your mat once, cut everything at once, and unload it once. Hello, time saver!
What Cricut Machines Can Cut Multiple Colors at Once?
All of them. This is a Cricut Design Space technique that works with any mat-based cutting on the Cricut Joy, Cricut Explore, or Cricut Maker machines.
NOTE: Because you use a mat to hold several colors at once, this technique is not appropriate for Smart Materials (i.e., mat-free) cutting.
What Kinds of Designs Can You Use?
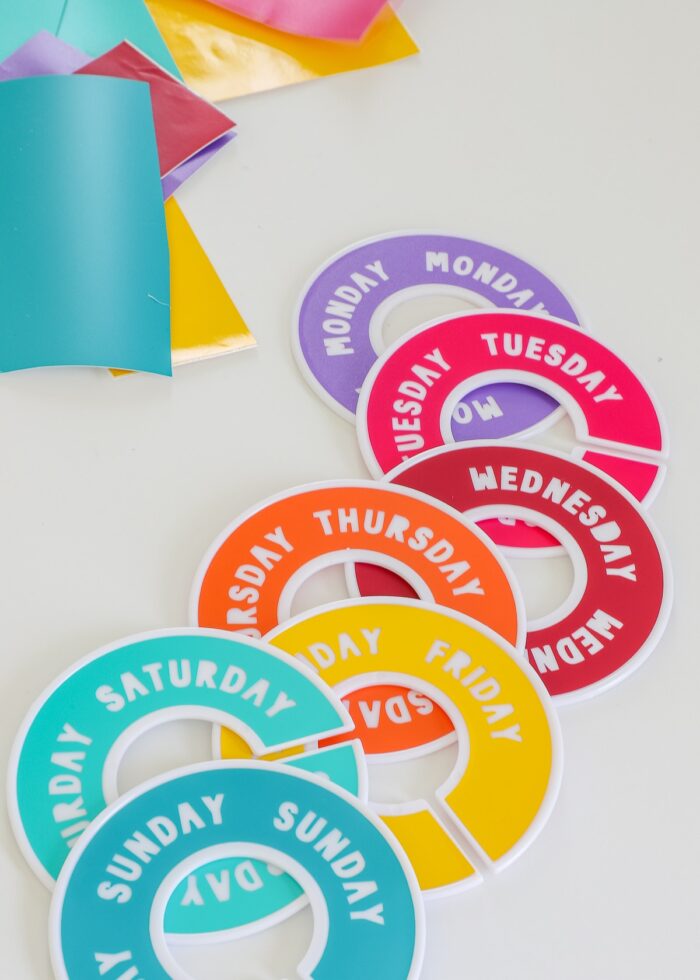
In order to use this technique, you must be creating a design with 2 or more colors. This includes different colors in the same design, as well as the same design cut in different colors (like my labels). Further, this will work on any image from the Cricut Design Space Library or SVG files you upload yourself.
Are There Any Limitations to this Technique?
There are two limitations to be aware of: size and material.
First, you are limited by mat size. So if a particular design element is the same size as your mat, you won’t be able to add any more layers to that mat. As long as you can fit multiple layers onto a single mat (without any overlap), this technique can be used.
Second, this technique only works when all the layers are being cut from the same material (i.e., all vinyl, all paper, all iron-on, etc). Material cut settings are made on a mat-by-mat basis, so the entire mat will receive the same cut pressure, speed, etc. As such, you cannot properly cut iron-on AND vinyl on the same mat, or paper AND vinyl on the same mat…regardless of color.
How to Cut Multiple Colors at Once | Step-by-Step
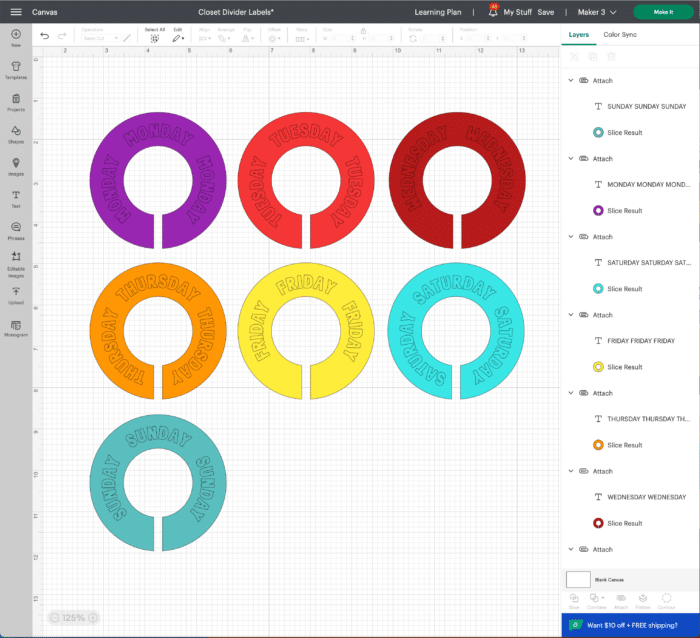
Step 1 – Prepare Design in Cricut Design Space
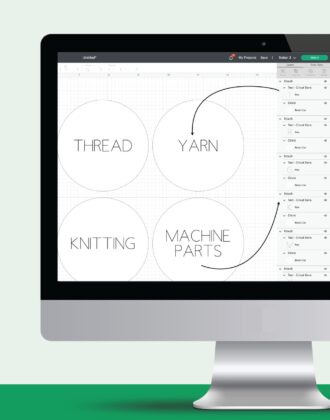
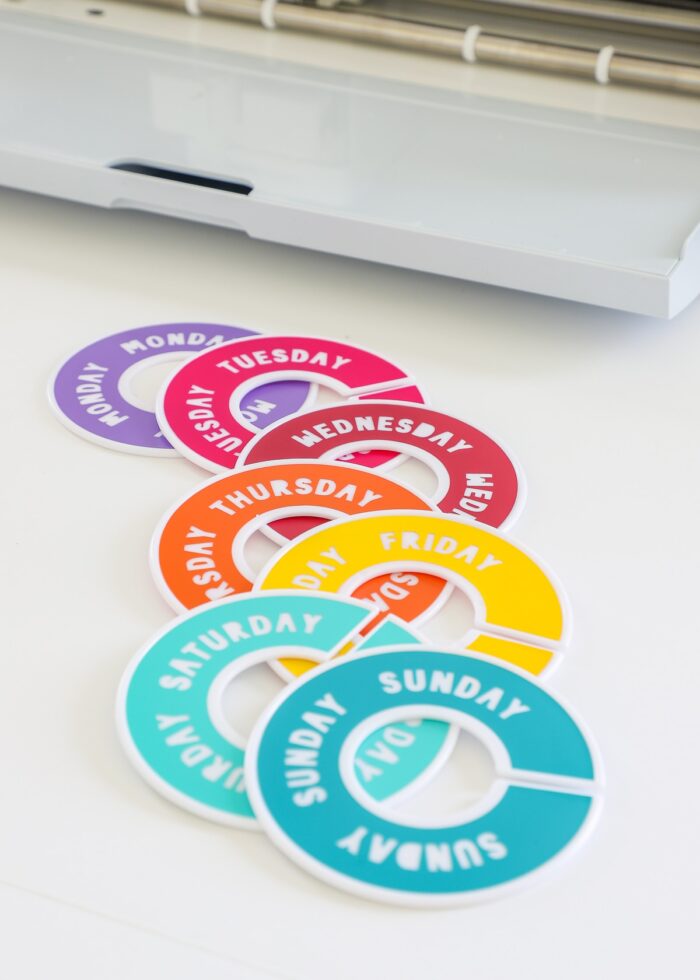
As always, start in Cricut Design Space, with a multi-color design on your canvas. I’m using some Day of the Week labels I made for round closet rod dividers. In the image below, note that each label is a different color, both on the canvas itself, as well as the color denotation in the right-hand Layers Panel.
TIP! Although not required, you may want to snap a quick picture or screen shot of your original design. If your design is complex or you’re not sure you can keep track of what color each layer should be, a visual reference can be quite handy!
Many tutorials will suggest that you “Attach” your layers together in order to cut them out of the same color. While that does work, I like to have a bit more flexibility in laying out my mat.
I recommend you instead navigate to the Color Sync tab (upper right-hand toolbar, next to the Layers Panel). Here, you can drag-and-drop every single layer to be one single color. It doesn’t really matter which color you choose; I switched all of my labels to turquoise.
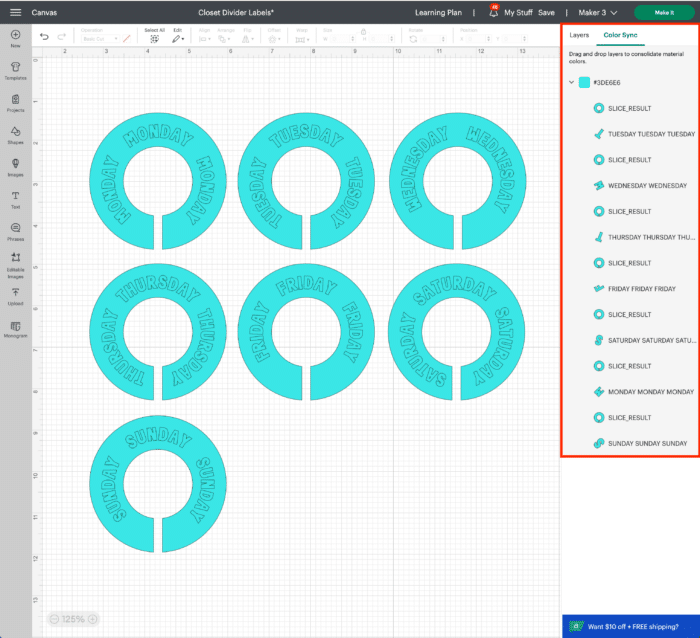
Now that all the layers are set to the same color, they will all be cut on the same mat by default.
Click the green “Make It” button to proceed.
Step 2 – Manually Adjust Cutting Layout
When your layers first pre-populate on a cutting mat, they will automatically be as close together as possible (along the top) in order to conserve material.
However, when using different colors, it’s significantly easier when the various cuts are spread out.
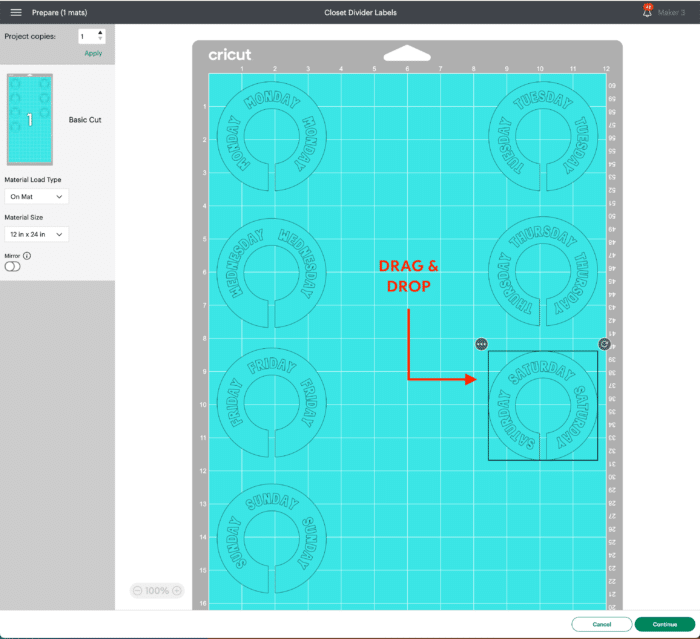
As such, on the (first) Prepare screen, select your appropriate mat size and then manually position each element (just drag-and-drop each one to wherever you want it).
Want to save this post?
When deciding where to place each layer, I highly recommend using the virtual mat grid. These grid measurements will not only help you determine what size to cut your material down to, but also exactly where to place it on your actual mat.
Notice in my example below, I moved each image to the center of a 4×4 block square, starting at the top of the mat, then spaced evenly around the perimeter.
TIP! Spread out the first layer, second layer, bottom layer, etc as much as possible. This makes placing your material on the mat much easier and reduces the risk that the wrong design will be cut on the wrong color or fall off the edge.
DO NOT yet click the green “Continue” button, as you’ll want to reference your virtual layout during the next step.
Step 3 – Trim Down Material
With your layout situated within Cricut Design Space, you will now trim down your material(s) to the appropriate sizes and place them on your mat accordingly.
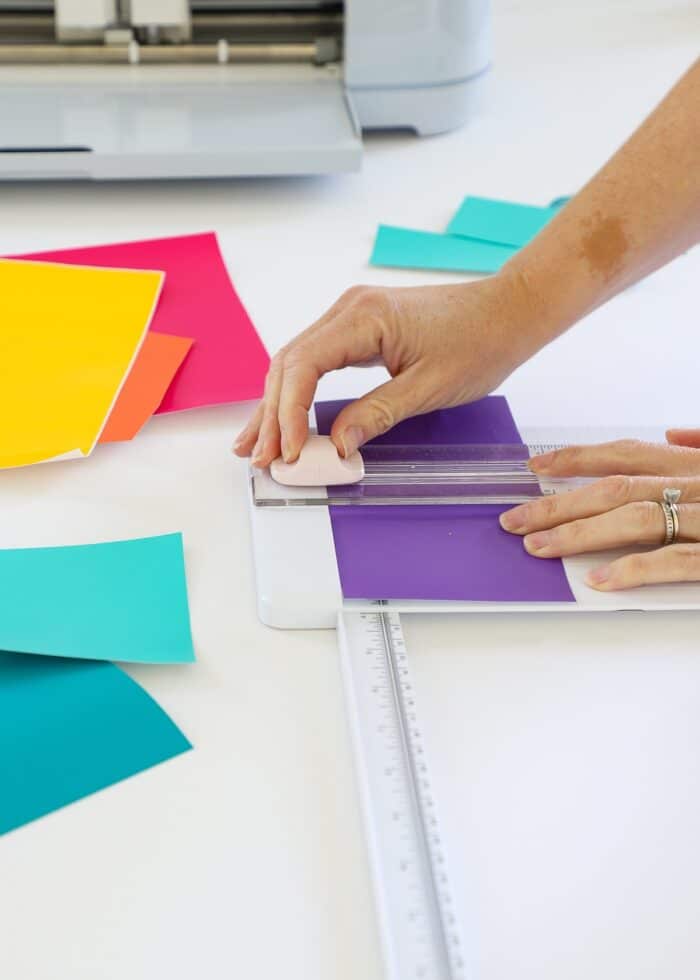
To do this, refer back to your screenshot of the original design, as well as the Prepare screen, to determine both the size and color material you need for each cut. My vinyl pieces for this project were really straight forward (4″ squares); but if your layers are all different sizes, be sure to pay attention to your needed dimensions so you don’t risk the design not fitting.
Step 4 – Place Material On Mat
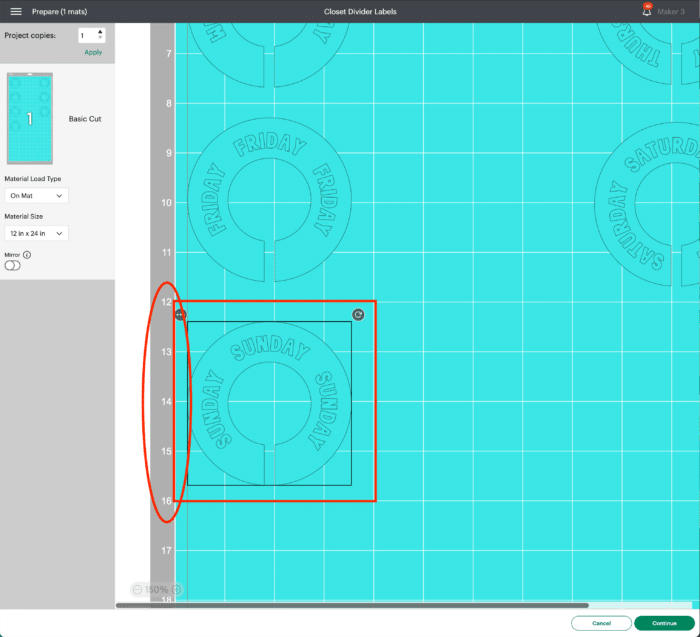
With the colors of vinyl, iron-on/HTV, paper etc all cut down, again use the Prepare screen to determine where each color needs to be placed. Refer to the white grid on the virtual mat and match it to the printed grid on your actual mat to ensure everything is in the correct place.

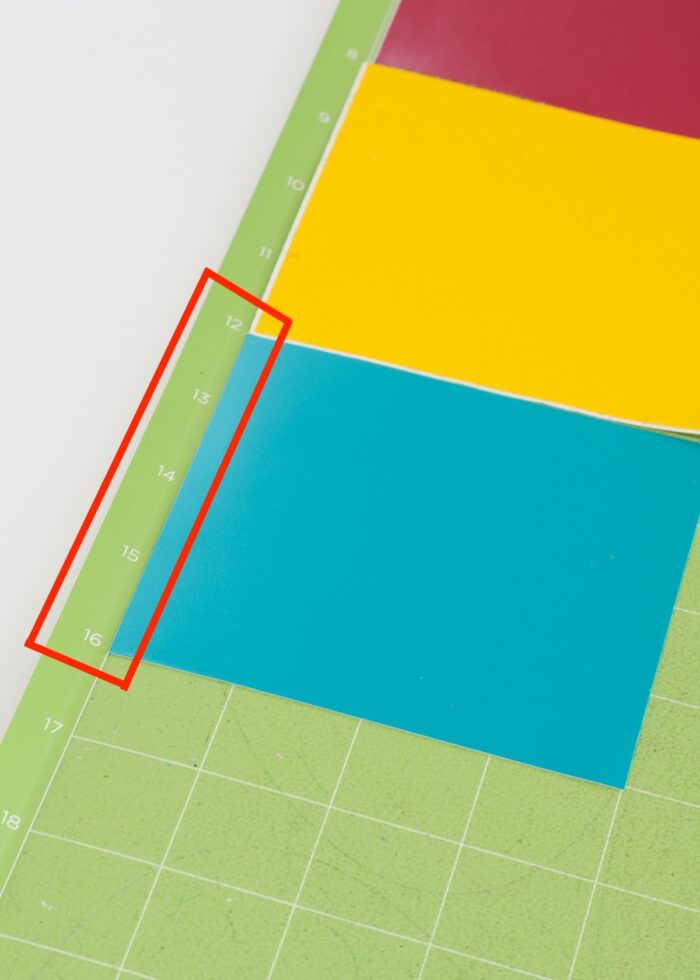
As an example, the Prepare screen (below) shows a label perfectly centered between 12-16.”
So I placed a vinyl square at the exact same position, in the color I wanted for that particular label.
If you have a really simple design or just a few colors, getting your material placement to match the virtual mat layout is pretty easy. But if you are dealing with lots of layers and lots of colors, be sure you are paying attention to what you’re putting where.
Step 5 – Cut Out Design
With all your material in the correct places, you can proceed through the mat Preview screen to the final Material Setting in Cricut Design Space. When the Go/Cricut light on your machine starts flashing, feed the one mat into your machine and start the machine cutting.
If you aligned everything up correctly, the right layers should cut in the right spots!
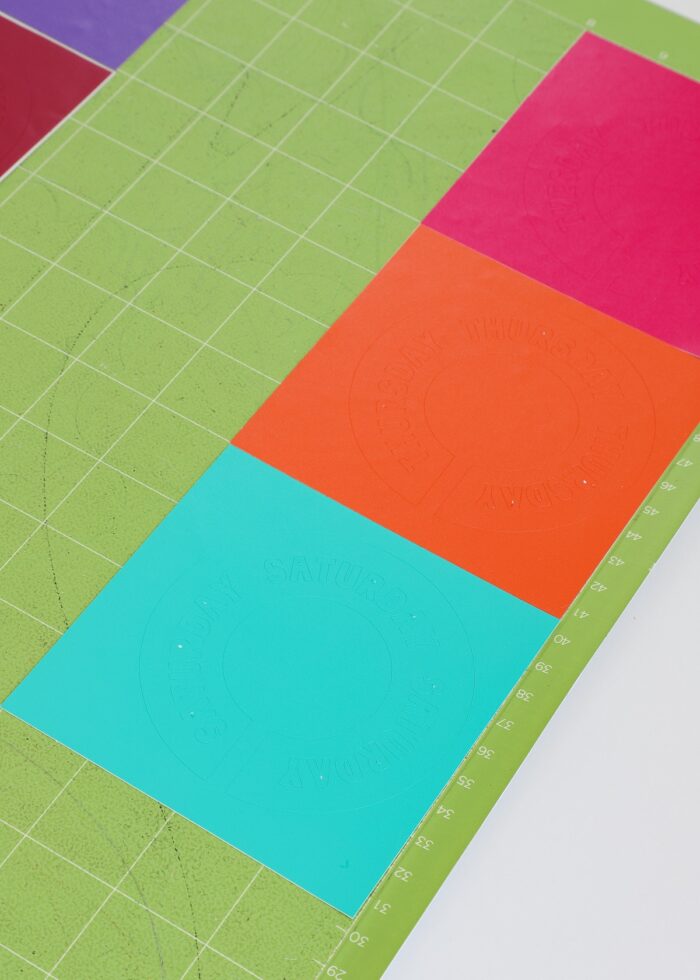
It’s a little hard to see the cut lines in the image above, so below is the same mat with the excess vinyl removed with a weeding tool.
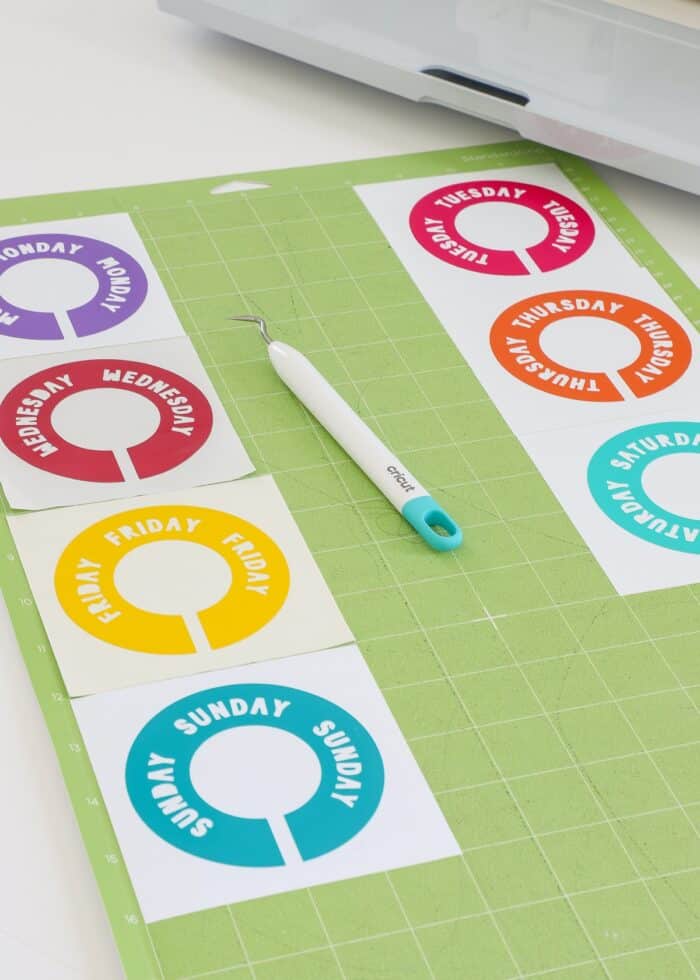
Sure, I could have cut one color at a time, but that would have involved 7 different instances of loading/unloading the mat.
By using this “hack,” I fed a single mat into my machine, and all 7 decals were cut together!
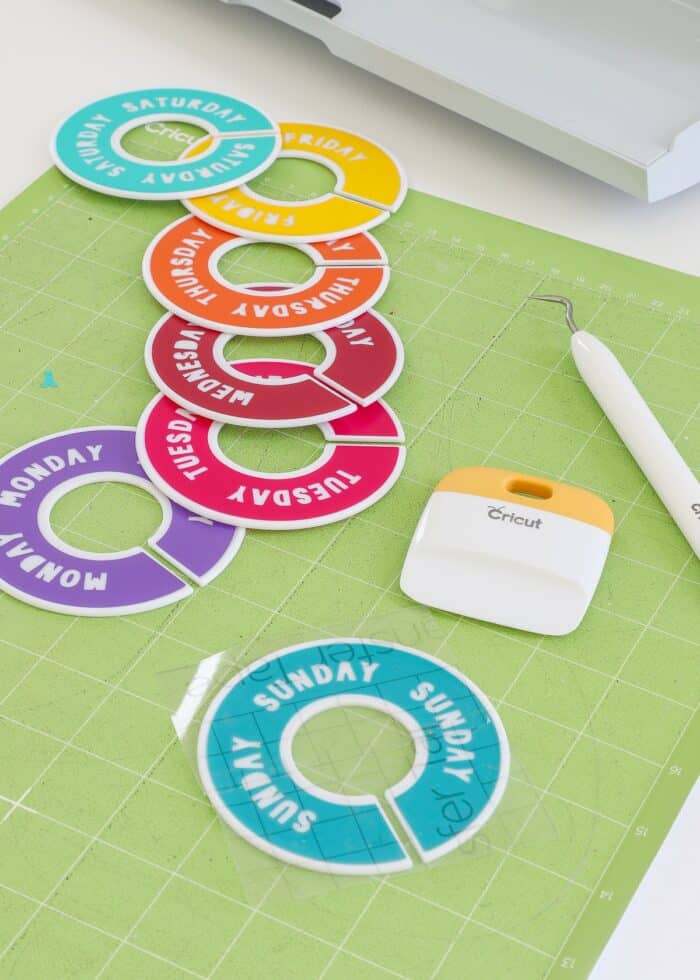
Step 6 – Complete Project
With all your layers now cut from different colors, all that’s left to do is to finish assembling your project as it was originally designed!
Curious about my closet dividers? Full tutorial here: Round Closet Divider Labels with a Cricut (+ SVG File)
More Helpful Cricut Design Space Tutorials
Cricut Design Space is a very powerful program, but it can have a steep learning curve for beginners. Check out my other comprehensive tutorials below:- How to Use Cricut Design Space | A Breakdown for Beginners
- 20 Cricut Design Space Tips & Tricks You Really Need to Know
- The Ultimate Guide to Cricut Terms & What They Mean
- How to Find Free Images to Use with Your Cricut Machine
- How to Use the Attach Tool in Cricut Design Space
- How to Use the Slice Tool in Cricut Design Space
- How to Use the Weld Tool in Cricut Design Space
- How to Use the Contour Tool in Cricut Design Space
- How to Use the Offset Tool in Cricut Design Space
- How to Use Print Then Cut in Cricut Design Space
- How to Design Monograms in Cricut Design Space
- How to Cut Really Big Designs on Your Cricut (The Off-the-Mat Technique)
- How to Design Mugs in Cricut Design Space
As a beginner, you might feel more comfortable relying on Cricut Design Space’s default mat organization. But as you get the hang of how the mats/colors work, don’t hesitate to cut different color layers on a single mat in order to speed up your entire process. Without a doubt, this technique is all about efficiency and convenience. And the more you have of both, the more projects you’ll ultimately be able to make!
Megan