The Ultimate Guide of Cricut Terms (& What They Mean)
When you purchase your first Cricut machine, you might be surprised to find yourself suddenly in a world of unfamiliar tools, materials, software, vocabulary, and more! And when you’re not familiar with this Cricut terminology at all, it can be quite difficult to navigate through even the most basic of beginner tutorials. To help you out, I put together this Ultimate Guide of Cricut Terms. It is purely designed to be a reference to look up the unfamiliar words you encounter as you work your way through new projects and techniques. Whether you’ve been using your machine for 5 days or 5 years, I know you’ll love having this handy resource at your side!
This is a sponsored conversation written by me on behalf of Cricut. The opinions and text are all mine.

Machines

Cricut – Refers to the parent company of all Cricut machines, supplies, and materials; also a general term for this brand of electronic cutting machines (e.g., “I used my Cricut to make this adorable mug!”)
Cricut Expressions II – An older (and no-longer-available) Cricut machine that relies on cartridges to cut images and does not operate using Cricut Design Space at all.
Cricut Explore – The very first machine Cricut released that operated with Cricut Design Space rather than cartridges. It is no longer available for purchase, but has most of the same features as the Cricut Explore Air 2.
Cricut Explore Air 2 – Available in a variety of colors and compatible with an array of accessories, it is the updated version of the original Cricut Explore. Its reasonable price tag combined with bluetooth technology and vast capabilities make it the most popular and approachable Cricut machine.
Cricut Explore 3 – This is the most current version of the Cricut Explore model. It boasts all the features of the Cricut Explore Air 2, but with increased speed and compatibility with Smart Materials for mat-free cutting up to 12’ at one time.
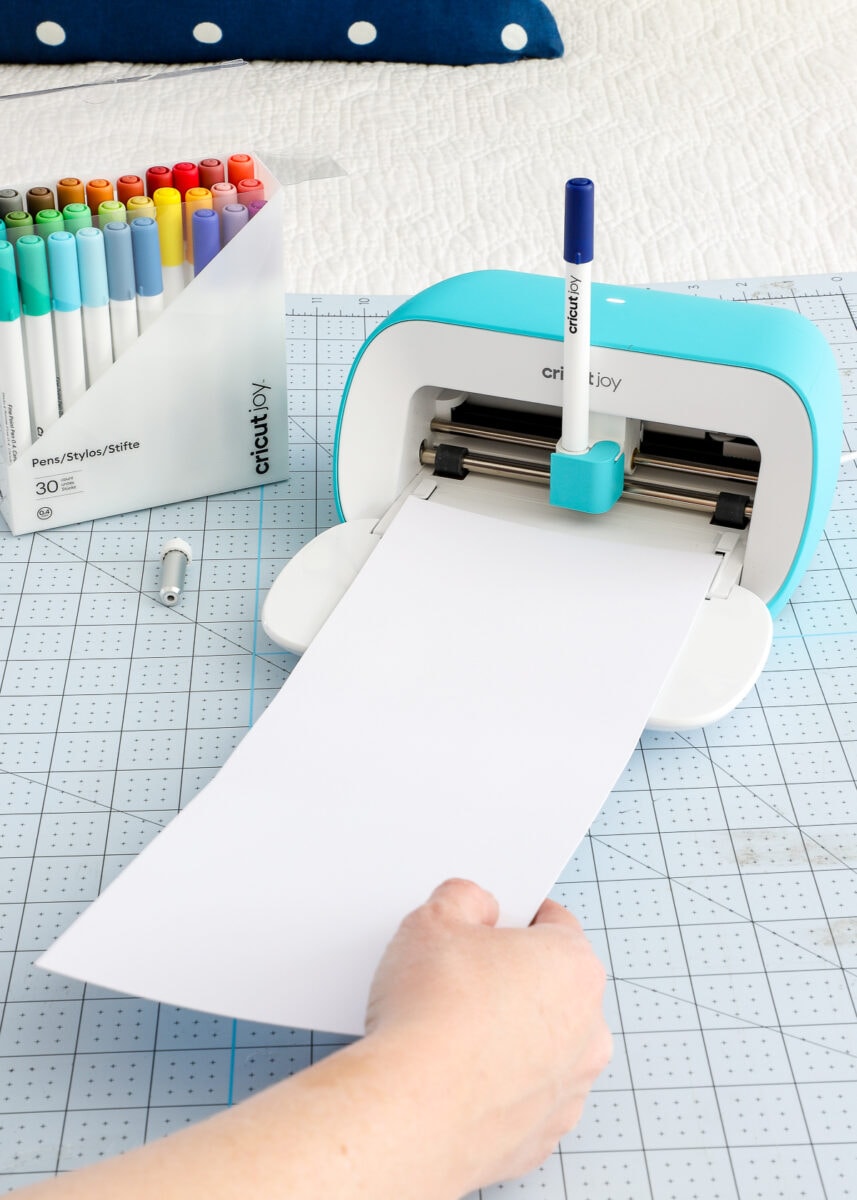
Cricut Joy – Known for its compact size and portability, it is ideal for small projects such as labels, vinyl decals, and Insert Cards. It is compatible with specially-sized Smart Materials for mat-free cutting up to 48”long; and is the only Cricut machine that accommodates the Card Mat. Full Cricut Joy Review.
Cricut Maker – This is the strongest and most capable machine in the Cricut family. Thanks to its more powerful tool housing and a wide array of interchangeable blades, it cuts the biggest collection of materials and performs the most specialized functions such as engraving, debossing, perforation, and more. Full Cricut Maker Review.
Cricut Maker 3 – This is the most current version of the Cricut Maker model. It boasts all the features of the Cricut Maker, but with increased speed and compatibility with Smart Materials for mat-free cutting up to 12’ at one time. Full Cricut Maker 3 Review.
Machine Features

Adaptive Tool System – The tool system featured on Cricut Maker machines that allows it to hold, steer, and expertly pressurize a wide variety of blades and tools.
A Clamp – The right-side clamp in both the Cricut Explore and Cricut Maker machines that holds all the blades.
B Clamp – The left-side clamp in both the Cricut Explore and Cricut Maker machines that holds pens, as well as the Scoring Stylus in the Cricut Explore models.
Tray – The front door of every Cricut machine that folds down; it has a liftable lid that reveals a hidden storage compartment.
In-Tray Storage Compartment – A storage compartment in the lower tray of all Cricut machines that can hold extra blades and tools.
Roller – This is the long silver rod across the machine’s interior that pulls mats and materials into the machine for cutting, drawing, etc.
Mat Guides – Plastic bracket guides that are located on either side of the lower tray, just in front of the roller. They help you properly position your mat or Smart Materials to be fed into the machine.
Docking Slot – This is the indented ridge on the top inside of both the Cricut Explore and Cricut Maker machines and is designed to hold mobile devices such as phones or tablets.
USB Port – The USB port is located along the bottom right of both the Cricut Explore and Cricut Maker machines; it can be used to connect your machine to Cricut Design Space upon initial setup and/or to charge mobile devices while running projects.
Power Button – This button is located on the top of both the Cricut Explore and Cricut Maker machines; it features an illuminated circle and will power your machine on and off.
Load/Unload Button – This button is located on top of both the Cricut Explore and Cricut Maker machines; it features up/down arrows and is used to both load and unload a mat or Smart Materials.
Cricut/Go Button – This button is located on top of both the original Cricut Explore and Cricut Maker machines; it features an illuminated Cricut icon and starts your projects cutting, drawing, etc. On the Cricut Explore 3 and Cricut Maker 3, the Cricut symbol has been replaced with a “play” symbol but functions the same.
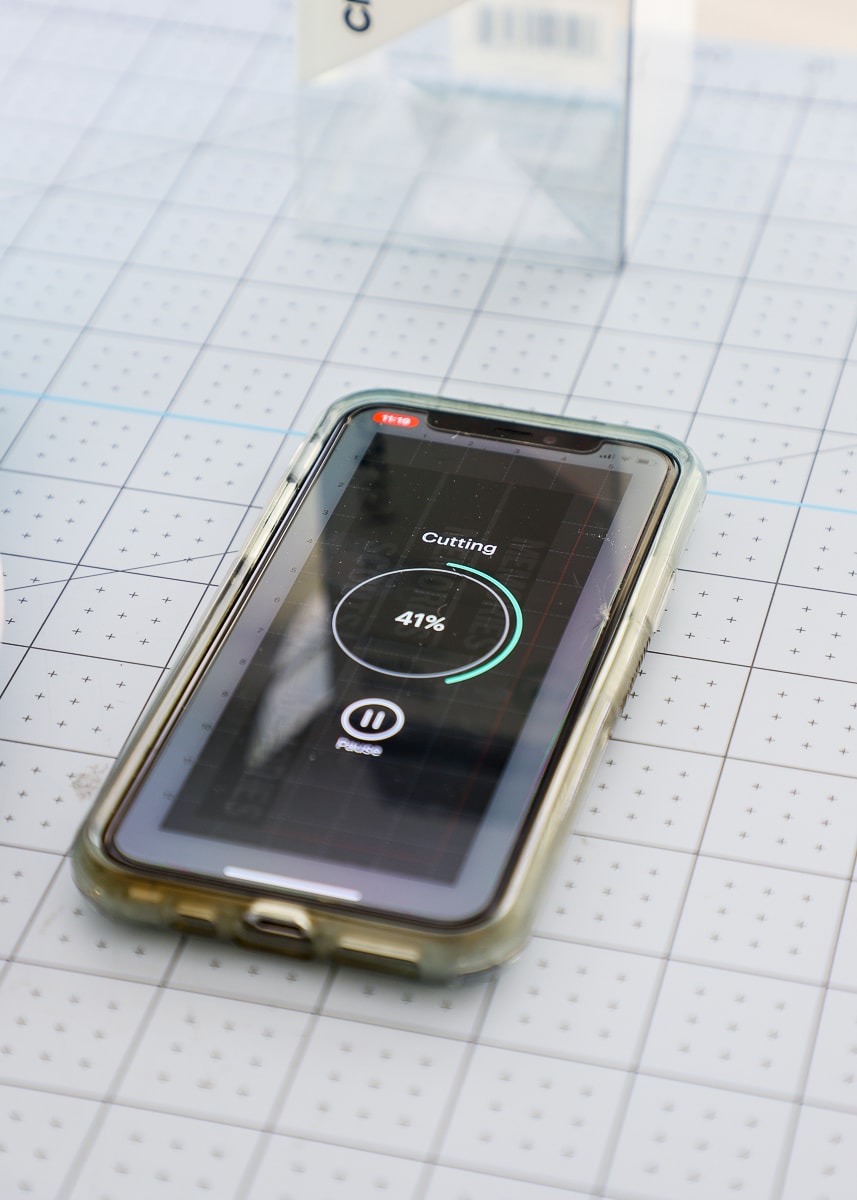
Pause Button – This button is located on top of both the Cricut Explore and Cricut Maker machines; it features an illuminated double line symbol and can be used to stop a project before it is complete.
Star Wheels – These are the small, white plastic rings positioned along the roller bar and help keep materials firmly secured to the mat while cutting. They can be moved horizontally along the bar, and even completely off to the side when cutting thicker materials.
Cartridge Port – This is a small, covered port located on the left-hand side of original Cricut Explore and Cricut Maker models. Purchased cartridges can be placed in this port in order to sync them with Cricut Design Space.
Smart Set Dial – This small dial is only featured on the original Cricut Explore and Cricut Explore Air 2 machines; it is used to manually set the correct material prior to cutting.
Heat Presses
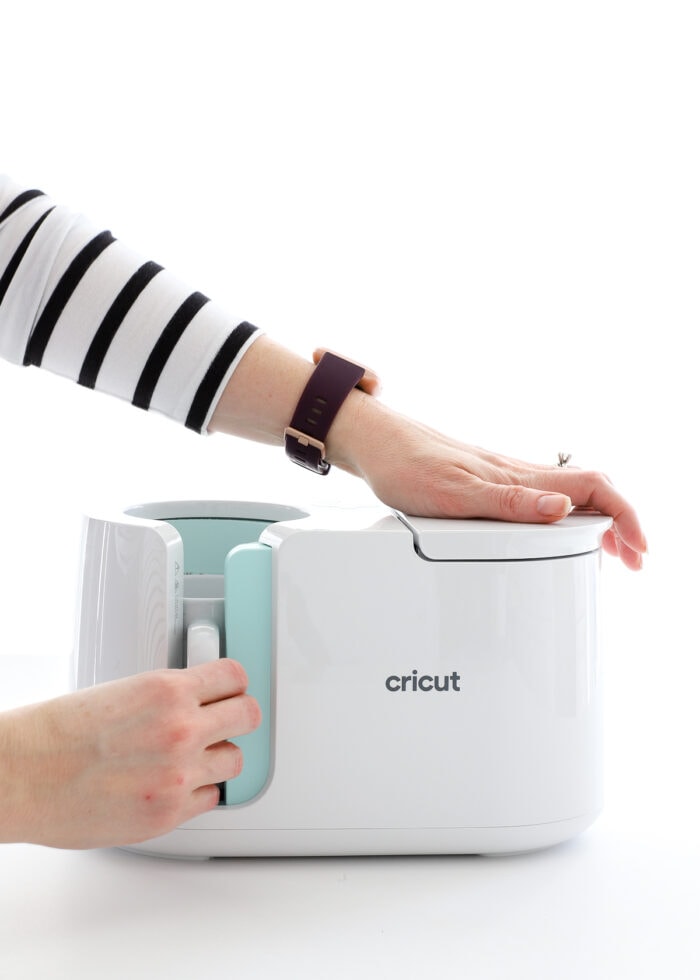
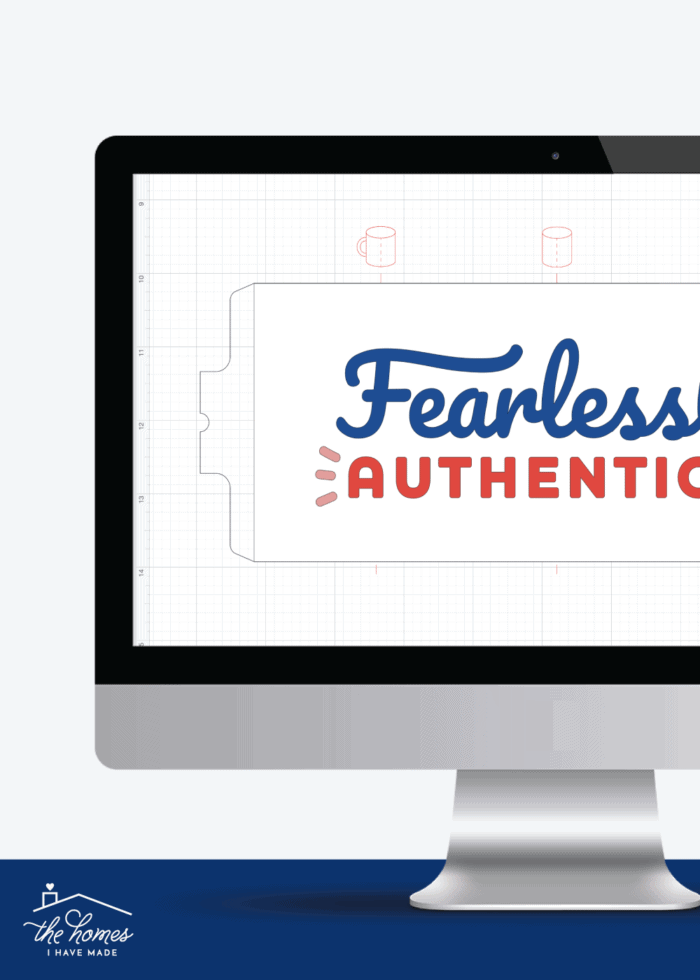
Cricut Mug Press – This is a specially-designed heat press that allows you to permanently transfer Infusible Ink designs onto mugs ranging in size from 12-15 ounces. Full Cricut Mug Press Review.
Cricut EasyPress – This is the original EasyPress. Turquoise in color, it allows for even temperature and pressure application on any heat-related project (e.g., Iron-on, Infusible Ink.)
Cricut EasyPress 2 – This is the most current version of the EasyPress. It comes in a variety of colors, as well as 2 sizes (9×9” and 12×10”). It features an enhanced heat plate that can reach 400 degrees and provides professional-quality heat transfer.
Cricut EasyPress Mini – This is a miniature version of the Cricut EasyPress technology, measuring just ~2×3.” It is ideal for adding small, heat-fused details onto projects such as shoes, hats, and toys.
Accessories
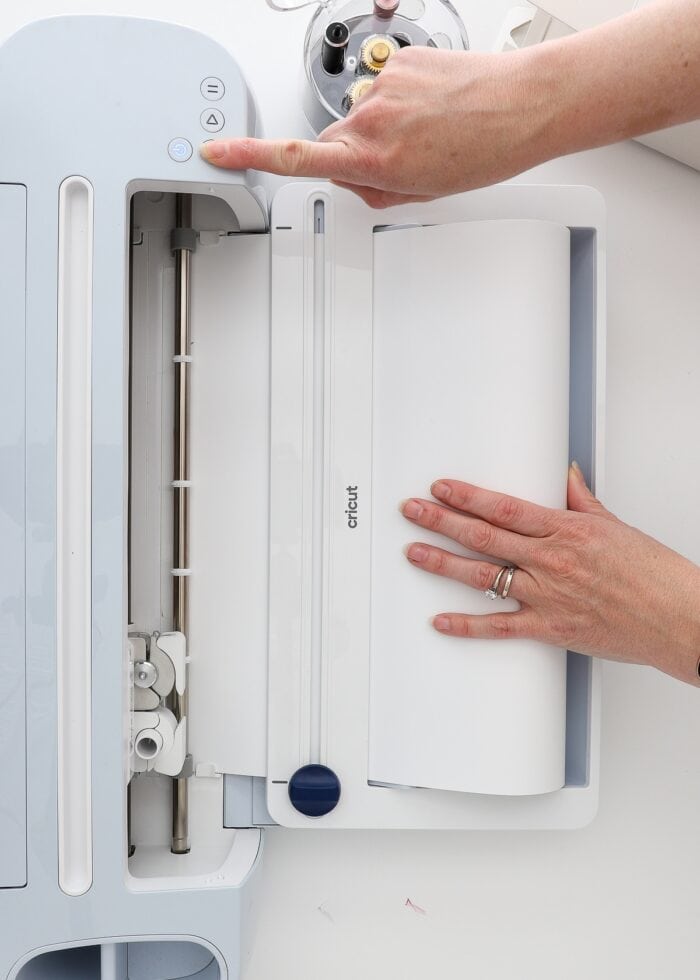
Cricut Roll Holder – An attachment for the Cricut Explore 3 and Cricut Maker 3 machines that holds long rolls of Smart Materials when cutting without a mat. Full Cricut Roll Holder Tutorial.
EasyPress Mat – A heat-safe mat that can be placed onto any firm surface for heat-transfer projects such as those with Iron-on and Infusible Ink.
Self-Healing Mat – A cut-safe mat featuring a pre-printed grid that is used for cutting paper, vinyl, and fabric with a rotary cutter.
Portable Trimmer – A trimmer that can be used to quickly cut down paper, vinyl, and iron-on as needed.
Machine Tool Organizer – A small, round caddy designed to hold Cricut blades, housings, and tips when not in use.
Foil Transfer Kit – A special housing + tips set designed to be used with included Foil Transfer Sheets in order to add metallic shine to projects. Full Foil Transfer Kit Tutorial.
Cricut Joy Foil Transfer Kit – A housing + tip designed specifically for the Cricut Joy machine in order to add metallic shine to cards and smaller projects.
Power Adapter – Every Cricut machine comes with a proprietary, labeled power cable and adapter, which will power on the machine for use.
Cricut USB Cable – Cricut Explore and Cricut Maker machines come with a USB cable that is needed for initial machine setup and firmware updates.
Bright Pad – A back-lit, 9×12” tablet that allows you to trace and weed with ease. It features 3 brightness settings and is powered via a USB cord.
Bright Pad Go – A back-lit, 9×12” tablet that allows you to trace and weed with ease. It features 5 brightness settings and is powered via rechargeable battery for on-the-go crafting.
Tools
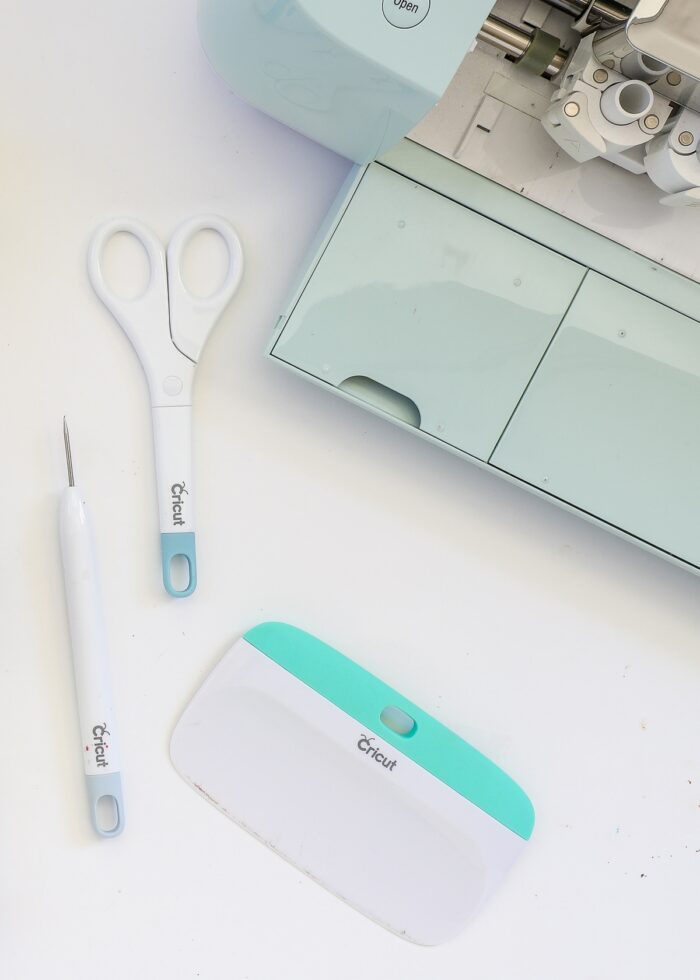
Weeding Tool – A pointed tool with a long handle that helps in removing small unwanted details from vinyl, iron-on, and Infusible Ink.
Scraper – A small, flat-edged paddle that is mostly used for rubbing transfer tape and/or vinyl to improve adhesion or remove bubbles and creases.
XL Scraper – A wider version of the smaller scraper, best used for rubbing and smoothing larger vinyl and transfer paper projects.
Rotary Cutter – A handheld cutting tool designed to be used on fabric in conjunction with a self-healing mat and ruler.
Spatula – A tool with a long handle and flat plate on the end to help lift materials (such as cardstock) off a sticky mat.
True Control Knife – A versatile craft knife that features an interchangeable blade and strong-grip handle for ultimate precision.
Brayer – A roller that is useful in adhering materials onto a mat and reducing wrinkles and bubbles in fabric and vinyl.
Heat Resistant Tape – A melt-proof tape that holds heated projects in place during the transfer process.
Pens
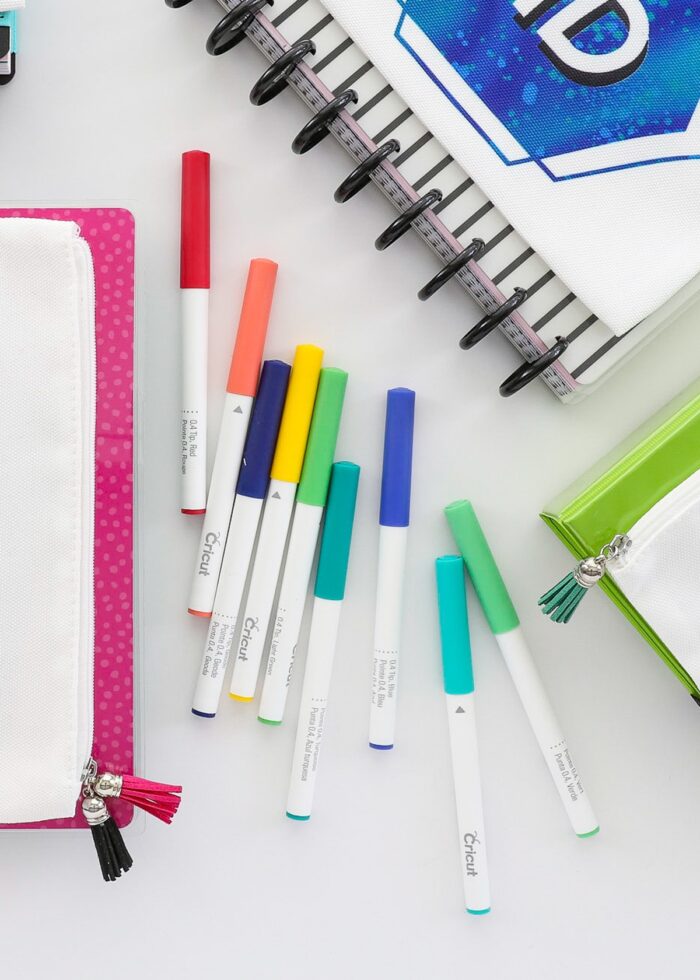
Cricut Pens – Pens that fit perfectly into the B Clamp on the Cricut Explore and Cricut Maker machines. They come in a wide variety of colors, sheens, and weights. Full Cricut Pens Tutorial.
Cricut Joy Pens – Pens with a slightly different size and shape that fit into the smaller machine. These pens also come in a wide variety of colors, sheens, and weights, and will specifically say “Cricut Joy” on the side.
Infusible Ink Pens – Instead of standard ink, these pens add Infusible Ink details to your projects. When used on a compatible “Blank” and heat activated, these pen details will have a vibrant and permanent finish.
Freehand Markers – These Infusible Ink markers are not designed to fit into any Cricut machine. Rather, they are used to draw or color in designs by hand in order to add vibrant and permanent details (via heat) onto compatible “Blanks.”
Washable Fabric Pen – These pens can be inserted into the Cricut Maker machines to add helpful markings onto fabric projects (e.g., seams, embroidery lines, etc). When washed, the pen marks will disappear.
Cutting Mats
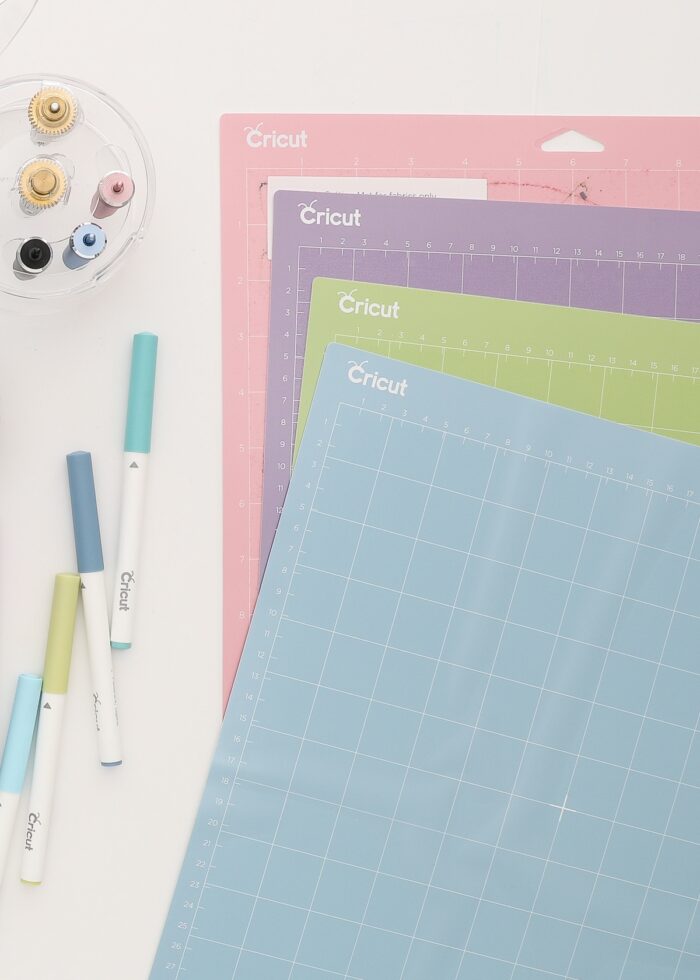
Light Grip – This light blue mat has the lowest tac of all the mats and is best used for lightweight paper, scrapbook paper, and vinyl.
Standard Grip – This green mat has a moderate level of tac and can be used for most materials including cardstock, vinyl, iron-on, etc.
Fabric Grip – This pink mat is especially designed for fabric, including felt and leather.
Strong Grip – This purple mat has the highest level of tac and should be reserved for heavy-duty materials such as Kraft board and chipboard.
Card Mat – This small, light blue mat is specifically designed for the Cricut Joy in order to make Insert Cards. Full Insert Card Tutorial.
Cricut Joy Mats – Cricut Joy mats follow the same color-coding as larger mats (e.g., Light Grip, Standard grip, etc), but are sized at 5.5” wide to fit into the Cricut Joy machine. These mats cannot be used in the Cricut Explore or Cricut Maker models.
Machine Blades & Tools
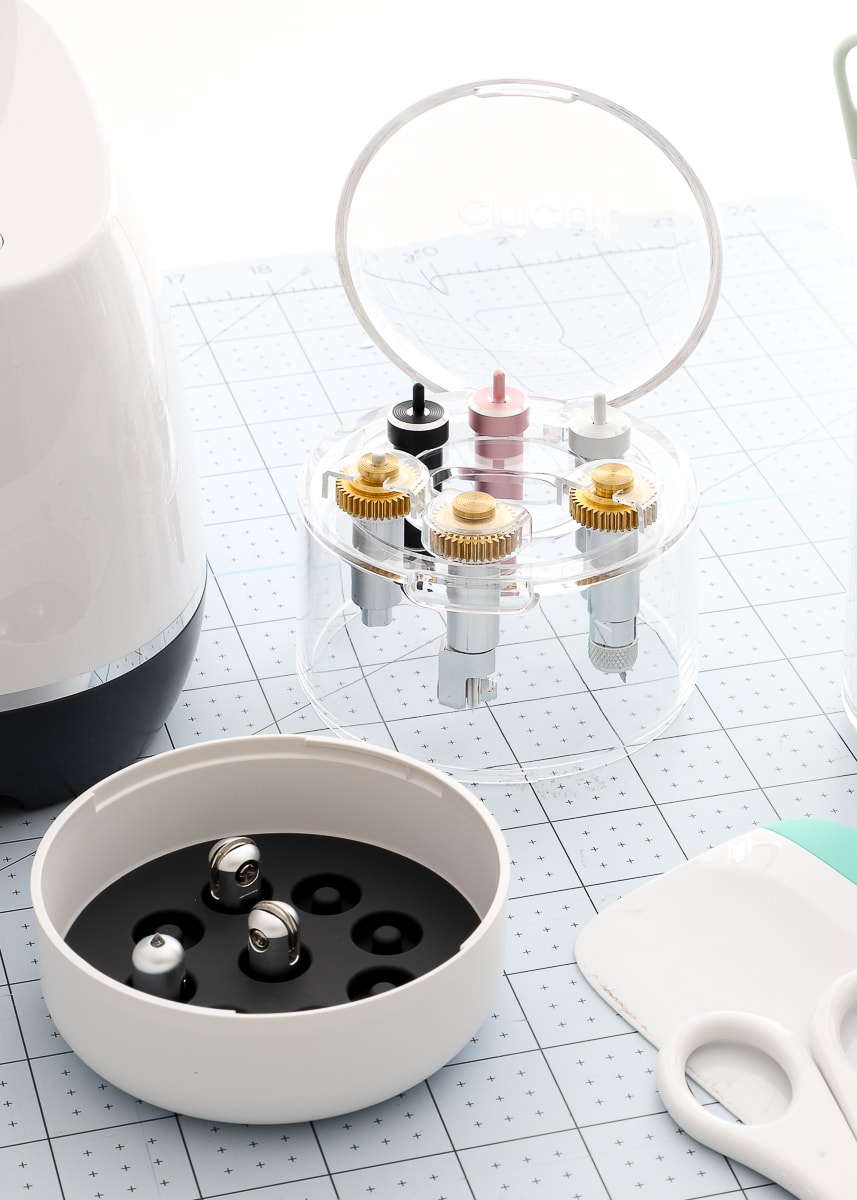
Housing – Refers to the metal, cylindrical capsules that hold the tiny cutting blades. They feature a release button along the top, and perfectly fit into the A Clamp on the Cricut Explore and Cricut Maker machines. The Cricut Joy housing is white and much smaller in size.
Fine-Point Blade – This is the standard Cricut blade that comes with every machine. It is gold in color, fits into the standard blade housing, and cleanly cuts a wide variety of materials. The blade can easily be swapped out by releasing the button on the top of the housing.
Deep-Point Blade + Housing – This blade is stronger than the Fine-Point Blade and is specially designed for cutting tougher materials (e.g, glitter cardstock, poster board, etc) on either the Cricut Explore or Cricut Maker models. It is black in color and fits into the black housing. The blade can easily be swapped out by releasing the button on the top of the housing.
Bonded-Fabric Blade + Housing – This pink housing with a specialty fabric blade allows you to cut fabric on both Cricut Maker and Cricut Explore machines. In order for optimum function, fabric should be bonded with an iron-on backing.
Scoring Stylus – Designed for the Cricut Explore machines, this pen-like tool adds score lines to projects to create nice folds.
Rotary Blade – This blade is specially designed for the Cricut Maker machines to precision cut fabric.
Knife Blade – This blade is specially designed for the Cricut Maker machines and is needed to cut thicker, tougher materials such as chipboard and basswood.
Scoring Wheel – This tool is specially designed for the Cricut Maker machines to add a single score line to projects so they fold and crease nicely.
Double Scoring Wheel – This tool is specially designed for the Maker machines to add a double-score line to projects so they fold and crease nicely (usually needed on thicker materials).
Quick Swap Housing – Designed specifically for the Cricut Maker machines, the housing fits into the machine like every other tool, but the bottom has a “quick release” function that allows you to change out specialty tips (e.g., engraving, debossing, scoring, etc) as desired.
Perforation Blade – This tool is specially designed for the Cricut Maker machines to add perforated lines to your projects to make easy tear-away details.
Engraving Tip – This tool is specially designed for the Cricut Maker machines to add deep, engraved, fine-point lines to a variety of hard materials (e.g., acrylic, wood, etc).
Debossing Tip – This tool is specially designed for the Cricut Maker machines to add a depressed line detail into a variety of surfaces such as cardstock, Kraft board, etc.
Wavy Blade – This tool is specially designed for the Cricut Maker machines; it turns any cut line into a wavy line for added style.
Cricut Joy Blade – The Cricut Joy uses a specially-sized Fine-Point Blade; it is smaller than the standard Fine-Point Blades and fits into the smaller Cricut Joy Blade Housing.
Materials & Finishes
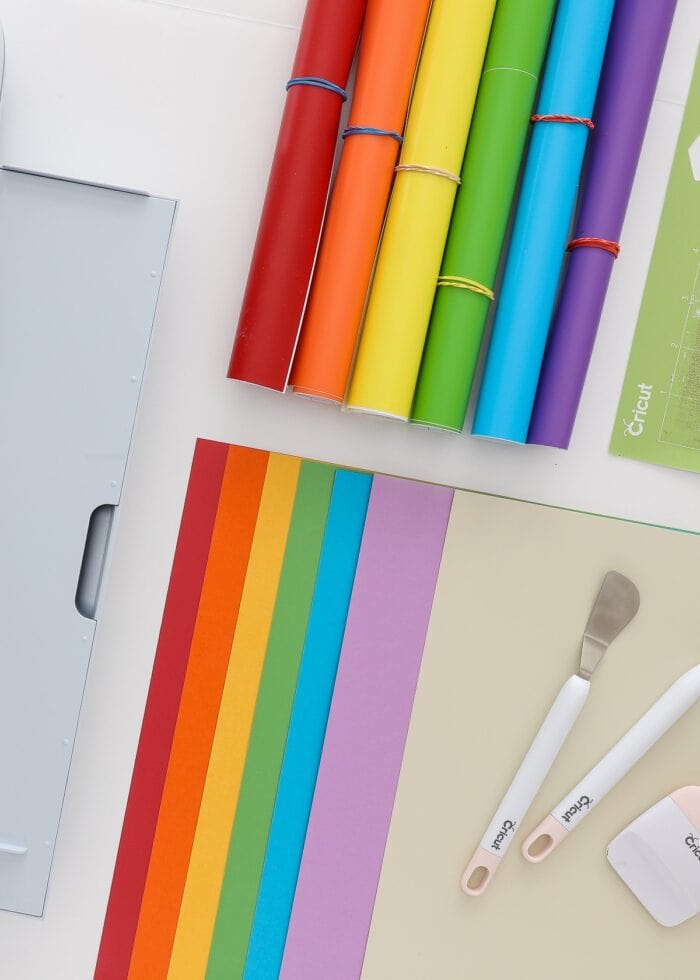
Vinyl – A removable, adhesive-backed product that can be cut into countless designs and applied to most clean, hard surfaces such as plastic, ceramic, glass, wood and more.
Smart Vinyl – Vinyl that is sized and stabilized to be cut without a mat on Cricut Joy, Cricut Explore 3, and Cricut Maker 3 machines.
Permanent – A term used to describe vinyl that is water- and UV-resistant, with adhesive that lasts up to 3 years. The term “permanent” refers to longer-lasting vinyl, but it can still be removed from most surfaces.
Removable – A term used to describe vinyl that is more easily removed compared to its permanent counterpart. It is best used on indoor surfaces and can easily be removed without leaving behind residue.
Transfer Paper – A clear, contact paper-like product that allows you to pick up cut-and-weeded vinyl off its paper backing and seamlessly apply it to your finished project.
Strong-Grip Transfer Paper – A clear, contact paper-like product that has higher tac than the standard version. It is mostly used to pick up cut-and-weeded Glitter vinyl off its paper backing and seamlessly apply it to finished products.
Iron-On – Also known as heat-transfer vinyl or HTV, it is a heat-fusible product that allows you to put washable and wearable designs on fabric projects.
Smart Iron-On – Iron-on that is sized and stabilized to be cut without a mat on Cricut Joy, Cricut Explore 3, and Cricut Maker 3 machines.
Infusible Ink – Specially-designed ink that, when heated, fuses into compatible “Blanks” to create vibrant and long-lasting color.
Want to save this post?
Infusible Ink Transfer Sheets – Patterned or colored sheets that can be cut into designs with any Cricut machine and then transferred to compatible “Blanks” with a heat source (e.g., Mug Press, EasyPress, etc).
Blank – Any product that has a “sublimation-compatible” surface designed to be used with Cricut Infusible Ink products (e.g., mugs, t-shirts, tote bags, etc.)
Smart Materials – A proprietary Cricut product that is designed to be cut without a mat on the Cricut Joy, Cricut Maker 3, and Cricut Explore 3 machines. Available in paper, vinyl, and iron-on products in a wide variety of colors and finishes.
Stencil Vinyl – A firmer vinyl product that can be cut with any Cricut machine and is easily repositionable for repeated use as a stencil. Full Stencil Vinyl Tutorial.
Window Cling – A vinyl-like product designed especially for window decals. It uses static rather than adhesive to adhere to clean, glass surfaces. Full Window Cling Tutorial.
Wood Veneer – A paper-thin product that has a lightweight, real wood finish and can be cut with both the Cricut Explore or Cricut Maker machines using a Deep-Point Blade.
Basswood – A super lightweight but sturdy wood that can be cut using the Knife Blade on a Cricut Maker.
Foil – A term used to describe vinyl, iron-on, or paper that has a metallic finish with a very high, reflective sheen.
Printable Vinyl – A white vinyl-like product that can be printed on with your home printer and cut with Cricut Explore and Cricut Maker machines to create stickers and decals.
Foil Transfer Sheets – Very thin sheets of foil that are used in conjunction with the Foil Transfer Tip in order to add metallic details to projects.
Cardstock – Thick craft paper available in a wide range of sizes, colors, and textures.
Glitter – A term used to describe paper, vinyl, or iron-on with a sparkly, glittery texture. These materials are often thicker and tougher to cut, requiring the Deep-Point Blade for perfect results.
Kraft Board – A material thicker than poster board and ideal for boxes and 3D projects. This product should be cut with a Knife Blade on a Cricut Maker machine.
Chipboard – Thick and sturdy board that is ideal for tags and 3D projects. This product must be cut with a Knife Blade on a Cricut Maker machine. Full Chipboard Tutorial.
Aluminum Sheets – Sheets of soft metal that can be engraved or debossed using specialty-tips on the Cricut Maker machines.
Smart Paper Sticker Cardstock – A cardstock product that can be fed directly into the Cricut Joy, Cricut Maker 3, or Cricut Explore 3 machines and cut without a mat. It features an adhesive backing that allows for quick project assembly.
Smart Label – Available in both white vinyl and Kraft paper, this is a writable product designed for making ready-to-stick labels with Cricut Pens. Full Smart Label Tutorial.
Leather – A buttery soft fabric that cuts beautifully with the Rotary Blade on the Cricut Maker.
Faux Leather – A fabric-like material that looks and feels like leather but is cheaper and lighter weight. It cuts beautifully with the standard Fine-Point Blade on all Cricut machines.
Sticker Paper – White paper with an adhesive backing that can be printed on with your home printer and cut with Cricut Explore or Cricut Maker machines to create your own stickers.
Holographic – A term used to describe vinyl or iron-on that has an ultra-glossy, shiny finish that slightly changes colors based on direction and light.
Felt – A lightweight, sturdy, non-fray fabric that can be cut into a variety of shapes using either the Rotary Blade (Cricut Maker models) or Bonded-Fabric Blade (Cricut Explore models).
Licensed – This refers to any imagery or product that features proprietary content from other companies such as Disney, Sesame Street, Star Wars, etc.
Software
Cricut Design Space – The free software required to design your Cricut projects and run your machine(s). It is available for both Mac and PC computers.
Cricut Design Space App – A mobile-friendly version of the same desktop software that can be used to design and run your projects on the go.
Cricut Joy App – An app specifically designed to quickly and easily make labels, cards, and decals with the Cricut Joy. Full Cricut Joy App Tutorial.
Cricut Design Space
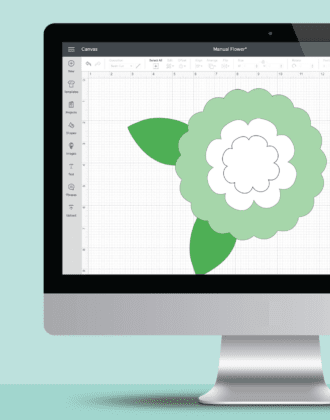
Canvas – The workspace where all designs are created, edited, re-colored, etc. A ruler along the top and left side of the screen identifies scale.
Templates – Built-in outlines for the most common projects such as t-shirts, onesies, mugs, and more that are intended to help size and space out designs. They are for reference only and will not cut or print.
Projects – Your designs in Cricut Design Space. They can be saved and organized into folders; and you can access them anytime from the Cricut Design Space home screen or from the “Projects” button in the upper left-hand corner of the canvas.
Images – Graphics and designs within the Design Space Library that you can use on projects. Quick access to the entire Image Library is via the “Images” button on the left-hand toolbar.
Upload – The process of importing files into Cricut Design Space to be used on your projects. Most common imports are PNG, JPG, and SVG files. Quick access to this tool is via the “Upload” button on the left-hand toolbar.
Shapes – A collection of basic shapes (e.g., square, circle, triangle, heart, star, line) that are free to use and can be quickly inserted at any time from the “Shapes” button on the left-hand toolbar.
Layer – Any single design element placed onto the canvas. A circle, square, and line of text on the canvas represent three individual layers. Layers can be grouped, attached, welded, and flattened together as needed.
Single Layer – An image or font with only one layer.
Multi Layer – Any image or font with multiple layers that stack together to create a single design.
Operation (formally known as Linetype) – Every layer on your canvas will be given a designated operation that determines how it is executed by your machine. Available options will populate based on what machine you have selected.
- Cut – Any layer designated with this setting will be cut with the inserted blade.
- Wavy – Any layer designated with this setting will be cut using the Wavy Blade (Cricut Maker models only).
- Perforate – Any layer designated with this setting will be cut using the Perforation Blade (Cricut Maker models only).
- Pen – Any layer designated with this setting will be drawn with an inserted pen.
- Foil – Any layer designated with this setting will be scored with the Foil Transfer Tool.
- Score – Any layer designated with this setting will be scored with a Scoring Stylus or Scoring Wheel.
- Deboss – Any layer designated with this setting will be debossed using the Debossing Tip (Cricut Maker models only).
- Engrave – Any layer designated with this setting will be engraved using the Engraving Tip (Maker models only).
- Print Then Cut – Any layer designated with this setting will print first and then can be loaded into a Cricut machine for cutting (Cricut Maker and Explore models only).
- Fill – Click the solid colored square next to Operation in order to designate the fill color or pattern for each layer.
Layers Panel – The panel on the right-hand side of the canvas that lists every layer in the current project, as well as their color and Operation (Cut, Pen, Score, Print, etc).
Color-Sync – This tool is located on the right-hand side of the Canvas, next to the Layers Panel. It allows you to easily change the color of any layer by dragging and dropping it to other colors already represented on the canvas.
Attach – Located in the bottom right-hand toolbar on the canvas, this tool attaches two or more images to each other so that they are cut/drawn together. The results created by the Attach Tool are reversible at any time. Full Attach Tutorial.
Weld – Located in the bottom right-hand toolbar on the canvas, this tool allows you to fuse two (or more) selected objects together. Selected objects must be ungrouped in order to be welded. The results created by the Weld Tool are not reversible. Full Weld Tutorial.
Contour – Located in the bottom right-hand toolbar on the canvas, this tool allows you to turn any individual element of a design on or off. The results created by the Contour Tool are reversible at any time. Full Contour Tutorial and Contour Video.
Slice – Located in the bottom right-hand toolbar on the canvas, this tool allows you to cut one layer out of another. Two (un-grouped) objects must have overlapping cut lines for this tool to work. The results created by the Slice Tool are not reversible. Full Slice Tutorial.
Flatten – Located in the bottom right-hand toolbar on the canvas, this tool allows you to transform any image into a Print Then Cut image. The results created by the Flatten Tool are reversible at any time. Full Flatten Tutorial.
Kerning – This term describes the amount of space between letters of text. If Kerning is turned “on,” the text will automatically optimize so that letters are spaced appropriately for the selected font.
Text – Words placed onto the canvas via the “Text” tool on the left-hand toolbar.
Fonts – A vast collection of text styles to add visual interest to your projects.
System Fonts – Fonts that are installed on your computer and are free to use on your projects.
Cricut Fonts – Fonts designed by Cricut and only available within Cricut Design Space. Many are included with Cricut Access membership; some may require additional purchase.
Writing Style – A style of text only available on certain fonts that give it the appearance of being hand-written (rather than outlined). This is the best font style to use when adding text to projects with Cricut Pens.
Curve – A tool located in the top toolbar of the canvas that allows you to bend a line of text by a matter of degrees.
Alignment – A tool located in the top toolbar of the canvas that allows you to left-, center-, or right-justify text.
Offset – This tool is used to create an extended outline of any layer (including both images and text). You are able to adjust how far out the outline extends, as well as if you want pointed or rounded corners. The offset image is created as an additional layer and can be found in the Layers Panel for editing. Full Offset Tutorial and Offset Video.
Align – A tool located in the top toolbar of the canvas that allows you to line up a group of objects to the right, left, and center, as well as equally space objects vertically or horizontally.
Arrange – A tool located in the top toolbar of the canvas that allows you to move layers forward and backward in relation to each other. Includes: Send to Back, Send Backward, Send to Front, Send Forward.
Flip – Use this tool to easily flip any selected object either vertically or horizontally.
Rotate – This tool is used to rotate any image by degree. Use the up or down arrows, or type in any number for specific settings. Rotation can also be done using the upper right handle on any selected image.
Position – Where an image is located on the canvas in X and Y coordinates. These are best used to create minute adjustments to spacing and placement.
Group – Groups any number of selected objects so they can be maneuvered with a single click.
UnGroup – Un-groups a previously “grouped” collection of objects.
Duplicate – Automatically creates a second copy of any selected object(s).
Delete – Removes a selected image off the canvas permanently. Can also be accomplished via the red X icon on the selected image or the delete key on the keyboard.
Hide – Temporarily remove any layer from your canvas (without deleting it) by clicking the eye symbol next to the corresponding object in the Layers Panel.
Image Set – A collection of images designed to work together and/or created in the same style, colors, fonts, etc.
Cut – Removes a selected object from the canvas and saves it to the clipboard.
Copy – Copies a selected object to the clipboard so it can be duplicated.
“Make It” Button – The bright green button in the upper right-hand corner of the canvas that sends your project to be cut with your machine.
On Mat – A cut specification for the Cricut Joy, Cricut Explore 3 and Cricut Maker 3 machines. Use this setting when a mat is required because of size or material.
Without a Mat – A cut specification for the Cricut Joy, Cricut Explore 3 and Cricut Maker 3 machines. Use this setting when using Smart Materials for your project.
Firmware – Refers to the computer chips within the machines themselves (including EasyPresses, Mug Press, etc.) These will sometimes require updating via USB cable, and are usually automatically updated during new product setup.
Cartridges – Cricut images and fonts used to only be available on insertable cartridges. These are no longer available for purchase and are not needed for use with any Cricut Explore, Cricut Maker, or Cricut Joy models. Older Cricut Explore and Cricut Maker machines do feature a Cartridge Port that allows you to sync any old/purchased cartridges with your Cricut Design Space account.
Cricut Access – A subscription service that grants access to most of the fonts and images within the Cricut Design Space library. Can be charged monthly or annually, and also provides discounts on shipped products and supplies.
Ready-to-Make Projects – A vast collection of ready-made projects designed by Cricut. These projects are a great way to get started with a new machine!
Image Styles (Operations)
Print Then Cut – Images that are designed to be printed (from a home printer) and then cut out with a Cricut machine. The colors and details in these images cannot be changed; and they can only be used with Cricut Explore and Cricut Maker models.
Cut Only – Images that feature only cut layers.
Cut + Draw – Images that feature both cut layers and drawn details.
Projects Types
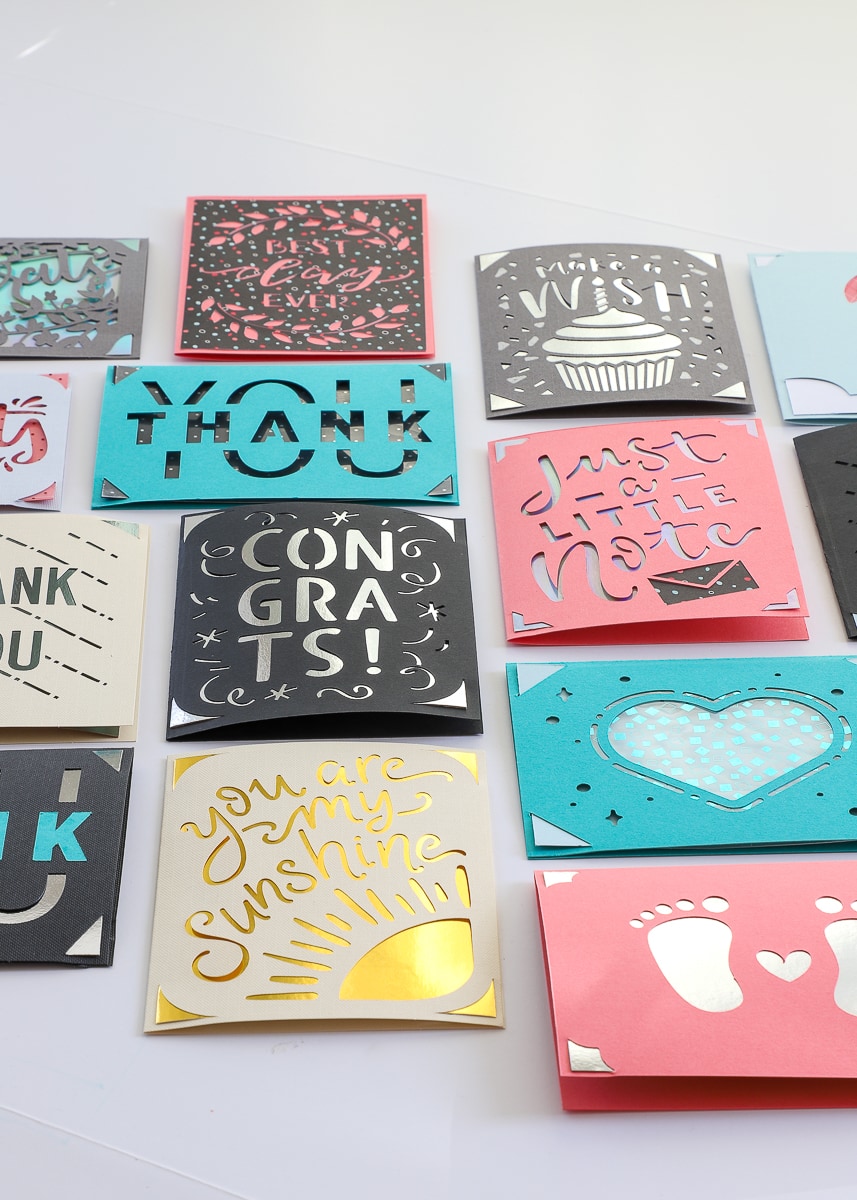
Insert Cards – These are proprietary Cricut card designs where an image is cut into the front of the card, and another paper is inserted under the front cover to fill in the design. Full Insert Card Tutorial.
Mug Designs – These are pre-made images specially designed to fit both Small and Large Cricut Mug Blanks. Full Mug Tutorial.
3D – These are projects that are designed to be cut and then folded or assembled into pop-up or three-dimensional shapes.
Actions & Techniques
Load/Unload – The process of feeding a mat or Smart Material into the machine and then unloading it when the machine is done cutting. This involves sliding the mat under the mat guides and pressing the Load/Unload button.
Weed – The process of removing all the negative (or unwanted) elements of a design. This is usually required for vinyl, iron-on, and Infusible Ink materials, and is typically done with the help of speciality weeding tools. Full Weeding Tutorial.
Weeding Box – A box placed around an image or text for the purpose of creating a smaller area to weed, which therefore preserves the full width of unused materials.
Transfer – The process of moving an image or design from one surface to another. Typically done via heat (iron-on and Infusible Ink) or transfer tape (vinyl).
Off-the-Mat – The process required for creating images larger than Cricut mat dimensions (12×24”). It involves slicing an image apart into cut-able sections within Cricut Design Space, and then re-assembling all the various pieces back into the full design after they are cut. Full Off-the-Mat Tutorial.
Snap Mat – If you use a tablet to operate Cricut Design Space, this feature allows you to take a picture of your mat to determine exactly where each layer will cut.
Matless – This term refers to cutting material without loading them onto a mat first. This technique is only available using Smart Materials on a Cricut Joy, Cricut Explore 3, or Cricut Maker 3 machine.
Mirror – A setting on the Cut Preview Screen that automatically flips your entire design horizontally so that it cuts backwards. This is mostly used for heat-fused projects such as iron-on and Invisible Ink.
Calibration – An operation that can be conducted to improve the performance of the Rotary Blade, Knife Blade, or Print Then Cut function. Launch this tool by clicking the three horizontal lines in the upper left-hand corner of Cricut Design Space.
More Helpful Cricut Design Space Tutorials
Cricut Design Space is a very powerful program, but it can have a steep learning curve for beginners. Check out my other comprehensive tutorials below:- How to Use Cricut Design Space | A Breakdown for Beginners
- 20 Cricut Design Space Tips & Tricks You Really Need to Know
- The Ultimate Guide to Cricut Terms & What They Mean
- How to Find Free Images to Use with Your Cricut Machine
- How to Use the Attach Tool in Cricut Design Space
- How to Use the Slice Tool in Cricut Design Space
- How to Use the Weld Tool in Cricut Design Space
- How to Use the Contour Tool in Cricut Design Space
- How to Use the Offset Tool in Cricut Design Space
- How to Use Print Then Cut in Cricut Design Space
- How to Design Monograms in Cricut Design Space
- How to Cut Really Big Designs on Your Cricut (The Off-the-Mat Technique)
- How to Design Mugs in Cricut Design Space
Phew! Who knew there was so much to know about using a Cricut machine! I’ve included all the Cricut terms I could think of; but you can rest assured I will keep this list updated as new products, materials, and techniques come on line. If there’s something I missed, be sure to let me know so I can include it for others!
Megan
6 Comments on “The Ultimate Guide of Cricut Terms (& What They Mean)”
Very nice comprehensive glossary for terms. A year of our Maker sitting on the shelf and I’m about to conquer my first project. Keep your fingers crossed….Trying vinyl text for the grandkids bookshelf I built, 12×12 mat, eight lines of text up to 16″. Will attempt to maximize material, so this should be an interesting attempt 🤞
Thanks for your input on your page, I imagine I’ll be returning for further insights.
Is there a print version of the Cricut terms? If so where do I find it for download?
Hi Jackie!
I do have it available in printable PDF format HERE.
Hope that helps,
Megan
Do you have an updated version with the new Design Space terms in it?
Do you have an update with the new Design Space terms?
Thank you so much, Megan, for these cheat sheets. Going to help me out more on using my Cricut machines.