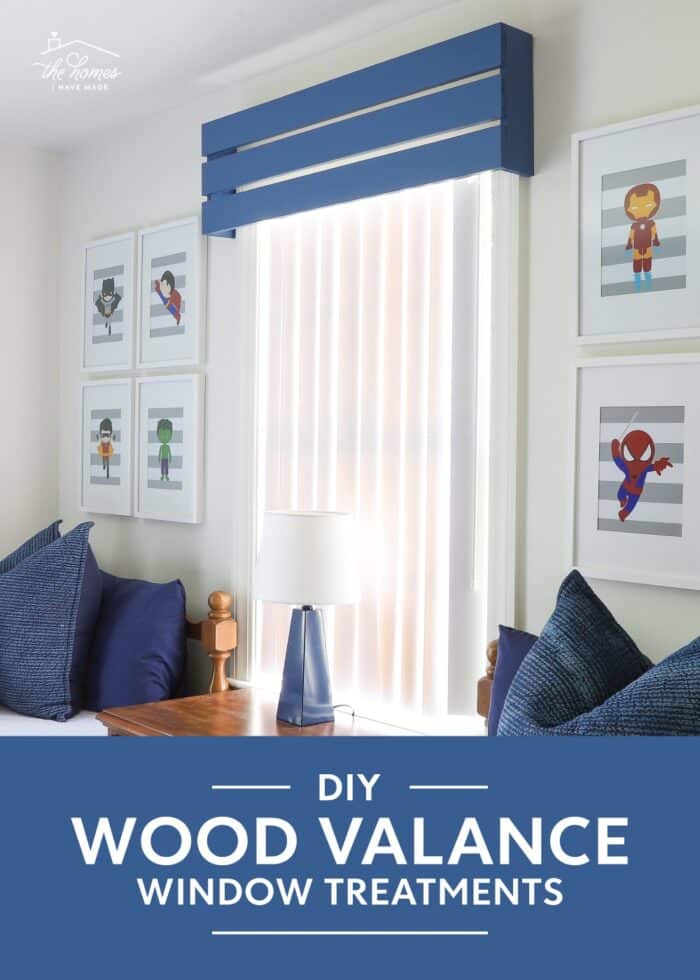
Easy DIY Wood Valance (With a Modern Twist!)
I’m really passionate about decorating our rental windows, since curtains, valances, cornices, shades, and other window treatments are one of the best ways to transform and personalize a bland space. For my sons’ shared bedroom, I wanted something sleek, modern, simple, and colorful on the windows; and boy, does today’s project deliver on all counts. This easy DIY wood valance project works with a variety of styles and can be easily assembled in an afternoon. Let me show you exactly how it comes together!
Our Windows | Before & After
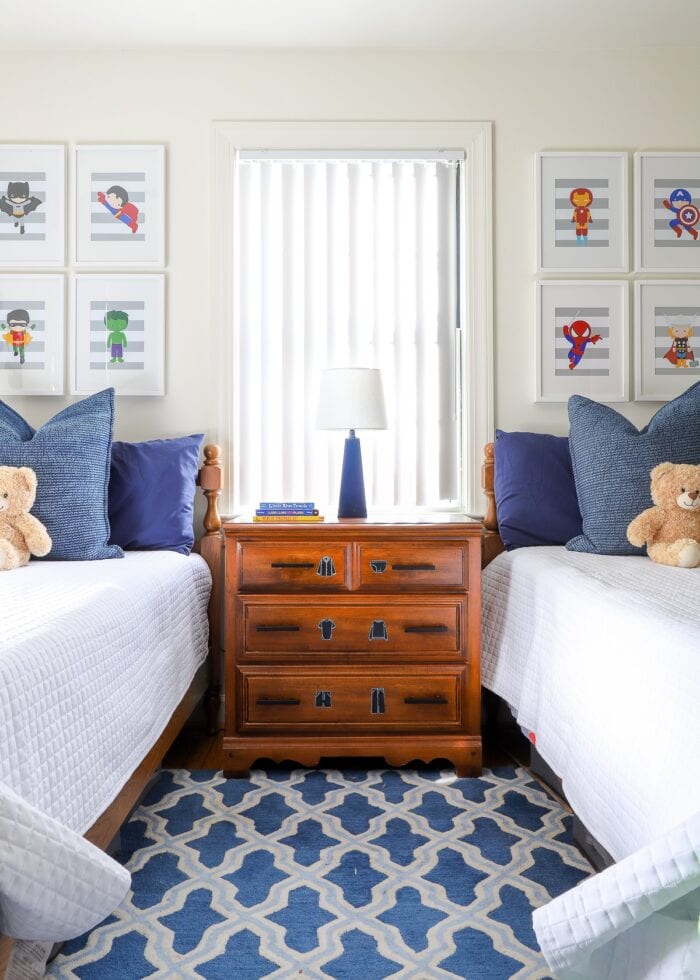
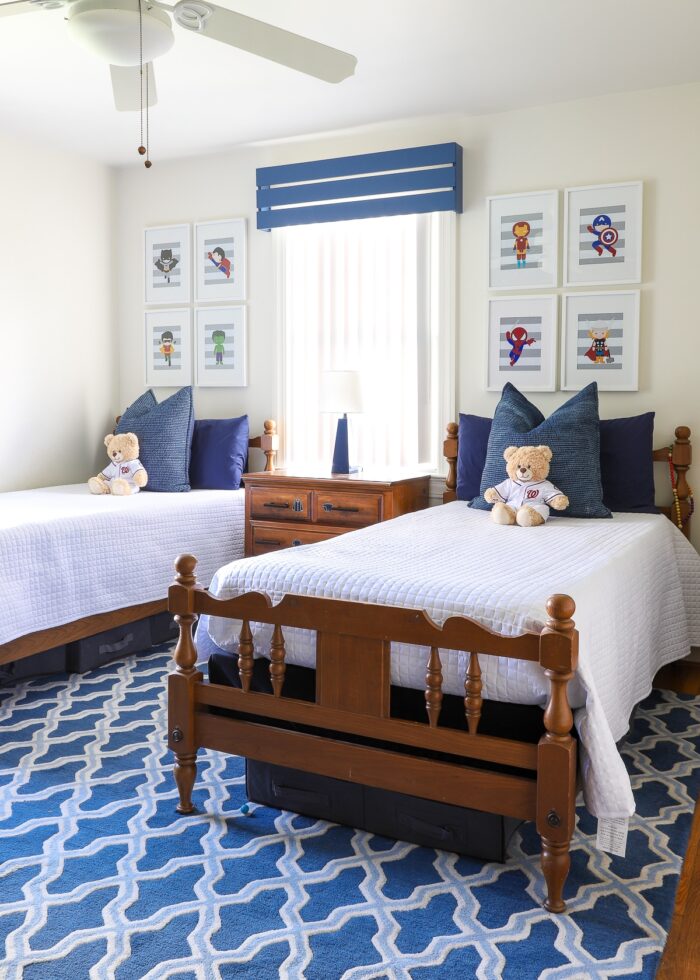
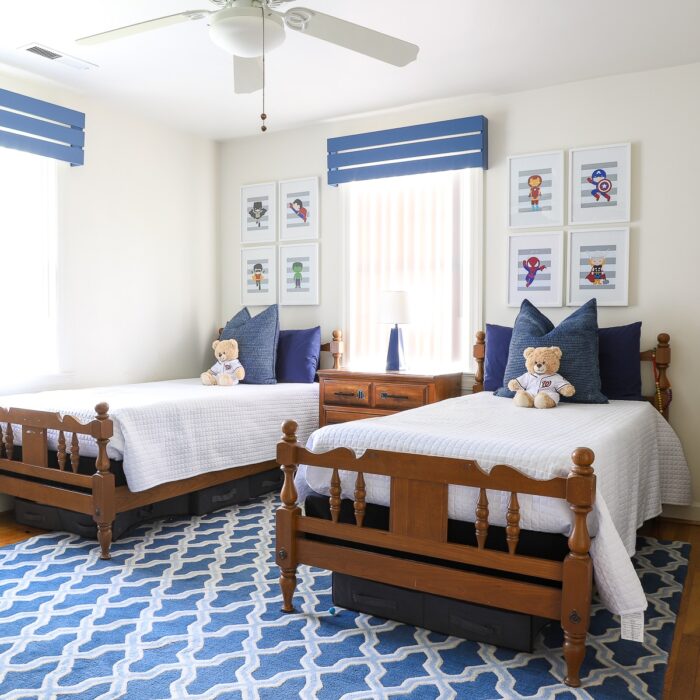
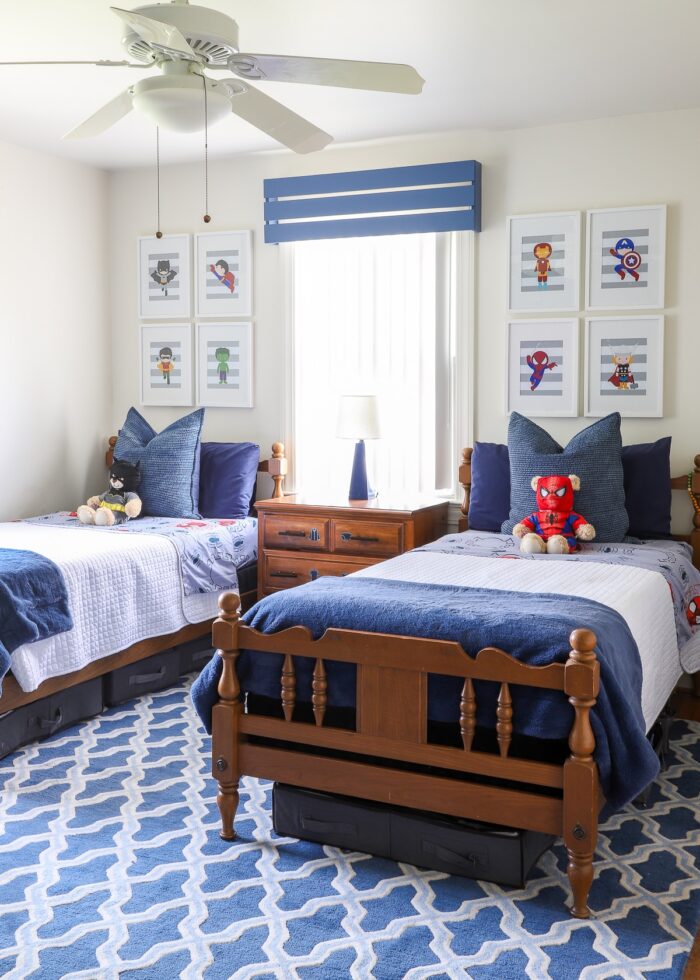
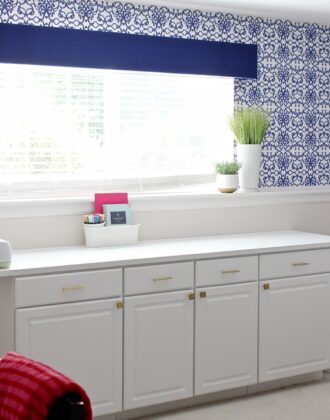
Below is one of the windows in my sons’ shared bedroom. With the furniture layout, long drapes on a curtain rod weren’t really an option. But thanks to the presence of vertical blinds (which I’ve choses not to remove for the time being) and nice chunky trim around the entire window, I knew I could get away with some sort of valance or cornice board just along the top.
I’ve made valances out of all sorts of things across our various rental homes (i.e., construction foam, foam core board, fabric), and I’ve had this simple slat version in my head for quite some time!
When we had just enough 1x4s leftover from the renter-friendly Board & Batten accent wall, I knew this was the perfect project to use it all up!
Sure enough…with just three 8′ 1x4s, about 2 hours, and a little help from a friend…these wood valances were ready for hanging in no time!
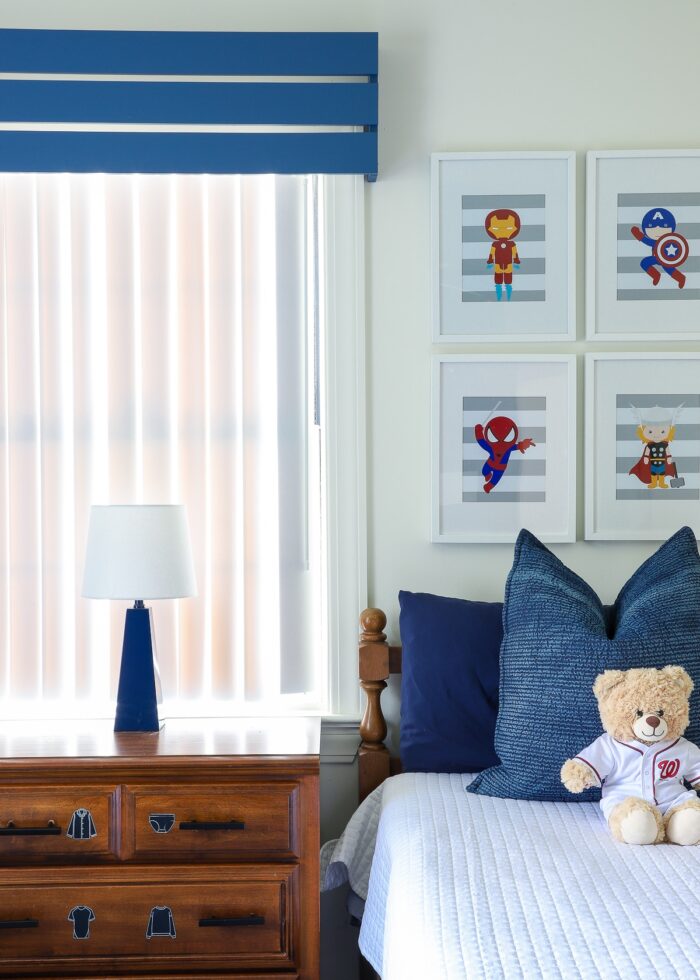
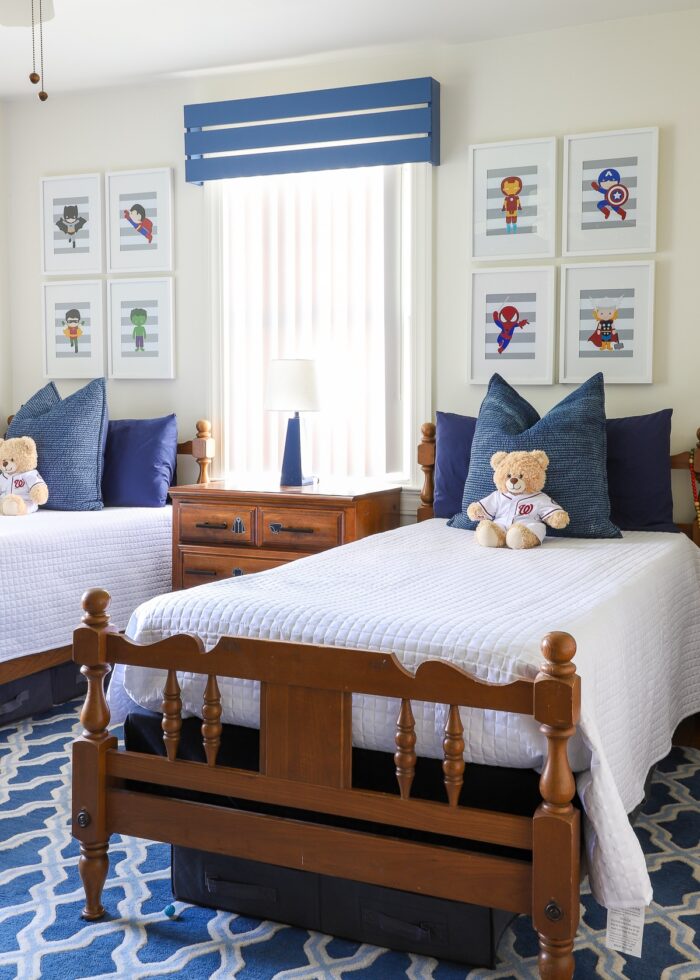
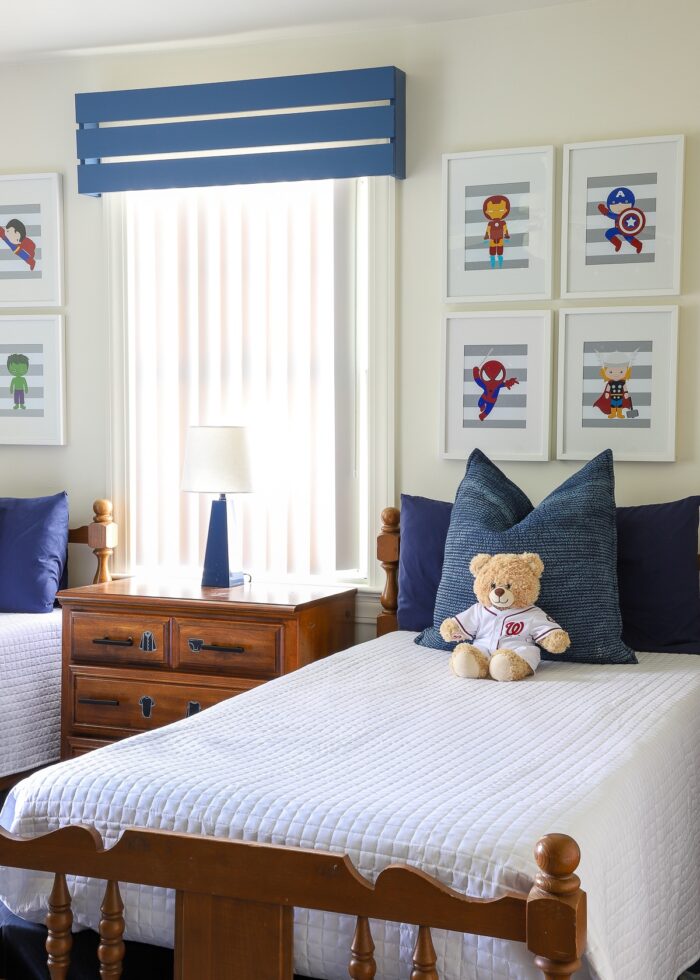
From the get go, I decided not to paint this room (mostly because of its size and the eye-popping mural on the opposite wall). But the room always felt a little off balance to me, especially with the saturated blue rug on the floor.
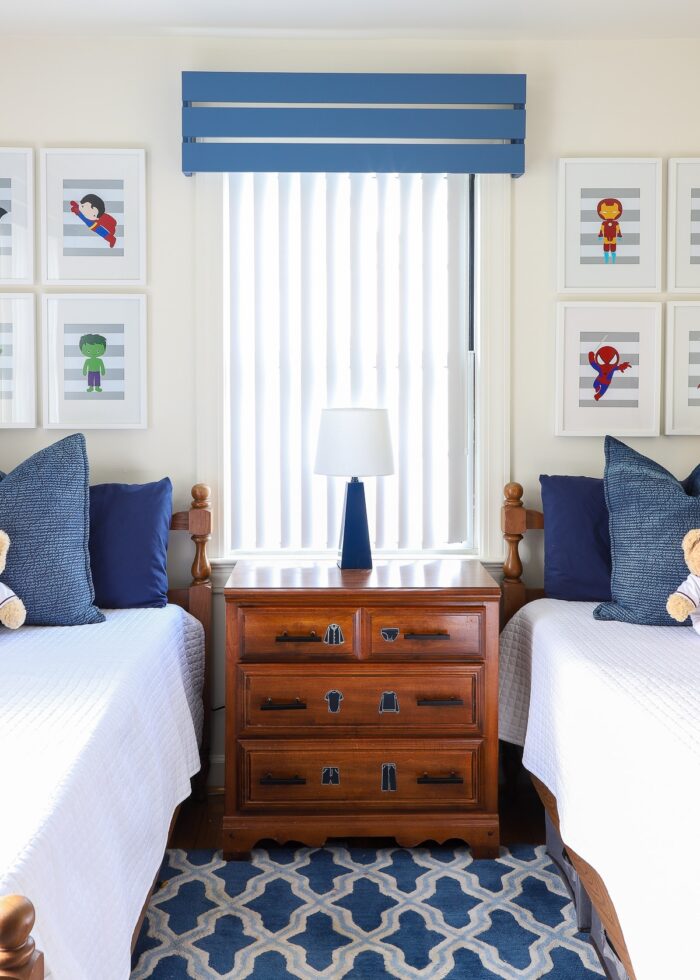
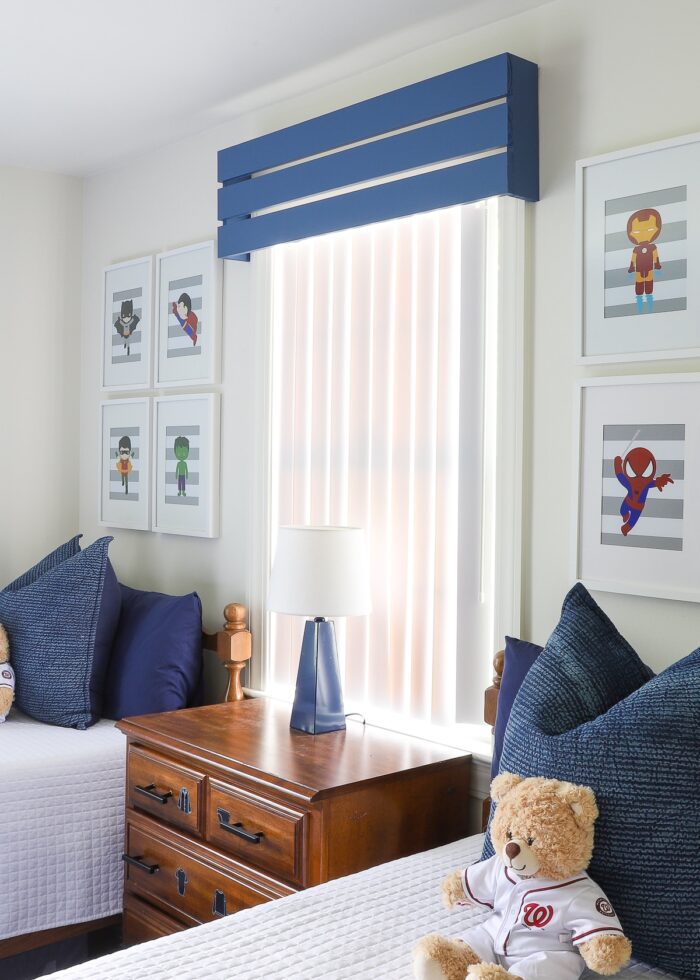
By putting bright blue valances on top of the windows, the room now feels so much more balanced and cohesive!
One thing I can’t over-stress is how truly easy these wood valances are to make. Even if you have limited DIY skills, I promise this is one you can tackle!
Supplies Needed
If you’re ready to make a DIY wood window valance, here is what you’ll need.
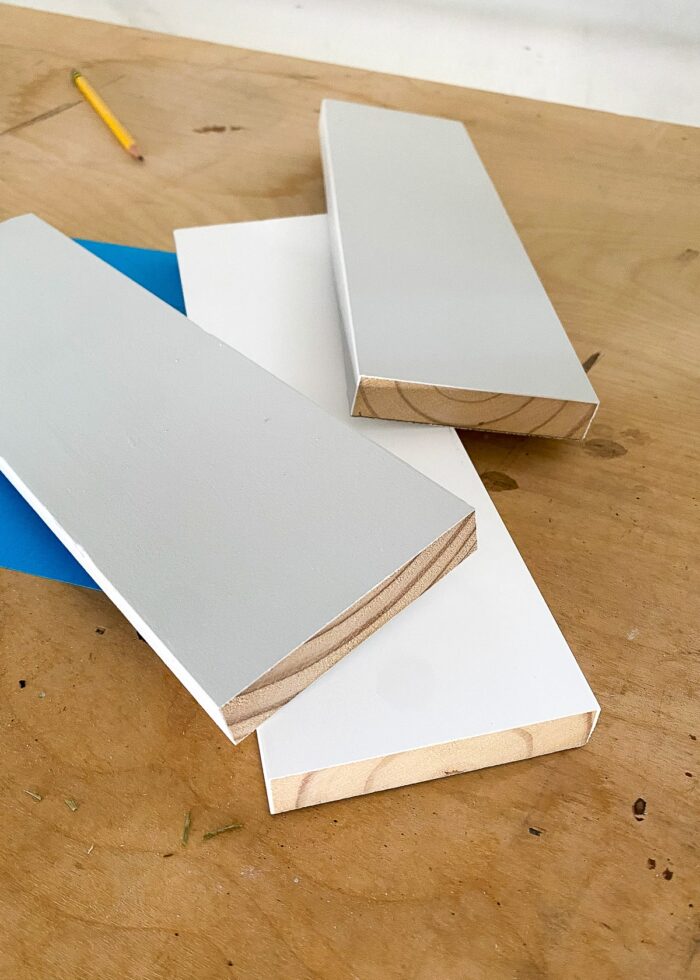
- Pre-Primed 1×4 Wood Boards or something similar; if you plan to to use wood stain on your valance instead of paint, get non-primed boards instead.
- Miter Saw, Circular Saw, or Table Saw
- Cordless Drill with Drill Bits & Screwdriver Attachment
- Tape Measure
- Carpenter Square
- Kreg Jig Pocket Hole System – optional but quite handy
- 1 Inch Pocket Hole Screws, 1 inch wood screws, or small L-brackets if not using a Kreg Jig
- Painting Supplies
- Latex Paint in the color of your choice
- 2″ Angled Brush
- Small Foam Roller
- Microfiber Cloth
- Hanging Hardware
Do You Have to Use a Kreg Jig?
As you’ll soon see, this specific wood valance design will use a Kreg Jig in order to create pocket holes, which allow the wood boards to be joined together, tightly, without any visible screws from the outside. Not only does the Kreg Jig make assembly really, truly easy. But it also means you won’t have to fill, plug, or patch any nail holes (saving even more time).
If you don’t have access to a Kreg Jig, you CAN still make this project by joining your boards with regular screws (from the outside) or small L-brackets (from the inside). If you use these alternative methods, I highly recommend still pre-drilling your holes to prevent the wood from splitting.
Video Tutorial
You can watch the DIY wood valance come together in this (very) short video tutorial! (Video not loading for you? Watch it HERE!)
How to Assemble a Wood Valance | Step-By-Step
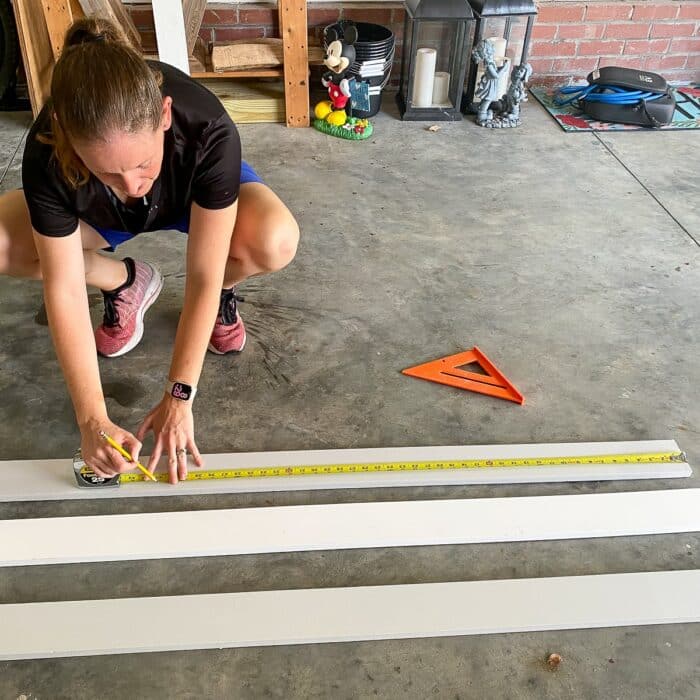
Step 1 – Measure Your Window(s)
Before you shop for supplies, first measure your window(s) to figure out the dimensions of your wood valance (as this will dictate how much wood you need). The nice thing about this particular wood valance design is that you can easily customize it to your aesthetic preferences: 1 tall main board across the front, 3 skinnier boards (like mine), 4 even-skinnier boards, etc.
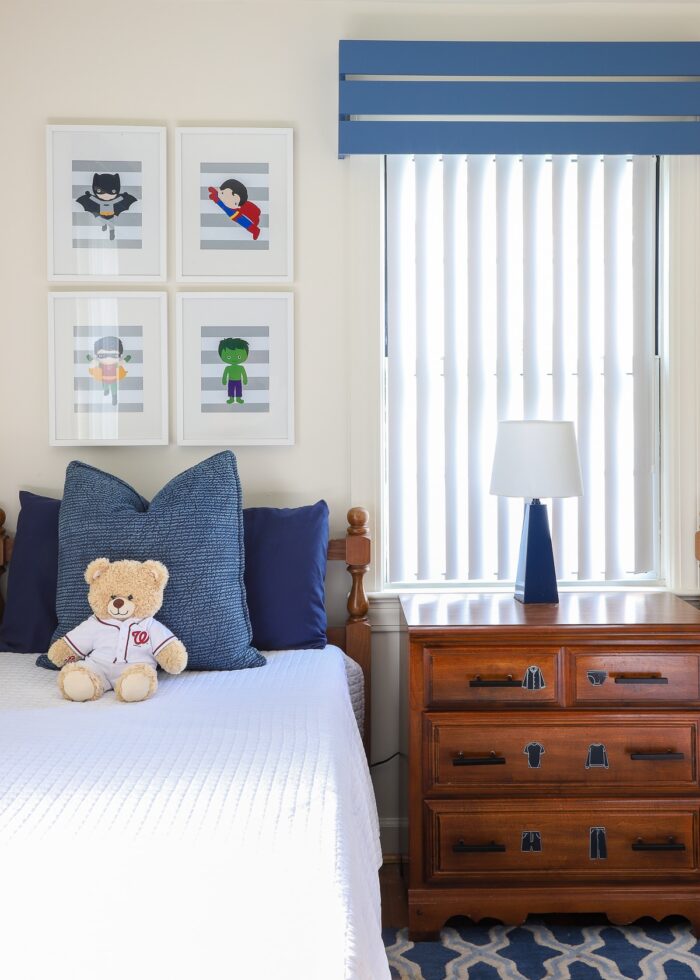
How wide and how tall of a valance you make is completely up to you. Our windows measure 40″ wide; and because of the art hanging above the beds, I didn’t want the side of the valance to extend too far past the thick window trim. You can refer to my specific measurements in my hand-drawn “plans” below.
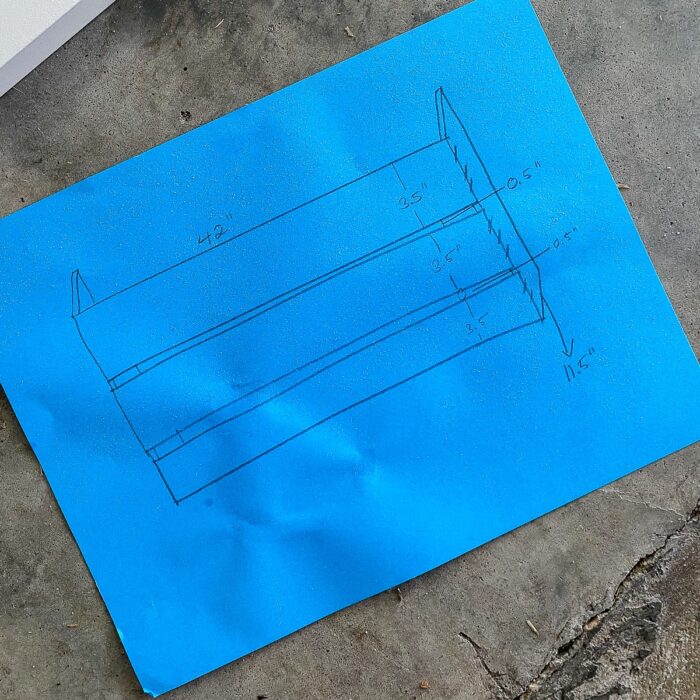
When you’re determining your dimensions, keep in mind that the valance returns (the boards that sit perpendicular to the valance and connect to the wall) should sit behind the front facing boards (as shown below) for a cleaner appearance. This means that your long front-facing board dimension will be your preferred finished dimension. (In my example: I wanted 42″ wide finished valances, so my front facing boards are 42″ wide).
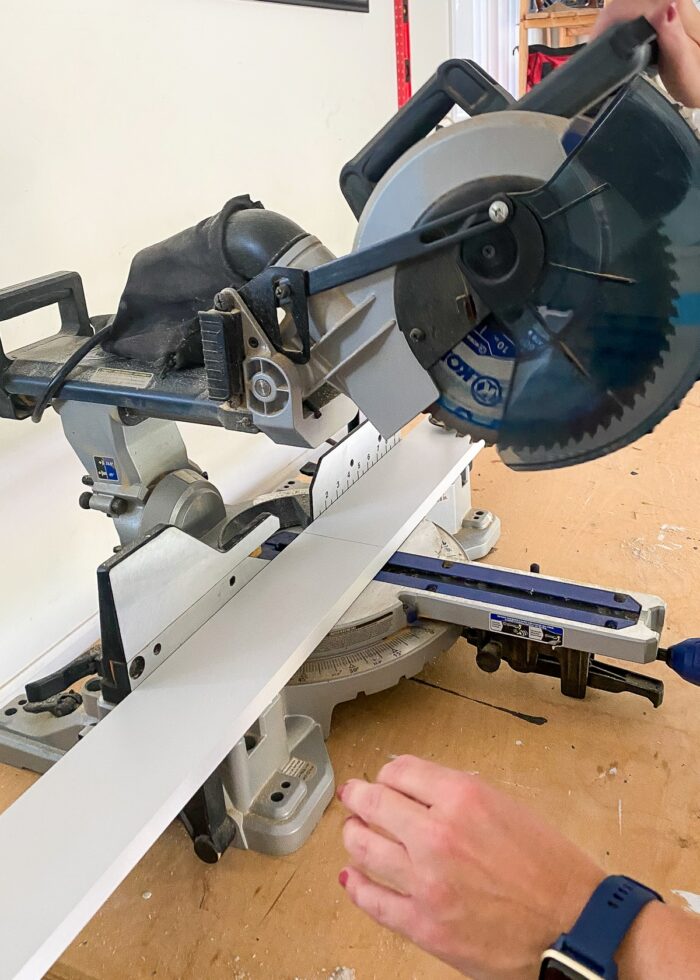
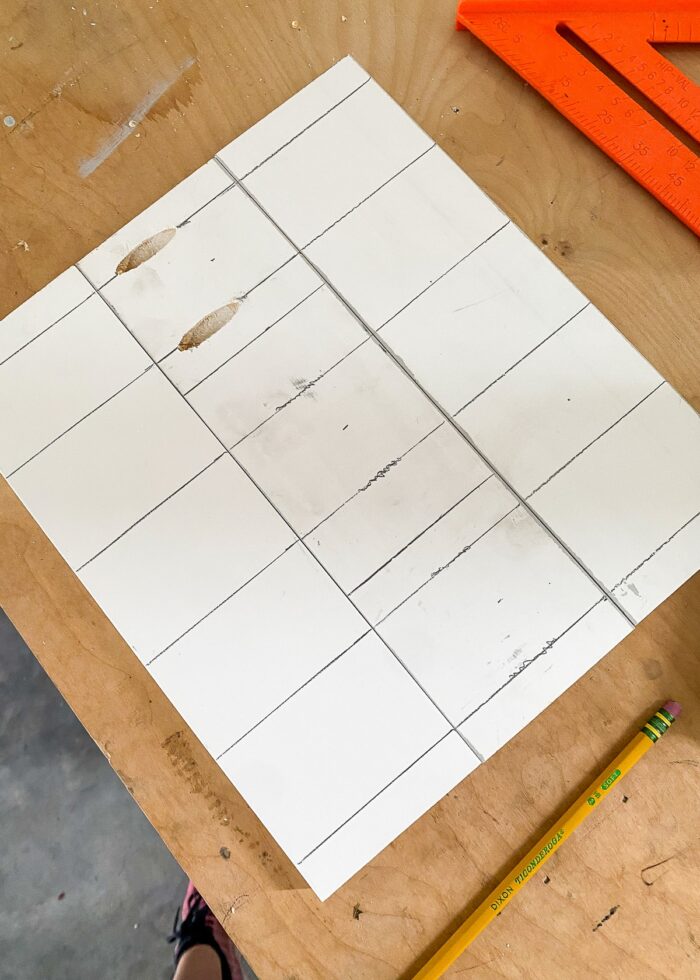
Step 2 – Measure & Cut Valance Boards
Once you have your design and dimensions determined, you’ll need to cut down the long 1×4 wood boards.
Use a measuring tape and a carpenter square to identify the initial length of your first cut.
Then use a miter saw (preferred), table saw, or circular saw to cut the board down to size.
(Whoa – didn’t see a miter saw on my personal DIY Tools list? Nope, we don’t have one. My friend does and agreed to help me with this project!)
To save time AND ensure that all your front-facing boards end up the exact same length, here is a trick: instead of measuring each board fresh, use that initial cut to mark your placement on each of the follow-on boards.
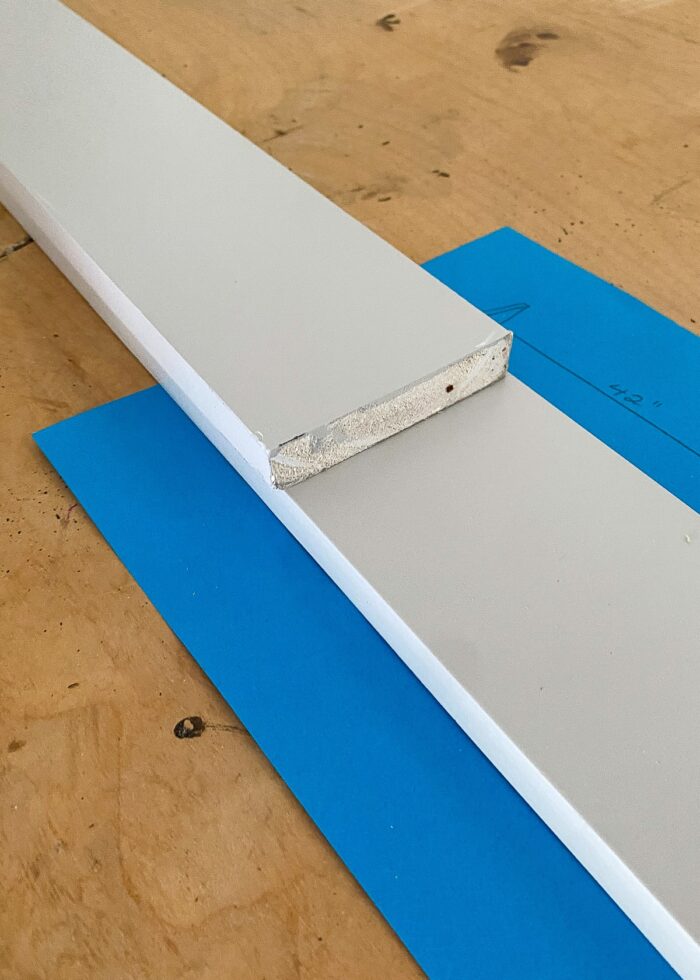
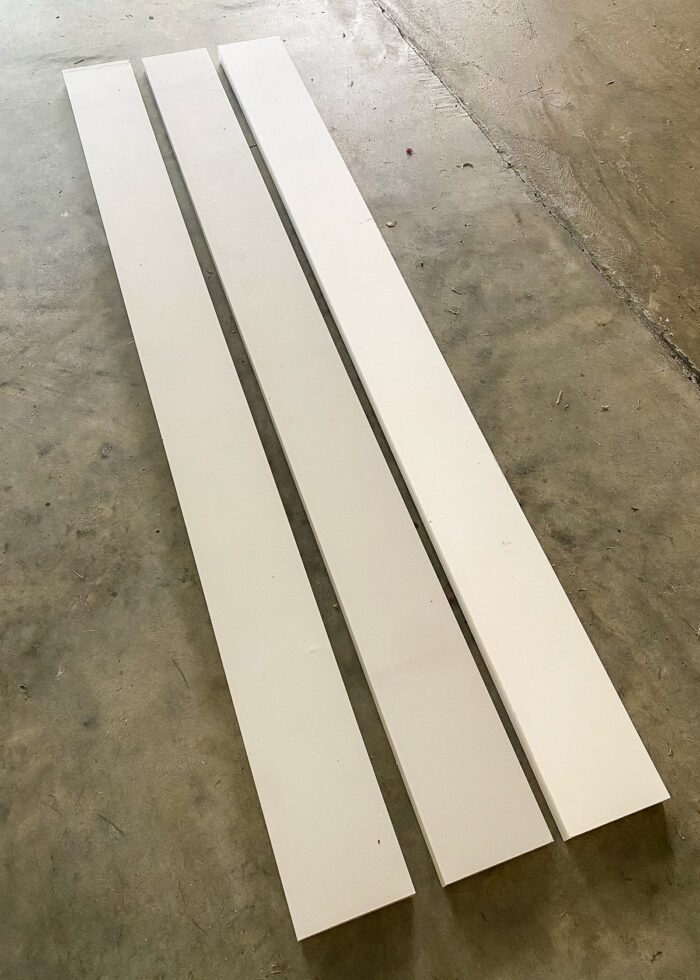
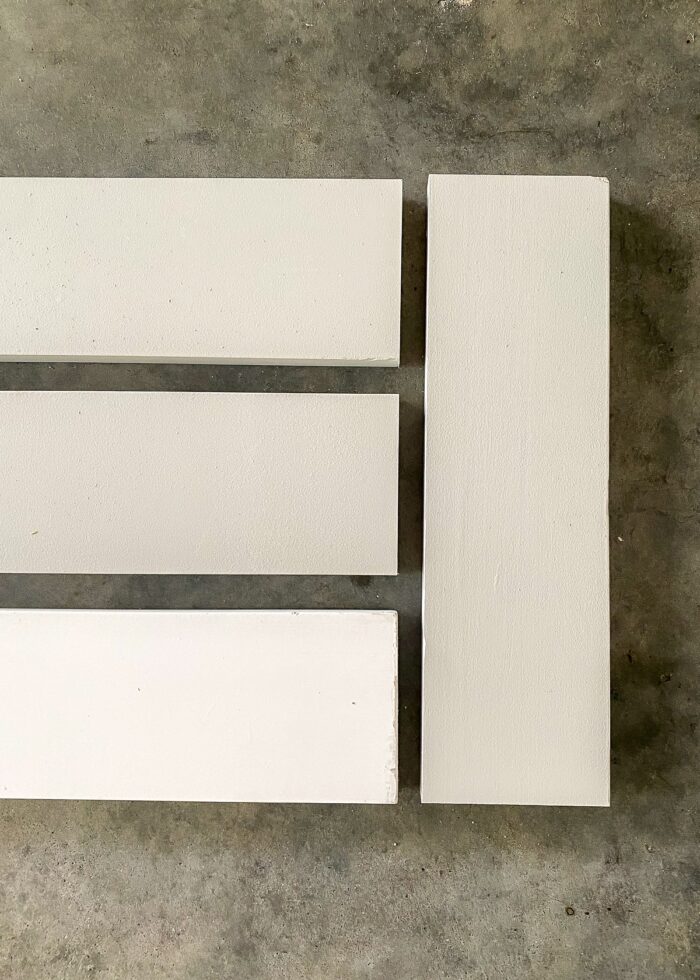
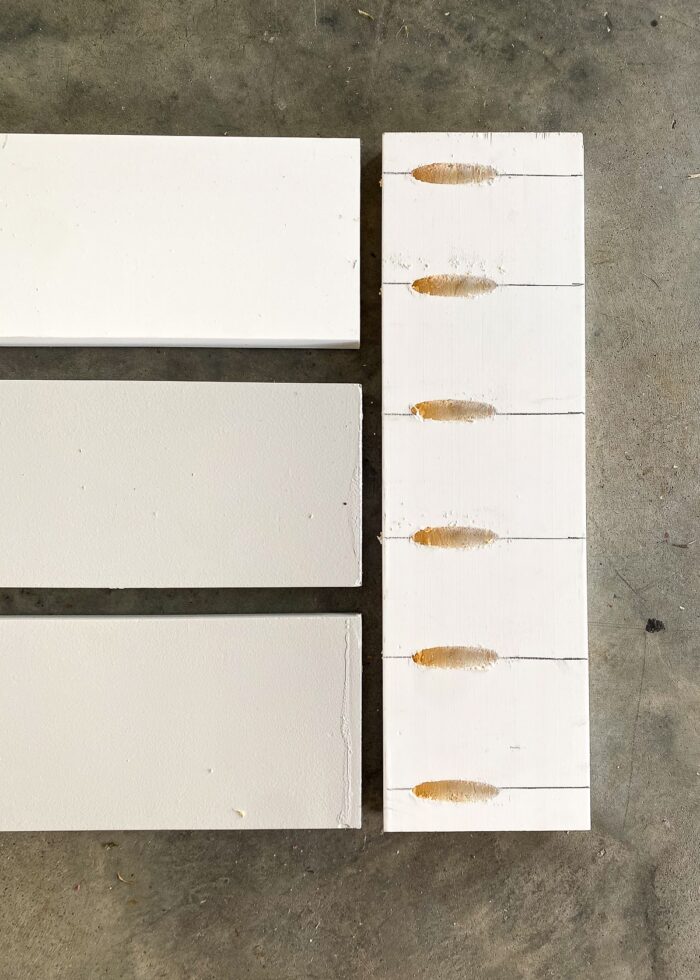
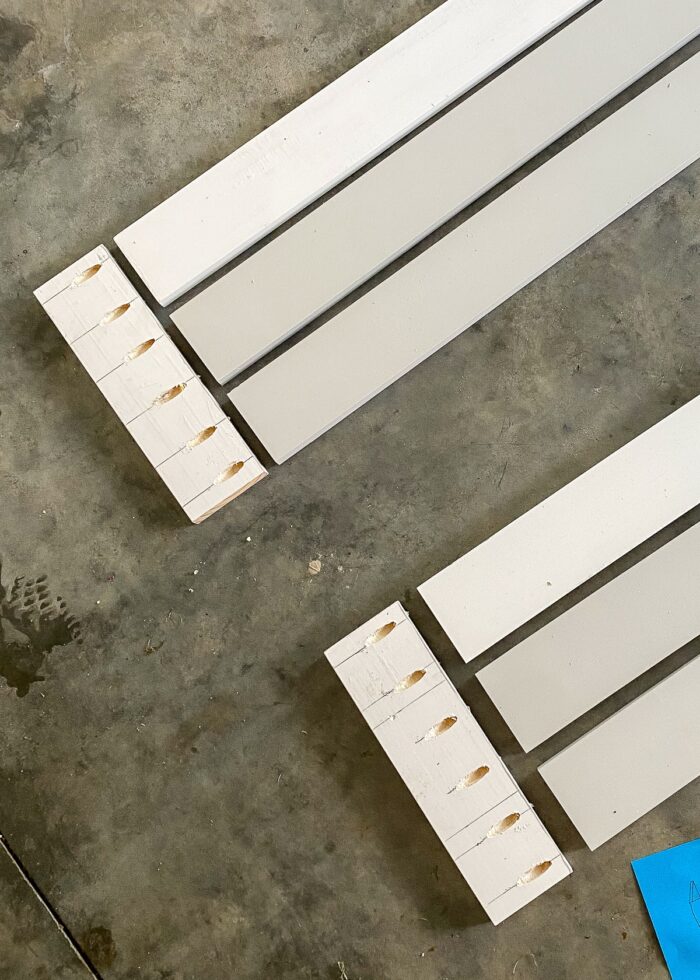
Cut enough long boards for each of your valances. We were able to cut all six 42″ boards from three 8′ 1x4s.
(Wondering why some of my boards are grey and some are white? The grey ones are left over from our Board and Batten wall!)
Next, cut down the needed length for your side pieces using the same methodology (cut one board, use it to measure the rest).
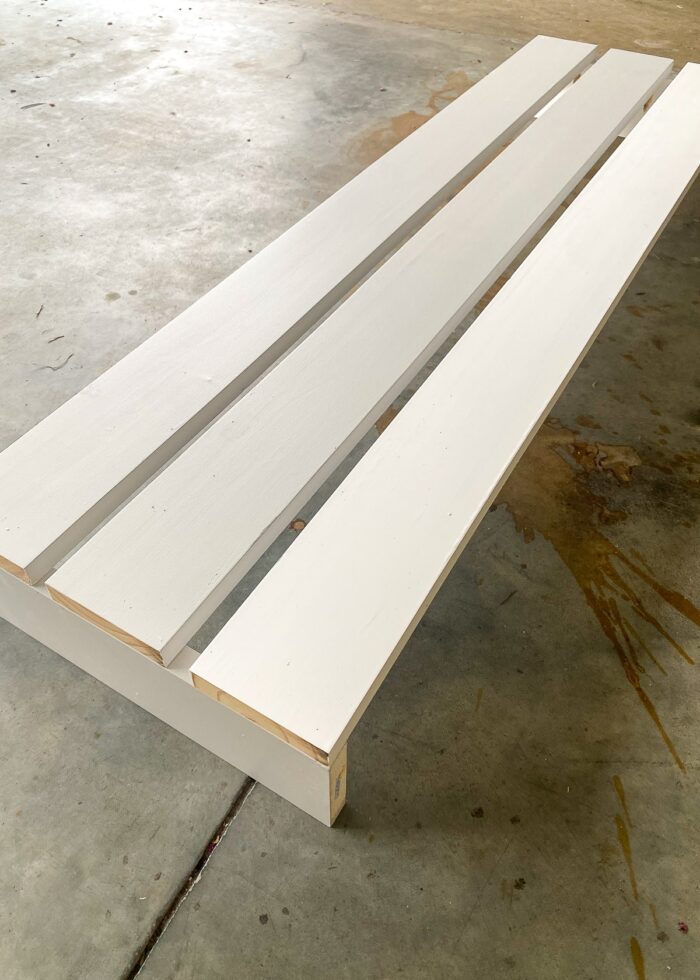
NOTE: Although my original plan was to make 11.5″ tall valances, we realized we were left with perfect 12″ cuts after cutting the two 42″ boards from the 96″ 1×4, so we just left the 12″ tall returns in tact and had slightly-larger gaps between each slat.
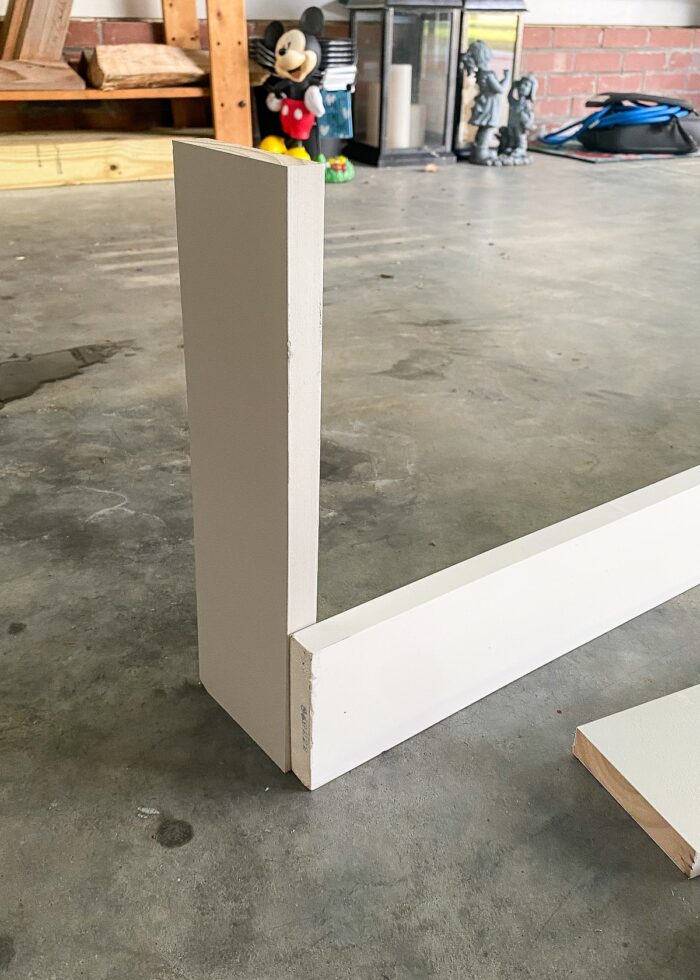
In the end, you should have two vertical returns (short pieces) and 3 long front-facing boards for each window valance you are making.
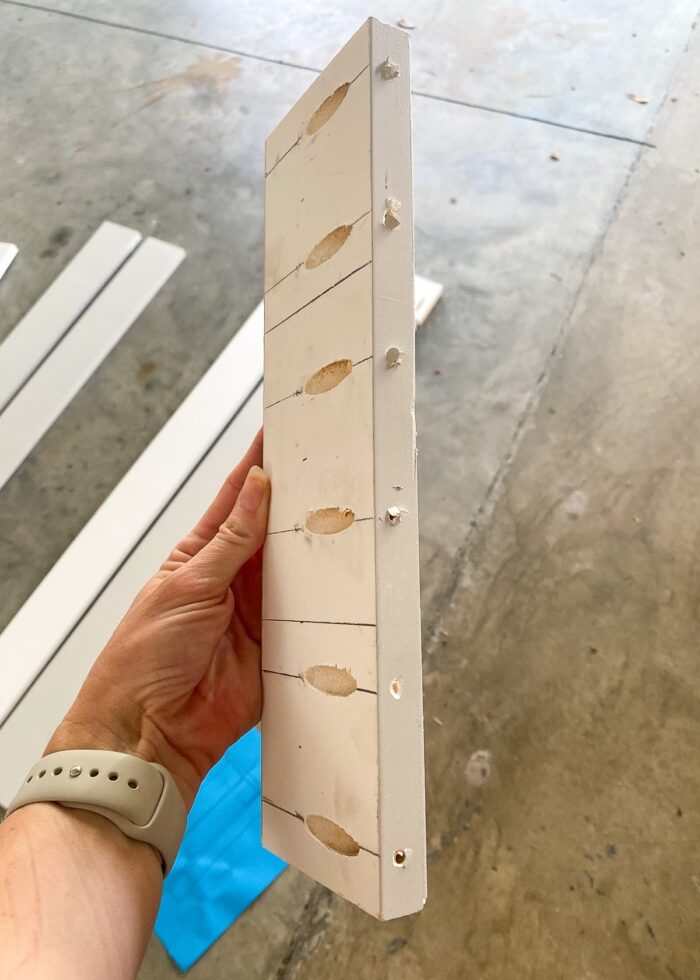
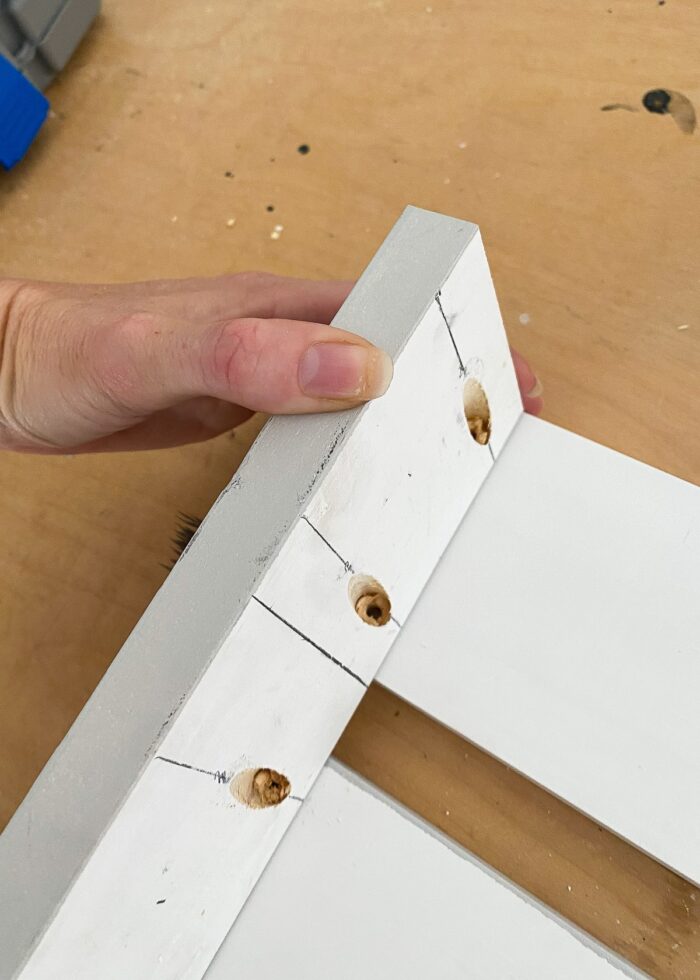
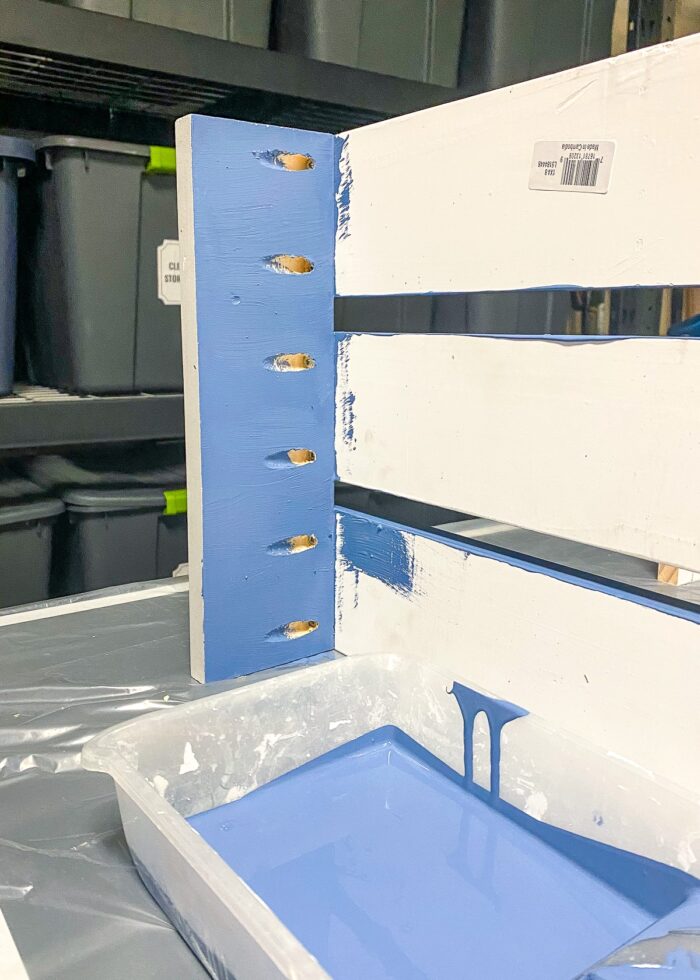
Step 3 – Identify Pocket Hole Placement
The next step is to identify where to pre-drill the (6) pocket holes down the length of each return board. These locations mark where each of the long front-facing boards will attach to the return. I chose to place 2 holes/board, but you can choose differently based on your overall valance size and design.
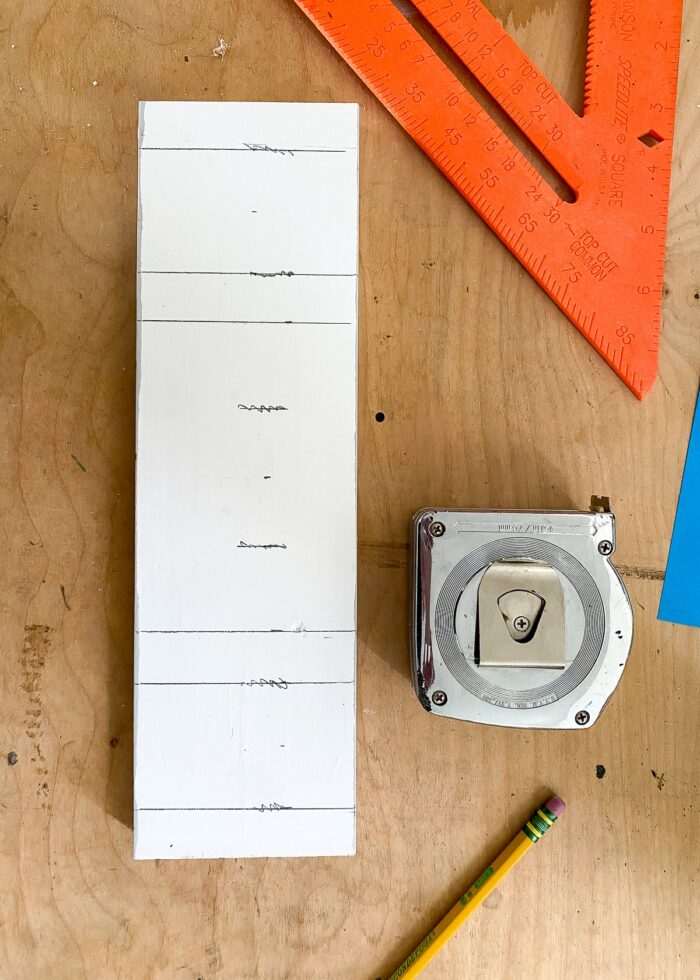
In the photograph below, the white rectangles indicate where the 42″ front-facing boards will intersect the return board (top, bottom, and middle). I then measured 1/2″ in from each board’s edge.
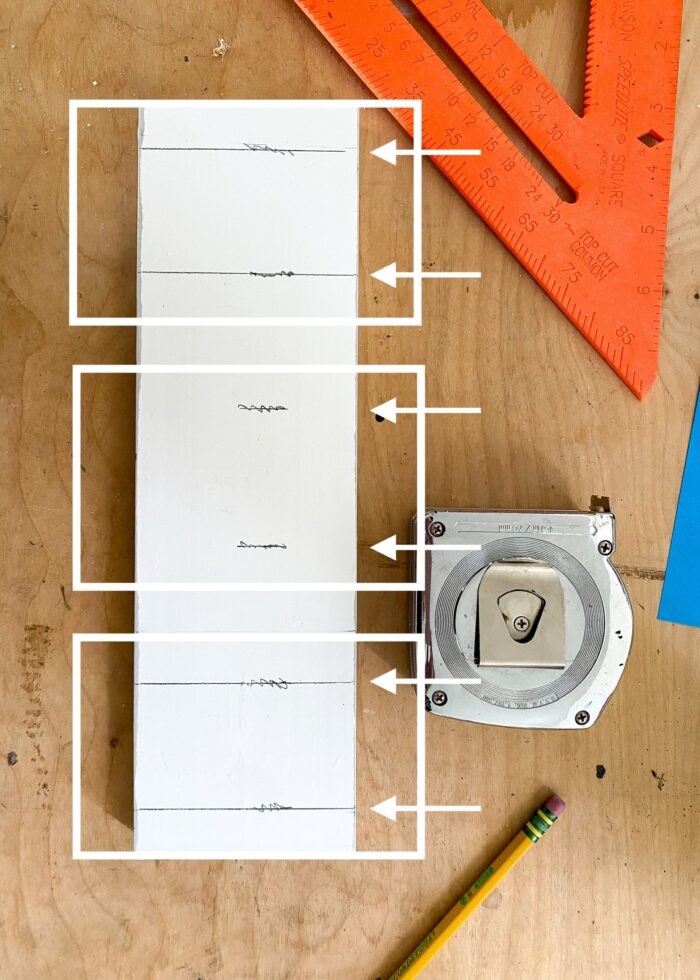
Once you have the measurements identified, translate them to the rest of the return boards before proceeding, so you don’t have to re-measure every single time.
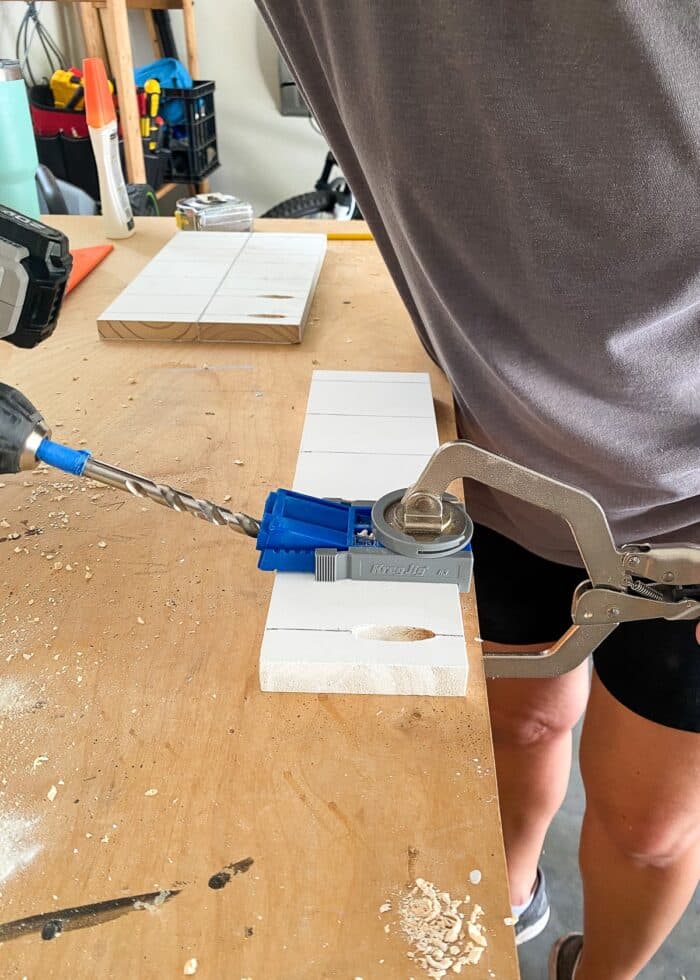
Step 4 – Pre-Drill Pocket Holes
Next, use a Kreg Jig to pre-drill pocket holes at each interval you identified in the previous step.
Want to save this post?
Nope, I don’t own a Kreg Jig either, but my friend does; and now having seen how easy it is to use, it’s definitely going on my Christmas list!
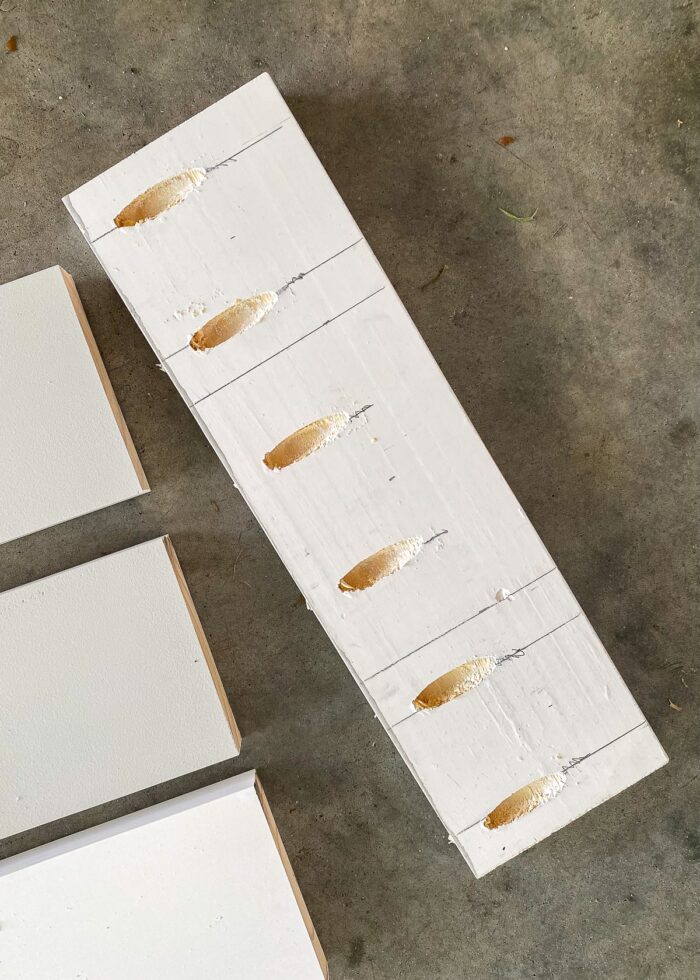
Admittedly, pre-drilling 6 pocket holes down the length of each return can feel a bit tedious. But the holes make the final assembly step so quick-and-easy that they are definitely worth it!
Once the pocket holes are pre-drilled, they should perfectly line up with where you want the front-facing boards to attach.
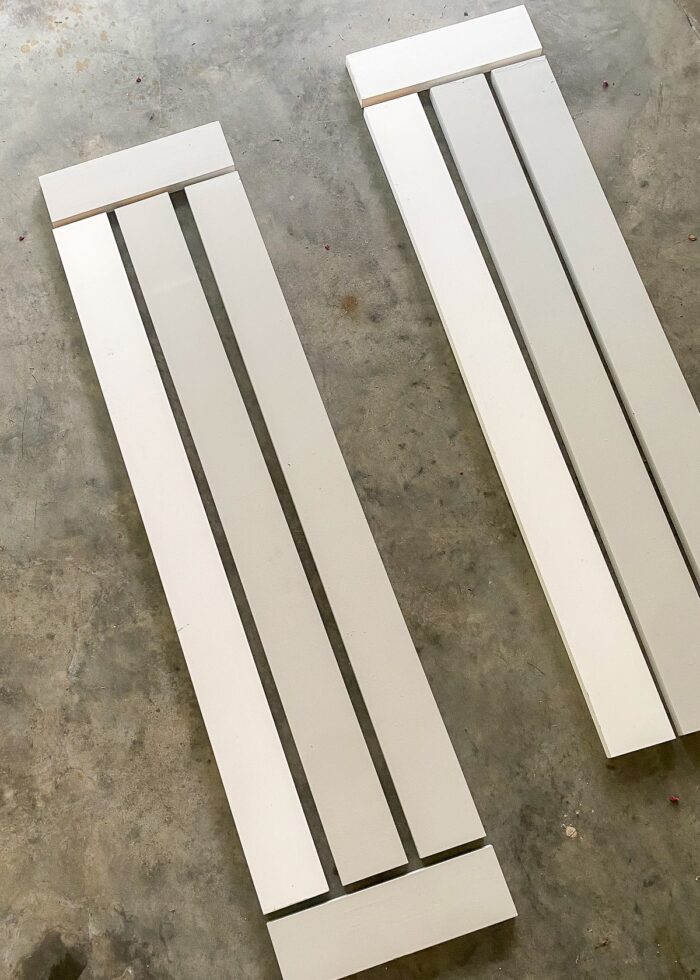
Step 5 – Screw Valance(s) Together
Most of the hard work (cutting, measuring, drilling) is now done and assembling the wood valance is just about screwing it all together.
If you used 1x4s, 1″ pocket hole screws will be long enough to join the boards without poking through the front. If you used different dimensions, pre-test your screws so you don’t accidentally puncture the front side of the valance.
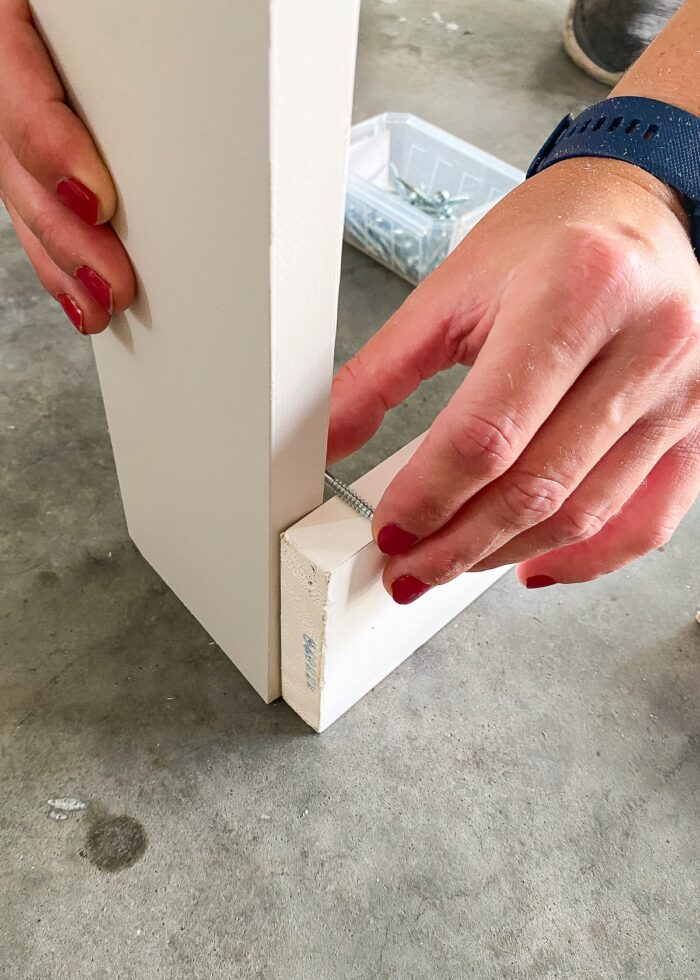
To assemble the wood valance, simply line up the front-facing boards down the length of the return board, matching up the outside edges.
We found it easiest to secure the top and bottom boards to the return first…
…then finish by positioning and securing the middle board.
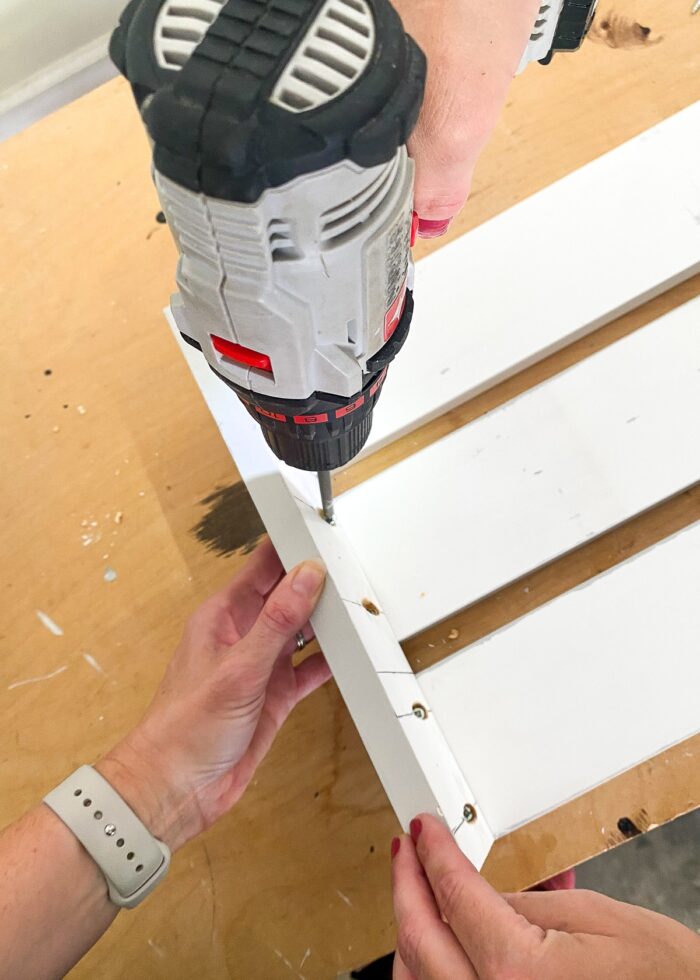
With all 12 screws in place (6/return), the wood valance is fully assembled into one large piece and will feel super sturdy!
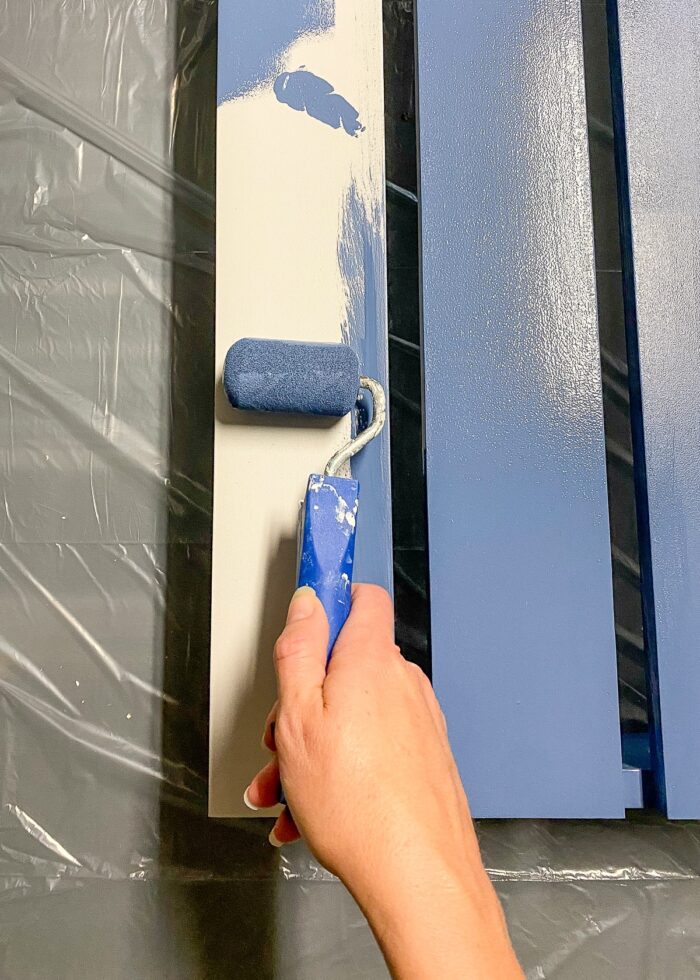
Step 6 – Paint Valance(s)
Even if you used pre-painted white 1x4s, you will likely still need to give them a coat of paint thanks to the raw edges along the sides.
So no matter what color you’re using, start by giving them a good wipe down with a wet microfiber rag in order to remove all the sawdust and debris.
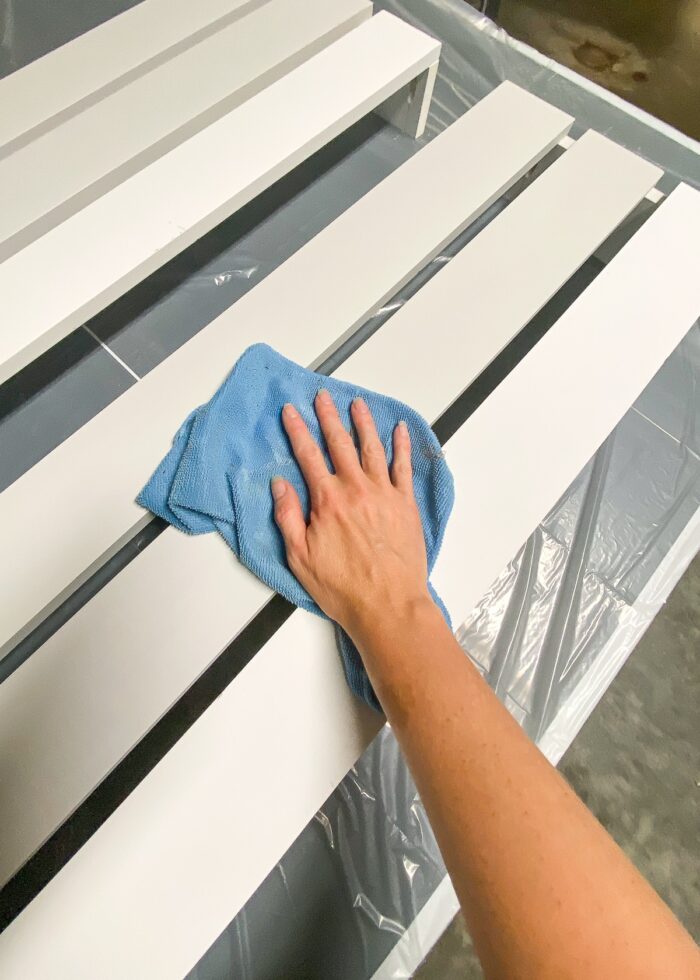
Because these window valances will hang up high, you will be able to see the undersides and edges from floor level. So start by painting the interior seams with an angled paint brush…

…as well as the insides of the vertical returns.
Then switch to a small foam roller (if desired) to finish the remaining fronts, sides, and edges until the valance is completely painted. Repeat with a second coat, as needed, for deeper, better coverage.
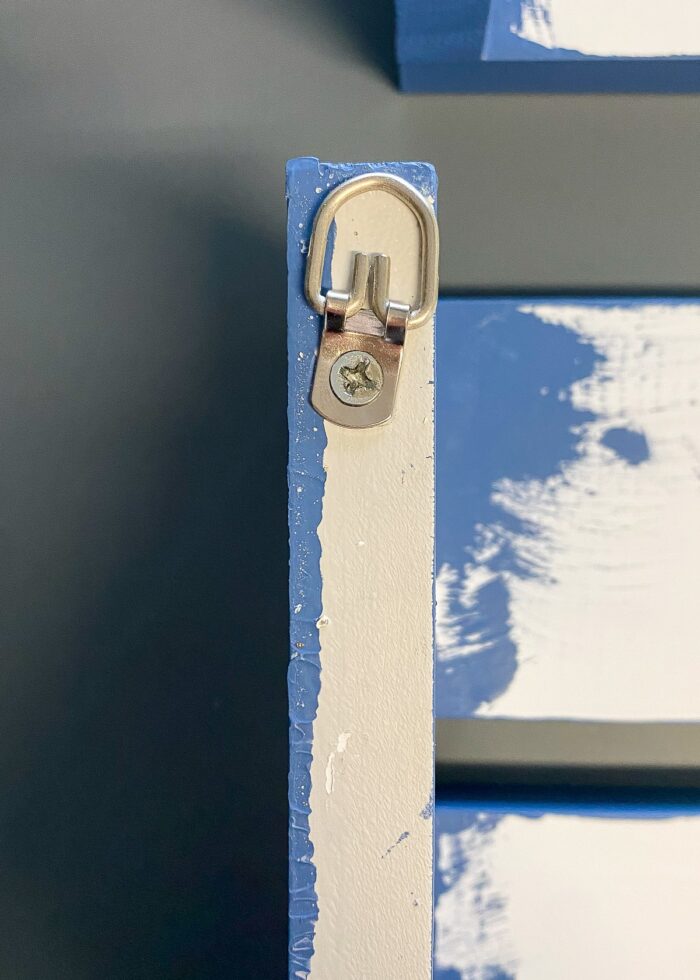
Step 7 – Add Hanging Hardware
Last but not least, add some hanging hardware to the back edge of the vertical returns (once the valance is dry and you can flip it over).
I chose to use large D-rings because I had some on-hand; but these keyhole hangers are likely a better, sleeker solution.
Step 8 – Hang Valance On Wall Around Window
To hang the wooden valance, identify the correct hole placements above/on top of the window, ensuring those placements match the hardware locations on the valance itself. Install screws with drywall anchors (unless you find studs) into the wall/window frame, then hook the valance hardware onto the protruding screws (just like you would a picture frame).
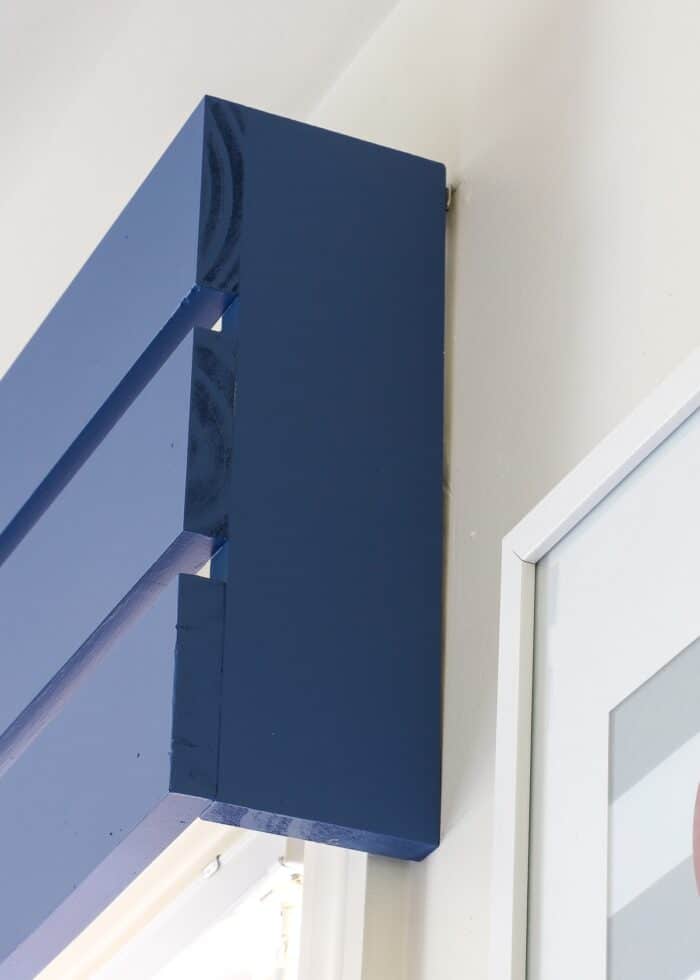
And that’s it! Step back and check out your new and (hopefully) improved view!
No doubt, I absolutely love the way these sleek, modern wood cornices look. But I’ve found, especially lately, that my overall satisfaction with a project is heavily influenced by how hard it was to achieve the final result.
From the initial design conception to stepping back and taking in the finished product, this wood valance project was absolutely seamless. The sizing, the assembly, the paint color, the installation…everything worked exactly as expected and without hiccups!
This is the kind of project that makes you want to DIY! And since this one resulted in a great visual payoff without hardly any investment, I’d say it was a few hours very well spent indeed!

Other Great Window DIYs To Try
Looking for other great solutions for your windows? I've got you covered with these other smart DIYs!
- How to Make a Window Valance with Foam Insulation
- How to Sew a Window Valance
- How to Make a Window Valance with Foam Core Board & Wallpaper
- DIY Modern Wood Valance
- DIY Cornice Box with Scalloped Edges
- How to Hem Curtains | A Foolproof Method!
- How to Hem Curtains Without Sewing
- How to Widen Store Bought Curtains | An Easy Fix!
- How to Remove Vertical Blinds
- How to Install Your Own Blinds or Shades
- Roller Shades for Windows (When Curtains Aren’t an Option!)
- How to Hang a Curtain Rod Without Drilling into the Wall
- How to Hang Curtains On Rings (With Perfect Results!)
- How to Hang Curtains In a Corner Window
- How to Completely Cover Up a Perfectly Good Window
- 6 Easy DIY Window Valance Ideas (You Can Totally Make In an Afternoon)
Psssst – This bedroom makeover is now complete! Take the full tour here: Our Boys’ Shared Bedroom Reveal
Valances are such a great window treatment solution because they are often inexpensive, easy-to-install, and work with almost any furniture/art arrangement. If you haven’t been able to identify a valance solution thats right for your space, I can’t recommend this wood version enough. With the ability to customize the size, design, and color, it really is an easy and affordable way to elevate your windows, and ultimately, your entire room!
Megan
2 Comments on “Easy DIY Wood Valance (With a Modern Twist!)”
The valances balance the room perfectly. Well done.
My DH loved his Kreg Jig!
I followed your directions with a few little tweaks of my own. I think it turned out pretty good! Thanks so much for this post! Here is how it turned out: https://jennbrissett.tumblr.com/post/810731343415803904/making-a-valance-my-kitchen-window-has-a-stained