How to Sew a Window Valance
One of the main ways I transform our rental spaces is via window treatments. Whether it’s long curtains or trim cornice boxes, adding some texture, color and pattern on top of every window is a great way to not only personalize a room and make it feel cozier, but also add some instant style relatively easily. Long curtains are usually my preference, but sometimes the windows themselves or the overall design of a room call for something a little less dramatic and fussy. In these instances, I tend to rely on simple valances to add that design jolt I crave without the fuss of yards and yards of fabric. The wonderful thing about valances is that they require less fabric than most other window treatments, aren’t as cumbersome to hang, and are super simple to DIY! Today, I’m sharing the latest tutorial in my Home Decor Sewing School series by showing you how to make a window valance (the quick and easy way)!
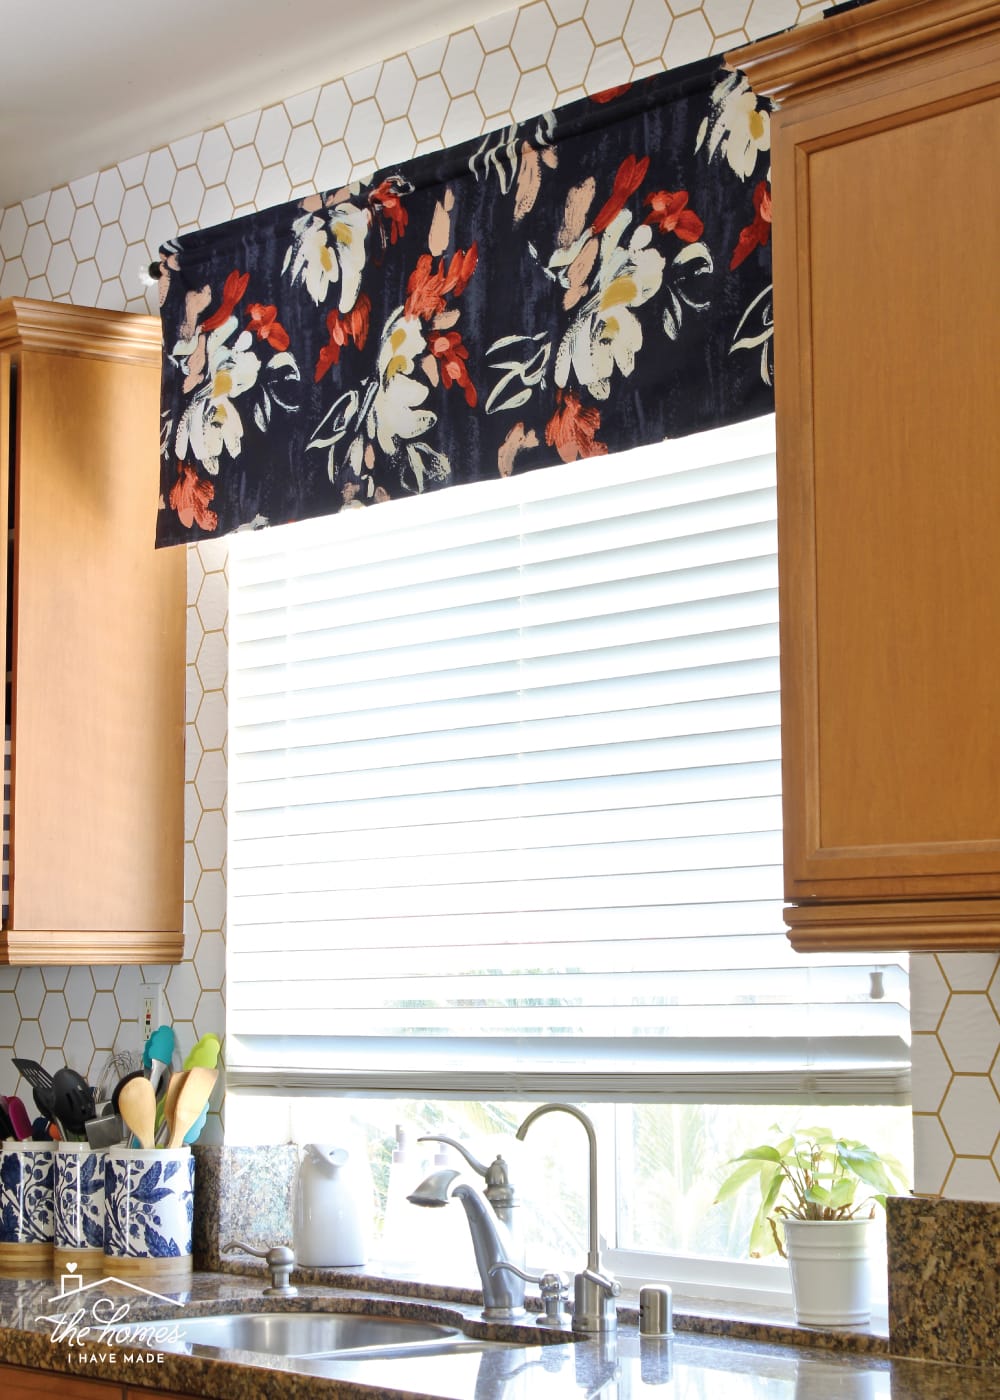
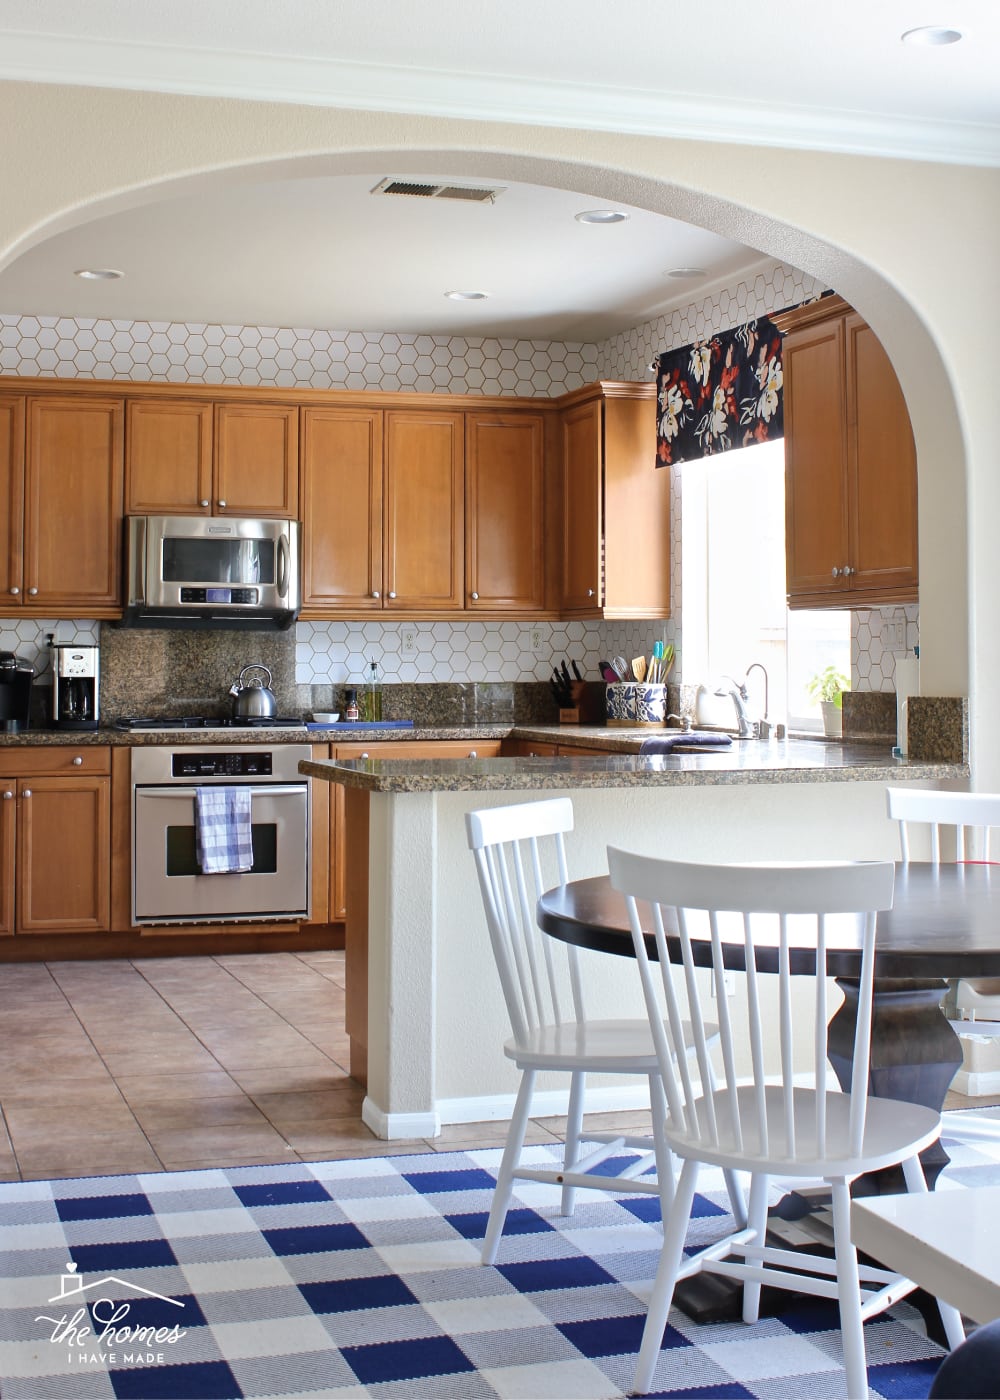
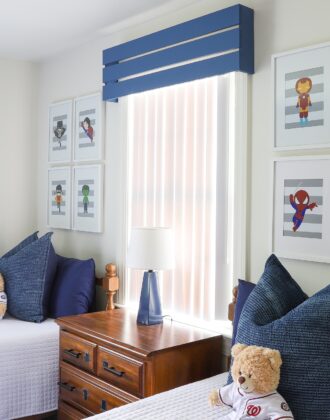
Our Kitchen Valance
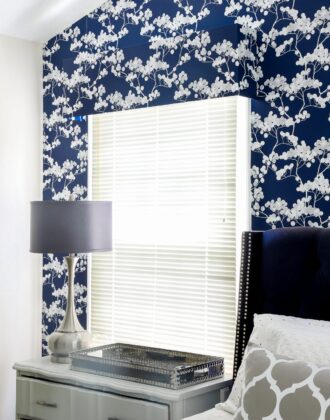
A few weeks ago, I gave you all the latest peek at our current rental kitchen. The wallpaper certainly created the biggest visual change in here, but the valance above the window also helped the room feel more complete.
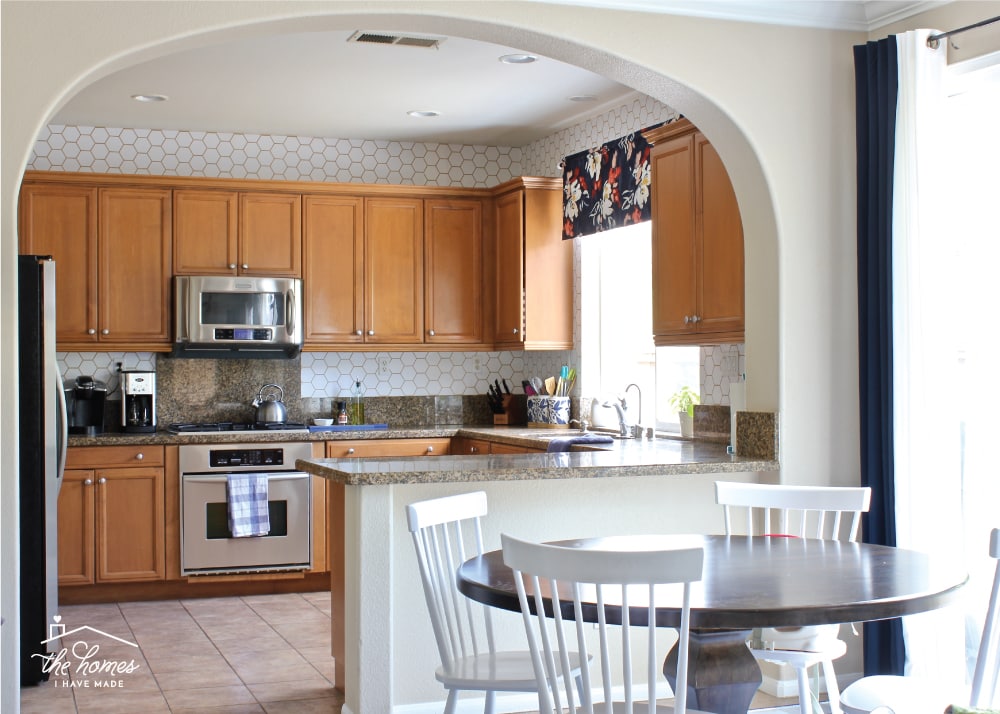
There is nothing particularly fancy or functional about valances…they are literally just strips of fabric above a window. However, they are the ideal place to use a large-scale, eye-catching, unifying fabric to set the tone or feel of a room and/or bring lots of different elements together.
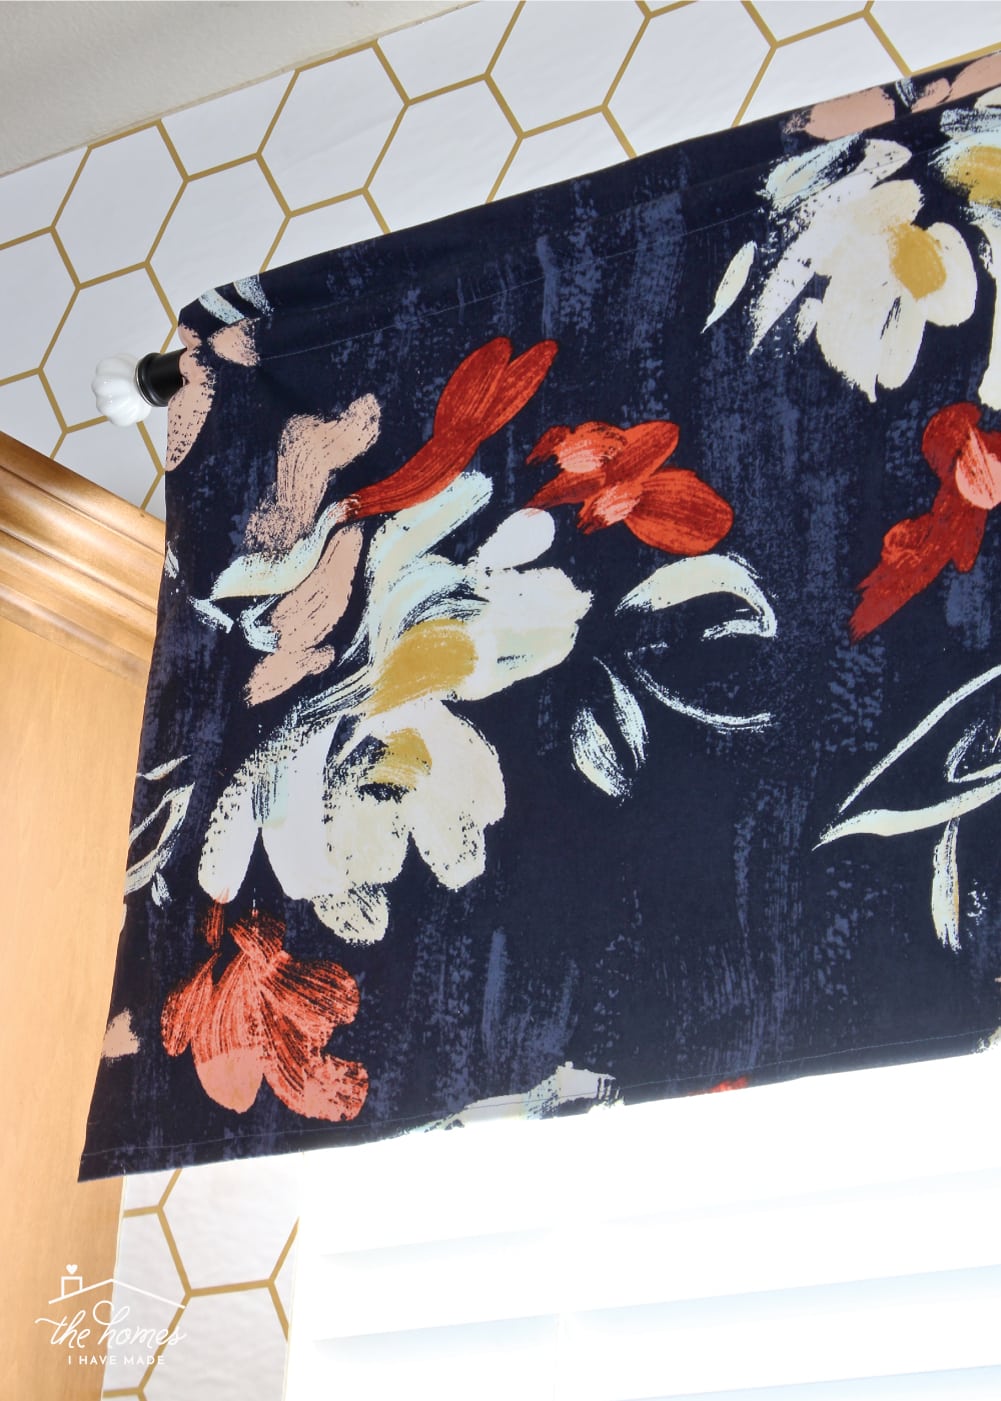
I chose to hang our valance on a curtain rod to match the other window treatments throughout our lower level. However, there are many ways to hang valances, including rods, rings with clips, tension rods and even Velcro if you really want it to be a quick, simple, and totally temporary DIY.
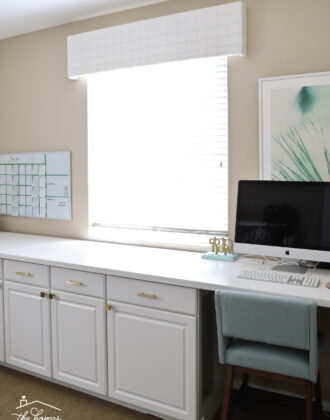
Valances are not only a great solution if you want a quick project that uses very little fabric, but it’s ideal on windows where long drapes would get in the way. You may typically see valances on kitchen windows, as well as any windows above counters, couches, and in kid spaces where longer curtains might be in the way.
There are many, many ways to make a window valance (including just throwing some fabric over a tension rod!), but this tutorial outlines how I prefer to do it. This method features a lining on the back of the valance and a rod pocket to make for clean lines and simple installation. That said, these instructions could also be easily adapted to fit your specific needs. I tried to break this down to make it as simple as possible for the novice or everyday sewer. If you can measure and sew a straight line, you CAN do this project, I promise! Let me walk you through it!
NOTE: My flowered window valance was VERY wide (about 70″!) making it really hard to photograph in a way that would be truly helpful to you. So that you could see exactly how this window valance comes together, I re-created a (much) smaller version with some scrap fabric.
Supplies Needed
To make a window valance, you will need the following supplies:
- Curtain fabric – This fabric (also referred to as fabric A) will be the main fabric seen on the front/outside of the valance. Use the measurement guides below to determine how much fabric you need. In order to avoid having to match seams across a large window, you may need to purchase enough yard length to fit your valance width.
- Drapery lining fabric – This tutorial uses inexpensive drapery lining (also referred to as fabric B) for the underside of the valance. The lining helps with construction and creates a nicer backside of the valance (which might be seen from the outside of the window). You don’t need anything fancy here so ask the fabric store staff for the most inexpensive drapery lining they have!
- Blackout drapery lining (optional) – If you use a thinner fabric that allows a lot of sunlight to shine through, you may need to use blackout lining instead of or in addition to the regular lining.
- Coordinating thread
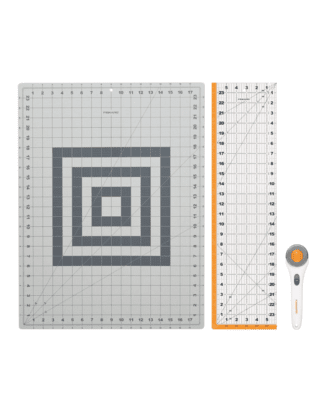
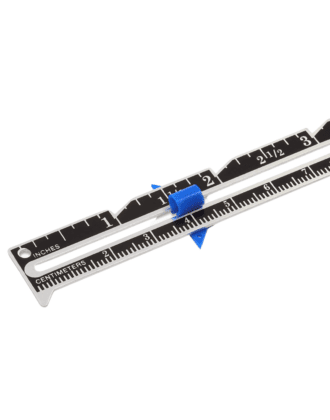
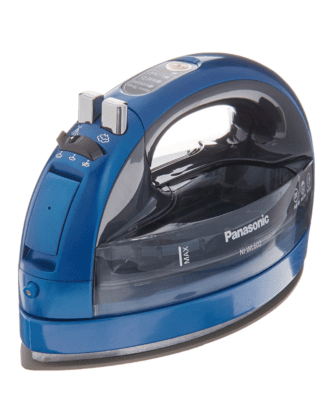
- Tools: Sewing machine | rotary cutter, ruler and mat | scissors | sewing gauge | chalk marker or fabric pen | pins | iron
- Curtain rod and hardware
Measuring and Cutting the Fabric
The first step is to measure your window and cut out the curtain and lining fabrics!
In order to cut your fabric, you need to know how big you want your finished valance to be. In order to do that, you need to measure your window! First, measure the window width. Typically, you want your finished valance to extend at least 3-5″ past the window casing on both sides (if possible). The length of your valance is certainly up to you and your aesthetic preference, but a 20″ length is a good starting point.
TIP! It is MUCH easier to cut off extra length than add it back on, so if you aren’t sure how long you want your valance, leave a few extra inches and trim it before hemming!
Once you have your finished valance measurements figured out, use them to determine the cuts of your fabric. You may certainly tweak these equations, but these are the measurements I typically rely on. In the diagrams below, fabric A represents the curtain fabric, and fabric B represents the curtain lining.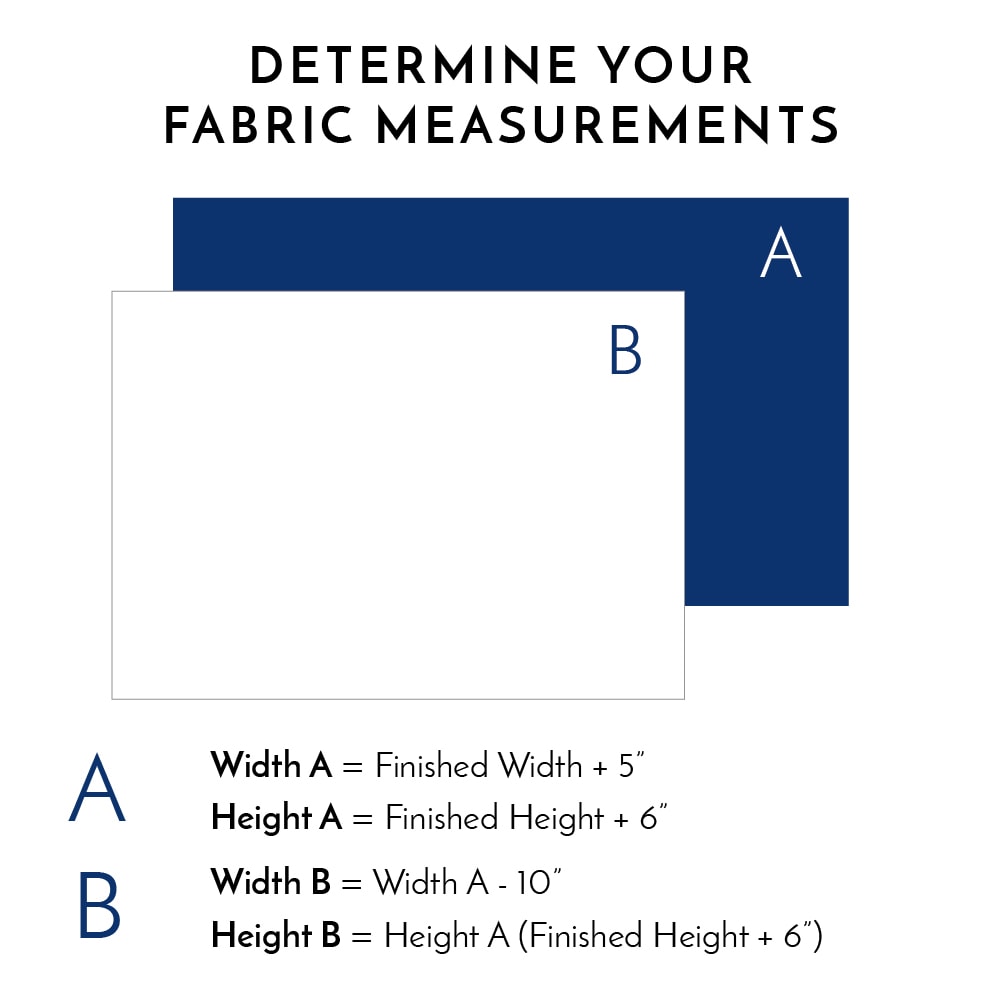 Hopefully, the above equations make sense to you. If a more concrete example helps, here is how I would cut fabric to create a valance measuring 20×10″ (finished):
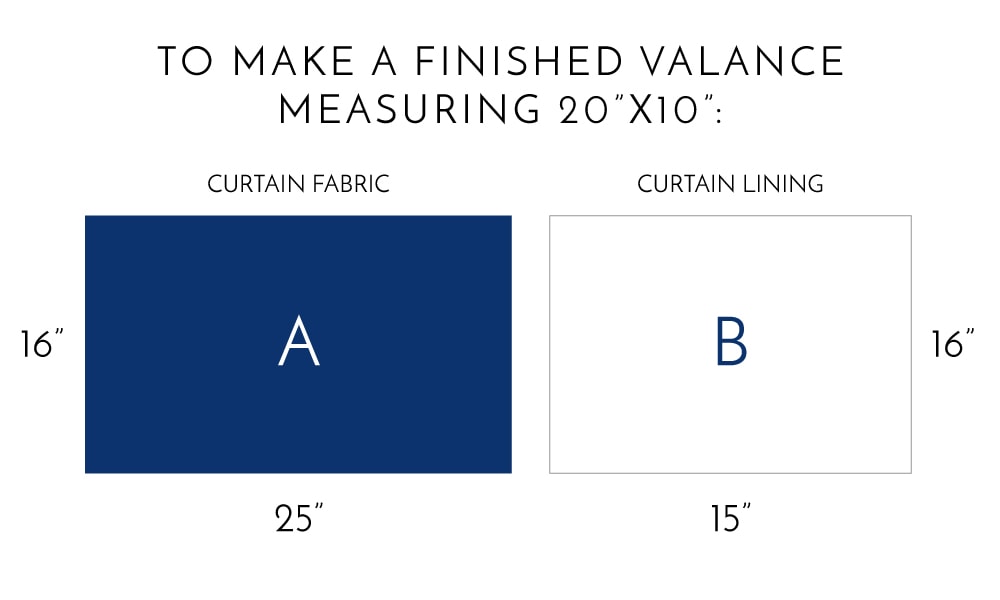
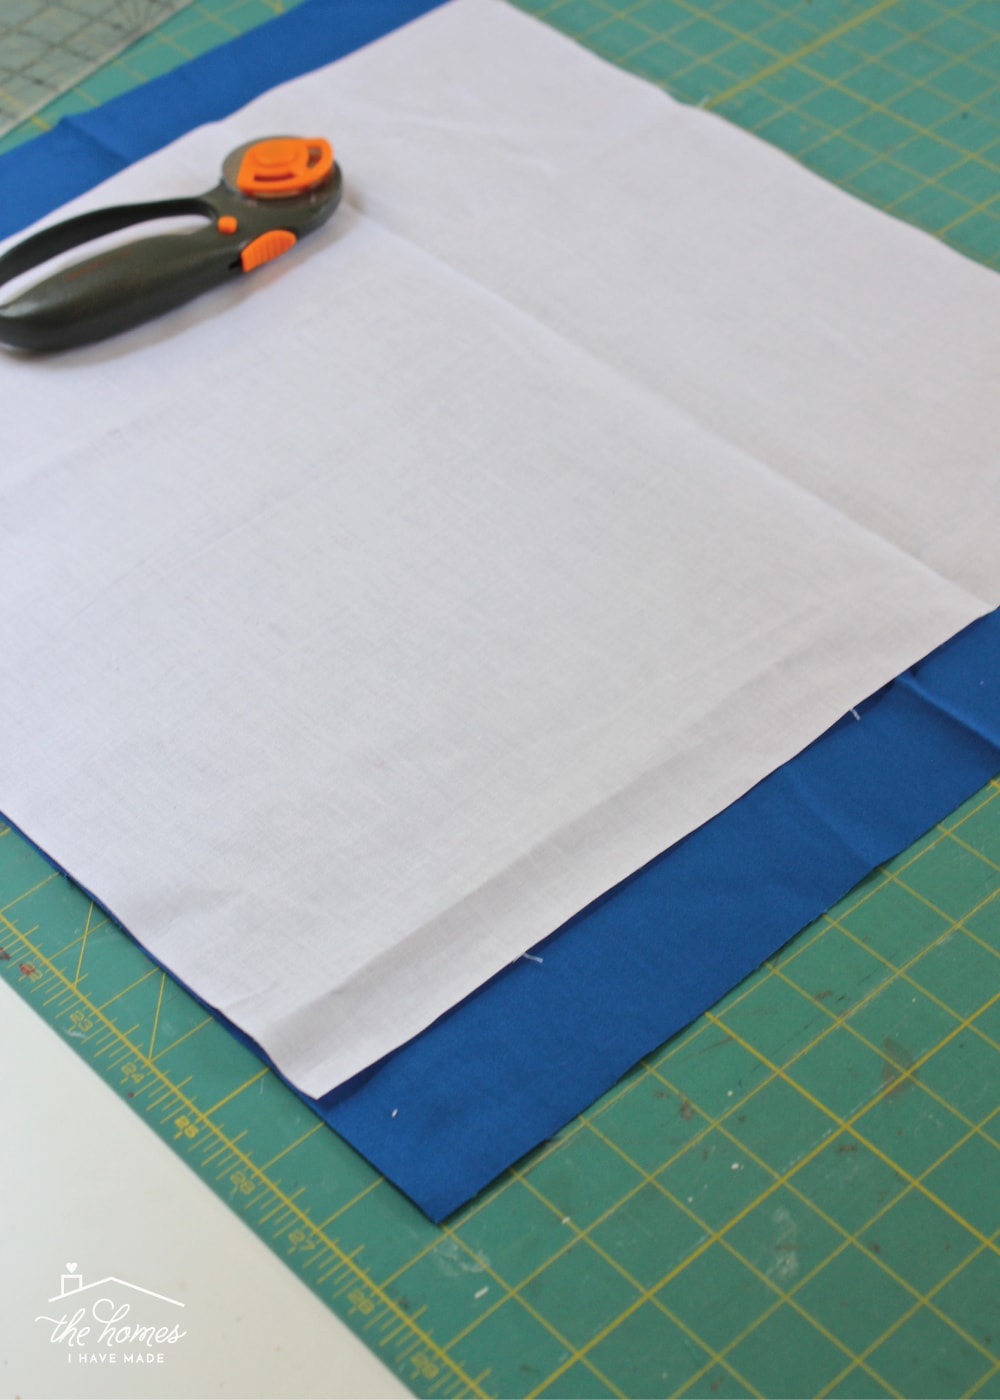
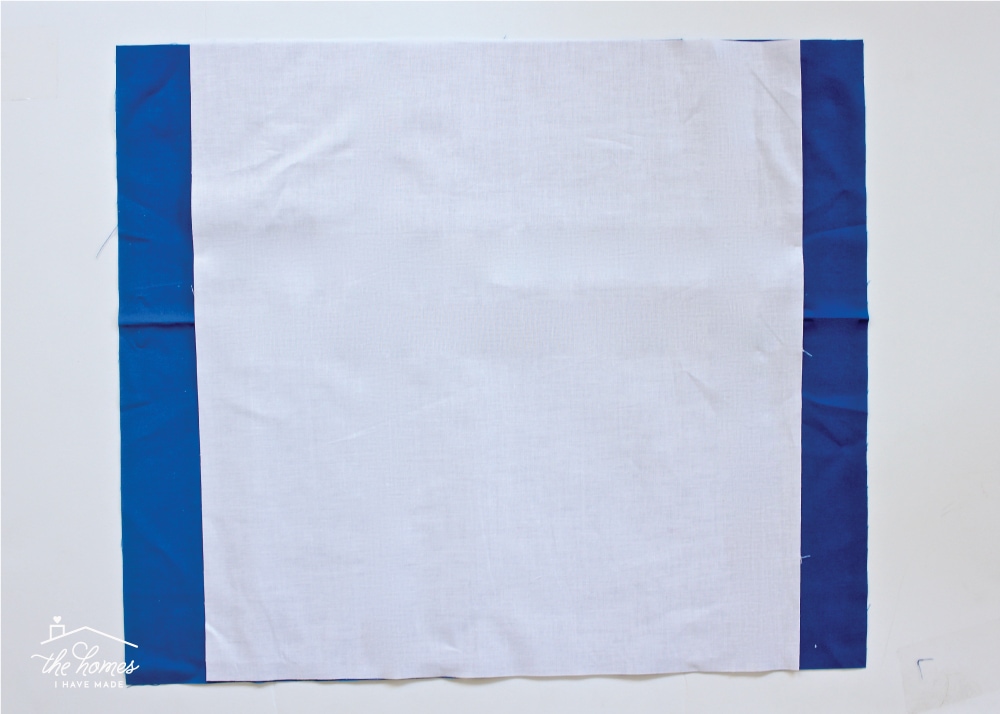
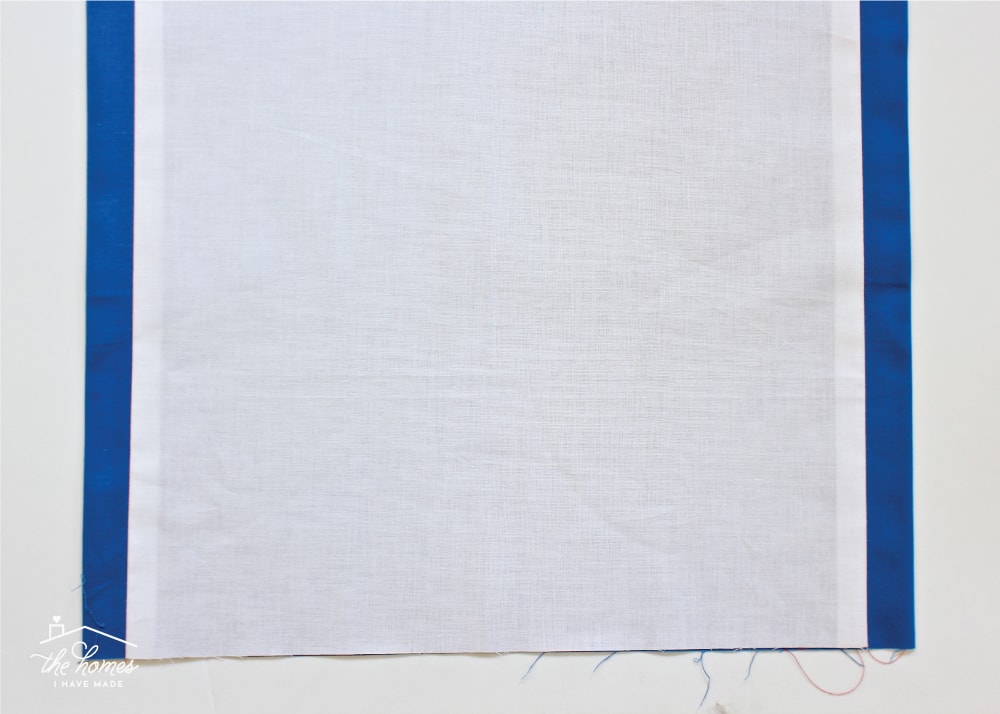
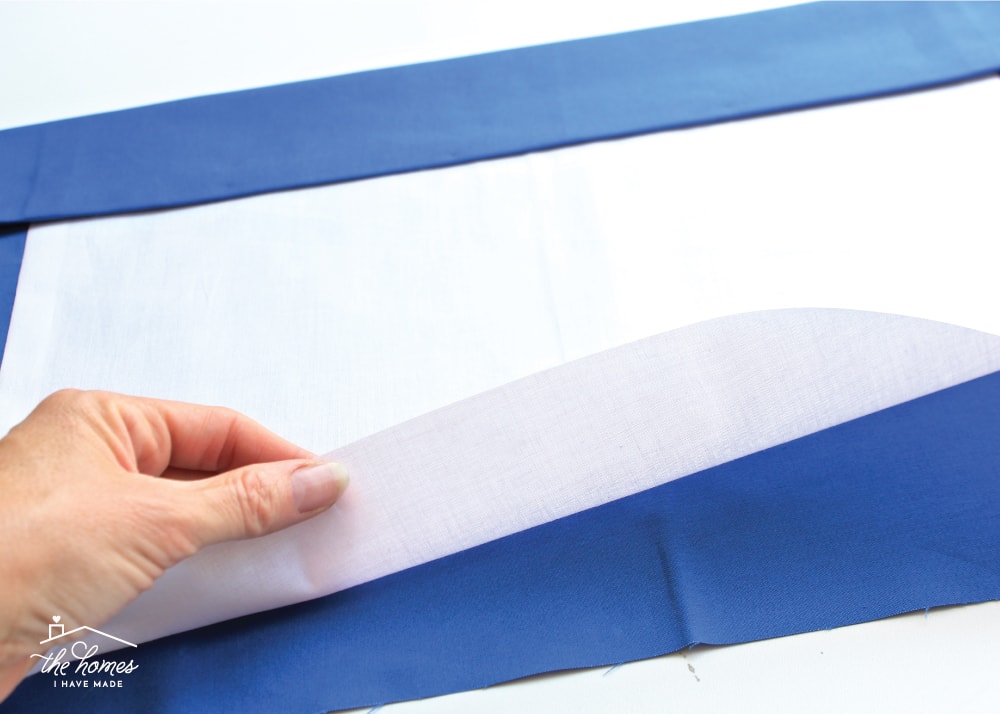
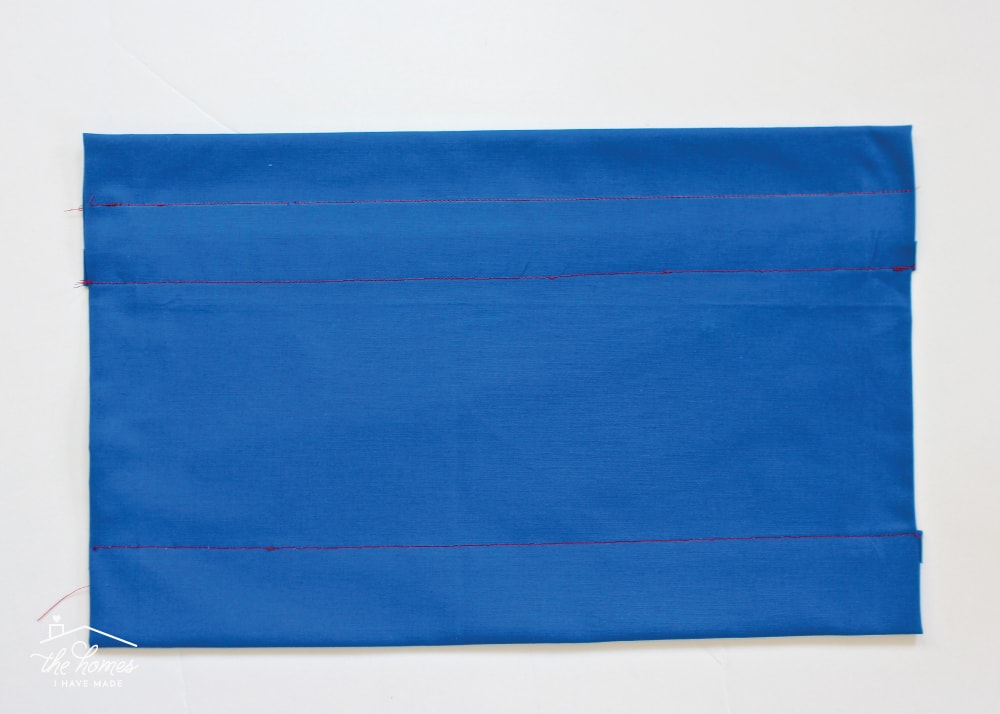
The biggest thing to note is that your curtain fabric and lining fabric will be the exact same HEIGHT, but the lining fabric will be LESS wide than your curtain fabric. If you were to lay the lining on top of the curtain fabric, it would look like this: In fact, here is my curtain fabric (blue) and my lining fabric all cut and ready to be assembled into a valance!
Sewing the Valance Together
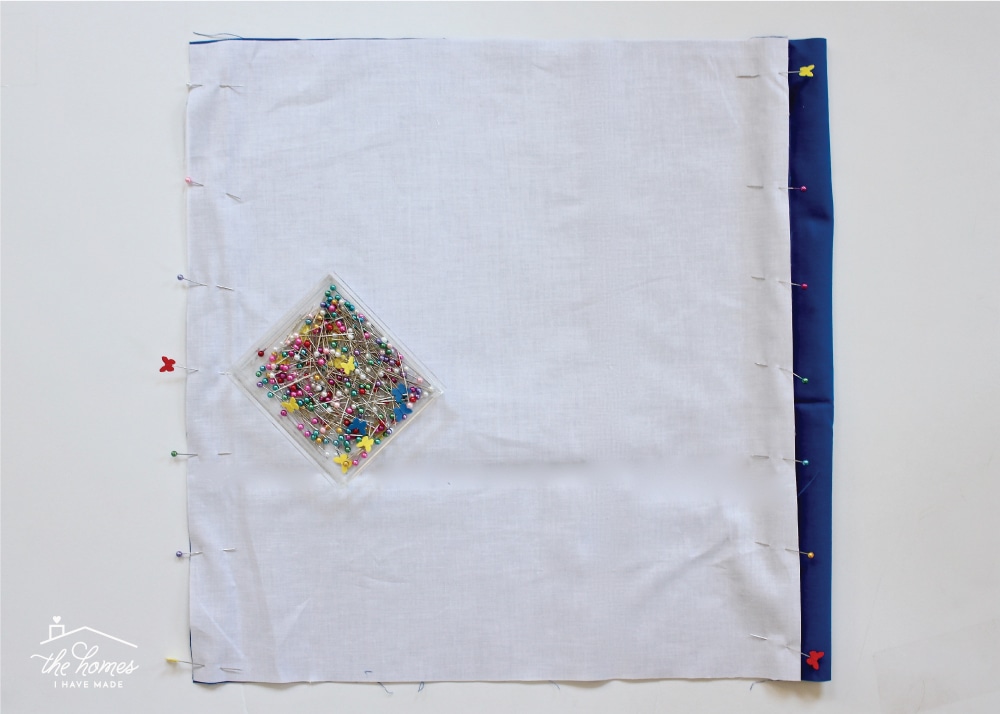
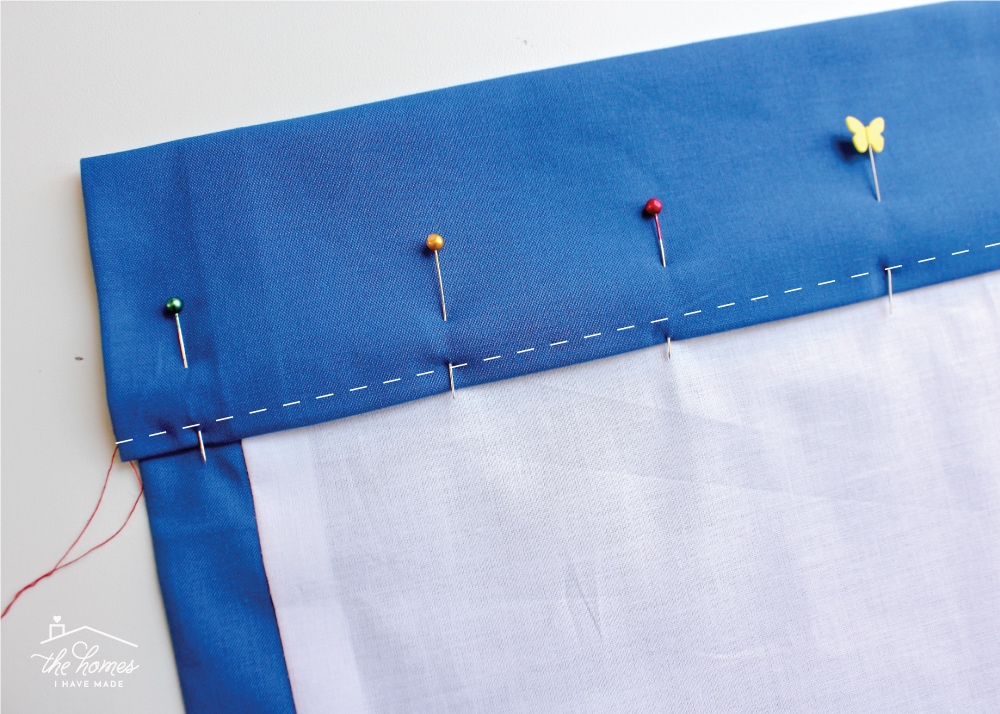
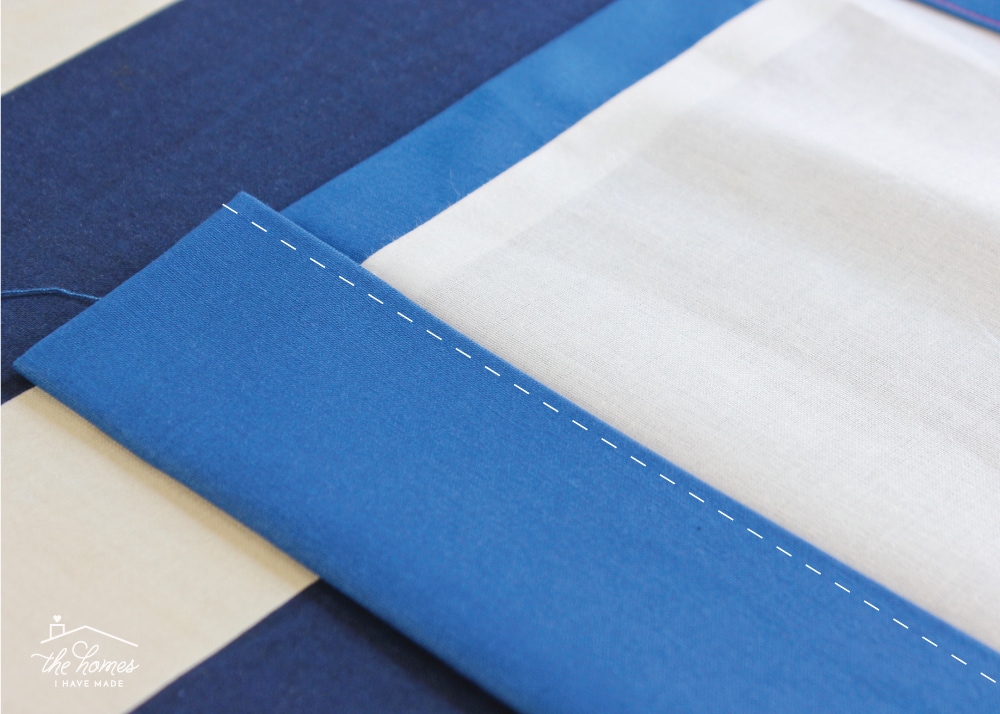
With RIGHT sides together, line up the top and bottom of the curtain and lining fabrics (they should be the exact same height). Next, line up the two left edges of fabric and pin together; repeat on the right side. (Unless you are making a valance that is as long as it is wide, you should be pinning the shorter sides together). You’ll notice that because the lining is cut smaller than the curtain, it will no longer lay flat once it’s pinned together on both sides (shown below).
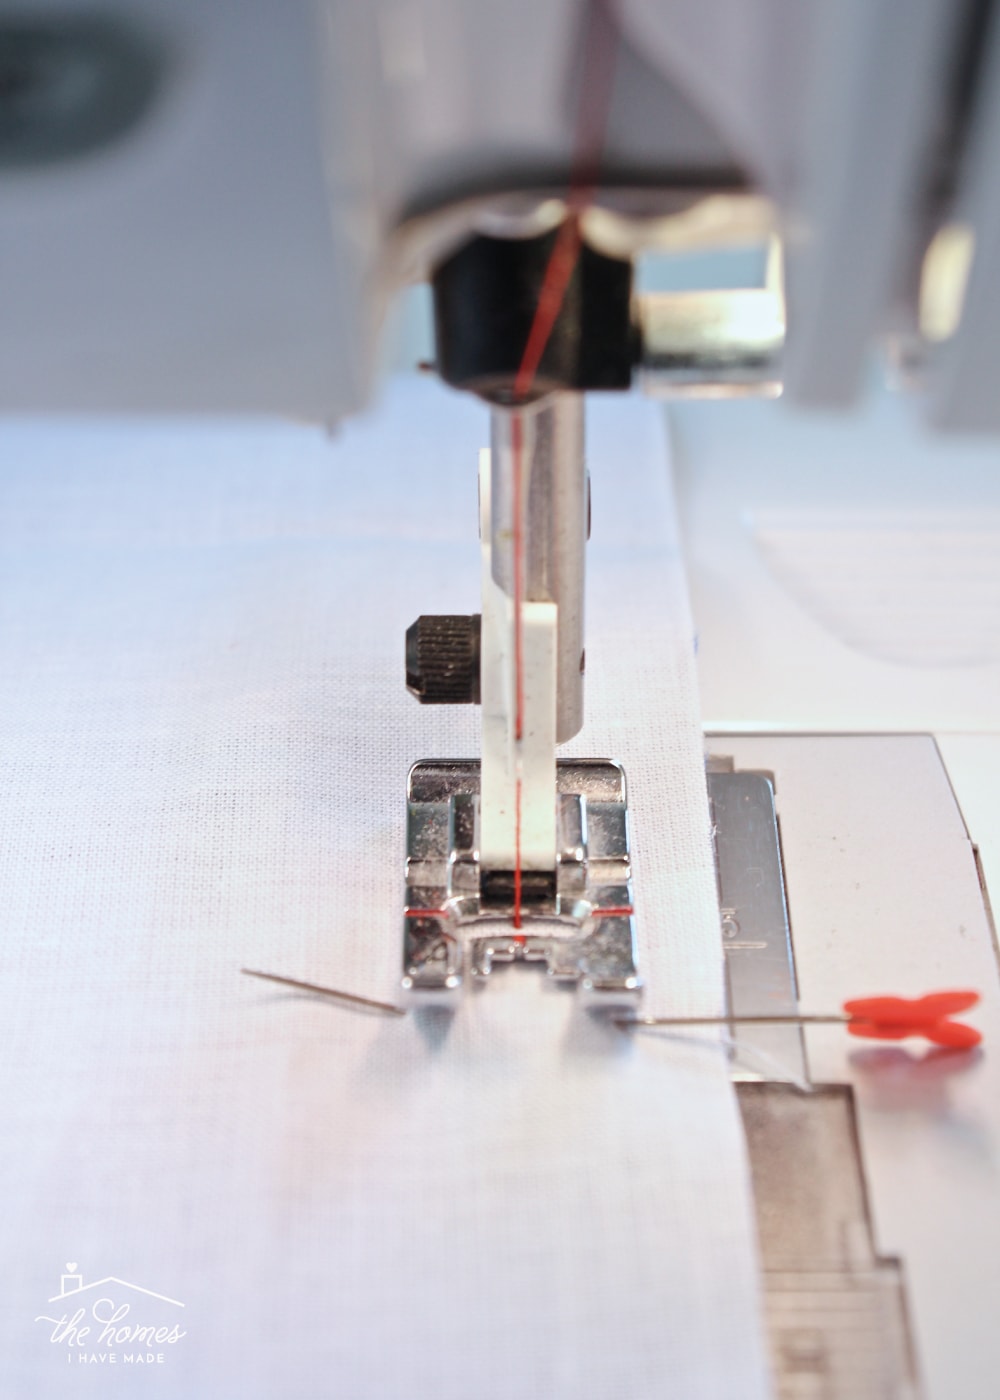
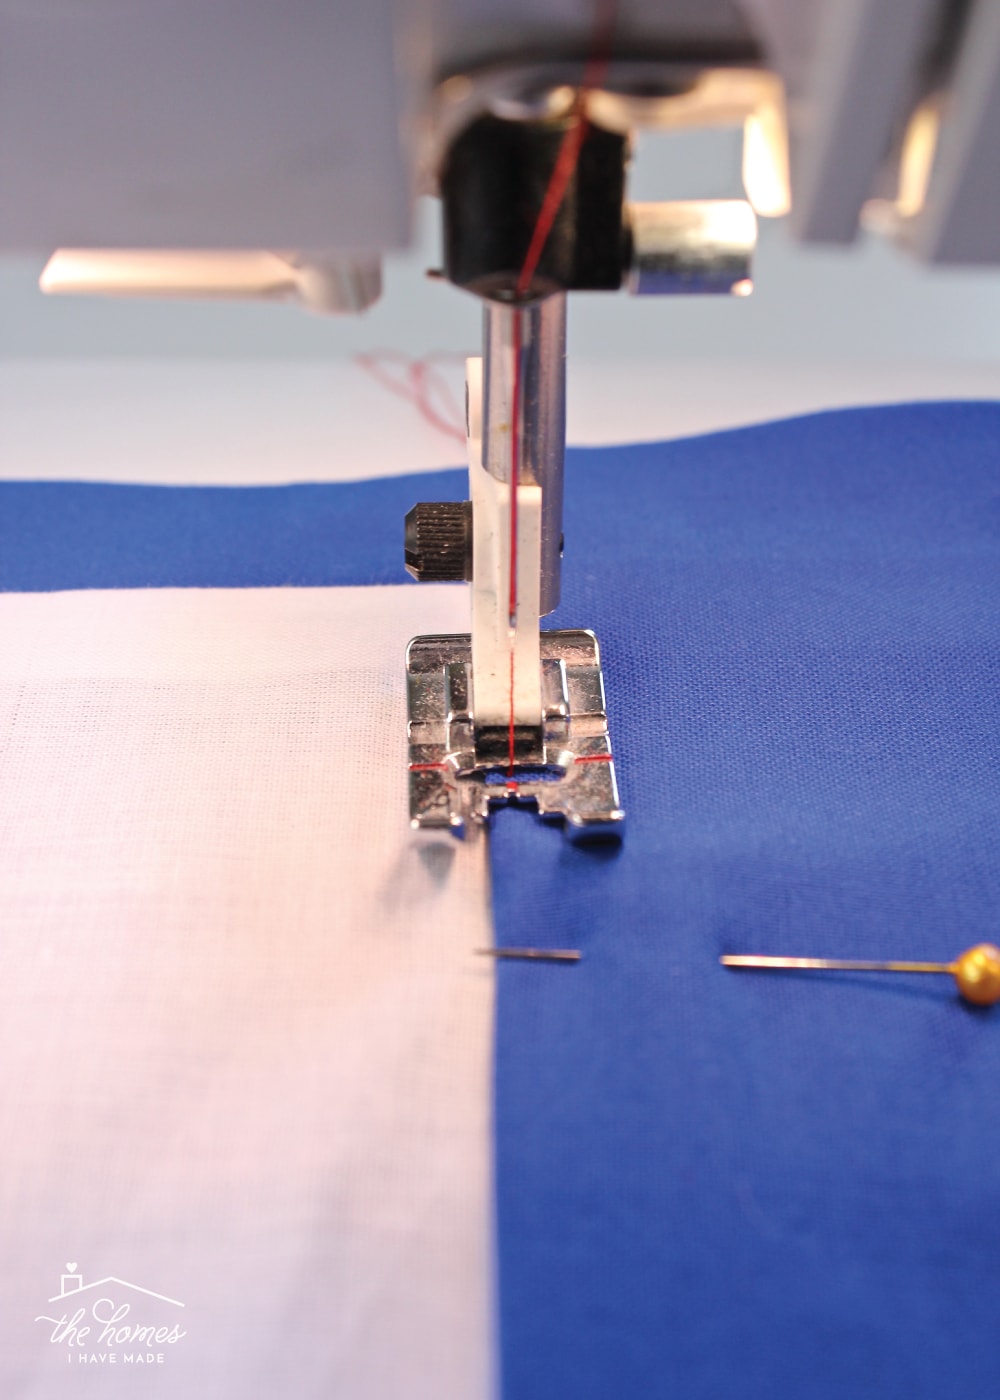
Using coordinating thread and a 1/2″ seam allowance, sew down both sides of the valance.
Remove the pins and flip the valance right-side-out. Next, use a hot iron to press the seams smooth and flat.
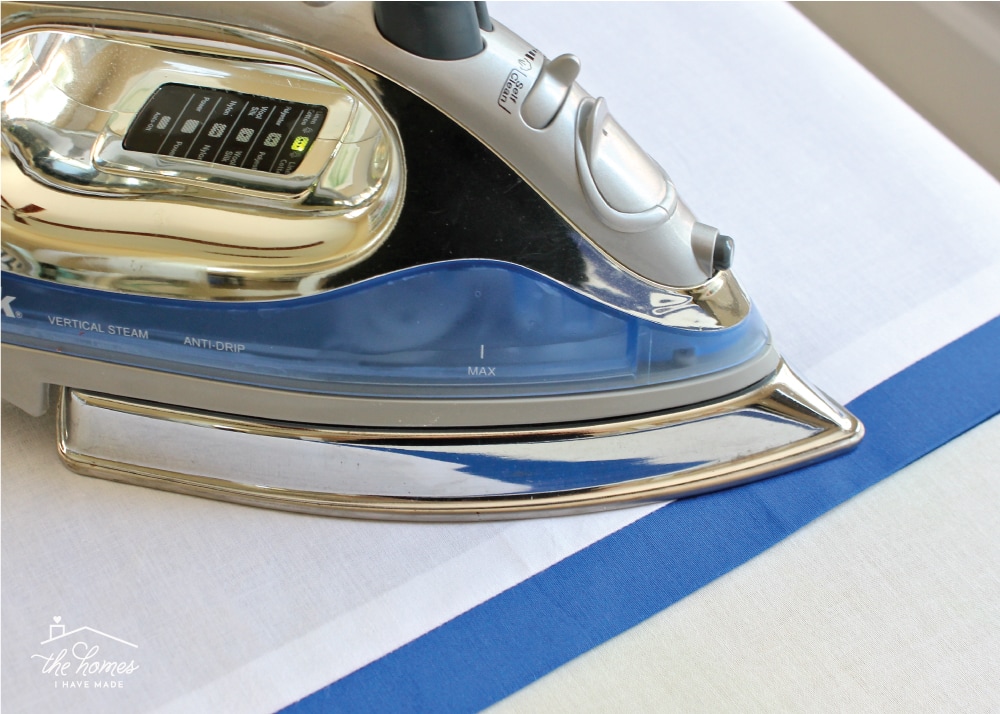
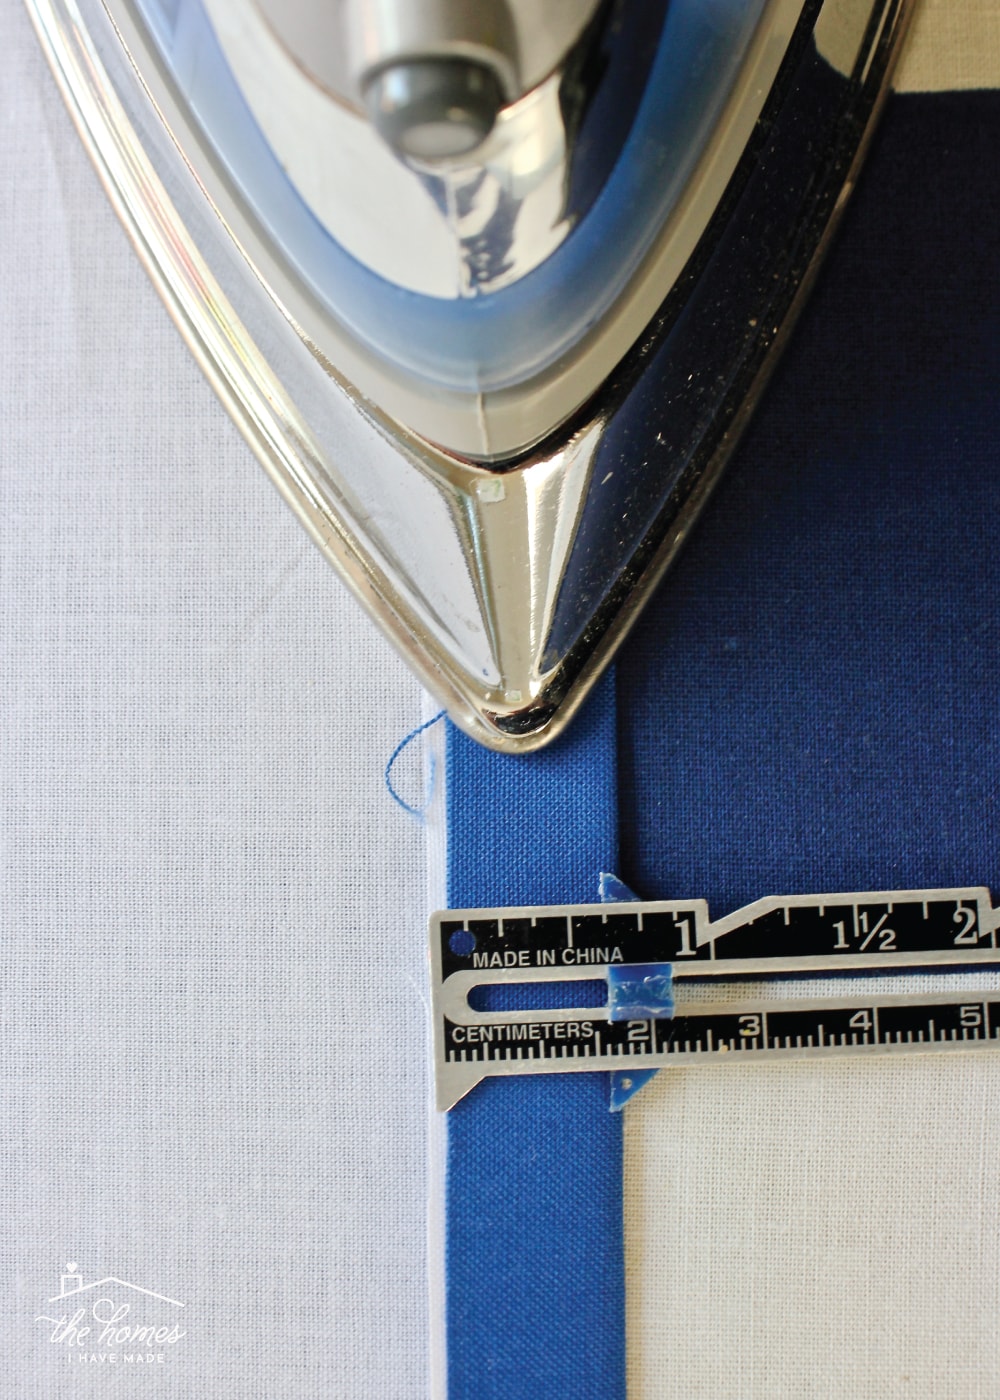
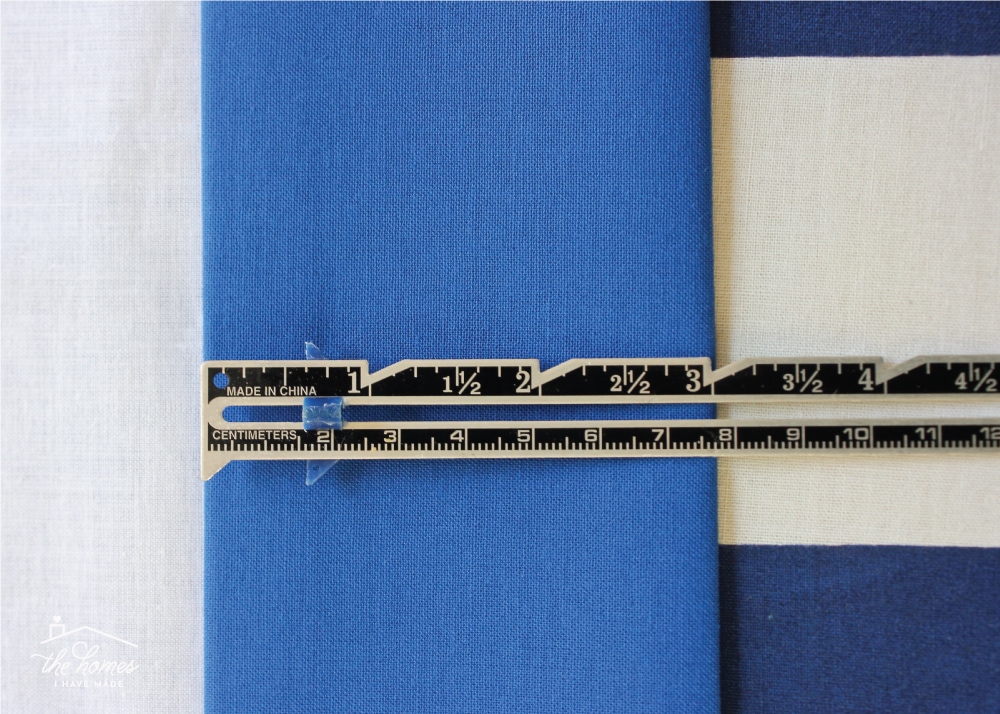
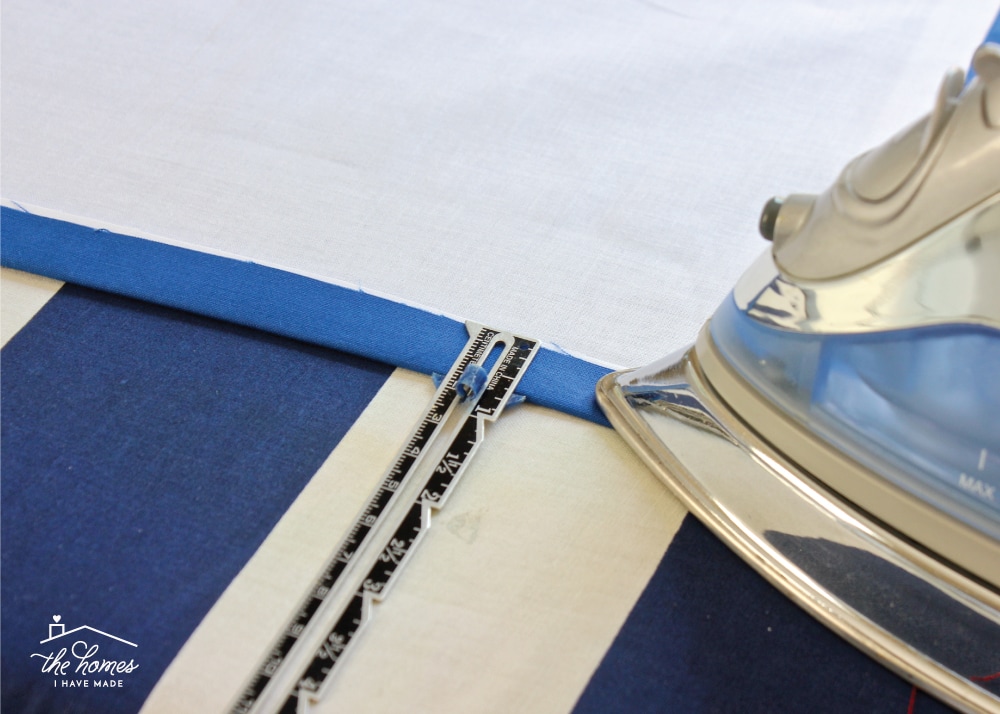
Because your lining was cut smaller than your curtain, about 2″ of the curtain fabric will end up folded toward the back (that’s what you want!). This gives your valance a nice finished edge but also keeps the contrasting lining well-hidden from the front.

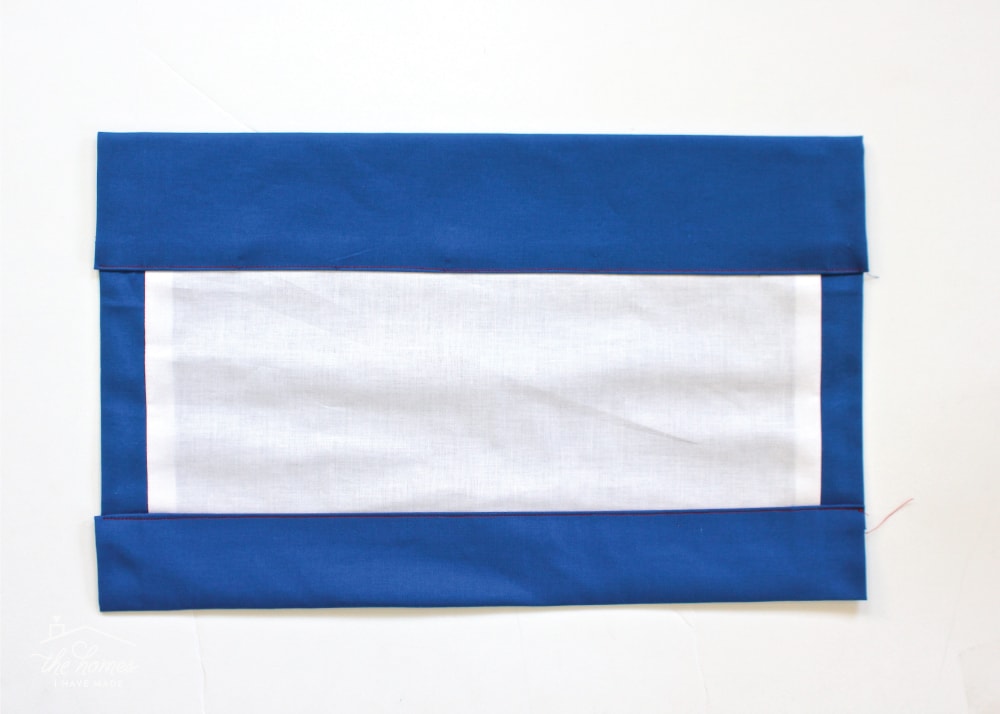
When pressing your seams flat, you want to make sure that you have an even amount of the curtain fabric on both sides. Notice in the picture below, I have the same amount of blue fabric folding toward the back on both sides of the valance. Depending on the size and bulk of your valance, getting these seems pressed and even may take some work and patience!
The picture below shows the backside of the valance. With everything pressed and smoothed, it should lay flat. From the front, you should only see your curtain fabric (not shown).
Finishing the Top and Bottom of the Valance
With the sides taken care of, the next step is to finish the top and bottom of the valance. For this step, a sewing gauge and hot iron will be necessary.
On the top of the valance, fold the fabric (both the curtain and lining fabrics) down 1/2″ and iron in place.
Want to save this post?
Then, fold the fabric over AGAIN another 3″ and iron in place.
Adding Blackout Lining (Optional)
At this stage, you would be wise to hold your curtain up to a window to see how much light is coming through. I *thought* my dark fabric plus basic drapery lining would be sufficient to block most light, but boy was I wrong! The light was pouring through my valance, which didn’t make it look very nice at all! To make your valance opaque, you will need to use a blackout lining.
There are two options for using blackout lining on your valance. The first is to use it instead of regular drapery lining. However, I worried that I’d end up with transparent edges where the lining didn’t extend. The other option is to trim out a rectangle of blackout lining and insert it inside of your valance before sewing the top of the panel. To use this second option, simply cut out a rectangle of blackout lining similar to the dimensions marked by the red dotted lines below. 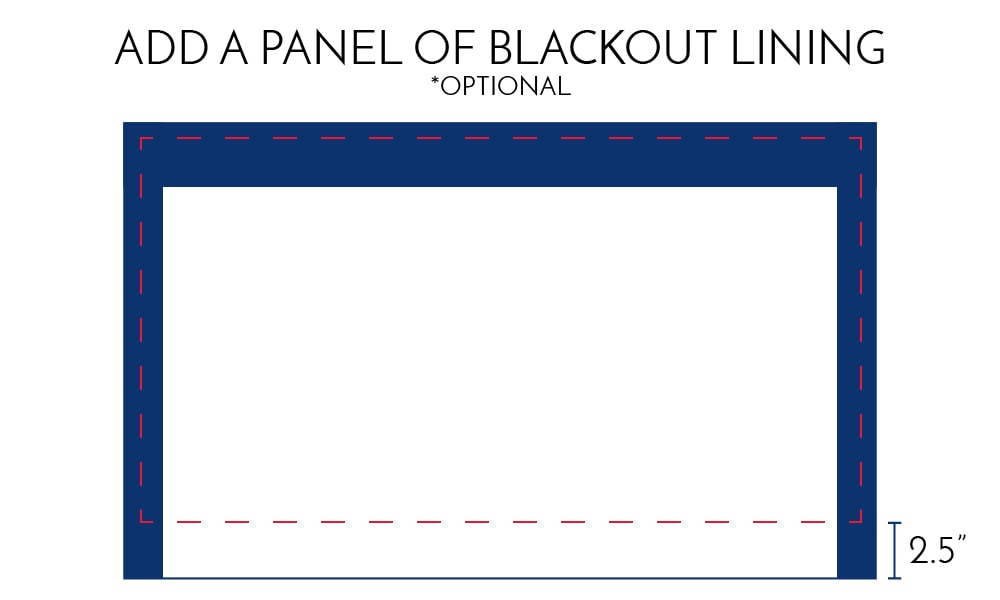
Before moving onto the next step (where you sew the top hem in place), slide the blackout lining between the curtain and draper lining layers. Take care to make it flat, straight and as far to the top of the inside of the valance as possible.
With the blackout lining in place, pin the top hem (that we measured out a few steps ago) in place, and stitch in place. Not only does this stitch line hem the top of the valance, but it holds that blackout lining panel in place.
You will want to stitch as close to the hem’s edge as possible. I used a contrasting thread so you could see it. But because your threads will be visible from the outside of the valance, be sure to use thread that matches perfectly with your curtain.
At this point, the top and both sides of the valance should be sewn up and looking clean and tidy! Let’s finish the bottom edge. Similar to the top, first fold over and iron 1/2″…
Then fold up and iron 2″ more and pin the hem in place.

Just as you did along the top, sew the hem in place as close to the hem’s edge as possible.
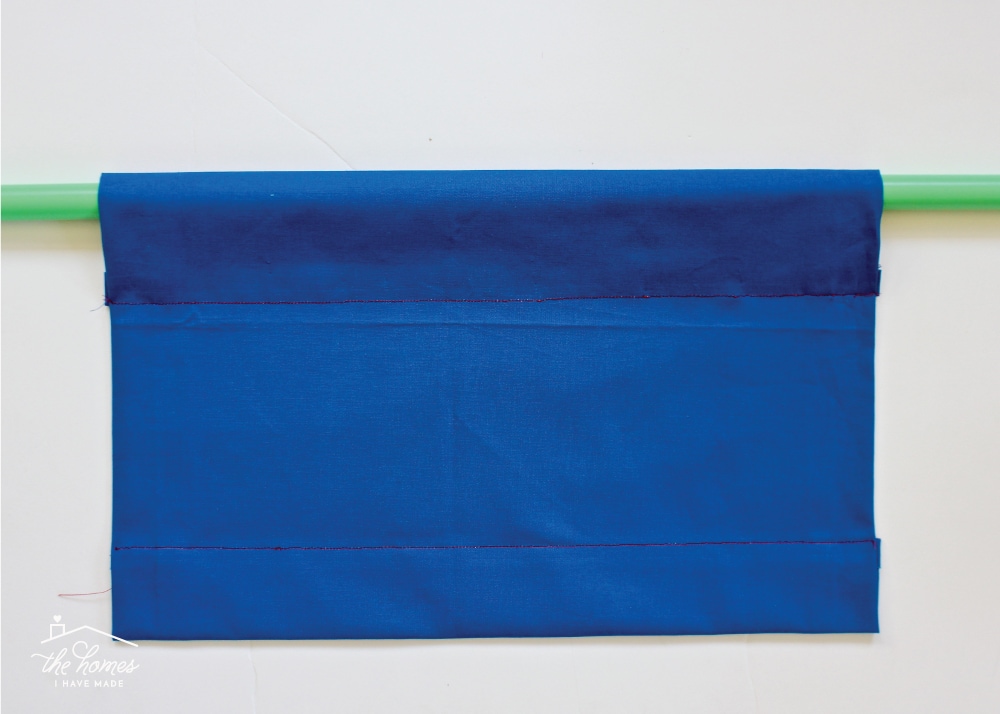
With both the top and bottom edges hemmed, this is what the backside of your valance should look like.
Adding a Rod Pocket to the Window Valance
With your fabric valance all sewn together and hemmed, you have some options for hanging it. If you would prefer to use rings with clips, you can go ahead and do so without doing this last step. However, I find adding a rod pocket is not only simple, but using a rod to hang a valence is one of the quicker and easier solutions!
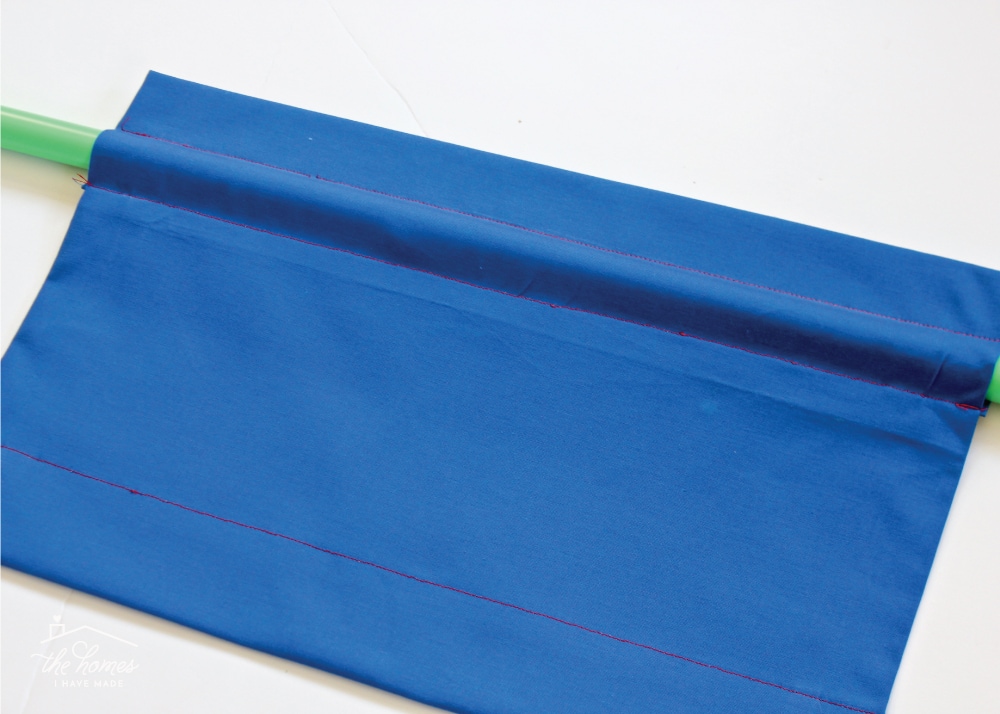
I strongly recommend using your actual curtain rod to determine the placement and size of your rod pocket. At this point, the valance is fully constructed, so you could just slide it onto a rod and be done (see below)!
However, I like to have the rod fit a little snugger in the pocket, and I like to have some fabric above the curtain rod itself. In order to create the rod pocket, move the rod down to your hemmed stitch line. Then use a pin to indicate a comfortable place for another stitch line (below left). Remove the rod, then use a chalk pencil or fabric pen to extend the line all the way down the valance (below right).
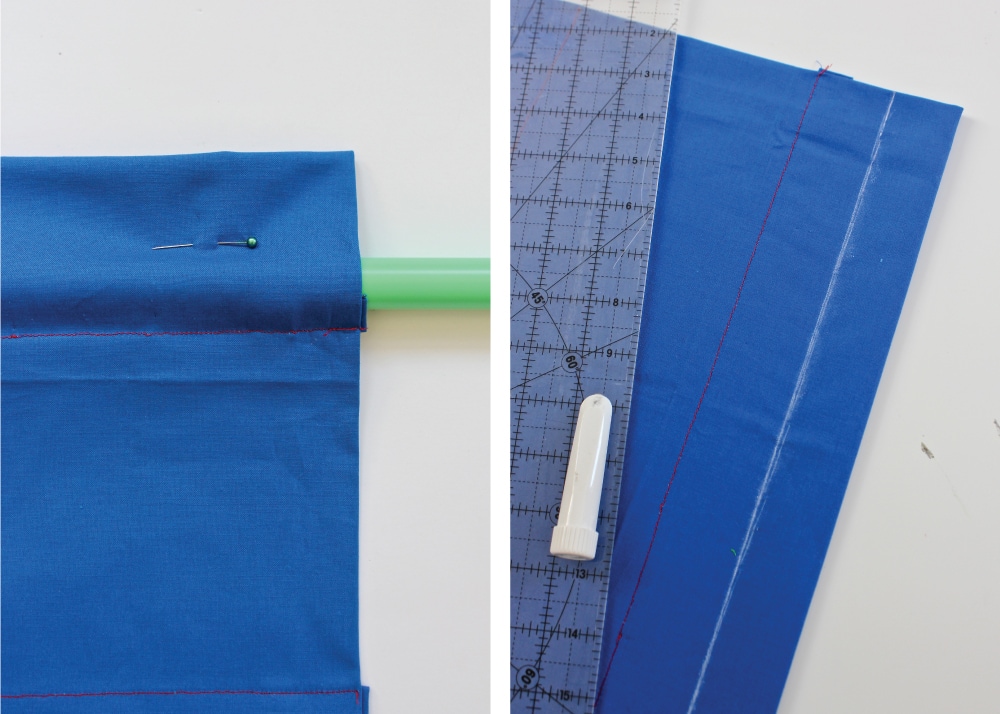
Run the valance through your sewing machine one last time along the line you just drew to make a perfectly fitting rod pocket.
The final step is to mount your curtain hardware, insert your curtain rod through your valance, and hang it up!
In just an hour or so, you can have a neat, tidy, and oh-so-pretty valance to dress up any window! If you don’t have the budget or energy for lots of fabric and lots of fuss, this is the DIY window treatment for you!

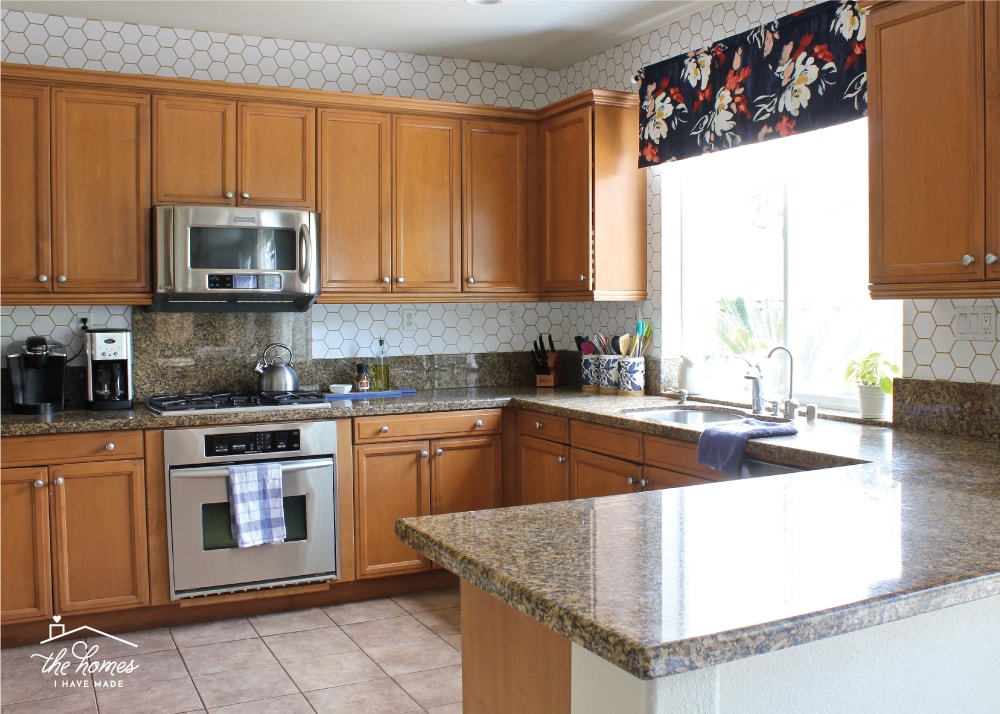
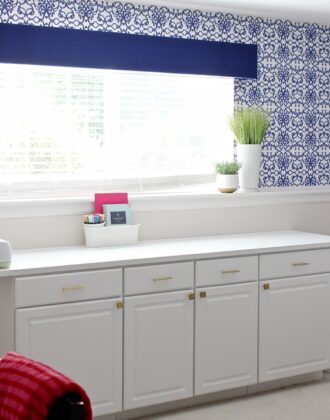
There are not a lot of opportunities to infuse pattern and style into a kitchen. This simple valance above the sink was just the ticket to take this whole space up a notch. In addition to this project being quick and easy, do you want to know something else really fun about it?
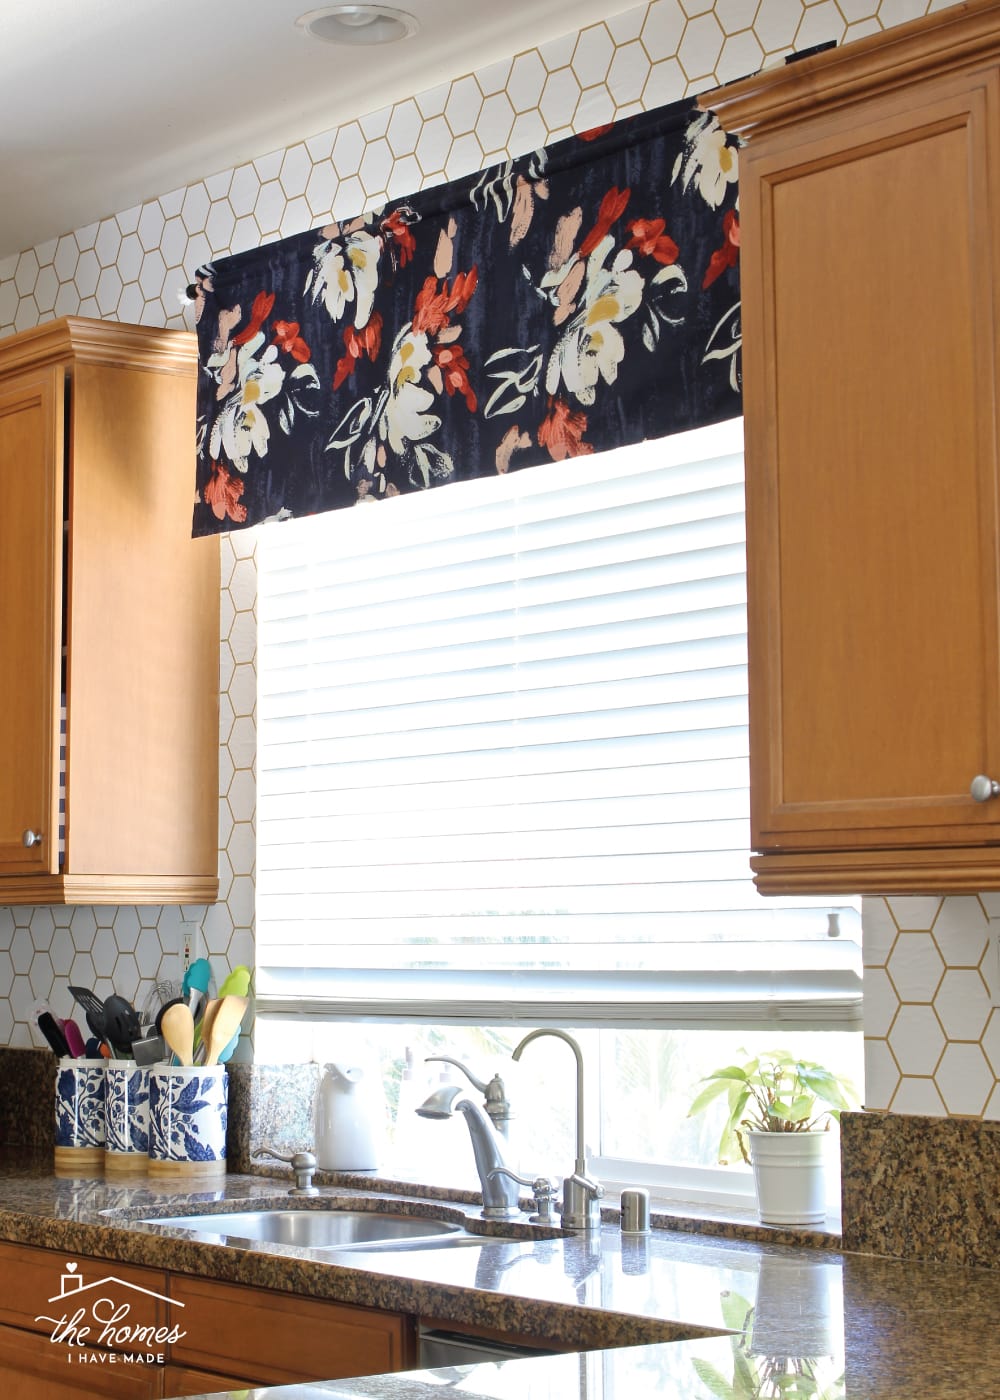
This valance was made from a Target shower curtain. Not only was the shower curtain’s width (72″) the perfect width for this window, but at $15, it was a super budget-friendly way to get so much fabric! And the cherry on top? I have just enough leftover to make two matching pillows for the couch in the nearby room! I’ll be showing you how all three rooms came together here very soon!
Other Great Window DIYs To Try
Looking for other great solutions for your windows? I've got you covered with these other smart DIYs!
- How to Make a Window Valance with Foam Insulation
- How to Sew a Window Valance
- How to Make a Window Valance with Foam Core Board & Wallpaper
- DIY Modern Wood Valance
- DIY Cornice Box with Scalloped Edges
- How to Hem Curtains | A Foolproof Method!
- How to Hem Curtains Without Sewing
- How to Widen Store Bought Curtains | An Easy Fix!
- How to Remove Vertical Blinds
- How to Install Your Own Blinds or Shades
- Roller Shades for Windows (When Curtains Aren’t an Option!)
- How to Hang a Curtain Rod Without Drilling into the Wall
- How to Hang Curtains On Rings (With Perfect Results!)
- How to Hang Curtains In a Corner Window
- How to Completely Cover Up a Perfectly Good Window
- 6 Easy DIY Window Valance Ideas (You Can Totally Make In an Afternoon)
Megan

23 Comments on “How to Sew a Window Valance”
Wonderful tutorial… so detailed, and the pics are great, too! Thank you!
For some reason I am not understand the first step of where to pin. How do you line up the left and right? Is it with A and B pinned together?
Hi Kayleigh!
Yes, you will be the top fabric to the lining fabric along the sides.
Let me know if something else isn’t quite clear!Thanks,Megan
I’m still unclear on this step. After the lining is stitched on, you wrote “Remove the pins and flip the valance right-side-out.” Does that mean that if it’s a patterned fabric (screen-printed only on one side for example), you are covering the printed/patterned side with the lining fabric (B), pin and stitch it together that way, then turn it print-side-out after the left and right edges are stitched together?
Basically when you pin the lining fabric (B), are you covering the side of the curtain fabric (A) that will show, or the side of the curtain fabric (A) that will NOT show? Since your example fabric is a solid color instead of something with obvious front and back sides, it’s hard to tell what that sentence means from the photos.
Hello!
Sorry for the late reply here. Yes, in general, you usually place “right sides together” on sewing projects. Which means that when you are sewing the curtain to the lining, the patterned side should “face” the right side of the lining. Once sewn, you flip it so both “right” sides are facing out.
Hope that clarifies for you. Good luck with your project!
Megan
This is exactly what I was looking for and very easy to follow! Thank you for posting this. Can’t wait to get started!
Love this tutorial, thank you! Do I need to add more to the width of curtain A before I cut to allow a seam allowance? EG. Should I add an extra inch?
Hi Kate!
No. The +5″ accounts for the seam allowance, as well as fabric to fold over toward the back.
Good luck with your project!Megan
Hi Megan-
Thank you for taking the time to make this tutorial- I feel more confident starting my project now! However I’m very confused on the math when it comes to the lining fabric. It seems like it should only be 8” smaller than Width A (3” smaller than he finished width) because if you end up with 2.5” of fabric A folded over to the back – 2” showing plus the 0.5” seam allowance – then basically the width of fabric B is 4” narrower than the finished width – plus 0.5” on either side that got used up in seam allowance. We needed to add that amount back on, not subtract it. By my calculations this would result in a finished product that is 1” narrower than you intended.
Did you have issues with your finished product ending up narrower? Did you follow your own instructions when making this, or did you make it first and calculate after to write the instructions (not a judgement- that’s how a lot of bloggers do it!)
I’m just trying to make sure I don’t screw it all up haha.
Hi Sara!
Thanks so much for writing. I have to be honest, I created this tutorial 2 years ago, and I was fairly confident with the math back then. While I did make my valance first, and the tutorial second, I’m pretty sure I followed my measurements when making the sample blue+white version for the photos.
I can’t really follow your math, but when I just hashed my measurements out on some graph paper, I think it works out fine. But I can’t say for sure since it’s been so long and math isn’t exactly my strong suit 😉 I’m going to run the measurements by my sister who creates sewing patterns for a living and I’ll get back to you if it needs changing.
Otherwise, you can always try it with paper or scrap fabric first which might help ensure your measurements are correct!
I’ll get back to you when I can!Thanks,Megan
You are correct! I made the valance exactly as the instructions stated and did end up with my valance 1″ narrower than it should be. I double checked my measurements and reread the directions twice after completing. Fortunately, I was able to make changes and ultimately use it, but the instructions are flawed.
Hi Susan!
Thanks so much for circling back and letting me know. I will definitely update my instructions so people don’t have the same issue!
I am sorry, but am glad to hear you were able to make your valances work!
Thanks!Megan
I’m getting ready to make a simple valance and am so glad I stumbled on your website. I am very new at this kind of thing and am sure I would have made a total mess of my project. I have read the comments above and wondered whether the instructions at the beginning of this site have been updated to correct the measurements mentioned in the instructions. If not, where should I change them?
I have to be honest I was certain I wasn’t following the directions correctly for my valance. I am a novice sewer and was not confident about what I was expecting from the finished product. But I followed each of your steps and took my time and WOW! It turned out amazing! Thanks so much!!
Yay!!! I am SO glad to hear that! Congrats on your new valance!
Have a great weekend!Megan
hi, I’ve been working on two valances for my house, following these directions. I end up being narrower than I want. In your finished 20″ sample width, if you have a piece of liner that is 15″ – with two seam allowances of 1/2″ each – that would give you 14″ of liner once attached to main fabric. Then with main fabric being 5″ over what you are shooting for, 1/2 ” allowance – so that leaves the 2 inches on each side. SO the 14′” plus 2 and 2 would give you a 18″ finished width. What am I missing? Thanks in advance – Karen C
Thank you for a great, well-written tutorial. I do agree with Sara. Width B should be Width A minus 8. I made a prototype first, using Width A minus 10, and the prototype was exactly one inch short. Look at it this way. My finished width was 40 inches. So Width A is 45. The finished width of the lining is 36. Add 1 inch for the seam allowance, so Width B is 37 inches. Calculate Width B as Width A minus 8. I am glad I found you
i agree with others. this tutorial is so excellently created. able to go step by step and return to the details whenever needed. prefer this instead of a you tube to start and stop. the valance turned out incredible.
Have you thought of doing a seasonal holiday valance with Fall on one side and Christmas on the other instead of a lining. I was thinking to cut both A and B the same size and leave a rod pocket opening on the side to sneak rod through.
That’s a great idea, Gale!
I will admit, I don’t decorate extensively for the holidays so it never occurred to me – but yes, that is a great idea!
I would make sure your fabrics are thick enough so the pattern on the backside doesn’t show through to the front when hung in front of a sunny window. Adding some blackout lining in between the two fabrics could help too!
Let me know if you give this a try!
This was very helpful. Thank you
I know this post is from many years back, but thank you for such a great tutorial! And it made me smile when the photo popped up on Google as I used to have that shower curtain in our guest bath!
Great tutorial! I have two large windows in our kitchen (craftsman with 12″ trim between the two windows). I have picked a fabric that has large repeat pattern both vertically and horizontally. My question is : Should the two curtains need to be cut exactly so they are matching or does that matter?