How to Make a Window Valance with Foam Board & Wallpaper
Next to drawers and walls, another common topic around here is window treatments! Since we constantly have to figure out new solutions for different windows every time we move, I am always brainstorming ways to make our windows look “dressed” but in a way that is still affordable and totally temporary. Valances are one of my preferred choices since they are aesthetically sleek and clean, but are also simple to make and require less material than other options. Today I’m putting yet another spin on this old standby, making a window valance with foam board and wallpaper. This is SUCH a quick and inexpensive way to make your windows look amazing. Let me show you!
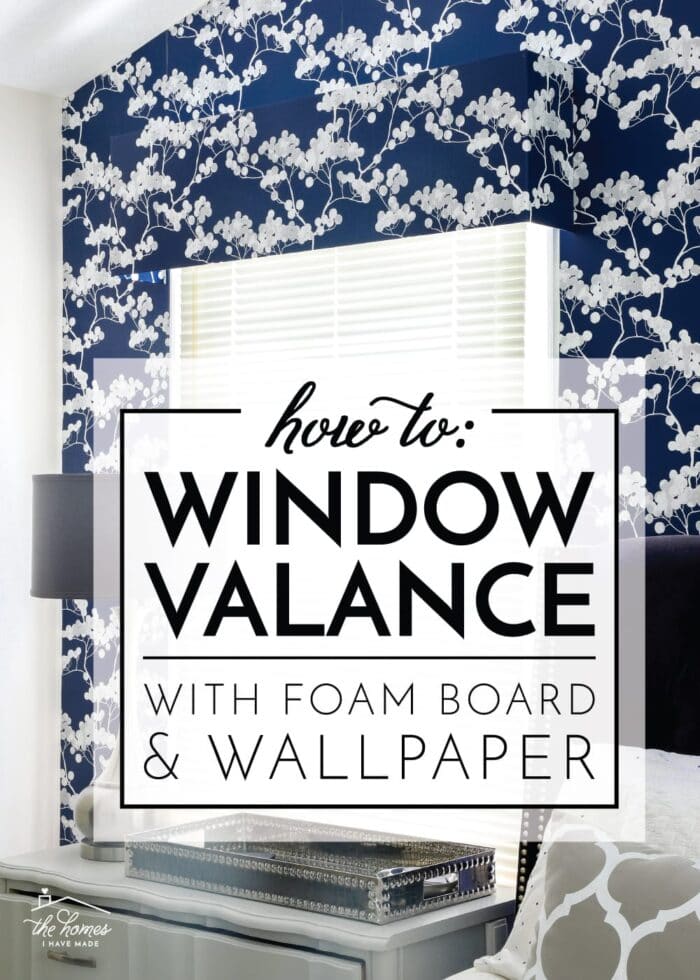
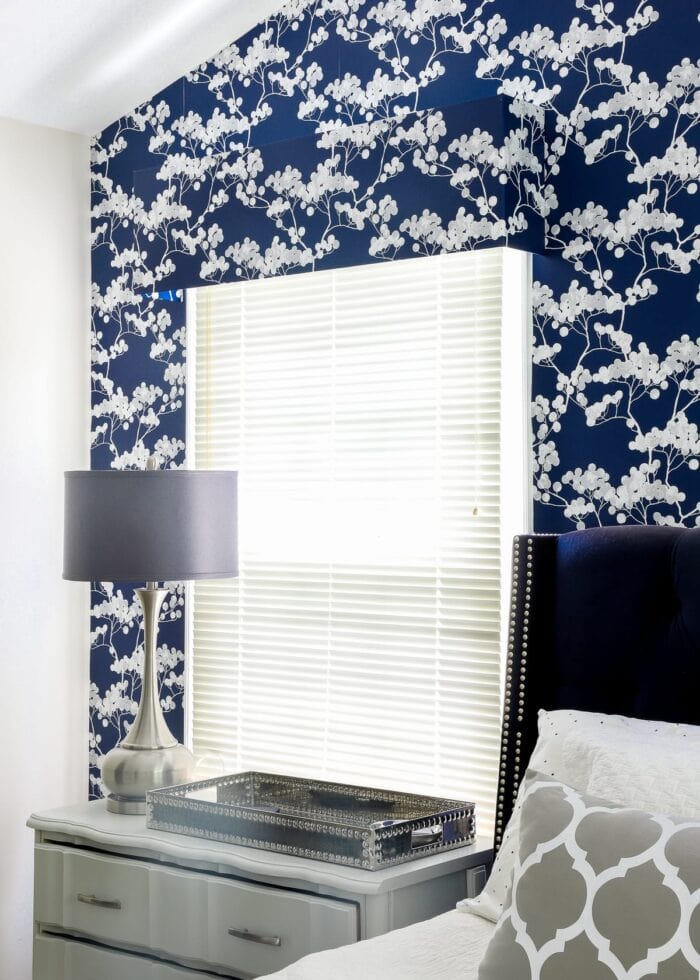
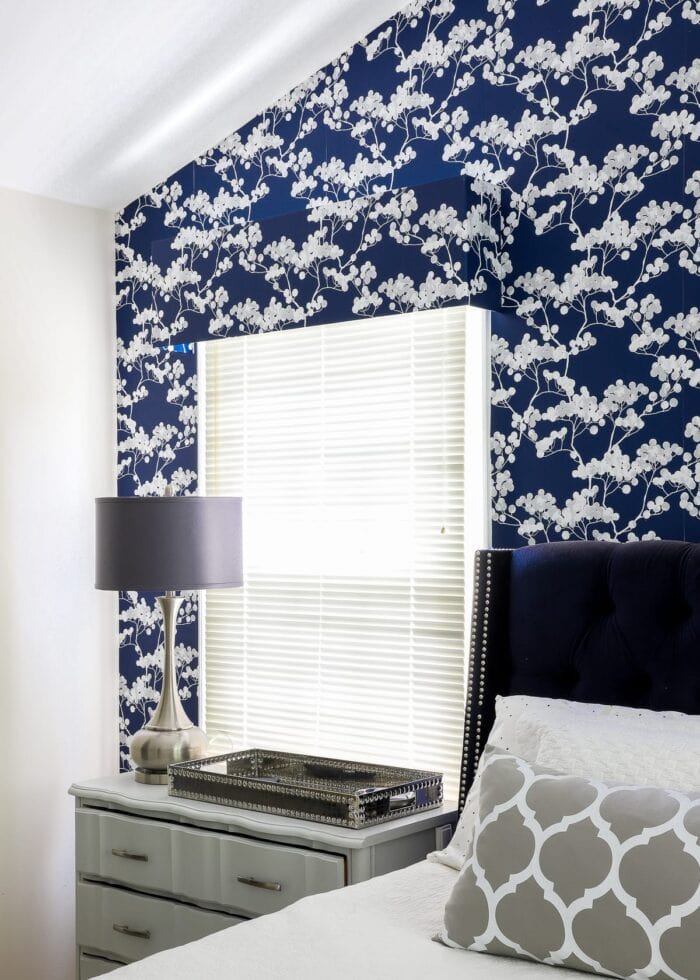
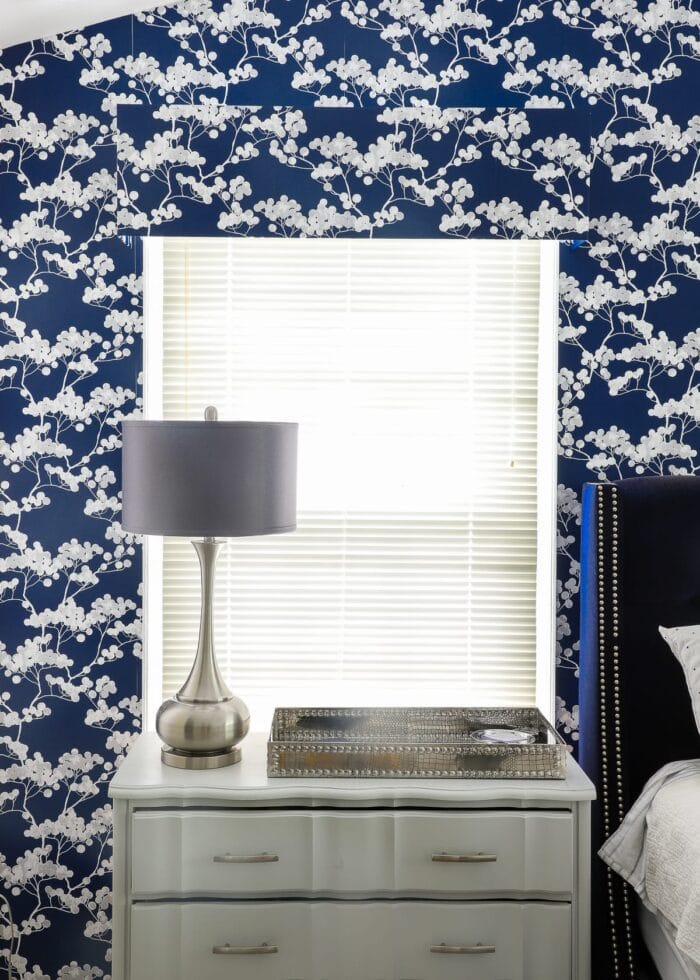
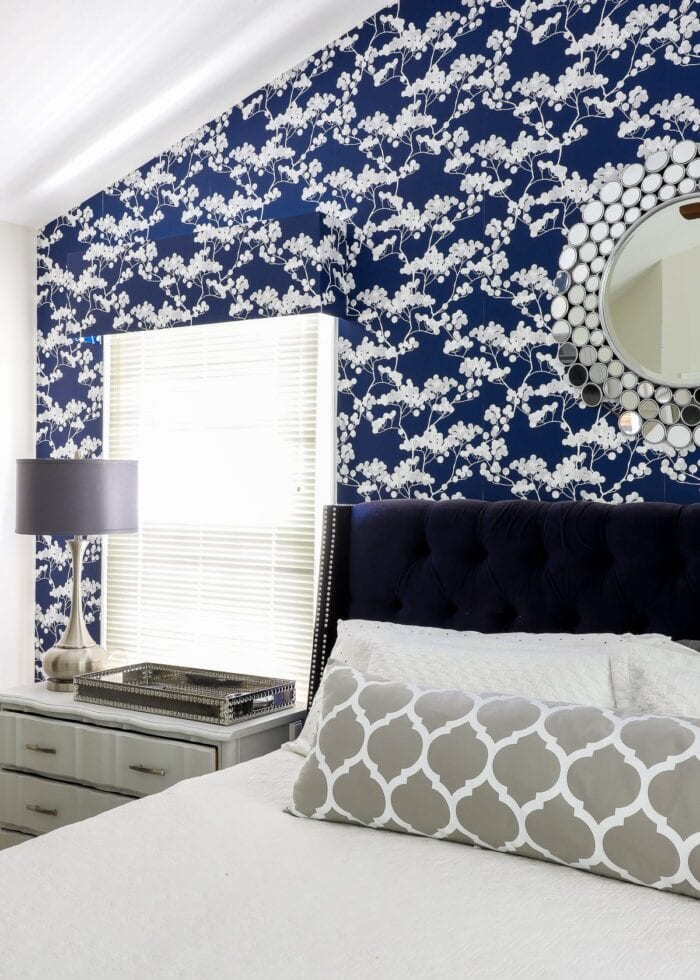
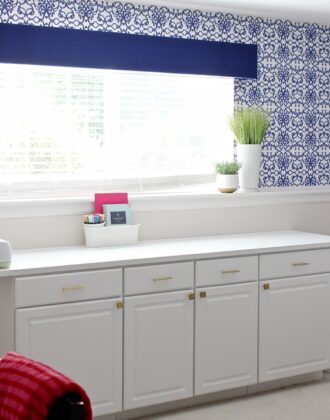
When I first envisioned/designed this project…and even as I was making it…it didn’t occur to me that it would end up as a game of “Where’s Waldo…Valance Edition”! Using the same wallpaper on the window valance was a great solution from a design, assembly, and budget perspective. I just didn’t realize it would be so hard to see in pictures!
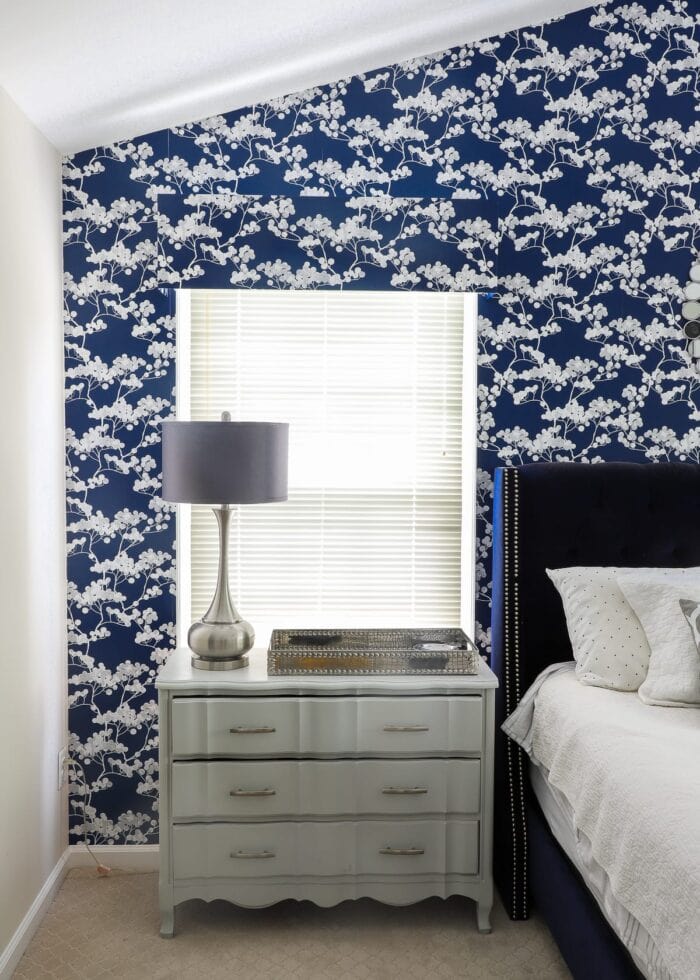
But I promise…if you look closely, our master bedroom window now has a lovely window valance above it. And although its addition is quite subtle, it really goes a long way in completing this side of the bedroom.
Below is a picture of our window in its “original” condition. Not only am I fairly passionate about adding window treatments to our rentals in general (you can read why HERE), but since there was already really obtrusive window hardware in place (left behind by the owners), I was extra compelled to cover it up.
I chose a valance for this window for a few reasons:
- A dresser sits in front of the window, so longer curtains would have been a bit awkward.
- The window already has blinds on it, so we didn’t need curtains for privacy or light blocking.
- The wallpaper on this wall is already fairly busy. I worried that adding additional (contrasting) elements would distract the eye even more.
- There isn’t a matching window on the other side of the bed, so a less obvious window treatment minimizes this imbalance.
- And finally…I really love the clean, simple aesthetic of window valances!
Supplies Needed
This project cost me nothing since I already had all the supplies on hand. Even if you need to shop for materials though, you’ll find this project is still fairly inexpensive when compared to other curtain options. It’s also really quick to make, taking under an hour!
Here’s what you need:
- Foam Core Board (I find the science fair board versions give you the most board to work with at the best price)
- Peel and Stick Wallpaper in the color/pattern of your choice (I used leftover of this paper from our wall)
- Clear Packing Tape
- Tape Measure
- Ruler with Self-Heeling Cutting Mat
- Craft Knife
- Scraper
- Command Strips or other hanging hardware
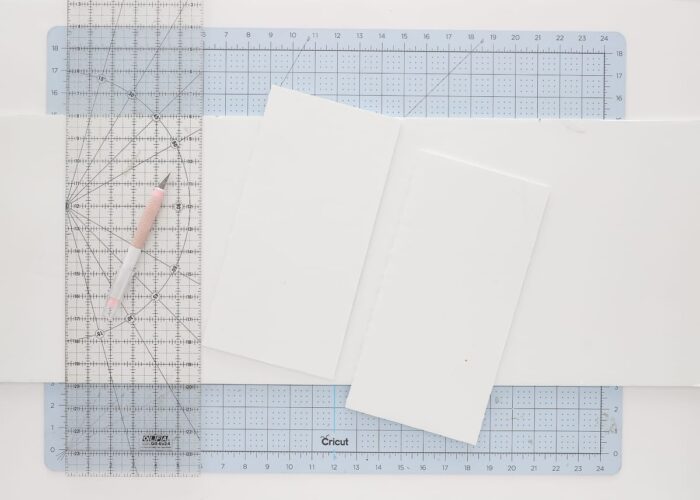
Measuring for Your Window Valance
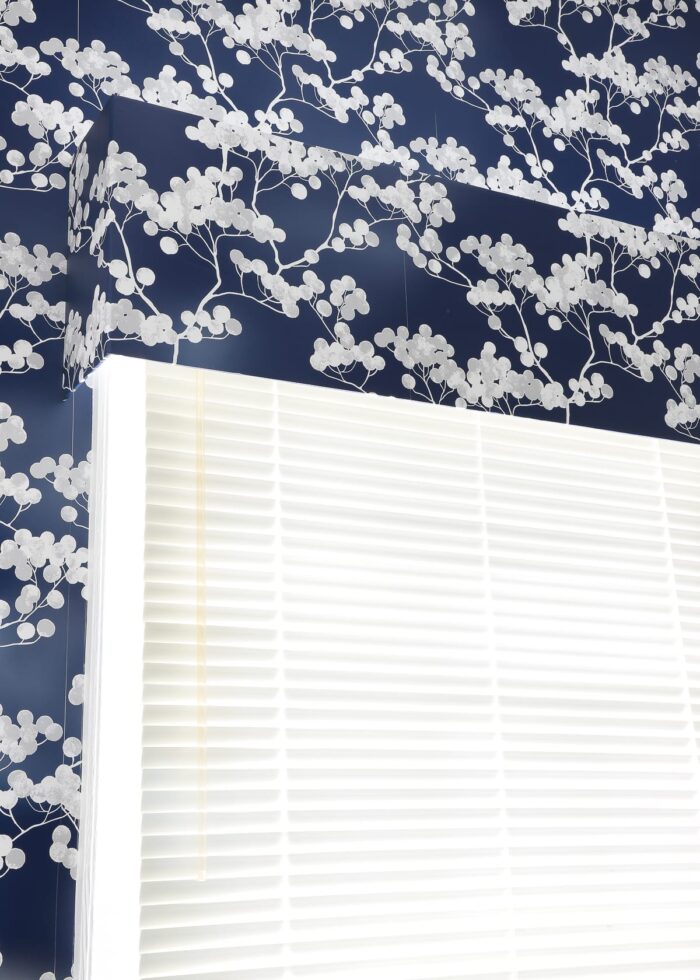
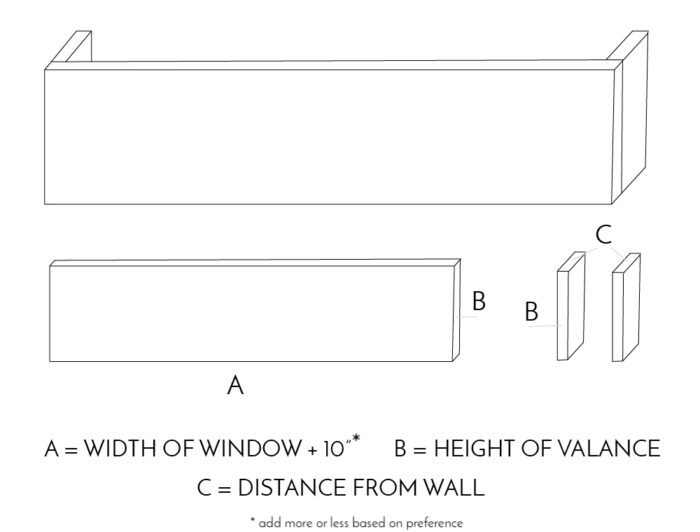
The first step is to measure your window in order to determine the size of your finished window valance (and therefor the size of your cuts). Below is an illustration of how this valance comes together and the three different pieces you’ll need to cut from the foam board.
- Main Board (cut 1) – This is the board that stretches across the front of your window and is the most visible. It is measurement A in the graphic below.
- I suggest adding 5-10″ to your raw window width measurement (equalling 2.5 – 5″ on each side), but you can make this number more/less depending how much wider than your window you want your completed valance to be.
- The height (B measurement) is completely up to you based on how tall your window and ceilings are. My valance is 12″ tall.
- Returns (cut 2) – These are the side panels of your window valance and determine how far out from the wall your valance sits.
- Most returns are between 3 – 8″ deep (mine are 6″), and will be the same height as the front main board.
Cutting the Window Valance from Foam Board
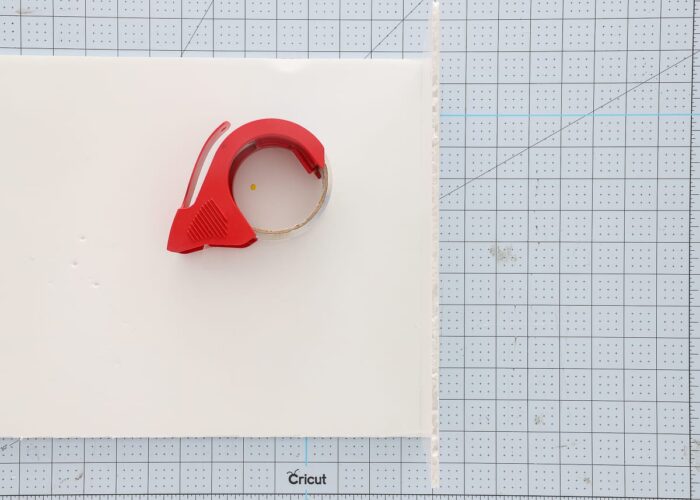
With measurements in hand, use a sharp craft or X-acto knife to cut down the foam board. Since you will need to make several passes to work all the way through the foam board, a long ruler and self-heeling mat really come in handy!
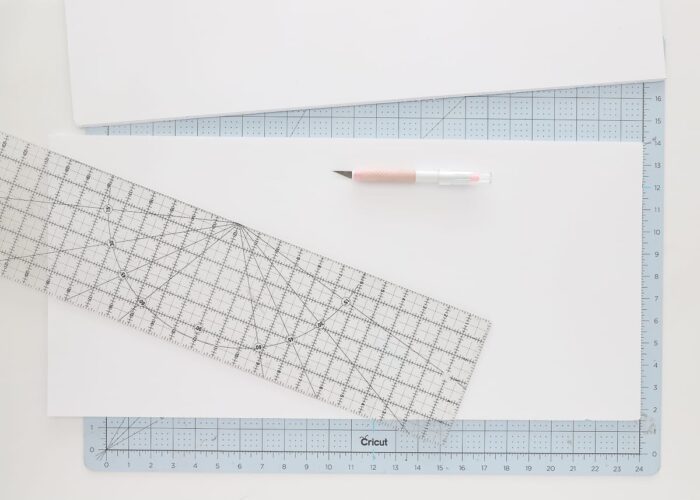
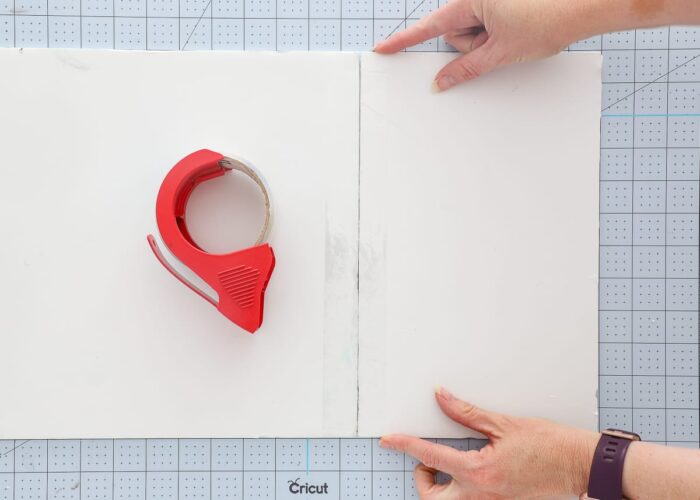
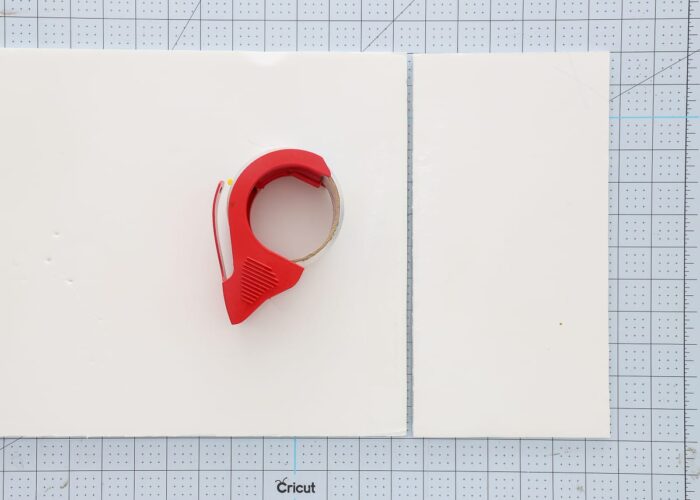
Unless you track down really, really large foam core boards, there’s a very good chance you will need to attach two cuts together in order for the front main board to span the width of your window. In order to do this, be sure you cut the two (or more) sections at the exact same height. Then simply line them up side-by-side and use clear packing tape along the seam (both front/back and up and over the edges). In my experience, clear packing tape is sturdy enough to hold the board firmly in place and can be easily covered with wallpaper or fabric as needed.
Next, cut down the two returns from the foam board according to your measurements.
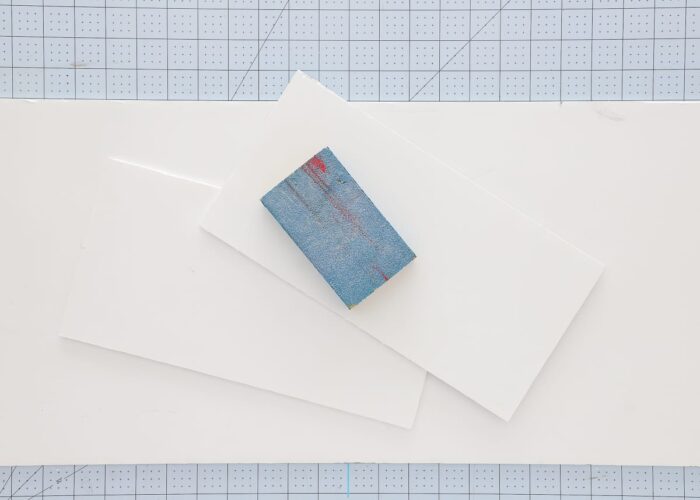
If you find that, after cutting down the boards, the edges are fairly rough and messy, you can use a sanding block to clean them up.
TIP! You might want to “sand” the boards outside, since it can make a good mess!
Assembling the Window Valance
With the foam board cut down to size, it’s time to assemble your window valance by attaching the two returns to either end of the main board. My assembly process may seem a bit strange to you at first…but I promise there is a reason for my method and your valance will turn out just right once complete!
Start by placing a length of clear packing tape along one of the vertical sides of a return board.
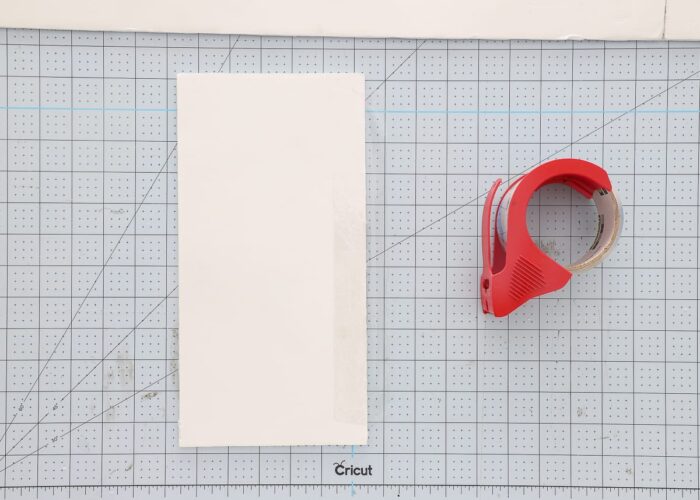
You will then place the return along the backside edge of the main board and wrap the tape to the front. See below for reference:
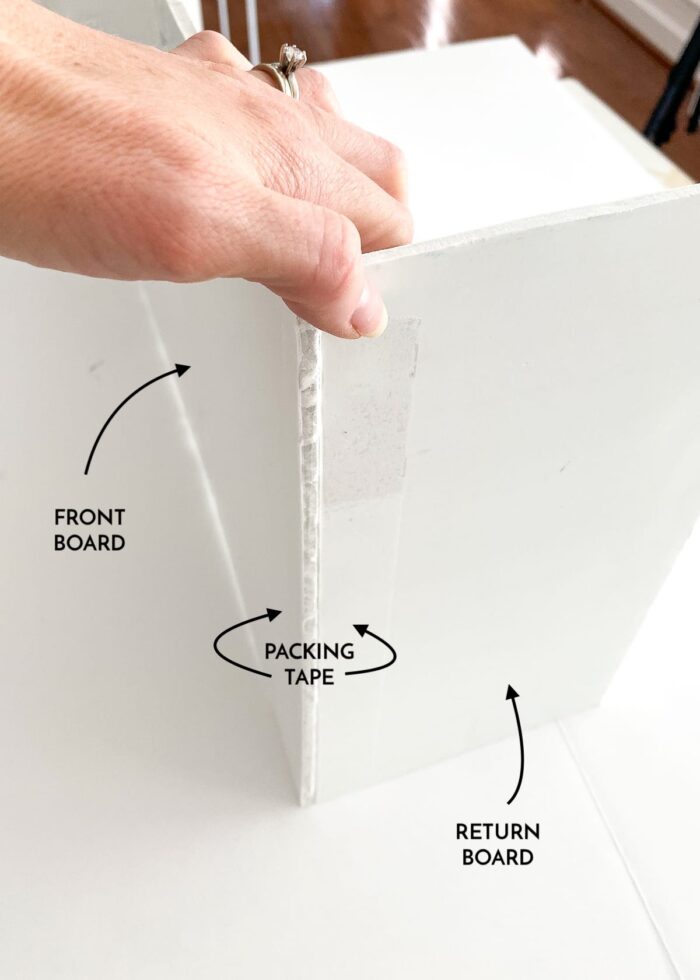
You will want to tape the main board and return board together so that it makes a perfect ninety-degree angle. But with just that single piece of tape, it will not hold there in place…
In fact, the board should be able to fall open flat, leaving a 1/4″ gap (the exact width of the foam core) between the two boards, as shown below. (This is the wrong side facing up. The tape is on the underside, closest to the cutting mat.)
Want to save this post?
There is no need to tape the return board in the standing-up position or tape the other side of the gap. A single stretch of tape on the front side of the valance is sufficient for now. Repeat this process on the other side of the main board with the other return.
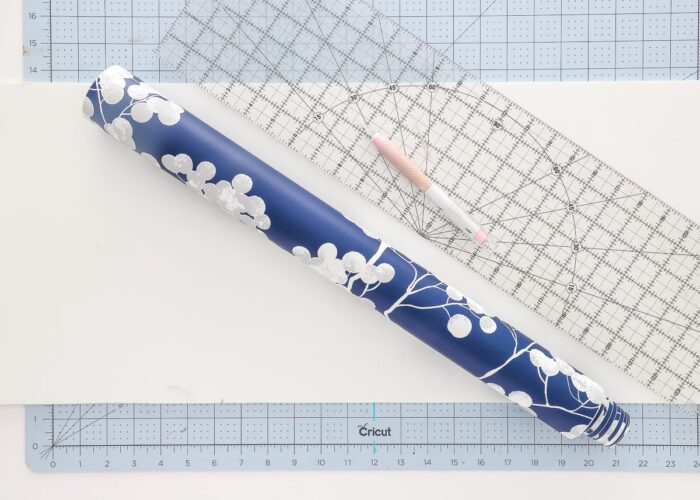
Wrapping the Valance in Wallpaper
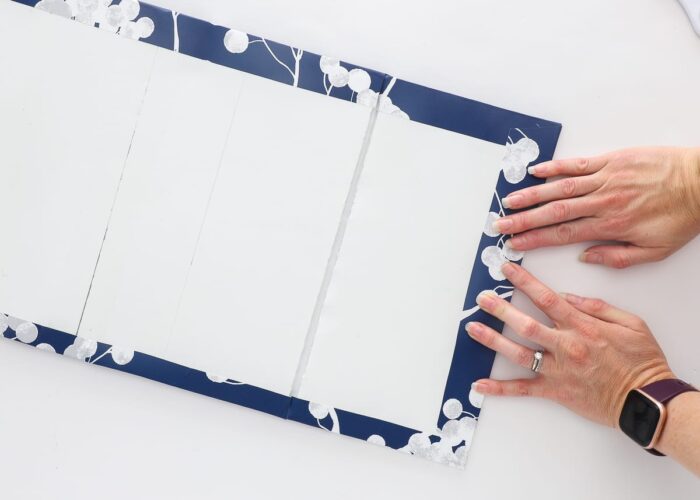
At this point, you should have your main board with the two returns taped on either side (both with that little gap between them). The next step is to wrap the window valance in peel and stick wallpaper to cover up all the seams/tape and create a pretty finished product!
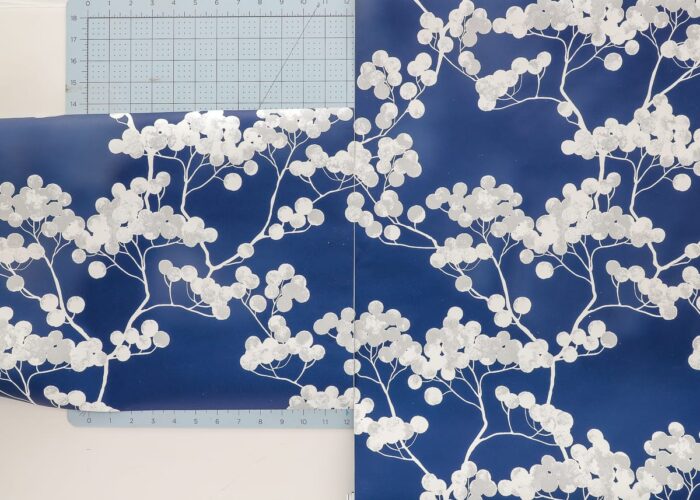
I had just enough wallpaper left over from our wall installation to cover this foam board. However, my pattern runs horizontally across the paper. So instead of just cutting a single stretch of paper to cover the entire valance (which I could have done with an all-over or non-directional paper), I needed to match the pattern side-by-side and make several shorter cuts.
How ever you choose to orient and cut your paper, be sure to cut about 2″ extra in every direction.
With the “right” side of your window valance facing up (the side with the tape on the seams), apply the peel and stick wallpaper to the foam board, letting the edges hang over and smoothing out bubbles with a paper scraper.
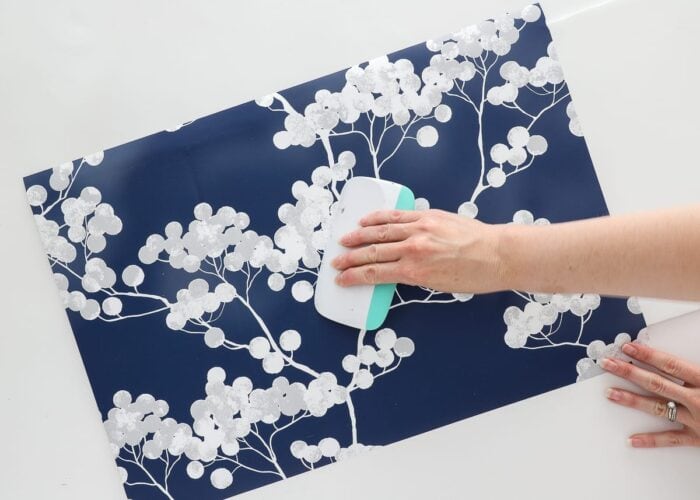
Work carefully across the full width of the valance, matching patterns if needed.

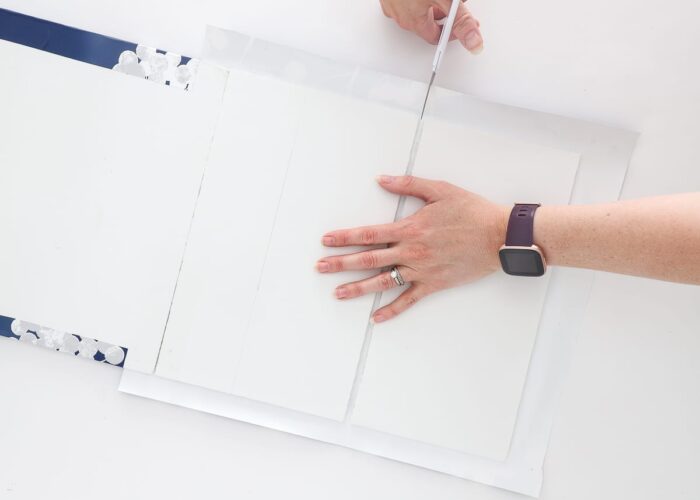
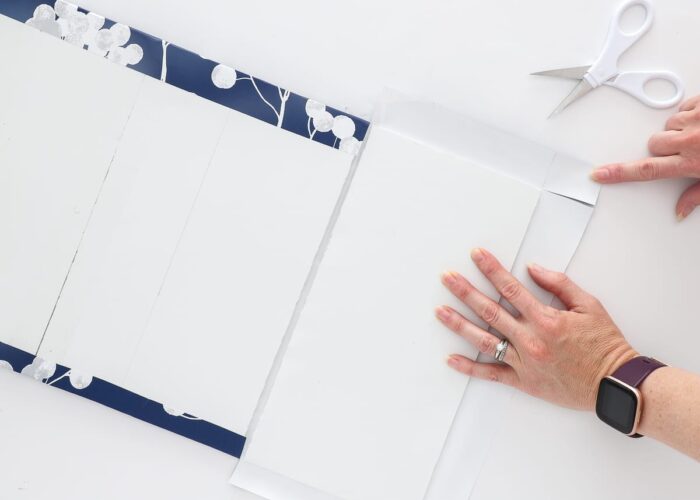
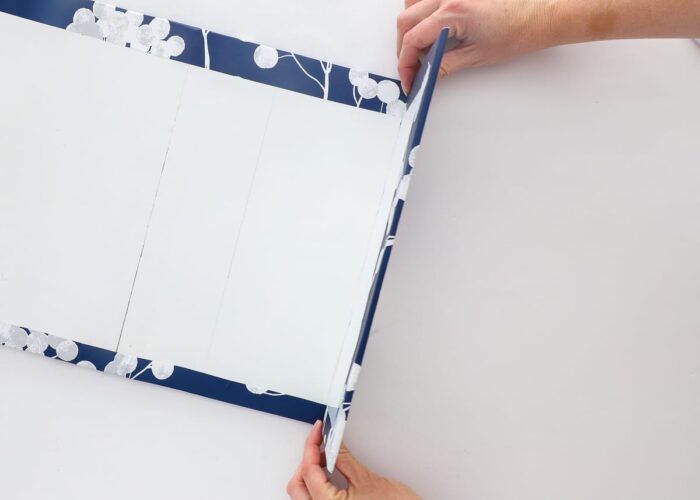
Once you have the paper applied to the front of the valance, flip the entire board over to clean up the edges.
Start from the center of the board and work outwards, folding the excess paper over the edge and toward the back, sticking it in place. Once you get to the returns, use the following instructions to make clean and tidy folds:

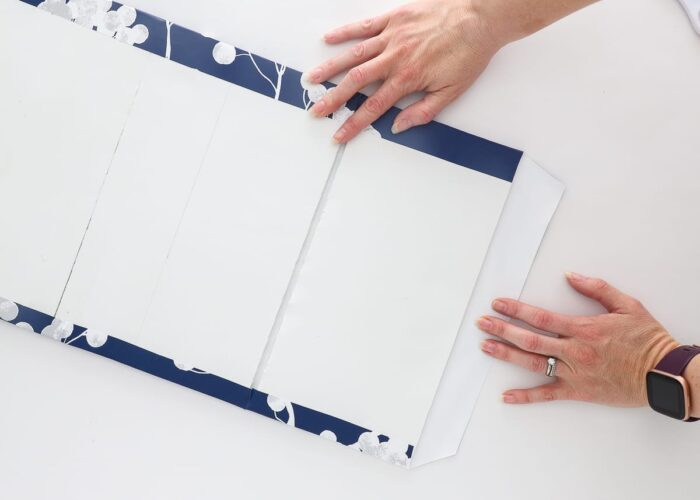
Once you have the paper all folded to the back, your window valance with foam board is complete and ready for hanging!
NOTE: There is nothing holding my window valance at 90 degrees (shown below). I just have it propped up that way. Thanks to that gap in the boards, the valance bends as needed, but can also lay flat (which is easier for assembly!)

Hanging the Window Valance
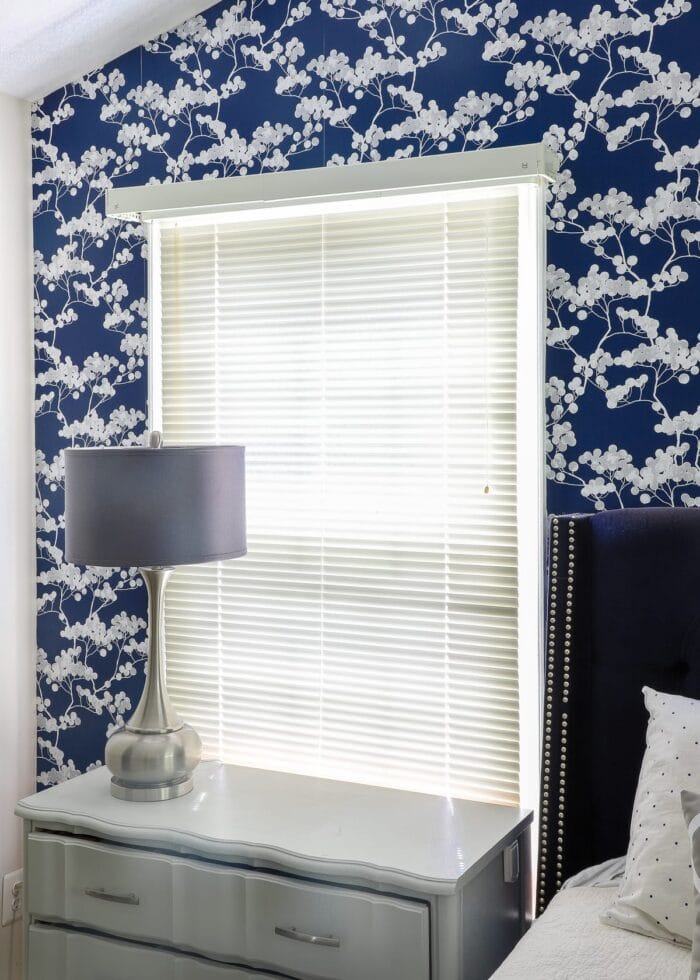
As I mentioned earlier, our windows already had valance hardware in place.
When I removed the front panel, these brackets are what remained behind affixed to the wall.
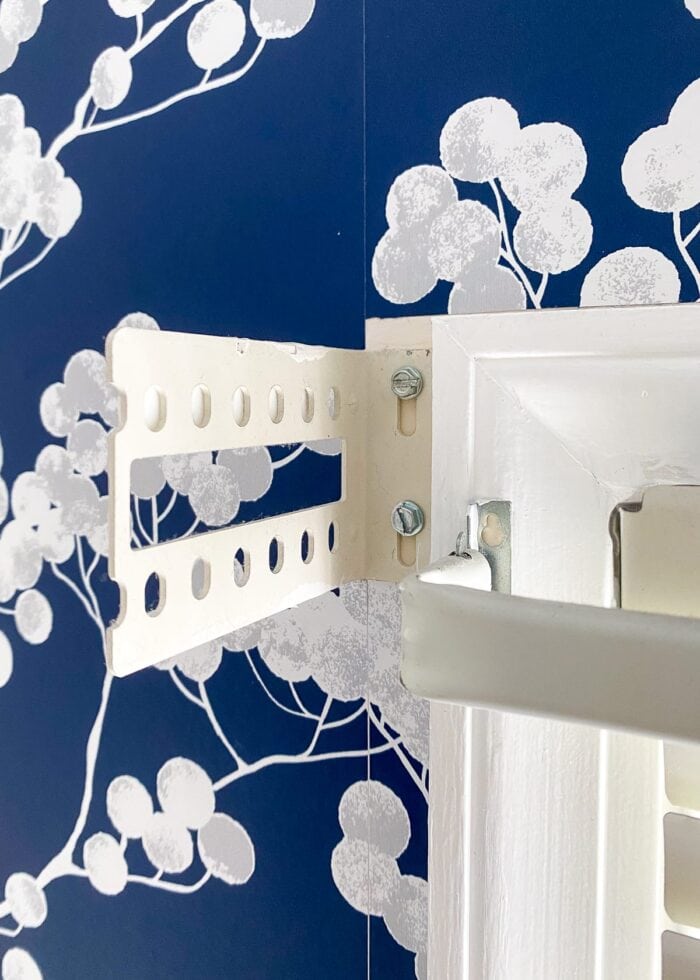
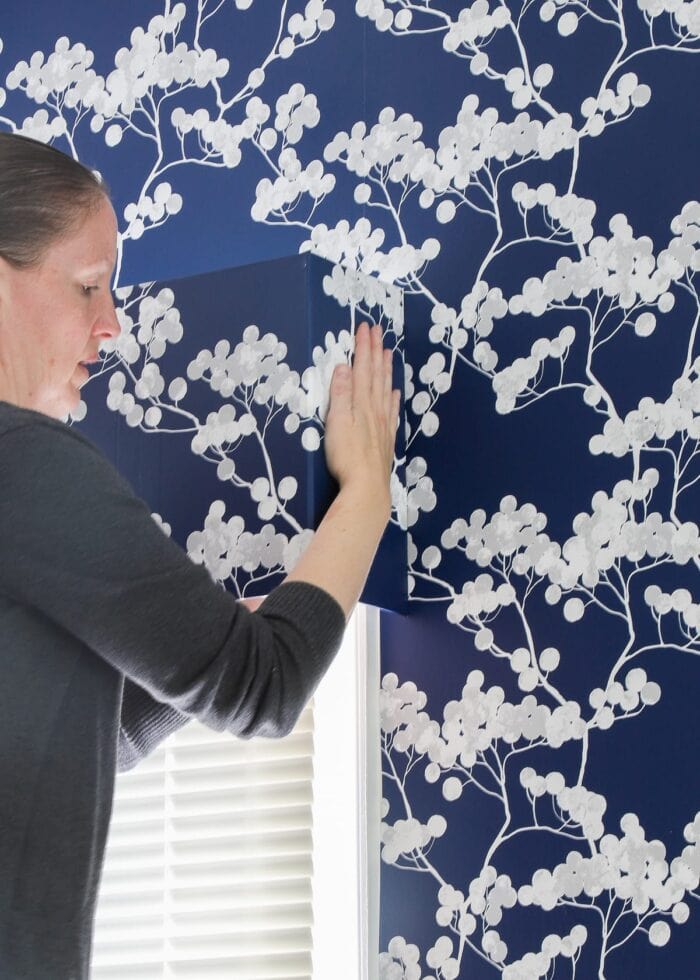
To affix my window valance, I simply used Command Strips on the outside of the brackets…
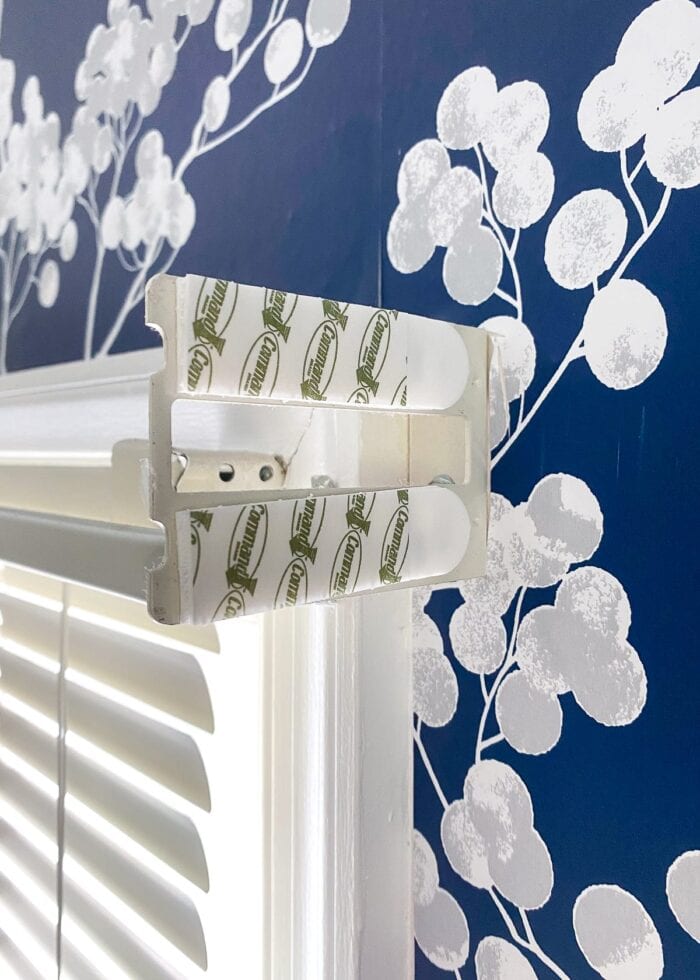
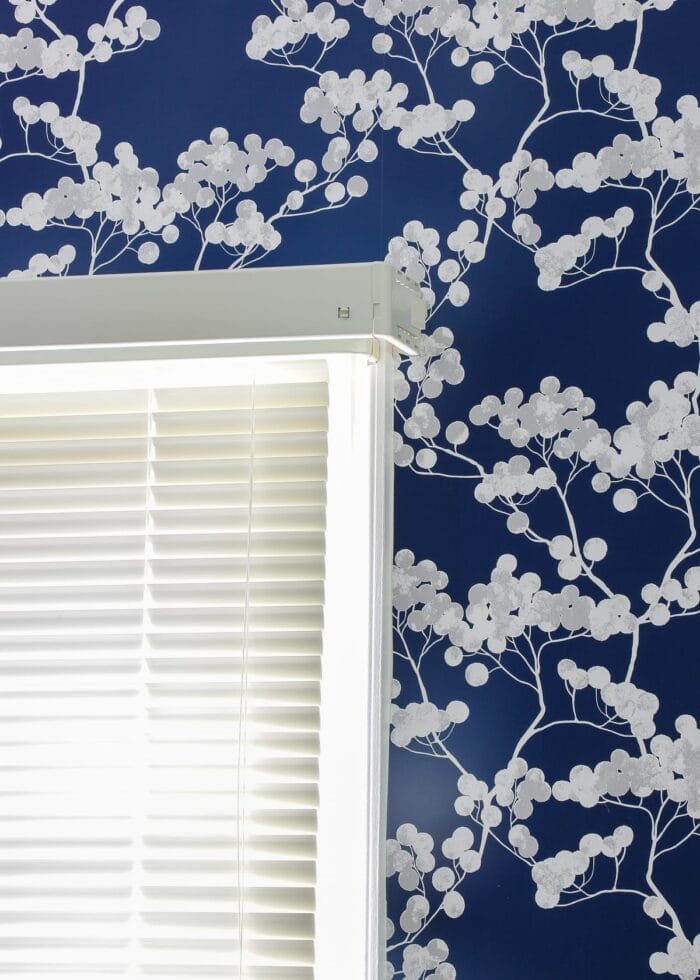
…and stuck the inside of the returns directly to them (with the valance flush to the wall along the back). My window valance is held up only on the sides; I do not have anything supporting the valance along the center. It’s sooooo lightweight that it’s not an issue on this skinny window.
If you do not already have hardware in place, there are a few options for hanging your window valance.
- Place Command Strips right along the (outside of the) window moulding. This method means your valance would not be not any wider than your window+trim.
- Install your own valance hardware (you can find similar here). This would mean screwing into your wall but is likely the easiest way to hang your valance.
- You could hang simple L-brackets from the hardware store (and affix Command Strips to the long flat surface).
- Use a screw or Command Strip to place a wood block (or something similar) alongside your window at whatever width you want your valance (and then affix Command Strips along the outside edge of the block to attach to the valance).
In the past, I’ve sewn valances from fabric and hung them on curtain rods (HERE) and made thicker valances from foam insulation and wrapped them in fabric (HERE). Although both of those valance projects are easy, this one is REALLY easy.
Not only did this simple valance come together in just an hour (and that was with taking pictures all along the way!), but thanks to the combination of foam board+wallpaper, it’s suuuuuper lightweight (making it easy to hang). What I love most though is that because I used supplies I already had on hand, it was a completely free project. So our window looks so much nicer, AND I got some materials out of my craft room…win win!
Finally, when we move and this window valance doesn’t fit our new house (which is practically a guarantee), I can toss it knowing that I didn’t invest in some expensive, custom window treatment!
Other Great Window DIYs To Try
Looking for other great solutions for your windows? I've got you covered with these other smart DIYs!
- How to Make a Window Valance with Foam Insulation
- How to Sew a Window Valance
- How to Make a Window Valance with Foam Core Board & Wallpaper
- DIY Modern Wood Valance
- DIY Cornice Box with Scalloped Edges
- How to Hem Curtains | A Foolproof Method!
- How to Hem Curtains Without Sewing
- How to Widen Store Bought Curtains | An Easy Fix!
- How to Remove Vertical Blinds
- How to Install Your Own Blinds or Shades
- Roller Shades for Windows (When Curtains Aren’t an Option!)
- How to Hang a Curtain Rod Without Drilling into the Wall
- How to Hang Curtains On Rings (With Perfect Results!)
- How to Hang Curtains In a Corner Window
- How to Completely Cover Up a Perfectly Good Window
- 6 Easy DIY Window Valance Ideas (You Can Totally Make In an Afternoon)
If you have some naked windows that are begging for something and curtains just aren’t the answer, give this simple window valance with foam board a try! For how chic it looks, you’d never guess it’s made from a science fair board and leftover wallpaper. I may never go back to “real” wood window boxes again!
Megan
5 Comments on “How to Make a Window Valance with Foam Board & Wallpaper”
Great tutorial, as is your other valence tutorial! Question – do you think you can you wrap this foam board in fabric or will fabric be too heavy for it?
Hi Kristen,
Sorry for the delay in getting to your question here.
I think you could definitely try it. I would likely skip foam and pins (usually used when doing fabric), and go straight to a strong spray adhesive to get the fabric to sit tight against the board. I wouldn’t choose anything heavy like a velvet or textured home decor fabric, but I definitely think it could work with quilting cotton and even lightweight home drapery fabric.
If you give it a try, do let me know how it goes!Megan
what glue can I use with the form valance for non stick wall paper? Your tutorials are wonderful.
Hello! I was looking for EXACTLY this tutorial for my daughters room — thanks so much for all the detail provided 🙂 The only thing I plan on doing differently is adding a top (she’s sensitive to light when she sleeps and I want to block out the spillage over her current curtains) — any tips or thoughts from your experience with these? Due to the shape of the window / wall / sloped ceilings in her room the sides will barely be able to be seen, so I’m thinking if I do the same step for the top as you did for your sides (with the extra space for it to fold over on it’s own) that might work better for me. Curious as to your thoughts, though 🙂
Do you think I could make this with wood and wallpaper? I’m putting it in a kitchen and fear the foam wont be durable enough. Thanks!