How to Widen Store Bought Curtains | An Easy Fix!
You all have heard me say that as a renter and frequent mover, one of the things we reeeeaaaallly don’t like to invest a ton of money in is curtains/widow treatments. Why? Because no matter how neutral or transplantable a curtain may seem; without fail, they rarely work from home to home without some modification. The right curtains for one space can be completely wrong for another space, especially when you consider the width of the window you’re working with. That said, I am also a pretty firm believer that hanging curtains in a rental is one of the main ways to make it feel more personal and like home when it comes to window treatments, which is why I am constantly on the lookout for super budget-friendly ways to dress our windows. Stores like HomeGoods, TJMaxx and Marshalls tend to have curtain options at a decent price; however, I’ve always found them to be kinda…meh…once they are hung up. Anyone else? Today, I want to show you an easy way to widen store-bought curtains to fit the width of your windows…a trick that can help make those inexpensive curtains much more stylish and suitable for your space! Whether you’re working with sheer curtains, cotton, velvet curtains, silk, polyester, or lightweight panels, these step-by-step instructions will be sure to upgrade the function of your curtains by adjusting the curtain width without sacrificing style.
First…a Little Background
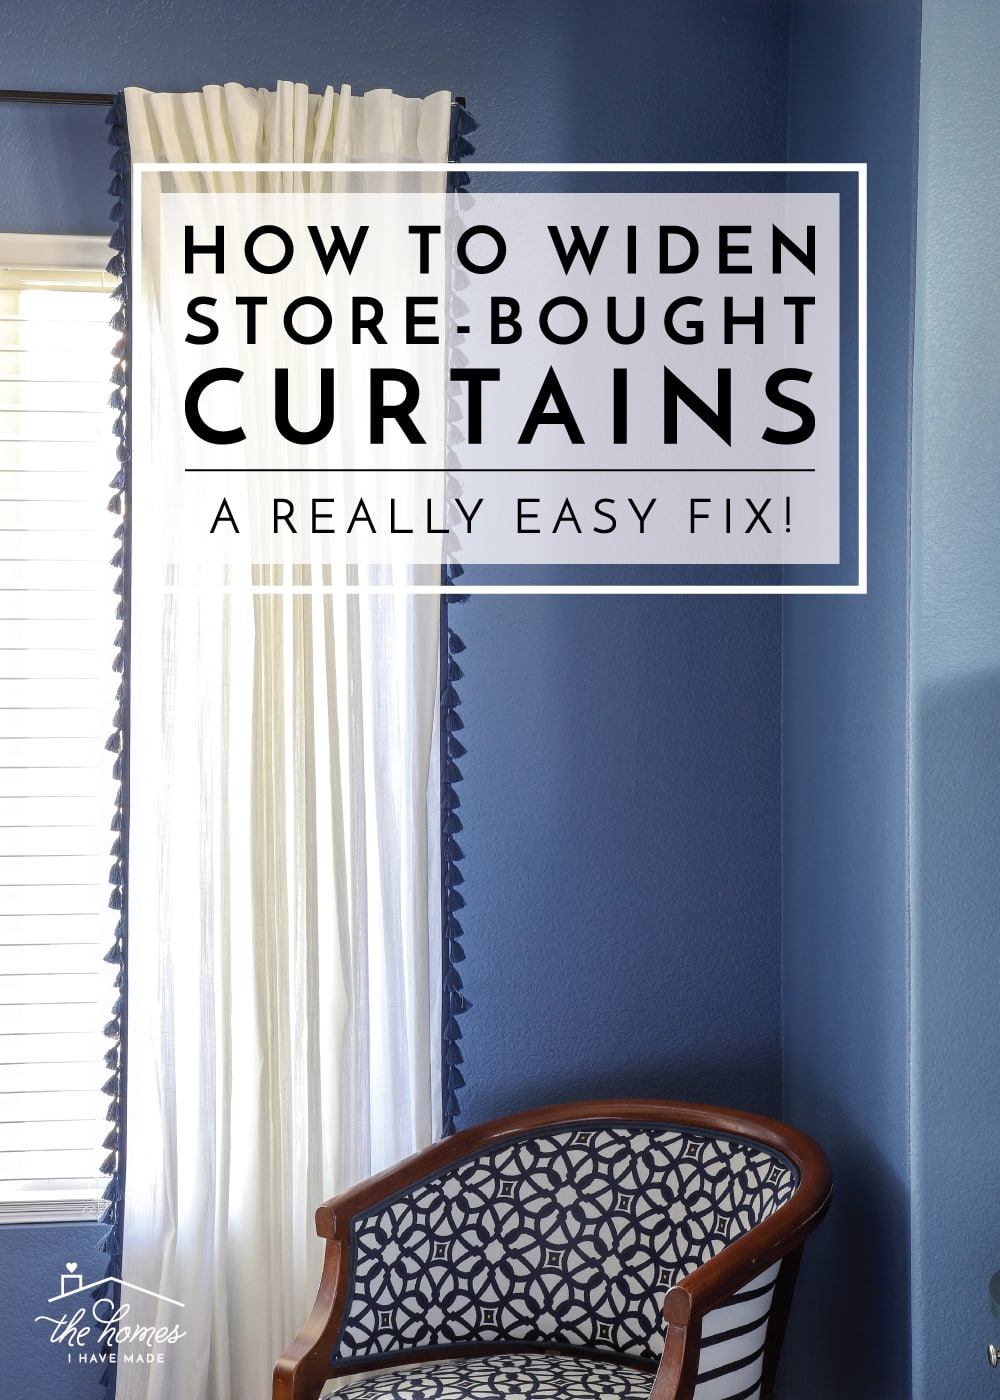
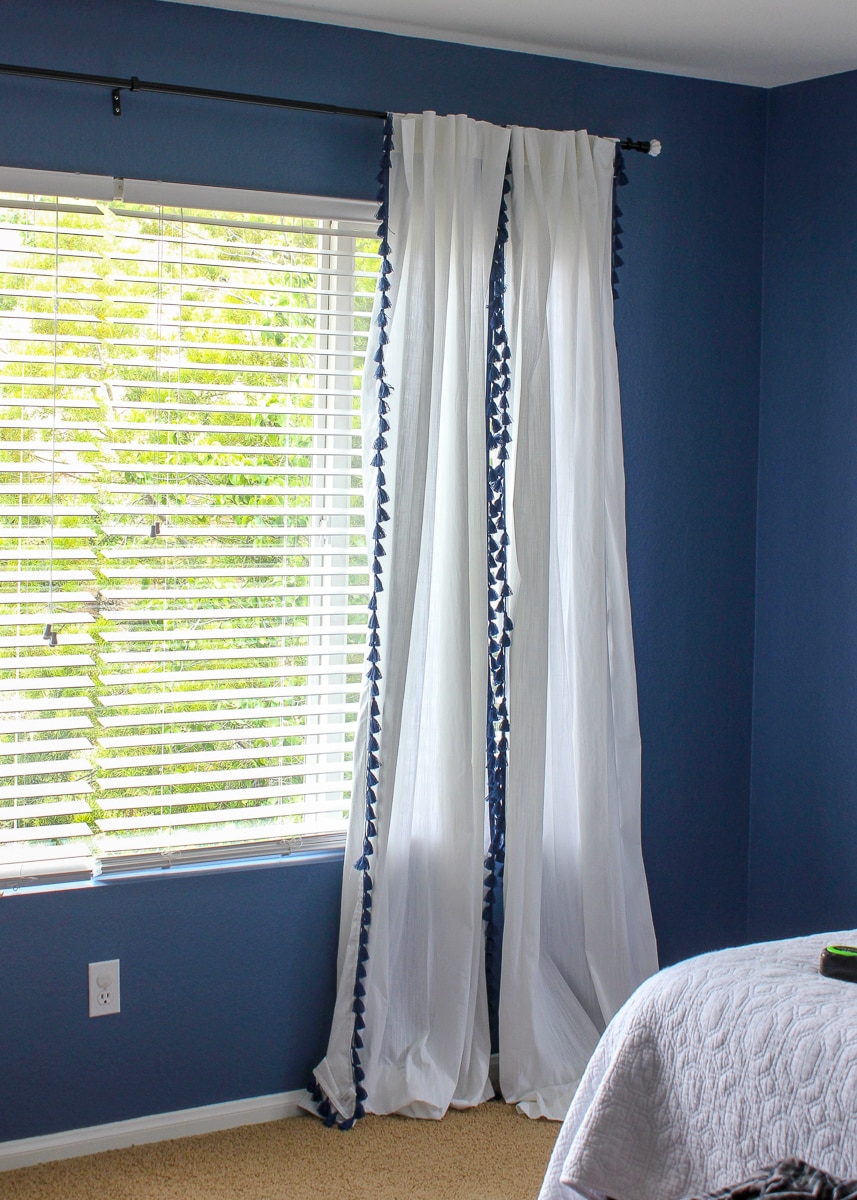
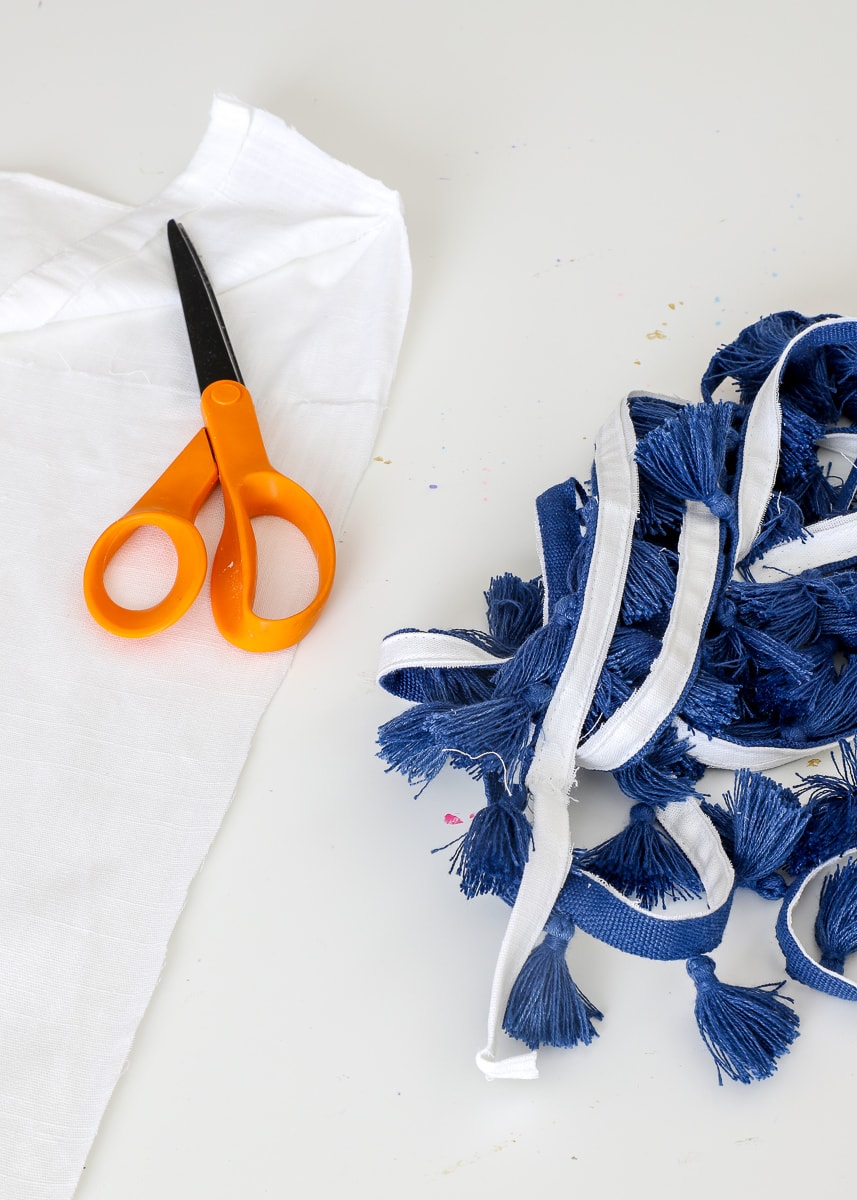
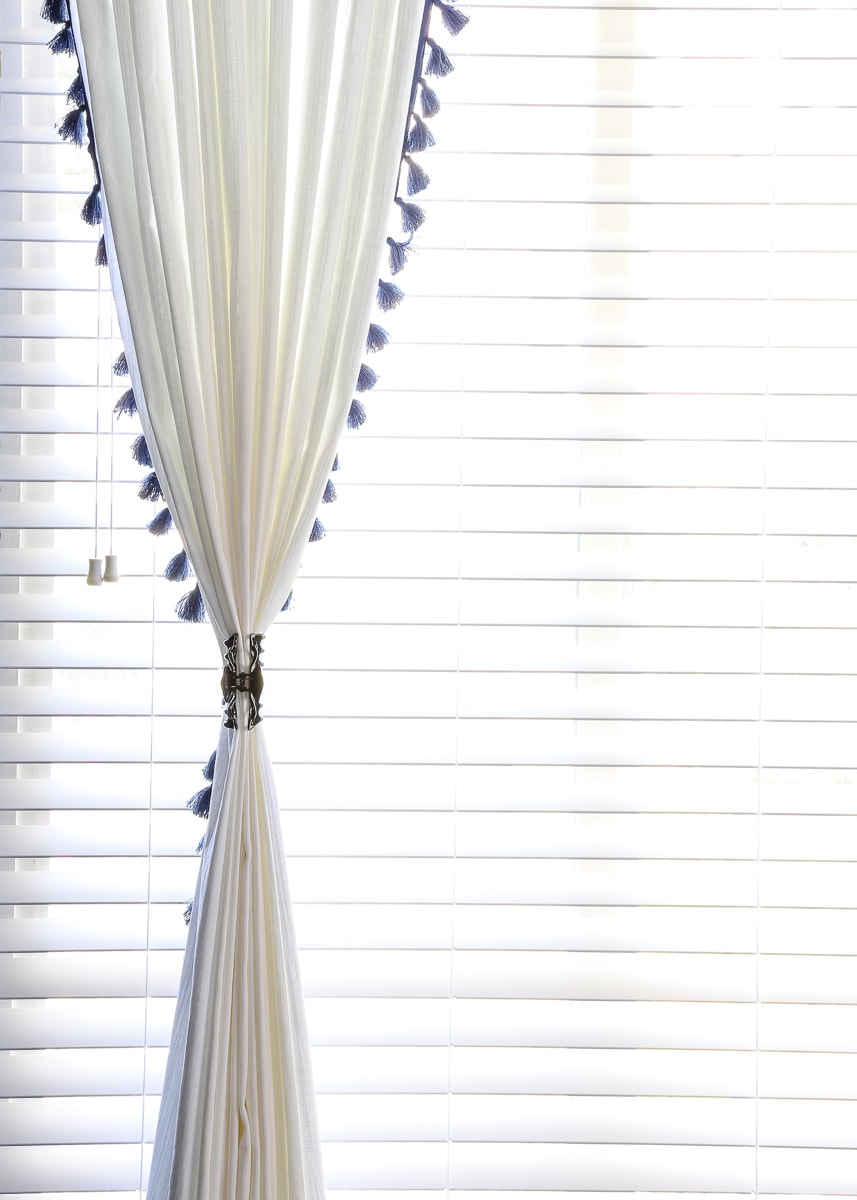
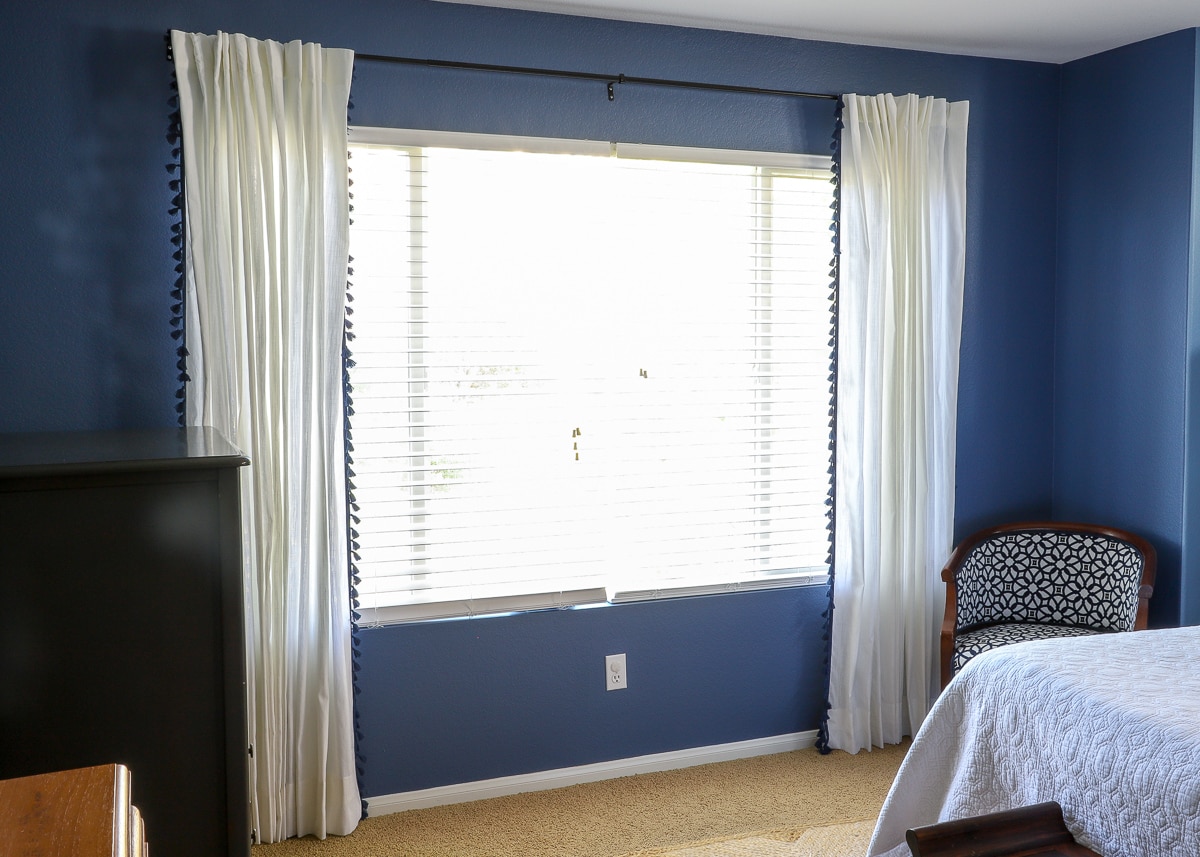
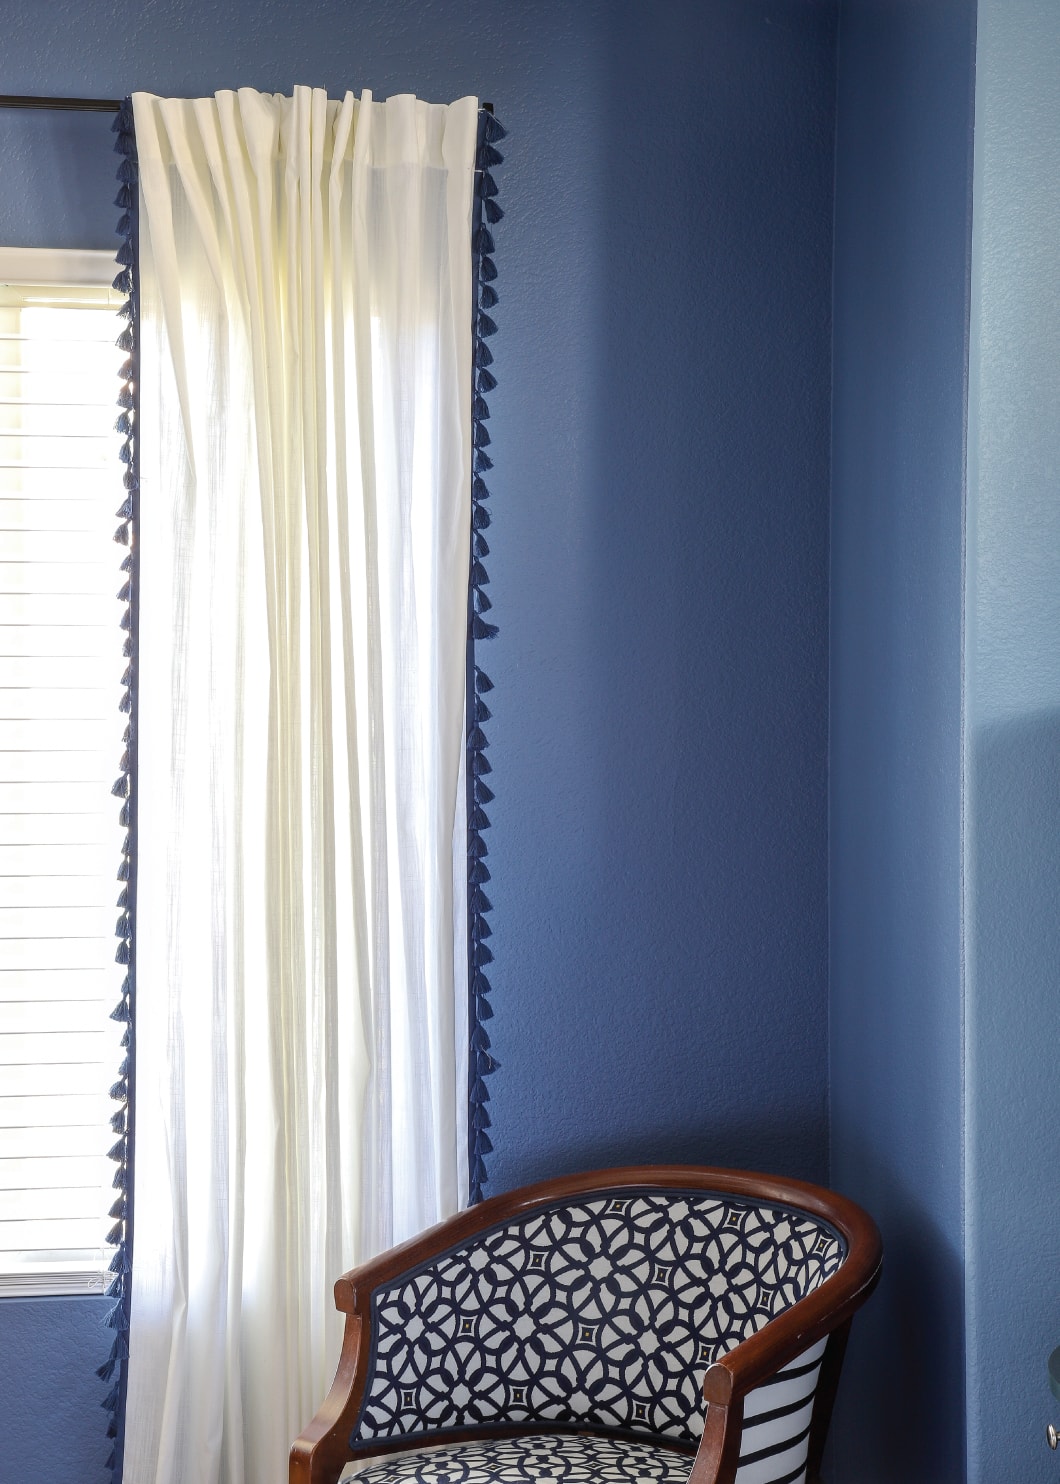
When we first moved in a few years ago and I was sourcing all sorts of curtain options for the countless windows in this house, I came upon these adorable white linen panels with navy tassels at HomeGoods. Measuring 96×54″ for $20/panel, I thought they’d be the perfect addition to our master bedroom. When I hung up one panel on each side though, I was so disappointed by how…dinky…they looked. Although they measured the same as other panels throughout our house, the large windows combined with the linen-like fabric made these panels look awkward and insufficient. I was hooked on that tassel trim though, so I decided to buy two more panels, on the hopes that I could use the combined width of multiple panels to fit the wide windows and spruce it up a bit.
But when I hung the white panels side-by-side, I realized the pom-pom trim I loved so much was keeping them from looking like a cohesive unit. ]]
Thankfully, joining two curtain panels into one large curtain panel is pretty easy…and it’s the perfect way to customize not-so-great off-the-shelf curtains for your specific windows! Let me show you how to do it!
Supplies Needed
To widen a store-bought curtain panel, you will need:
- Curtain panels – 2 (or more) of the same exact panel
- Sewing machine
- Coordinating thread
- Basic sewing tools: scissors, pins, seam ripper, iron, and ironing board
Joining 2 Curtain Panels Together
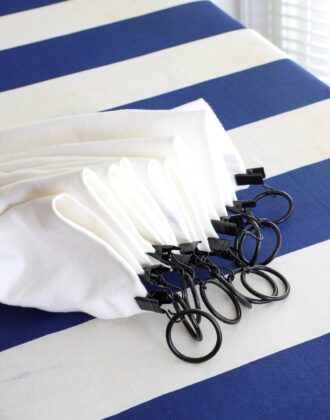
Below are the two curtain panels I am going to join into one solid curtain panel to better fit the width of my windows. The goal here is to make extra wide curtains from two curtain panels. Every curtain panel is going to be constructed a little differently, but these steps should work no matter what kind of top (tabs, rod-pocket, rings) or other design details you’re dealing with!
Step 1: Align Curtain Panels
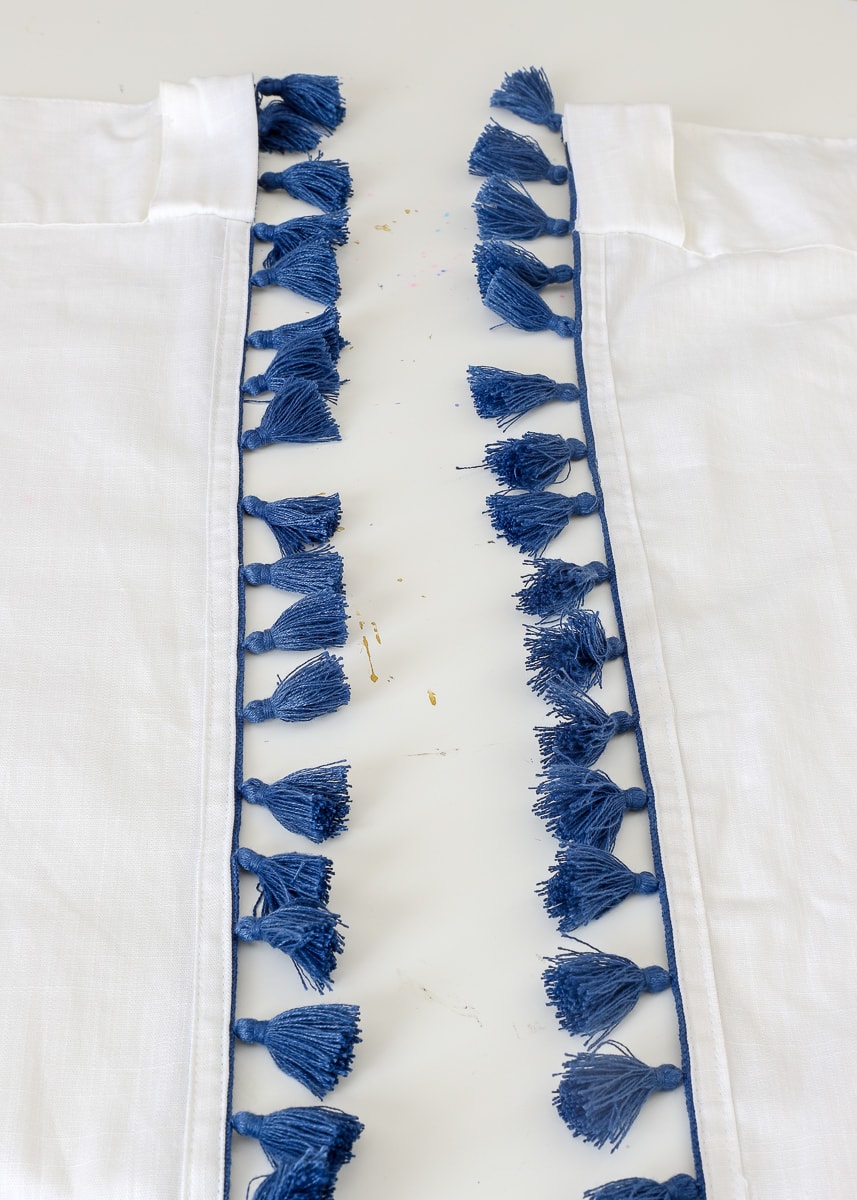
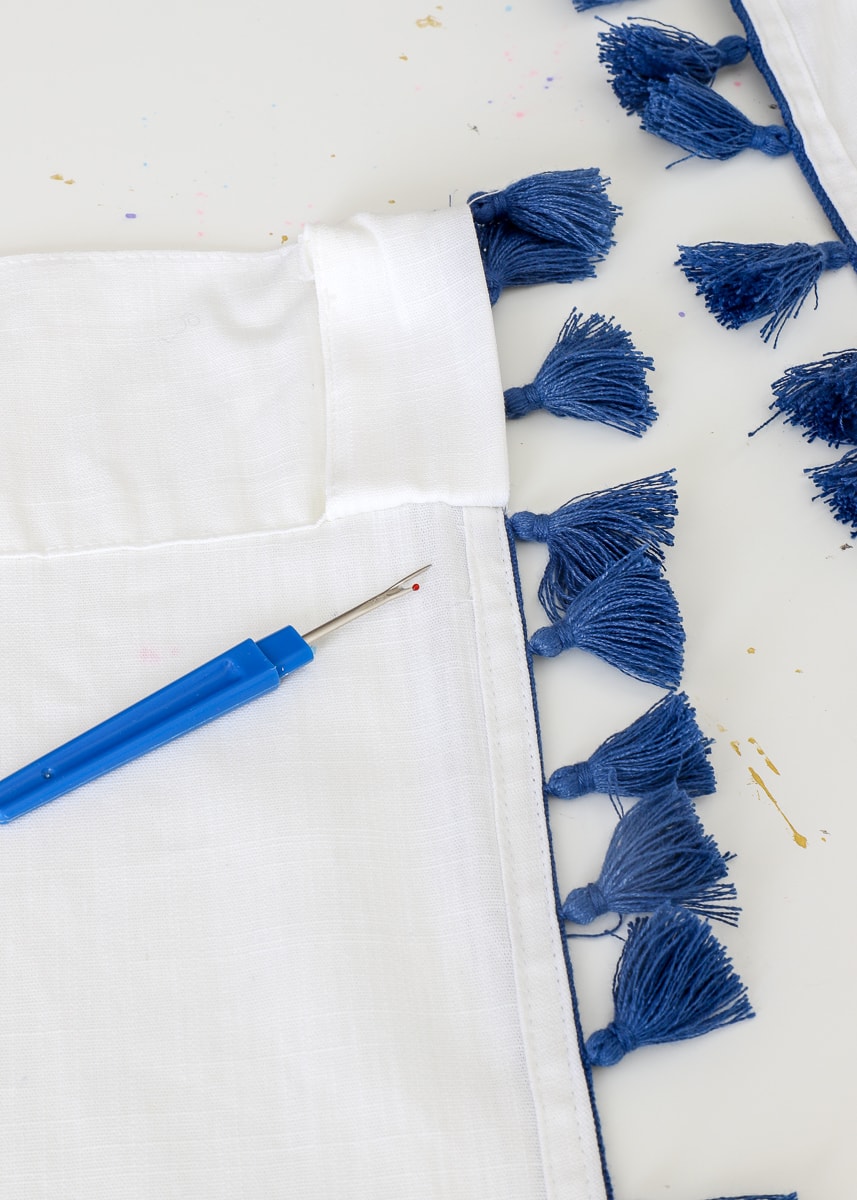
Place your two curtain panels, right-side down and side-by-side, on your work surface. The innermost side of each panel will be trimmed and sewed together. (So…you’ll be un-doing the left side of one panel and the right side of the other.)
Step 2: Analyze Original Construction Method
Before you grab your seam ripper and start pulling apart your curtain panels, spend some time analyzing them to see how they were originally constructed. Without too much effort, you should be able to tell the order in which everything was sewn together.
Here’s how my curtains were originally constructed from start to finish:
- the top hem and bottom hems were sewn in place
- the blue tassel trim was added along the sides
- the tab was tacked on last
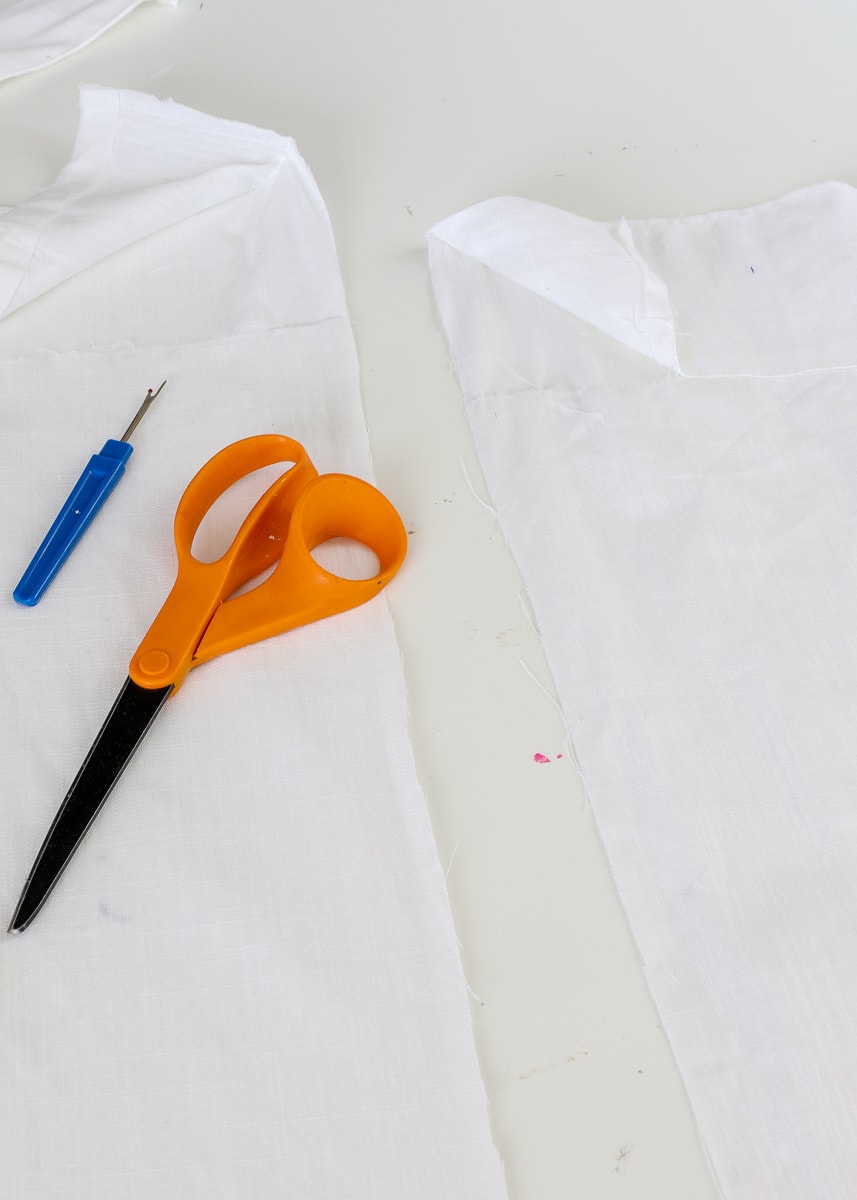
Step 3: Create Raw Edges on Both Panels
Your goal is to un-do everything along one side of your curtain panel so that you have a clean raw edge to sew to the other panel, and it’s easiest if you do it in the reverse order it was put together. So…I first carefully removed the tab top by simply pulling out the stitching with my seam ripper…
I then un-furled the top hem about 8-10″. We will just be sewing down the side of the curtain, so only pull out enough to give you room to work.
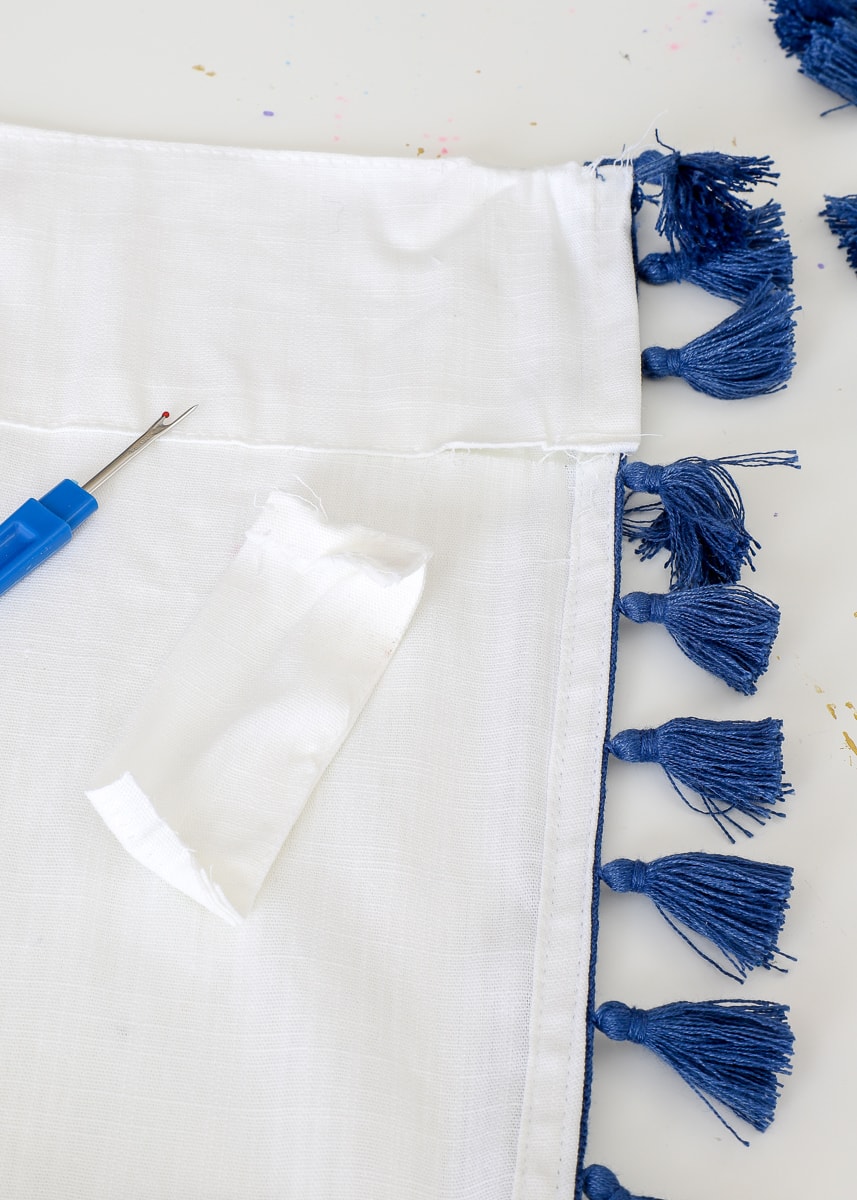
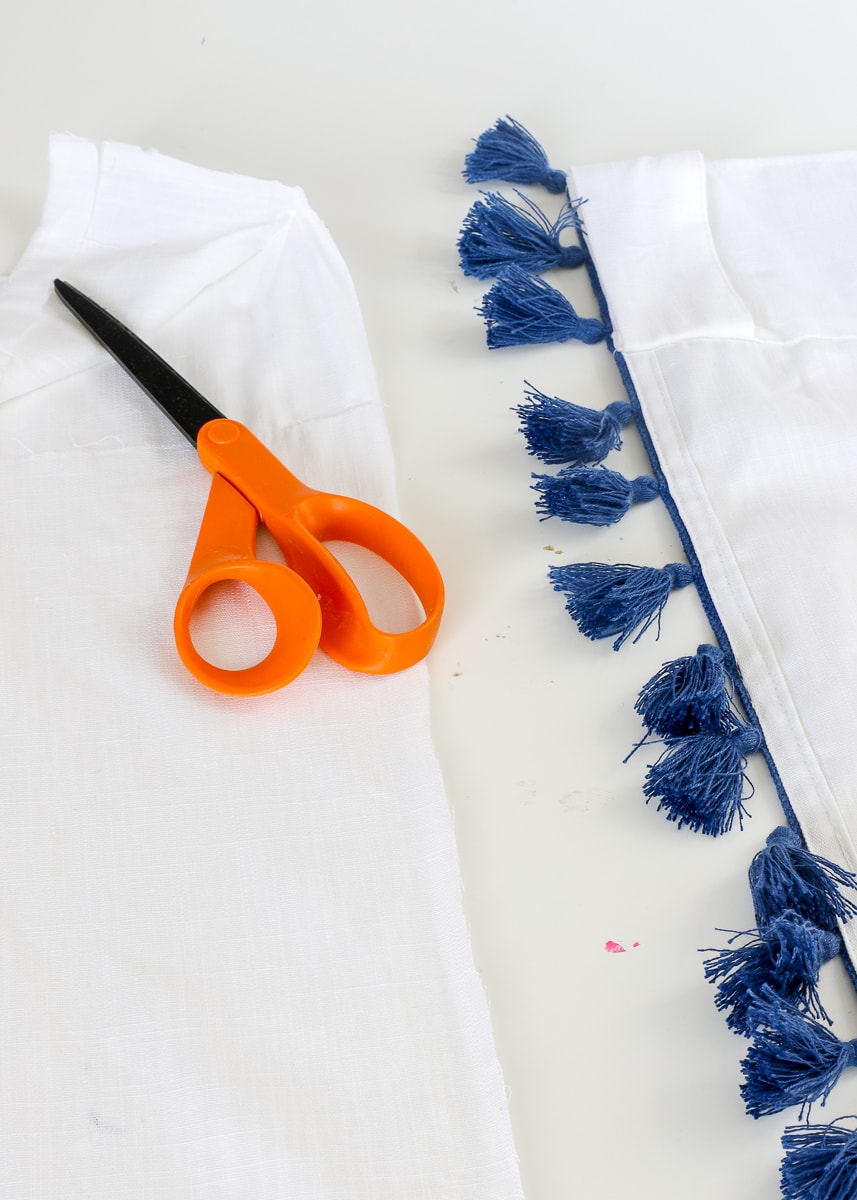
When I went to un-do my hem, I realized my tassel trim was on top of the finished hem…
…so I went ahead and trimmed it all off at this point.
NOTE: If you don’t have any side trim and just have a simple hem on the side of your curtains, you have a choice. You can either trim the hem off like I did with my trim (quicker and easier), or you can use your seam ripper to undo all the stitching holding the side seam in place (longer but more “correct.”) Either way, you want to have a flat, raw edge down the length of your curtain when you’re done.
With the trim off, I could undo about 8-10″ of the bottom hem as well.

At this point, you should have carefully un-done any hems or stitching along the top (only 8-10″ in), side (the whole length of the curtain panel) and bottom (only 8-10″ in) of the curtain panel, creating a clean raw edge down one side.
Next, repeat the exact same steps on the other curtain panel. Take caution to pull apart the OTHER side of the curtain so that you are left with raw edges down the middle of your two panels.
Want to save this post?
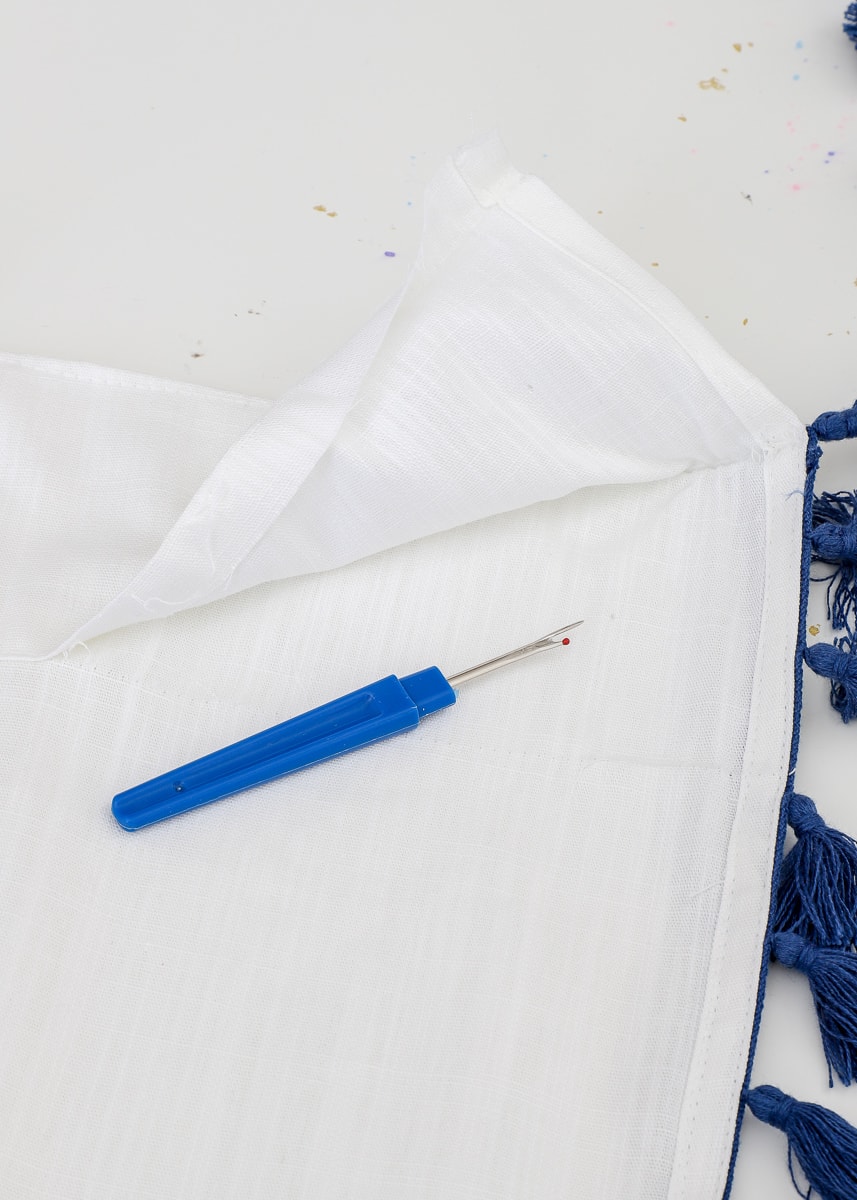
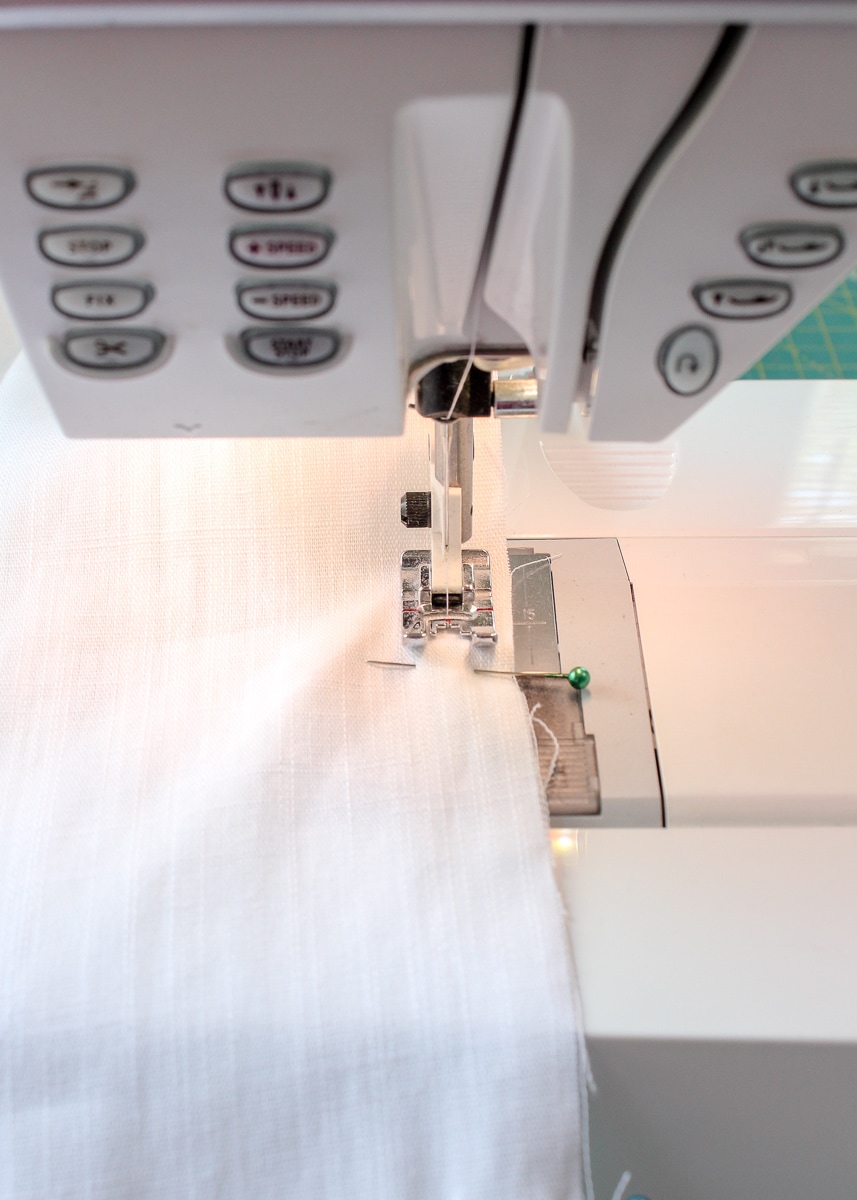
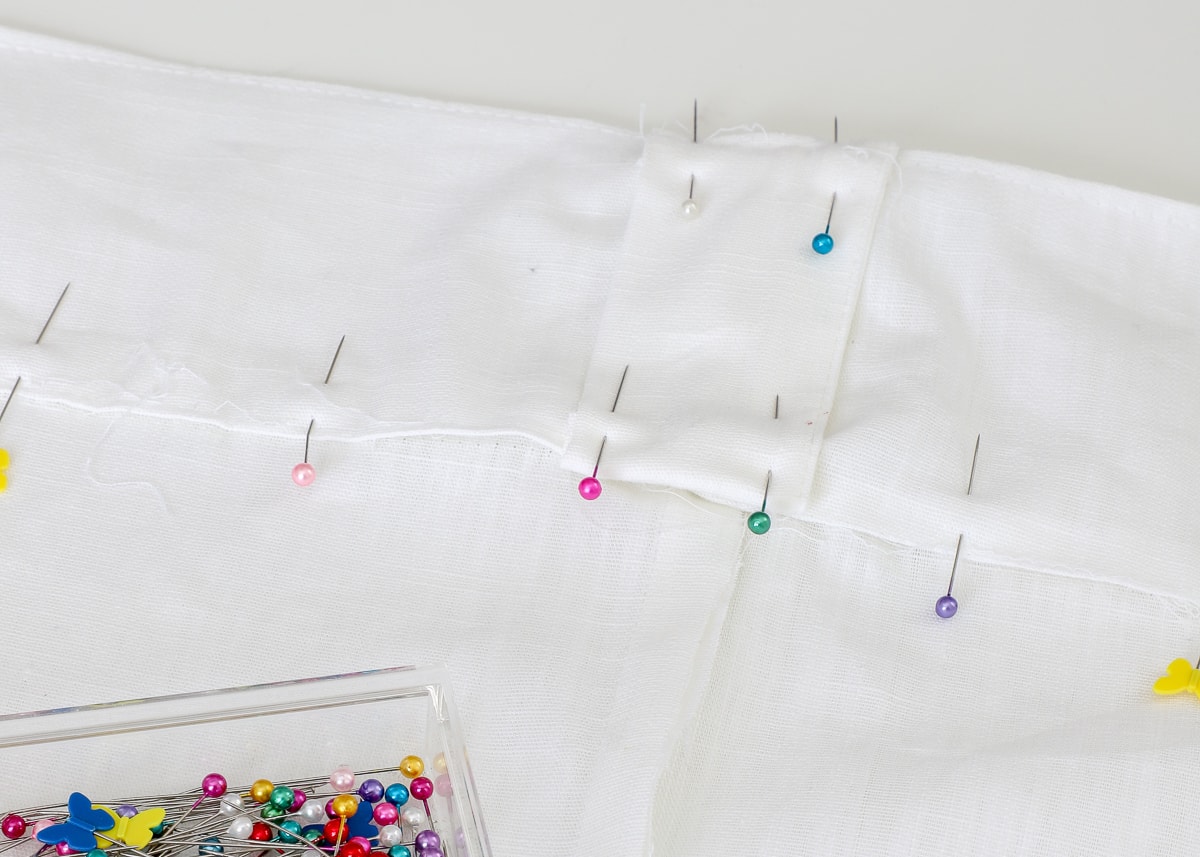
Step 4: Sew Panels Together
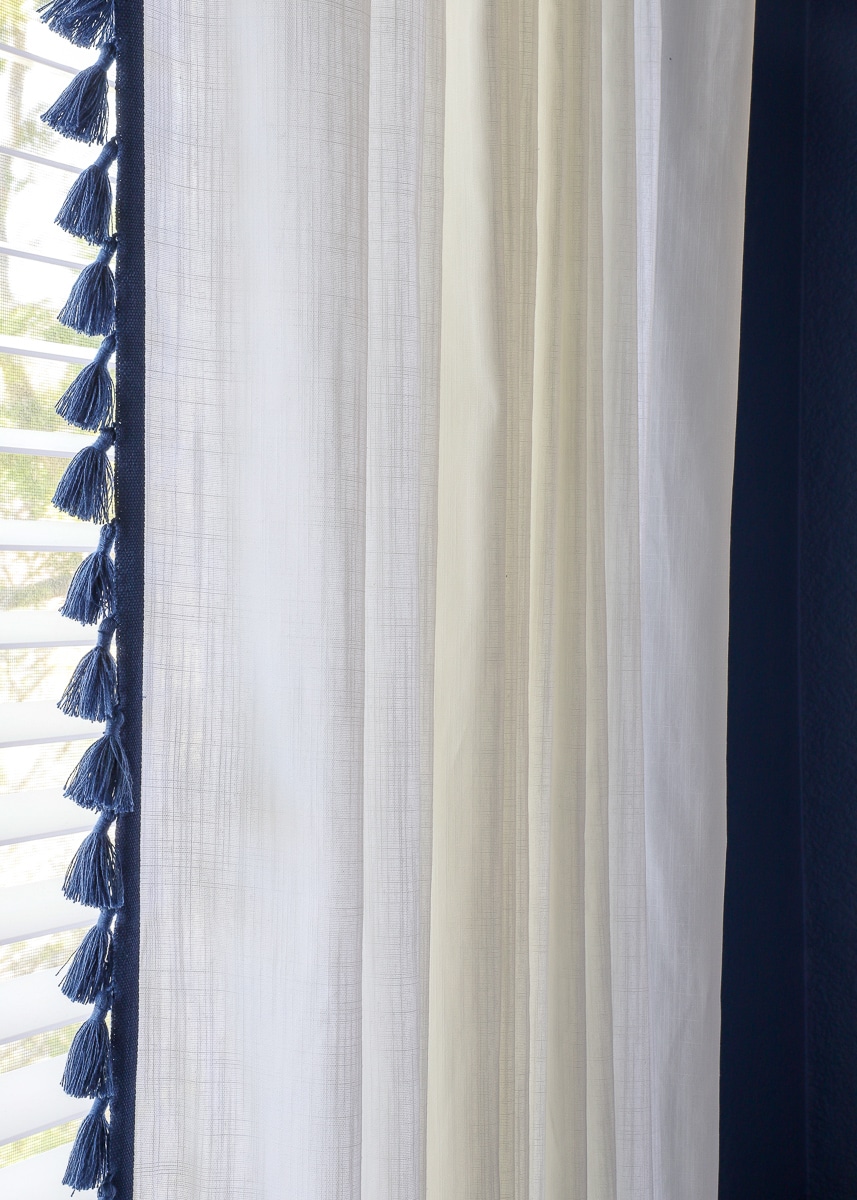
Now, with RIGHT SIDES together, pin the two panels together down the entire length of the curtain. If possible, line up any hem creases or pattern details from one panel to the other in order to make your curtain look more seamless when complete.
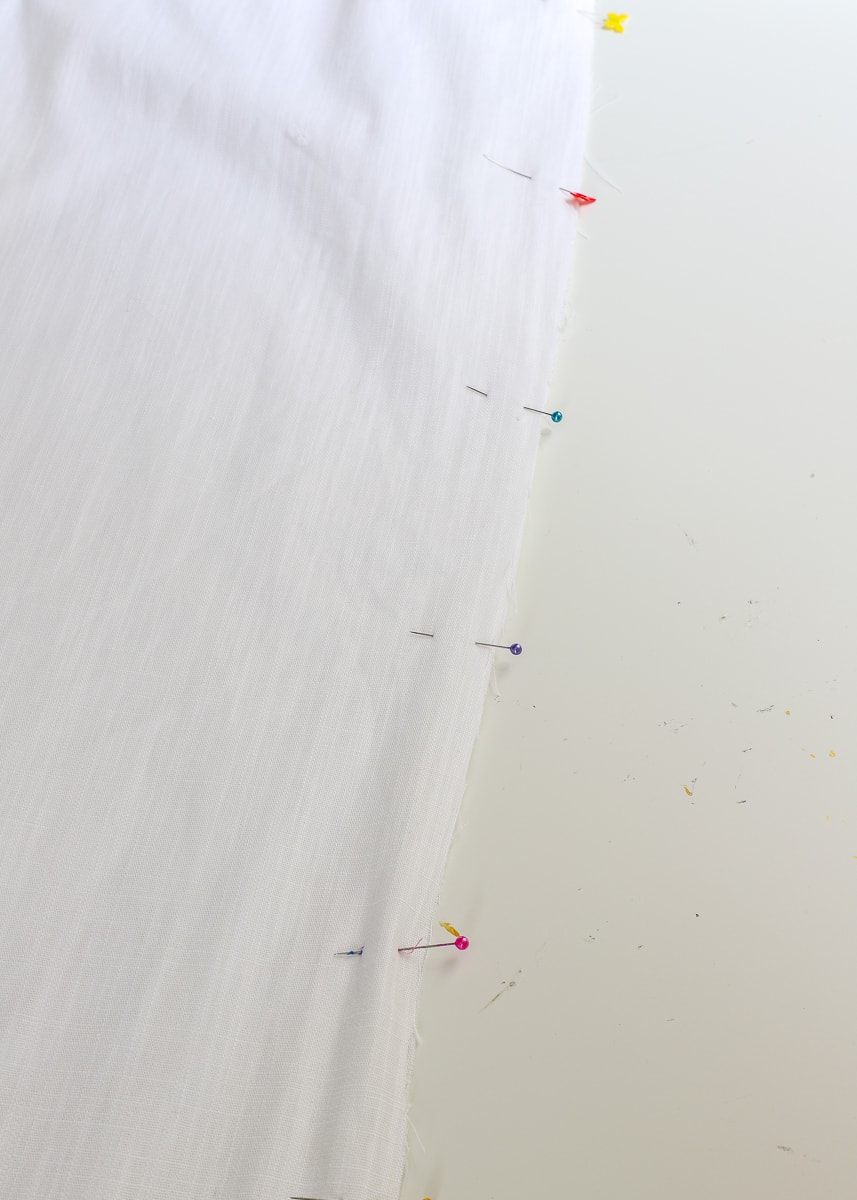
With coordinating thread, sew down the length of your curtain panel.
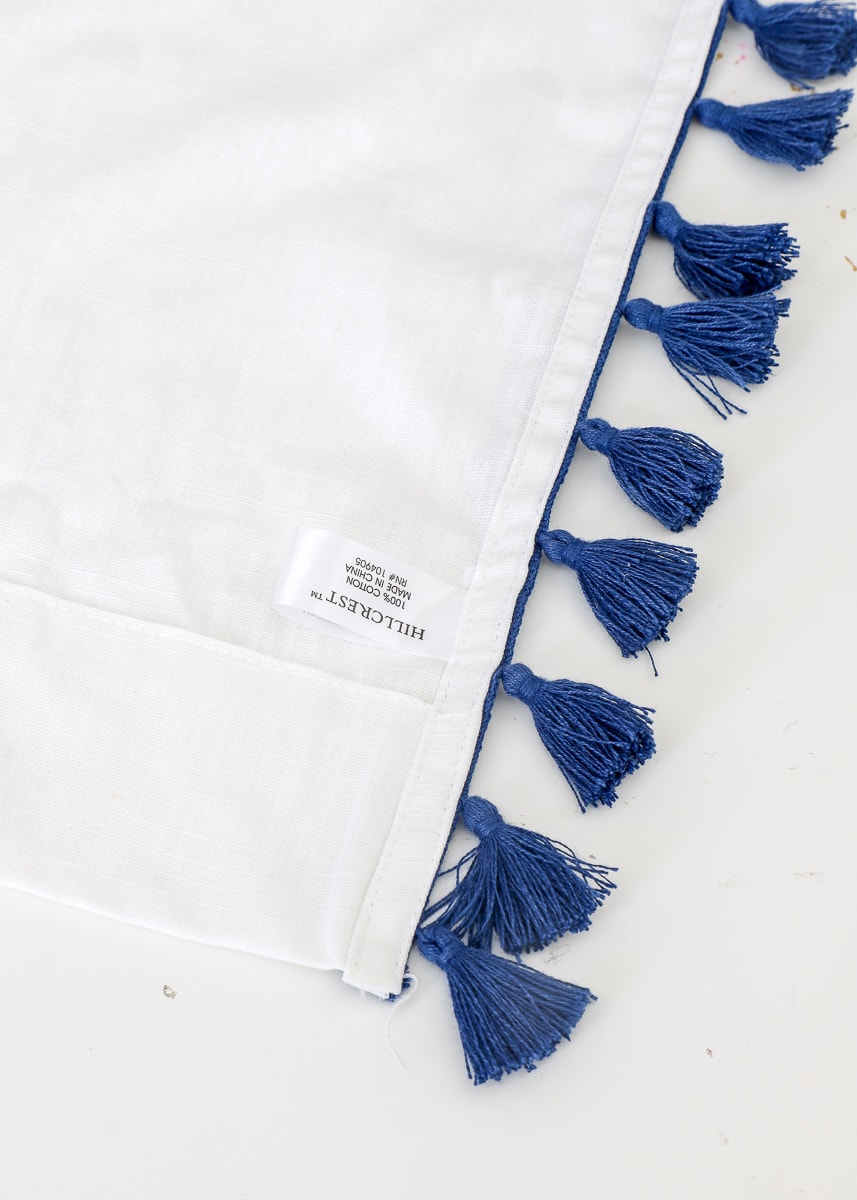
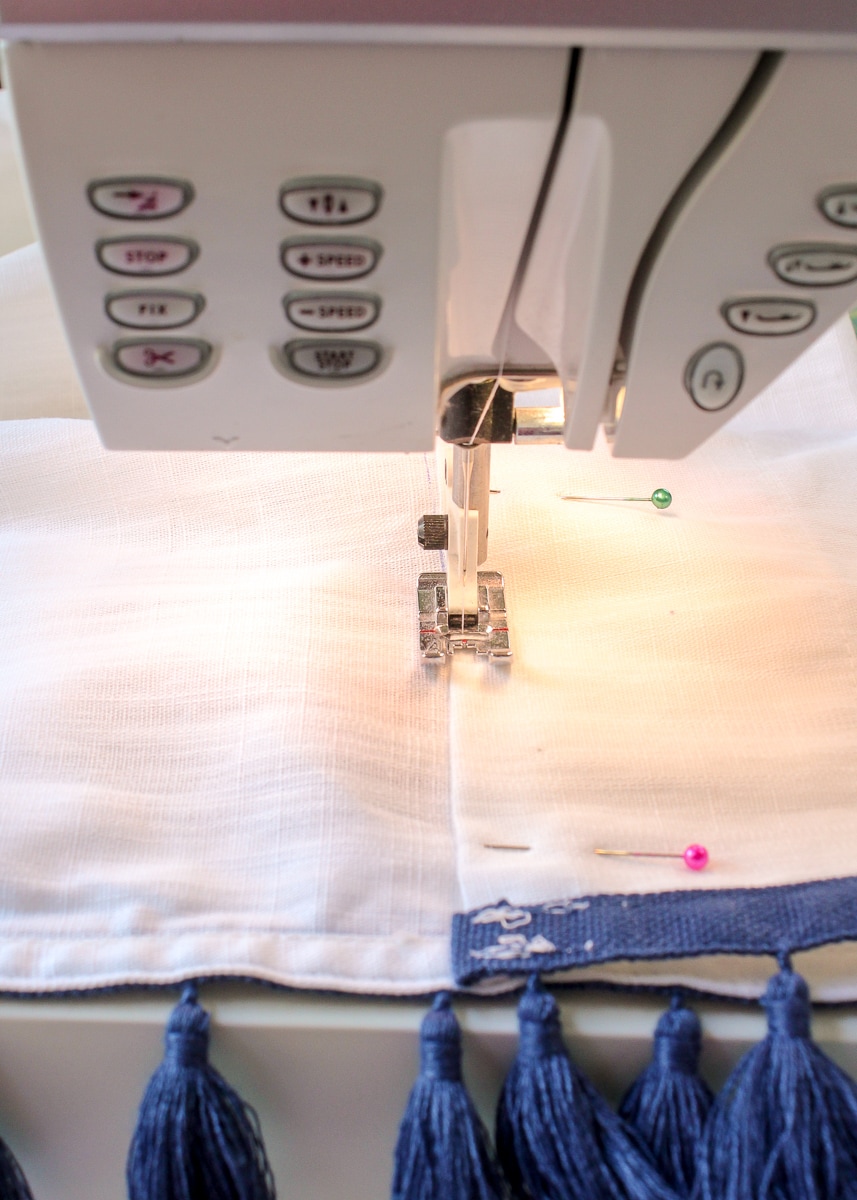
Step 5: Put Tops & Bottoms Back Together
With the two curtain panels fully joined from top to bottom, you simply need to put the top and bottom back together as it was!
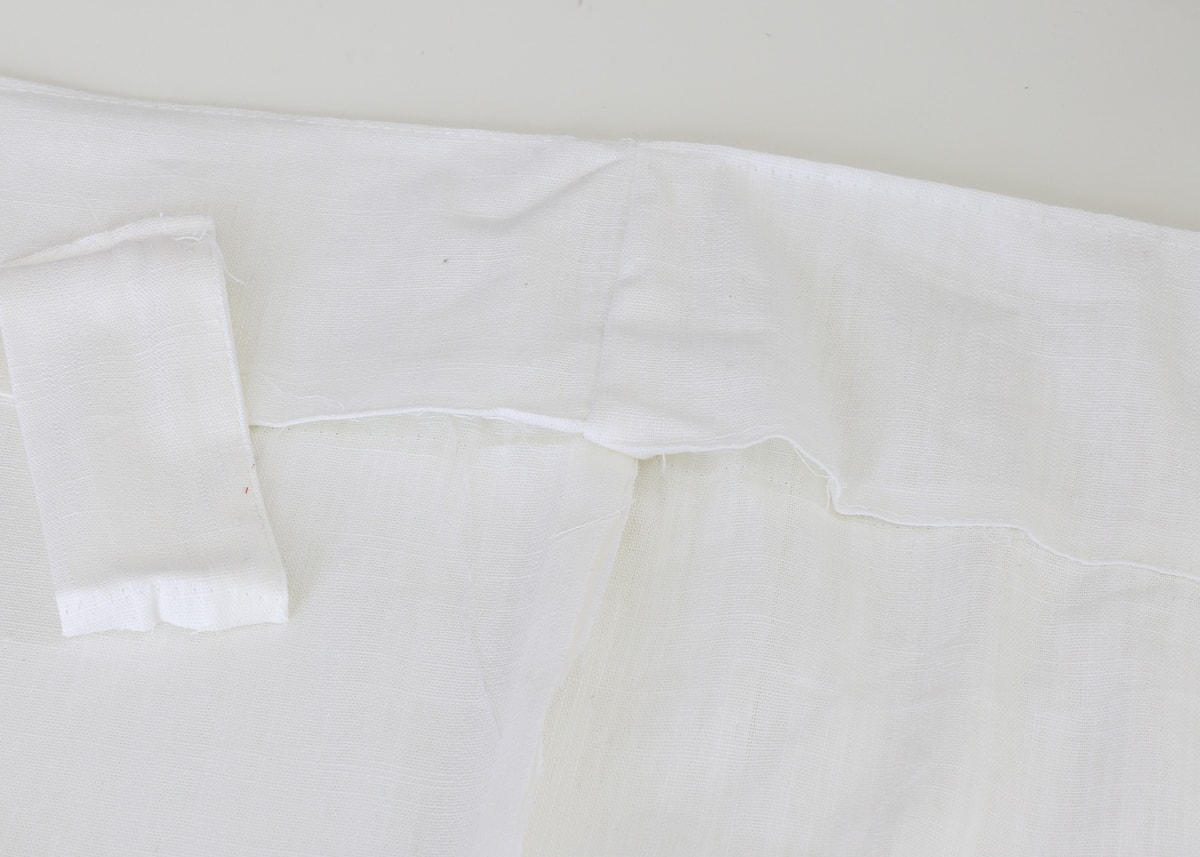
To do that, lay your seam to one side and iron it in place. Then fold down the top and bottom hems, exactly where they were, and pin in place. Add any tabs or other details back as needed. Top stitch right along the existing stitch lines with matching thread.
NOTE: If you lined up your two panels correctly, you will be amazed at how easily everything folds back together the way it was! There is no need to measure or figure anything out…just follow the fold and stitch lines that were there before.
NOTE: Although I removed a tab from each panel, I only used one on the seam between the two curtains once they were joined.
Repeat along the bottom of the panel by closing up the hem and top-stitching in place. Again, just follow the fold/stitch lines that were there before!
Step 6: Iron the Curtains
Although curtains are a pain to iron because they are so large, go ahead and take the time to iron everything (especially the seams you pulled apart and then sewed back together) nice and crisp!
Step 7:”Train” the Curtains
All that’s technically left to do is hang your panels up with some curtain rods; but based on the fabric of your curtains and your style preferences, you might want to do this last step!
I once saw an Instagram post by one of my favorite interior designers showing how she always “trained” her clients’ drapes. Based on how the curtains pleated at the top, she manually folded the lengths of the curtains to match those pleats. She then wrapped a ribbon around the curtains for a day or two in order to get them to hang a specific way! Genius! Oh the things you can learn on Instagram!
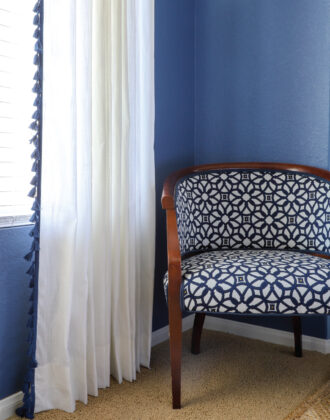
Even after they were sewn together, I didn’t particularly love how “flowy” these panels were, so I creased them and held them in place with some hair clips for the afternoon…
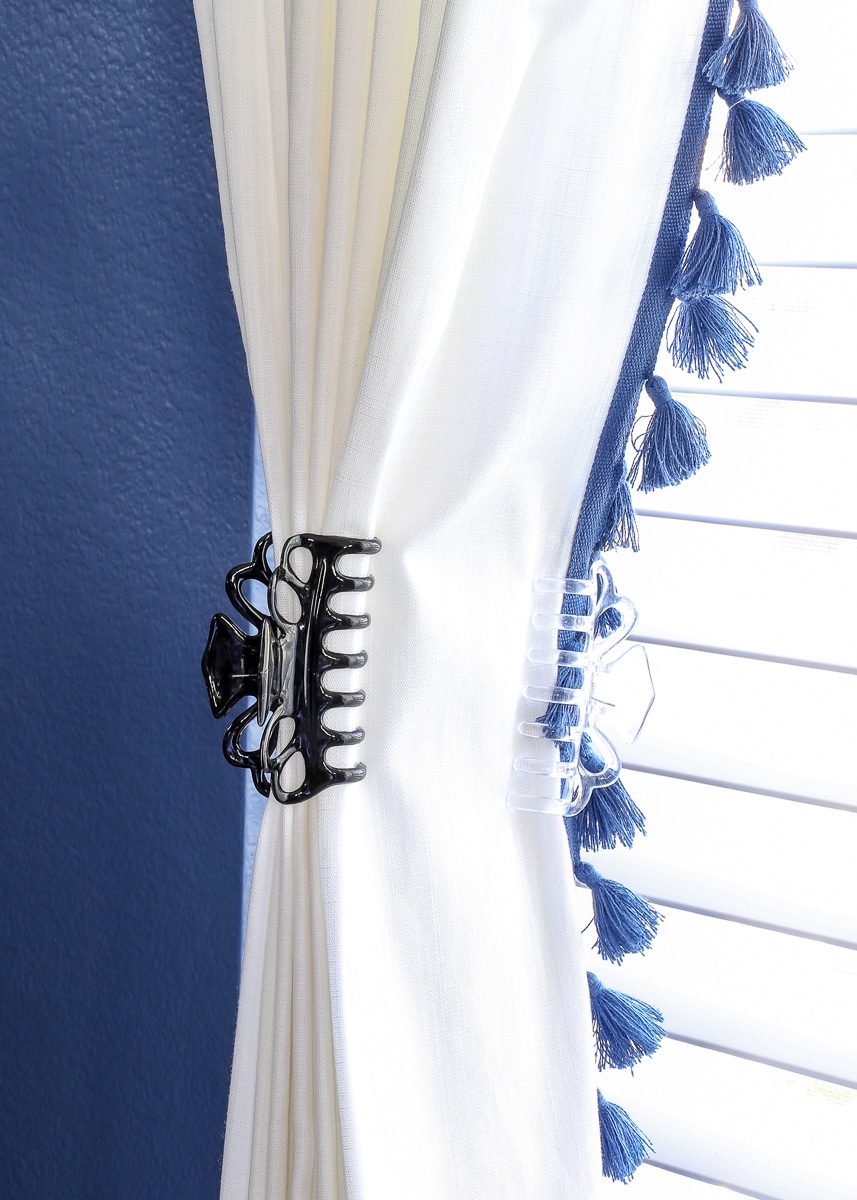
When I removed the clips, I was thrilled to see that I had nice straight and consistent creases down the lengths of my panels!
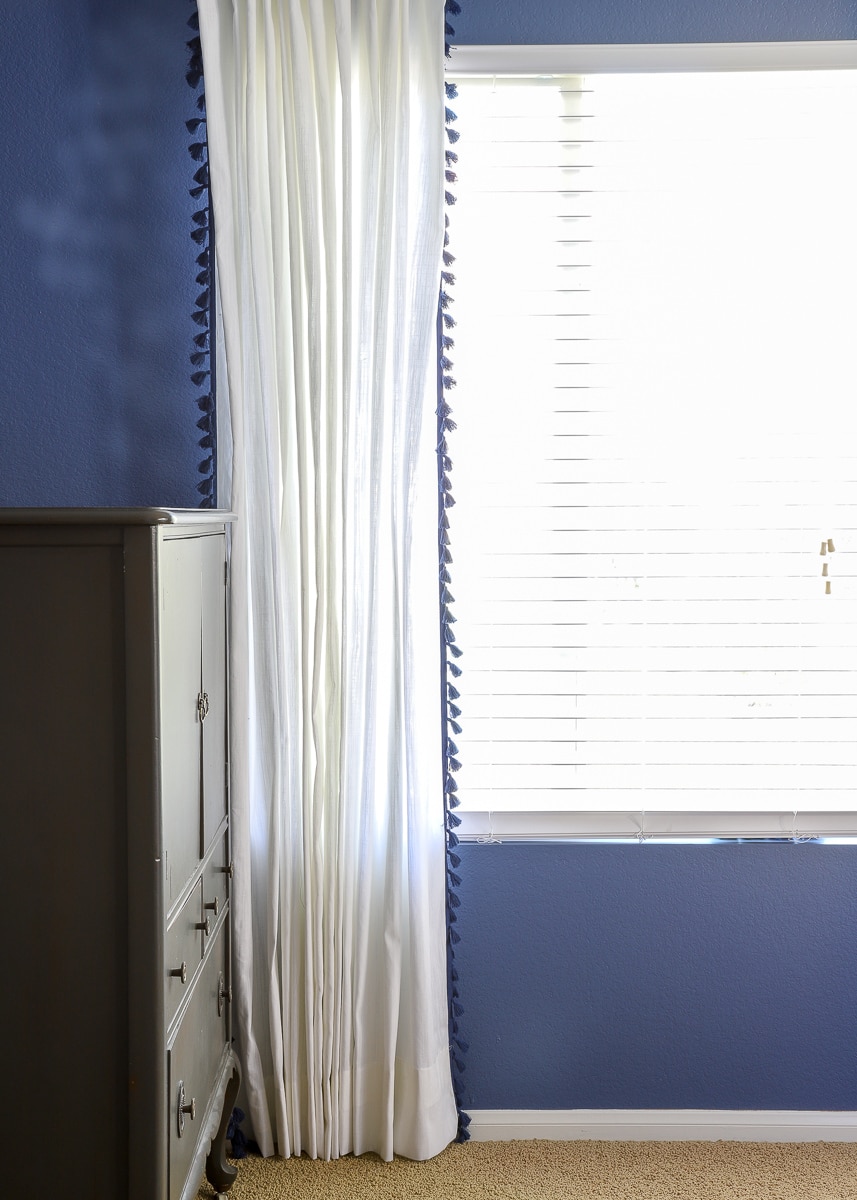
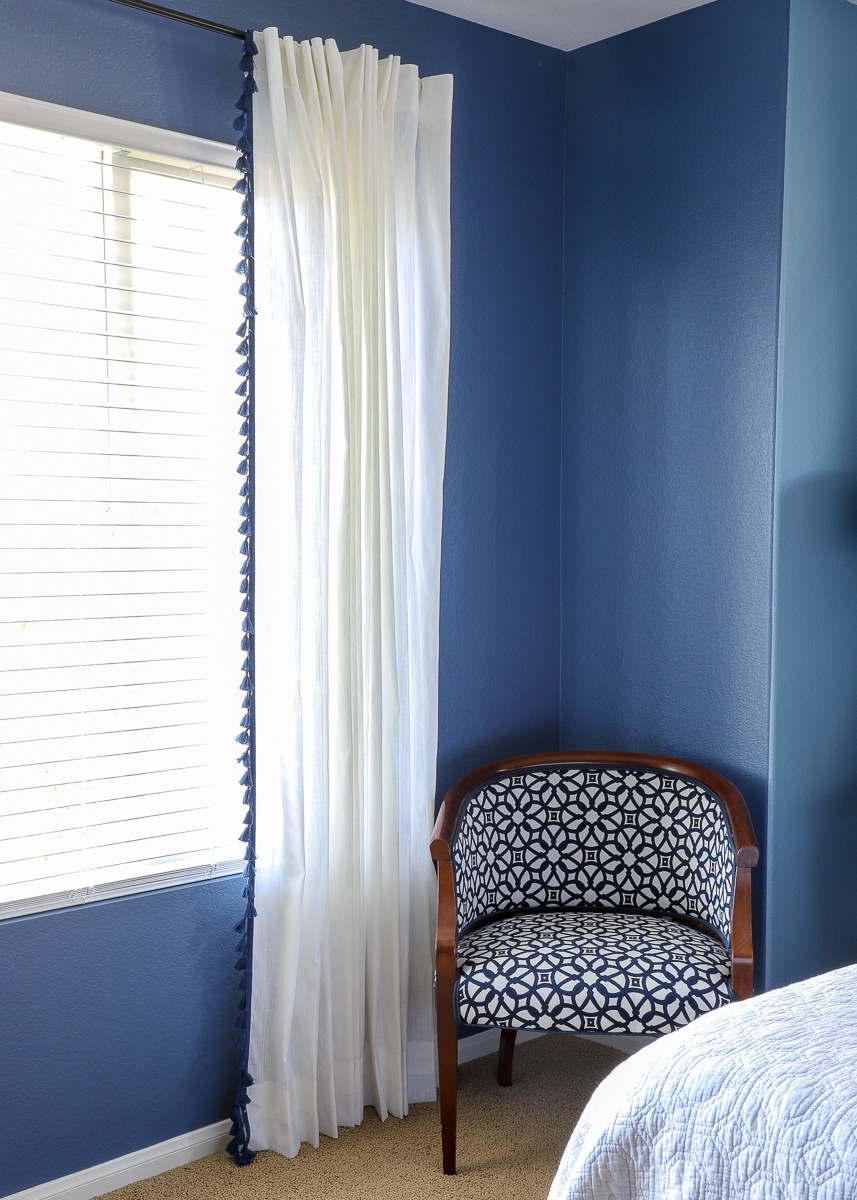
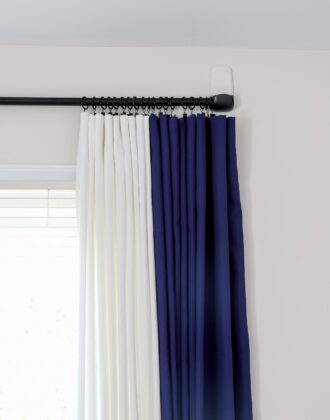
You all might remember that this curtain widening project was one that sat half down for the past couple years. Well, shame on me. Because once I finally decided to do the other curtain, I had it done in less than 30 minutes. These long curtains took some hemming, but it only took me another 30 minutes or so to hem them both with my foolproof method. With months to spare, our master bedroom curtains are done and looking mighty fine!
Other Great Window DIYs To Try
Looking for other great solutions for your windows? I've got you covered with these other smart DIYs!
- How to Make a Window Valance with Foam Insulation
- How to Sew a Window Valance
- How to Make a Window Valance with Foam Core Board & Wallpaper
- DIY Modern Wood Valance
- DIY Cornice Box with Scalloped Edges
- How to Hem Curtains | A Foolproof Method!
- How to Hem Curtains Without Sewing
- How to Widen Store Bought Curtains | An Easy Fix!
- How to Remove Vertical Blinds
- How to Install Your Own Blinds or Shades
- Roller Shades for Windows (When Curtains Aren’t an Option!)
- How to Hang a Curtain Rod Without Drilling into the Wall
- How to Hang Curtains On Rings (With Perfect Results!)
- How to Hang Curtains In a Corner Window
- How to Completely Cover Up a Perfectly Good Window
- 6 Easy DIY Window Valance Ideas (You Can Totally Make In an Afternoon)
If you find bargain curtains you love but they are simply too skinny or dinky for your windows, I hope this tutorial demonstrates that there is an easy solution! It may seem like a lot of steps, but I promise this is something anyone can do AND it doesn’t take very long (despite me putting it off for forever!). I love taking off-the-shelf products and customizing them for our home, and I hope you’re feeling inspired to do the same with your drapery!
Megan
9 Comments on “How to Widen Store Bought Curtains | An Easy Fix!”
Megan,
What brand and model of sewing machine do you use?
Good Morning, Hope!
I sew on a Husqvarna Viking Designer SE Limited Edition – I inherited from my Mom after she passed away 🙂
Hope that helps!
Megan
Thank you for this great tutorial! I was able to follow it and sew my four curtain panels into two according to your instructions. I’m no great seamstress, but it came out great! I would encourage anyone to give it a try.
Hi Rachel!
I’m so glad you gave it a try and it worked for you! It’s a bit of a “random” project, but I find double-width curtains always look so much better!
Thanks for circling back and sharing your experience!Megan
What if the curtains are lined?
Hi Payricia!
I will definitely be more work if the curtains are lined. You will essentially need to fully deconstruct the panels so that the curtain and lining are separate. Once apart, sew the two curtains together first, and the two linings together next. Then you can sew the lining back onto the curtain.
Hope that helps a bit!Megan
If you out small cardboard rings in the rod between tabs the panels will hang nicer and not look scrunched up when opened.
Great tip! I’ll have to give that a try!
Thanks for chiming in!
Megan
Hi! I get why you opened the adjoining seems with your curtains that have a decorative detail. I have a very light weight cotton, not sheers, but it’s thin. I would like to combine the two panels. Is there any benefit to opening the seams or should I just sew together and press the seam to leave two finished edges. I definitely feel this fabric will fray. And I want easy but looks good. Thank you!!