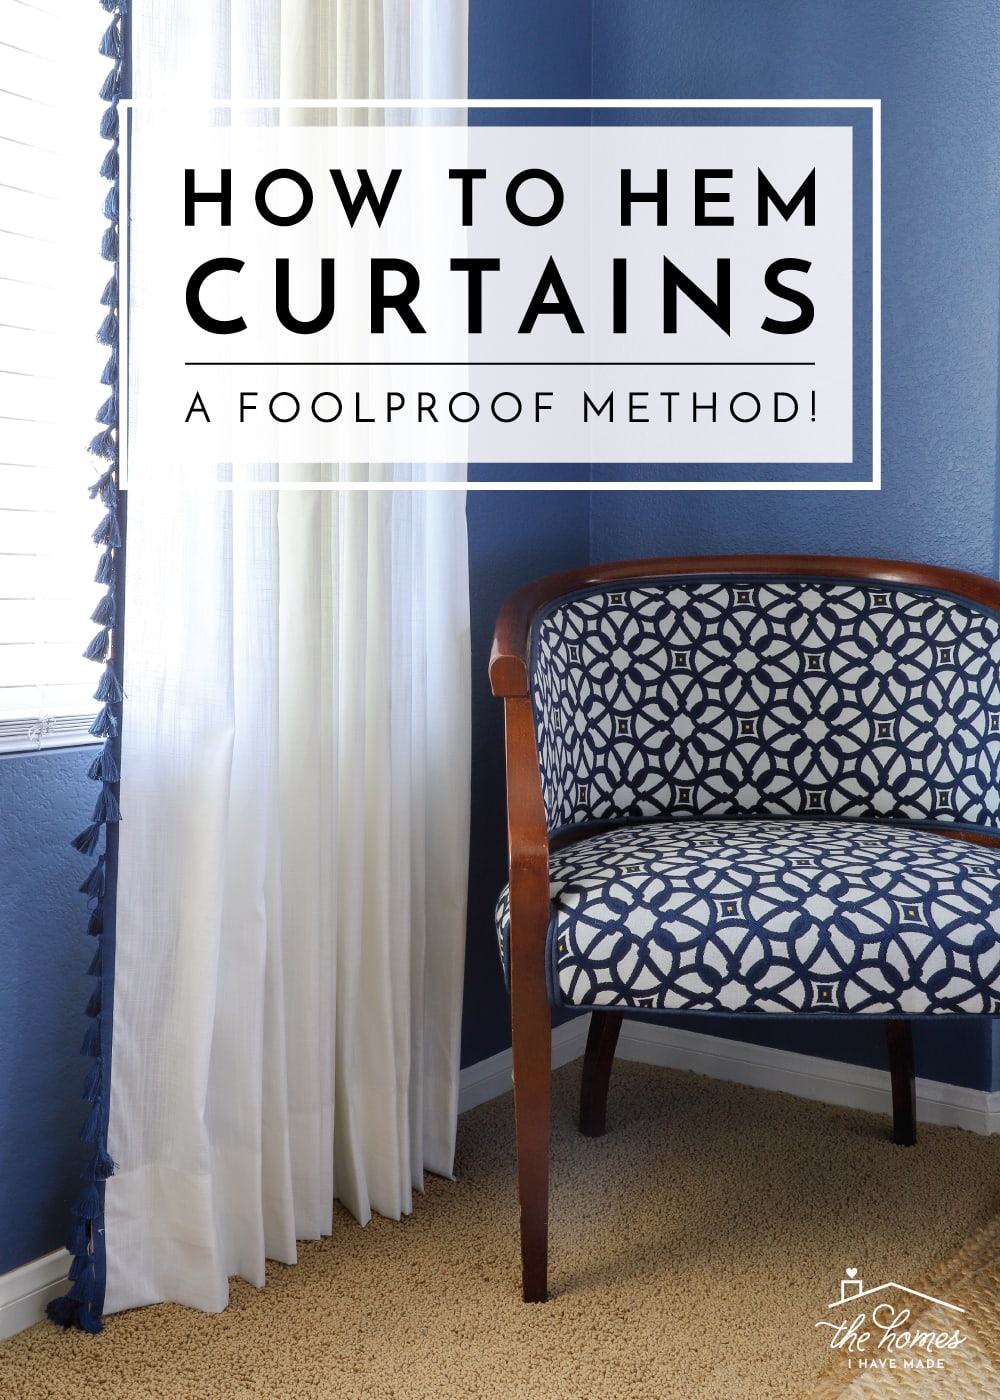
How to Hem Curtains | A Foolproof Method!
Last week, I shared a curtain hack that, while handy, is a little obscure and may not be something you ever use (you can learn how to widen curtains here). On the other hand, today’s curtain tutorial is one that I am pretty sure most of you will find useful! I want to show you how to hem curtains. And although there are lots of similar tutorials out there on the subject, I want to share my foolproof and super simple method for getting your curtains to hang at just the right length, every time, the first time!
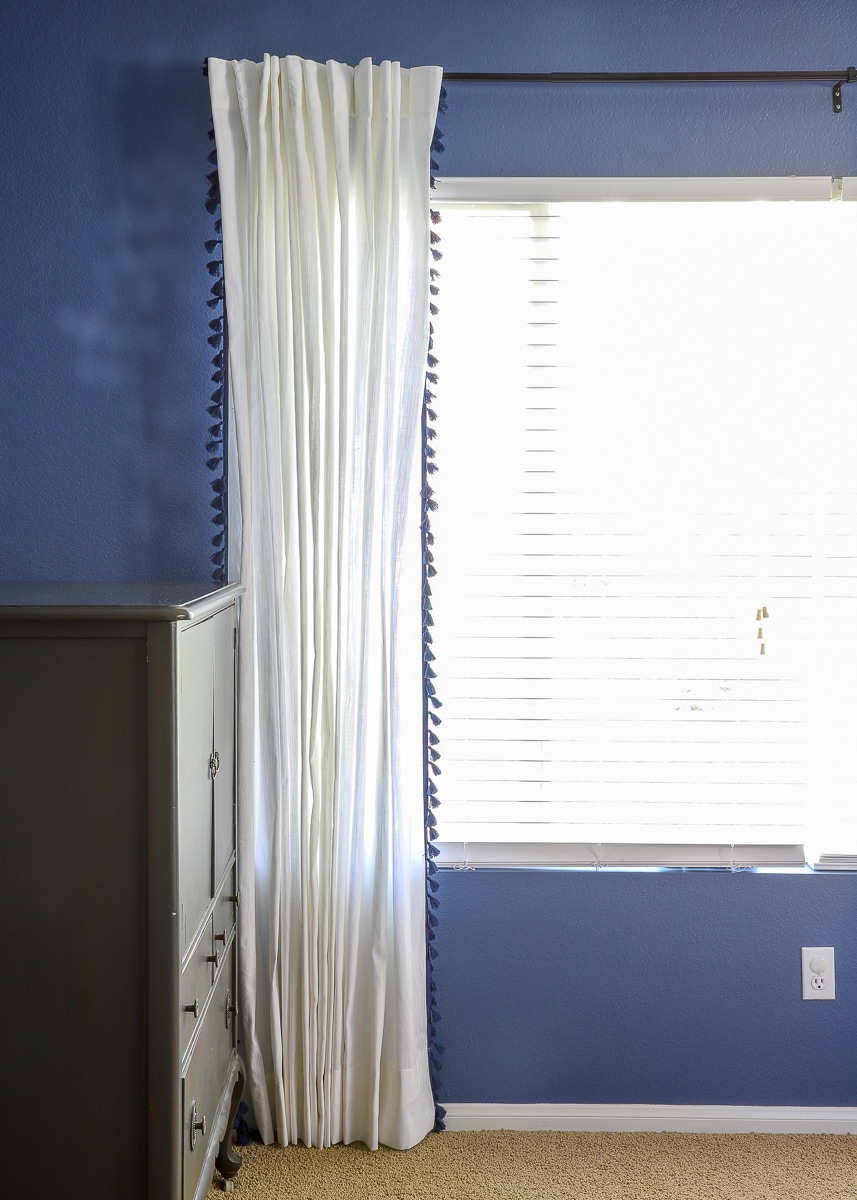
Our Curtains | Before & After
Unless you order custom drapes or happen to be very adept at hanging curtain rods at the precise height you need for your specific curtains, you will likely find yourself in a situation, at some point, when you need to hem a pair of too-long curtains. And you may even tend to put it off and off and off because it seems too hard or you’re worried you’ll get it wrong. I’m not going to lie…of all the crafting skills, measuring is NOT my strong suit, and I’ve hemmed curtains to the wrong length more times than I care to admit. But the method I’m going to share today is not only easy, but will practically guarantee your curtains end up at the right length…the first time!
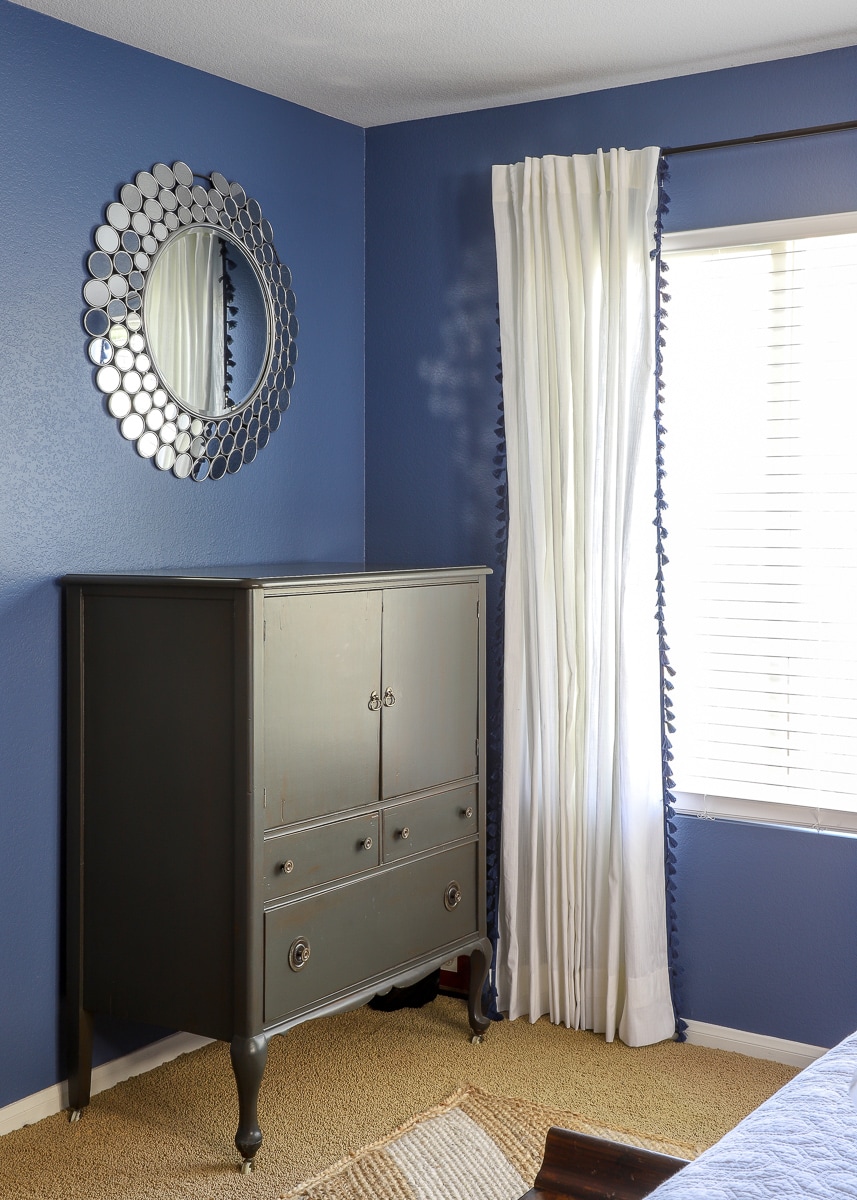
After I widened our master bedroom curtains, I still needed to deal with their length…
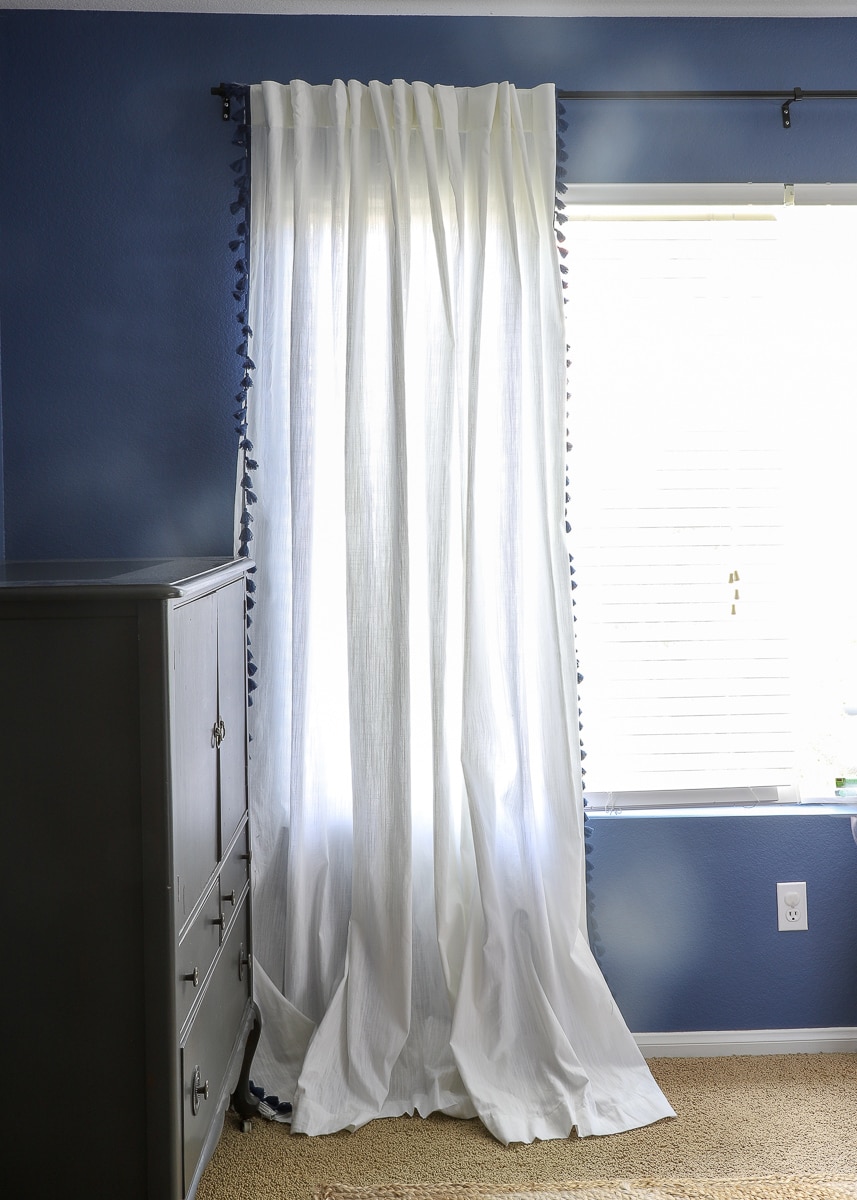
But in about 20 minutes (start-to-finish) and without measuring (seriously!), I had my curtains hemmed to the perfect length!
The Method
Now…I came up with this method for hemming curtains for a few reasons. First, as I said, even if I measured precisely and checked it twice, without fail I’d go to put up my newly hemmed curtains and they’d still be too long or too short. I’d then have to pull out the hems to let them down or take them up more. Further, even if I hemmed curtains a consistent length across the bottom (2″ up across the entire width of the panel, for example), it always seemed like they ended up too short on the ends and too long in the middle. Has anyone else had that problem?
Tired of never getting it right, I decided to hem my curtains the way my Mom used to hem my pants: instead of taking my pants up XX” all the way around, she’d have me put them on and would then pin them up so that they fell to the same height all the way around. Full disclaimer: I’m pretty sure this is NOT the “proper” way to hem curtains, but it really works! Ready to see how?!?!
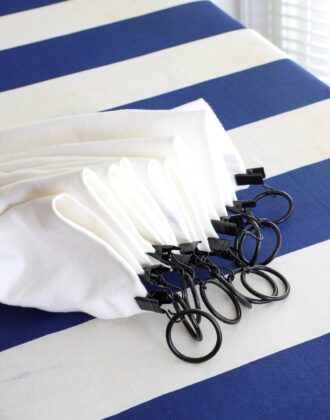
Supplies Needed
- Too long curtains
- Straight pins
- Sewing machine
- Coordinating thread
- Iron and ironing board
- Clear ruler or yardstick (optional)
How to Hem Your Curtains with Perfect Results
Step 1 – Hang Your Curtains
Before you hem your curtains, hang your curtain rod(s) to your preferred height, and go ahead and put your curtains onto the rod.
TIP! Some curtains shrink a lot, so if you anticipate washing your curtains regularly, go ahead and pre-wash them before you hem them!
Step 2 – Pin the Curtain Hem
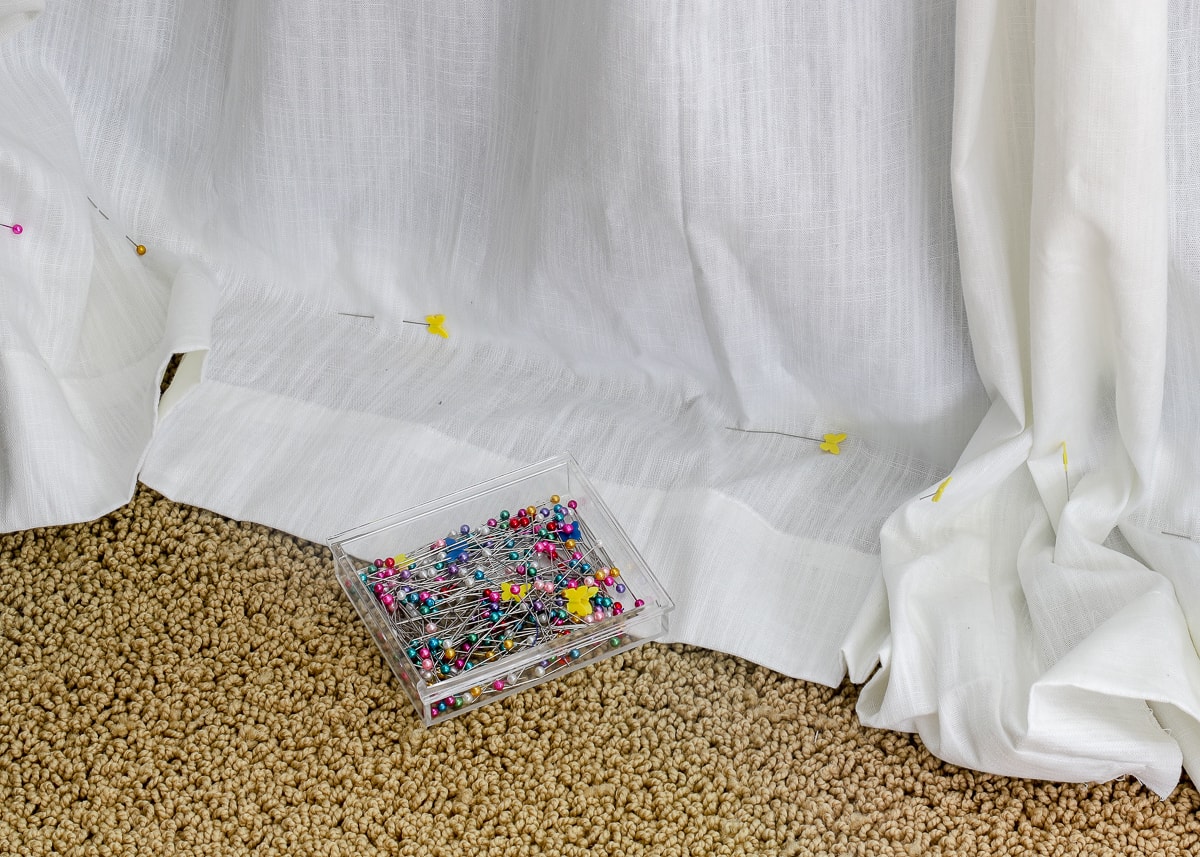
Next, decide where you want the bottom of your curtains to land. I personally like my curtains to just touch the floor, so it makes measuring (or rather, not measuring) quite easy. To get your curtains to touch the floor, start on one side and put it gently toward the floor so it hangs straight down. On the curtain, mark where the floor/carpet meets the wall/baseboard with a pin.
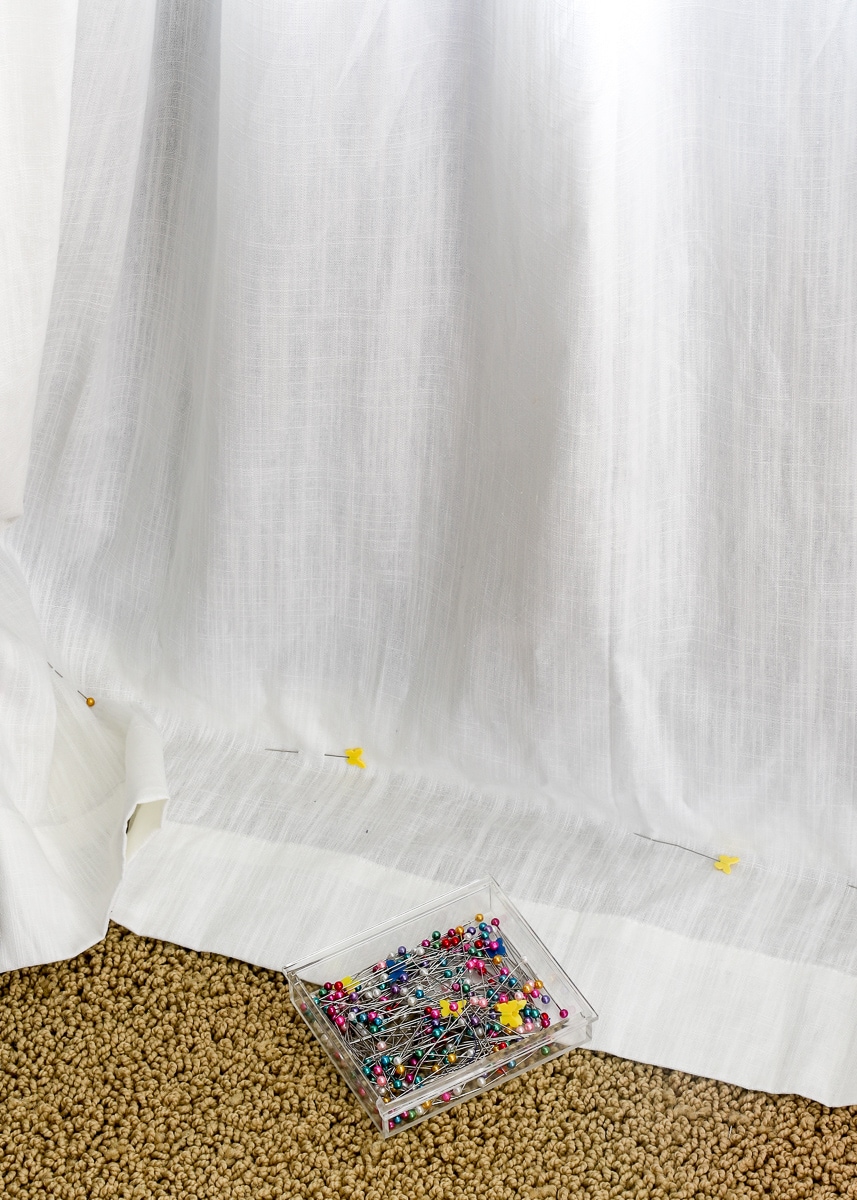
Work your way across the entire curtain panel in 8-10″ intervals, always making sure that the curtain is pulled straight down before marking your desired location with a pin.
NOTE: I don’t take into account if the pin is in line with the previous pin, or if each pin is equidistant from the current hem. Rather, I focus on making a line of pins that meet the same place on the wall/floor when the curtain hangs straight down.
If you want your curtains to hang 1″ off the floor, you can adapt this method by using a yardstick instead of the wall/floor to place your pins. Still pull the curtain straight and taught at intervals across the panel, but hold up a yardstick (set on the floor but standing vertically) and place a pin on the curtain at the 1″ mark (or 2″ or 3″ etc). Again, by having your curtains hung and straight and relying on an external source for measurement (the yardstick), you will be much more likely to have a straight and perfect hem!
Step 3 – Fold and Iron the Hem
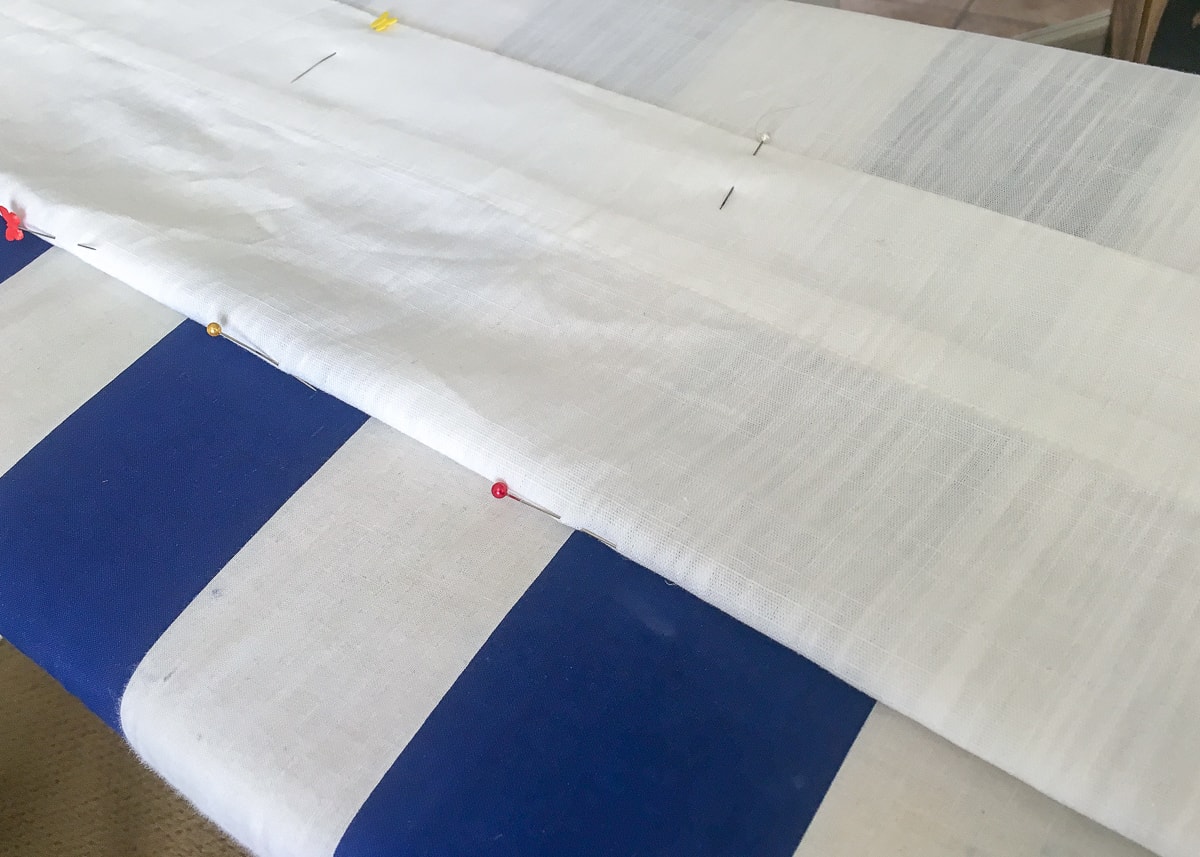
Next, take the curtains off the curtain rod and move them to a heat-safe surface such as an ironing board. Place the curtain RIGHT SIDE DOWN with the bottom of the curtain sitting on the ironing board.
NOTE: I should note here that you don’t need to un-do the existing hem (unless you really, really want to). I always keep all the extra length in tact because I often need to re-adjust our curtains in future houses. As such, I use the current hem as the finished inside edge of my new hem.
Want to save this post?
If your curtains don’t have a finished hem, be sure to fold the raw bottom edge up at least 1″ and then another 1″ before proceeding. If you have the length to spare, I like to first fold my curtains 1″ then 4″ before creating the final hem (as shown below). This gives the inside of your hem a clean edge rather than a frayed, tattered edge.
To create the new hem, you are simply going to fold the bottom of the curtain up (toward the back of the curtain panel) along that pin line you created while the curtain was still on the rod. Once you have the bottom folded up across the width of the panel, pin it in place along the top of the hem (the vertical pins shown below).
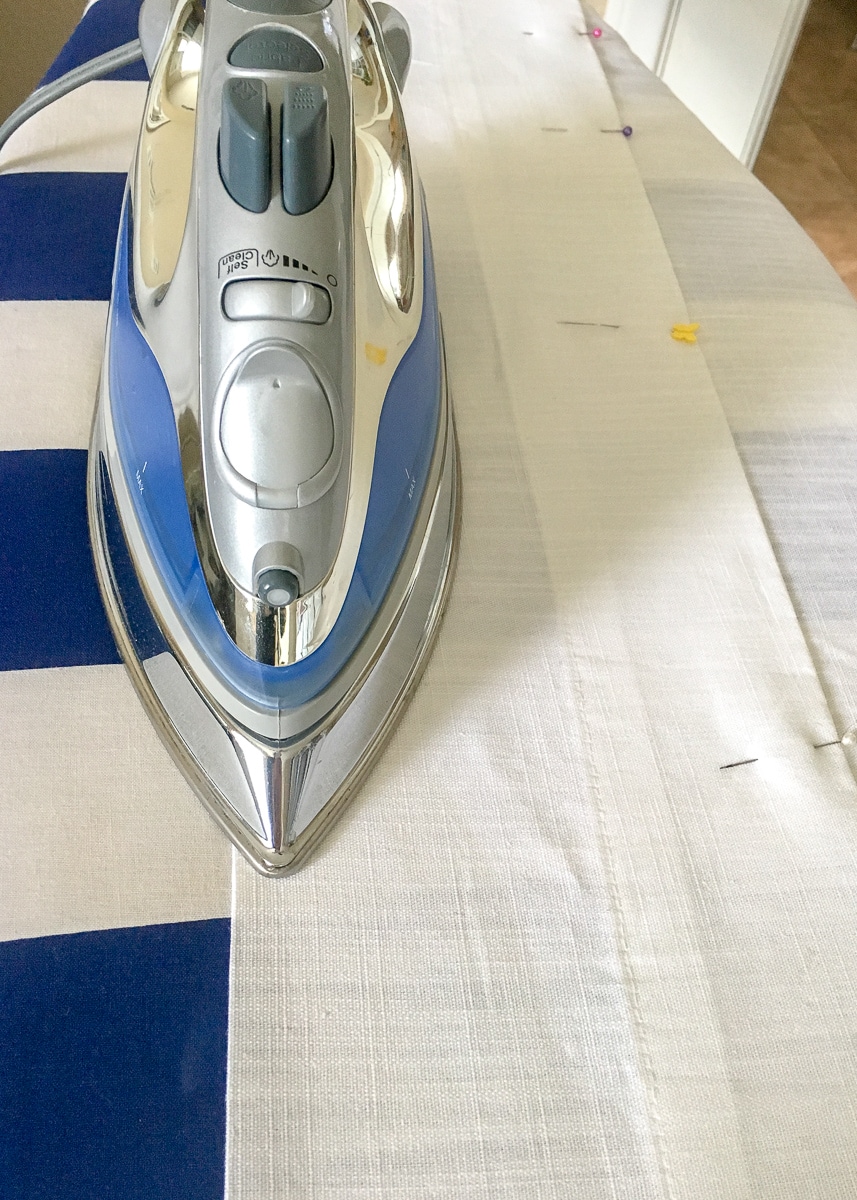
Before sewing your hem in place, iron your hem fold to give it a nice, neat crease. Use steam here as necessary to get it to lay nice and flat.
Step 4 – Sew the Hem In Place
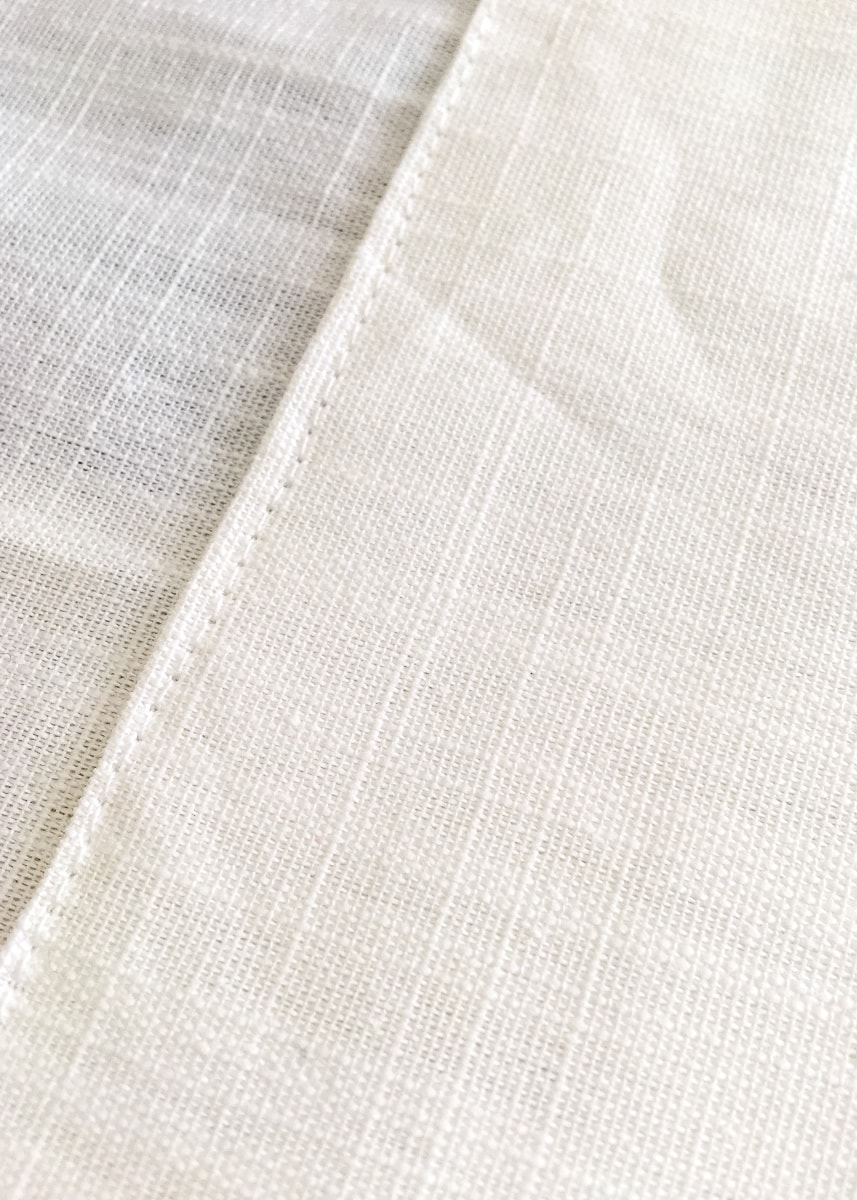
With the hem “measured,” pinned and ironed, load your sewing machine with coordinating thread and sew the hem in place across the width of the panel. I like to sew about 1/8″ – 1/4″ in from the finished edge.
TIP! You can certainly use heat-n-bond tape under your hem here to make this a no-sew project. However, iron-on products are rarely removable, and I always like to have the option to take my hem out!

TIP! If you don’t anticipate changing your hem anytime soon, a standard stitch length is fine. However, I always like to lengthen my stitch length to 3 or 4. It holds just as well, and is much easier to pull out when I need to re-do the hem down the road!
Take the time to press your curtains (the full panels) one last time before hanging them back up.
Then step back and enjoy your perfectly hemmed curtains!
I don’t know if this is how you’re “supposed” to hem curtains, but it’s been a game-changer for me! Not only am I thrilled with how quick and easy it is, but since I know the hem is going to turn out right, I’m much more motivated to actually get it done!
Other Great Window DIYs To Try
Looking for other great solutions for your windows? I've got you covered with these other smart DIYs!
- How to Make a Window Valance with Foam Insulation
- How to Sew a Window Valance
- How to Make a Window Valance with Foam Core Board & Wallpaper
- DIY Modern Wood Valance
- DIY Cornice Box with Scalloped Edges
- How to Hem Curtains | A Foolproof Method!
- How to Hem Curtains Without Sewing
- How to Widen Store Bought Curtains | An Easy Fix!
- How to Remove Vertical Blinds
- How to Install Your Own Blinds or Shades
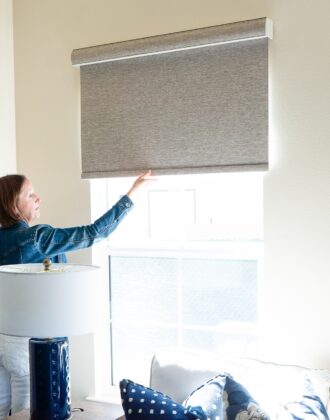
- Roller Shades for Windows (When Curtains Aren’t an Option!)
- How to Hang a Curtain Rod Without Drilling into the Wall
- How to Hang Curtains On Rings (With Perfect Results!)
- How to Hang Curtains In a Corner Window
- How to Completely Cover Up a Perfectly Good Window
- 6 Easy DIY Window Valance Ideas (You Can Totally Make In an Afternoon)
I hope you guys love this curtain hemming hack as much as I do! Have you ever hemmed your curtains this way? Do you have another trick I should try?
Megan


39 Comments on “How to Hem Curtains | A Foolproof Method!”
Love this so much! Curtains are a must for me, but dealing with hemming every time we move is exhausting! As you said, this is a game changer! Can’t wait to use this new hack.
This is pretty brilliant. I often allow the perfectionist in me to dictate how I do things. I MUST measure that, I MUST make precise cuts on something that doesn’t ever show… That means I often don’t do projects I would like to do because I just don’t have it in me to be that precise all the time. This looks great, is practical, and does exactly what it’s supposed to do. 🙂
Thanks so much. Very helpful.
Thank you for adding all these images. Helps a lot
This is a very smart way to get the job done! I have used this technique, but, go one step further to tamp down the OCD in me….. After using a basting stitch to secure the new hem (about 1/4″ from the edge), I turn the hem back to the right side of the fabric and use my blind stitch foot……it’s gives a gorgeous hem and then I just pull out the basting threads and iron the new hem that you can barely see, but is beautiful secured. I’m all about a blind stitch foot! Thank you for you wonderful article!!!
thank you for the simple hack! Can you tell me what brand/style of curtains you have? Love them!
Thanks for this great tip, I agree w your preference of keeping original curtain length and just sewing straight stitching, easier than fooling around w a blind hem stitch and giving flexibility to pull out stitches to adjust in future… fusible web heat and bond would be permanent. I ended up ripping out the stitches a couple times to redo hem length.
Hi there!
Yes – I learned a long time ago that anything “fusible” is recipe for disaster. The temporary stuff doesn’t hold long-term and the permanent stuff can’t be undone! Although my methods might not be the “official” way to do it, my curtains look great and they get DONE, which is most important of all!
Hope you’re having a great week!Megan
This makes so much sense! thanks. The worst part is lugging the curtains down and then hanging them back up. Wish I had seen this a few months ago. I’m going to see if you have any tips about making shades.
Hi Andrea!
As I was doing these curtains, I totally wished I had tried it sooner because it really was so much less of a hassle!
My only shade tutorial is this one: https://thehomesihavemade.com/2017/05/diy-faux-roman-shades/
Hope you’re having a great week!Megan
This is a great idea – but for those of us who don’t own an ironing board or a sewing machine I guess my only option is iron on hem. I guess I now understand it won’t be removable. This is always something I wish I had learned how to do. Right now I am trying to find the best way to hang them all as they are various lengths and many are rod pocket or grommet but I have recently realized pinch pleat would look so much better with rings so I am struggling along to figure out putting a pleated header on the back and weights on the bottom. But first, getting them the right size. Great post and I love the tassels on the curtains. Did they come that way or did you add it in?
Hi Vanessa!
You can certainly use iron-on hem tape for your curtains, but like I said, it won’t be un-doable. That might not be a concern for you but with our frequent moves, that would make them less likely to transfer from one house to the next. Another option, if you need them just done fast and temporary is safety pins. I know that sounds lame, but in our last house, we had them pinned up the ENTIRE time, and not one person (including myself) ever noticed.
Btw…you can also iron on pleater tape along the top of your panels (something like this) and use them with pleat hooks to make for instant pleats. Easy peasy!
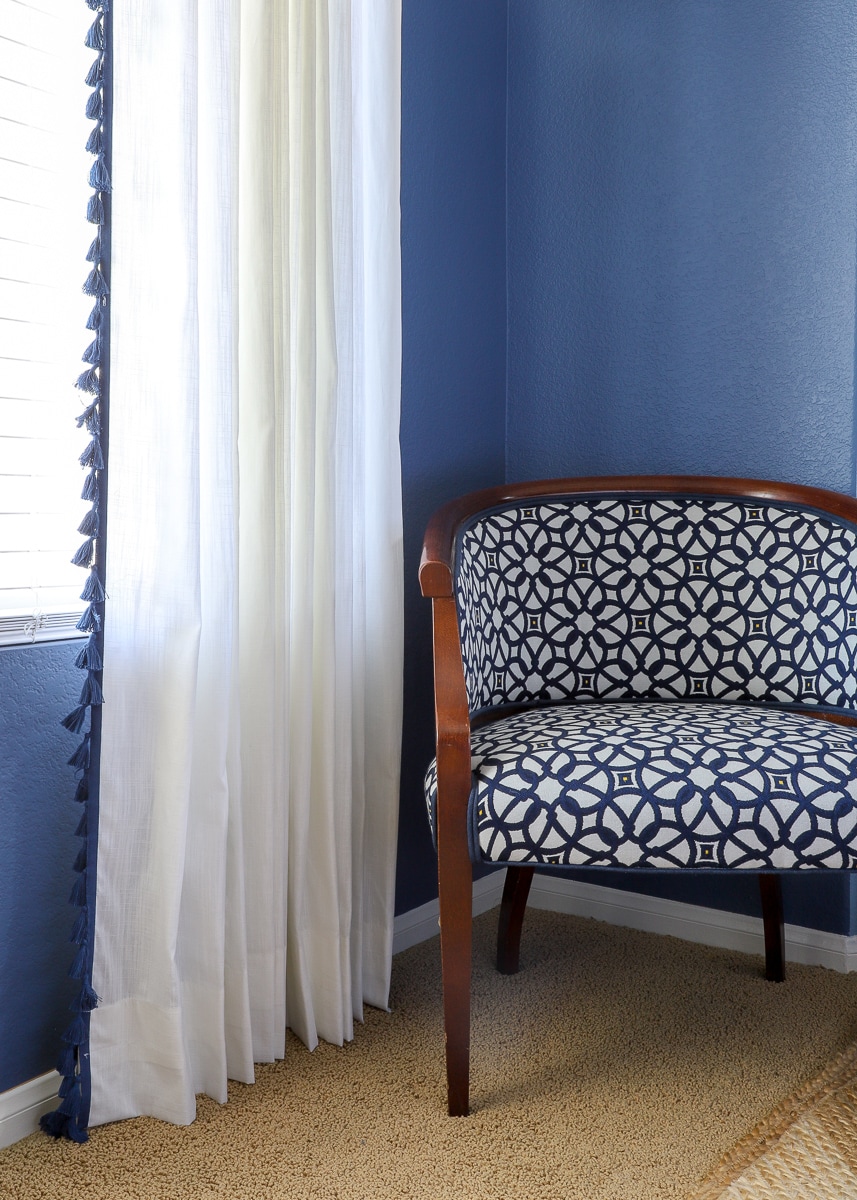
The tassel curtains were a steal find from HomeGoods!
Hope your week is off to a great start!Megan
I cannot thank you enough. I knew there had to be a way to do this so that it was perfect. I was trying to figure out a way to measure them while hanging. This will save so much time!! Thank you for sharing.
There are many ways to hem, your method is great. The important part is that you gave them your drapery hang a wider hem which hangs better, gives weight, and looks better as you apparently already know. I’ve never seen a designer give drapery instructions to their workroom to make a 4″ hem. Good job.
Thanks so much! I tend to figure things out on my own (without learning properly!) so I’ve been thrilled to hear how well this method has worked for others!
Thanks for chiming in!Megan
I have to give you a big thank you for your tips!
I would have made a mess of it if I just followed the tape measure rather than do a final check while they were hanging.
I also followed your advice in leaving the hem long. It’s turned out perfect.
I ended up sewing up the hems, rather than using the tape. Very happy with the final result.
Hi Julee!
I am so glad to hear this method worked for you! Trust me, I’ve messed up so many curtains over the years that I am thrilled to finally have a method that works every time!
Thanks for letting me know it worked for you!Megan
Love this. I will definitely be trying this method!
Thanks so much! I think you’ll be really pleased with how well it works!
Keep me posted!Megan
This worked great for unlined drapes. Any suggestions for lined?
HI Brigitte!
Thanks so much for your comment!
Without knowing exactly how your drapes are lined, my gut would be to:Un-do the seams along the sides.Hem the drape and lining separately.Then re-sew the side seams together.Hope that helps a bit!Megan
Thank you! I am just about to attempt this after reading give time. It just occurred to me I was going to get some pleating clips and haven’t yet so should I wait to hem u til I have those?
I would like to make a one inch hem at the TOP of my curtain, I want it to look a little fuller and “bunch” up and make a little ruffle or hem so to speak. I only need a inch.
I do not have a sewing machine and could do it by hand, but do you think the sewing tape would work? Would it defeat my purpose and not “bunch”? Any thoughts?
Thank you so much for your ideas and photos on window treatments! I, too, see a room as “finished” when lovely fabric surrounds the windows. Your tips are such a help, and I love your style! Clean and fresh, fun but not so trendy that we all feel like we have to buy new stuff on a constant basis! I see very clever “refreshed” furniture from yesteryear in your homes, and I love it!
Hi Ellen!
Thank you so much for this kind comment – I’m really glad you found this post helpful!
It’s definitely taken me a little while to find that balance of modern+classic but I think I’m slowly getting there!
Happy Thursday!Megan
Absolutely the best tip I have ever come across! And I have been sewing for 50 years. Thank you for this.
HI Kathleen!
I am thrilled to hear you found this helpful! I especially love getting an “endorsement” from other sewists since I’m very much self taught. This trick works for me every time, and I hope it helps you too!
Thanks for stopping by!
Megan
I’m a Home Economics teacher and didn’t know this trick! I made it even easier by using my fabric pen rather than pins. Just made a 1/4” mark instead of using pins, lessening the chance of getting pricked as usually happens with an unwieldy piece of cloth. I also left the curtains on the rod the entire time by pulling a table to the window and using my ironing pad when pressing the hem before sewing, then just brought my machine over too. So very easy. I did trim to a 4” hem as I think it looks best that way and these are staying for a long time!! Thank you for your wonderful tutorial. We’ll done!
Hi Darma!
I LOOOOOVE it when “real” sewists chime in and tell me they love this tutorial. Thank you so much for sharing your experience, and I’m so glad it worked well for you.
Oh – and great minds think alike – I don’t bother taking my curtains down either (here’s a pic I shared a while back!)
Happy Weekend!
Megan
Megan, love the tip for hemming drapes! I find it very frustrating when buying draperies that the panels are rarely even. I will be using your tip for that issue also!
Can I ask how you ironed your drapes to produce those nice, crisp pleats?
Hi Maria!
Sorry for the late reply.
In short, I didn’t iron my drapes at all! I just “train” them, as I outline in THIS post.
Hope that helps!
Megan
I would like to add that premade curtains need to hang for about two weeks to allow the fabric to relax. You may end up with curtains that are too long as the fabric may become longer over those 2 weeks.
Hi. I am 70 and have been sewing since the age of 9. The one thing that always defeats me is hemming curtains and sometimes I have to admit my curtains don’t look great. I am putting new ones up and was getting very tired and frustrated with the hamming so decided to Google How to Hem Curtains and your idea came up. I just can’t thank you enough, sheer genius! Thank you so much.
Thank you for sharing this! I’m about to hem four panels of curtains after putting it off for over a year, and this seems very doable.
Thanks for the tips! I have several exta inches to remove from the drapes so should I trim off the extra fabric? Thank you!
Thanks 🙂 did you find that the amount of fabric that you needed to turn up towards each end of the curtain panel decreased as you got closer to the edge? I’m envisioning me having to make a curved hem to have it lay evenly across the whole panel but.. Maybe there’s an easier way?
Hi Colette,
Yes – that’s exactly why this method works so well actually. If you do a flat 3″ hem across your entire panel, the sides will actually lift up off the floor. But by marking the correct hem, while they’re hanging, you can adjust the hem width so that, when hung, they actually appear flat. By marking the hem line while they are hung, you don’t have to bother with measuring at all.
Hope that helps,
Megan
This is genius and so so glad I came across your post. I’m renting my home and my old curtains were in need of replacing. I bought a cheap pair just to freshen up my living room.
What is genius here is putting in the reality of the situation I.E. hemming in situ, which allows for a neater and more accurate hem. I admit o did still measure mine where I had pinned and it was a 5” hem!!!
I thought 5” is too big but because they are long floor curtains the extra long hem really makes them hang better and actually look better for it too.
What I especially love is that it took me under an hour to do this and I’m so happy with the result and the fact that I didn’t have to do or be the usual perfectionist that is always suggested in these jobs.
First time I’ve come across your site and now I’m intrigued to read more.
Thanks ever so much for such clear instructions to, simply brilliant and easy to follow.