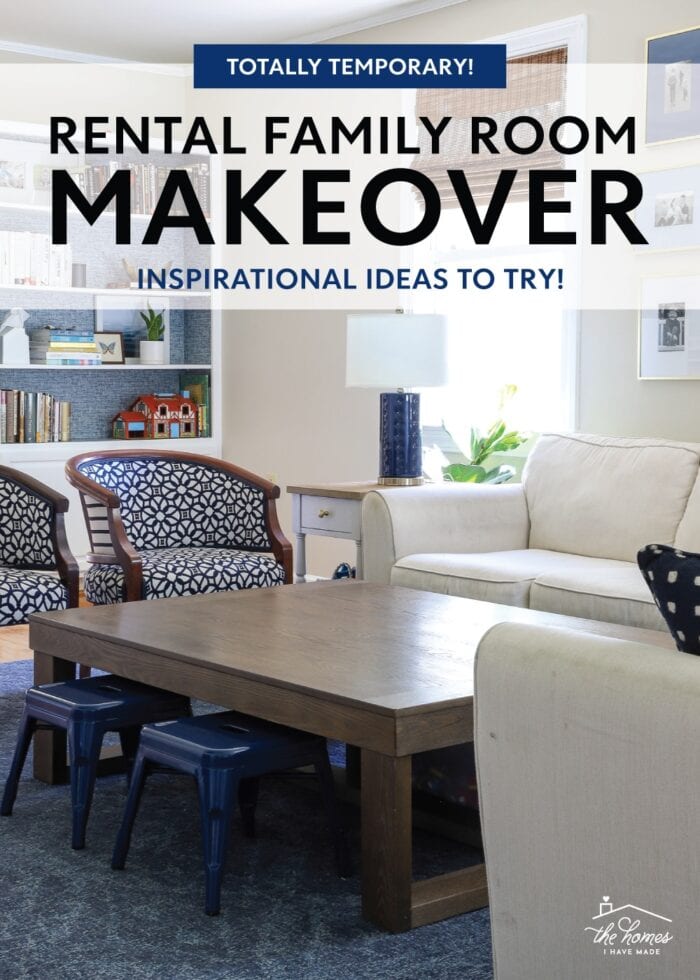
Revealing Our Cozy Family Room (That I Finally Got Right!)
When it comes to decorating our homes, there are rooms that come together much more effortlessly than others. I don’t really struggle with dining rooms, kitchens, or bedrooms, but it always seems I can never get our family rooms quite right. (Which is frustrating, because it’s the room we spend most of our time in!) But that was not the case in our North Carolina rental. For once, all the elements came together to not just create a truly lovely space, but a room we all felt comfortable gathering, hosting, playing, watching, and relaxing in. Let me give you the full tour!
Our Family Room | Before & After
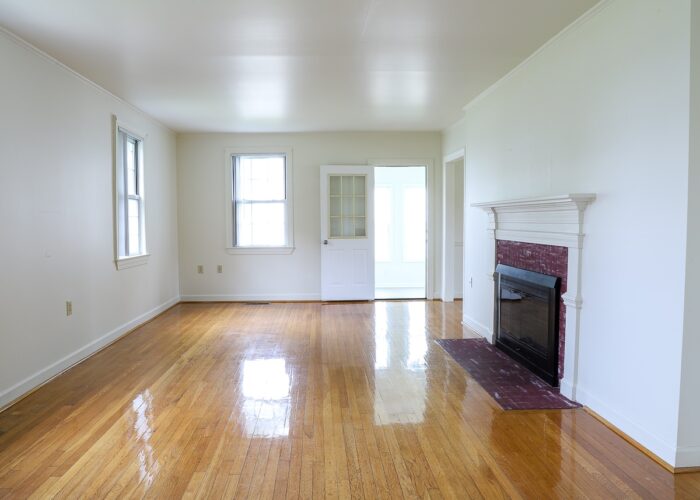
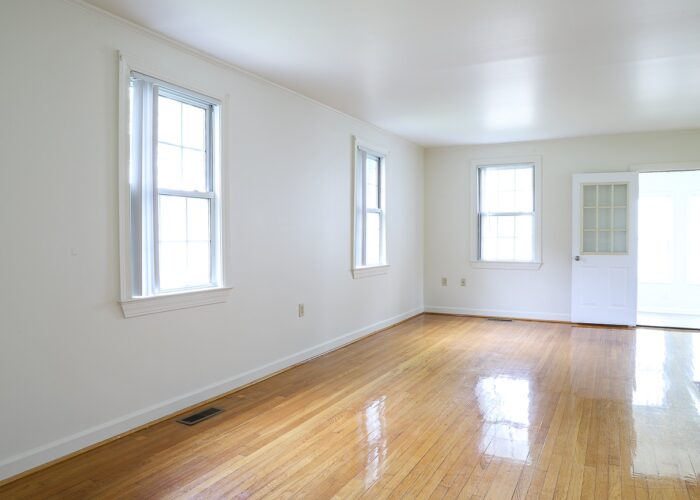
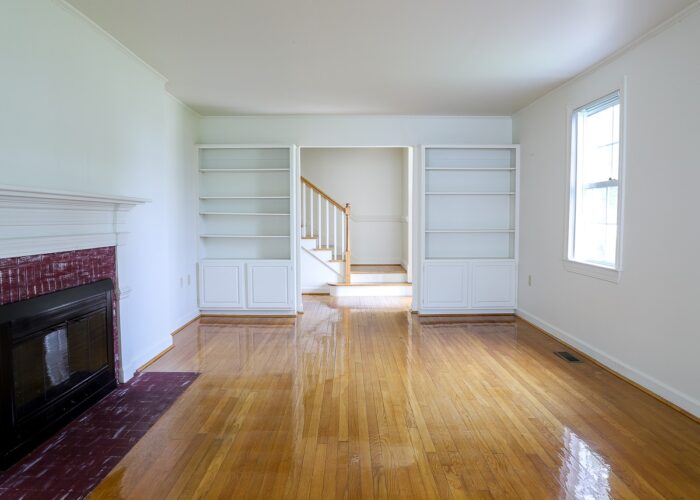
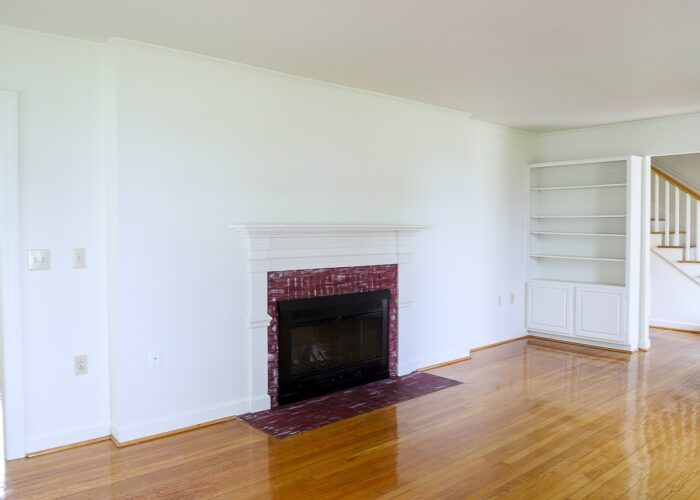
Below are pictures of our empty family room on the day we were handed the keys. Measuring ~13×25′, this is easily one of the biggest rooms we’ve ever had. While the placement of windows, built-in bookshelves, and the ugliest fireplace (ever) made furniture placement a bit tricky, one thing we had in spades was…space!
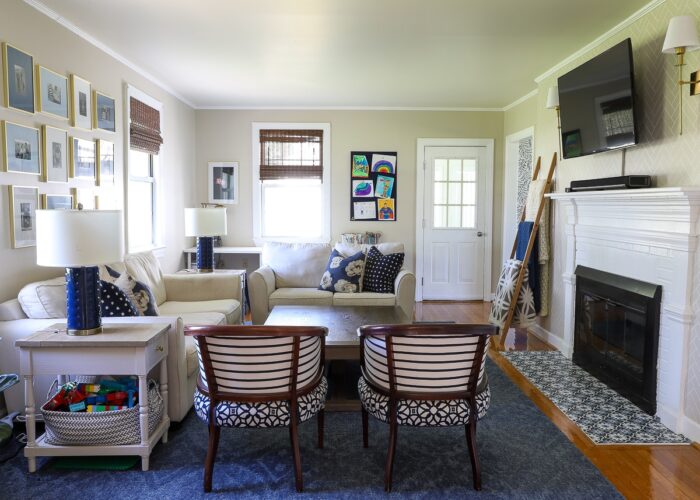
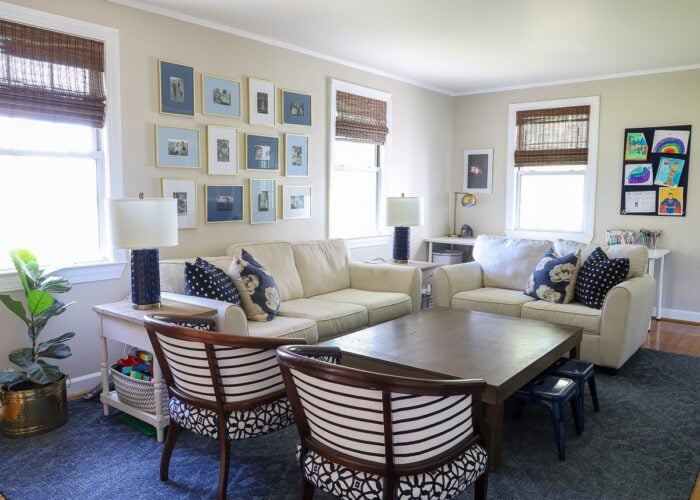
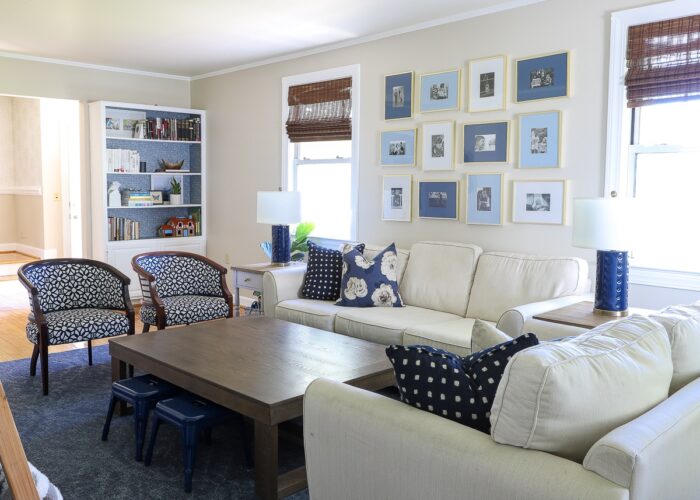
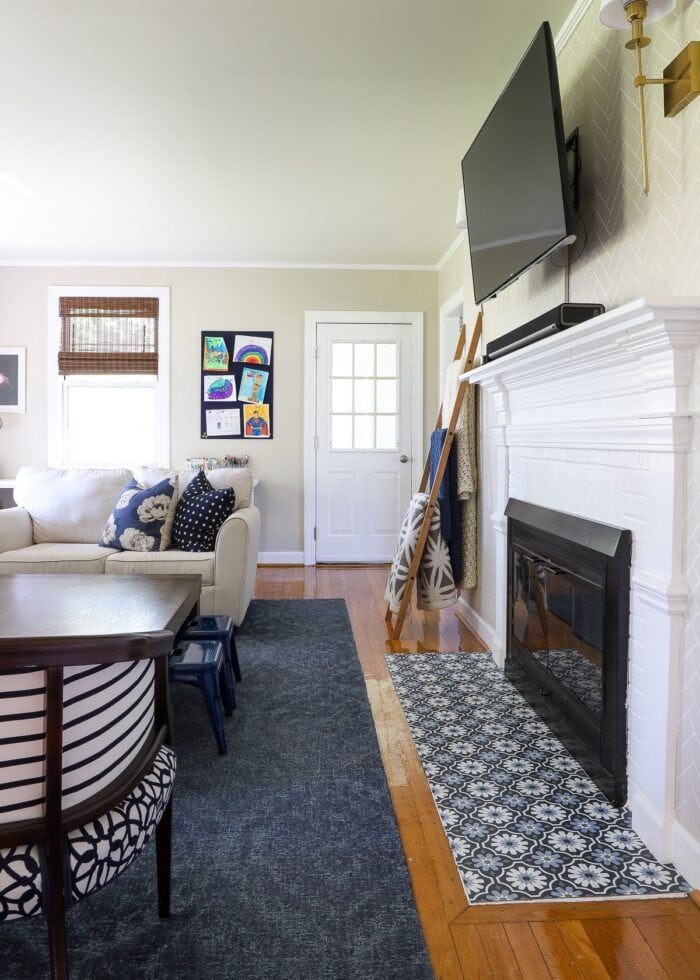
Below are the final pictures I took of this room just weeks before moving out. The cozy, comfortable result was a culmination of a creative furniture layout (that really allowed us to pack this room with tons of function) and some impactful DIY projects that brought some much-needed warmth and texture to the big, bland space.
In the end, this room was the ultimate gathering space for our family to play games, watch TV, take naps, do arts and crafts, and just relax! Isn’t that what a “family room” is all about?!
Video Tour
Before I break down the entire room in more detail, you can watch a short video tour of the entire room below. (Video not loading for you? You can watch it HERE.)
The Walls
Before even moving into the house, I painted the yellow-cream walls a more cozy shade of beige (Edgecomb Grey), to match the adjoining foyer. However, this made all the trim in the room look even more yellowed, so I eventually painted the moulding, trim, bookcases, and mantel bright white too.
To say that the energy in the room dramatically shifted as a result of the paint treatment would be an understatement. Instead of sterile and muted, the room instantly felt more fresh, cozy, and chic.
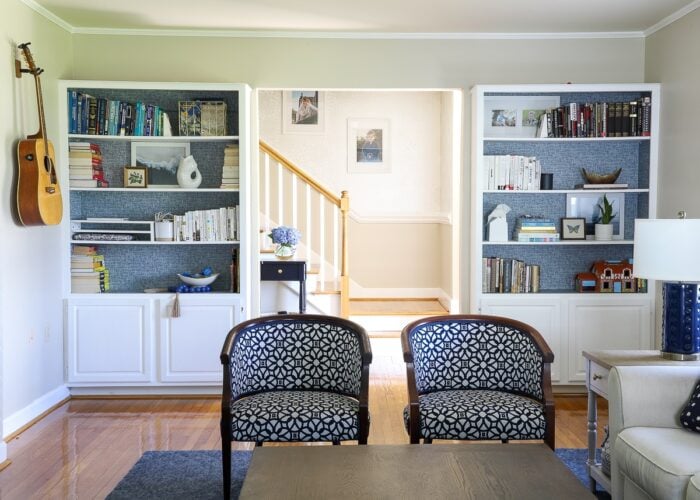
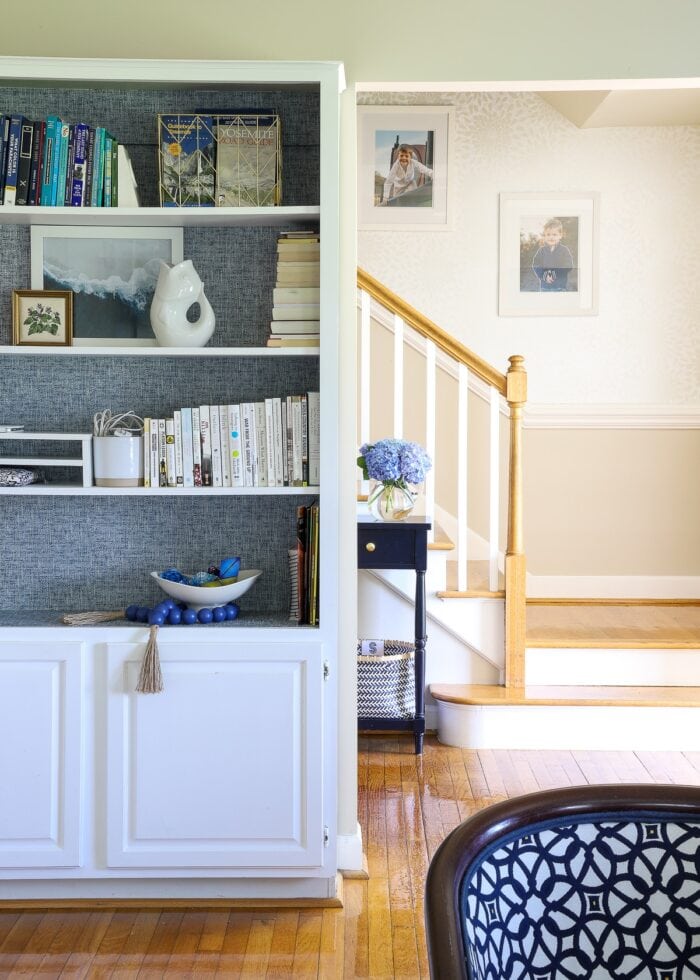
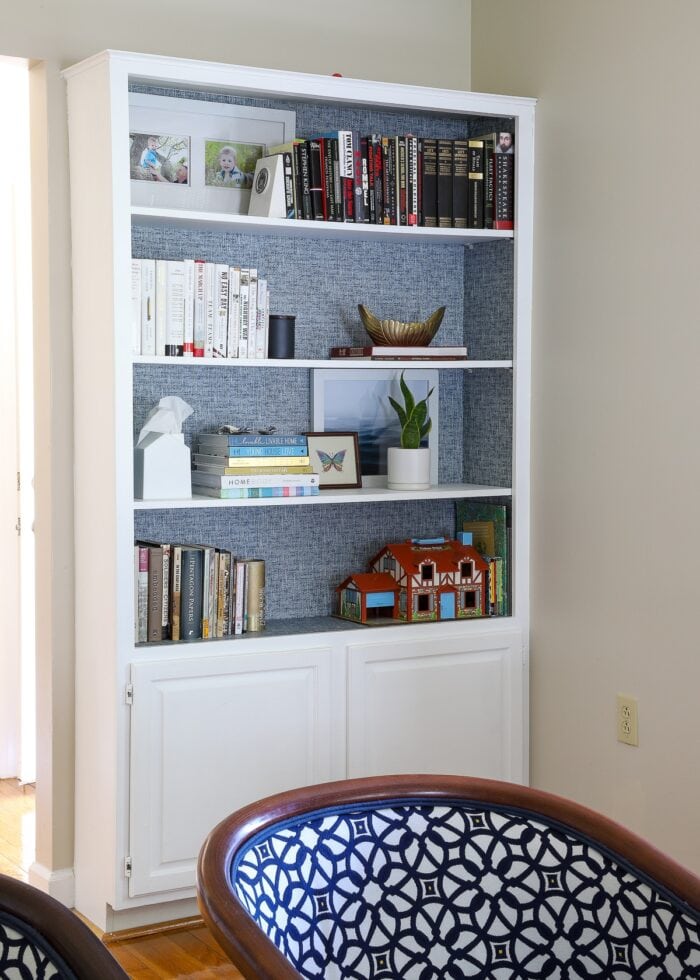
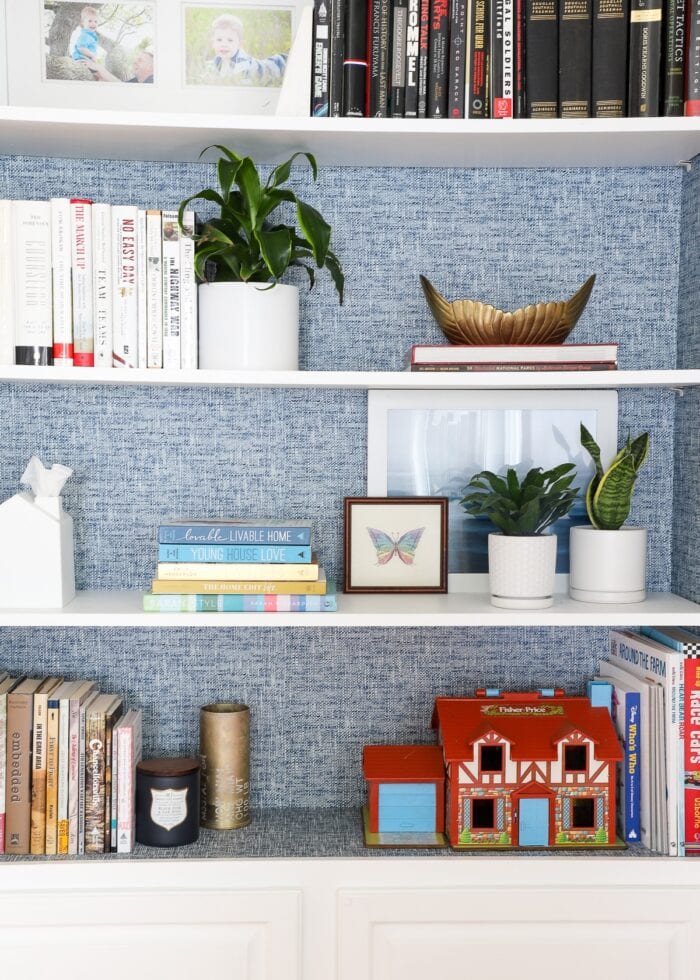
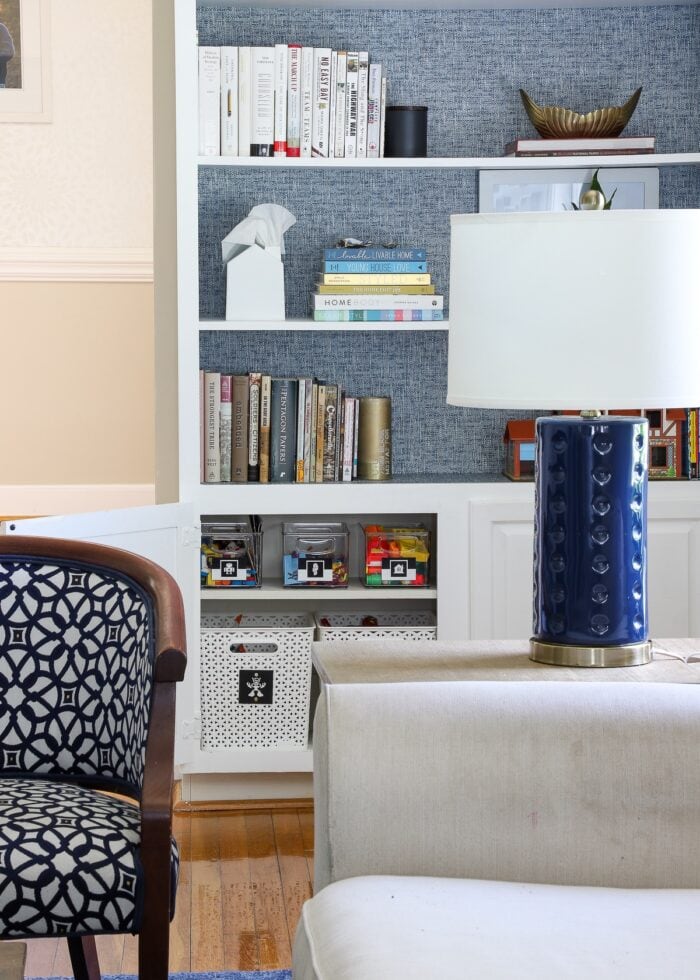
The Bookcases
Although I am (finally) learning that saturated color doesn’t work on the walls in our family room spaces, I couldn’t help but bring a dose of color to the built-in bookcases. As one of the more prominent focal points of the room, I knew some sort of patterned paper would be a fun upgrade. However, I didn’t want to add something that visually competed with the items on the shelves or the strong patterns on our accent chairs and rug.
How to Wallpaper the Back of a Bookcase | Step-by-Step
This navy poplin wallpaper is one of my tried-and-true wallpapers, and it worked perfectly on these shelves. It provided enough pattern, texture, and color to the room without being loud or overpowering. Of all the projects I undertook across the entire house, this bookcase makeover was one of the best: huge impact with relatively little effort!
How to Style Bookshelves (When You Actually Need Them to Hold Stuff)
Want to save this post?
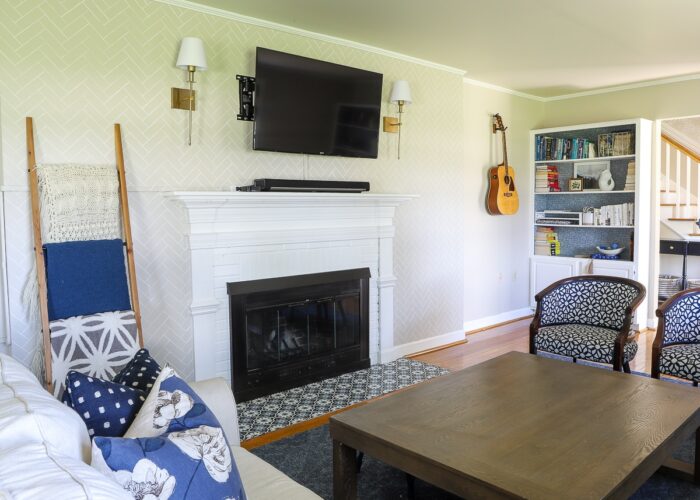
The Fireplace Wall
The same cannot be said for the fireplace side of the room. Phew – what a labor of love this wall turned out to be. So many projects in one little spot!
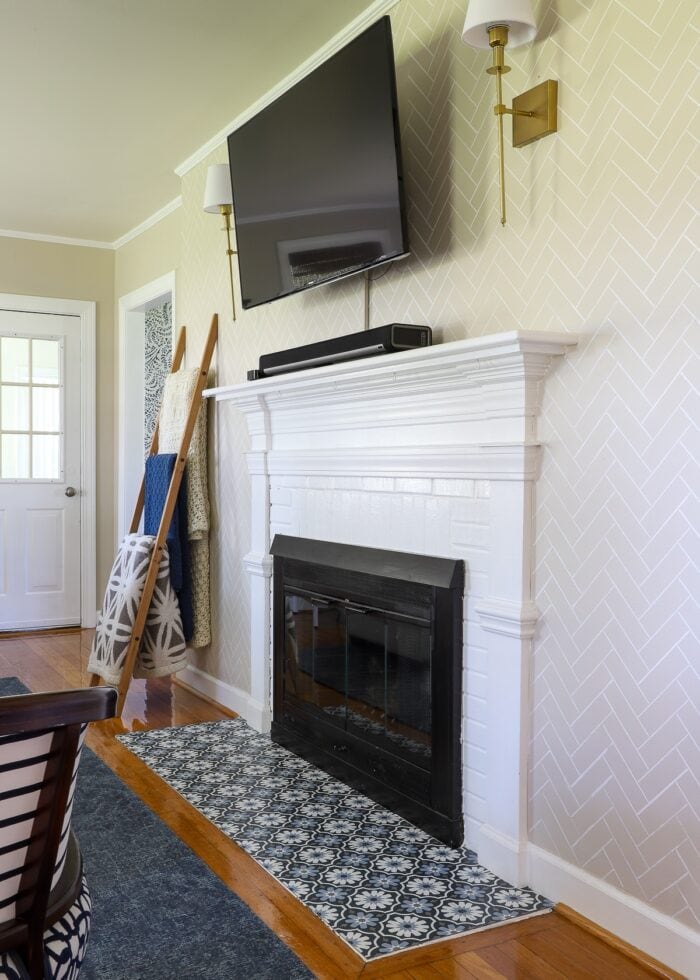
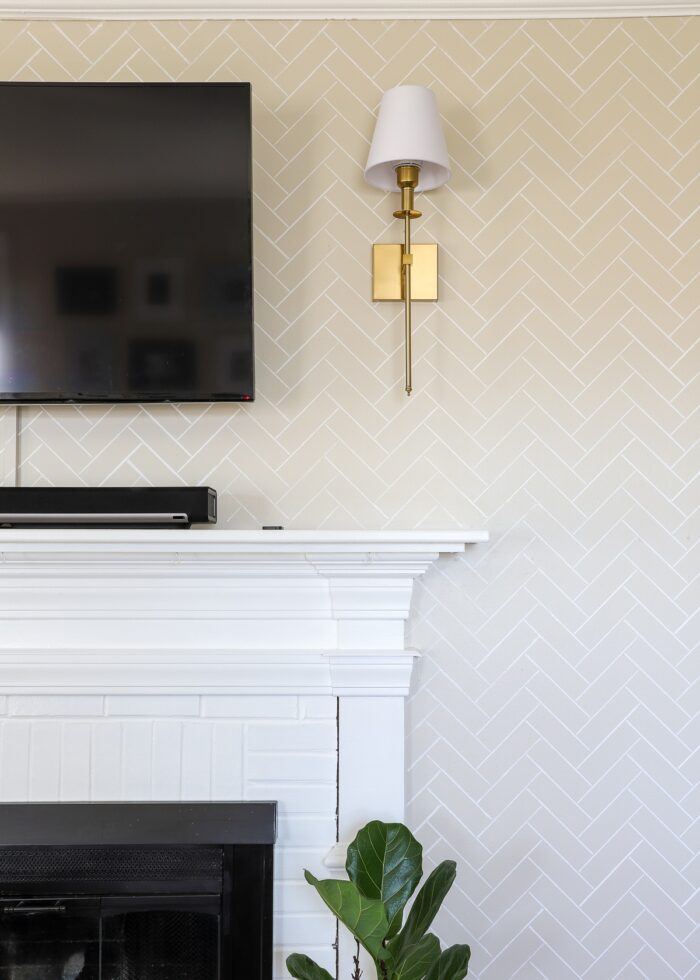
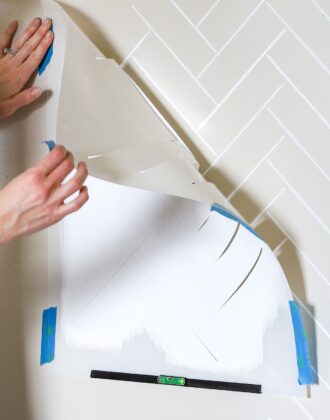
The Stenciled Wall
With a 12’+ stretch of the wall bumping out about 6″, I really felt like it was the perfect spot for some sort of accent treatment. But with wallpaper on the bookshelves (and in the neighboring dining room), I was sensitive about bringing too much into this room. Additionally, with such tall ceilings, I estimated that wallpapering just this small section of wall would have cost me ~$200, which didn’t seem worth it.
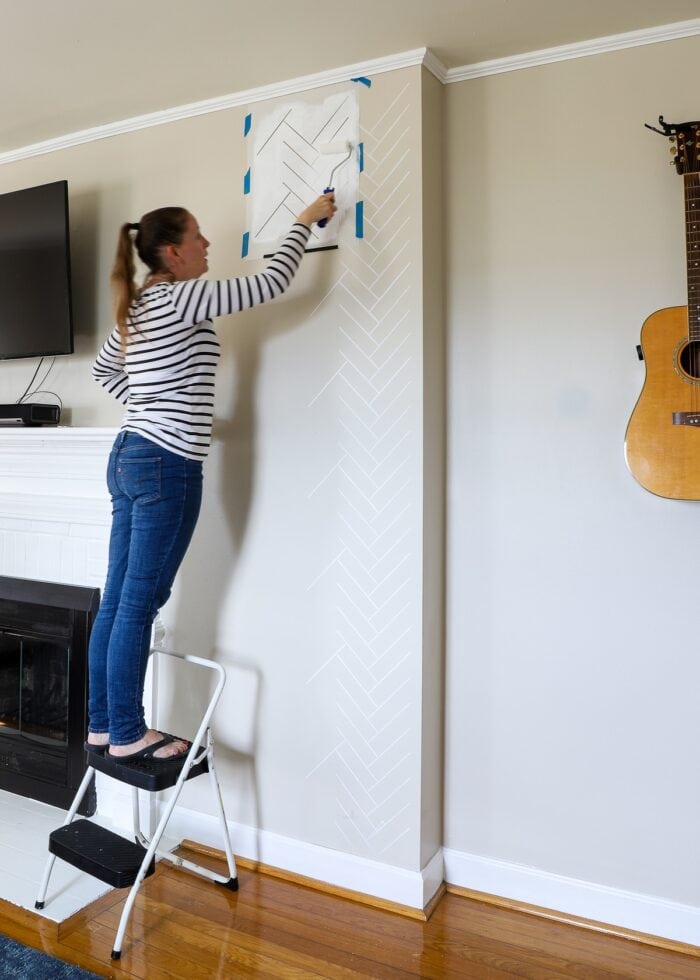
Look for Less: How to Stencil a Wall to Look Like Wallpaper
In the end, I opted to stencil a wallpaper-like herringbone pattern on the bump-out. While it did add a nice, subtle dose of pattern and interest to this huge wall, the project was sooooooooooo much work that it’s hard for me to view it as a true success. That said, it did take me all of about 15 minutes to paint over it before moving out, so it wasn’t entirely bad.
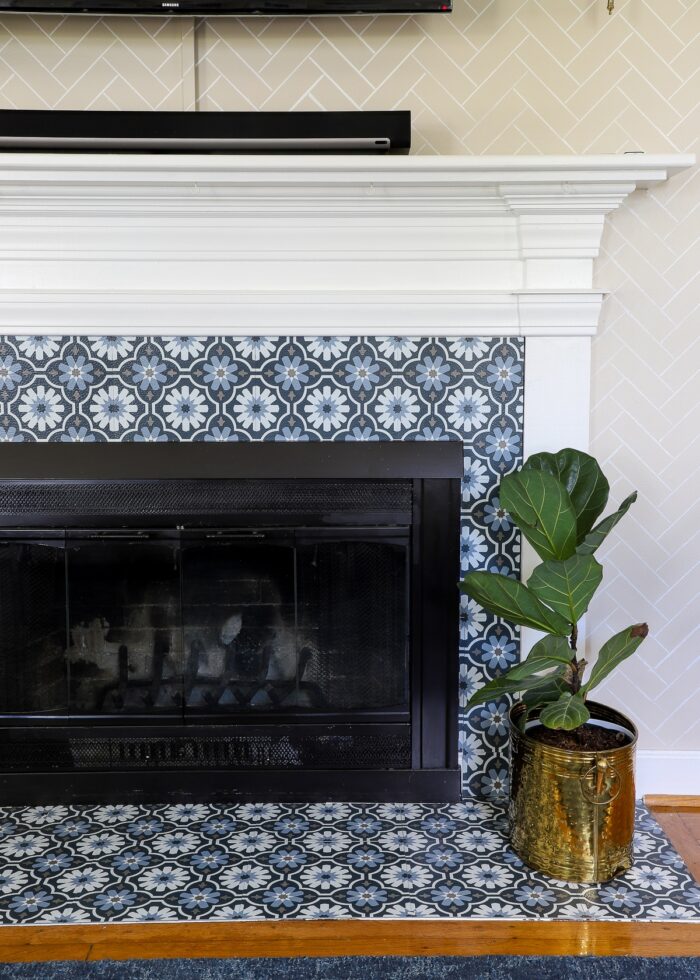
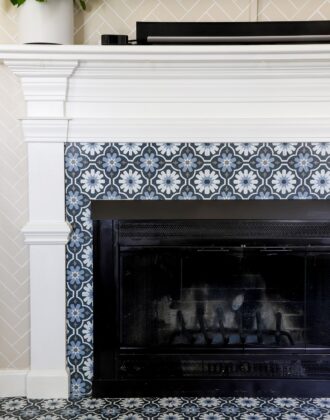
The Fireplace
The fireplace, on the other hand, had the opposite storyline.
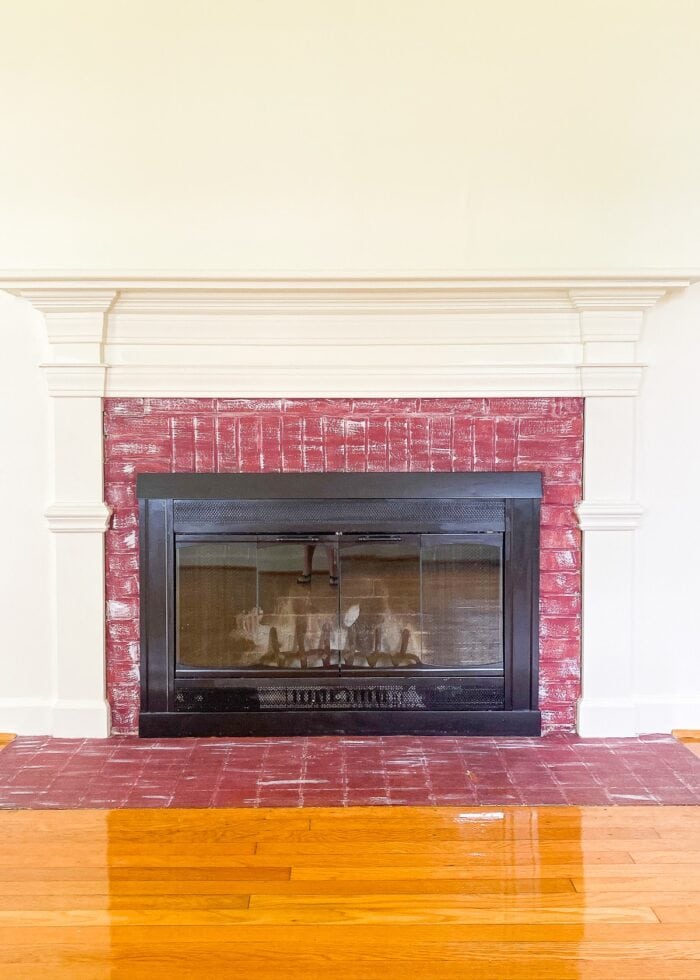
As a reminder, below is what the fireplace looked like when we moved in. Not only was the mantel painted the same blah yellow as the rest of the room, but all the brick and tile were painted over with maroon paint and faux white brick marks. (I have no idea why, but I always suspected someone, somewhere along the way, was trying to cover up some damage.)
With permission, I painted both the mantel and the surrounding brick/tile bright white, but it still felt a little under-done to me.
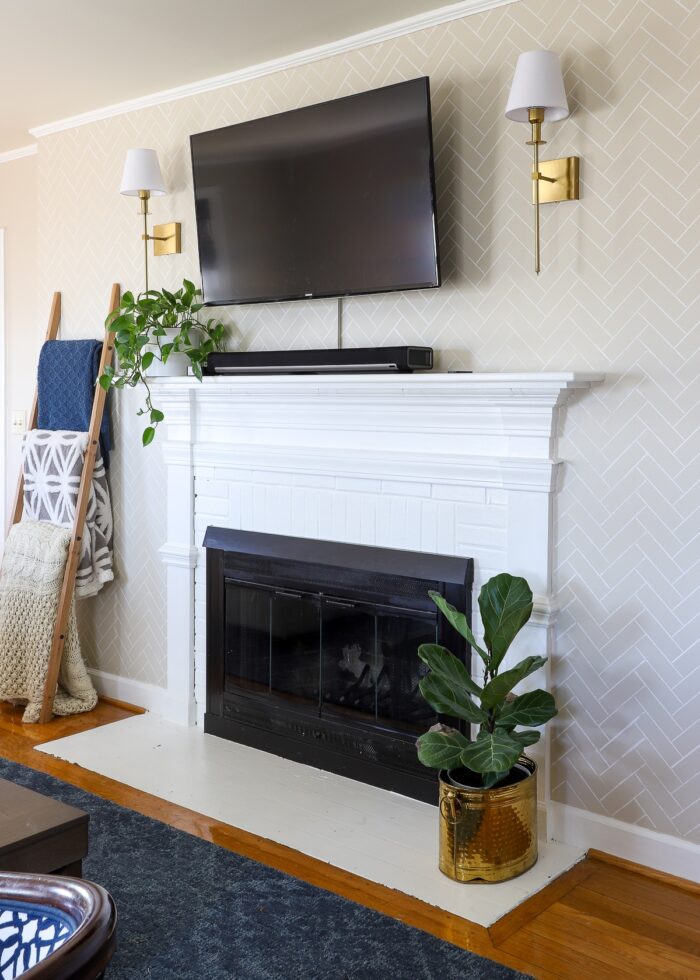
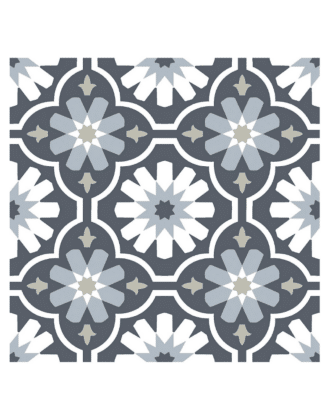
So I applied some pretty peel-and-stick tiles to both the hearth and the surround. This project was quick, cheap, easy, and rather stunning.
Renter Friendly Fireplace Makeover with Peel & Stick Tiles
In the end though, I determined the pattern on the surrounding brick was too much (within the room as a whole), and pulled those tiles down shortly after install. The hearth tiles stayed in place until we moved out, but they actually proved to be one of my biggest headaches in our final clean out. (I’ll have a full post dedicated to using Floor Pops in rentals coming up.)
The TV Cords
One more challenge on the fireplace wall was figuring out how to somewhat gracefully hide the electronics cords from our TV and components, especially since we weren’t able to drill through the wall. Although I received some “hate” for this project, I still think our solution worked well to hide the distracting cord chaos in a truly renter-friendly way.

How to Hide TV Wires Above a Fireplace (When You Can’t Go Through the Wall)
The Windows
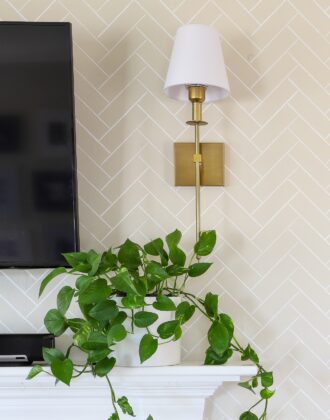
Another easy project that dramatically changed the way this room both looked and felt was the removal of the vertical blinds and addition of wooden bamboo shades. Removing the vertical blinds helped the whole room feel brighter and less cluttered, and the added texture of woodgrain on the windows really helped to enhance the overall coziness of the room. This swap was also really easy to un-do, making it another worthwhile change!
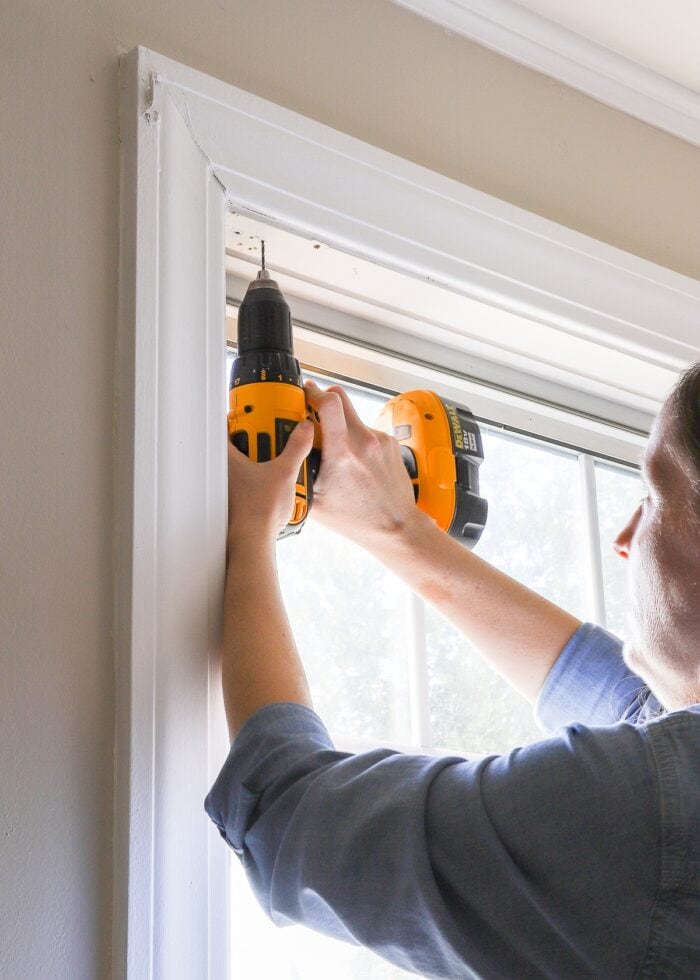
How to Remove Vertical Blinds | It’s Easier Than You Think

Installing Your Own Blinds or Shades | It’s Easier Than You Think!
The Furniture Arrangement
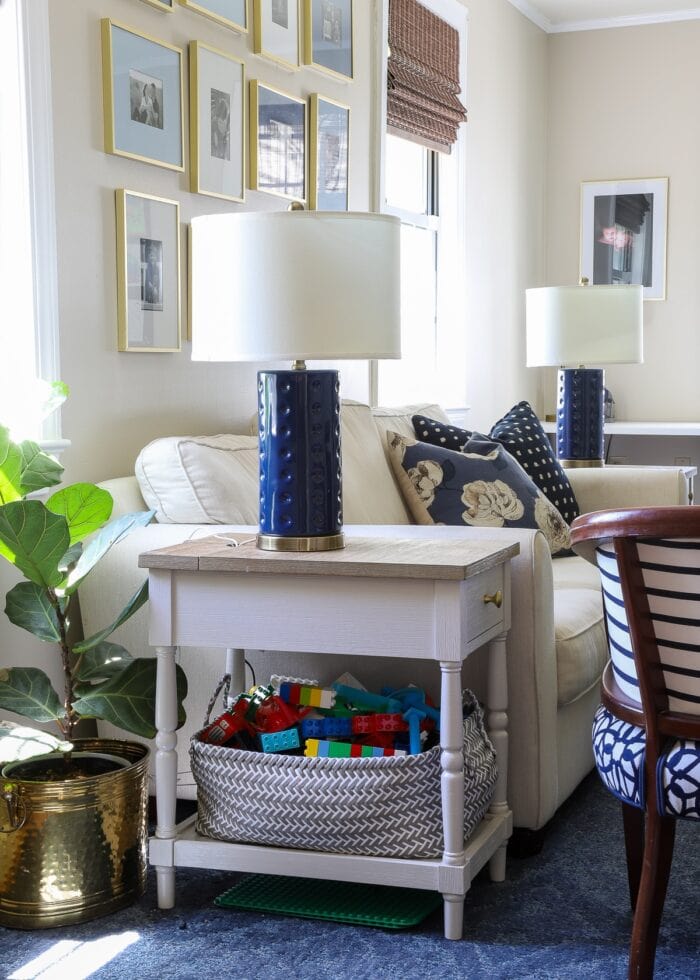
Being such a long, skinny room with randomly placed windows and features, furniture placement wasn’t exactly intuitive. Placing the couches along the walls felt like there was so much wasted space in the middle of the room, while splitting the room in half didn’t quite work with the centrally-placed fireplace (and TV above it). We ultimately opted to float our furniture in the center of the room (placed atop a gorgeous 10-x16″ wool rug), creating two distinct areas on either side of the couch arrangement.
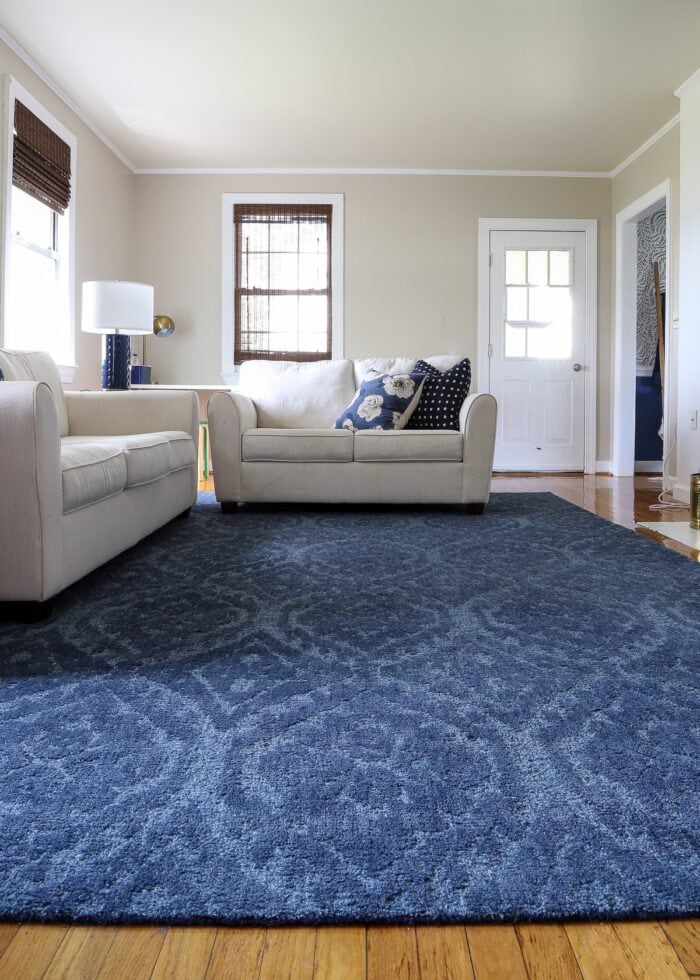
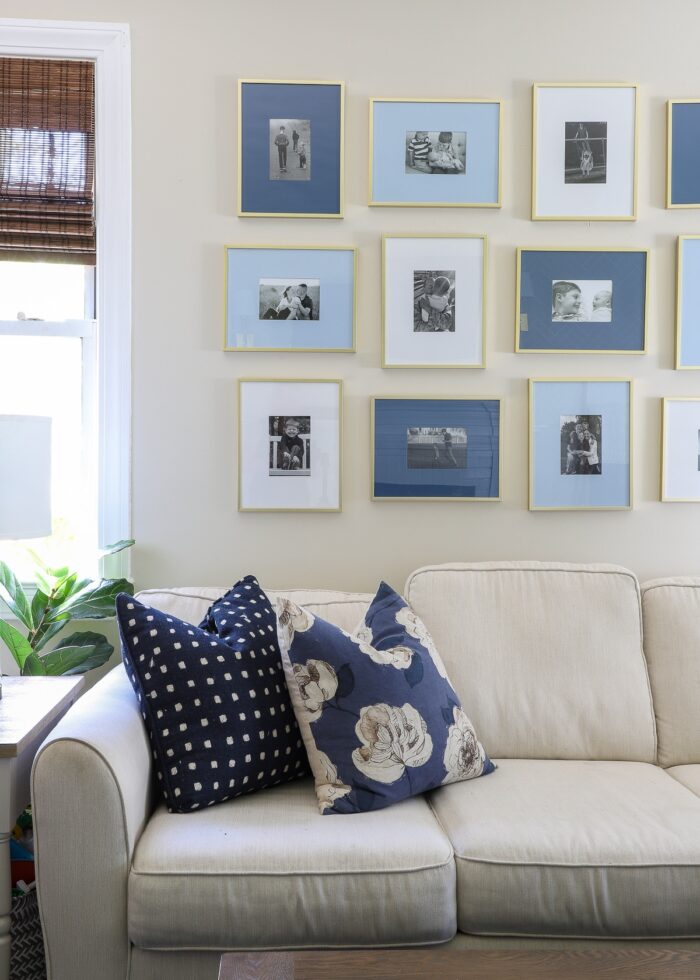
Side Note: Putting a blue rug under our white couches finally helped them work in our family room space(s)! One of my struggles with previous rooms was our white couches were always on top of light/neutral rugs, which always felt too bland. This combination works so well, I’m not sure I’ll ever put anything different under our white couches!
The side near the bookcases/foyer became our “playroom,” with most of the toys residing inside the built-in cabinets. For a time, our play kitchen sat on the small wall between the window and the bookshelf; but once it was moved, there was plenty of floor space for the kids to spread out and play, build, race, etc.
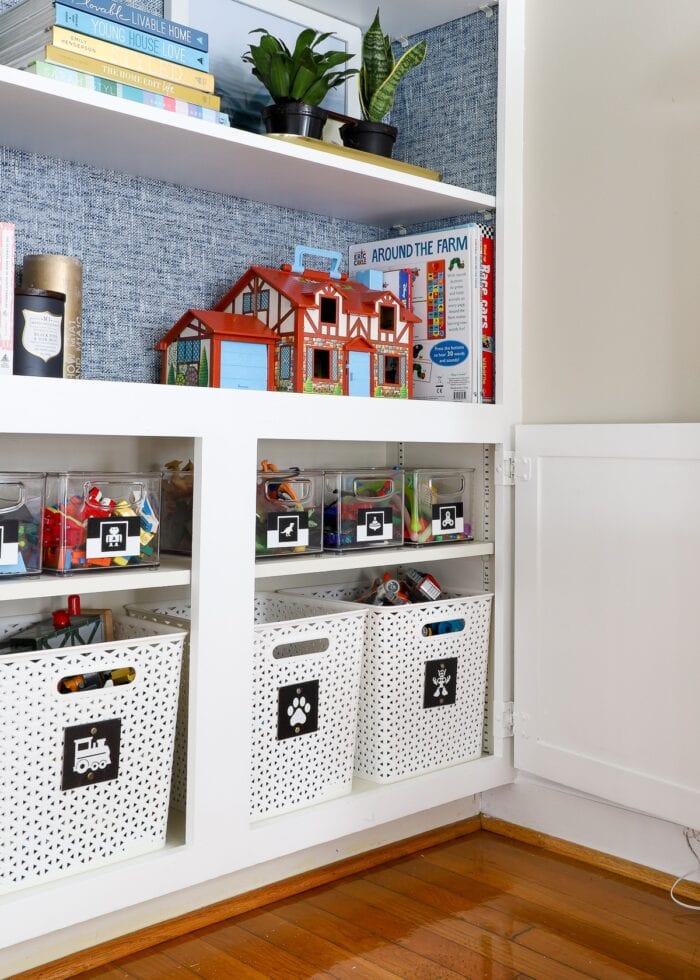
No Playroom? Try These Toy Storage Ideas for the Living Room
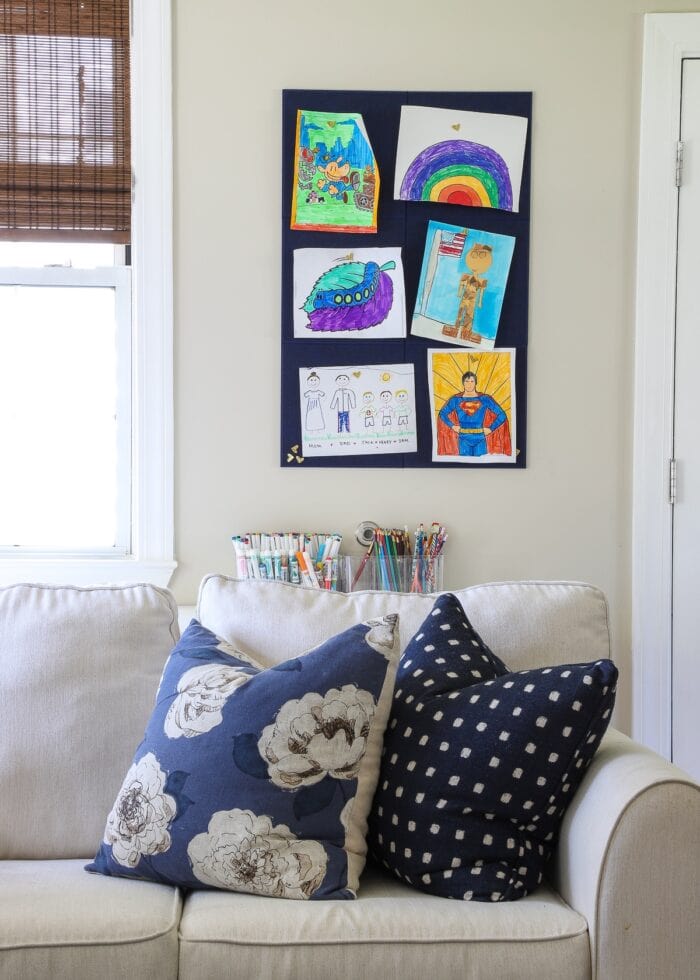
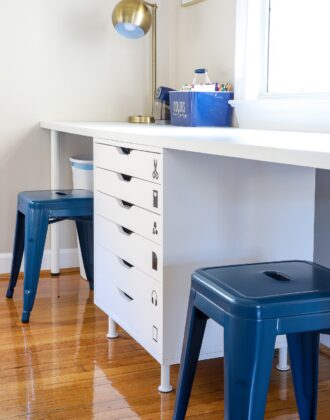
On the far side of the room, under the single window, we setup an “art station.” Outfitted with a long table, two stools, and ample drawer storage for art supplies, it really became the primary destination for our coloring-crazy kids. Not a day went by when they weren’t camped out at this table, projects spread out in countless directions. Without a doubt, this was the best way to use up this long, open space!
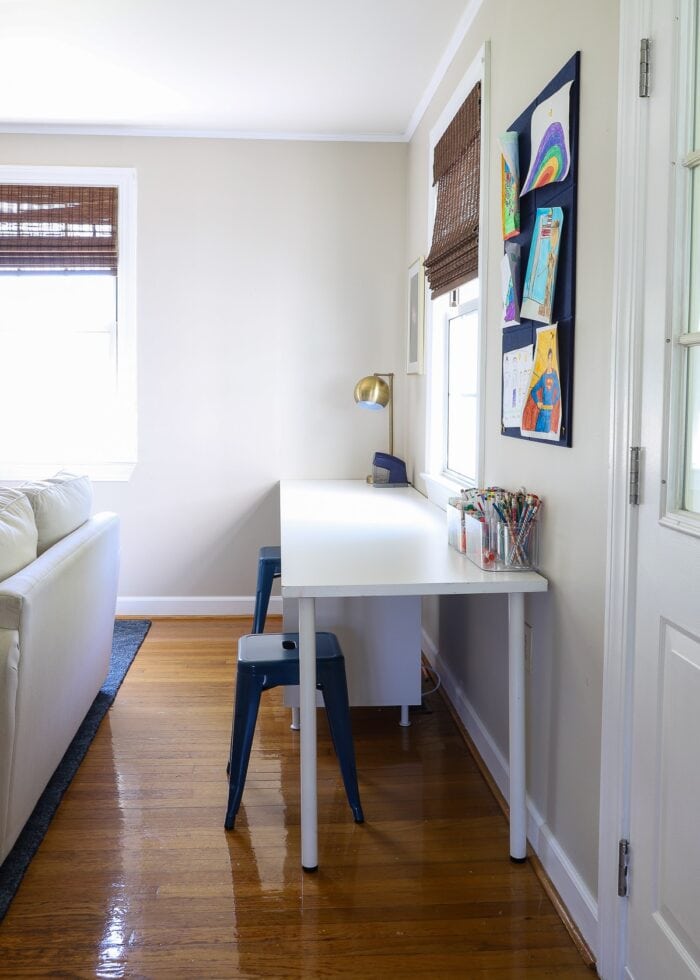
How to Set Up a Kids Art Station | 10 Essentials to Include

How to Make Picture Toy Bin Labels with a Cricut
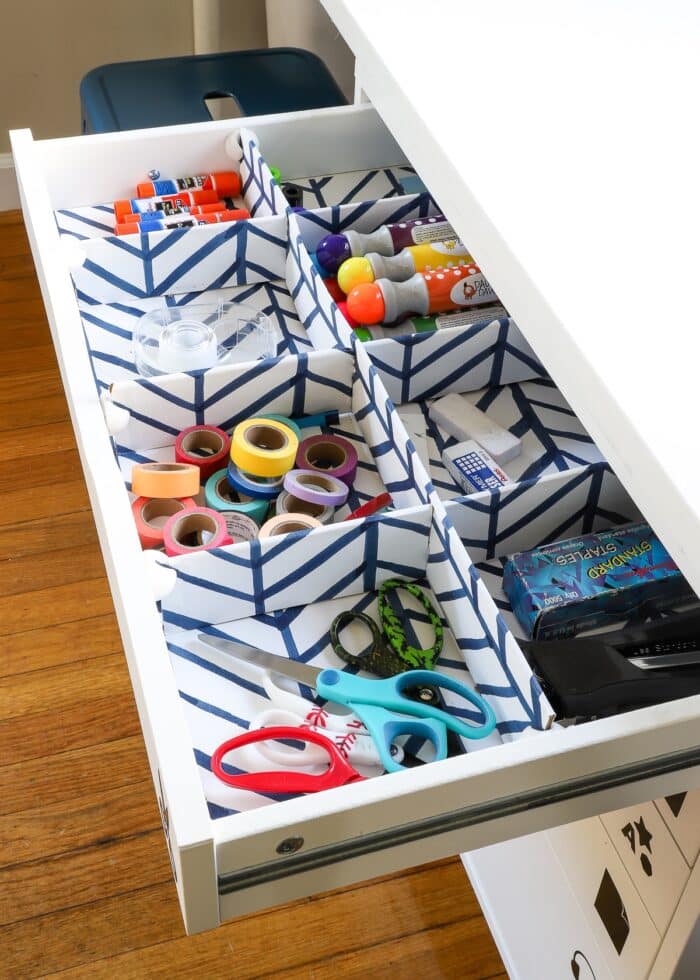
Easy DIY Drawer Dividers (Using What You’ve Got!)
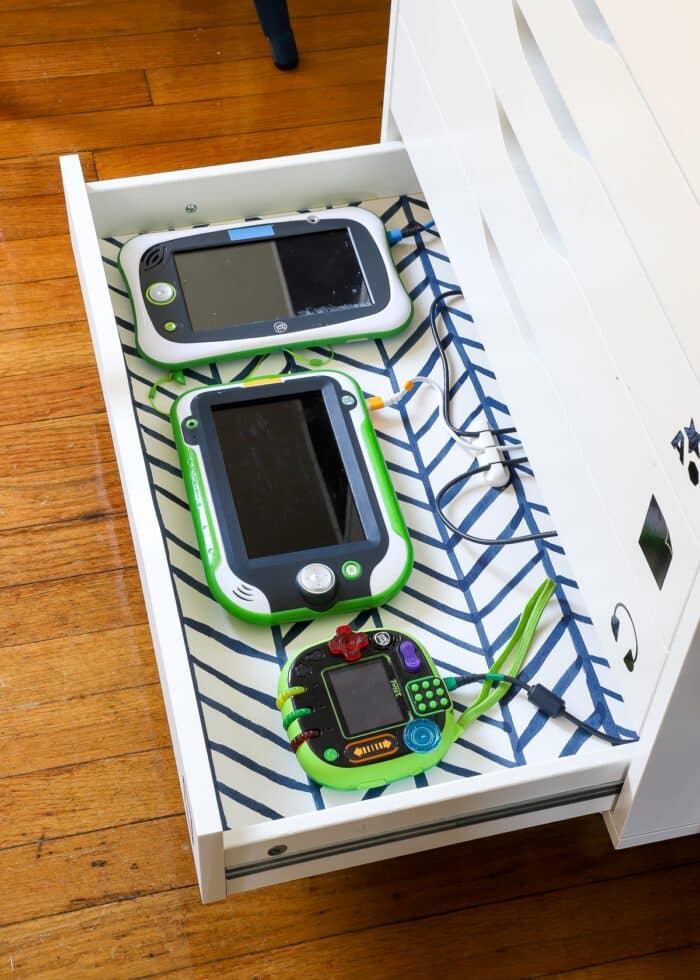
DIY Charging Station In a Drawer | Easy 1-Hour Project!
Making the Space Work for Our Kids
Last but not least, what I think really made this space functional for our entire family is that we took the kids’ needs into consideration. With toys tucked into unsuspecting locations, the art table in the corner, small stools under the large coffee table, and (of course!) a tv with couches and comfy pillows and blankets, this was a room we could all enjoy. I can’t help but feel that it’s these “real life” elements that helped the room feel so authentically cozy and just right for our family!

Explore All the Projects In This Room
At first glance, it may not look like this room was overly DIYd, but there were a lot of little-by-little changes that occurred in here! Below are all the projects in this room for you to explore in more detail:
- How to Wallpaper the Back of a Bookcase | Step-by-Step
- How to Style Bookshelves (When You Actually Need Them to Hold Stuff)
- The Rugs We Purchased for Our New Home (& Why)
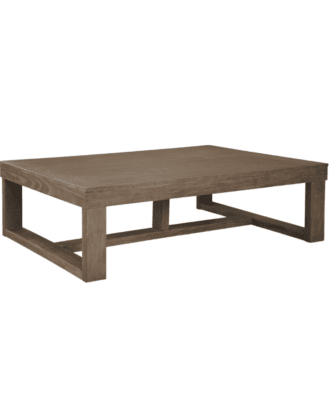
- Stylish Large Coffee Tables (That Are Affordable Too!)
- No Playroom? Try These Toy Storage Ideas for the Living Room
- The Best Solutions for Storing Tiny Toys
- How to Make Your Own Printable Toy Bin Labels (With Template!)
- How to Set Up a Kids Art Station | 10 Essentials to Include
- The Best Way to Line Drawers & Shelves with Pretty Paper
- DIY Charging Station In a Drawer | Easy 1-Hour Project!
- Look for Less: How to Stencil a Wall to Look Like Wallpaper
- Renter Friendly Fireplace Makeover with Peel & Stick Tiles
- Renter Friendly Wall Sconces | Without Hard Wiring or Puck Lights!
- How to Hide TV Wires Above a Fireplace (When You Can’t Go Through the Wall)
- How to Remove Vertical Blinds | It’s Easier Than You Think
- Installing Your Own Blinds or Shades | It’s Easier Than You Think!
Tour More of Our NC Rental
Want to explore the other room makeovers from our NC Rental home? Tour the entire home in the following posts:
- Full Before Tour
- The Kitchen
- The Family Room
- The Dining Room
- The Laundry Room
- The Office/Craft Room
- The Master Bedroom
- Our Teens Tiny Bedroom
- Shared Little Boys' Bedroom
- The Garage
- The Final Home Tour


This room felt like such a huge success, as I finally “cracked the code” on what works for our family and our furniture. While we might never have this much space again, the elements we applied here are flexible enough to carry over to any new home we find ourselves in!
Megan


6 Comments on “Revealing Our Cozy Family Room (That I Finally Got Right!)”
Turned out so good. I am still waiting for my living room to be finished. I plan to create something like this in my living room. I have two fun chairs from my husband’s grandmother, with the upholstery from when she had the chairs. I cleaned them and cannot wait to use them in my living room. I just need to pull the colors out of the fabric to use. Unfortunately, the colors are not my favorite. They may end up being accent colors. I will be revisiting this post when I get my turn to work on my living room!
Love it, the room is so pretty. I would think new tenants would love the warm walls, stenciling and wallpaper touches.
Hi Megan,
I am missing your posts. I hope all is well in your world. And that you are missing NC!
Kathie
Hi Megan, Your readers are thinking of you and hope to see you here in the fall to tell us all about the Carlisle, PA house + experience! ❤️
Are you still making email posts? I have not received any in quite a while.
Thank you.
Thinking of you and hoping all is well with your family and this is just a busy season for you!