How to Hide TV Wires Above a Fireplace (When You Can’t Go Through the Wall)
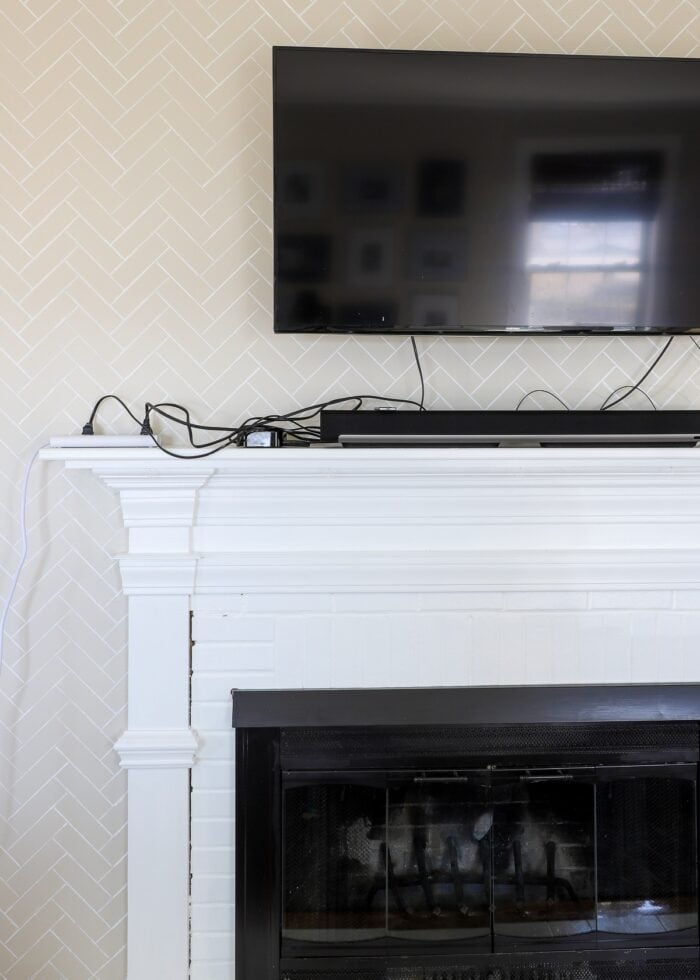
The most logical place for our television in our current living room was above the fireplace mantel. But without a built-in outlet and over 6′ to the nearest plug, we had quite the “ugly cord” situation on our hands. As renters, feeding the cords through the drywall was out of the question, so we had to turn to more “creative” means to conceal the cords and make everything look nice-and-tidy. Let me show you how to hide tv wires above a fireplace…when you just can’t (or don’t want to!) go through the wall!

Our TV Setup | Before & After
Mounting a flat screen TV above a fireplace has lots of pros and cons…both functionally and aesthetically. Functionally-speaking, a wall mount can save on floor space and make the television viewable across the entire room. But without a piece of furniture (e.g., media stand, console table, cabinet) directly below the television, the usual cord problems are significantly exacerbated.
In fact, unless there is an electrical outlet installed right above the fireplace, you will most likely be faced with having to run cords from the television down to any components (e.g., speakers, video game consoles, etc), as well as to a power source.
In most homes, there are no secret channels or built-in compartments above a fireplace to run these cables through…leaving them very visible right at eye level.
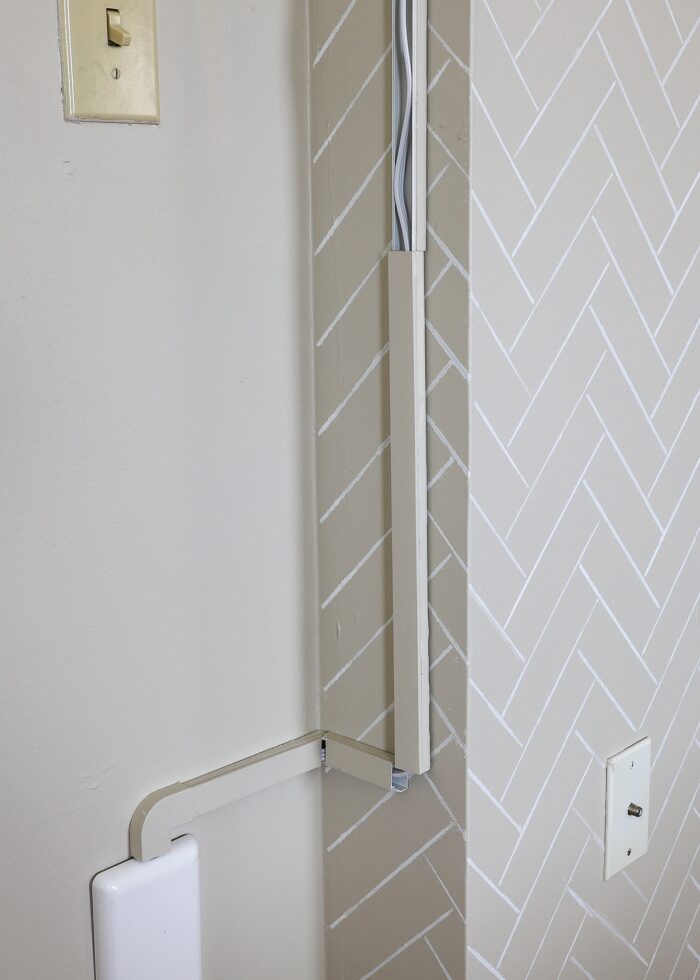
Our particular TV wall is even a little trickier since it’s a bump out. About 12′ of the wall protrude forward 8″, and the only outlet is far away AND on the recessed part of the wall. This meant we didn’t just need to stretch our cord across a long distance, but also navigate around two corners (one outer corner and one inner corner).
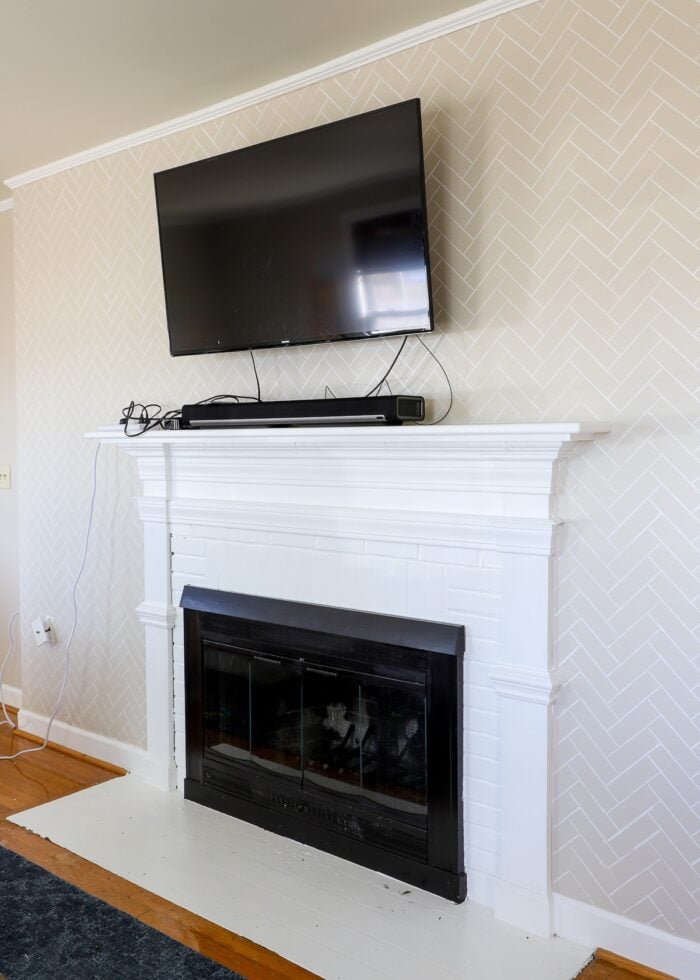
Having concealed cords with off-the-shelf cord covers before, we had a pretty good sense of what needed to be done. However, the distance and complexity of the protruding fireplace wall caused us to put this cable management project off over and over and over. But once I (finally) completed the wall stencil, it was time to deal with the cords and tidy up the whole display once and for all.

So with the help of two handy cord concealing products (discussed below) and a few well-placed accessories, we were indeed able to hide wires and vastly improve the cord situation above our mantel.

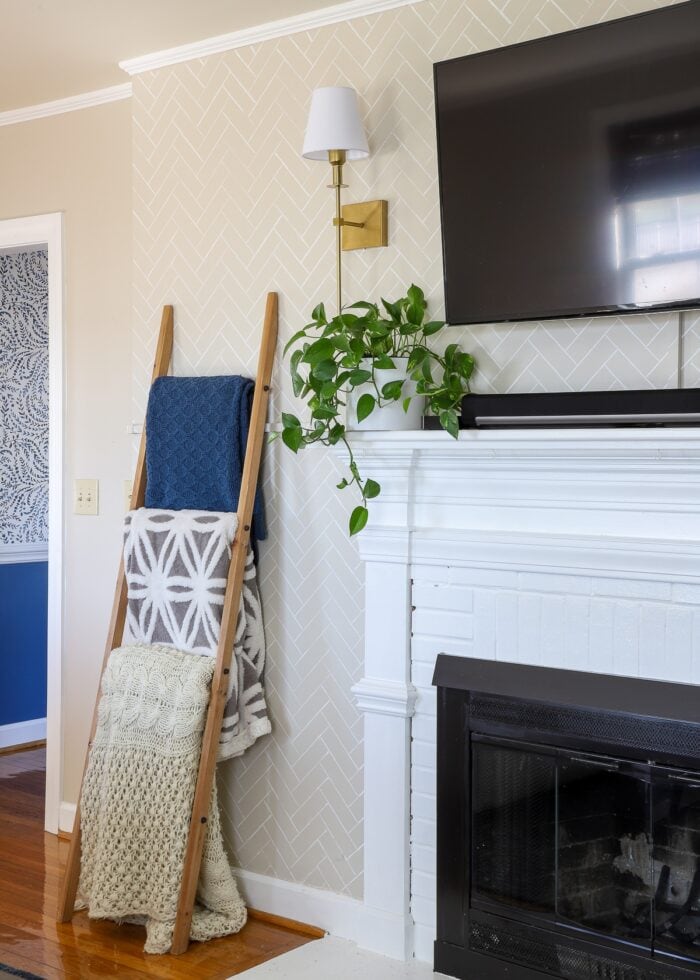
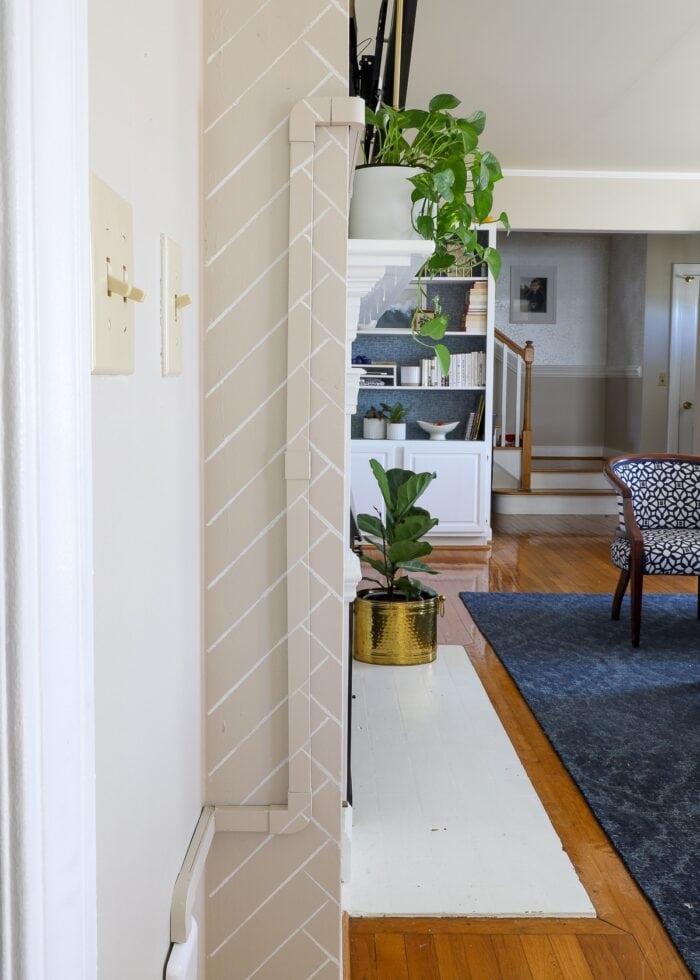
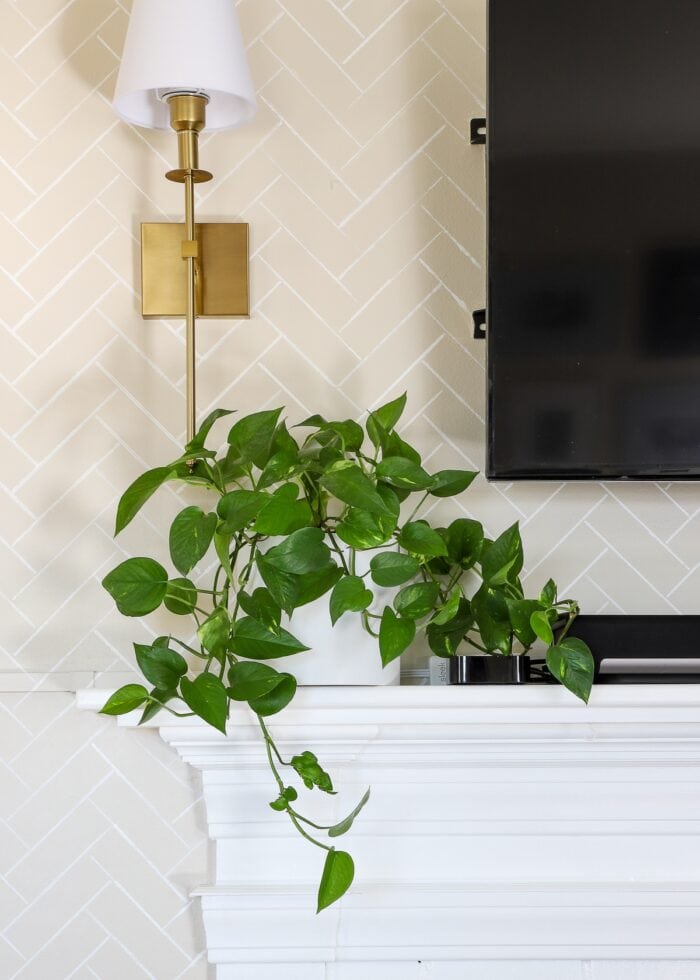
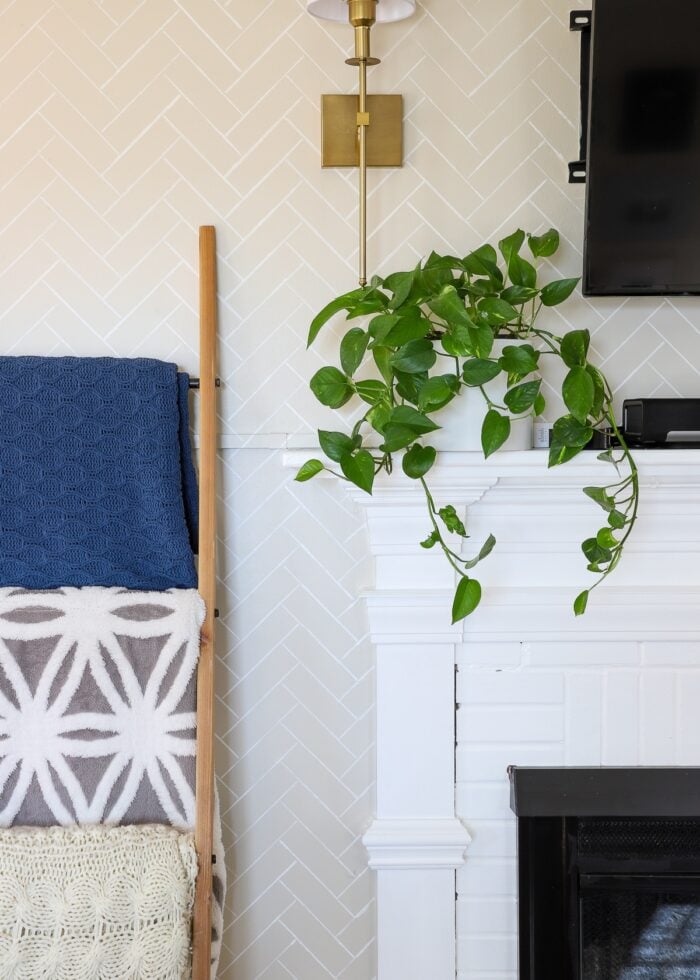
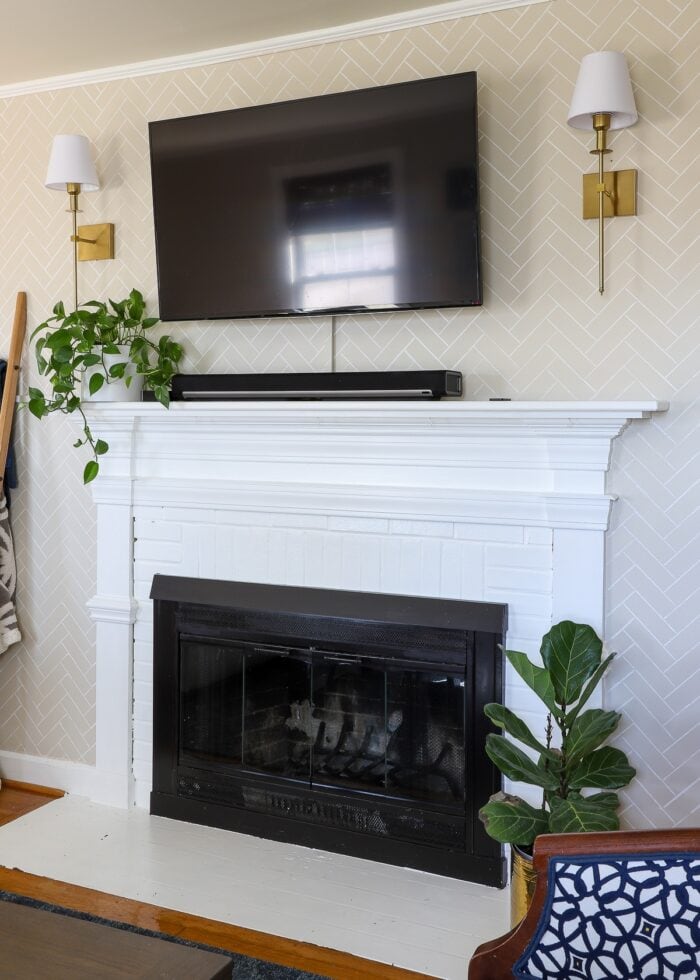
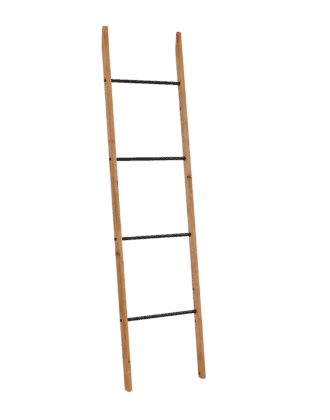
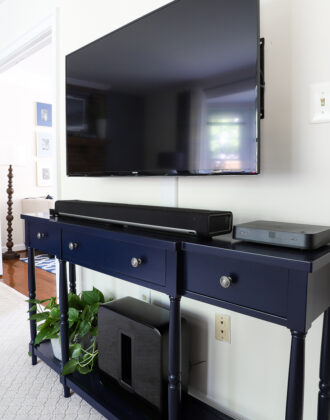
You see…behind that blanket ladder and plant…
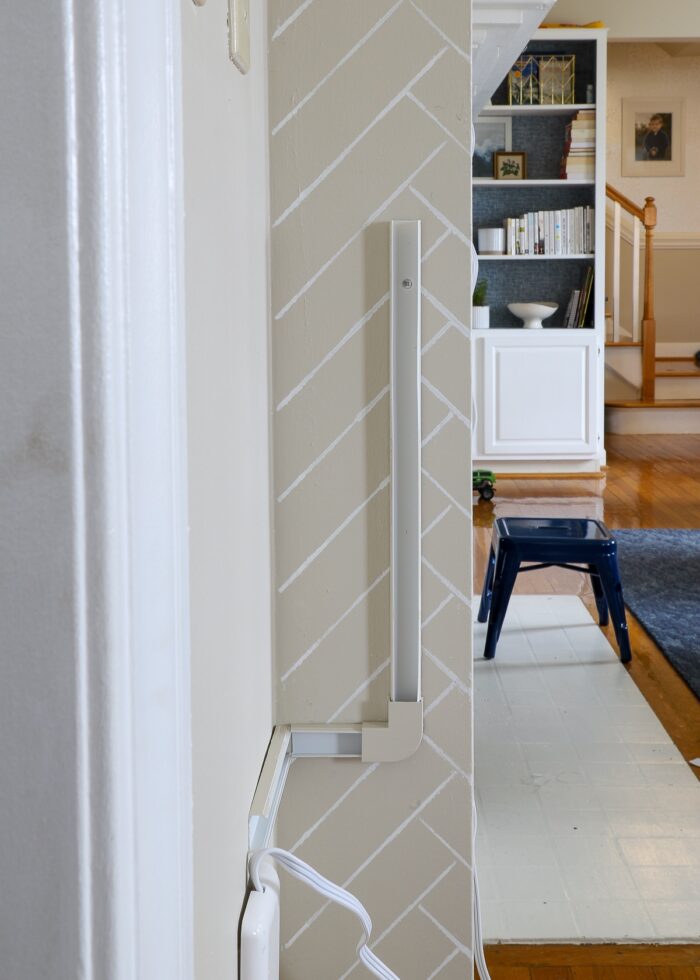
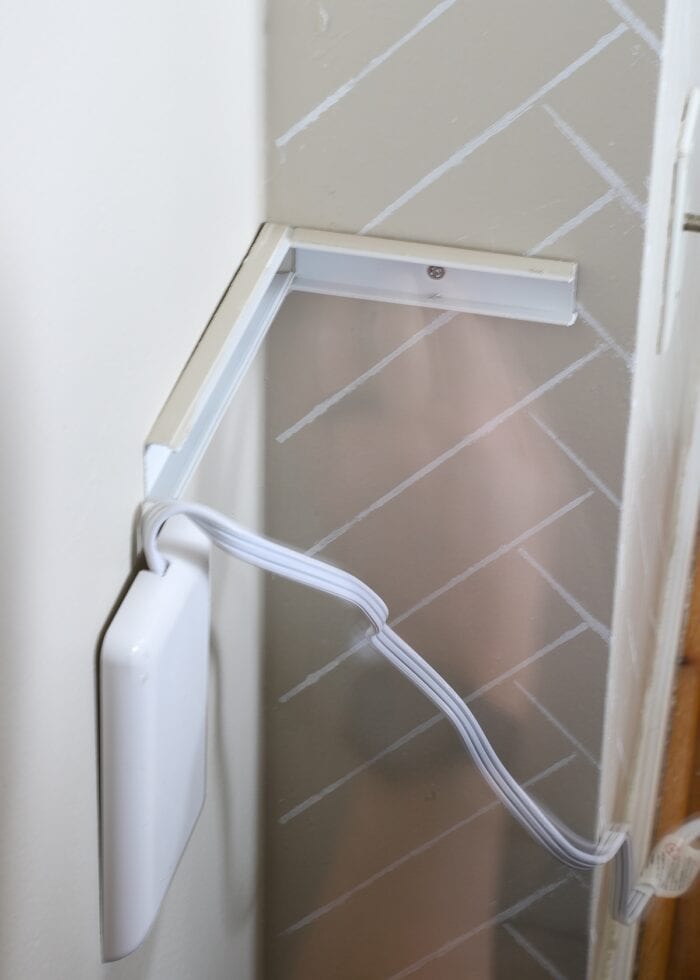
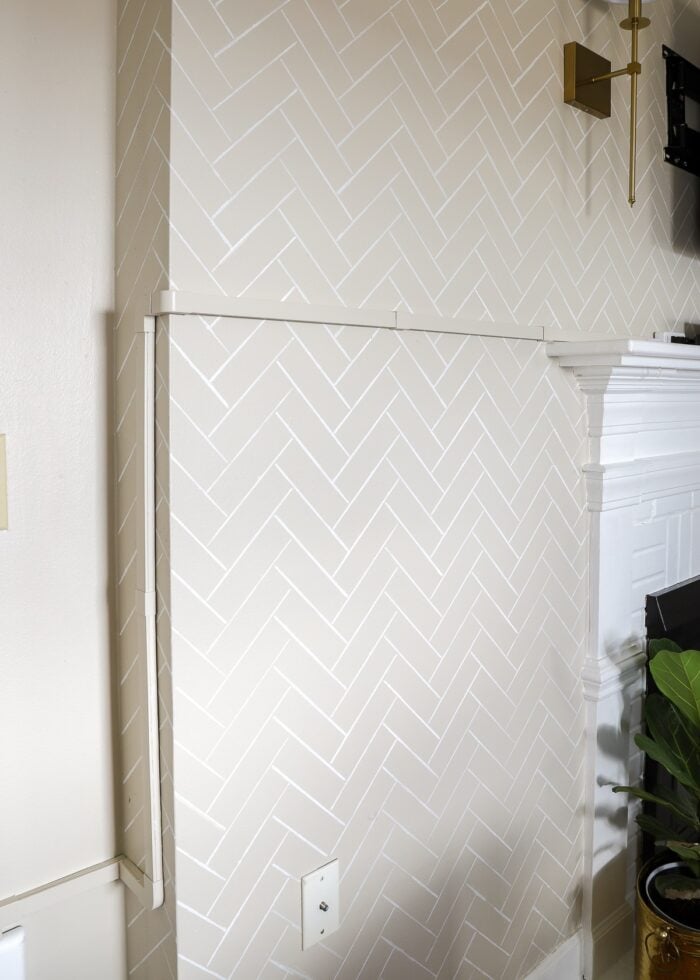
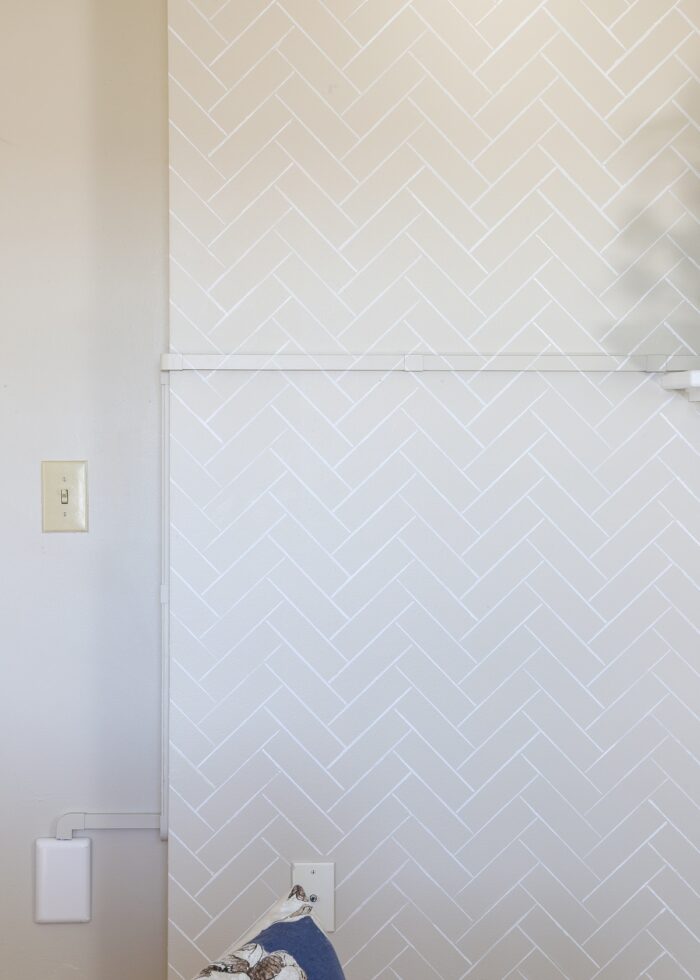
…is a thin track that conceals the power cord from the top of the mantel…
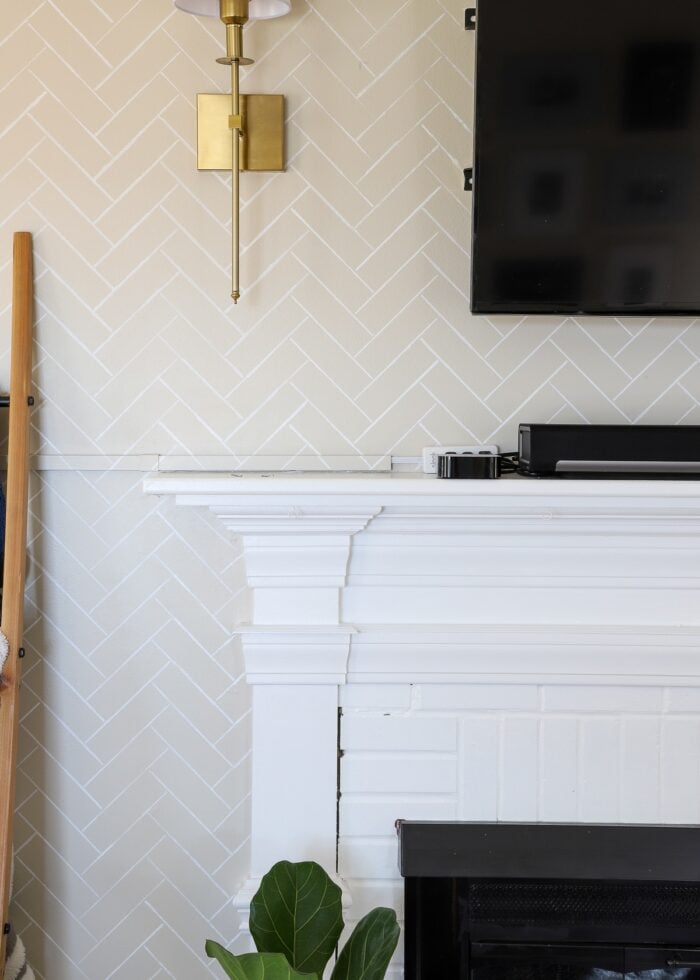
…across the wall, around the bump out corner, and down to the outlet.

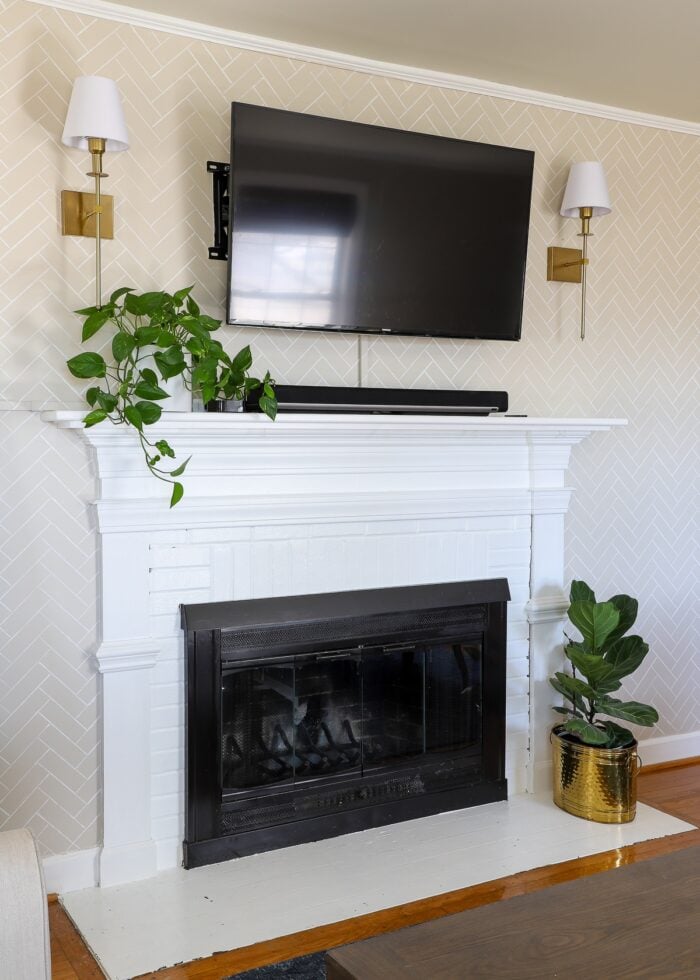
While this solution is not 100% concealed (obviously), this particular wall left us with very few good options. In the end, I’m just happy not to be looking at a mess of clunky black cords; and if I squint, I can almost not see any cord concealer at all!
Supplies Needed
If you too have a TV mounted above a fireplace and you can’t (or don’t want to) drill through the wall in order to hide the cords, here is what you’ll need:
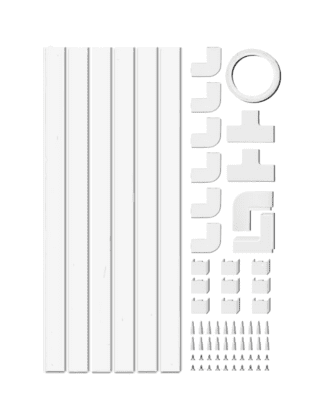
- Cord Cover Raceway Kit
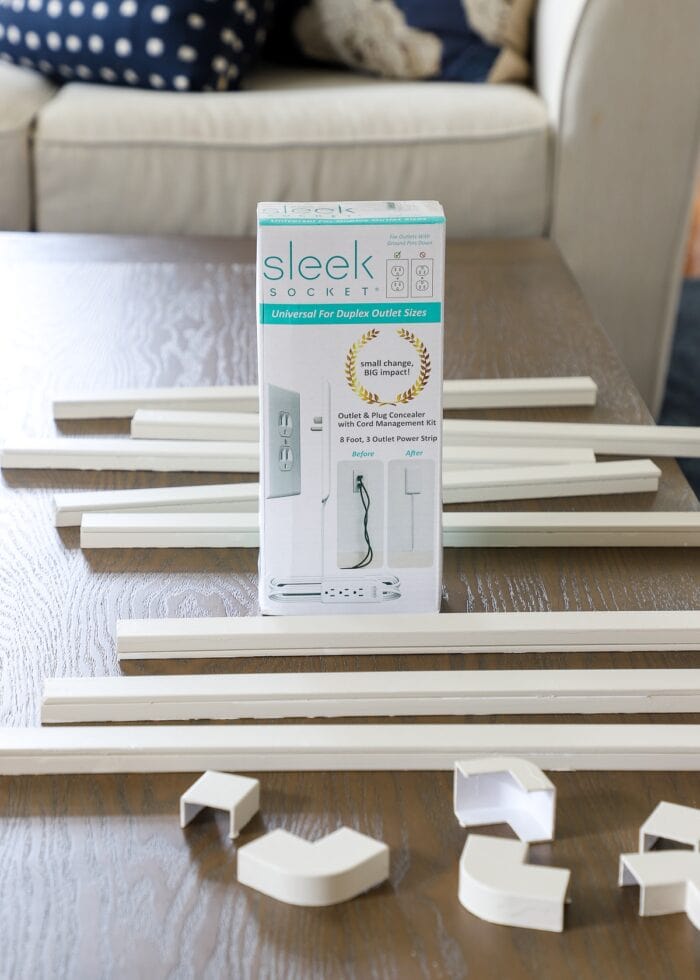
- Sleek Socket
- Small Level
- Saw – either a Jig Saw or Mitre Saw are ideal
- Scotch Tape
- Electric Screwdriver (if opting against peel-and-stick strips)
Picking the Right Cable Management Kit
Before diving into the step-by-step tutorial, let me quickly chat about what particular product you should use to conceal your cords.
The best choice for your particular setup will primarily depend on these things:
- How many cords need to fit through the raceway? – 1 or 2 cords? A smaller cord track will be sufficient. 4+ cords? You’ll need a wider raceway.
- How far do you need the cord concealer to run? Do you have a short, straight stretch (like in our Virginia Family Room)? A single raceway will be enough. Do you need to cover a long distance? Look for one that has multiple sections like the one we used for this fireplace installation.
- Are there any corners to navigate around? If so, be sure to pick a kit that has corner covers for all the different directions you need.
In our last home, we had great luck with this single cable raceway because it fit lots of cords (e.g., HDMI cable, ethernet, etc) in a single track. However, this fireplace installation was very different because of the distance and bends. As such, we opted for this 13′ track that better accommodated all the turns we needed to make.
Why Use a Sleek Socket?
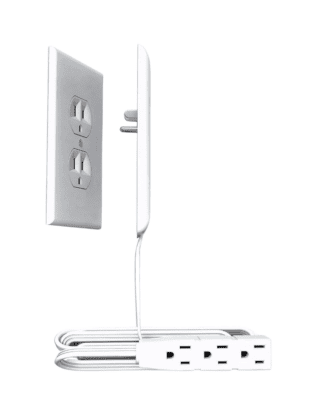
The Sleek Socket is a very cool outlet cover+extension cord+power strip that allows you to really streamline your cord situation.
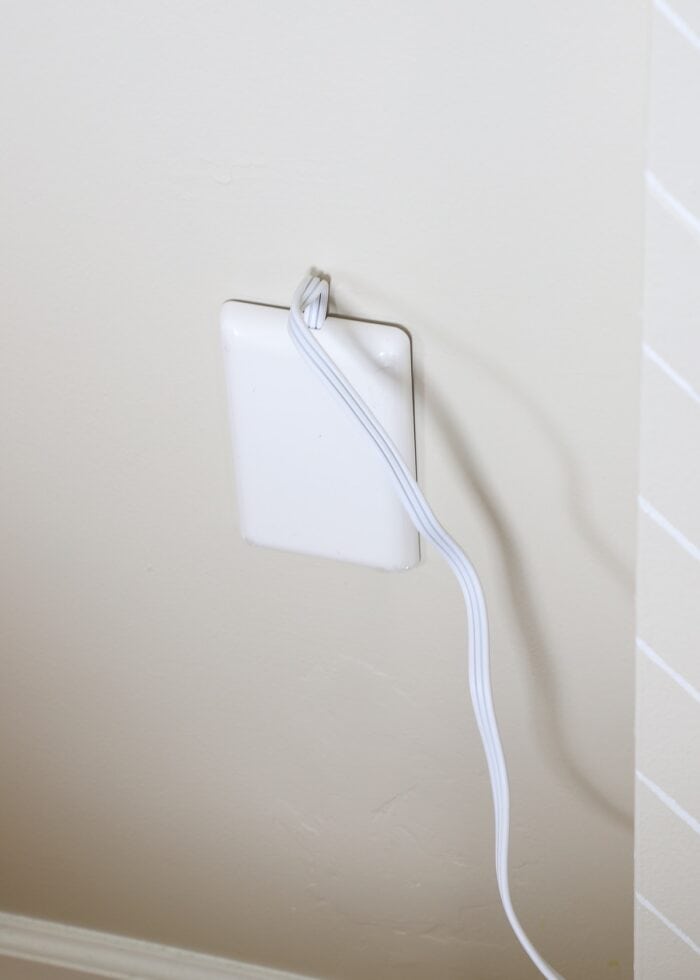
To start, it has a full-plate cover that places the (flat) power cord flush against the wall. Instead of having a (standard) bulging cord that is difficult to bend and maneuver, this product instantly allows you keep cords flat against the wall and the outlet looking simple, tidy, and clean (no long surge protector sitting awkwardly on the floor!)
The other end of the Sleek Socket has a slender 3-plug arrangement that is easier to hide compared to most power strips. We chose the 3-plug version based on the components we have on our mantel, but they have other options for 2 and 8 plugs as well.
While you can certainly use this tutorial with a standard power strip/extension cords, the Sleek Socket will really help your whole arrangement appear tidier in the end!
Video Tutorial
If you’d like to watch how to this cord cover project came together, here is a 2-minute video of the entire process. Full picture/text instructions are below the video. (Video not loading for you? You can watch it HERE!)
Step 1 – Plan Your Route
If there is one tip you take away from this tutorial, let it be this one: spend some time learning how your particular cord raceway kit works AND plan out the routes before you secure anything to the wall.
In most cases, there are two different routes you will need to figure out:
- From the TV down to the mantel
- From the mantel to the outlet
From the TV to the Mantel
Working from the back of your TV down to the mantel will likely require just one track. However, you will need to make sure it runs high/low enough to completely conceal the cords behind the TV.
Also, ensure you leave enough cord slack if you move your TV in/out or tilt, swivel, or adjust it frequently. You might want to use cord clips or zip ties to bundle up excess length so they don’t dangle loose below the TV.
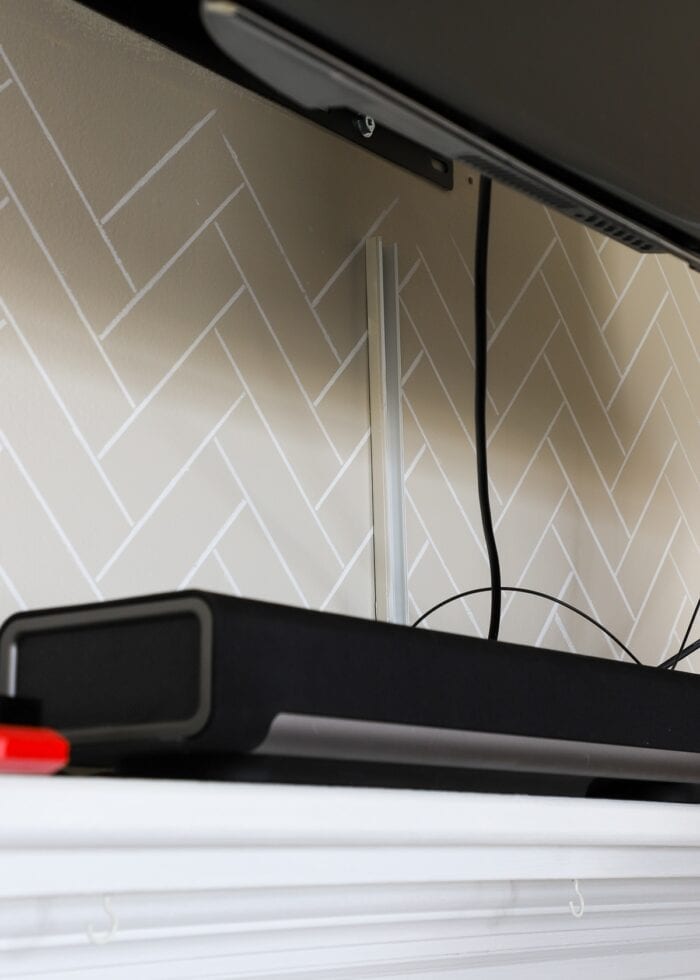
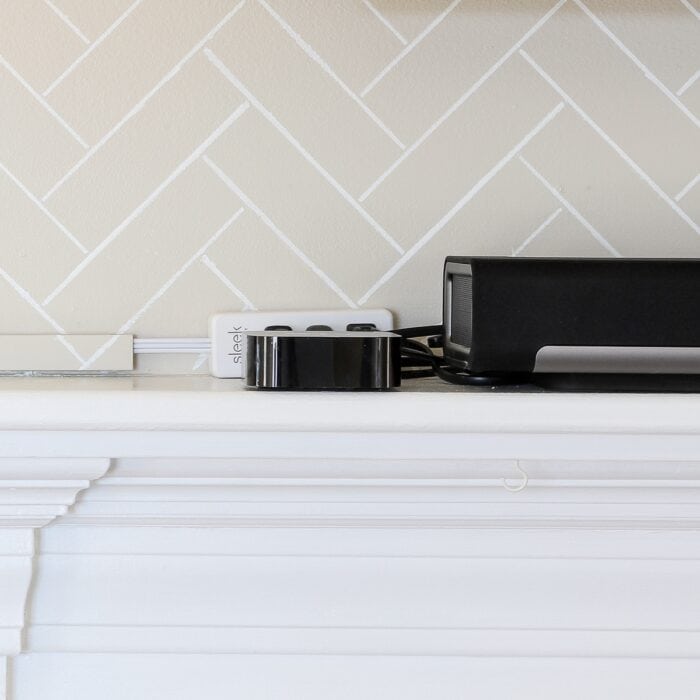
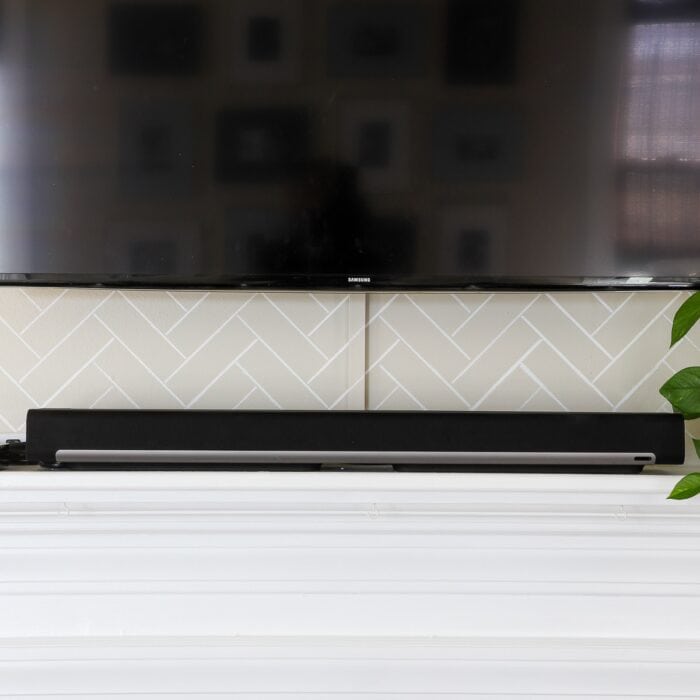
We didn’t bother hiding the cords at the base of this one vertical track since we have a sound bar on the mantel that hides the unsightly wires. If you don’t have anything on your mantel, you will likely want to continue the track, turning toward the outlet and running parallel to the mantel.
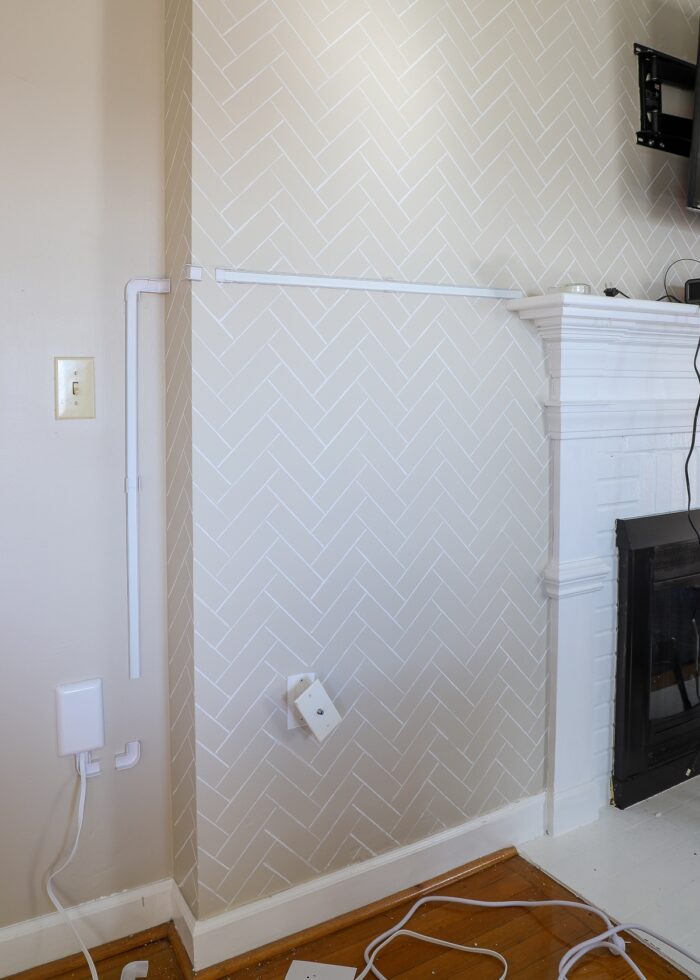
From the Mantel to the Outlet
For any wall, there are likely several different ways you can route your cords from the mantel to the outlet. Whether you go up and over, down and around, or straight across like we did, each layout will require different lengths and turns. You will need to figure out a route that works with your wall, the length of your power cord, and the unique cord concealing pieces available in the kit you choose.
Here’s why.
We originally didn’t spend too much time planning out our route. We had a general sense of where we wanted to go and just started installing the channels. But after we got the first few channels down, we discovered that the right-hand turn we needed to make in order to go around the bump out corner required extra wall space.

So we had to re-trim our pieces and move the entire arrangement over to the left in order to fit the right-turn.
This was a fairly easy correction to make, but it was also very preventable. So…here’s where you get to benefit from my lesson learned: Before you even screw anything into the wall, I recommend taping your tracks to the wall with Scotch tape. This will not only allow you to get your layout exactly as you want it, but also cut various track sections down to fit, as needed.
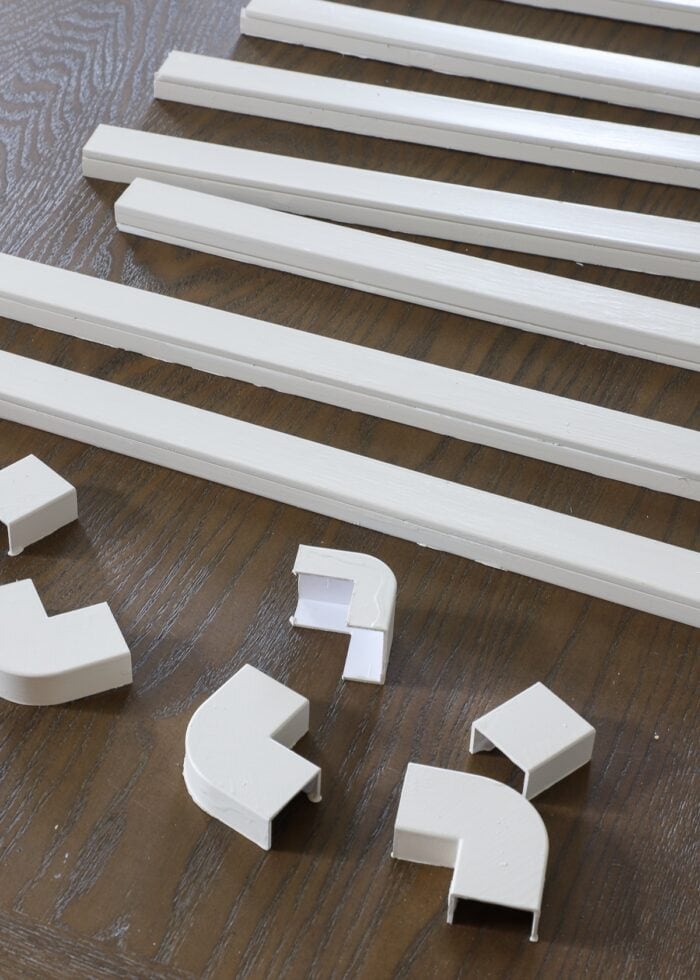
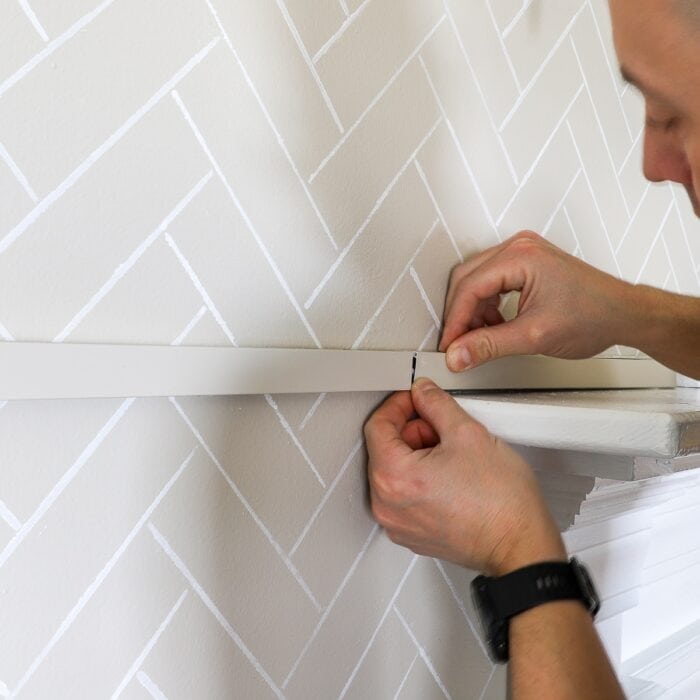
Cutting the Cord Raceway Track
Our cord concealer kit came with 10 sections of 15″ track. In order to work around the corner and reach the outlet just right, we had to cut the track into shorter sections. Unfortunately, we found the plastic just too hard to cut with an X-acto knife or hand saw and had to pull out the power tools.
As you identify sections in your layout that require shorter lengths than what comes in the box, mark the length with a pencil and then use either a Jig Saw or Mitre Saw to trim both the track and the cover down to the size needed.
Want to save this post?
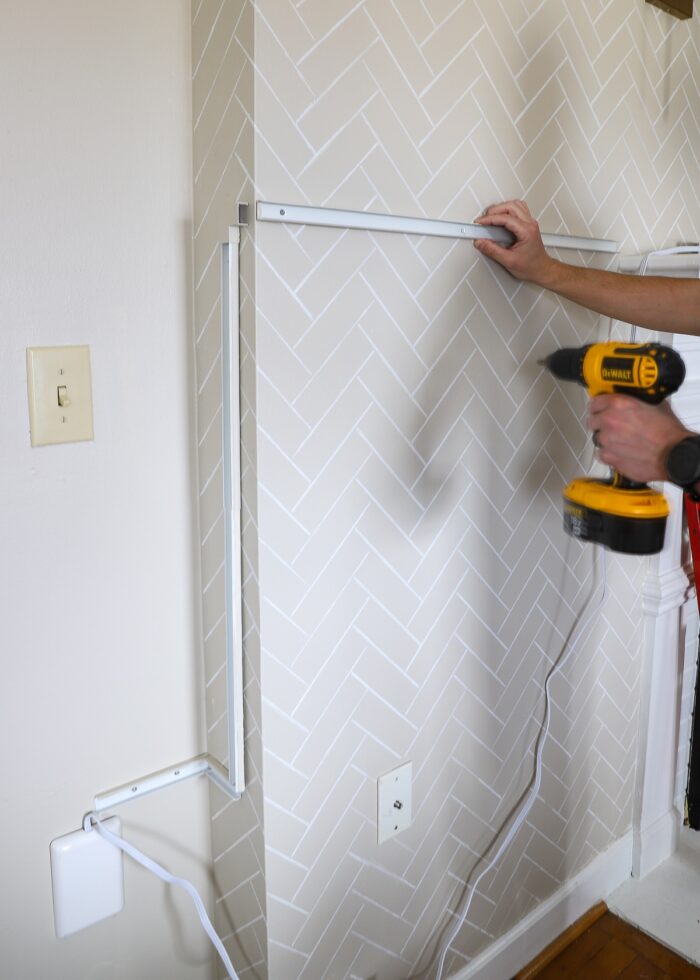
Step 2 – Secure Your Track
Once you have your track layout exactly right, you can start securing it to the wall. To ensure that all the extra “slack” ends up on top of the mantel and not down by the outlet, I recommend starting on the outlet side.

Our cord concealer kit came with adhesive strips, but not the easily-removable kind. They were instead the “rip the paint off the wall kind.” Since our management company doesn’t require us to patch small holes, we opted to screw our cord concealers in place instead.
However, screws can have a downside too. Beyond creating holes you may have to repair, they will be harder to install on a brick wall above a fireplace and are tougher to get through the plastic track. Adhesive strips are definitely the “easy installation” option.
All that to say, whether you use the adhesive backing or screws is up to you and your particular wall situation.
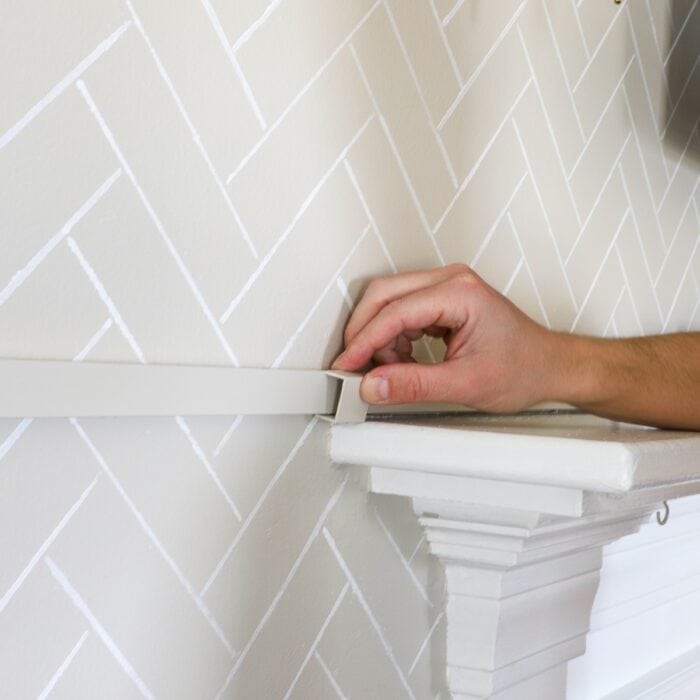
Install one piece of track at a time, constantly checking to make sure your cord passes through the track exactly as you want it to. Although the cord cover “junctions” will cover up a lot of imperfections, use a small level and line up ends to keep your entire installation looking tidy.
Step 3 – Attach Cord Track Covers
As you install your track, the cord will likely not stay put and instead fall to the floor (as shown above). What will ultimately hold the cord in place will be the track covers. So once the bases of the track are fully secured to the wall, go back and attach the covers to each section, while ensuring the cord sits flat and smooth in the channel.

While I can’t speak for every cord kit out there, our covers were rather tricky to snap on. Take your time to really ensure everything “clicks” into place because over time, the weight of the cords can pull the cover away from the track if not properly secured.
Step 4 – Place Junction & Corner Covers
Once all the long covers are in place, the next step is to snap on the junction covers where any two ends of track meet. While you might be tempted to skip this step if you have a fairly short install, these junction covers will ultimately hide every bit of cord and “firm up” the entire structure.
Once all the corner and junction covers are in place, the whole arrangement will really look neat and tidy, without a cord in sight!
Step 5 – Paint the Cord Concealers
Most cord concealers are paintable so you can “camouflage” them to match your wall color. Whether you paint them before or after installation is up to you.
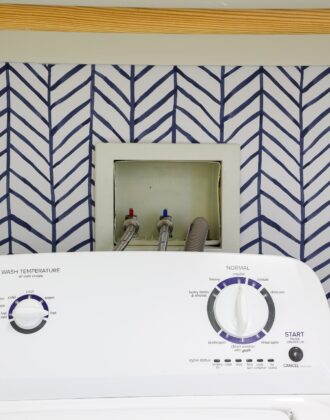
Because of the stencil on our wall, I opted to paint the cord concealers beige prior to installation, but then added the stencil detail once everything was in place.

If you have a patterned wall (e.g., stencil, wallpaper, stripes, etc), I very much recommend you paint/wrap the cord tracks after installation so you can be sure to get the pattern continuation just right.
Step 5 – Strategically Accessorize
We specifically chose both a cord length AND route that would allow the plug side of the Sleek Socket to reach behind the electronics that sit on our mantel. So once the cord and track were fully in place, only the outlets were exposed along the mantel top, which we could tuck behind the Apple TV.
While this arrangement was sure better than what we started with, I realized a few well-placed décor accessories could help conceal our cords even more. So I placed a large plant on the left-hand side of the mantel…
…and a blanket ladder in front of the larger expanse of wall (where the cord track is much more visible).
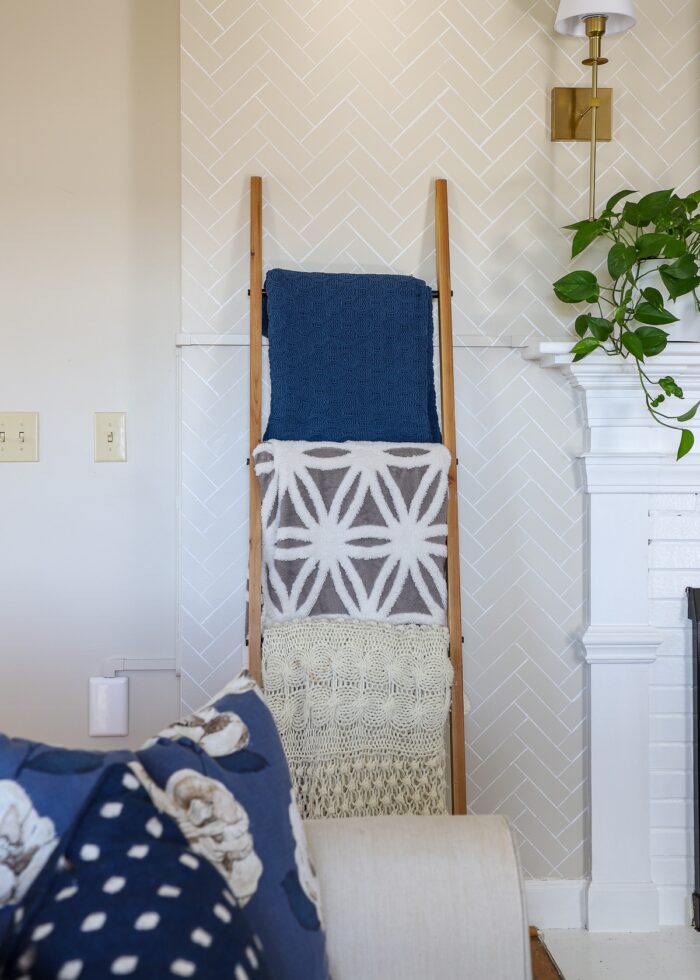
While these two things don’t 100% hide the cord tracks, the entire display, as a whole, is much less of an eyesore. While you can certainly find the cord track when you’re looking for it, it doesn’t jump out at you nearly as much as the black cords did.
So if you find that your cord concealing “tricks” are still just a bit too visible, brainstorm what kind of plants, objects, books, art/frames, lamps, or other items you can use to distract the eye away.
No fireplace mantel but still have a mess of cords under your TV? Check out my other solutions here: Easy Ways to Hide Cords Without Drilling Through the Wall
If you have a TV installed above a fireplace mantel and you just aren’t sure how to tackle the mess of cords, I hope the concepts and products I shared here help you figure out a solution for your own setup. While this kind of project is never fun and quite often tedious, it’s almost always worth it to not look at a mess of ugly cords while trying to relax or watch TV!
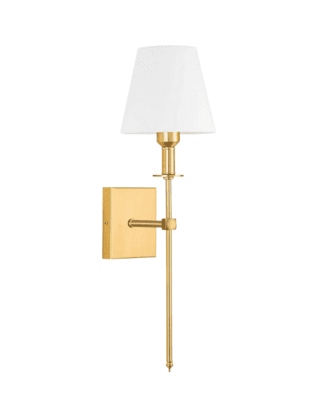
Curious about the “wire free” sconces too? Learn more here: Renter Friendly Wall Sconces…Without Hard Wiring or Puck Lights!
Megan

8 Comments on “How to Hide TV Wires Above a Fireplace (When You Can’t Go Through the Wall)”
Another great project!
I have no need for this solution, but I still read every word because of the excellent way that you explain your decisions – and point out what a person should consider before moving forward, every step of the way. I am not handy and even I feel I could install this, after reading your description!
You did it again! Wow! I bought a wall mount Apple TV holder so it can sit on wall behind the tv. We have no mantel presently. I’m going to buy a hollow box type (they are actually cheaper imported from China than buying lumber locally) and we will judiciously place some holes in it. Our fireplace facade is floor to ceiling slump stone and we white washed it. It is wider at the bottom (7’) and tapers up to 3’. I hate it lol but we are owners so have some leeway.
Now I want to know are the lights functional? Battery operated or were there older scones with j boxes already there?
Very spiffy.
As much as I would like to corral the cords under my TV, I fear that I can’t get my son onboard to help and the daughter who would is too busy when she’s in the area.
Fantastic job you did and tutorial is great as well. Can you give us information about the sconces on either side of the TV? They also add to the wonderful result.
The tracks look as bad as the wires!
No it doesn’t! And you know it. Heck, painted duct tape would look better and be more tidy than dangling wires and cords.
How do you deal with your cords? Got a better suggestion or just want to gripe and criticize?
Thank you for this. Much appreciation to you!