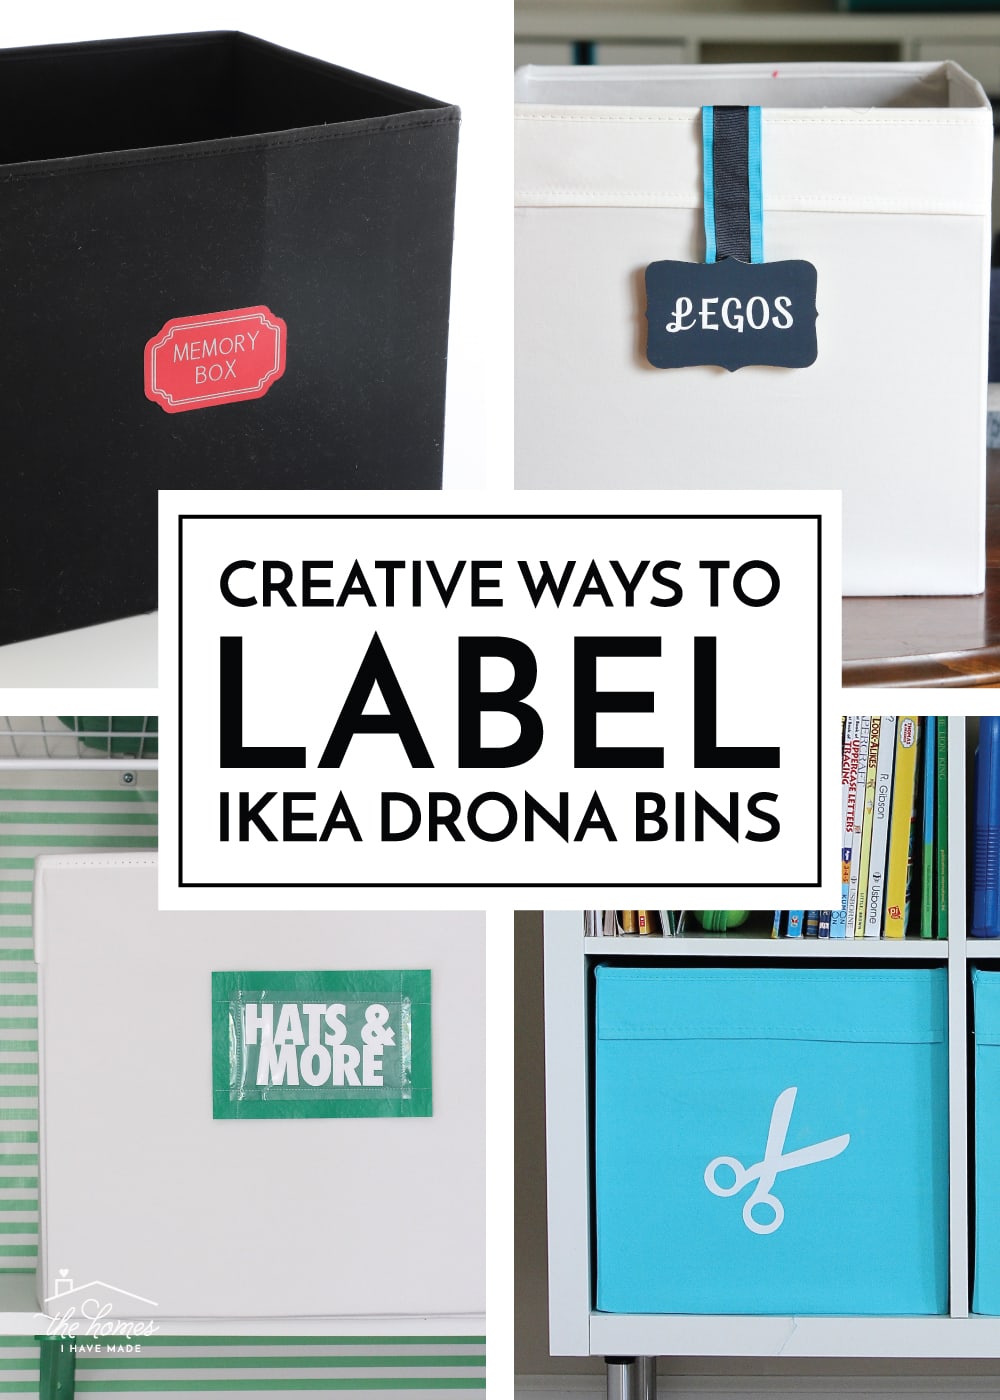
Creative Ways to Label IKEA DRONA Bins
It’s no secret around here that the IKEA Kallax is one of my favorite go-to organization systems; so much that last month, I dedicated an entire post to stylish and smart inserts you can use to maximize every inch of the cubby shelves. Personally, one of my favorite inserts for the IKEA Kallax is the IKEA DRONA bin. Not only are they super affordable ($4 a bin!) and come in a wide variety of colors (that change seasonally), but they are pretty sturdy and hold sooooooo much stuff! But the solid-front, non-handled, fabric-covered design might leave you stumped on how to add labels that are both user-friendly AND look great. Today, I’m rounding up a bunch of creative ways to label IKEA DRONA bins so you can know exactly what’s tucked into each one when they are loaded onto your shelf!
Deciding How to Label DRONA Bins
How you label your IKEA DRONA bins will depend on a few factors:
- What room are the bins are in? – Playroom labels will likely look different than labels for your master closet
- How detailed do the labels need to be? – Are single pictures sufficient or do you need longer words?
- Do the labels need to be removable? – Do you re-organize or swap items around regularly? Easily removable labels will be key!
- Do the labels need to be kid-proof? – Little kids tend to pull off loose labels or play with small parts; you’ll want options that are more durable!
Keeping those considerations in mind, here are various ways to label IKEA DRONA bins that we’ve tried and loved!
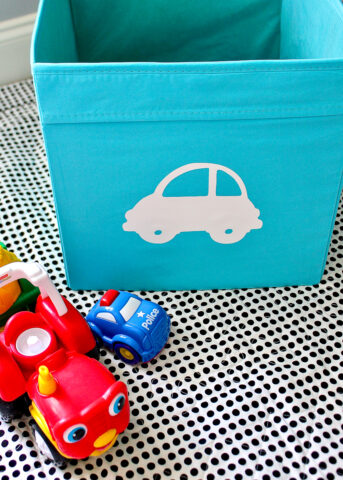
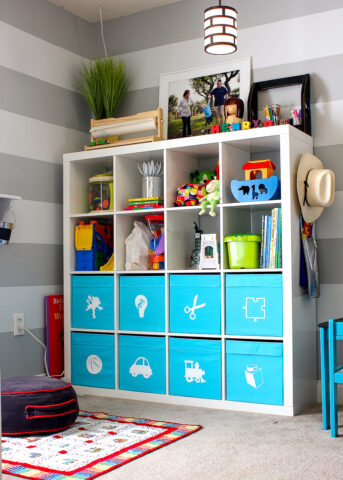
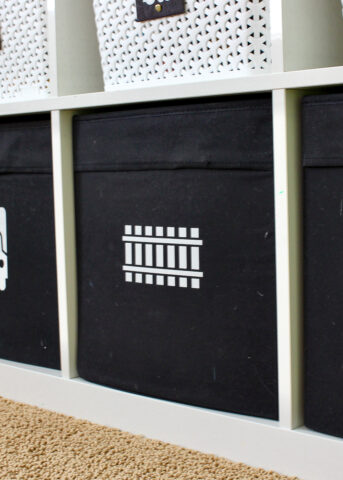
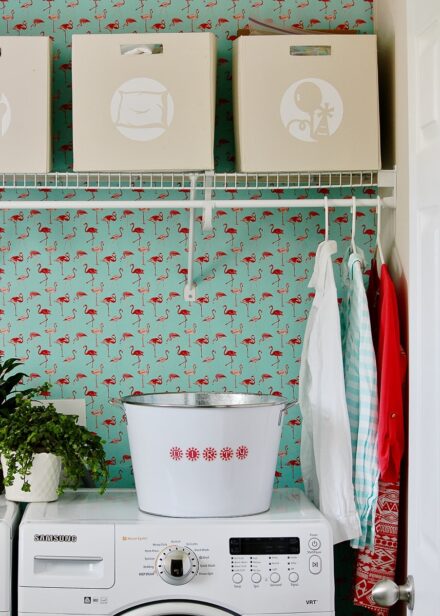
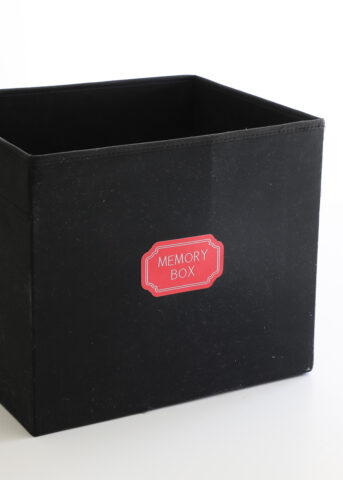
Label IKEA DRONA Bins With Vinyl
Easily, one of the most common and easiest ways to label IKEA DRONA bins is with vinyl labels. You all have seen me do it over and over and over. Whether you use vinyl, contact paper, or other peel-and-stick products (e.g., wallpaper), shapes, words, symbols, icons, numbers and more all stick seamlessly to the fabric covering on DRONA bins.
One of the best aspects of using vinyl (besides that you can cut it into pretty much anything you desire), is that it’s completely removable. I’ve labeled our bins over and over again throughout the years. I just peel off previous labels before adding new ones!
NOTE: I wanted to quickly point out that you could use iron-on (heat transfer vinyl) to label your bins in a very similar way as standard vinyl. However, iron-on is not easily or cleanly removed from fabric surfaces, so it’s not quite as versatile of a solution. I’ve never had issues with my standard vinyl not sticking to the DRONA bins. But if you do or you’re worried about little hands picking off your labels, iron-on might be an option to consider!
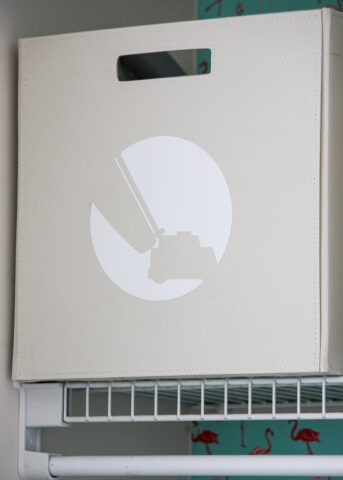
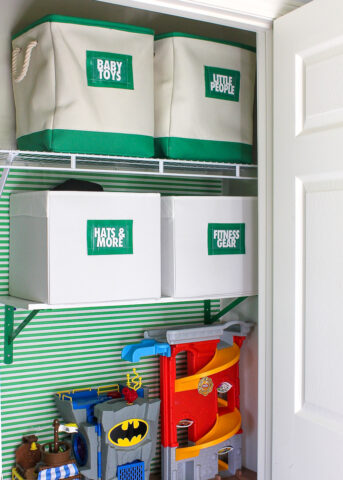
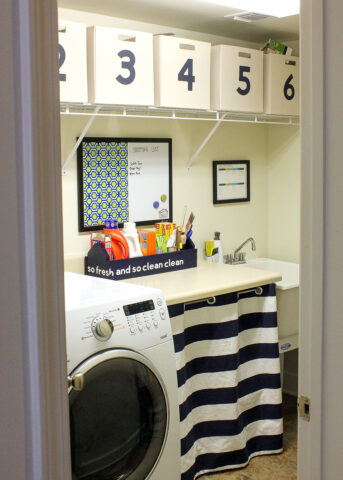
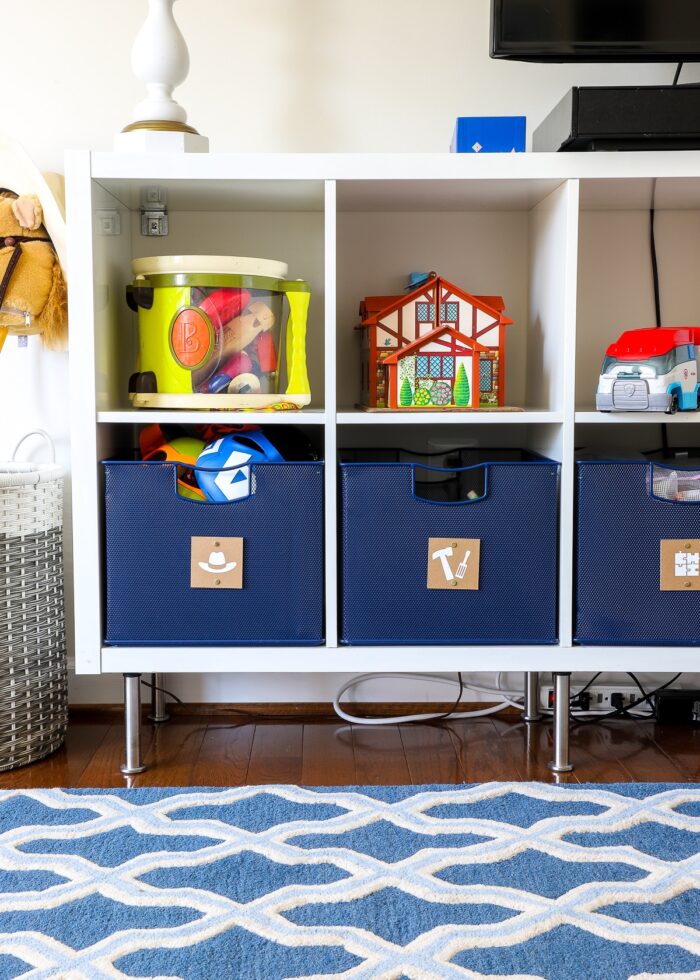
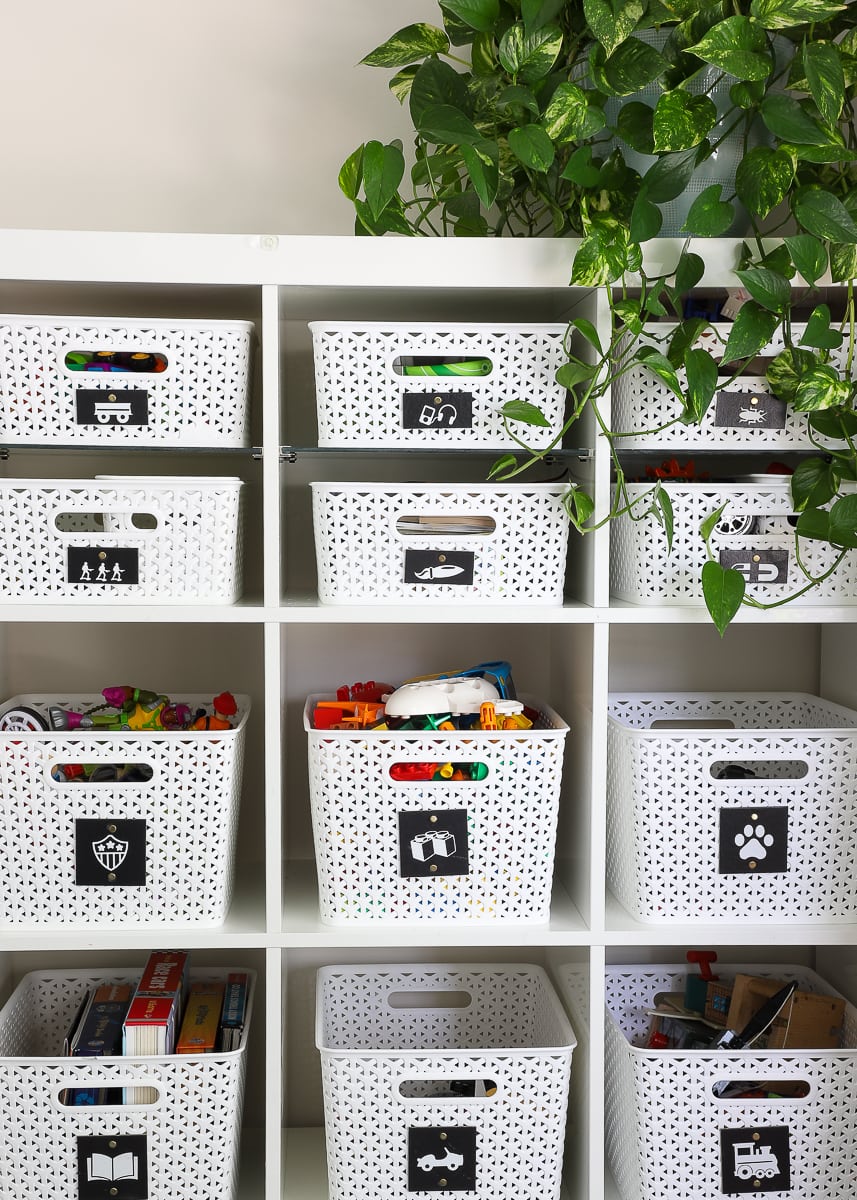
Large shapes representing various toy categories are my favorite playroom labeling method:

Cutting words or images out of standard shapes (e.g., squares, circles) can provide uniformity to your bins:
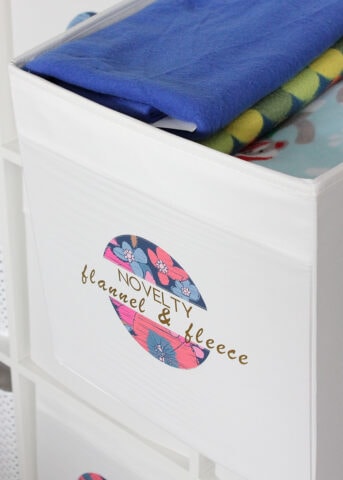
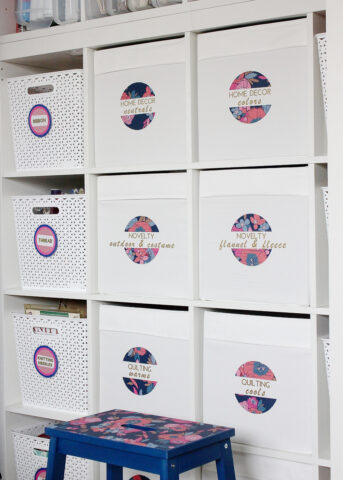
For bins that aren’t easily categorized by a picture, vinyl wording can be much more descriptive.
I use my Cricut machine(s) to make all my vinyl labels. If you don’t have one, I suggest checking out Etsy for sellers who can make you custom decals for whatever you need!
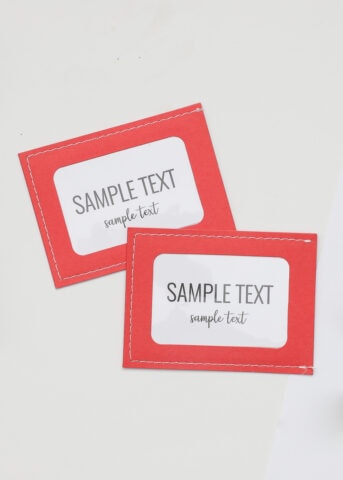
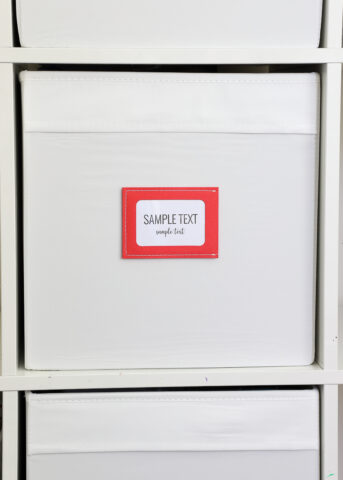
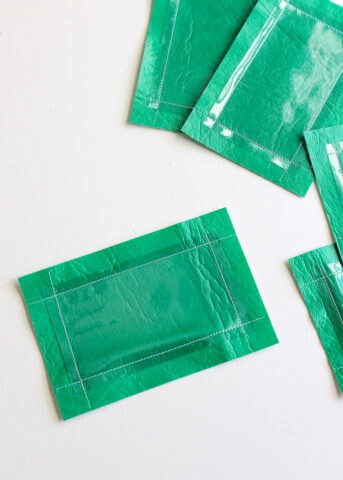
Label IKEA DRONA Bins With Sticker Paper
Although the IKEA DRONA bin is covered in fabric, don’t overlook basic adhesive labels. I’ve had great success using sticker paper, written on with my Cricut pens and cut into decorative shapes (see how I did it here). However, while the sticker paper does stick to the bins, paper labels are not something I would use on ones that are opened and closed a lot, or are used by kids (because they will just pull them right off!).
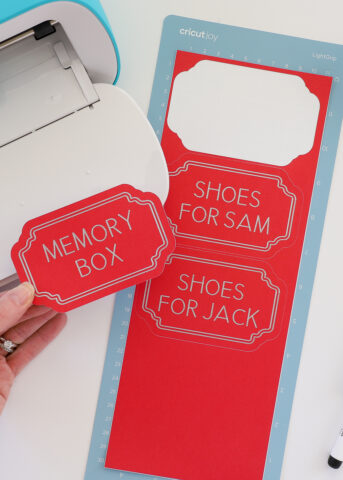
Using Cricut’s Deluxe Adhesive Backed Paper is a great option for making your own labels (as shown above), but here are some stylish off-the-shelf versions that you can write on as well!

Beyond just sticker paper, keep your eye out for other peel-and-stick labeling options. These dry-erase and chalkboard labels are super functional and also stick right to the DRONA bins!
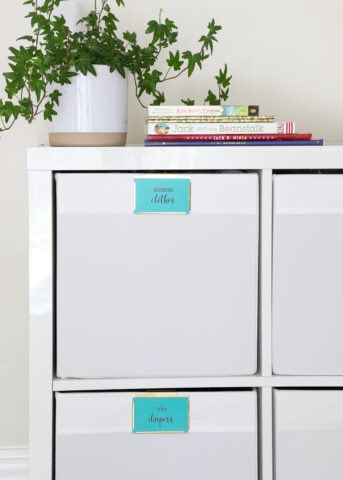
Label IKEA DRONA Bins With Label Holders
Using clip-on label holders is one of the quickest and easiest ways to add labels to IKEA DRONA bins. By investing in a set of holders, you can easily customize them for your space by changing up the paper color, pattern, and font. Beyond the simple aesthetic, I love that these holders make swapping out labels a snap. My beloved gold clip-on label holders are the exact height as the fold-over fabric detail on the bin, making these such a chic labeling solution, especially for offices and bedrooms!

Want to save this post?
I just discovered that The Container Store has expanded their collection of clip-on label holders (whoop whoop!) From white and black, wood to clear…I mean…so many gorgeous options!!!
Clip-on holders aren’t your only option for quick-swap labels! Adhesive-backed label holders are another great solution (again, provided you don’t have little kiddos around who will gleefully pluck them right off!) I snagged these red ones ages ago on clearance at The Container Store (unfortunately, I can’t find them anymore).
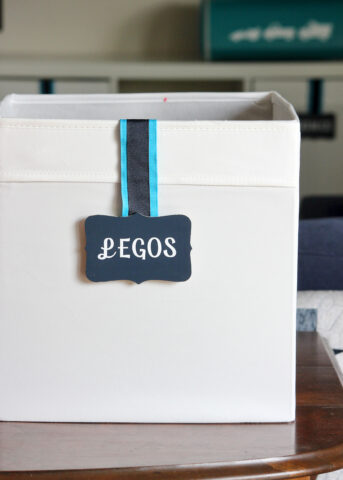
If you can’t find any label holders you love, DIYing your own is pretty easy! I crafted these out of some marine vinyl and clear plastic; they are held onto the IKEA DRONA bins with Velcro!
Unfortunately, I couldn’t find any cute adhesive-backed label pockets; but these clear versions are super budget-friendly, and are easy to dress up with your own custom labels:
Label With Magnets
Years ago, I really wanted to come up with a cute way to label IKEA DRONA bins that didn’t involve sticking anything to the fabric or puncturing them in any way. It took me a while to figure out; but ultimately, I was able to create these adorable labels that are magnetized from the inside (in a very kid-friendly way!).

Using magnetized placards is a great way to label your IKEA DRONA bins; again, provided they aren’t in a play space or in a room that little kids can get them. Why? The bins themselves aren’t magnetic, so you will need to use small magnets on the inside of the bins to hold them in place. These versions below are all so fun; plus, they have dry-erase surfaces that make for easy labeling!
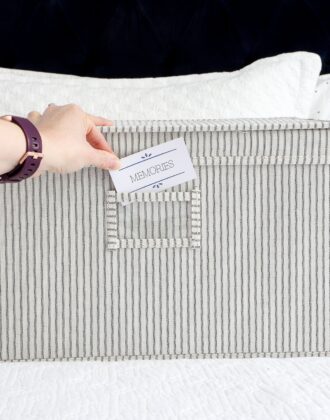
Label With Tags
I can never resist a gorgeous set of chipboard tags when I see them; and instead of using them on gifts, I prefer to use them on baskets! However, adding holed-tags to the IKEA DRONA bins is tricky, since there are no holes, handles, or slats to attach them to.
Below, I used strong double-stick tape to hold the chipboard tags to the fronts of my office IKEA DRONA bins. They (surprisingly) held in place wonderfully (if only my children would have left them alone!)
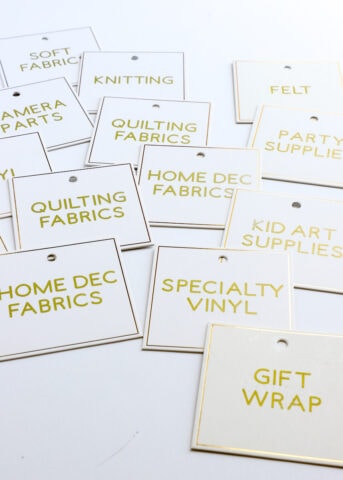
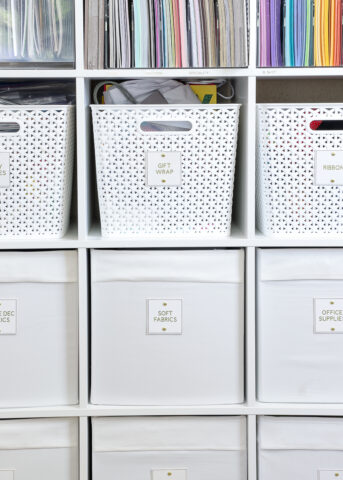
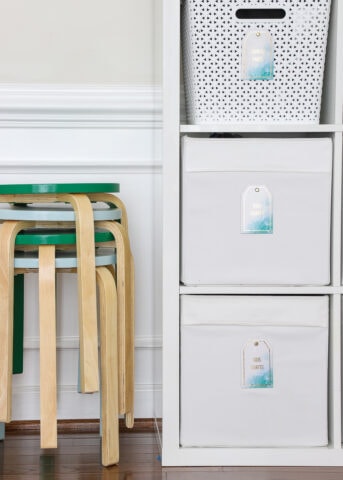
More recently, I added these gold-foiled tags to my office bins. Knowing my kids would constantly be tugging at them, I decided to puncture tiny holes through the DRONA bin fabric + cardboard and secure them with paper fasteners. Although this methods is fairly “permanent” (since I put holes in the sides of the bin), I can always swap out the labels, cover the holes with future labels, or turn the bins around!
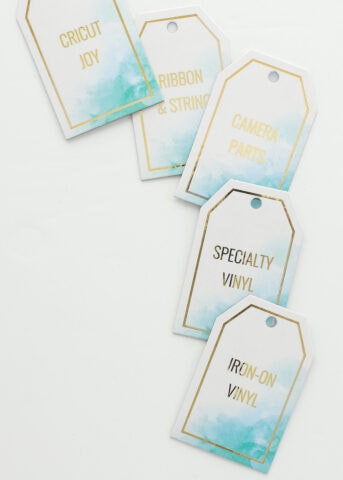
Below are some lovely chipboard tag options for your IKEA DRONA bins!
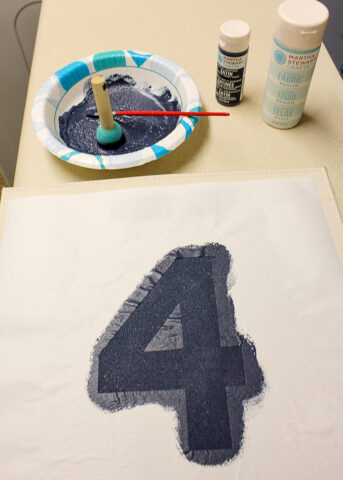
Label With Paint
Last but not least, you can use paint (with or without stencils to help!) to label your bins. Honestly, peel-and-stick products have come so far, I would offer there is no need to pursue the permanence of painted labels. However, if you find yourself wanting a specific look, fabric paint does work quite well!
I guess I never realized how many different ways I’ve labeled our IKEA DRONA bins over the years! Ha! It was fun hunting down all these ideas and old pictures. I do hope you find these ideas helpful when trying to come up with stylish, easy, affordable and practical ways to label DRONA bins; and you better bet if I try other things in the future (which, of course, I will!), I’ll update this post!
Other Stylish IKEA Hacks
- Functional & Stylish Inserts for the IKEA Kallax
- Make a Sofa Table in 10 Minutes Using IKEA Parts
- IKEA Kallax Hack With Wallpaper
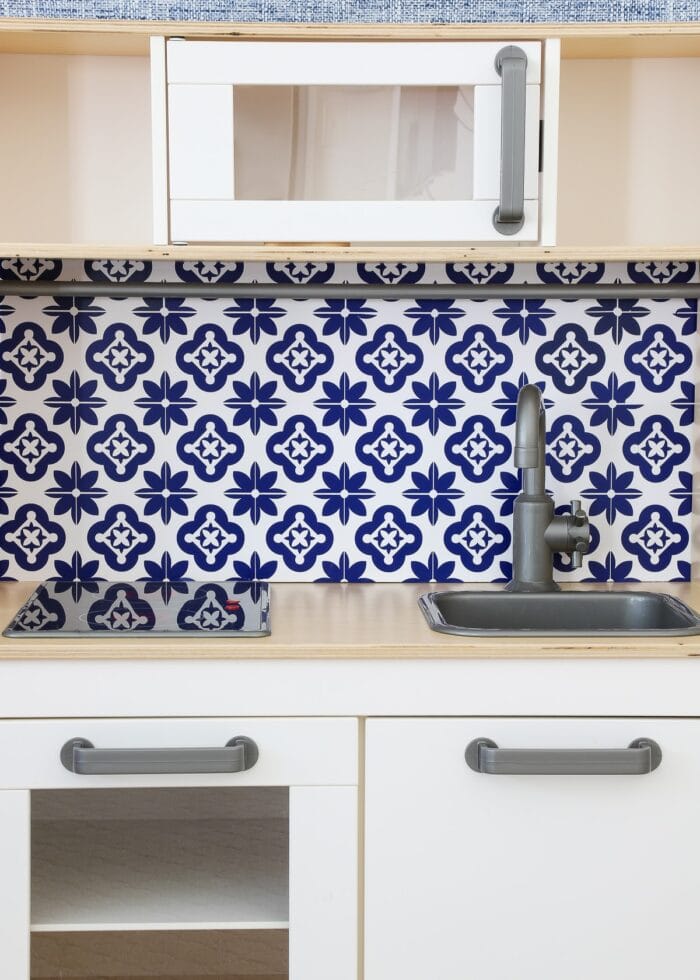
- How to Put a Backsplash on the IKEA DUKTIG Play Kitchen
- How to (Affordably) Store Craft Paper on IKEA Kallax Shelves
- Creative Ways to Label IKEA DRONA Bins
- DIY Wallpapered Stool (An IKEA BEKVÄM Hack)
- How To Add Feet to an IKEA Kallax
- "Stenciled" IKEA Table with Cricut Vinyl
- 1 IKEA Dresser | 4 Totally Temporary Transformations
Megan

2 Comments on “Creative Ways to Label IKEA DRONA Bins”
Hello
I’m looking for felt box labels to organize playroom.
Hi there!
I would check Etsy to see if you can find what you’re looking for!
Thanks,Megan