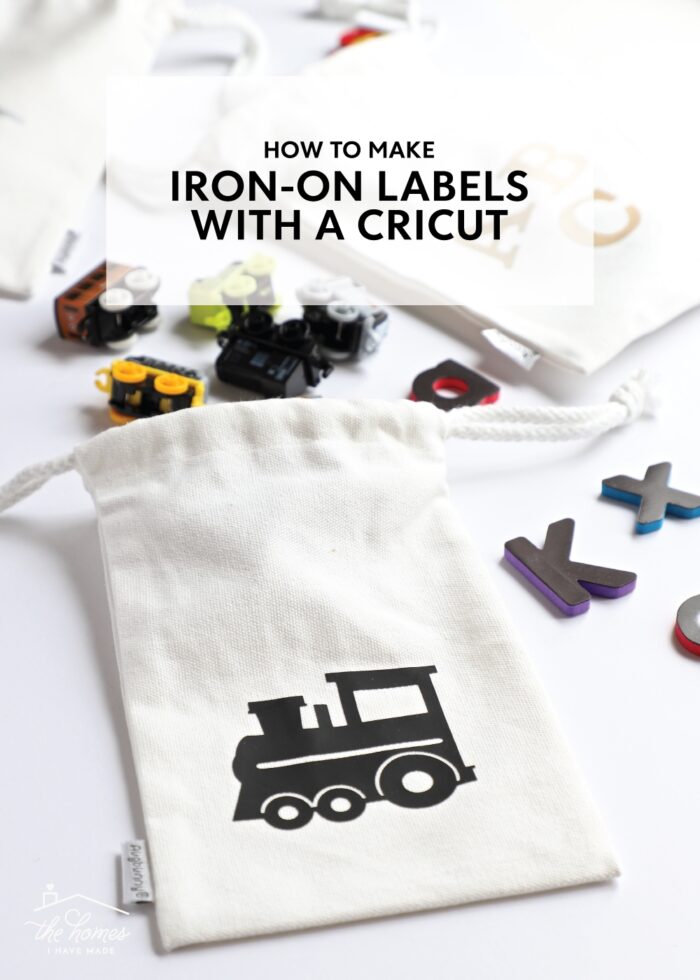
How to Label Fabric Items with Iron-On Vinyl
I have shared lots and lots of tutorials over the years for creating gorgeous custom labels with a Cricut machine. And while I find adhesive labels (made from vinyl or made from sticker paper) ideal for most surfaces, these products aren’t great for labeling anything made of fabric (e.g., canvas bins, pouches, makeup bags, etc). Today I’m breaking down exactly how to make iron-on labels with a Cricut machine, so you can really, truly label any item around your house!
Why Use Iron-On Vinyl to Label Fabric Items?
Most items around our home (at least ones that require labels) tend to be hard surfaces that are easily labeled with vinyl labels or sticker labels. However, that isn’t quite the case with fabric bins, canvas pouches, makeup bags, tote bags, etc. While you can sometimes label these soft surfaces with vinyl, it usually doesn’t take long for the vinyl/stickers to peel up and fall off.
As such, the best way to make durable custom labels for fabric surfaces is with iron-on vinyl (also called heat transfer vinyl/HTV). Since iron-on vinyl uses heat to activate its adhesive, you end up with longer-lasting, permanent labels.

Cons to Using Iron-On Vinyl for Labels
That permeance, however, is the exact reason you might not always want to use iron-on vinyl to label items around your home. While iron-on vinyl can indeed be removed (by applying more heat and peeling it up), it usually leaves behind adhesive/residue on the fabric. So anything you label with iron-on vinyl should be considered permanent, and therefore is not easily changeable.
When To Use Iron-On Vinyl for Your Labeling Projects
I’ve personally had good luck using standard adhesive vinyl to label fabric bins and boxes that don’t get heavy use (like on the top shelf of our laundry room shelves). However, any items that get really heavy use/friction or can easily be picked/pulled at by little kids, iron-on labels are typically the way to go!
Here are some common household items that would benefit from iron-on labels:
- Zipper pouches for school supplies
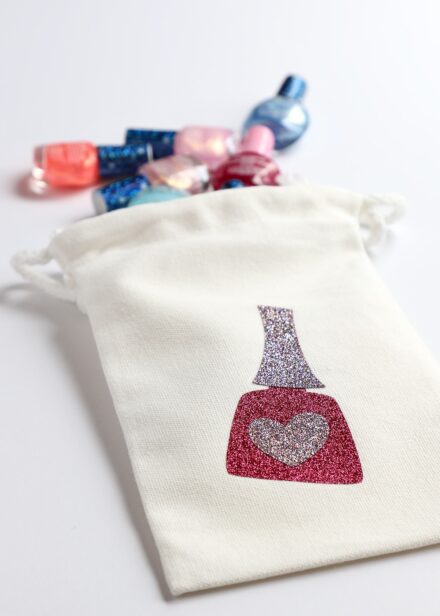
- Cosmetic bags
- Coloring kits
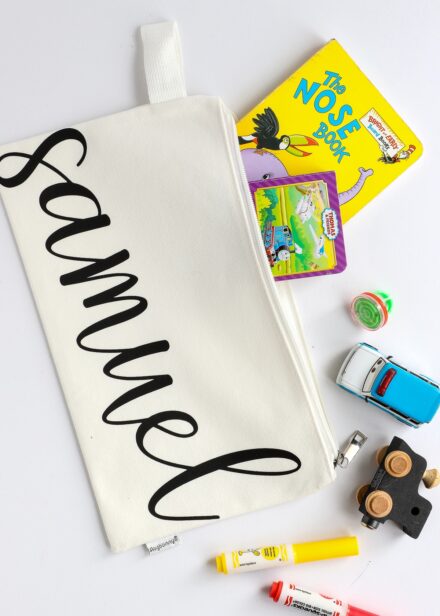
- Names on beach towels or bags
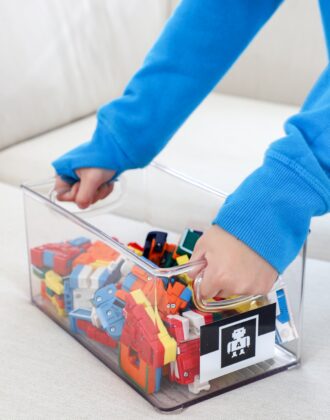
- Canvas or fabric bins on shelves/cubbies
- Fronts of fabric journals or notebooks
- Names on Christmas stockings
- Monograms on placemats or napkins
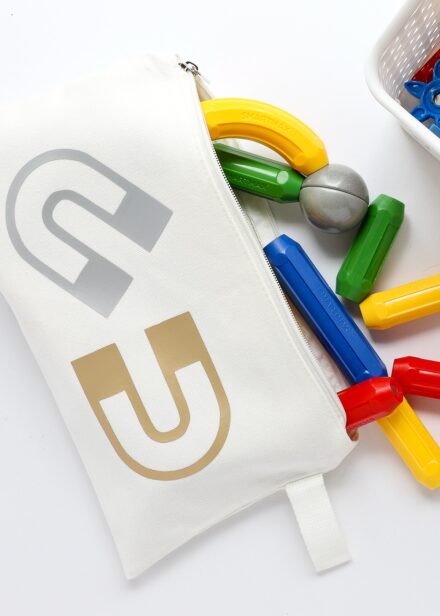
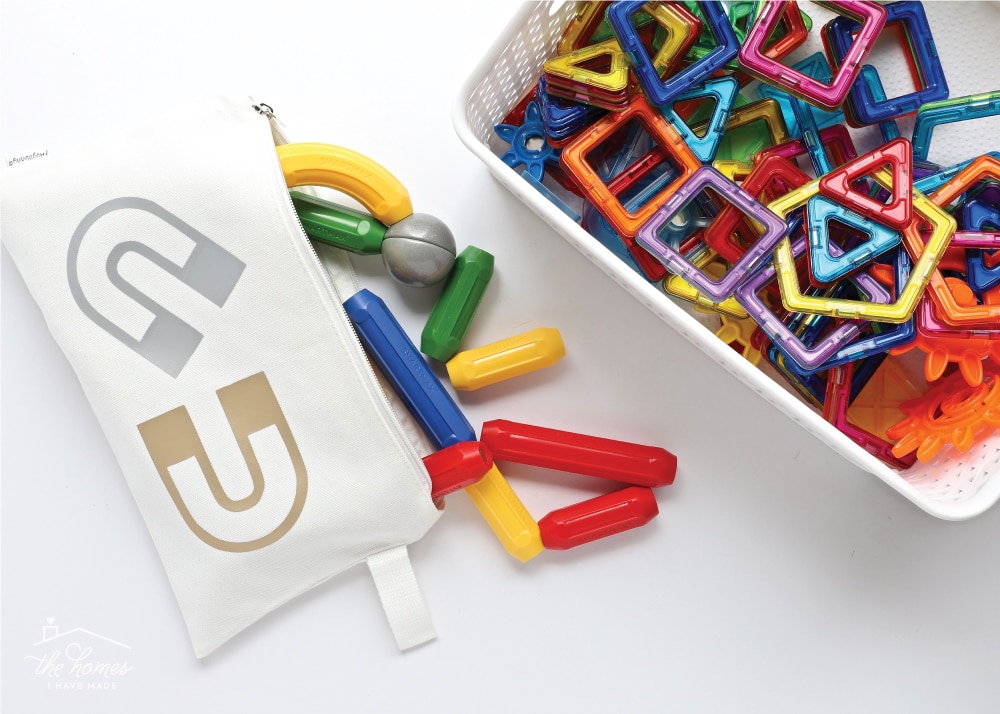
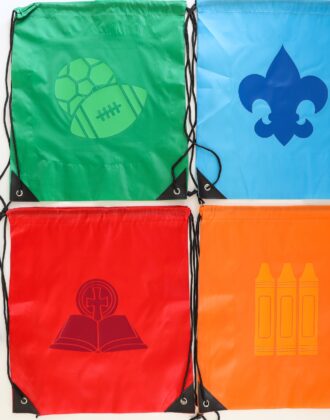
One of my favorite ways to organize little collections of toys is with small drawstring bags and zipper pouches. Not only are they great for tossing into larger playroom baskets, but they are then quick and easy to grab to take along to restaurants, trips etc.
But since these bags get opened and closed all the time and often get thrown in with other heavier toys, I knew sticker-style labels would never hold up. So I used my Cricut Maker to make some simple iron-on labels that are as cute as they are helpful. Let me show you exactly how these come together!


Supplies Needed
To make iron-on labels with a Cricut machine, you will need:
- Cricut Machine – any Cricut cutting machine can be used for this labeling project (Cricut Joy | Cricut Explore series | Cricut Maker series).
- Standard Grip Cutting Mat
- Premium Fine-Point Blade – the one that comes with your machine
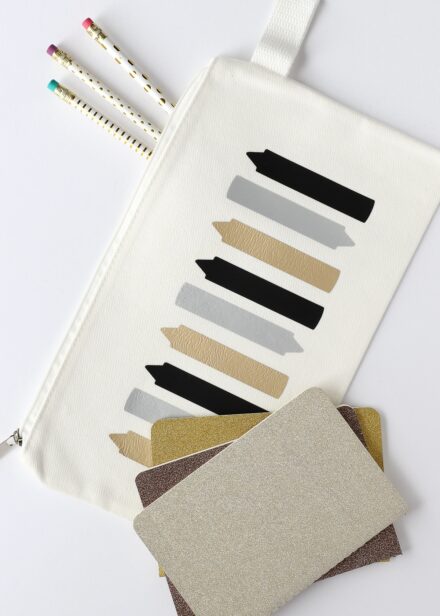
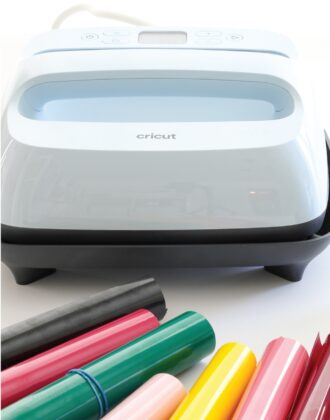
- Cricut Iron-On in the color/texture of your choice (both Smart Iron-On and regular versions will work)
- Cricut EasyPress or Iron – any size press, including the EasyPress Mini, will work.
- Cricut EasyPress Mat or other heat-safe surface
- Weeding Tools
- Scissors
- Tape Measure
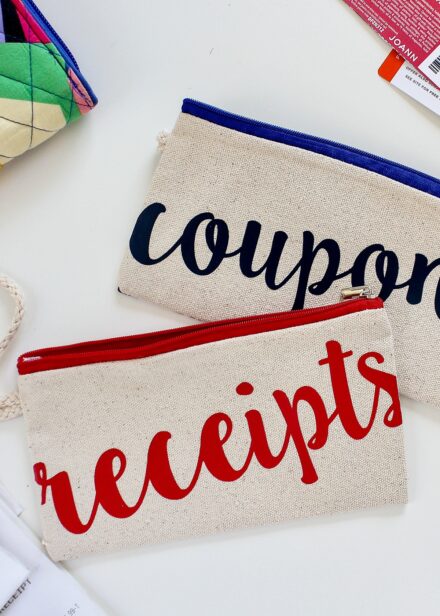
- Fabric “Blank” – This is the bag, pouch, bin, or tote that you want to label. For this project, I used these 5×8″ bags and these 7×12″ zipper pouches.

Step 1: Prepare Your Label Designs
Measure Your Blank & Create a “Template”
Start by measuring the front-facing surface of whatever you want to label. For bins/baskets, this would be the entire front; for my pouches, I measured the entire flattened bag.

Next, open Cricut Design Space and re-create these dimensions to serve as a template for your label designs. First place a square onto your canvas, and then re-size it to match the dimensions you just measured.
My bags measured 5×8″ and 7×12,” so I replicated those dimensions onto my canvas.

Design Your Labels
Next, search for images in the Cricut Design Space Image Library to represent whatever it is you’re storing in that container. Upload your own images if you can’t find something that works or get creative with letters and fonts to make your labels just right.
Use the white rectangle “templates” to size your designs and get a sense for what your labels will look like once applied.
When you’re satisfied with your label designs, hide/delete the white rectangle “templates” (since you don’t need to cut them out). Then click the green “Make It” button to send the designs to your Cricut machine.

Step 2: Cut Out Labels from Cricut Iron-On (HTV)
I include full instructions below, but if you need even more help cutting Iron-On Vinyl/HTV with your Cricut, refer to my comprehensive tutorial: Iron-On Vinyl & Your Cricut | A Complete Guide.
Mirror Your Design
Whenever you are working with iron-on vinyl, but especially if you are cutting a directional design (like letters), you must first “Mirror” your design by clicking the “Mirror” button under each mat on the Cut Preview screen. This will flip your designs so that when they are ironed onto your finished project, they appear the correct way.
TIP! Sometimes Cricut Design Space doesn’t lay out images out as tightly as possible on your mat. Since iron-on vinyl can be expensive, I like to move my images around on the Cut Preview screen so they are as tight as possible, therefor allowing me to conserve my iron-on material!
Want to save this post?

Select Your Material
On the final Cut Preview screen, you will be prompted to select a material. So that your Cricut uses the exact precise settings, be sure you select whatever iron-on vinyl you have chosen for your project (e.g., glitter, holographic, etc).
Load Iron-On Vinyl Onto Your Mat & Cut
Place the iron-on vinyl/HTV shiny side down onto your mat and cut out your label designs with the (included) Fine Point Blade. Once your design is finished cutting, unload your mat and repeat with any additional colors.

Weed Your Label Designs
The next step is to weed your iron-on labels, but WAIT! As I mentioned, iron-on vinyl is pricey so save whatever you can. Before weeding, I always recommend trimming away the un-cut areas to save them for another project.

Next, use a weeder (or a seam ripper if you don’t have one) to pull away all the negative parts of your label designs. Don’t forget to remove the insides of letters and tiny decorative details. (Get more help with weeding here.)
Once weeded, use a scissors to trim apart each label from the others. Isolating each image will give you more accuracy with placement and prevent you from accidentally ironing labels to the wrong blanks.

Step 3: Heat the Iron-On Labels
Most of the “hard” work is now behind you and all you need to do is secure the labels to your fabric blanks with heat. This can be done with a standard household iron or a Cricut EasyPress, which will give you better, professional-level results thanks to its large, even, high-temp heat plate.

Find Your Heat Settings
There are two easy ways to find the exact right heat settings for your labeling project:
- Cricut Heat App – for use with the Cricut EasyPress 3.
- Cricut Heat Guide – for use with any other Cricut EasyPress
Once you punch your type of iron-on vinyl (e.g., standard, glitter, etc) and type of material (e.g., cotton, nylon, etc) into either of these guides, you will be given precise time and temperate settings for your project. Adjust your Cricut EasyPress or iron accordingly.
Setup Your Press
While your heat press is warming up, get your blank and label ready for application.
- Place the fabric blank on a smooth, firm, heat-safe surface (like a Cricut EasyPress Mat) with the front facing up.
- Pre-heat the blank for 5-10 seconds and then place the label (with the clear carrier sheet facing up) onto the surface wherever you want it.

Press Your Iron-On Labels
Once your Cricut EasyPress is fully heated, press your label with firm, stationary pressure for the recommended duration. Once done, flip your blank over, and heat for an additional 15-30 seconds (per the Cricut Heat Guide/App).
When the label is cool, gently peel off the protective layer to reveal your perfect iron-on label!


Repeat as Needed
Making fabric labels can feel a bit tedious if you’re just doing one item. So while you have everything out, take a look around and see if there are any other fabric items that could benefit from a label. While your machine is cutting and your Cricut EasyPress is warm, knock everything out at once!

TIP! If you label some cute little bags like these, know they are very addicting! I suggest carving out a snowy/rainy afternoon to whip up a bunch at once! These would even made adorable gift bags!


More Great Cricut Labeling Projects
Ready to label even more with your Cricut machine? Check out these other awesome projects:- Make Vinyl Labels with a Cricut
- Make Labels Using Cricut Pens
- Make Labels with Cricut Print Then Cut
- Make Waterproof Labels with a Cricut
- How to Label Fabric with Iron-On Vinyl
- Iron-On Clothing Labels with a Cricut
- Toy Bin Labels with a Cricut
- Pantry Labels with a Cricut
- Dresser Drawer Labels with a Cricut
- Luggage Tags with a Cricut
- Return Address Labels with a Cricut
- Fast Labels with the Cricut Joy App
- Make Easy Round Closet Dividers with Cricut Vinyl
- Label Drawstring Backpacks with Cricut Iron-On
- How to Make Vinyl+Wood Labels
Every now and then, you might come across a fabric item that needs a label. Whether it’s bins in the playroom, pouches in a purse or backpack, towels for the beach, or clothes for camp, applying an iron-on label is both easy AND fun! I hope the process I outlined here today gives you new ideas for labeling aaaaaall the things in your home (not just the hard surfaces!) with your Cricut machine!

Megan
6 Comments on “How to Label Fabric Items with Iron-On Vinyl”
link for the totes and pouches didn’t work. I really like them! At first I was thinking you were going to have us sew our own…
Thanks for letting me know, Heather!
The small bags are here and the large pouches are here!
Hope that helps and sorry for the trouble!
Megan
I am new to the Cricut world and am also looking to invest in the Cricut Heat Press. The only problem is I am unsure of which one to get. My main goal right now is learning how to make cute t-shirts for my family and then gradually learn how to do the rest. What would you recommend? Our sizes range from my husband who is an XL to the youngest member of our family 4 months.
Hi Tamera!
If you want to get into making t-shirts, you will LOVE the ease and convenience of the EasyPress, especially over a standard iron. It makes iron-on projects pretty much fail-proof! If t-shirts are the primary thing you will make, I would save up for the largest size (the 10×12″). It’s SOOO nice to be able to heat an entire (large) design all at once. And by having the largest version, you’ll be able to tackle any smaller projects with ease too…whereas if you buy the smaller one, you’ll always have to heat larger projects one section at a time (does that make sense?). I know the large EasyPress is quite pricey, so keep your eye out for sales, which seem to happen somewhat regularly!
Hope that helps and please let me know if you have any other questions!
Megan
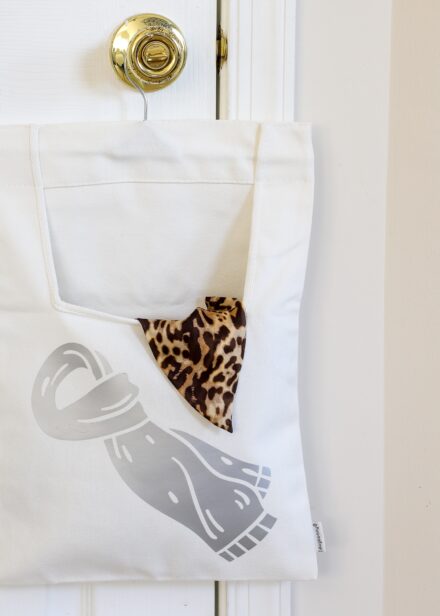
I love this idea. Do you have a link to the bag with the scarf on it that has a built in hanger?
HI Julie!
The bags are HERE.
And you can see a fuller tutorial on how I made them HERE!
Hope that helps!
Megan