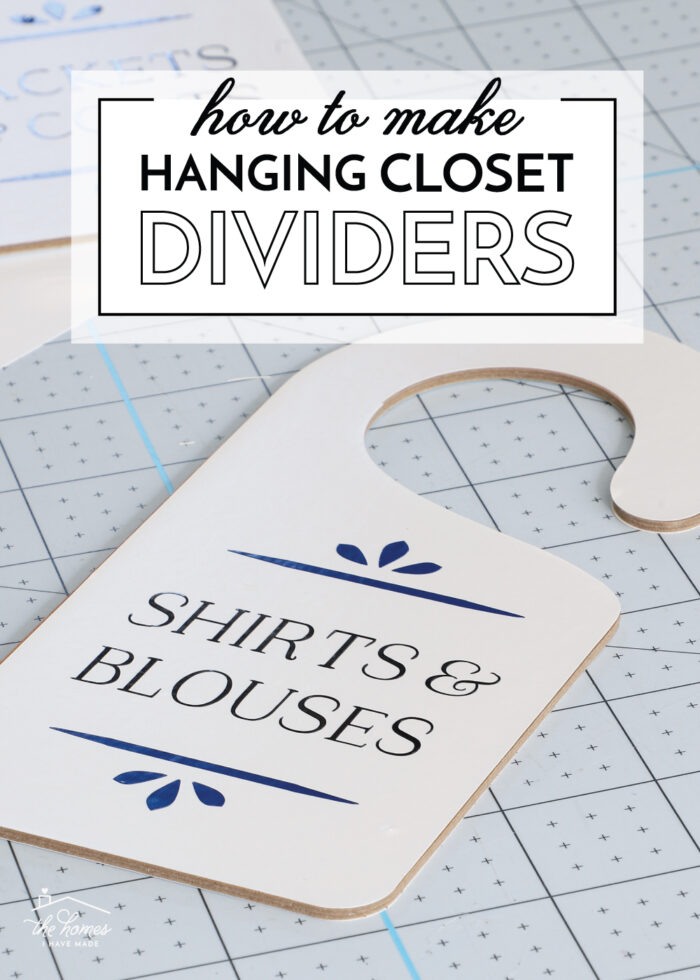
DIY Hanging Closet Dividers with a Cricut Maker
Today I want to show you how to make DIY Hanging Closet Dividers using a Cricut Maker. These are really easy to make, and are a great way to add some organization to closets…especially if they hold clothes for multiple seasons, multiple people, or in multiple sizes. I’m breaking down every step and sharing some easy tips to get flawless results, so let’s get started!
If you search for hanging closet dividers, you will likely find just a few options, most designed for baby clothes. So if you want a slightly different look, size, or label, you’re likely going to have to make your own. Using a Cricut Maker and just a few supplies, you can do just!
Supplies Needed
For this project, you will need:
- Cricut Maker – The vinyl coverings and labels can be cut with any Cricut machine, but you will need the strength and power of the Cricut Maker to cut the chipboard.
- Knife Blade – to cut the chipboard
- Fine Point Blade – to cut the vinyl
- Chipboard – The 2mm thickness of this board makes the dividers super sturdy, easy to hang, and resistant to warping.
- On Cricut.com
- On Amazon
- Vinyl – Chose a color to cover the chipboard (I used white), as well as some contrasting colors for the label (I used black and blue).
- Transfer Tape
- On Cricut.com
- On Amazon
- Other Tools: Scraper, Weeding Tool, Scissors
- Hook SVG Image (it’s free for personal use!)
Design the Hanging Closet Dividers
Start by download the free SVG file for the dividers HERE, and then upload it to Cricut Design Space using THESE instructions.
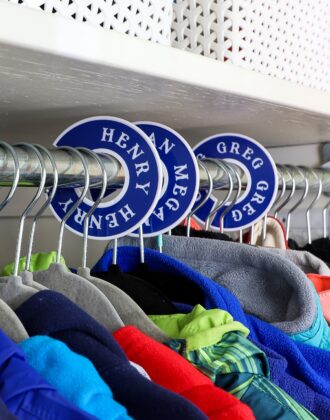
Once uploaded, experiment with the sizing for your closet rods. I found setting the divider at 3.5″ wide to be the best dimension for hooking it over my closet rods without it being too large that it fell off easily.
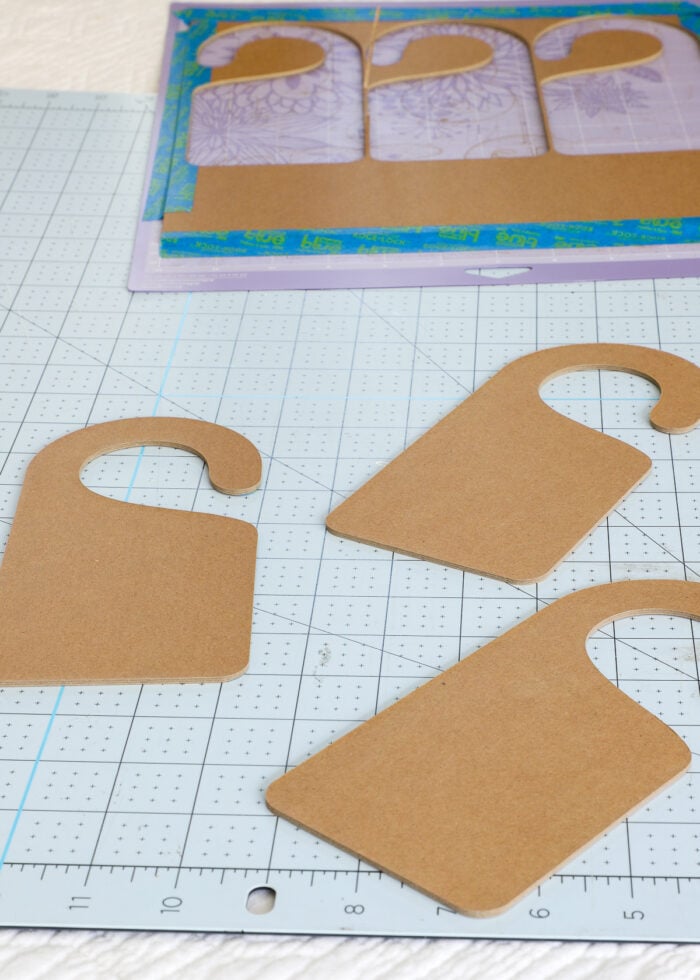
When you are satisfied with your dimensions, create three (identical) versions of the image as follows:
- (1) set to light brown and cut from chipboard
- (1) set to white and cut from vinyl
- (1) flipped horizontally, set to white, and cut from vinyl
Before cutting, you can also design/size word or picture labels to go on each divider.

Cut the Closet Dividers with a Cricut Maker
When you have the dividers sized and designed exactly as you want them, it’s time to cut everything out with your Cricut Maker!
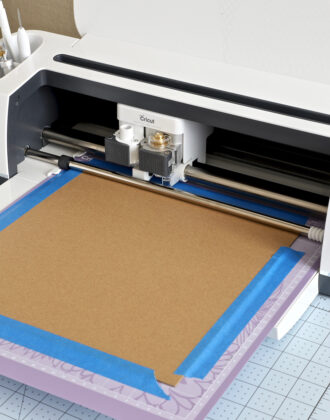
Start by cutting out the hanging dividers from chipboard using the Knife Blade. If you’ve never cut out chipboard, refer to THESE comprehensive instructions.
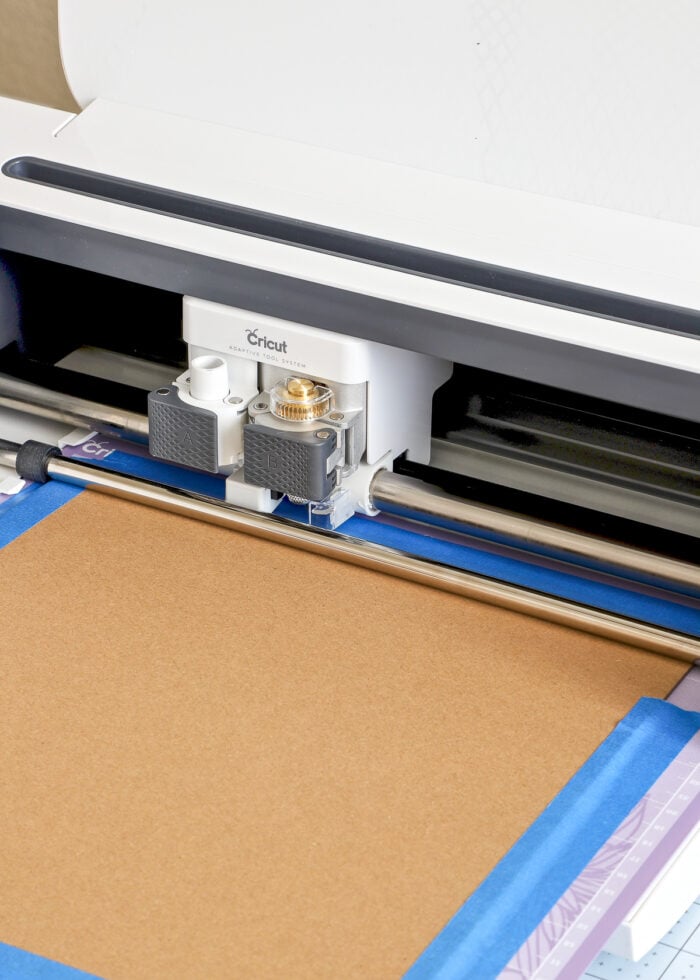
Although these will take some time to fully cut through (plan for about 30 minutes per sheet), they should pop off your mat with perfectly clean edges.
Switch to the Fine Point Blade on your Cricut Maker to cut out the covers and labels from vinyl.
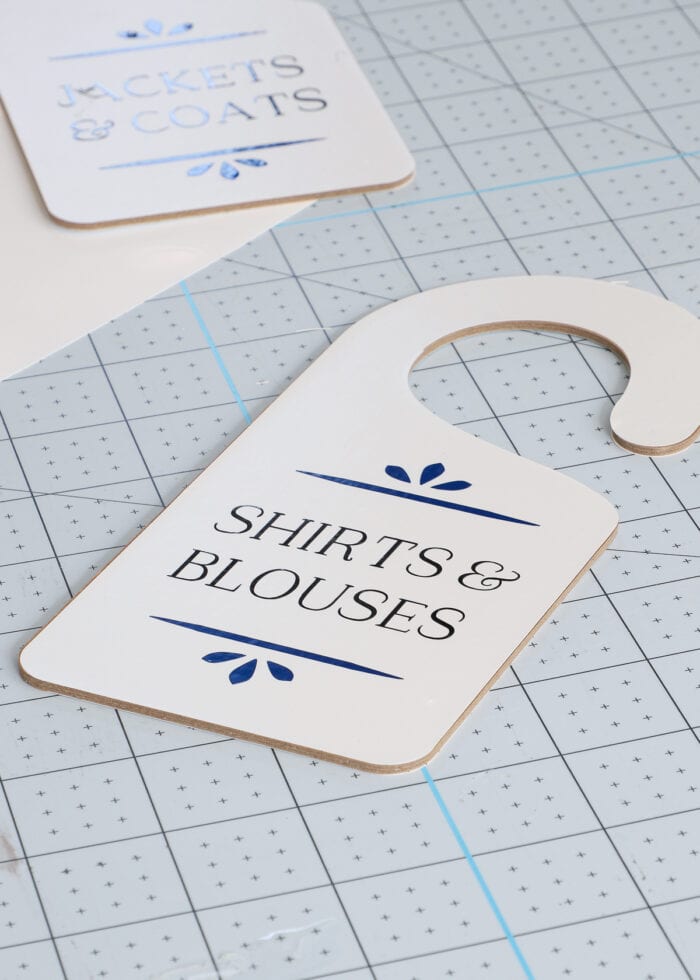
Applying the Vinyl to the Hanging Closet Dividers
I love chipboard for its sturdiness, but I don’t love its rough, brown color/texture. To make these look prettier, I covered the chipboard in smooth vinyl. Getting the vinyl shape to line up perfectly with the chipboard shape can be tricky, so here’s the best way to do it!
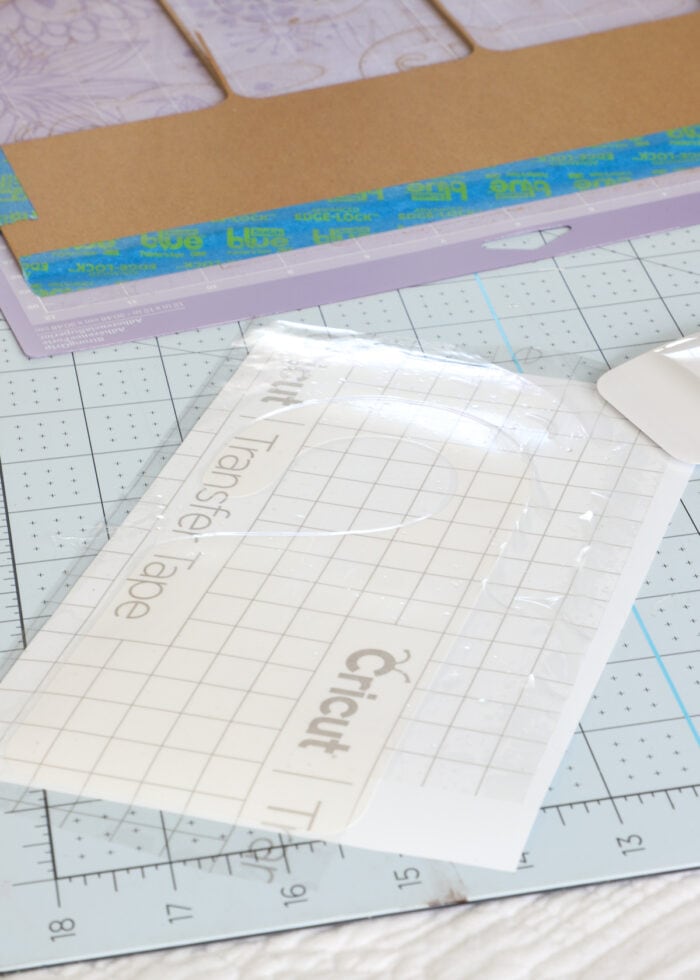
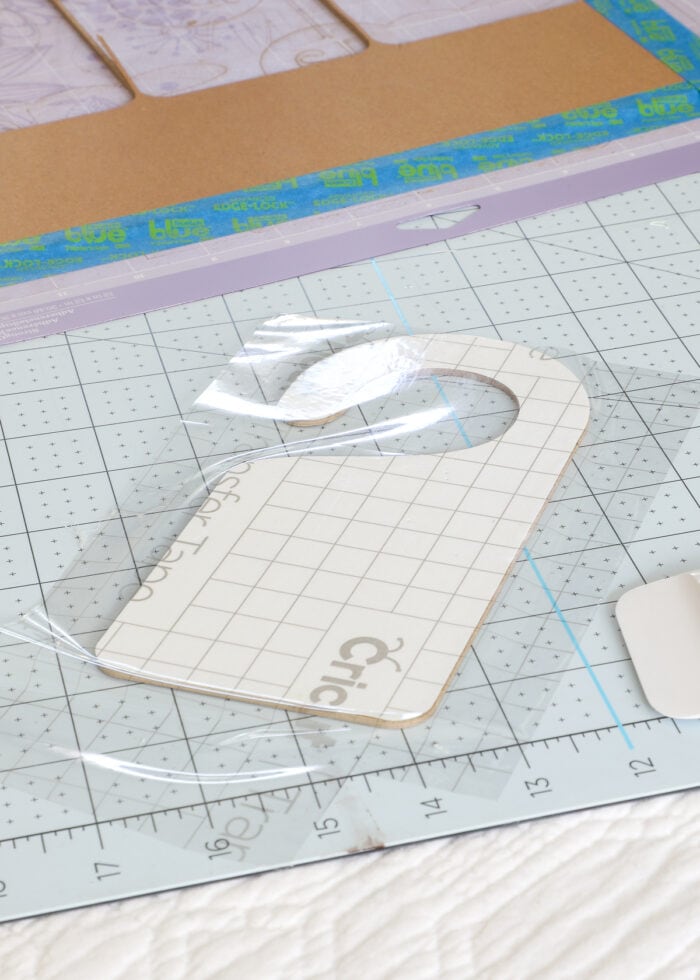
Lay a cut of Transfer Tape over the entire vinyl door hanger shape. Scrape it thoroughly with a scraper.
Want to save this post?
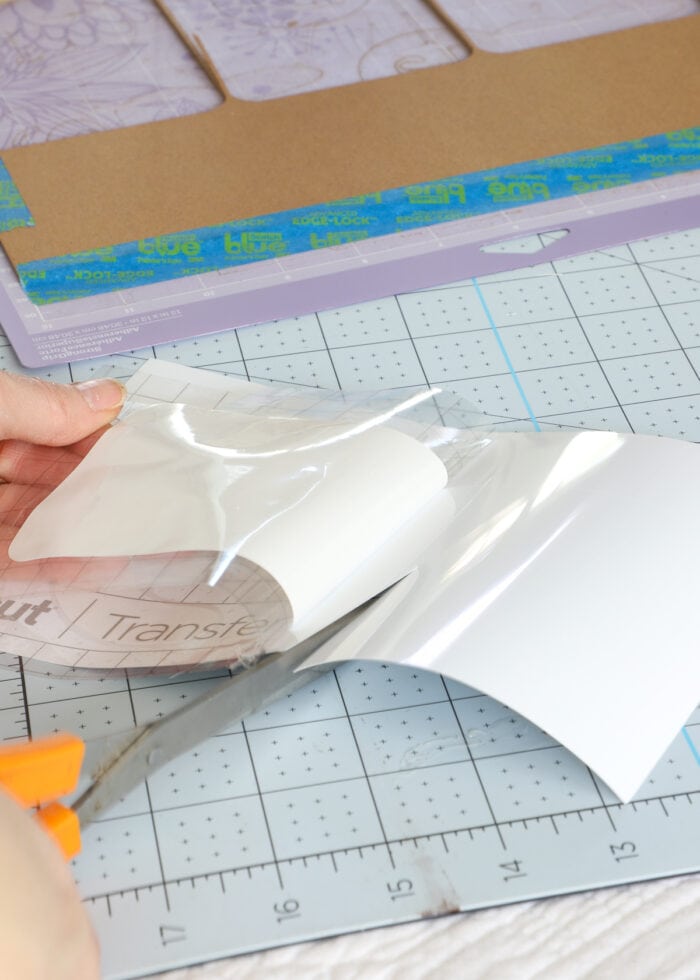
Next, peel up only the bottom half of the vinyl shape off the paper backing. Use a scissors to trim away the exposed paper backing (shown below).
Carefully place the exposed half of the vinyl door hanger onto the corresponding side of the chipboard. Take your time to line it up perfectly along the bottom edge and 2 corners. How the vinyl is placed here will determine how it lines up along the rest of the door hanger, so don’t hesitate to peel it up and try again to get it perfect.
When you are satisfied with the placement of the first half of the vinyl covering, remove the paper backing from the rest of the door hanger decal.
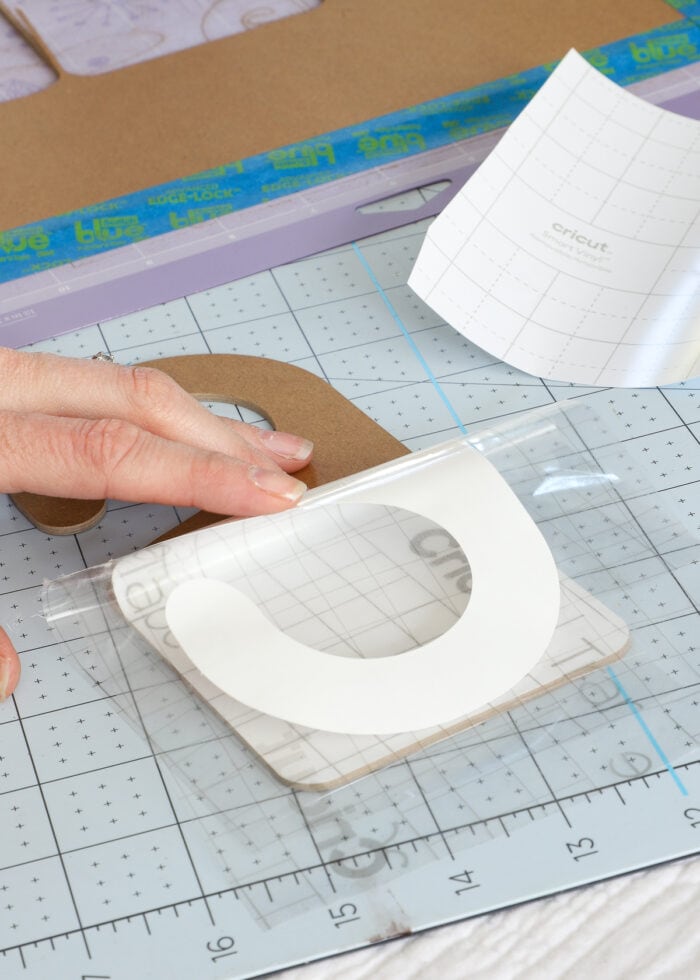
If you got your placement right on the lower half, the upper half should lay right down and line up perfectly with the chipboard shape underneath.
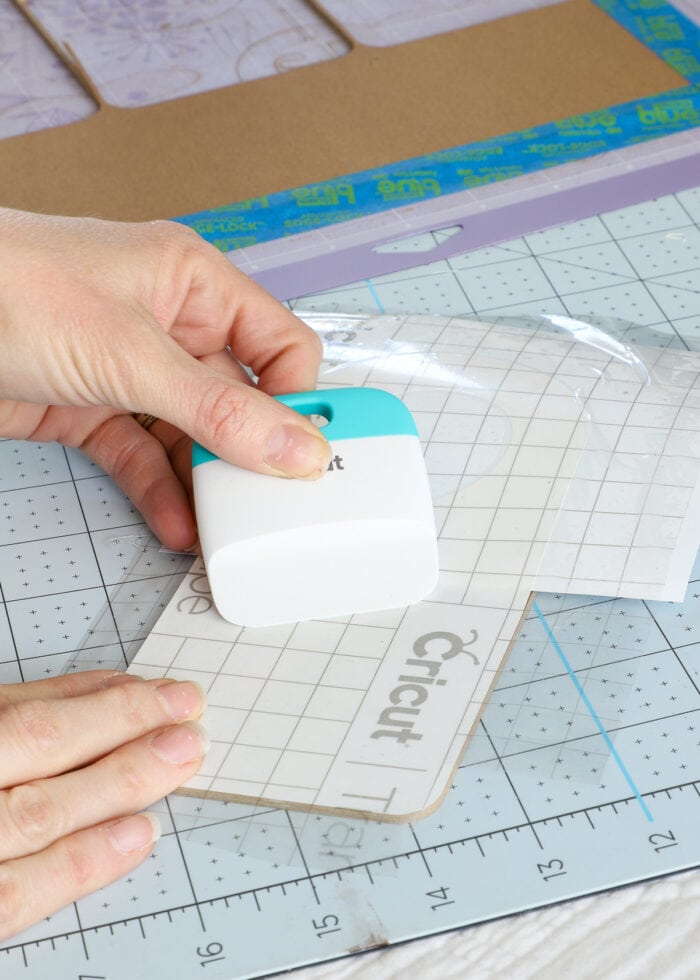
Use your scraper vigorously on the vinyl+transfer paper combo to adhere the vinyl to the chipboard. Finally, pull the transfer tape away to reveal your perfectly-covered closet hanger!
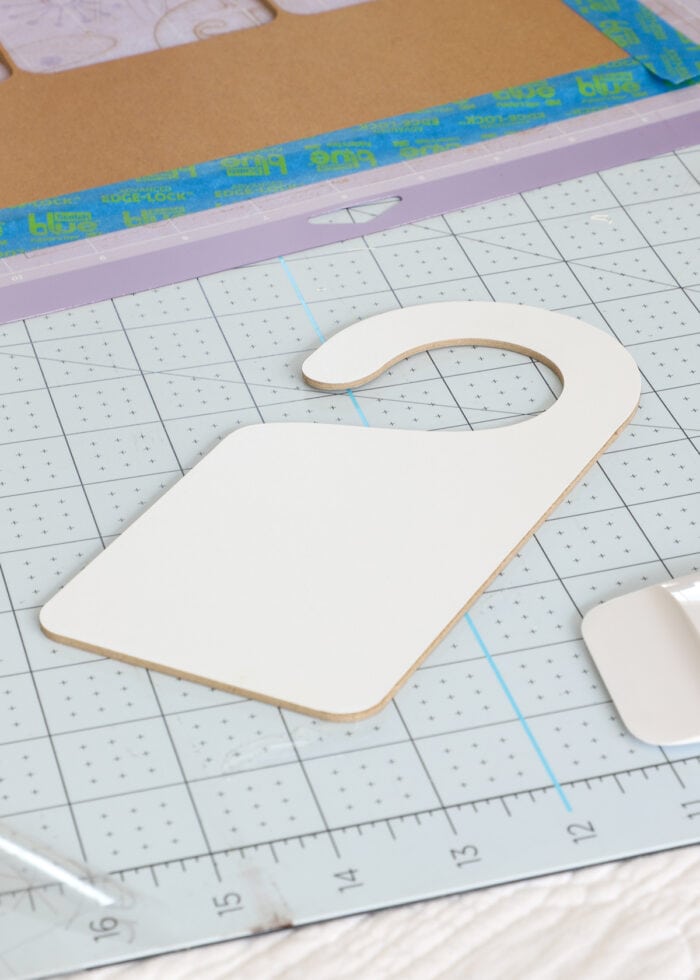
Flip the chipboard over and repeat with the other vinyl cut. (NOTE: This is why you cut two from vinyl, one facing the opposite direction).
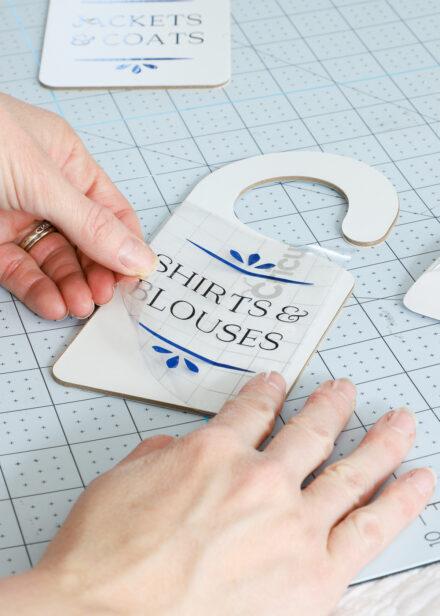
Label the Hanging Closet Dividers
Your final step is to add the vinyl labels to the covered closet dividers. To see how I made my labels, check out the full labeling tutorial HERE.
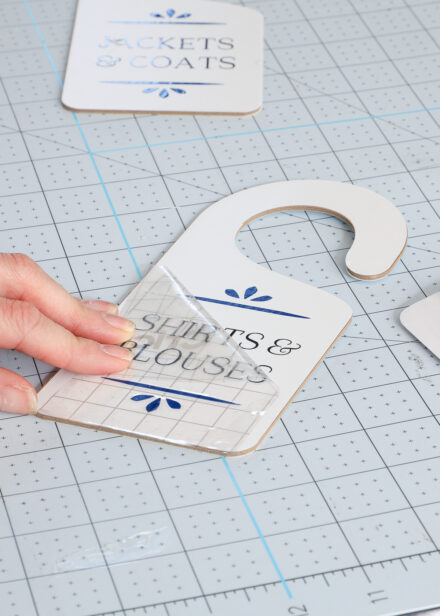
If needed (based on your specific closet arrangement) consider labeling the other side of the divider as well. Then continue cutting, covering, and labeling additional dividers until all your closet categories are covered!
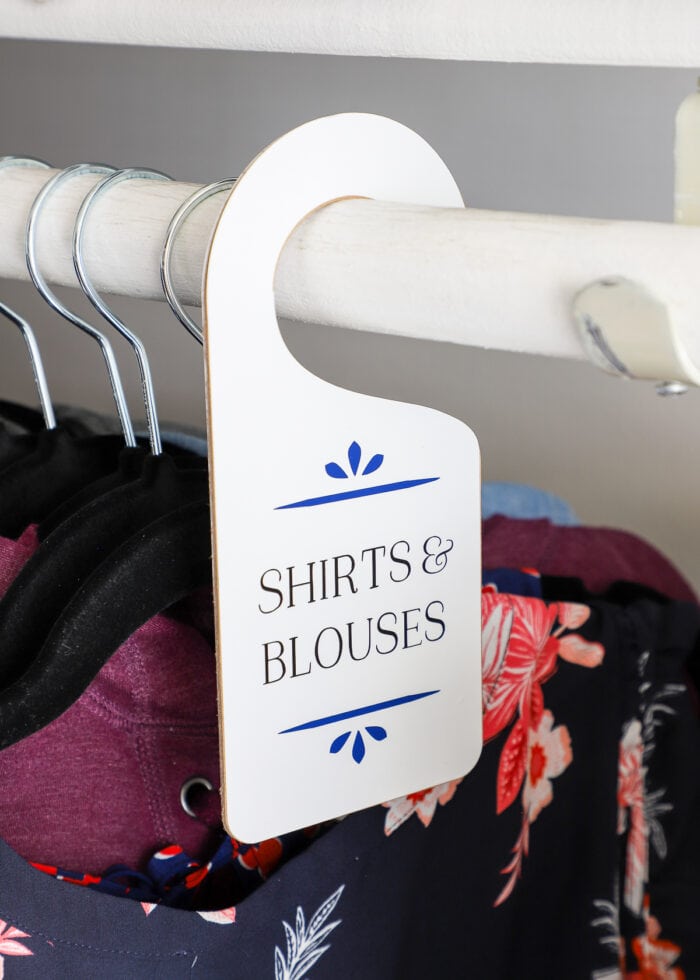
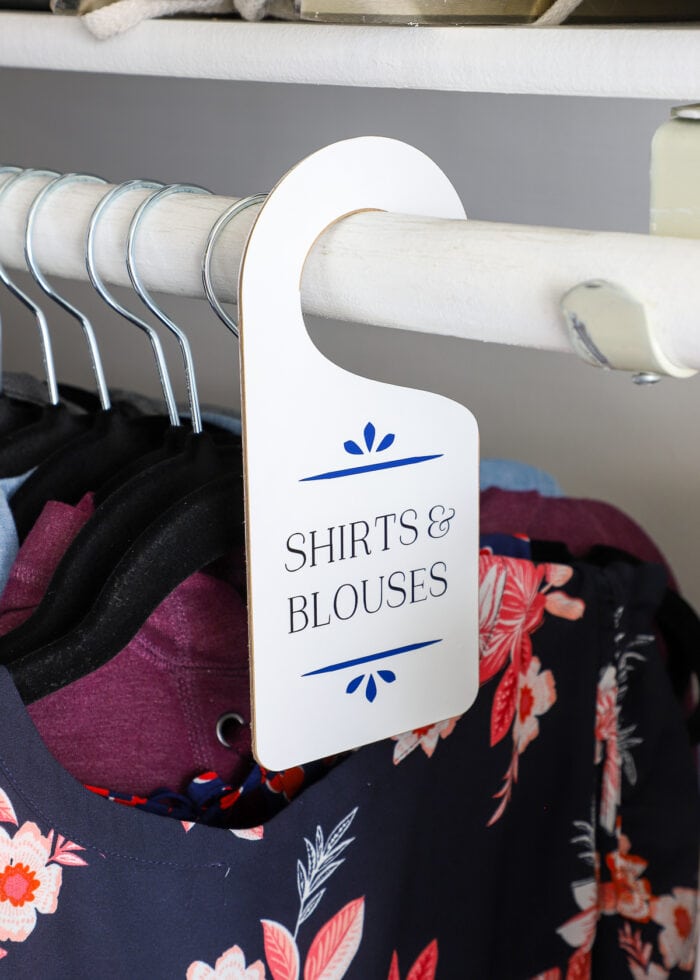
When done, simply hook the DIY Hanging Closet Dividers over the rod in your closet in the correct spots. The opening is wide enough to hook over, but not so wide that the dividers can fall off!
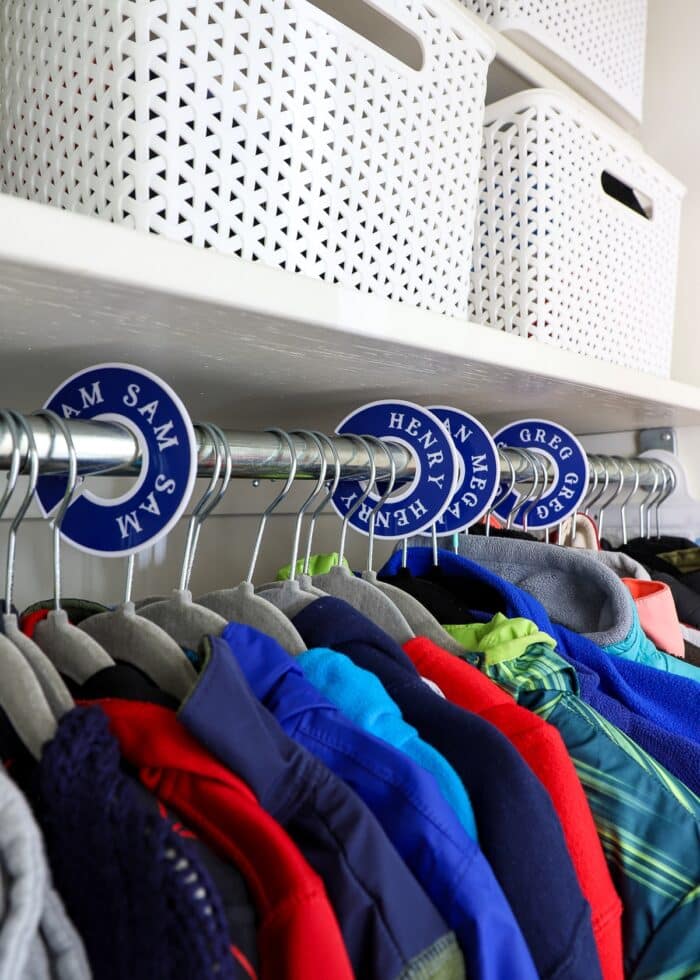
Round Closet Dividers
Interested in making round closet dividers instead? Learn how I made them here: Round Closet Divider Labels with a Cricut (+ SVG File)
More Great Cricut Labeling Projects
Ready to label even more with your Cricut machine? Check out these other awesome projects:- Make Vinyl Labels with a Cricut
- Make Labels Using Cricut Pens
- Make Labels with Cricut Print Then Cut
- Make Waterproof Labels with a Cricut
- How to Label Fabric with Iron-On Vinyl
- Iron-On Clothing Labels with a Cricut
- Toy Bin Labels with a Cricut
- Pantry Labels with a Cricut
- Dresser Drawer Labels with a Cricut
- Luggage Tags with a Cricut
- Return Address Labels with a Cricut
- Fast Labels with the Cricut Joy App
- Make Easy Round Closet Dividers with Cricut Vinyl
- Label Drawstring Backpacks with Cricut Iron-On
- How to Make Vinyl+Wood Labels
These DIY Hanging Closet Dividers are a great way to add some simple organization to your closet. They are especially popular in closets where you have multiple seasons or sizes (like in nurseries), but I also think they’d be handy to break up closets that hold clothes for different family members! I hope you give them a try!
Megan