DIY Wood Labels for Baskets
I recently went through a substantial purge and re-organization of all my craft supplies. As a result, many of my previous basket labels no longer matched. Since I’m never one to shy away from a labeling project, I opted to add some texture to my all-white craft space with some DIY Wood Labels. Although they didn’t turn out quite as I intended, I’m still fairly smitten with the chic-and-stylish result. Let me show you how they come together!
Why Use Wood Tags as Basket Labels?
Unfinished wood tags are a great solution for basket labels because they are inexpensive, have great durability, and come in a wide range of shapes and sizes. But best of all, they can be easily painted or stained in pretty much any color you desire, allowing you to get the exact look you want for your room and organizational needs.
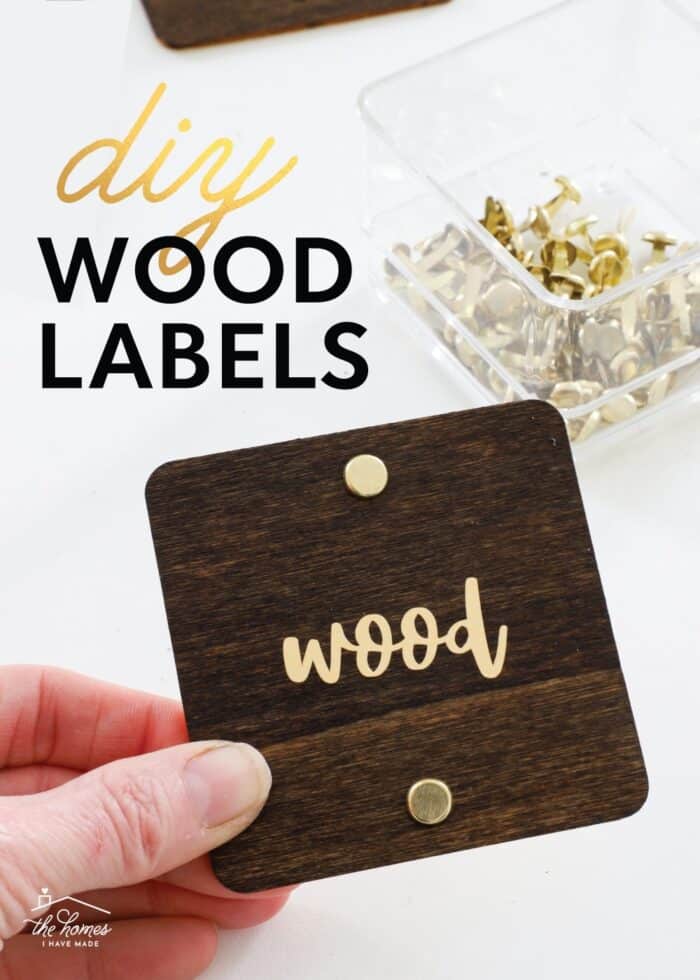
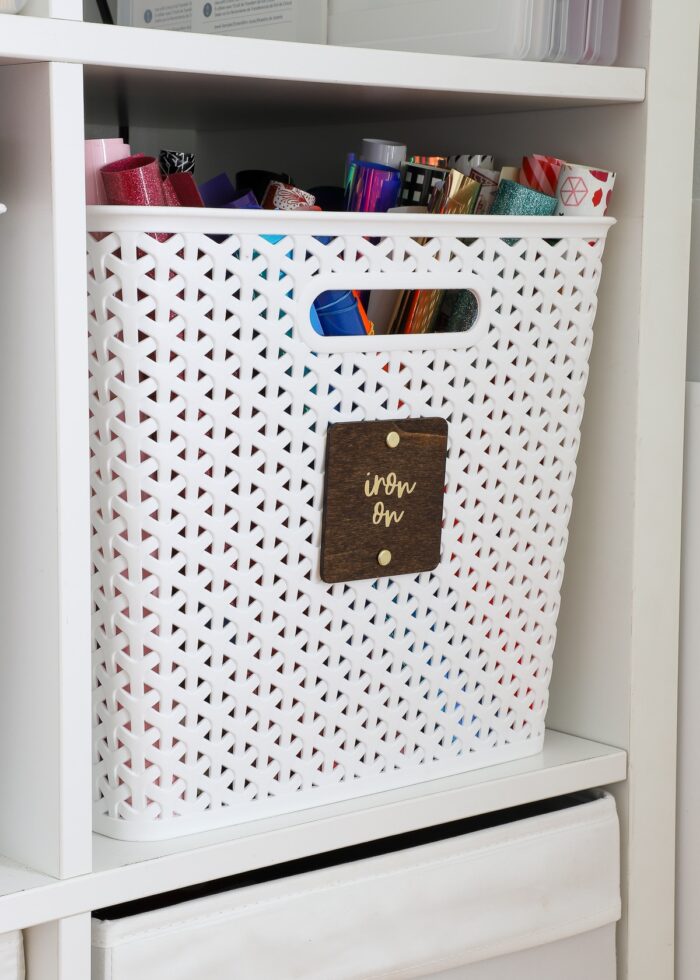
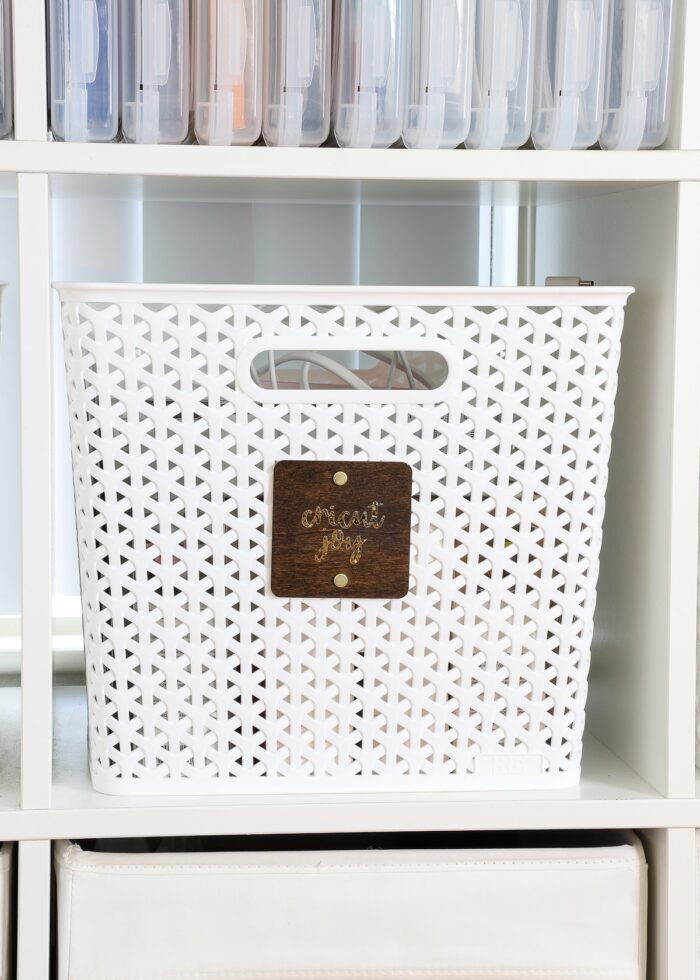
Admittedly, I originally set out to label these wood tags with a metallic paint pen for a more…organic…look. But when I just couldn’t get my handwriting to look crisp and clean, I switched to cutting out the letters from gold foil vinyl instead.
This solution is likely better in the long run. Not only do I get the text clarity I wanted, but now it’s really easy to swap the basket labels if needed. The wood tags can stay in place, and I can just peel-and-replace the sticker text as the basket contents change!
These DIY wood labels take a bit of time, but you’ll love how customizable (and ultimately, changeable) they are! Let me break it down for you!
Supplies Needed
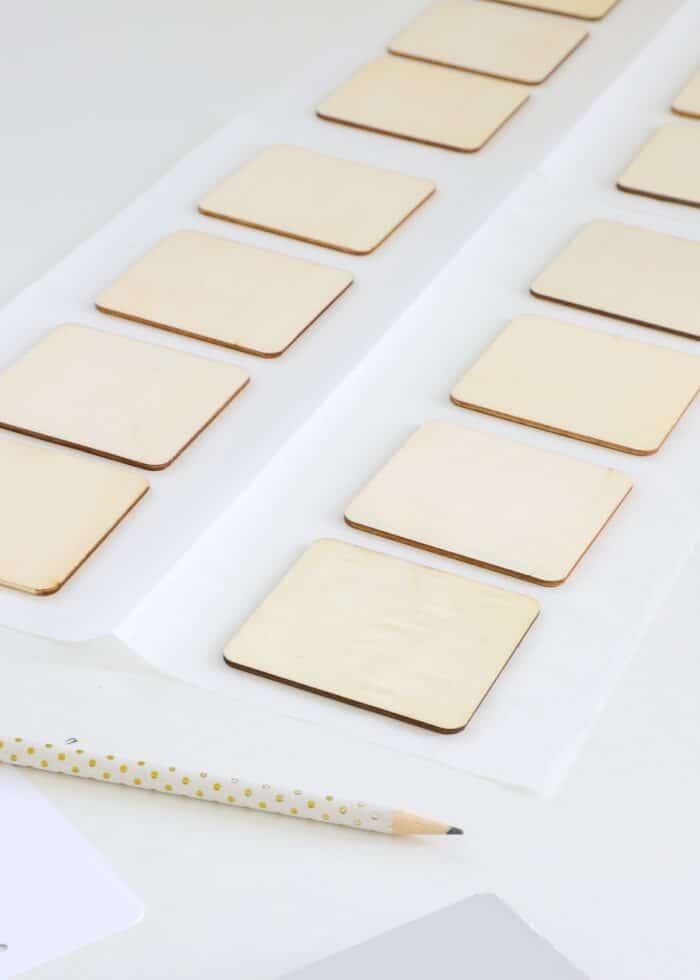
- Unfinished Wood Shapes – You can use any shape and size that looks right on your baskets. I used these 3″ wood squares, leftover from this project.
- Paint or Stain – In the color of your choice. However, you’ll need glossy wood surfaces for the vinyl to stick properly. So choose either glossy paint or a stain with polyurethane included.
- Drill and 1/16 Drill Bit
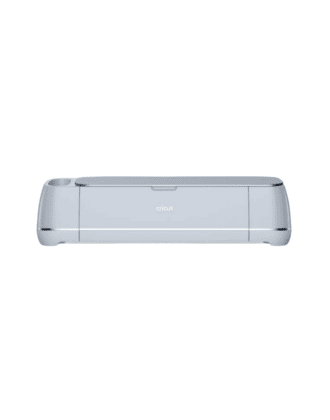
- Electronic Cutting Machine – Such as a Cricut or Silhouette
- Vinyl – In the color/sheen of your choice. I used gold foil vinyl.
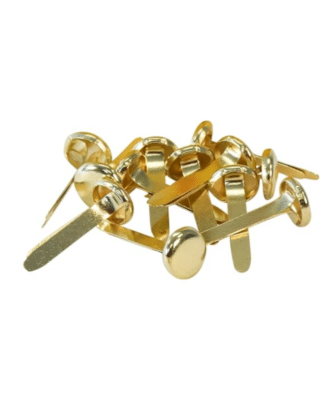
- Brass Paper Fasteners
Video Tutorial
Watch these labels come together from start-to-finish in the short video below. (Video not loading for you? You can watch it HERE!)
How to Make Wood Labels | Step-By-Step
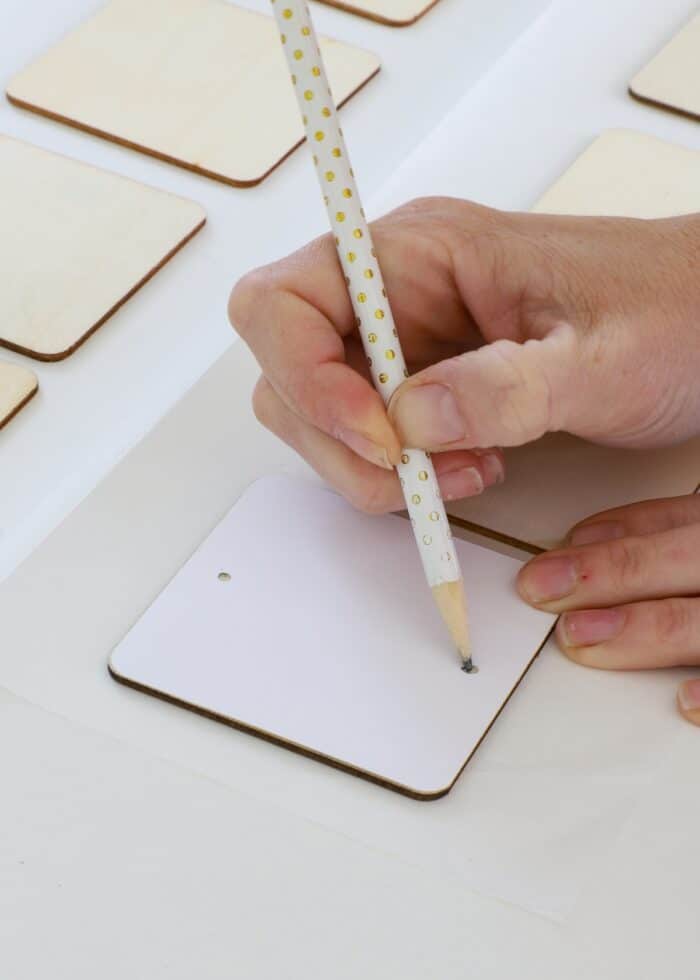
Step 1 – Mark Hole Placement
Most wood tags/shapes do not come with pre-drilled holes. So in order to uniformly add your own, I recommend making a paper template. Simply trace your tag shape onto some cardstock and choose a hole placement. Then, use that paper template to mark hole placement on all of your wooden tags.
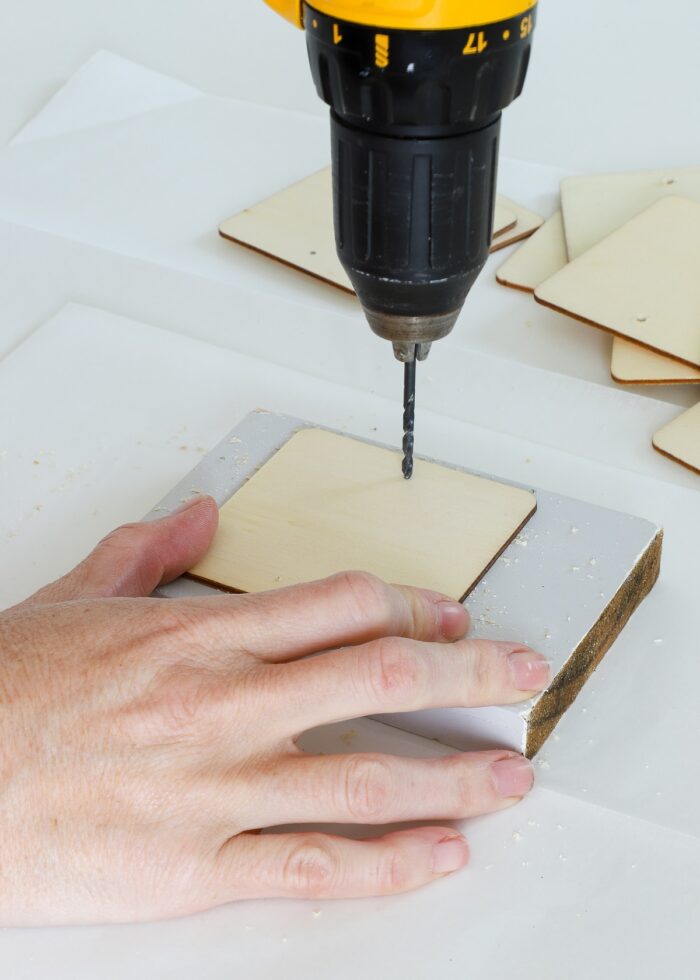
Step 2 – Drill Holes
Next, use a 1/16 drill bit to create holes at each marking. Drill slowly, so as not to crack the thin wood shape.
TIP! Place a wood scrap under each tag as you drill, so as not to risk damaging your work surface.
Repeat until all wooden tags are drilled.
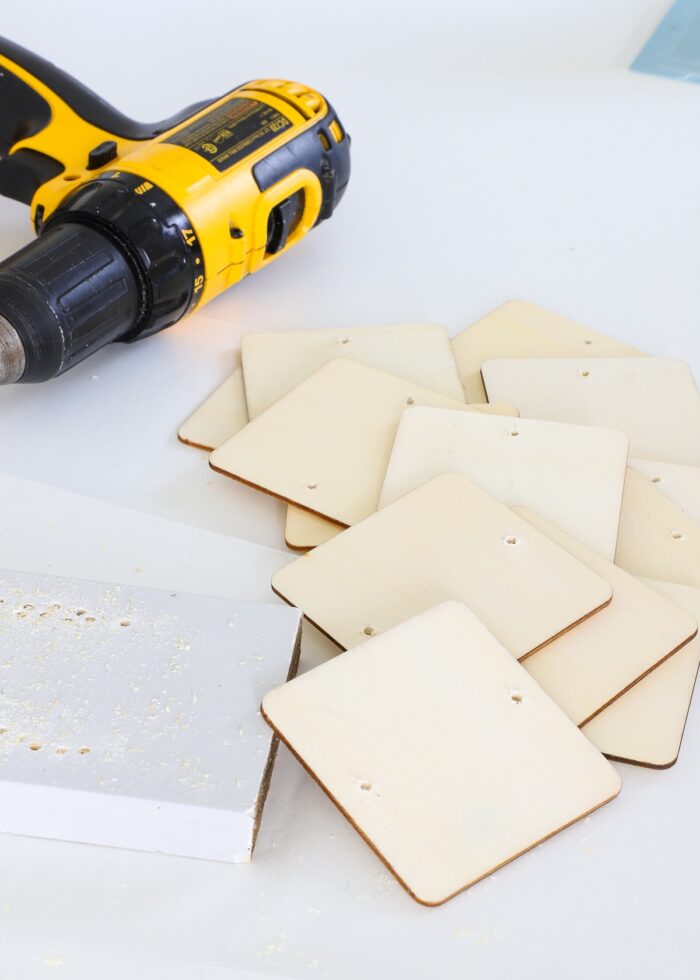
NOTE: You don’t really need to worry about the uneven wood surfaces created by the drilling. The brass fasteners cover up the holes entirely!
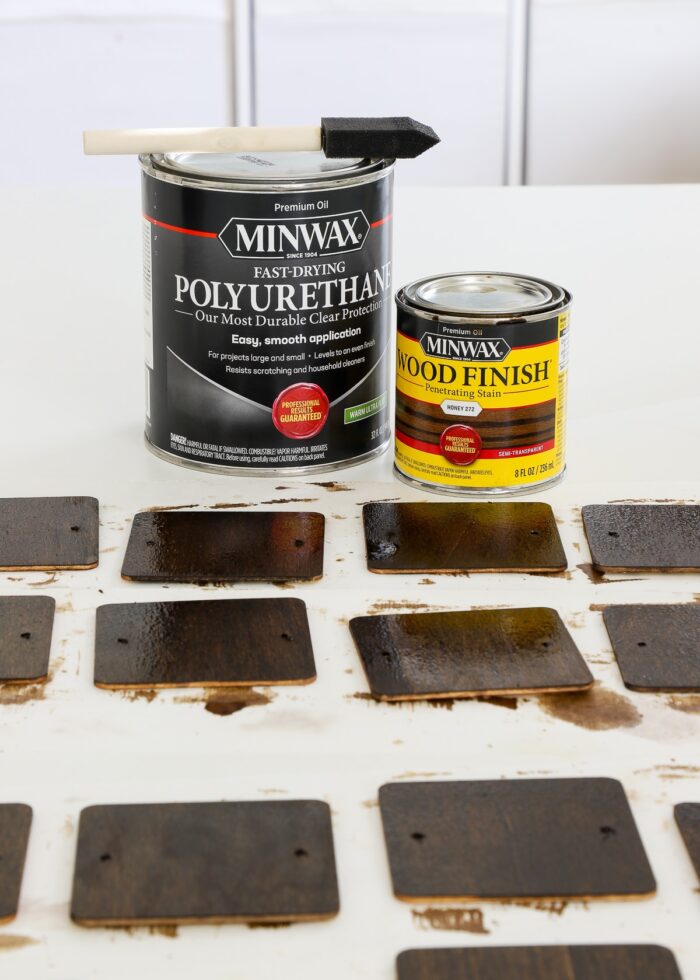
Step 3 – Paint or Stain Wood Labels
Next, use paint or stain to change the color of the wood tags. A few tips to consider:
- The balsa-type wood will soak up the stain quickly, so apply a (very) light coat.
- The vinyl letters will transfer easier to a glossy surface. So use a paint/stain with polyurethane/gloss included or add a clear coat once the stain/paint is dry.
- Skip the hassle of cleaning oil-based paints/stains from brushes by using a disposable sponge brush instead.
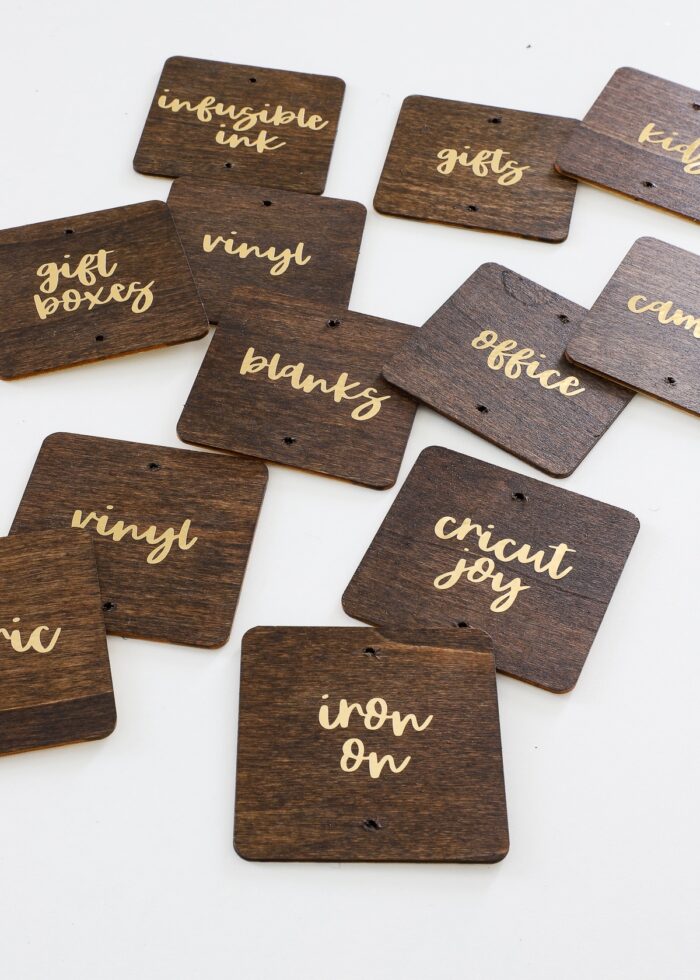
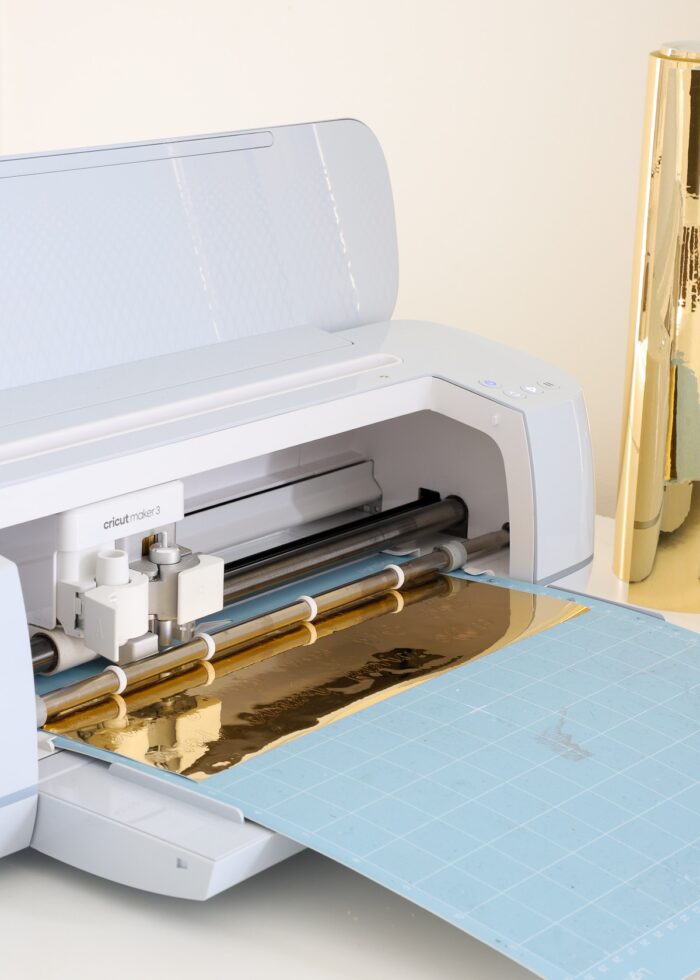
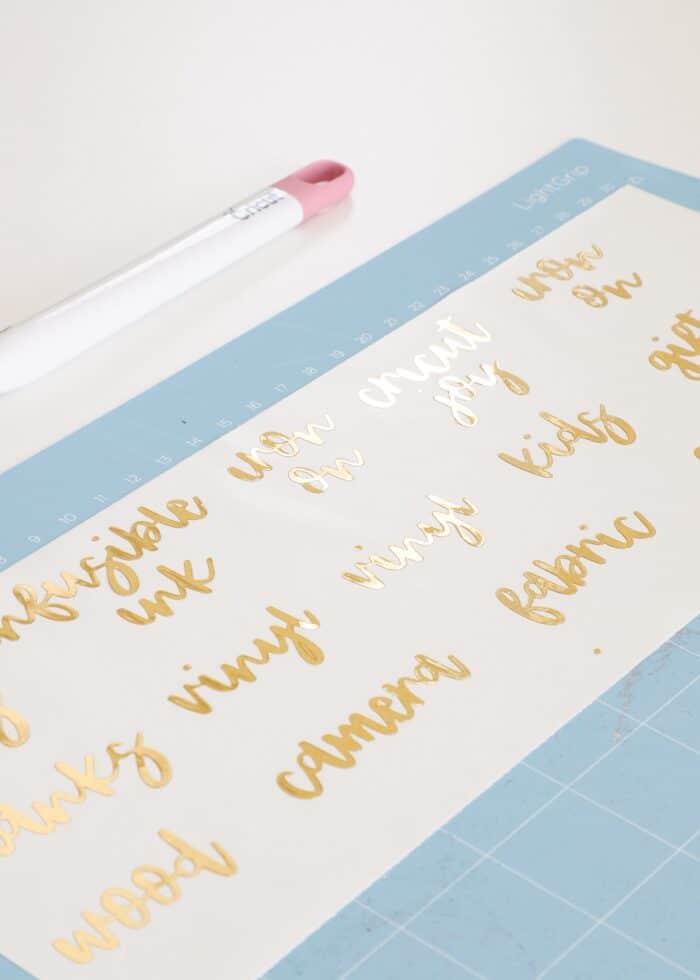
Step 4 – Cut Out Text from Vinyl
While your wood tags are drying, use an electronic cutting machine (such as a Cricut or Silhouette) to cut out the label text from foil vinyl.
Then use a weeding tool to prepare the words for transfer to the wood tags.
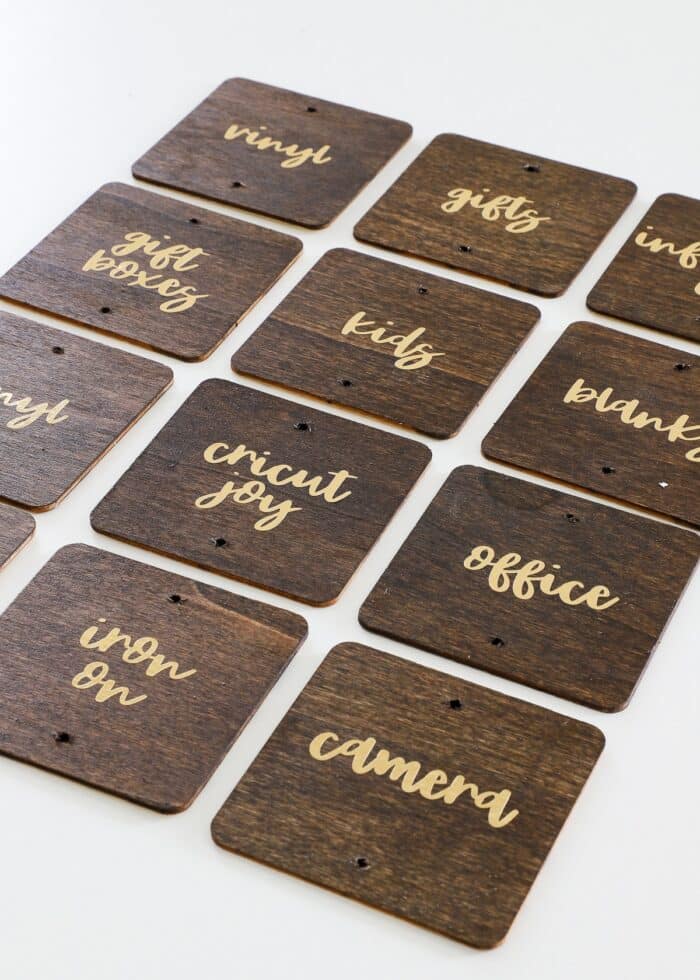
Step 5 – Place Text Onto Wood Labels
Once the paint/stain/poly is 100% dry, use transfer tape to move the vinyl text from the white paper backing to the wooden tags. If you need help with this step, see a comprehensive tutorial here: Your Complete Guide to Cutting Vinyl with a Cricut
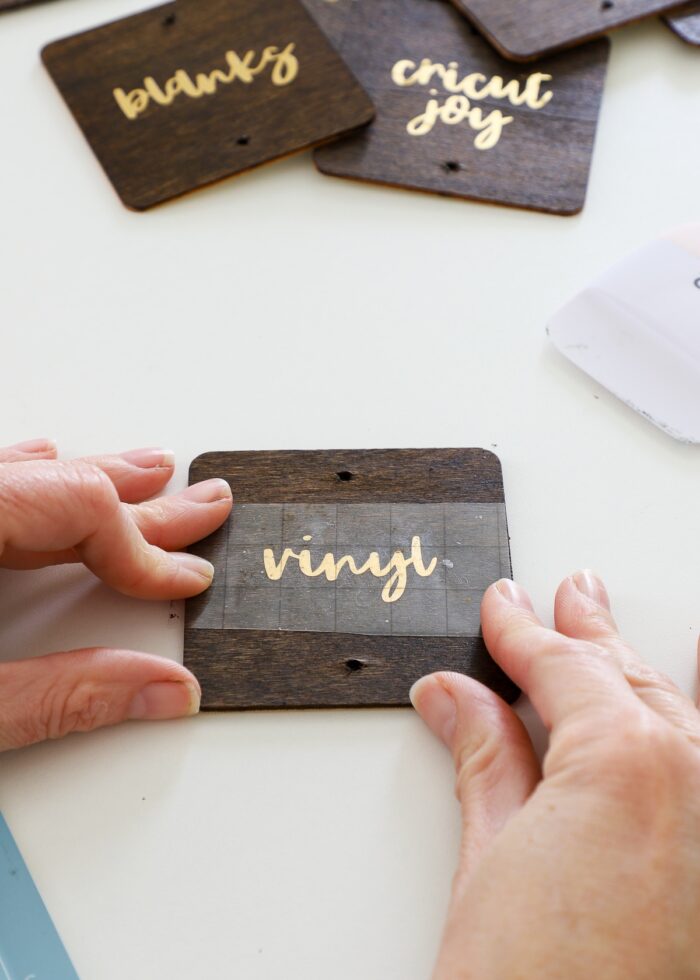
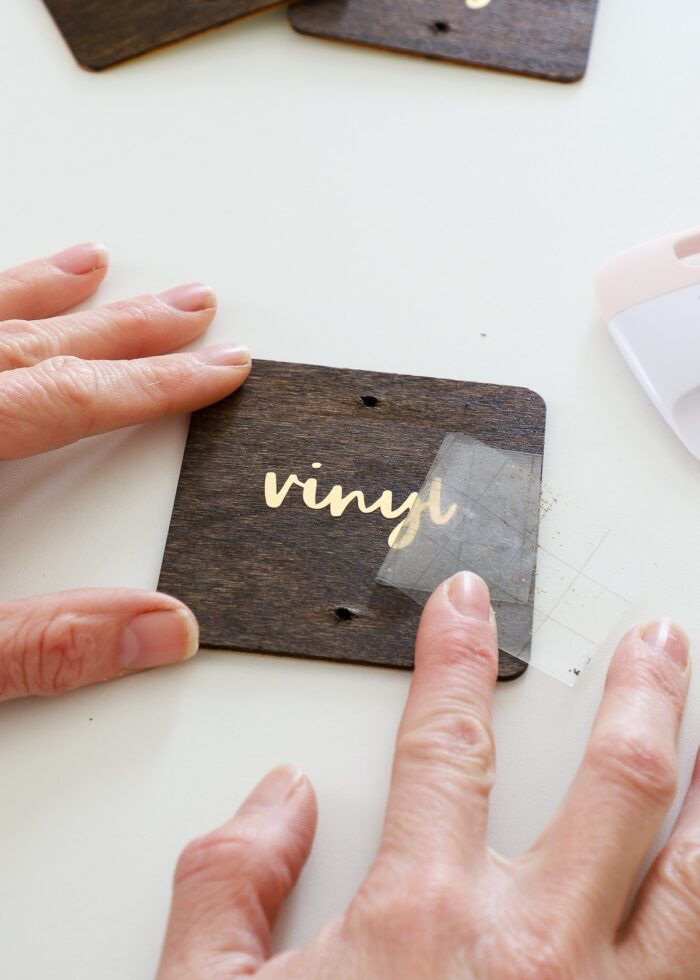
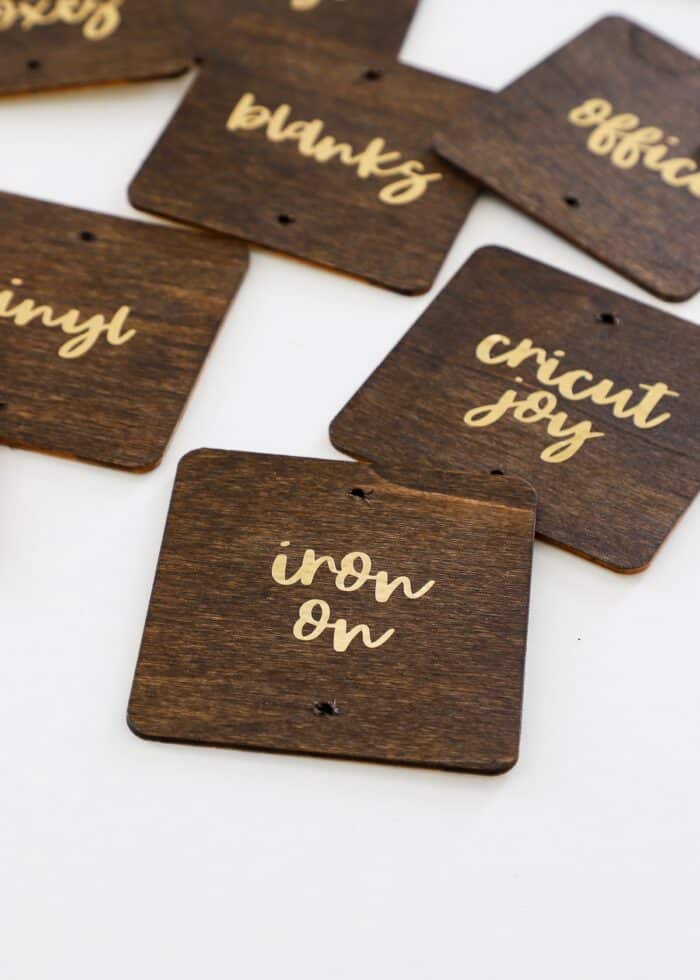
Repeat with all words and wooden tags.
Step 6 – Secure Labels to Baskets
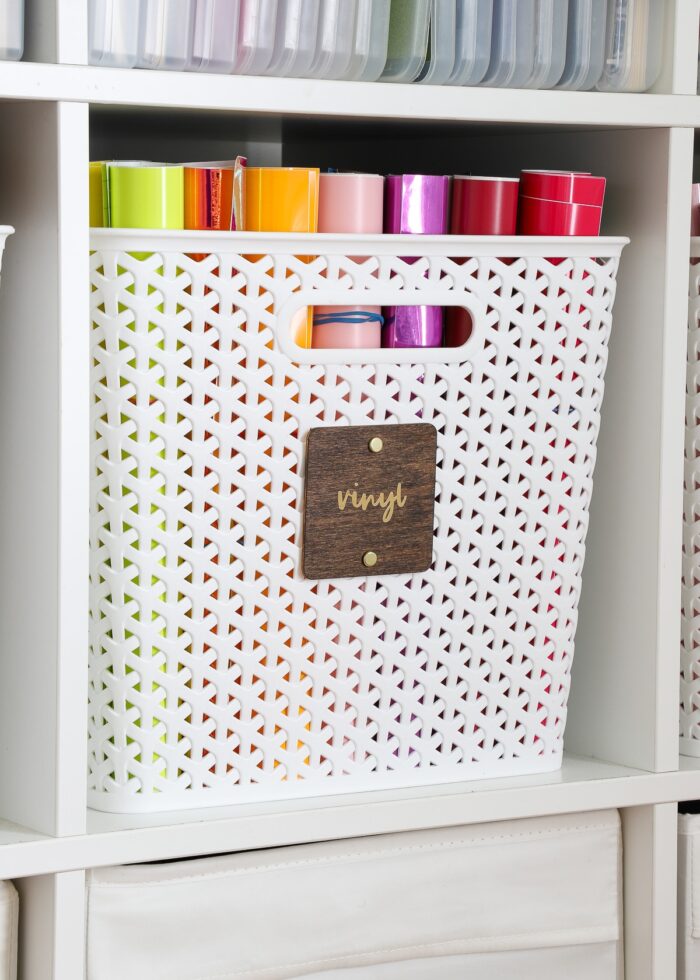
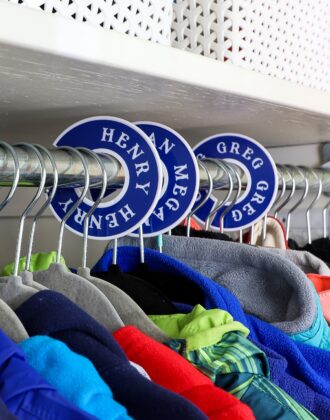
Once all the words are transferred to the wood labels, insert brass fasteners (my preferred way to secure labels to basket fronts) through the holes…
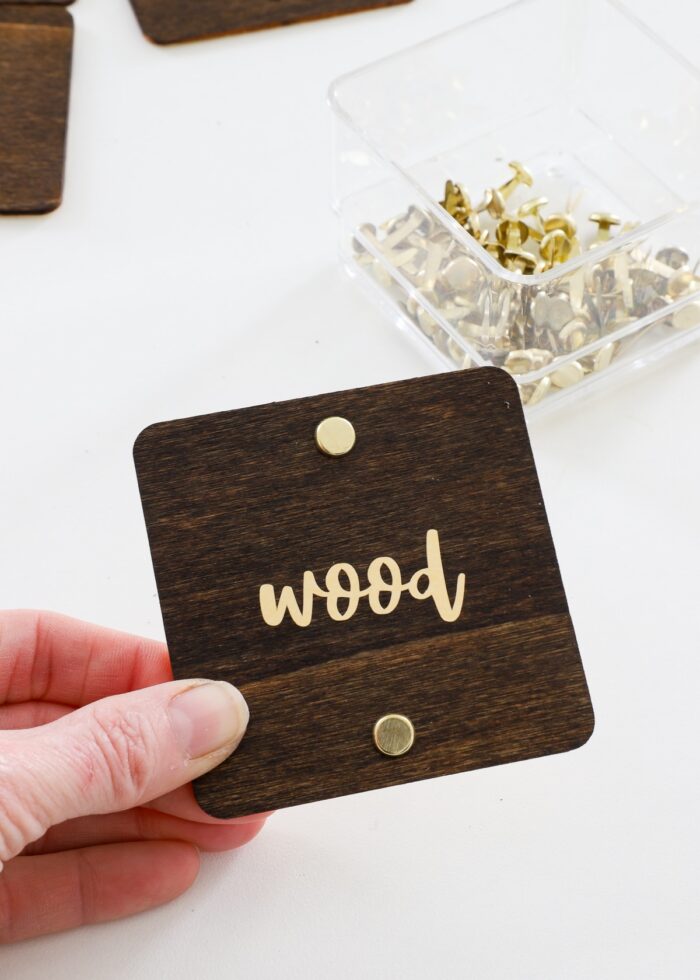
…then stick the fasteners through the basket holes and open the prongs on the inside of the basket.
If your baskets don’t have holes, like my IKEA DRONA bins, you have a few options:
- Make your own holes with a sharp puncture tool like I show here: How to Label DRONA Bins
- Secure the labels to the fronts of baskets with peel-and-stick Velcro instead
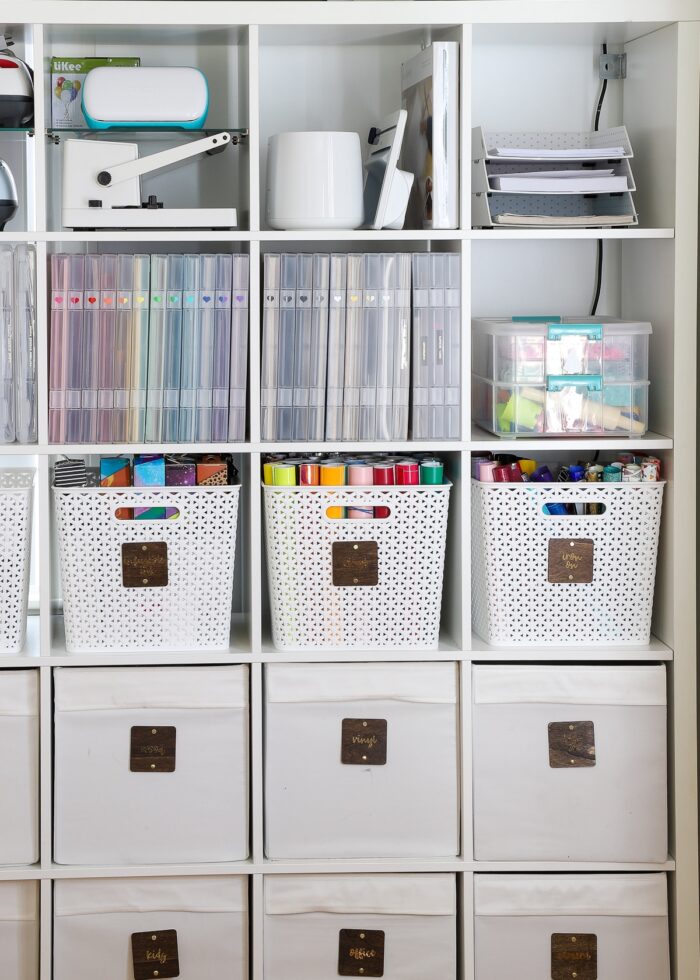
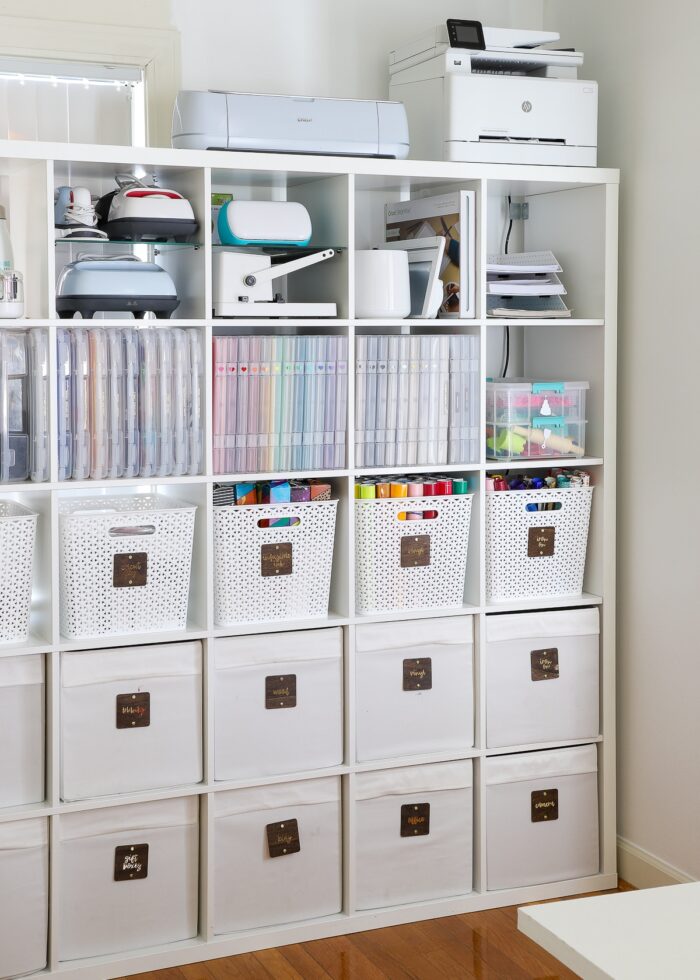
Repeat with all your baskets so that you can easily tell where everything is located!
More Great Cricut Labeling Projects
Ready to label even more with your Cricut machine? Check out these other awesome projects:- Make Vinyl Labels with a Cricut
- Make Labels Using Cricut Pens
- Make Labels with Cricut Print Then Cut
- Make Waterproof Labels with a Cricut
- How to Label Fabric with Iron-On Vinyl
- Iron-On Clothing Labels with a Cricut
- Toy Bin Labels with a Cricut
- Pantry Labels with a Cricut
- Dresser Drawer Labels with a Cricut
- Luggage Tags with a Cricut
- Return Address Labels with a Cricut
- Fast Labels with the Cricut Joy App
- Make Easy Round Closet Dividers with Cricut Vinyl
- Label Drawstring Backpacks with Cricut Iron-On
- How to Make Vinyl+Wood Labels
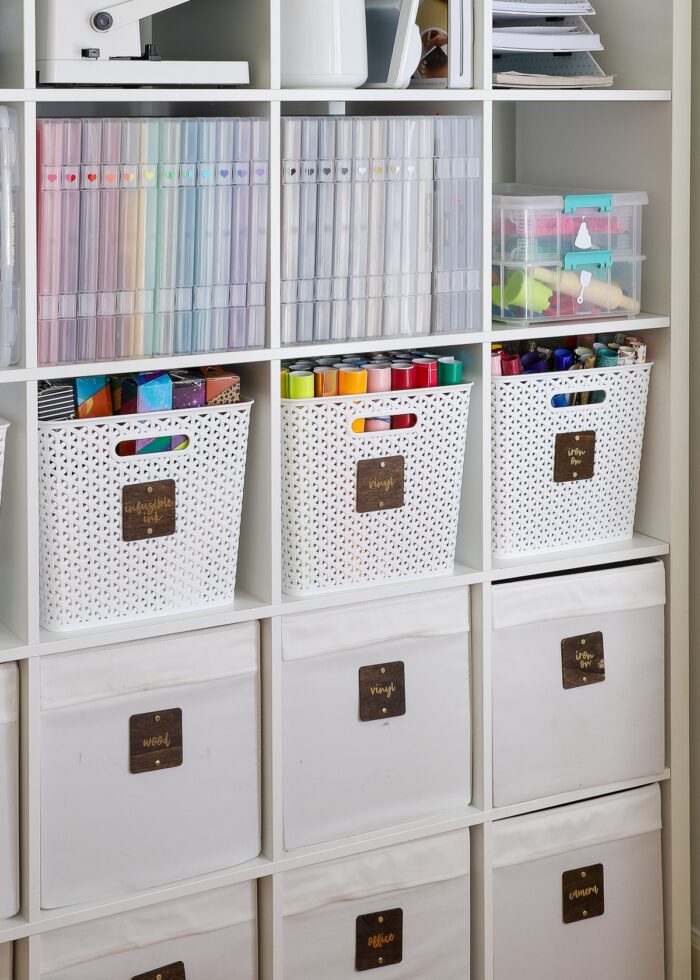
I really love this labeling combination: the foil lettering coordinates nicely with the brass fasteners, while the wood texture gives a casualness to the whole aesthetic. Best of all, these labels are easily changeable and add a nice dose of warmth to all my plastic shelves, bins, baskets, and containers. If you’ve been wanting wooden labels in your space but couldn’t quite figure out how to make it happen, I hope this tutorial provides the inspiration you need!
Megan


2 Comments on “DIY Wood Labels for Baskets”
What font did you use? Great looking labels!
Hi Lori!
It’s Lillybelle – definitely my favorite script font for labels since it’s easy to read.
Hope that helps!Megan