Renter-Friendly Wallpaper Installation – Yes, You Can Install Wallpaper!
Well friends! After lots of brainstorming and trial and error, I finally figured out how to hang wallpaper in a completely removable way. Picture me literally jumping in my chair with excitement over here!
While peel-and-stick “removable” wallpaper is now available in a variety patterns, I find it is quite costly and a bit temperamental to work with for a large installation. Notice my use of quotes on the word “removable” since I’ve never actually been able to successfully remove a single sheet of peel-and-stick wallpaper despite its claims. Traditional wallpaper on the other hand, is much more budget-friendly and more widely available in a variety of patterns, textures and price points. On top of that, using the method I’m about to show you, it’s completely removable and reusable, making it the ultimate renter-friendly wallpaper installation method out there!
I really enjoyed partnering with Walls Republic on a few other wallpaper projects (modern wall art and a grasscloth-covered trunk), so I wanted to collaborate with them again to bring you this completely renter-friendly solution for wallpaper installation that I can’t wait to show you!
Our Wallpapered Craft Space
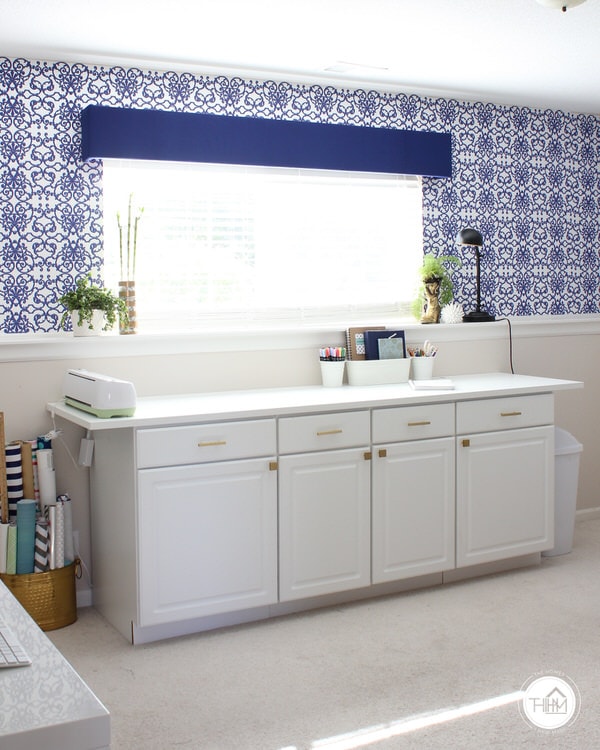
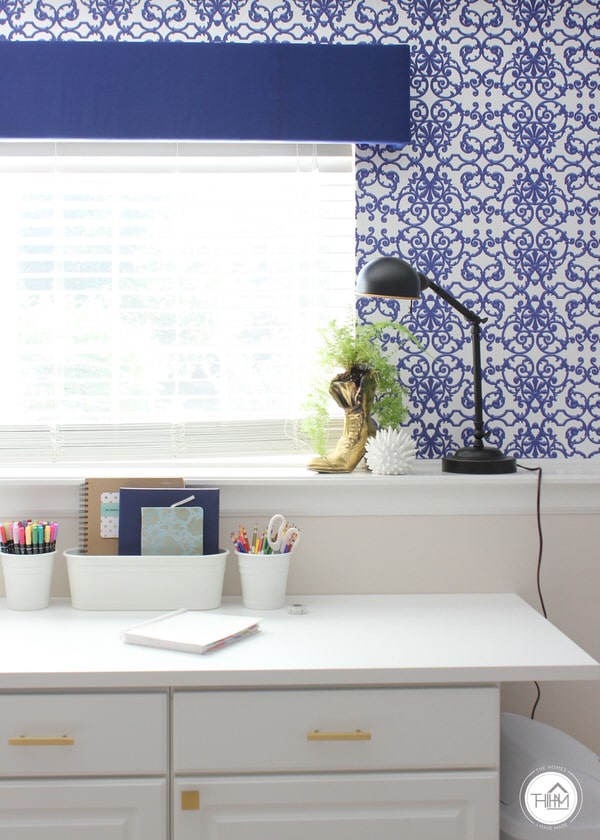
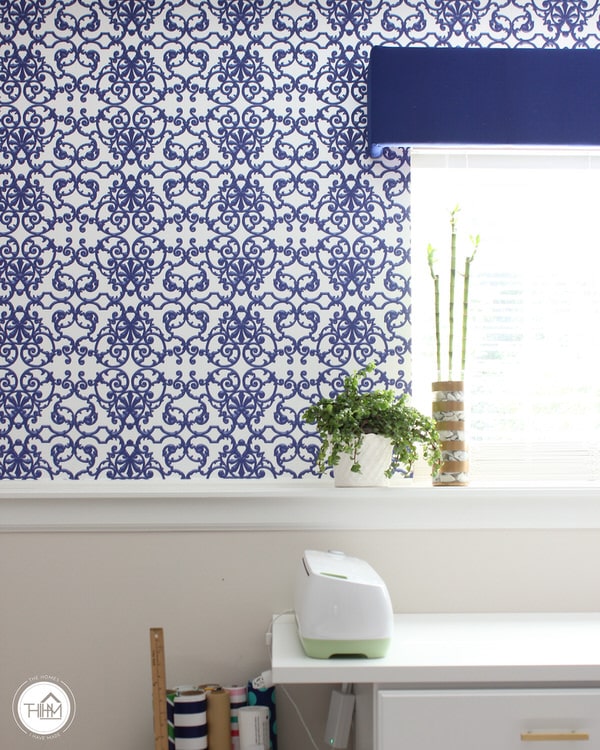
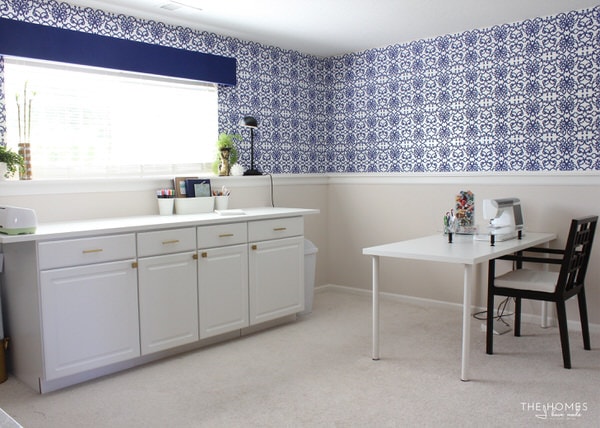
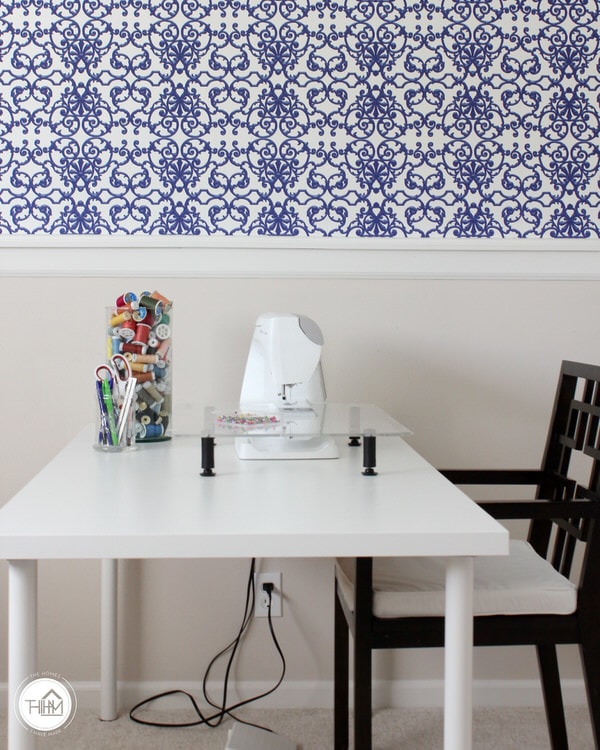
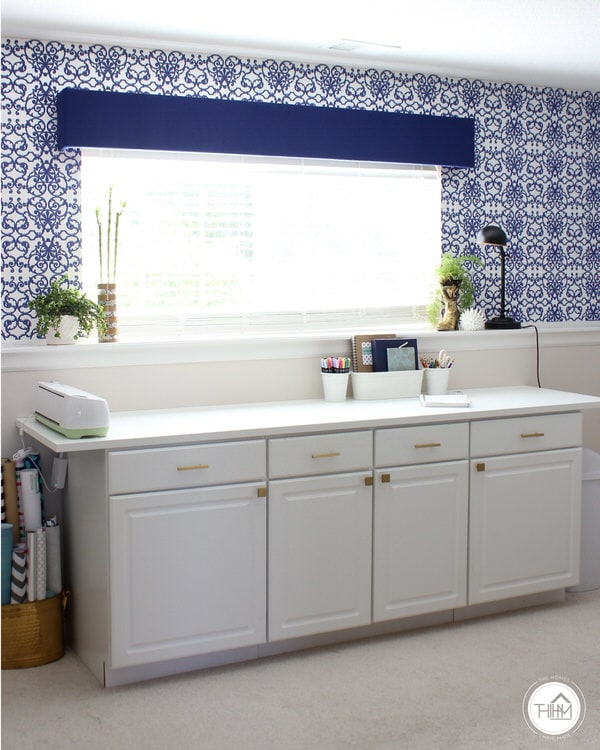
As most of you know, I am a pattern-loving girl, and I am LOVING the recent trend of fun and funky wallpapers in stores, spaces and projects. I view a powerful wall treatment as a relatively quick and easy way to add MAJOR impact to a space without having to buy lots of new furniture or accessories. The walls in both our new office and playroom are cut in half width-wise with an 8″ ledge in the middle. Since I’ve committed to not painting, I decided these walls were the perfect candidates for wallpaper installation. And boy, was I right! Take a look at my office now:
Some of you might be scratching your heads thinking, “Wait a minute, I thought we were going pink in the office?” And for a little while, that was the plan. But I couldn’t shake the idea of the bright cobalt blue that I miss from our old dining room so much; and a sweet reader also suggested that blue would flow better with the rest of our house. After weeks of trying different fabric and wrapping paper ideas, I came across this blue and white metallic wallpaper from Walls Republic and switched my plan instantly!
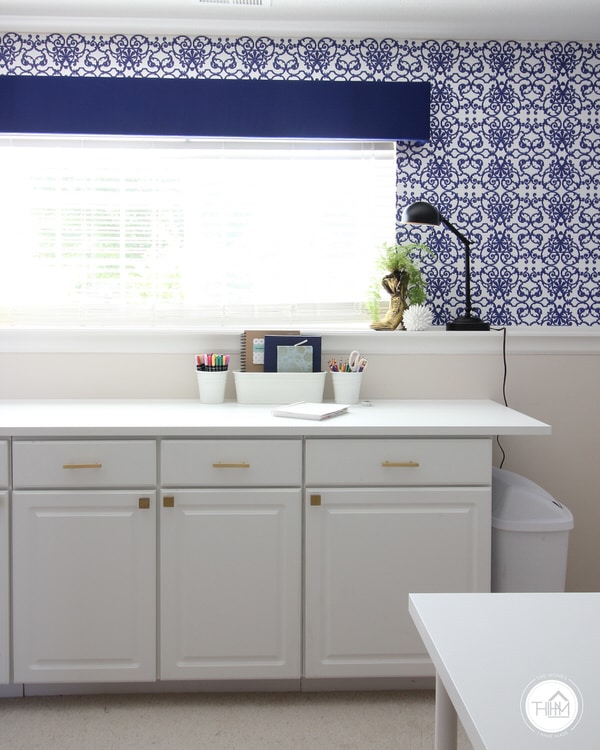
I realize some of you may not even entertain the idea of wallpaper in your home, especially a rental. But I want you to consider what the wallpaper is doing in this room. Everything in here is plain: white table, white counter, white cabinets, light-colored carpeting, white trim, neutral walls. The room went from a boring white box to a designer-like room in just a few hours thanks to the addition of the wallpaper. I’m telling you: you get a lot of bang for your buck with wallpaper. So if you don’t want to change up everything in a space, but the room is calling out for some major personality…give wallpaper a try!
The Liquid Starch Hack
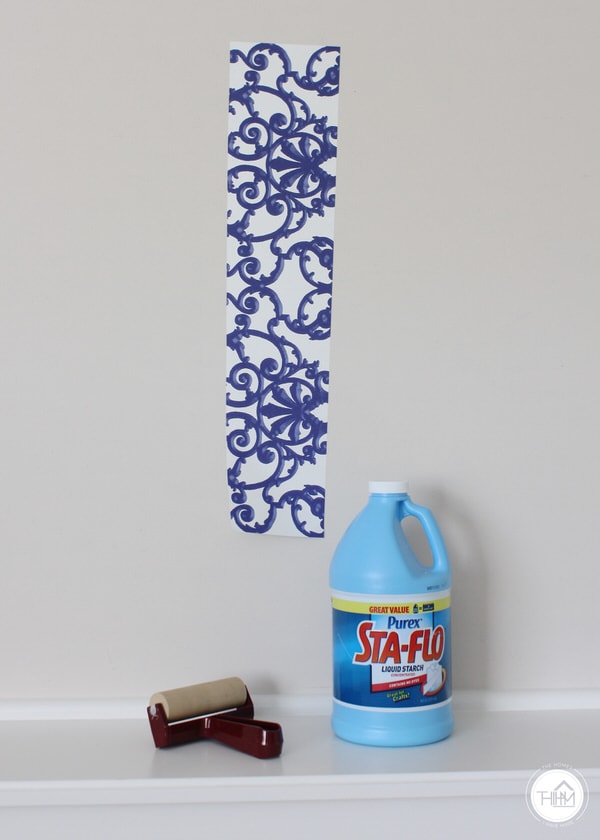
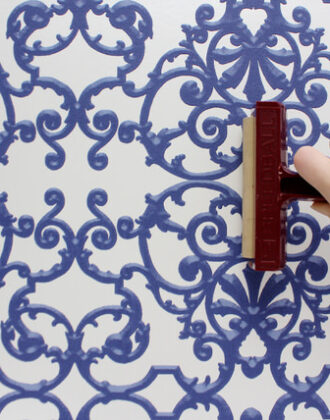
Are you ready to learn my renter-friendly wallpaper installation secret? This wallpaper feature is done with real wallpaper and one other product: liquid starch! I recently tried the age-old trick of applying fabric to the walls using liquid starch. I found that it goes up easily, and the fabric literally peels right off the walls when it’s time to go. After seeing the fabric+liquid starch work with my own eyes, it occurred to me: why wouldn’t it work with wallpaper too?!? So I cut off a scrap piece of wallpaper, and secured it to the wall with some liquid starch and smoothed it flat with my craft brayer.
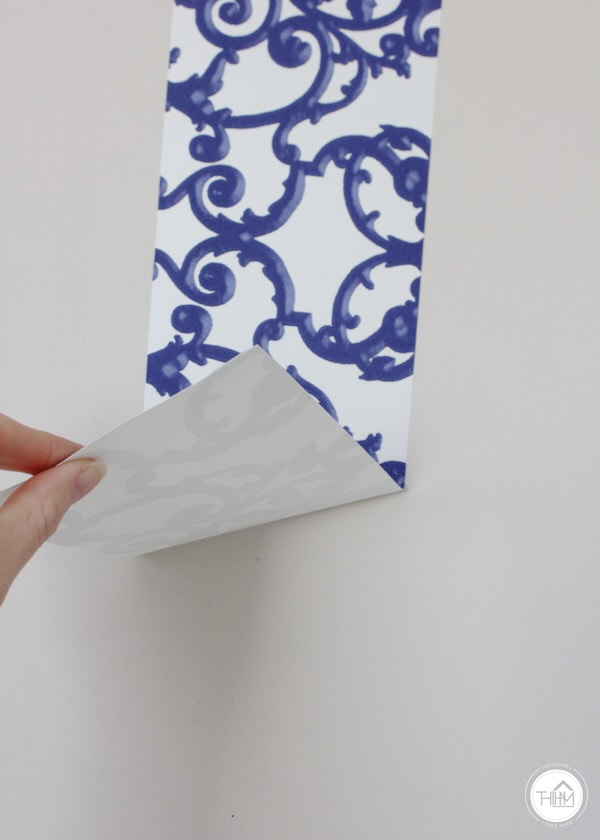
The paper adhered to the wall perfectly, and I let it stay up for 48 hours. During that time, the paper hadn’t lifted from the walls or wrinkled a bit, so I gave it the ultimate test: how does it come off? With NO effort and leaving NO residue behind, the paper peeled off in a single, perfect strip. Seriously. You guys: I had my renter-friendly solution at last!
Throughout this post, I have been intentionally using the words “quickly” and “easily.” I know I’m a passionate DIYer who is up for almost any amount of work to get the “right look,” but believe me when I say this paper truly went up quickly and easily! I think these two walls took me about 3 hours from start to finish, and I did it all in my “nice” clothes. The installation is pretty straight forward and surprisingly mess-free, and I’m going to walk you through the whole thing!
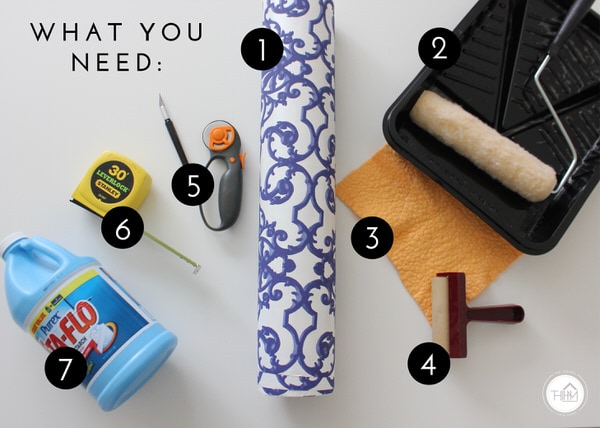
Supplies Needed
- Non-pasted Wallpaper (Walls Republic carries ONLY non-pasted wallpapers, making them ideal for this kind of installation)
- Paint tray and roller
- Paint Brush
- Rag
- Brayer
- Rotary cutter and self-healing mat
- X-acto knife
- Measuring tape
- Liquid starch
- Straight edge ruler
Renter-Friendly Wallpaper Installation
Step 1: Measure Your Walls
Start by measuring your walls to determine how many rolls of wallpaper you will need. For my two half walls, I used about 1.5 rolls.
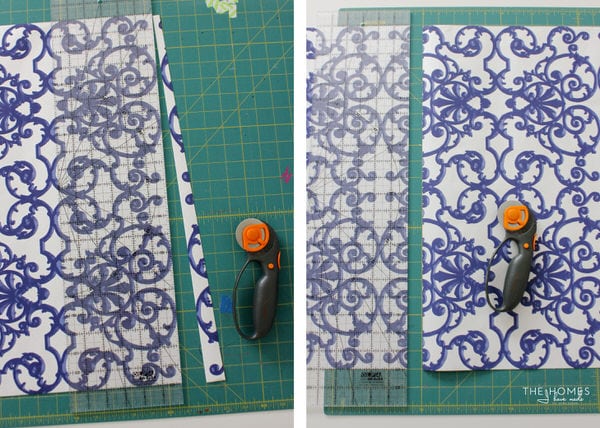
Step 2: Trim Paper Into Strips
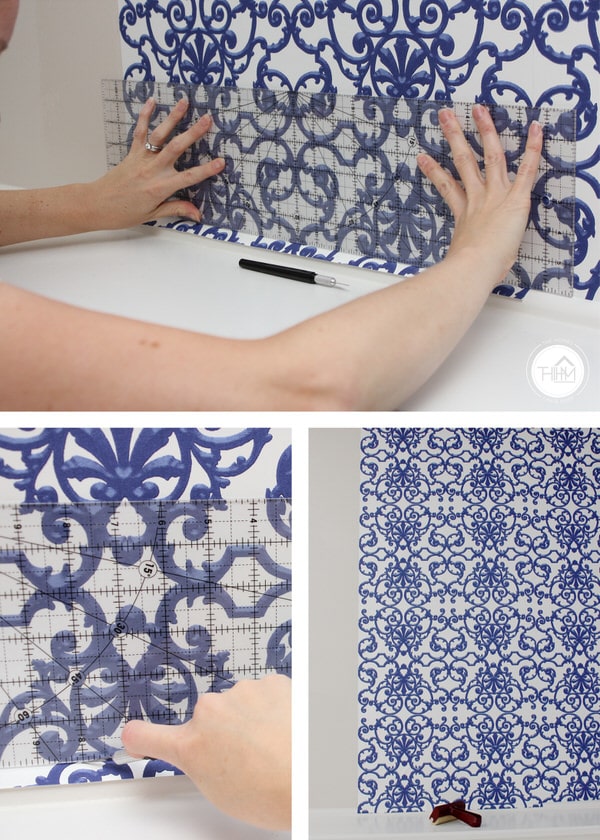
Lengthwise along your wall, determine where you want your pattern to start. Mark this spot with a ruler and trim to that point with a straight edge. I wanted each strip of wallpaper to start at the two scrolls (bottom left). So for each new sheet of paper, I trimmed down to that part of the pattern.
Before you cut your paper strip, you’ll want to make sure you add ~1” to the length of your wall for wiggle room. For reference, I cut each sheet of wallpaper down to 49″ long for my 48″ wall.
Step 3: Apply Liquid Starch
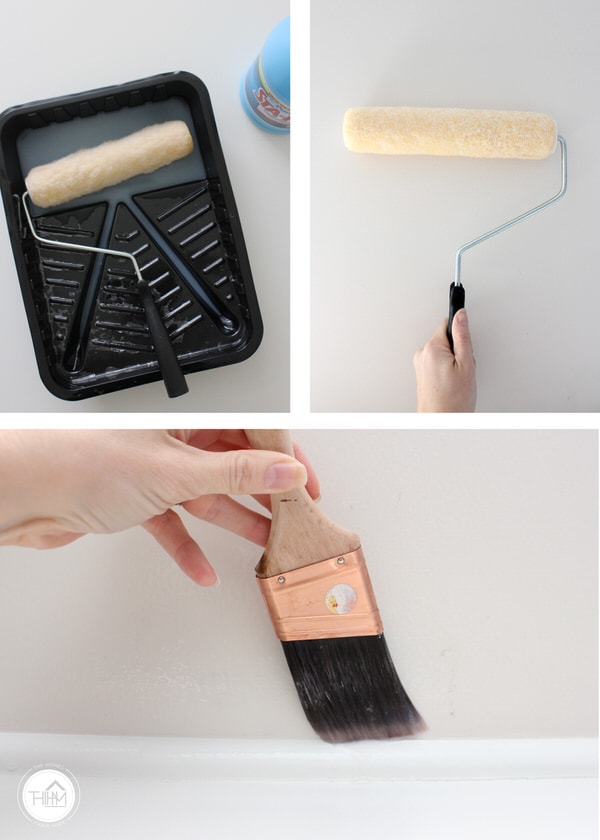
Start by soaking a roller in a small amount liquid starch and roll off excess liquid using a tray. Next, roll the starch onto the section of your wall where the paper is going. Since the roller is a bit bulky, you’ll need to use a brush along the top and bottom edges of the wall.
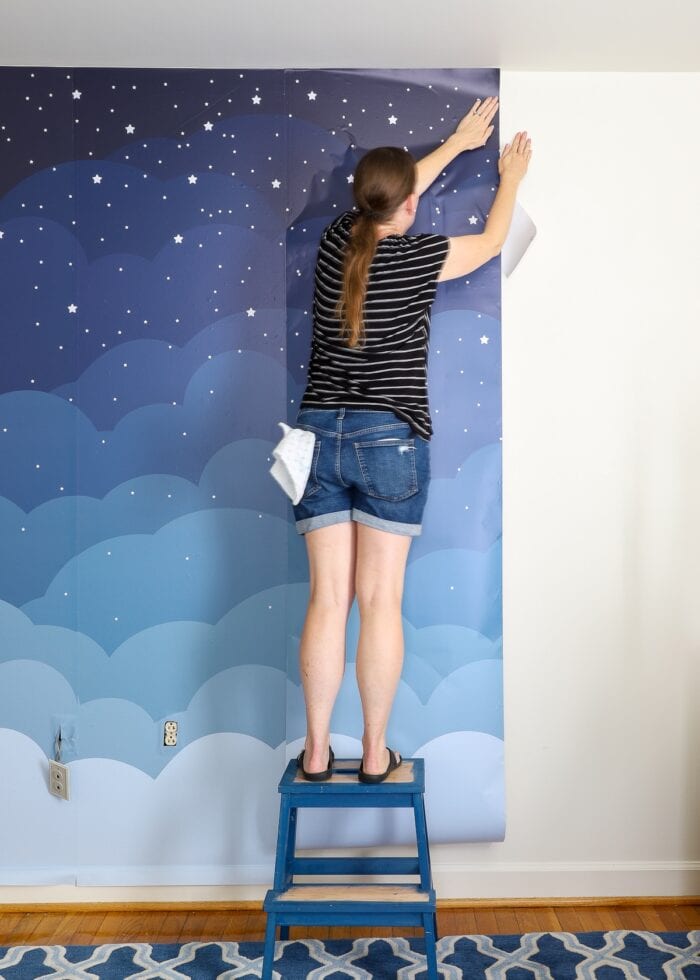
Step 4: Attach the Wallpaper Sheet
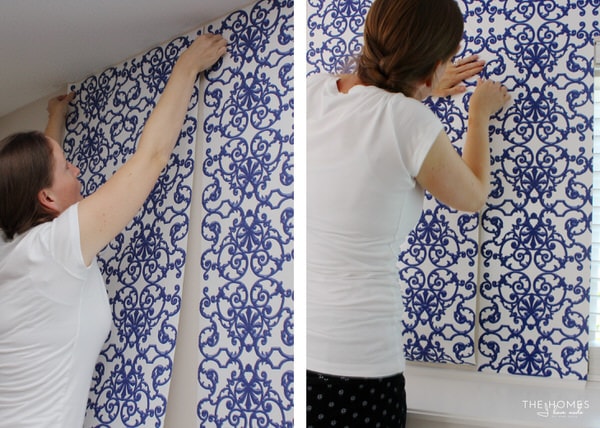
Next, take your measured and cut sheet of wallpaper and “loosely” attach it at the very top. Take care to match up the vertical seems.
Step 5: Press and Smooth the Paper
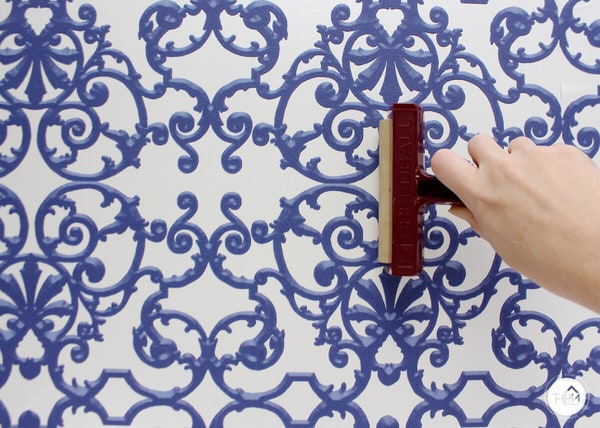
Working from the middle of the sheet, smooth upwards, downwards, and to the left with a brayer, working out all the bubbles and excess starch. To soak up excess liquid starch as you smooth the paper down use a rag.
Step 6: Trim Away Excess Paper
Use a straight edge to crease the paper at the bottom, then trim away the excess paper with an X-acto knife.
And with that, a single stretch of paper is installed! Repeat steps 1-6 until you have applied all sheets of paper to your walls.
I kid you not…what I thought was going to be a full weekend project, was done in three hours, all by myself. And the transformation is truly jaw-dropping! The blue color is gorgeous, it has a thick, 3D texture, and what you can’t really tell from the photos is that the white has a pearly iridescence to it, so it REALLY brightened this entire room.
My office/studio space had me a bit down the last few months. It was pretty much a big white box full of white furniture that just felt so style-less and boring. I really wasn’t sure what to do to make it a space I wanted to work and create in without a massive makeover (which honestly, I just wasn’t up for!) and a ton of new stuff (which we don’t need). With a three-hour installation of some pretty phenomenal paper, this room instantly has energy, personality and style. I feel like this space is now so reflective of me, my taste, and my brand, and I LOVE walking in here to work each day!
I really hope you give this wallpaper project a try in your home. Whether you rent or own, it’s a great way to get a fantastic pattern on your wall with minimal commitment!
FAQs About This Wallpaper Method
Does the Wallpaper Come Off Clean?
You can see how quickly and easily this Wallpaper came down HERE!
Can this Method be Used on Textured Walls?
After moving into a new house, we attempted to hang (different) non-pasted wallpaper on textured walls using this same method. It still worked great, but I had to make a few adjustments to get the wallpaper to grip. See the slight changes I made HERE.
How has the Wallpaper+Liquid Starch Technique Held up Over Time?
After years of testing and using this method in multiple rooms, I can now say, without hesitation, that this method can successfully be used for long-term applications. Even with fluctuations in temperatures, the paper is still in perfect condition without any peeling, drooping, etc. It’s literally as good as the day I hung it.
Can I Try the Liquid Starch Method Over Existing Wallpaper?
I have not personally tried to hang wallpaper over existing wallpaper at all, much less with the liquid starch method. That said, I don’t recommend it, but let me clarify why.
I do think wallpaper applied with liquid starch would adhere to another layer of (non-textured) wallpaper. My concern is that the liquid starch might leave a cloudy discoloration of the existing wallpaper and/or leave wet marks on the wallpaper (sort of like it did on the fabric here). If you don’t mind that the underlying wallpaper might get damaged, then go for it. But if you’re trying to use the liquid starch method as a safe, removable, renter-friendly solution, I would not risk discoloring or damaging the existing wallpaper.
In this case, I would use peel-and-stick wallpaper since it will come off cleanly and not damage the existing wallpaper at all!
Can the Wallpaper be Used Again?
In my experience, yes. If you use liquid starch to hang non-pasted wallpaper, then take it down and try to hang it in a new space, it should work. That said, keep in mind that ceiling heights and wall widths are different from home to home. So your lengths of paper or the amount you have may not translate to your next space perfectly.
Can I Use Spray Starch to Hang Non-pasted Wallpaper?
It’s come to my attention that the big jugs of liquid starch are not available in other countries; and as such, some readers have asked if spray starch will work? Although I have not experimented myself, I don’t think so. I don’t think the spray cans of starch will get the paper wet enough to secure it to the wall. If anyone has tried it, please share your results with us in the comments!
Can the Liquid Starch Technique be Used in Moist Spaces Such as Bathrooms or Kitchens?
I honestly don’t see why not. Although I haven’t personally tried to hang wallpaper with liquid starch in a bathroom, I have been so impressed with the durability of this method that I certainly wouldn’t hesitate to do so. As always though, I do recommend doing a test with a small swatch of paper (before you paper the entire room) to make sure the heat and moisture don’t adversely effect it.
If you’re still worried, peel-and-stick wallpaper is another great option here. I have used peel-and-stick wallpaper in both a bathroom and a kitchen and have had zero issues with it peeling up.
Where do I Buy Non-pasted Wallpaper?
You can find non-pasted wallpaper almost anywhere wallpaper is sold, you just need to read the specifications to find out if it’s pre-pasted (avoid) or non-pasted (this is what you want!). Some of my favorite sources are Walls Republic, Graham and Brown, Joss & Main, One Kings Lane, and The Home Depot.
What is the Advantage of Using the Liquid Starch Method Versus Peel-and-Stick Wallpaper?
1) cost – Although peel-and-stick papers don’t require any special supplies to hang it (other than scissors and a level) you can often paper much more space for a lot less money using non-pasted wallpaper. There are, however, tips for cutting the cost of peel-and-stick wallpaper that I’ve mapped out here if you’re interested. Still, I tend to use peel-and-stick papers only for smaller spaces, closets, or accent walls.
2) the ability to re-use it – Non-pasted traditional wallpaper will peel off in perfect sheets that can be used again and again. The same cannot be said true of peel-and-stick wallpaper despite its claims of being removable and reusable.
Can I Skip the Liquid Starch and Tray the Double-Stick Tape Method Instead?
Painter’s tape can be pricey, and if you need to use a lot on your walls to get the paper to fully stick, you may not save any money in the long run. And you certainly won’t save any time or hassle. Additionally, because you are only securing paper to the wall at intervals (where the tape is), the paper might “billow” away from the walls, making it look more like a poster than wallpaper.
If you’re using a good, thick wallpaper, I suggest you use the liquid starch method to give you the visual results of “real” wallpaper, though fully removable. Maybe save the painters tape+double stick tape to hang thinner papers, such as wrapping paper.
Why Not Just Use Peel-and-Stick Wallpaper Instead?
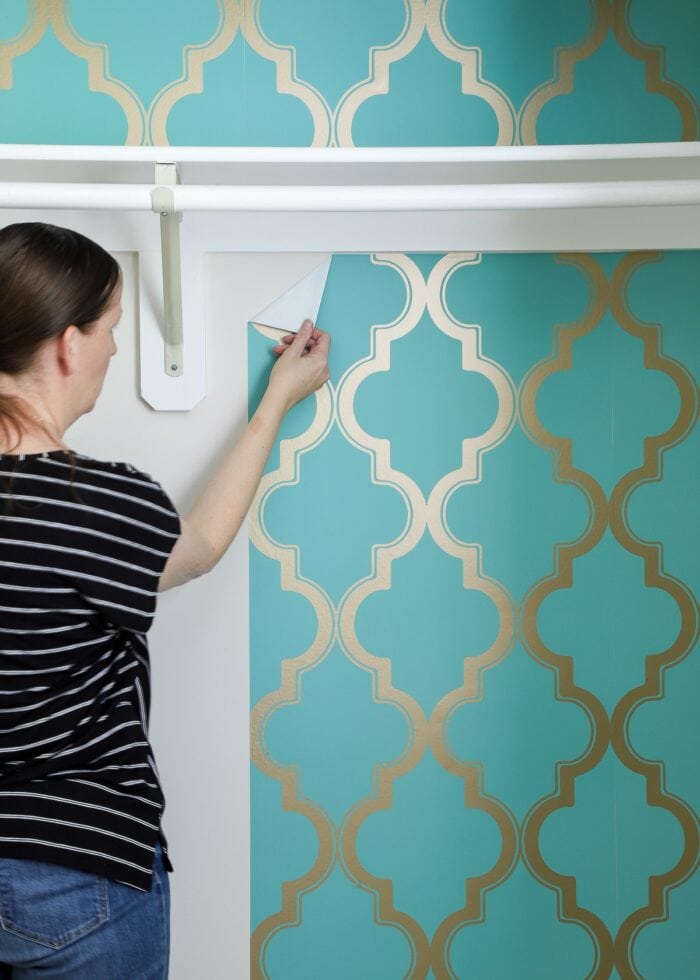
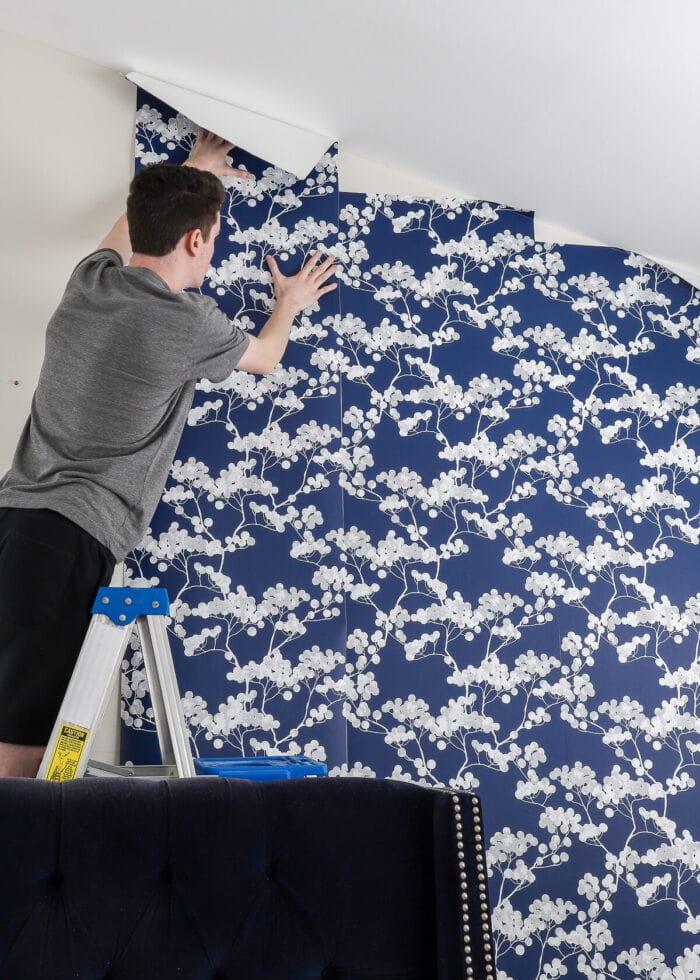
Peel-and-stick wallpaper is another really viable renter-friendly solution; but it has some pros and cons compared to the liquid starch application. Refer to these posts to learn about hanging peel-and-stick wallpaper in your rental!
Looking for more information on peel-and-stick wallpaper? I’ve got a couple of posts for you: How to hang peel and stick wallpaper, the best places to buy peel-and-stick wallpaper at affordable prices, and 5 ways to cut the cost of removable wallpaper.
More Great Information on Using Wallpaper In Your Home
Ready to tackle more wallpaper projects in your home? Check out some of my other favorites!
- How to Hang Peel and Stick Wallpaper
- A Complete Guide to Updating Furniture with Wallpaper
- How to Wallpaper the Back of a Bookcase | Step-by-Step
- Wallpapering a Stairwell | Tips You Need to Know!
- How to Hang a Wallpaper Mural | Tips & Tricks for Great Results
- How to Wallpaper a Backsplash
- Can You Put Peel and Stick Wallpaper on the Floor?
- How to Line Drawers with Wallpaper
- Solid Wallpaper | What It Is + Ideas for Using It
- Wallpapering a Whole Room Versus an Accent Wall | What I Learned
- How to Frame Wallpaper as Art
- Does Peel and Stick Wallpaper Damage Walls?
- How to Use Wall Decals to Look Like Wallpaper
Megan





71 Comments on “Renter-Friendly Wallpaper Installation – Yes, You Can Install Wallpaper!”
Love your blog! I have a few walls that could use some attention and this just might the route I take. Thank you for the inspiration to get started. Now if I can get my husband out of the house for a few hours….
Megan, this is amazing!! As a renter myself I CANNOT wait to give this a try. Your office space is wonderful 🙂
Once again thank you so much for your fantastic and inspirational post.
Really beautiful space!
Oh this is awesome! Now I have to find something that doesn’t clash with the current paint. I wish I had plain white walls, but I have “renter’s beige.” Woof!
Hey Stacey!
If you look closely, our walls are “renter’s beige” too! Although, they seem to have a pinkish hue, which I think is even worse! The white trim helps to tie in the white paper, and the paper really works to brighten the whole room. I thought I would be really worried about the beige-ish wall below, but so far, it doesn’t really bother me!
Have a good weekend!
Megan
Wow this is fabulous. Removing wallpaper is such a pain and hard to bring the walls back like new so even as a non renter I love this idea so much. I’ll definitely try this in my own home. Thanks for sharing 🙂
What a great trick!! Thank you for sharing! I will definitely pass this on and may be using this for a space I may be helping with!
P.s your office space looks so bright and fresh I love it! That wallpaper as well, what a fabulous pick, love that blue and white 🙂
Lauren Baxter | Lovely Decor
xx
Does it work to wallpaper walls that are textured? Our walls have a sort of “orange peel” effect.
Hi Sara!
I can’t think of a reason why it wouldn’t?!? Then again, I’m not sure how bumpy or textured your walls are. What’s nice about wallpaper is that it’s so thick I don’t think you’ll be able to see the wall texture through it. You may really need to saturate the wall with the liquid starch to “fill in” all the texture on the wall, but I think it would still work. Maybe practice with a sample (you can order free samples from Walls Republic) before going for the whole space?
Hope that helps, and let me know how it turns out!
Megan
Pingback: UHeart Organizing: Office in an Armoire (With DIY Paper Drawer Dividers!) | Gregory Mcallister
What a fun solution! We’re renters too. I’m curious what the wall looked like when the paper was removed. Was there any residue left behind? It doesn’t seem worth the effort if you have to do a bunch of wall treatment after you pull the wallpaper down. But I’m hoping that’s NOT the case!
Thanks!
Hi Stephanie!
Thank you so much for commenting! As far as I could tell on my test strip, the wall looked perfect underneath! When I practiced the liquid starch with fabric first, it actually left lots of little threads and pills behind, but the paper pulled off clean with nothing left on the wall! I am planning on wiping the walls down with a wet sponge once it all comes down, but I’m not expecting to do much more than that. Fingers crossed it turns out just the way I am expecting! I’ll be taking it all down next Spring, and will absolutely do a follow-up on the blog, so keep your eyes out for it!
Have a great weekend!
Megan
Pingback: How Do YOU Use Pinterest? Thoughts, Tips, and Tricks for the Blogger and Everyday User | The Homes I Have Made
Hi Megan,
Thanks for sharing your experience with this. I am moving to a new apartment and wanted to add some style to the place. I thought I was doomed when I found a wallpaper I loved but it said non-adhesive. Glad to hear from you that that’s actually a good thing. THis blog post has helped me so much and given me hope that I can actually do this. I do have one question about your experience. Would you say the wallpaper you got is thin? I’m only asking because of the two patterns I have in mind, one seems to be textured and could make it heavier. I’m mostly worried about it sliding down the wall after I install it because of the weight. Would you mind looking at these two links to the Amazon listings and telling me your opinion? I would really appreciate it!
http://www.amazon.com/HaokHome%C2%AE-600906-Vintage-Wallpaper-bedroom/dp/B00OOQRUFO?ie=UTF8&colid=1DCWA02ZIU6H6&coliid=I2J0SO5FJ8L3A7&ref_=wl_it_dp_o_pC_nS_ttl
http://www.amazon.com/HaokHome-Flocking-Textured-Wallpaper-Decoration/dp/B00Y7QWDWG?ie=UTF8&colid=1DCWA02ZIU6H6&coliid=ITZ5986IWL79J&psc=1&ref_=wl_it_dp_o_pC_S_ttl
The second link is the one I was thinking would be too heavy. I thought about push pins at the top to hold it in place while it dries. Sorry for all the questions! I respect your opinion and would love to know what you think since you’ve done this before.
Thank you in advance!
Hi Lauren!
Thanks so much for reaching out! I have to say, this wallpaper project may have raised a lot of eyebrows from my readers (and my Landlord!), but it was one of the most successful projects we did in our house. We actually JUST took the paper down (I’ll have a video coming soon!) and it peeled off perfectly, no residue, no paper tearing. It was so easy and I kinda wish I had used this technique in all our rooms. I can feel relatively confident recommending this project to other renters now 🙂
It’s pretty hard to tell weight/texture via online, so I am not really comfortable giving you a recommendation on which one to go with. I will say that the paper I used was pretty thick and had texture on it and it hung without any issue. I think you might be surprised at how easily it goes up…I didn’t need to use thumbtacks or a second set of hands! If you’re really worried, maybe try and track down a sample before ordering full rolls?
I would go with whichever pattern you like better and then troubleshoot if you’re having trouble hanging it!
Sorry I can’t be more help, but I DO want to see how it looks once you’re done! Good luck!
Megan
Hi, this may be a silly question but would this method work on mirrors? I have one wall that’s just a giant mirror in my dining area and I’m dying to cover it without ruining the glass. If this method won’t work, do you have any suggestions?
Hi Jennette!
It’s worth giving it a try! You usually can order samples from wallpaper companies for free, so I would do a test before ordering a bunch of rolls. It might slip and slide as you’re putting it up, but as it dries, there’s a good chance it will stick. Peel-and-stick wallpaper would certainly work, although it’s more expensive.
Hope that helps! And if you do try it, please let me know how it turns out!
Megan
That’s a great idea, I’m going to do as you suggested and try ordering a sample to test out. I’ll let you know how it works out!
Did you have to prepare your walls, like paint it and clean it? And would this work on matte walls?
Hi Sylvia,
When I did this project, our walls were painted with flat paint. I didn’t do any other prep to them besides wipe them down with a microfiber cloth to remove dust. I would always to a test before doing your entire wall(s).
Good luck!
Megan
Hi:
I bought some pretty heavy (weight-wise) wallpaper that was on clearance at Wayfair on impulse (50 cents a sq ft for paintable paper!)
Wondering if you think that this would hold up with liquid starch,
or if I should use the alternative double sided tape technique I’ve seen elsewhere… any idea? Thanks!
Here’s the paper:
https://www.grahambrown.com/us/small-squares-wallpaper/12011-master.html#prefn1=application&prefn2=brand&prefv3=White&prefv1=Paste+The+Wall&prefv2=Superfresco+Easy&prefn3=colourgroup&gclid=CjwKCAjwk4vMBRAgEiwA4ftLs89OHpKIHR-wPNEfSdc-4QaLUM1r1w5_0J1Xpc4MljK4alvosRH78RoCm2cQAvD_BwE&start=17
Hi Jessica,
You can certainly try it – but I have often found that paintable wallpaper and little finicky. It tends to shrink up once it’s painted. The liquid starch method is sort of a no-loose situation. It’s easy and inexpensive to try and gives really good results. If it doesn’t work, you can then resort to the tape method.
Hope that helps!
Megan
Thanks, Megan. I’ll see how it goes 🙂
Hi Megan,
We too are a military family and I have been searching high and low for a solution to temporarily cover ugly permanent wallpaper that my landlord is fond of 🙂 I have researched the temporary wallpaper solution to see if it can go over permanent wallpaper. The concern is it might leave some residue behind. Do you think your method could work over existing wallpaper? Any other ideas or solutions you might have used in old rentals to cover existing wallpaper? Thanks in advance!
Hi Sara,
Ooooo – I feel your pain! I think the only thing worse than a wall color you hate is wallpaper that you can’t take down. I hate to say it, but I would NOT use the liquid starch method on top of existing wallpaper. Not that I don’t think it would stick – I think it would. But as you suggested, I think there is a very good chance it will leave a cloudy discoloration (or at least evidence of liquid) on the wallpaper. If the existing wallpaper is wipeable, you might be able to get away with it. I would definitely test a small strip in an inconspicuous location first though.
I think if I were you, I’d go one of two different routes.
Use peel and stick wallpaper over the existing wallpaper. Peel and stick paper IS expensive, but you will be guaranteed that it will come off cleanly and not damage the wallpaper underneath. This is probably what I’d do. I’d try to find a coupon and just gulp down the cost.
Use the painter’s tape trick – Line the top, middle, and bottom of your wall with painter’s tape (on top of the existing wallpaper), then use regular double-stick tape on top of the painter’s tape to hold either unpasted wallpaper or wrapping paper in place. It won’t give the smooth, stuck-on look that standard applications would give you, but at least would cover up the ugly paper.
Hope that helps and good luck!!!
Megan
Do you think I could do this over existing wallpaper?? Like 20 year old wallpaper that has seen some very bad days?
Hi Elizabeth,
It’s certainly worth a try – but only if the old wallpaper is really not something you’re worried about salvaging. This installation method won’t “damage” the wallpaper underneath, but there is a chance the liquid starch could make the existing wallpaper cloudy or even show liquid “lines” as the starch dries. I would test it on a a small corner to see if you’re okay with the results before doing an entire room.
Hope that helps!
Megan
Looks incredible! What a transformation!
Hi Megan,
This is a great idea! I want to wallpaper my laundry room. My walls are painted with semi-gloss white and are lightly textured. I heard Acrylic Primer is helpful for wallpaper to stick better on walls like that. However, I do wish I can remove wallpaper easily in the future when I fully remodel my house. Do you think the liquid starch can be used on the primed dry wall? Do I really need the primers?
Thank you so much!
Wendy
Hi Wendy,
Sorry for the delay in getting back to you! In my experience, the liquid starch method works on both flat and textured dry wall…without any additional primers or paste needed. You can see more about my texture wall application here: https://thehomesihavemade.com/2016/10/can-you-wallpaper-textured-walls/
I will say that I am a renter and never apply wallpaper “permanently,” so if you are looking for a 100% permanent application method, you might want to try something else. That said, I’ve never had wallpaper fall down and love the ease of this method!
Good luck!
Megan
How has this method held up over time and seasons change? Were your walls textured?
I’m so happy I came across this! I’ll be renting an apartment with awful wood paneling ALL throughout. Of course, the landlord does not want the panels to be painted, and I don’t feel comfortable with trying temporary wallpaper because I’m afraid it’ll still leave sticky residue (and I certainly don’t want to have to clean that up when I move out). I’ve come across the idea of starched fabric, but starched wallpaper just sounds SO much easier. My question is: do you think it’ll stay on wood paneling? How has yours held up? Has it peeled at all?
Hi Jenn,
So glad you love this project. I took down this wallpaper after a year of living in the house pictured, only because we were moving. At the time we moved, it hadn’t peeled at all. I then wallpapered a room in our current house using the same method, and haven’t had any issues with it staying (and we’re going on about 18 months here). I would certainly do a test on the wood paneling to make sure the starch doesn’t discolor or stain the wood. I doubt it would, but you never know. For whatever it’s worth, I’ve had no issue with peel-and-stick papers leaving behind residue, so you might want to consider that option as well!
Hope that helps!
Megan
Megan, I recently found your blog and I’m REALLY enjoying it! Question on this post…. Backstory first. I recently purchased some removable wallpaper and I have textured walls (orange-peel). I’ve done a test strip, and it seems to be working ‘okay’, but I’m still a bit skeptical on whether or not it is going to stay put. 😉 Have you had any experience using the starch with the removable wallpaper? Any other hints to help it stay put? Thanks!
Hi Julie!
I am so glad you found my blog and are loving what you see! As far as textured walls – have you read this post? https://thehomesihavemade.com/2016/10/can-you-wallpaper-textured-walls/ We have textured walls to, and in that post, I share all my tips for getting various papers/methods to work!
Let me know if that helps or if you have more questions!
Happy Monday!
Megan
Hi!
Thank you for this lovely post and hard work.
I tried it with traditional non pasted wallpaper and diy cornstarch solution. I was getting bubbles and creases and then decided to remove it to put another one to apply another one to make it more nice. However, I was very disappointed and discouraged, because it was not peeling off. It cut the wallpaper and so, I sort of can’t use the wallpaper again and also it is so hard to clean the wall now. 🙁
any tips please?
thank you
Evanthia
Hi there!! thanks so much for posting this. I’m looking to do my bathroom at my new rental apartment….do you think the shower heat will omit the starch from keeping the wallpaper on?? thanks!
Hi Jennifer!
Thanks for your note. I have received this question a few times, and unfortunately, I don’t have a clear answer for you. I have no reason to believe this installation method wouldn’t work in a bathroom. That said, I do recommend doing a small test (put up a 10×20″ swatch and leave it for a few days/weeks) before you commit your time and money to a full installation. I will say, I don’t think the sheets would just fall down, but the edges may start to curl over time (I don’t know, just speculating). Since this method is so easy though, fixing it would just require adding a bit more starch under the edges.
If you do try it, please keep us posted since I know many other readers have been wondering!
Good luck!
Megan
Hi Megan,
I excitedly ordered some awesome wallpaper from Wayfair when I saw this tutorial. So I went to buy some liquid starch for when it gets here only to find that you can’t buy liquid starch where I live in Canada. Ugh! I can purchase a tin of spray starch. Do you think this would work or have any advice as to what I could do?
Hi Megan,
I ordered a fabulous wallpaper to try this out in my porch. I have since discovered I can’t buy liquid starch where I live in Canada. Spray starch in a can is all that’s available. Would this work do you think or do you have another suggestion as to what I can use?
Hi Sue!
It’s definitely worth a try! I would test a 12×12″ swatch where you want to hang it. See if it goes up and then give it a few days to see if it stays before you do a larger installation!
Hope that helps!
Megan
Hello,
I’ve just stumbled upon your blog. I am renting and am thinking of doing a large mural or big patterned wallpaper. I have never attempted a project like this before so I am very nervous. I plan to do a feature wall in a bedroom. Unfortunately, the wall is 8ft by 14.5 ft. Any advice on how to shrink some of the cost because the wall is so large? I’m very excited about it, but don’t want to spend a $1000 to achieve the look in my head. Any advice on places to buy murals or wallpaper in bulk cheaply? Also any tricks or tips you’d recommend before getting started? I’d really appreciate. Thanks!
I am considering this method for my bedroom wall. Can you let me know how this held up after several years? I live in the desert so am wondering if temperature might cause this method to fail, and if yours has peeled up along edges over time. Many thanks!
I didn’t find this successful with the wallpaper I purchased. Luckily, I did it in the closet first. The paper wouldn’t stick flat to the wall, and then pieces of the paper (it was kind of a two-ply paper) stayed stuck to the wall when I tried to pull it off. I would be wary of trying this without testing it first.
Question. Traditionally, I have always rolled adhesive on to the back of the wallpaper rather then the wall. This way, you only have the adhesive on the paper and not spread beyond it, if you get my drift. I *think* this is how it’s usually done??!? Was there a reason you rolled the liquid starch onto the wall instead of the paper?
Hi Linda!
I am not sure I have a great answer for you! At the time, I think it seemed easier to “paste the wall” and maneuver around dry paper, rather than to have long strips of wet paper. When I first wrote that post, I didn’t have any experience hanging wallpaper, and just did what felt right. I’ve since repeated that project and needed to wet BOTH the wall and the paper to make it work (on textured walls), so I think it works either way!
Hope that helps a bit!
Megan
Thanks for quick reply! Yes, I think wetting both may be required in my case; I’m in an old house from 1910 with plaster walls that have suffered years of bungled repairs to the plaster – cracks etc. I’ve ordered quality, heavy duty wallpaper so I should be able to work the paper pretty well without it disintegrating. I’ll let you know how it goes – wish me luck!
Hey, Megan!
This is my first time reading your blog and I am so excited to have found this post. I recently found the most perfect 70’s wallpaper to use on an accent wall, but after ripping down 5 rooms worth of outdated wallpaper in our new house, I wasn’t keen on gluing the new stuff on. I have read other methods of using painters tape paired with double sided tape, but in my experience, painters tape isn’t strong enough to hold anything to walls. Im excited to try this method, but wanted to ask – after you pulled your wallpaper down (when you moved) was it able to be used again? Thanks for any info!
Hi Kristen!
Thanks so much for reaching out! Yes – after removing the wallpaper from the walls using this method, it was in perfect condition (no rips or tears) and could have easily been put up again! I just never did since we didn’t have a way to use in our next house!
Good luck and hope that helps!
Megan
This is excellent! Thank you SO much. I can’t wait to try this – I’m so glad I found this blog through my “how to make traditional wallpaper removable” google search. Thanks again!