How to Use the Contour Tool In Cricut Design Space (My Favorite Tool of All!)
Of all the Cricut Design Space tutorials I’ve done over the years, it’s pretty remarkable that this is the first time I am going over the Contour Tool in detail. Of all the various tools and capabilities in the Design Space software, it is by far my favorite tool, the one I use the most, and the one I believe is the most powerful in letting you truly create unique and custom gifts, decor and more. By its name, you likely wouldn’t know what the Contour Tool is or what it does (which is probably why I get lots of questions about it!). The best way to think of the Contour Tool is as an “On/Off Button;” as in, this tool allows you to turn on and off ANY cut line in ANY cut file, thereby letting you customize any image in countless ways. That sounds a little abstract, so how about I show you how to use the Contour Tool in Cricut Design Space, as well as some really cool things you can do with it?!?
I am pretty certain I’ve used the Contour Tool in some way, shape or form on pretty much every project I’ve made. This tool just makes it way too easy to make things that are uniquely yours, rather than having to rely strictly on the images from the Design Space library as they are. Here are just a few projects that have used this tool heavily:

Love Vase | Sparkle Pillow | Vinyl Dresser | Ninjago Party
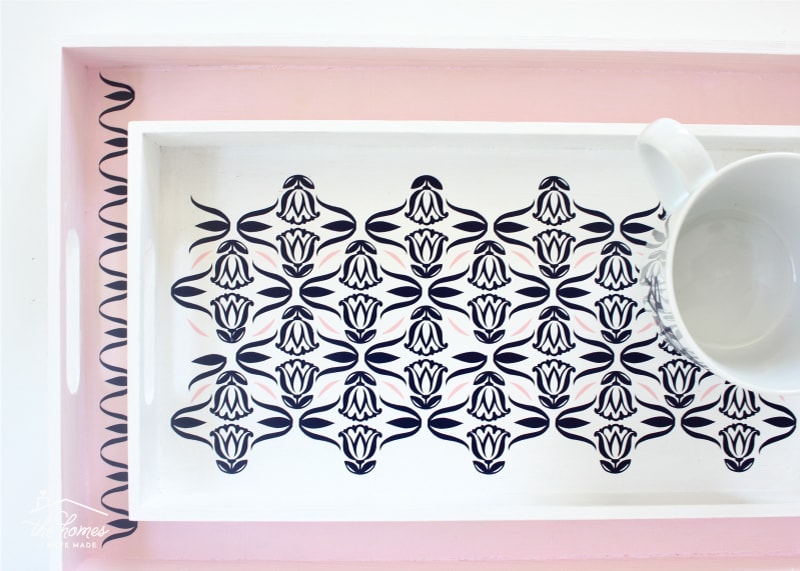
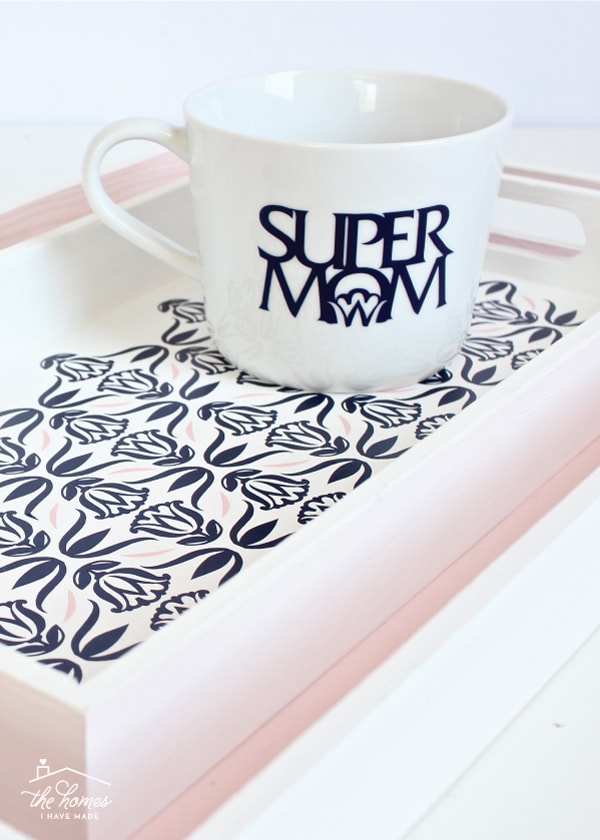
These examples may still be a little vague, so let me show you a much better example of what the Contour Tool can do. Below, is a three-piece tray and mug set I made using vinyl. Each one has a slightly different pattern and design…but they were ALL created using the exact same flower graphic. By turning different elements of the flower design on and off, turning them around, and changing their sizes, I was able to create a unique design for each piece of this set.
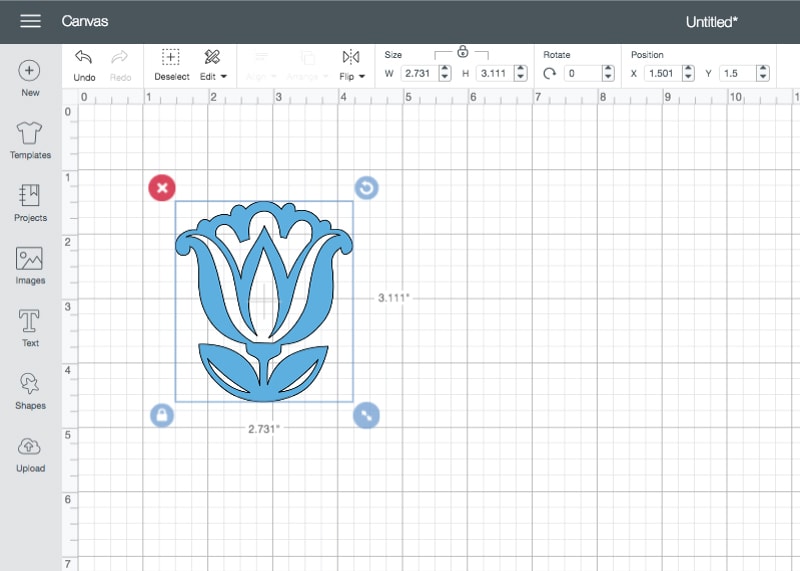
Here is the basic flower I used…
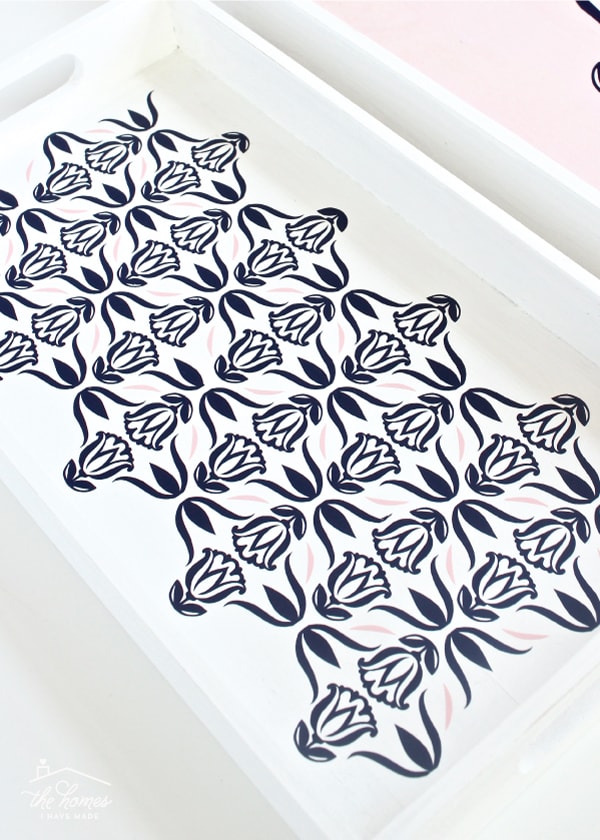
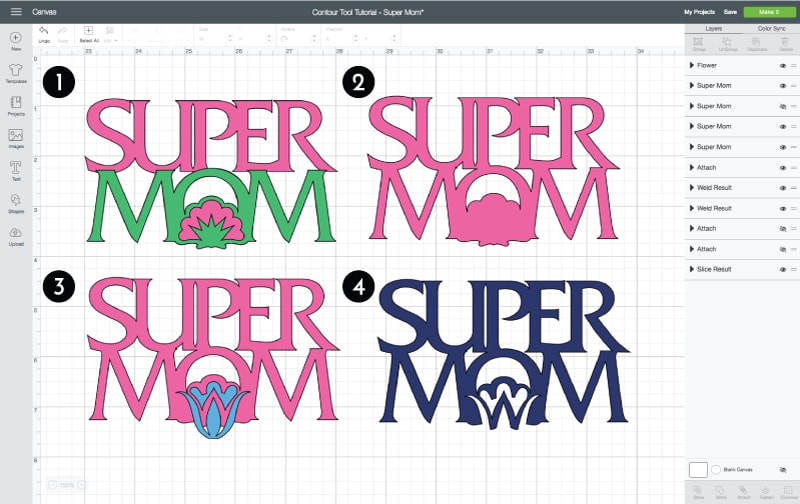
But now look closely at the details of each piece (below), and you’ll see what I mean. The original flower is used on the small white tray. But then the center of the flower was “Contoured out” to create additional details in the pattern, as well as the border on the pink tray and on the Mom mug…

Video Tutorial
Using this tool is pretty easy and intuitive once you know what it is and what it does. To understand what this tool is and see it in action, first check out this brief video tutorial. More thorough step-by-step instructions are included below.
How to Use the Contour Tool In Cricut Design Space
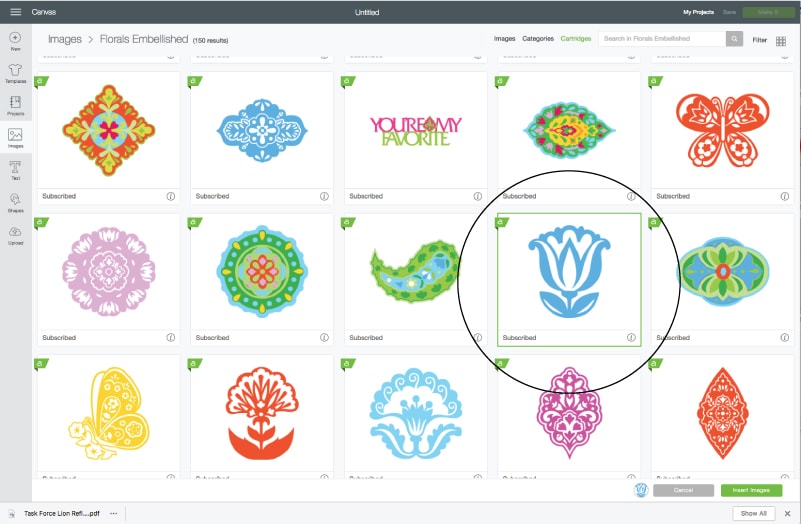
First, place any design on your Design Space canvas. I chose this blue flower from the Florals Embellished set.
It’s important to note that the Contour Tool will only work on a single layer. If your image has multiple layers, you will notice that the Contour Tool is not highlighted along the bottom toolbar (which means you can’t use it.)
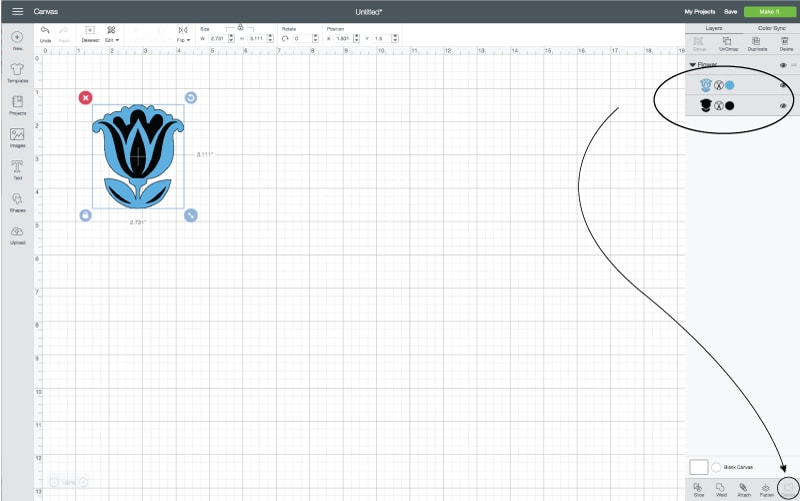
The Contour Tool will work on any layer of any design, just not layers that are grouped together. So if your image has multiple layers, ungroup them and then select a single layer to work on. Once you have a single layer selected, you will notice the Contour Tool illuminated on your bottom toolbar.
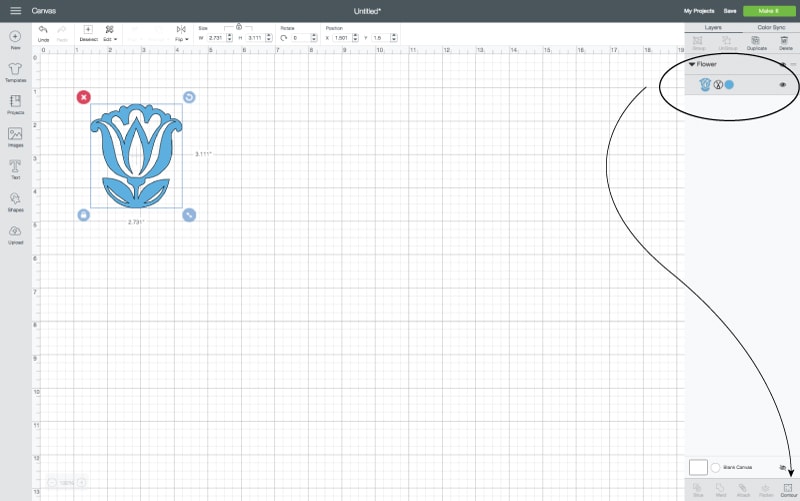
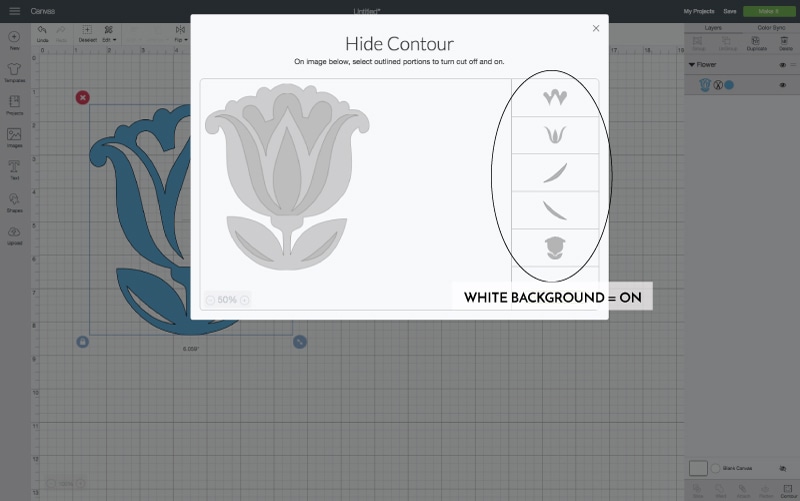
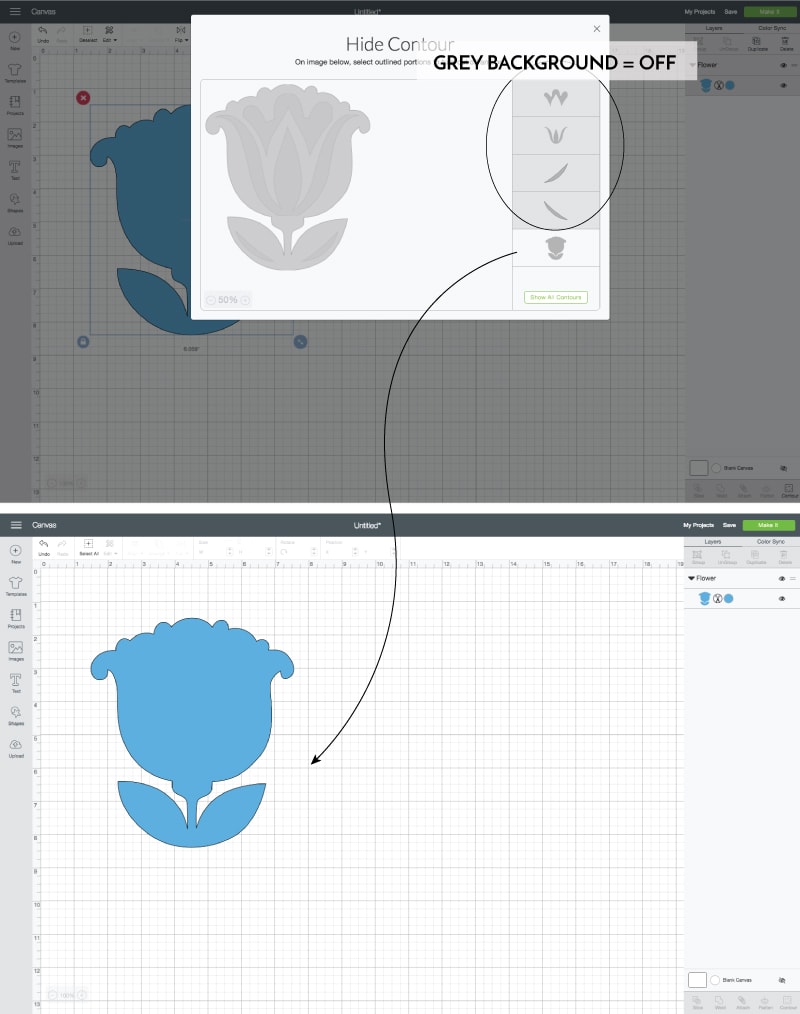
With an image (single layer) selected, click on that Contour icon along the bottom toolbar. Once you do, you will see your selected image open in a new window. This image (shown in the white box below) is essentially “clickable” and you can click each element of the design to turn them either on (to be cut) or off (not cut). You can click either on the image itself or on each element of the design along the right-hand side of the box. If the design elements have a white background, they are “on,” which means they will be cut.
But as you click each design element off, either by clicking on the design (on the left) or the list (on the right), the elements that you’ve turned “off” will be greyed out. In the example below, notice how everything is turned “off” with the exception of the outlined image (below, top). If you click out of that white box back to your design, you’ll see all the inside cuts of the design are now gone, and you are left with a solid flower (below, bottom).
Want to save this post?
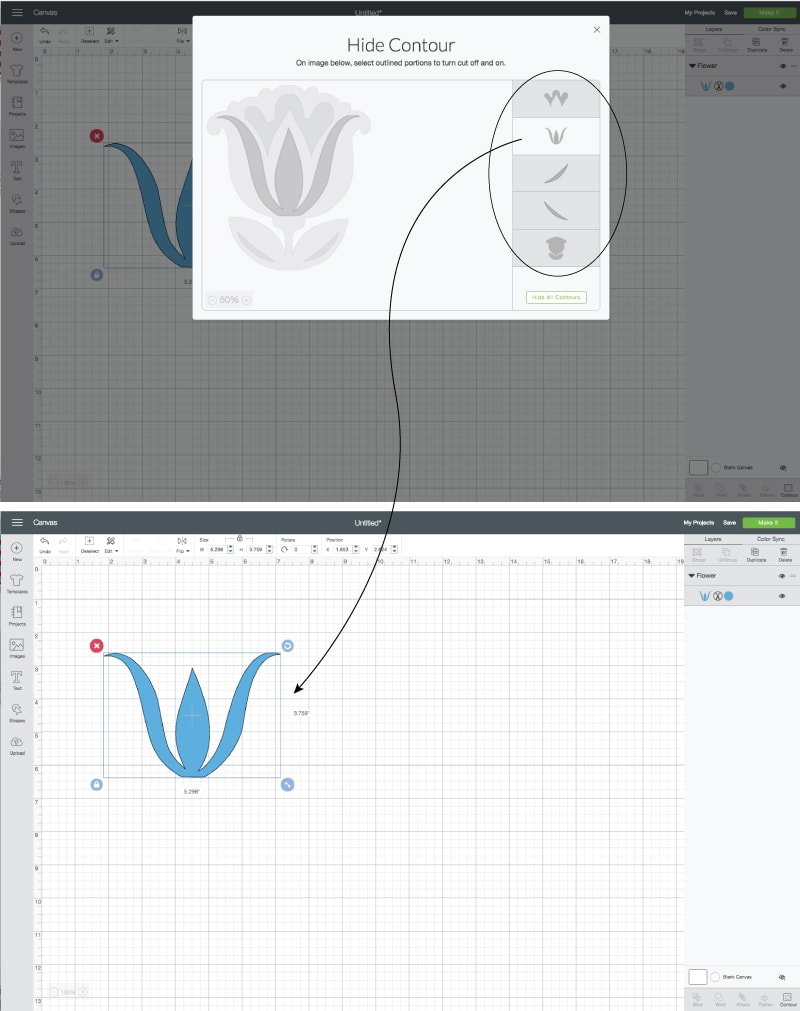
At any time, you can click back into the image and re-contour out different elements. This time, I went back into the same flower, turned the middle petal shape back on and turned the outside flower border off (below, top). Now, just the center part of the flower remains as a single cut design (below, bottom).
Just by using the Contour Tool on this single blue flower, I am able to create 5 unique designs, as shown below:
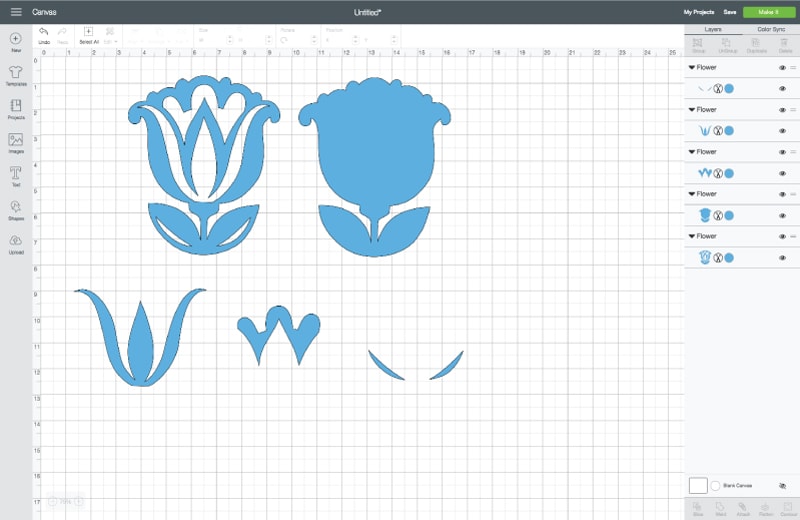
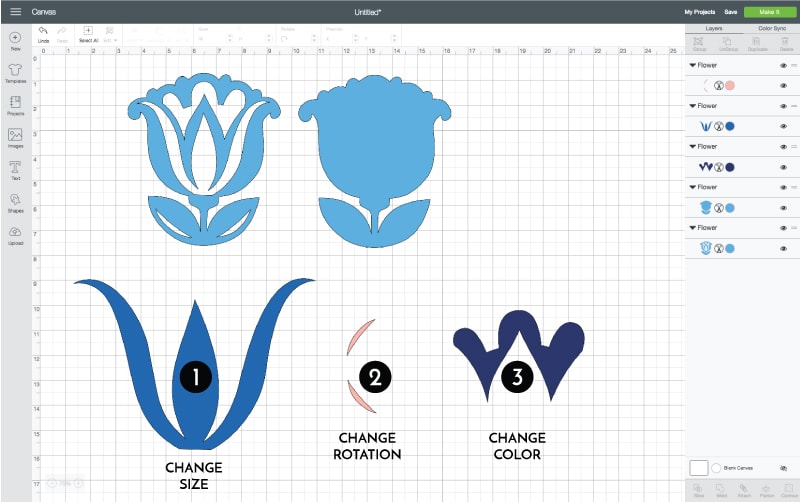
And just as the flower was right when you inserted it onto your canvas, each of these elements is now its own, individual graphic that can be manipulated however you wish, such as changing the size, rotation and color. These individual elements can also be sliced and welded just like other design elements too! Essentially, you are able to take the “negative” parts of any design (those parts that would be discarded) and turn them into their own cut-able images.
3 Different Projects with One Graphic
Small White Tray
Once you get the hang of using the Contour Tool and understanding what it can do, your eyes will really be open to the possibilities of tweaking and manipulating images over and over again. Using the Contour tool is the main way I re-color designs and how I make patterns that coordinate with each other. For example, to make the white patterned tray for this post, I used the basic flower design, and then #1 (large center petal) and #2 (leaf details) elements (from above). By rotating the various elements and changing their sizes, I was able to create a basic tile (below, top). Once laid out in a repeating pattern (below, bottom)…
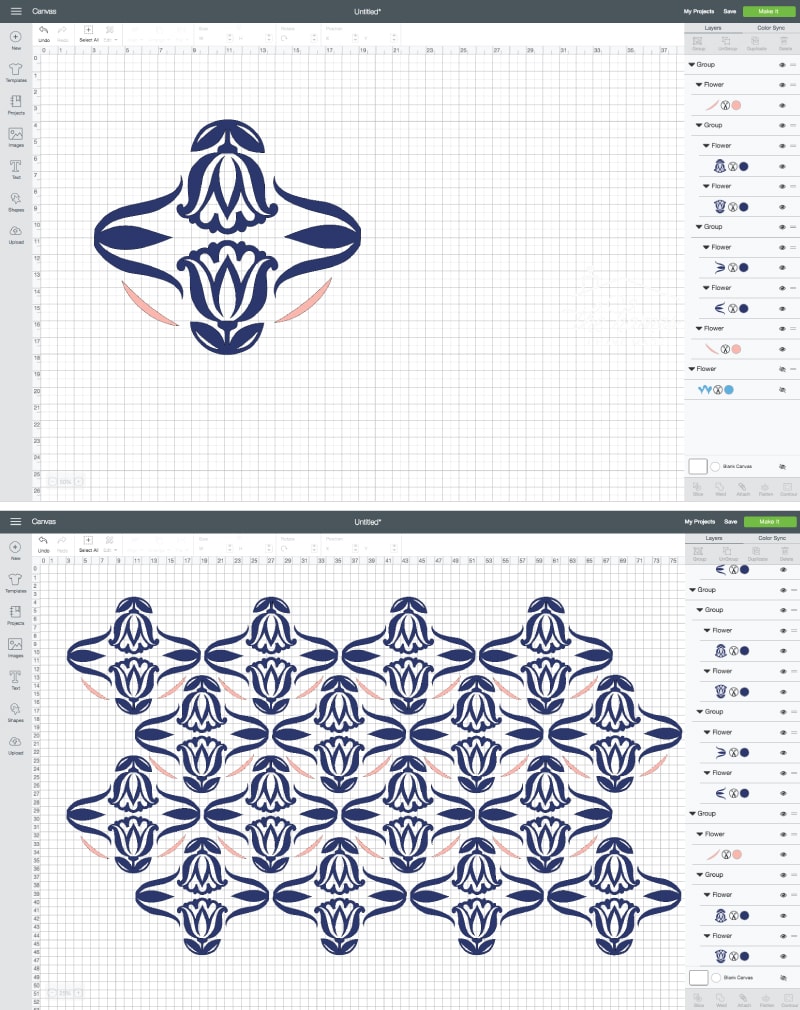
I was left with a pattern that feels interesting, whimsical and fun…all from a single flower!
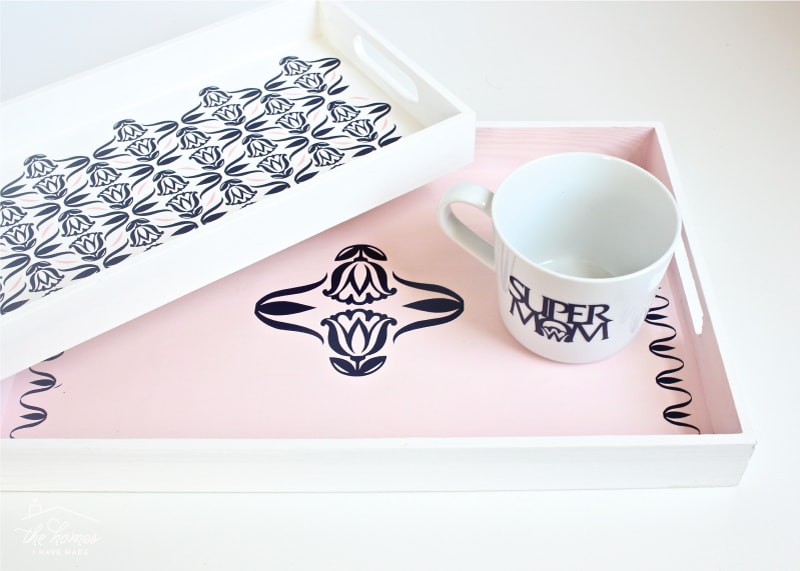
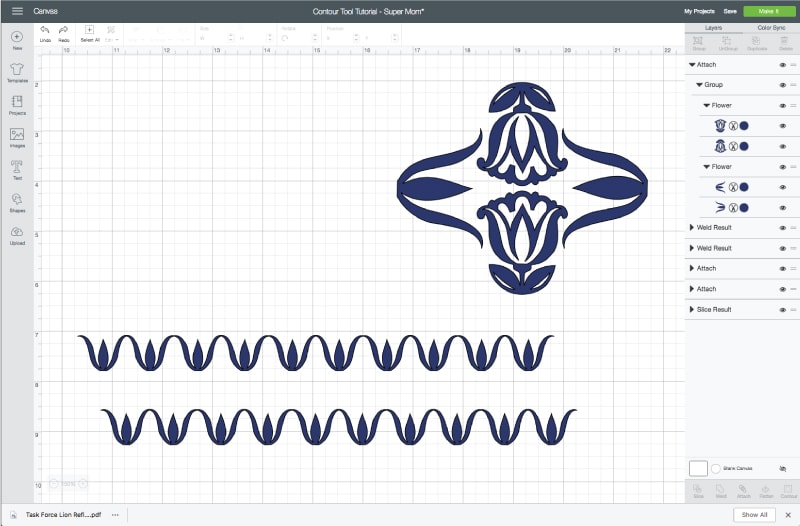
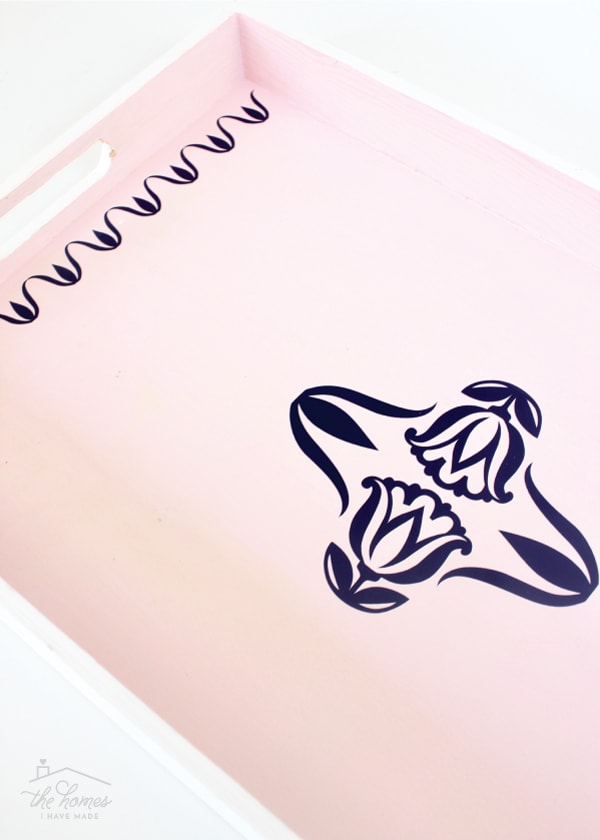
Large Pink Tray
Let’s use the same flower to create yet a different design. For the center of the pink tray, I used the same flower “tile” I created for the white tray (the two flowers plus the two petals); I just sized it bigger to fill out the center of the larger tray. I then took that same small petal detail and put 10 of them in a line (equally spaced and lined up along the top). Once welded together, I had a border that perfectly matched my flower design…
Super Mom Mug
Finally, I mentioned this earlier, but it’s worth repeating. Once you contour out an image into different/smaller elements, these elements function just like any other design in Design Space. Meaning you can weld, slice, attach, rotate and re-color it however you wish. For the Super Mom mug, I found another graphic in the Florals Embellished set I really liked, but the floral element already on it didn’t quite match the patterns I made for the tray.
To match the flower design on Mom to the flower I was already working with:
- I first deleted out the green layer by ungrouping the design, selecting the green layer in the Layers panel and clicking Delete.
- With the green layer gone, I am left with a single-layered Super Mom design with no flower detail.
- I then placed another one of my original flower images onto the canvas and used the Contour Tool to turn off all the cut lines except for the two inside petal details.
- I re-sized the petal graphic to fit into the Mom design. I then selected everything and clicked “Slice” (along the bottom toolbar). Once all the excess pieces are deleted out, the contoured-petal design is cut into the Super Mom graphic!
I truly believe that the Contour Tool is THE best tool in Cricut Design Space since it allows you manipulate images in countless ways! This is especially helpful if you don’t have a Design Space subscription and/or only have access to limited designs. By using this tool, you can change them and play with them to create new things over and over. I only scratched the surface of how I use the Contour Tool in this post (I’m laying the groundwork for some more posts to come!), but I hope this opens your eyes to the ability you have to create almost anything!
More Helpful Cricut Design Space Tutorials
Cricut Design Space is a very powerful program, but it can have a steep learning curve for beginners. Check out my other comprehensive tutorials below:- How to Use Cricut Design Space | A Breakdown for Beginners
- 20 Cricut Design Space Tips & Tricks You Really Need to Know
- The Ultimate Guide to Cricut Terms & What They Mean
- How to Find Free Images to Use with Your Cricut Machine
- How to Use the Attach Tool in Cricut Design Space
- How to Use the Slice Tool in Cricut Design Space
- How to Use the Weld Tool in Cricut Design Space
- How to Use the Contour Tool in Cricut Design Space
- How to Use the Offset Tool in Cricut Design Space
- How to Use Print Then Cut in Cricut Design Space
- How to Design Monograms in Cricut Design Space
- How to Cut Really Big Designs on Your Cricut (The Off-the-Mat Technique)
- How to Design Mugs in Cricut Design Space
I hope you all have a great weekend! I’ll be back here on Tuesday with another brand new printable kit to kick off the month of May; I’ll then be taking a little time off while my boys and I escape for some good family time! See you next week!
Megan
11 Comments on “How to Use the Contour Tool In Cricut Design Space (My Favorite Tool of All!)”
Thanks, this is very helpful. I just got a Cricut, so I went back and read over the earlier tutorials as well. I now (for the moment!) understand contour, attach, and weld.
Wow. I’m impressed. I must say this is the most detailed tutorial I’ve ever come across. I just got a Cricut Joy (first Cricut machine ever), and was using the Design Space. I myself already found some tricks but I knew there must be tons more. This site is a great resource tool. Also, thanks ever so much for explaining the difference between weld, contour and slice. Just editing the pics alone is time-consuming. Great job!
HI Kate!
I am SO glad to hear you found my tutorials helpful! I’m usually add (at least) one in-depth Design Space tutorial each month so be sure to follow along regularly!
Don’t hesitate to let me know if you have questions as you get working with your Joy! Have fun!Megan
Thanks for this. It’s such a cool tool that I never knew existed 🙂
You are most welcome! It’s such a powerful tool, but it’s not intuitively named so most people don’t know what it can do! Glad you found my tutorial helpful!
Have fun with your projects!Megan
Great Tutorial!
But the video does not open – message: Video Unavailable!
Thanks for the tutorials and cheat sheets. I’m trying to learn about Design Space while I wait for my Cricut Joy to be delivered. I’m getting a little frustrated trying to figure out why both Flatten and Contour are grayed out even when I think I am following your and other people’s instructions.
Hi Jan,
Flatten will always be “greyed” out when you have Cricut Joy selected as your machine. Flatten is only used for Print-Then-Cut which is not supported on the Cricut Joy.
As far as Contour, make sure the image is fully unattached and un-grouped. Even then, make sure you are selecting a single layer at a time. If you’ve done these things, the Contour Tool should populate for you!
Hope that helps!Megan
Thank you so much for your fantastic explanation of the Contour Tool. It opens up so many opportunities for the images in Design Space and am so looking forward to using the knowledge you have provided me with in future projects. You are a star!!
Great tips thank you for thinking outside the box.
Is there a link for the video?