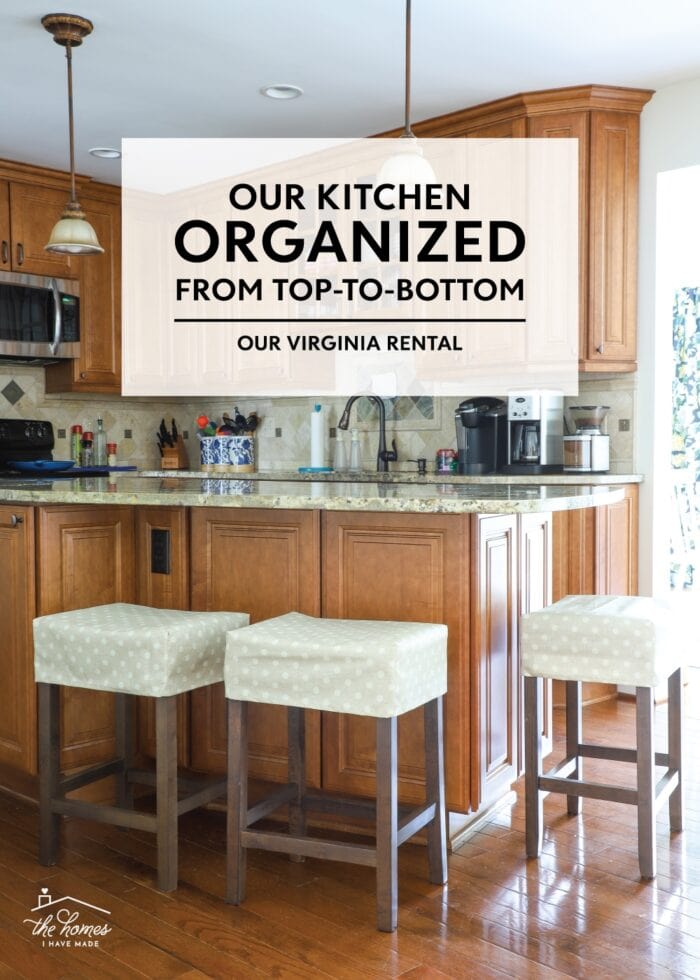
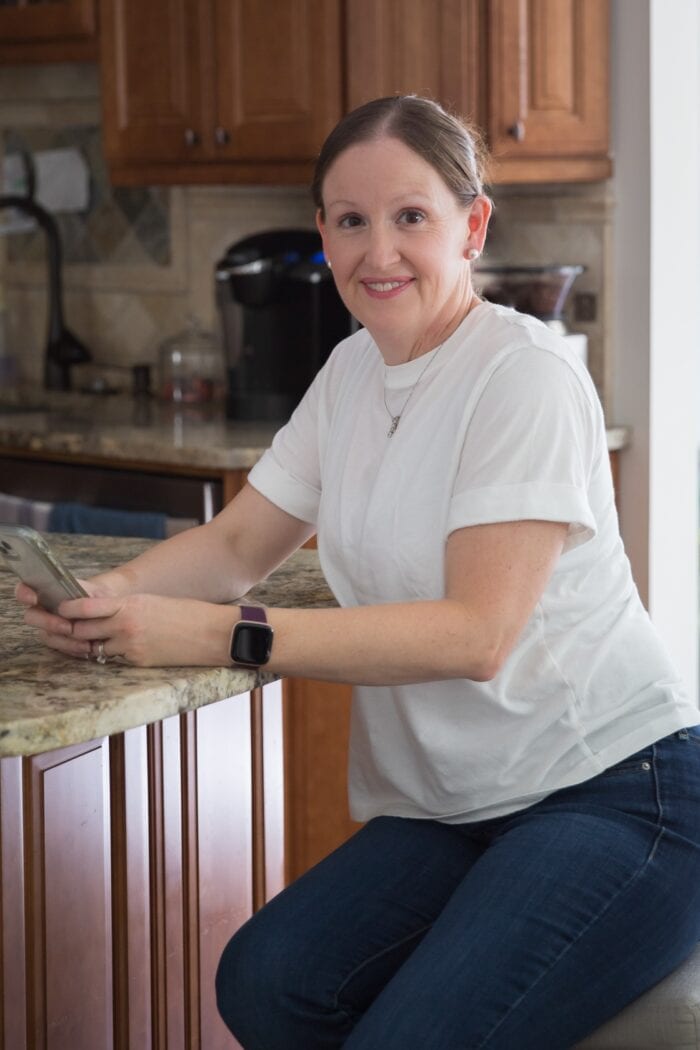
Our VA Rental Kitchen Reveal | Top-to-Bottom Organization
For the first time ever, we have a completely renovated, “high end” kitchen in our rental home. And while it isn’t at all my taste with brown cabinets, a rustic backsplash, and sandy granite countertops, these finishes also meant there wan’t much I could do to this space to make it feel more like us. But what I could do was organize the heck out of it! Today, I’m giving a full “final” tour of our Virginia rental kitchen and showing how each spot is organized to perfection!
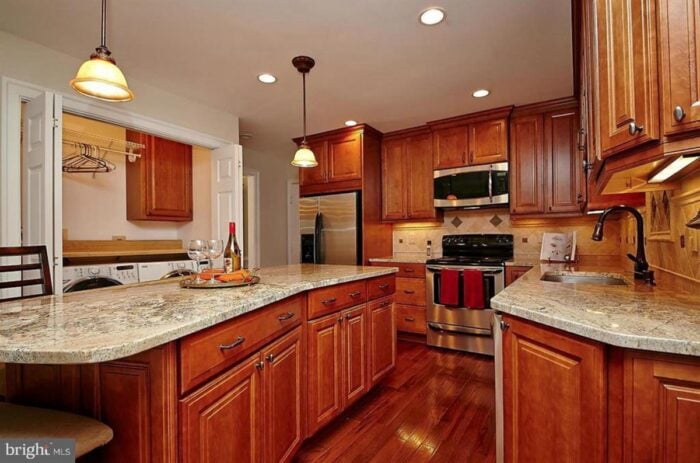
Before
I somehow never took my own “before” pictures of our kitchen…maybe because I knew there wasn’t much we could do in here.
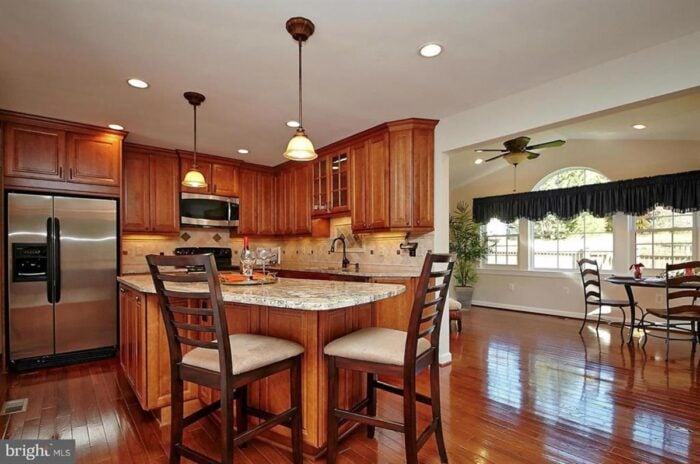
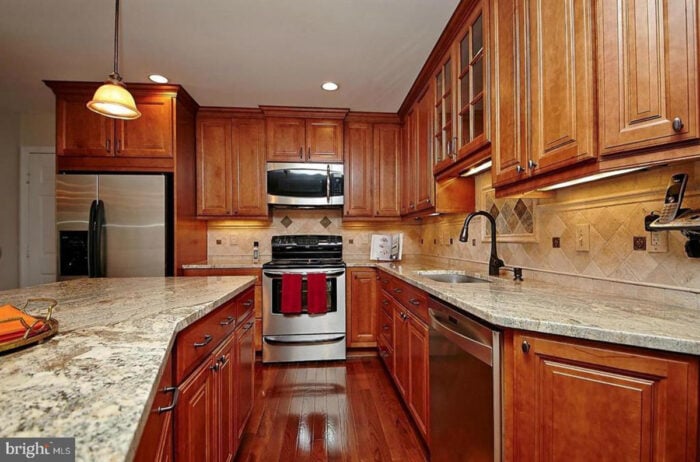
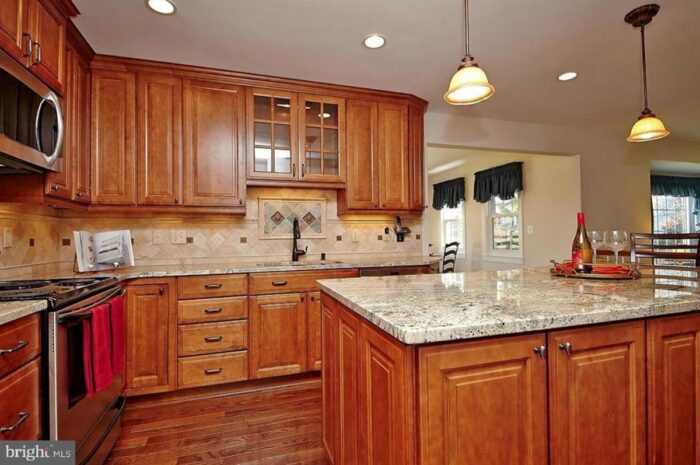
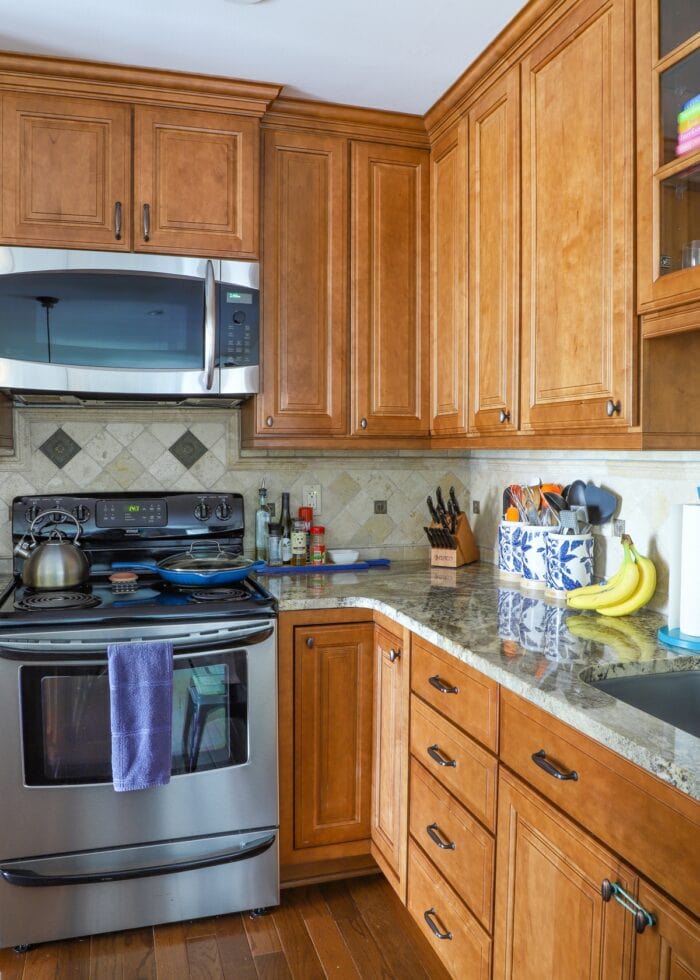
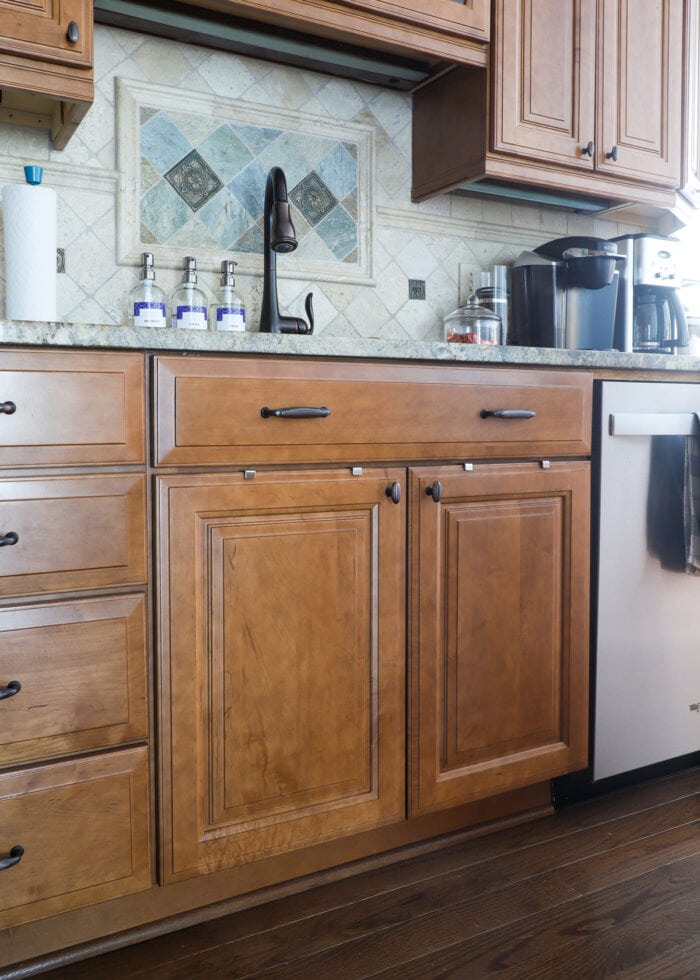
This kitchen was clearly renovated as part of the remodel that added the dining room extension. Complete with an extra-large island, granite countertops, ceiling-height soft-close cabinets, and lots of custom lighting, it’s by far the fanciest kitchen we’ve ever had. And while we love the island and overall layout, it is actually surprisingly low on cabinet space and doesn’t have a dedicated pantry.
Here’s a look from every angel straight from the MLS listing…
After
And…below is how this kitchen has looked for most of our time in this house. Besides our own kitchen gadgets and a few barstools, there aren’t really any visible updates. Much of the work I did is behind closed doors, so to speak!
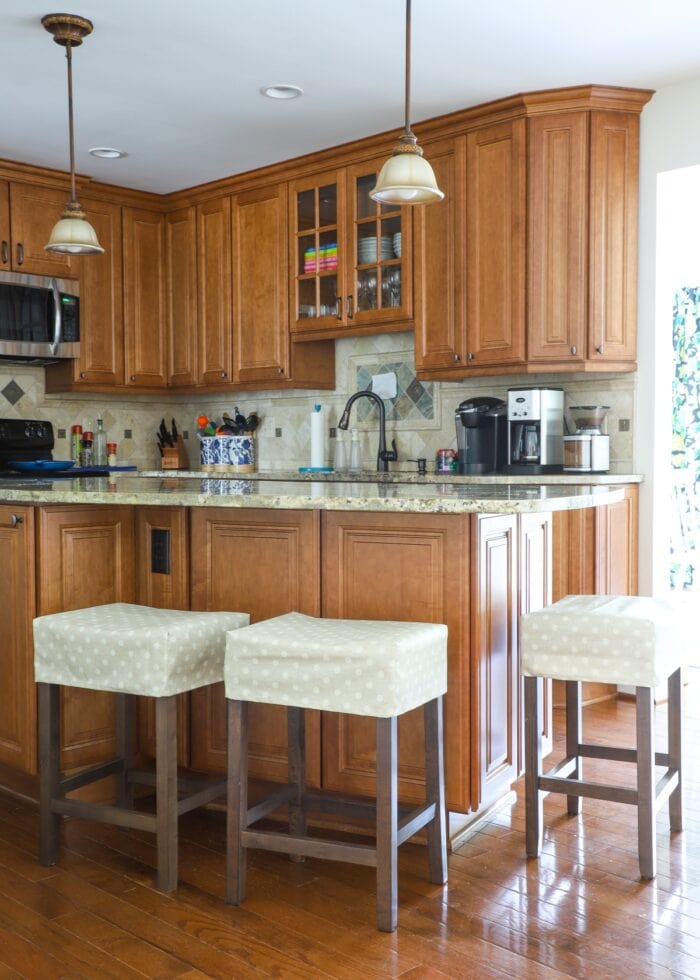
The Island Stools
Upon moving in, we had to search far and wide for stools that would work well under this island. Although you may not be able to tell from pictures, the walkway between the island and the laundry doors is fairly narrow. And since this is the main passageway to the garage door, we wanted to keep it as free and clear as possible.
Finding backless stools that were the right dimensions (and right price!) alluded us for a while, but we finally landed on these; and they tuck in perfectly under the overhang! However, the fabric stools weren’t going to survive our three boys, so I made these slipcovers using a wipeable tablecloth.
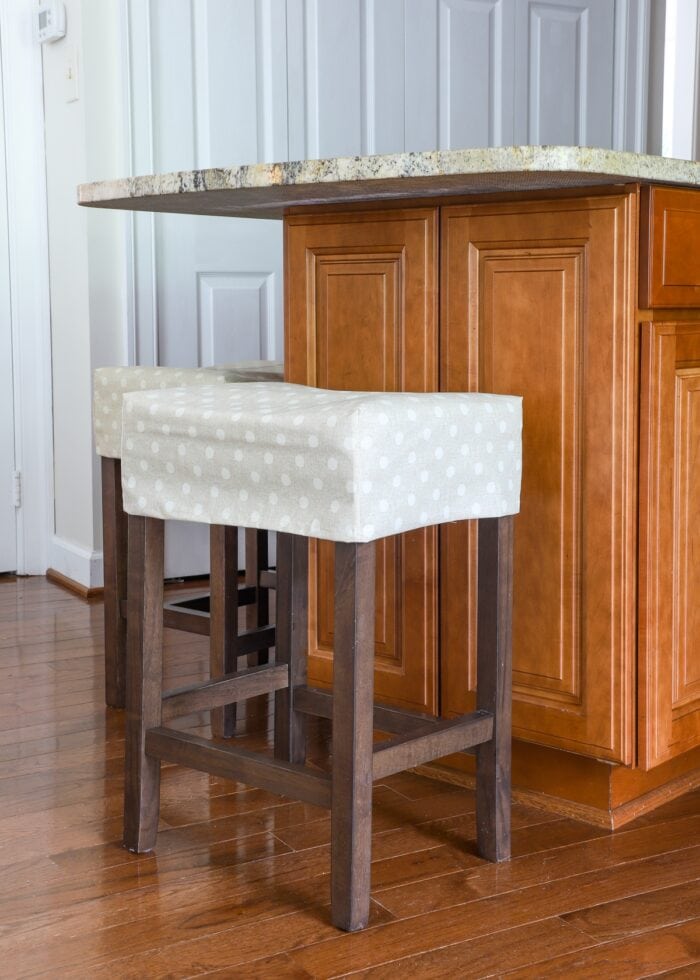
In full transparency, these covers didn’t last our full time in the house. You might recall when I made them that the table cloth fabric was fairly “brittle” and after a bunch of use, they completely tore away at the seams. Had I chosen more durable fabric, these covers would have been a win, so they are on my list to make again in the next house!
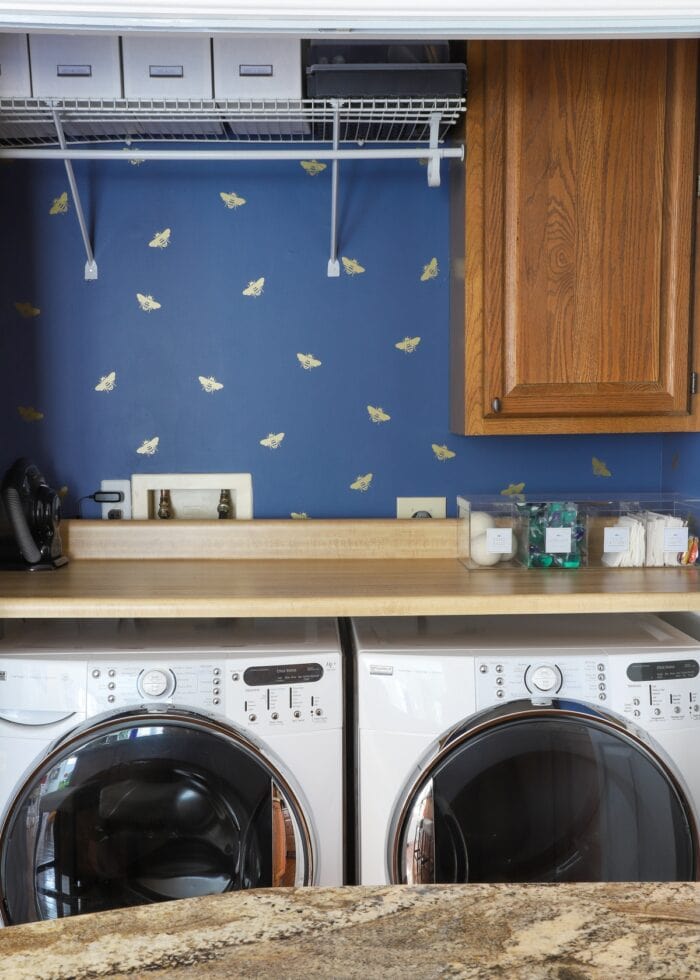
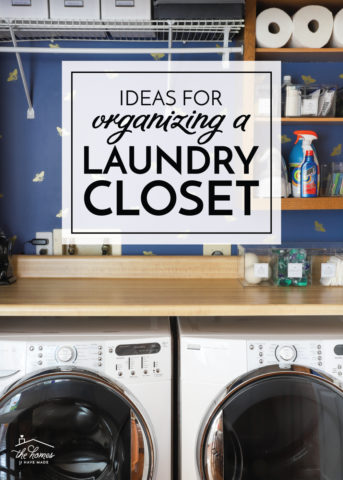
The Laundry Closet
Behind the bifold doors next to the island is our laundry “room.” Most houses in this area have the laundry down in the basement, so we considered it a huge win to have our laundry on the main level. (Although, it was at the expense of a pantry!) Still, this little laundry nook right off the kitchen proves quite convenient for loading, swapping, and folding laundry.
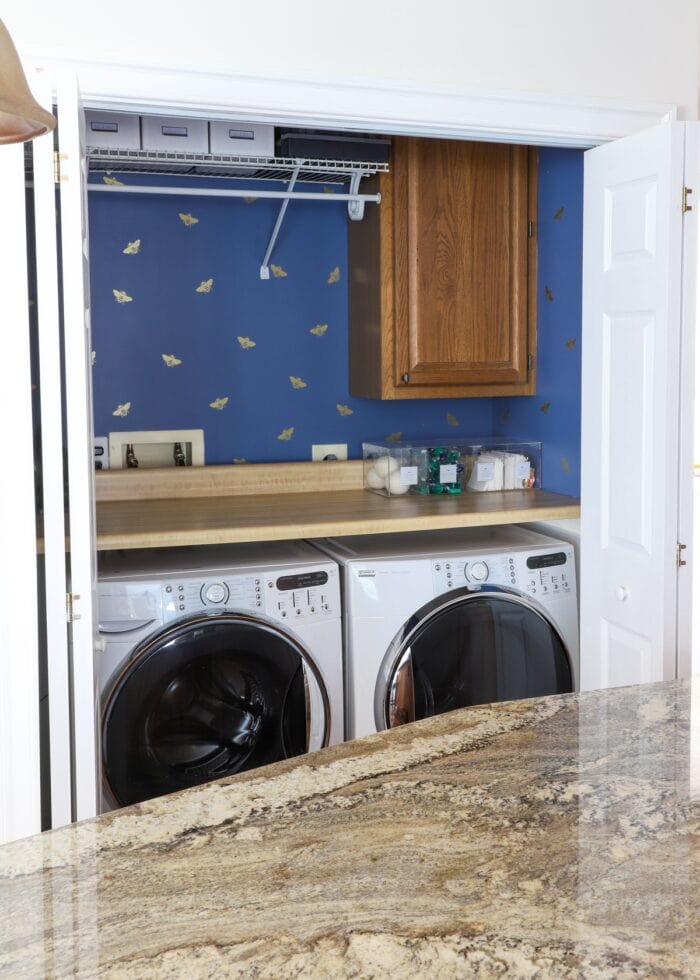
You guys know that I’m a sucker for a “pop of fun” inside closets, so I couldn’t leave this laundry room alone, especially with few decorating opportunity elsewhere in the kitchen. I used some leftover paint from the Super Hero Bedroom on the walls and cut some quick bee decals with my Cricut Joy. These little upgrades sure make laundry just a bit more fun!
Inside the Kitchen Cabinets & Drawers
As I’ve mentioned a few times, the real “work” in this space was less about decorating and more about outfitting each and every cabinet with functional storage solutions. Let me give you a look inside the cabinets and drawers!
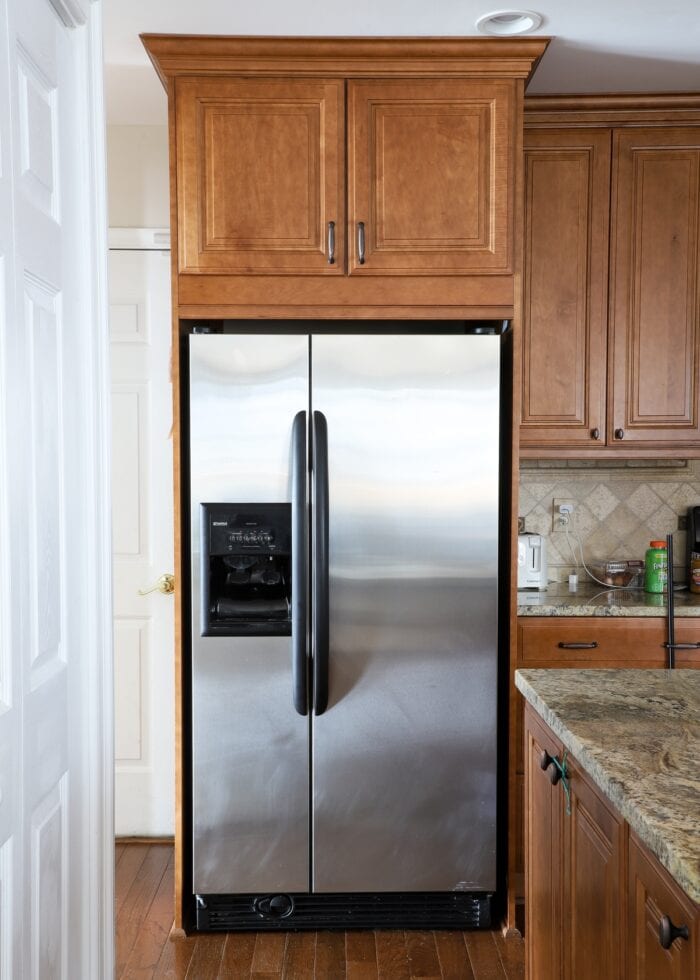
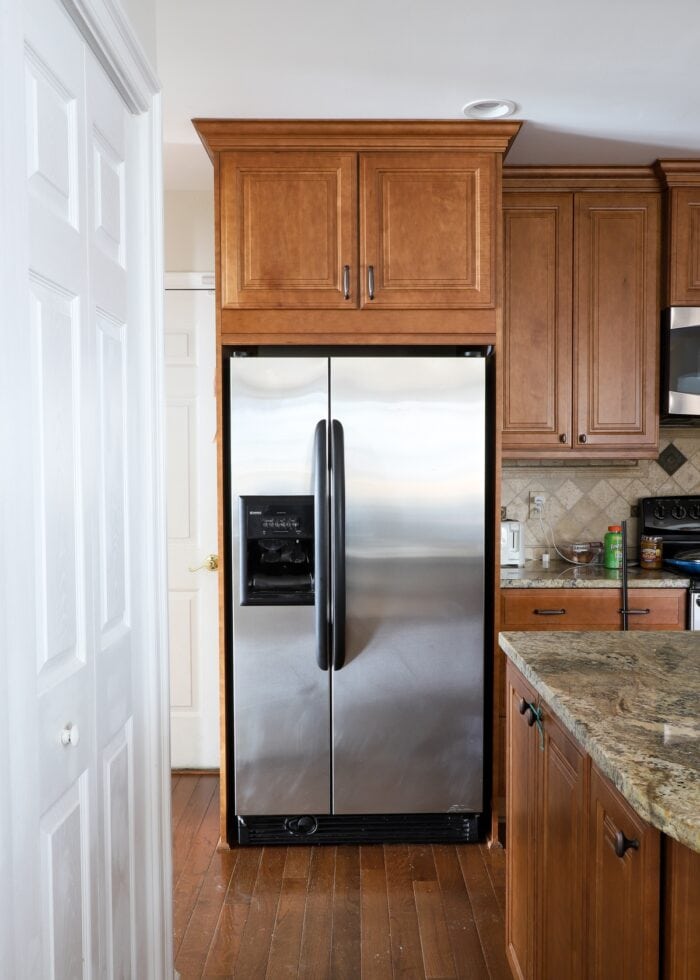
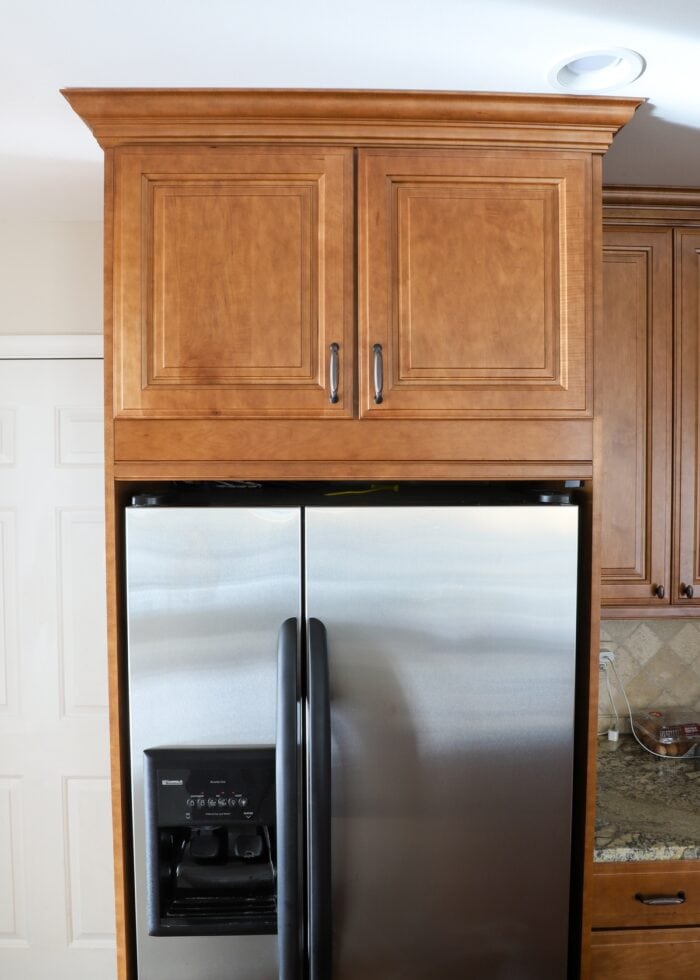
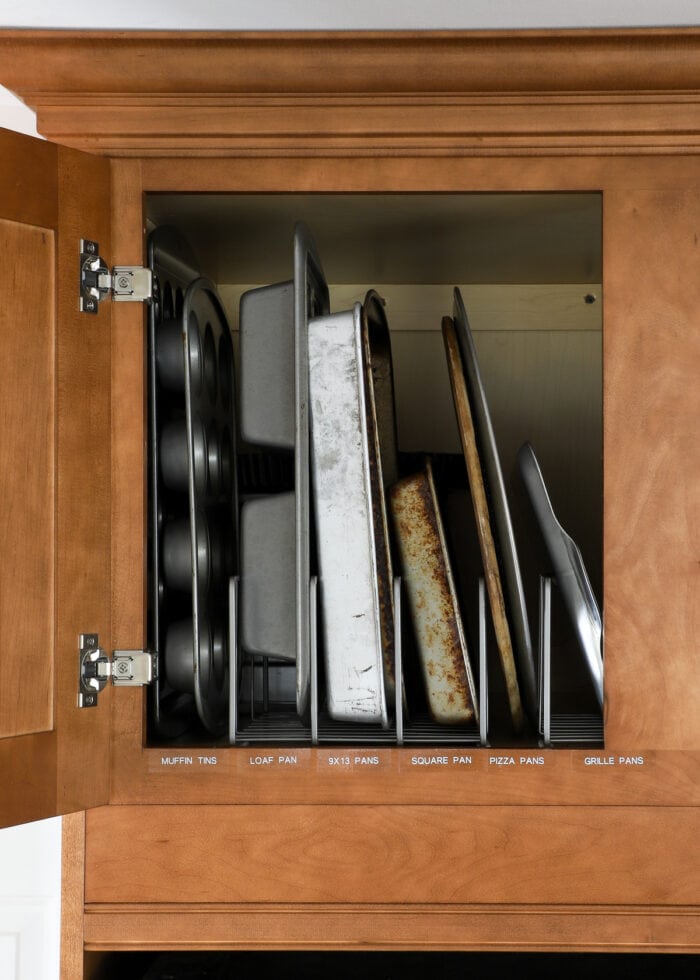
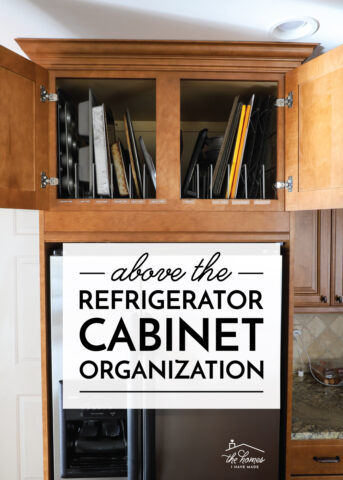
Above-the-Fridge Cabinets
Although the kitchen is large, the amount of usable cabinets is actually fairly low, so we had to use each and every one strategically. The deep cabinet above our fridge had to hold all of our bakeware because there was no where else to put it!
I installed a series of vertical organizers to take advantage of the deep space in a really usable way…
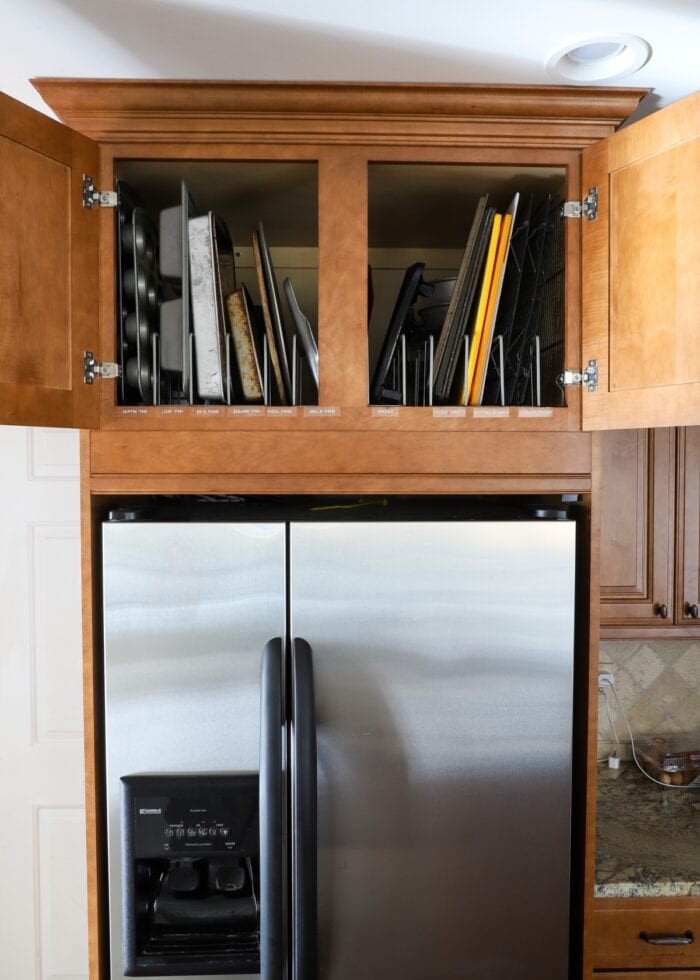
…and simple stick-on labels ensure this cabinet remains tidy!
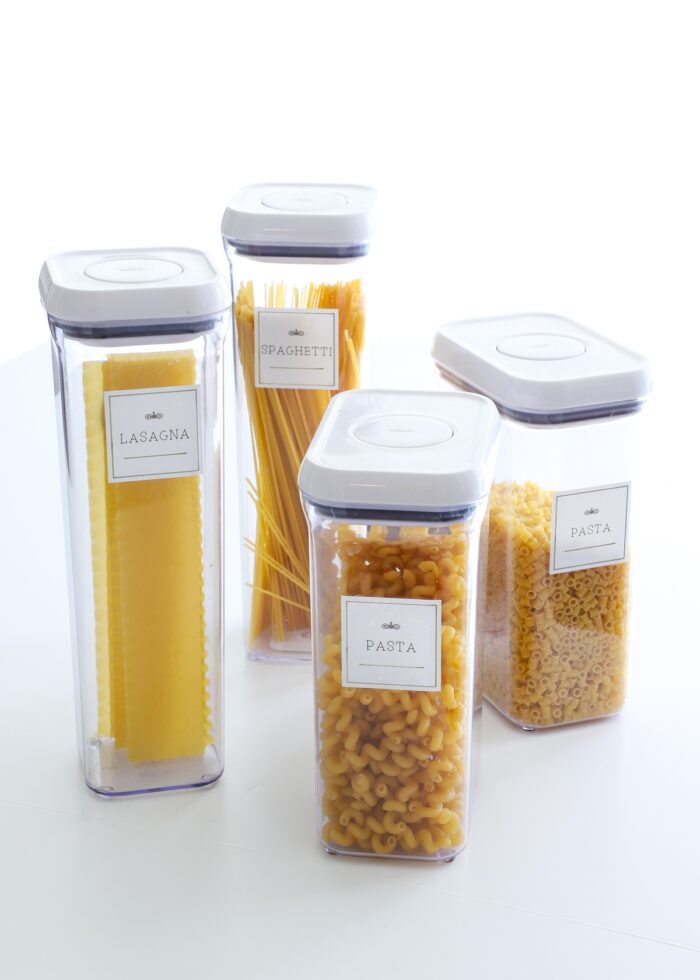
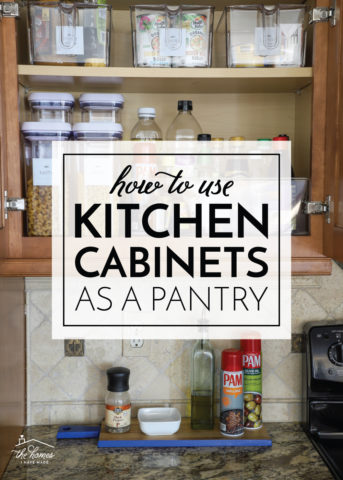
Pantry Cabinets
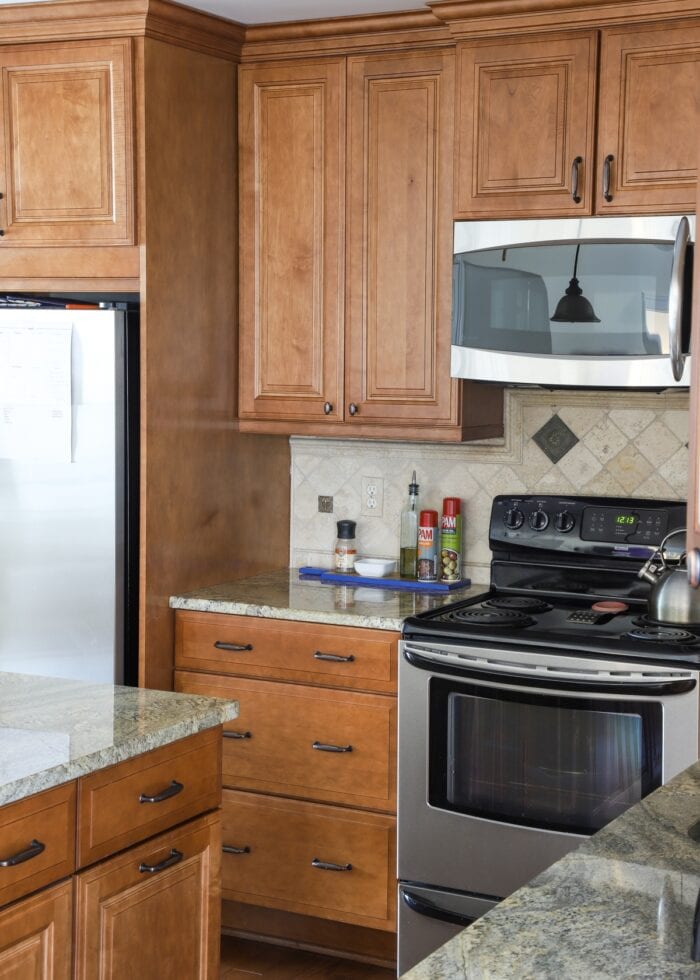
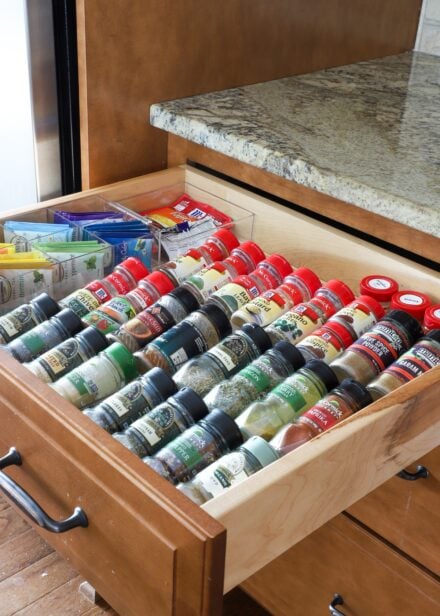
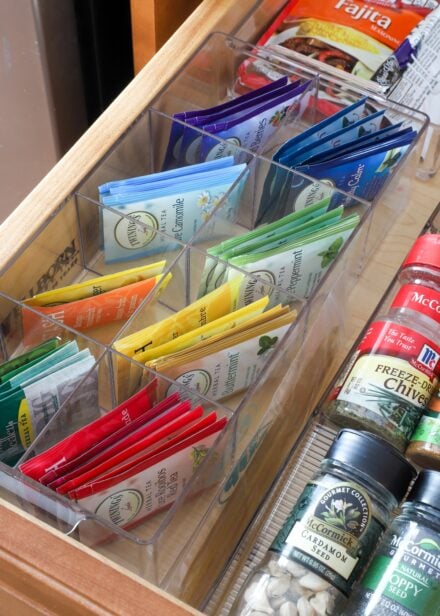
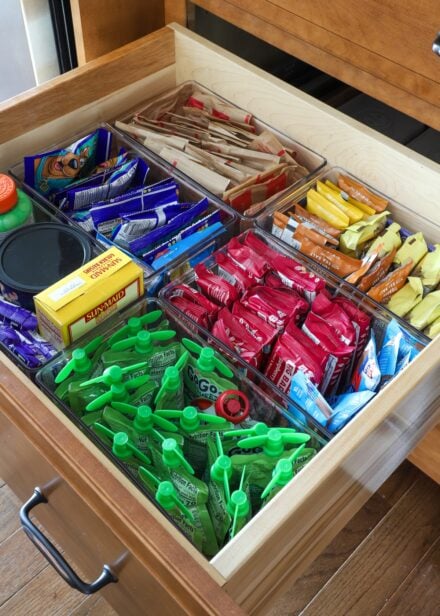
In our eyes, the biggest problem in this renovated kitchen is the lack of a pantry (in other houses in the neighborhood with the same floorplan, it’s where our laundry room is). As such, we had to dedicate quite a few kitchen cabinets to serve as food storage. We chose this stack of upper cabinets and lower drawers to the left of the stove because of their proximity to the refrigerator.
It took a lot of ingenuity to figure out how to store food items on these skinny, shallow shelves, but we ultimately got it to work thanks to a slew of different bins.
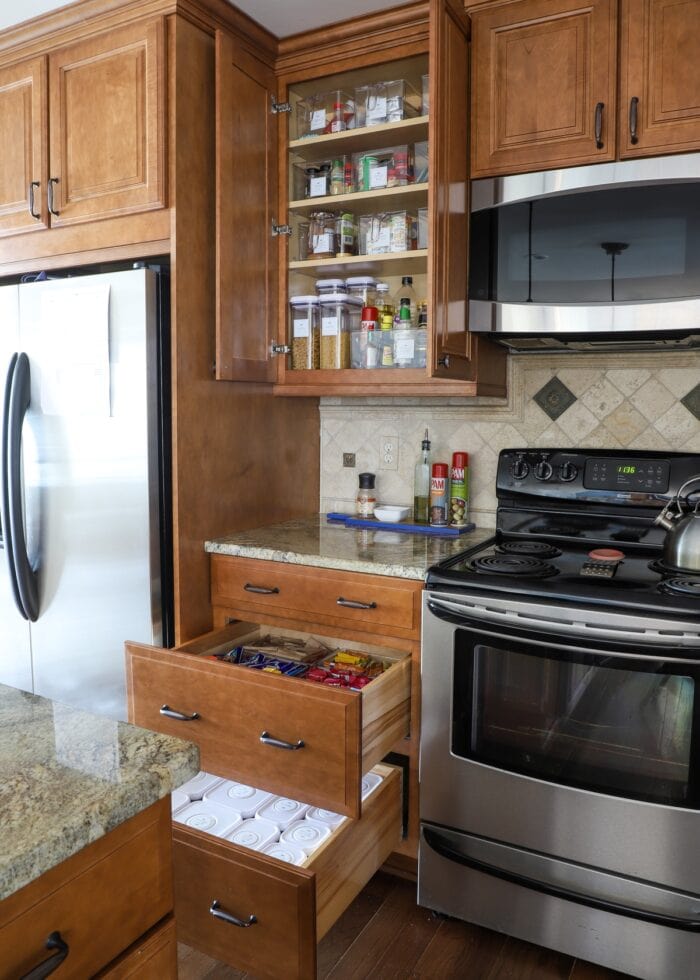
In the upper cabinets, we use a variety of acrylic bins to hold smaller pantry items. The handles make it feasible to actually get these items down from the higher shelves.
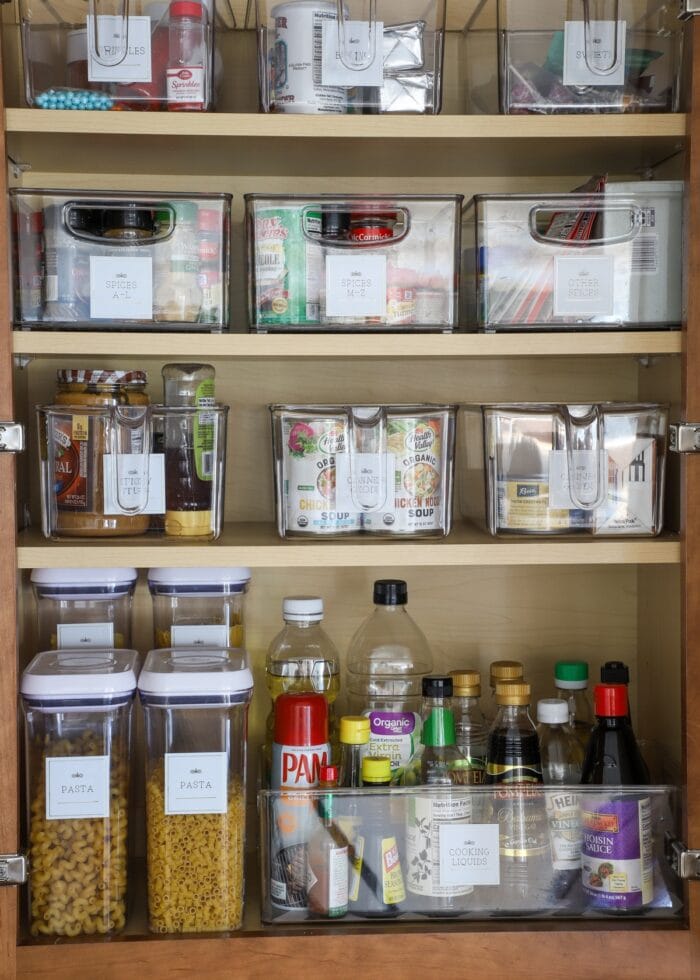
The three bottom “pantry drawers” hold various food items, also in a variety of clear bins, such as spices, tea bags, snacks, and pantry staples.
Want to save this post?

Everything in this pantry setup is labeled with my Cricut Joy so we can easily find exactly where everything is (especially the pantry staples that we can only see from the lids).
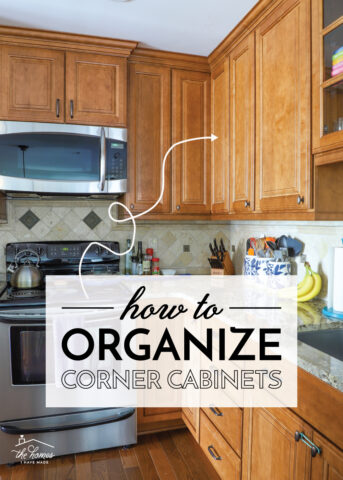
Corner Cabinets
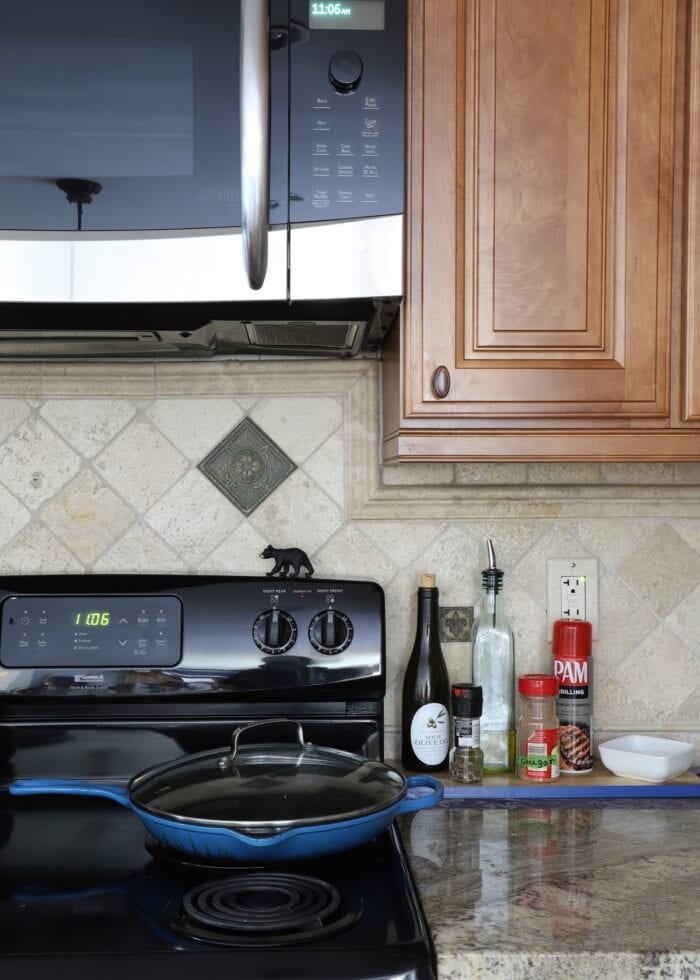
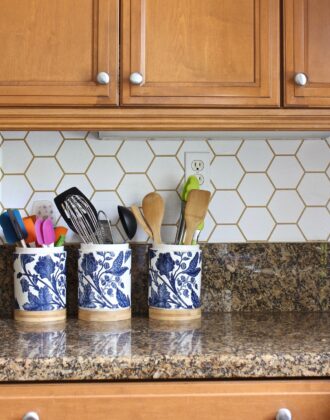
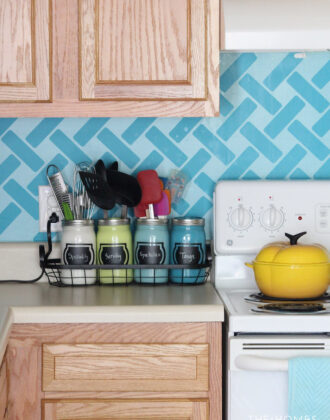
Many of the cabinets to the right of the stove are quite skinny, holding smaller items like the cheese grater, measuring cups, etc. We did utilize some counter accessories (e.g., a small tray, flowered canisters) to corral oils, serving utensils, and spatulas. (Curious about the little bear on our stove? Read the story here!)
But another cabinet that needed some creativity was the set of corner cabinets on the right…both upper and lower.
I quickly learned that round items work best on corner shelving, so we use this spot to hold our mixing bowls, small appliances, and strainers.
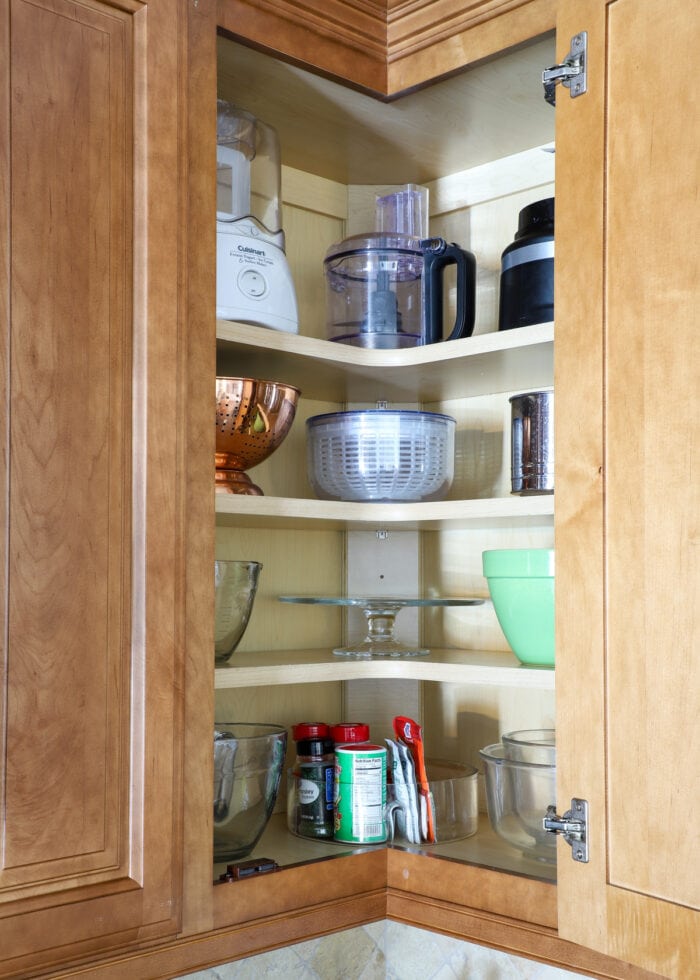
The lower cabinet already had a lazy susan shelf, making it an ideal place for all our pots and pans. Having all these awkward items out of sight but right next to the stove is an awesome way to use this large cabinet!

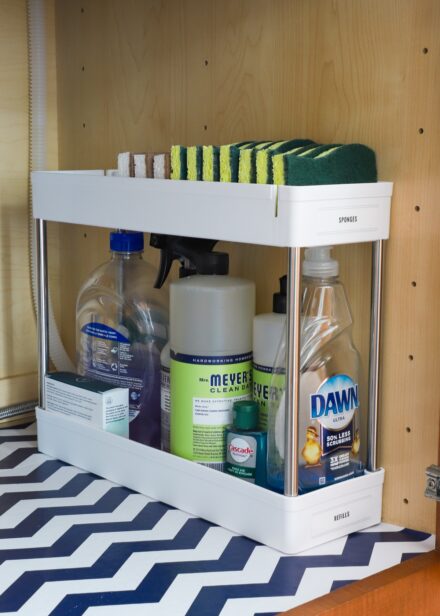
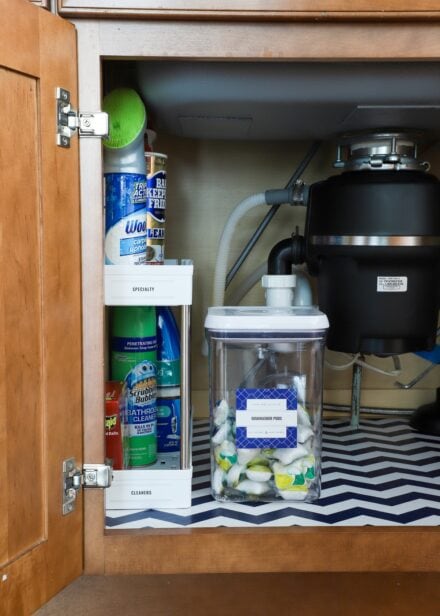
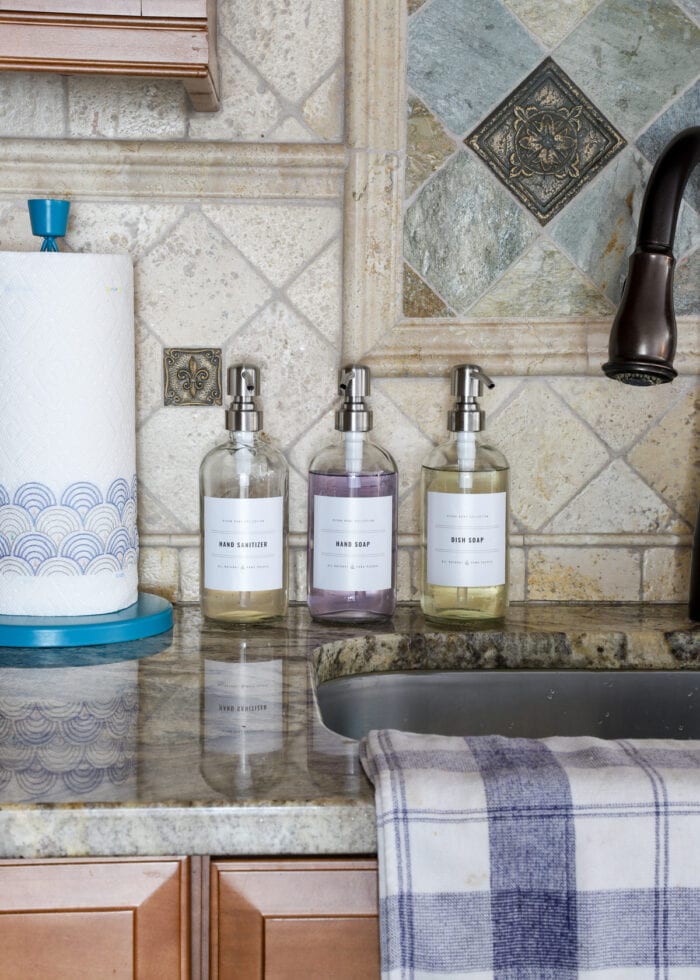
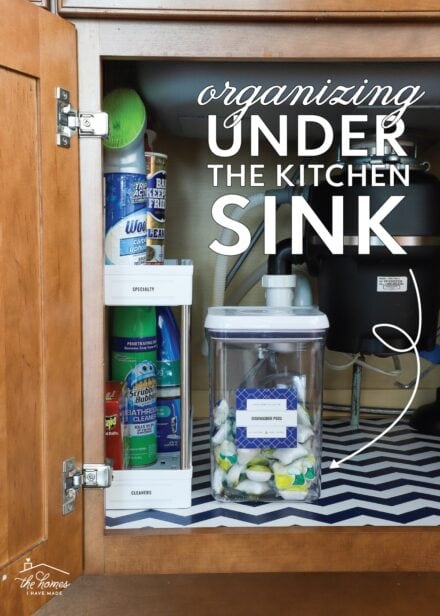
Cabinets Under the Kitchen Sink
By far, my biggest (and favorite) organizing project in this space is the cabinet under our kitchen sink. This spot is problematic for so many of us, and I finally got it under control just in the last year. Boy do I wish I had done it sooner!
Really simple and budget-friendly caddies helped me carve out some much-needed order in this spot. I can say, for certain, that I am much more willing to pull out our cleaning supplies now that they are so easy to see and this cabinet looks so good!

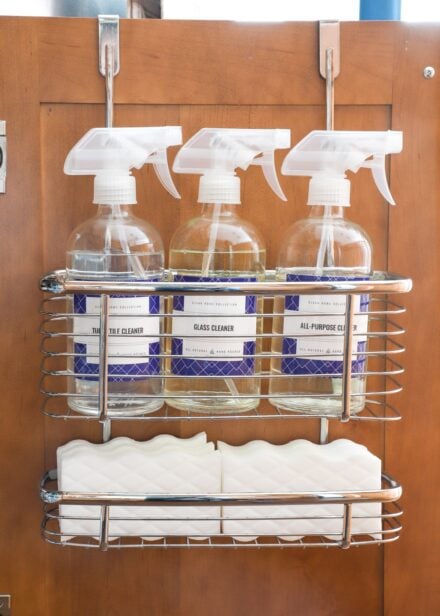
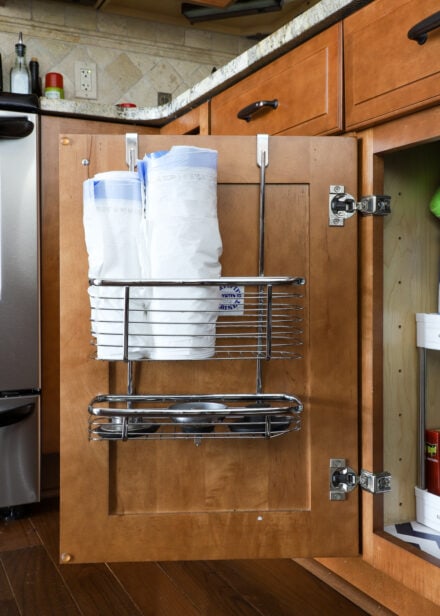
Swapping out commercial plastic soap dispensers for sleek glass ones gives a little sophistication to our sink setup…although I never got around to replacing our ooooooold turquoise paper towel holder for a matching silver one. Whoops!
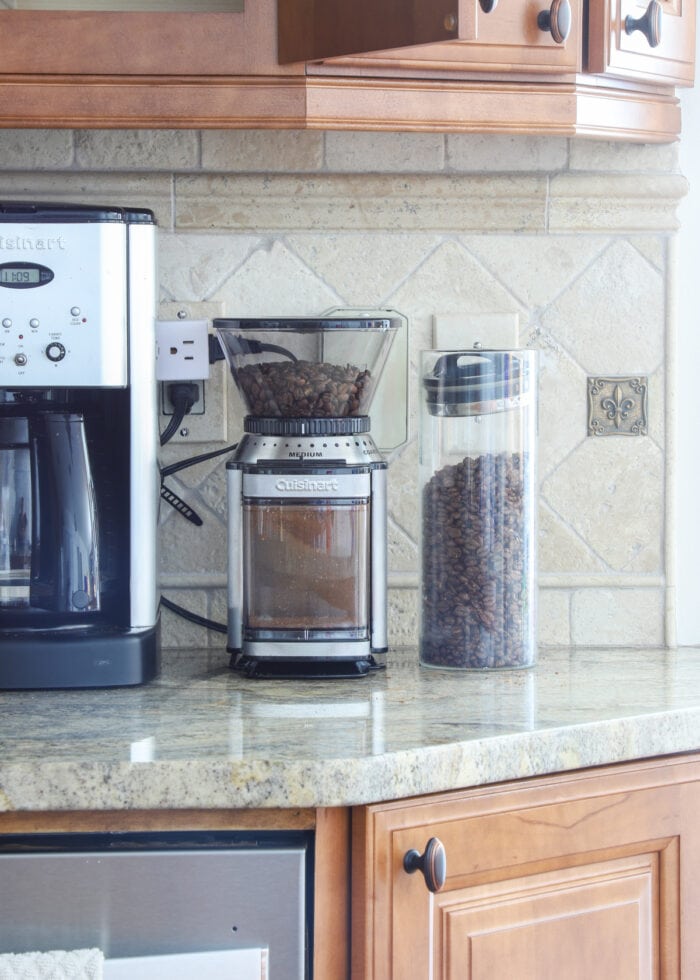
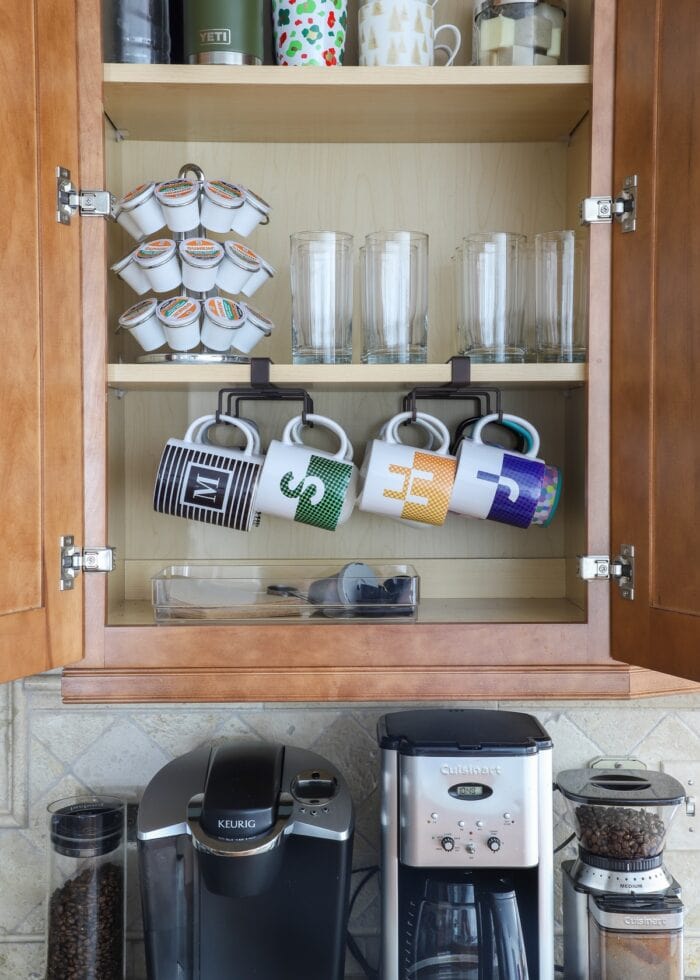
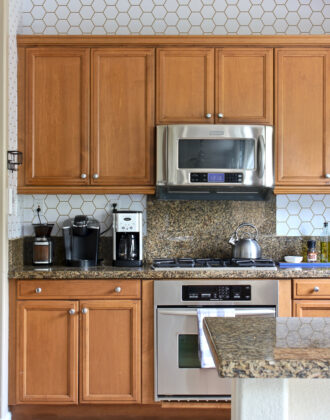
Coffee Station Cabinet
To the right of the sink is another favorite and functional spot: our Coffee Station and Mug/Glass cabinet.
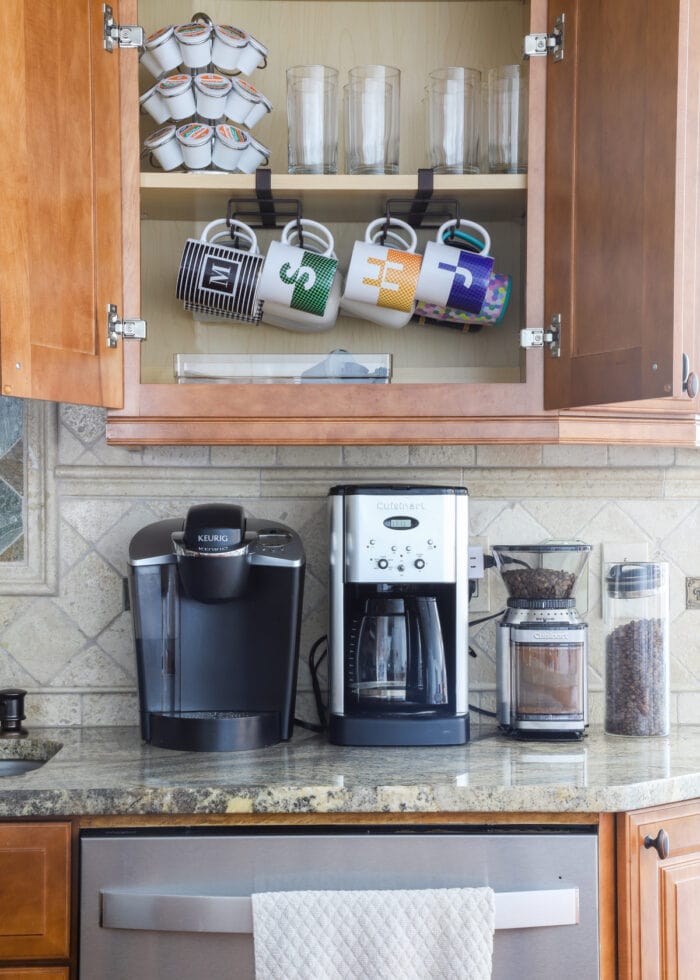
This tiny stretch of counter space proved ideal for our coffee makers, grinder, and bean storage…
….and the cabinet above is outfitted with mug hangers so we can really make use of every single inch. I love these mug hangers so much, I’ll never go back to stacking mugs again!
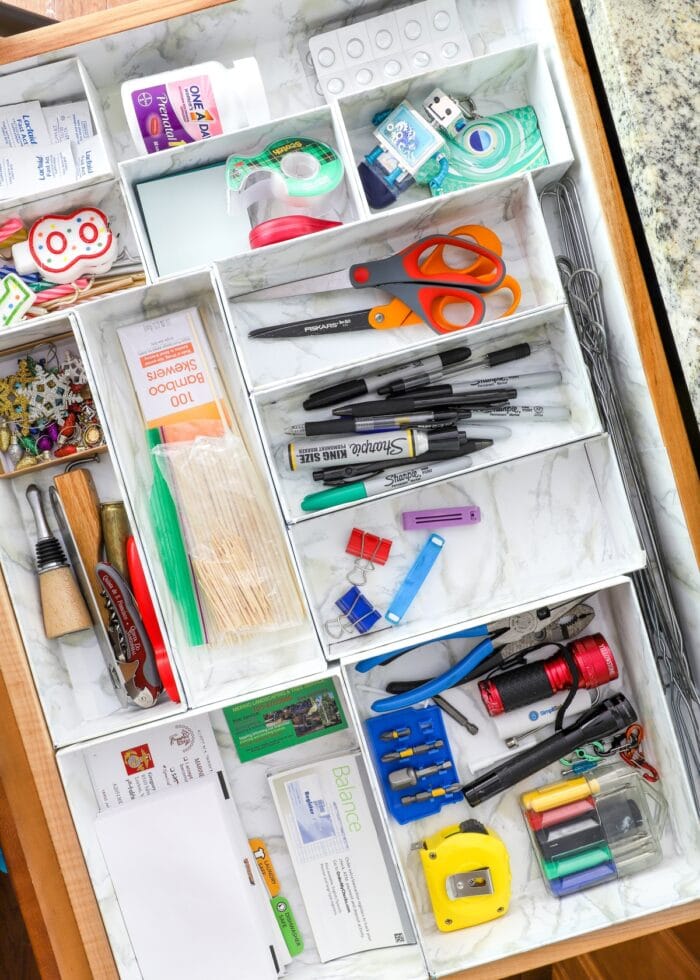
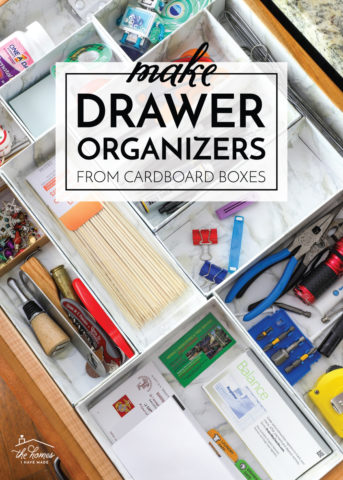
The Junk Drawer
Although the island is quite large, it doesn’t have a ton of storage in it. One big cabinet holds the trash can, and another holds our mixer. However, the last two spots (a drawer and a cabinet) are some of the most heavily-used in the entire kitchen!
A very wide but shallow drawer right at the end of the island became the default junk drawer early on. To give it a little more organization, I created custom organizers out of a bunch of old phone and sock boxes!
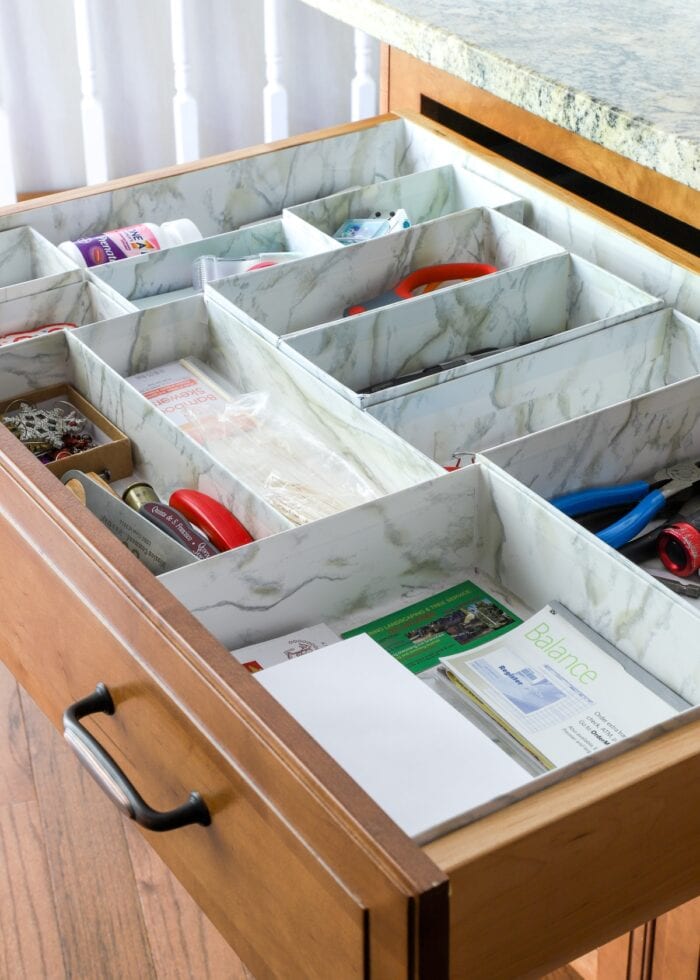
Although it doesn’t always look quite this beautiful (other junk eventually got thrown in, after all!), but these cheap organizers were such a great way to create order in this massive drawer!
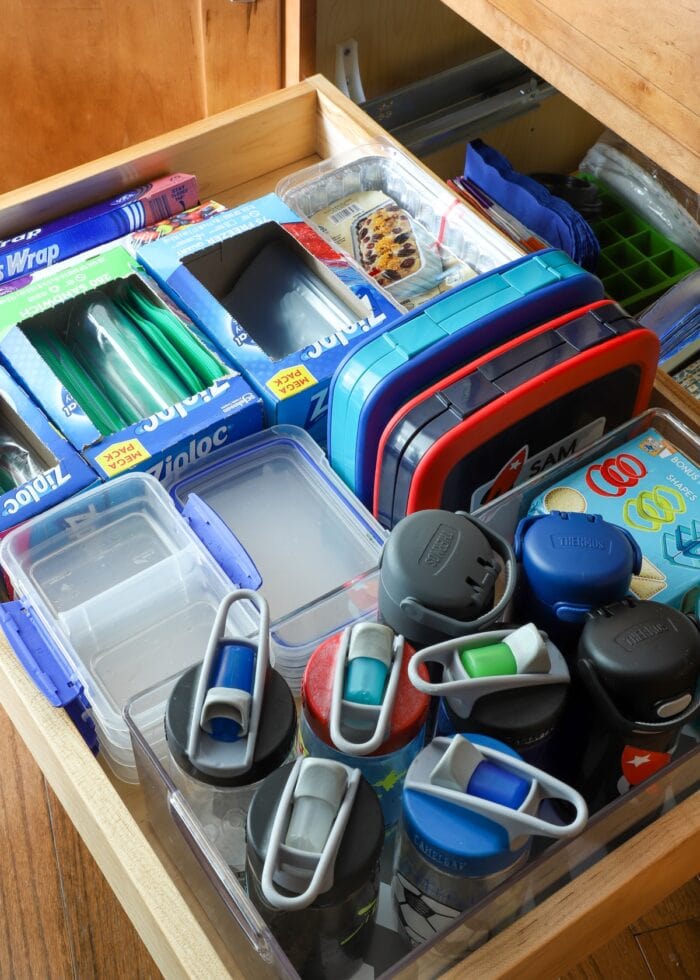
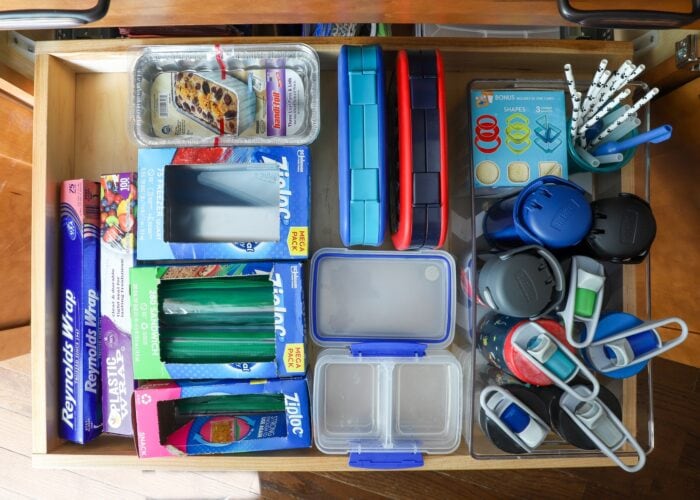
Lunch-Making Station
Last but not least, the cabinet just below the junk drawer is our “lunch making cabinet.” These pull-out drawers hold all of our Ziplocks, lunch containers, and water bottles, creating a “one stop shop” for lunch-making every day!
Products & Tutorials In This Room
Because I didn’t participate in the renovation of this kitchen, I can’t speak to any of the cabinet, tile, counter, or light sources. But here are the products we used to organize each and every spot!
- Bar Stools – Nailhead Pub Stools
- Organizers
- Cleaning Supplies
- Laundry Room Wall Color – Sherwin Williams Denim


Although I don’t love the way this kitchen looks, I must admit it functions beautifully for our family. The big island is amazing for meal prepping, lunch eating, cookie making, play-doh playing, homework helping, and general gathering. Although the lack of pantry and usable cabinets is limited, I’m really proud of the storage and organization we were ultimately able to create using a variety of budget-friendly products and systems.
I hope you enjoyed this in-depth look at our kitchen organization. This “room reveal” is actually the final one in our Virginia home. In a few weeks, I’ll be sharing one last look at our entire Virginia home transformation and then it will be time to (finally!) kick off our new home in North Carolina (where I’ll actually have the opposite kitchen problem: tons of great storage, but all builder-basic finishes!)
Megan
One Comment on “Our VA Rental Kitchen Reveal | Top-to-Bottom Organization”
Meaghan,
I think you are a dynamo! Does your husband appreciate the way you’ve made so many homes livable, functional, beautiful? And on a budget? He has a treasure. Tell him I said so.
I love following your blogs and your creative, charming approach to organizing and decorating. You are a goddess!
Sheila