How to Organize Cabinets Above the Refrigerator
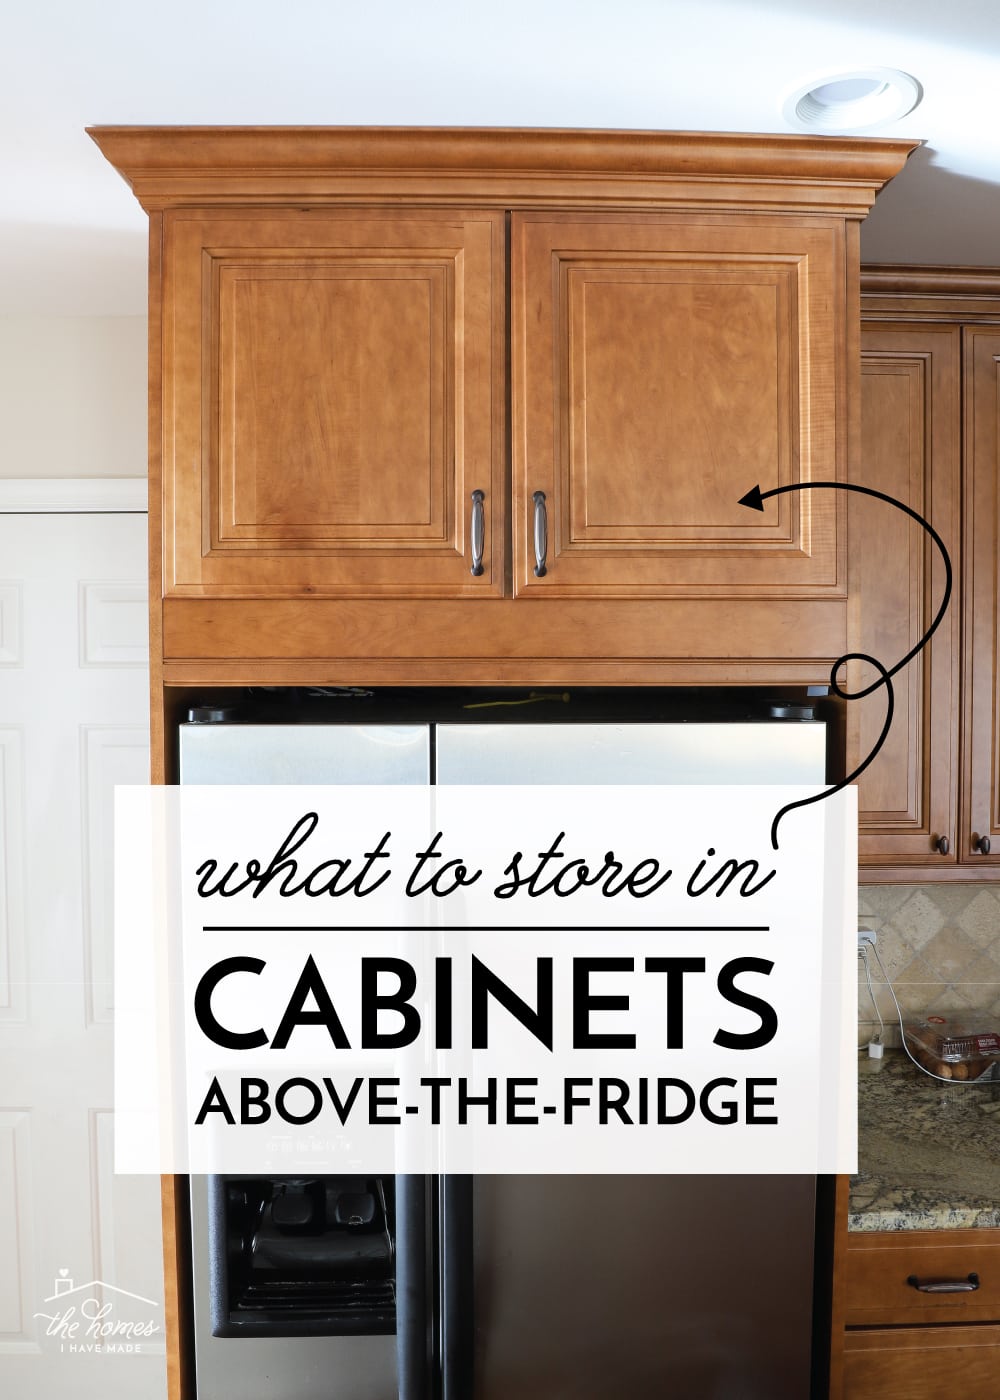
Today I want to chat a bit about one of the most awkward spots in the kitchen: the cabinets above the refrigerator! After fighting with our racks and pans jammed up there for over a year, I finally took the 20 minutes to organize this cabinet with really inexpensive products I already had on hand. While there are all sorts of custom DIY ideas floating around the web, I think you guys will love this simple, no-fuss solution for creating more order in this hard-to-reach space!
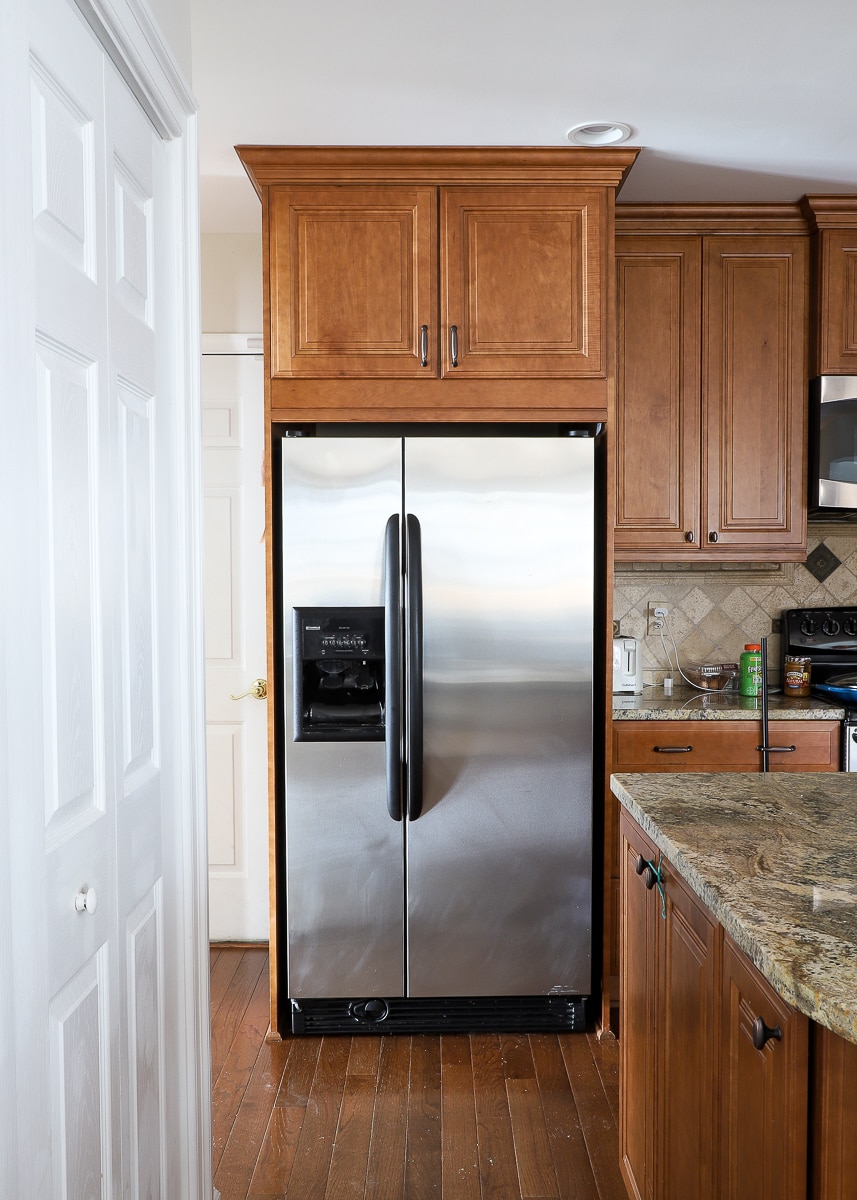
Despite having a really spacious kitchen, we are actually pretty short on cabinets. And since we had to dedicate both an upper cabinet and stack of drawers to be our pantry, we had no choice but to fully utilize the hard-to-reach cabinets above the refrigerator for more storage.
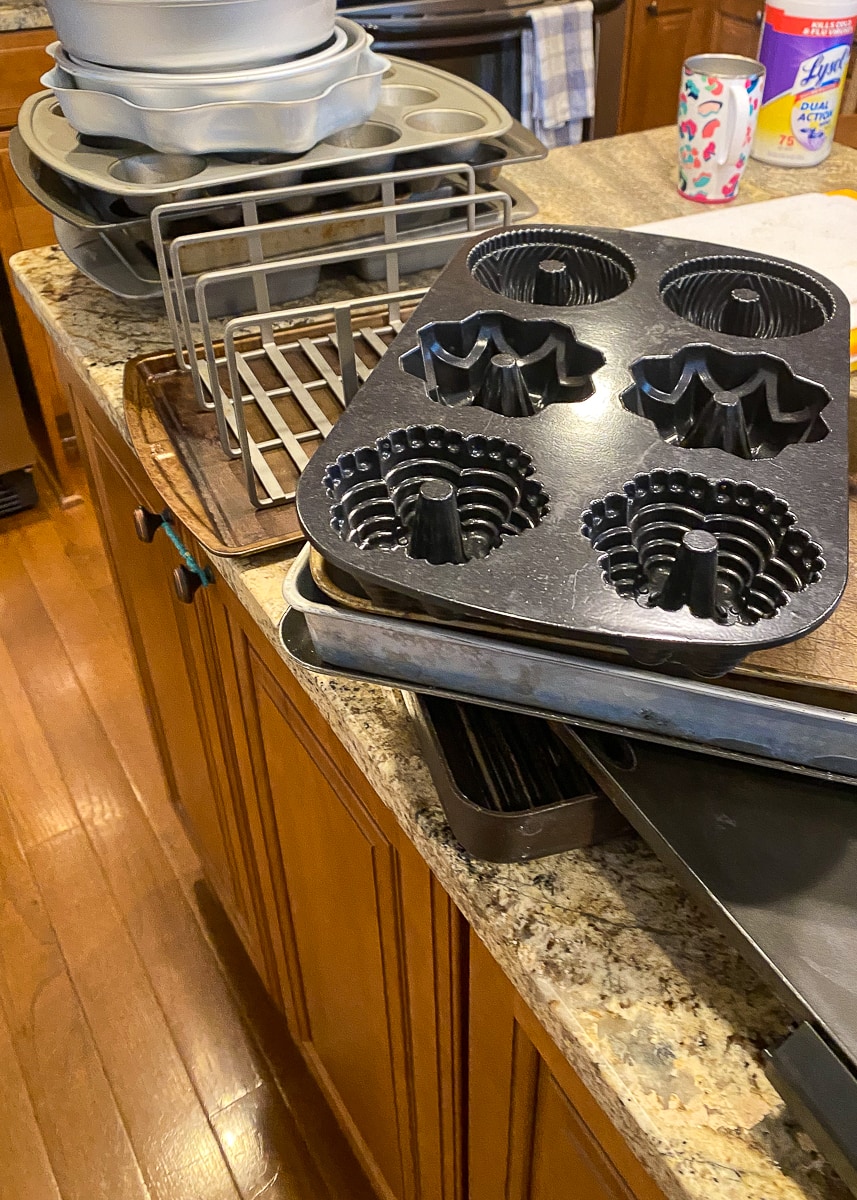
Upon moving in almost 18 months ago, we threw a few wire organizers up there (we’ve used them to organize our bakeware for ages); loaded in our pans, cooling racks, and other items; and called it good. But over the months, we found ourselves constantly shoving items in and out however and wherever they fit. And with racks and other pans being unruly by nature, it was a big ol’ hassle to access anything.
I recently reached my breaking point with the chaos (I mean, how many times can you fight with a cooling rack before you do something about it!) and made some really simple upgrades that have made all the difference!
Let me break down this 20-minute project so you can create more organization in your cabinets above the refrigerator too!
Supplies Used
To start, here is what I used for this upgrade:
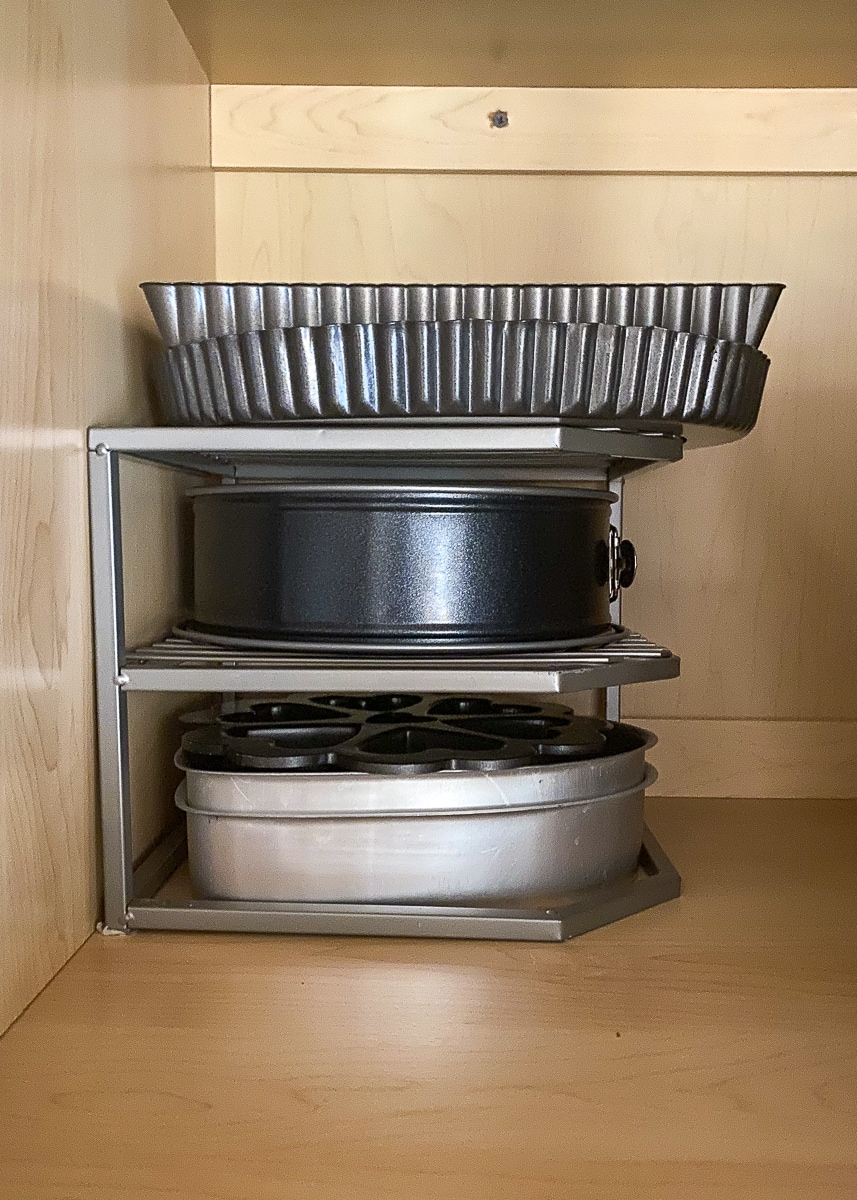
- Vertical Pan Racks (3) & Corner Cabinet Organizers (2) – I bought these exact ones years ago at Marshalls. They have held up SO well, and we can always find spots for them in any kitchen layout.
- Command Strips – I tried three different methods to keep the organizers in place inside the cabinet, and these are what did the trick!
- Label Maker with Clear Label Tape – My exact label maker is no longer available, but this will give you the same look and functionality!
Organizing the Cabinets Above the Refrigerator
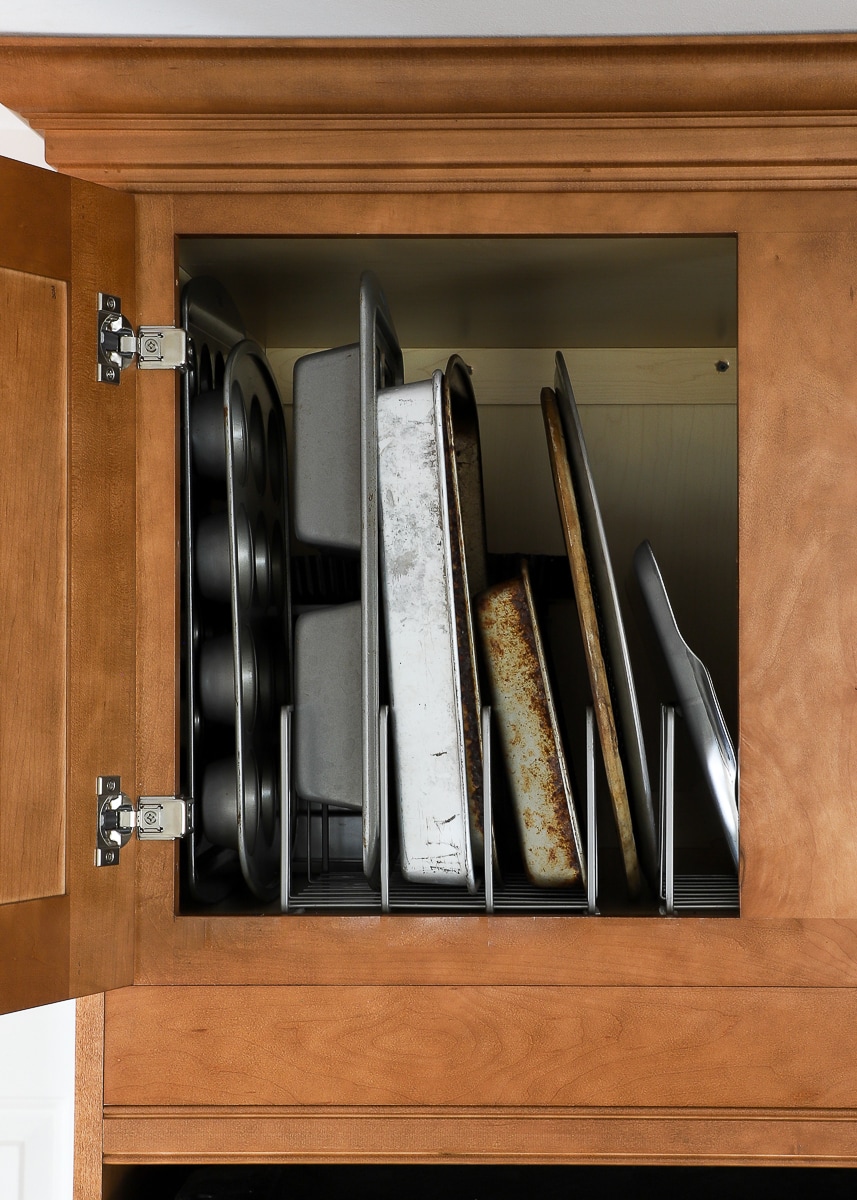
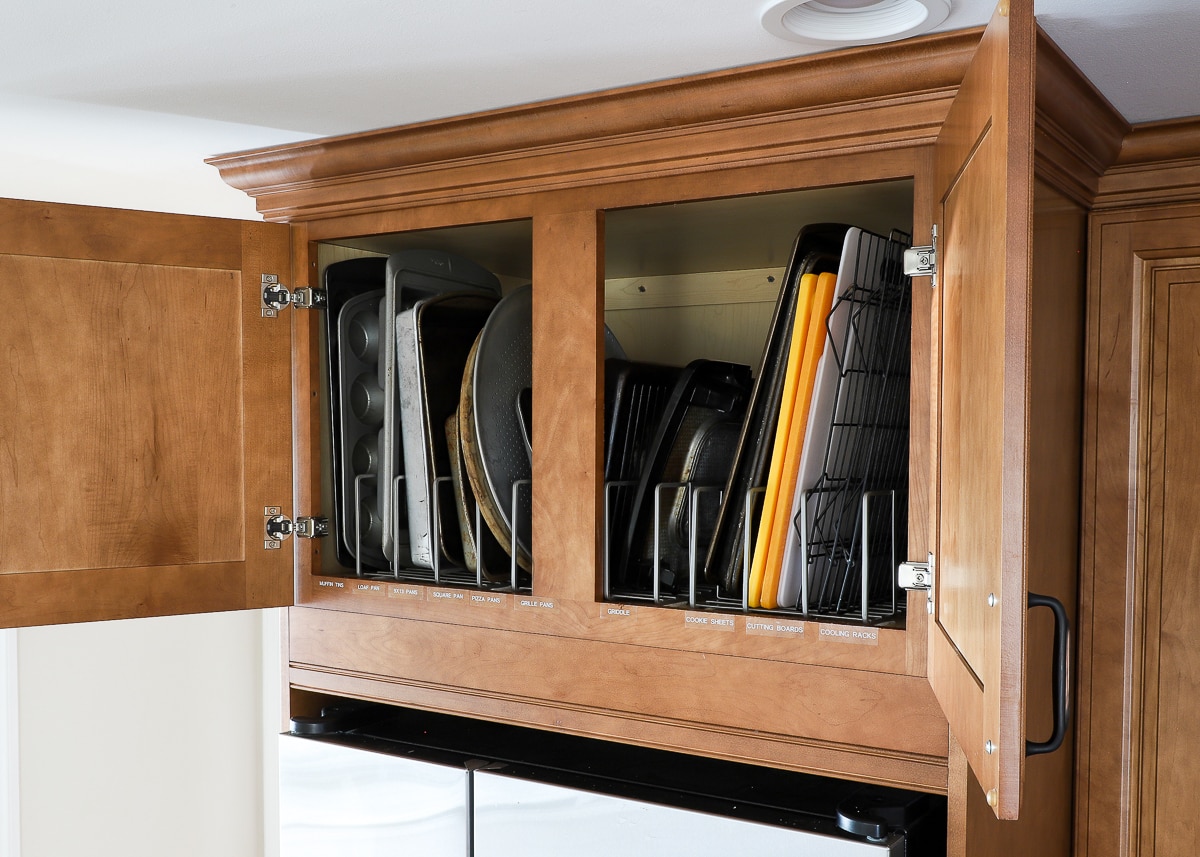
Like with any organization project, I started by completely emptying out the cabinet. I then placed like items together so I could identify how many unique spaces I needed for each group.
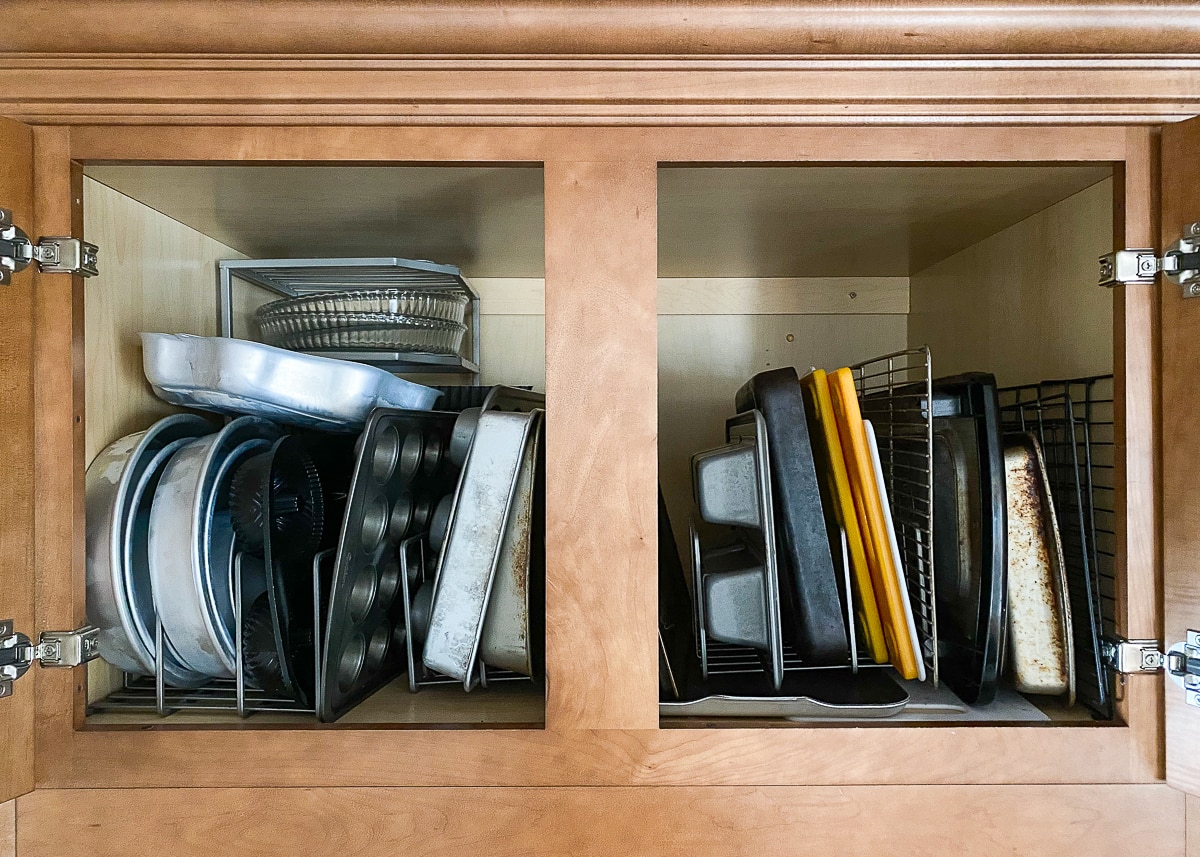
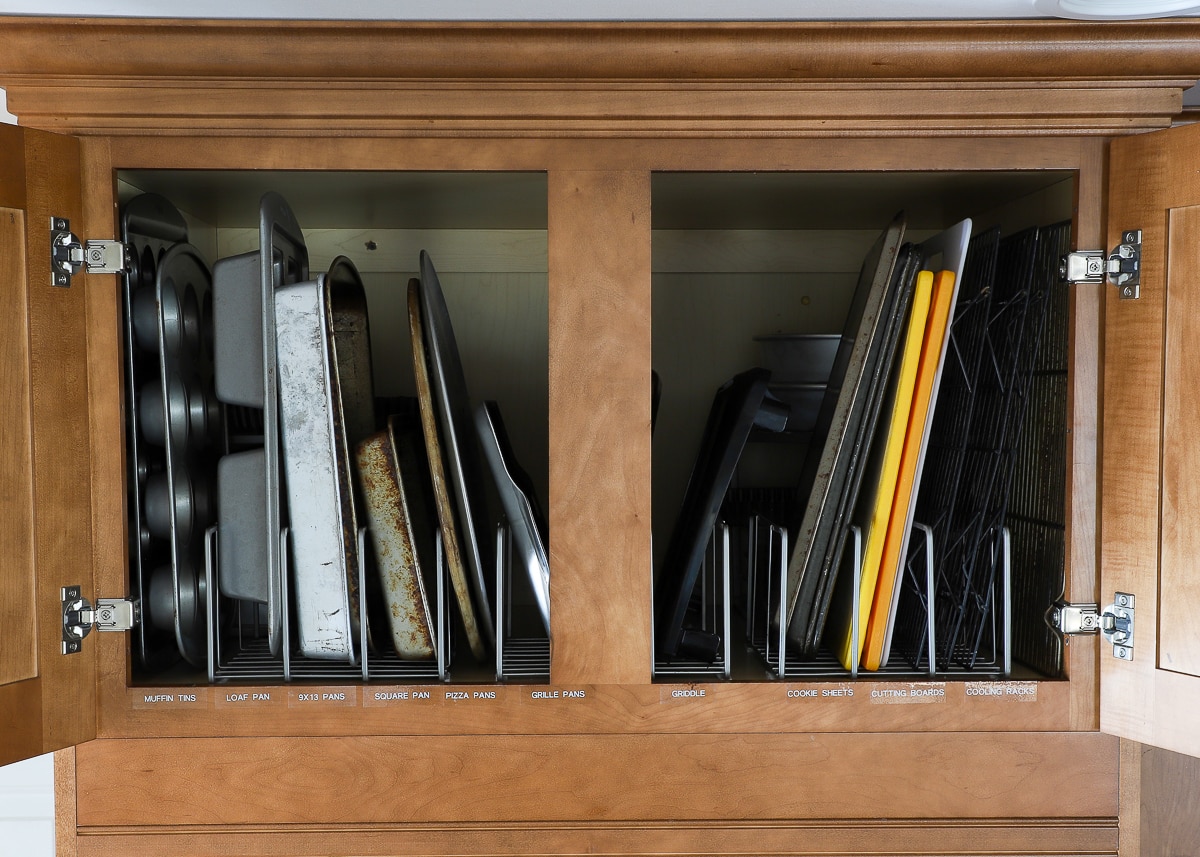
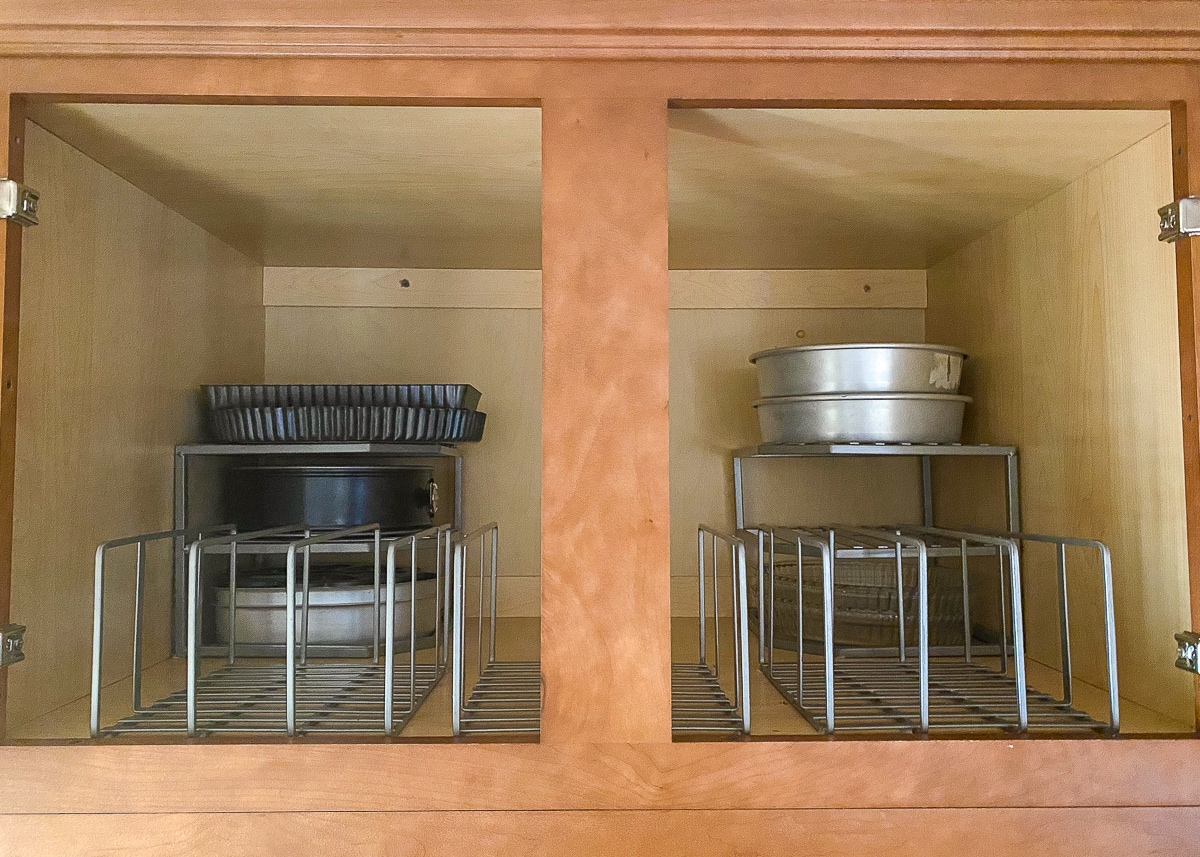
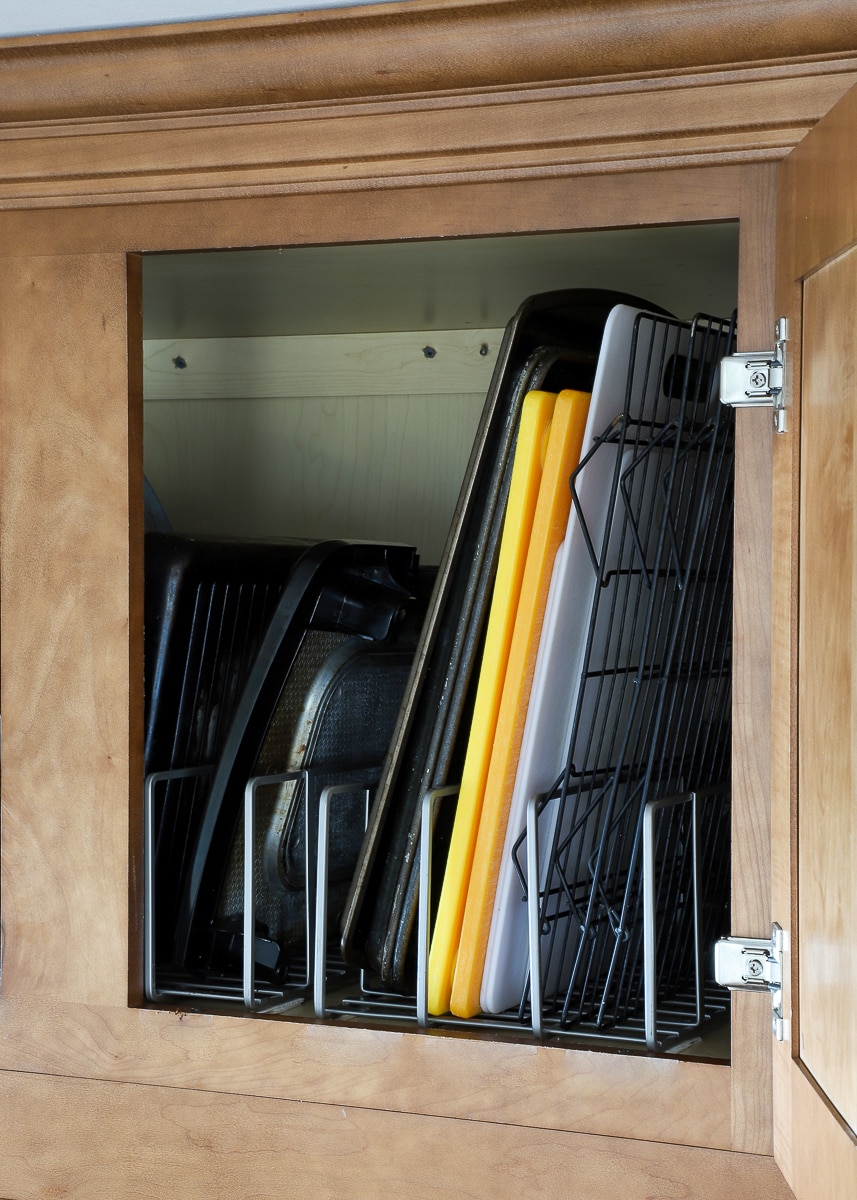
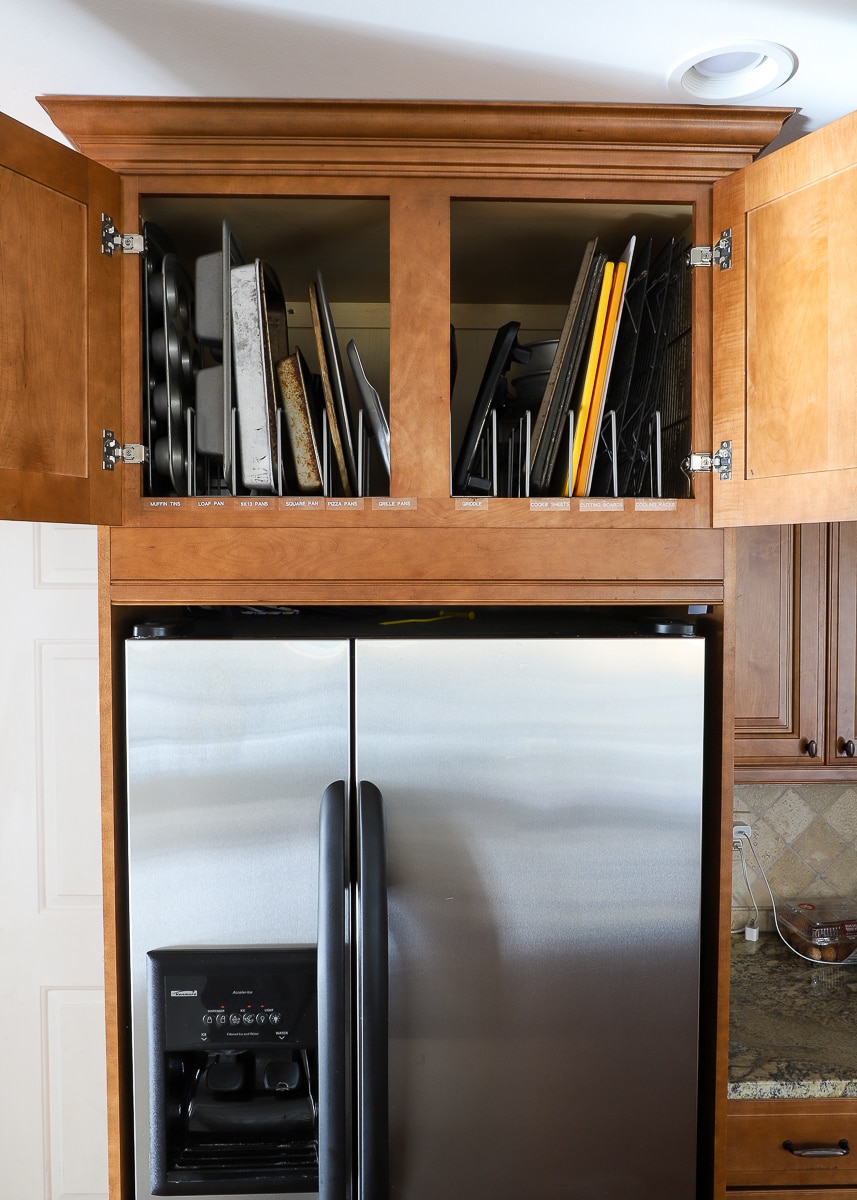
Next, I experimented with several different layout options. I originally had the corner organizers stacked on top of each other in one corner. But by un-stacking them and placing one in each corner, I increased the amount of available levels onto which I can store pans. Since these rear stacks are harder to reach and will be behind other pans, I primarily placed items here that we very rarely access.
Next, I determined that by spacing the vertical racks with 2″ gaps, I was able to create 13 channels rather than just 9. This ultimately allowed me to dedicate one channel to just one item (or group of same items).
At this point, I highly recommend you experiment with different pans in different spots based on their size. Because I placed the corner cabinets in both corners, I lost my depth in much of the cabinet. However, I determined that many of my pans fit standing on their ends. This allowed me to place most items in the right and left racks, and only the really-long items (e.g, grille pan, skillet) in the (deeper) center channels.
After lots of trial and error, I was ultimately able to find just the right spot for each and every item, ensuring everything went in and came out with ease.
Important Finishing Touches
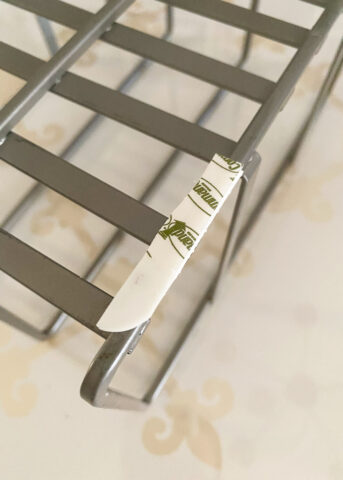
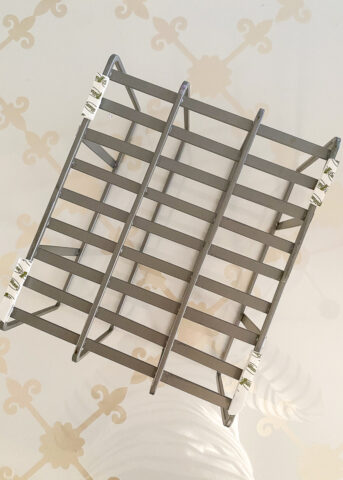
After months of shoving items in and yanking items out of this high cabinet, we determined that the organizers themselves…while very handy…almost created more chaos because they could slip and slide all around. For this arrangement to work long-term, I had to figure out a way to keep the racks firmly in place. After trying both museum wax and thinner double-stick tape with no luck, I finally made them completely immovable with my trusty, favorite Command Strips. These large ones are super strong, so slicing a single set into smaller strips for each corner is more-than-sufficient!
The final step was to add labels under each channel with a label maker and clear tape. While I have been known to add labels “just for show,” this time they were absolutely necessary. Again, this cabinet originally fell apart because we took to just shoving items in wherever and however they fit. Labels now ensure that items go back to the exact spot they were intentionally assigned to.
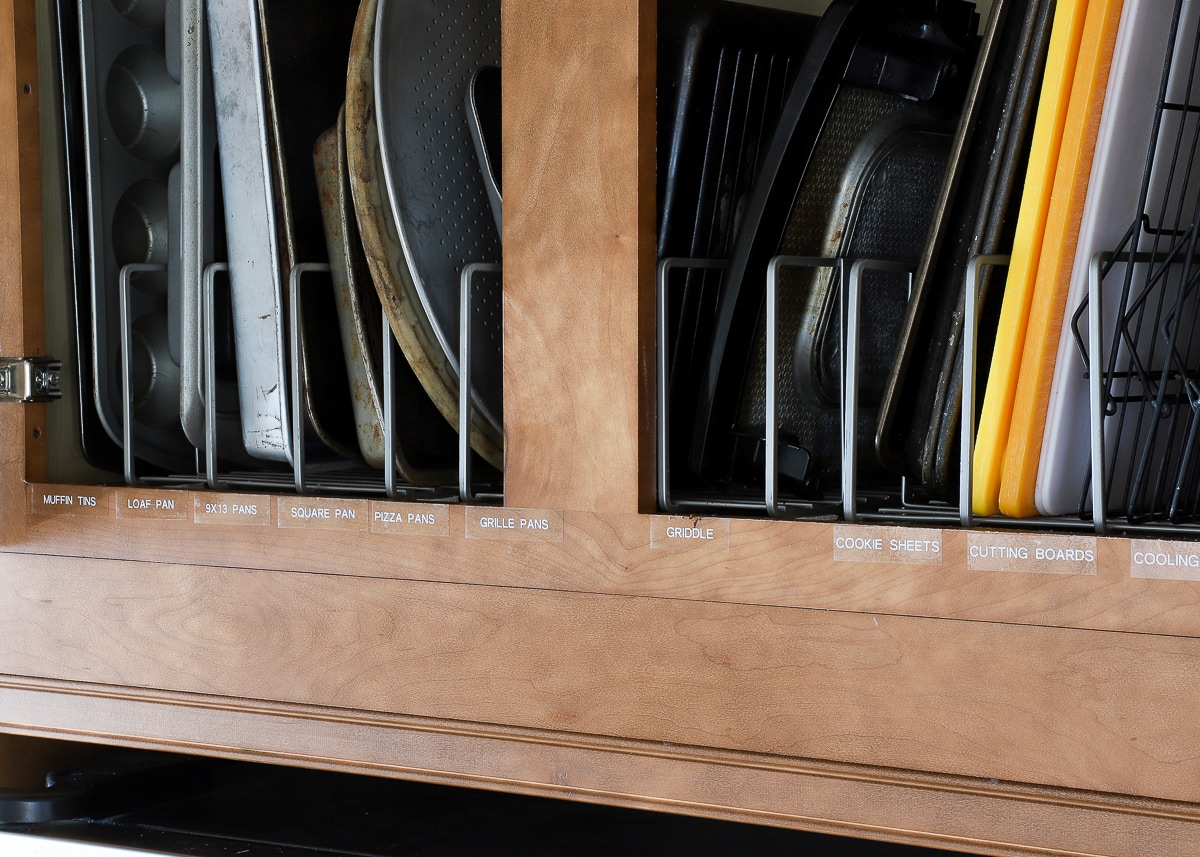
As is the case with any messy closet, cabinet, and junk drawer, the 20 minutes spent sorting it all out and putting good, intentional systems in place is always worth it! I can’t tell you how many times I have wrestled with the cooling racks or climbed up on a stool to retrieve something lost in the back. This is definitely another “wish I had done it sooner” project!
Other (Really) Smart Above-the-Refrigerator Solutions
As renters and frequent movers, I was more than happy to be able to organize this cabinet with inexpensive, off-the-shelf products that can easily move with us. However, there is no shortage of other really good ideas for making sense of this awkward cabinet. Here are some other solutions that might work better for your home or situation:
- This is a great IKEA hack for a pan/lid organizer!
- If you’re looking for a truly custom and permanent solution, these instructions are great.
- Taking the cabinet doors off and adding a shelf for display is such a clever solution!
- Here’s a way to turn this area into a wine rack.
Other Great Kitchen Storage Solutions
Ready to organize the rest of your kitchen? I’ve got you covered with more easy solutions!- How to Organize a Pantry
- How to Organize Baking Pans
- How to Organize Kitchen Drawers
- How to Organize Corner Kitchen Cabinets
- How to Organize Upper Kitchen Cabinets
- How to Organize Cabinets Under the Kitchen Sink
- How to Organize Small Appliances Inside Kitchen Cabinets
- How to Organize Spices
- How to Organize Coffee Mugs
- How to Organize K-Cups
- How to Organize Recipes
- How to Organize Ziplock Bags
- What to Do with Dirty Dish Towels
- How to Make Pantry Labels
In our last home, our above-the-fridge cabinet was sort of the “pit of despair,” filled with stuff we rarely used or needed. I am so excited we’ve been able to make this cabinet work really hard for us by using easy-to-find items. If your cabinets above the refrigerator aren’t looking or working so well, I hope you give these ideas a try!
Megan




14 Comments on “How to Organize Cabinets Above the Refrigerator”
Great ideas! Especially if you have someone in your family who is over 6 ft tall! Did it in my house kitchen.
There is no cabinet over my fridge here in my apartment. It looks awfully bare. I’ve used it to store (sounds awful) the flower saddle for my husband’s grave memorial. I figure a few months here gathering dust is better than being out in the cold and snow and wind in the winter. I’ll take it back in May. Would you have any other suggestions for the top of my fridge? Decorated lidded basket? For picnic supplies?
Hey Linda!
I’ve seen some really pretty decorative displays on top of fridges. A stack of cookbooks with a plant. A large wicker basket full of outdoor dishes (or like you said, picnic supplies). A wine rack. A collection of pitchers or decorative vases.
Those are just a few that come to mind!Hope that helps!Megan
Your cabinet looks great! What a great idea to attach the organizer so it doesn’t slide. Our above fridge cabinet is recessed way back and I am short so it requires a tall stool and lots of reaching, but it is perfect for our cookie cutter and sprinkle collection! We have the famous IKEA stool and I was inspired to partially stain it blue like the one you did for your craft room a couple houses ago!
Wow – you’ve been reading for a while if you were around for the blue stool! I still love how that one turned out but have been wanting to swap the pink flowered paper for something different. The boys are currently using it as a seat at the LEGO table!
Have a great Wednesday!Megan
The cabinet above my fridge is much shallower than yours, and I’m short. I used the idea from one of your previous posts on the topic, and have a mix of Target Y-weave baskets and a clementine box (free) to store stuff like the disposable containers I use to take food to people, and canning supplies that are strictly seasonal.
A stepstool is required to get stuff out, so I’m really glad I don’t need it for stuff in regular use!
And as to what to keep on top of the fridge, may I suggest your cat? Mine has a fleece-lined wooden box up there that is her favorite spot. I wash the fleece monthly, and usually wipe down the top of the fridge at the same time. If I had a full-depth cabinet like yours I’m not sure where she’d go.
Hey Margaret!
I’m so glad you were able to find that other post (upper cabinets) helpful! That’s still one of the best things I’ve done in our kitchen cabinets. It makes those little cabinets much more useful!
And what a great idea about the cat!!! Thanks for sharing!~Megan
I have one of those vertical racks in our narrow bottom cabinet that we use for sheet pans, cooling racks, and cutting boards. It is frustrating because it moves and slides to the back. I’ll be improving that space TODAY with command strips! Thanks for the tip. Also, my favorite cookie sheets (really a jelly roll pan) are too tall to fit in the cabinet well. We could make them fit but it was a huge hassle and they had to be diagonal. I finally found the perfect space for them–I took a scrap of 1×1 wood, about a foot long, and attached it to the bottom inside the sink cabinet (I used screws but command strips would work), near the side. It only takes up about 4 inches of horizontal cabinet space total, uses the previously unused vertical space in that cabinet, and gives the perfect spot to slide those large pans in.
Yes!!! I feel exactly the same. Just having all the crumbs gone makes a huge difference…even if there are milk spots and such still around 🤪
Have a great Wednesday!Megan
What a brilliant idea for your sheet pans!!! I’ll have to keep that one in mind.
Hope you give the Command Strips a try – makes such a difference!
~Megan
I keep my bread baskets, the old recipe books – that I just can’t separate from, some Tupperware and anything else that might only be used on holidays (like table clothes & candle sticks). Items that are less used, towards the back & things I might use if I have company, towards the front
I am going to try this.
I just thought of lower cabinets that have a smaller shelf above. When putting a box like containers to organize smaller items Tupperware glass bakeware etc diy with putting those stick on wheels that’s shown on utube vlogs. That way pulled out with ease same with smaller upper shelves
If mixers are added they’ll be less of a struggle to get to also
I just thought of lower cabinets that have a smaller shelf above. When putting a box like containers to organize smaller items Tupperware glass bakeware etc diy with putting those stick on wheels that’s shown on utube vlogs. That way pulled out with ease same with smaller upper shelves
If mixers are added they’ll be less of a struggle to get to alsoy
My doors are recessed back and difficult to reach even with a stool so I had my husband take off the doors, tack up a couple trim strips to hide the holes from the hardware and I decorate it! I put removable wallpaper on the back and change the decor with the seasons.