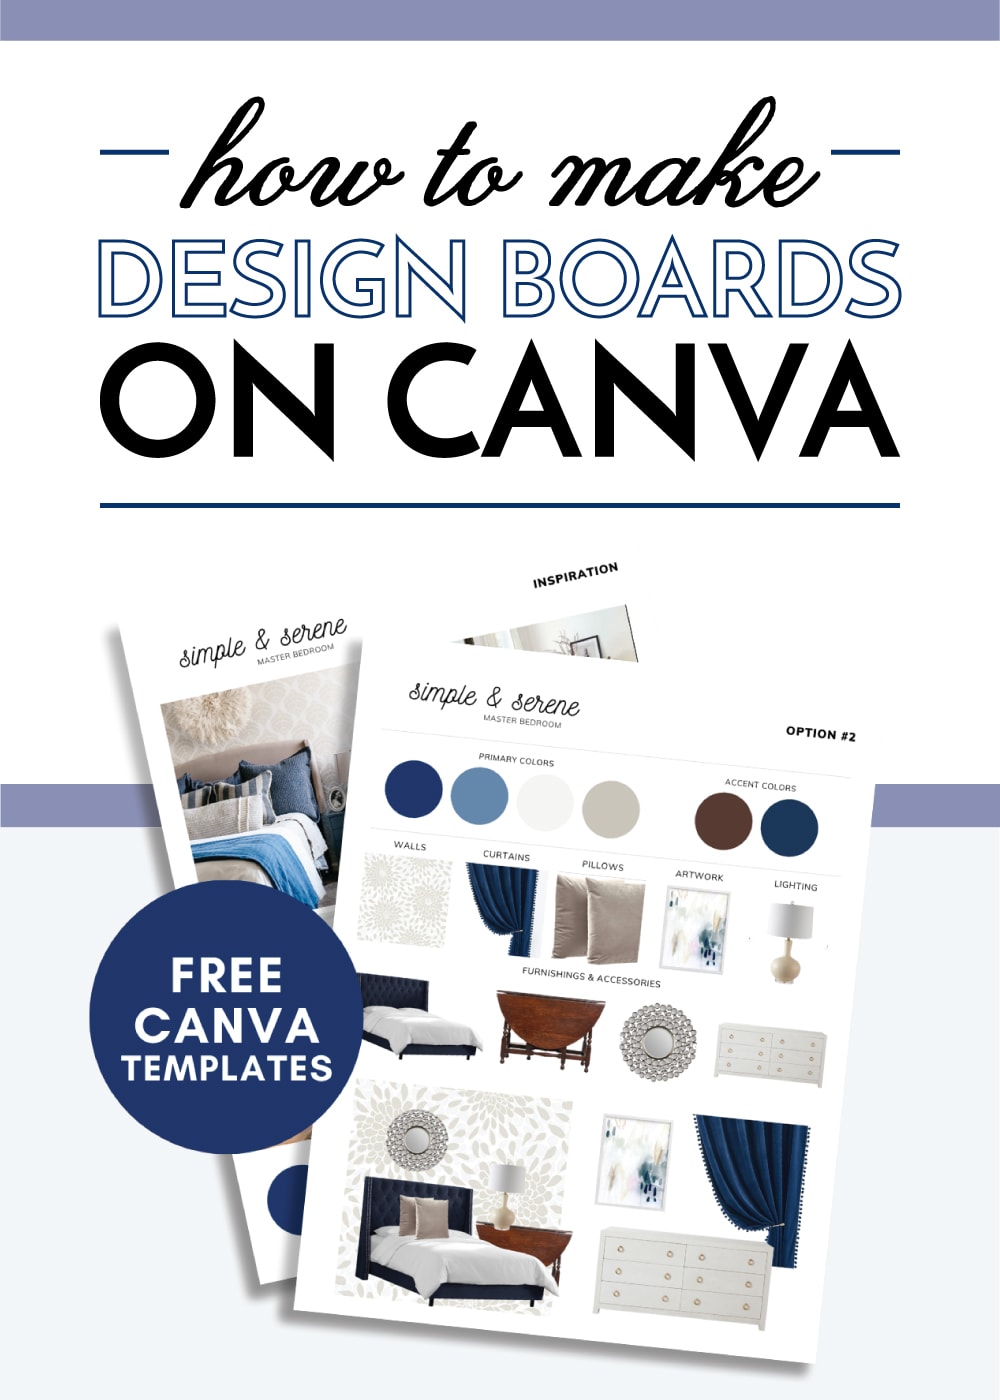
How To Make Design Boards on Canva (with Video & FREE Templates!)
A few years ago, I wrote a very in-depth post on how to easily create room design boards using Microsoft PowerPoint. While that tutorial is still quite useful (especially if you’re savvy in Microsoft programs), in recent years, I’ve started making my design boards with a free online graphic design program called Canva. Thanks to Canva’s intuitive drag-and-drop functionality, it’s easier than ever to make professional-looking graphics. So today, I want to break down exactly how to make design boards on Canva. Not only am I covering every last step with pictures and text, but I also have a video showing the entire process from start-to-finish, as well as FREE templates to get you started. Let’s dive in!
What Are Design Boards?
Design Boards are collage-style graphics that can help you visualize a room’s overall look and feel, as well as get a sense for how different elements might work together before actually buying/installing anything. Creating design boards can be a really valuable exercise when you just don’t know what style direction you want to go for a room makeover, or you’re simply having trouble visualizing certain items together. I personally find that creating a design board not only helps me refine my vision for space, but (more importantly) guides every purchase so that I ultimately end up with the room I wanted.
What Is Canva?
Canva is an online graphic design program intended for the everyday user. Not only is it FREE, but it’s also one of the quickest and most intuitive programs I’ve ever used to create graphics, flyers, invitations, labels, and more. Even if you don’t have any need for creating design boards like I’m showing today, I still recommend creating an account and playing around with it because you’ll love how easy it is to create designs for parties, social clubs, events, and more.
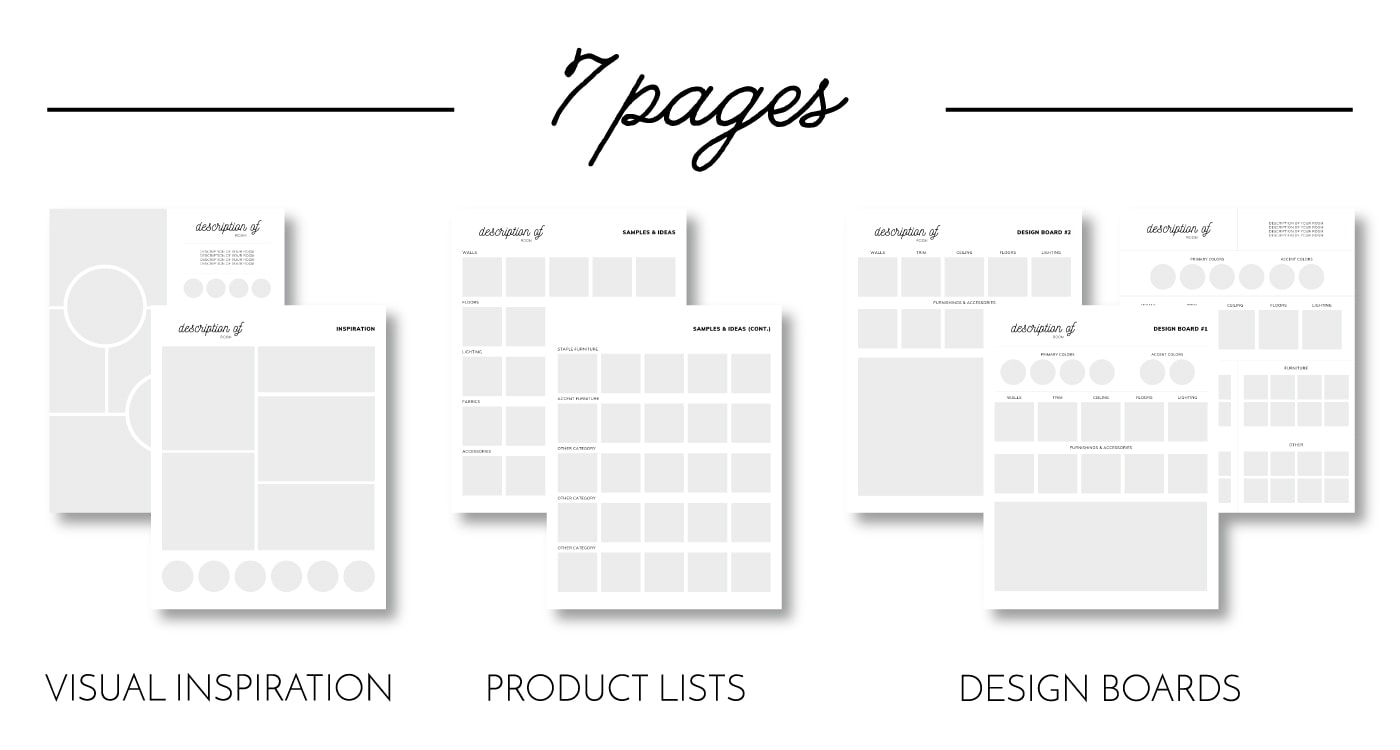
You are most certainly welcome to create your design boards from scratch with a blank canvas on Canva. However, I’ve also created 7 pages of Design Board Templates that can help you assemble your design boards much quicker!
Included in this free Canva template are: 2 Inspiration Boards | Product & Ideas Lists | 3 Design Board Formats!
Accessing the Design Board Templates
To use my FREE Design Board templates, follow these instructions:
- Create a FREE Canva account if you don’t already have one.
- Click HERE to open the Design Board Templates within Canva.
- Click the “Use Template” button.
- In the upper right-hand corner, change the file name to something you prefer.
- Get desinging using the instructions below!
Watch: How to Make Design Boards on Canva
I break down all the steps in full detail below; but to watch my design boards come to life from start-to-finish, see the video below!
Not loading for you? Click HERE!
Step 1: Gather Inspiration
Every room makeover starts with some sort of inspiration. Whether you have a very specific “look” in mind, or you only have a general idea, it helps to collage together images that reflect the direction you want to go.
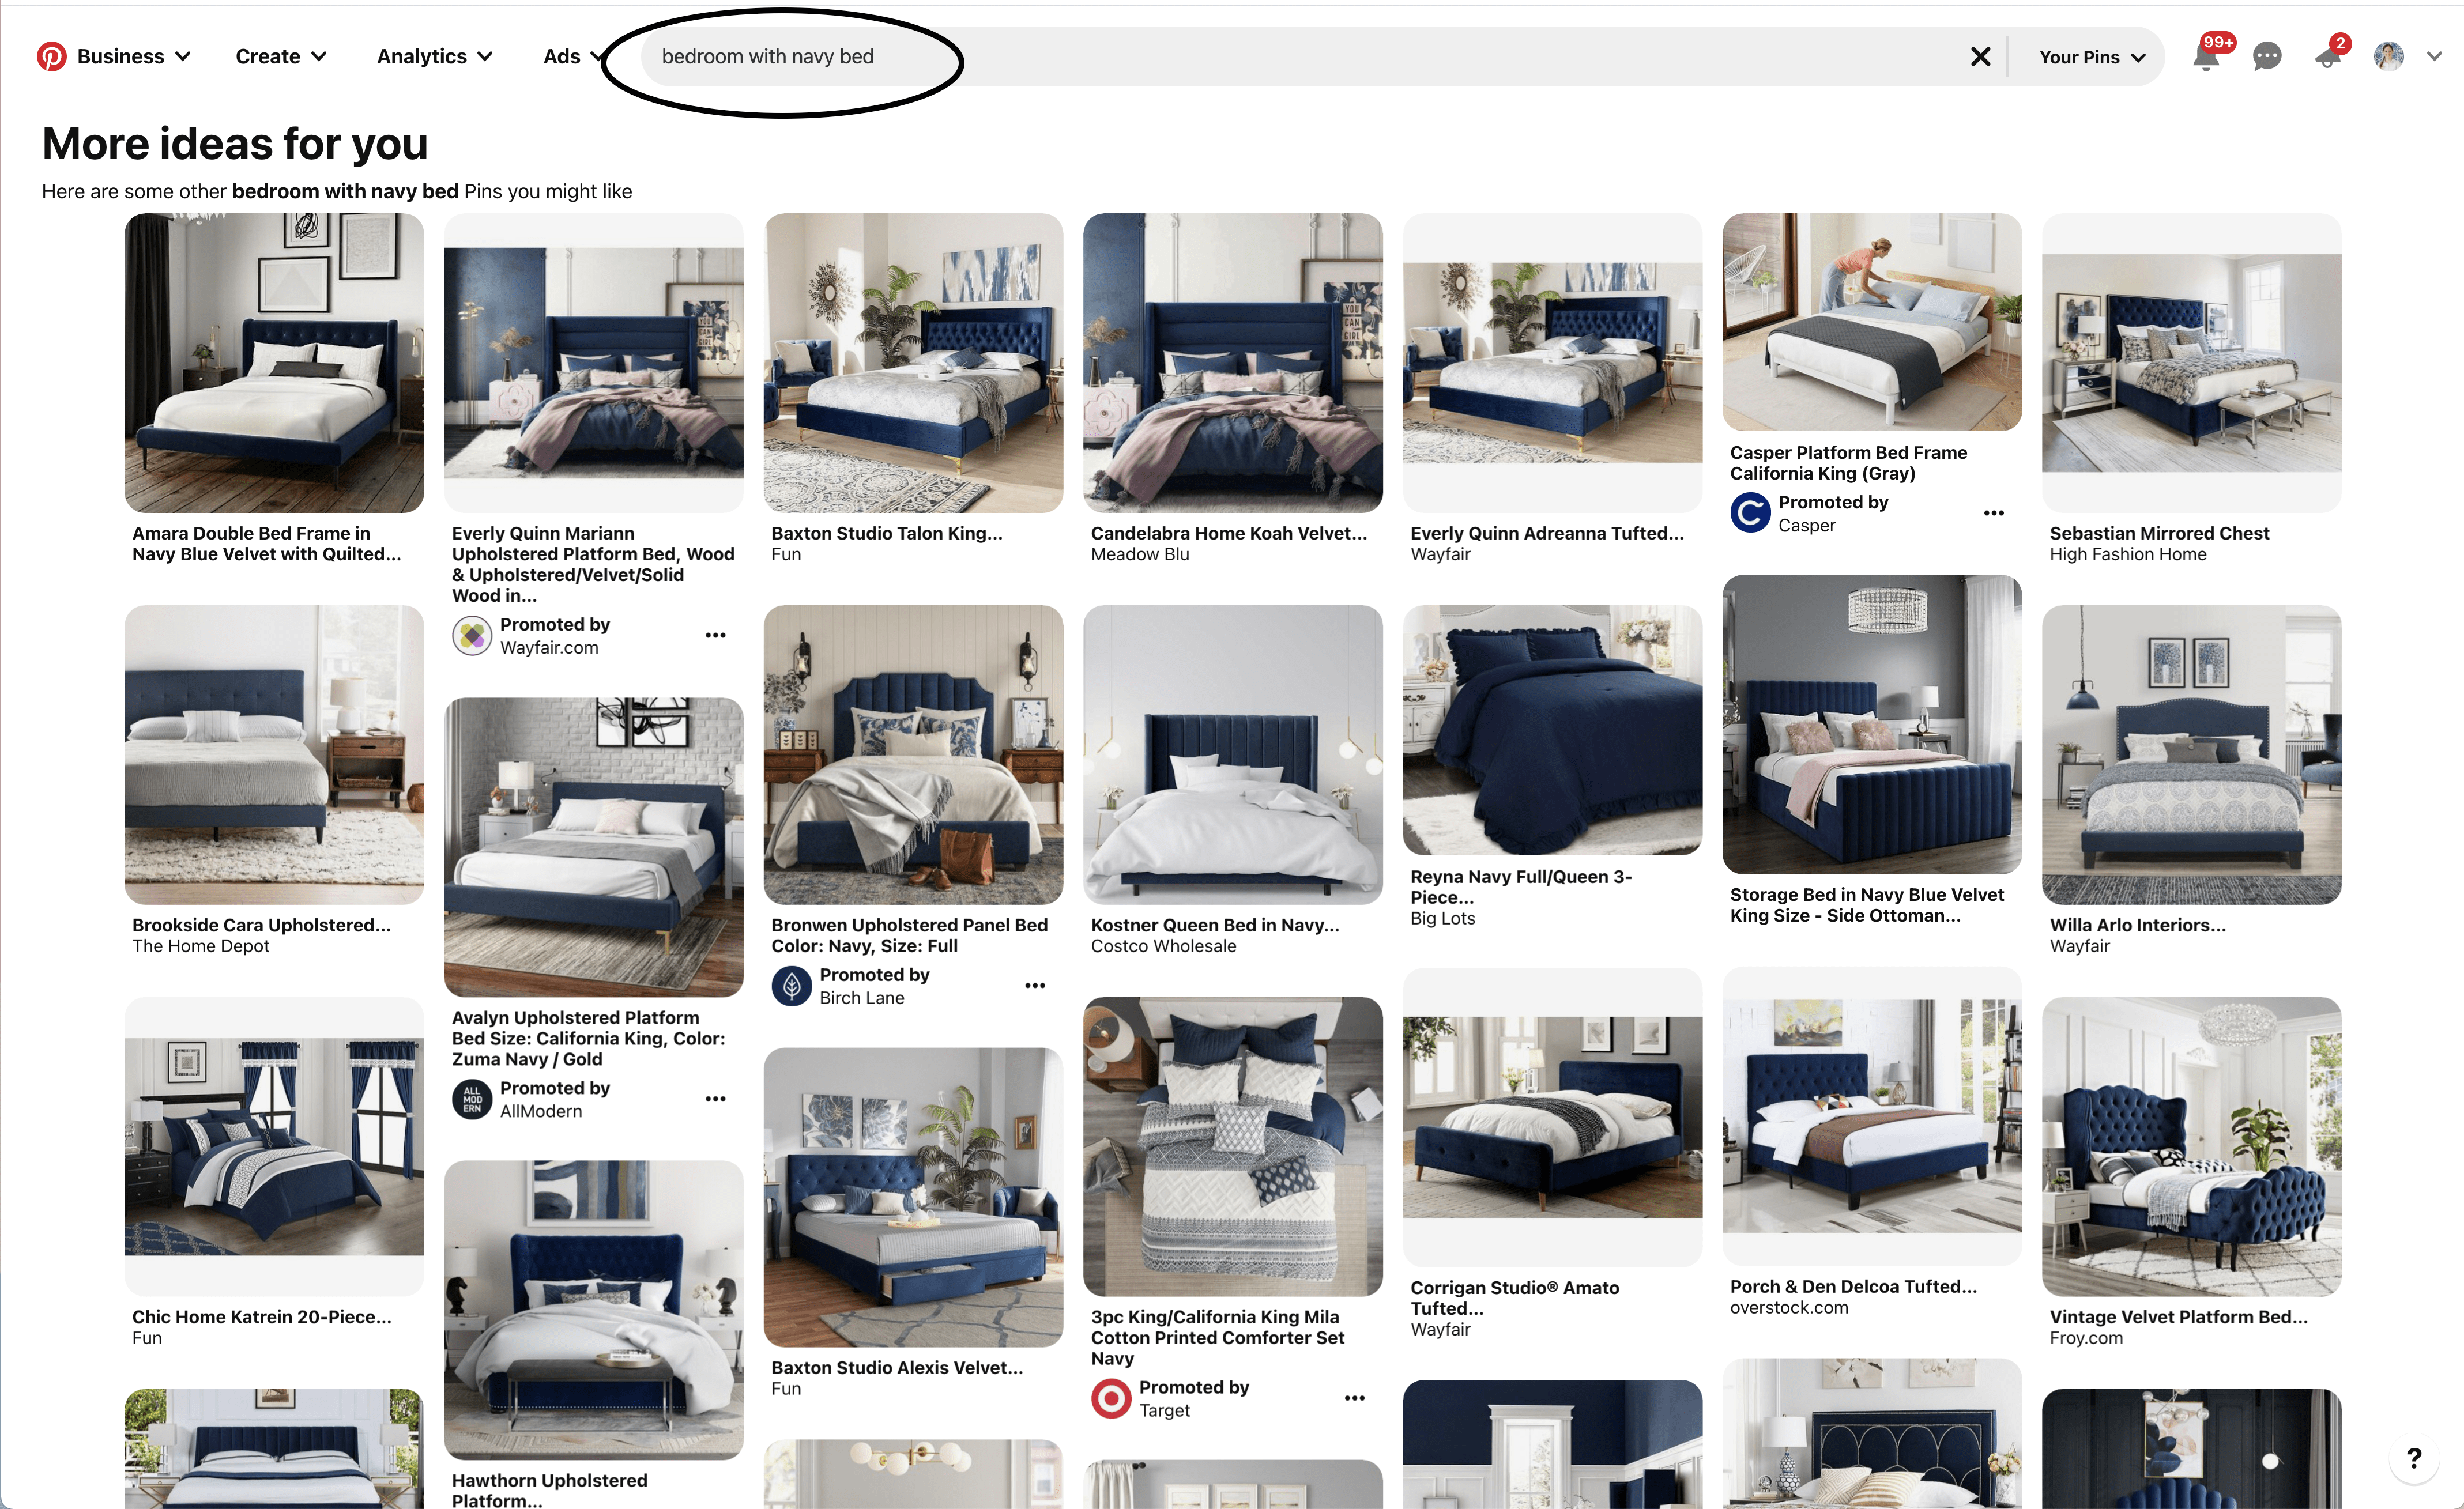
I recommend using either Google Images or Pinterest to find a plethora of inspiration images for your design boards. When looking for images, use a variety of search words based on what you’re looking for. Here are some examples:
- Style – bohemian kitchen | rustic family room | coastal bathroom
- Feel – calming bedroom | bright kitchen | happy playroom
- Specific design elements – bedroom with wallpaper | kitchen with white cabinets | yellow nursery
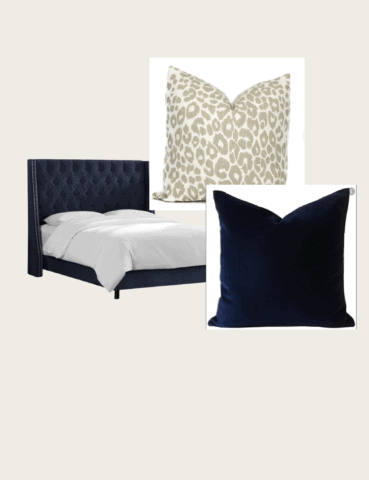
For this post, I am going to use our upcoming Master Bedroom makeover as my example. I know for sure we aren’t replacing our bed, but I don’t have many other concrete ideas. So I started with “bedroom with navy bed” to find some inspiration images.
Saving Images
When you come across images you like, you will need to save them to your device so you can access them later. There are two main ways to to this:
- Save As – When hovering over any image you want to save, right click on your mouse and select “Save As.” Then designate a folder on your device for all your inspiration images.
- Screen Grab – Oftentimes, saving images can be tricky because of various animation and zoom effects. In these instances, using a screen grab tool comes in very handy! (Pssst – Not sure what this is? I show this handy shortcut in the video at the bottom of this post!)
No matter how you save your images, I highly suggest organizing them on your device so you can quickly access them when making your design boards in Canva.
Step 2: Create Inspiration Boards
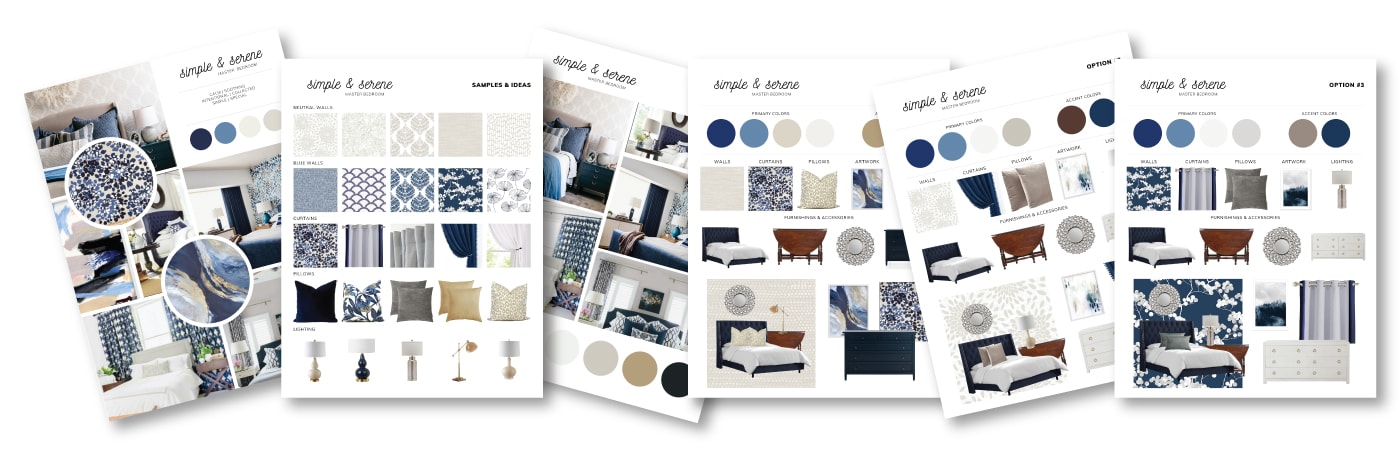
Creating an Inspiration Board is the best place to start since it will help guide all your other design choices. As such, I have included 2 different Inspiration Board layouts in the templates.
When you first open the Design Board Templates, I highly recommend adding your own file name and titles to all the Inspiration and Design Boards.
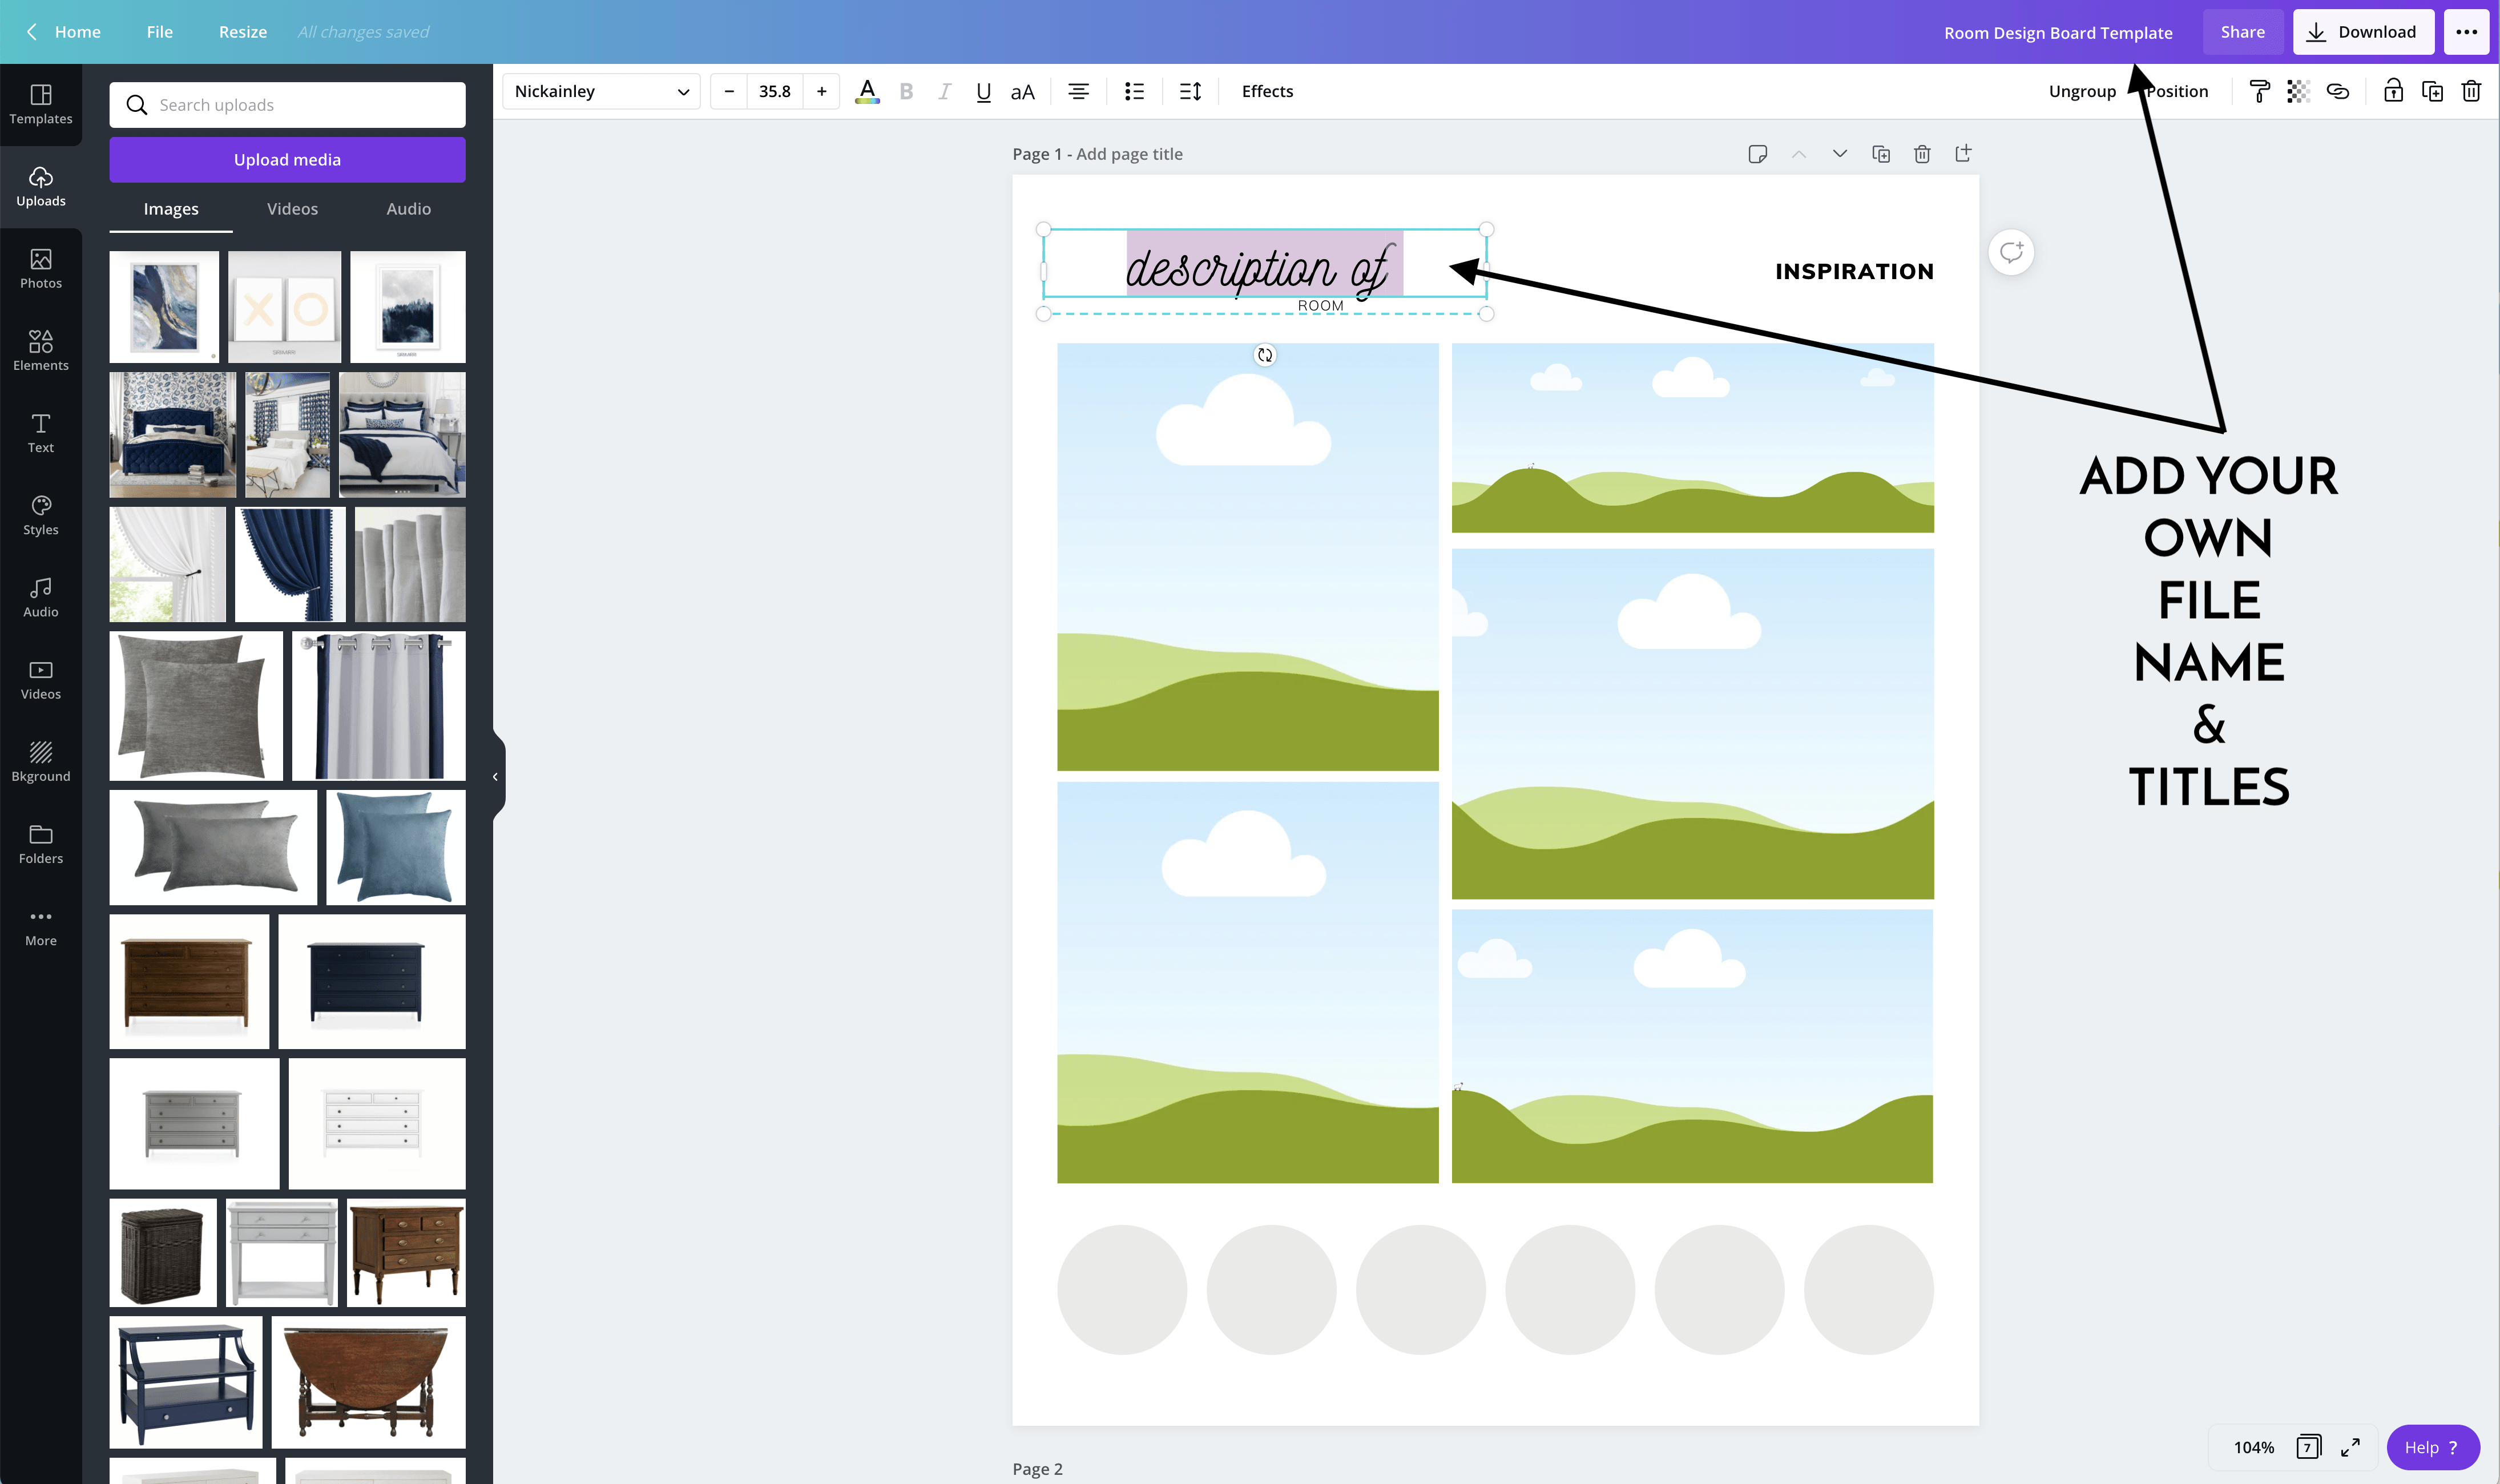
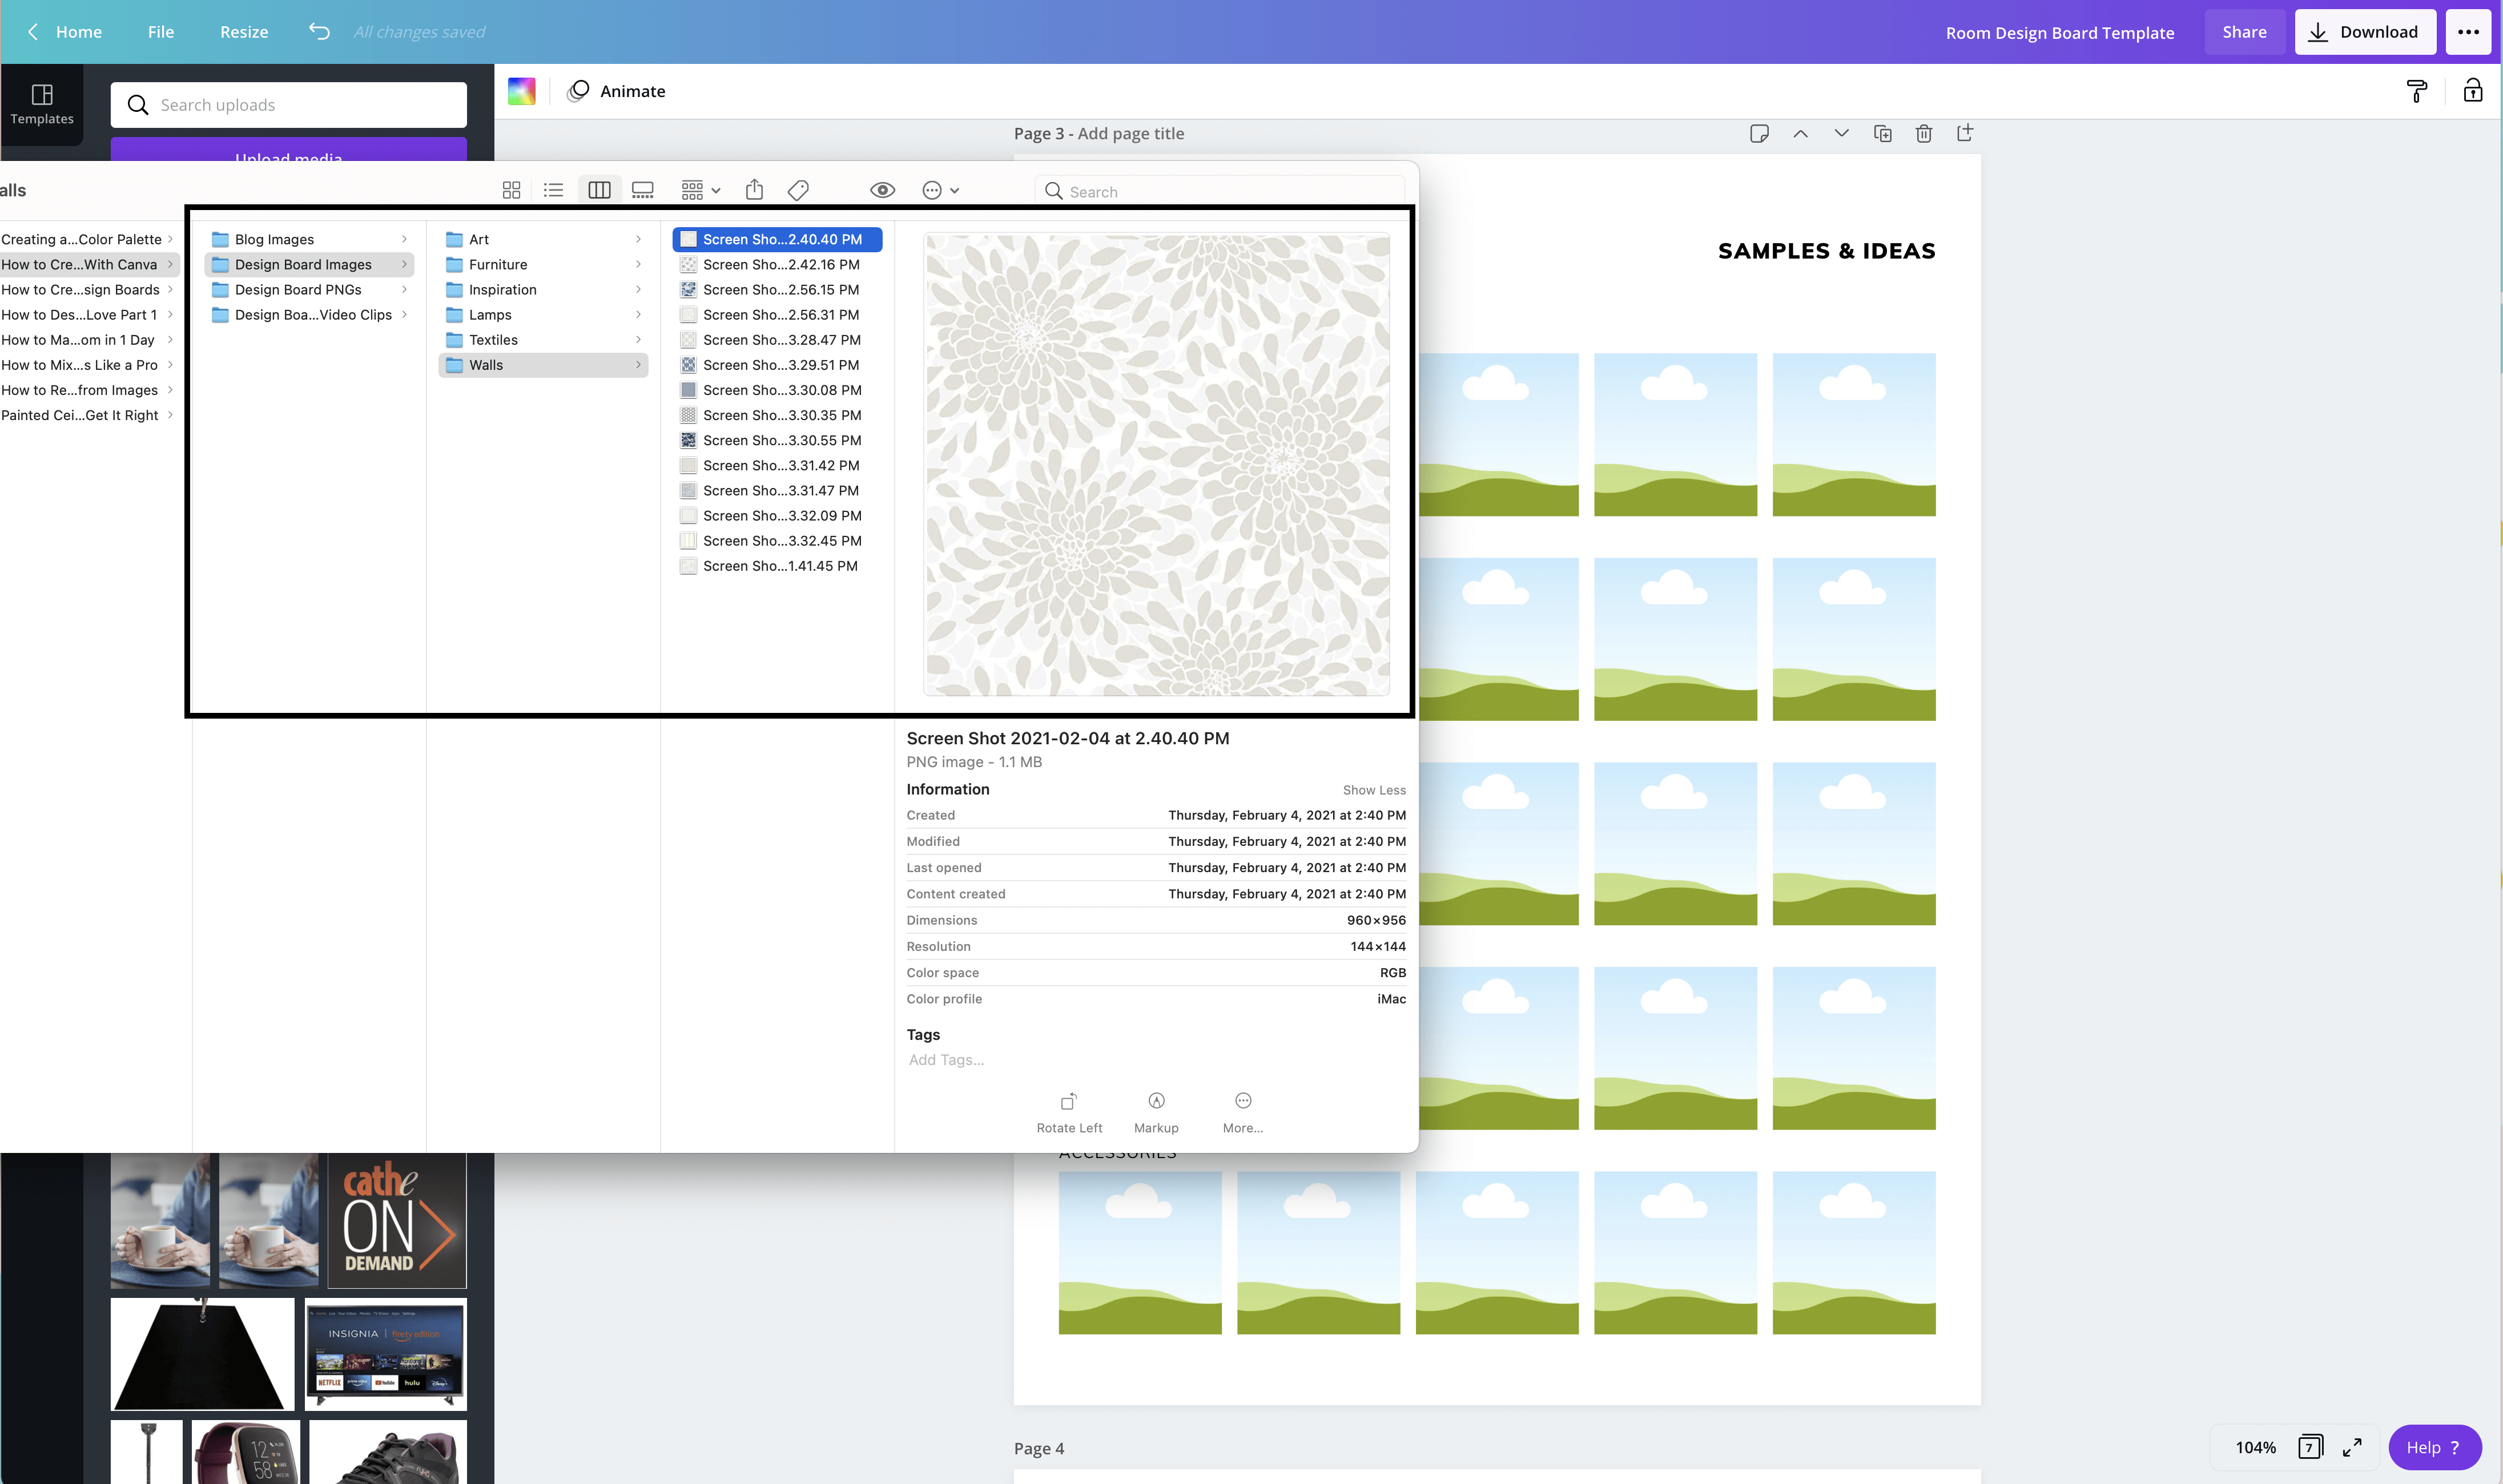
Next, click on the Uploads button along the left-hand side menu, and navigate to the folder where you saved your Inspiration images. You can select one or all images to upload at one time.
SHORT CUT! You can also perform the upload process by simply dragging-and-dropping your images from your folder to the canvas within Canva!

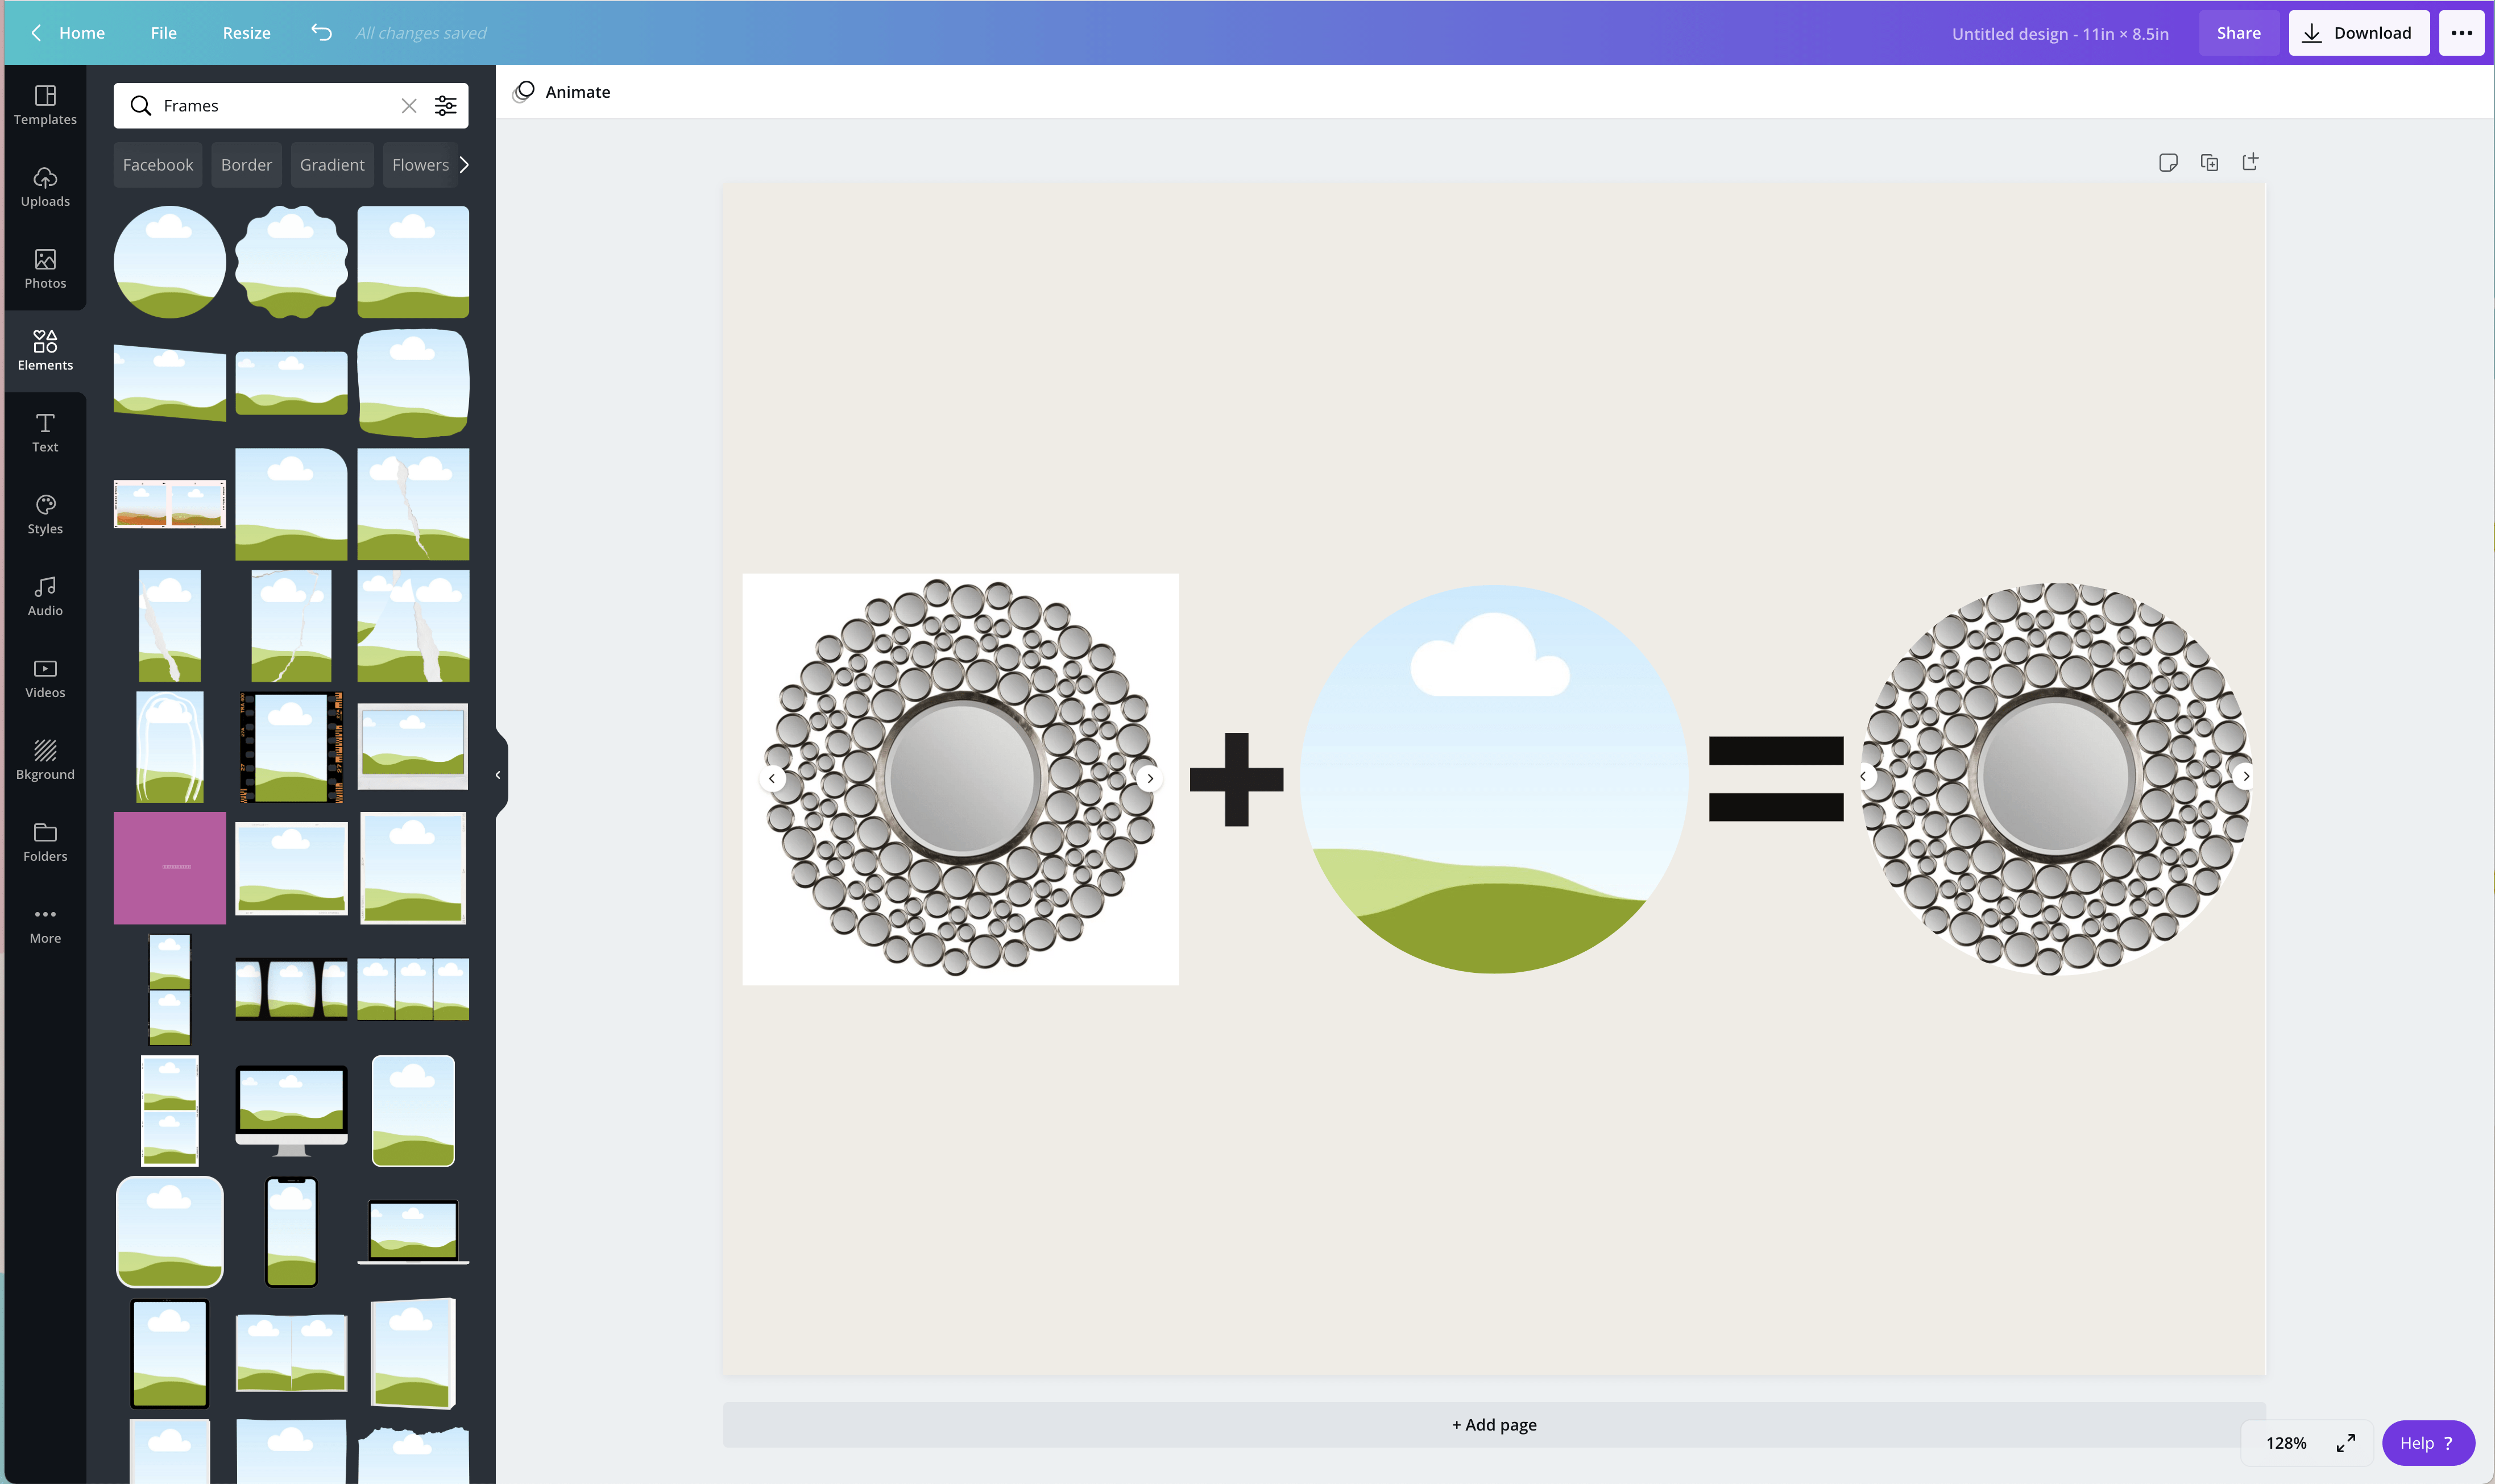
Once your images are uploaded, they will populate along the left-hand side of your screen. To add them to your Inspiration Board, simply drag-and-drop any image into any photo placeholder (the grass+sky boxes are called Frames, which are essentially placeholders you can drop any image into).

A Few Quick Tips
- You can replace any picture by simply dragging-and-dropping a new photo over the old one.
- You can zoom in/out by double clicking the photo and using the corner handles to adjust size.
- You can change what part of the picture is centered in the frame by double-clicking on the photo and moving it around as desired.
Once you are fully satisfied with your collage, your next step will be to use those images to dictate your color palette, which will be reflected in the 6 circle along the bottom of the collage.
Start by selecting one of the circles and then clicking on the color change tool in the upper left side of the toolbar.
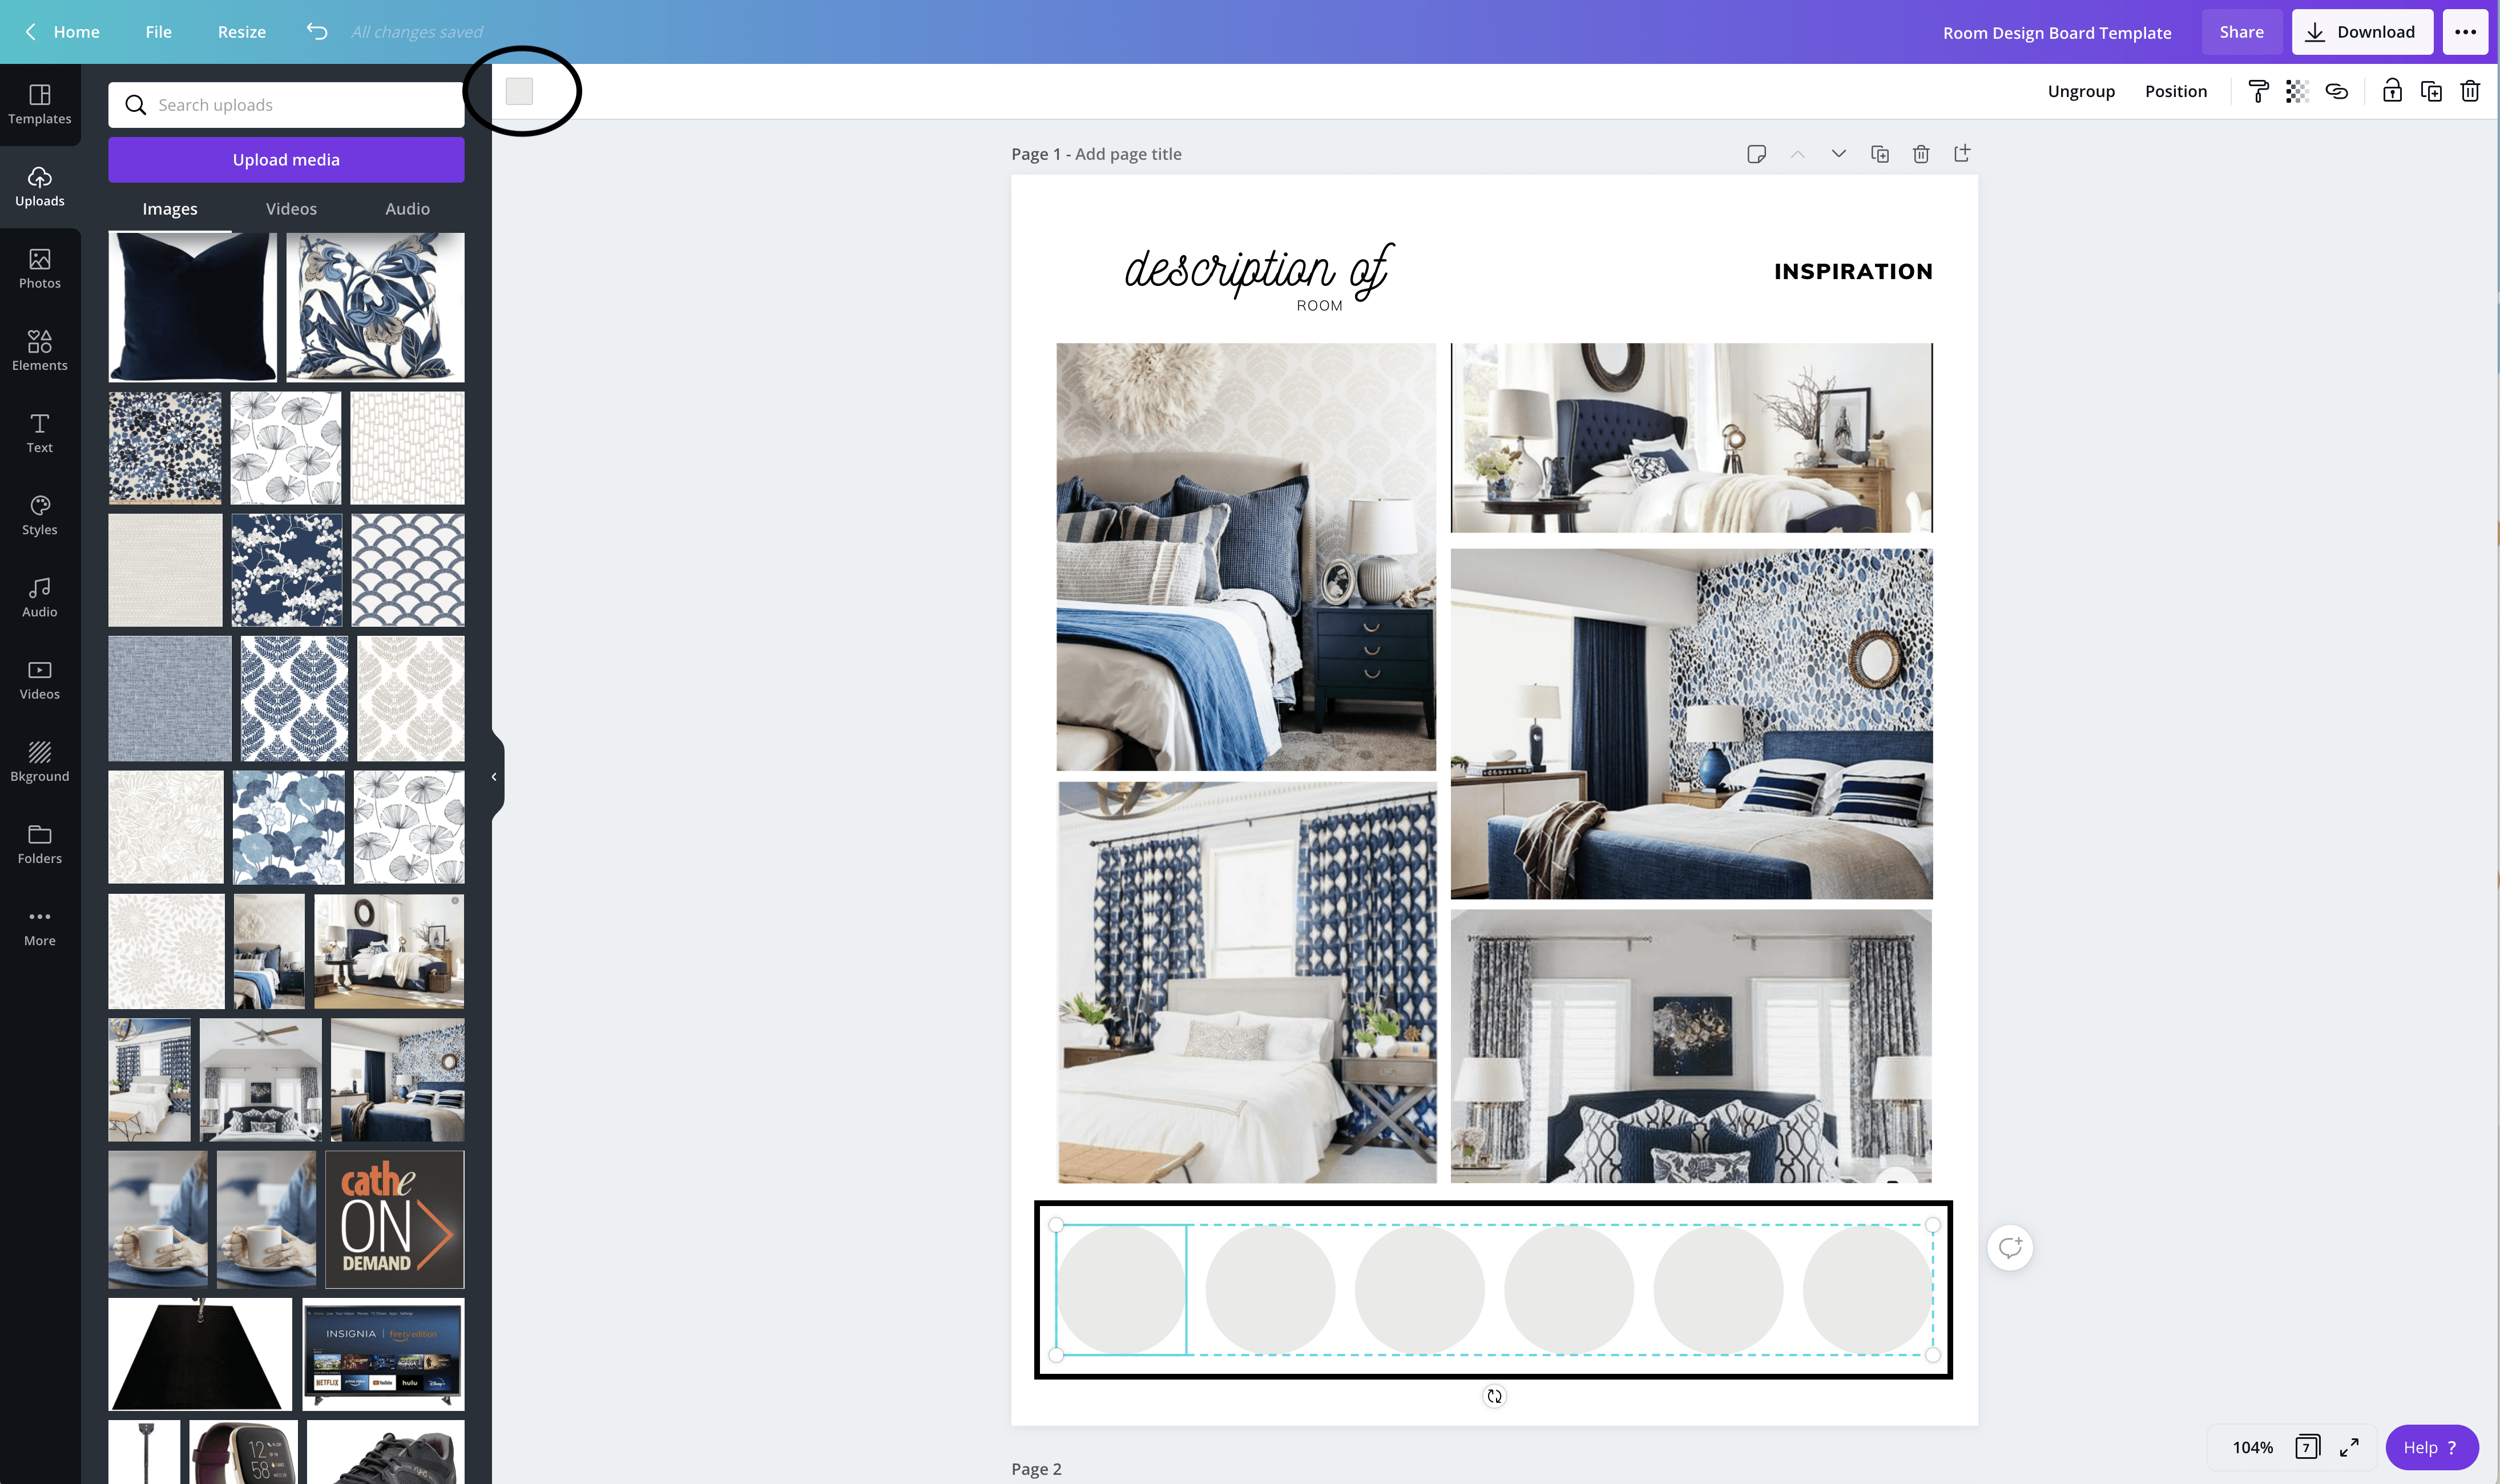
This will open up an array of color options.
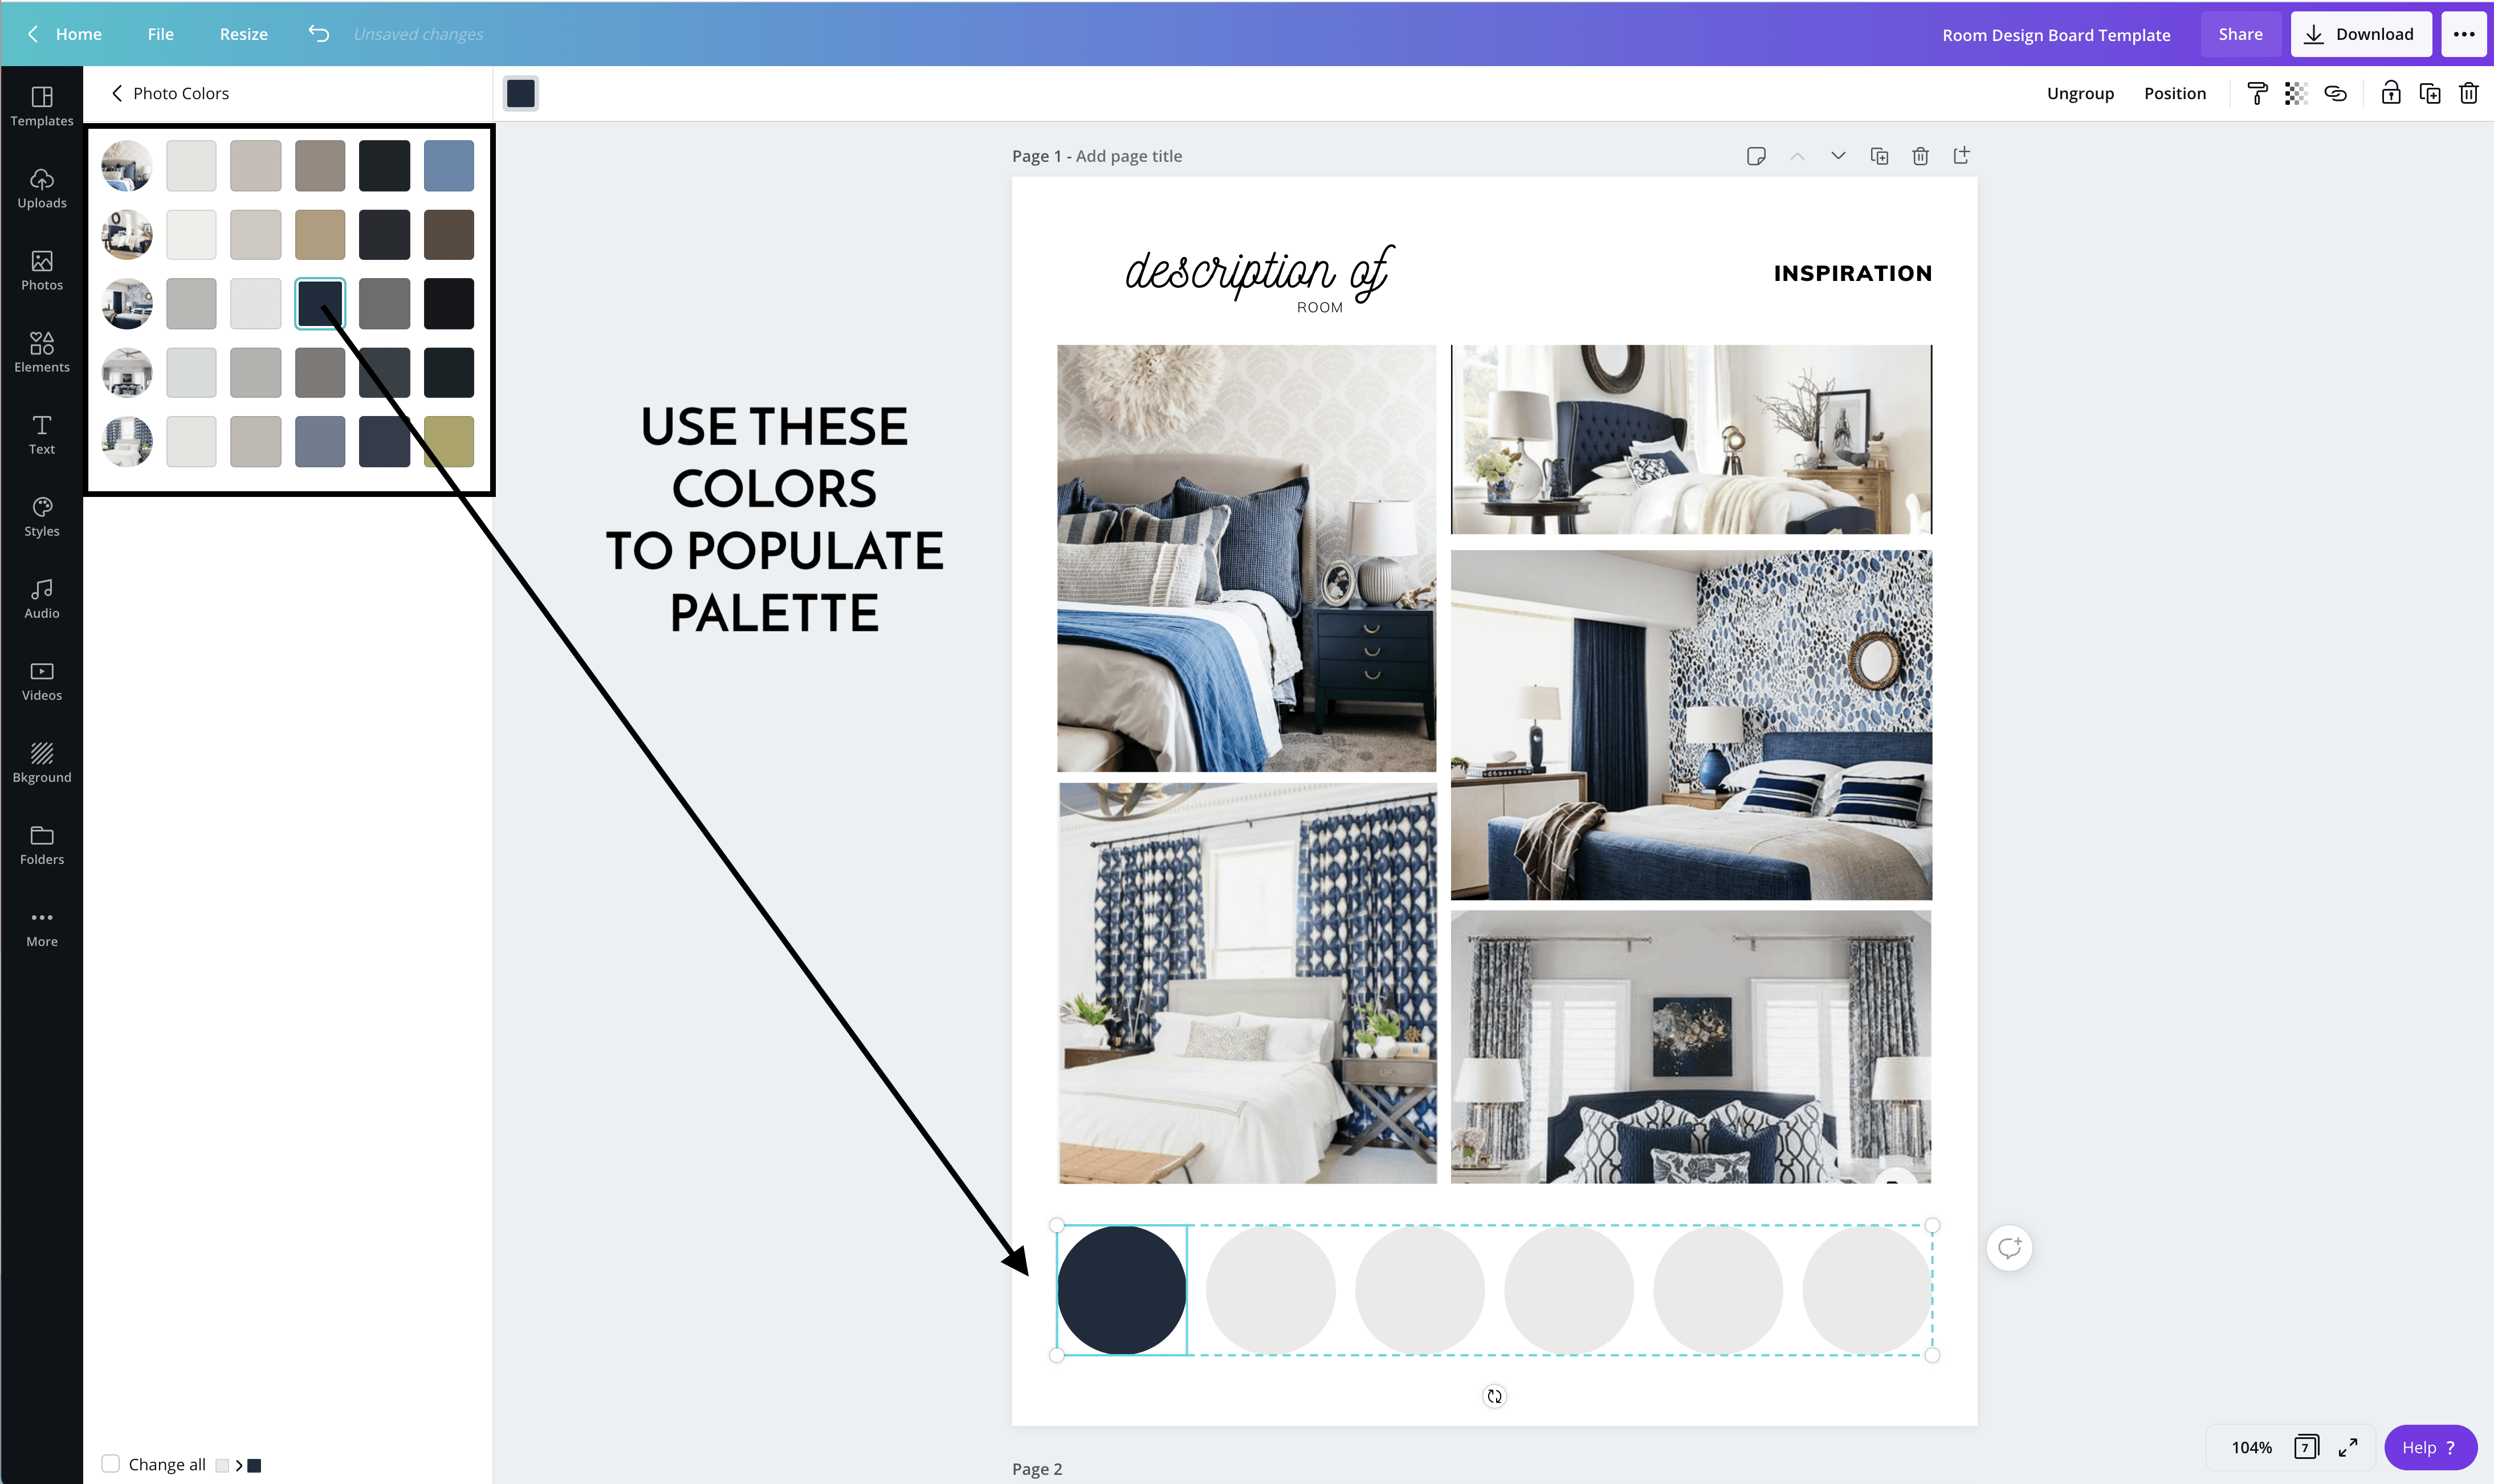
Notice, in the middle of the color menu, is a section called “Photo Colors.” These are the various shades reflected in the pictures you just added to your Inspiration Board.
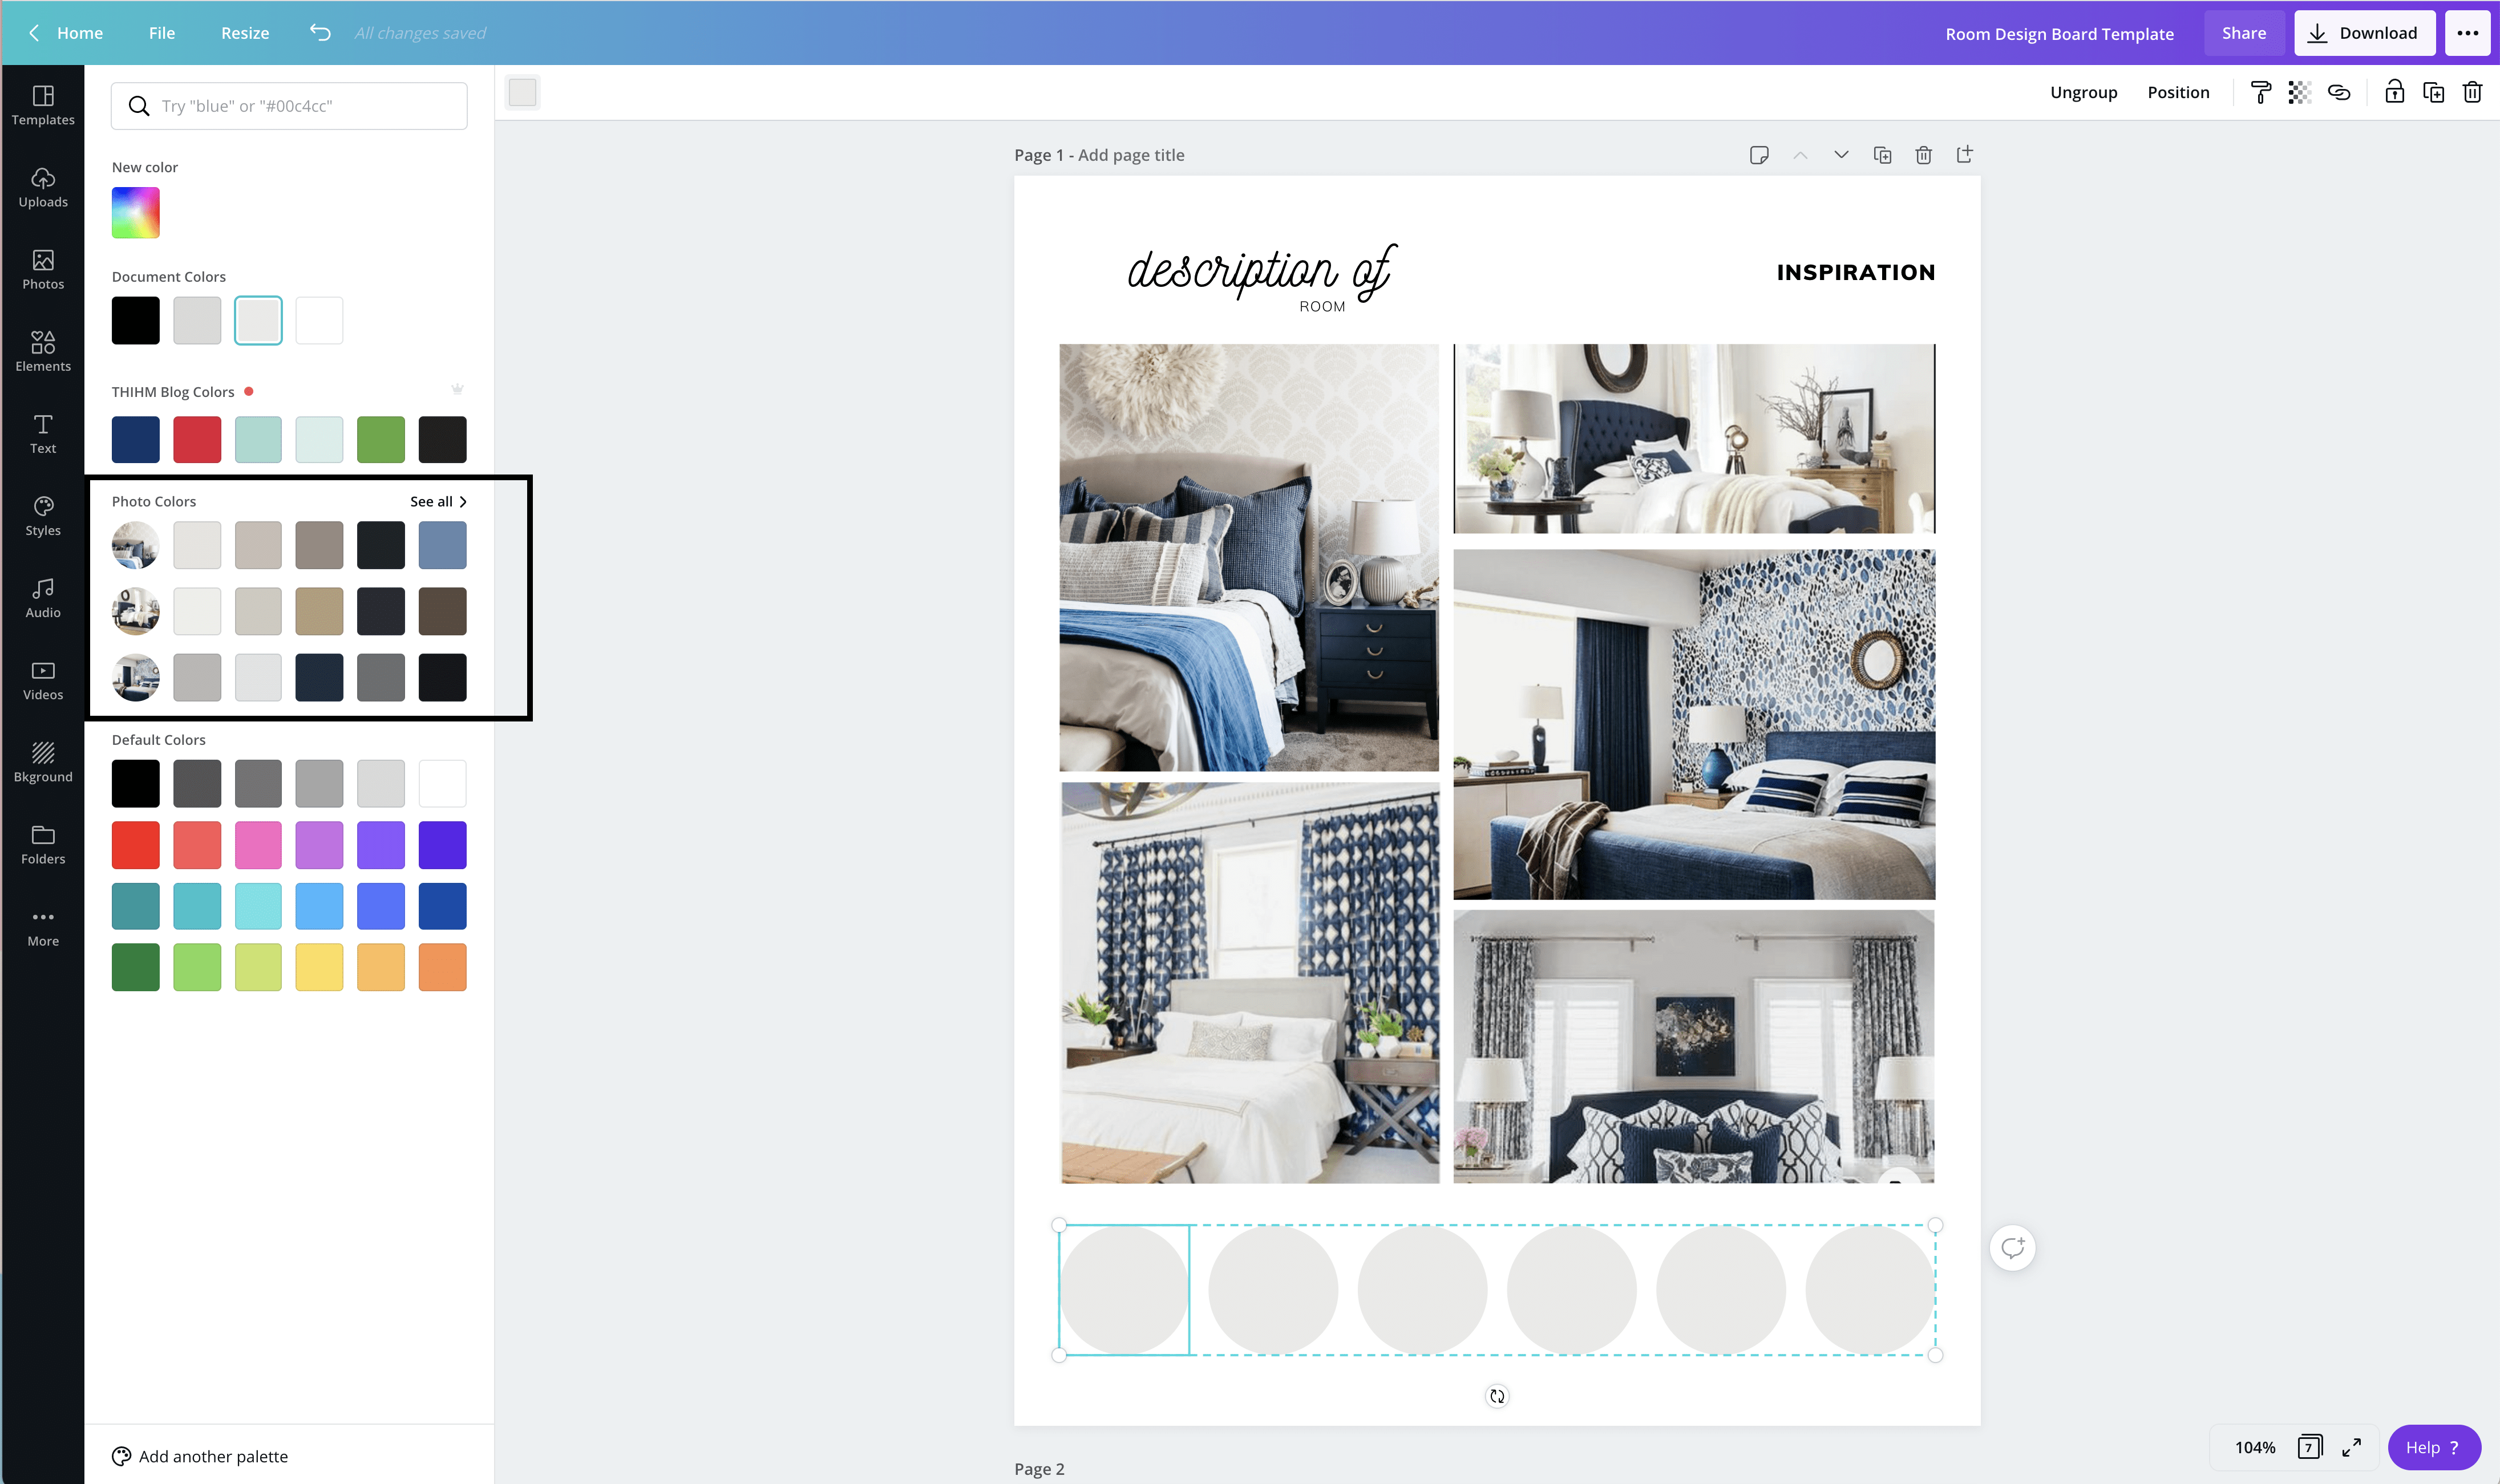
When you click on “See All,” it will open up all the photos currently in use on your canvas. You can then select and play around with all the various options to populate your room’s color palette.
I should point out that you certainly don’t have to use these color recommendations. If you have specific colors you want or need to use (like existing wall, furniture, fabric, or tile colors), you can add those in using the “New Color” button. However, if you’re stumped on how to pull together a coordinating color palette, the “Photo Colors” are a great place to start and then adjust manually as needed.
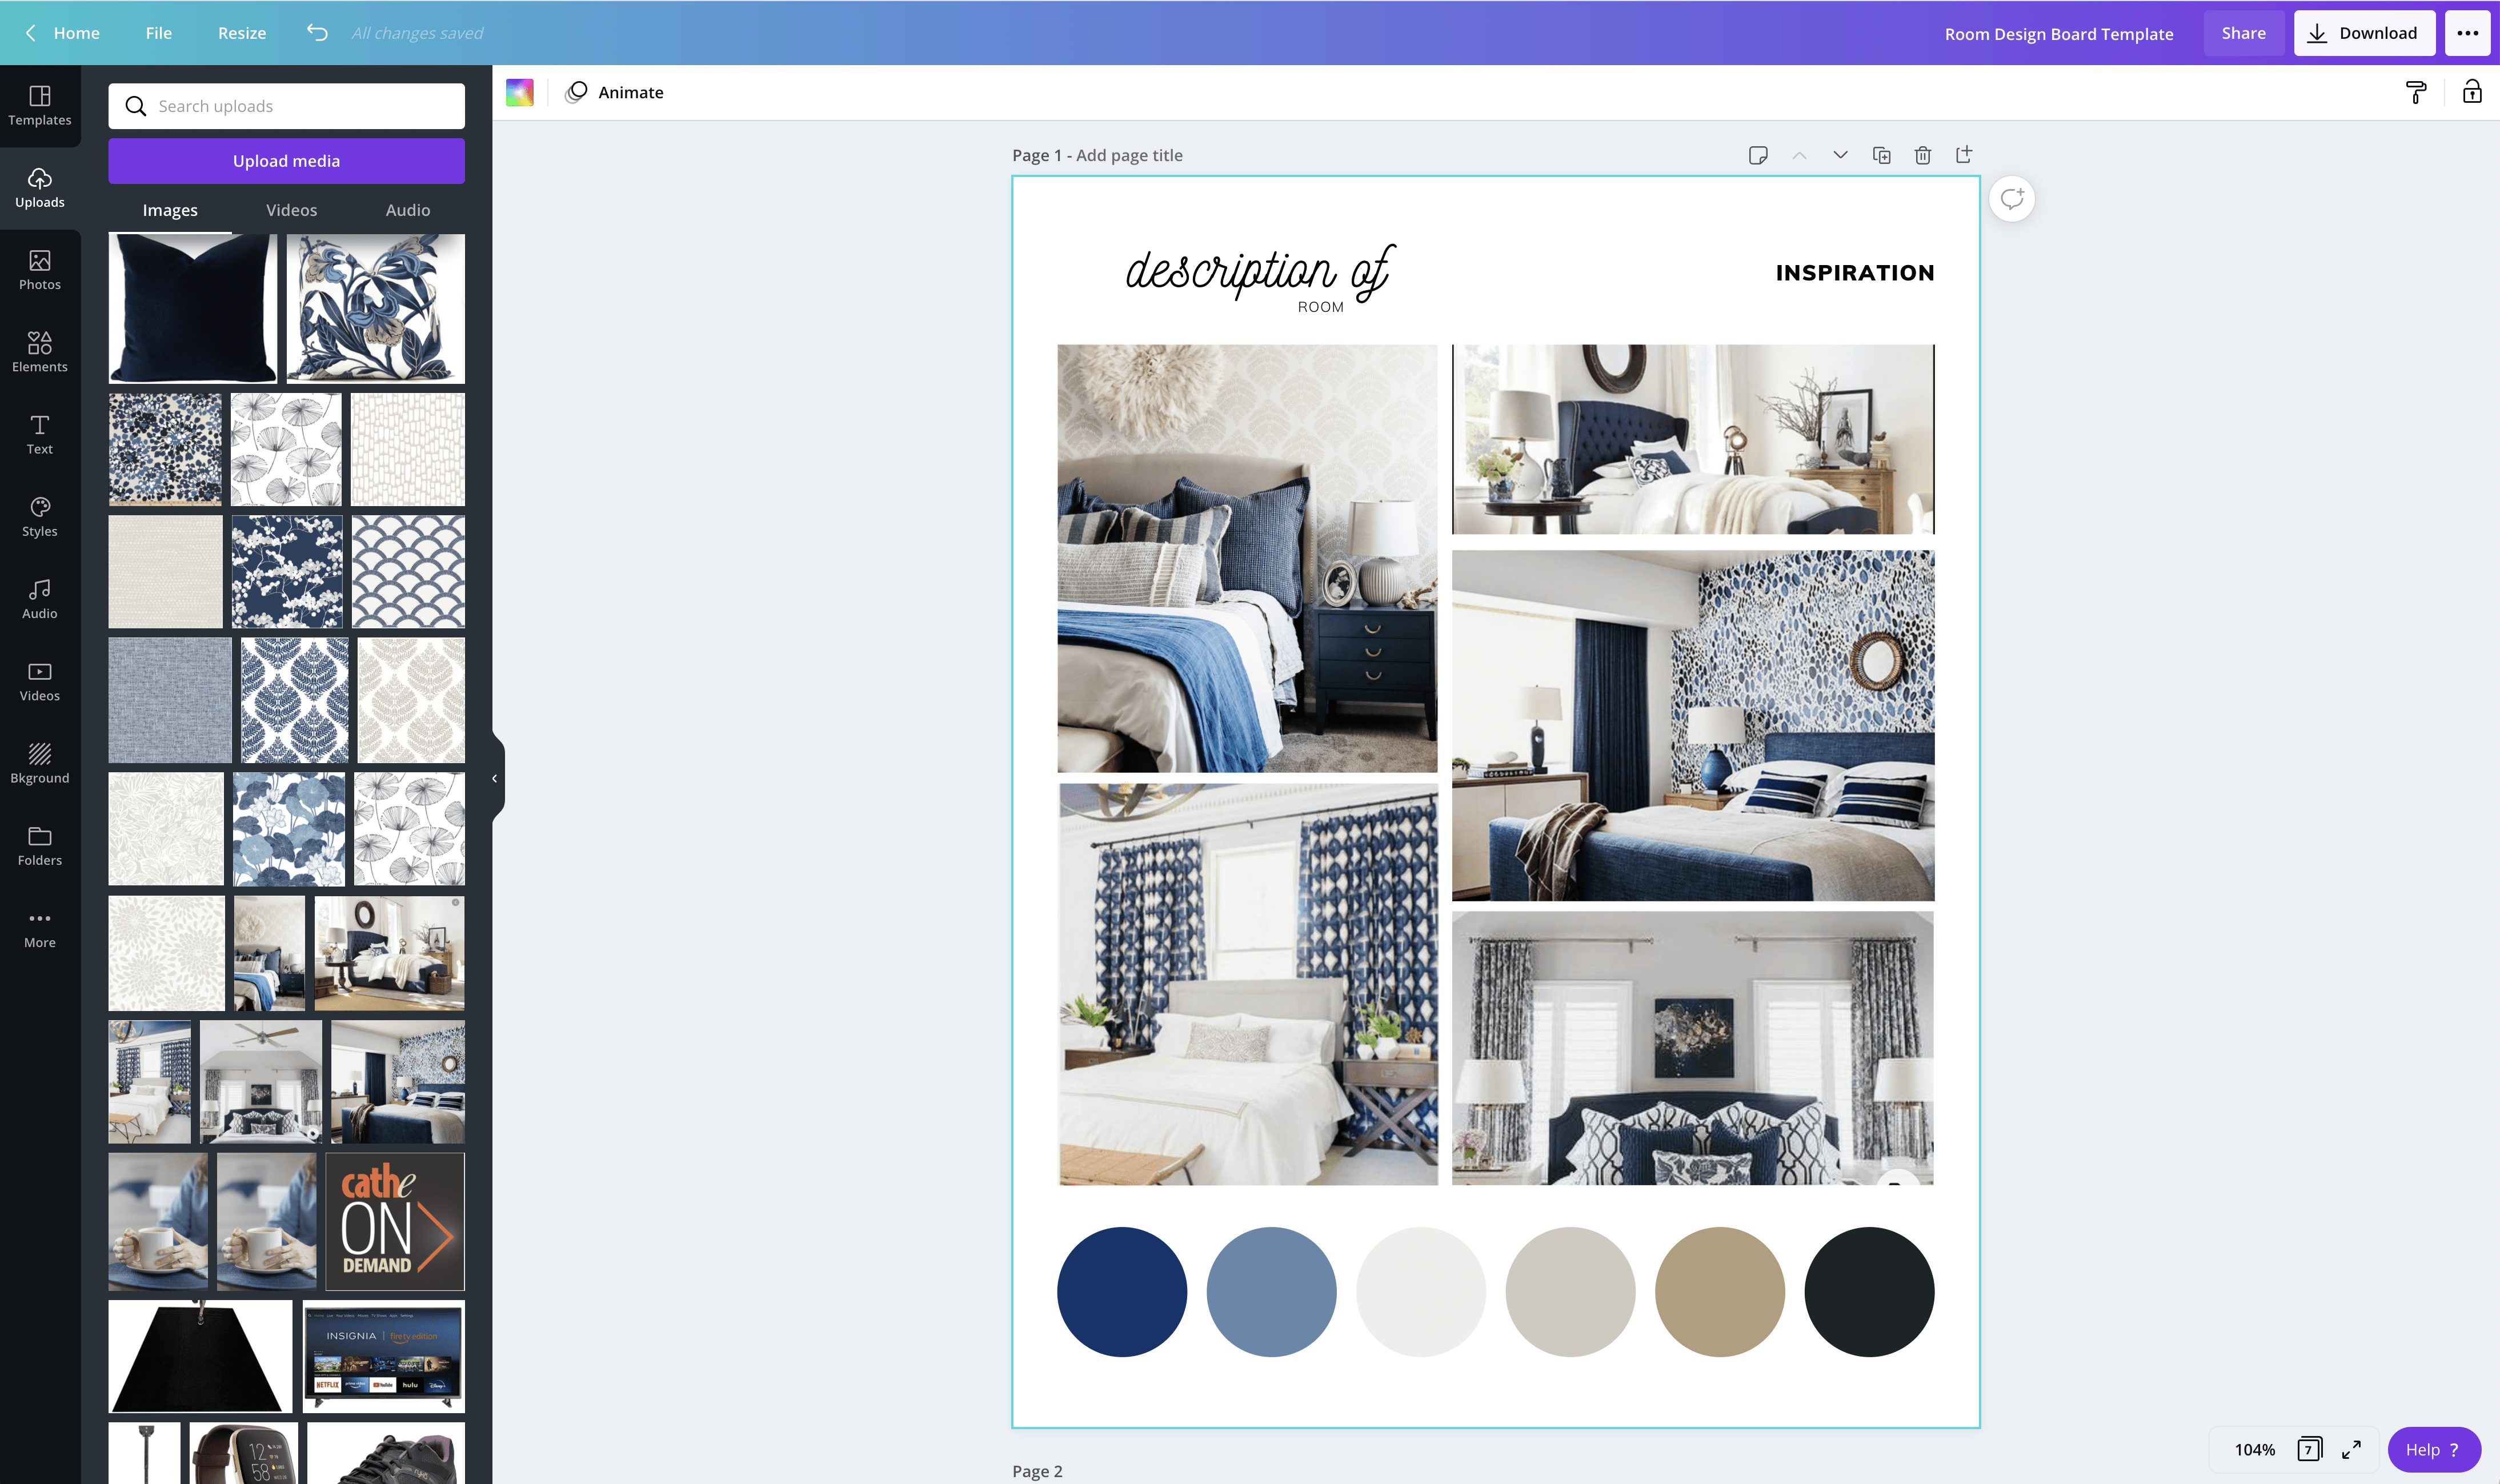
Once you are completely satisfied with the look and feel of your Inspiration Board(s), you can move on to collecting sample products and ideas for your room!
Step 3: Collect Samples & Ideas
The next two pages are places for you to collect a whole bunch of potential products and ideas to play with later in the design board process. The layout is fairly simple, featuring broad category names with 5 picture placeholders under each one. To keep yourself organized, swap the included titles to the various elements in your specific room.
For my bedroom, I included categories for Walls, Lighting, Pillows, and Walls. Here are some other ideas:
Want to save this post?
- Kitchen might have categories for Cabinets, Tile, Hardware, Appliances.
- Family Room might have categories for Rugs, Couches, Curtains, and Pillows.
- Basement might have categories for Flooring, Walls, Storage.
TIP! I always like to include a category for “Existing Items” so I am sure to work the current furnishings, wall colors, etc into the design (if they are staying, of course).
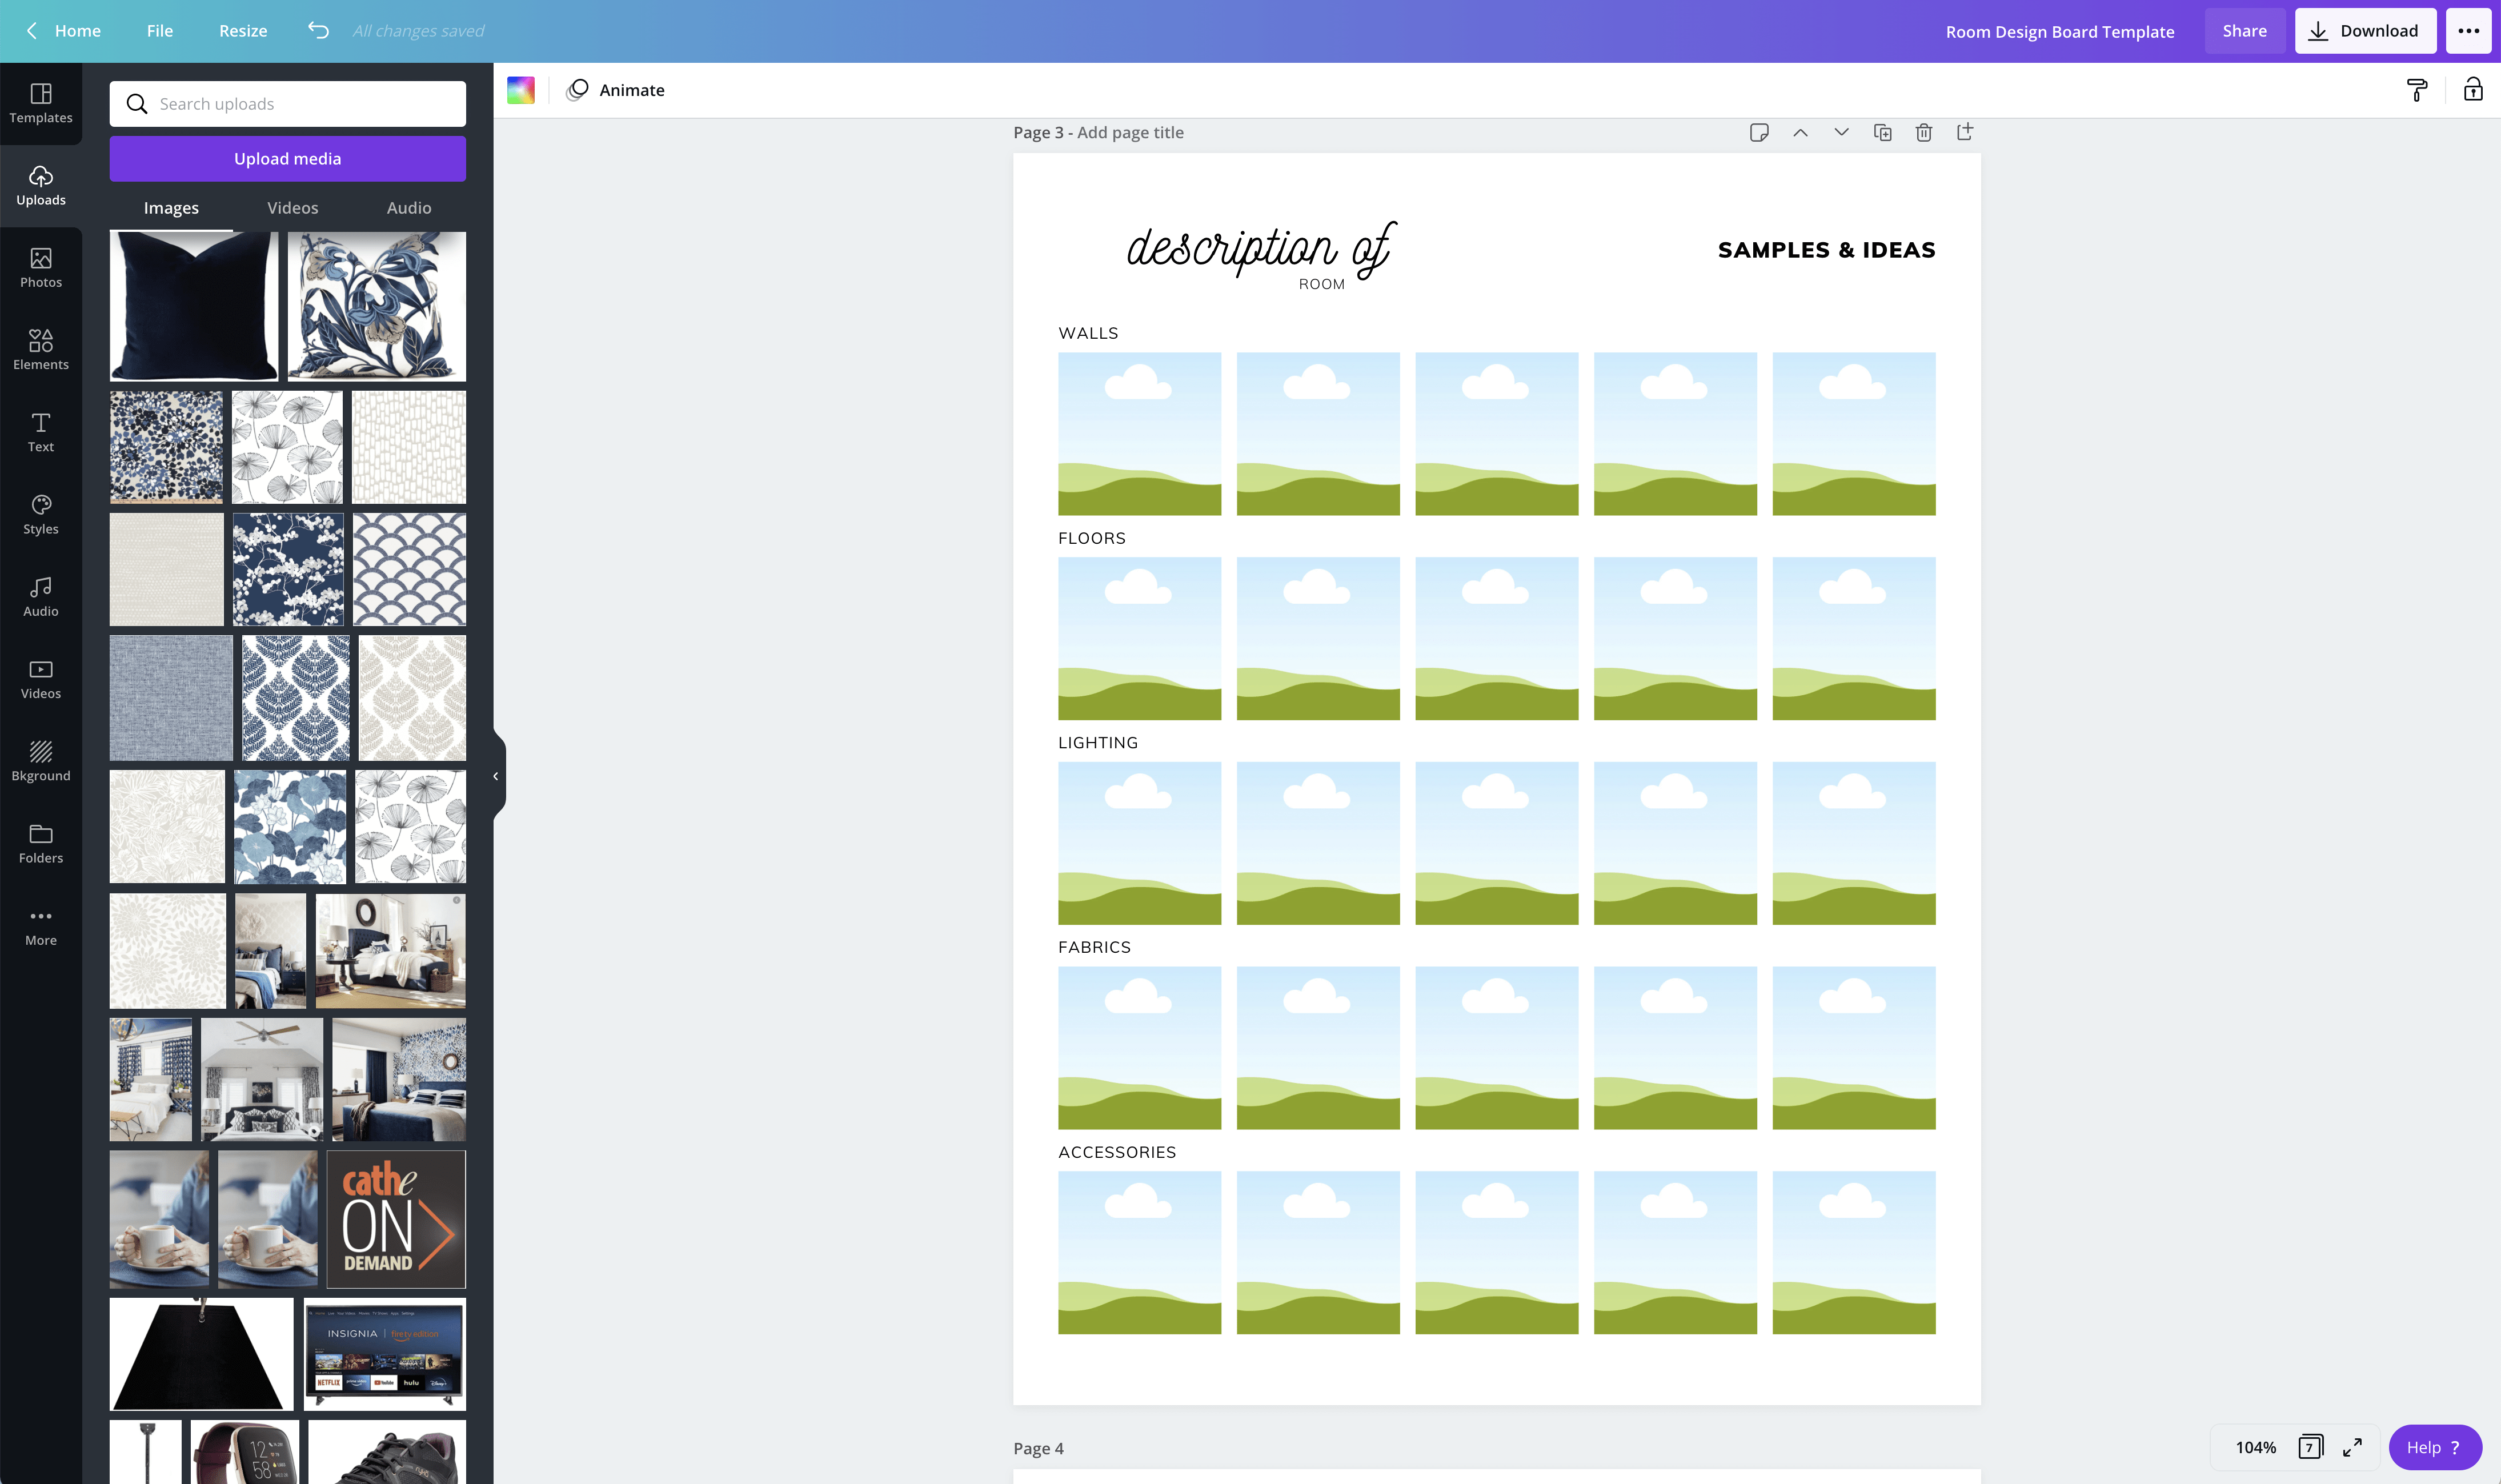
Next, you’re going to browse, browse and browse some more (all online)! Essentially, you want to find all sorts of options for the various categories that will eventually bring your vision to life.
For my bedroom makeover, I started with finding images of my current furnishings (e.g., bed, dresser, nightstand, mirror). I then sourced a bunch of different wallpapers, lamps, artwork, pillows, and dresser options that might work with my Inspiration Board and color palette.
TIP! These images don’t need to be the “exact” product you’d consider buying. Remember, you are just trying to get a sense for how things look together, so representations or “like” products are fine. For example, if you can’t decide between a neutral wallpaper or a colored one, find samples of both so you can experiment to see what you like best. Once you decide which color family you want to use, you can then hunt for THE specific wallpaper to install.
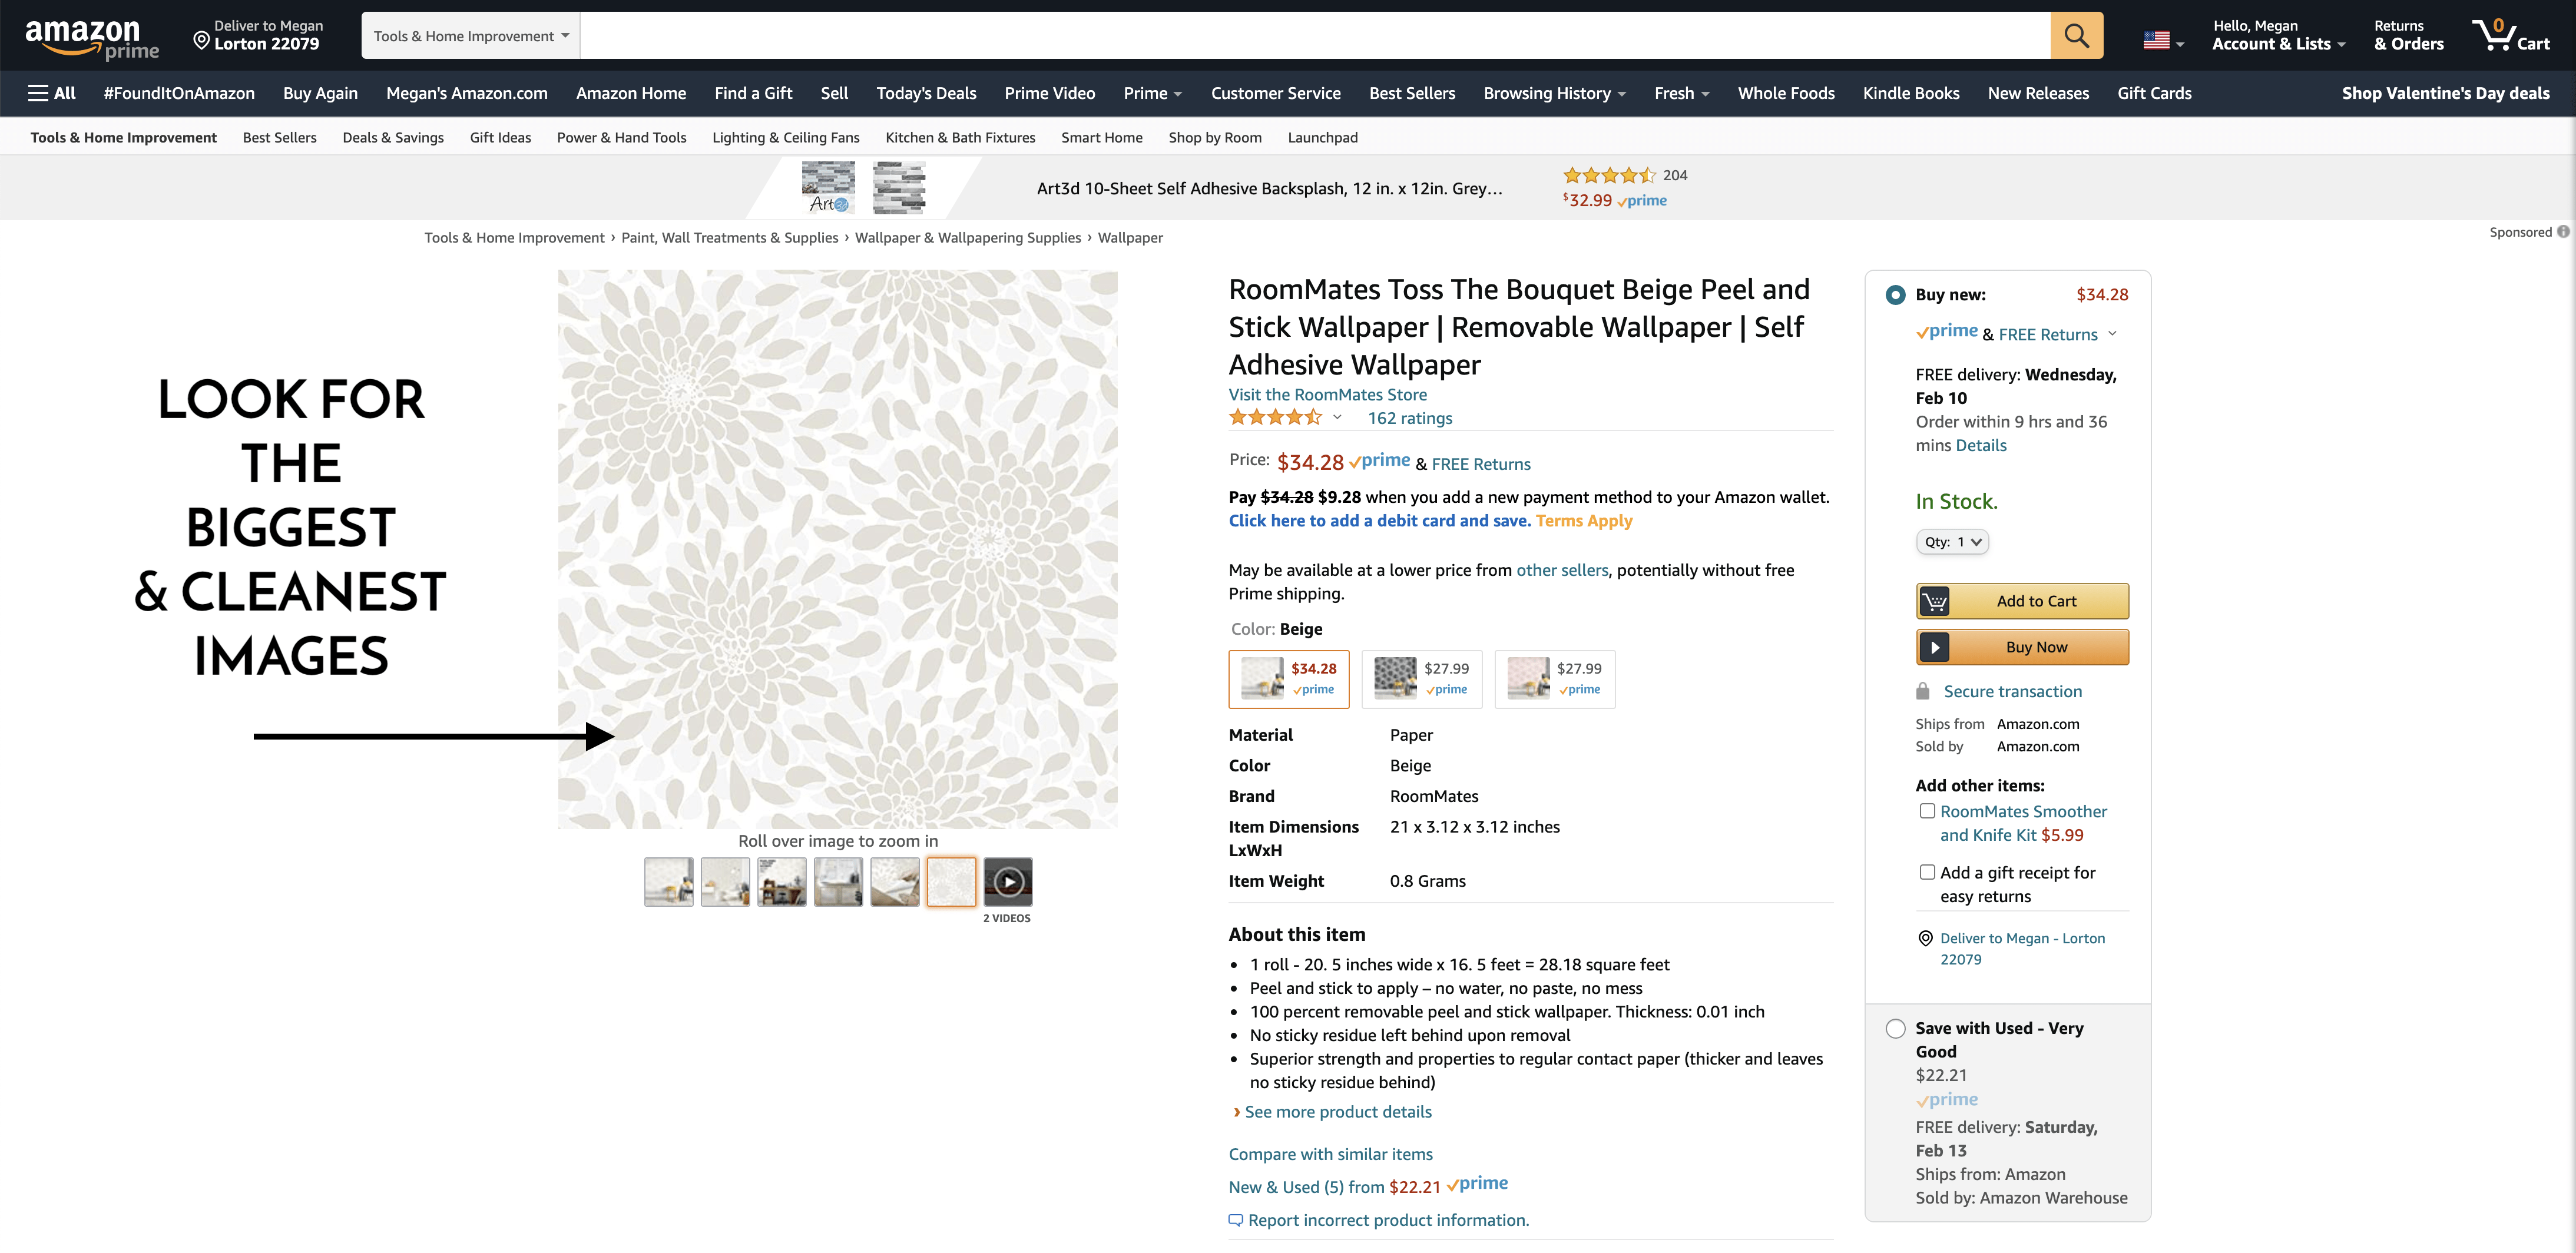
When saving images, I primarily like to use Google Images, Wayfair, Target, and Amazon. Not only do these sites have a vast selection of products, but most of them feature large, clean photos against white backgrounds.
Whether you Save As images or use the Screen Grab method, take the time to organize all your samples into the corresponding categories on your Samples & Ideas template.
Once you have a plethora of images saved, upload them to Canva (just as you did before) and drag-and-drop them into the Samples & Ideas pages of the template. This page is a such a great way to see a whole bunch of items at one glance, and can help you quickly identify promising combinations for your design boards!
TIP! Try to include as many different options for each category as possible so you can really play around with various looks. Notice, below, I didn’t include 5 different blue lamps. Instead, I uploaded cream, blue, silver, brass, and white versions so I can identify which color will look best with the other elements.
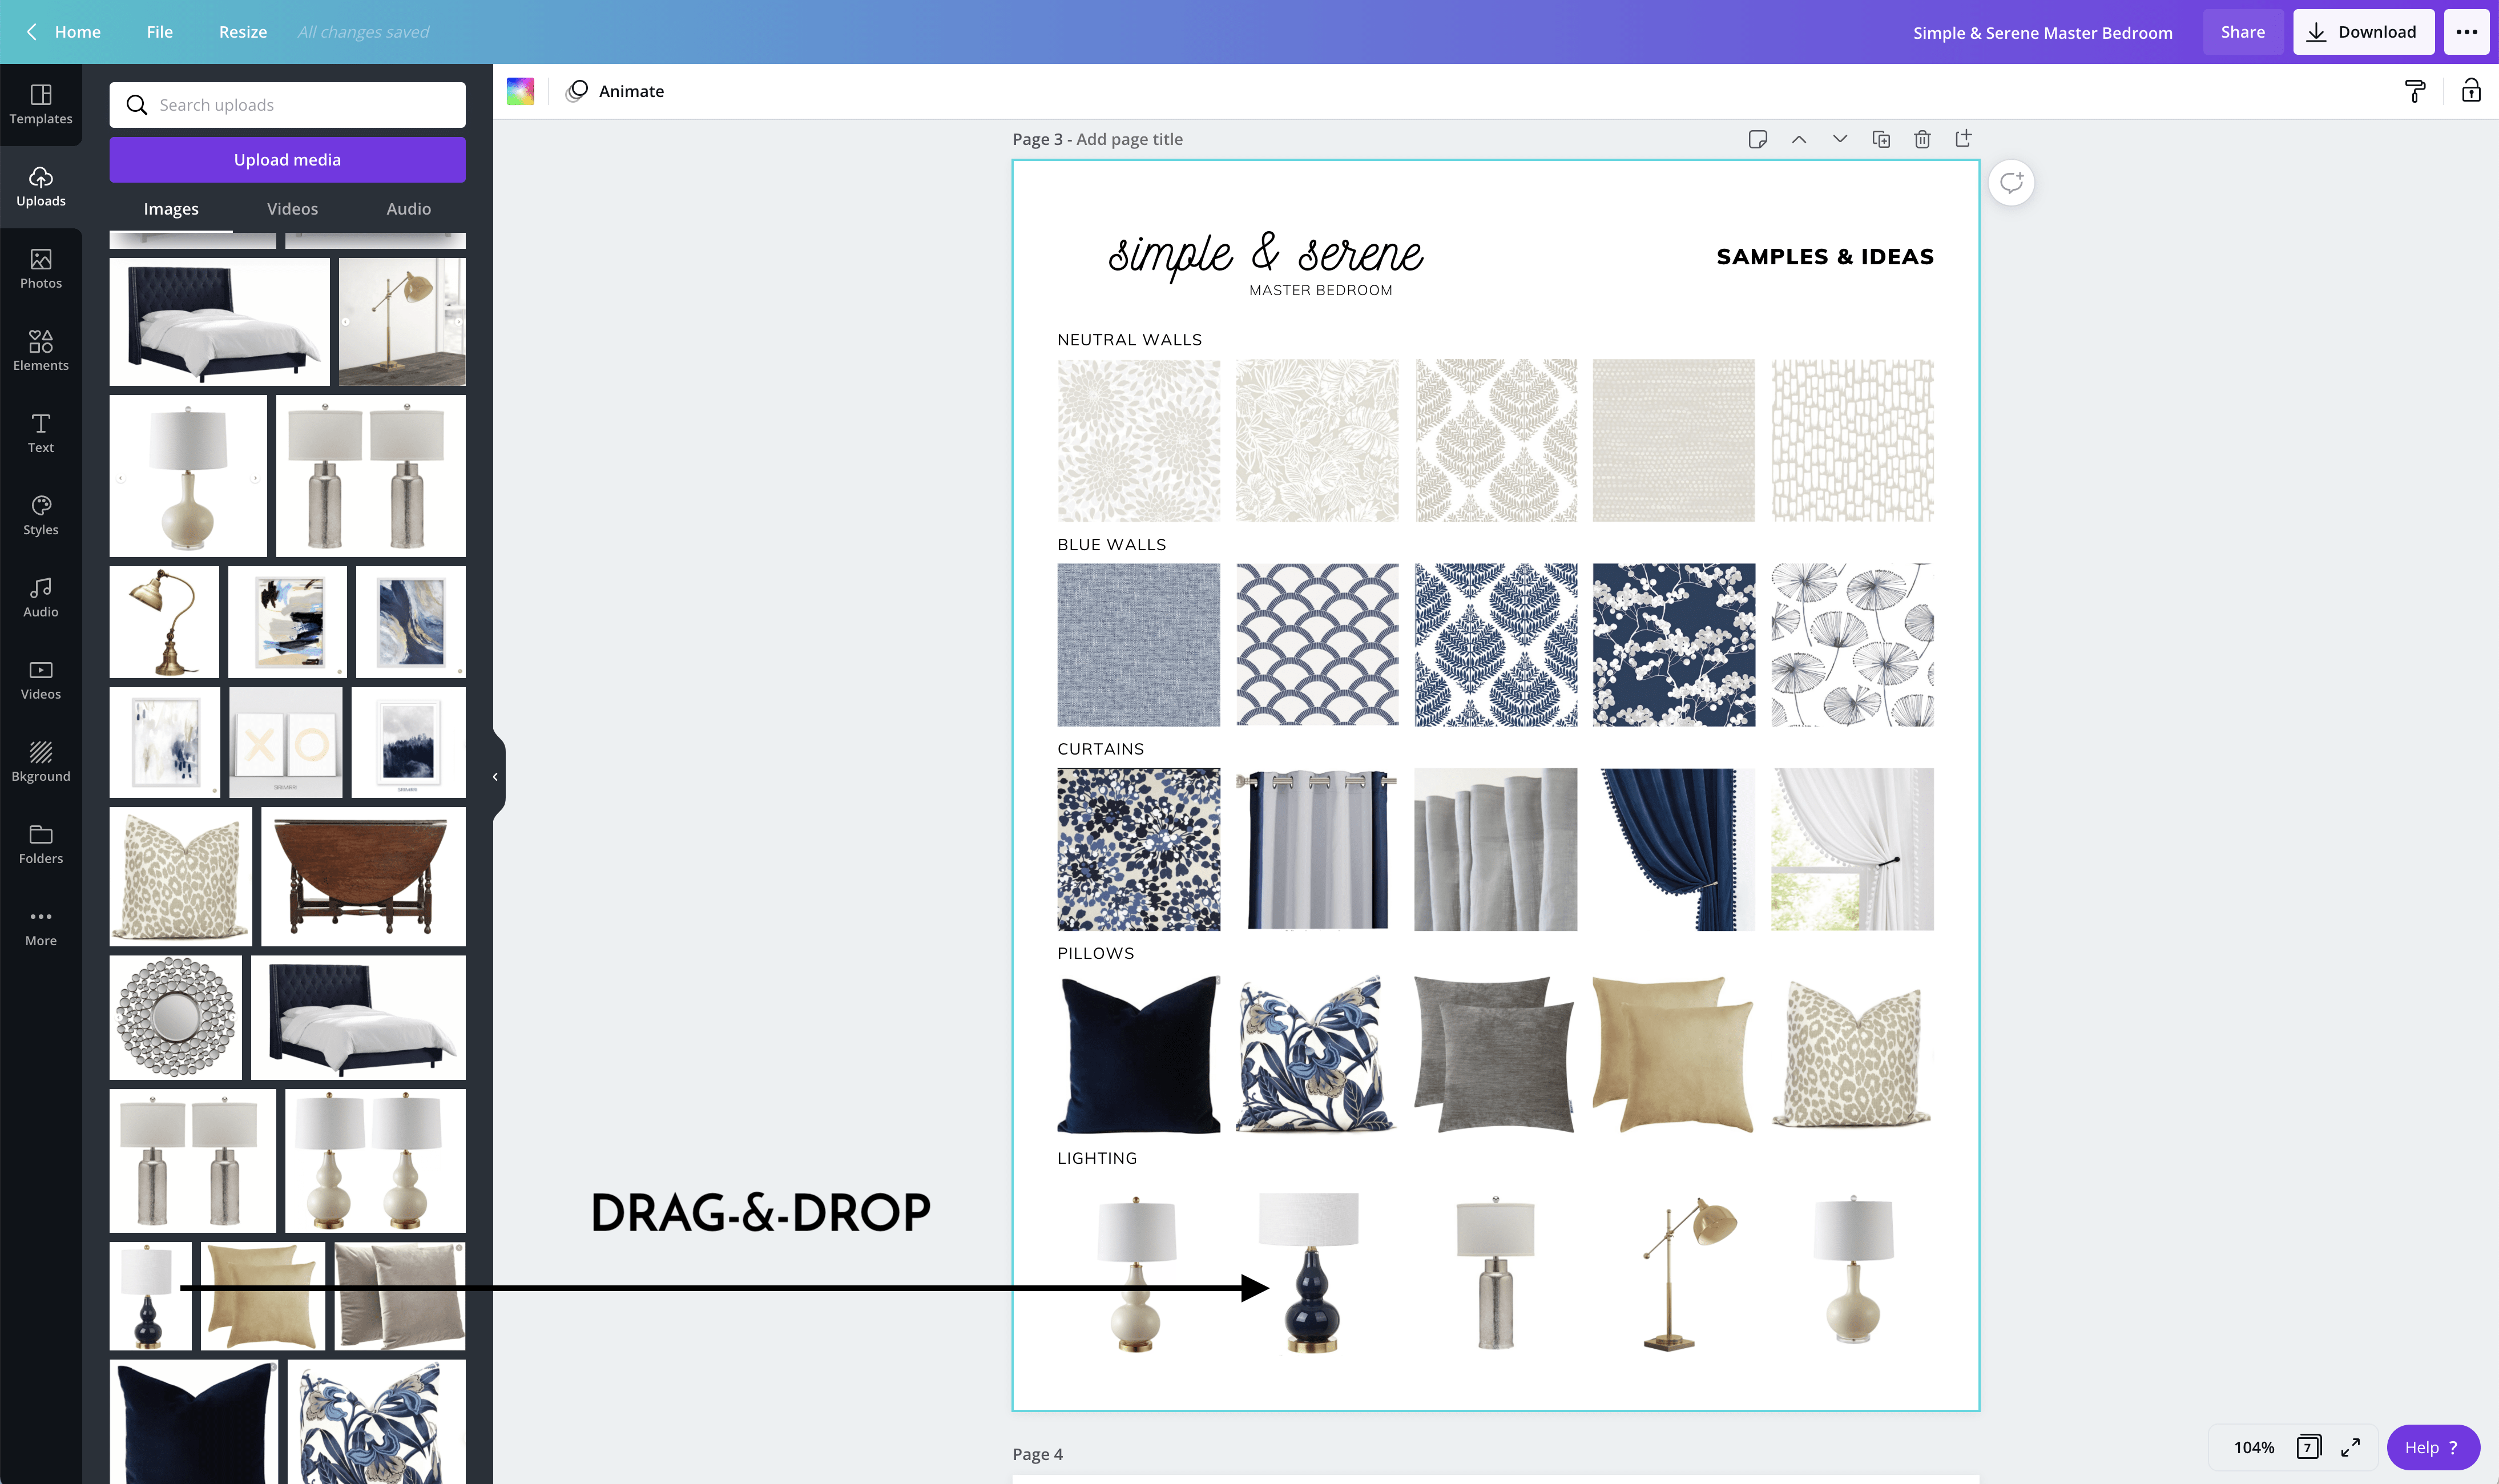
Don’t hesitate to duplicate this page (the duplicate button is right above every single page) to fill out as many categories and options as you need!
Once you have all sorts of samples and ideas uploaded and laid out, it’s time to start making your design boards!
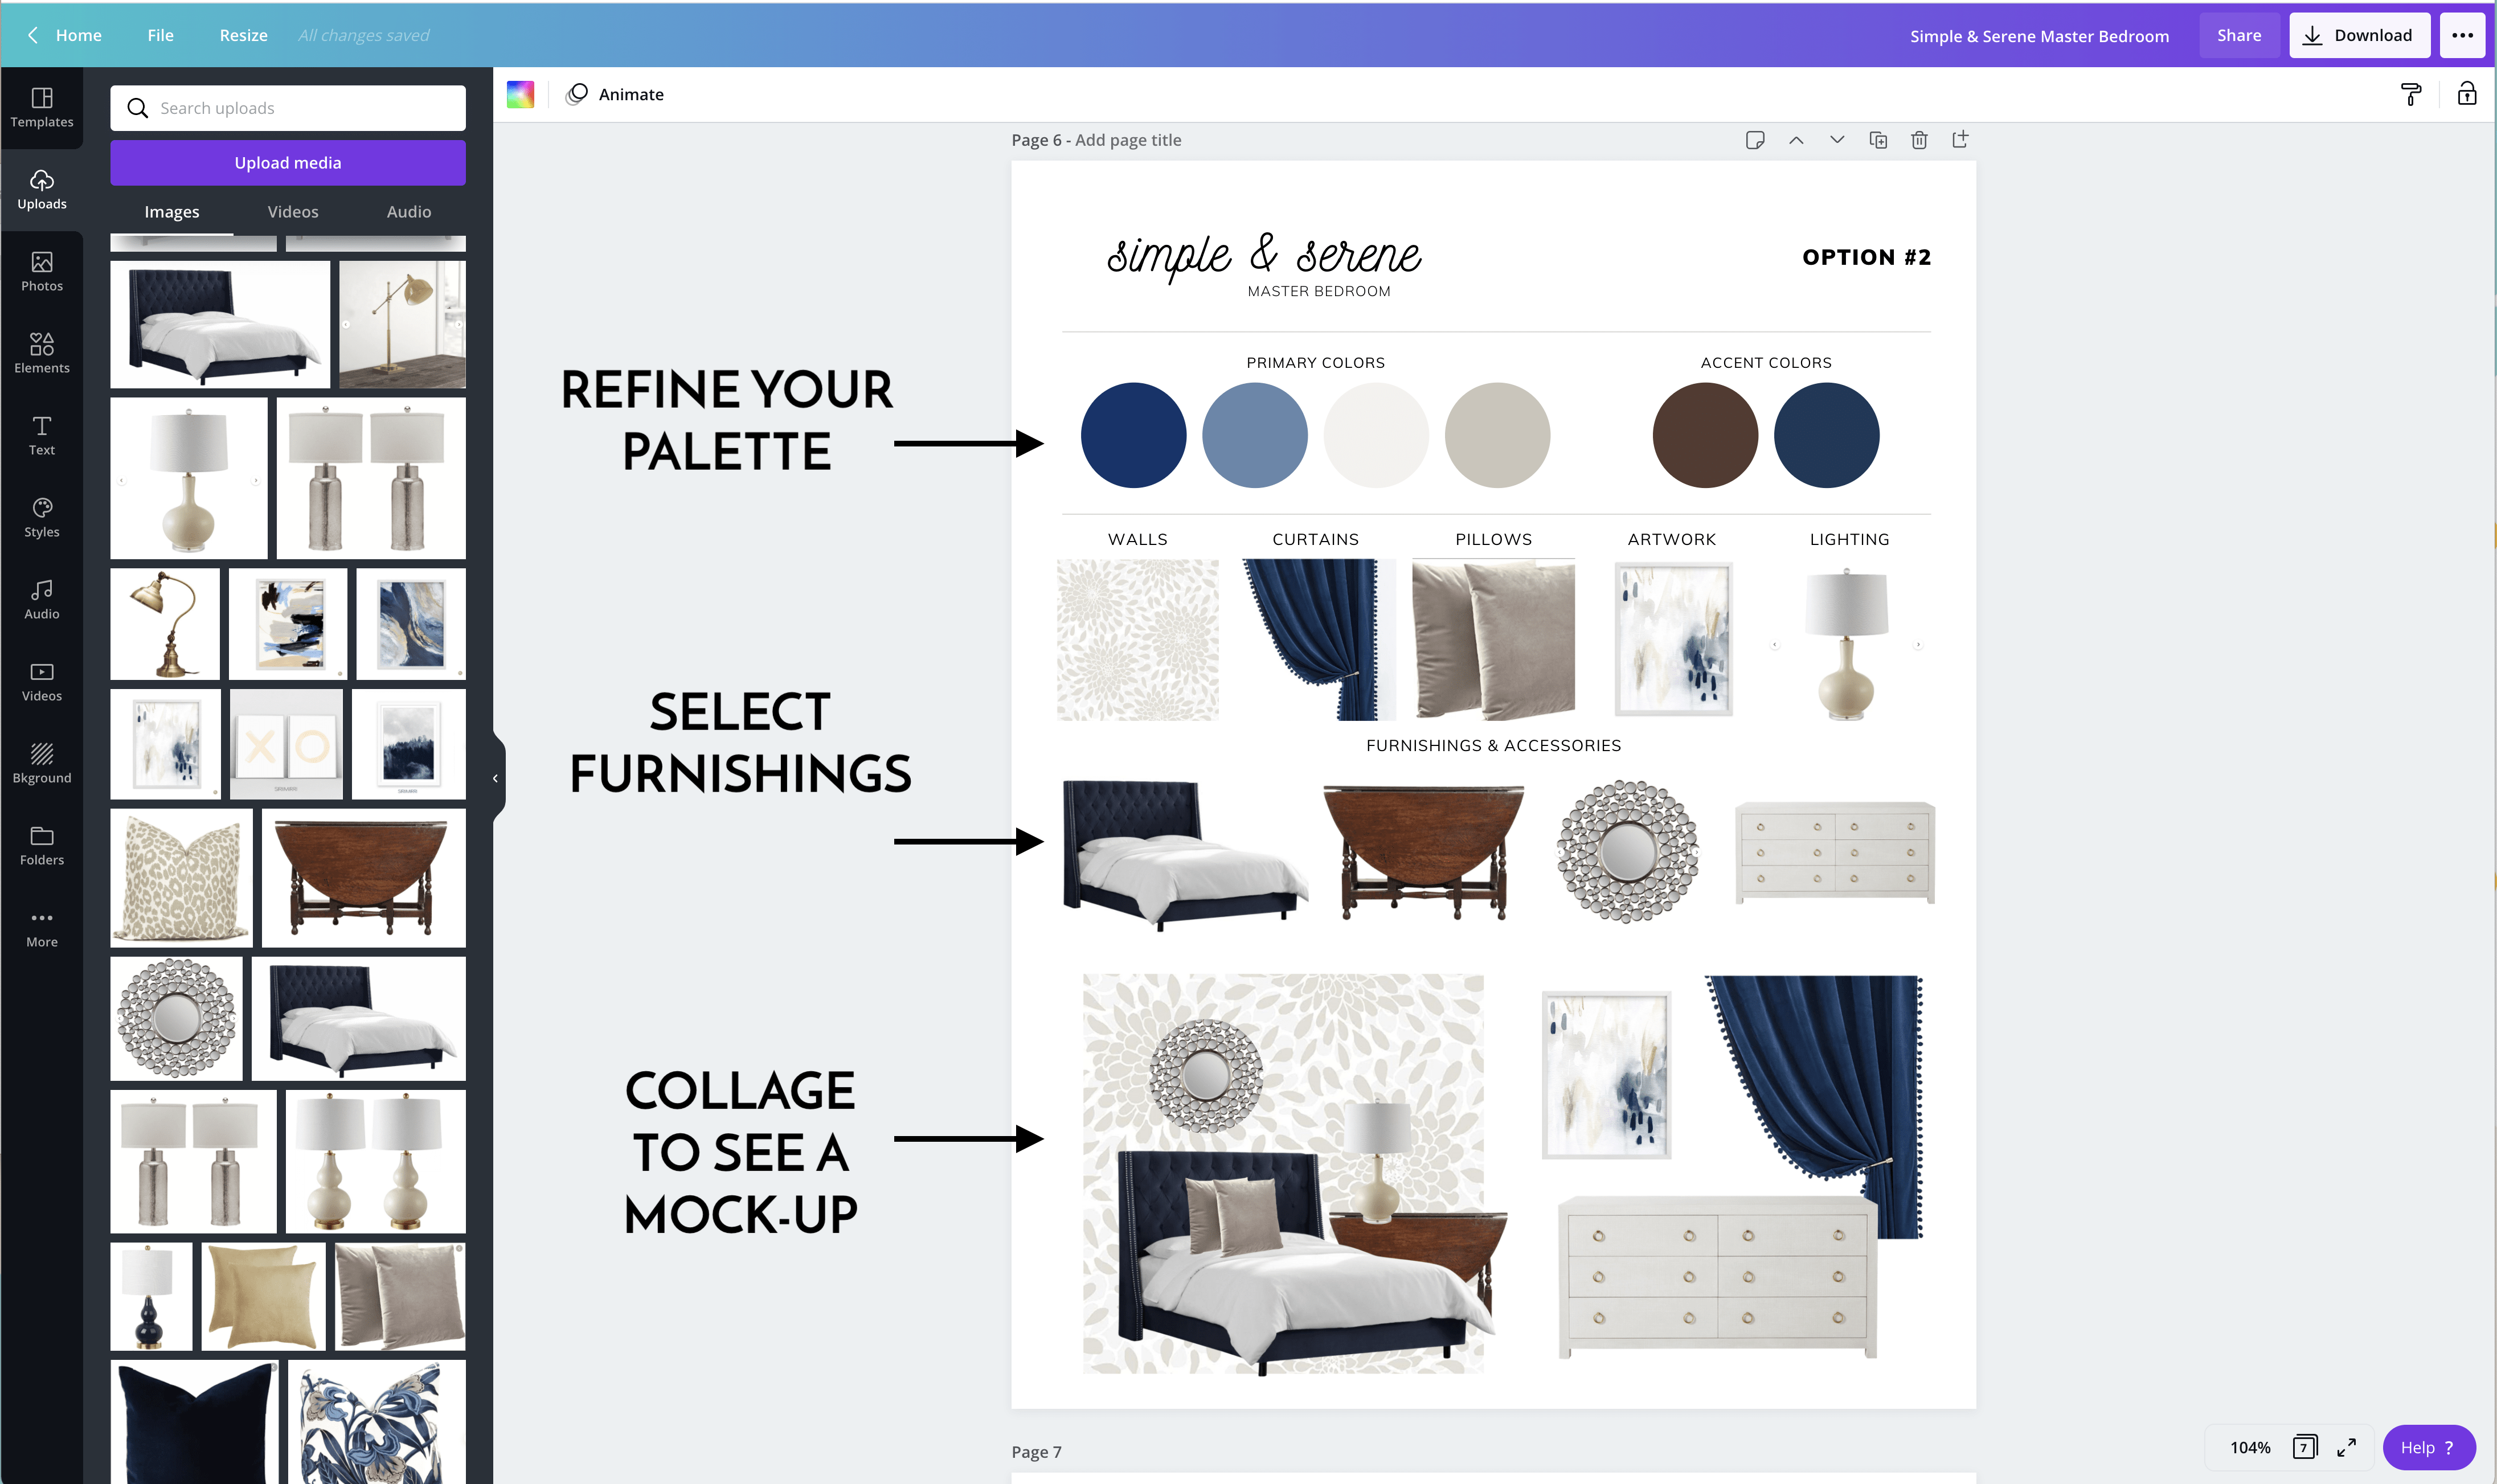
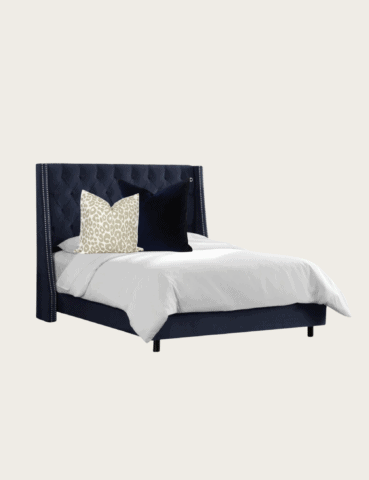
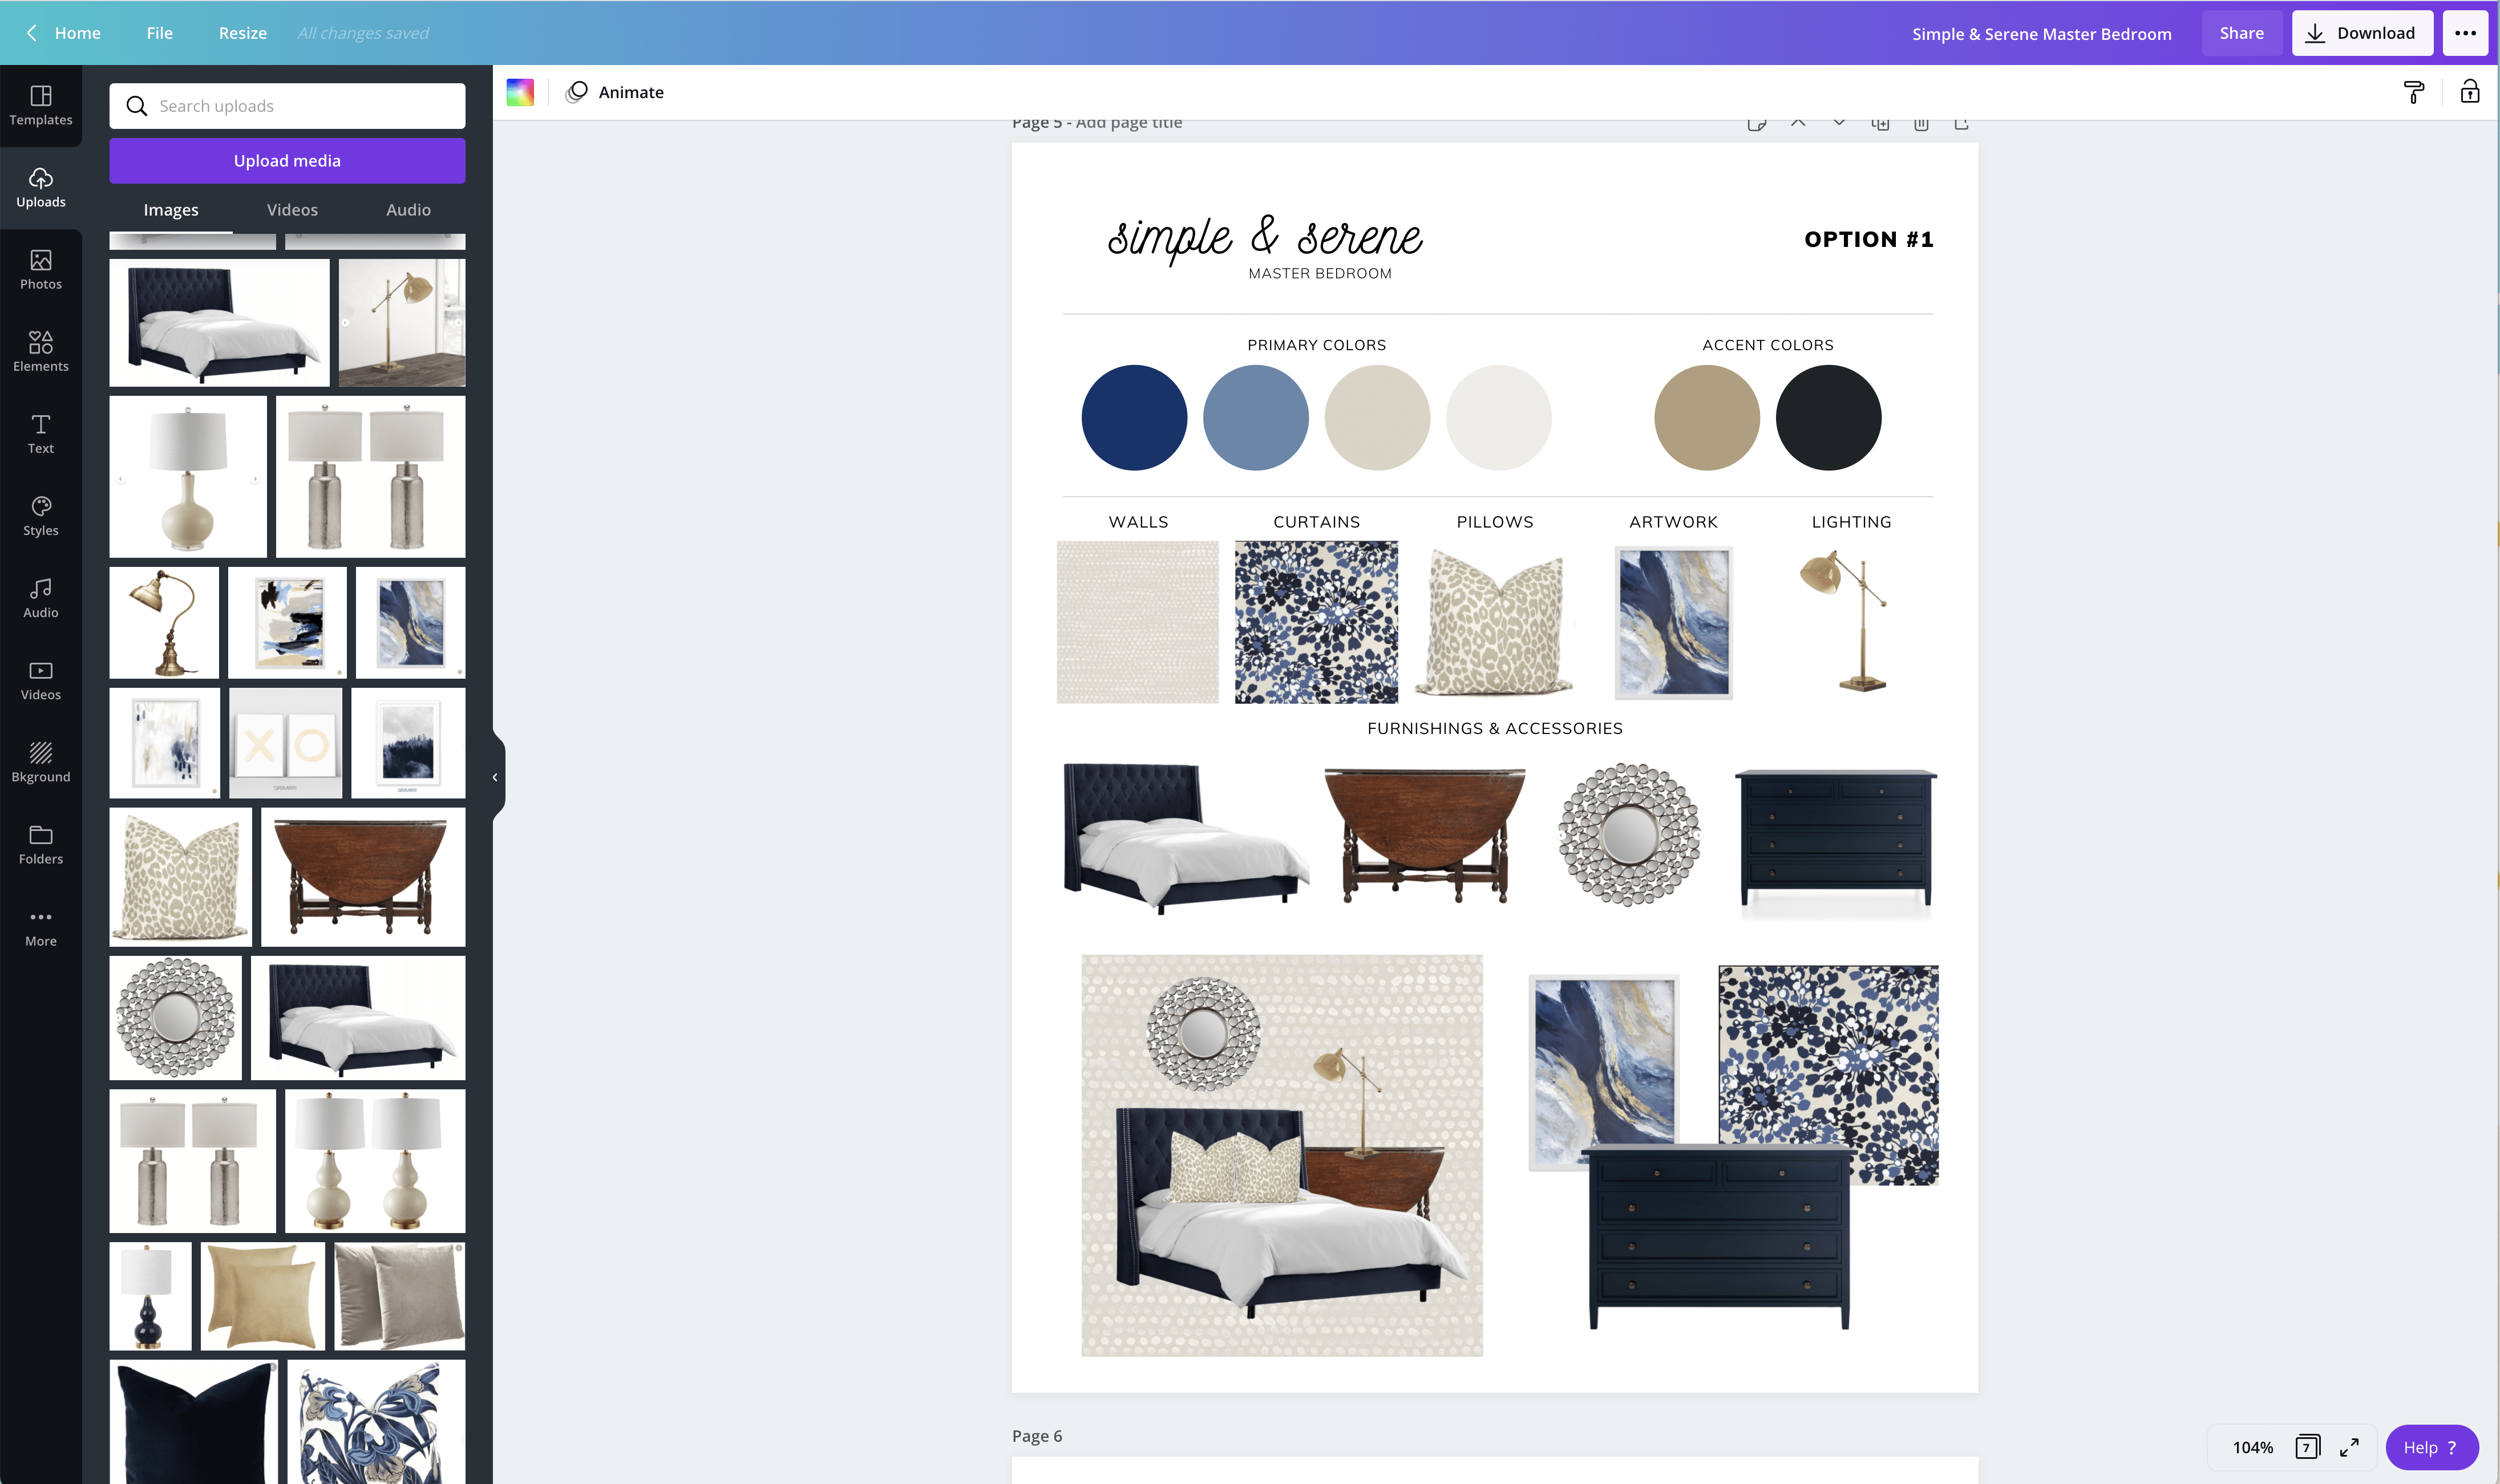
Step 4: Make the Design Boards
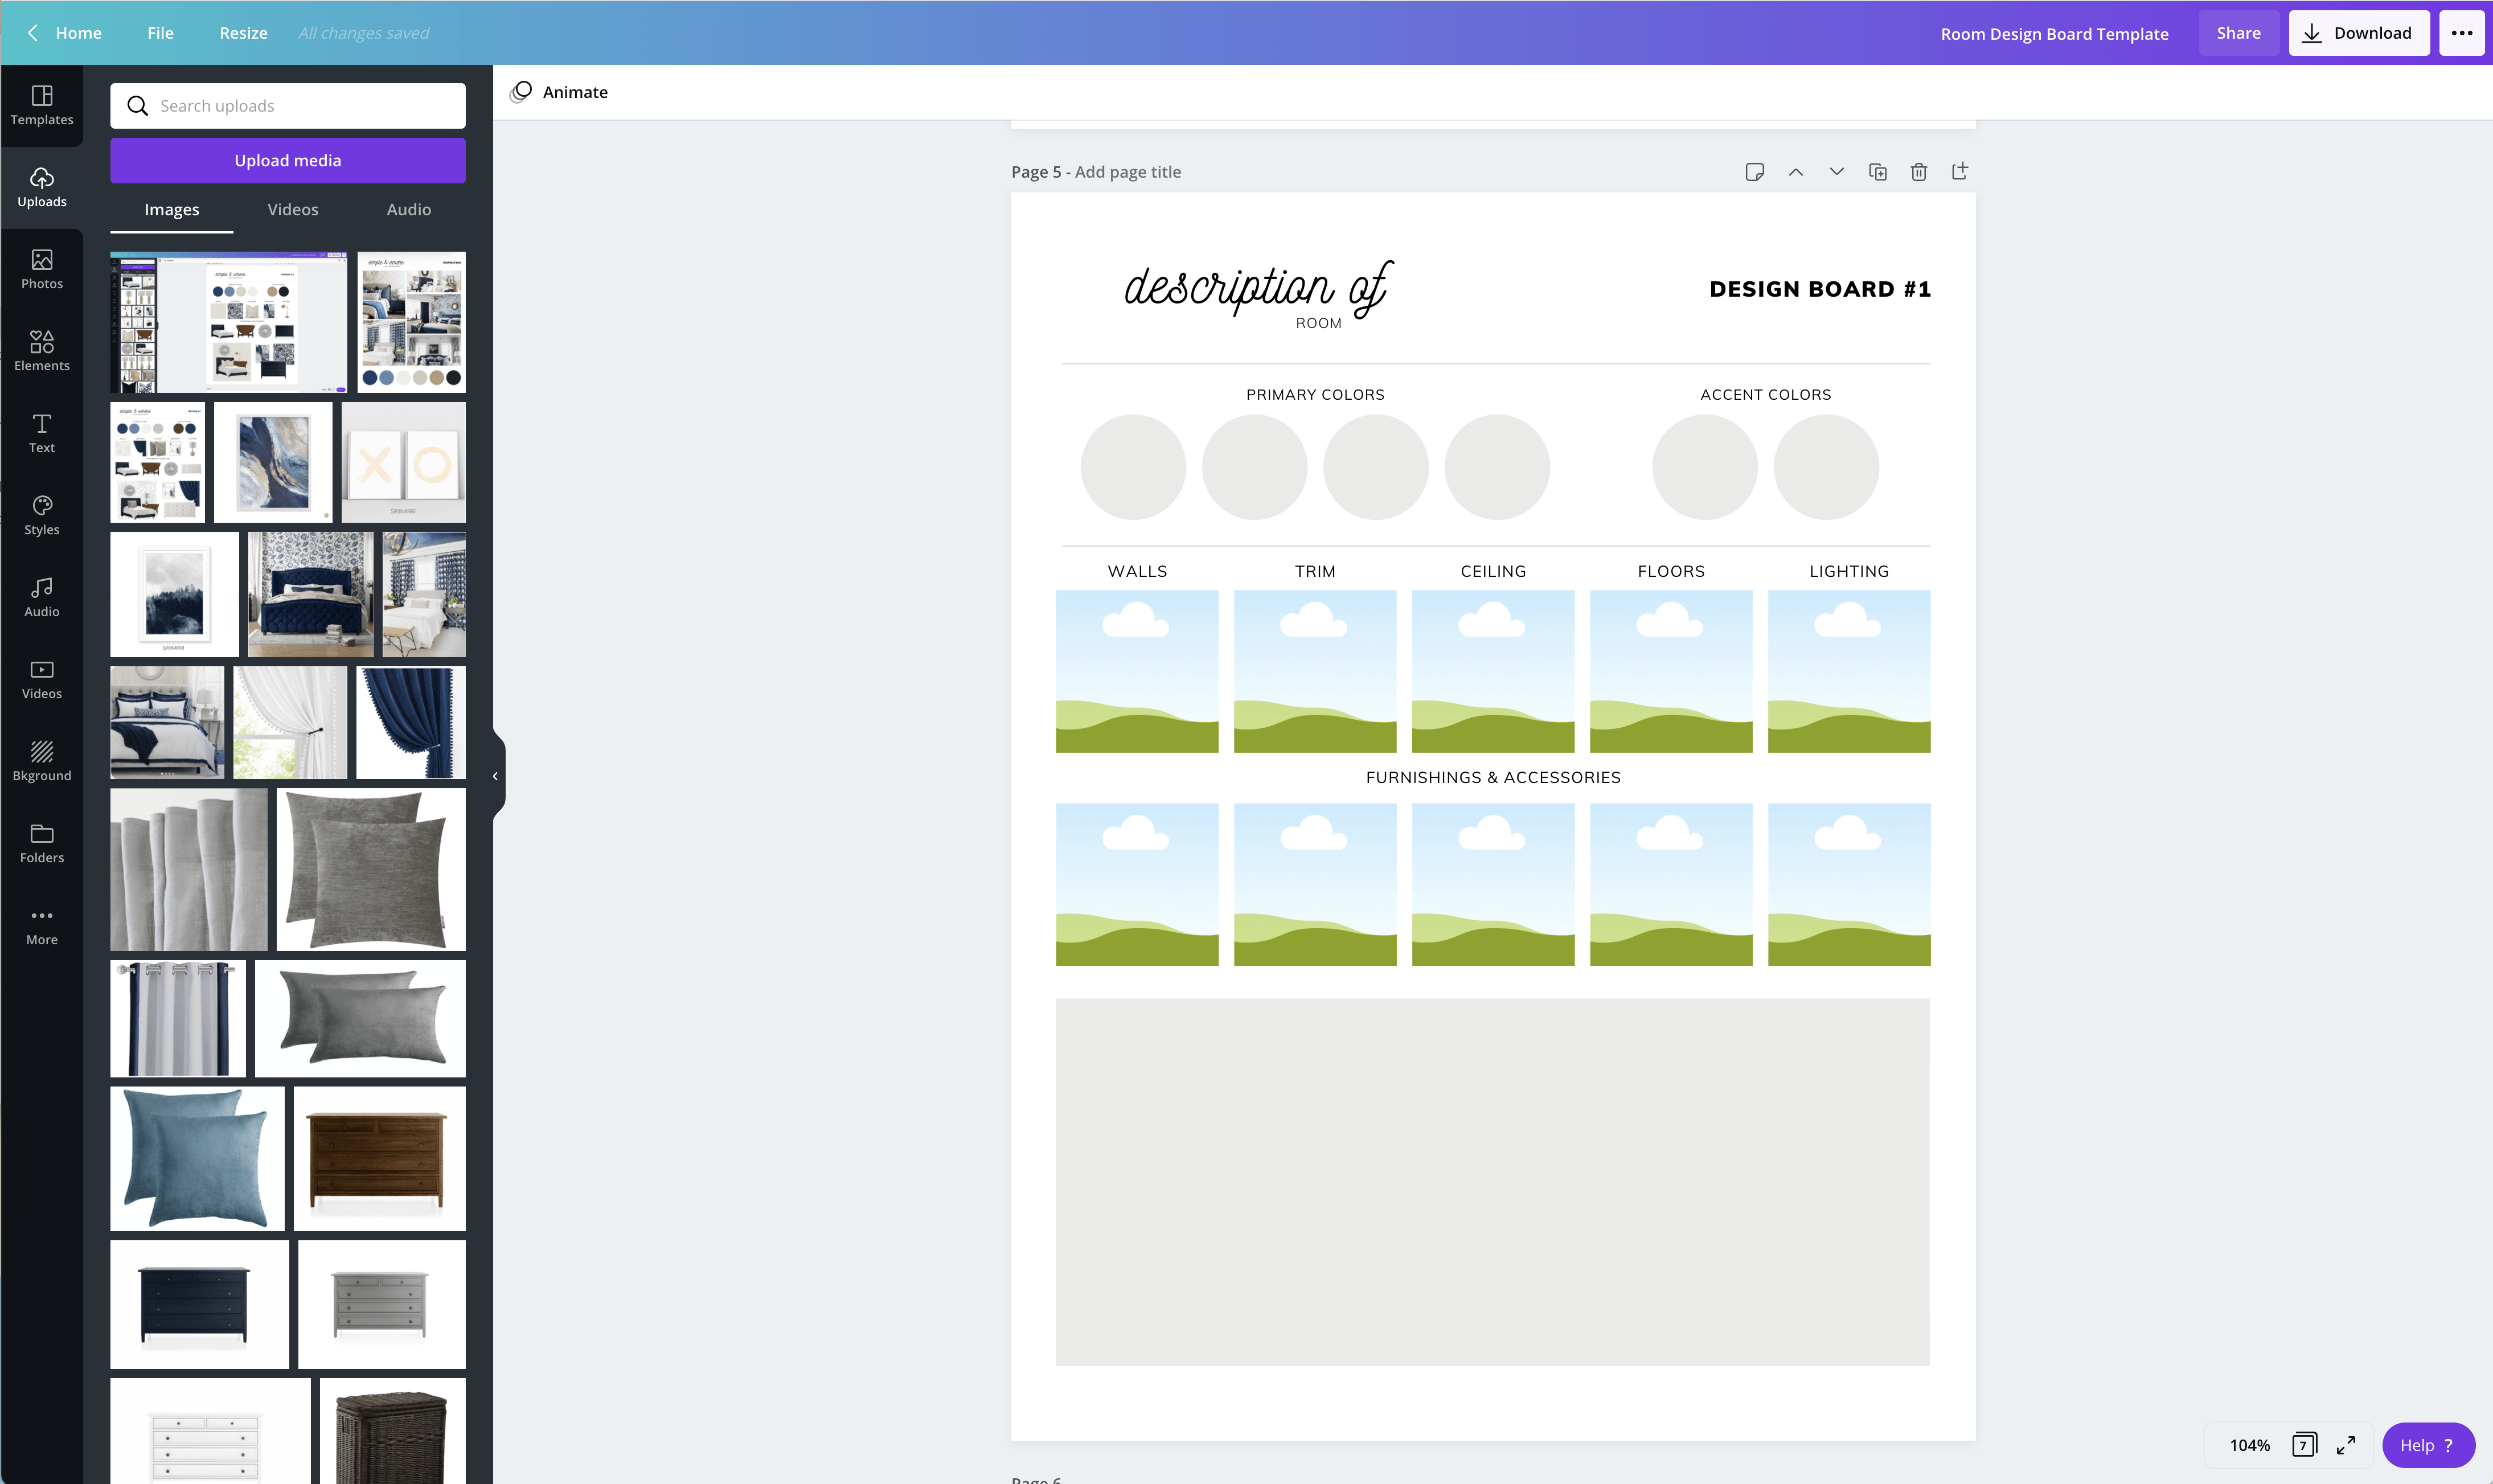
Three different Design Board layouts are included in my free templates. Each includes a title, color palette, titled pictures, and a furnishings and accessories section, as well as an open space to collage your choices together.
Just as we’ve done with the other pages:
- First, use the color tool to refine your palette.
- Then, drag-and-drop various images to represent unique selections for each of your categories. (TIP! Refer back to the Samples & Ideas pages to get a sense of what might work well together.)
- Finally, use the bottom area to collage your selected items to get a sense for how things looks together.
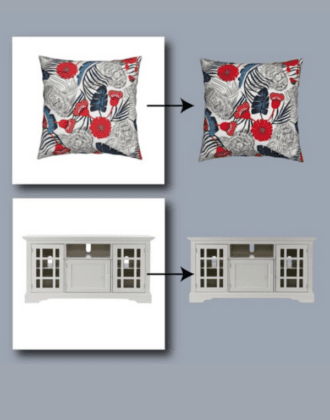
4 Ways to Remove Backgrounds From Images
In order to make your collages look fairly “lifelike,” it is really helpful to remove the white background of your images. This can be done in a variety of ways.

Background Removal Tool
While Canva is indeed FREE, there are a few “specialty” tools that come with the Canva Pro plan, which is $12.95/month (but you CAN get a free 30-day trial!!!!) Of all the different ways I’ve removed backgrounds over the years, this is by far the quickest and easiest and gives the absolute best results!
To remove backgrounds with the Background Removal Tool:
- Select the image you want to remove the background from.
- Click the Effects button.
- Click Background Remover.
In mere seconds, the background will be gone; and the edges around your image will be pristine!
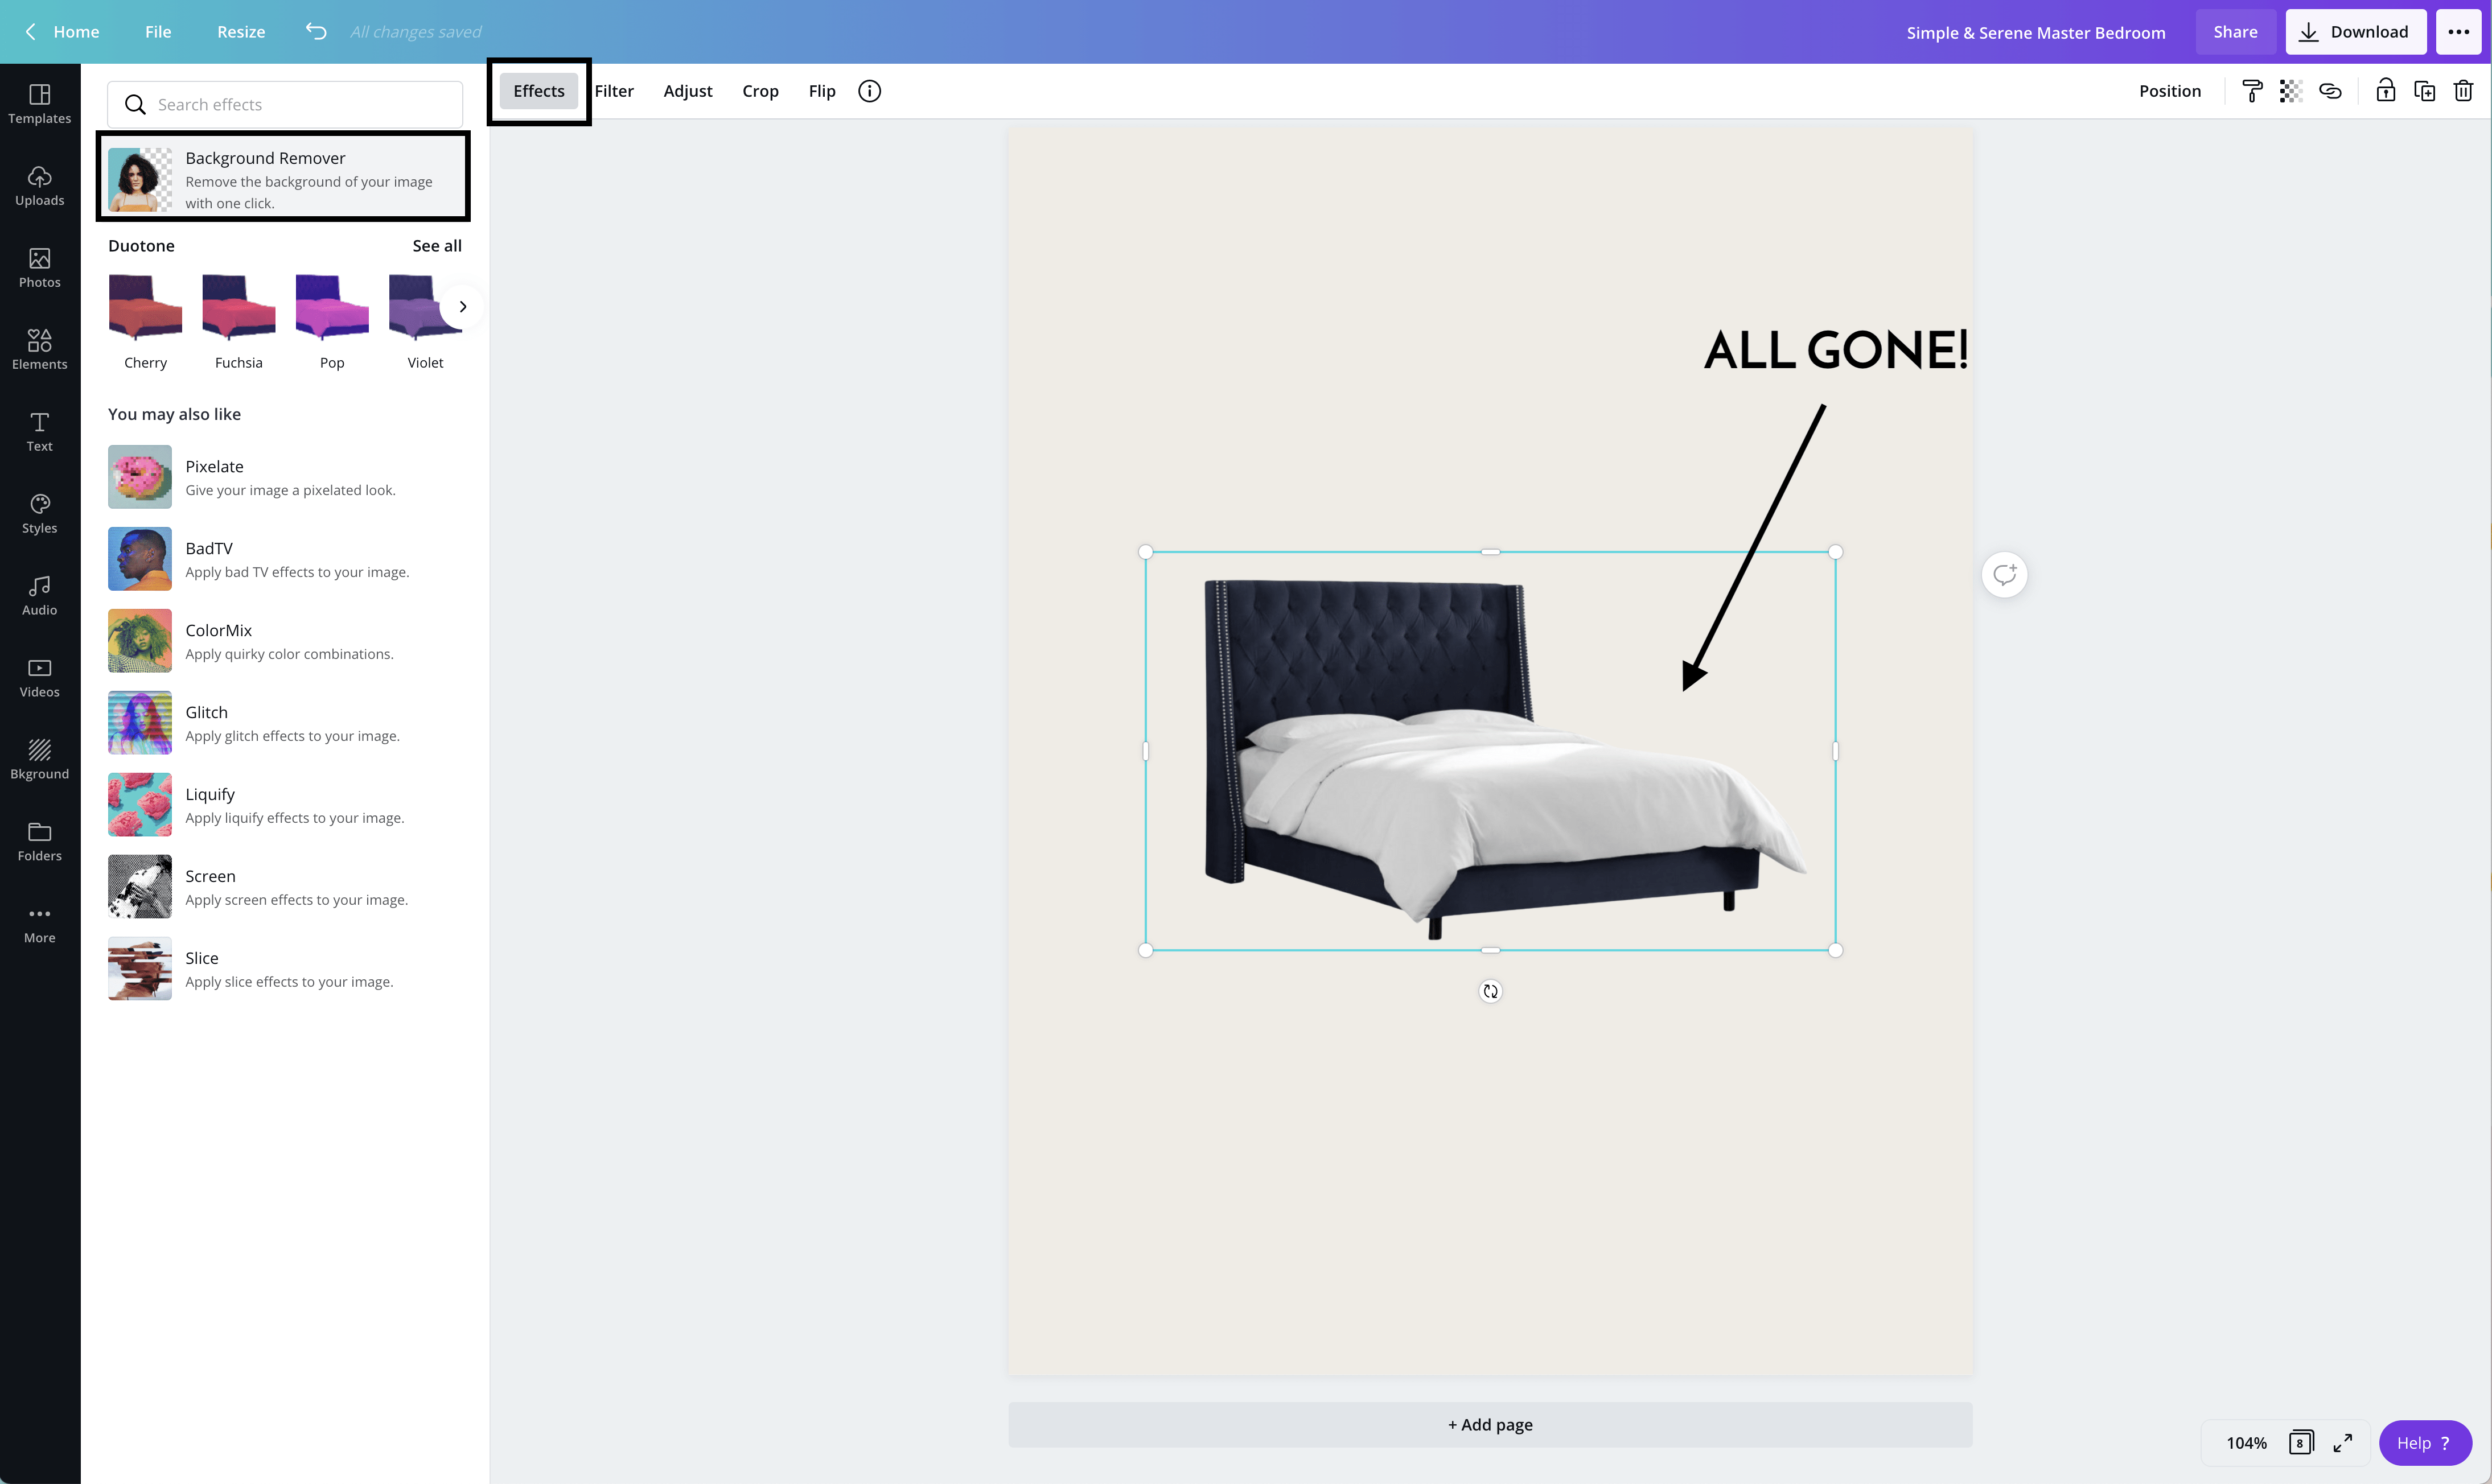
Using the Background Remover Tool is really the best way to collage items together in realistic ways. So if you’re making a lot of design boards or want the cleanest designs possible, you might find Canva Pro worth the free 30-day trial or monthly fee.
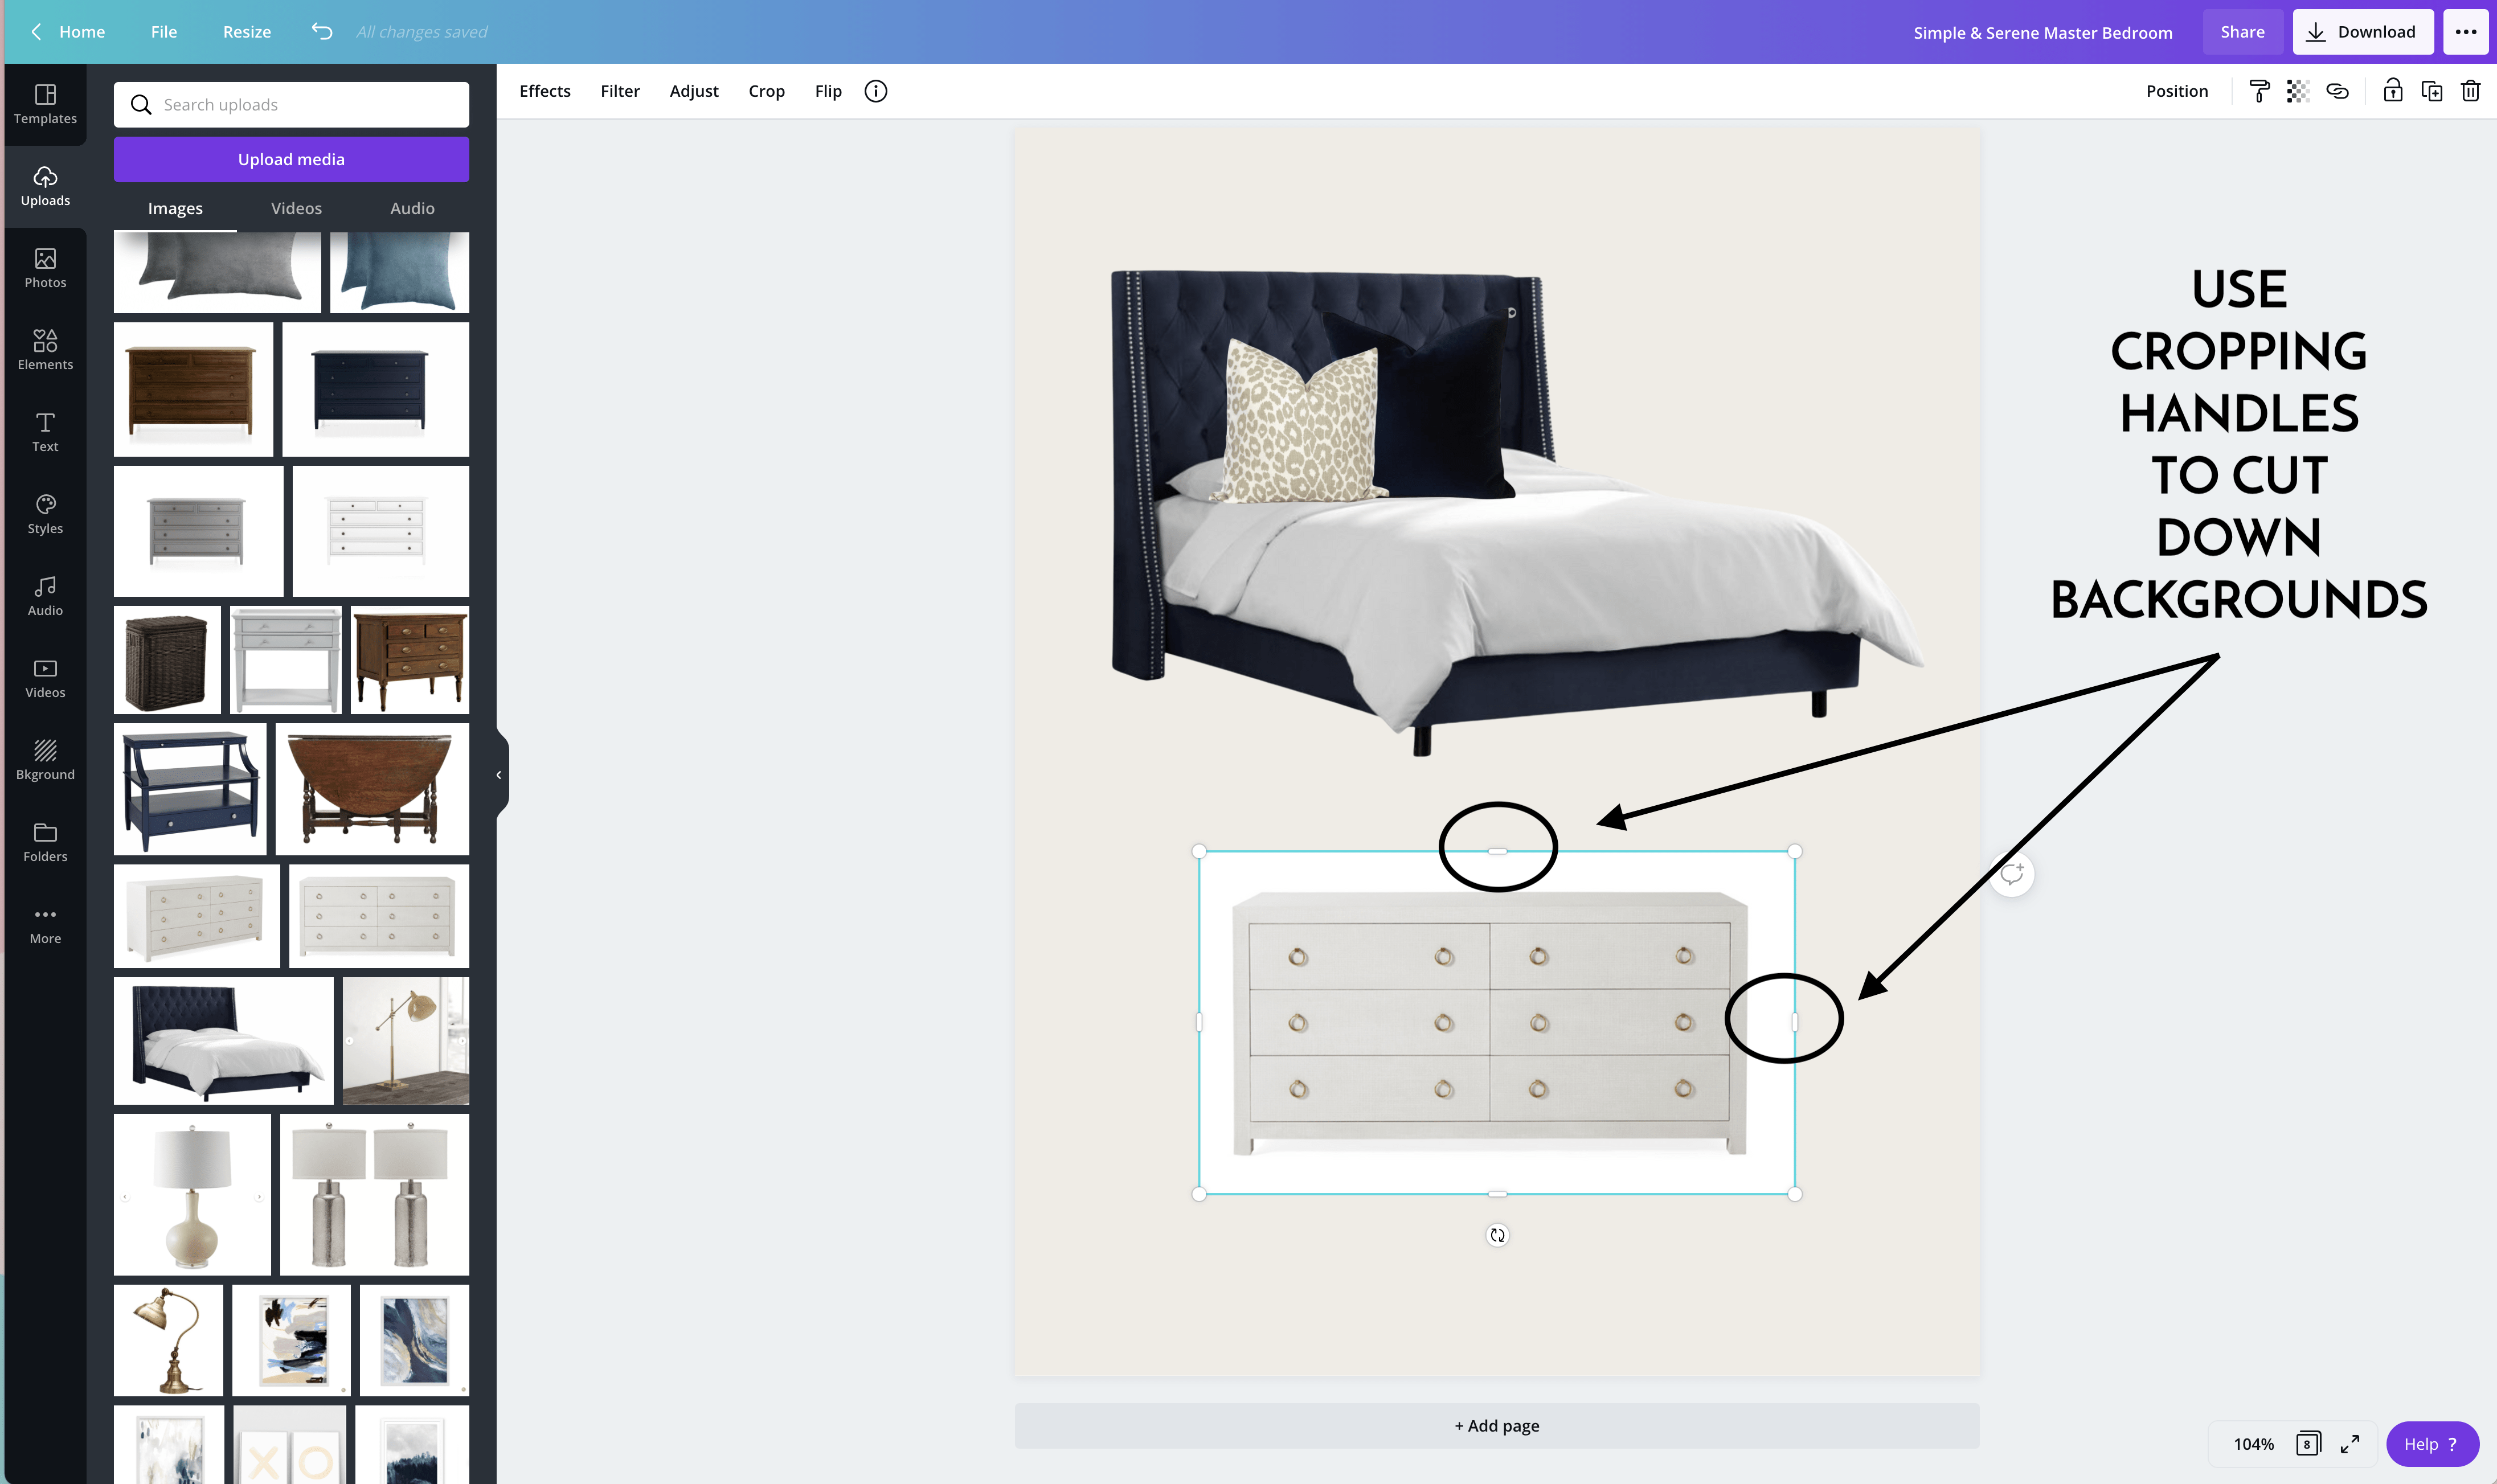
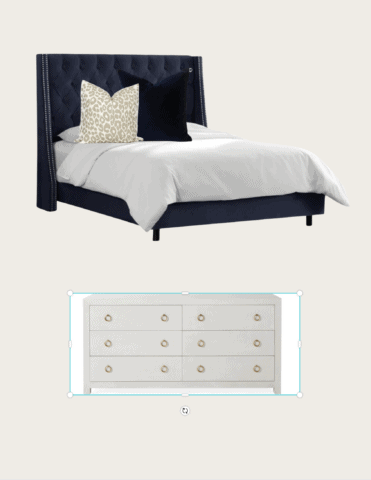
Cropping Handles
If you don’t want to try or pay for Canva Pro, you do have some other options! The first being the Cropping Handles. Whenever you select an image, you will see small white rectangles on the tops/sides of the image. You can drag these handles in to eliminate the surrounding white space. Although it’s not a perfect background remover, the results are still better than leaving all the white space in view!
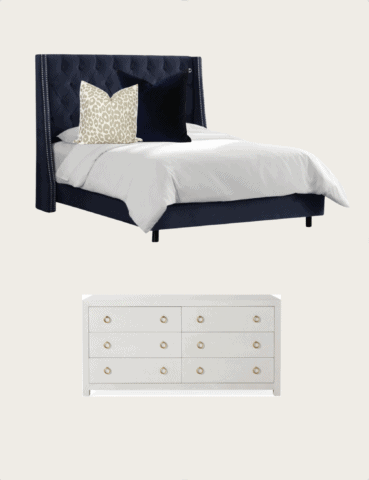
Frames
The next option is to use Frames, which are those grass+sky picture placeholders. Below, I dropped my circle mirror into a circle frame and it instantly cropped out all the excess white. Again, although it’s not a perfect background removal, the framed version is much better to collage with.
Use Microsoft PowerPoint
Finally, you can also use Microsoft PowerPoint to remove image backgrounds. If you go this route, I would first use PowerPoint to clean up your images, and export them as new files. Then upload the new images to Canva for the collages!
Step 5: Repeat & Save
At this point, I recommend you keep adding/removing various elements on your design board until you get a look you really like. At any time, duplicate a board to swap just a single element to see which version you like better, or start from scratch and go in an entirely different direction.
Even after you find a design that resonates with you, I highly recommend that you keep playing because you just might create a design you like even better with combinations you didn’t quite anticipate!
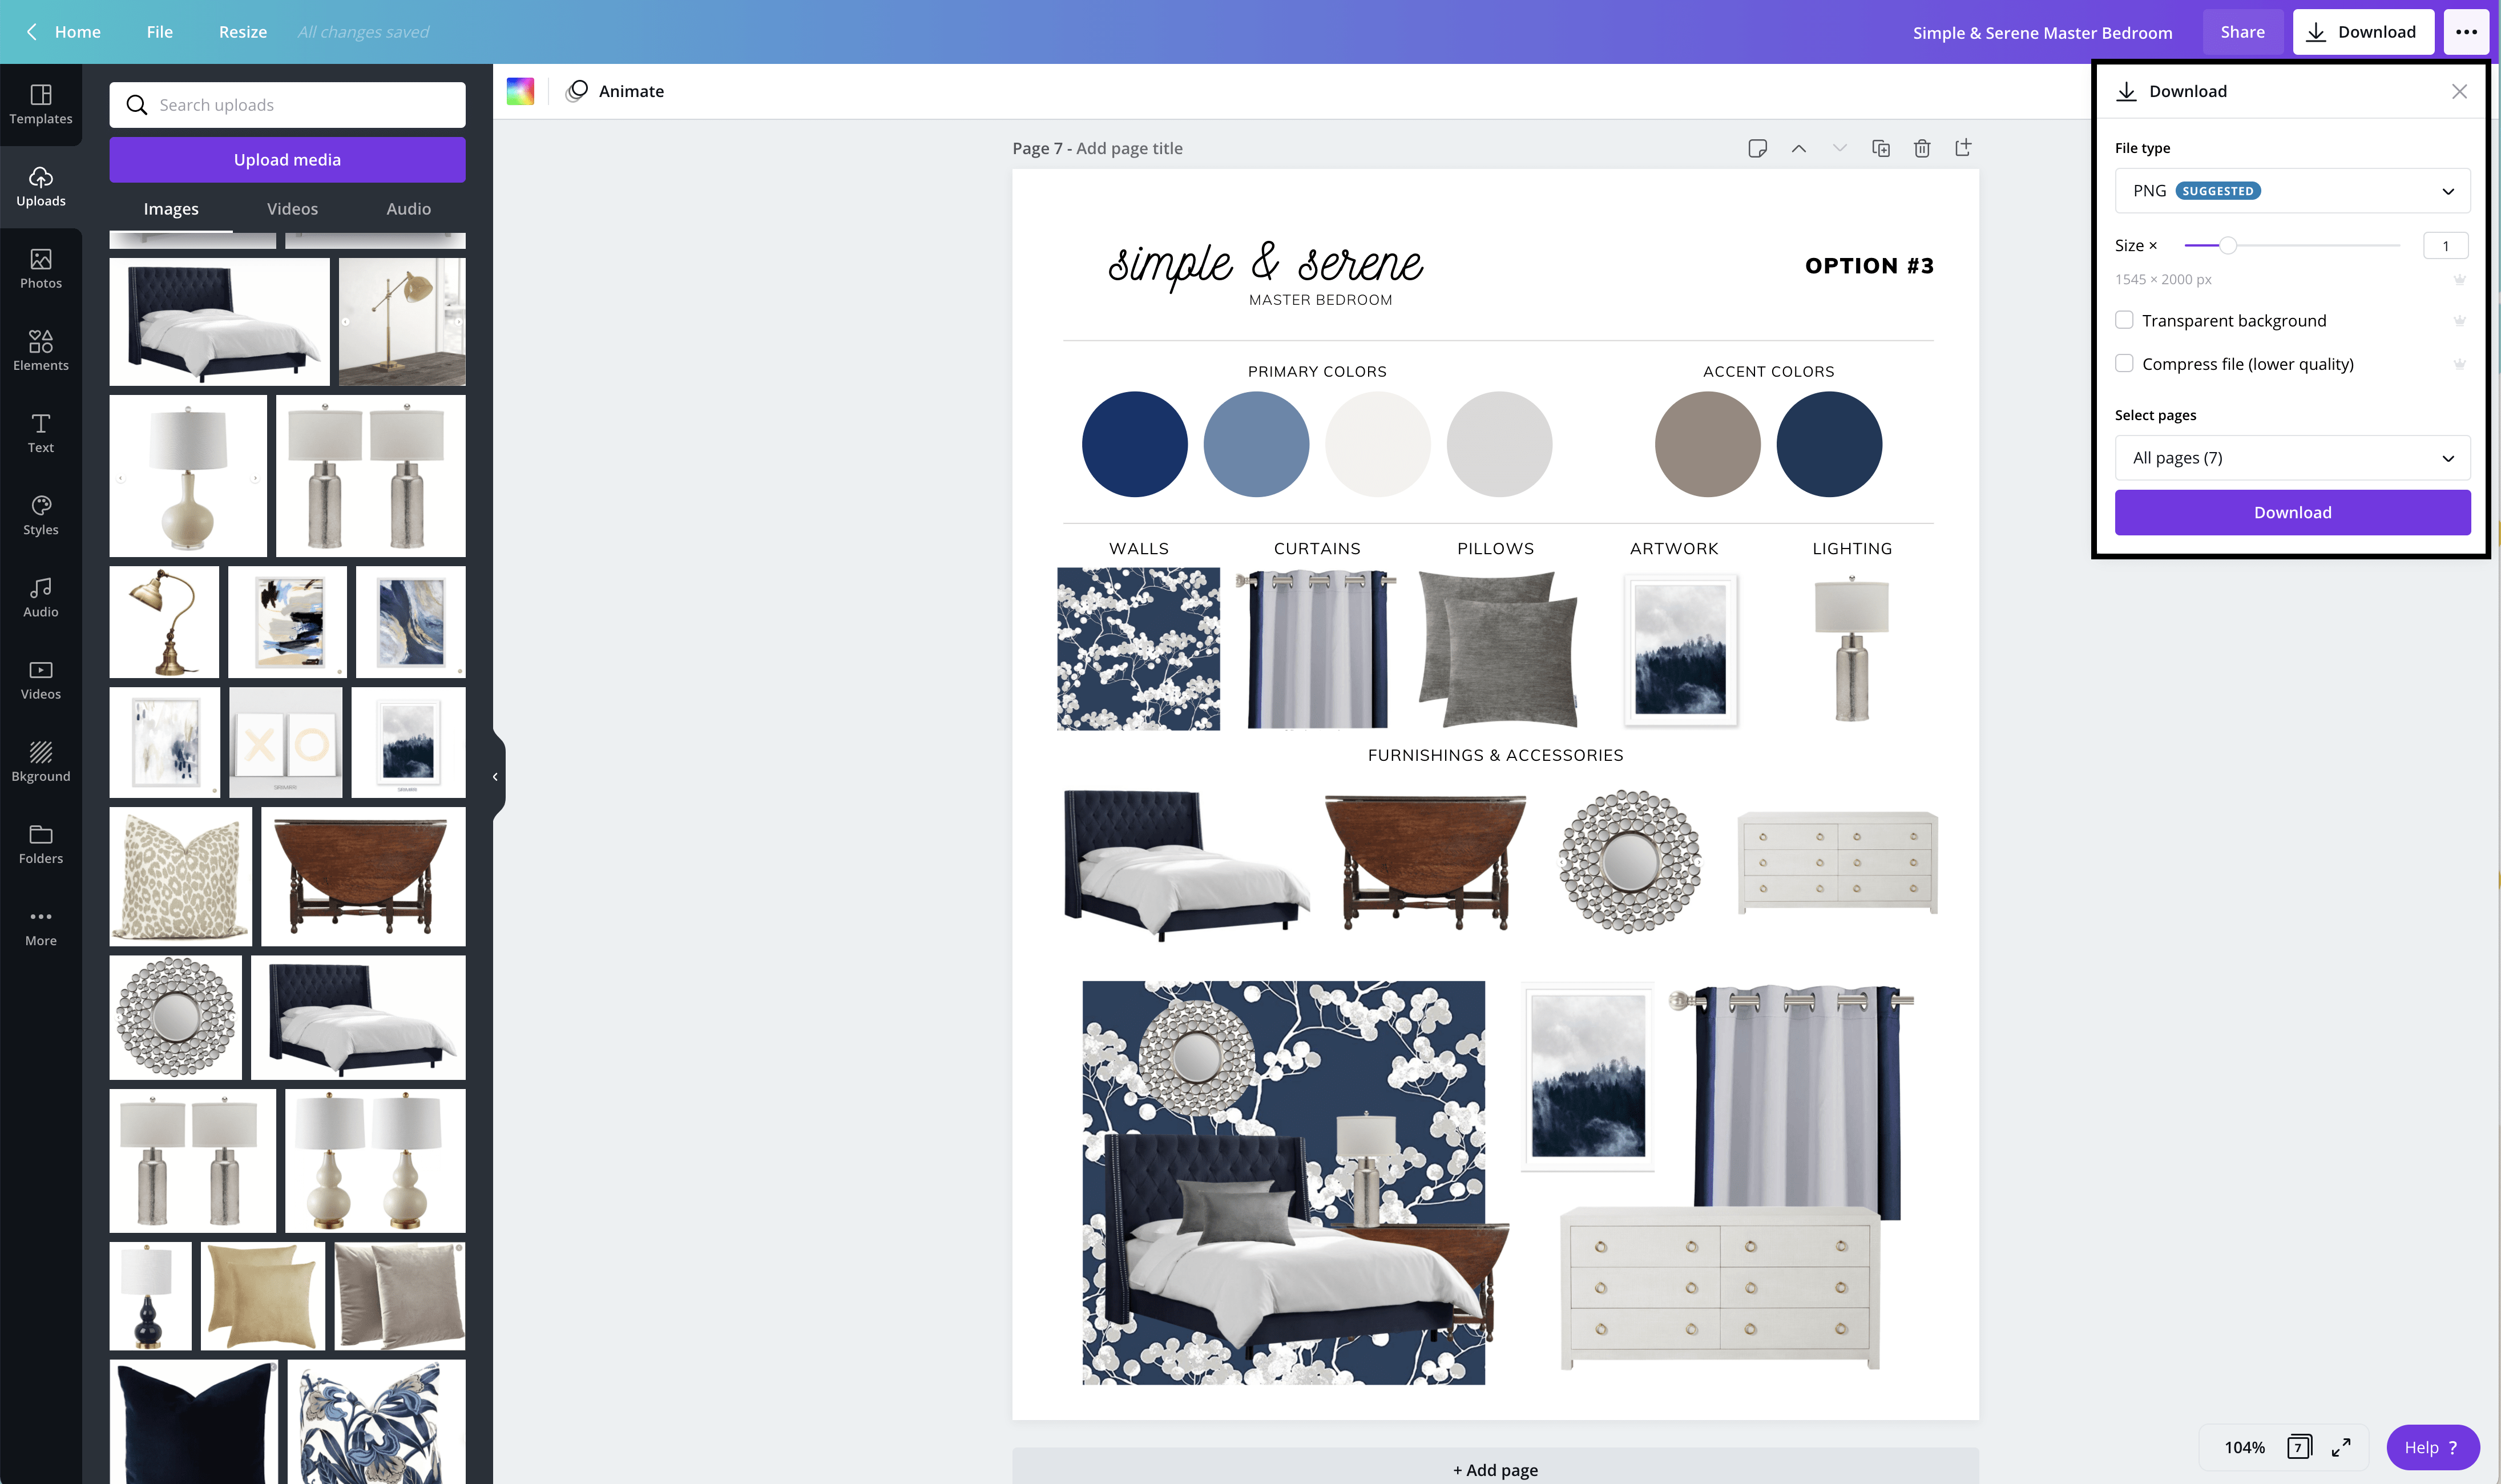
Whether you make one design board or many, once you’re done, use the Download button in the upper right-hand corner to export the images in whatever format is most helpful to you. I like to keep PNG/JPEG files on my phone so I can refer to them quickly and easily; but you can also export as a PDF if you’d rather print and execute!
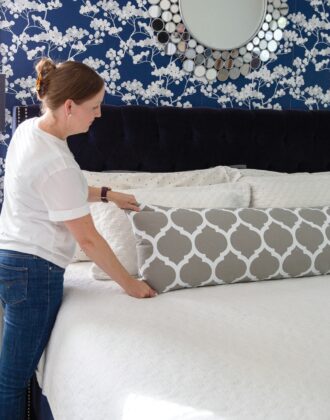
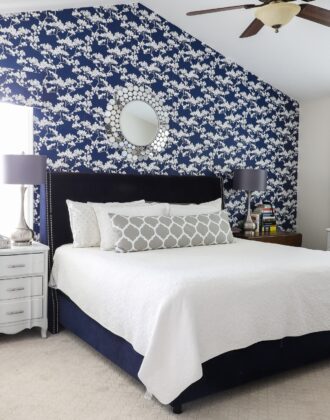
While I did specifically set out to create a Canva tutorial, the example design boards are part of our real life master bedroom update. See more how I use these design boards to inform my decorating process. 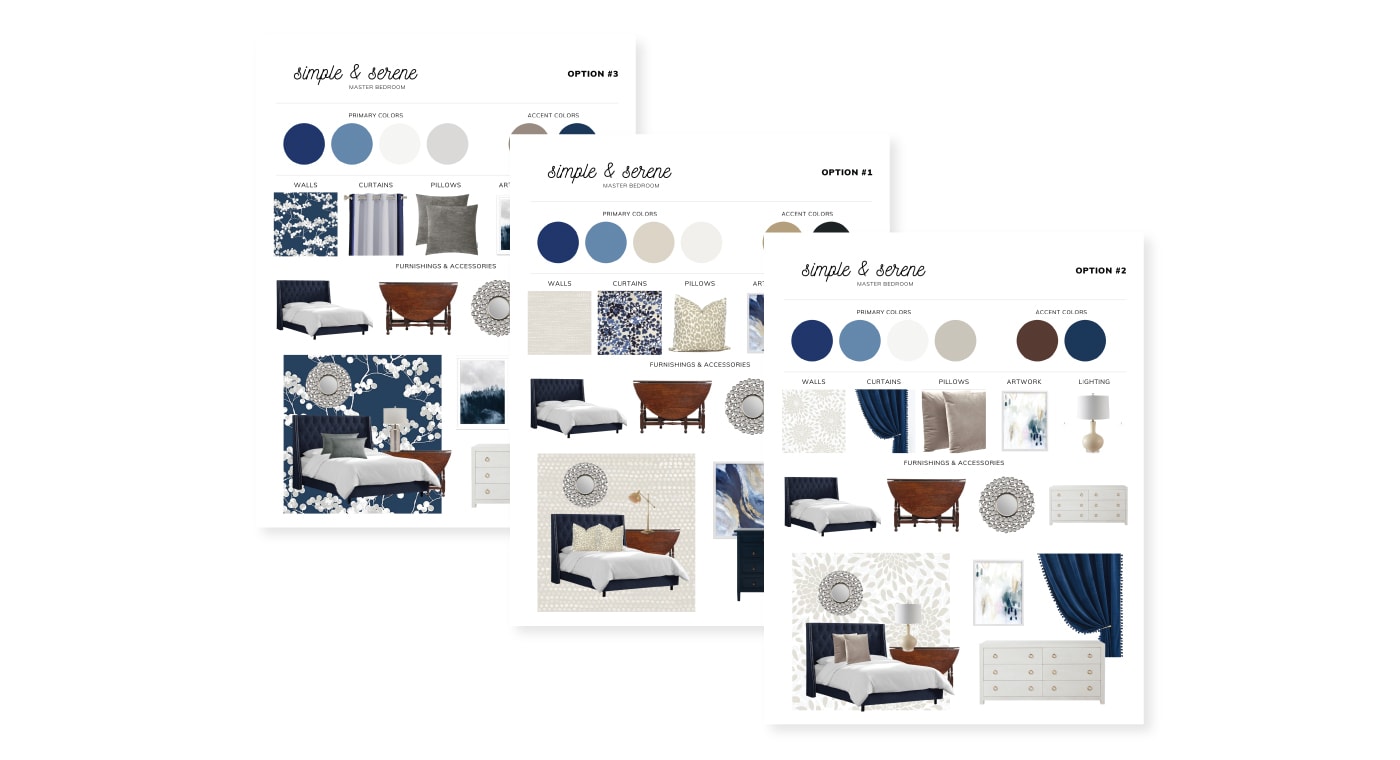
I really, really hope you guys give this design board exercise a try the next time you want to refresh a room. I know it may seem really overwhelming, but I think you will be amazed at how easy Canva makes creating professional-looking graphics! If you do, be sure to send me your finished boards so I can see!!!!
Megan

20 Comments on “How To Make Design Boards on Canva (with Video & FREE Templates!)”
This is so cool! I’ll have to read this tutorial a few times to understand it, but it’s a whole lot less overwhelming than living in a house for 3 YEARS and not knowing where to start!
I love the first design because I cannot resist statement wallpaper, but I think I would actually choose the middle option because I also know statements get annoying really quickly. I’m trying to decide if we go statement or neutral in our entryway, I think a design board might just help me work it out. Thanks Megan!
It’s funny, the middle option was absolutely my first choice, but it required MORE changes throughout the entire room despite being neutral. The blue statement wallpaper actually coordinates so much better with everything else, and is more of a “one and done” solution! Guess I just gave it away 😉
Happy Wednesday!Megan
I use Lunapic to remove backgrounds from pictures. It is a free online tool to edit pictures and is really easy to use.
Hi Terri!
I will have to check Lunapic out…I’ve never heard of it! Thanks so much for sharing that tip!
~Megan
This is fantastic! I’ve been looking to upgrade my Canva skills to help with my blogging and this is super helpful. Thanks so much for sharing these tips!
So glad you found this tutorial helpful Madalaine!
Have fun playing with Canva!~Megan
Love this post. I’m designing my home that is being built soon. Super helpful! Thanks for the Canva templates.
You are most welcome! Hope they help with your new home!!
~Megan
Great tutorial. Thank you for the video, the instructions and the template. I also like the options regarding how to obtain as clean an image as possible.
You are most welcome! So glad you find this tutorial helpful!~Megan
Option 2!
I’m not able to access your templates. I sign-in to Canva, but it brings me to a page that states it’s a forbidden page. Please help
Hi Megan!
I’m so sorry you’re having trouble. I just accessed the link and had no issue opening it. I would suggest signing out of your Canva account and back in, then try the link again.
If that still doesn’t work, let me know!
Thanks,
Megan
This EXACTLY what I was looking for! We just bought a house and I was struggling to get my design ideas together for updating the rooms and this is going to make it much easier!!!
This looks like just the tool I need to help with the design of our new home! I am wondering if all of this will add to my already overloaded iPad? That constant message of overloaded memory! I’ve been saving pictures all over the place; in my photos, on Instagram, created Pinterest boards, and even tried Houzz. Obviously I need one landing place and a tool to use when purchasing materials. I’m hoping this might help me?!
Hi Melanie!
Yes – Canva can be a GREAT solution for saving up all your images and getting them off your iPad. Once you load pictures into Canva, you can organize them into folders. And then they are essentially stored there so you can delete everything off your iPad. I *think* at any time, you can re-download the image from Canva should you ever need it.
I highly suggest you give it a try – I think you’ll love it for what you’re trying to do!
Megna
This is a very beautiful, informative blog post. THANK YOU SO MUCH ♥️
Megan, I’m working on my sons bedroom makeover, and I’m so happy I stumbled upon this post!
Im checking these templates out and tagging you when I’m done 🙂
Thank you for your thorough posts, I love them all!
What a beautiful room and thank you for sharing how to do this. You make it look so doable and fun!
Oh my goodness Megan!
You are a gift! I enjoy decorating and organizing my home and my salon and was recently asked by a client to decorate their home. I want it to be a space they absolutely love, but I’ve never done it for someone else before (even though people have asked me about it before). Your page was the first place I researched, but it is so comprehensive. Thank you so much for taking the time to create such a detailed post. I blog as well, and I know this was a lot of work! Your designs are stunning and your creativity and skill shine through!
Warm Regards,
Carina Ayiesha