How to Remove Backgrounds from Images | 2 Easy Methods
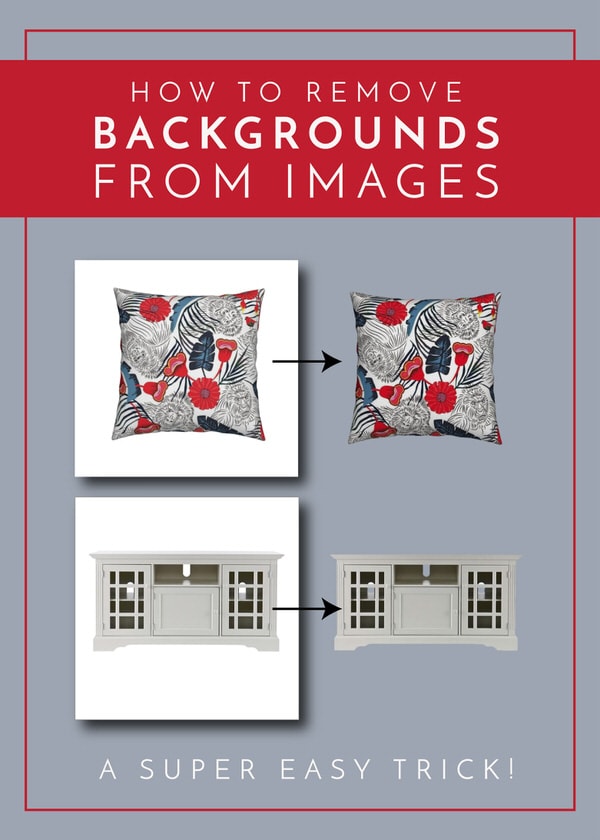
Whether you are a blogger or not, being able to remove the backgrounds of images is a pretty handy skill. Not only does it make assembling those fancy design boards pretty simple, but this trick is also helpful if you are needing to make party invitations, flyers, decor, cut files etc. You might think you need fancy computer software or graphic design skills to give images a transparent background, but I have a super simple way of doing it that I’ve been using for years. Today, I want to show you how to remove backgrounds from images using…PowerPoint!
What does “Transparent Background” Mean?
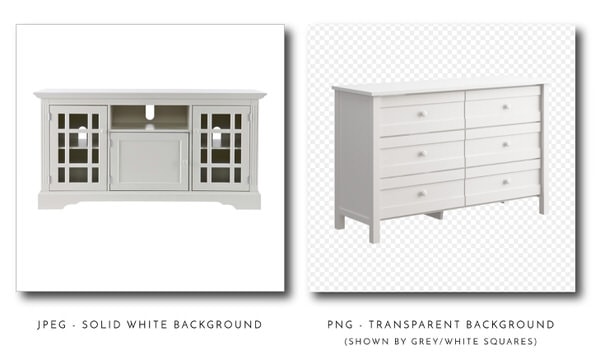
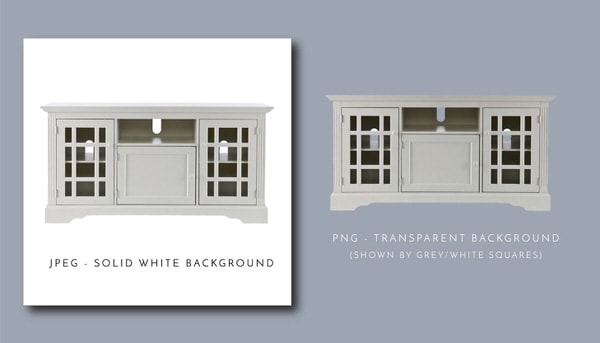
Before I dive into the tutorial, let’s just quickly review what I mean when I say “transparent background.” If you were to search for and save an image for use on a design board or other project, you will likely come across several different file formats. Sometimes you will be able to find images with a transparent background already; and you’ll know it because the area surrounding the image has a pattern of small grey squares around it (below right). Most times though, the image will be a JPEG with a solid white background (shown below left).
If the background of an image is a solid color (or has any other design to it), it doesn’t have a transparent background. Therefore, when you lay it over a colored background or other images, you will still see the white box around it (below left). With a transparent background, you can layer images over any color or any other object and be able to see the background (below right).
I’ve played with lots of different programs to take the background out of images because it’s something I do quite often. In all my trial and error, I’ve found two tried and true methods for easily removing backgrounds from images: PowerPoint and Canva. I’m going to break down both methods below so that you too can get great results when removing backgrounds from future images!
Method 1: Removing Backgrounds from Images with PowerPoint
PowerPoint has amazing photo capabilities for the everyday user. Not only does it allow you to easily drop in images and move them around without any weird bounding boxes or formatting restrictions, but it also has a tool built into the program to remove backgrounds in just a few clicks.
Start by finding and saving your desired image to your computer. If the image has small white/grey squares all around it, then you don’t need to use this tutorial; your image already has a transparent background. If it has a white or colored background, here is how to get rid of it!
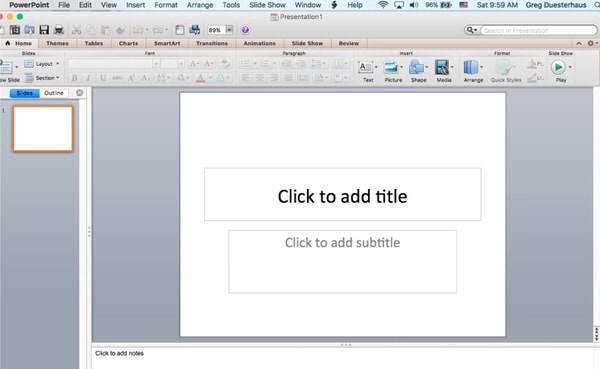
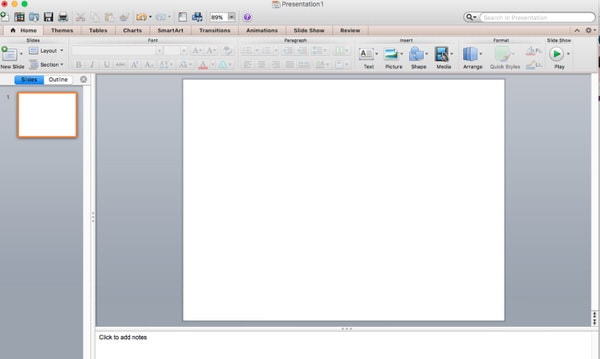
Open a new PowerPoint file.
Remove any default text boxes already on the first slide by just clicking on them and hitting the delete key on your keyboard.
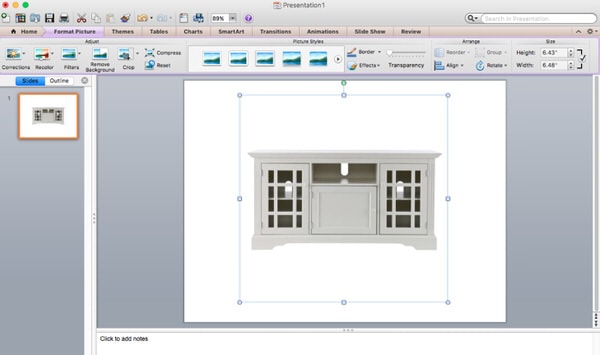
Drag and drop the picture you have saved to your computer (or navigate to Insert –> Image) onto the blank slide.
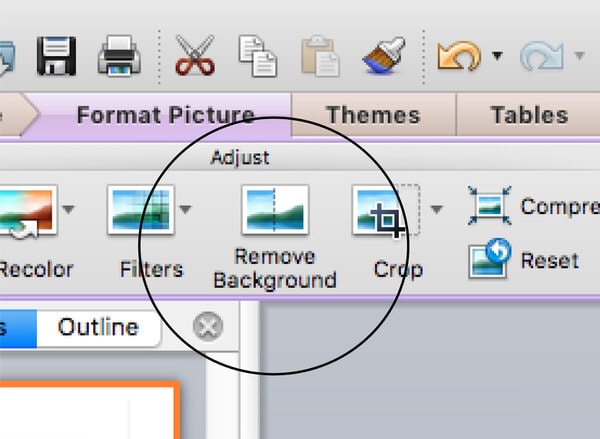
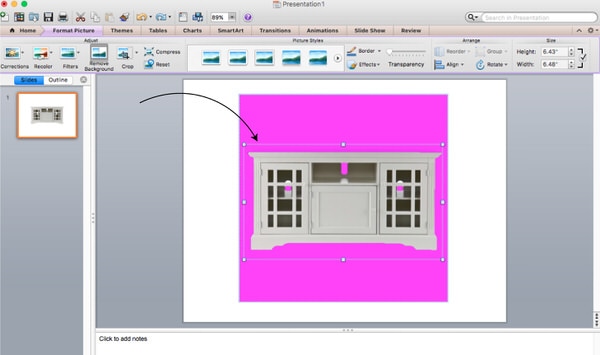
Once you drop the photo onto the slide, the Format Picture tool bar will automatically appear across the top of the screen. If it doesn’t, double click on the image. In the middle of that toolbar, you should see an option to “Remove Background.” With your image selected, click that button.
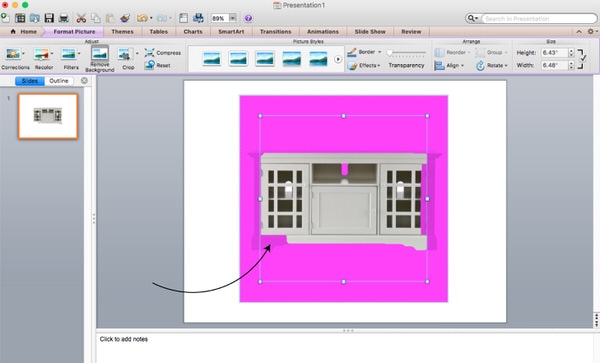
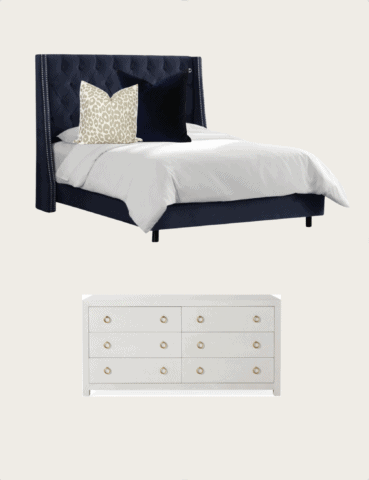
Once you do, you’ll see a pink box appear around your image. Your image should be in full color, and the pink box represents everything that will be made transparent (as in clear, not white). Notice below that the automatic boundaries that PowerPoint creates don’t catch my full graphic, so parts of the dresser are being made transparent. Tip: You can use the mini slide in the sidebar to see a preview of how your image will look once you’re done using the Remove Background Tool.
To make sure your entire image is shown in full color, simply adjust the handlebars of the box to fully frame out your image.
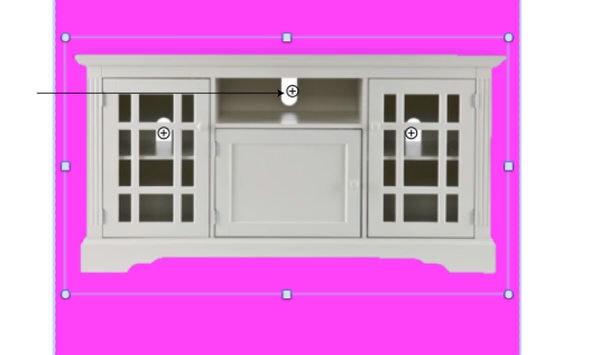
Depending on the image, you may notice that the program automatically makes certain parts transparent (notice the little pockets of pink throughout the dresser above). To make them opaque again, simple click on the pink parts with your mouse, and they will change back to the original color. The + symbol means it will be shown in its original color (as in, not transparent).
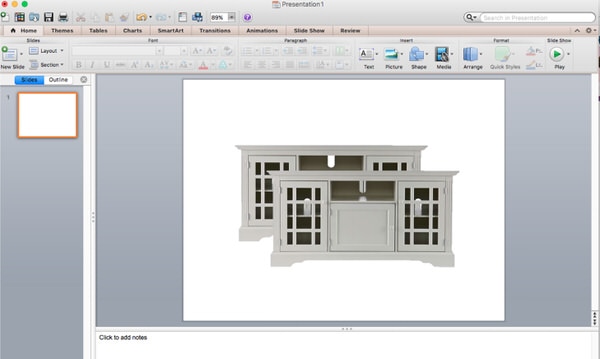
Once you have your image adjusted to your liking, simply click outside the pink box to de-select the Remove Background tool. Before you save or use your image, make sure it is really transparent by copying and pasting it onto the same slide. If the white box is removed and your two images can lay over each other as shown below, your image now has a transparent background! (You can delete out the extra copy of the image once you determine it has a transparent background.)
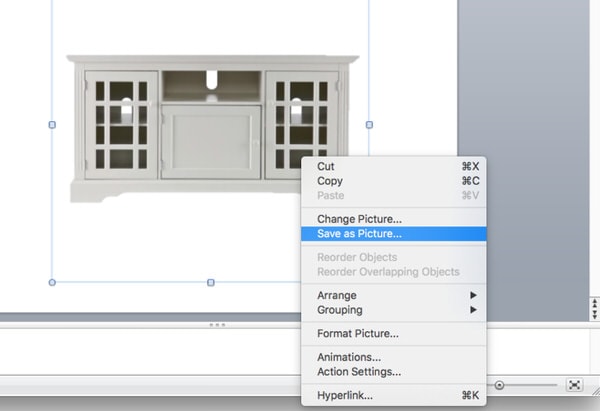
Now that the background is removed, you’ll need to save it so you can work with it in various ways. To do that, right click on the image, and select Save Picture As.
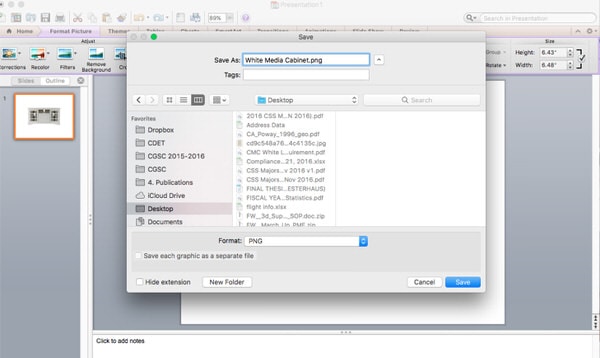
A new window will open, and you’ll notice the image file type is automatically now set as a PNG file (that is typically the file type for images with a transparent background). Type in a file name and click save.
Removing the Background of Complex Images with PowerPoint
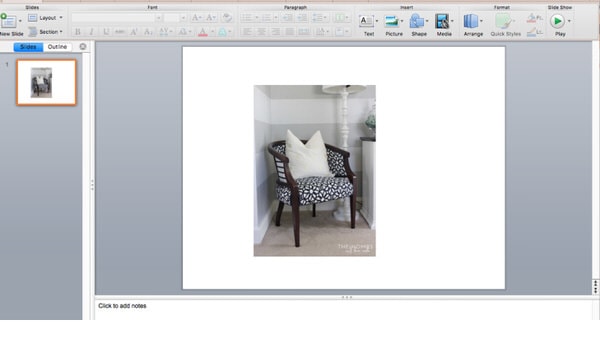
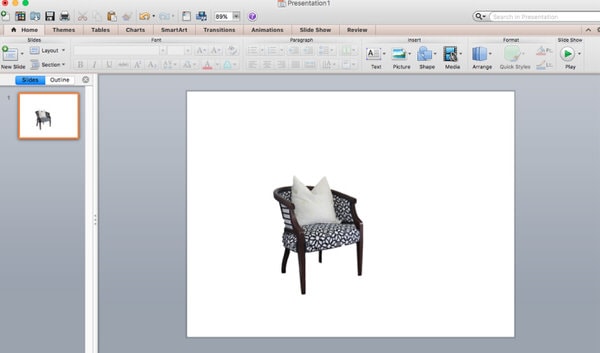
For images with white solid backgrounds (like shown above), removing the background is super easy. PowerPoint almost always automatically gets which parts of the graphic should be in color versus transparent. For images that are layered into a complex photo (like the chair in a room shot below), it is still possible to isolate out the chair, but it takes some playing around with the same Remove Background tool.
Just as above, drop a photo onto an empty slide in PowerPoint.
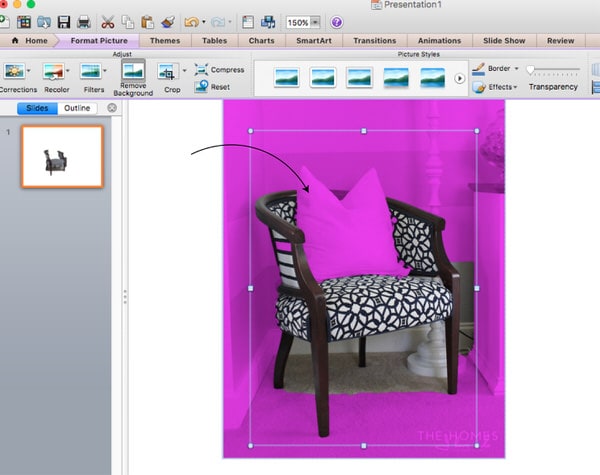
Again, double click on the image and then select the Remove Background tool from the Format Picture toolbar. Below, you can see that PowerPoint automatically selected which elements of the picture should be shown in color and which should be transparent, but didn’t get it quite right.
Like before, start with moving the bounding box to fully surround the image you want to isolate out.
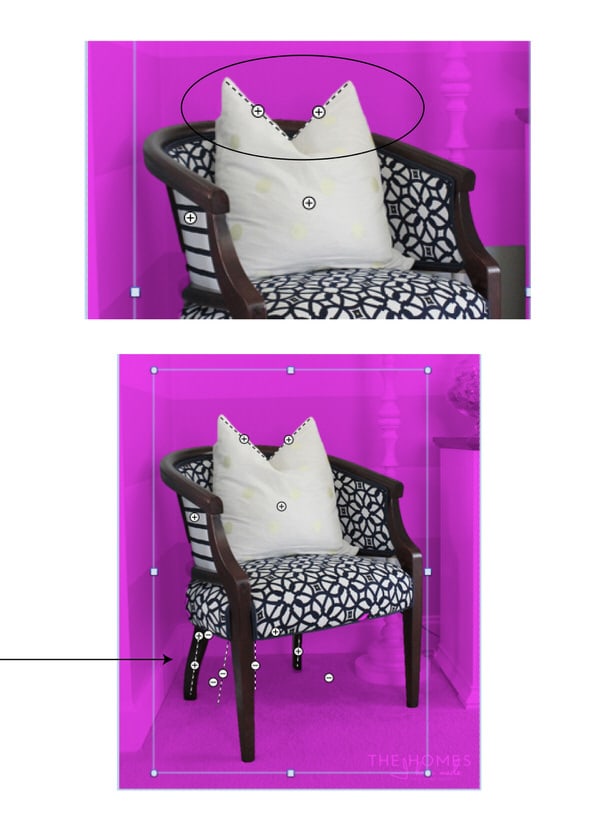
Then, use your mouse to continue to select pink areas to bring them back to full color. Sometimes just clicking on an area will switch them (like the stripe on the left side of the chair), yet other times you will need to draw a straight line for the program to acknowledge a certain part of the graphic.
Continue clicking around the photo and turning various areas from + to – or vise versa. Notice in the photo above that I had to draw and click on several different areas to finally get the chair shown in full color with a transparent background throughout the rest of the photo. It may take some trial and error, just keep clicking around until you have what you want.
Once you’re done, click off the pink box and save the image as I showed you above!
Method 2: Removing Backgrounds from Images with Canva
As I’ve mentioned before, one of my favorite ways to create design boards and professional-looking graphics, flyers, invitations, labels (and more!) is through a free online graphic design program called Canva. It is by far the easiest, most intuitive programs I’ve ever used.
Background Removal Tool
While Canva is indeed FREE, there are a few “specialty” tools that come with the Canva Pro plan, which is $12.95/month (but you CAN get a free 30-day trial!!!!) One of these specialty tools is the Background Removal Tool. Of all the different ways I’ve removed backgrounds over the years, this is by far the quickest and easiest method and gives the absolute best results!
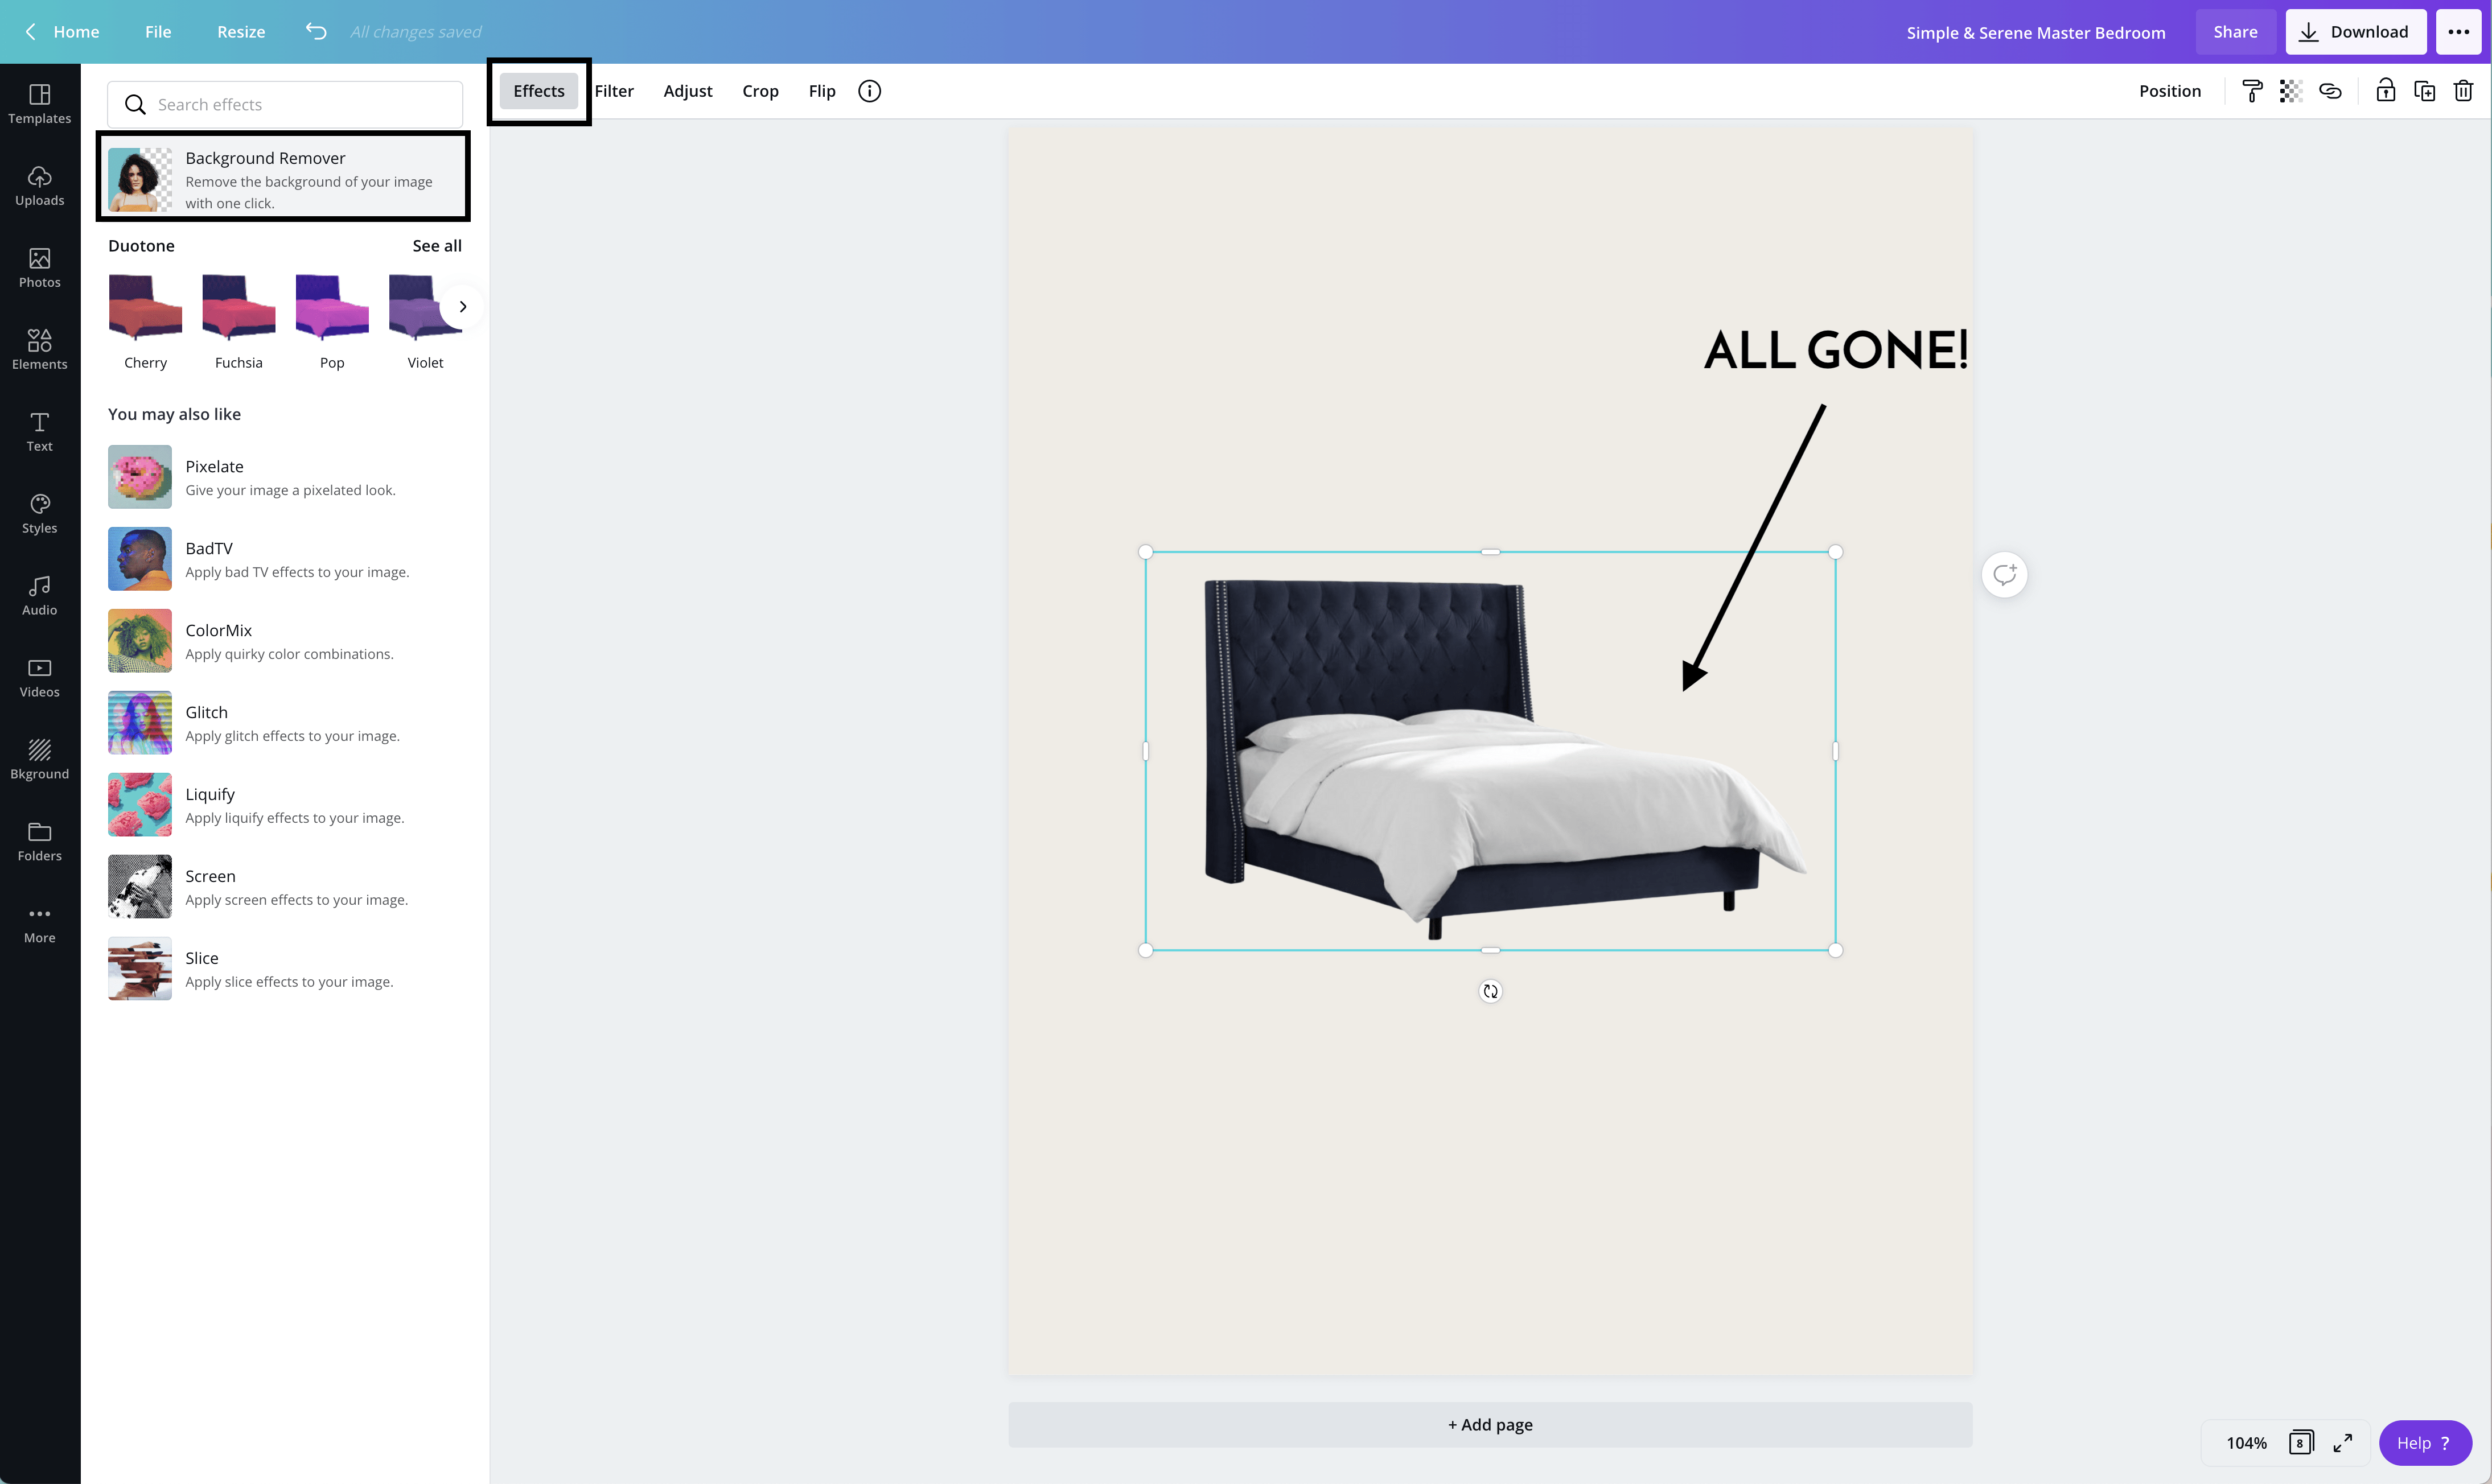
Removing backgrounds from images with Canva Pro’s Background Removal Tool is done in 3 quick and easy steps:
- Select the image you want to remove the background from.
- Click the Effects button.
- Click Background Remover.
In mere seconds, the background will be gone; and the edges around your image will be pristine!
Using the Background Remover Tool is really the best way to collage items together in realistic ways. So if you’re making a lot of design boards or want the cleanest designs possible, especially if you’re dealing with product photos, you might find Canva Pro worth the free 30-day trial or monthly fee.
Cropping Handles
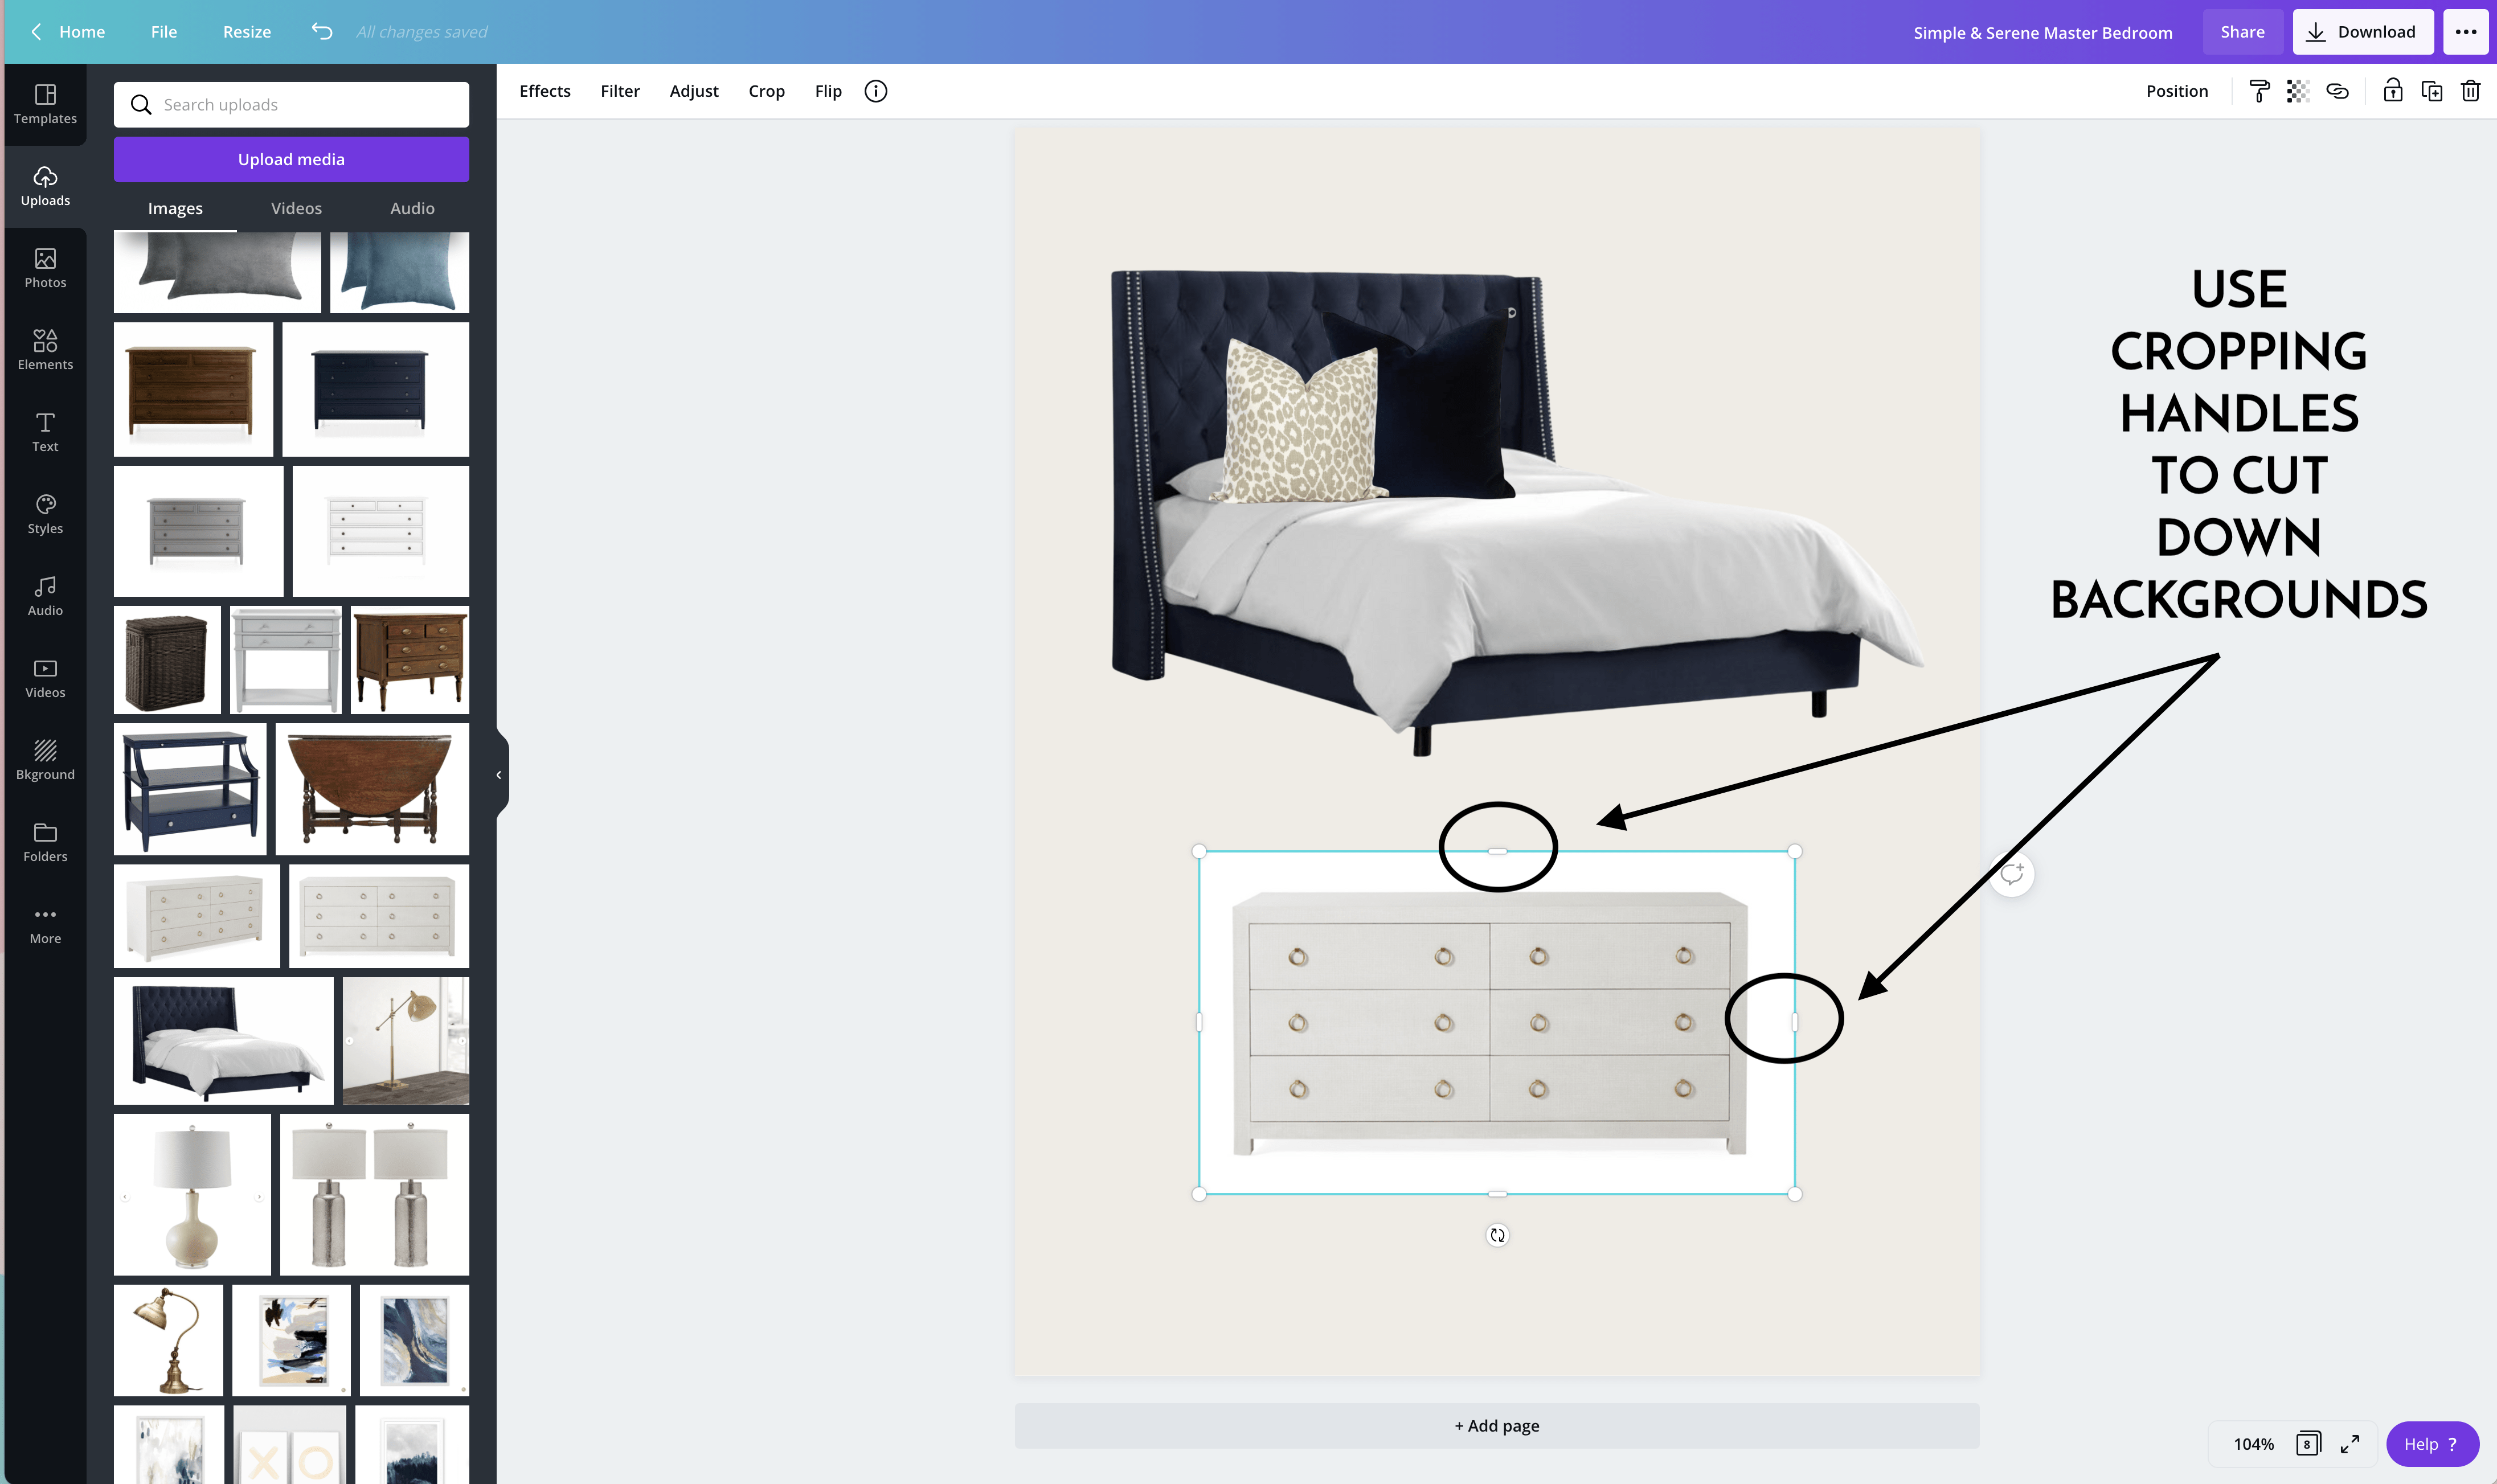
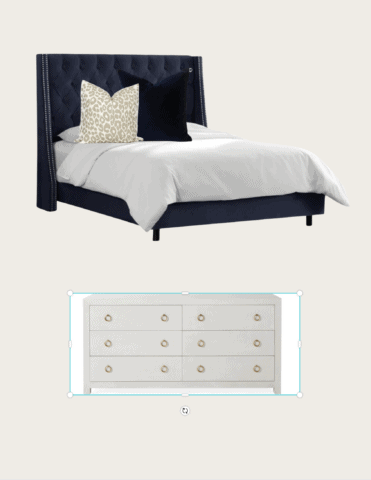
If you don’t want to try Canva Pro right away, you do have some other options to cut down image backgrounds within Canva’s free program (though you should be aware that you will be sacrificing the pristine image edges that the background removal tool has to offer). One of these options is utilizing Cropping Handles. Whenever you select an image, you will see small white rectangles on the tops/sides of the image. You can drag these handles in to eliminate the surrounding white space. Although it’s not the perfect background remover that Canva Pro has to offer, the results are still better than leaving all the white space in view!
Frames
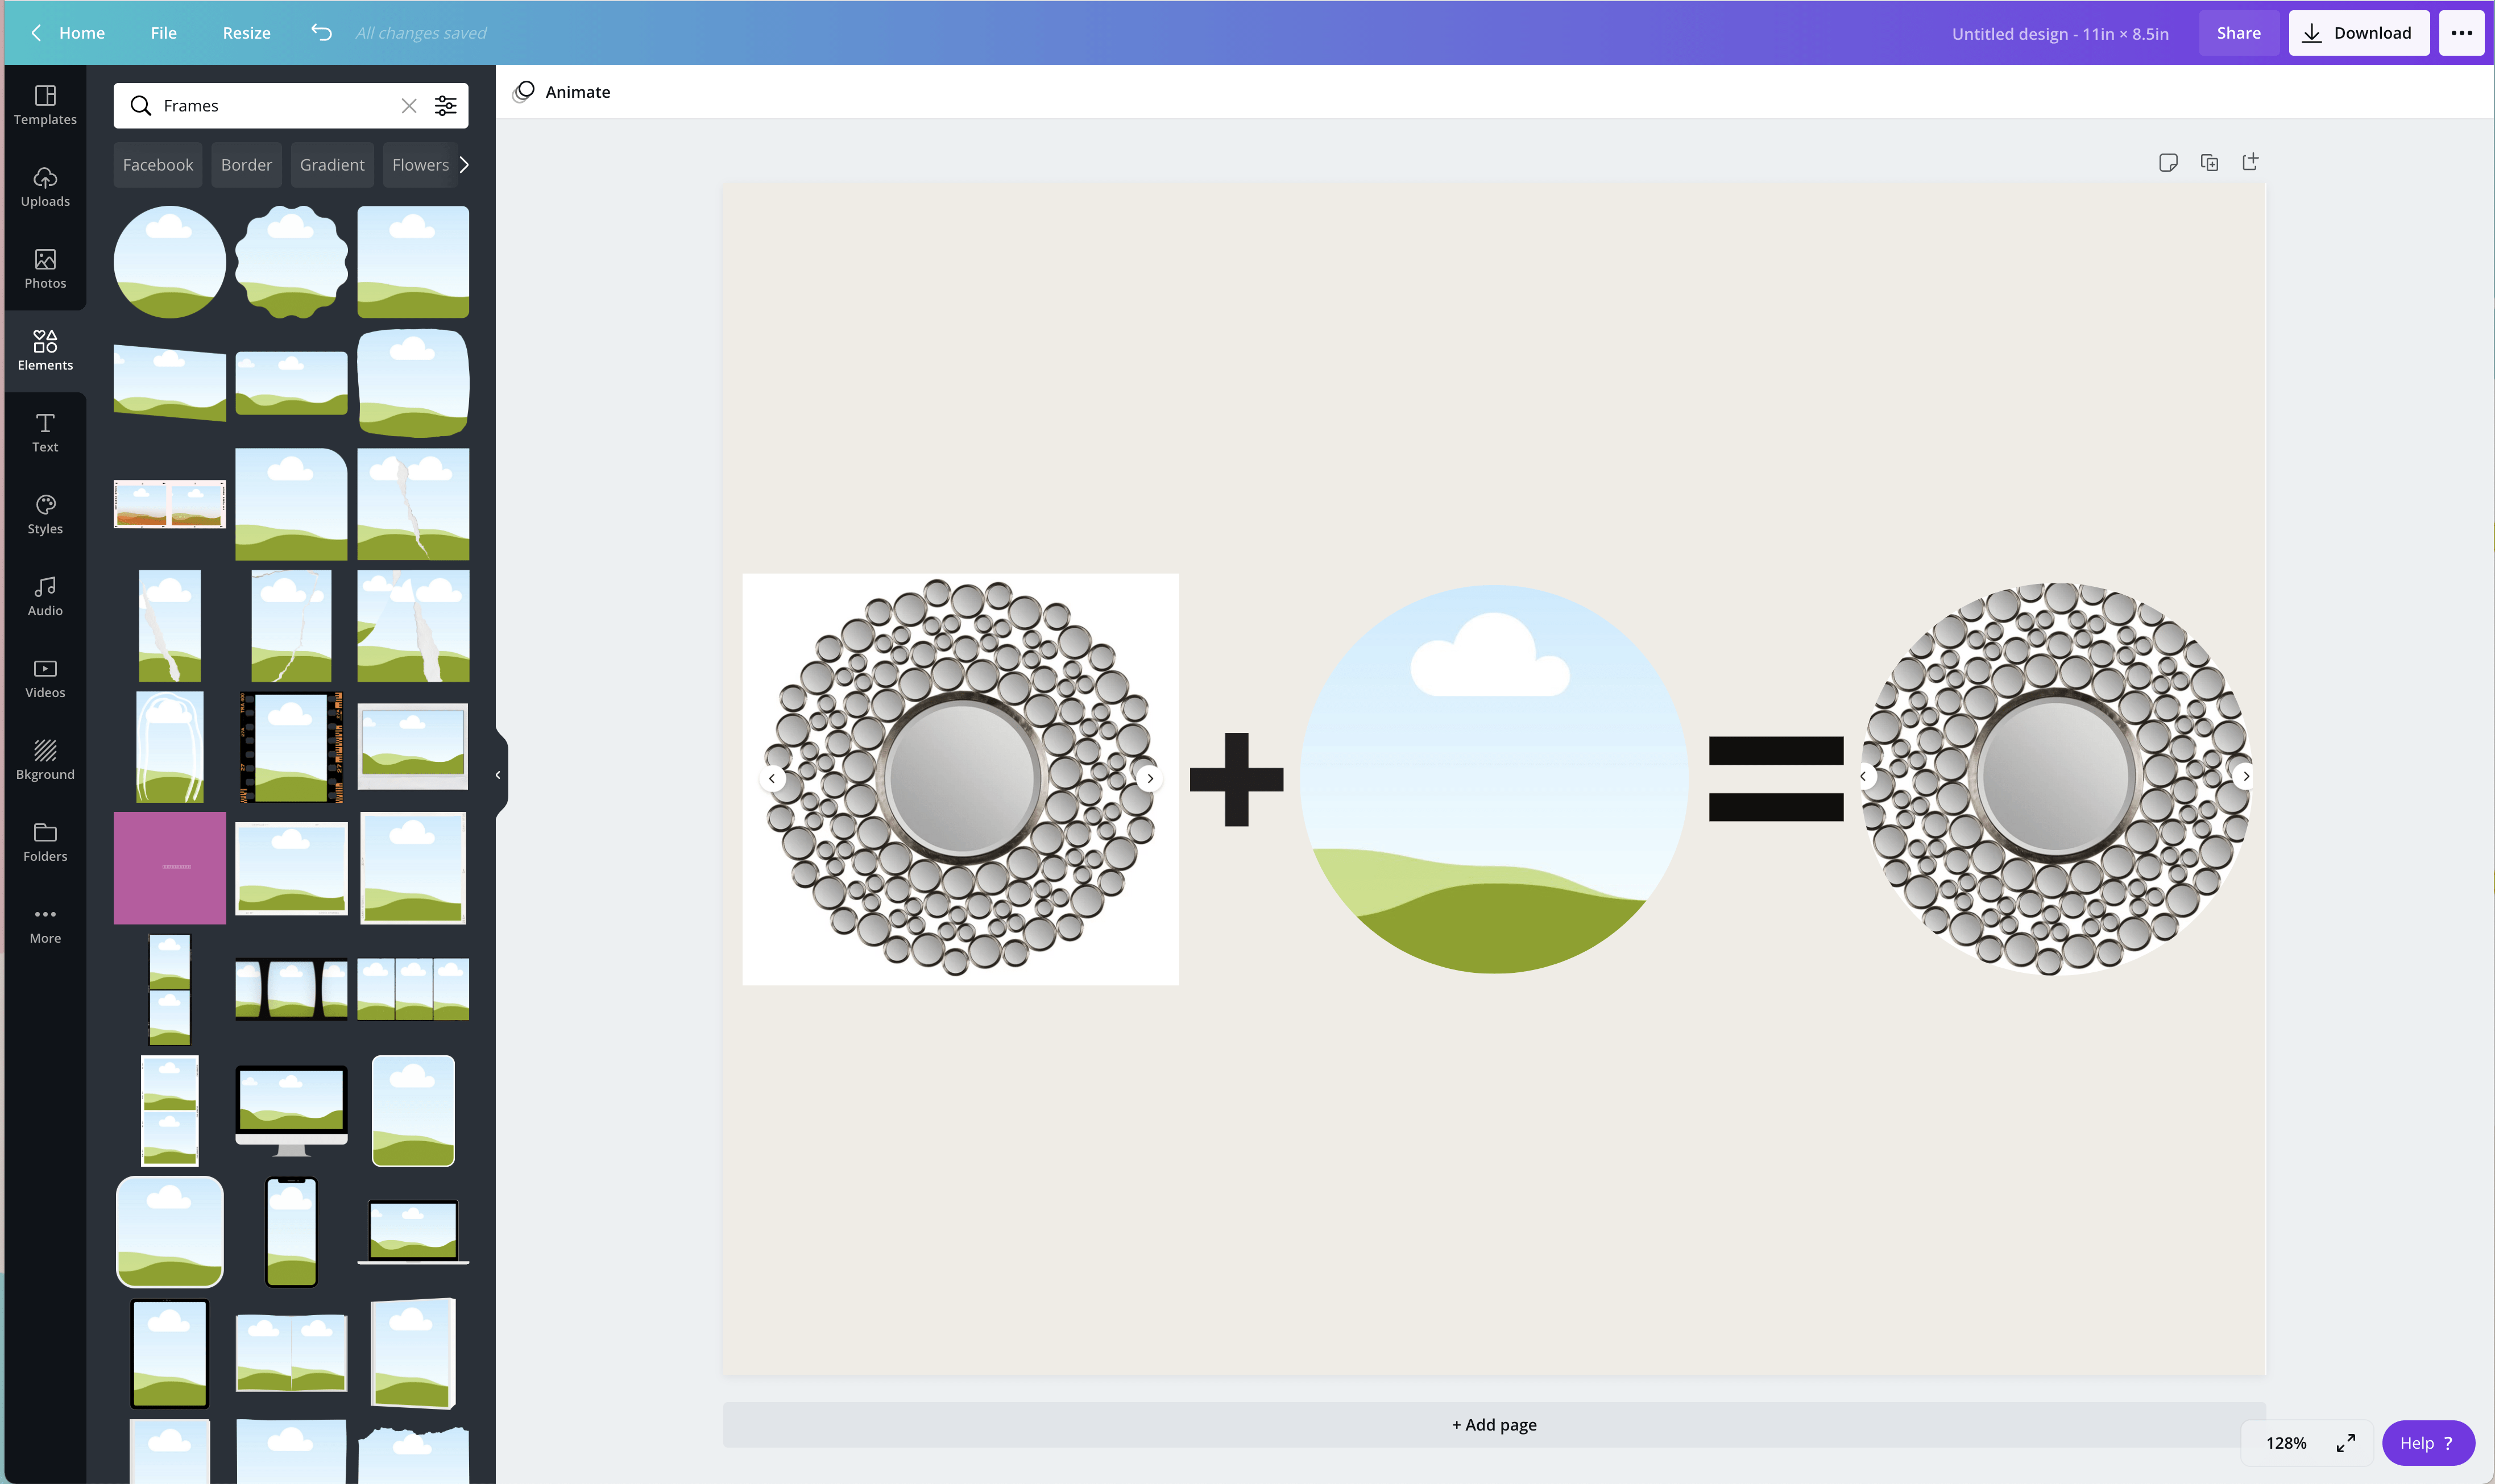
Another option you have to cut down on image backgrounds is to use the Frames feature within the free version of Canva. Frames are those grass+sky picture placeholders in which I dropped my circle mirror into (shown below). By doing this, I instantly cropped out all the excess white around the edge of the photo. Again, this method is not as perfect as Canva Pro’s Background Removal Tool, but it’s definitely a better option than leaving all the harsh white space in view.
And that’s it! Two methods to remove image backgrounds that are both quick and simple! I mostly remove backgrounds from images when I am creating themed party decor (e.g. Ninja Turtles images), preparing cut files for my Cricut Explore, and creating design boards for room makeovers. Keep in mind, however, if you’re using this tutorial to remove images of pictures you find on the web, it should be for personal use only!
Megan







28 Comments on “How to Remove Backgrounds from Images | 2 Easy Methods”
Great tip! Thanks for sharing it!
Oh my gosh. It’s really that easy!?! I followed your tutorial and did both pictures in under 5 minutes. Who know you could do this in PowerPoint. My mind is seriously blown! I may not get anything accomplished the rest of the day as I’m going to be playing around with pictures I’ve saved on my computer! Seriously, thank you so much for this tutorial!!!
Hey Jenna!!!
I know it! That’s why I had to share the tutorial – I had a hunch most people didn’t realize that capability existed and is SO easy! Thrilled to hear you found this tutorial helpful – have fun!!!!
Megan
Thank you so much for this post. I will definitely be using this “trick” soon.
Awesome tip Megan! So much fast than cutting it out in photoshop! Appreciate the clever post!
Wow! Thanks!
Wow, this was VERY helpful! I appreciate you sharing your knowledge with us!
Omigosh – how did I not know this for all these years?! I always used to use PowerPoint for editing photos and saving them in whatever format I desired, but I somehow never knew this trick. Thanks so much for sharing!!
What version of PowerPoint are you using? I have 2007 and it doesn’t have a “remove background” button. :o(
Hi Victoria,
I am using PowerPoint for Mac 2008. But I’ve been using this trick for years, it’s just gotten easier in recent versions. Old versions of PowerPoint use to have a “Set Transparent Color” tool. It looked like a little eye dropper and used to be near the Crop image tool. You could use that tool to select out the background on images. It was as clean or perfect as this enhanced tool is, but still gets the job done in a pinch!
Hope that helps a bit!
Megan
So helpful! I had access to photoshop & illustrator at my last job, so I wondered how to do it without those expensive programs. Thanks!
Great tip.. thanks a million!
So good to know. Thank you!
OMG! This has changed my life! Thank you! I use Power Point a lot to edit things since my Mac does not have publisher, but I never knew about this and it was right there in front of my face the whole time!
Thank you for sharing this! SOOOOO helpful!
Lady! You have no idea what you have just done for me!!!! I was a graphics design student, but I have always struggled with photoshop, and adobe illustrator isn’t much better. I have spent hours and hours on this task. Finally, this morning I decided to look around to see if someone else has miraculously found an answer to this problem, AND LOOK WHAT YOU DID!!! You are amazing and have suddenly opened up hours of my time to focus on other parts of our new business. Now I can focus on our website!! I’m so excited. I am subscribing to your blog to see what else you have up your sleeve!!! Thank you so very much!!
Donna
I just love this blog, because after reading this blog my all problems going to be solved. Thanks
This is such a lifesaver!! And the fact that I am using a program I already have makes it even better!! Many thanks!!
Amazing! Thank you so much for that little tutorial. It’s crazy how once you start looking, the technology we already have can do what we need and we didn’t even know it!
Thank you for the detailed instructions!
Just found this and Thank you! I have struggled with trying to remove backgrounds in Picmonkey and you need a very steady hand. This is so helpful and I am currently working on a few design boards for a renovation. Thank again for this time-saving tip!
I remove backgrounds almost every day to list items for sale. You are a godsend!!! Thank you so much! i was struggling with this everytime i did it. your method. comes out great. thanks again!!
You are most welcome!
I also just discovered that the Pro (paid) version of Canva has a tool that works even quicker and easier. But if you want to keep it Free, PowerPoint is the way to go!
Have a great day!Megan
This isn’t working for me. Nothing comes up when I click the image, and I have to go to Colour/Transparency colour and then click. With grey and white square backgrounds, that doesn’t work. I prepare presentations as a volunteer for community members. I love doing it but really need a simple way to cut out the grey and white backgrounds for images that are meant to be transparent. Thankyou so much for what you have offered, Eliz T
The information you shared is really helpful to me. I’ll try them out and see how they go. In addition to these tools, I often use another tool called “https://removal.ai”. Give it a try, I’m sure it will work for you
I have been reading others’ reactions to this post. The entire time I was saying, yeah, Right! or me too! Oh wow, how awesome! … to all the testimonies. However, my all-time favorite was Donna the graphics student… I am like her, ‘Lady I am signing up to your blog’ just to learn what else you pull off the shelf of your library of knowledge.
I am currently out of work thanks to Covid. So while I wait for God to open my next door, I will poke around with my new Cricut Maker, God only knows what doors might be opened. My journey started with my Embroidery/Sewing Machine which I just dusted off making/testing facemask for my senior family member at the beginning of Covid, now I make a customized mask. With my Cricut, I am sure I can do so many other things.
So thank you for sharing!!
Craft on my fellow crafters,
Melanie
All the way from Bermuda
This is amazing – thanks so much! I’m not a designer and couldn’t get this to work in Canva…arghh. I would have to rejigger a newsletter to accommodate photos that wouldn’t work, which was not a great solution and not what I wanted. The PowerPoint solution is a dream come true…made my day!
Thanks so much for leaving this comment, I am so thrilled to hear the solution work for you!