How to Make a Window Valance with Foam Insulation
Window box, valance, cornice box, pelmet box…I’ve seen this kind of window treatment called all sorts of things. Regardless of whatever the right/official name is for them, they are easily one of my favorite ways to dress a window…especially as a budget-conscious renter! Why? Window valance boxes are pretty easy to DIY, so you can customize them to your exact window size and style preferences; they don’t require much fabric, so they are often cheaper than long curtains; and since so many rentals often have blinds pre-installed, they are a great option when privacy isn’t a concern. Over the years, I’ve always made our cornice boxes out of wood, but I recently tried a much easier and cheaper method, and it worked brilliantly! Today I want to show you how to make the ultimate budget-friendly window treatment: window valances from foam insulation!

Love for the Valance
I wasn’t kidding when I said that window valance boxes are one of my go-to window treatments…I’ve used them in pretty much every home we’ve lived in, including this one! Not only do I love that they give me an excuse to add more pattern to a room, but I also think they finish off bare windows really nicely!
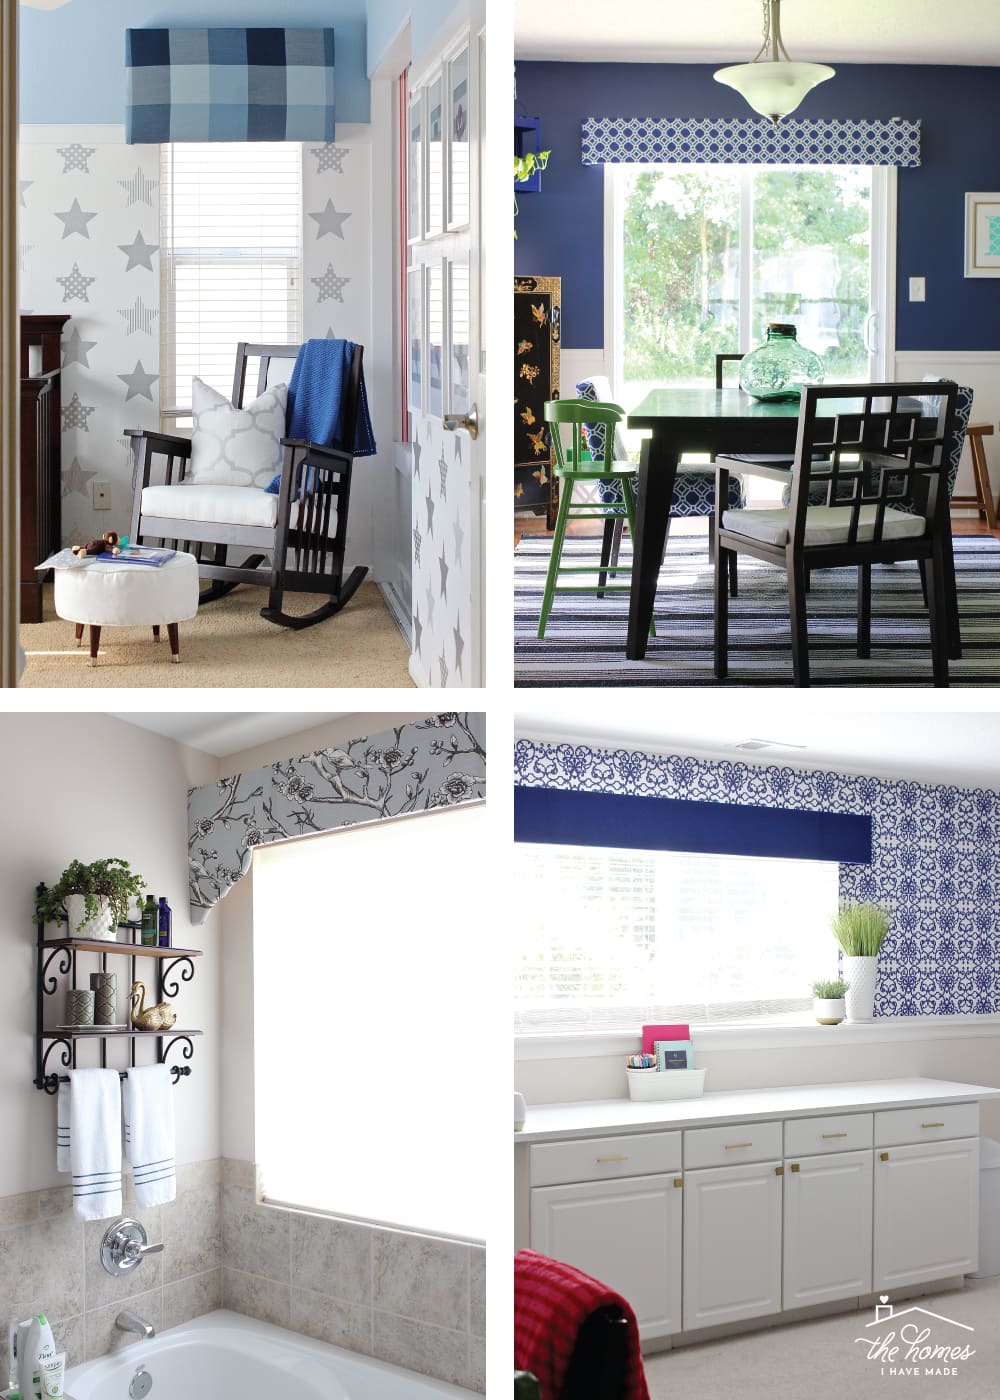
CA Nursery | NC Dining Room | KS Bathroom | KS Office
Side Note: I have to admit I was pretty taken aback by these oh-so-bold-and-colorful photos of other rooms I’ve done in the past…especially in contrast to my current office shown in this post. As much as I’ve tried to embrace the brown walls in this rental, the above photos were a huge jolt of a reminder that I really, really love bold spaces. Although we don’t yet know where we’re moving this year or what kind of house we’ll have, you better bet I’m already scheming up colorful wall ideas!
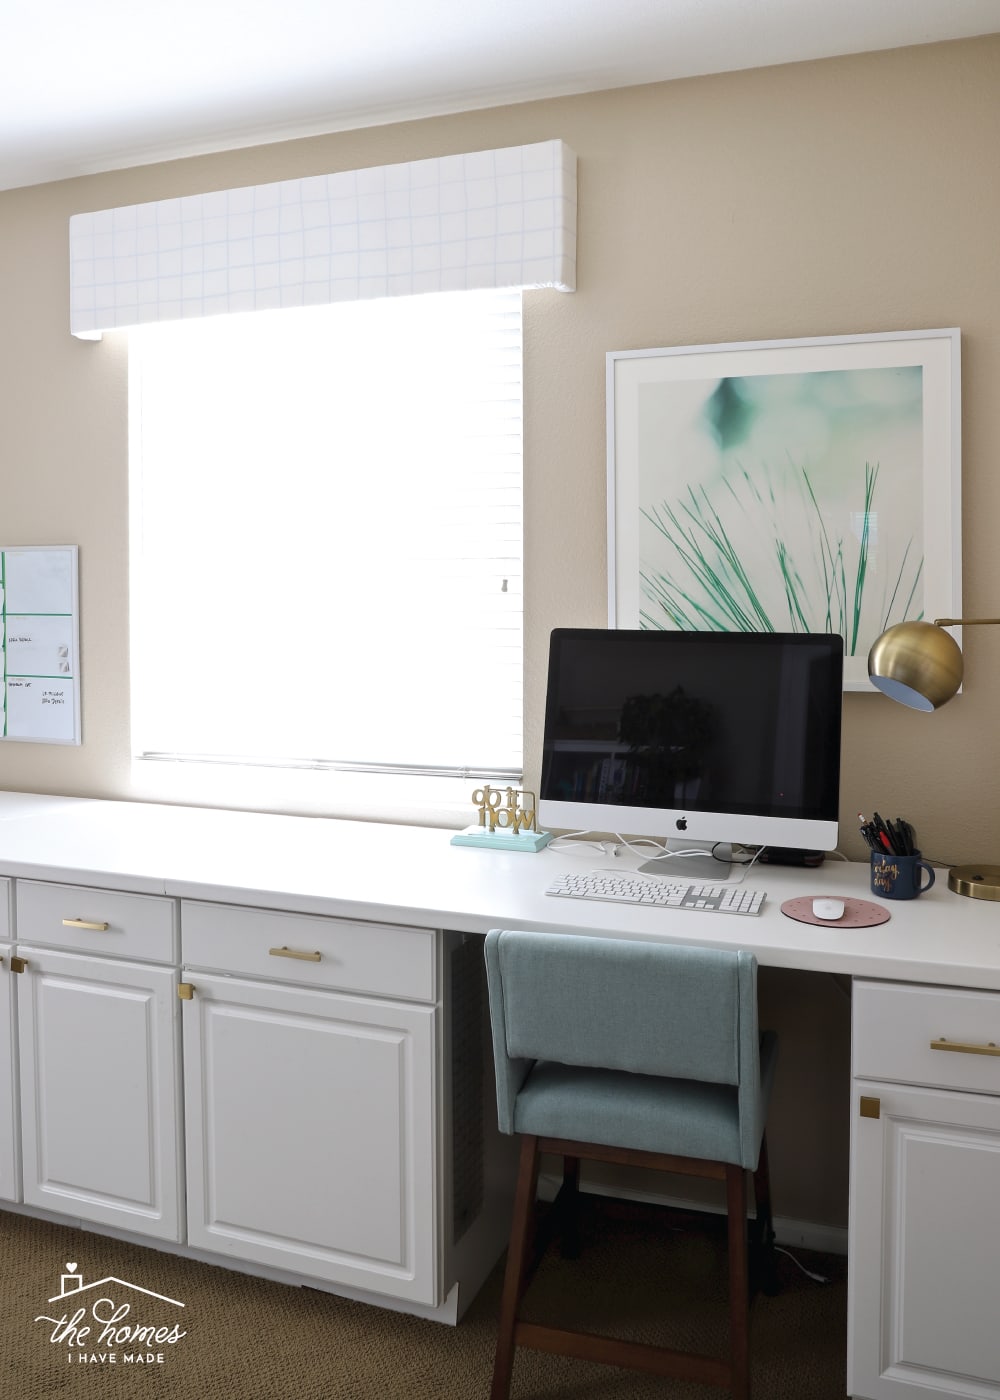
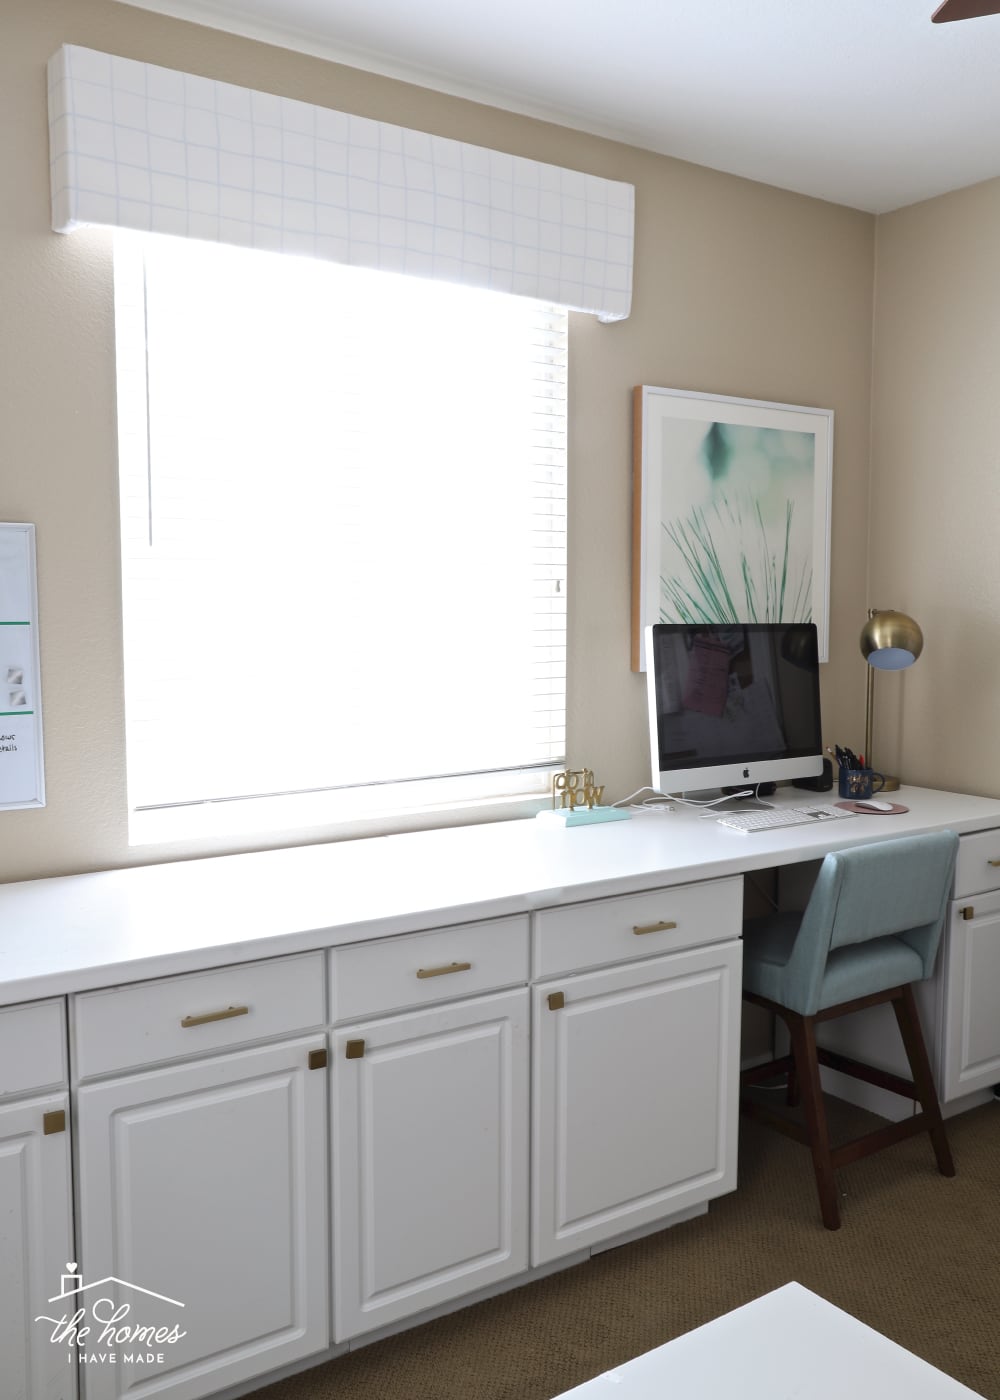
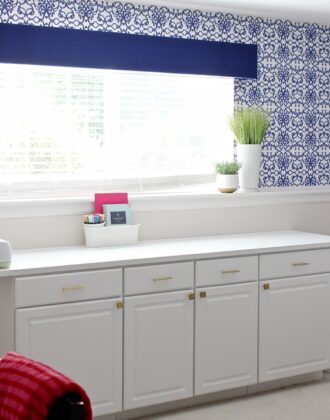
Over the last few months, I have been pulling together some final details in my home office. Naked windows, for some reason, really, really bother me so two window treatments were at the top of my list. A window valance was the obvious choice since the counters prevent my other preferred option: long curtains. But because we’re so close to moving out, I didn’t want to drill any more holes in our walls than necessary. I had heard and seen other people make window valances from sheets of thick foam insulation from the hardware store, and I figured this was a perfect opportunity to try it out!
The results were just as easy (if not easier!) than their wood counterparts, yet the investment in both time and money was significantly less. I’m not really sure if I’ll ever go back to making our cornice boxes out of wood again!
Supplies Needed
To make a window valance/cornice box/pelmet box from foam insulation, here is what you need:
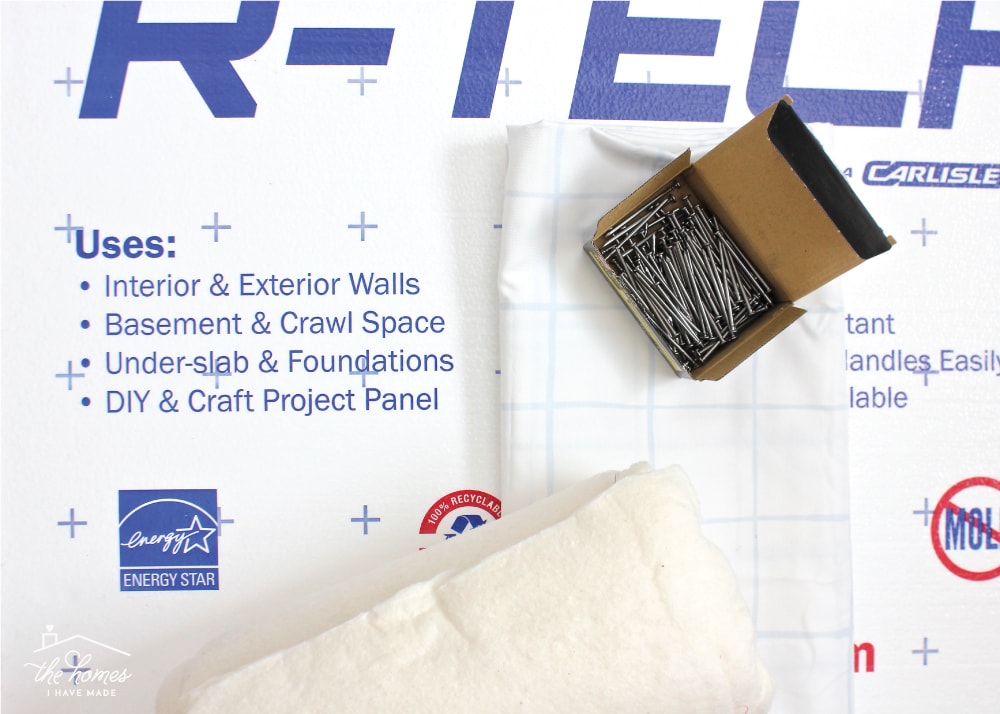
- Foam insulation from the hardware store (more on this below)
- Quilt batting – enough to cover the size and amount of valances you’re making
- Fabric – enough to cover the size and amount of valances you’re making (I used a shower curtain I found on clearance at Target)
- 2″ nails
- 3/4″ nails
- Command strips
- Tools: Tape measure and/or ruler | Electric cutting knife or retractable craft knife | Level
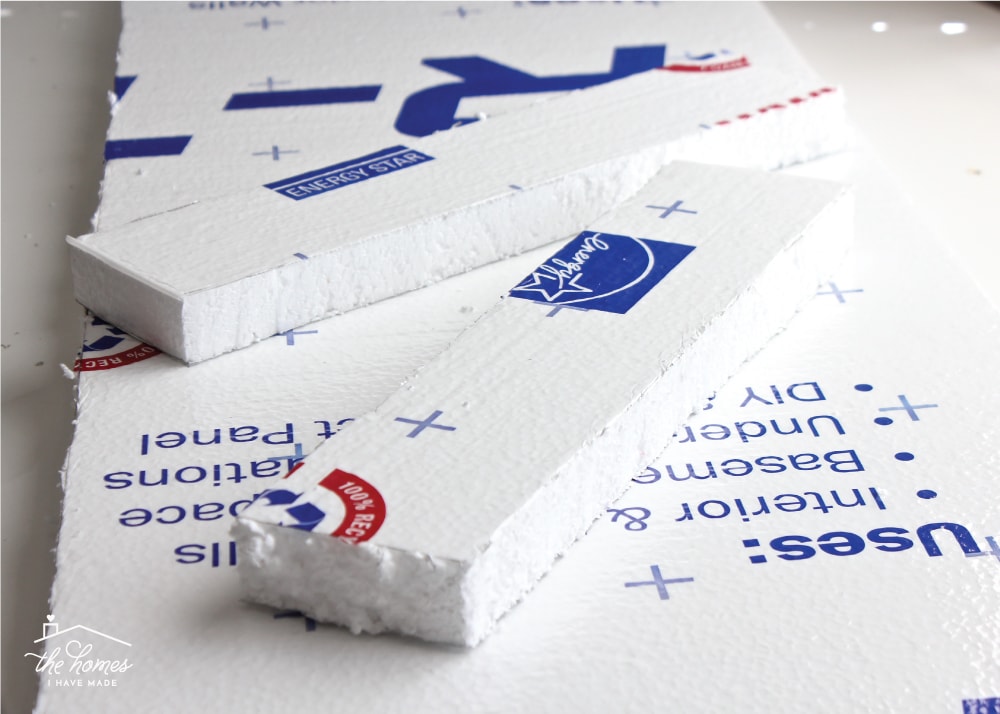
Years ago, I used thick foam insulation from The Home Depot to make a bulletin board. However, that insulation was bright pink; and since I knew my fabric for this project was bright white, I worried about it showing through. Then I discovered that Lowes carries solid white foam insulation and that’s when I finally decided to give this a go!
Here is what you’re looking for (below). It comes in several thicknesses, so you can choose how substantial of boxes you want to make. I chose the 1″ thick sheet since that’s what we have always used for our wood versions. Plus, I felt it was the best price and would be the most manageable!
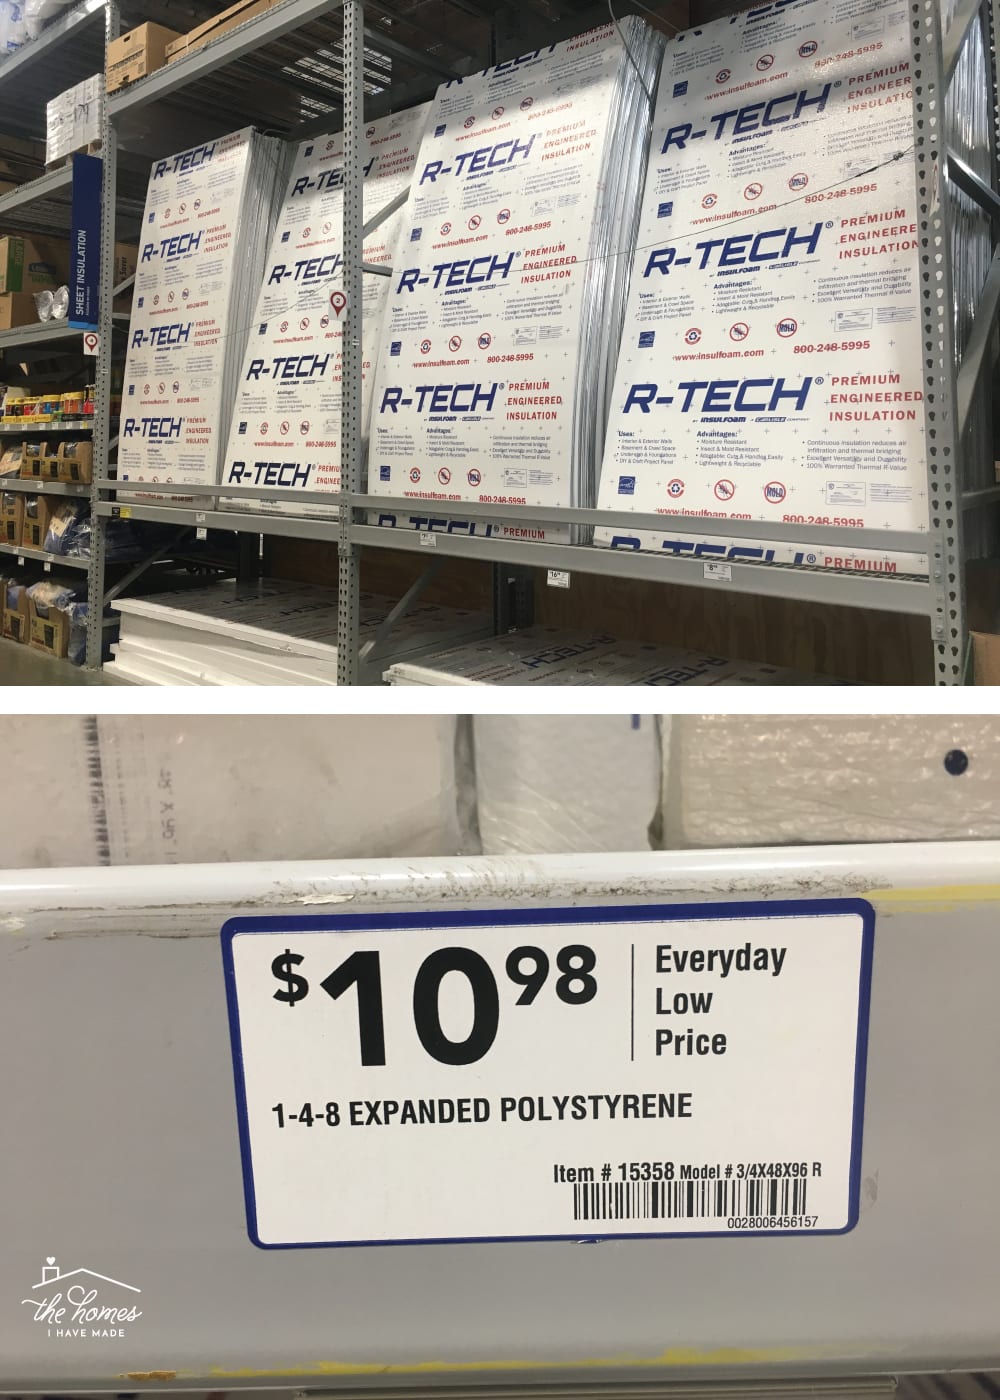
Yep…that says ~$11. And I was able to get two window treatments out of a single sheet with LOTS leftover! Told you this was a cheap project! 😉
Measuring the Foam Insulation
The first step is determining how big you want your window valances to be. I like mine to extend at least 5 inches beyond the window on each side and measure at least 12″ tall. We have incredibly high ceilings in this house, so I decided on a height of 15″ for my boxes this time.
You will also need to determine how far out from the wall you want them to sit. We have always used 1x4s for the returns on the boxes, so I decided on a depth of 4″.
Here’s an illustration to help you: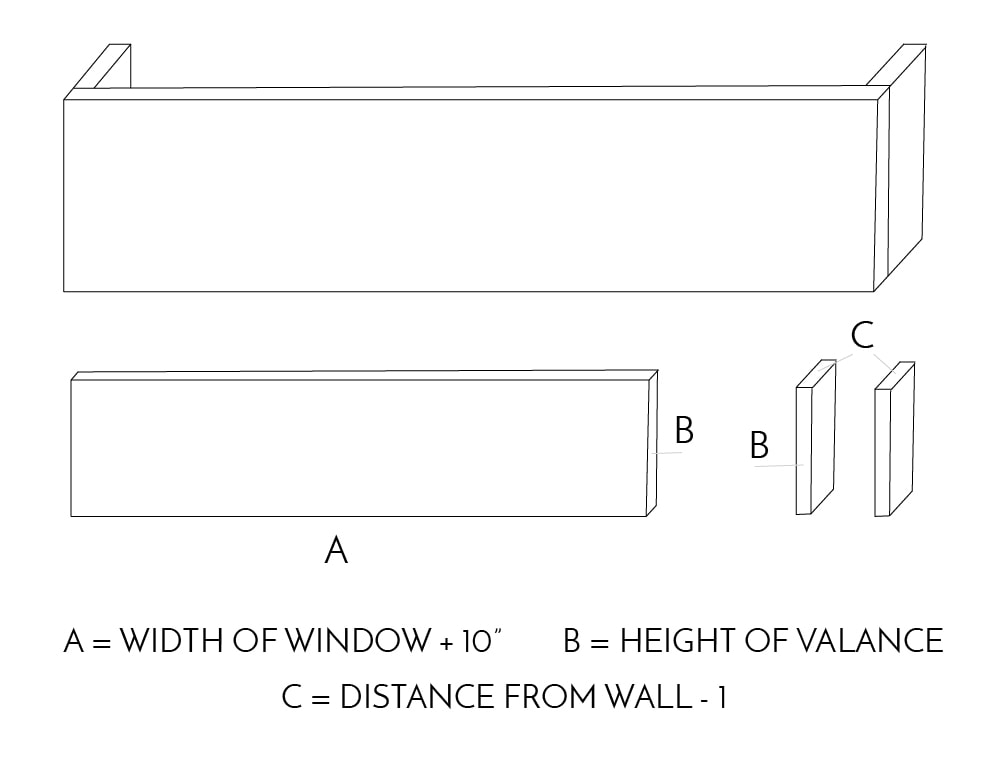 Once you have your measurements figured out, you need to transfer them to the foam insulation. One of my favorite things about working with this product is that it has pre-measured marks down the entire sheet, so it’s very easy to make sure you’re measuring/cutting in a straight line!
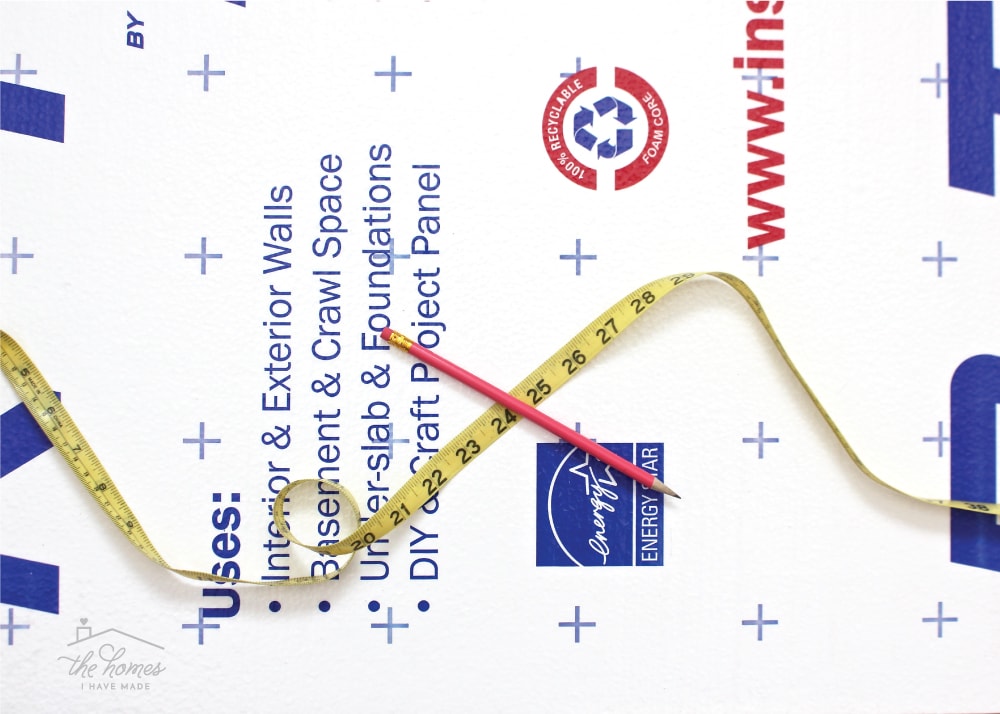
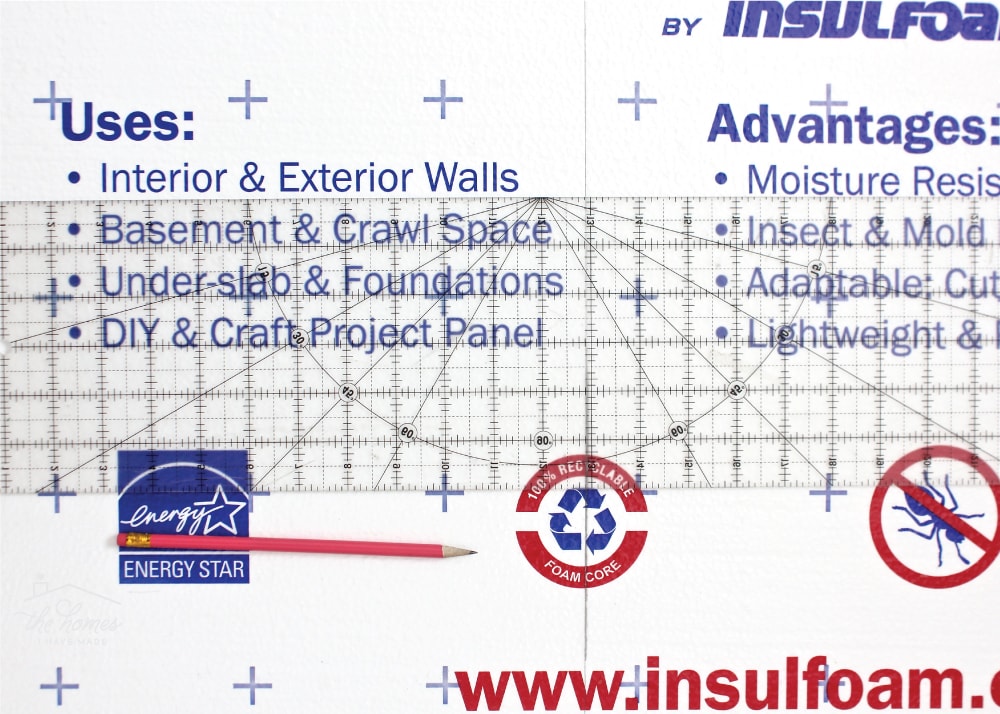
I found using a combination of a tape measure, long clear ruler and the provided hash marks the easiest way to translate my window box measurements to the foam sheet.
Cutting & Assembling the Window Valance Box
Admittedly, the hardest and most time-consuming part of the whole project is cutting the foam insulation. Even with using an electric cutting knife (like the kind you’d use on a turkey), it can be very messy and slow going. I got the cleanest edges and straightest lines using the electric knife, and also got decent results using a sharp retractable knife with the blade extended out as far as possible (to cut through the 1″ foam). I tried using a serrated knife; but since it required so much back-and-forth motion, it easily snapped the foam board. Just go slow, take your time, and make as many passes as you need to get it cut clean through!

I made most of my measurements for my boxes along the clean outer edges of the sheet, so I could at least be sure I’d have one very flat edge on each box. However, once everything is wrapped up in batting and fabric, you won’t notice your messy edges at all, so just do your best to get the foam cut apart in the correct dimensions!
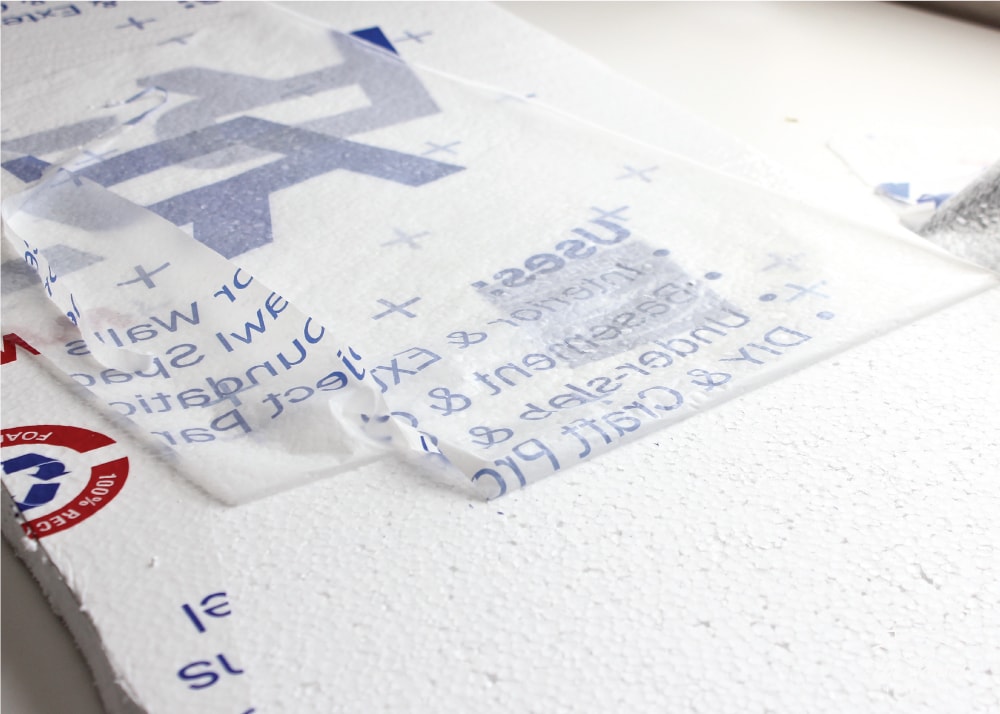
You probably notice that there are blue words all over the foam insulation, but that’s actually just a protective film covering the solid white foam sheet. I chose to leave the film in place for cutting and then removed it afterwards, thinking it would keep the mess down. I’m not entirely sure it helped (my office was still covered in white foam!) so you can remove it whenever you’re ready! (And if you’re using a thick, dark fabric, you probably don’t need to remove it at all!)
With the flat front and the shorter returns all cut from foam, you next need to “assemble” the box. I like to have a solid, clean board along my window fronts, so I always attached my returns behind the front panel, as shown below…
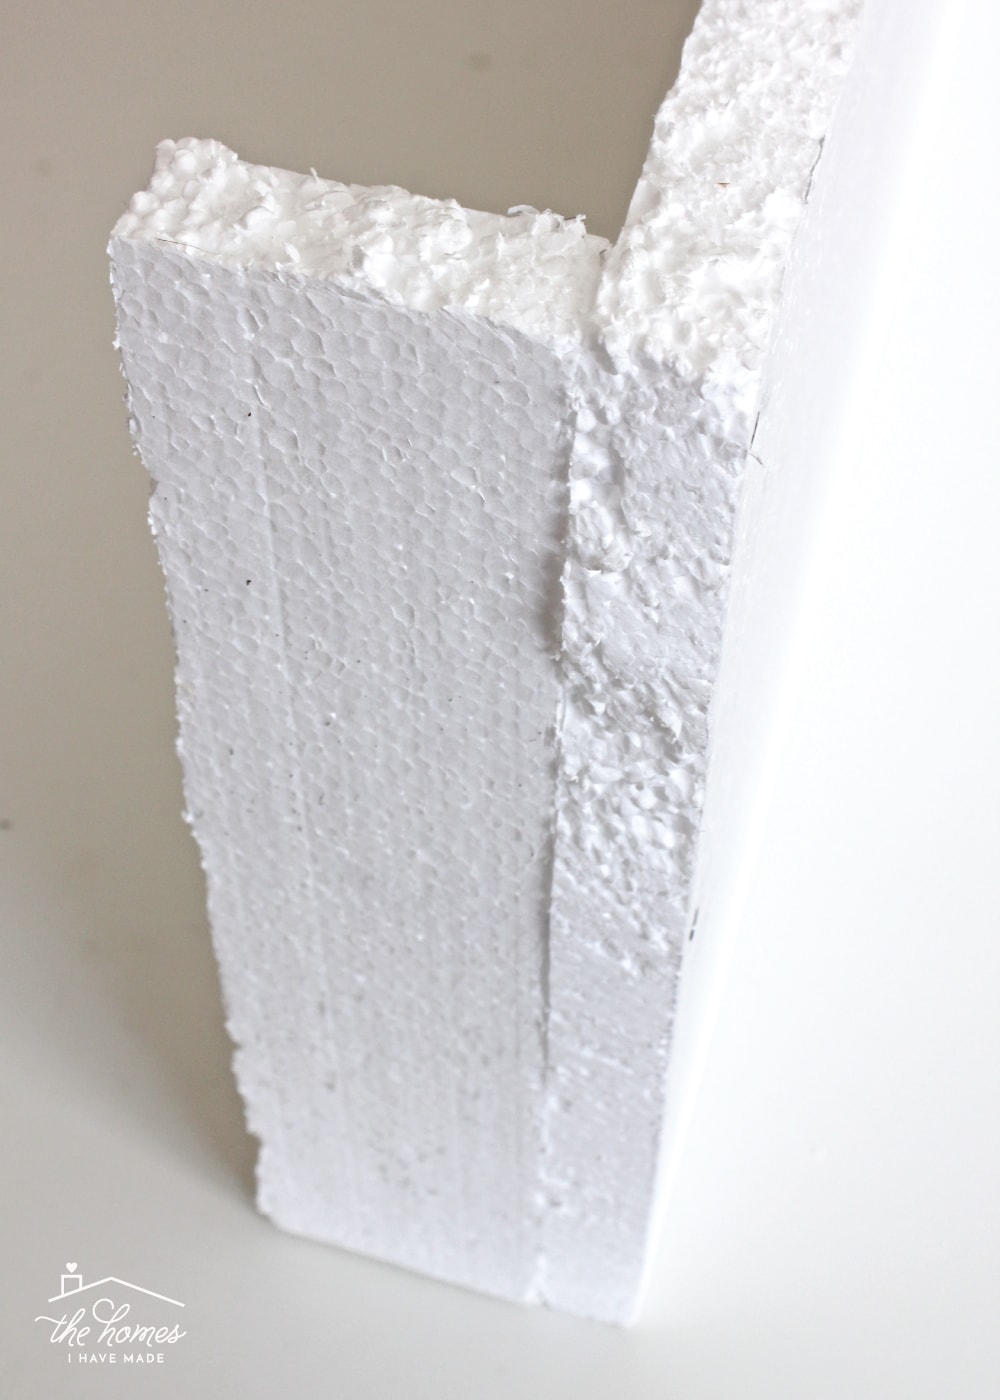
Here’s where the simplicity of the foam makes a big difference! All you need to do is slide some sturdy 2″ nails through the front foam panel into the side returns. Do 3 or 4 nails down the height of your valance, and take care to drive the nail into the center of the returns. No tools are needed here…just press them on in! You’ll be surprised at how sturdy they are!
Wrapping & Hanging the Valance Box
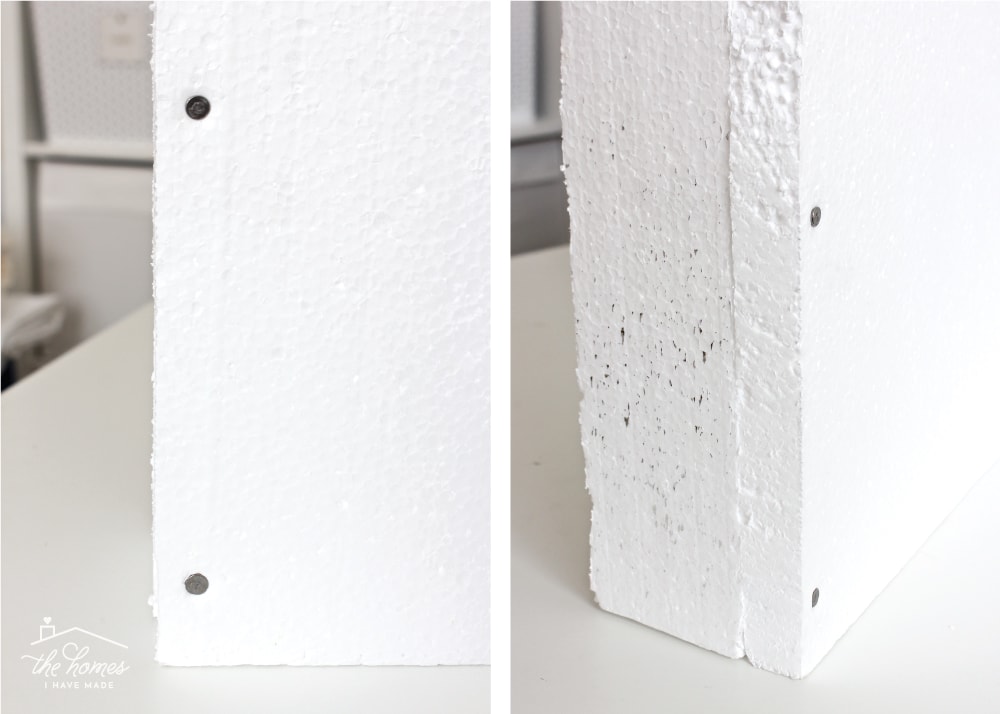
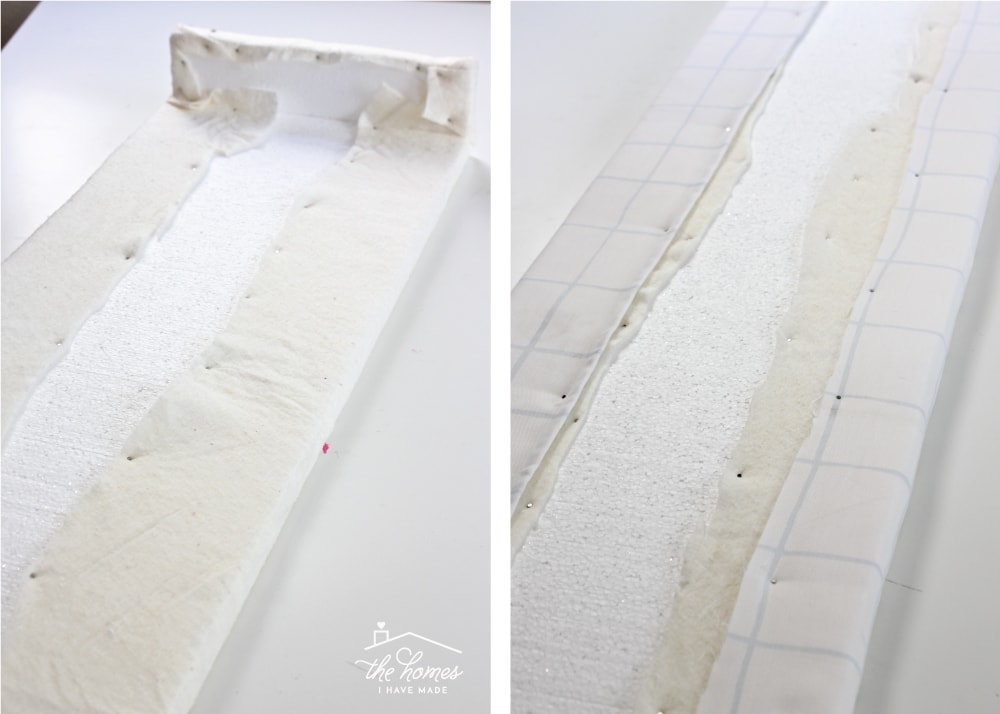
With the foam box assembled, the last step is to wrap it in batting (to give it an upholstered look) and fabric. I recommend securing one then the other (rather than trying to do both materials at once), as working around the corners can be quite tricky. After experimenting with different options for securing the batting and fabric, I ultimately landed on some 3/4″ nails (the same ones I used for this project). They slide right into the foam, yet are small and sturdy enough to keep the batting/fabric tight.
TIP! One benefit of using wood is that staples into wood hold fabric much tighter than nails into the foam. However, I found that by pushing the nails in at just the right angle and using a nail every inch or two, the fabric was plenty tight!
To cover the boards, cut a piece of batting/fabric 10+ wider and 10+ longer than your foam box (including the returns). Starting in the middle, wrap the batting/fabric toward the back, as tight as possible, and secure in place with nails. Work your way to the ends of the box, snipping and folding at the corners where necessary.
Besides the cost and effort savings of using foam, you might recall that my other main priority was to keep installation hole-free. Because this cornice box is so light, I was able to hang it with a single large Command strip on each side (seriously!!!)
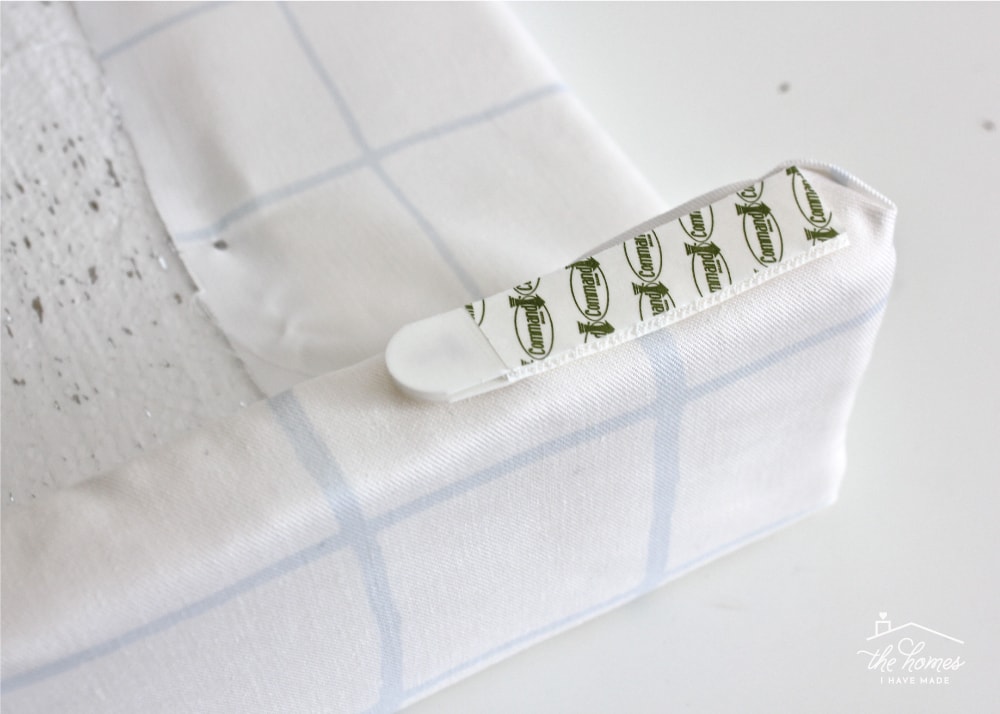
TIP! To ensure your valance is nice and straight, place a small level on top of it as you secure it to the wall!
Next, repeat for however many windows you have, adjusting widths as needed for different size windows (but keep the height the same for a consistent look around the room).
I am so glad I gave this foam insulation version of the cornice box a try! Not only do I love that I didn’t have to pull out the power tools to bring it all together, but I just adore how low commitment it is! If this box doesn’t fit in our next home (or heck, if it doesn’t survive the trip in the moving truck!), it was a $20, 1-hour, damage-free project that brought some much-needed style to my bare office for our remaining time here! I’d say that’s a win-win-win!

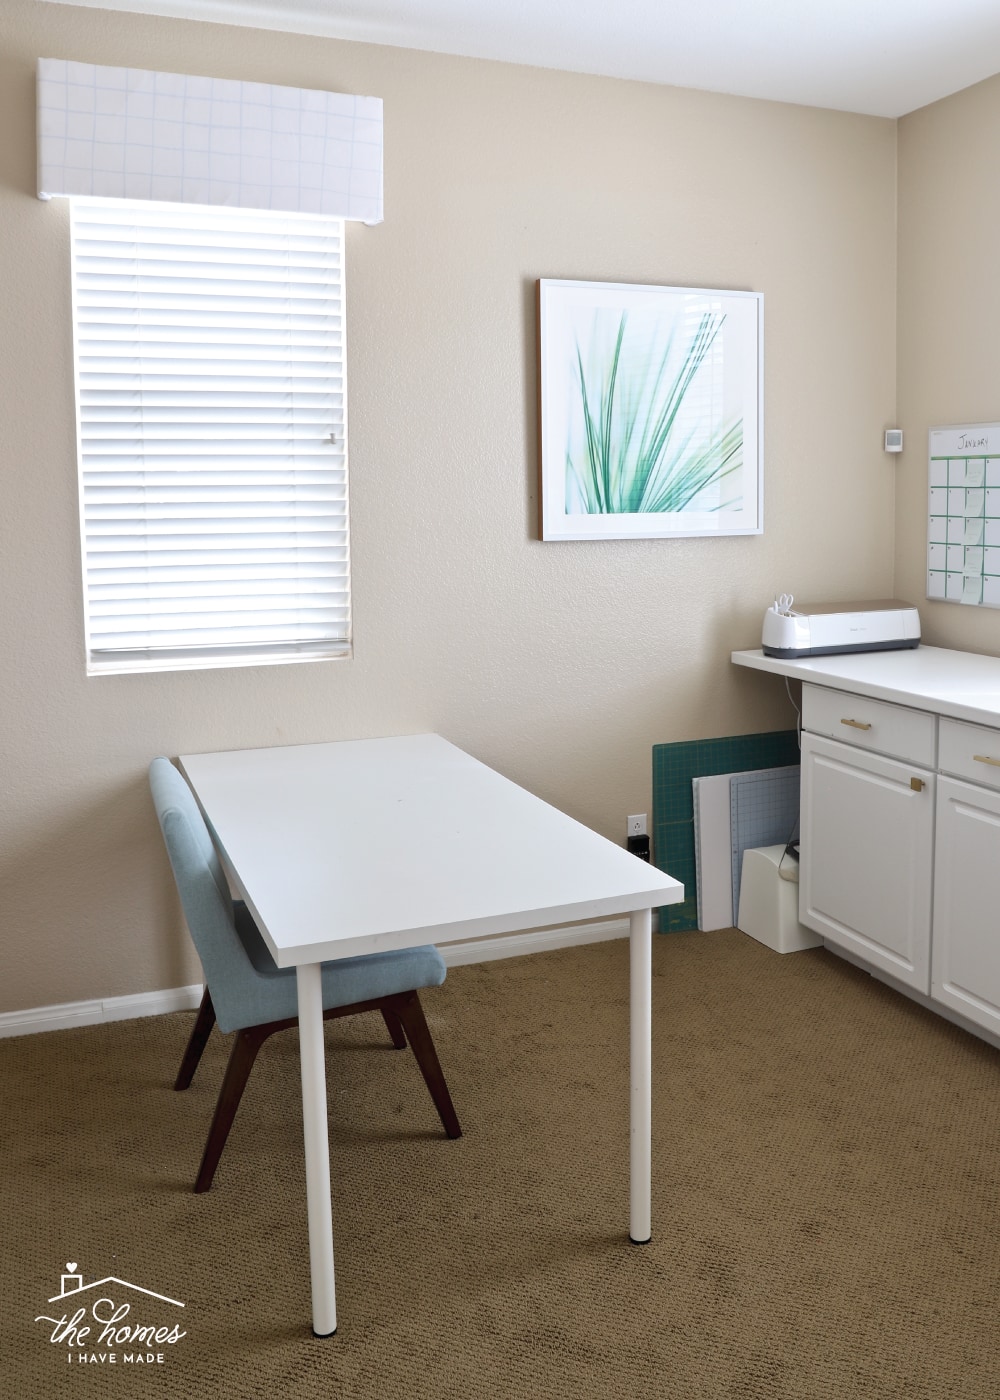
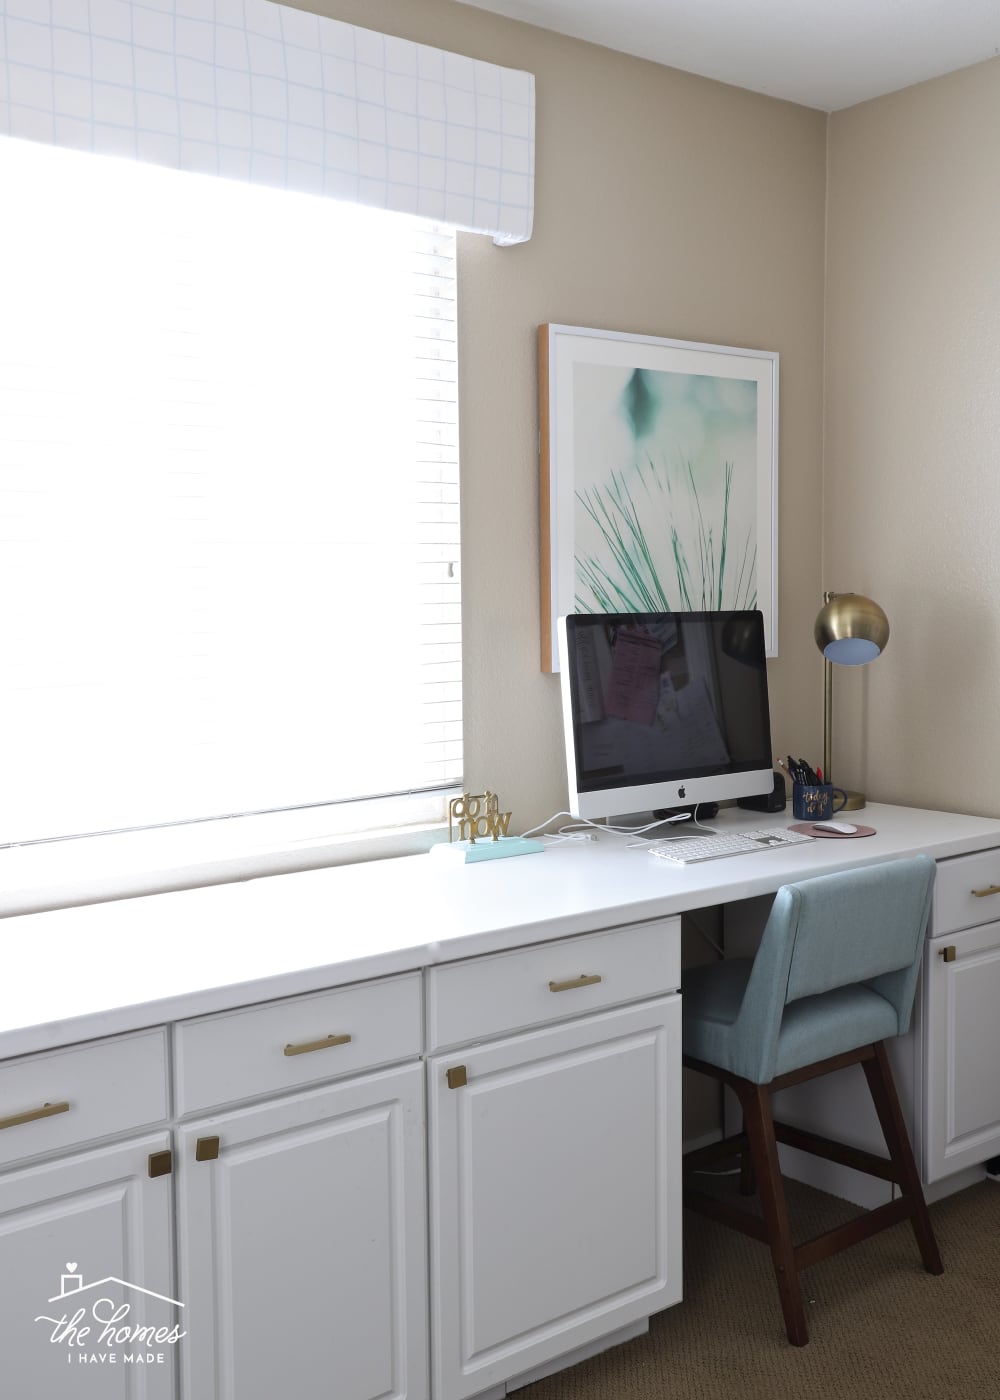
There have been quite a few updates in the office since you last saw the room. Yes, the walls are still a horrible shade of tan, but I’ve added some new cozy chairs and finally got my Minted art pieces framed, so it’s feeling much more polished. I’ll have a room tour for you soon once I finish up a few organization details!

Budget-friendly, easy window treatments are something I’ve done a lot of over the years because as anyone who rents a lot knows…window treatments rarely work from home to home. As such, it’s really hard to invest good money in making your windows look great knowing it’s probably just for your current home. If you’re looking for some more easy ways to dress up your windows, try these other projects!
Other Great Window DIYs To Try
Looking for other great solutions for your windows? I've got you covered with these other smart DIYs!
- How to Make a Window Valance with Foam Insulation
- How to Sew a Window Valance
- How to Make a Window Valance with Foam Core Board & Wallpaper
- DIY Modern Wood Valance
- DIY Cornice Box with Scalloped Edges
- How to Hem Curtains | A Foolproof Method!
- How to Hem Curtains Without Sewing
- How to Widen Store Bought Curtains | An Easy Fix!
- How to Remove Vertical Blinds
- How to Install Your Own Blinds or Shades
- How to Hang a Curtain Rod Without Drilling into the Wall
- How to Hang Curtains On Rings (With Perfect Results!)
- How to Hang Curtains In a Corner Window
- 6 Easy DIY Window Valance Ideas (You Can Totally Make In an Afternoon)
Have you ever made anything from foam insulation? Do you have a go-to window treatment you use all the time? I’m a sucker for long patterned curtains too, but when they aren’t possible, these window valance boxes are my next go to! Give them a try – I think you’ll love how easy they are!
Megan

44 Comments on “How to Make a Window Valance with Foam Insulation”
What a great post, Megan. Went and visited the scalloped post, too, and saved it to 5 of my boards! LOVE!
Thank you so much, Julie! Glad you enjoyed the tutorial – it’s a handy one to have, for sure!
Have a great weekend!
Megan
So smart! I want to try this!
What are your thoughts on different window coverings in the same area? We have an open-concept living room/dining room and I’m thinking about trying a window corner over the the dining room windows and having regular floor length curtains in the living room. How do you think that would look??
Hi Victoria!
Yes – I have done a similar thing in the past too! As long as the fabrics/styles coordinate, I think it’s a great way to unify the two spaces while still tailoring the window treatments so the specific windows!
Keep me posted on how it turns out!
Megan
I can’t wait to try this!!
This is a fabulous diy idea! Thanks for sharing!
This is a suggestion. Try heating the blade of your razor with a lighter before you cut. It should go through much cleaner. I haven’t tried this, because I don’t have any foam on hand. But, I know that foam melts pretty easily. It should work.
Love that no power tools are needed! Do you think this would work in the bathroom above the shower curtain rod?
These are very easy to make but they do not stick to the wall. I’ve made 5 of these one for myself and 4 for a restaurant. Mine fell after being up for one week and one fell on a customer’s head the same day I put it up. I used industrial Velcro, screwed to the wall and the other end sewn on the fabric. 3M strips are a joke.
Hi Michele!
I’m sorry to hear this project didn’t quite work out for you! Mine have been up for quite some time and still haven’t budged. My hunch is how well they stay put depends on the weight of the fabric and the walls themselves!
Hope you found a way to keep them up eventually!
Megan
Perhaps you have plastered walls rather than drywall? I have plaster and command strips do not work. I’m glad we chose plaster but much harder to hang stuff!
And love, love, love the valances!! I have professional ones—made of wood (upholstered). Takes 3 of us to take them down and put back for cleaning. Only do that once a year!
I would like to make these with a lightweight wood (what would you suggest?) and attach them permanently to my walls. We have textured walls and command strips do not work. Any instructions on how to attach them to the wall?
Hi Megan! Your tutorial is exactly what I was hoping to find. Thanks for posting it. My question has to do with dimensions. I have a large front room window (12’ wide) I’d like to put this window treatment on. What might you suggest to connect two pieces of the styrofoam board to total the 12’ I need?
Thank you to you and your husband for his service from one military family to another!
Hi Sindi,
I am so sorry for the delay in getting back to you. If you haven’t yet proceeded with your project, I would recommend starting with just Duck tape or packing tape along the seam (several stretches of it, all the way around and also working out from the seam). If it doesn’t seem sturdy enough, maybe you could brace it with a rectangle of cardboard stretched across the gap (and taped/nailed into place)?
Hope that helps a bit!Good luck with your project!Megan
Hi, I have a question about making a window box for my guest room. My windows are 63 inches wide x 43 inches long and I wanted to know what board or insulation piece measurements you would suggest for a window that size? I want to know how far away from the window I should make the end pieces and how wide I should make the front board. I’m a brand new beginner atthis, so step-by-step instructions on the measurements would be appreciated! (For example I didn’t know what you meant by “depth” and “return” in your instructions above).
Hi Ashley,
“Return” and “depth” both refer to the how far away from the wall/window frame you want your cornice to sit. It’s the distance that will dictate how wide you cut the side parts of the box. For example, if you want your box to sit 5″ away from the window, you would cut your “return” pieces (the side pieces) to be 4″ since they will be put behind the 1″ front board.
As far as how wide, that’s completely up to you. Typically, you want to extend 8-12 beyond the width of the window on each side. So for a 63″ window, you’d want a front board that measures 63″ + (8″ x 2) = 79″ (I multiplied by 2 since you want to extend that measurement on either side of the window). How far out from the window you want to go depends on your personal preference so I suggest you measure a couple different options to see how wide you want it.
Hope that helps,Megan
I’m glad to find a way to hang these without holes in the wall. I’m going to try the Command strip method. Hope they stick.
Love these lightweight valances! Thanks so much for the directions to make them.
Did you have any trouble pushing the nails through the fabric? I thought of using “U” pins, which would cost more.
Wow! Great idea.
I am wondering if you ever tried to put a top on your box. I am interested in adding a top to decrease window drafts during the winter.
Please see https://www.familyhandyman.com/article/house-insulation-winter-curtains/
they explain it better than I do.
Janice
I make mine with a top. I upholster the entire box. I have hung mine by tapping in nails in the wall on bath sides of the window . I tap in a the 3 “ nail in the wall, partially, about one inch. I balance the cornice box on top of the nails. I have also used L brackets on each side of the window and rested the cornice box on the L brackets.
Glad I found this post! We just purchased an older RV and hated the outdated valances, We took the old ones down and put up new curtains. The windows lacked a finished look and we don’t want to put heavy valances back up. This is the answer we are going to try. I am wondering if you could also use stick on velcro provided the window isn’t too big. Looking forward to trying this anyway. Thaks for the idea!!
Hi there!
You can certainly try the Velcro! In my experience, it’s SUPER sticky…making it not ideal for rental walls. But it sounds like your requirements are a bit different so it would definitely be worth a try!
Hope that help!Megan
How wide can a valance be. I would think it would sag in the middle if I used it above a sliding door. What do you think?
Hi Francine!
This foam insulation is pretty thick and firm (and you can even buy thicker), so I doubt it will sag in the middle. If it does, you could always add an additional “return” (what is on the sides) in the middle too!
Hope that helps a bit!Megan
I’m definitely using this idea to replace the outdated curtains in my RV! Thanks for the Command strip tip. This will let me hang the box without damaging the RV walls.
A marvellous solution. As I’m renting my house I’ve been wondering how to add window treatment without using wood and nails or screws. I thought of cardboard but wondered how to attach it to the wall. Also with so many different shapes of the pelmet I would like a definite pretty shape carved into the pelmet to add character and style. Thank you for this easy solution
You are most welcome! I think this solution will work well for you!
Good luck with your window!~Megan
Love your posts and easy through directions.
I bought 2 styrofoam window valance kits 23 years ago. We had just build a house. I had a double window and needed 2 kits. It came with appropriate glue for styrofoam. There were “t” pins and a piece of styrofoam for a connecting middle support. Also it had styrofoam across the top as well which makes it very stable. I used quilt batting as you did. It also came with 2 lucite “L” brackets per kit. They had a hole in the tops of them and very long tacks to hand the valance board on the brackets. You glue it together instead of leaving nails in. Then you cover with the batting and fabric using “T” pins. Hang bracket at each end with a third bracket as a support in the middle for wide windows. I use nice tablecloths or fabric and change them out with holidays! Love it!
I am going to be doing this but on a bay window in my kitchen. Any suggestions on getting the corners right? Don’t want to hook together incase I need to take down separately for some reason.
Hi Jody!
Thanks for reaching out about this. Corners could be tricky…my best thought is to use something to join them after each panel is upholstered. Almost like how wooden pegs hold IKEA furniture together – something you can stick into each end to gently hold it together?
I’ll keep thinking but if you figure out a solution, be sure to let me know!
Unfortunately, this was not an hour project for me. I did the cutting and assembly in one hour. Making pretty took a lot longer. I tried this method to do a valance for a patio door. I do not recommend it. I also made a smaller one for a window. The window valance was ok. I had to use extremely strong double sided adhesive strips (took from my husband’s tool box, don’t know what it was) to hold to the wall.
Thanks for the great idea.
I get more and more impressed with you every time I see your work. You are a “wonder woman”. At this time I am in a mobile home that was left to me after my parents went to the great beyond! I moved the contents of my home from up north to the mobile in Florida with all of my parents’ belongings. You are so helpful to me as I work my way through this mess. Thank you for your inspiration. You are saving my heart, soul and what is left of my brain.
Jean
This looks great but what do you suggest if your windows are a lot wider than that. My window is at least 3m wide ! What do I use to join to make it long enough for the window ?
Another suggestion for foam insulation board – if you want to give your ceiling that old cottage look and want to put up beams, well, this is perfect for ‘ faux ‘ beams. You can get the ‘ faux wood ‘ look by scraping the insulation with a fork to get the wooden beam look. I dont have any photos with me but I have seen it done and the result is amazing ! You can use angled brad nails or very strong hot glue etc to get the insulation to stick to the ceiling. Painting too is easy – just a simple dark brown or even white if you like acrylic paint is perfect.
I did this in a beach house with less success. Your use of long nails to secure the end posts to the front is what I didn’t know. I used a lot of tape that didn’t secure. Nor did I use Command Strips – another flaw.
So, BRAVO. I’ll use your method next. Thanks.
Thanks for the DIY project… I wish there was a place to show my before and after. I did this at my work for my naked window….AWESOME !!! I did just put 2 nails in the wall on each side and push it on… it’s been up for 2 months. I got my styrofoam board from Lowes & lucked out at Joann Fabric’s clearance bin for my fabric — put it all together with brad nails– except for what I nailed into the wall- my fabric comes right to the back nail – so pushing it onto the nails were easy. Made it at my desk at work- worked slowly so no stuff on the floor. THANKS !! Super Easy !!
I am so excited to hear this project worked out for you, thanks so much for circling back and letting me know!
Megan
Thank you for this instructive post. I plan to cover some ugly valances with cornices.
FYI – Theaters use foamboard in set-building. It is best cut with a hot-wire tool (it looks like a hack saw with wire for the blade and is battery heated). I don’t own one, but I’ve used one before and plan to find one!
Hi! Do you think a staple gun would work to secure the fabric?
Hi, I just made the valance. I needed it to be 81 inches long and it is bowing. Any suggestions before I attach the fabric?
I am interested in making a foam window valance for my sliding glass door. How do I keep it from sagging in the middle?
Thanks for the great instructions!
Great ideas. Have you ever tried duct tape for adhering the batting and fabric?