Our California Rental’s Master Bedroom “Reveal”
Today I’m going to give you a “final tour” of the one space in our home that is rarely seen here on the blog: our Master Bedroom. There are lots of reasons why this space hasn’t made the regular blog appearances that other rooms have. Aside from it being incredibly difficult to photograph, the room never really came together in a way that warranted a big reveal. I started out with lots of big ideas and a pretty loose plan. But very few of those big ideas ever got completed, and many of my initial choices didn’t come together the way I hoped. Then, over the course of our 3 years here, the room became the landing place for items that didn’t fit anywhere else; and like most master bedrooms, giving it a “real,” top-to-bottom makeover kept falling lower and lower on the priority list. Despite all these excuses, I am choosing to share our Master Bedroom “Reveal” with you today because 1) I like to have our house fully documented before we start to pull it all apart and 2) I think it’s valuable to see that even with the best of intentions, some rooms just don’t come together as we hope or expect! Let me show you around, as well as chat a bit about what I didn’t quite get to and what my hopes are for this space in our next home!
Our Master Bedroom | Before & After
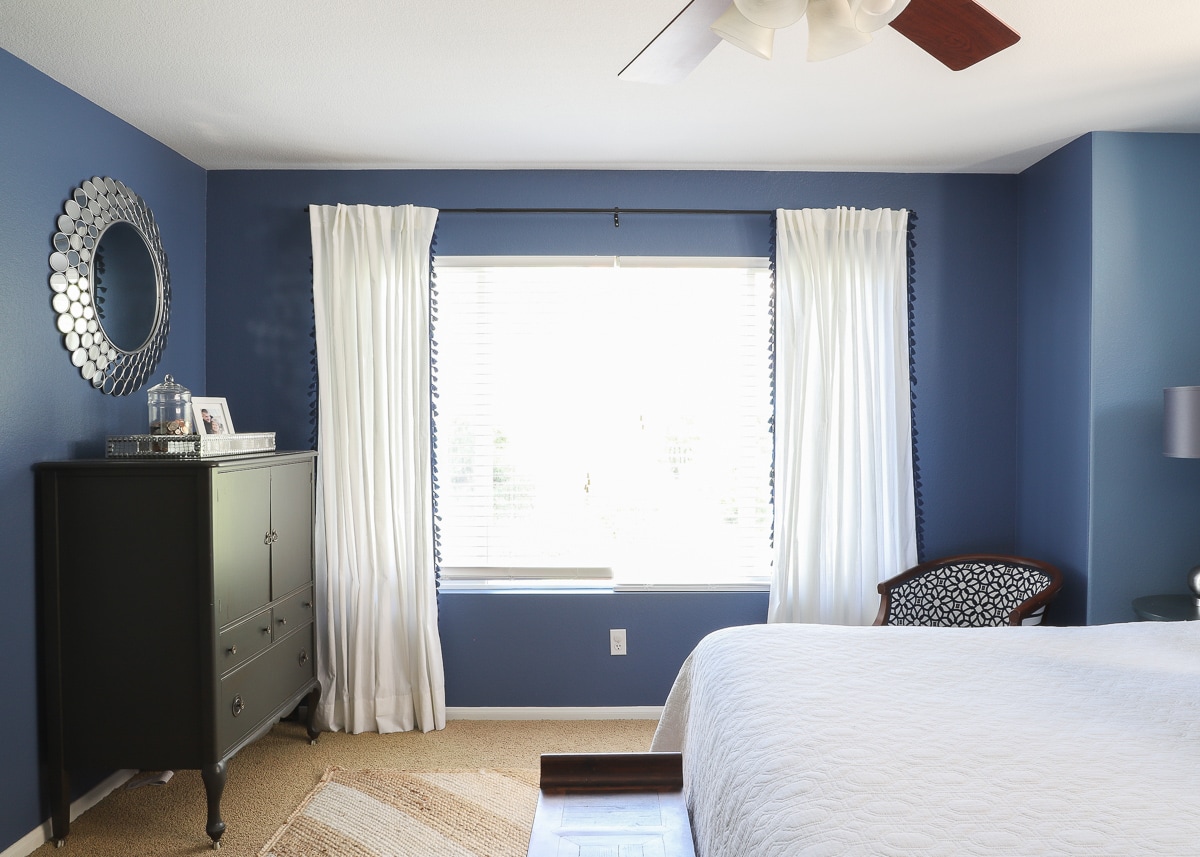
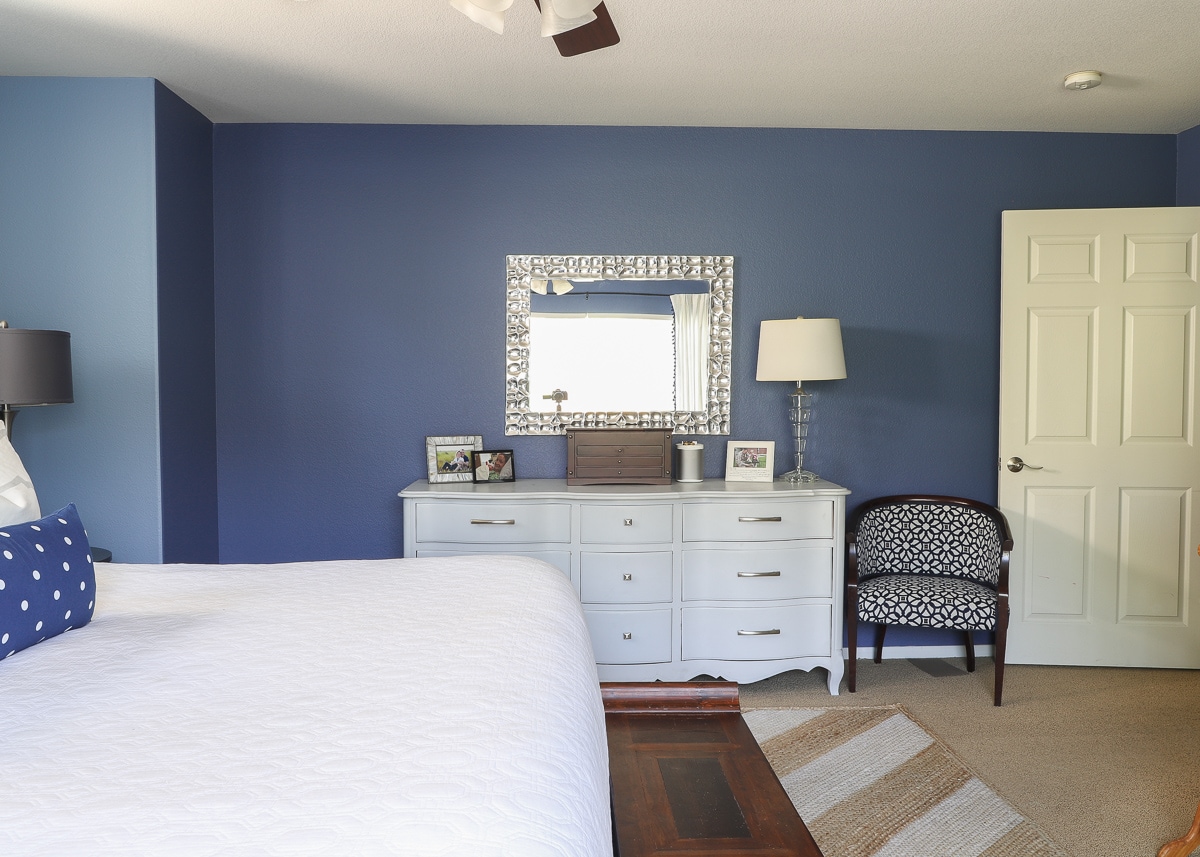
Here are a few quick shots of the room before we moved in. Although a majority of our house was painted the same tan/beige color, the master bedroom was painted what I would call gold. Since our bedroom furniture is navy blue and grey, paint was practically required in order for our stuff to work.
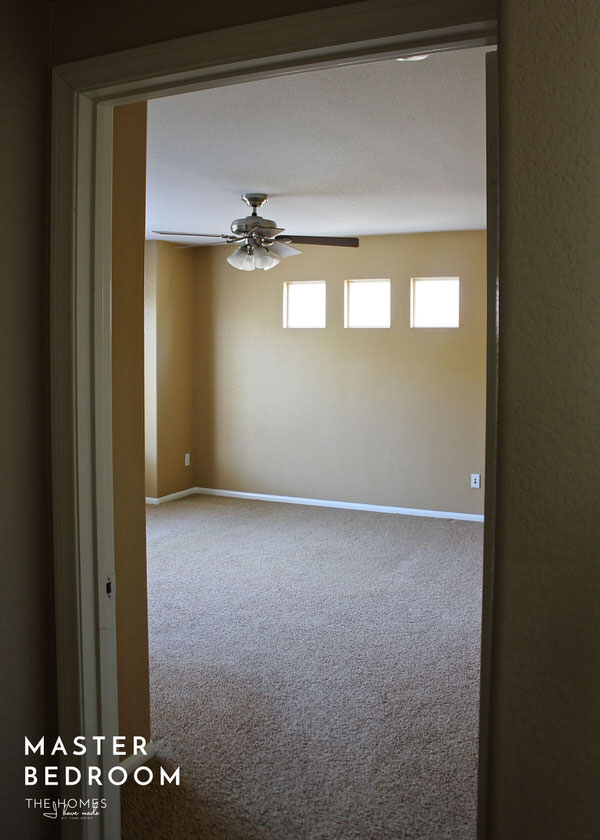

Painting the room beige to match the rest of the house wouldn’t quite work because of the light grey furniture, so I decided to paint the room two different (but coordinating) shades of blue from our whole-home paint card. Although the wall color now falls into the “things I wish I could change about this room” category, I did really think this decision through at the start:
- By using the same palette as the rest of the house, the blues wouldn’t look random or jolting; and by selecting two coordinating blues off the same card, I could be sure they would work together.
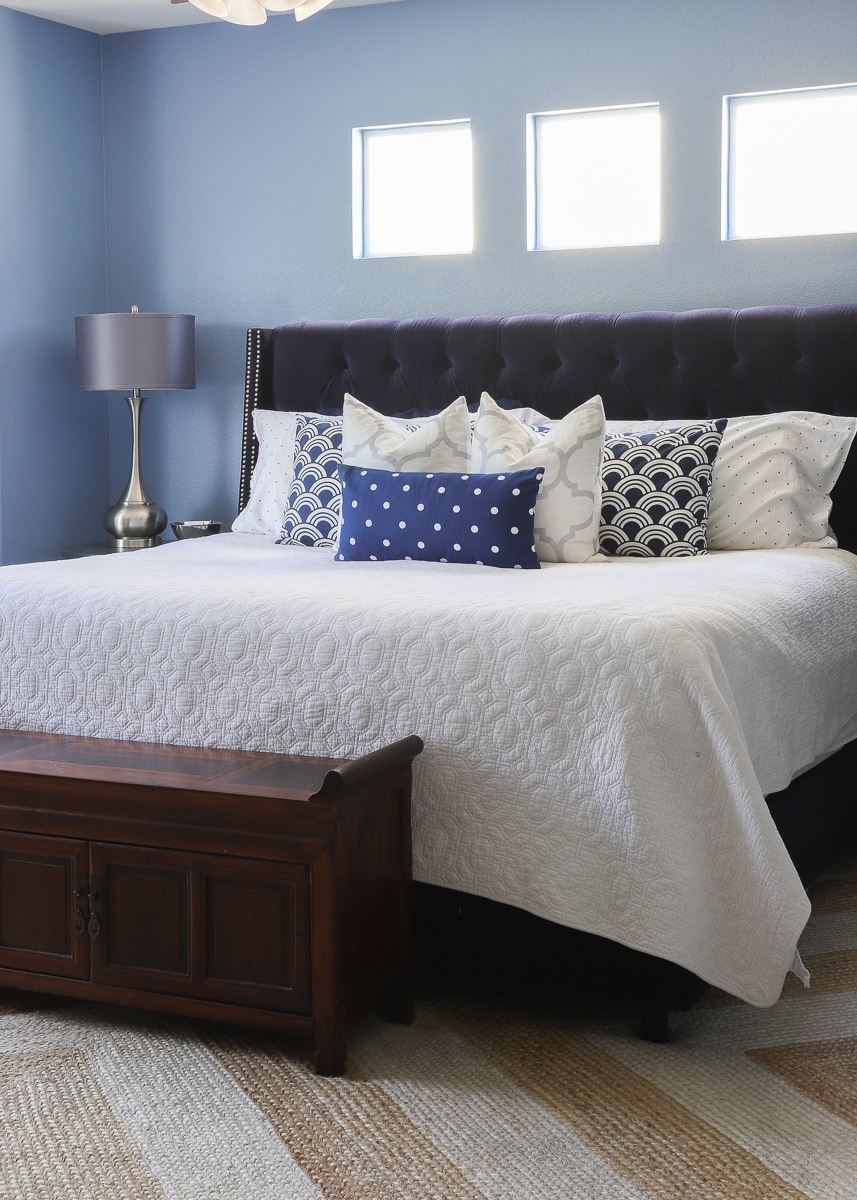
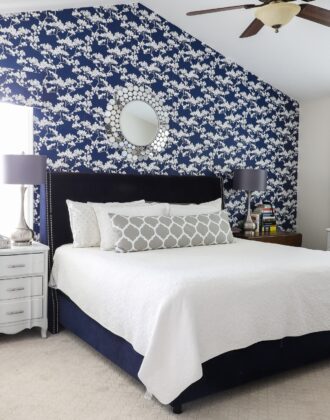
- Why two tones? Because of the Navy blue bed. I was worried if the entire room was the darker denim color, the bed would have gotten lost. And since the room featured a “bump out” where the bed would go, there was already a logical place to block out different colors.
- The paint card itself featured a bedroom painted in these two colors and it looked so fresh…so I moved forward with confidence.
The second I walked into the room once it was completed, I knew the lighter blue was the wrong color choice. It was just a gut feeling in the moment, but that sentiment has held pretty constant, and I’ve never really warmed to the light blue over the years. It feels too country or little boy and not sophisticated enough to match the other finishes in the room (e.g., crystal lamp, nailhead trim on the bed, etc). I toyed with lots of ideas for “fixing it,” including painting the bump out bright white or wallpapering it with a great focal paper…but I ran out of time, and the room has stayed these two colors the whole time!
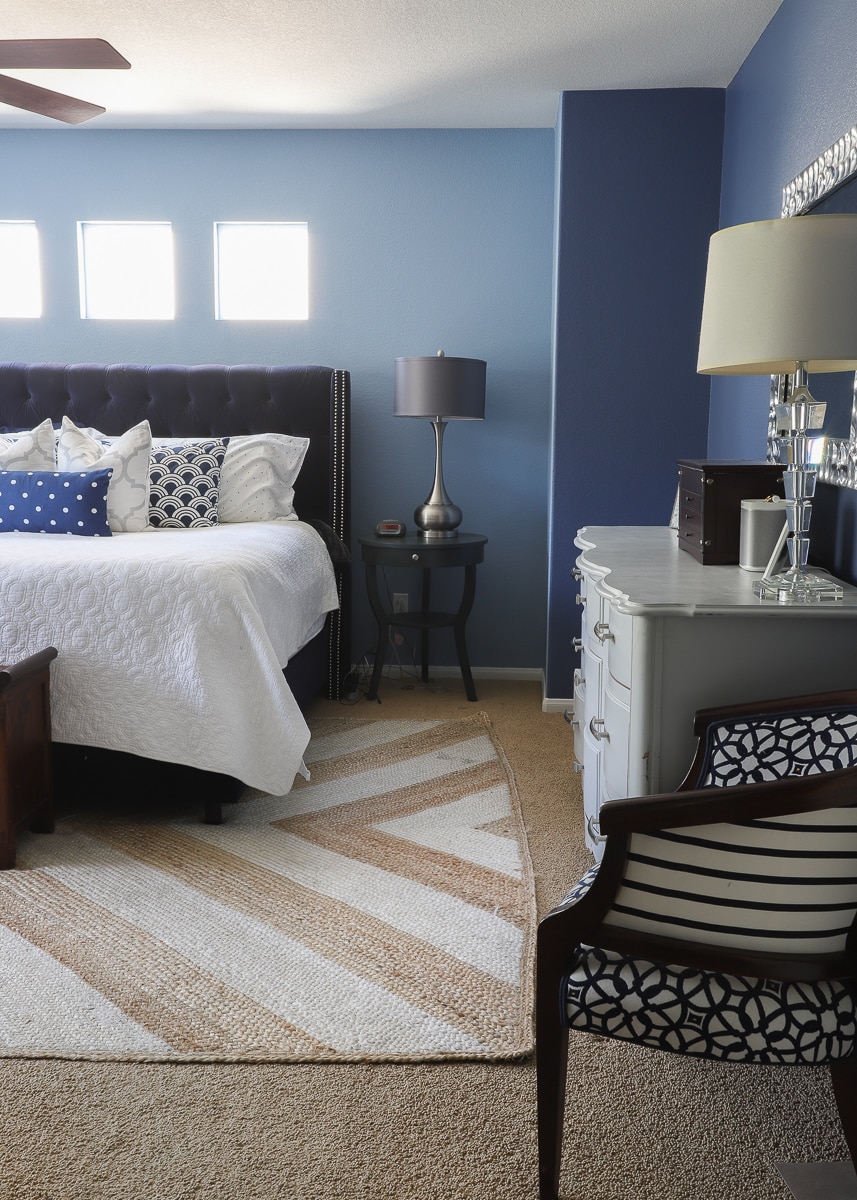
The other main challenge in this room is the bump out itself. Not only did our original (larger) nightstands not fit into the bump out alongside the bed, but the placement of those three ridiculous little windows have proved more-than-exasperating our entire time here. Sure, we love how light and bright they make the room appear, but their size and placement make it impossible to cover/dress them (not to mention their east-facing direction ensures we are up with the sun pretty much every day!) I had plans for DIYing a huuuuuuuge peice of artwork to cover those windows, but that’s another one I didn’t quite get to in time either!
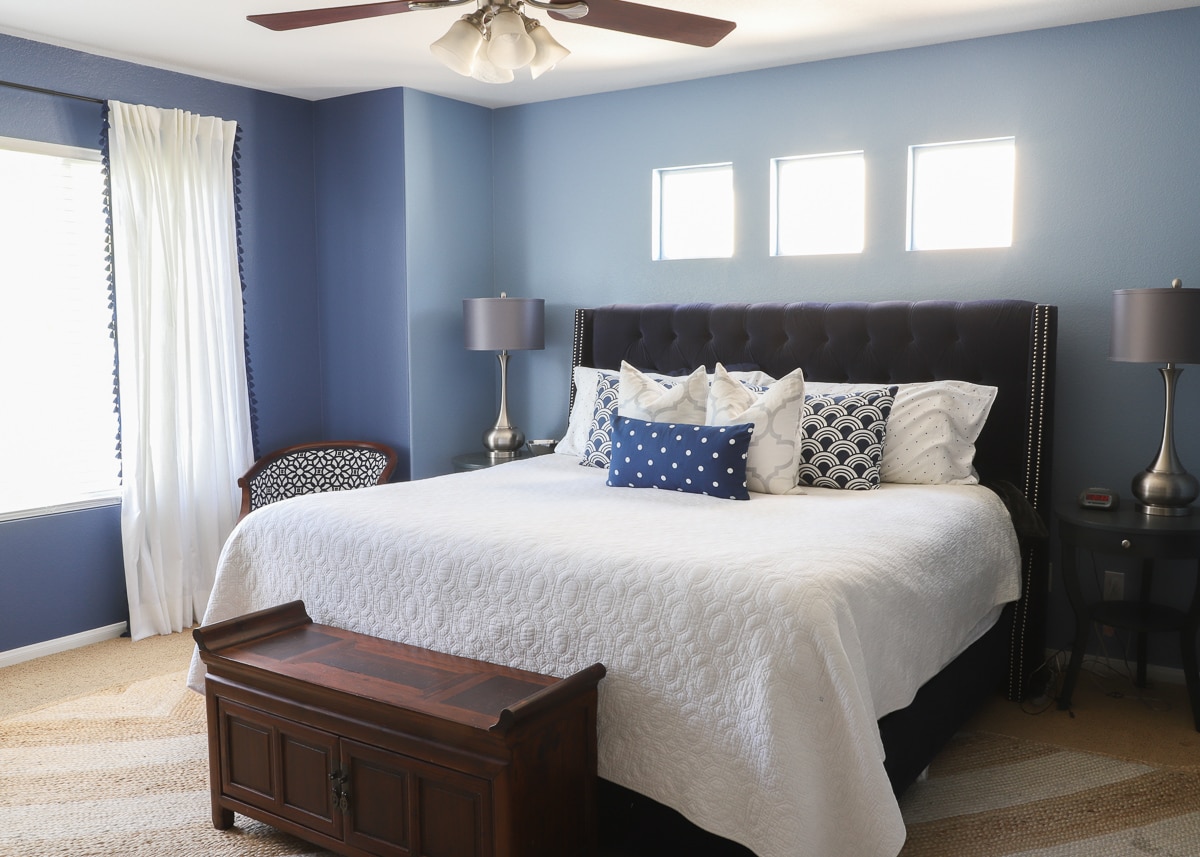
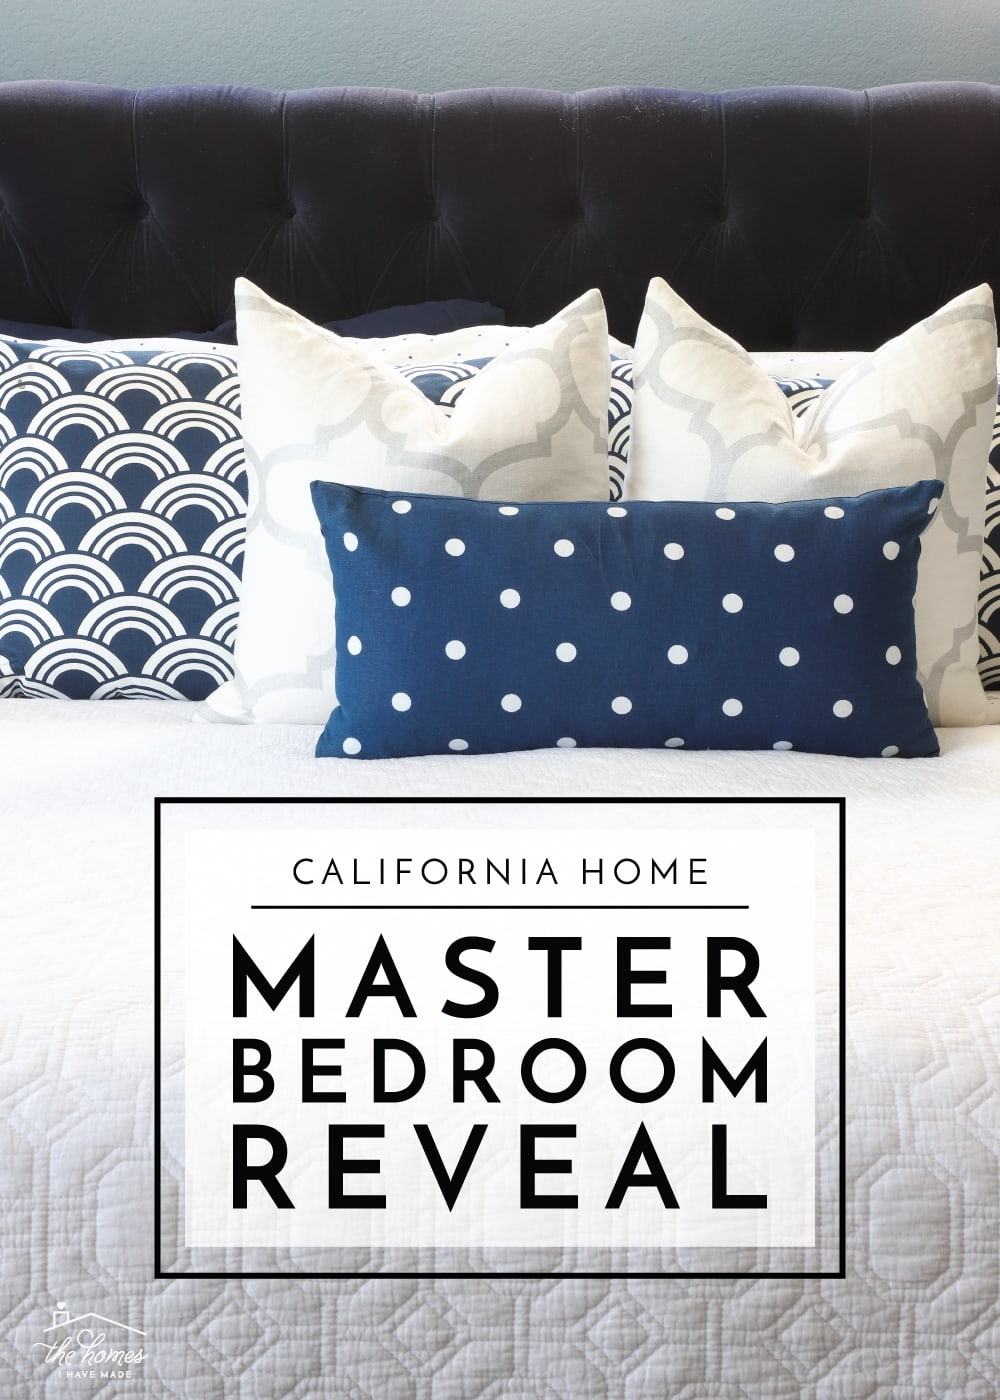
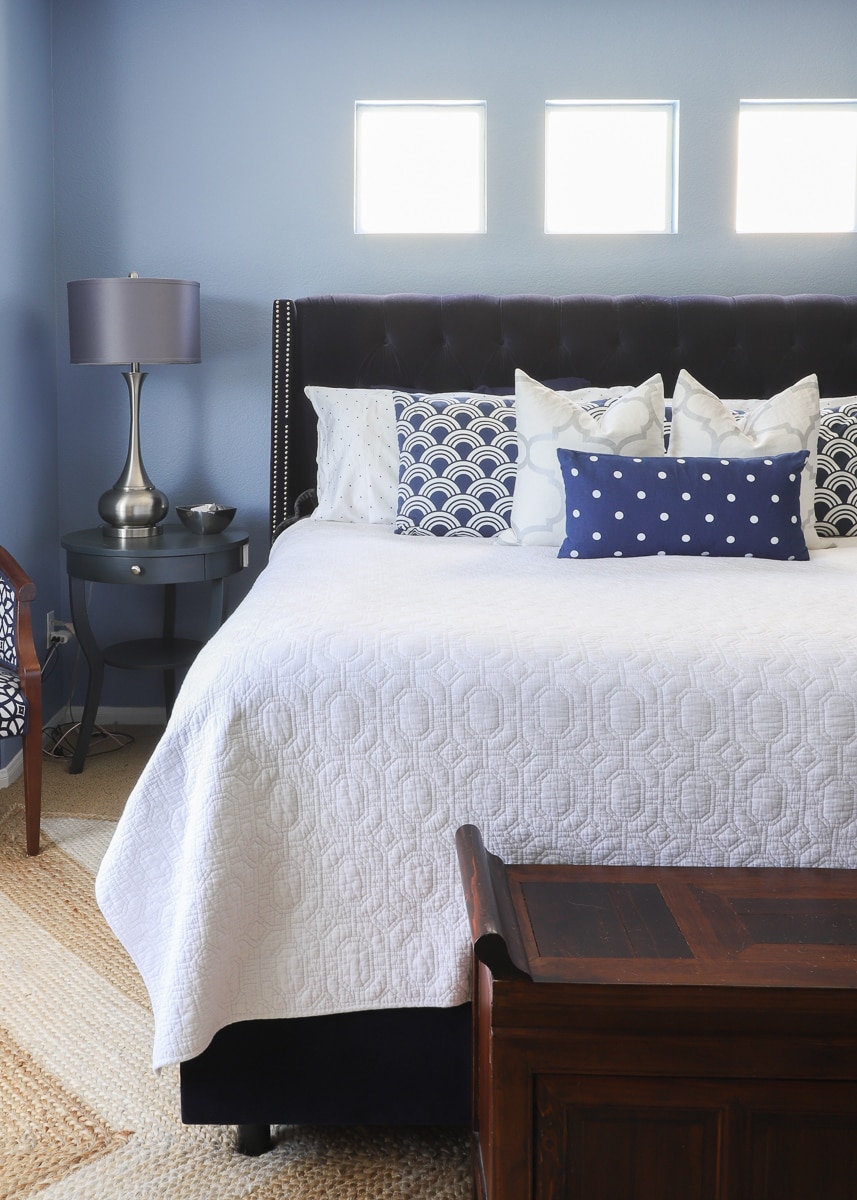
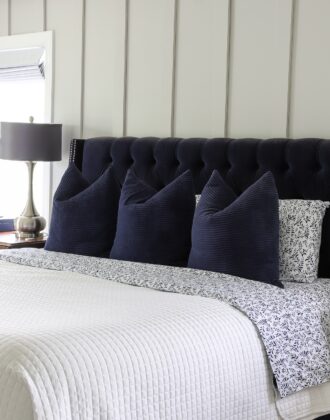
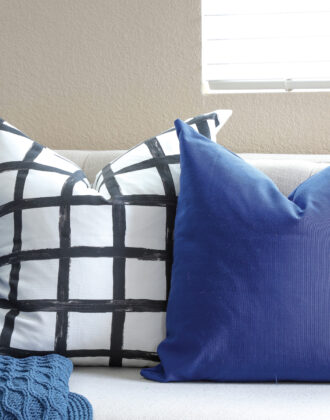
The bed itself hasn’t changed much over the years (besides when I added red throw pillows for the holidays), and that’s because I’m still so smitten with the combination of patterns featured across the various pillows.
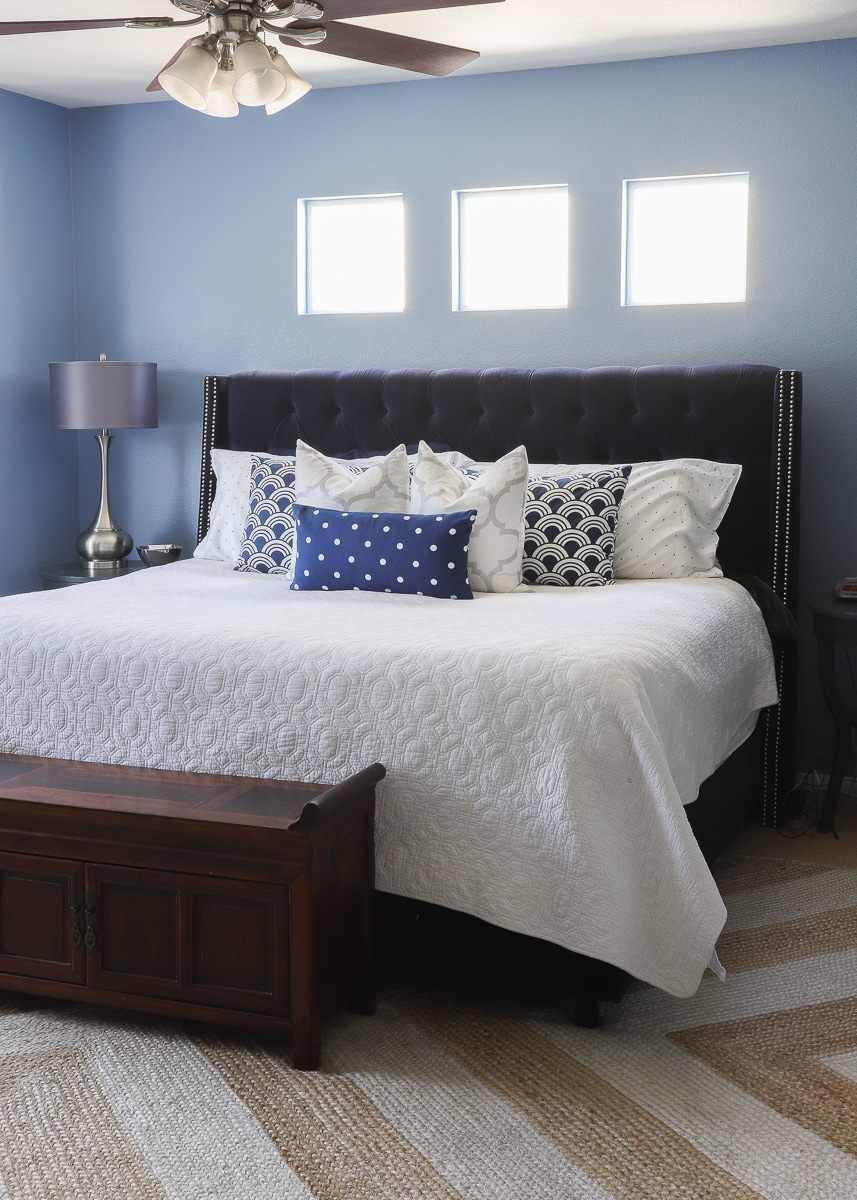
We have these tiny blue dot sheets and shams on the bed underneath the white coverlet (I find the white quilts at HomeGoods/TJ Max/Marshalls and we use them on all of our beds!) I then layered another set of decorative shams, two throw pillows and a dot lumbar pillow on top to fill out the display. We’ve found that this number of pillows not only lends itself to a really complete look but also isn’t too cumbersome to put on and pull back off each day!

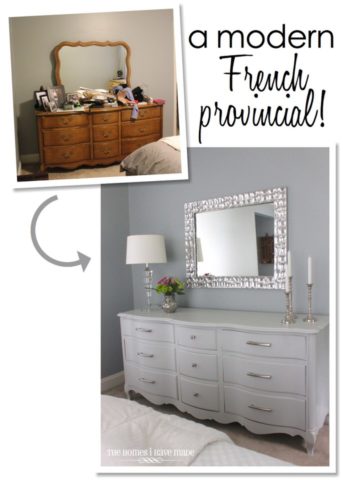
The bed itself was our 10th wedding anniversary present a few years ago. I still love its grand and classic aesthetic even if it is still missing one nail from our most recent move. When our original side tables wouldn’t fit alongside the bed in the bump out, I looked for something that matched the “French provincial” style of the other dressers in the room but still offered the height we needed for the tall bed. These two tables turned out to be a pretty perfect find. Not only did their height work out perfectly for the bed itself, but they have just enough storage space to be useful and not excessive. An added bonus: they were listed as “teal” and I had every intention of painting them. Once they arrived, their slate color worked well enough alongside the other blues and greys in the room!
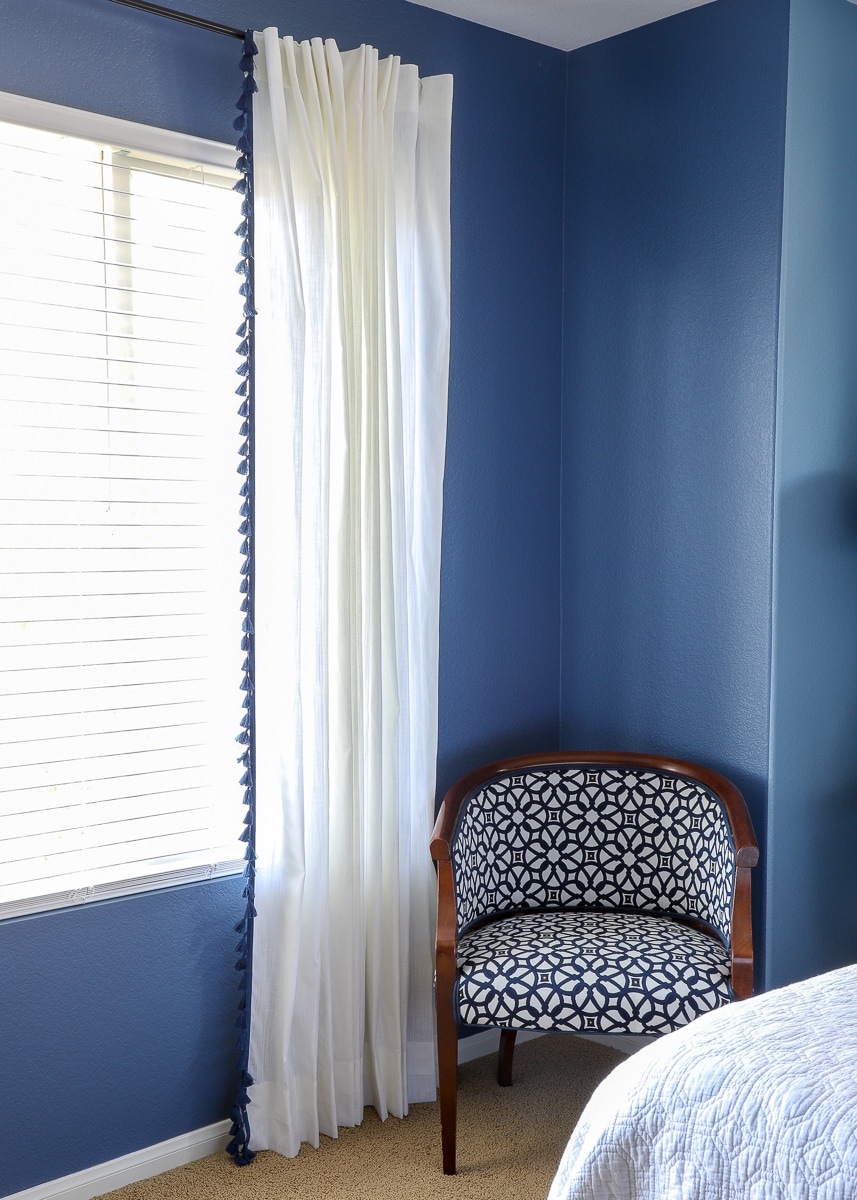
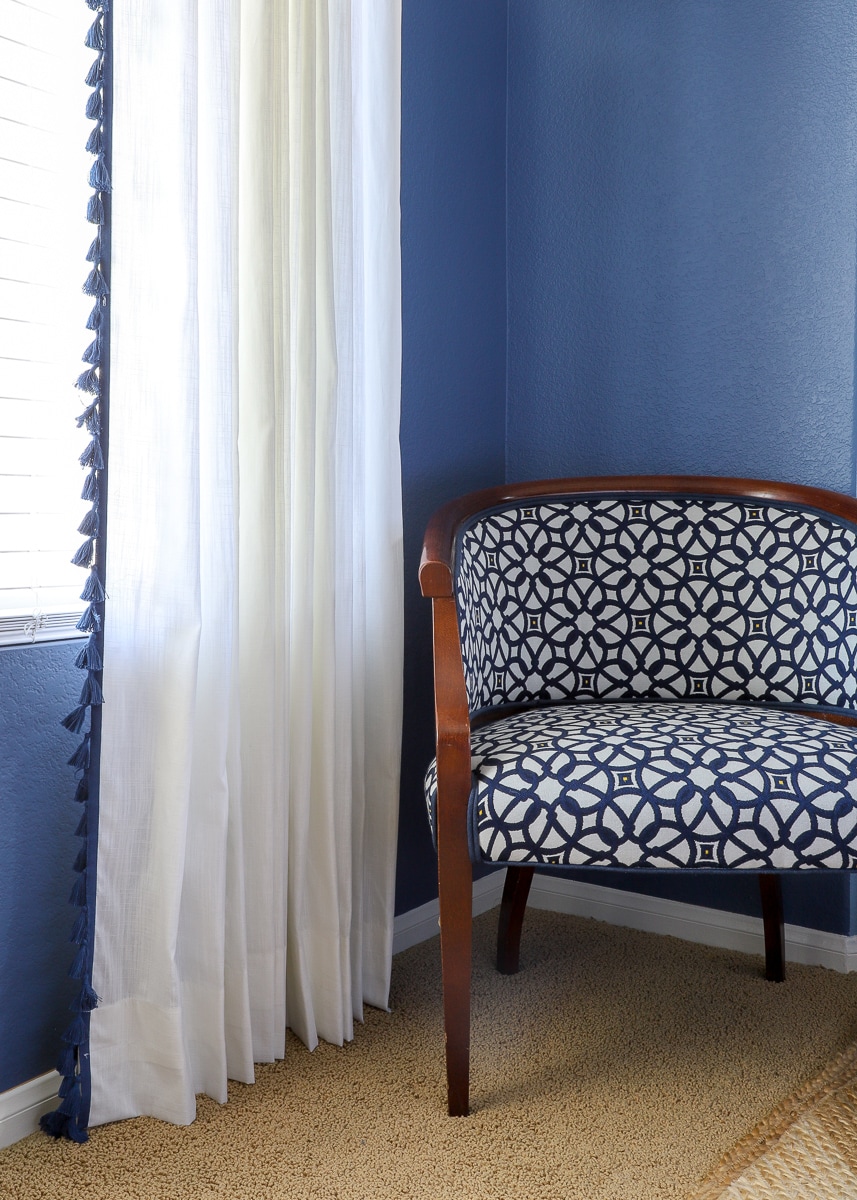
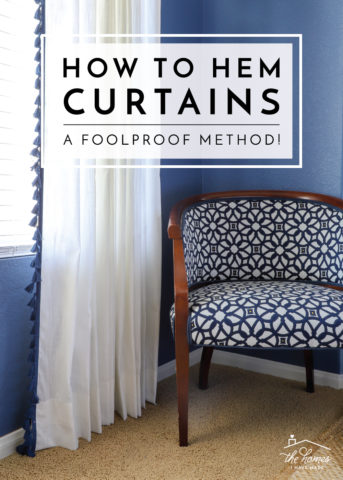
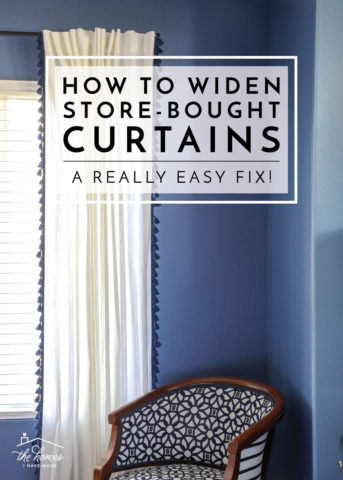
One of my favorite parts of decorating a bedroom is playing with all the textiles and fabrics, and I often find that little details can often go a long way in making the room feeling cozy and personal and special. I personally love to use tassels and pom-poms on pillows, curtains and bedspreads (I’m going to chat more about this soon!), so when I found these navy tassel panels at HomeGoods, I knew they would be the perfect curtains for our bedroom.
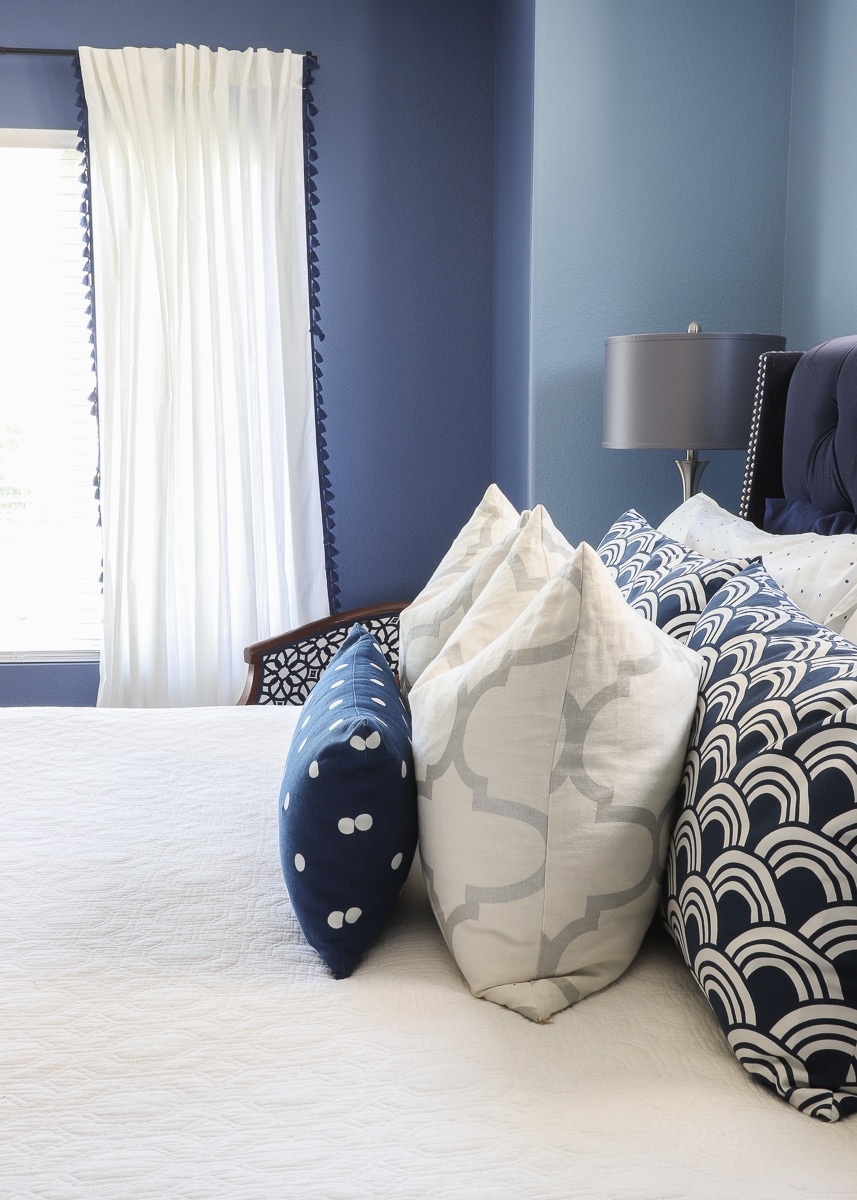
The curtains themselves were a bit too low-impact though (wispy and kind of thin), so I sewed two panels together to create one giant panel for each side.
Want to save this post?
This trick not only provided the bulk I needed to balance out the really large window, but gave the curtains a really full custom look on a pretty slim budget!
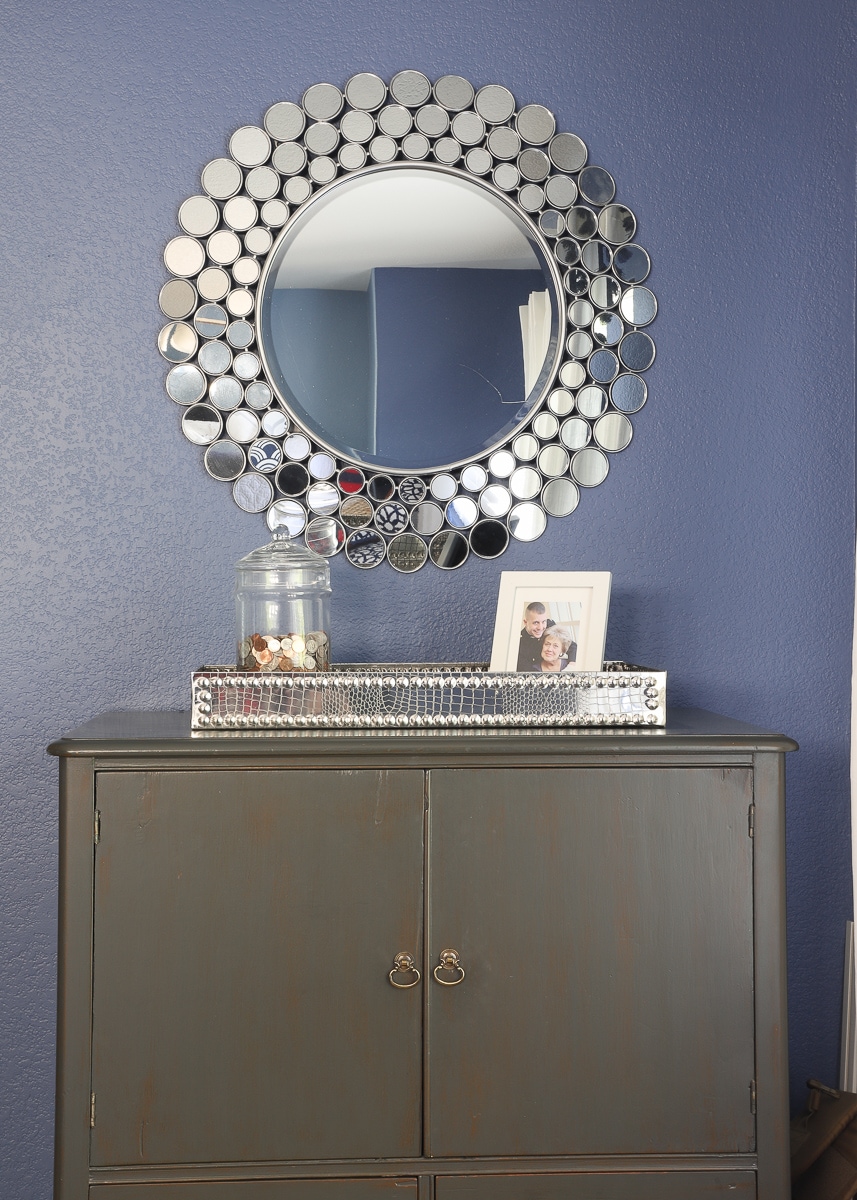
The little nook between the window and the passageway to the bathroom was the perfect spot for our taller dresser (that used to reside in my Kansas office). Although this dresser is a darker shade of grey, its rounded legs and curved details help it coordinate with other pieces throughout the room.
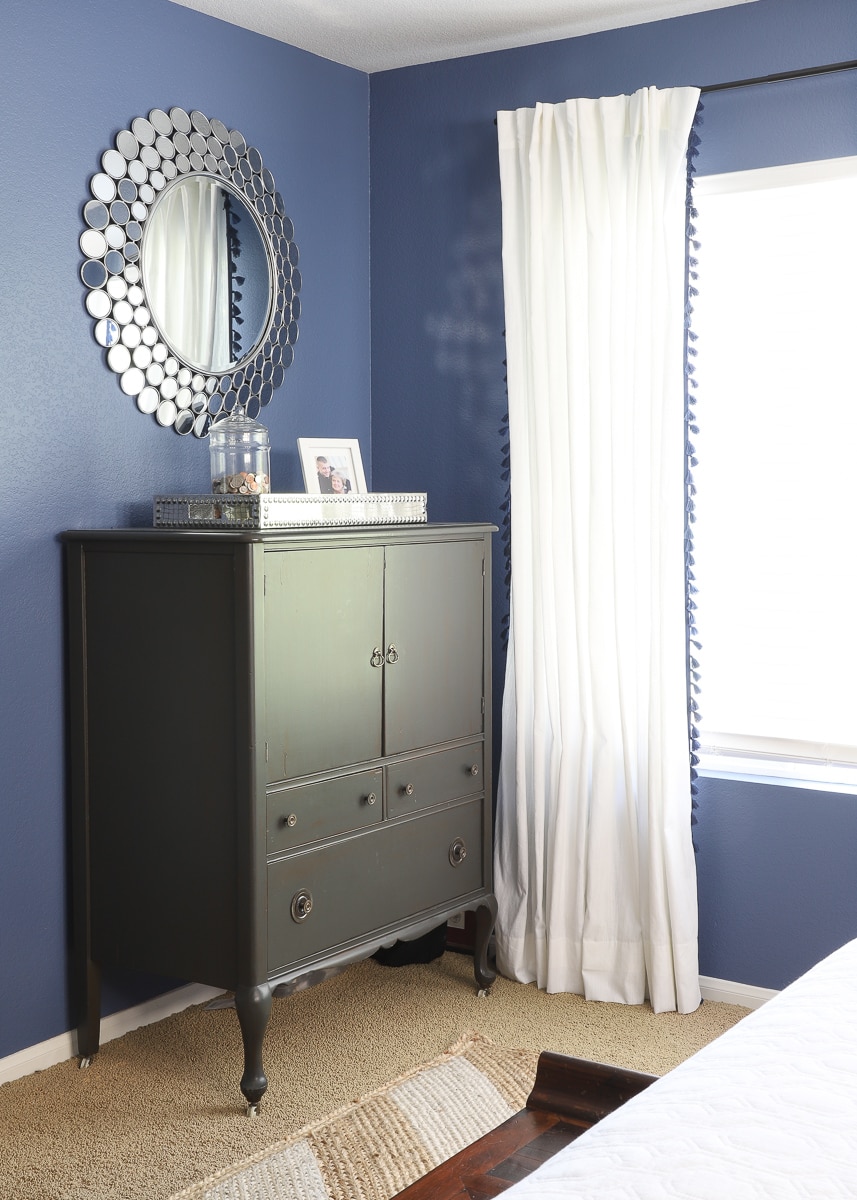
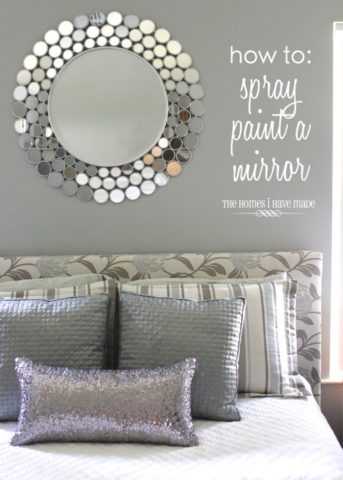
Right above this dresser is a TV outlet. We covered up the unsightly hookup with my pretty silver mirror…keen observers will note that I (finally!) glued the missing circles back on!
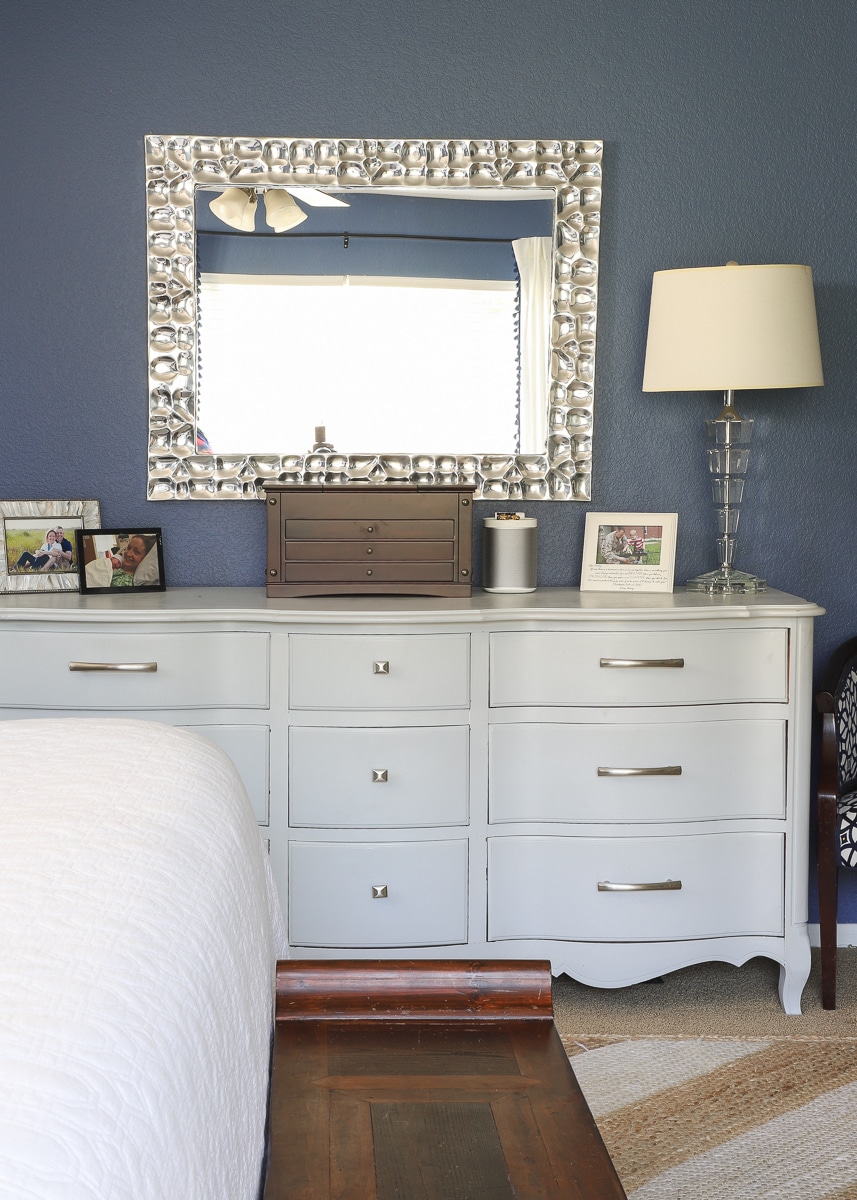
The final wall holds my beloved French Provincial dresser, one of the very first furniture pieces I painted when I just started blogging years and years ago. We have a matching (smaller) dresser that we just couldn’t find room for in this room, so it has sat out in the garage all these years. I’ve got all my fingers crossed we’ll be able to use both in our next home!
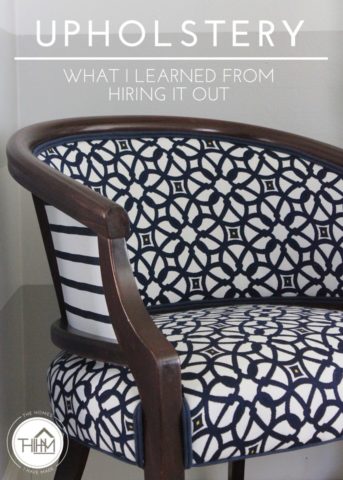
Next to the dresser, as well as across the room by the curtains, sit my two upholstered round-back chairs…
These chairs started in the family room downstairs, but ever since Sam became mobile over two years ago, there just wasn’t space for them. Although I hate having their beauty tucked away where no one can see them, they sure prove handy for putting on shoes and (of course) throwing clothes onto! A benefit of purchasing furniture pieces all in the same palette is that they can easily transition from room to room and still work!
The final two elements in this room are also two that just kind of landed here…not because I wanted them here but because we had no other great place to put them: the bench at the foot of the bed and the rug.
Once I determined the sisal rug was horrible under our kitchen table, I moved it up here with the hopes that it would brighten up the camel-colored carpet on the floors. While it certainly did just that, the natural texture of the rug really competes with the finer finishes in the space…and not in a good way. It also sheds like crazy, leaving fibers all over clothes and pillows…which Greg just loves.
The bench is a holdover from our time in Okinawa. I’ll be honest: the longer and longer we are back stateside, the less and less I am drawn to the Asian aesthetic. For a while now, I’ve been casually searching for something that better compliments the headboard from a color, texture, and style perspective, and I think I’ve finally settled on what I want!
It’s a little strange for me to call this post a “reveal” when there is so much in this room I’d love to change. In reality, our Master Bedroom is more of a “work in progress,” and I just ran out of time before I could fix everything that isn’t quite working. With another year or so, I’d be able to add a wallpaper feature wall behind the bed, DIY some oversized art to coverup those small windows, find a better rug that works with the overall style of the space, and swap out the few furniture pieces that landed here by chance. Just by fixing those four big elements, I honestly feel the whole space would click into place and feel more like the bold retreat I was initially going for.
So…although I won’t and can’t get everything done this time around, at least I have a jumping off point as we transition some of these elements to our new home! I’m pretty sure I won’t be painting the walls blue and I am 100% certain the sisal rug isn’t making the move, but I do have a better sense for what will and won’t work with our other bedroom staples. And that…at least…is progress and a step in the right direction!
Posts & Projects Featured In This Master Bedroom
As I said at the start, I wanted to share this type of “room reveal” because I know so many of us wish various aspects of our home were a little further along or came together a little easier. I know for me and this Master Bedroom in particular, I got really hung up on the things I didn’t like about it (e.g., the windows, the wall color, and the carpet color) and could never find the motivation to move past them in order to make the room better. That said, I do now have a little better idea of what I want and need in our master bedroom space, and am so looking forward to a new room in a new home (with no tiny little windows!) to try to get it right!
Megan

7 Comments on “Our California Rental’s Master Bedroom “Reveal””
Thanks for sharing, Megan! Very encouraging and helpful, as my bedroom is ‘suffering’ from no updates, as well. (Your bedroom is HUGE!)
You are pregnant with #3 — another year there wouldn’t have changed your bedroom!! (I know, I have 4 born while we were active duty) You do not give yourself enough credit — it is a beautiful, serene room. I’ve lived in my current house for 21 years (since retirement) and have never gotten the master bedroom finished — in spite of having 4 wildly different bedspreads and linens, and same paint color. But now I am retired, I hope to get my act together.
Don’t be hard on yourself!! You do an amazing job with your various homes.
Laura
Don’t be so hard on yourself! Your room is beautiful, serene, and well put together.
Also, did you forget about #3’s impending arrival? Even if you had another year, you wouldn’t be able do all you’d like!!
You do amazing things to make your various houses into HOMES.
I really appreciate your showing a room you feel is in-progess! That’s where I live most of the time: very few of the rooms in our house feel “done” and over 20 years here, I have come to appreciate that it’s OK. Our lives change, our needs change, our tastes change, and the really important thing is to spend time with your kids. The bed you’ll have forever, but the boys will grow up and move on, so good for you for spending the time where it really counts.
I think the room is lovely and I hope my master bedroom comes together as well.
I absolutely love this room. I think you have done a wonderful job pulling it together. I actually think the 2 blues work very well together, and add an interesting touch. I also really like the Asian bench because it ensure the room doesn’t feel so “catchy-matchy.”
So I guess I respectfully disagree that this room is not ready for a reveal!
Love your room here!! The colors are great, and you have so much space that I’m in awe! I live in an apartment in CA, and I’ve NEVER seen a bedroom this large! May I ask, is this a home rental or apartment? Would you kindly share the room dimensions?
I’m wondering if my furniture is just too big, as we have a king sized bed which I can’t part with now b/c we purchased a rather pricey new mattress set for last year. And the furniture we have, we purchased when we lived in TX. ( and as you know, everything IS bigger in TX! LOL) We’ve lived in CA for 9 years now, still with the same furniture, and I think we just need to buy new, smaller furniture. However, storage in CA apartments is ridiculously sparing, along with the lack of space….