How to Spray Paint a Mirror | Step-by-Step Guide
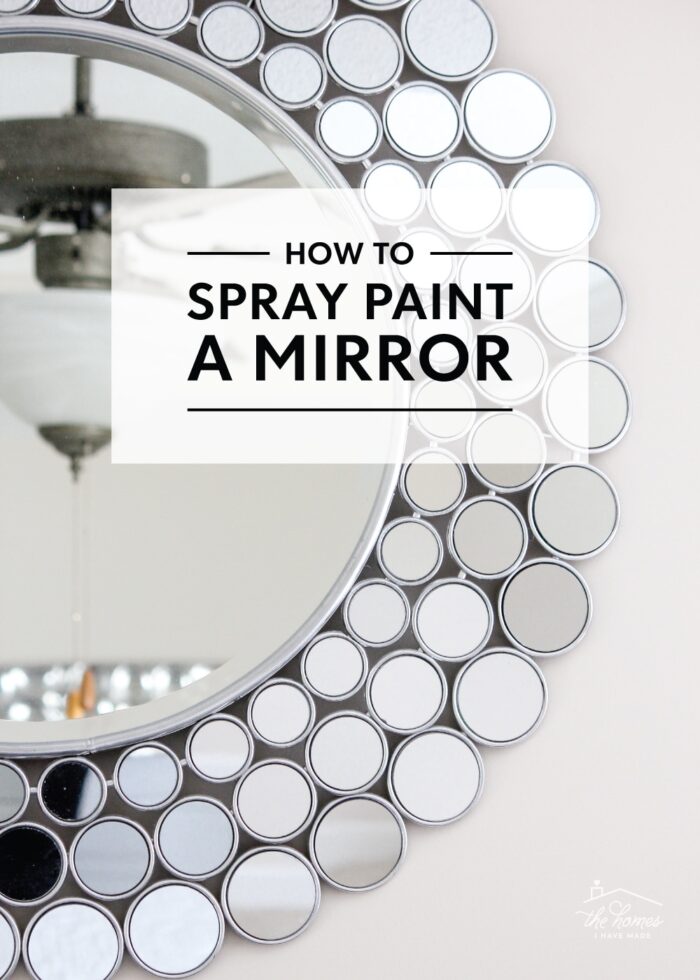
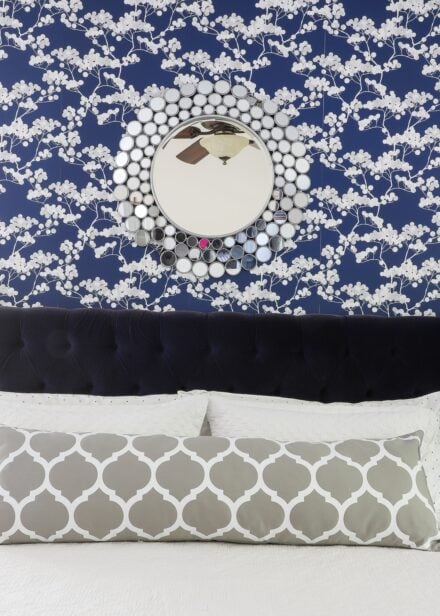
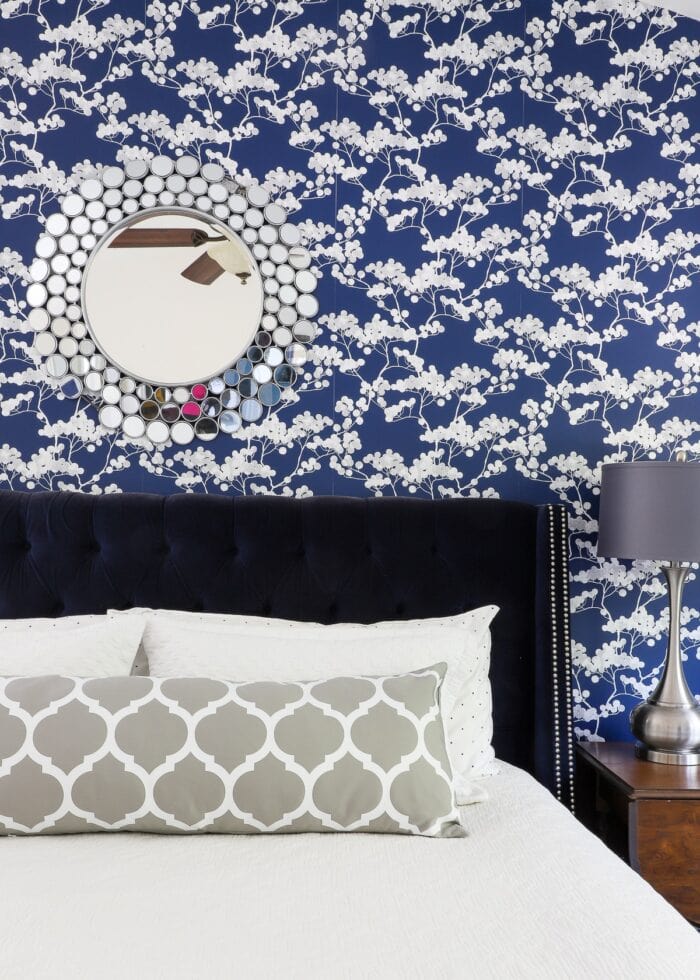
I absolutely adore the mirror that hangs over our bed. Not just because of the style of it, but because it’s one of my most gratifying DIY projects ever! I actually scored this mirror on a major deal from Kirklands years ago. But when I got it home, I realized the original finish really didn’t work in our home. After moping about it and assuming I wasted my money, I decided to give it a makeover using spray paint. And very much to my surprise: it worked…beautifully! Spray painting a mirror isn’t necessarily hard, but there are some tips and tricks you should know before trying it yourself. Let me break down how to spray paint a mirror from start-to finish!
Before & After
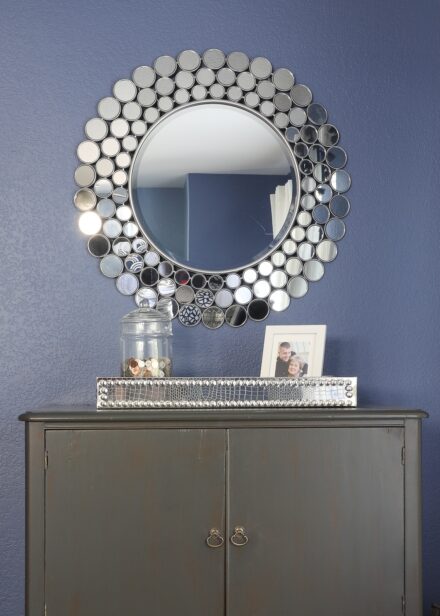
When I first snagged this mirror for $30 (thanks to a sale, a coupon, and a small scratch in the mirror itself), I thought it was the “bargain of a lifetime.” But as soon as I got it home and hung it on the wall, I was so bummed to realize the finish was so, so wrong for our home.
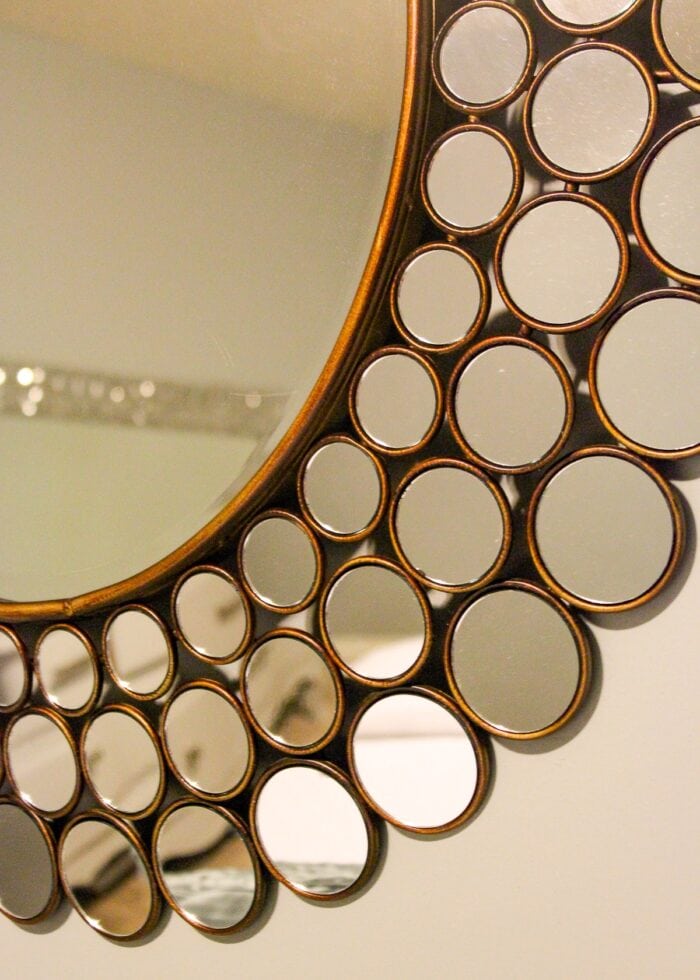
At first, I saw no easy way to fix it. Mirrors are notoriously tricky to paint because they almost never separate from their frames, and I knew I’d never be able to paint the tiny edges by hand. But at a loss for any other options, I threw caution to the wind, taped up every inch of the mirrored surface, gave the wire frame a few coats of spray paint, and crossed all my fingers.
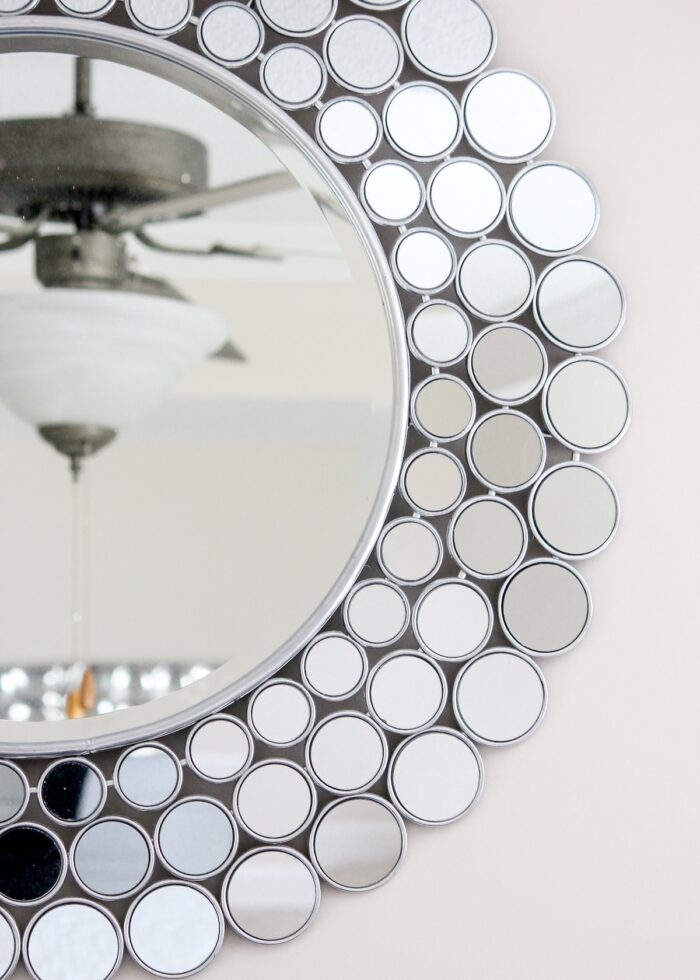
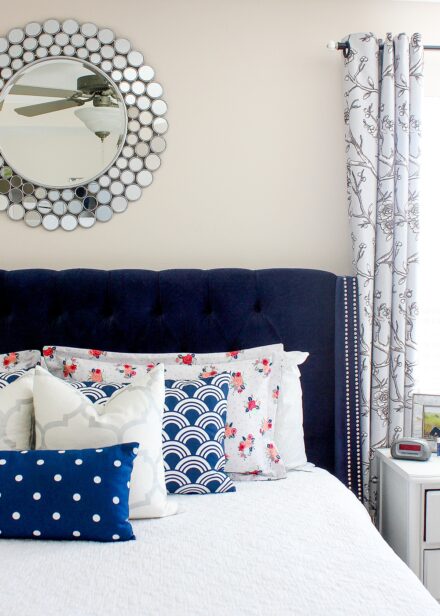
The results exceeded every expectation, and now you’d never know this mirror started out as dingy brown! It’s one of my favorite bargain DIYs ever, and a true testament to the power of paint. In fact, I’ve purposely made a place for it in our 4 previous homes because I still love it so very much!
Why Spray Paint a Mirror?
Spray paint is likely the easiest option for giving fresh life to a mirror, especially compared to latex paint, acrylic paint, or chalk paint that all usually require a brush. Not only does spray paint give you a hard, clean, stroke-free finish, but it also allows you to maneuver from all directions in order to get into odd angles and tight crevices.
The trick with spray paint though is that you can’t easily control where it lands, so you must mask off anything you don’t want painted (like the mirrored surface). Thankfully, this is pretty easy (albeit time-consuming), but the beautiful results will be well worth it!
Supplies Needed
- Masking Supplies – this includes a variety of materials such as painters tape, contact paper, newspaper, brown paper bags, etc.
- Spray Primer – optional but recommended
- Sanding Block
- Spray Paint – in the color of your choice. I used Valspar Silver Spray paint and loved it.
- Cutting Tools – scissors, sharp craft knife
Step 1 – Prep the Mirrored Surface
When You CAN Remove the Mirror from the Frame
Some mirrors (although not many) are designed like standard picture frames, where you can easily remove the mirror from behind its frame. If this option is available to you, it is well worth your time to lift the clamps or loosen the screws in order to remove the mirror completely away from the frame. Place the mirror in a spot where it can safely lay flat and out of the way while you paint the frame.
However, even if it appears that you can easily remove the mirror from the back of the frame, please do so very carefully. Many mirrors are held to the frame with strong adhesive and if you attempt to pop it out by force, you will risk shattering it (speaking from experience). As such, I recommend removing the mirror only if it is very clearly unattached and loose within the frame itself. If the mirror is glued to its frame, refer to the instructions below instead.
When You CAN’T Remove the Mirror from the Frame
In most scenarios, you will not be able to easily remove the mirror from the frame. This can be for a variety of reasons:
- The mirror is glued in (as discussed above)
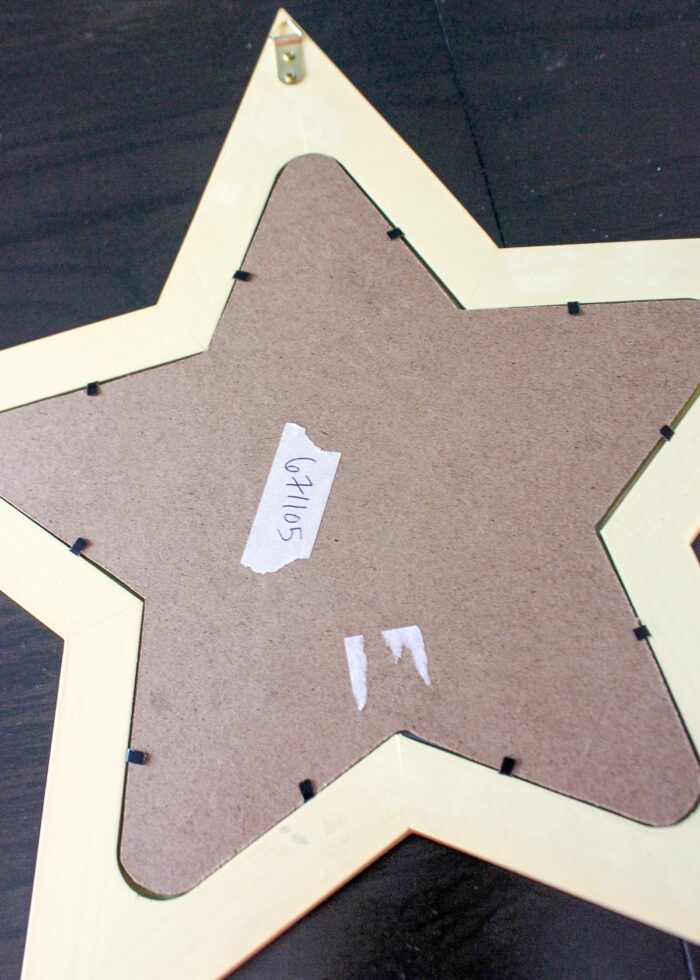
- The back of the mirror is “sealed” up in such a way that you can’t access it (usually with tight paper and hangers glued into place)
- The mirror has lots of distinct, separate mirrors that would be too difficult or too tedious to pry out.
In any of the instances, you will first need to mask the mirror…as in, protect it with some sort of tape or paper covering…so that you can paint the surrounding frame without saturating the reflective mirror surface.
Masking a Square Mirror
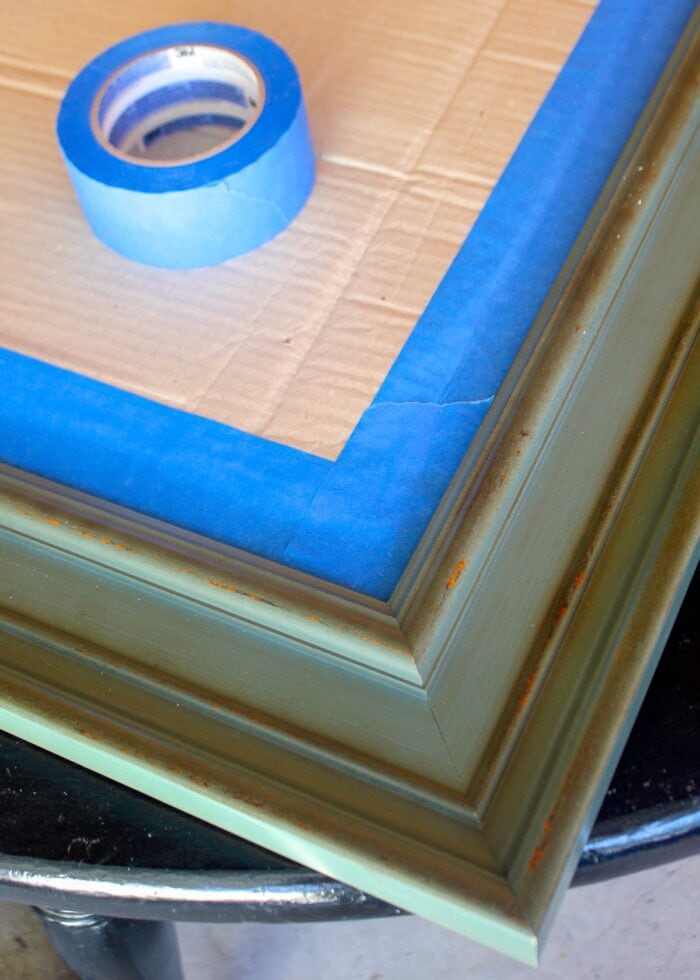
Most mirrors are squares or rectangles, which makes masking quite easy. While you can technically use painter’s tape across the full surface of the mirror, that will waste a lot of tape. Instead, place large stretches of newspaper, brown paper bags, or cardboard sheets across most of the mirror, and then place stretches of tape along all the edges. As you tape, be sure you nudge it under the frame’s edge at least 1/4″ to prevent paint seepage onto the mirror’s front.
Masking a Circular Mirror
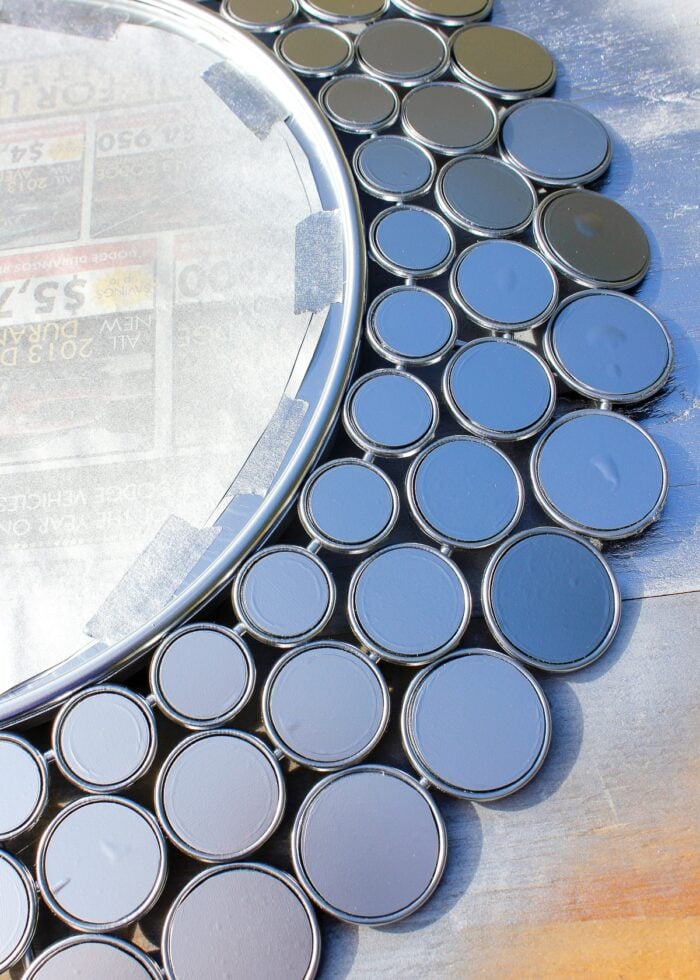
Masking a circle-shaped mirror is quite a bit more challenging, but it can still be done with some scissors and a lot of creativity! Every circular mirror will be slightly different, but let me show you how I masked up my circle mirror with a combination of newspaper, painter’s tape, and contact paper.
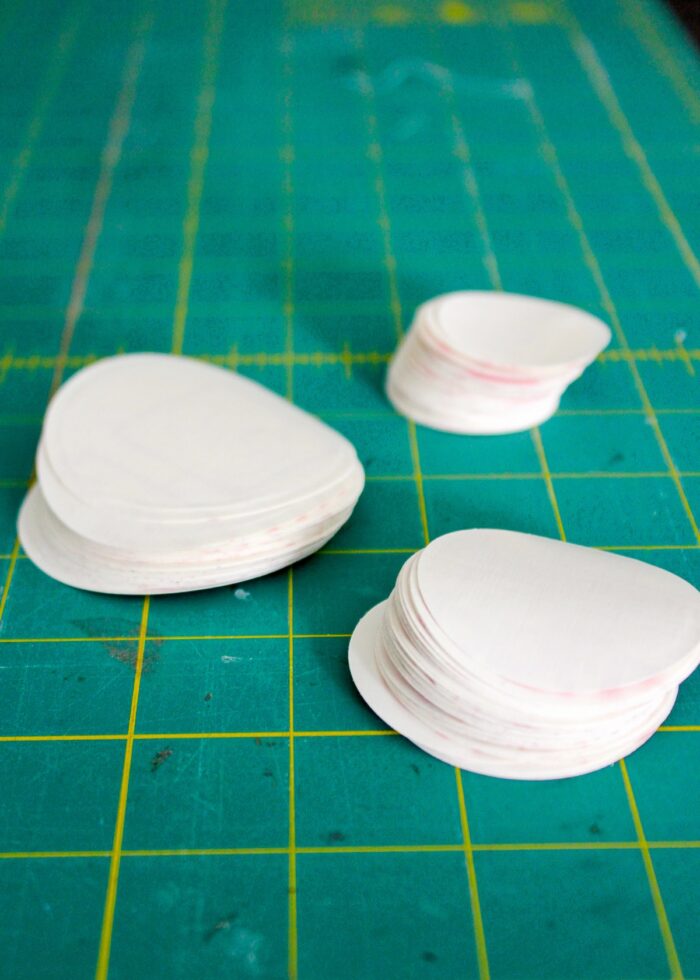
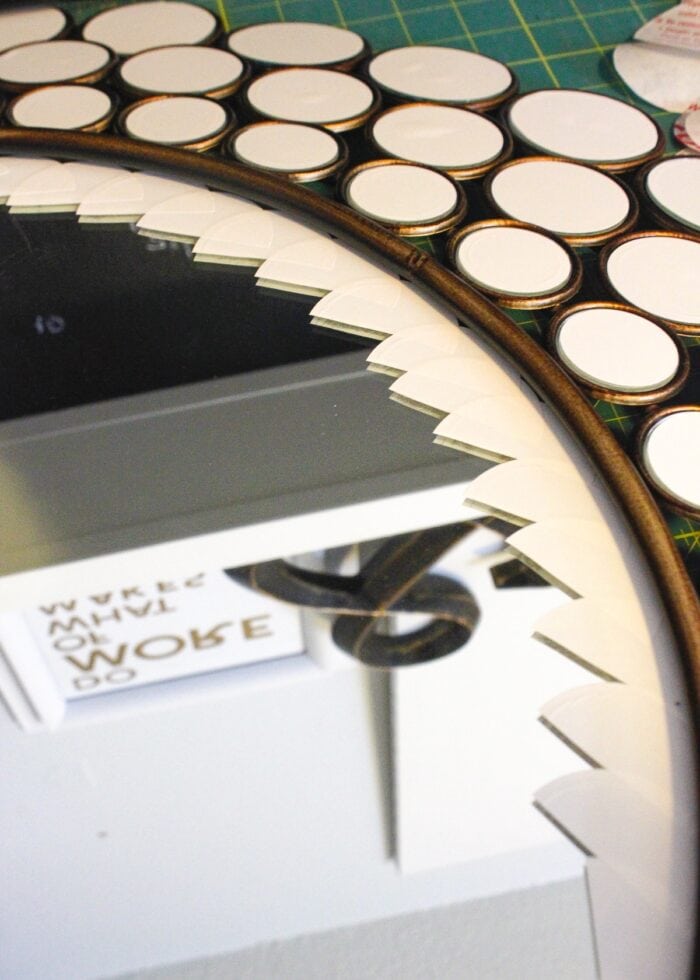
First, I used my Cricut machine to cut down basic white contact paper into a bunch of circles perfectly sized to fit the circles on my mirror.
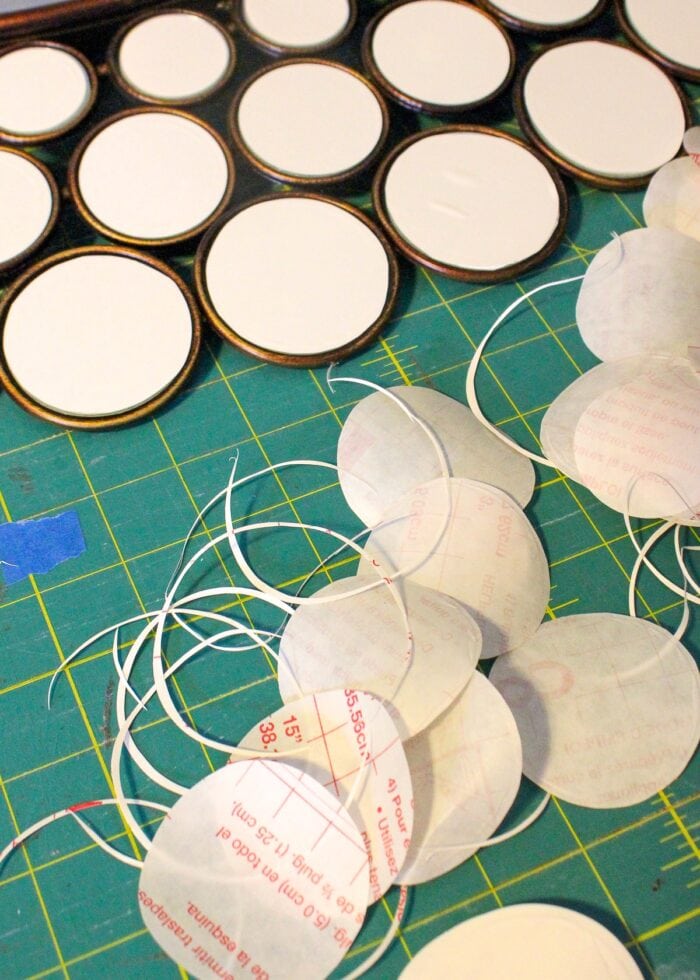
I then placed the circles onto all the small mirrors around the perimeter. If I couldn’t get the placement just right, I used a sharp craft knife to cut away the contact paper along the edges.
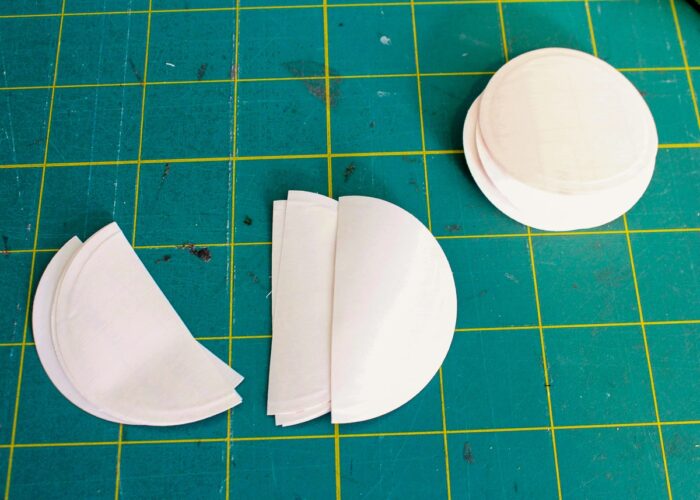
With the smaller circles all covered up, it was time to tackle the big middle circle. Taping in a circle is a bit tricky since straight lines of tape don’t bend around a curve round curve. But I found that cutting the remaining circles in half allowed me to put a curved edge of contact paper around the inside rim of the mirror. (You can’t likely achieve the same result by layering really short strips of tape around in a circle.)
Want to save this post?
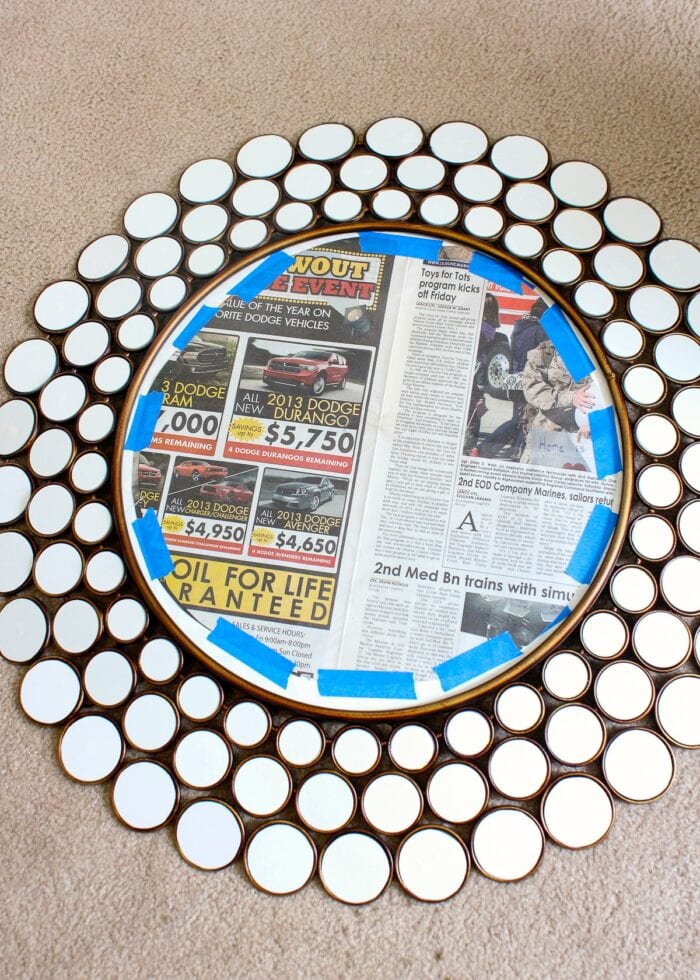
Once the edge was nice and protected, I cut a big circle out of newspaper, covered up the rest of the mirror, and secured it in place with small lengths of painter’s tape.
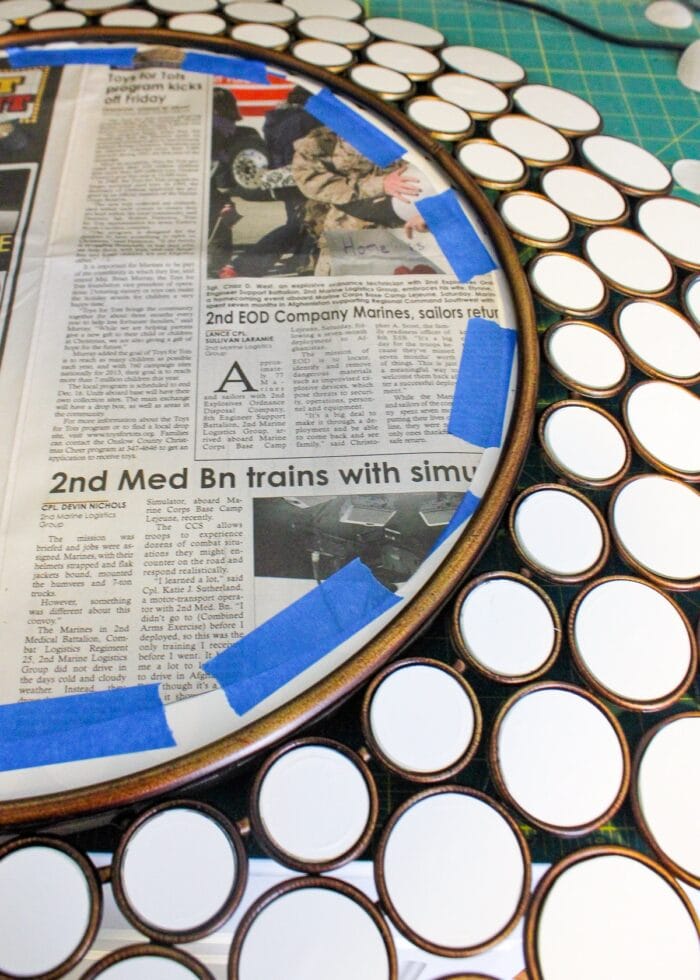
Below is my mirror all masked and ready for cleaning and painting. Before you proceed, take some time to ensure that every bit of mirror is covered up, even if it means you have to cut down tape or paper into funny angles to cover awkward areas. Although getting paint on the mirrored surface isn’t a huge deal (I’ll show you how to take care of that down below), taking time to mask well here will save you time later on!
The most tedious step of spray painting a mirror is now behind you and the next few steps should be quicker and easier!
Step 2 – Clean the Mirror Frame
For any painting project to have good results, it’s always recommended that you first thoroughly clean the surface. A damp cloth or rag with a small amount of vinegar or rubbing alcohol is usually enough to remove any dust, residue, or dirt from the mirror’s frame, especially if its metal, plastic, or finished wood. However, if you have a very old mirror or one that has wax or chipping paint, you may want to consider a deglosser or a light sanding with sandpaper.
Step 3 – Prime & Paint the Mirror Frame
Once the mirror is clean of dust and residue, it’s time for priming and painting! As I mentioned above, I recommend using spray paints for mirror projects since they allow you to get into all the various nooks and crevices much easier than with a brush.
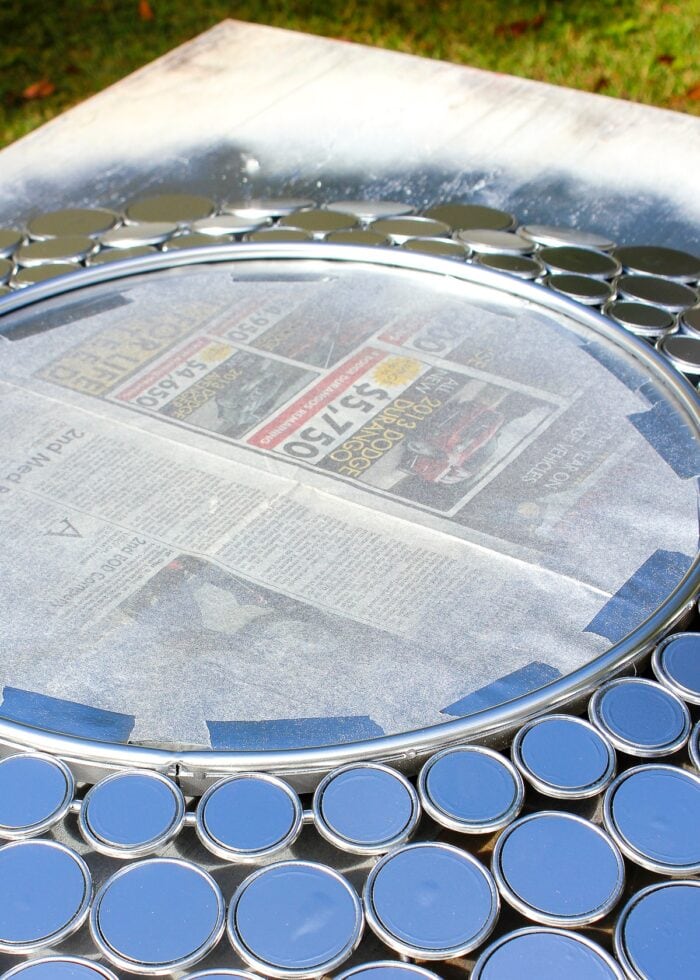
TIP! I highly recommend working outside with the mirror placed on a table protected by drop cloth. Having the mirror higher up off the ground will ensure you can easily get all angles of the mirror’s edge.
Prime…
To ensure really good adhesion, start with a few light coats of primer. Keep your hand moving quickly to avoid thick coverage and drips. If the white primer feels gritty to the touch after its dry, a light sanding is all that’s needed to make the surface nice and smooth in preparation for paint.
…Then Paint
After the coat of primer is dry and you’ve sanded away any roughness, use your preferred spray paint to give the mirror several light coats of color. It is always better to do lots of light coats rather than a single heavy coat, which will more likely produces stickiness and drips. As you’re painting, don’t worry about the mirrored surfaces (since they are protected). Instead, work diligently from every angle possible to thoroughly cover the mirror’s frame.
Step 4 – Remove the Masking
Once the mirror’s frame is painted to your satisfaction, give it ample dry time. For most spray paints, this will be a few hours; but depending on weather and the paint you chose, it can take up to a day. When you can touch the painted surface without any tackiness, you can proceed with finishing up this DIY project:
- If you were able to remove the mirror from the frame back in Step 1, go ahead and replace it now.
- If you masked your mirror instead, you can now carefully remove all the tape and paper. You may need to use a craft knife to lift up tight or stuck edges as you work, but most should peel away without any damage to the mirror or the paint.
Step 5 – Remove Excess Paint from the Mirror Surface
When I removed all the contact paper, tape, and newspaper, I had nice clean edges across most of my mirror. However, my smallest circle cutouts were a touch smaller than the mirror’s, which left a ring of silver paint along the edge of each circle.
Although discovering paint on your carefully protected glass surfaces is a pain, it’s totally fixable. Simply use a razor blade/craft knife with some Windex to remove paint from the mirror(s). It will take some patience, but the paint should come off quite easily and won’t damage your mirror!
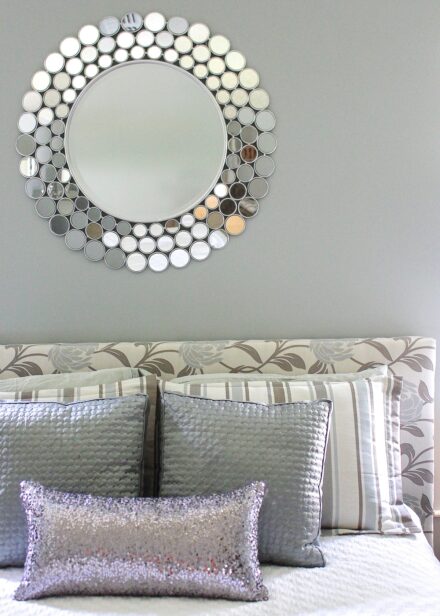
Step 6 – Hang Your “New” Mirror
With the frame now painted and dry, give the entire mirror one more cleaning with some glass cleaner before hanging it on your wall. Then be sure to step back and fully take in the transformation you were able to achieve with a simple $5 can of spray paint!
In the end, I am so thrilled I made the decision to spray paint this mirror. I assumed this transformation would be difficult and turn out poorly. However, quite the opposite was true! Each step of this transformation was admittedly a bit tedious and time consuming, but not at all difficult; and the results are more than worth it. If you have a mirror or frame in your home that you wish was a different color but can’t imagine how to go about fixing it, I hope these tips and tricks on how to spray paint a mirror motivate you give it a go!

Megan
7 Comments on “How to Spray Paint a Mirror | Step-by-Step Guide”
I love it!! It looks beautiful over your bed!! The idea of the contact paper circles is genius!! I never would have to thought to paint a mirror like that because of all the circles. Genius!! Love it!!
This is the best way I could find to to decorate a mirror. Though this demands some extra work but the outcome would be really fantastic. I am gonna do this as soon as I get a chance to do the same.
Great ideas for spray paint a mirror. Thanks for sharing.
WOW! So beautiful, job well done! I just purchased a mirror that is similar but has rectangles all around the larger round center mirror and ill be using this when I spray paint it gold. Thanks for the great idea!
Hi Lisa!
I am so glad you found this tutorial helpful. It really was an easy DIY, and all these years later…it still looks amazing!
Good luck with your mirror!
Megan
What color/brand silver spray paint did you use? Looks beautiful
I really don’t like leaving negative comments. I do hope you realize that I am just giving you some feedback on my experience.
I was so excited to open this page. I was looking forward to learning from you. I am starting a mirror project, I am gather ideas from creative people like yourself.
I couldn’t even get past the paragraph. The constant interruption by ads was so intense. I literally scrolled, as fast as I could, to the bottom of the page to see if there was a way to communicate with you. I thought you should know how disappointing it is to be so excited to see someone’s content and not be able to enjoy it.
Is there a way I can have this emailed to me. I apologize if I am being harsh but the ads are overwhelming.