DIY Magnetic Polaroid Picture Frames
We all take tons of photos, but how many of us actually get those photos off our phones and on display? Well…after today’s project, you’ll have no excuse because I am sharing an oh-so-cute and oh-so-simple method for displaying photos: Magnetic Polaroid Picture Frames! Truth be told, these frames were born out of a random idea that I just really wanted to see come to life. But as they came together so easily and turned out so darn cute, I couldn’t stop thinking of fun uses for them. Obviously, they are ideal for adorning refrigerators, magnetic boards, lockers, dorm rooms, and other surfaces with favorite snapshots! But with prom, wedding, shower and graduation season upon us, they would also make for the perfect party favor, parting gift or sentimental memento. These “polaroid frames” require only a few supplies and can be easily made whether you have an e-cutter or not…so let me show you how to do it!

These little picture frames are made out of magnetic paper. So beyond cutting them out, all you have to do is slap them up onto your favorite magnetic surface atop some of your favorite photos, and you have one heck of a cute and easy way to show off your family and friends!
I (of course) had to dress up my magnetic frames with some different patterned and glitter vinyls. But this (simple) extra step really gives the frames a ton of personality so I highly recommend doing it! And now with so many different patterned, colored and textured vinyls on the market, you can customize these frames to suit your style, favorite colors, school colors, club colors and so much more!
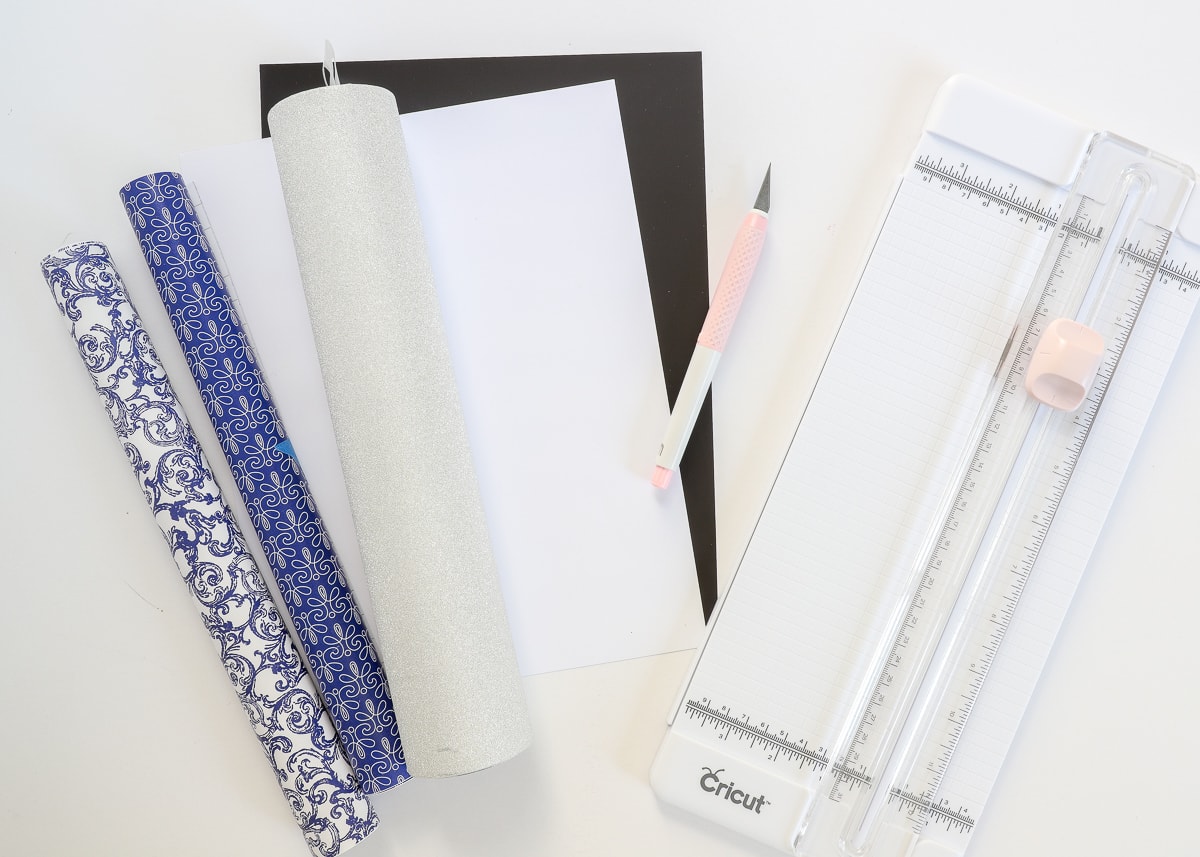
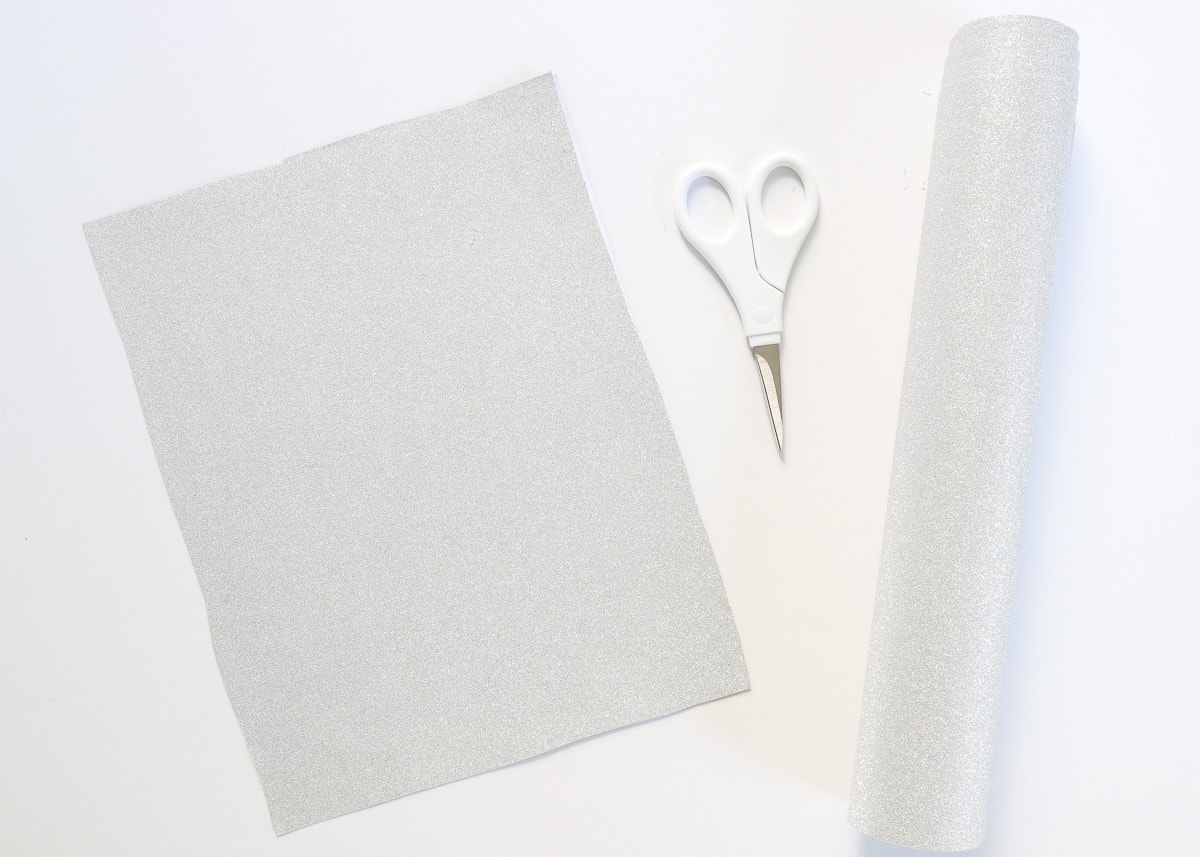
Supplies Needed
Here is what you need to create these Magnetic Polaroid Picture Frames:
- Magnetic Sheets
- Patterned Vinyl (optional)
- Cricut Machine (both the Cricut Explore or Cricut Maker can cut magnetic paper) with StandardGrip Mat
- The project can also be made with a sharp craft knife, ruler and self-healing mat
- Scissors or Paper Trimmer
- Printed Photos – see how I printed photos onto Post-It Notes
How to Make the Magnetic Polaroid Picture Frames
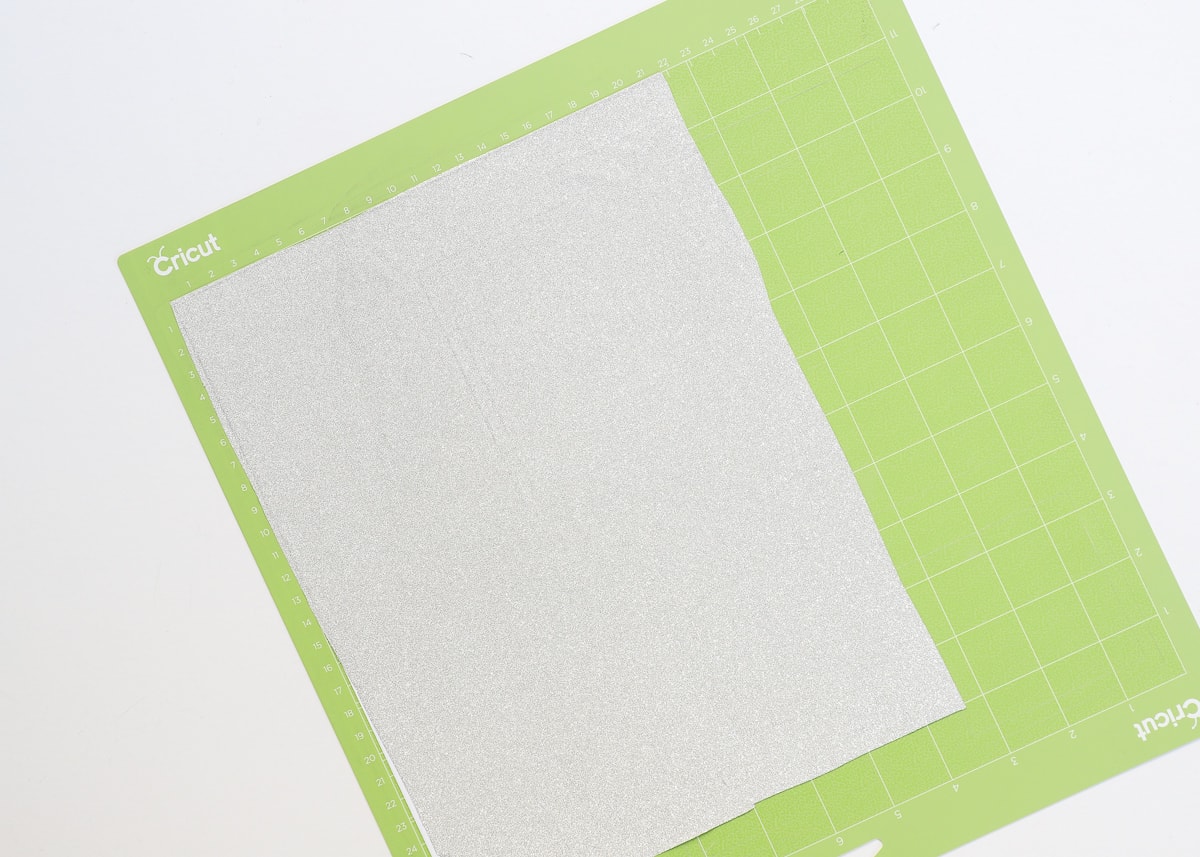
Most magnetic paper comes with a white top and a black underside (the magnetic sheet). If you want plain white frames, you can skip this first step. However, if you’d like your frames to have a little color, texture, or pattern, it is easiest to add it right now, at the very beginning before you cut anything out!
TIP! This approach means you won’t have to painstakingly layer vinyl onto the magnetic frames after they are cut!
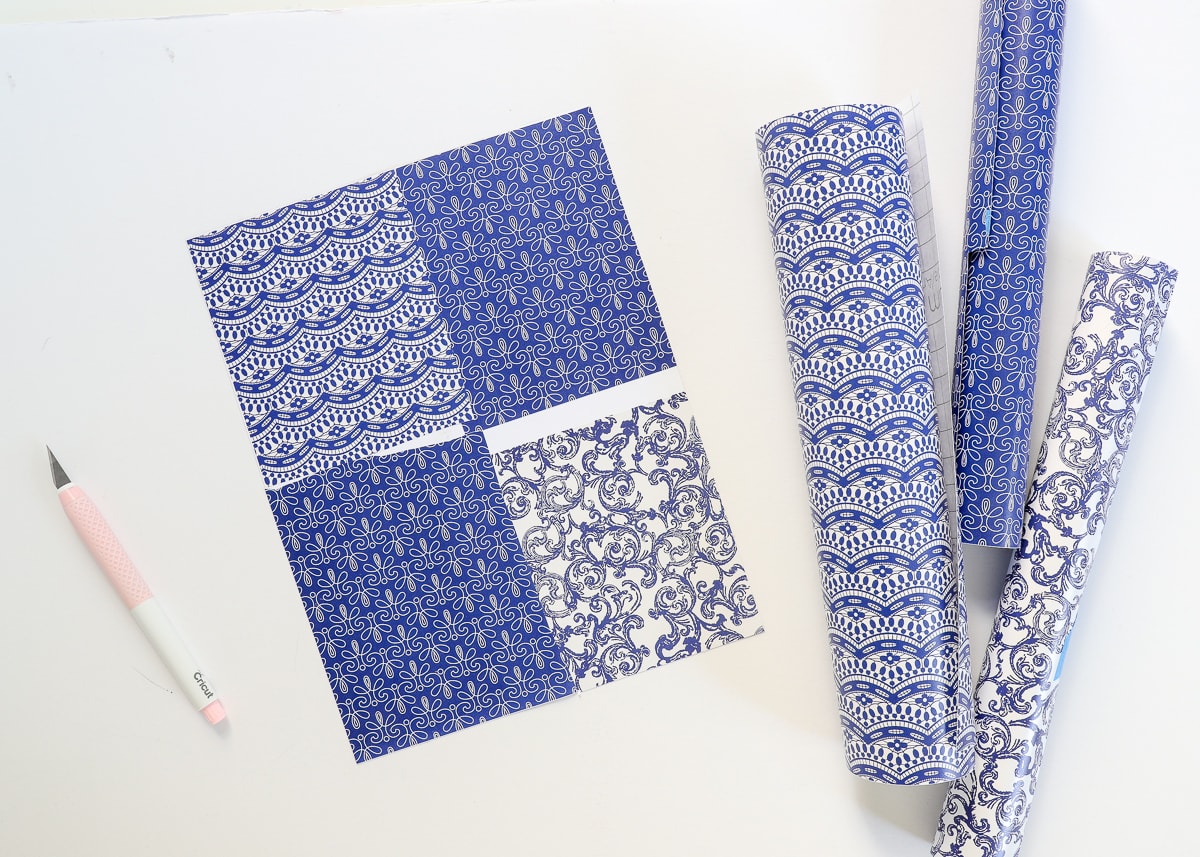
Start by cutting down your selected vinyl (in my case, the glitter vinyl) to fit on top of the standard 8.5×11″ magnetic sheet. I just used a paper trimmer to slice a 8.5″ wide section of vinyl off my longer roll.
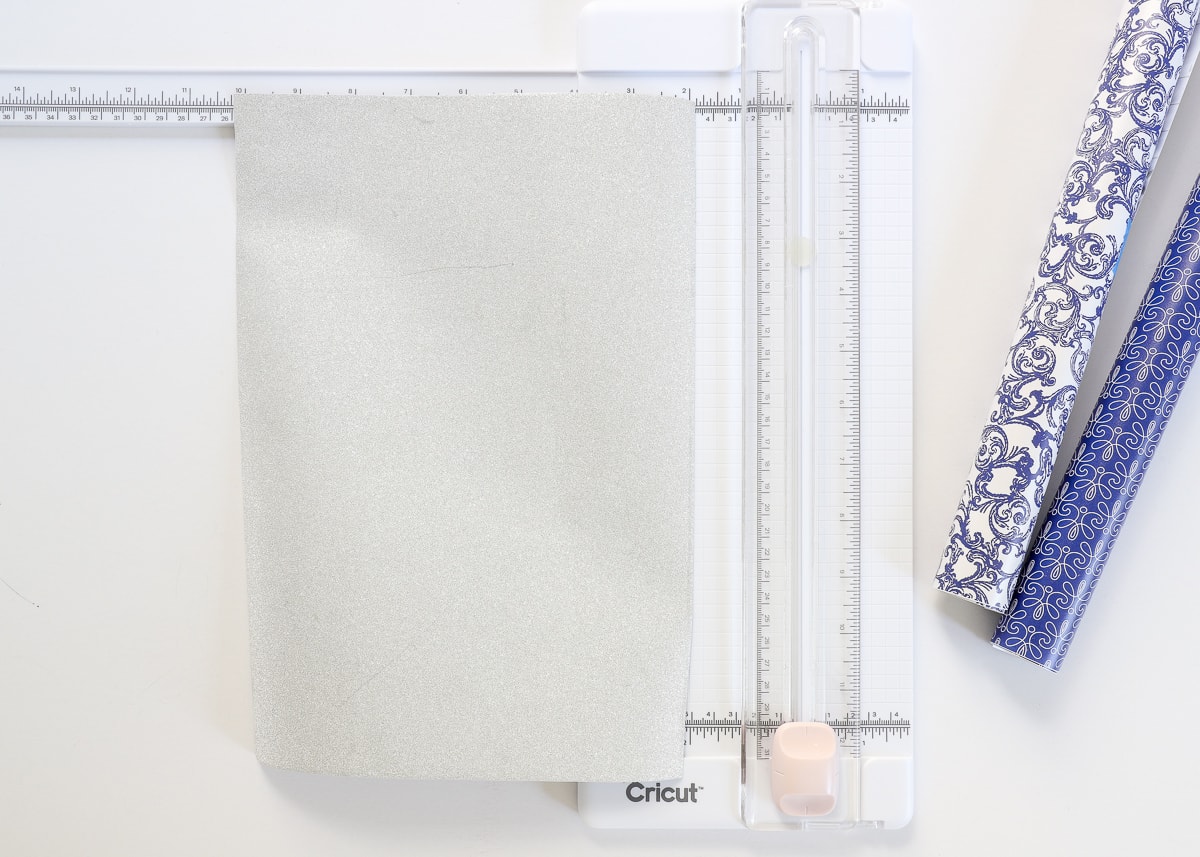
Remove the paper backing off the vinyl and lay it on the top (white side) of your magnetic sheet. Working with really large cuts of vinyl like this can be a little unwieldy. So work slowly to avoid big bubbles and wrinkles in your vinyl.
If You’re Cutting On a Cricut…
The quickest and easiest way to cut out these frames is using a Cricut machine or other e-cutter. Start by loading the magnetic paper onto a sticky Standard Grip mat with the magnetic side facing down and your vinyl facing up.
TIP! You will want to use a very sticky mat for this project to ensure your vinyl+magnetic paper cuts cleanly through!
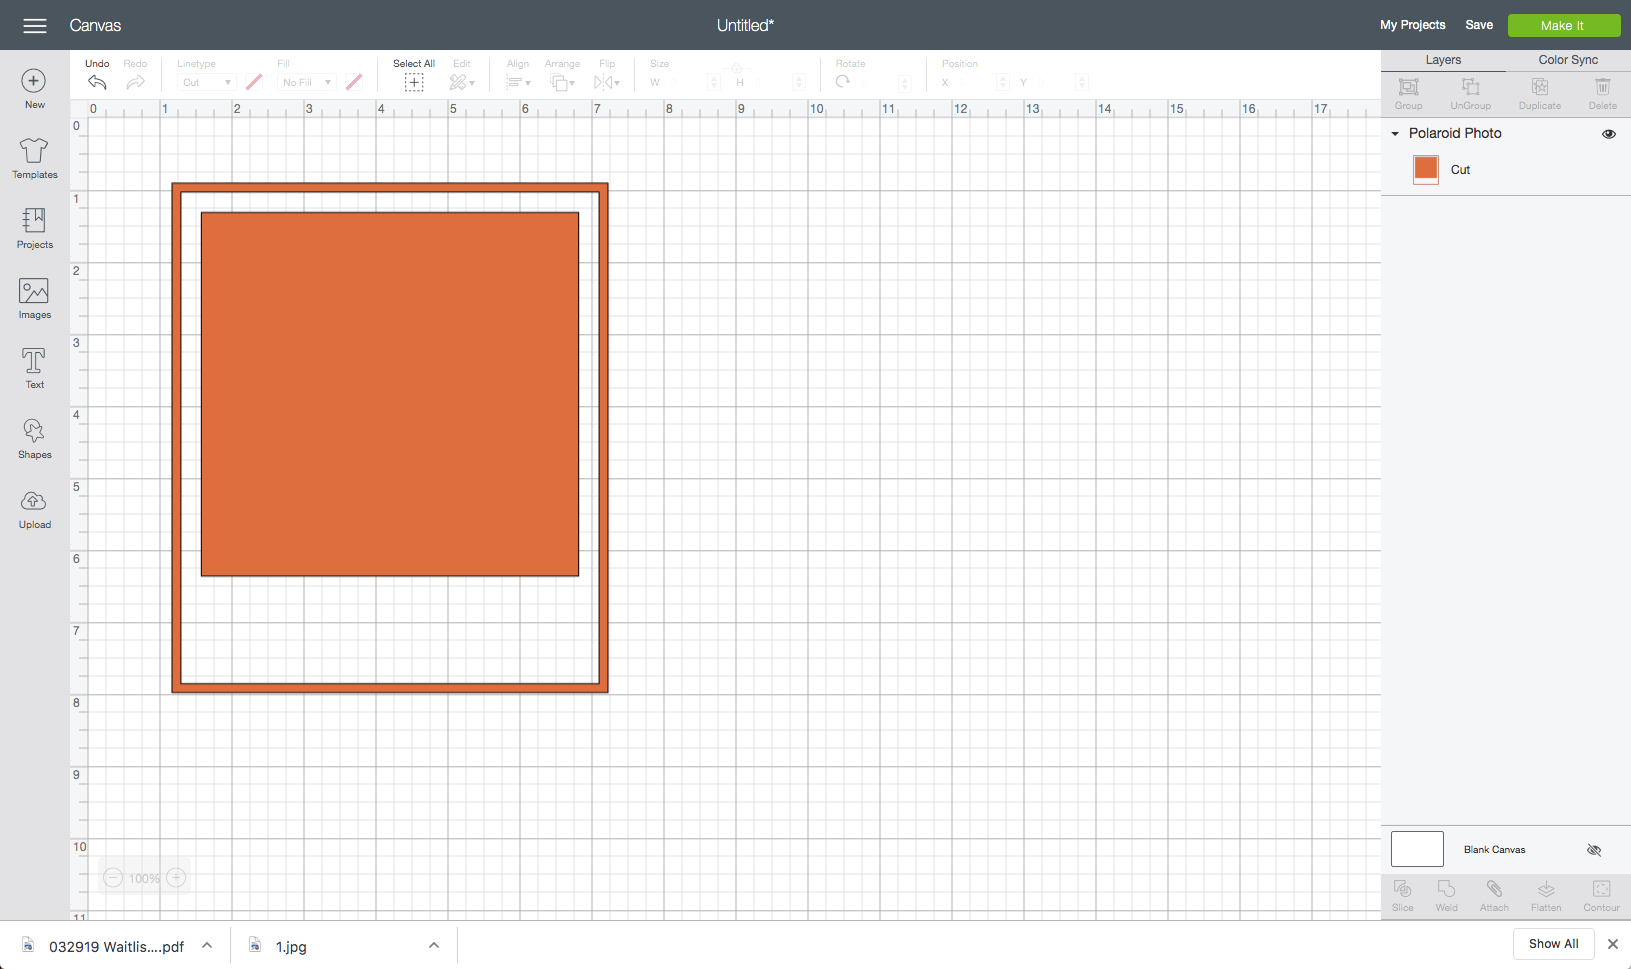
Next, locate the following image in the Design Space Image library: Polaroid Photo | #M38467 | Brooklyn Iron-on Cartridge and place it on your canvas…
Want to save this post?
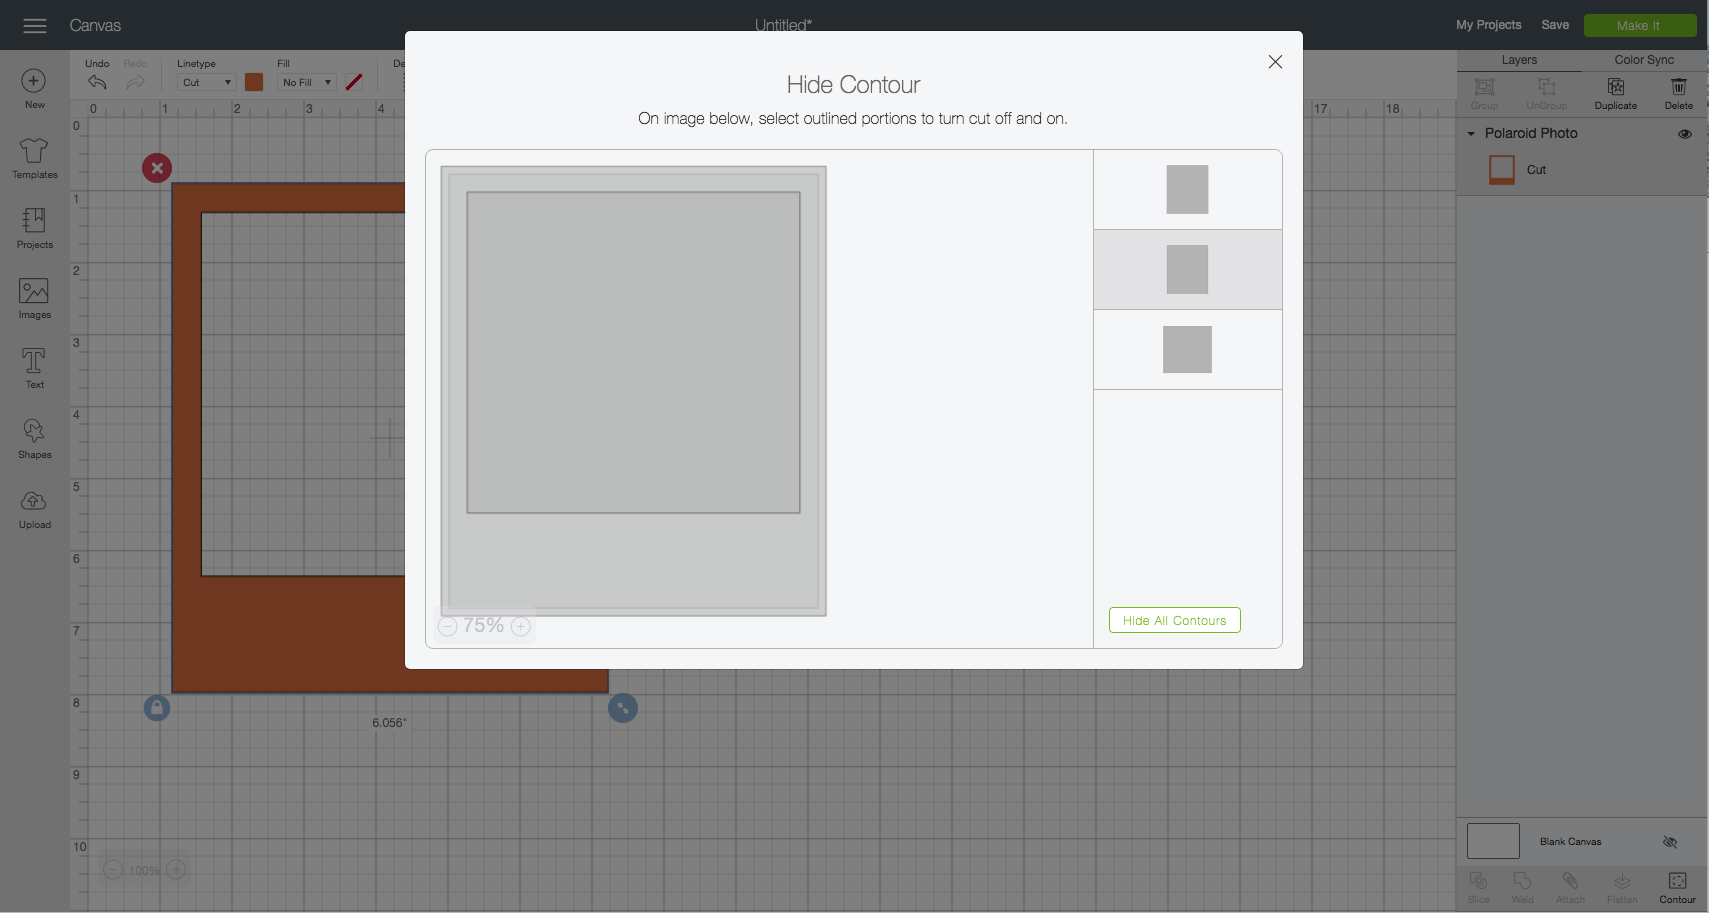
Use the Contour Tool to reverse the image and create a solid frame design:
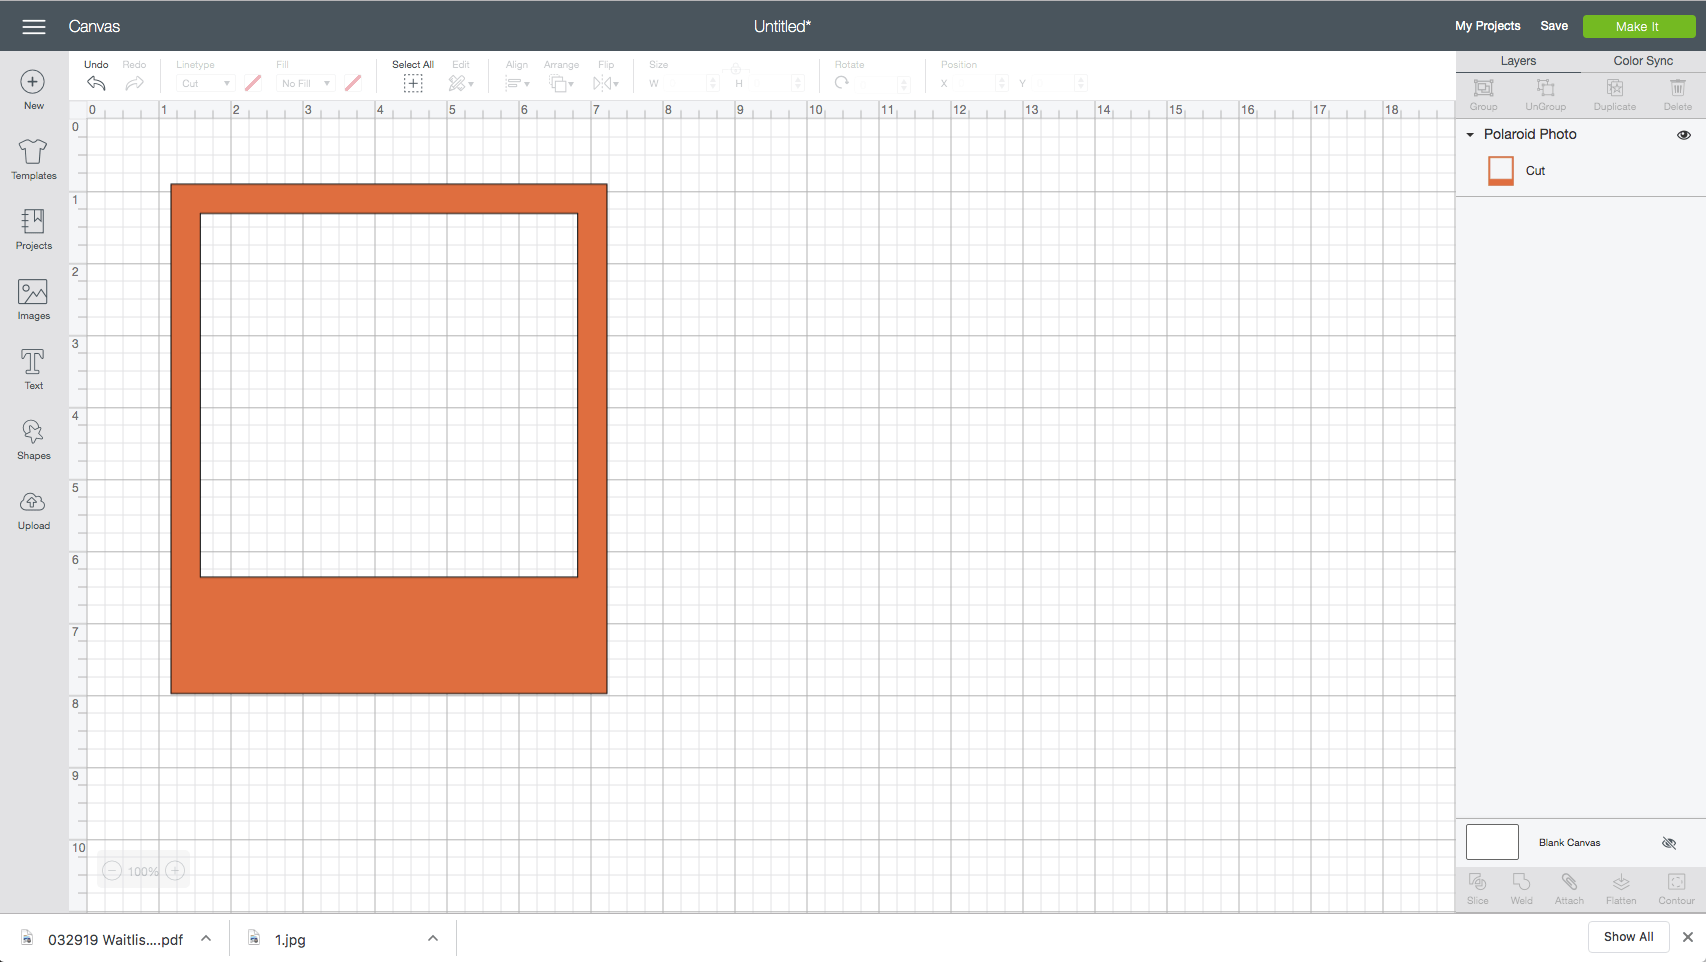
I sized my polaroid frames to be 4″ tall (so they would hold a 3″ square photo), but you can choose to size them to whatever dimensions you wish. Once you are satisfied with the size, click the green “Make It” button to cut out the frames. Whether you are cutting on an Explore or Maker, select “Magnetic Paper” from the Custom Materials menu in order to cleanly cut through both the vinyl and magnetic material.

After the frames are cut, unload your mat and use a weeding tool to remove the excess material from around and inside each frame. Carefully remove the frames from your mat…and then secure them to any magnetic surface you wish! Yep – they’re done…that easy!

If You’re Cutting with a Craft Knife
I’ve worked with magnetic paper a lot, and I am always surprised by how easily and cleanly it cuts, even with plain ol’ scissors. If you don’t have an e-cutter, this is absolutely still a project you can make! And although they may not come together quite as fast as using a machine, they are still pretty easy since you just need to cut a bunch of straight lines!
- Prepare the magnetic paper with your choice of vinyl, exactly as I show above.
- Next, cut out the following shapes from some heavy cardstock or scrap paper: (1) 3.5×4″ rectangle, (1) 3×3″ square.
- Trace the two shapes onto your vinyl+magnetic paper combo using a pencil, placing the square inside the top part of the rectangle (just like a polaroid photo)
- Use a sharp scissors, paper trimmer, and/or craft knife and a ruler to cut along the lines to create the frames!
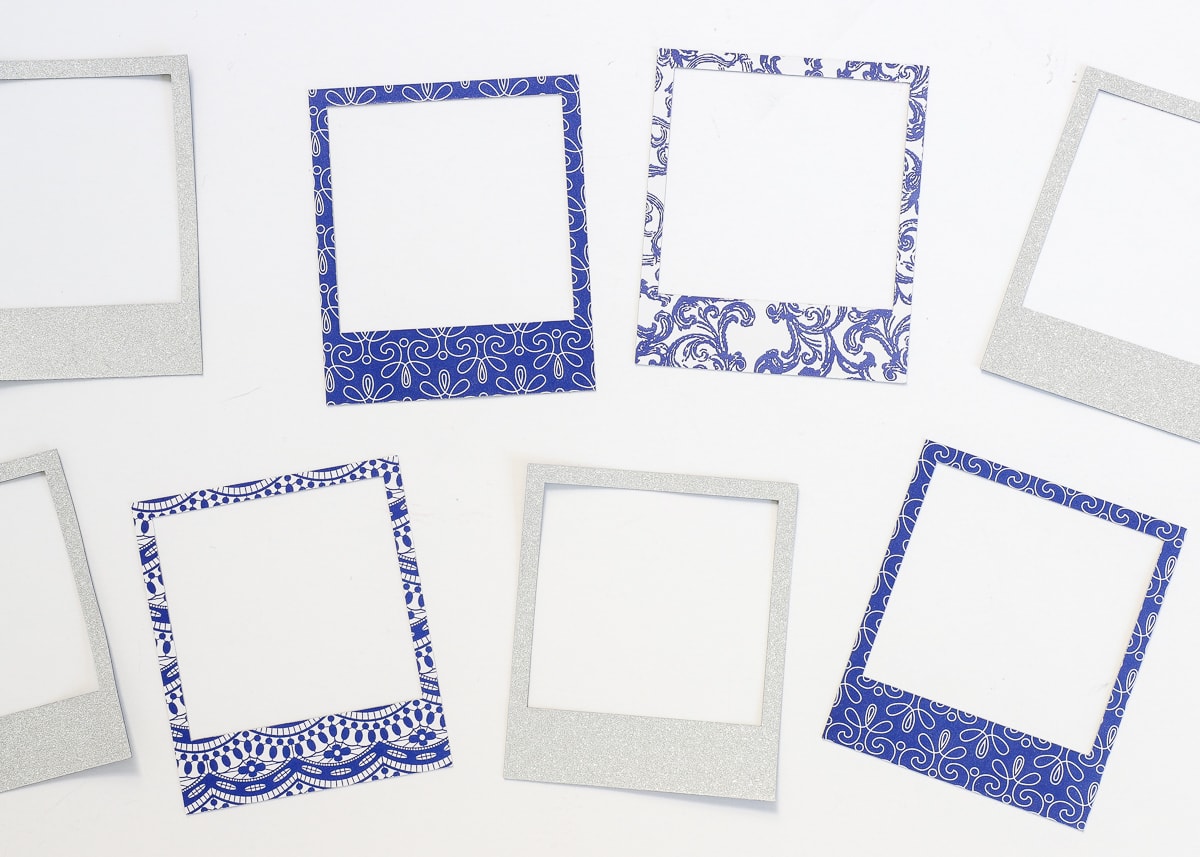
Magnetic Polaroid Frames with Patterned Vinyl
The patterned frames come together in exactly the same way thanks to my new favorite product: patterned vinyl!

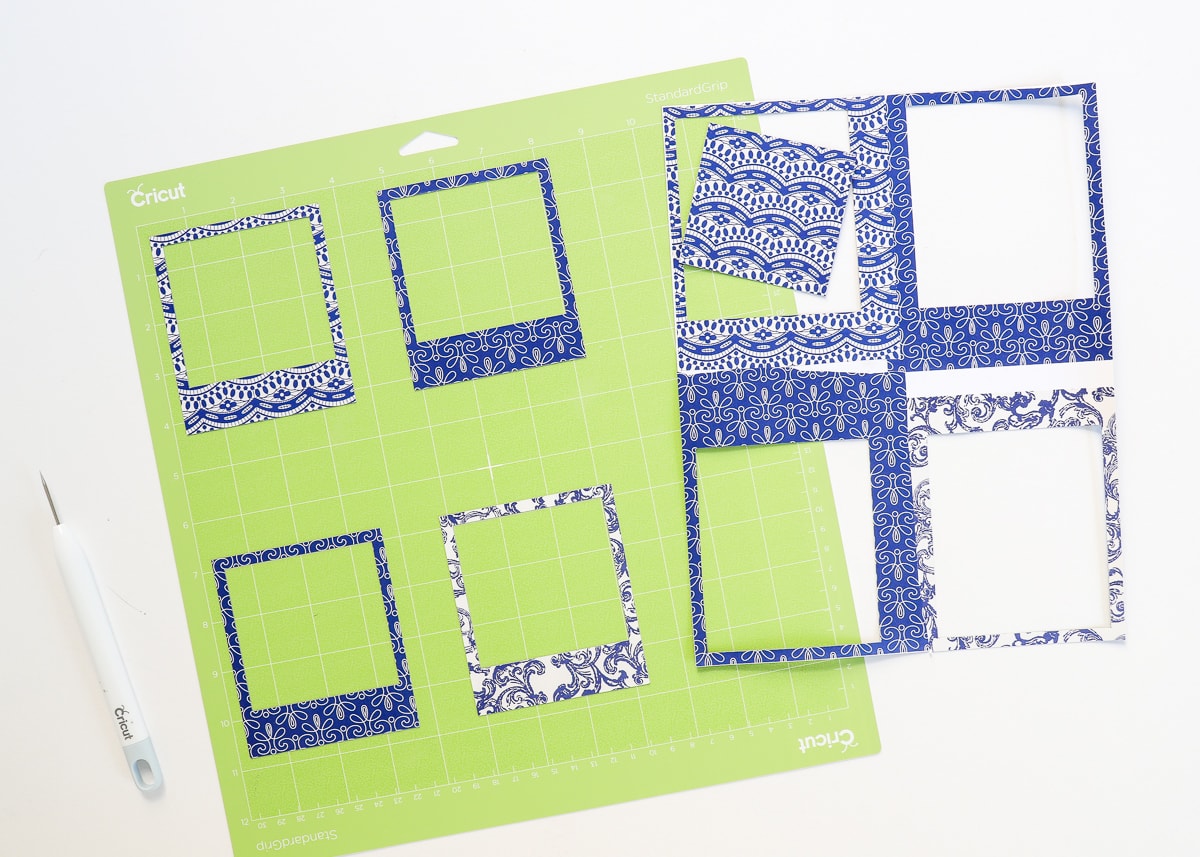
Here’s a quick tip for easily cutting the same shape from a variety of colors or patterns. Instead of cutting one pattern/color at a time, load your vinyl onto four quadrants of the magnetic paper and cut them all at once! Below, I have four “swatches” of patterned vinyl secured to a single magnetic sheet…
I then setup four polaroid frames to cut in the four corners of the paper (all on the cut screen in Cricut Design Space)…

…and ran the mat through to cut just one time! After peeling away all the excess, I’m left with an array of pretty frames for displaying my pictures in a matter of mere minutes!
Assembling Your Magnetic Polaroid Frames
In the grand scheme of this project, creating the frames may be the easier part! It’s getting those darn photos printed that may prove the tricker step. You likely already have a way you like to print your photos or may even use a service…those options will certainly work here! If you use my measurements for your frames, print/cut your photos down into 3″ squares. Otherwise, size your photos to fit into whatever frame opening you created.
I chose to print some photos onto Post-In Notes for ease and to give the images some fun color! I had no idea that printing photos onto Post-It Notes would be so fun AND so addictive, and you can see how to do it here: How to Print Photos Onto Post-It Notes
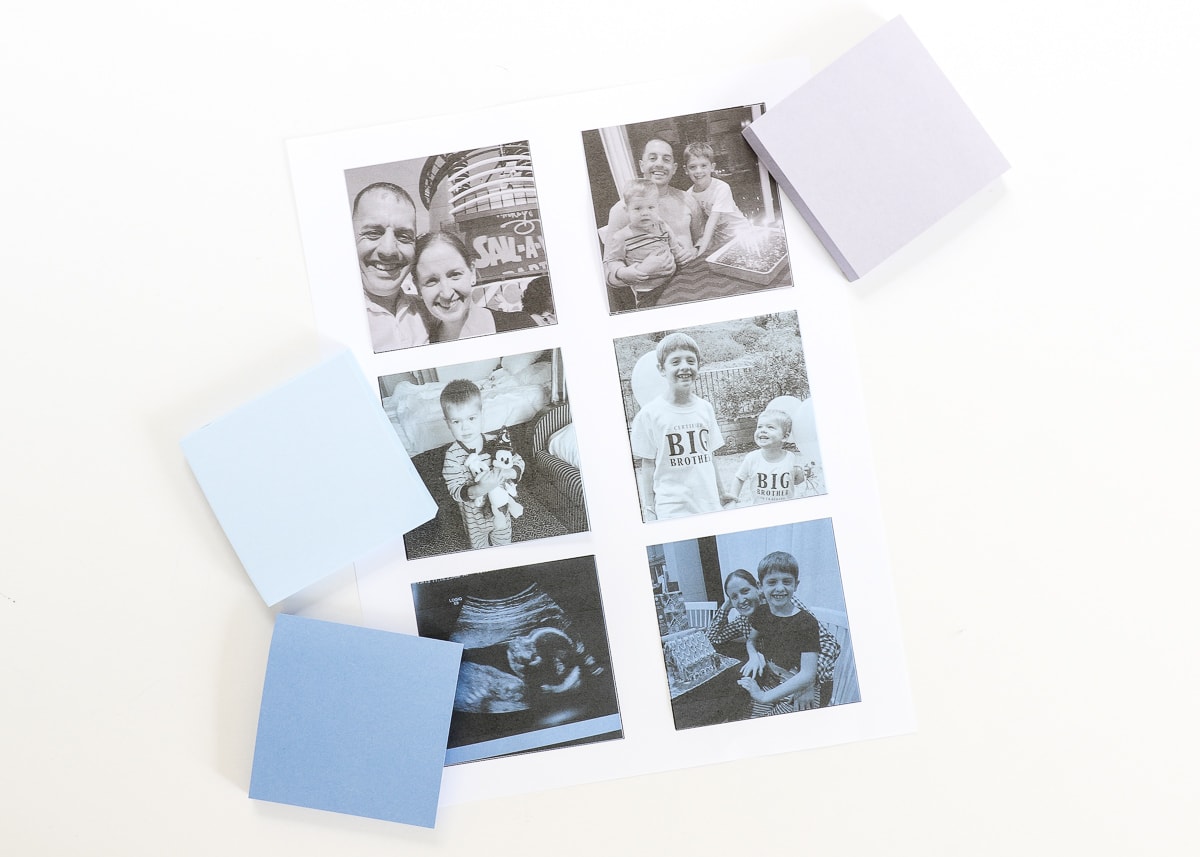
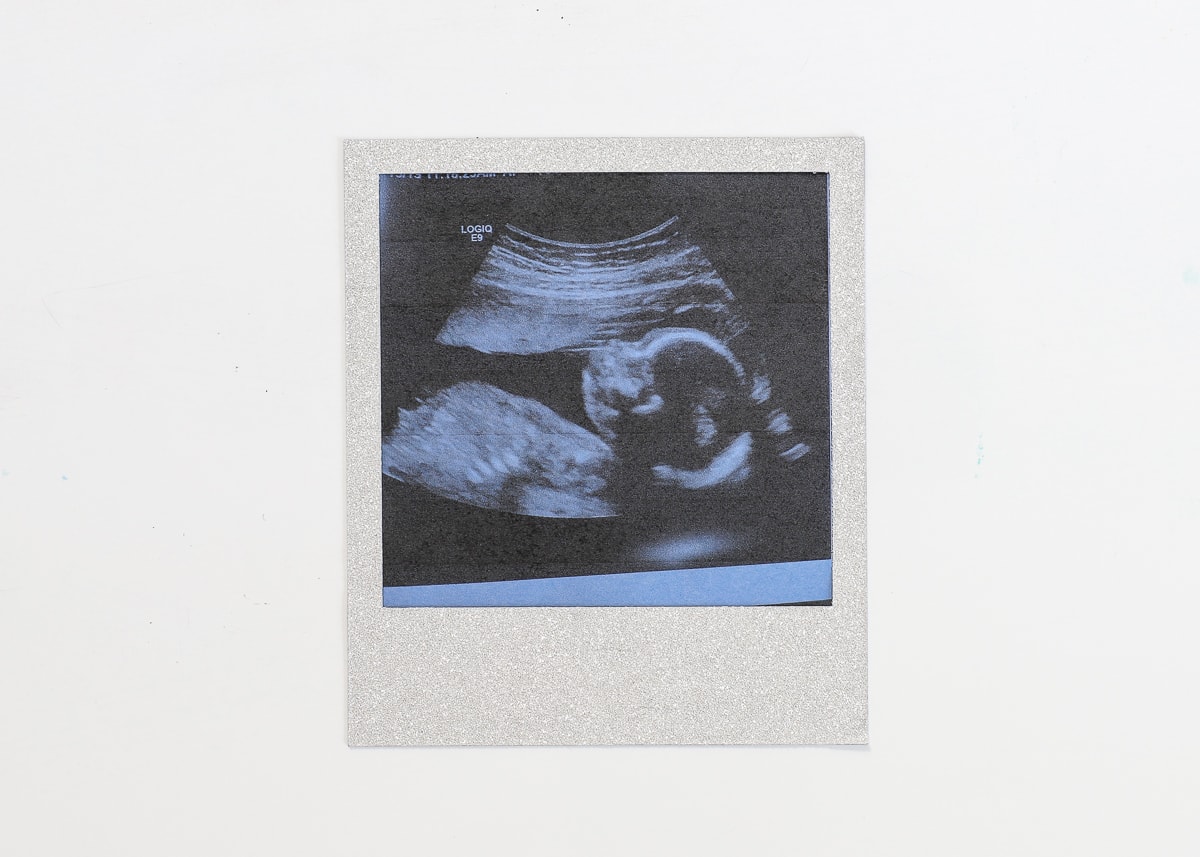
The thing I love about using Post-It Note photos is that they are already sticky. So to get your photos up and on display…
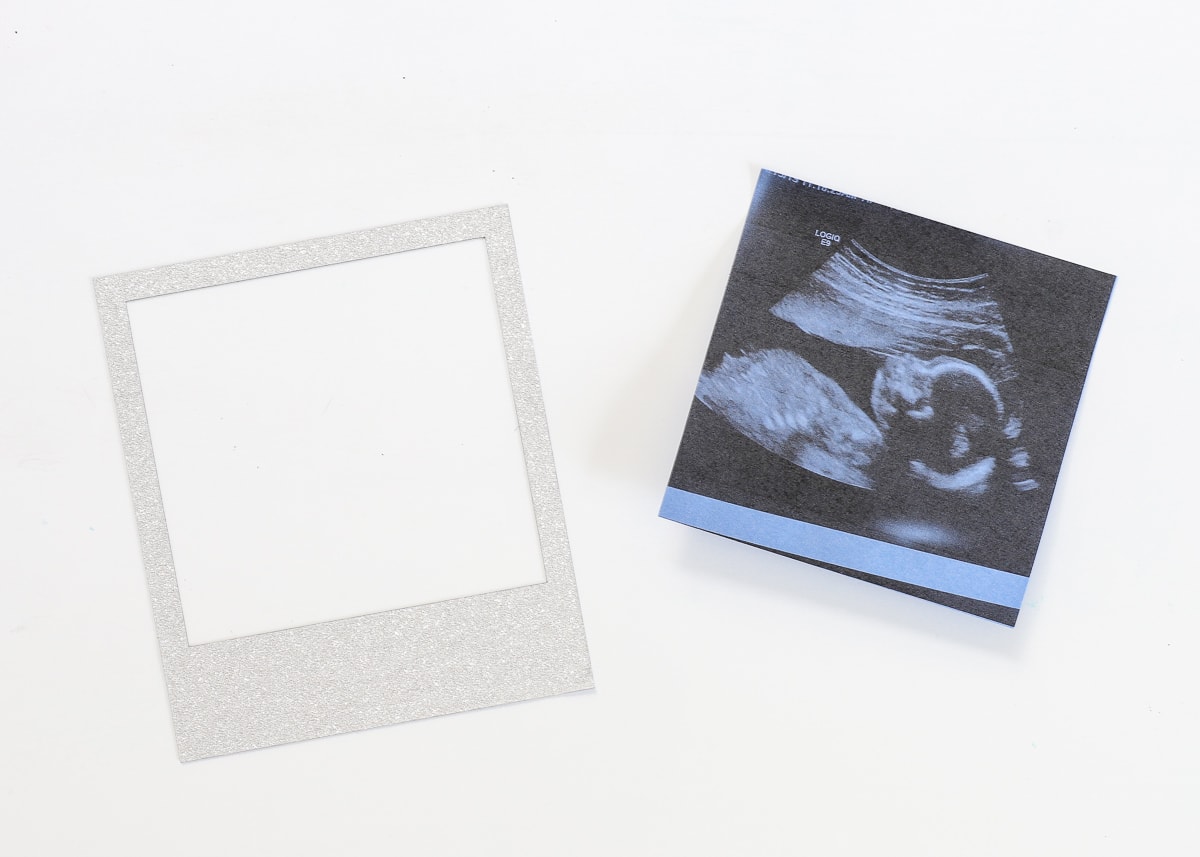
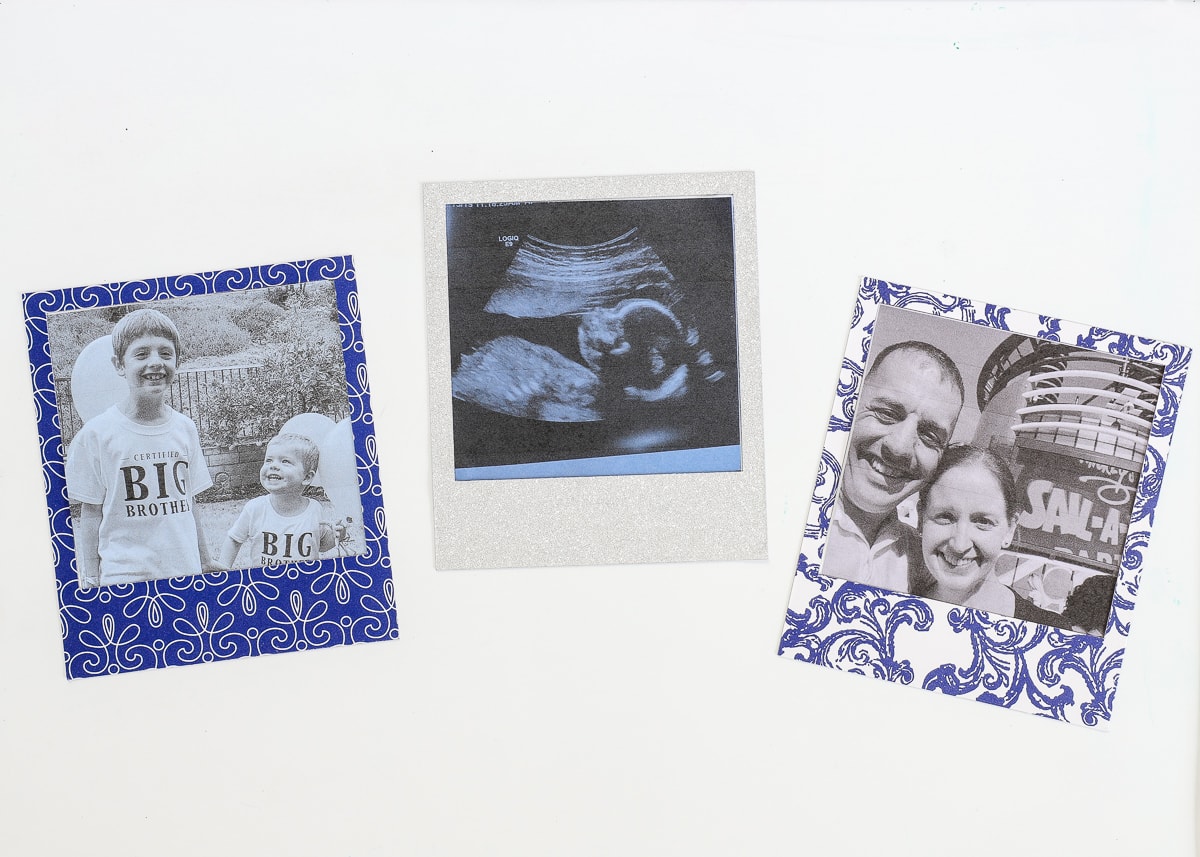
…simply put your photo wherever you want it, and then place your magnetic frame right over it to keep the edges down and to frame it out nicely!
These magnetic frames aren’t only adorable but they really do make displaying or swapping out photos oh-so-simple! Spend 30 minutes making a whole bunch of frames and keep them stuck to your refrigerator or another magnetic surface. Then…whenever you come across a photo (or even a quote or reminder) that you love, you can frame it up in a matter of seconds!
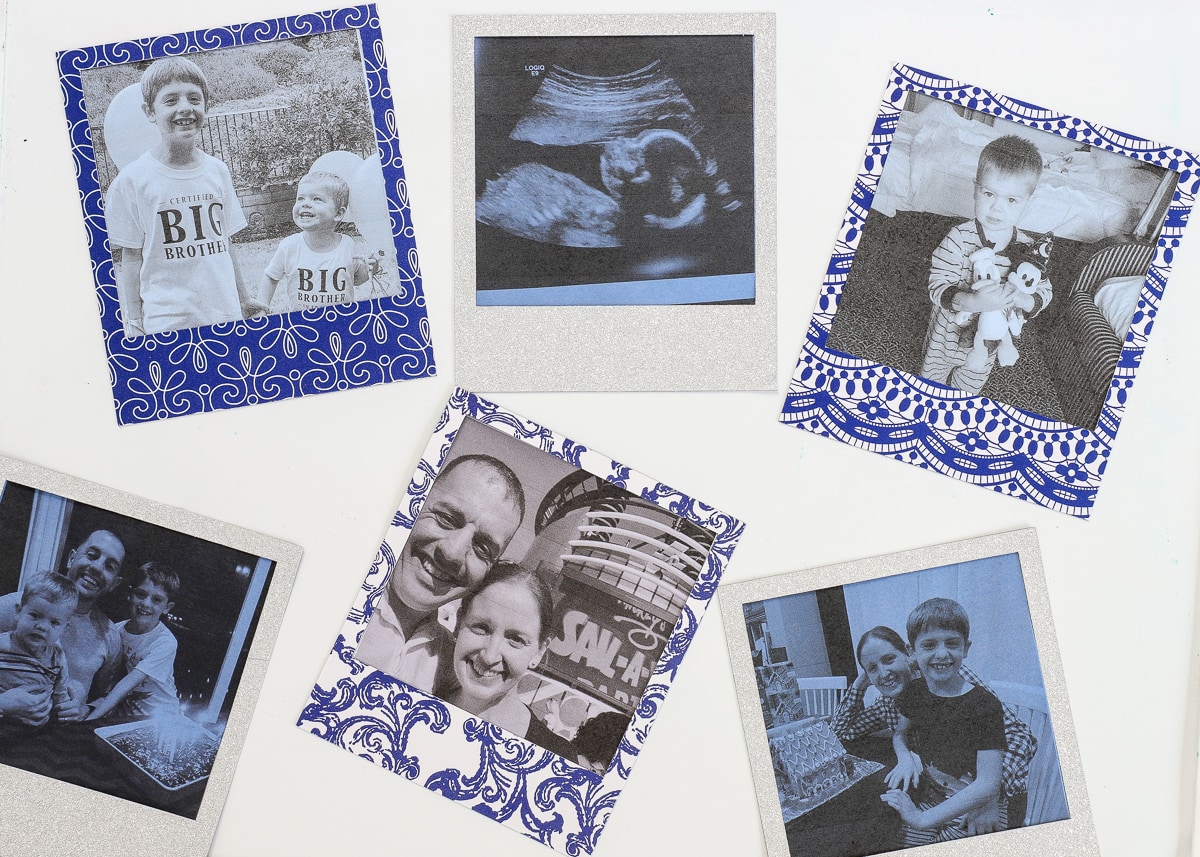
I love these for my office memo board and along the side of our refrigerator, but I also think they would be so great for lockers, staff rooms, and other unexpected places! You can even personalize the bottom of each frame to say things like “Prom 2019” or “Graduate” and other fun descriptors! The possibilities for customization are endless, and they are sure to bring a smile to your face when you see them around your home. I do hope you give them a try!
Megan