How to Cut Really Big Designs On Your Cricut – The Off-the-Mat Technique
If you’ve been around here for a while, then you know I’m really passionate about teaching those of you who are Cricut lovers how to use your machine quickly and easily in order to create anything your heart desires! Today, I want to teach you how to cut really big designs on your Cricut…designs that are bigger than the available cutting mats. It’s very easy, although perhaps not intuitive, so let me walk you through it!
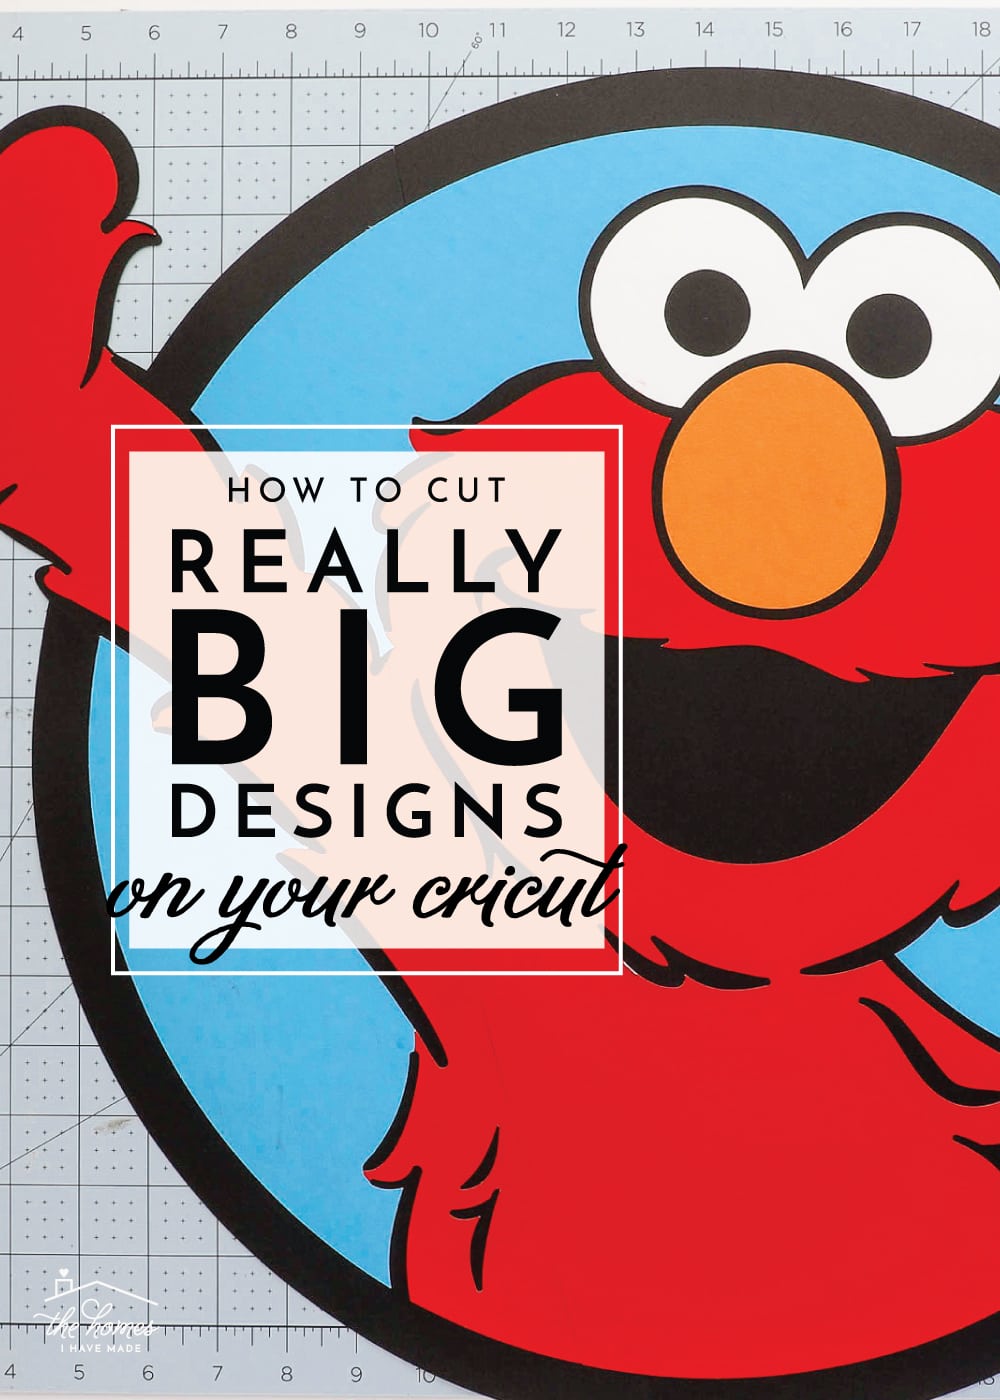
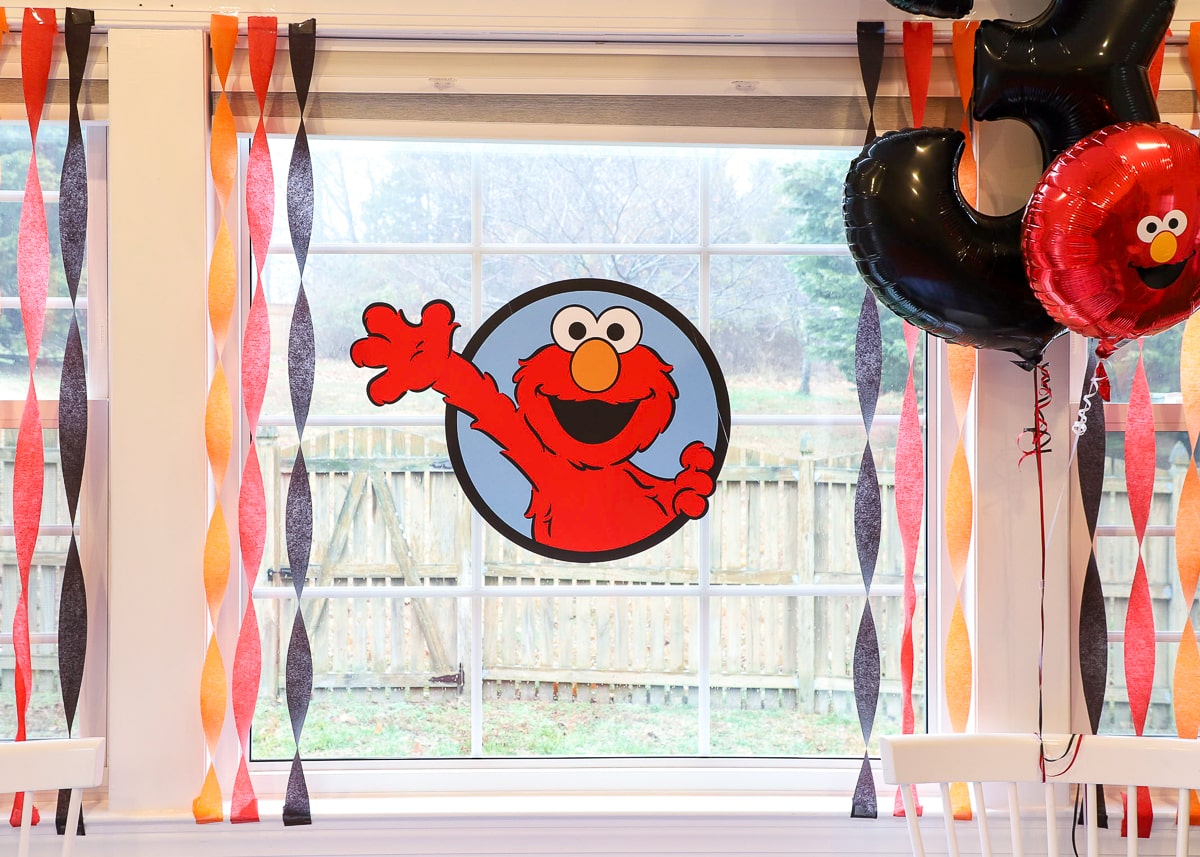
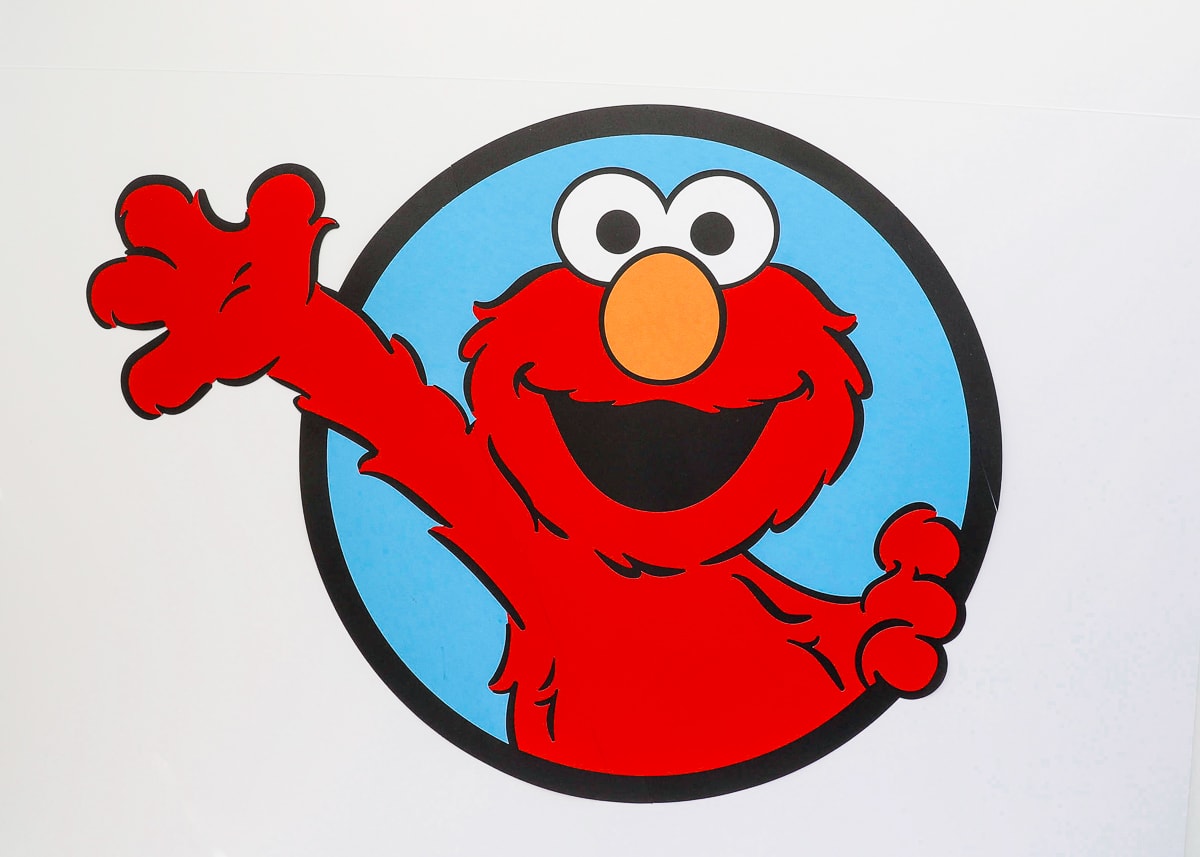
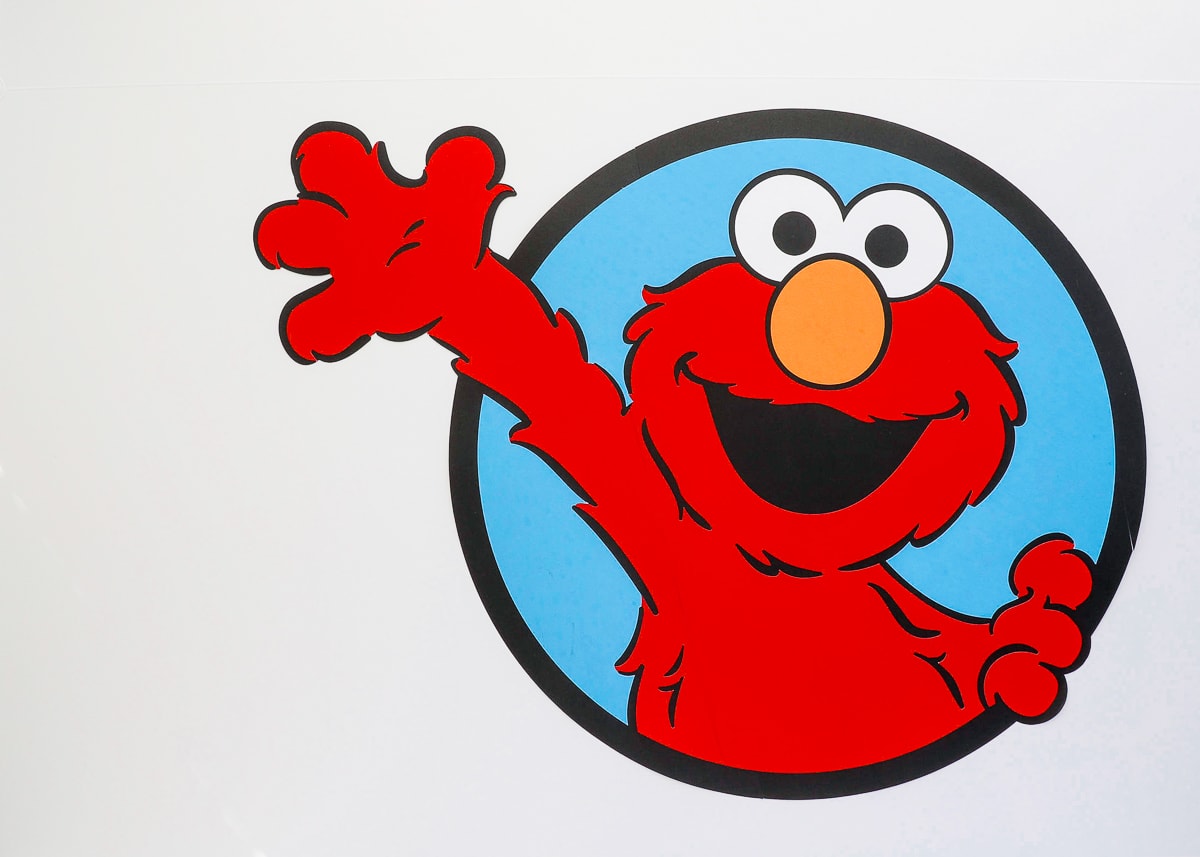
Today’s tutorial is one I’ve been wanting to write for a while yet it came about pretty organically! You see, at the last minute, I was pulling together Sam’s Elmo-themed 3-year-old birthday party and I needed something to make a BIG visual impact so I didn’t have to make lots of little decorations. This super-sized Elmo totally made our party display!
It might be a little hard to tell from the pictures, but that Elmo is BIG! As you can see on the cutting mat below, he measures just bigger than my 18×24″ mat!

But how did I cut such a big design on my Cricut when the largest mat available is only 12×24″???
I’m going to break it down into super-specific steps down below, but here is the gist of it:
What Is “Off the Mat”?
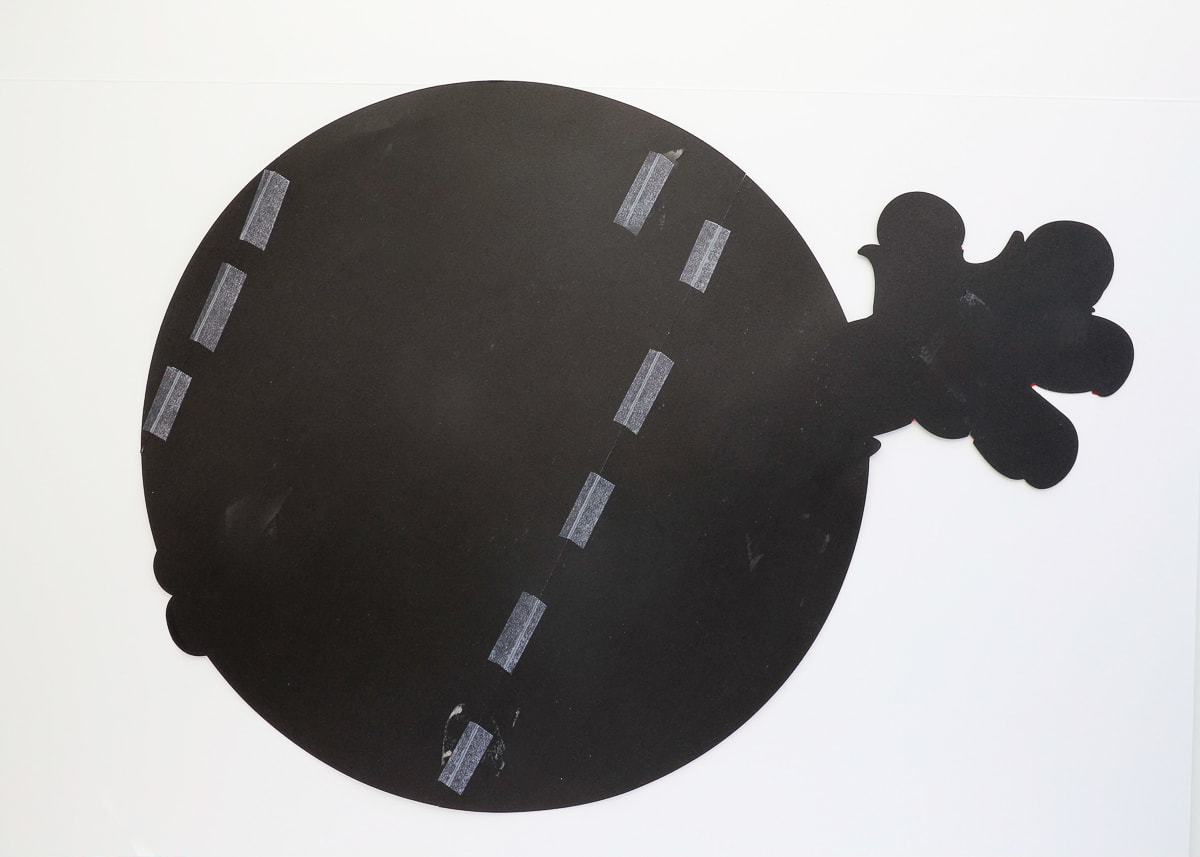
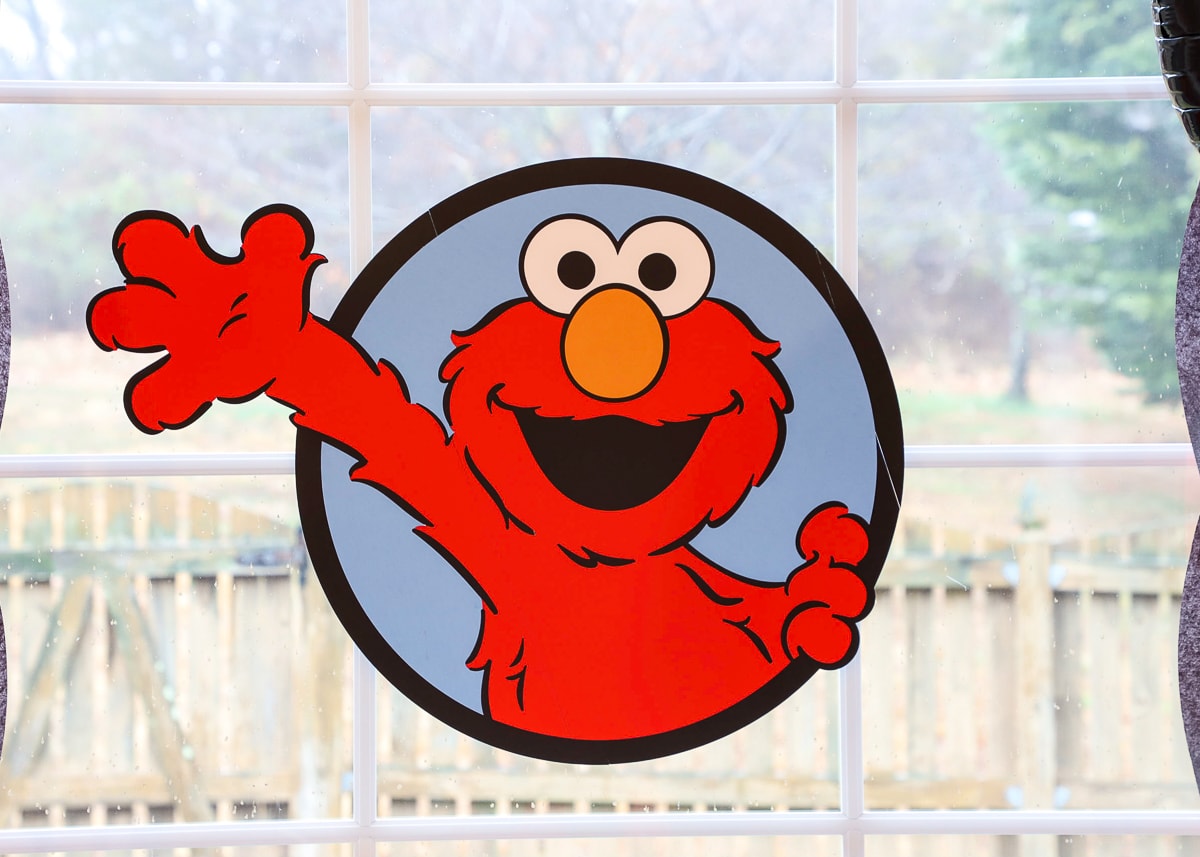
To cut really big designs, you will need to slice the image into sections that DO fit on your cricut mat and then re-assemble it after it’s cut. Below, you can see the back of my Elmo all taped together. This technique is often referred to as “Off the Mat,” which essentially means you will assemble your design…wait for it…off the mat 😉
I think it’s important to acknowledge here that yes, your design will have seams. If you want a completely seamless design that you don’t have to put back together then you are restricted to mat size (either 12″ square or 12×24″). If you want to go bigger, your design will have seams and you will have to assemble it. That said, with really precise “slicing,” your pieces should match up perfectly and your seams will be hardly noticeable.
Below, you can see the seam down from Elmo’s shoulder. It is nearly undetectable up close…
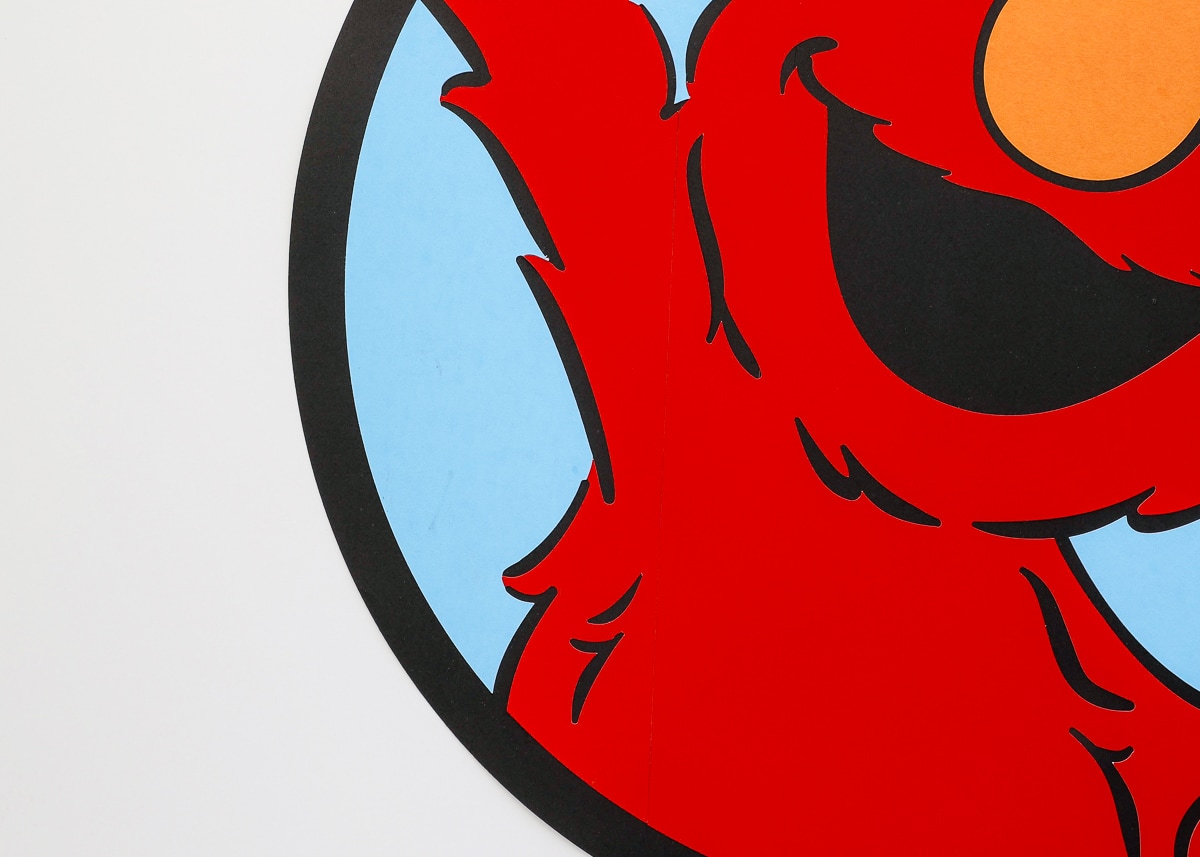
…and virtually impossible to see from far away!
Okay, let’s do this. To cut really large designs on a Cricut machine, you have to start in the software, Design Space.
Preparing Images for “Off the Mat” Cutting
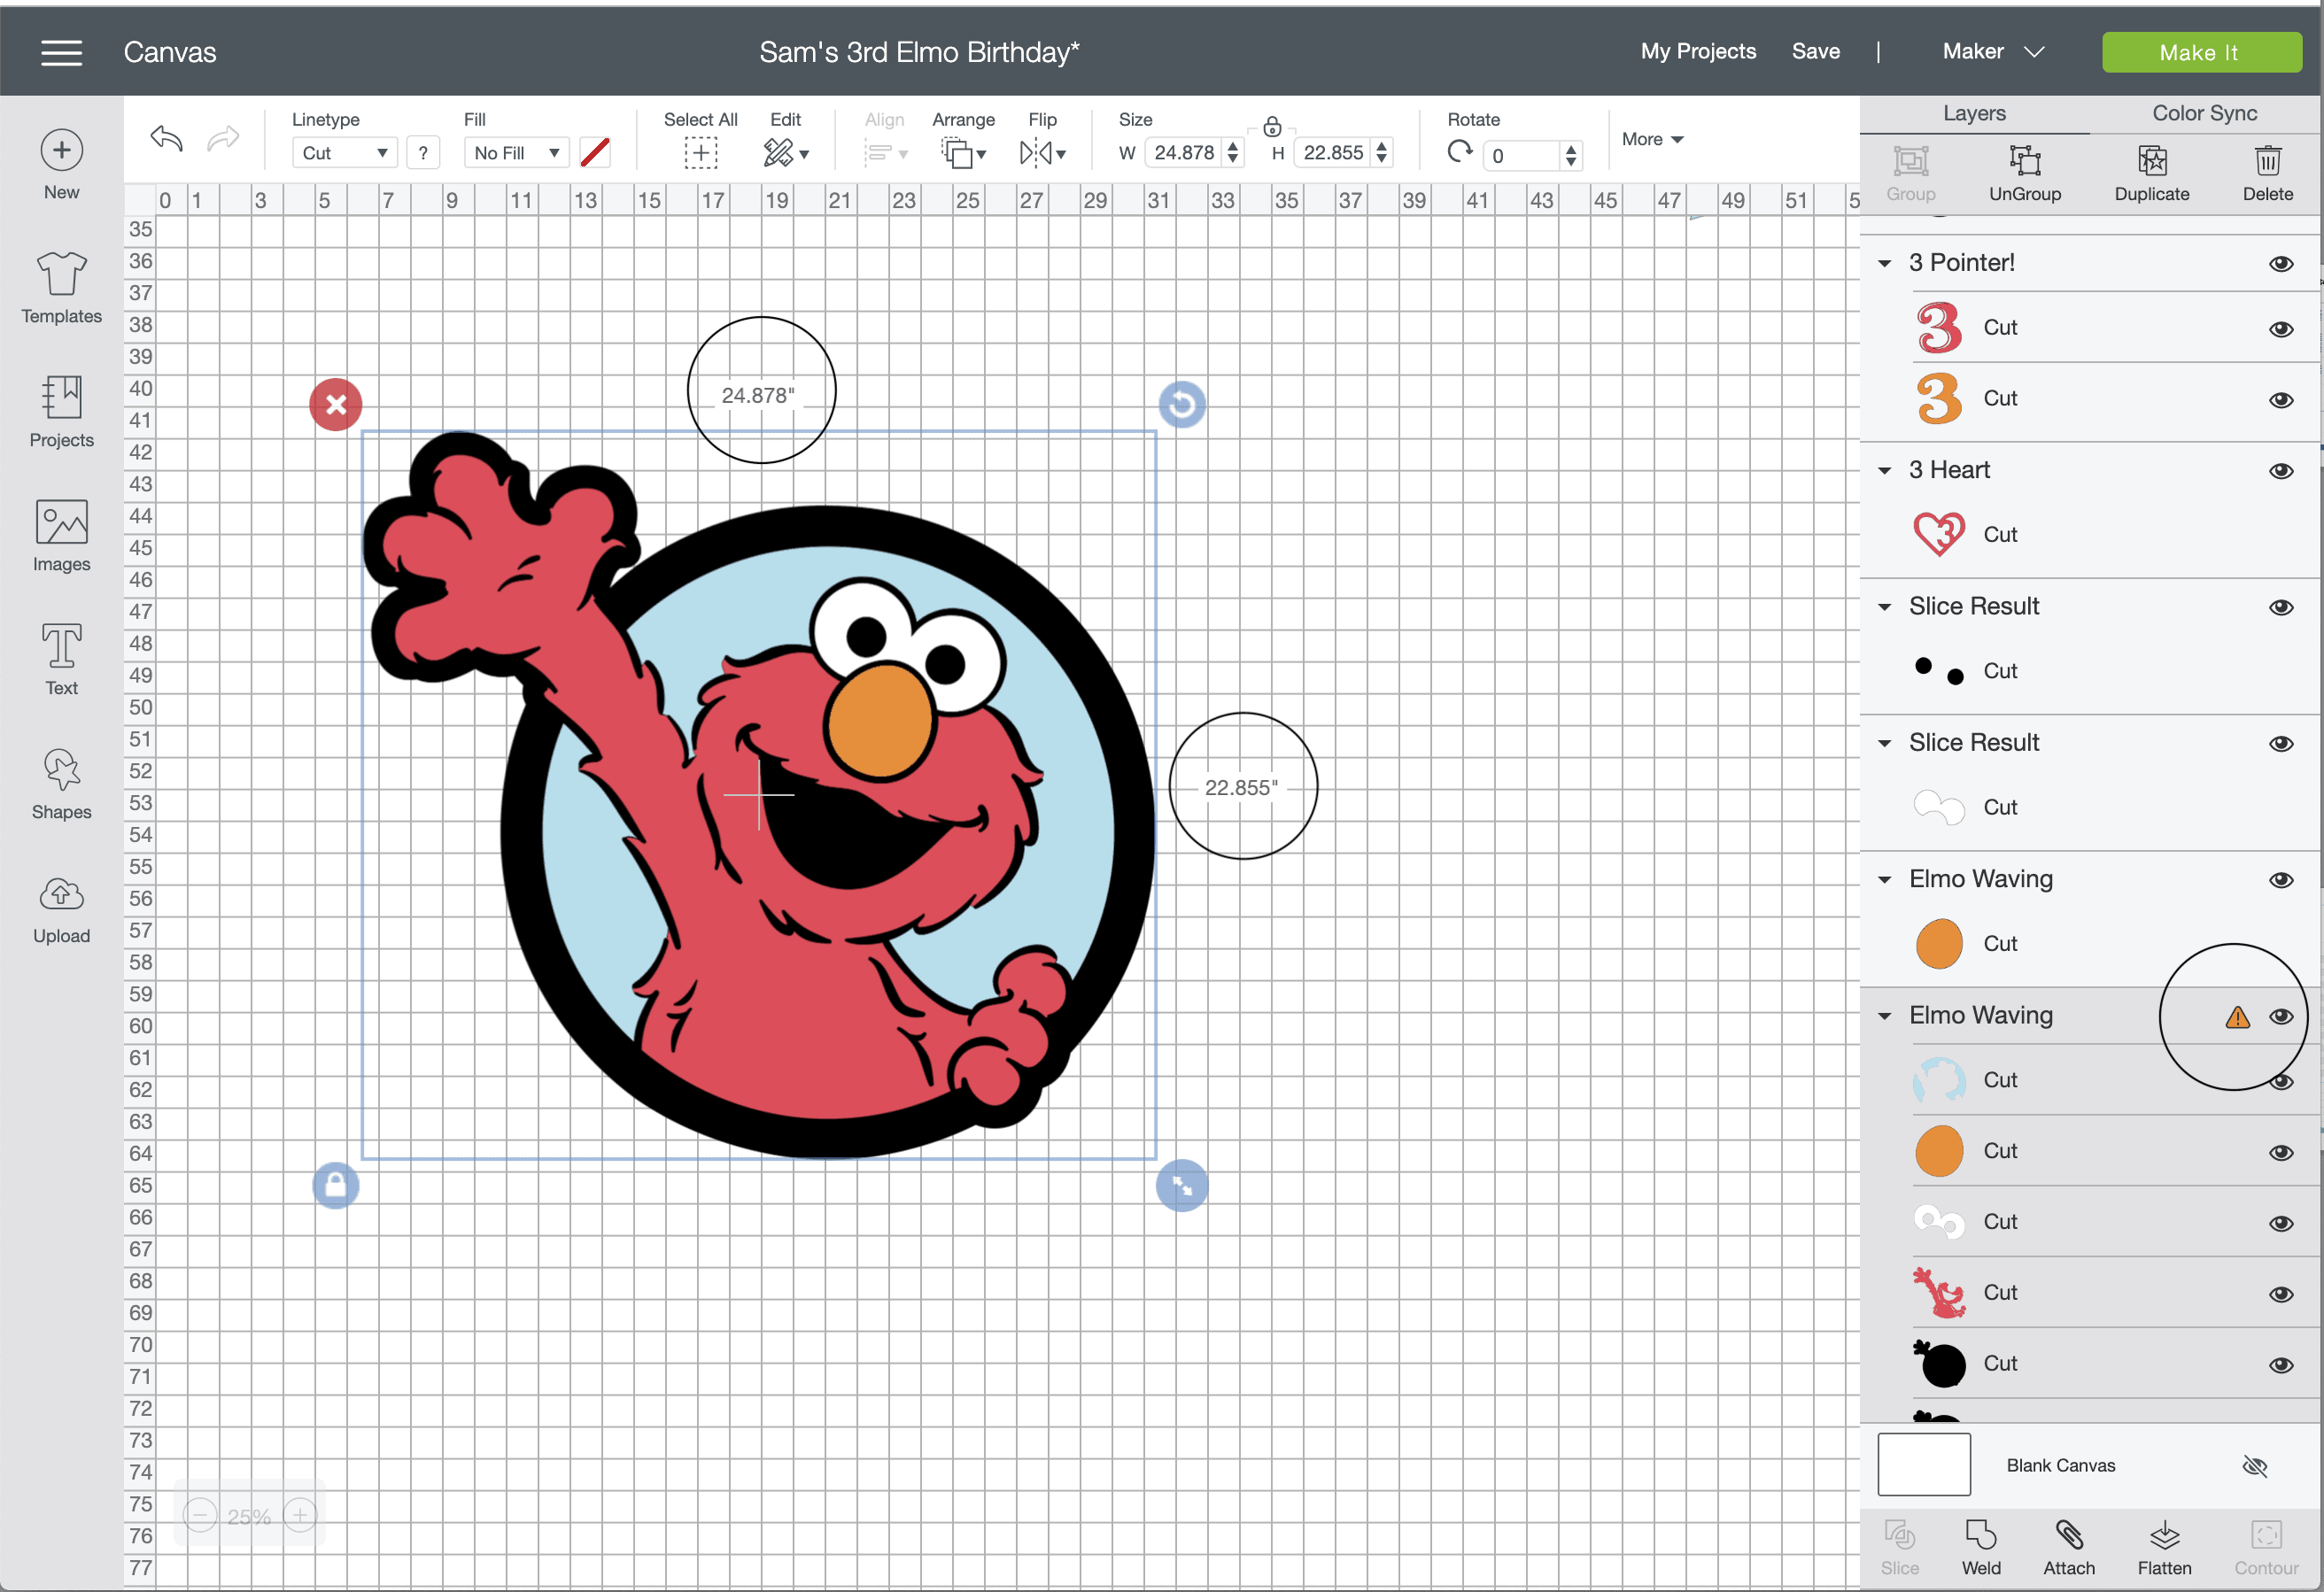
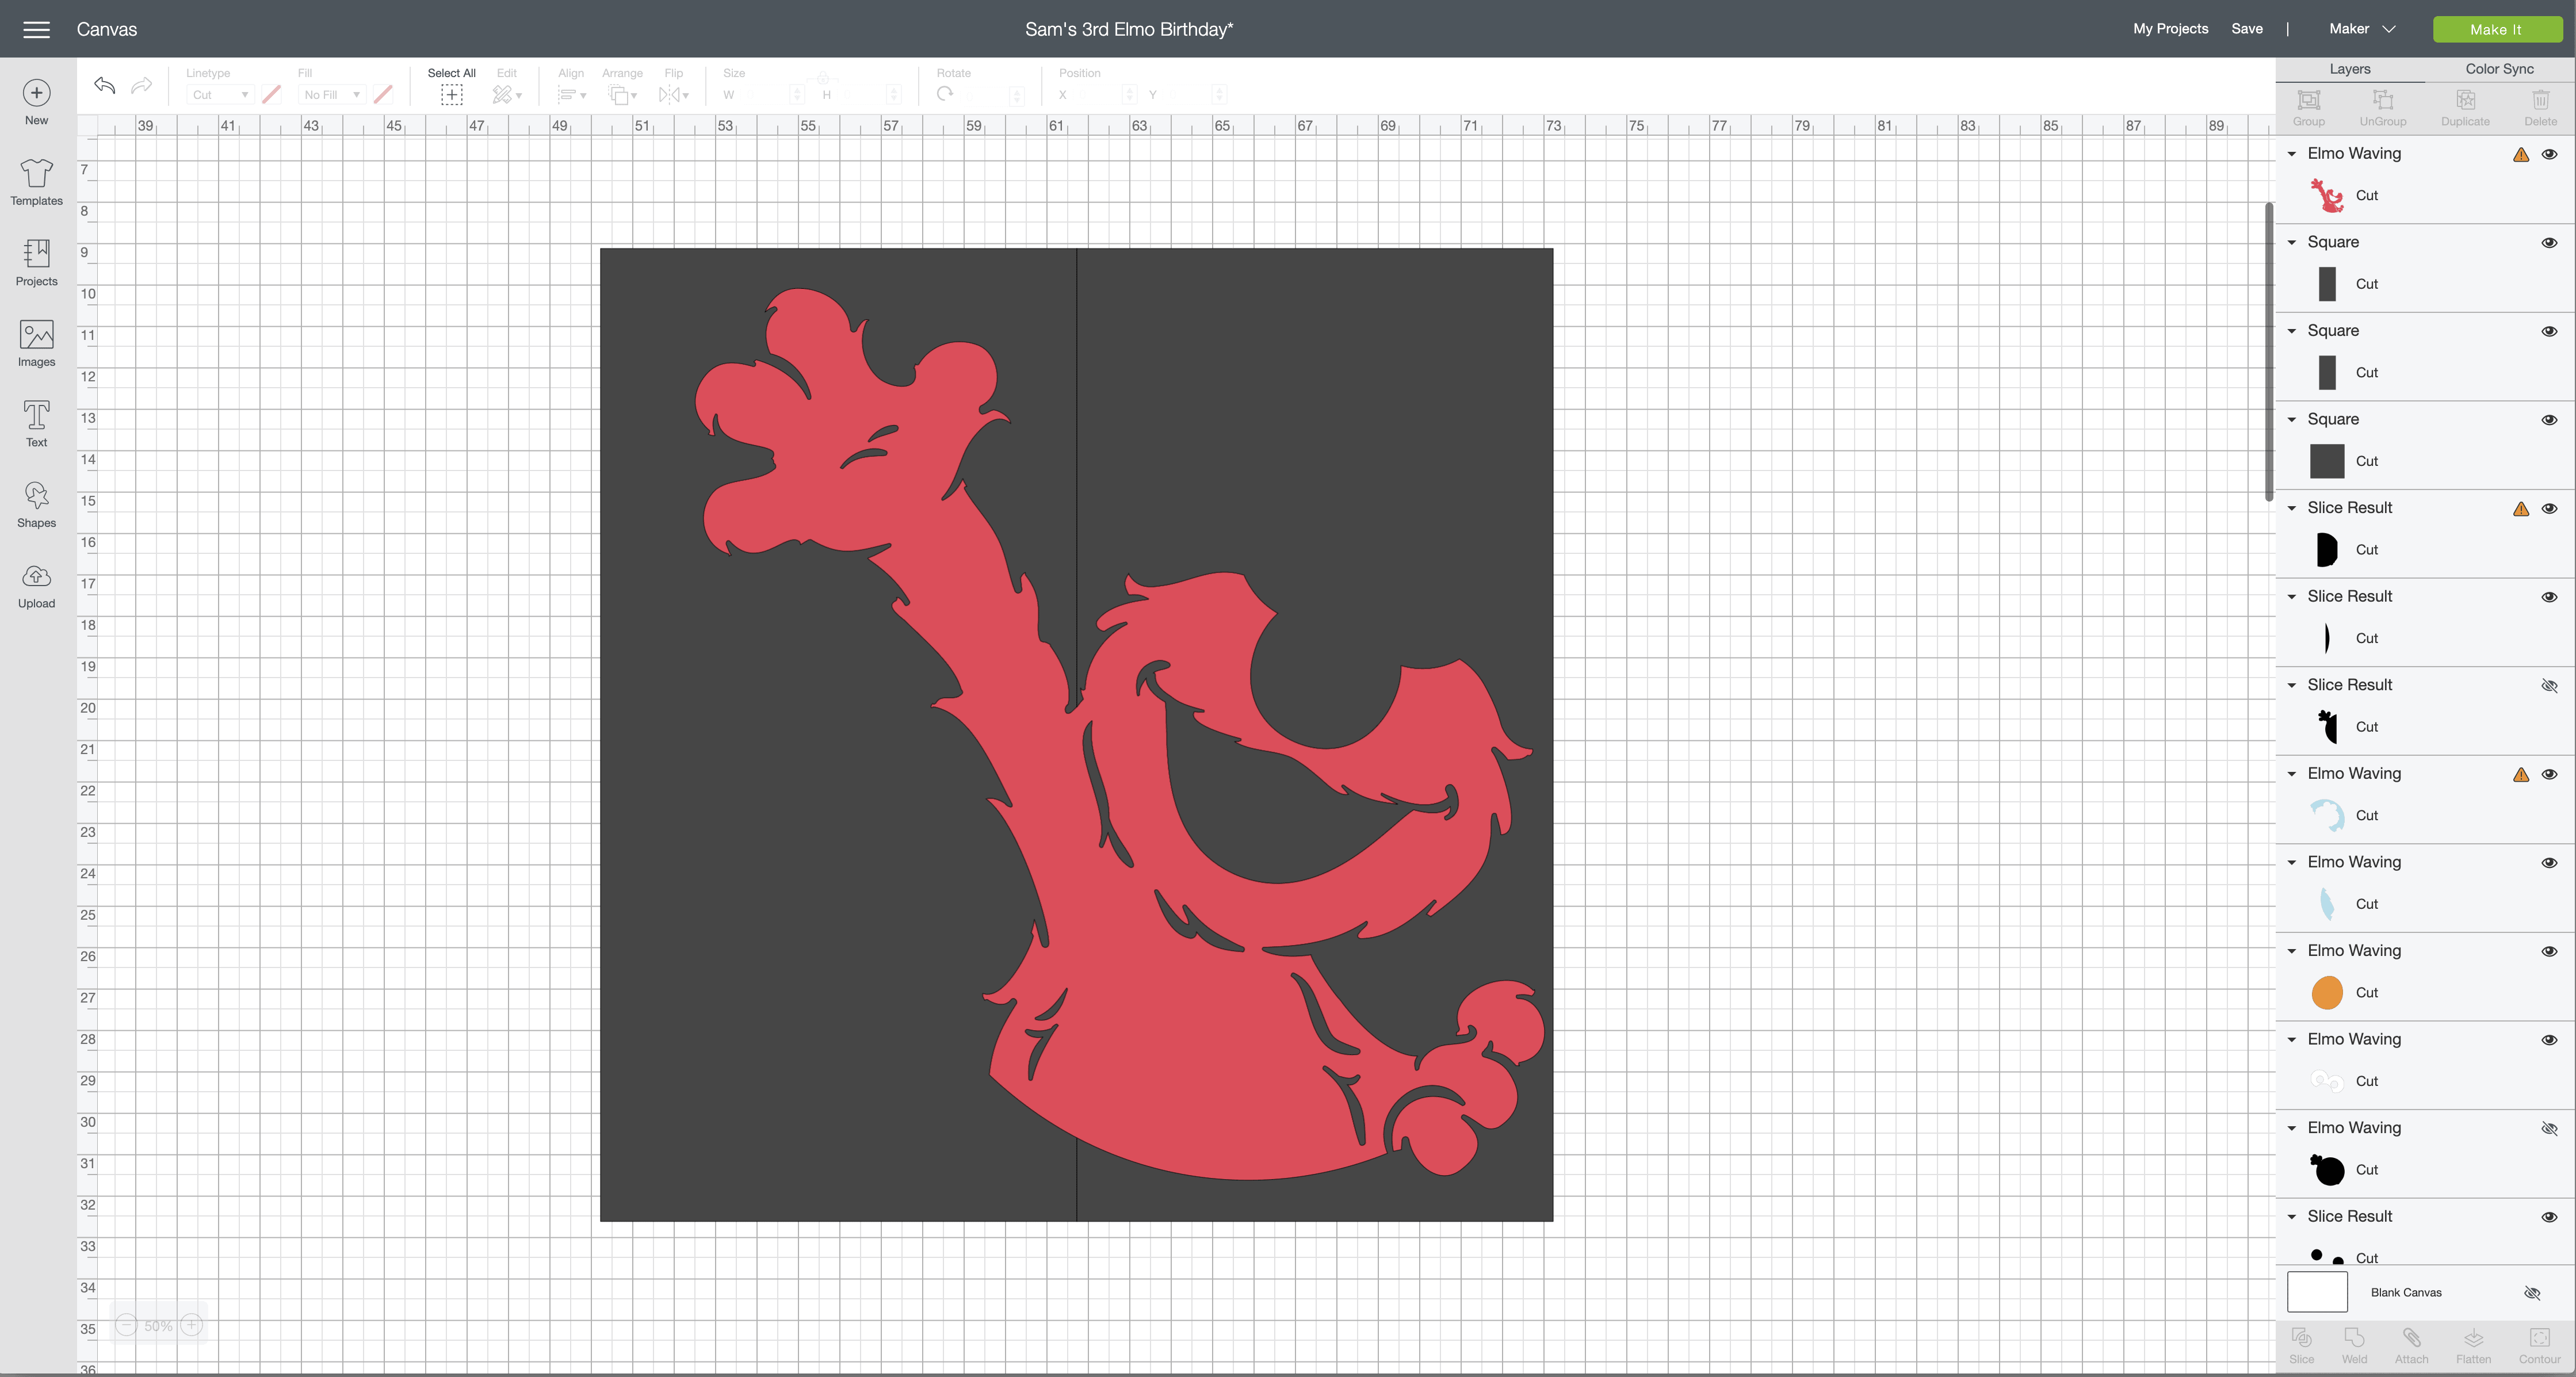
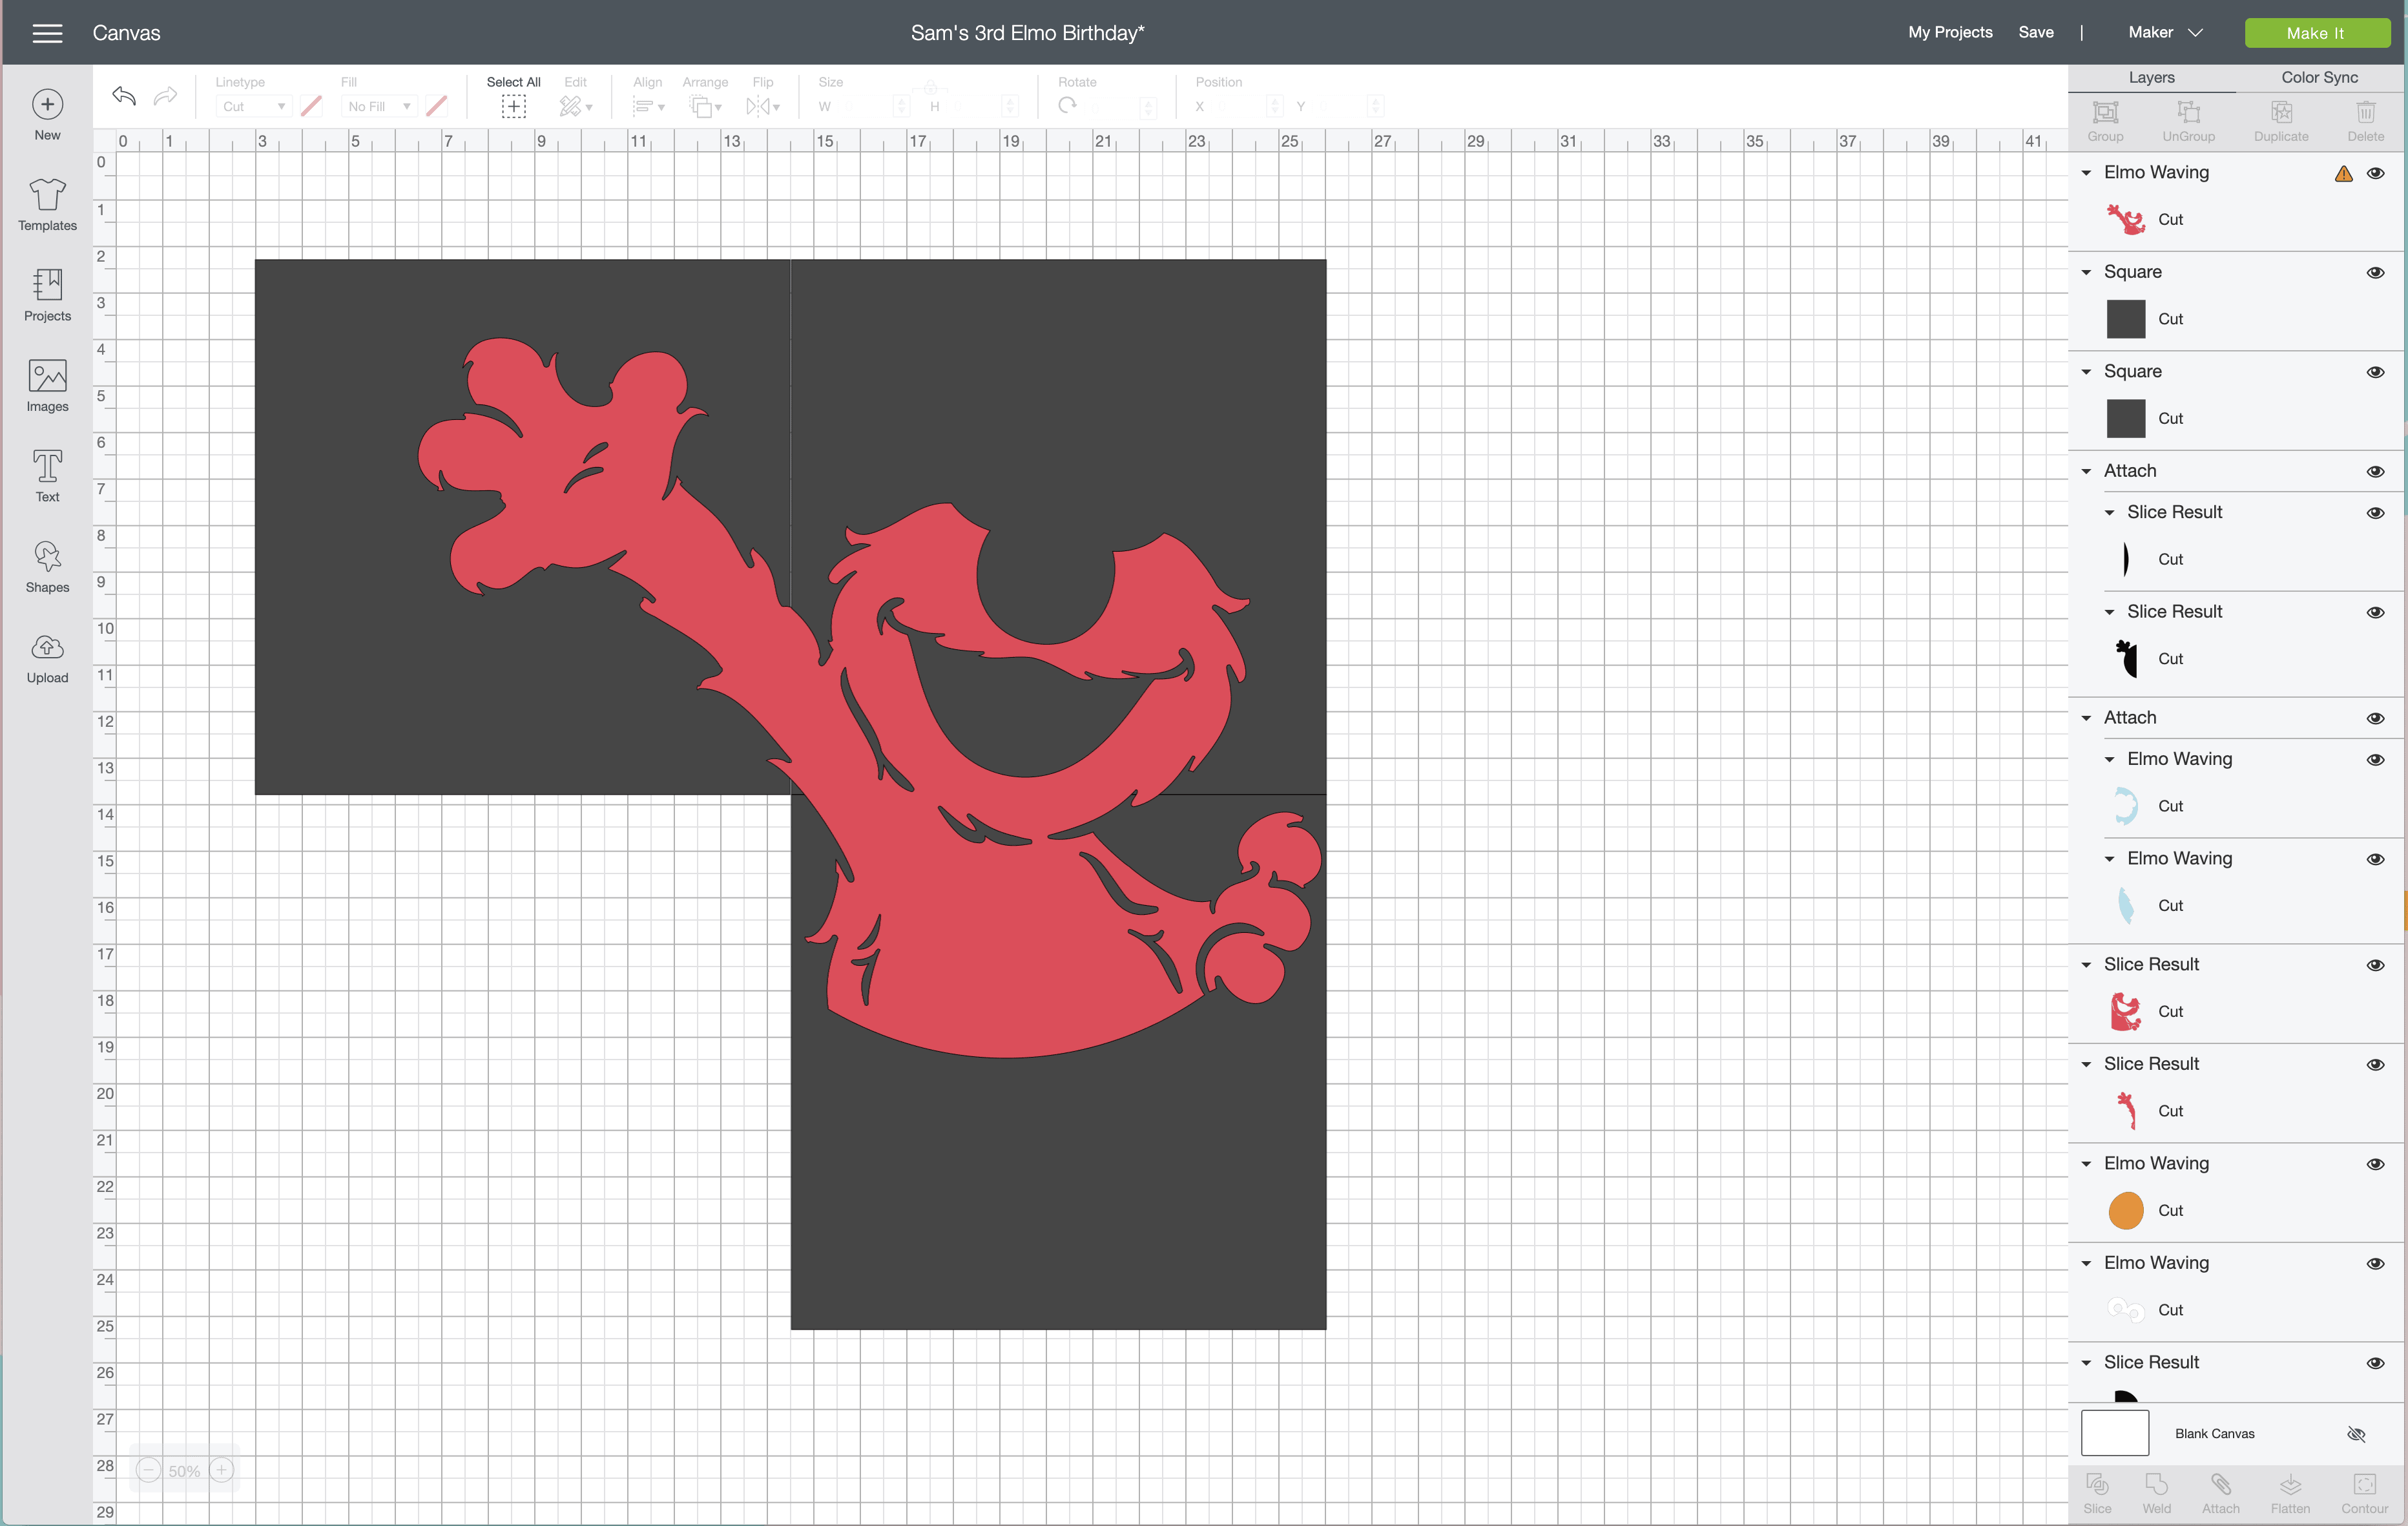
Below is the original Elmo graphic I used for our party display (Elmo Waving (#M4063E)). As you can see, I have it sized to be 24″ wide and 22″ tall. Not only can you, as the user, realize it will definitely surpass the edges of your mat, but Design Space will also tell you so. See that orange caution sign next to the Elmo graphic in the righthand panel? It’s telling you that the mats can’t support the design you have on your canvas.
Ungroup and Detach layered images
You cannot manipulate images that are grouped or attached, so the very FIRST step you MUST do is to UNGROUP and DETACH any and all layers (if you have a multi-layer design like my Elmo). From here forward, you will deal with each layer separately, because based on the design itself, you can use a variety of techniques to get it ready to cut.
Set your final project size
Also…set your final project size at the start. Once you cut the images apart, re-sizing can potentially effect the way your slices match up, so set your size now and try not to adjust it! Hacks like this will be sure to spare you from any frustration as you set out to complete your project!
Check For Layers That Now Fit Onto the Mat
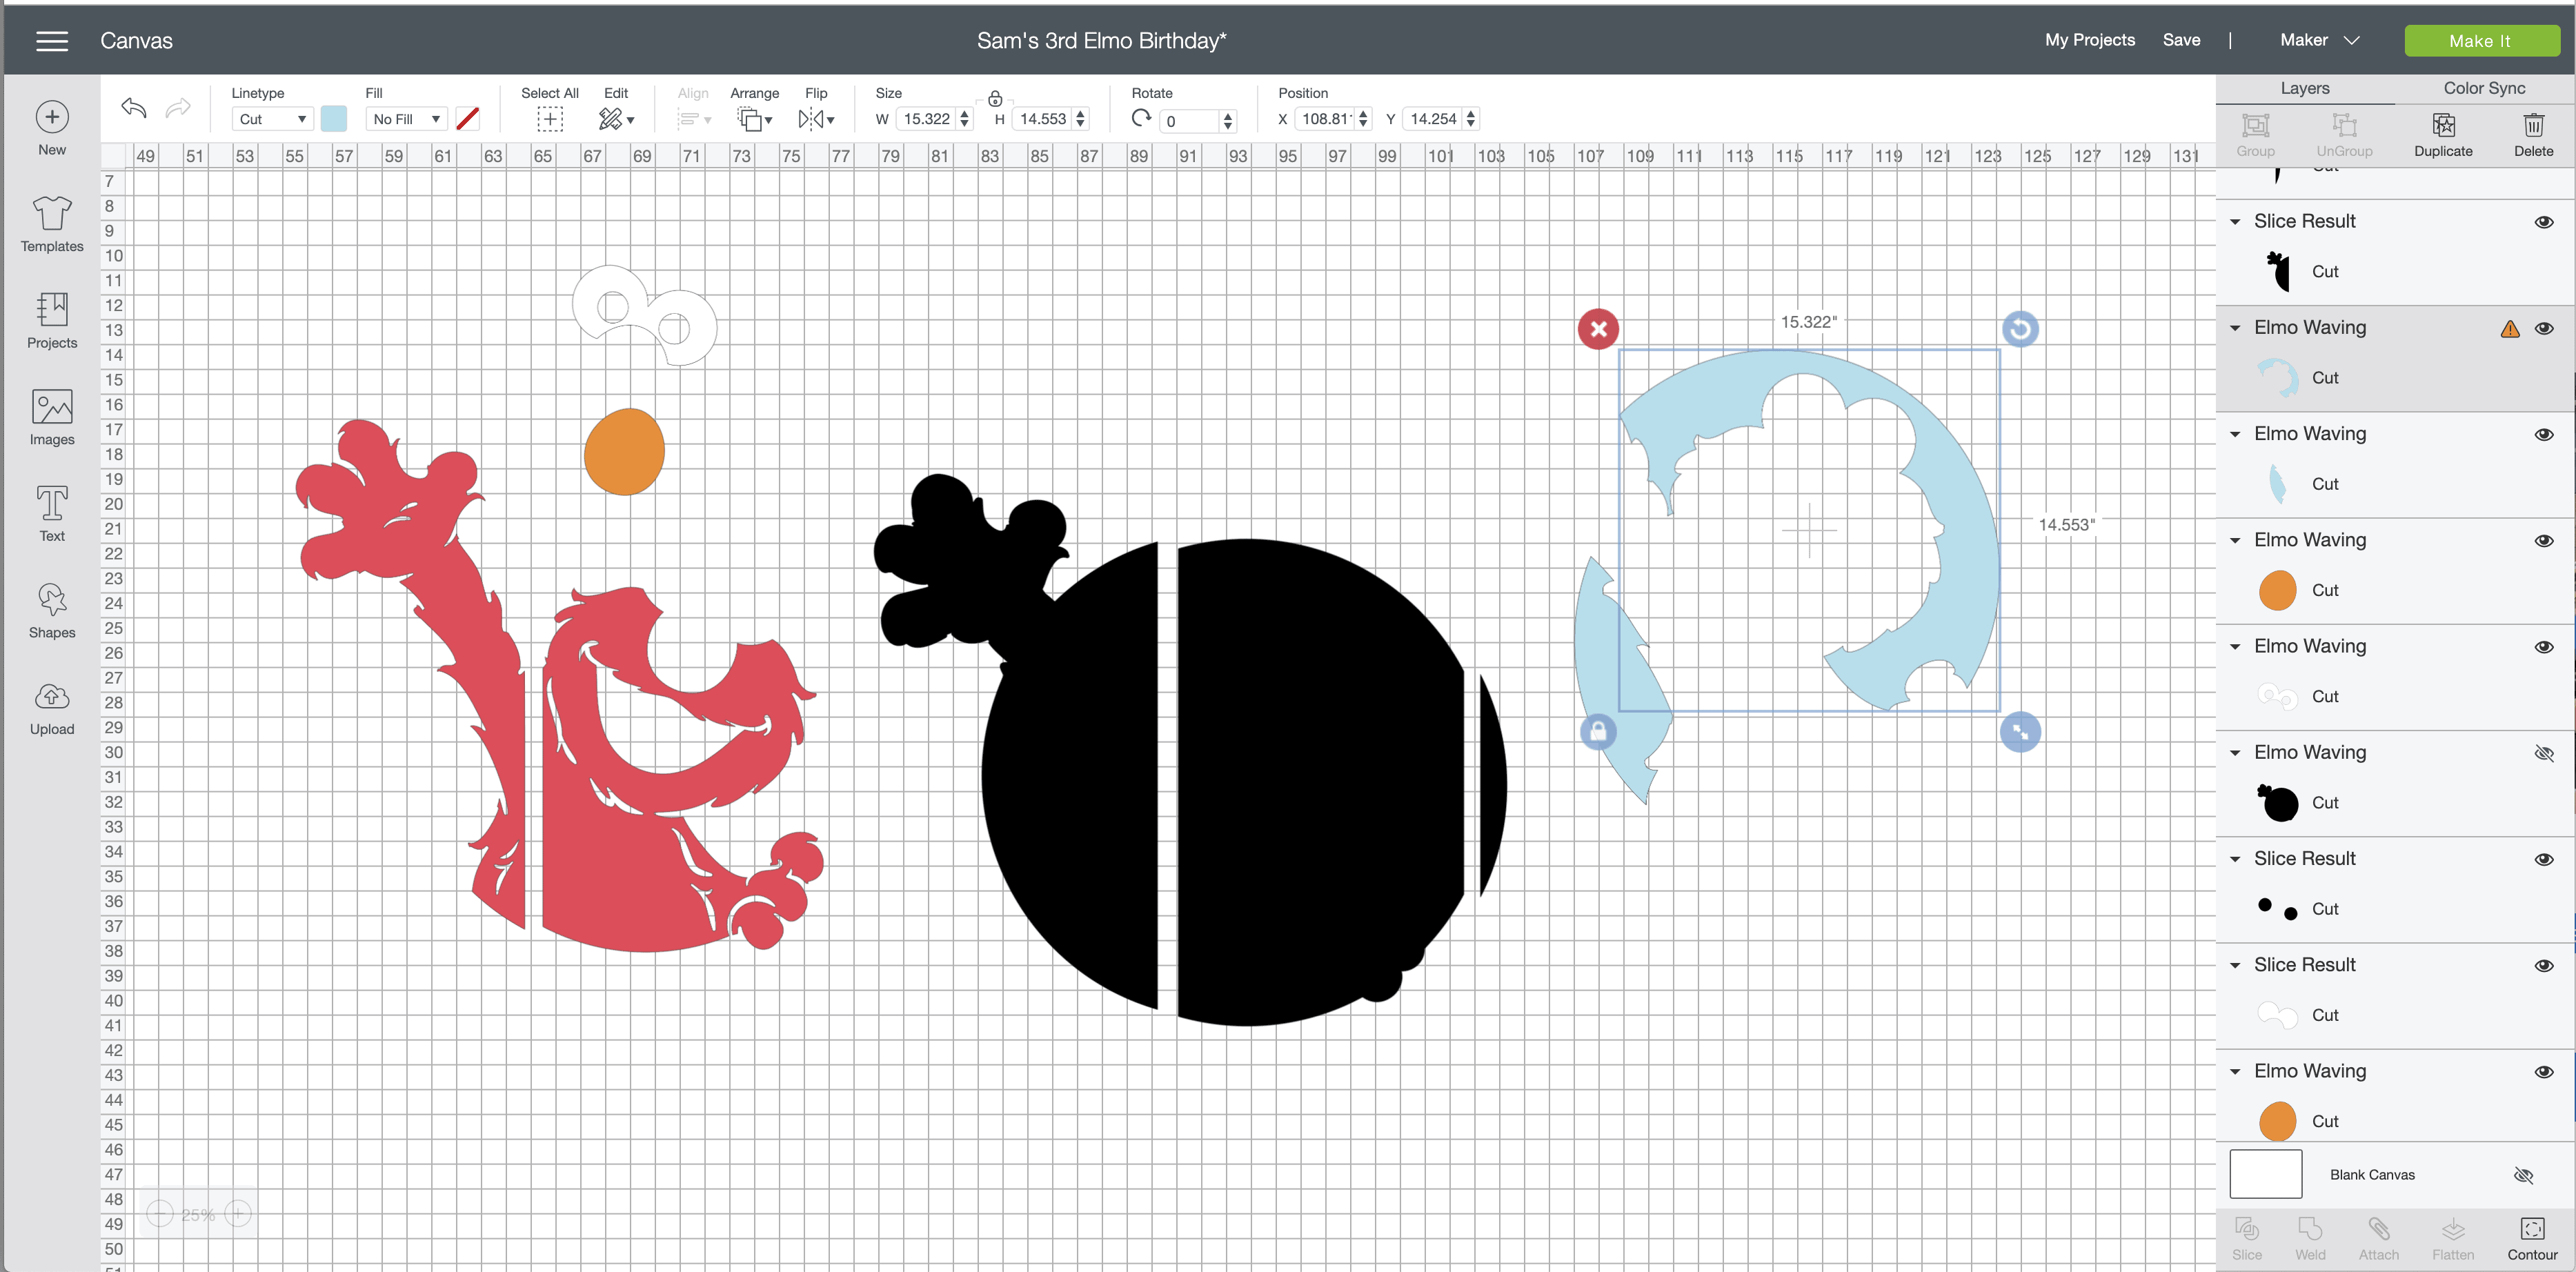
Once you ungroup, detach, and size your design, you will likely immediately see layers that now fit well within the edges of the mat without any special treatment. These are usually small/accent elements. In the case of my Elmo, both the orange nose and the white part of the eyes could easily fit on a standard mat without needing adjusting.
Use Contour To Make Images Fit Onto the Mat
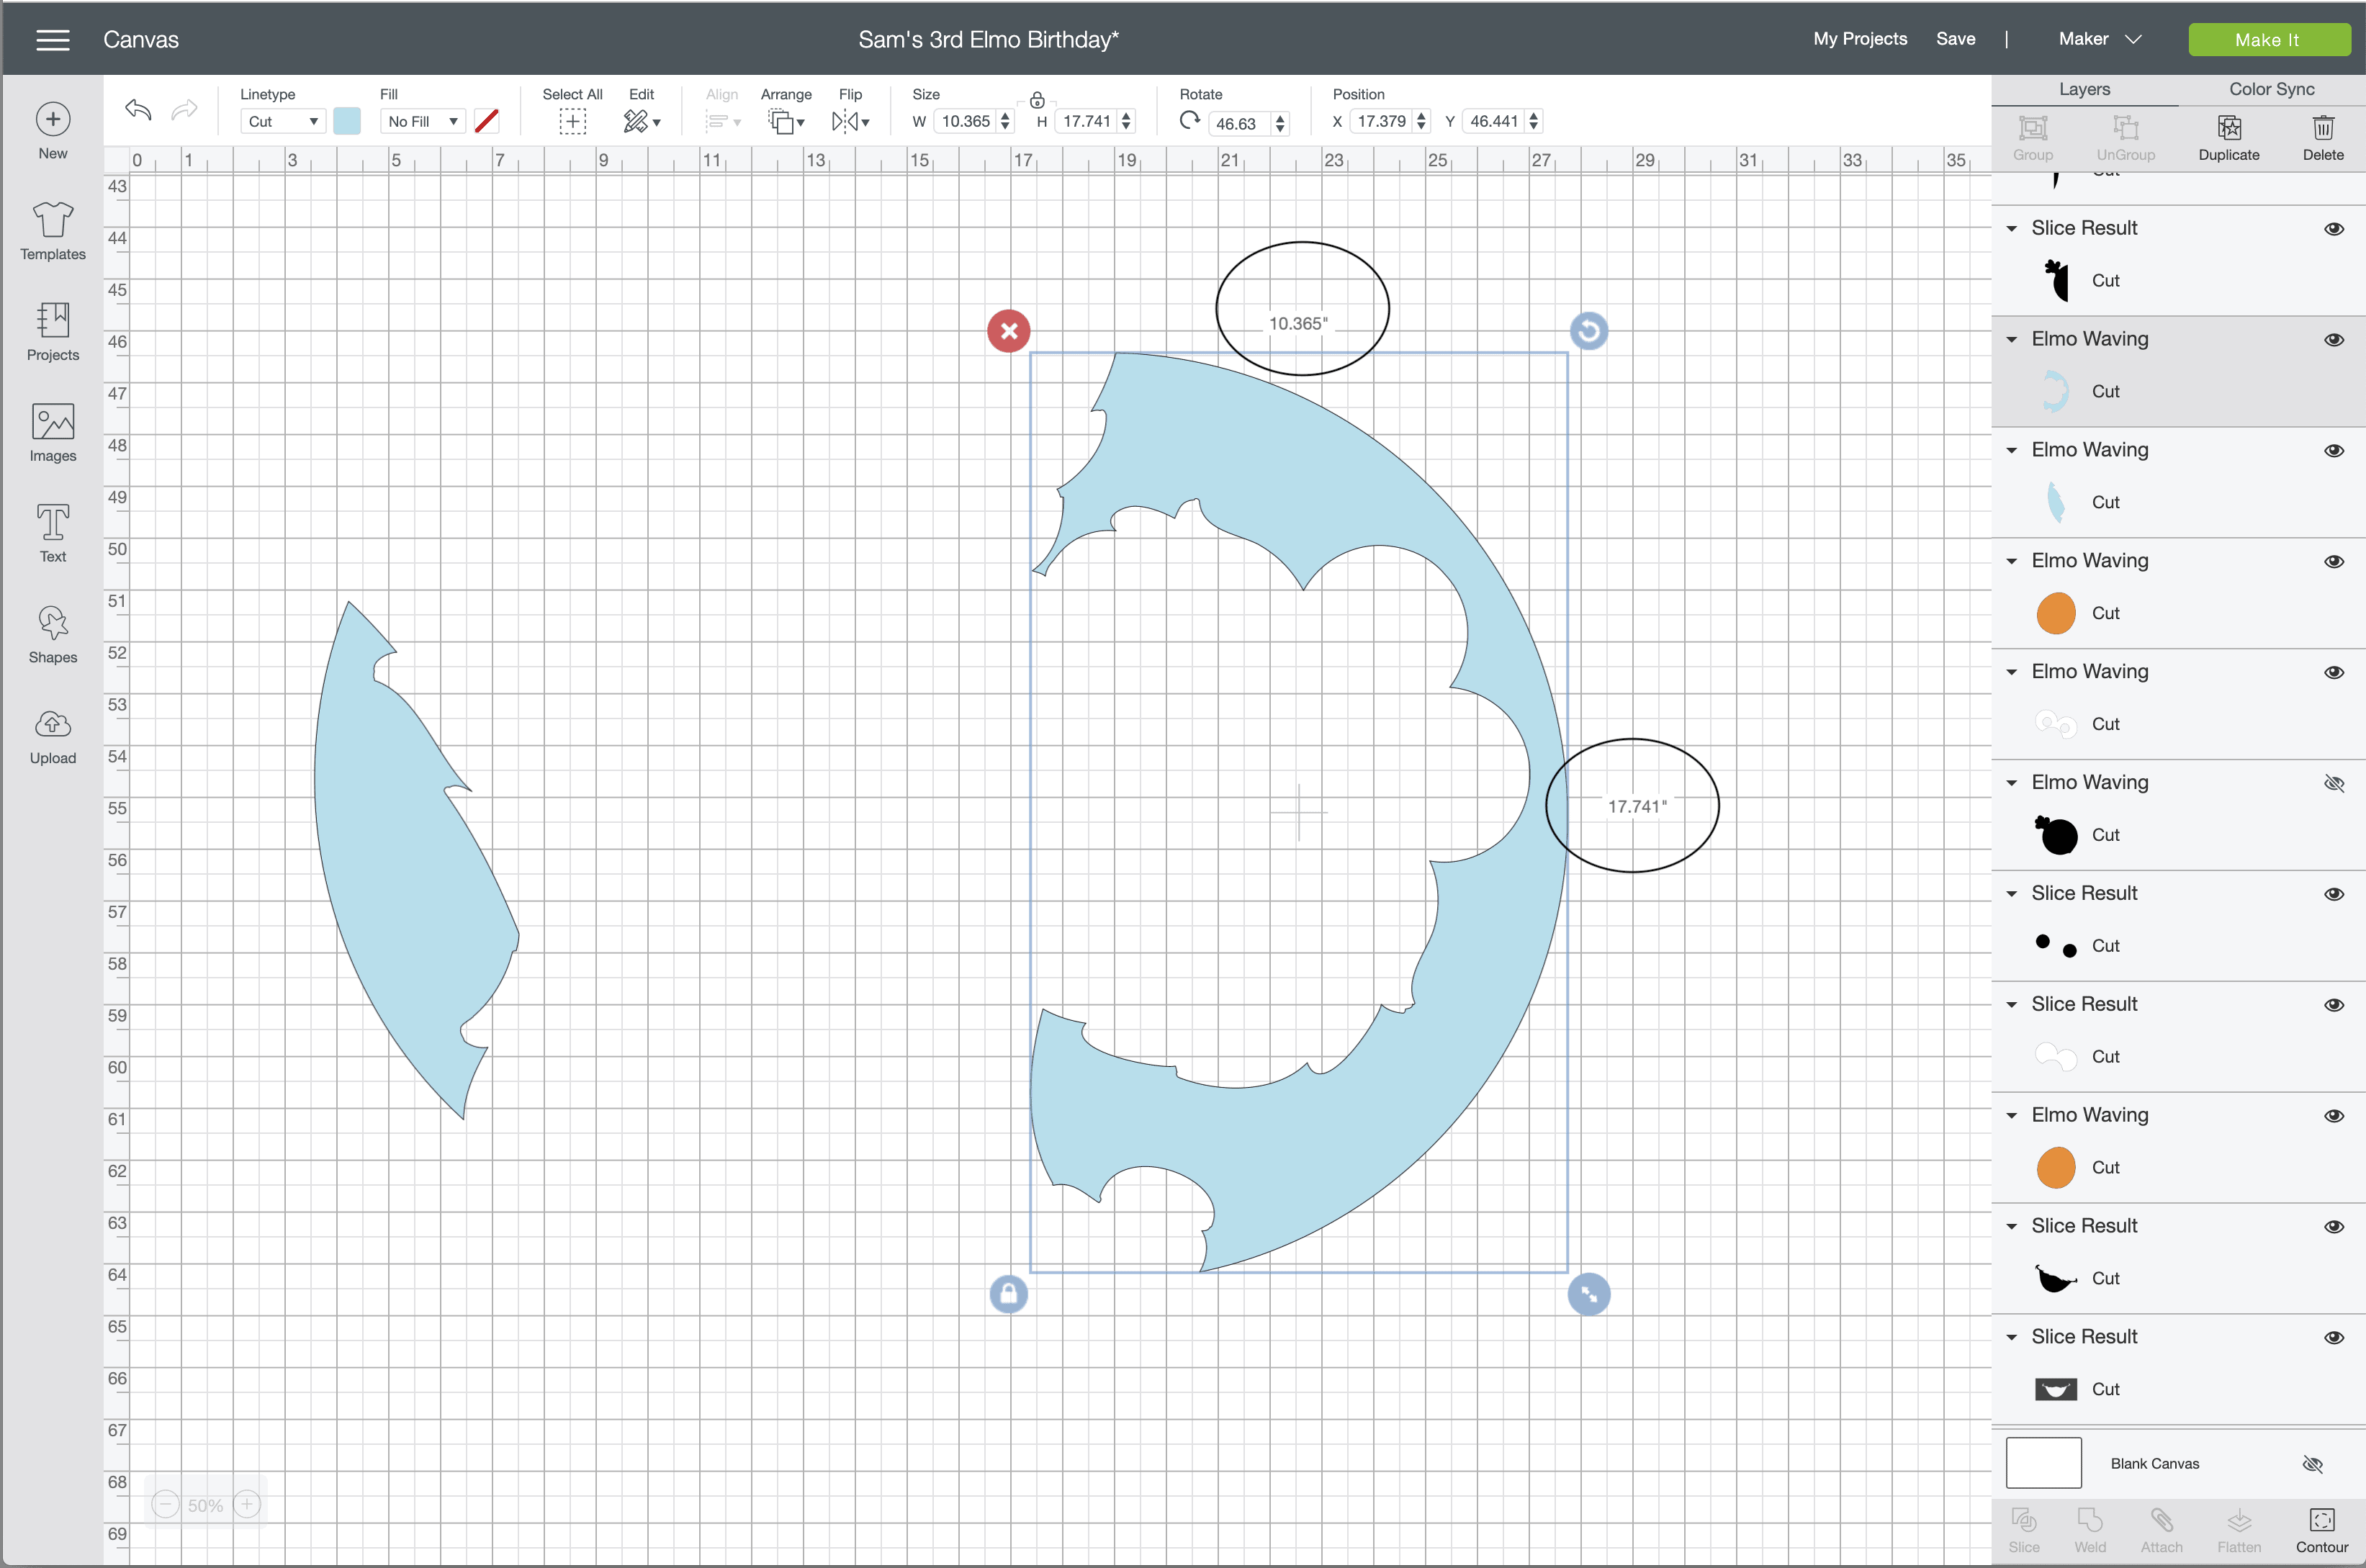
Next, I suggest seeing if there are any images you can make smaller via the Contour Tool. (If you are unfamiliar with this tool, see my comprehensive tutorial here.) In summary, the Contour Tool allows you to turn various parts of your design on and off. To be clear on this application: you are not making the design smaller via re-sizing. Rather, by turning parts of the design on/off, you can create cuts that will fit on your mat. Let’s look at the blue layer as an example.
The current blue layer, with the two separate pieces, is too big for my mat (as denoted by the caution sign in the righthand panel).
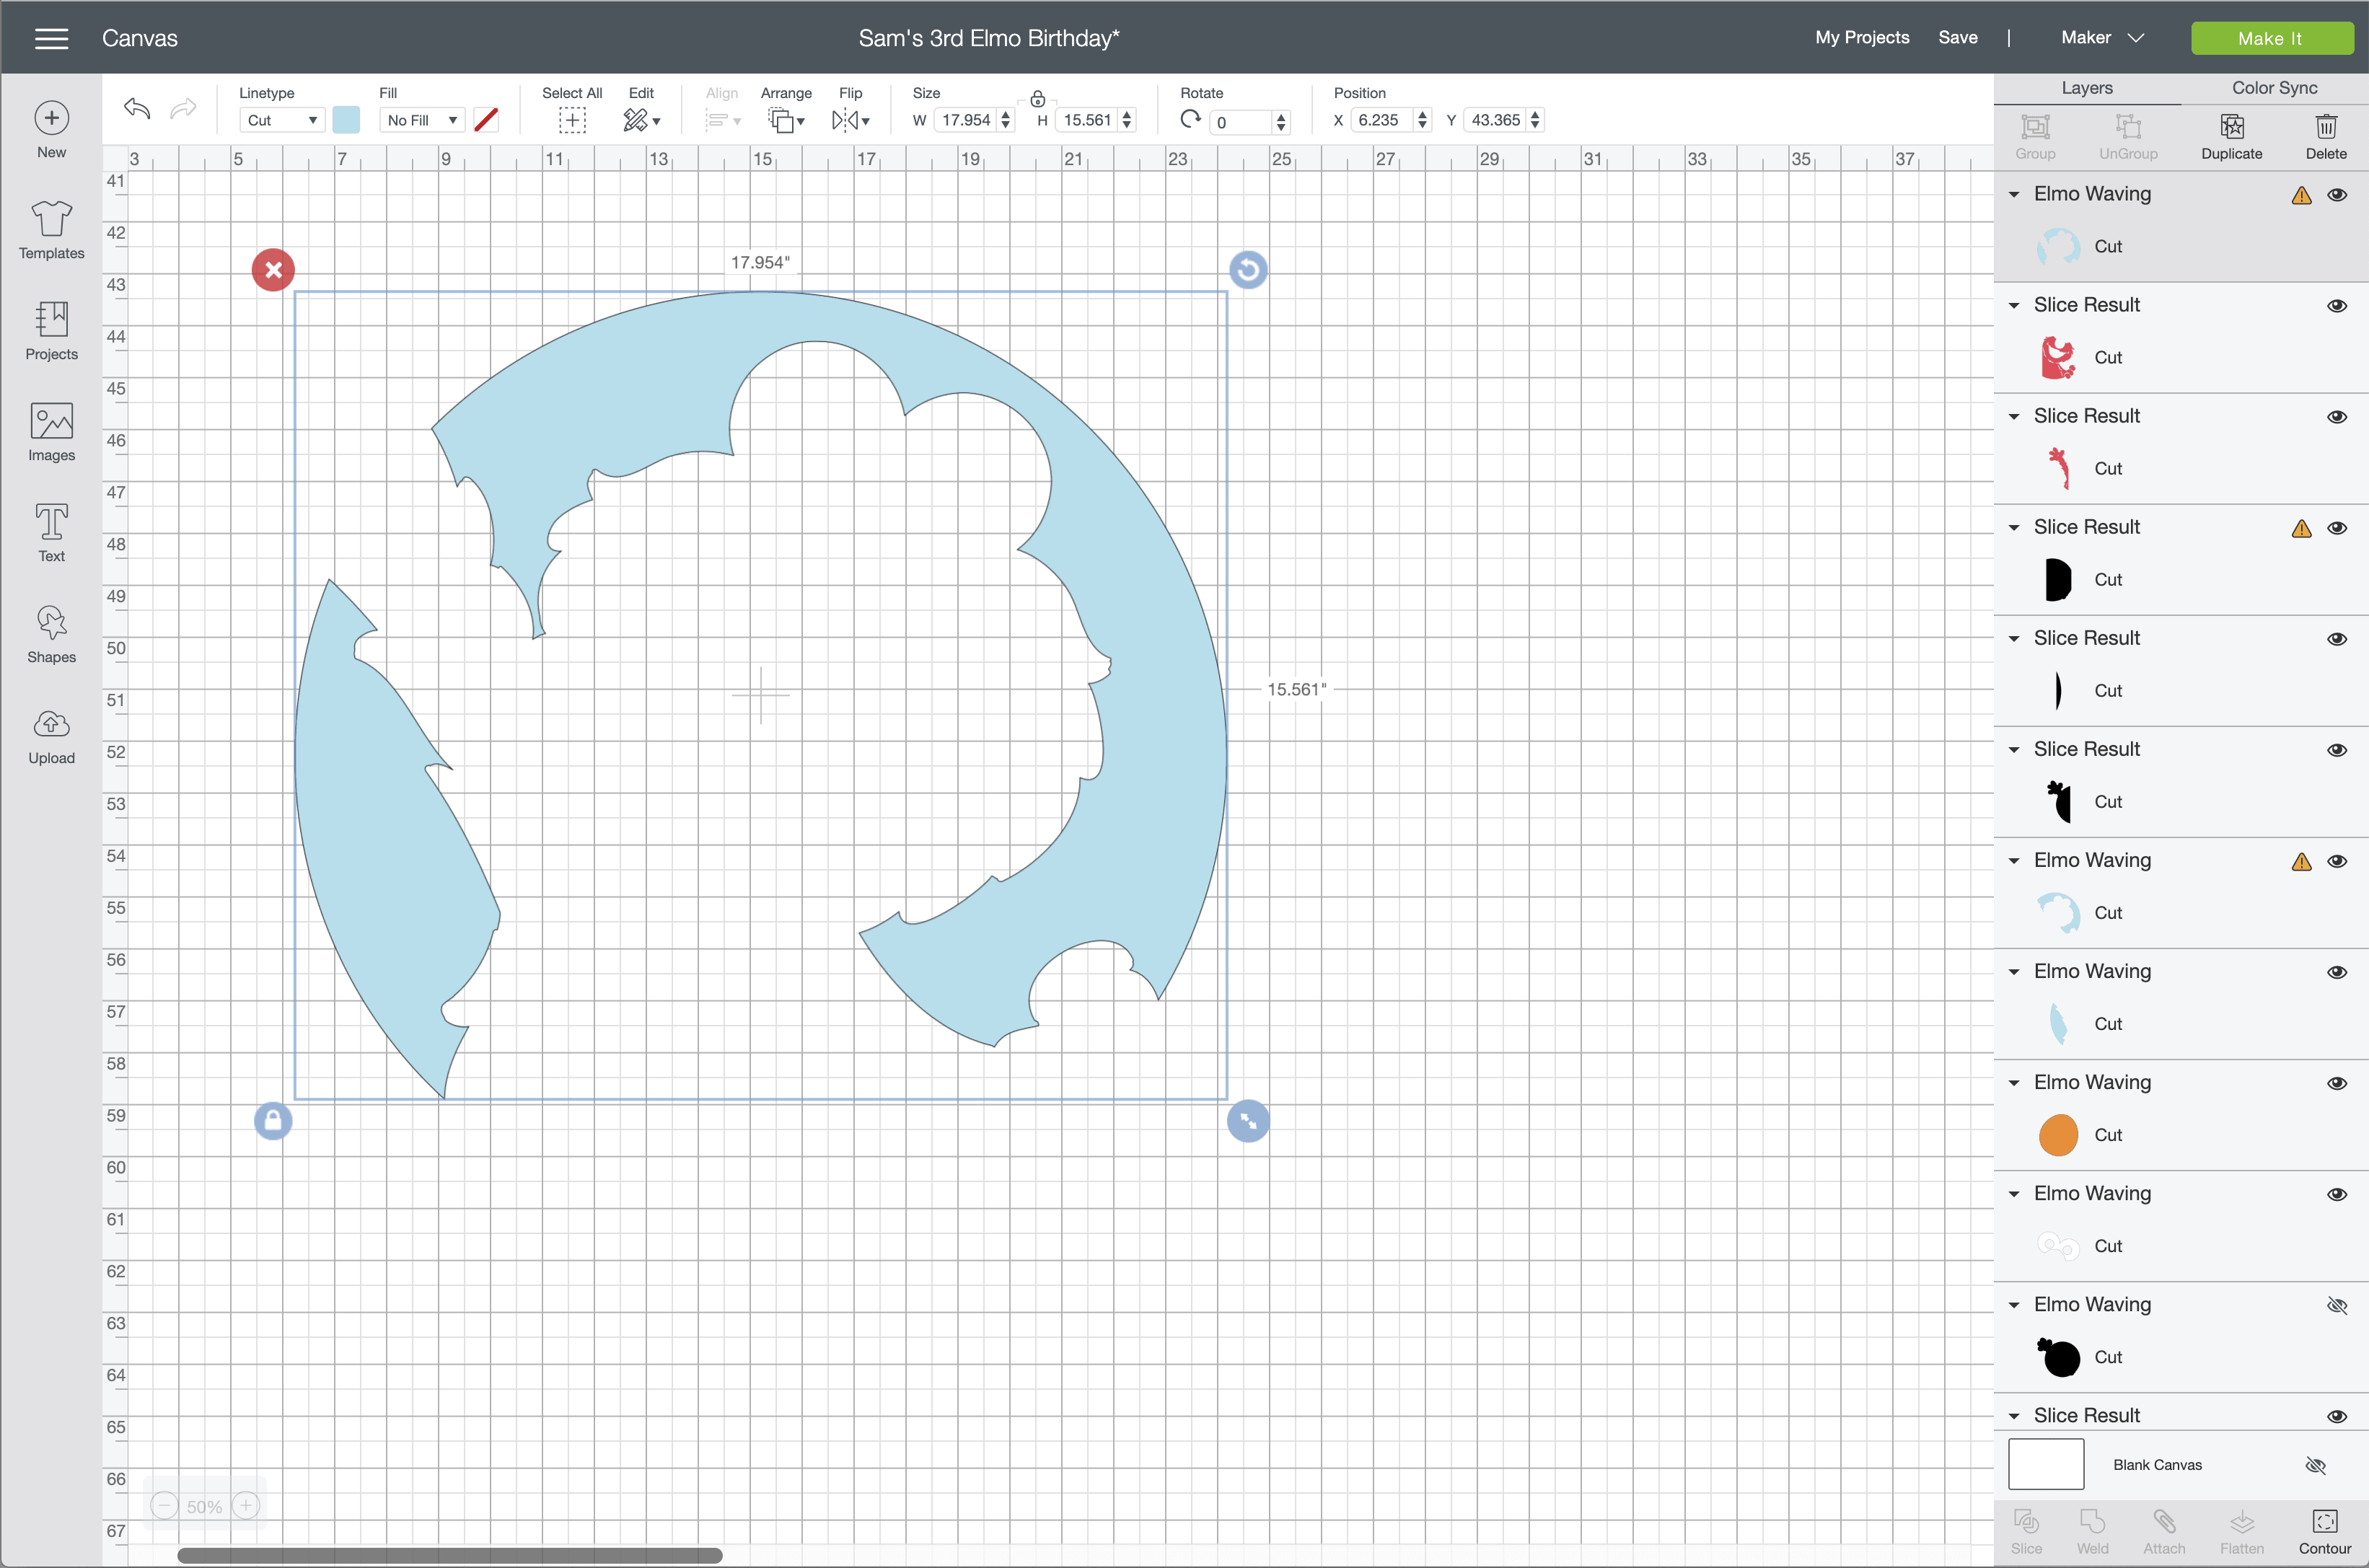
By selecting the blue layer and hitting the Contour button (bottom of righthand panel), you will see that you can break the design into two parts, both of which (without re-sizing) will fit on the entire surface of a mat with room to spare.
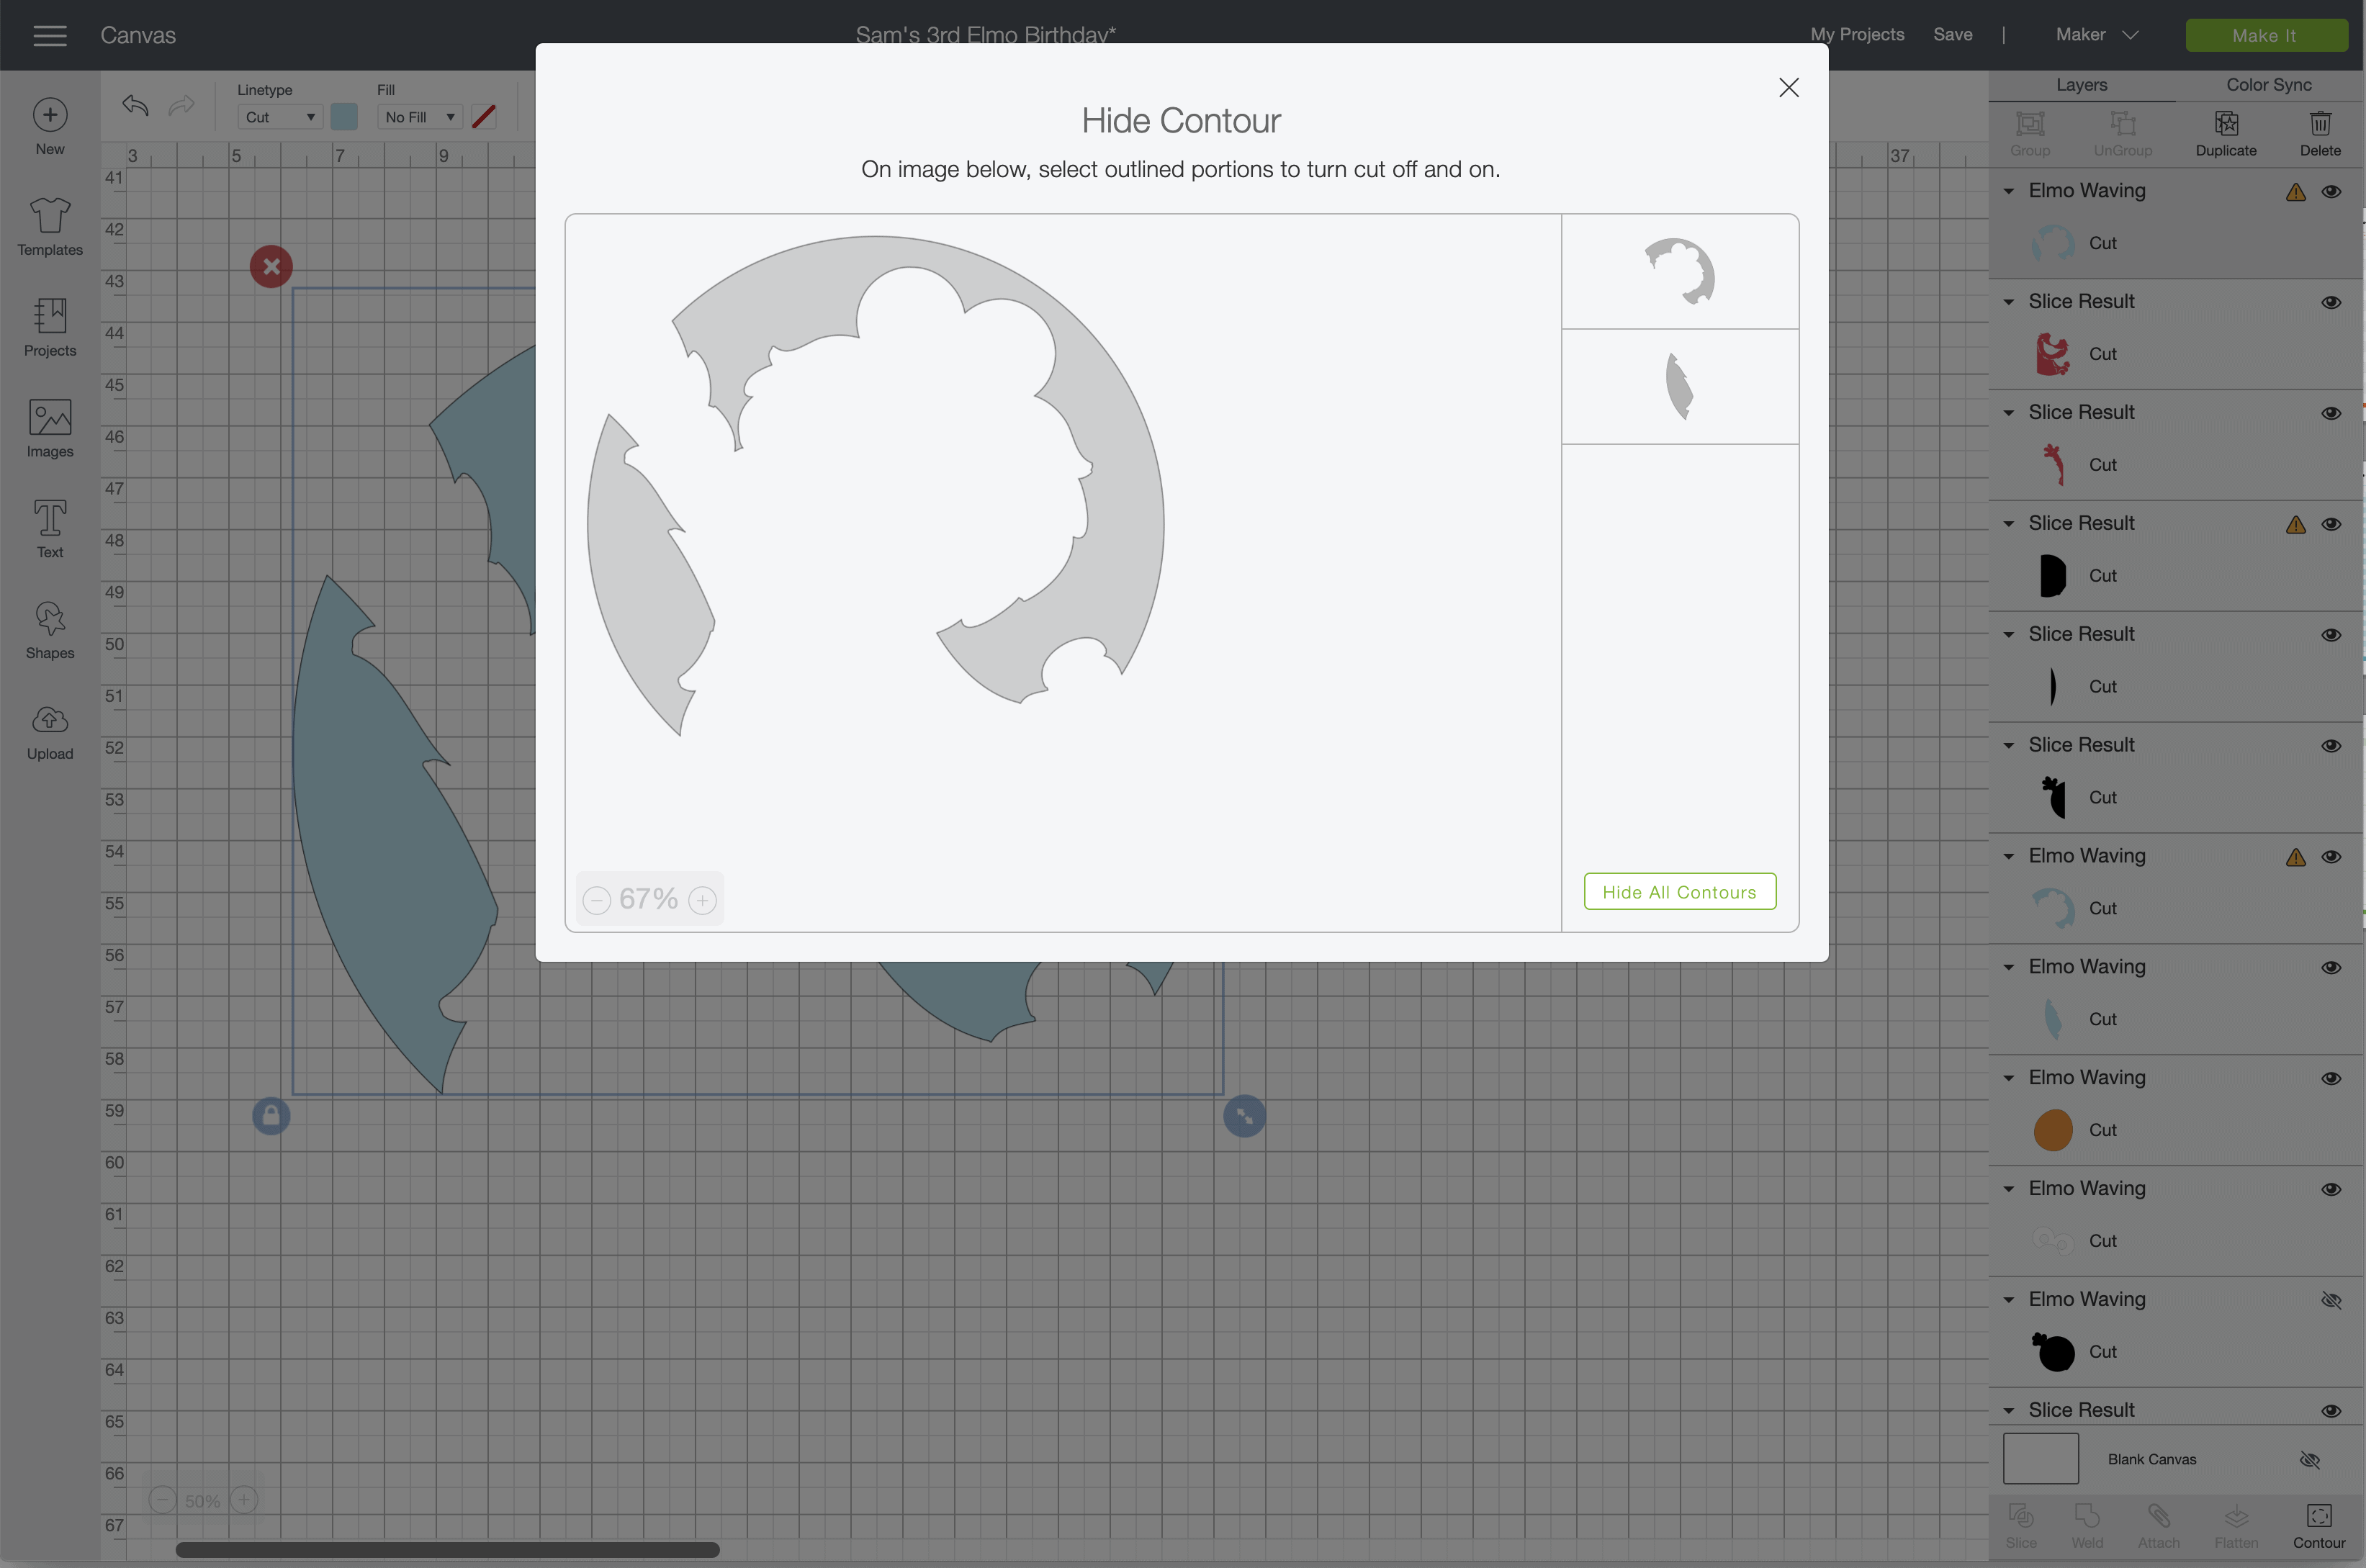
Start by Contouring out one element of the design and exiting out of the tool. Then, duplicate the image and re-Contour it so another part of the design is turned on. Once you’ve done that with each disconnected element of your design, you will (likely) be left with elements that will fit on your mat. In my example, notice my blue layer has been split into two completely different cuts (denoted by two separate lines in the righthand panel) and both will fit on the mat no problem (no caution symbols!)!
Use Slice To Make Images Fit Onto the Mat
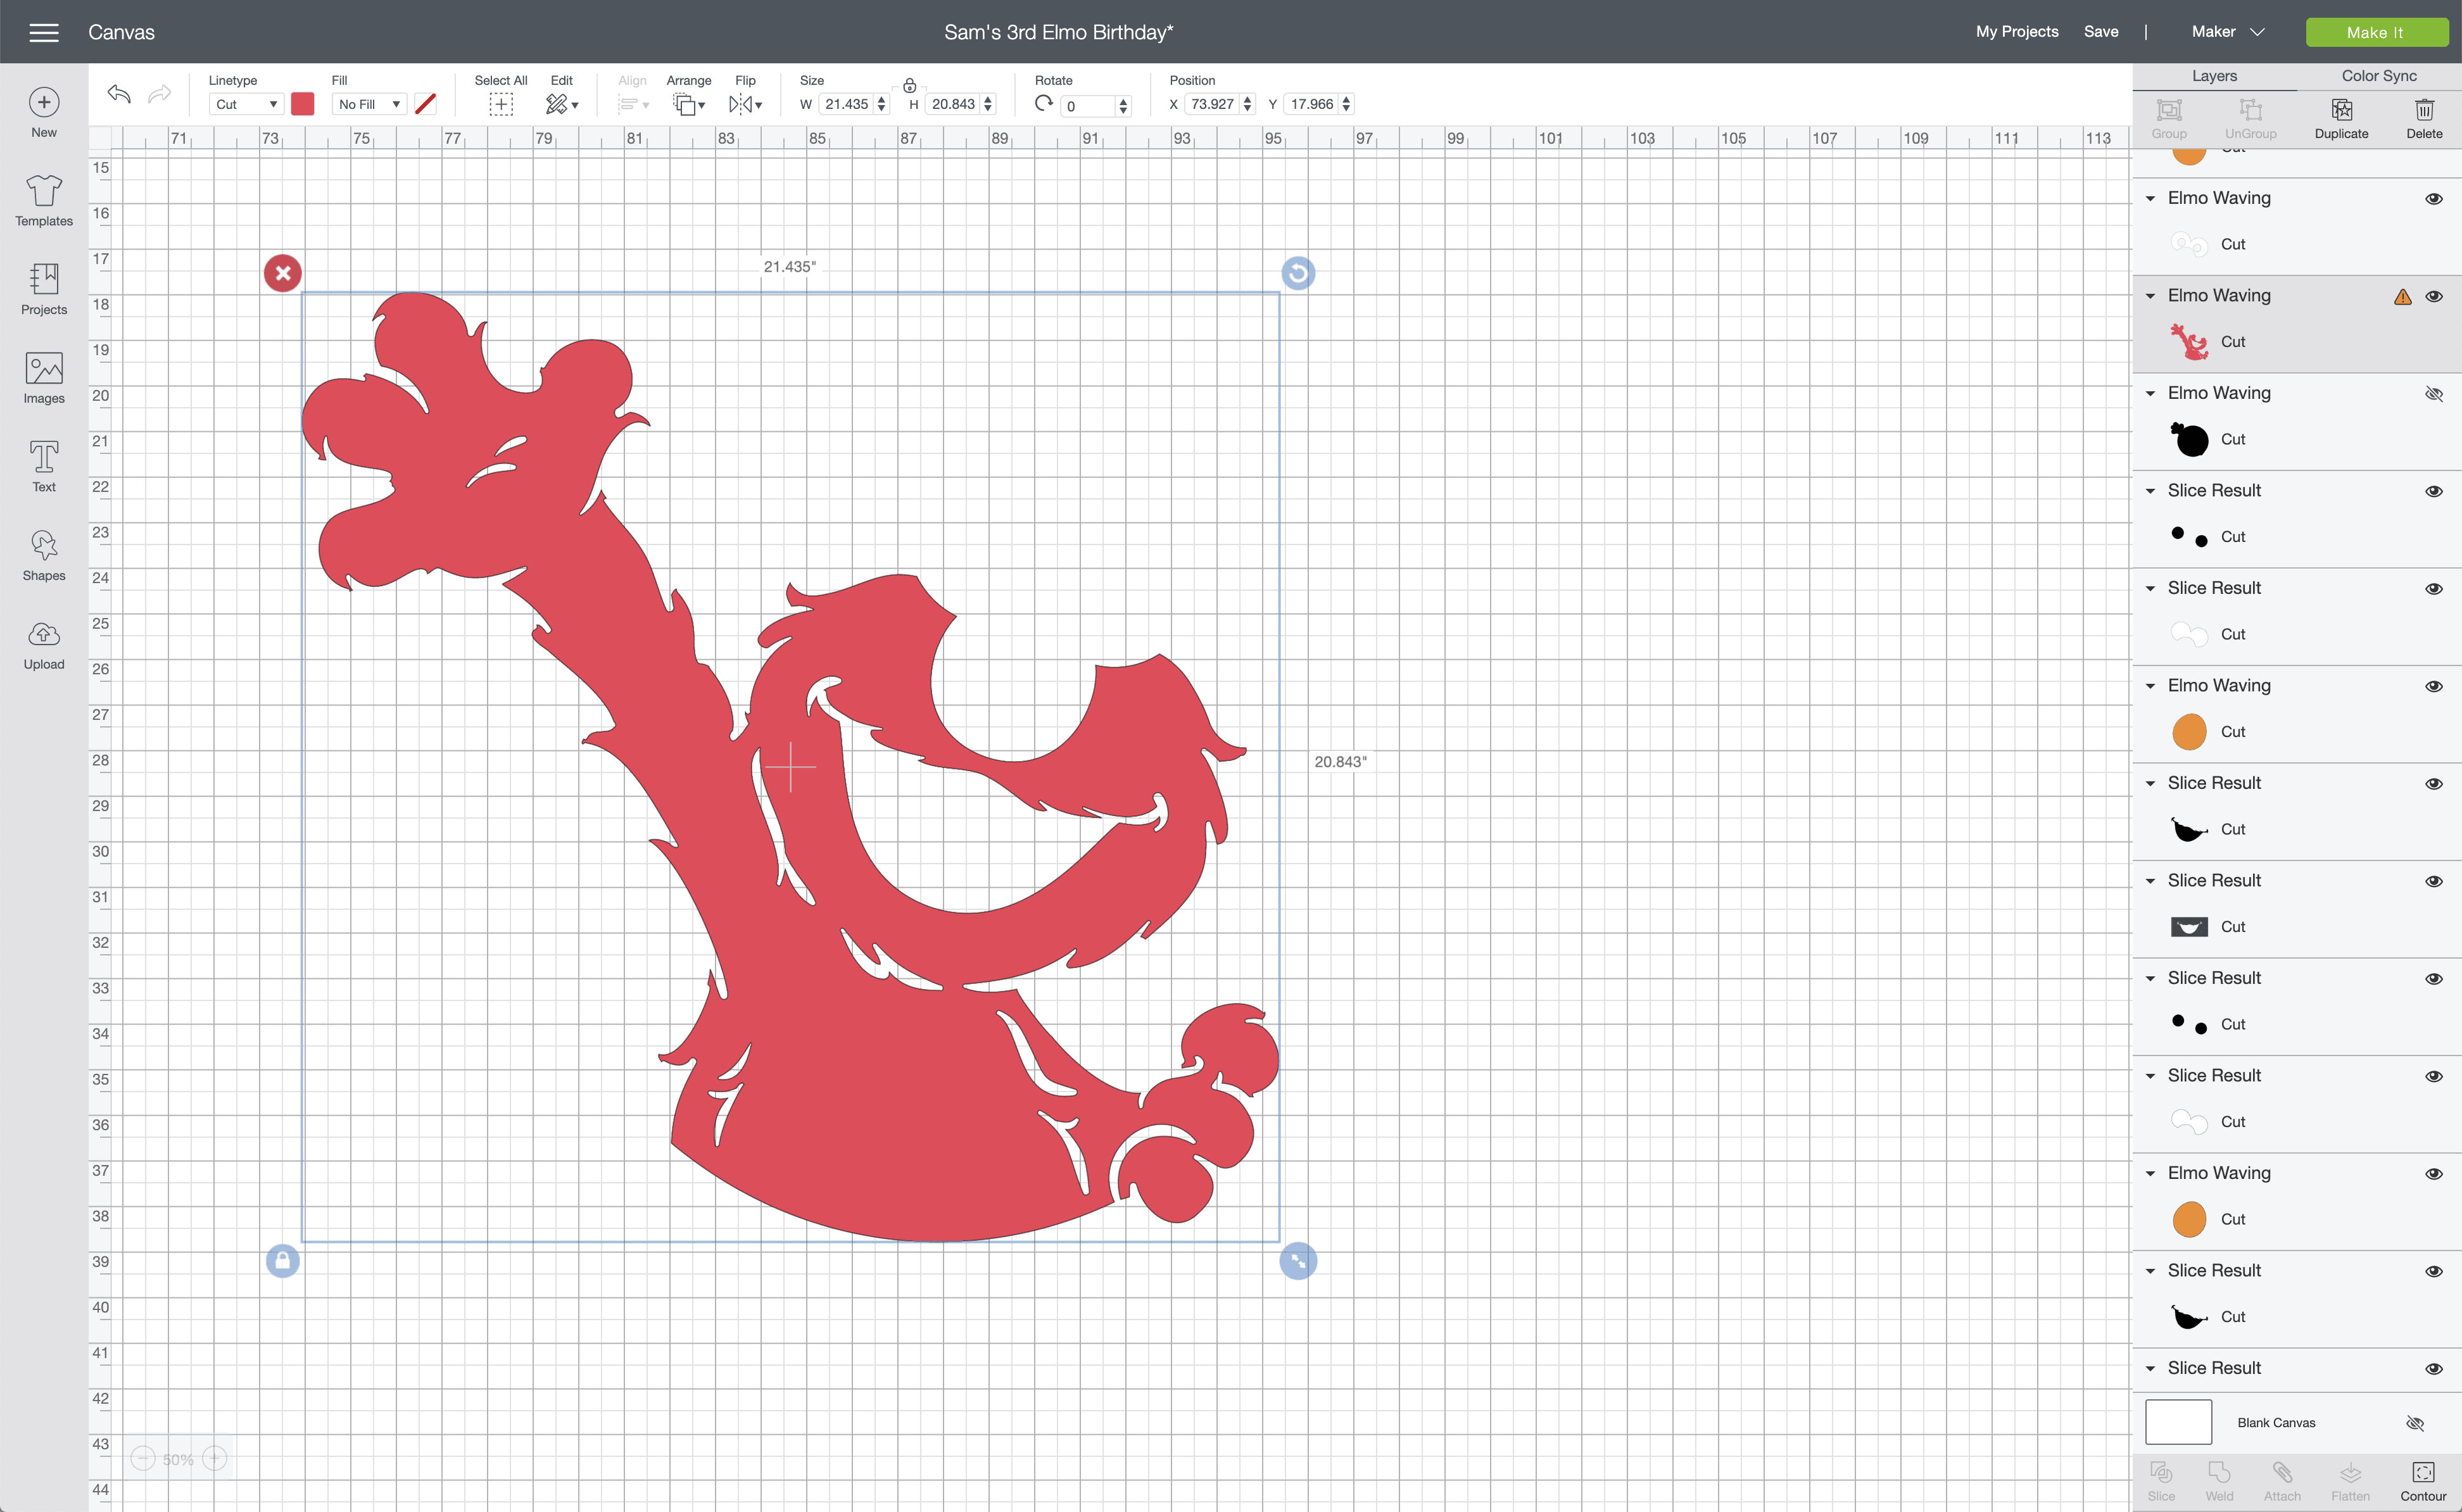
Although some images can be Contoured to fit your mat (as shown above), MOST images will need to be sliced down. Let’s look at the Elmo cut below. As denoted by the caution symbol, it is way too big for my mat and it doesn’t have any detached elements that we can Contour out. In order to make it small enough to fit on a mat, it will need to be sliced apart.
TIP! It is important to know that Slicing is irreversible, so I always recommend duplicating your image and hiding it off your screen (by clicking the eye symbol in the righthand panel) so that you have a fresh copy you can use again as needed.
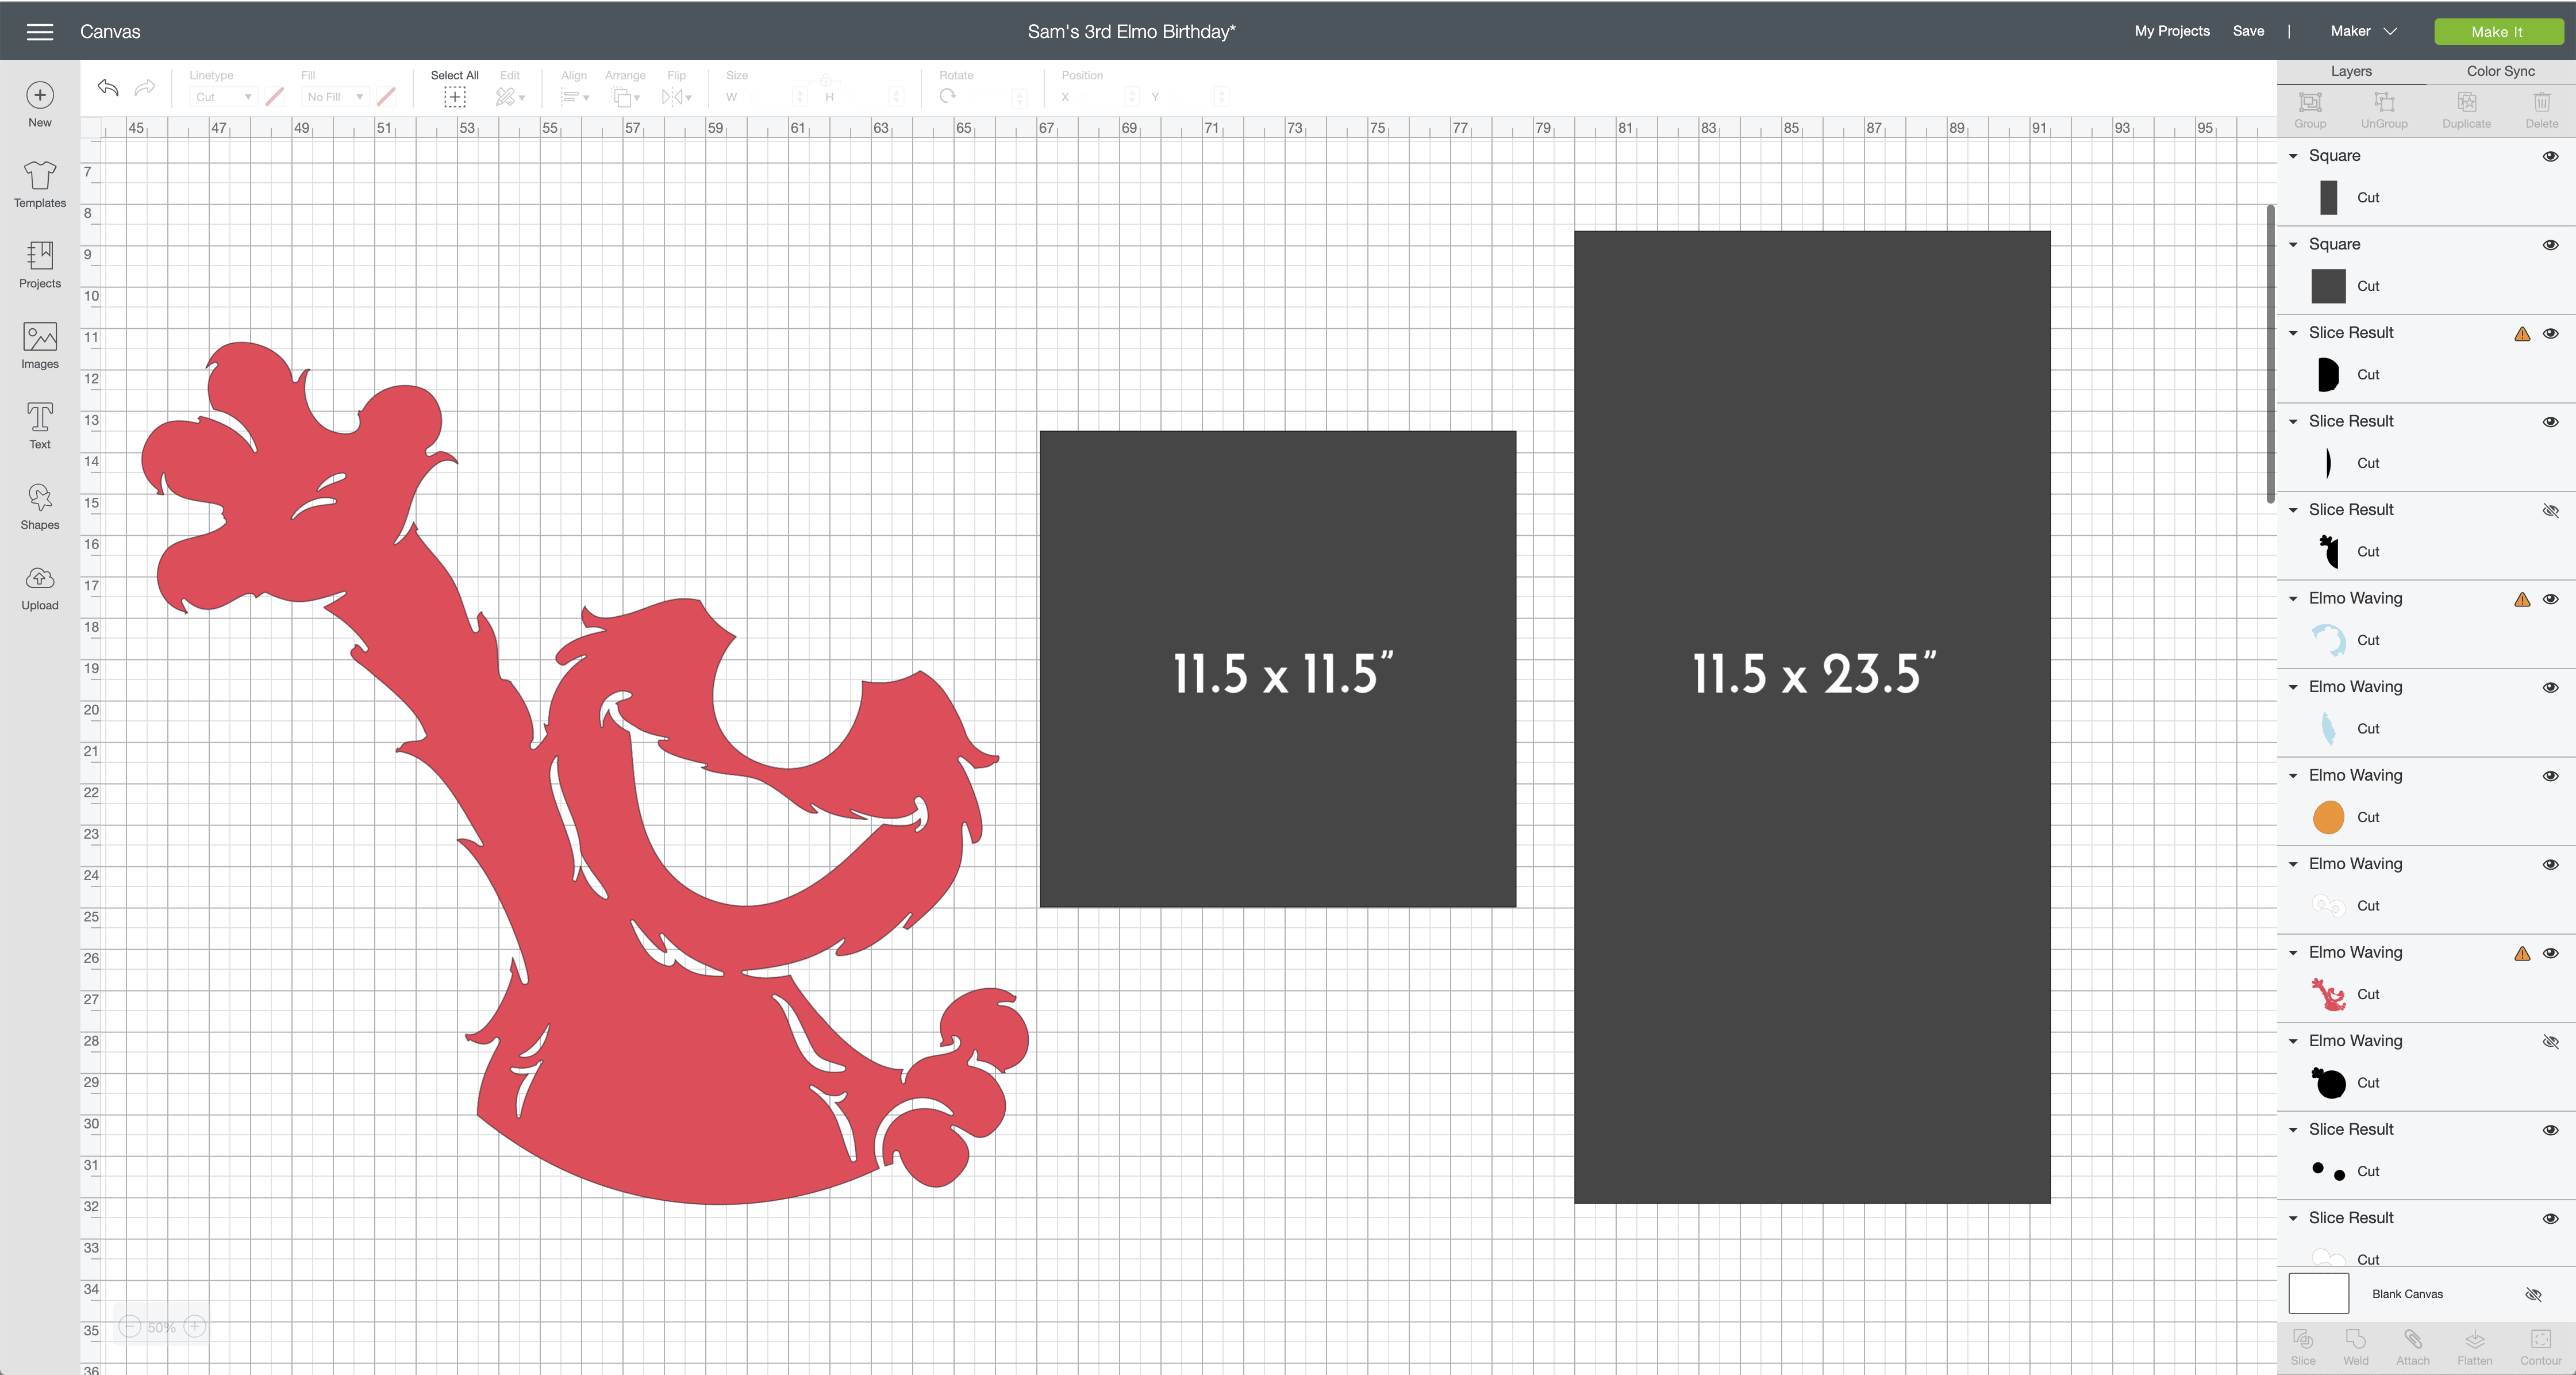
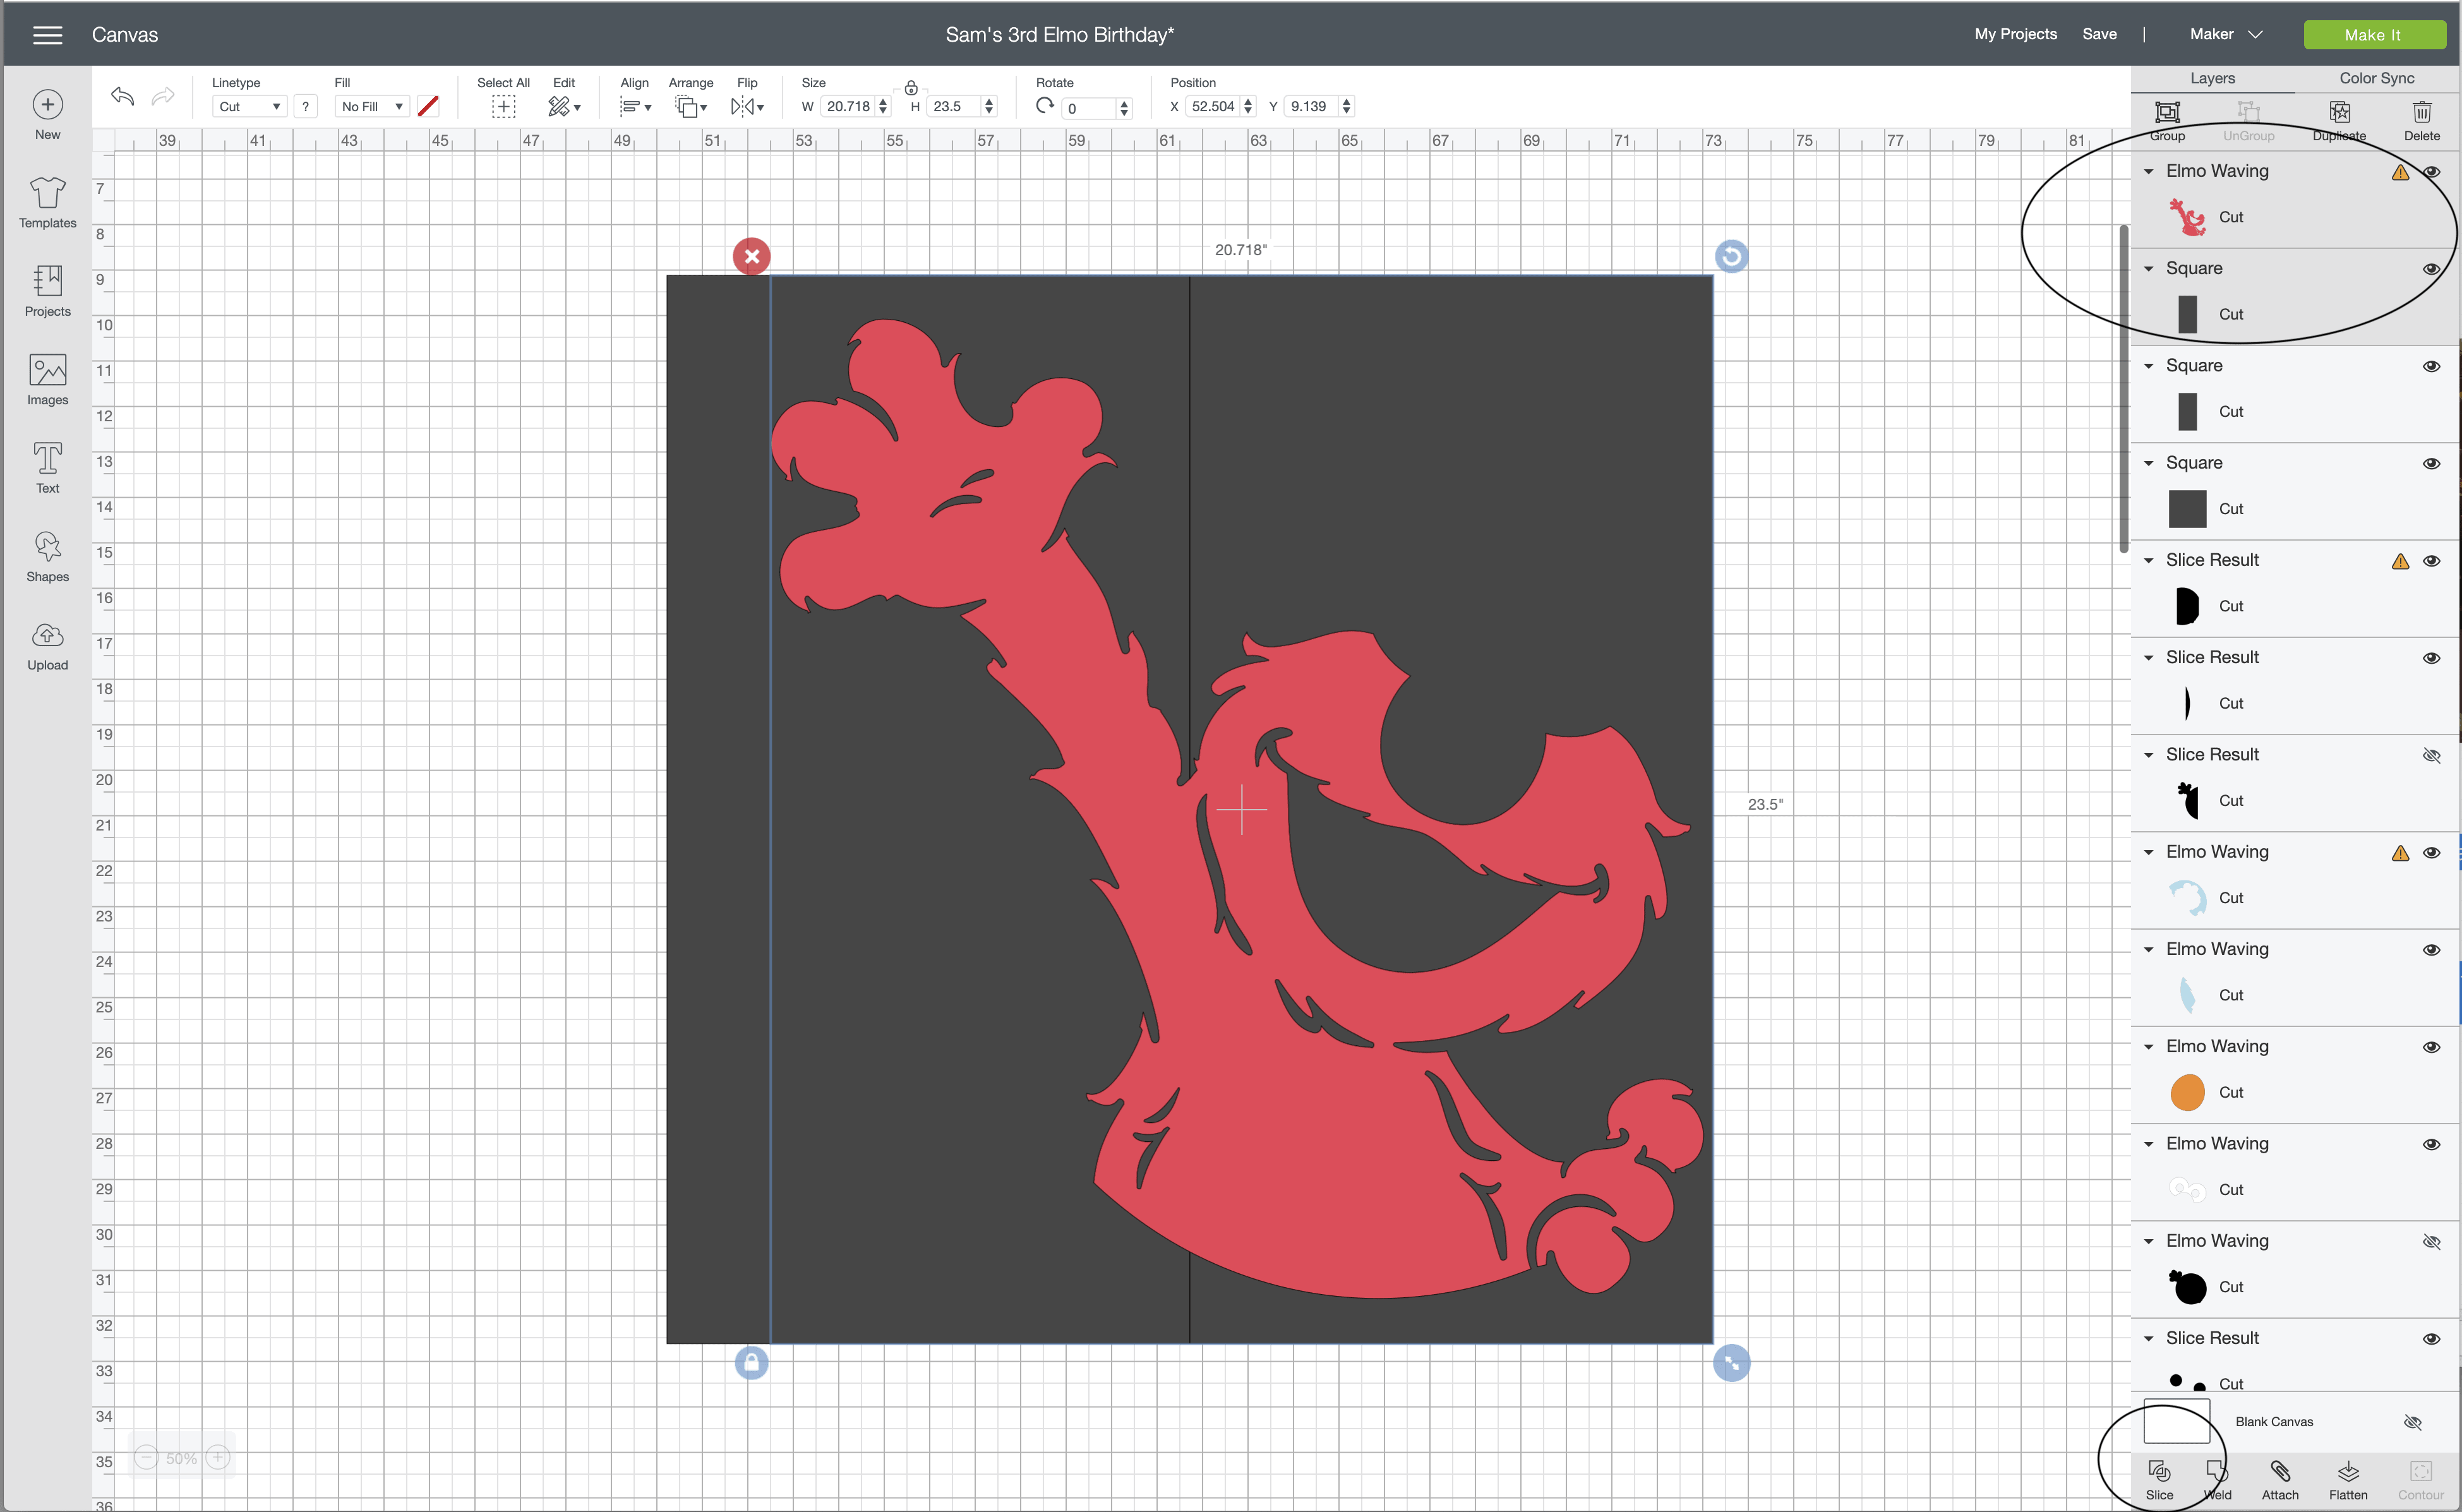
To slice your image apart and ensure it fits onto your mat in the best way possible, I recommend placing a square on your canvas and size it to match whatever mat you will be using:
- If you are using a 12×12″ mat, size the square to 11.5×11.5″ (the largest you can cut on this mat).
- If you will be using the larger mat, size the square to 11.5×23.5″.
NOTE: I used the larger 12×24″ (right mat) for my project, so the rest of the tutorial will use the larger rectangle. If you only have 12″ square mats, use the smaller square in the same method as I outline below.
Want to save this post?
To ensure your sliced designs will fit on your mat AND to see how many times you will need to slice up your image, I suggest duplicating the square/rectangle enough times so that when they are positioned right next to each other, they will fully encompass your design. This not only ensures each slice will end up fitting your mats, but will also prevent against making more slices than truly necessary (therefor allowing you to create your big design with as few seams as possible). Using the squares/rectangles like this also ensures you don’t end up with any really odd cuts (small sections, hard-to-match angles). Don’t hesitate to shift the squares/rectangles as needed to get the best set of cuts possible!
NOTE: I don’t have any Cricut Design Space tricks that easily allows you to put two objects RIGHT next to each other. Unfortunately, you will need to place them manually, but it is worth the time to get them EXACTLY next to each other with no gap or overlap.
In my example below, two 11.5×23.5″ rectangles were sufficient to surround Elmo. This indicates that cutting Elmo into two pieces will be sufficient to fit on the mats but not create excess seams.
There is no need to move any of your images or rectangles at this point. To slice your image, simply select your image (Elmo in my case), and one of the rectangles (you’ll see they are correctly selected because they are greyed out in the righthand panel) and then select Slice (bottom of the righthand panel).
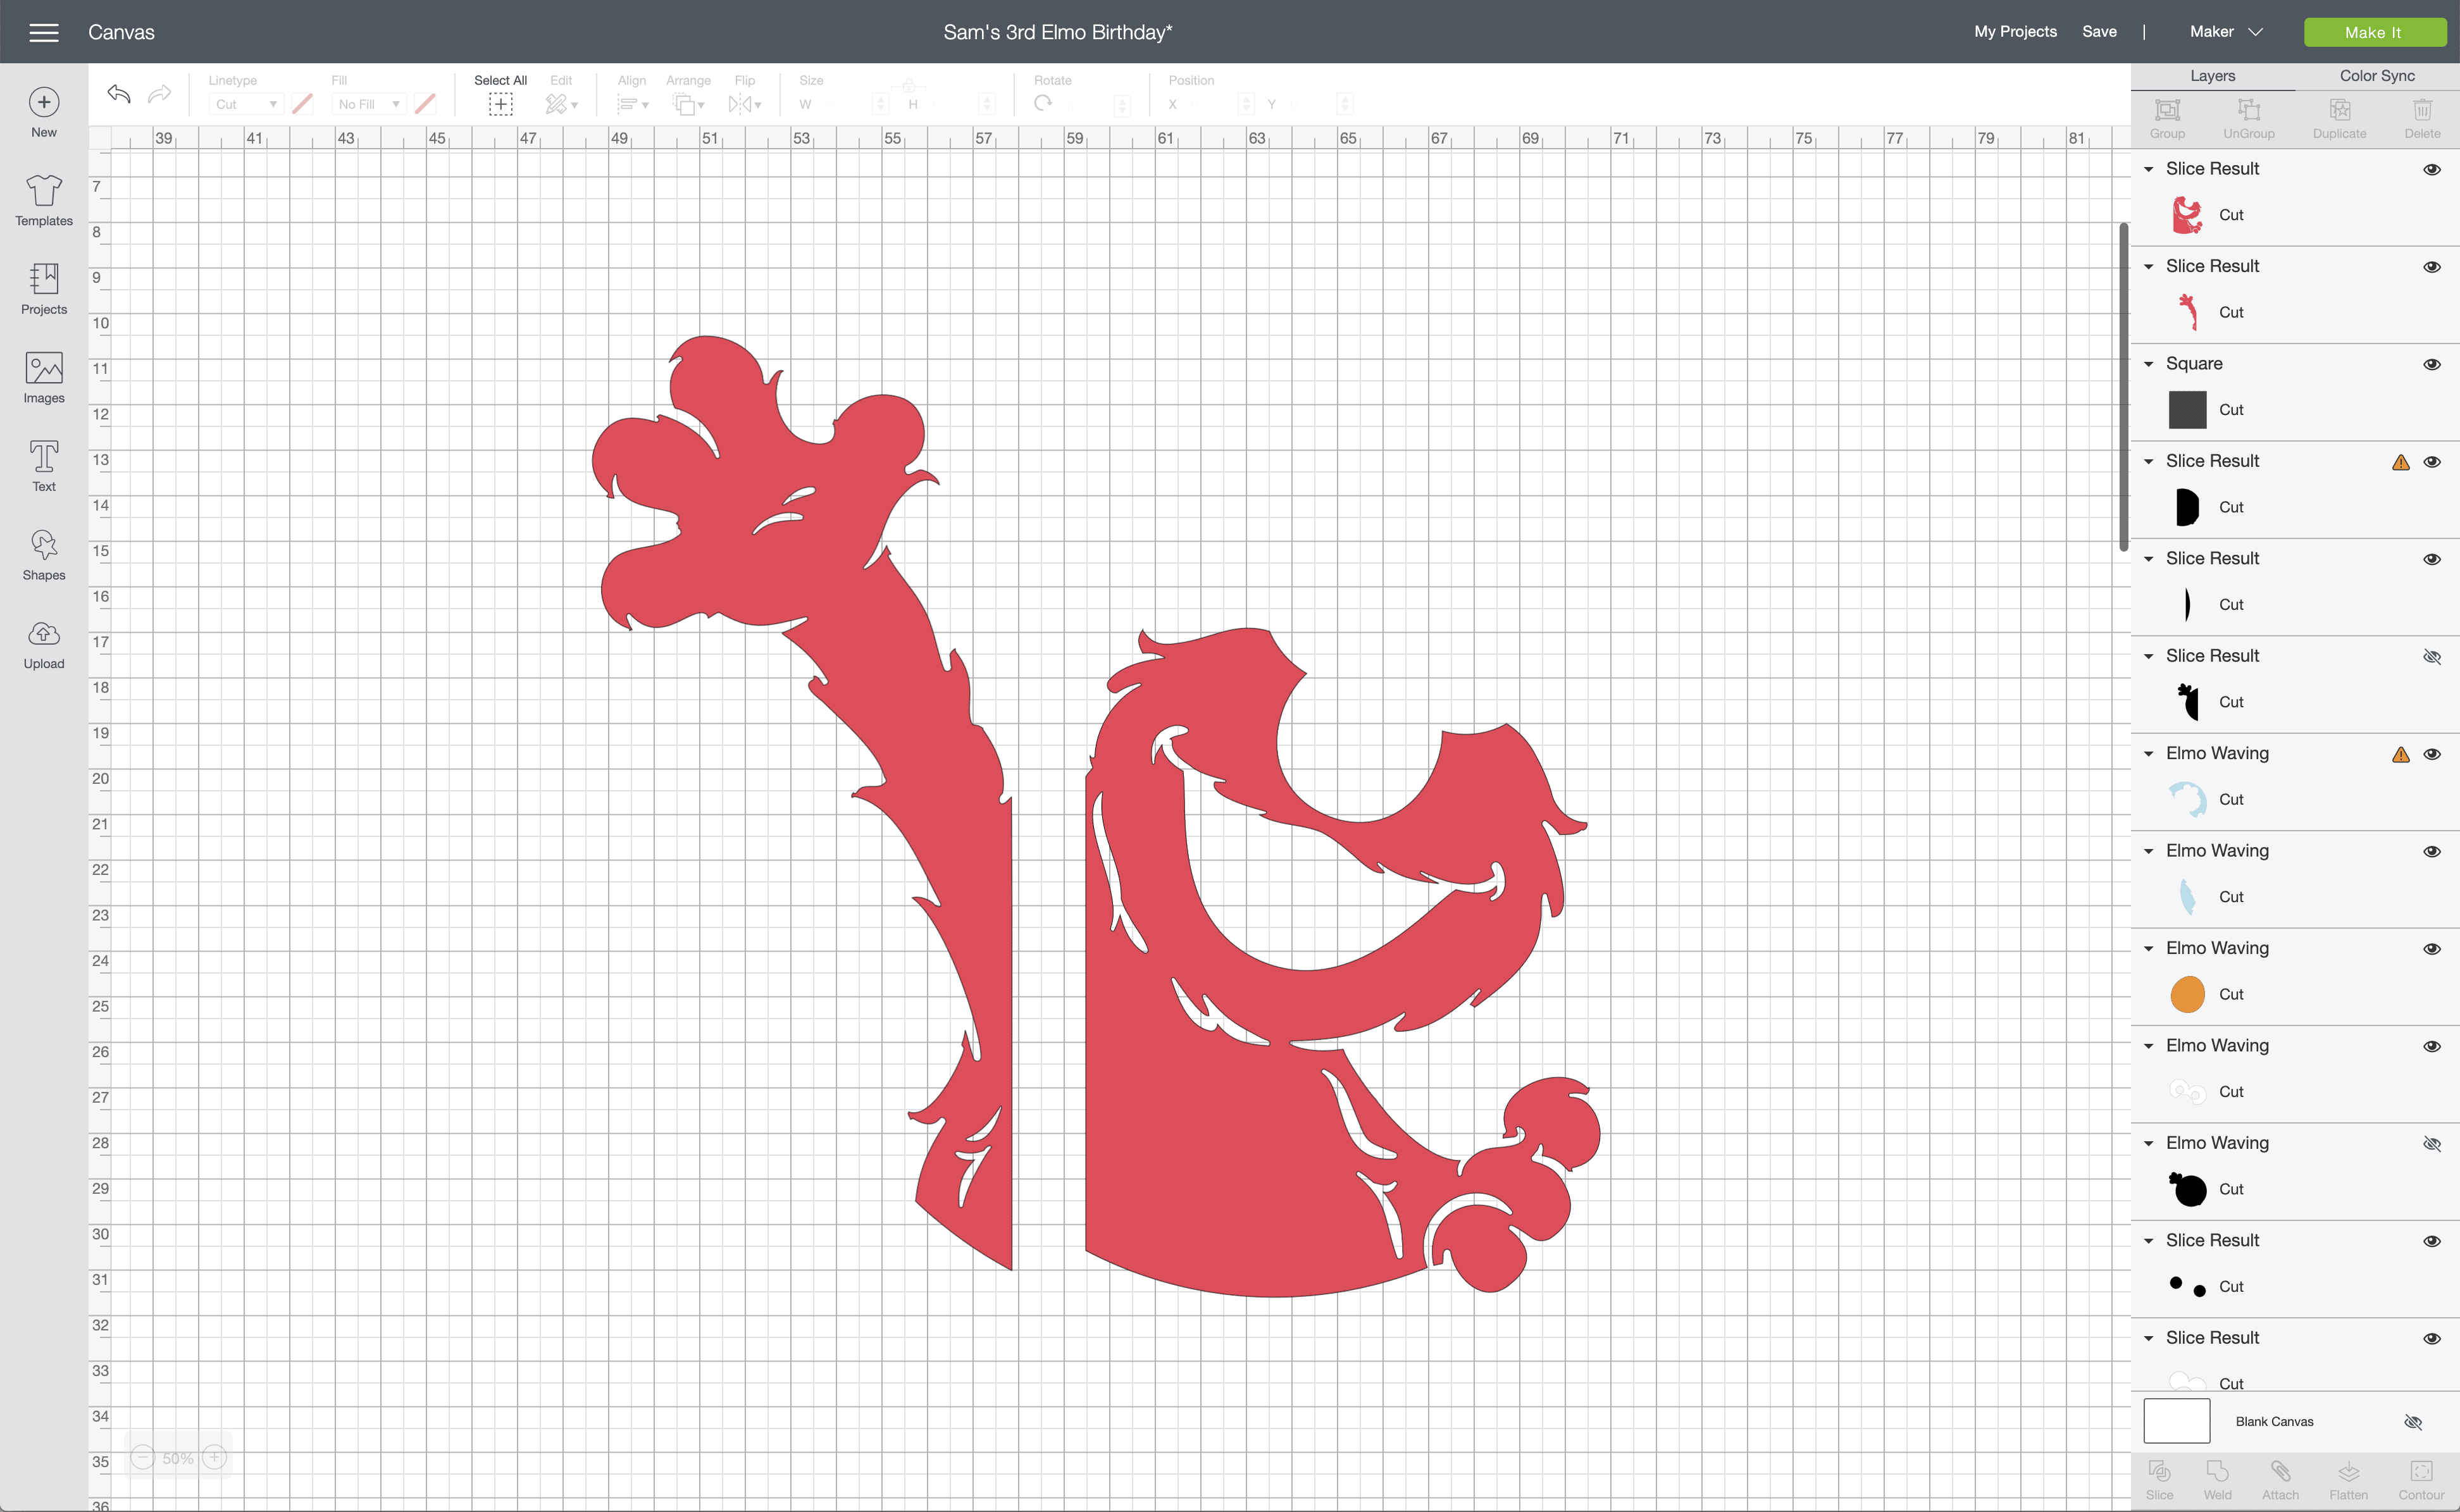
Once you delete out the first rectangle, you will see that your Elmo has been sliced right along the seam between the two rectangles. If my image was bigger, I’d keep slicing rectangles until the entire image was cut into sections that fit onto the mats.
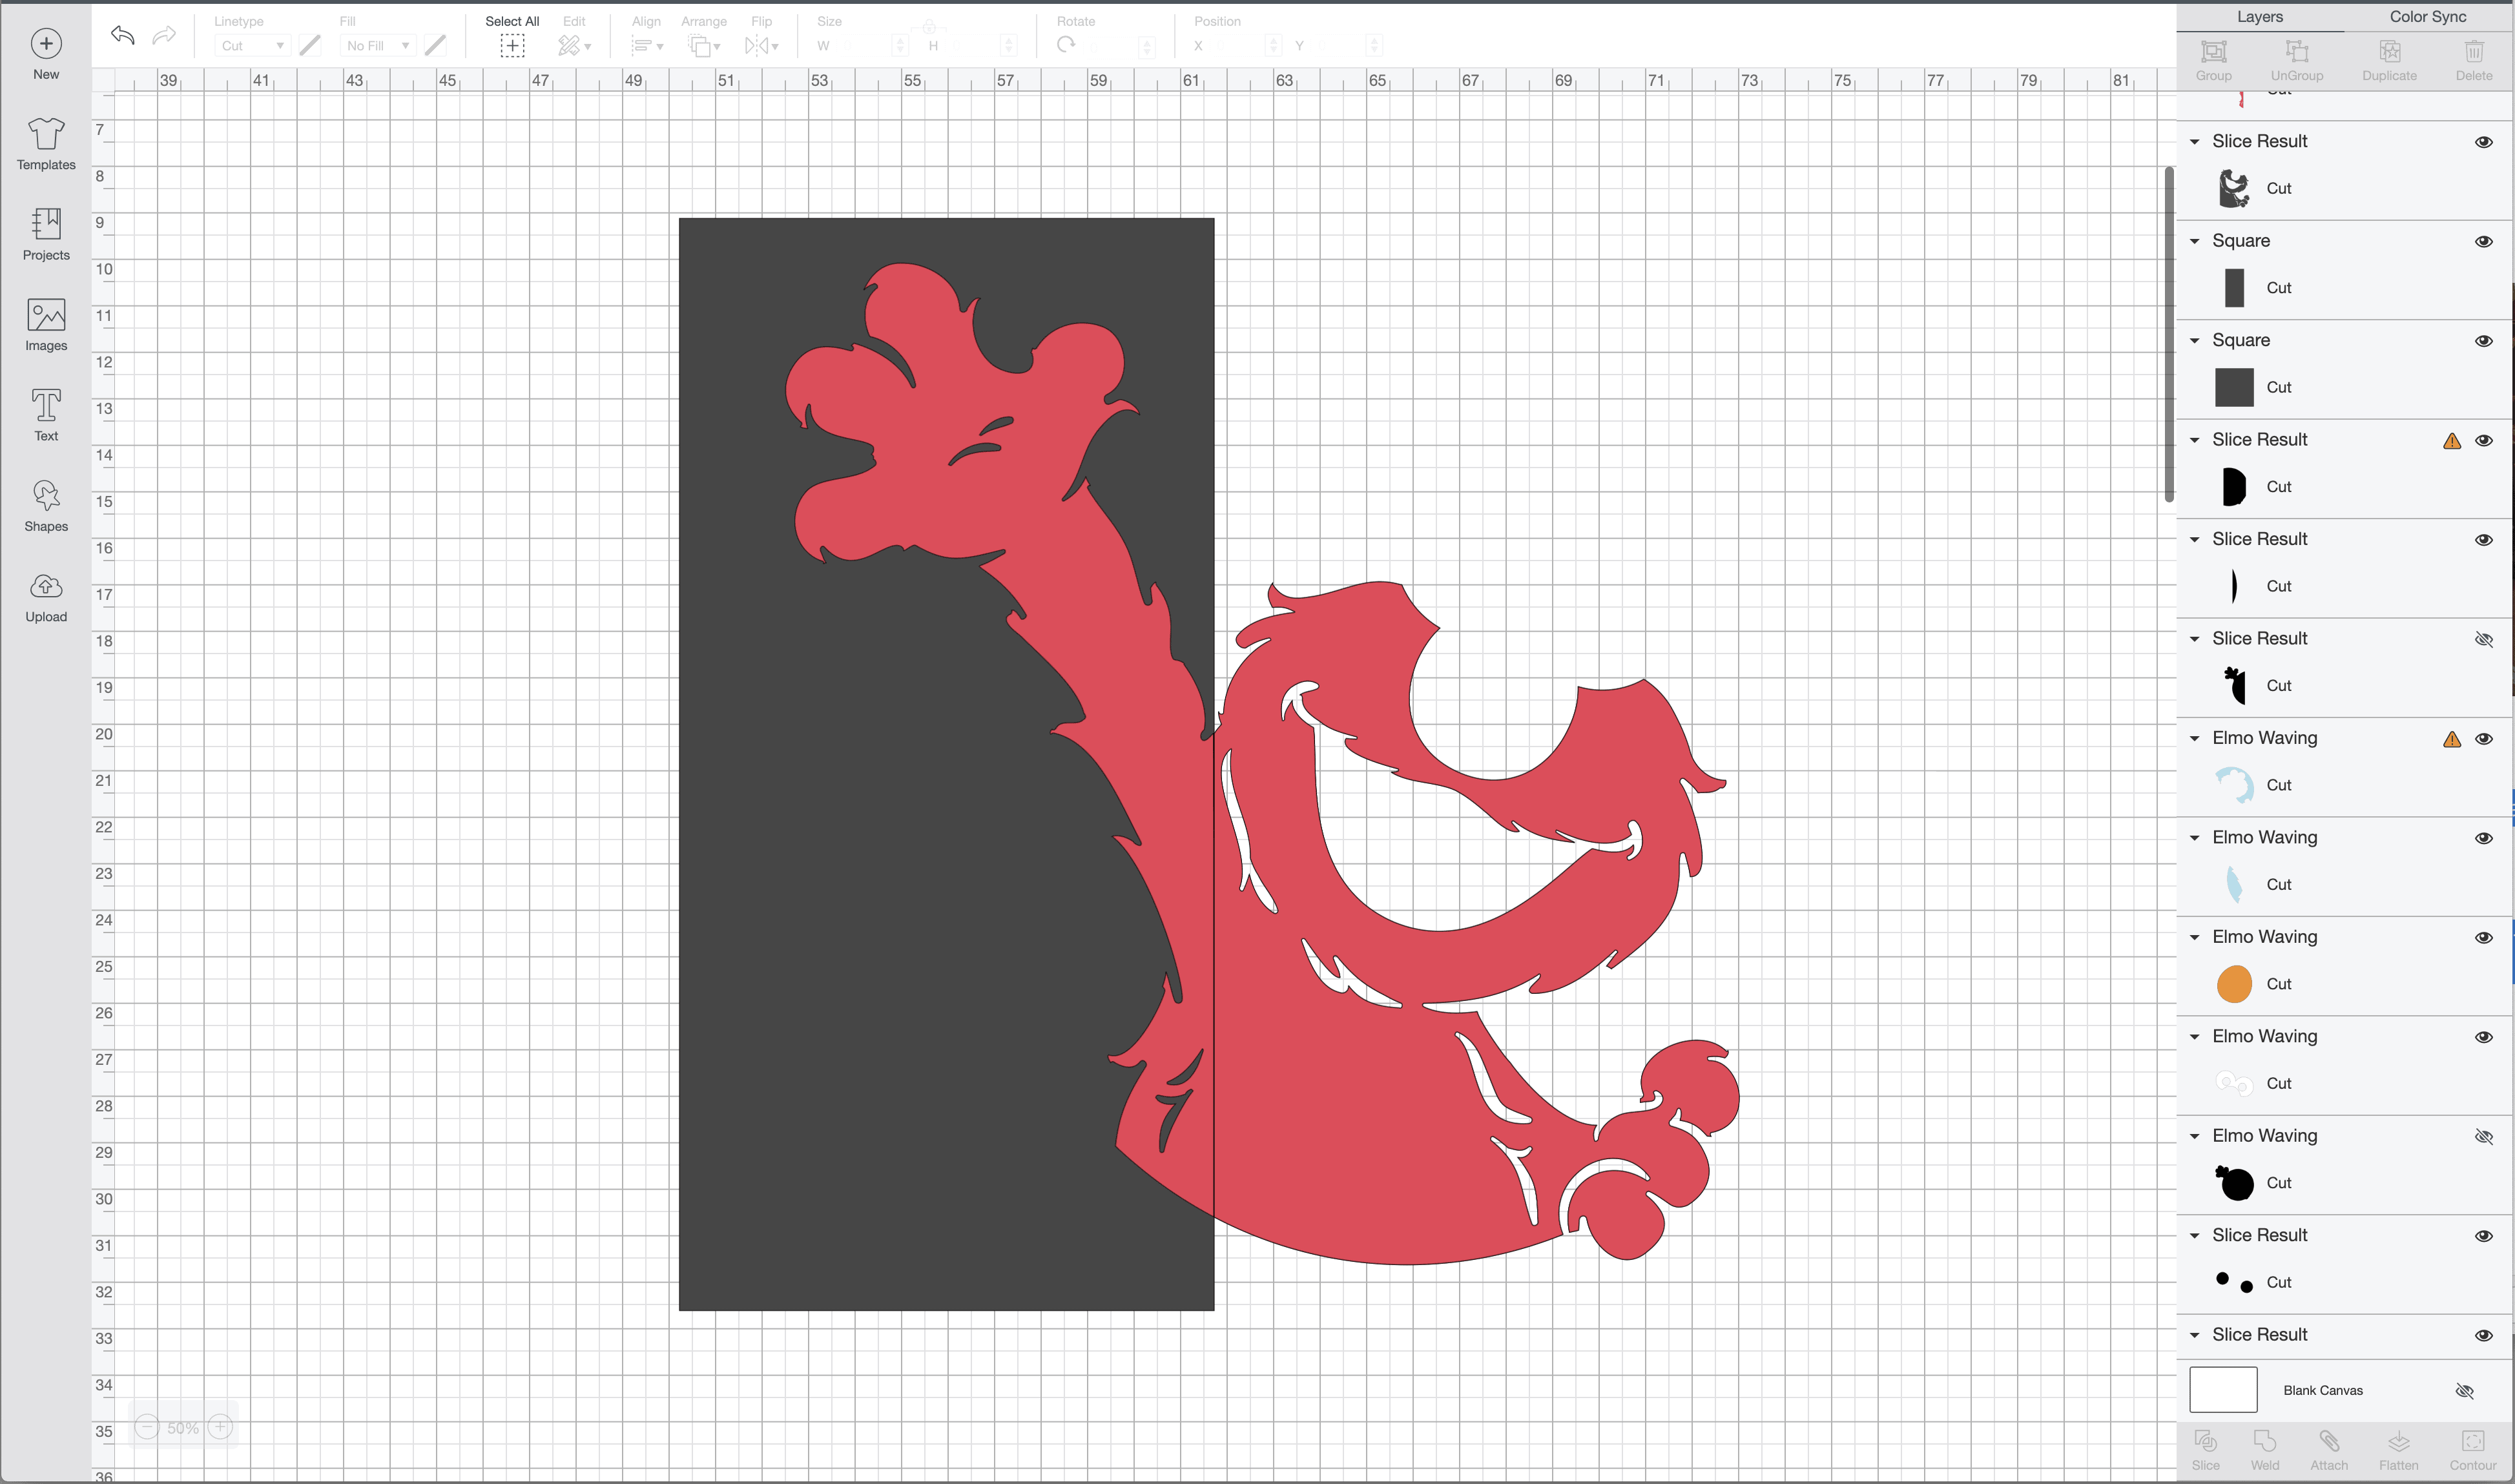
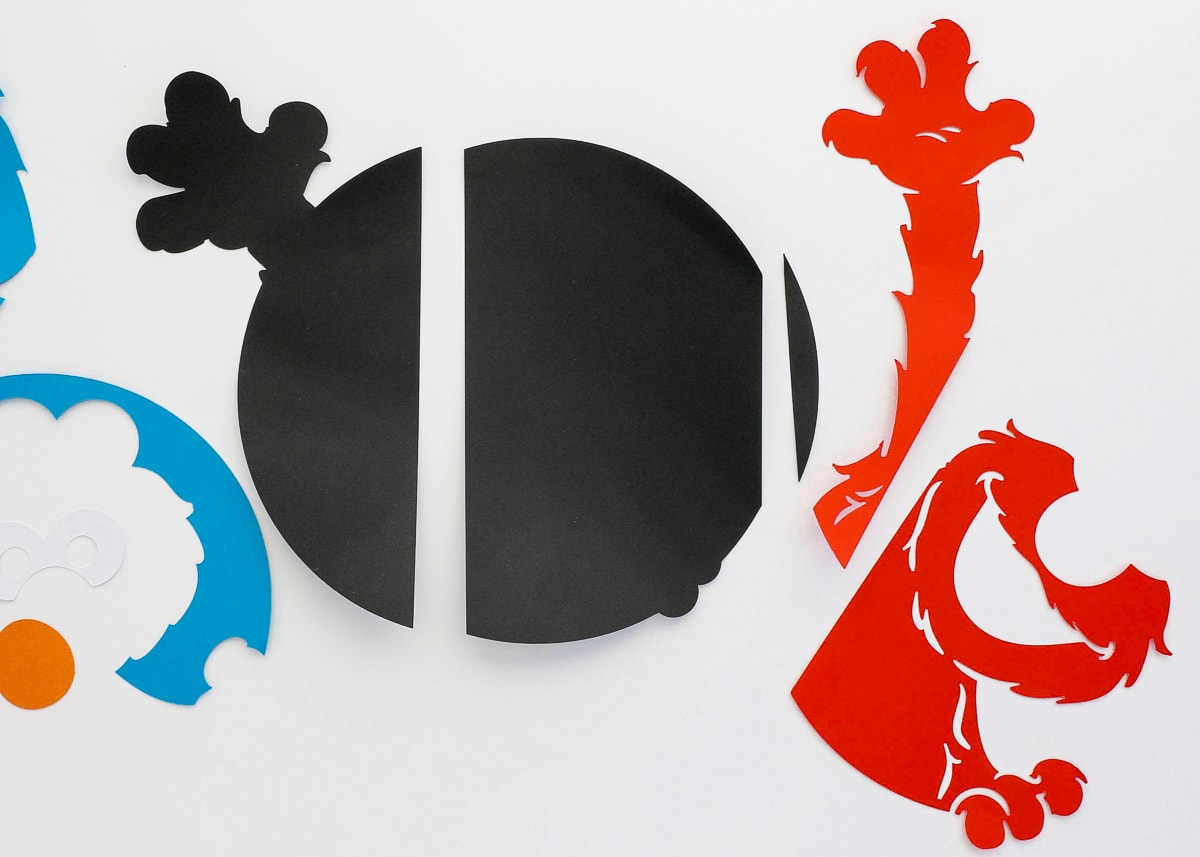
I deleted out the second rectangle since I didn’t need it. Now both the right and left sides of my Elmo are sized perfectly to fit on my mat!
If I were using 12″ mats, here is how my slices would have looked:
Okay…just to summarize, for Elmo so far:
- The orange nose and white eyes didn’t need any Contouring or Slicing – they both fit onto the mat in their original form.
- The blue layer was duplicated and then Contoured in order to split the design into two cuttable parts.
- Both the red Elmo and black background were Sliced down using the rectangle method described above.
NOTE: You may notice that part of my blue background design is still showing as too big. But once it was rotated slightly, it fit on the mat and the caution sign disappeared.
How to Cut and Assemble Designs “Off the Mat”
A majority of the work required to cut really big designs is done in Design Space. So once you have all your layers sized to fit a mat, all you need to do is load up and cut.
Load Appropriately-Sized and Type of Paper Onto Your Mat
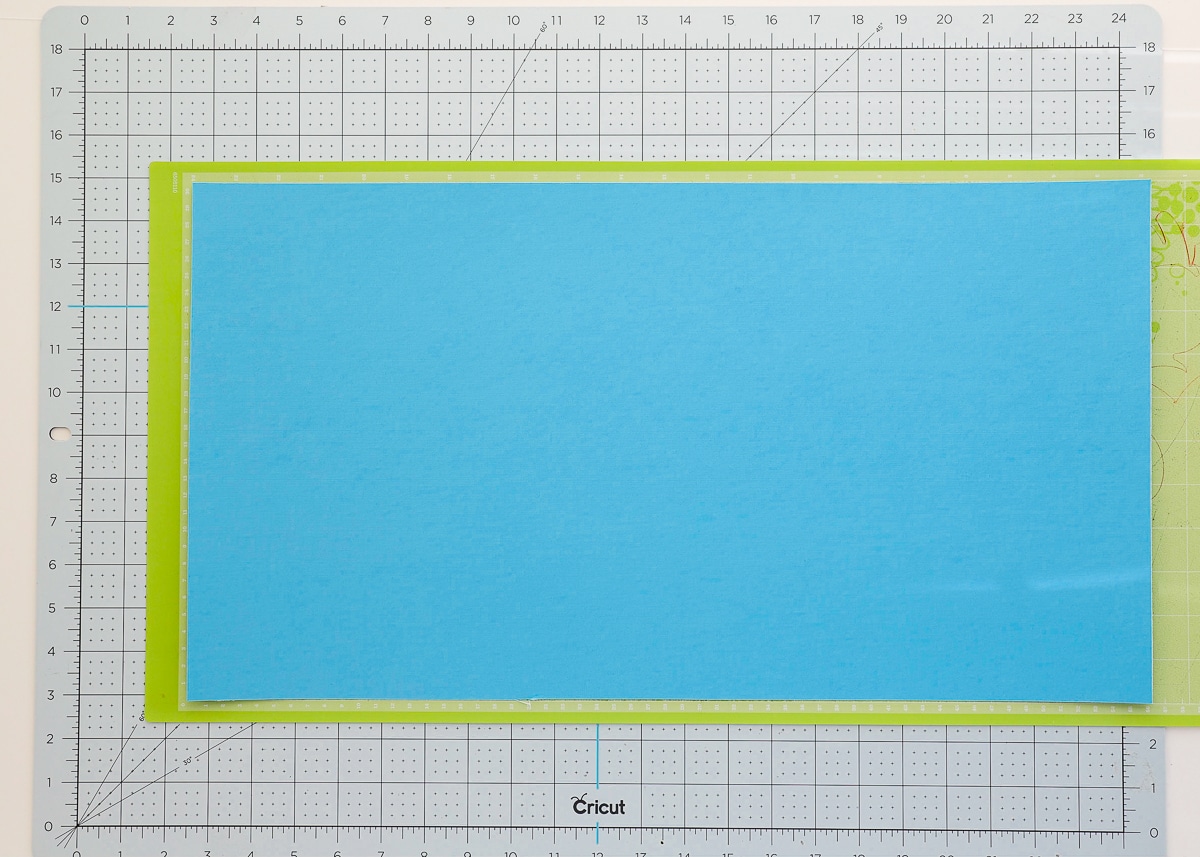
If you’re working on 12″ square mats, you can use normal cardstock. But if you want to use the larger 12×24″ mat, you might be wondering…”Where do you find really big paper to use on big mats?”
Cricut actually just recently launched 12×24″ cardstock in an array of colors (hurrraaayyy!!!). But if you don’t have any on hand or need a big stack of large paper, you do have other options. Usually, I use good ol’ fashioned sheets of posterboard.
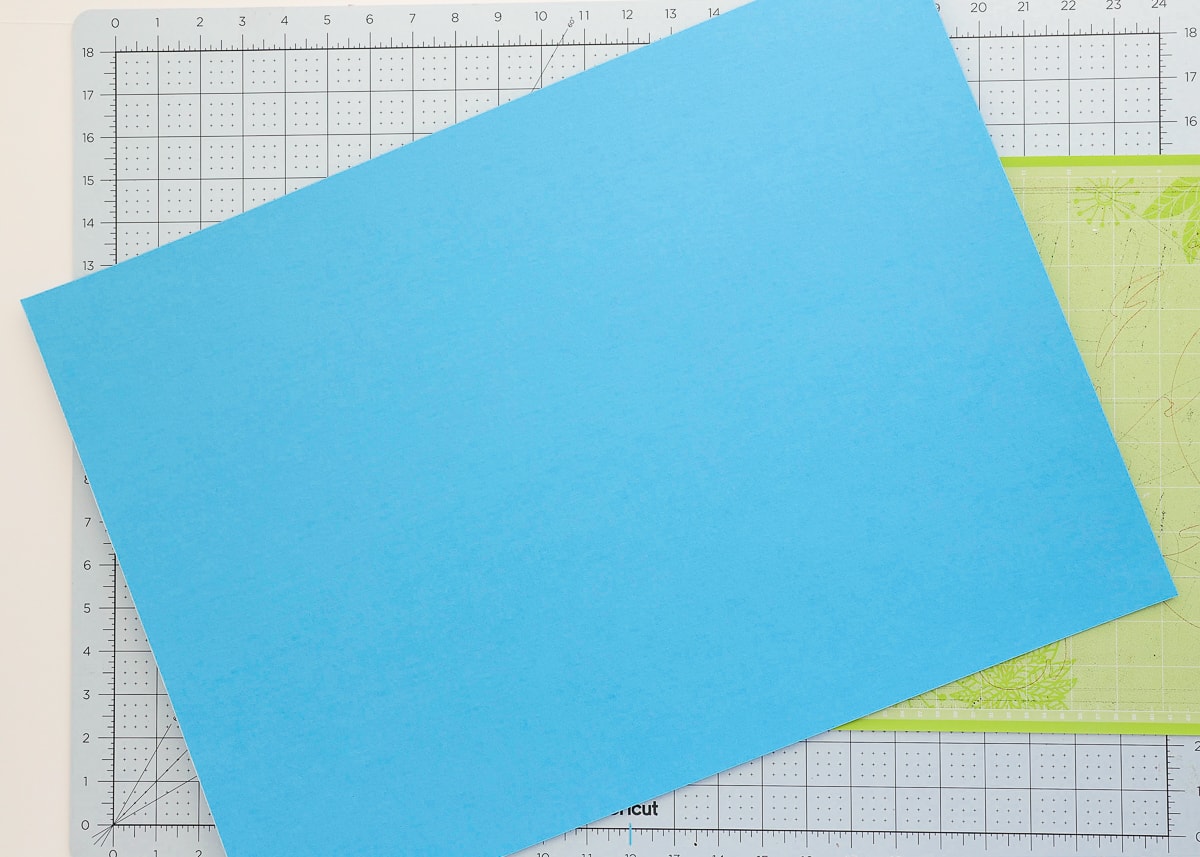
I just slice the sheets of posterboard down to 12″ wide (with my rotary blade and ruler) and load it onto the mat. If you can’t find posterboard in a color you love, most craft stores sell really large acid-free craft paper in an array of colors. They are just a few dollars a sheet and can be found in the paint/art section!
Cut Out Your Layers
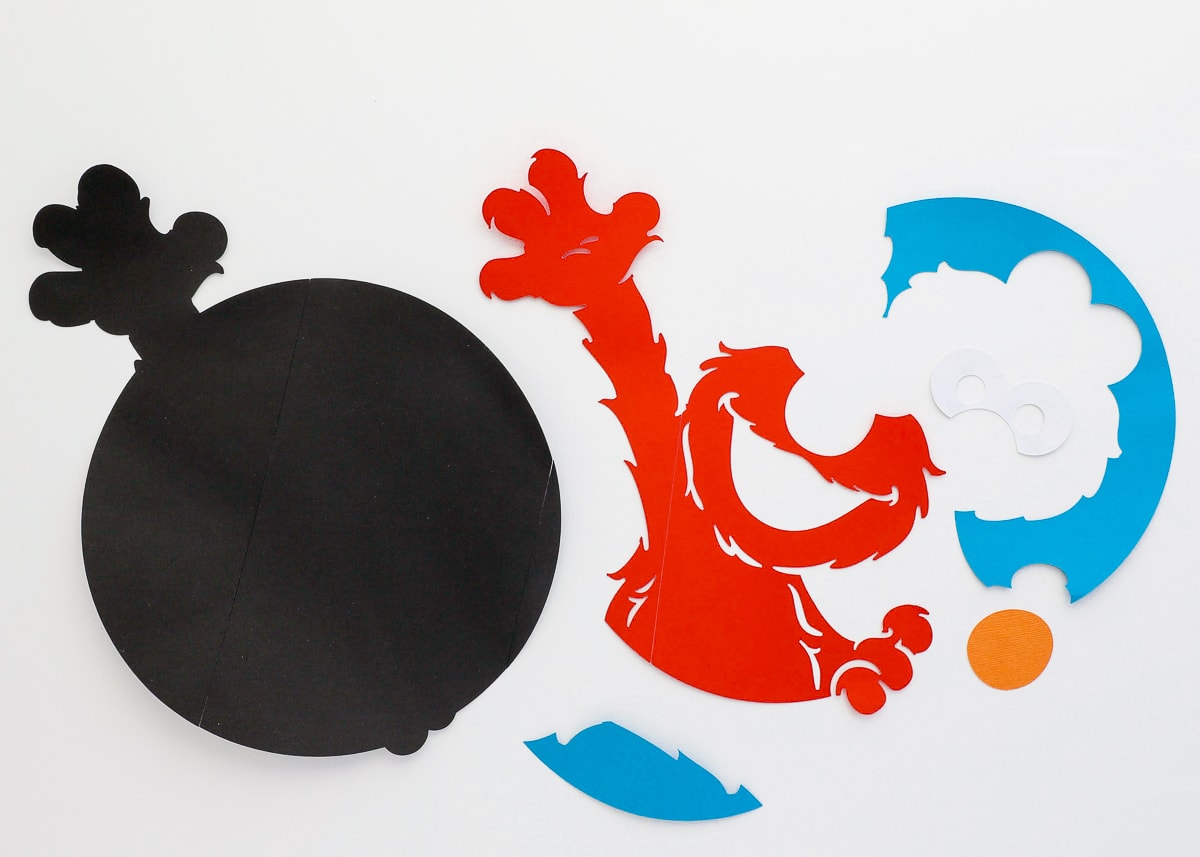
Once you have large paper loaded onto your mat, cut out all your prepared layers. Below, you can see each of my cuts as they came off the mats.
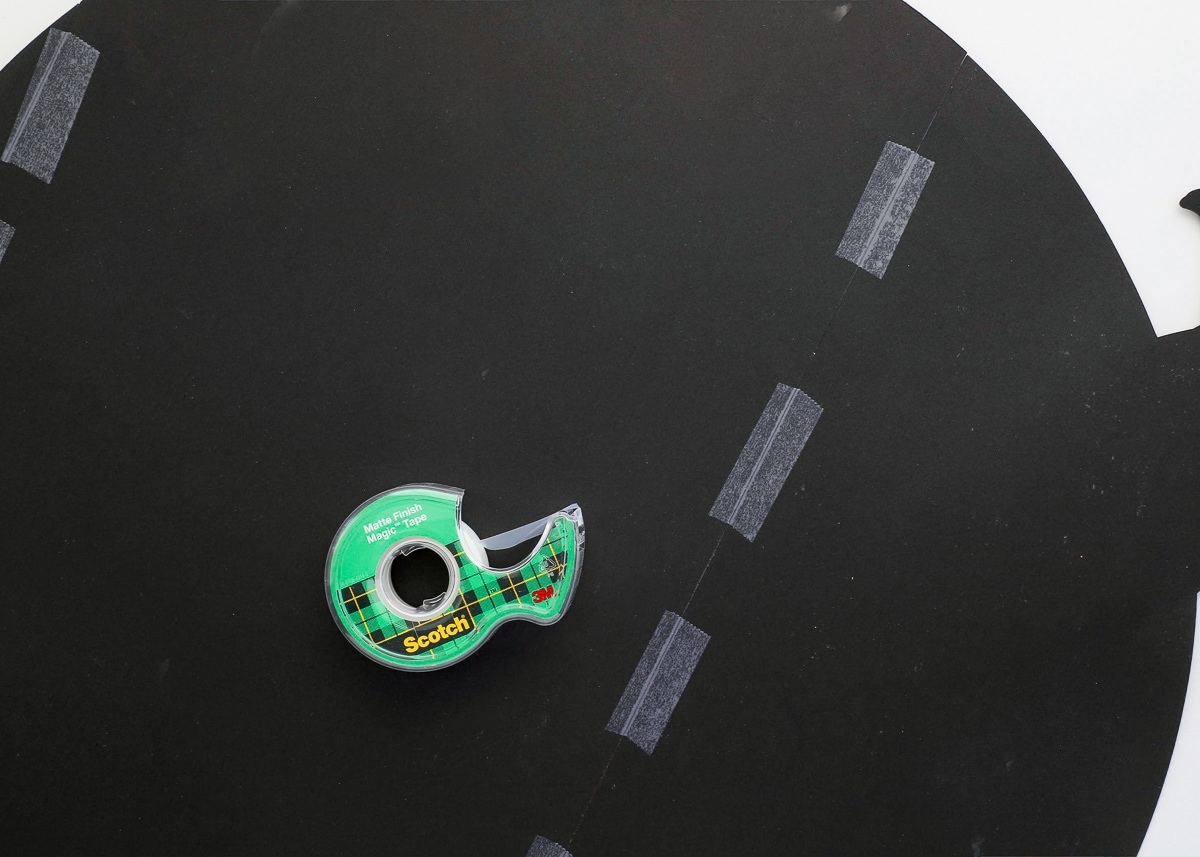
Re-Assemble Your Layers Along the Seams
With the layers cut out, all that is left to do is assemble them back into your original design. My favorite way to do this is to flip all the cuts over and use Scotch tape along the back. Since you Sliced the designs apart with no overlap, you simply butt them up next to each other perfectly, and apply tape along the seam.
With multi-layer designs, tape all the various layers together first…
…and then use glue or your favorite adhesive to secure each layer onto each other.
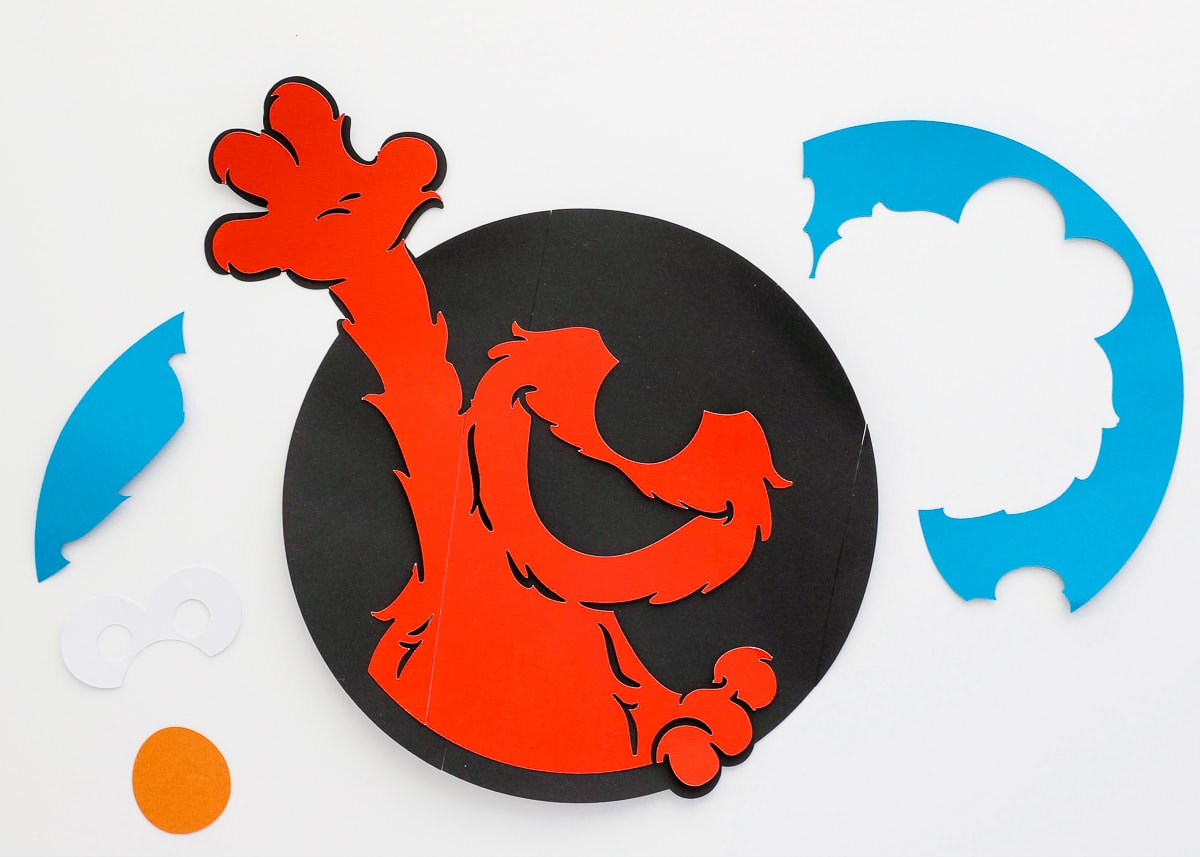
NOTE: You can see above that the seams on Elmo and the seams on the black background don’t exactly line up. It doesn’t really matter since you are essentially taping each layer together individually, and by having off-set seams, your entire design will hold together a bit stronger.
Now that all your layers are glued together, you should have a cohesive image and will likely be unable to tell exactly where everything was sliced apart!
Although I cut my Elmo into just a few sections, this same technique can be used to cut a design as big as you wish. You will just need to keep slicing your original image down into as many cuts as necessary until each one fits on the mat. Whether you have 2 slices or 20, re-assemble along the seams to puzzle your image back together!
More Helpful Cricut Design Space Tutorials
Cricut Design Space is a very powerful program, but it can have a steep learning curve for beginners. Check out my other comprehensive tutorials below:- How to Use Cricut Design Space | A Breakdown for Beginners
- 20 Cricut Design Space Tips & Tricks You Really Need to Know
- The Ultimate Guide to Cricut Terms & What They Mean
- How to Find Free Images to Use with Your Cricut Machine
- How to Use the Attach Tool in Cricut Design Space
- How to Use the Slice Tool in Cricut Design Space
- How to Use the Weld Tool in Cricut Design Space
- How to Use the Contour Tool in Cricut Design Space
- How to Use the Offset Tool in Cricut Design Space
- How to Use Print Then Cut in Cricut Design Space
- How to Design Monograms in Cricut Design Space
- How to Cut Really Big Designs on Your Cricut (The Off-the-Mat Technique)
- How to Design Mugs in Cricut Design Space
This Elmo party is one of my favorites I’ve ever done! It really came together in just a few hours, and I think the larger-than-life Elmo made a huge visual impact at the party. What do you think?
Megan

6 Comments on “How to Cut Really Big Designs On Your Cricut – The Off-the-Mat Technique”
Thank You For The Great Post & Who Doesn’t Love Elmo I Just turned 50 And I Still Love Him lol 😉 Big Gidday From Australia 😁
You’re most welcome! Glad you enjoyed the project!
Megan
I was wondering how you would do that. Thank you for this!!
You are most welcome! It can be tedious but it’s not hard!
Good luck!Megan
Thanks for this! I have a question. I want to cut a giant US map out of vinyl. Is there an easy way (any way?) to separate the map into smaller pieces along state lines (as opposed to the straight lines you used for Elmo)?
That was, and I nearly gave up, too much,