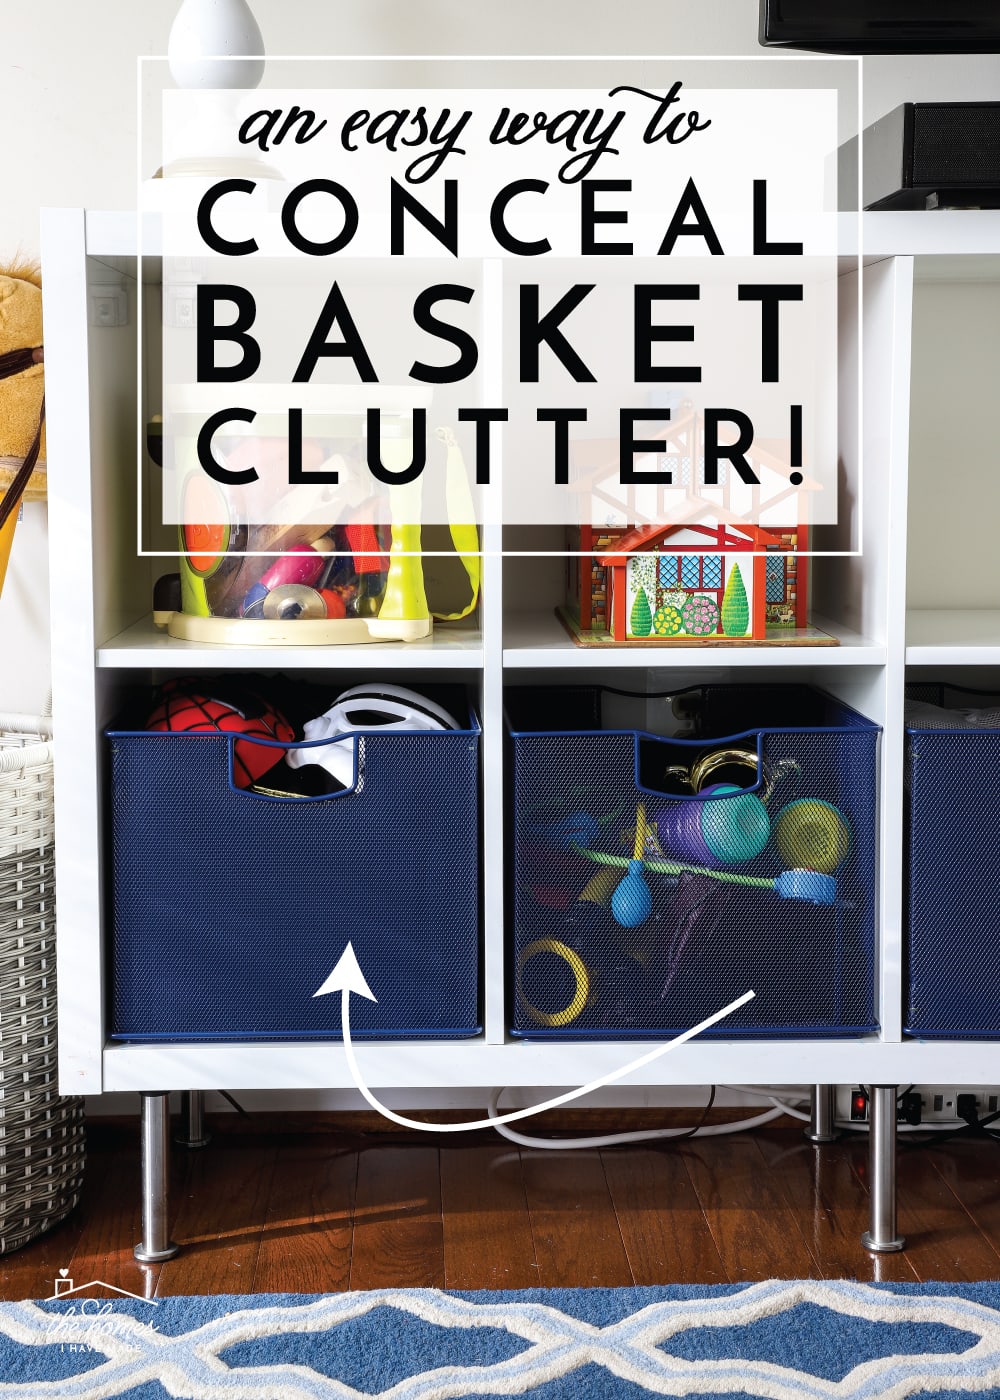
An Easy Way to Conceal Basket Clutter
I have a feeling today’s project will draw one of two reactions. Some of you, maybe even most, will say “Megan…aren’t you a busy mama with never enough hours in the day? Certainly you have more important things to spend your time on?!” And then there will be others, who are crazy about visual clutter like I am, who will say “This is brilliant, and I’m heading out to dig through my recycling pile so I can do this right now!” Well…no matter which camp you fall into, I’m pretty sure most of you will love this practically free and oh-so-easy solution to conceal basket clutter. Let me show you what discarded cardboard boxes and an X-acto knife can do to visually streamline your home!
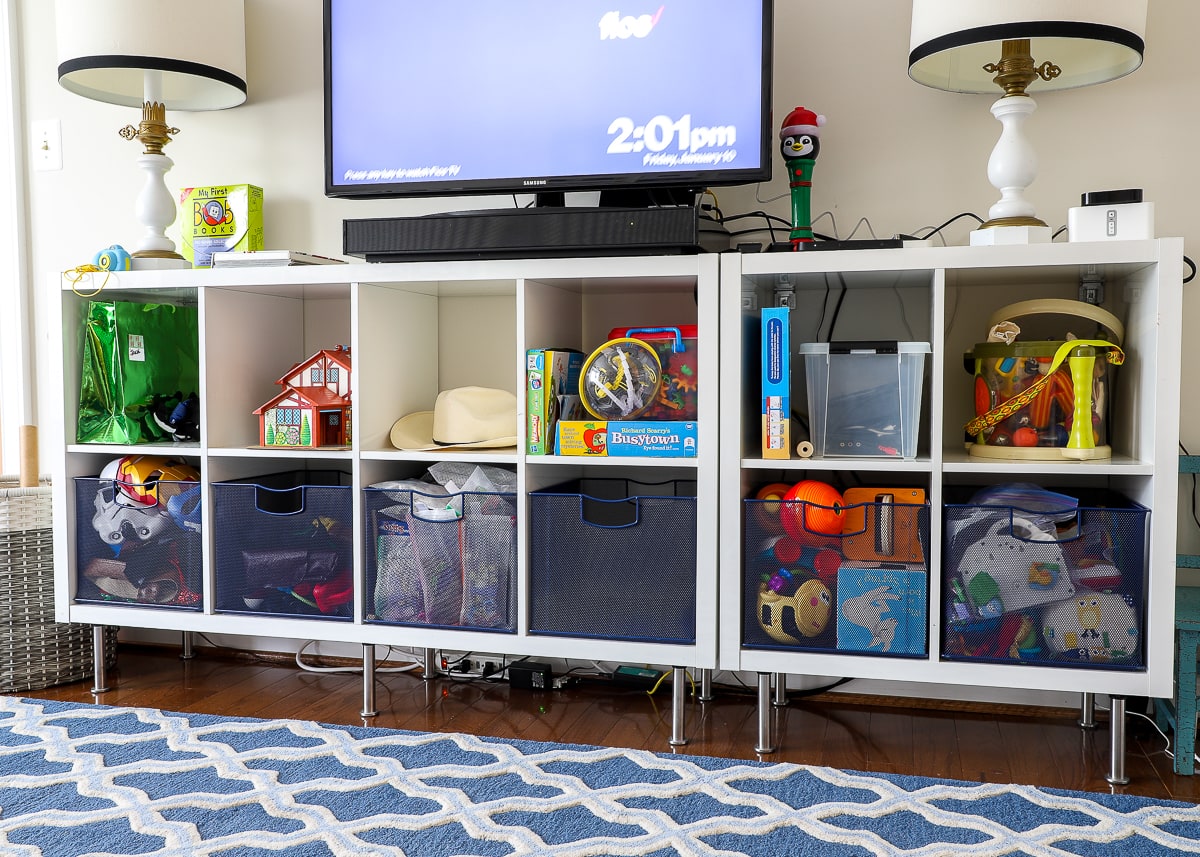
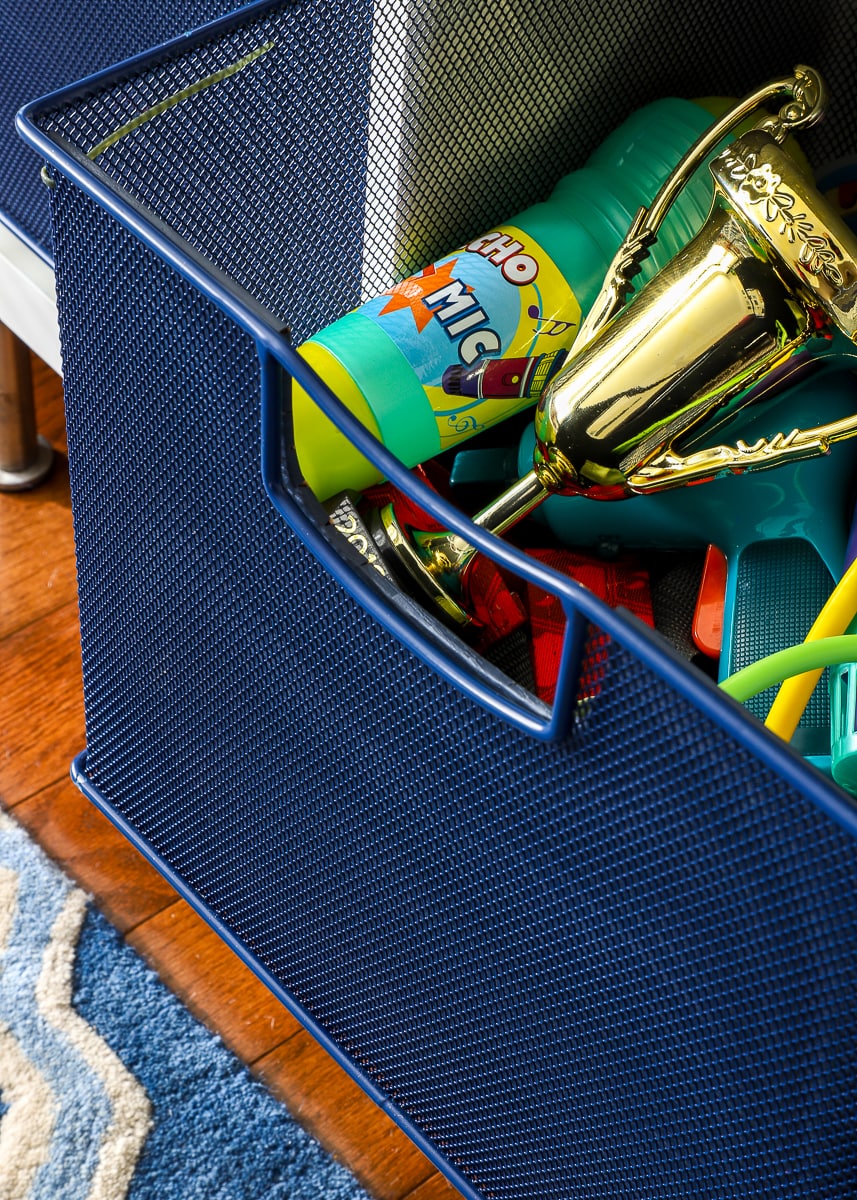
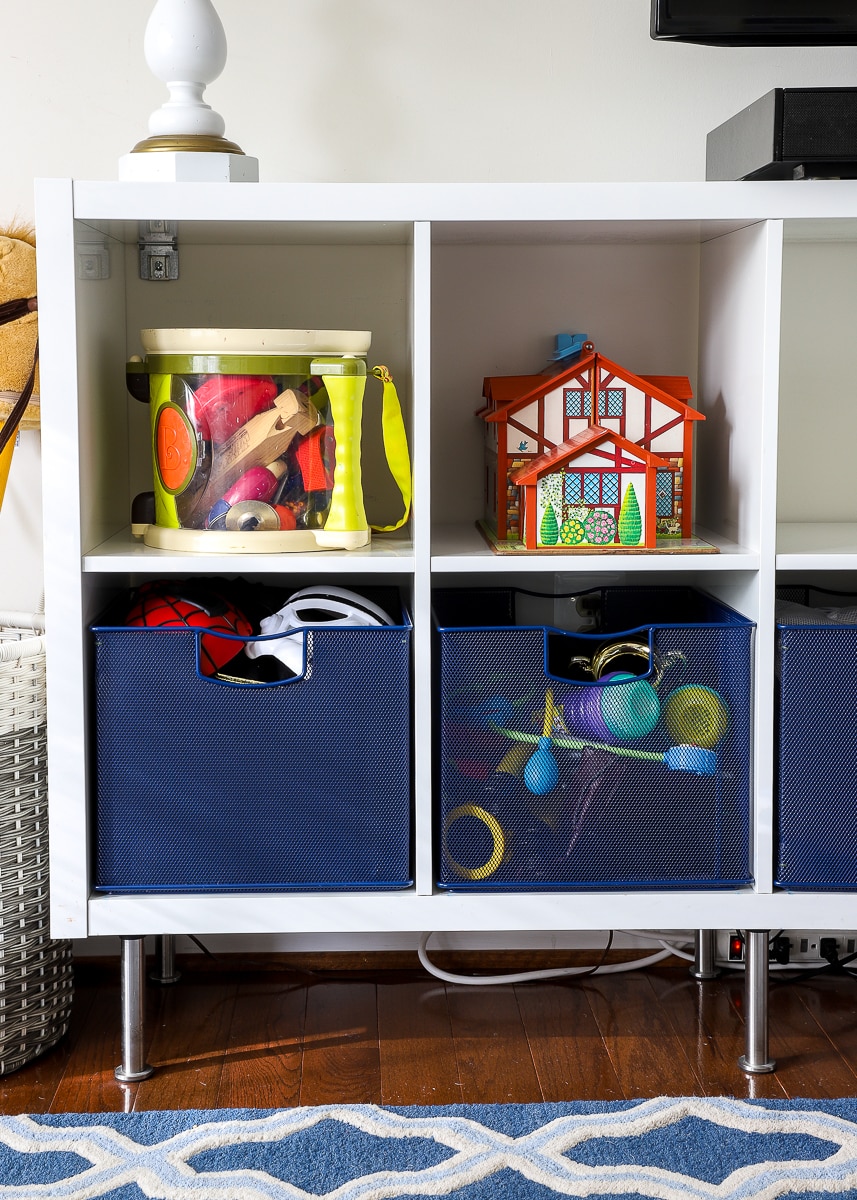
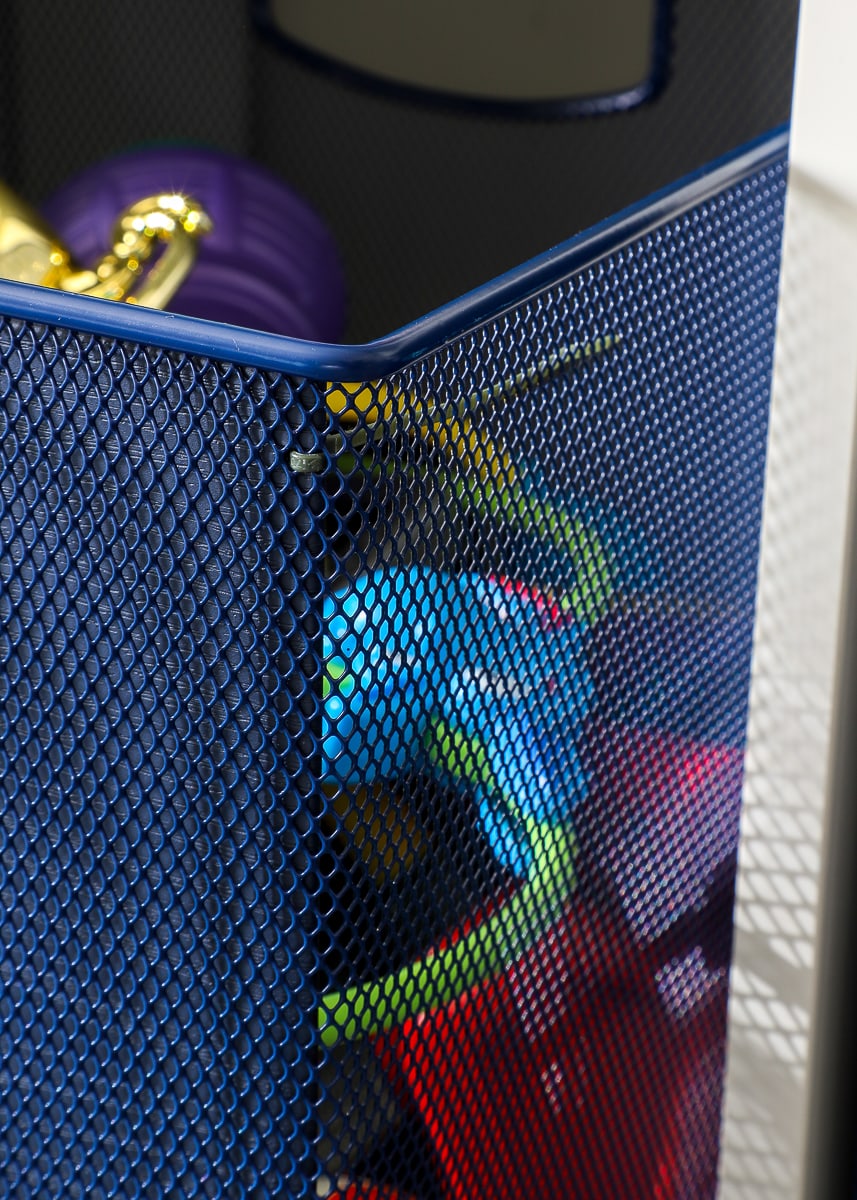
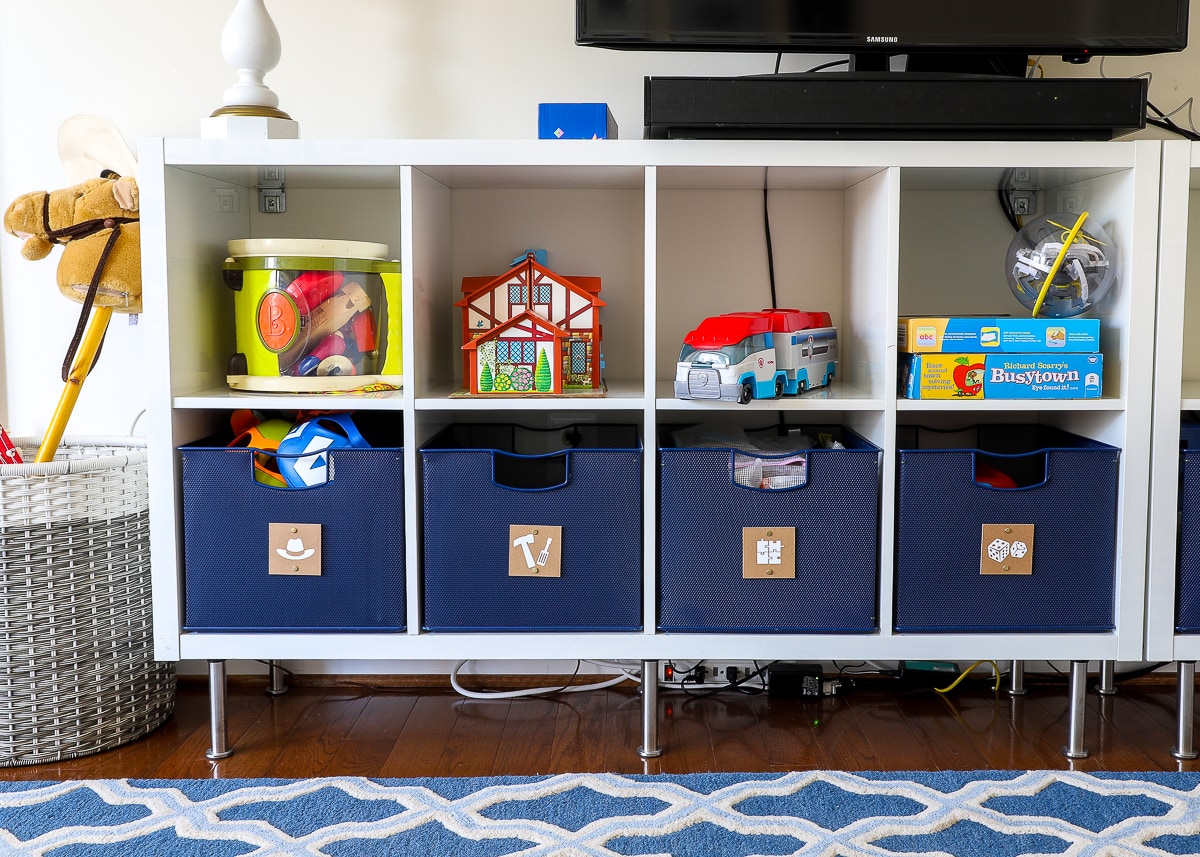
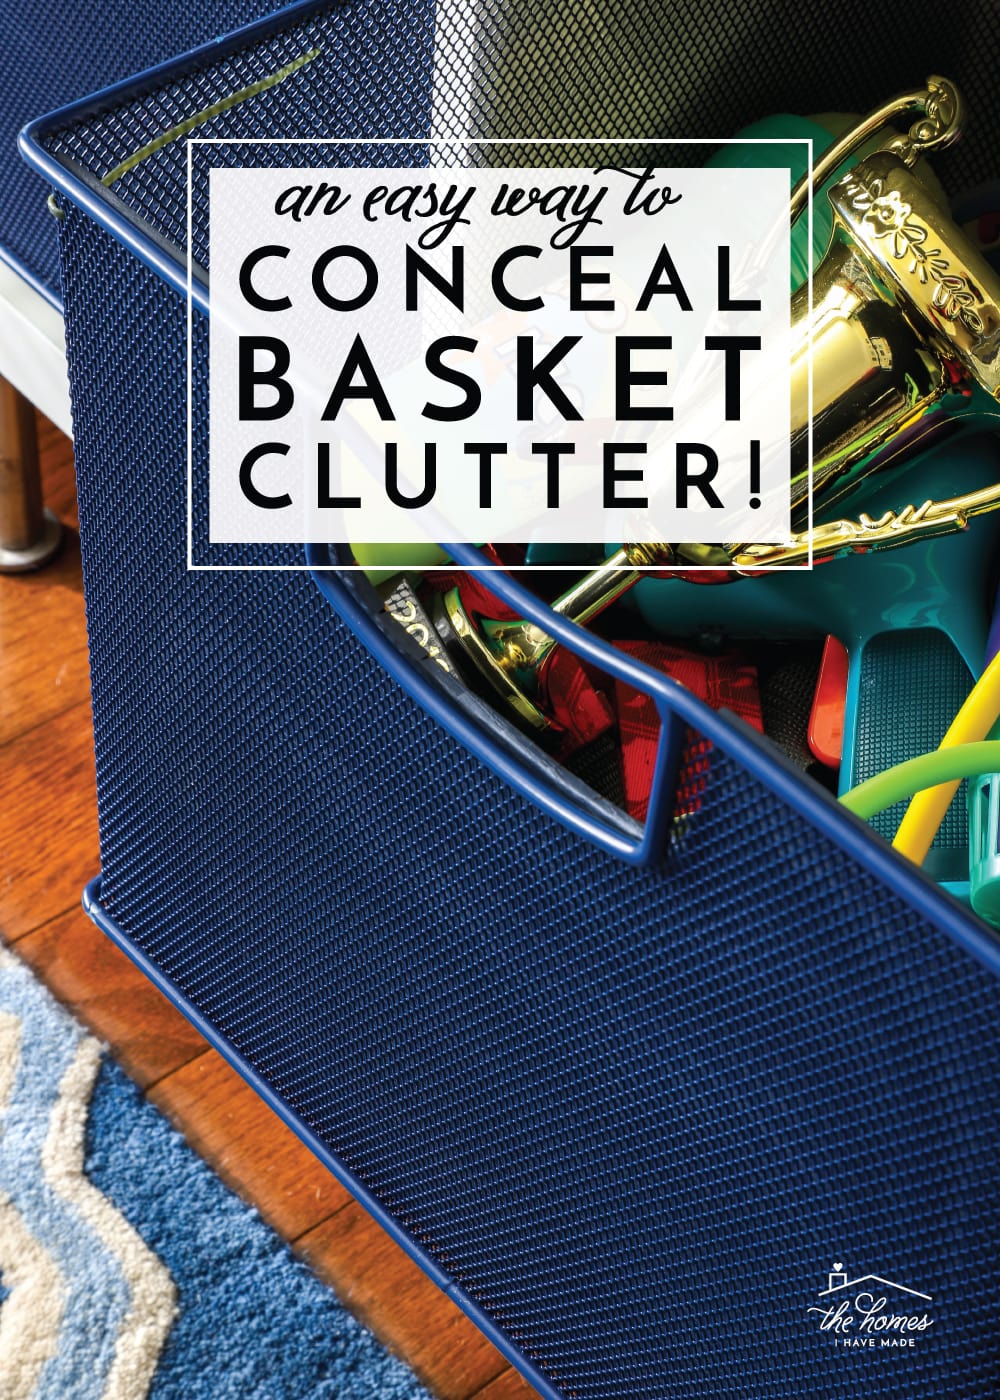
Has this ever happened to you? You find awesome baskets that are the perfect color, perfect size, perfect texture, and perfect price, only to load them up, step on back and say…”yuck!” It happened to me…big time…with some new baskets I bought for our playroom:

Yikes, right?!?
First – a quick little back story. Devoted readers will notice instantly that I strayed from my tried-and-true Y-weave baskets here. Some of you may be wondering why (something I also asked myself mid-project!). But I had my reasons: 1) I LOVE those Y-weave baskets, but I’ve found that even the X-large size isn’t quite sufficient for large bulky toys; 2) I already had a full shelf of Y-weave baskets on the other end of the playroom and wanted something different to give this side of the room some more color; 3) I was just plain smitten with the sturdiness, size and color of these metal baskets and 4) when I bought them, the price was too good to be true. So I went for them, not anticipating the the metal mesh wouldn’t conceal the basket contents at all.
(Does anyone else completely cringe at that photo?! Anyone?!)
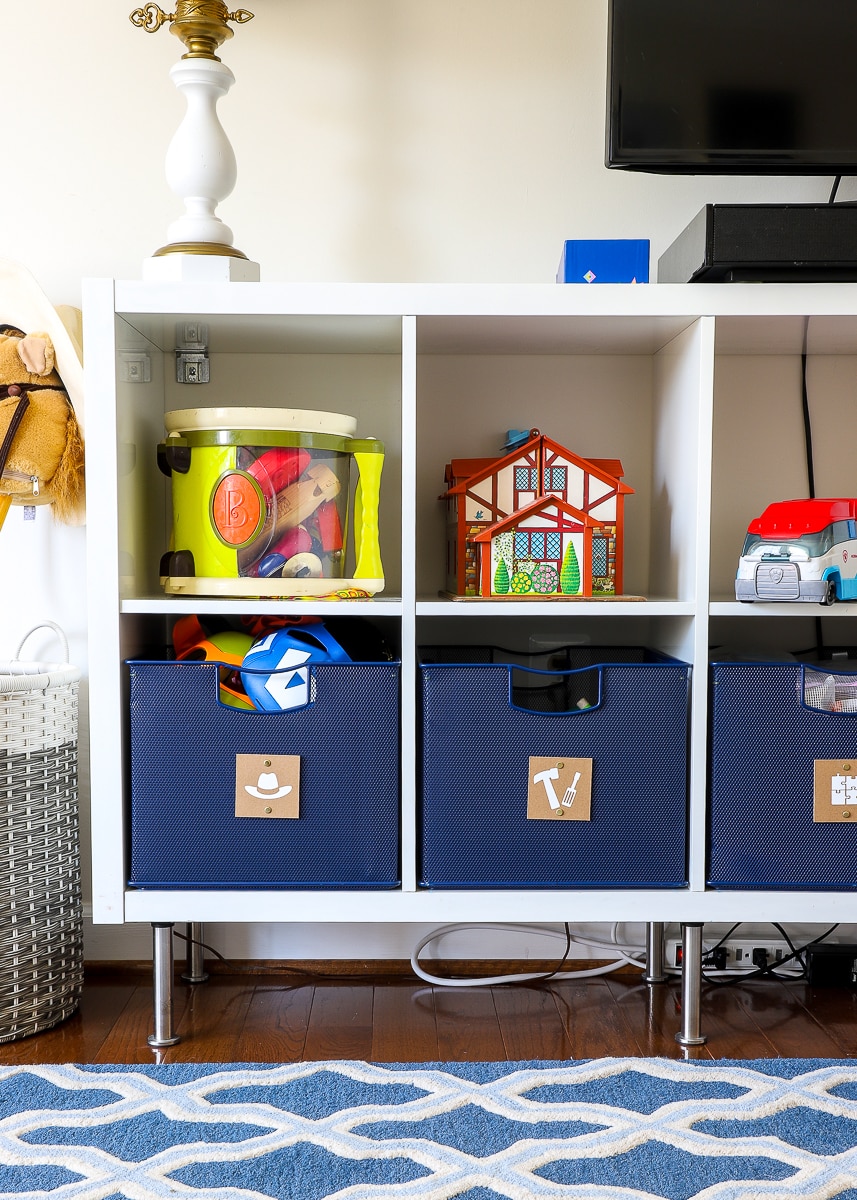
It took me about 0.2 seconds to determine that if the baskets were staying, I had to figure out a way to give them solid fronts so I didn’t see all the toys contained within. So that’s what I did! I created faux fronts for each basket out of old cardboard boxes and slid them into each basket…
Ahhh….so much better, don’t you think?
Who knew a simple sheet of cardboard could be so effective?!? Below is a side-by-side of the before-and-after:
Admittedly, this project was a little tedious. But it was practically free (thank you Amazon boxes!) and really transformed the look and feel of our entire playroom! If you too have found yourself with baskets you love but visible mess you can’t stand, here is an easy way to conceal the clutter!
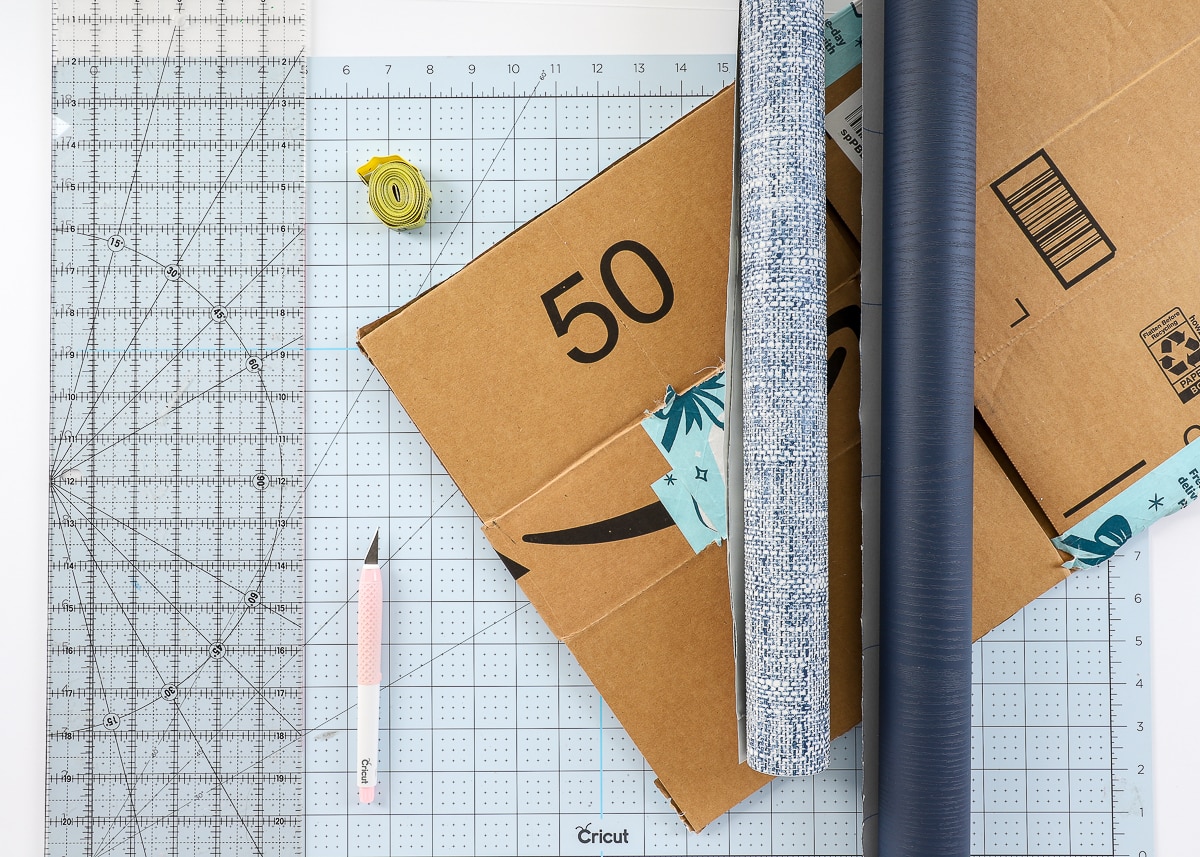
Materials Needed
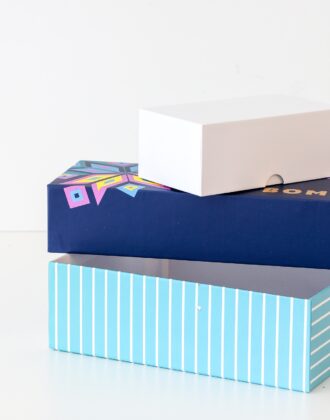
- Cardboard – This is the PERFECT way to use up all those Amazon boxes. Just make sure you have solid (non-creased) cardboard as large as your basket front. If you don’t have any boxes on hand, you can buy sheets of cardboard here or check the Dollar Store for inexpensive science fair boards.
- Cutting mat, ruler, and tape measure
- X-acto knife – You guys know I am firmly on Team Cricut, but even if I wasn’t, I’d tell you this: this is THE best X-acto knife I have ever used. I reach for it day in and day out and its precision makes a project like this easy peasy! (Not sponsored, just a huge fan of this little tool!)
- Decorative paper covering such as contact paper, shelf liner, peel-and-stick wallpaper, etc – I used this one and this one – This is completely optional but also completely worth it to make your baskets look nice and polished. You can also paint your cardboard to keep it super budget-friendly!

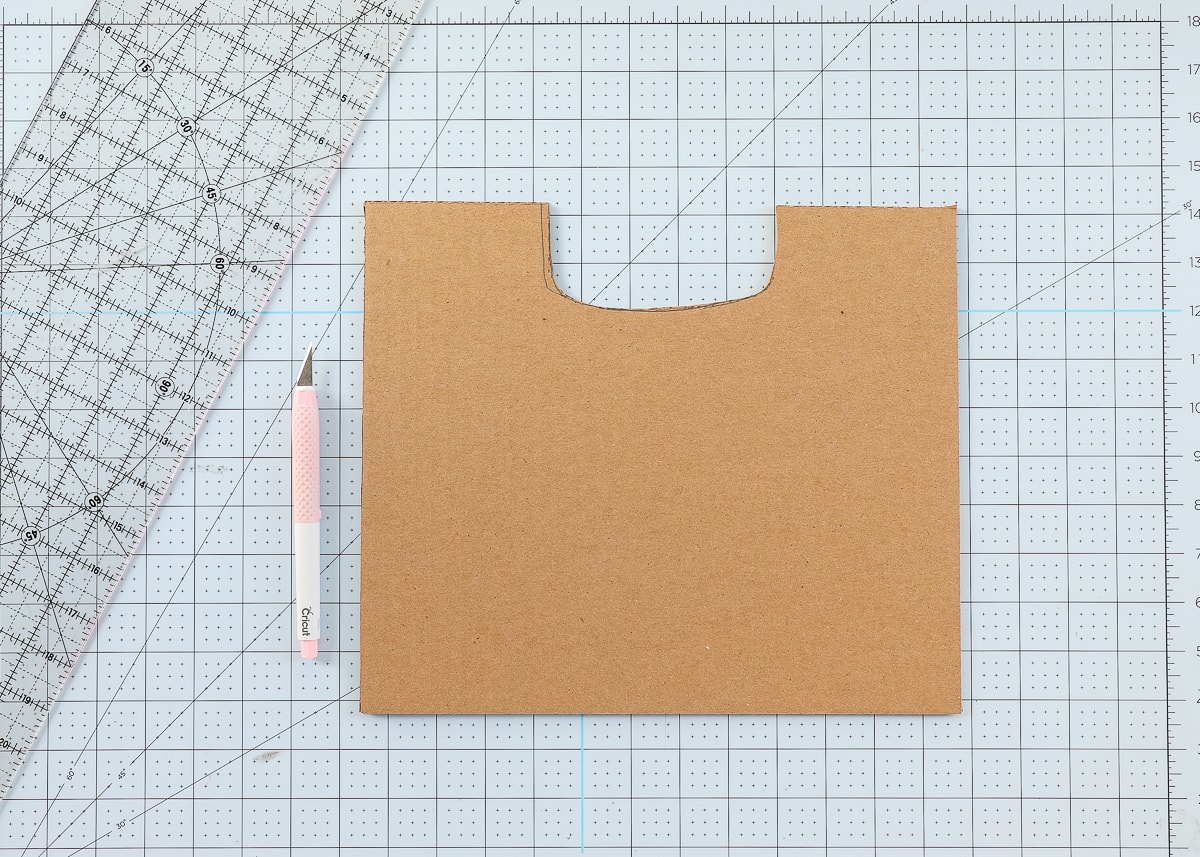
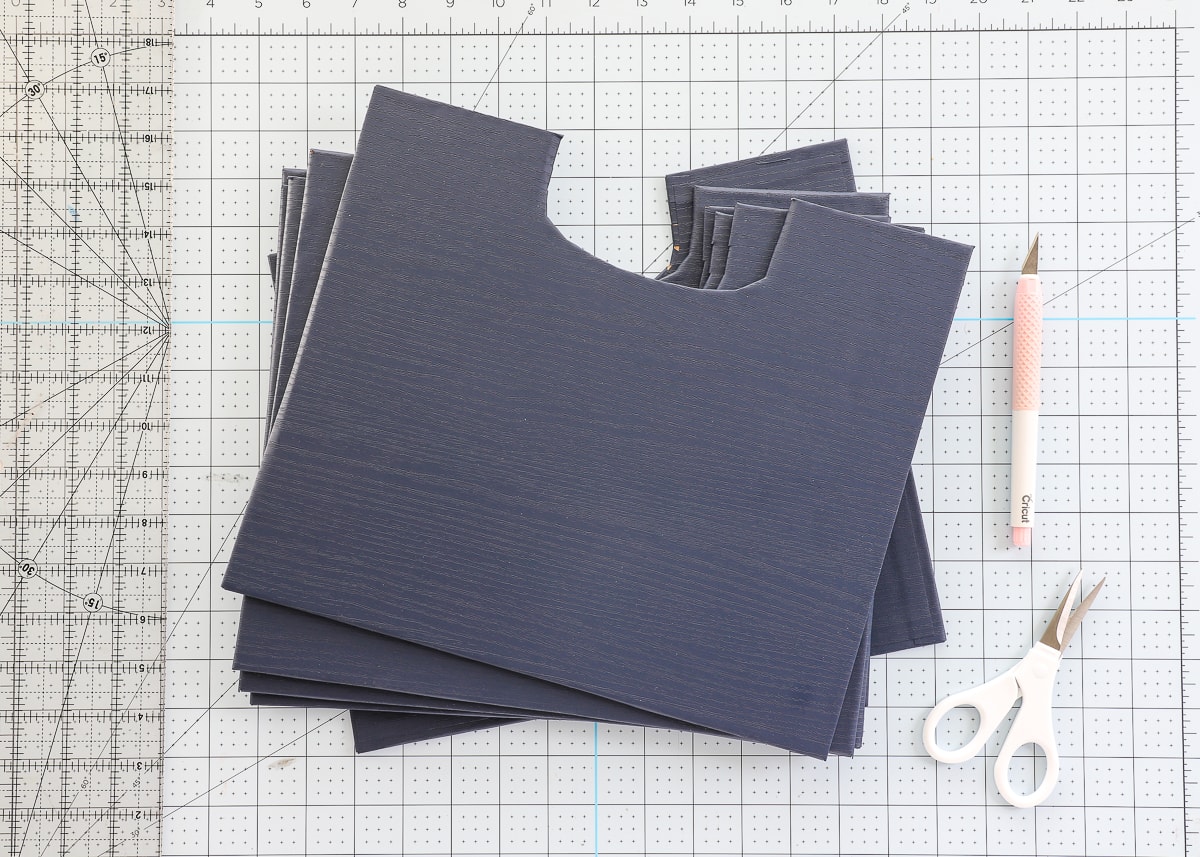
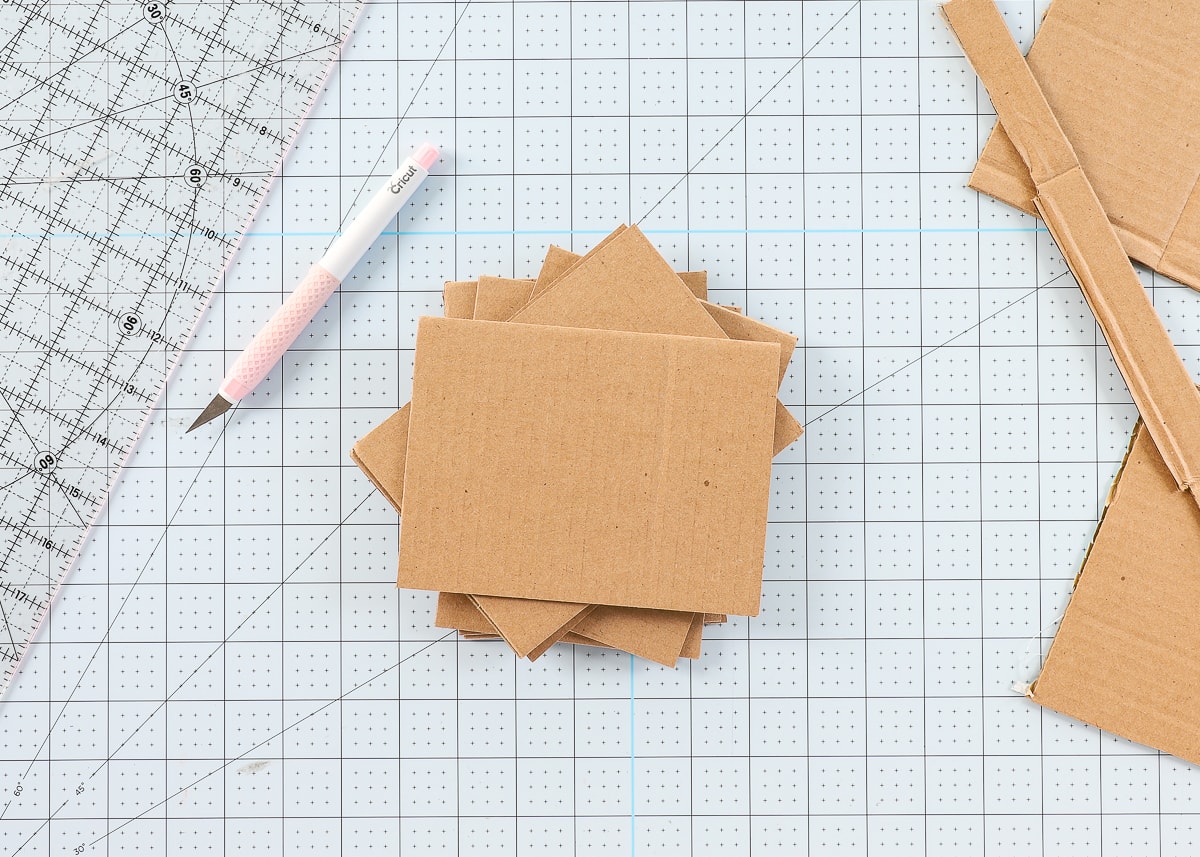
Cut the Cardboard Fronts
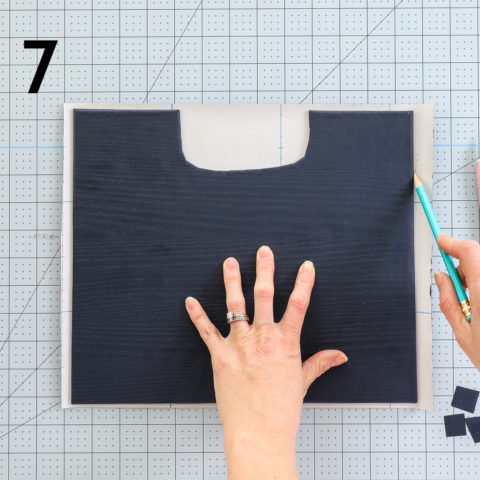
The first step is to cut the cardboard down to fit your basket fronts. Start by measuring the interior dimensions of your basket front and cut out a cardboard rectangle in those dimensions. If your basket has a handle, slide the cardboard rectangle into the basket and trace the handle shape through the opening; then cut out the handle along those lines.
TIP! Place the cardboard front into your basket and trim it down until it fits juuuust right. Then use your first cut as a template to create additional fronts.
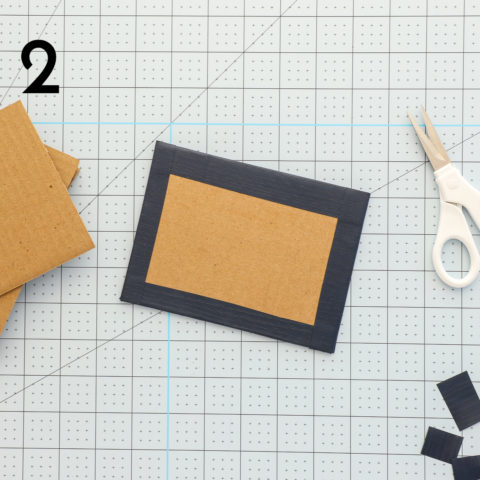
Wrap the Cardboard Fronts
Depending on the color of your baskets, you might be able to just slide the plain cardboard into the fronts and call it a day. Since my baskets are dark, the light cardboard wasn’t quite cutting it. Covering each cardboard front with navy contact paper was a quick and easy solution (and also helps their durability!).
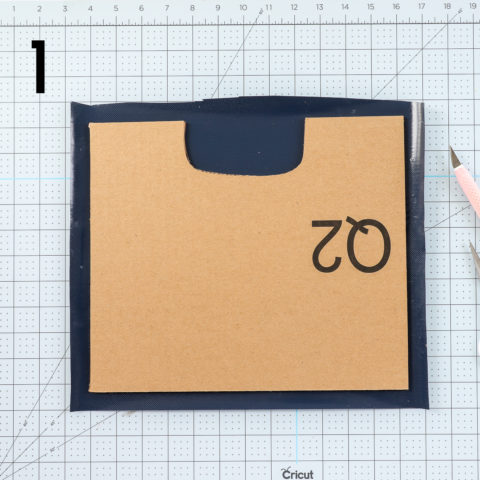
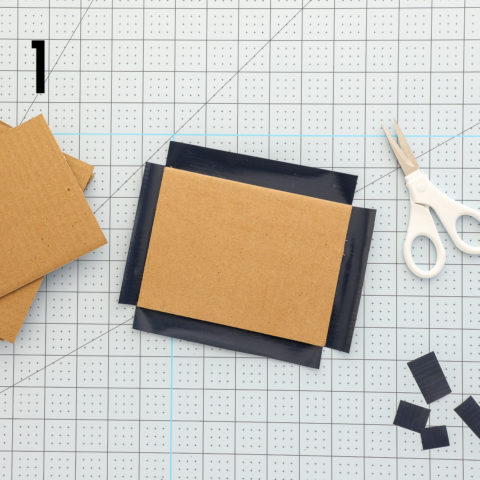
Here is the easiest way to cover the cardboard:
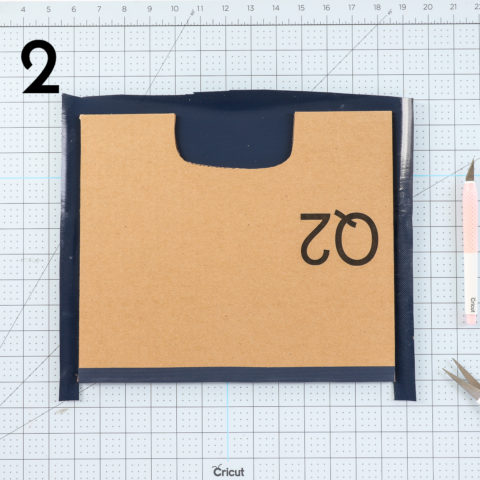
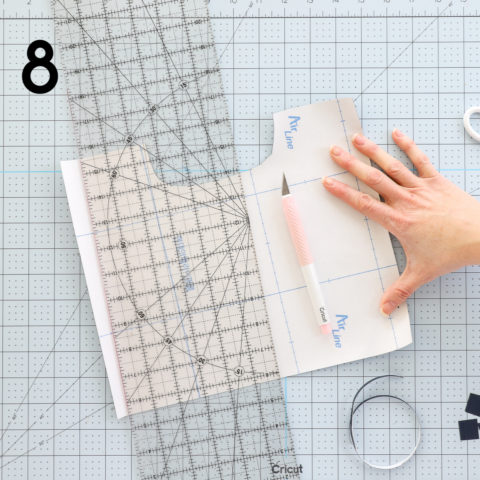
1. Cut out a rectangle of contact paper that is ~1-2″ bigger than your cardboard front. Remove the paper back and place the cardboard onto the sticky side, careful not to create any wrinkles.
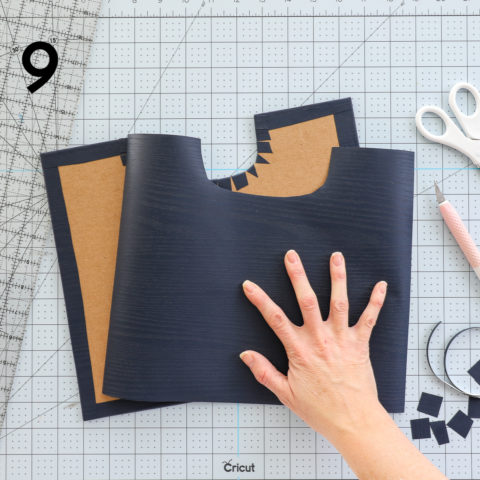
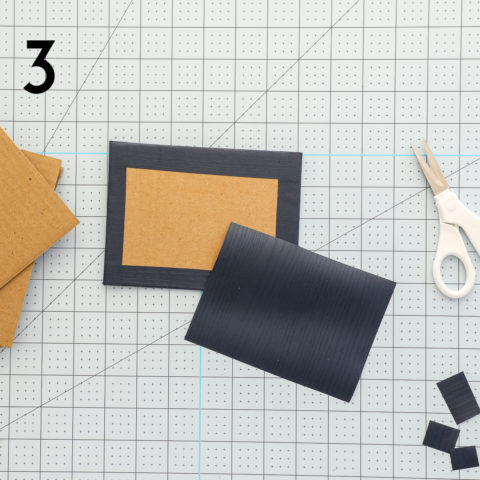
2. Make a vertical slit at each bottom corner and fold the bottom edge of paper up onto the cardboard.
3. Horizontally trim the bottom and top corners (removing the corner cuts as needed) and fold the sides onto the cardboard.
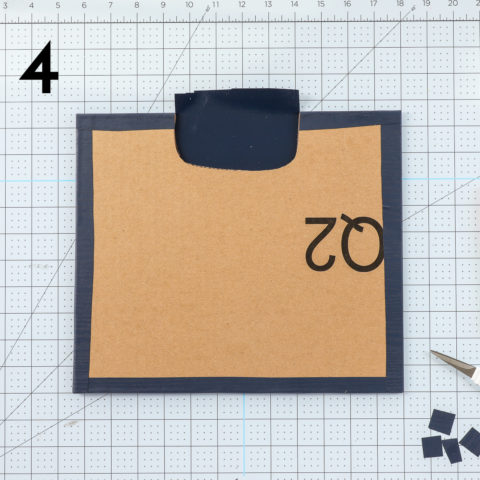
4. Make vertical slits at the top corners (removing corner cuts as needed) and fold the top down onto the cardboard.

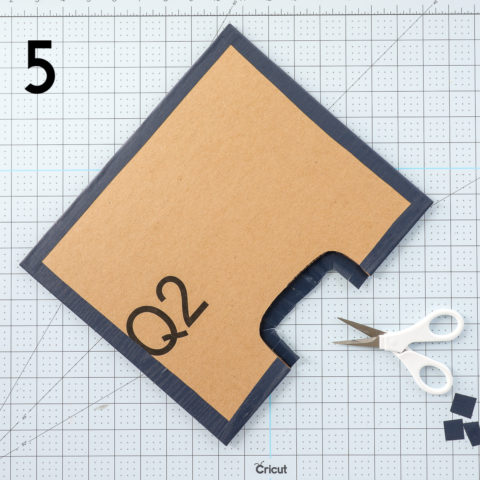
5. If your cardboard has a handle, trim away the paper so there is a ~3/4″ margin around the handle shape. Then make tiny slits into the paper margin around the perimeter of the handle.
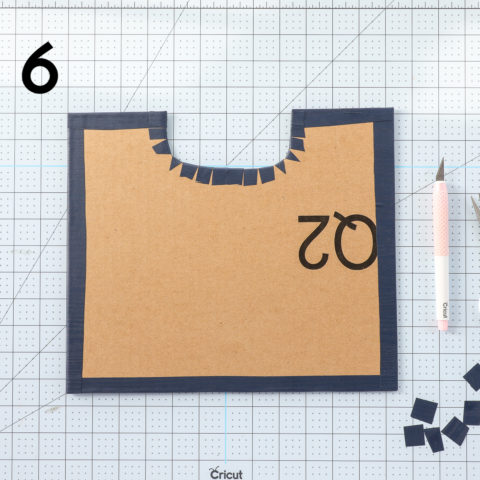
6. Fold each tab of paper over the cardboard, working around the handle.
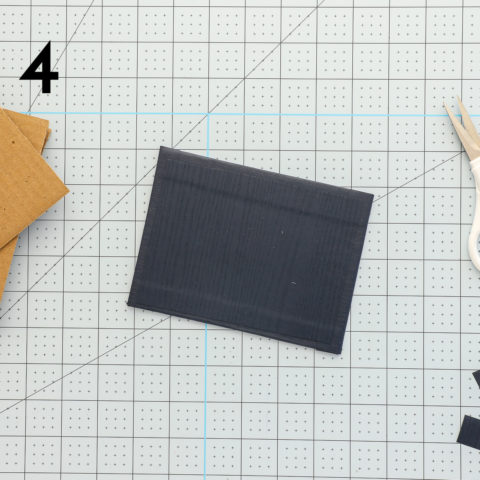
If you desire, you can carry the paper covering onto the other side of the cardboard. I recommend this for baskets that will get a lot of use and/or you will see the insides of the basket regularly. To cover the other side of the cardboard front:
7. Use your half-covered cardboard front as a template to trace the basket shape onto another piece of paper covering.
8. Cut out the traced shape, decreasing the size by ~1/4″ all the way around.
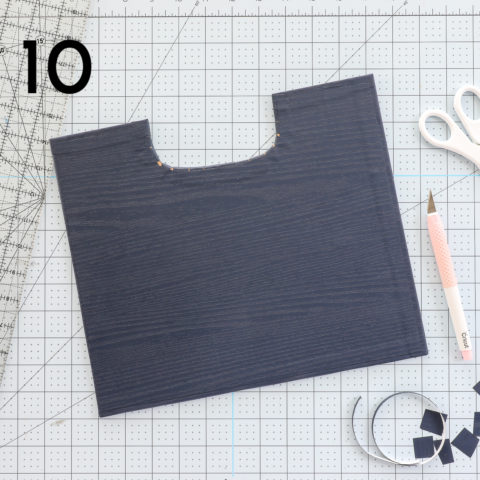
9. Peel off the paper backing…
10. …and secure over the folded edges on the exposed cardboard side.
Want to save this post?
Repeat the process for as many baskets as you have. Like I said earlier, this isn’t hard, but it is a bit tedious. So pop on a good movie and get cutting away!
NOTE: That woodgrain texture on that navy contact paper is SOOO good. You better bet I’m looking for other places to use it in our home!
Insert the Cardboard Fronts Into Your Baskets
The final step is to put your cardboard fronts into the baskets. Depending on the size/shape of your basket and who will use it, you might be able to just slide the front in and be done. However, these are playroom baskets that will be opened and rummaged through daily by little hands. I knew the cardboard fronts wouldn’t stay in place on their own, so I secured them with tiny zip ties.
TIP! Wondering why I didn’t snip the ends of the zip ties? Once snipped, the tie actually becomes pretty sharp. But by leaving them long, they just rest along the side of the basket and we hardly notice them!
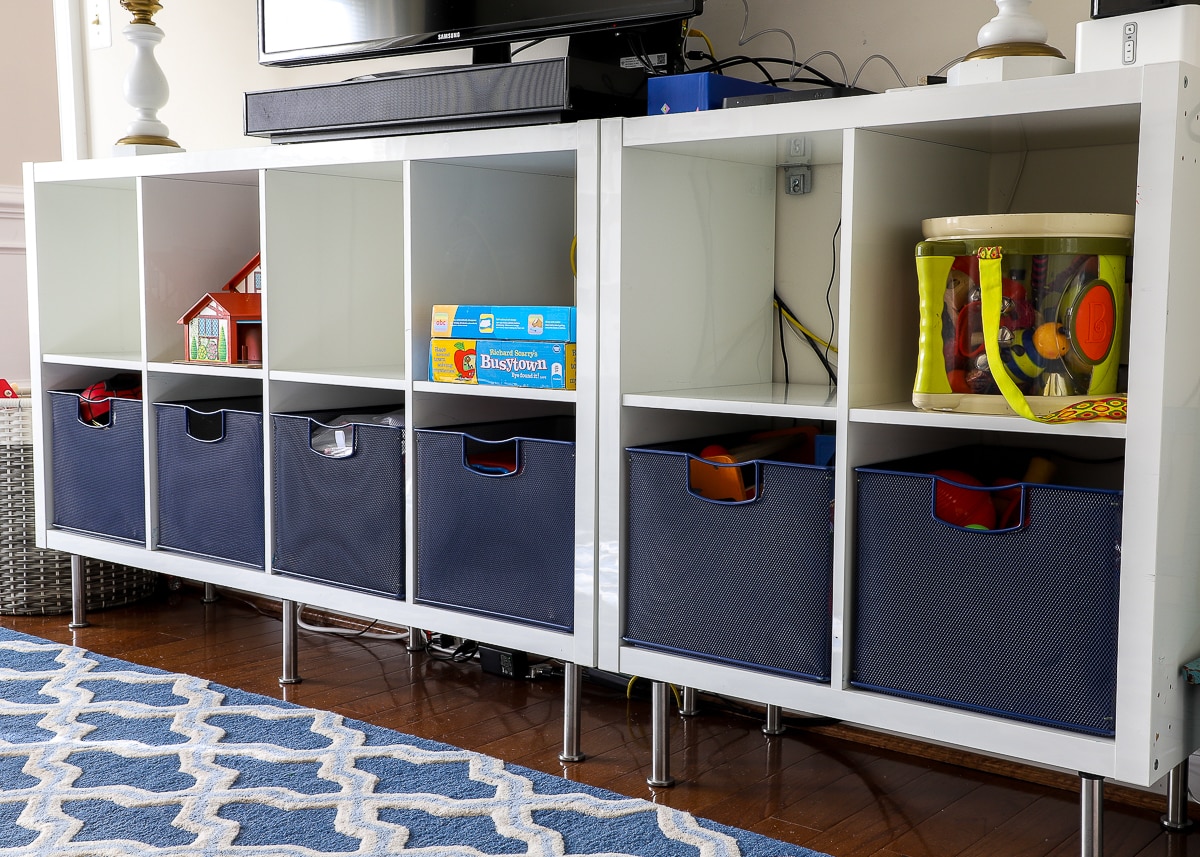
Because before and afters are so fun, let’s take one more look, shall we? Below are our baskets without the cardboard fronts…
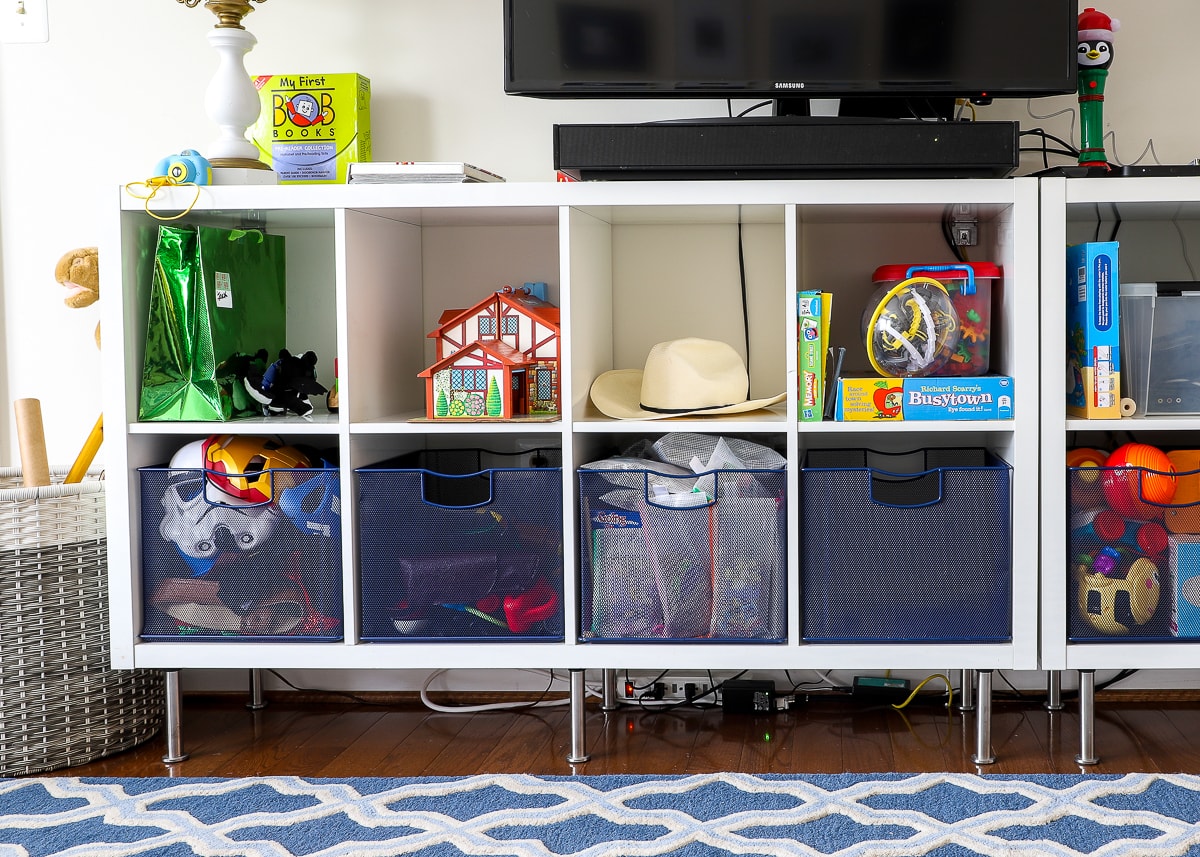
Here is how the baskets look with the cardboard fronts…no clutter visible!
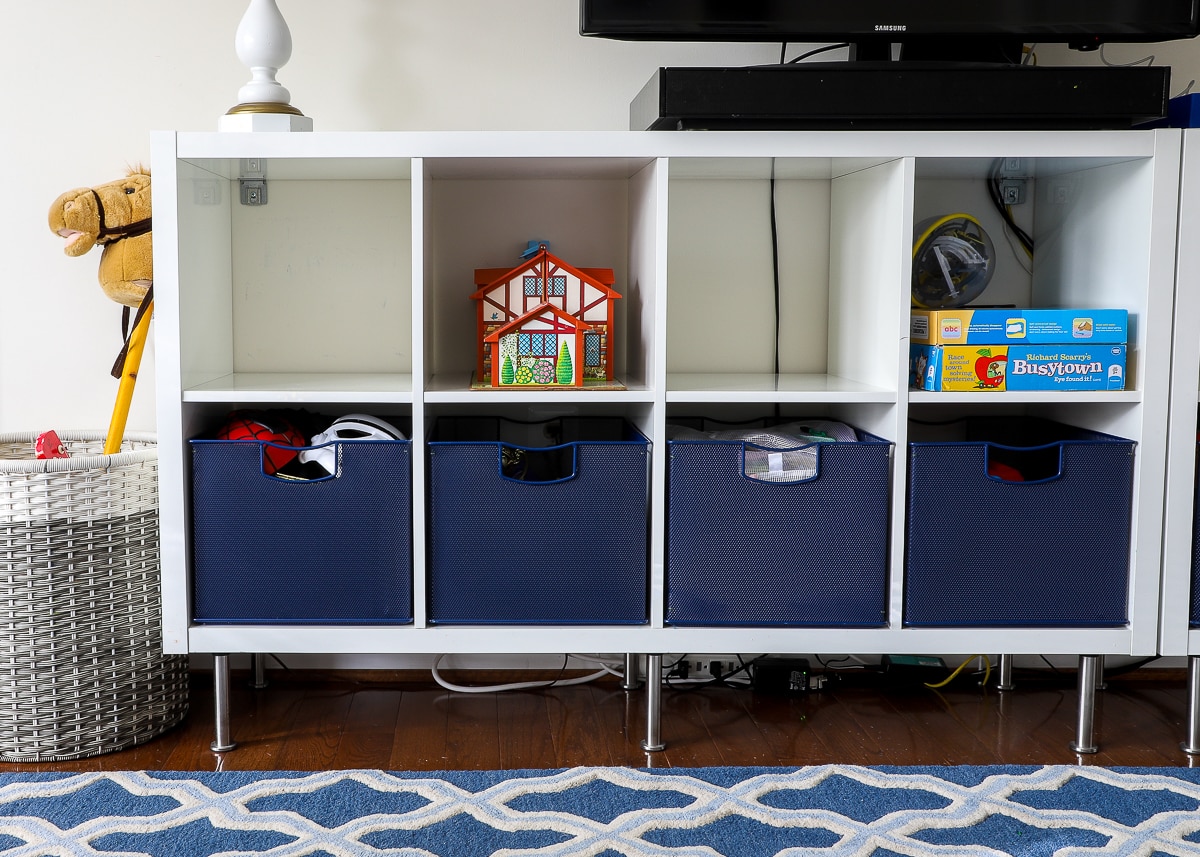
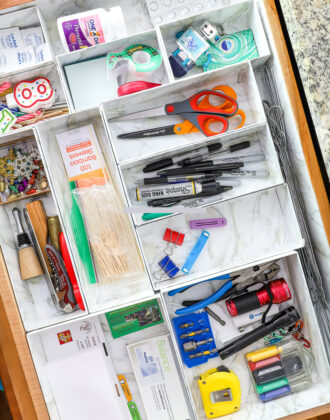
And of course I went one step further by adding picture labels! Ahhh…my clutter-averse eyes feel so much better!
(Wondering how I made those labels? You can see how here!)
Apply To Any Box, Bin, Basket or Container!
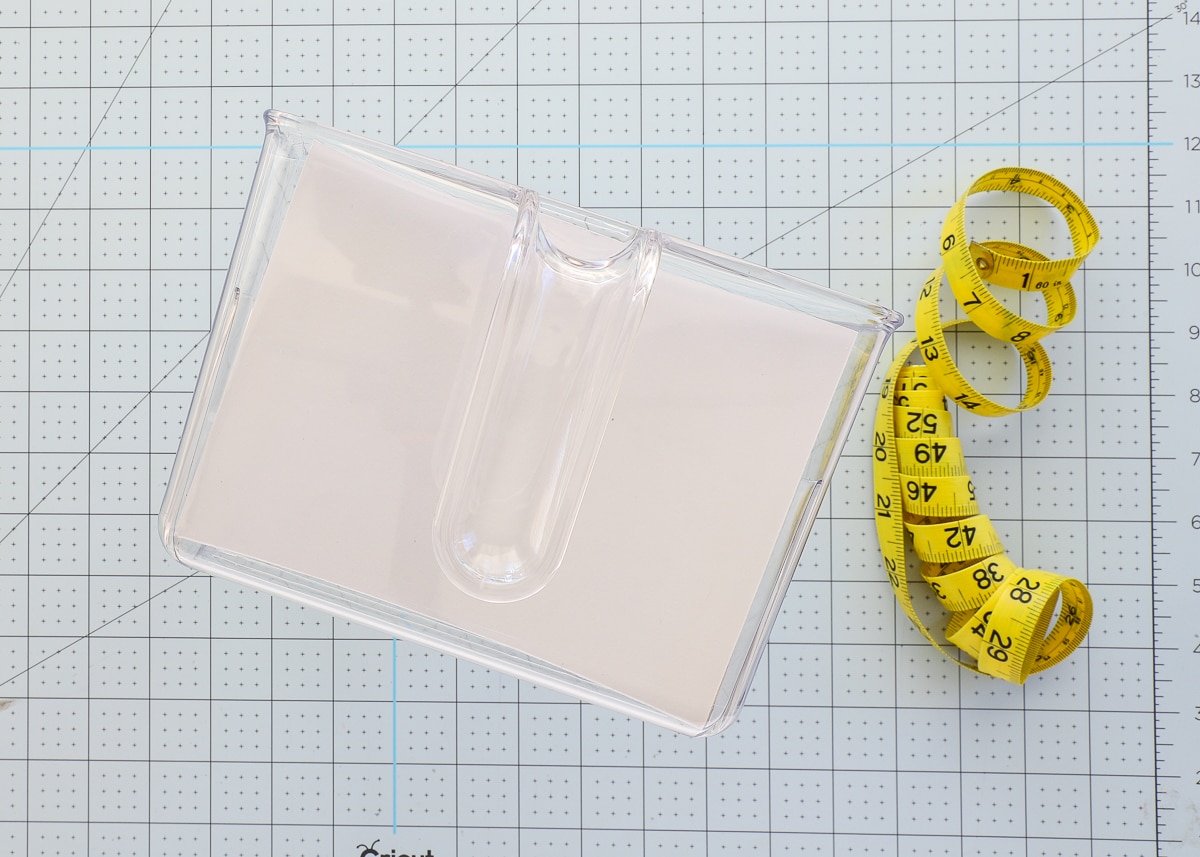
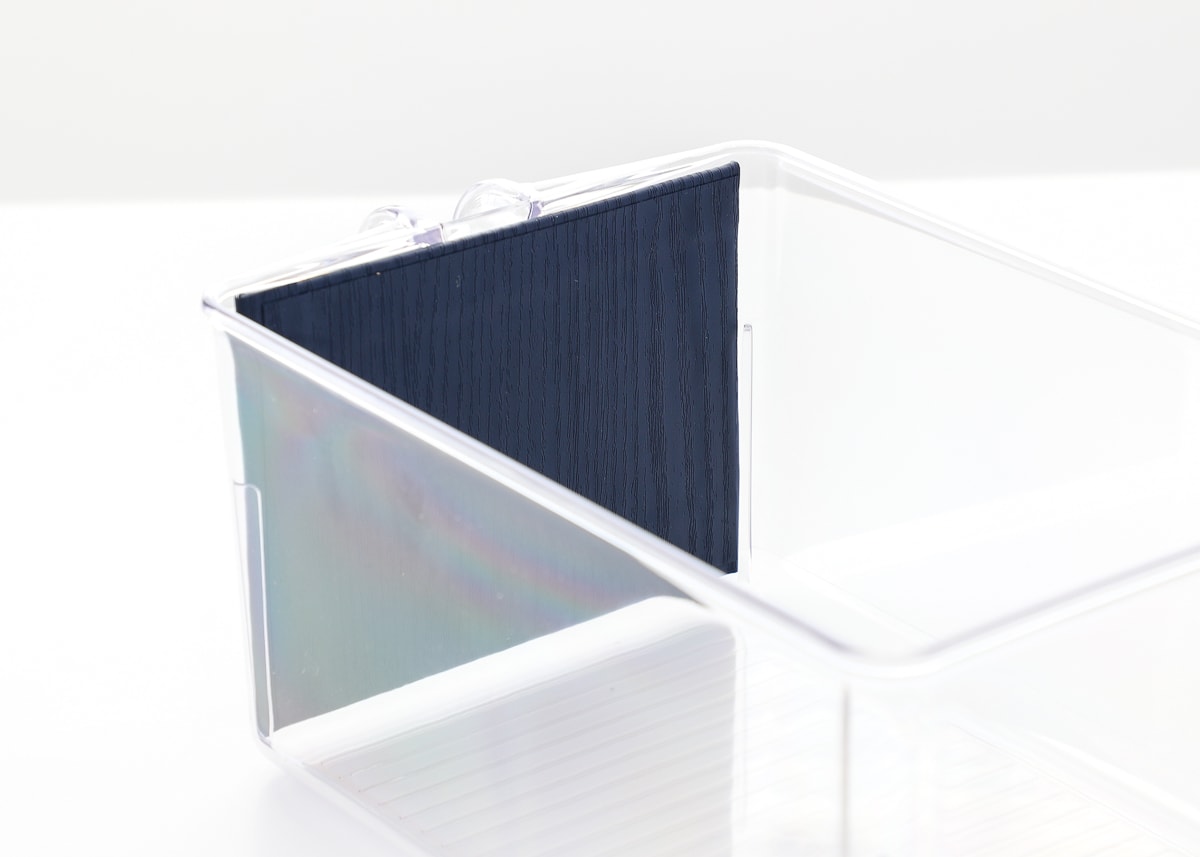
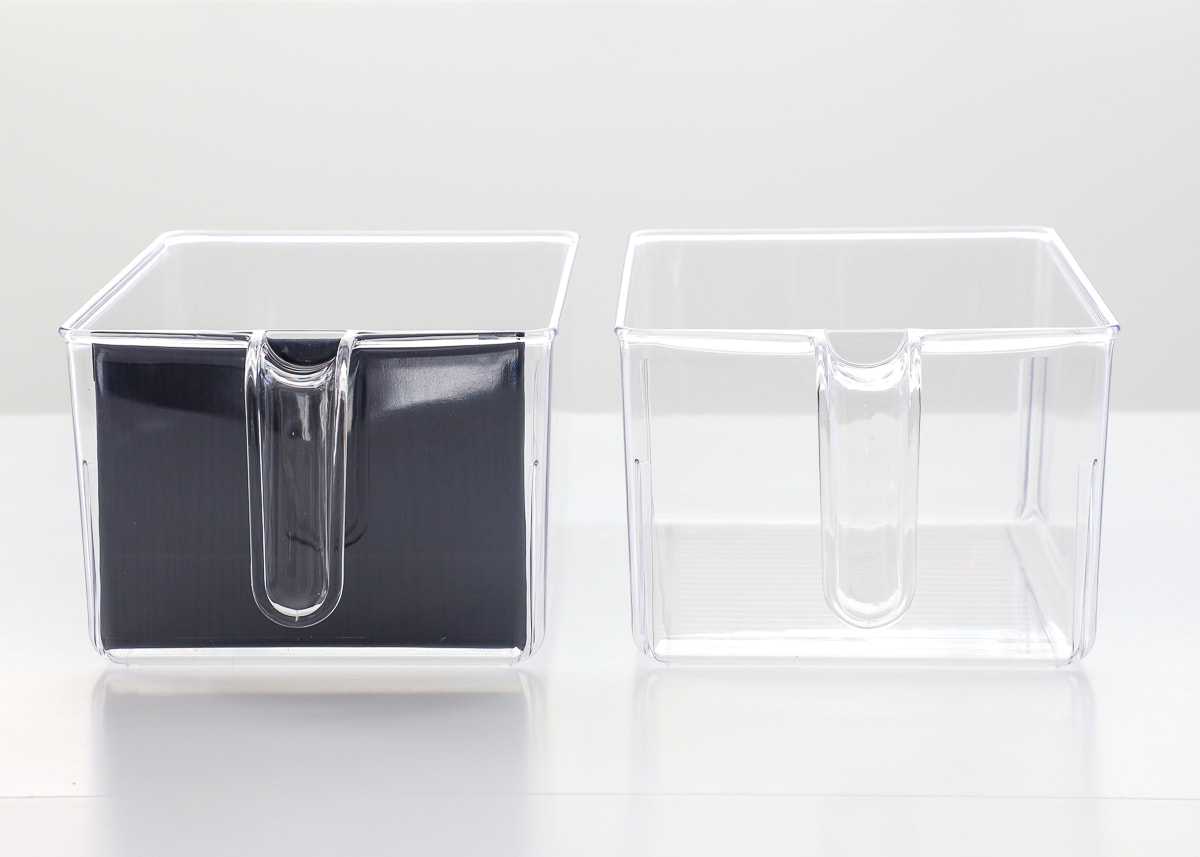
Although I can’t say for sure that this concept will work on every basket out there, I have been able to apply the same concept to other bins around our home. I’m actually in the middle of a pantry organization project (coming soon). Although I LOVE the containers I found for our shelves (they are currently out of stock but this is the listing), I figured some faux fronts would help streamline the whole display!

I essentially went about these containers the same way as the baskets. Measure:
Cut:
Wrap:
Insert: (These containers even had little plastic ridges that held the fronts in perfectly!)
So much better! I can’t wait to get these labeled up and into the pantry!
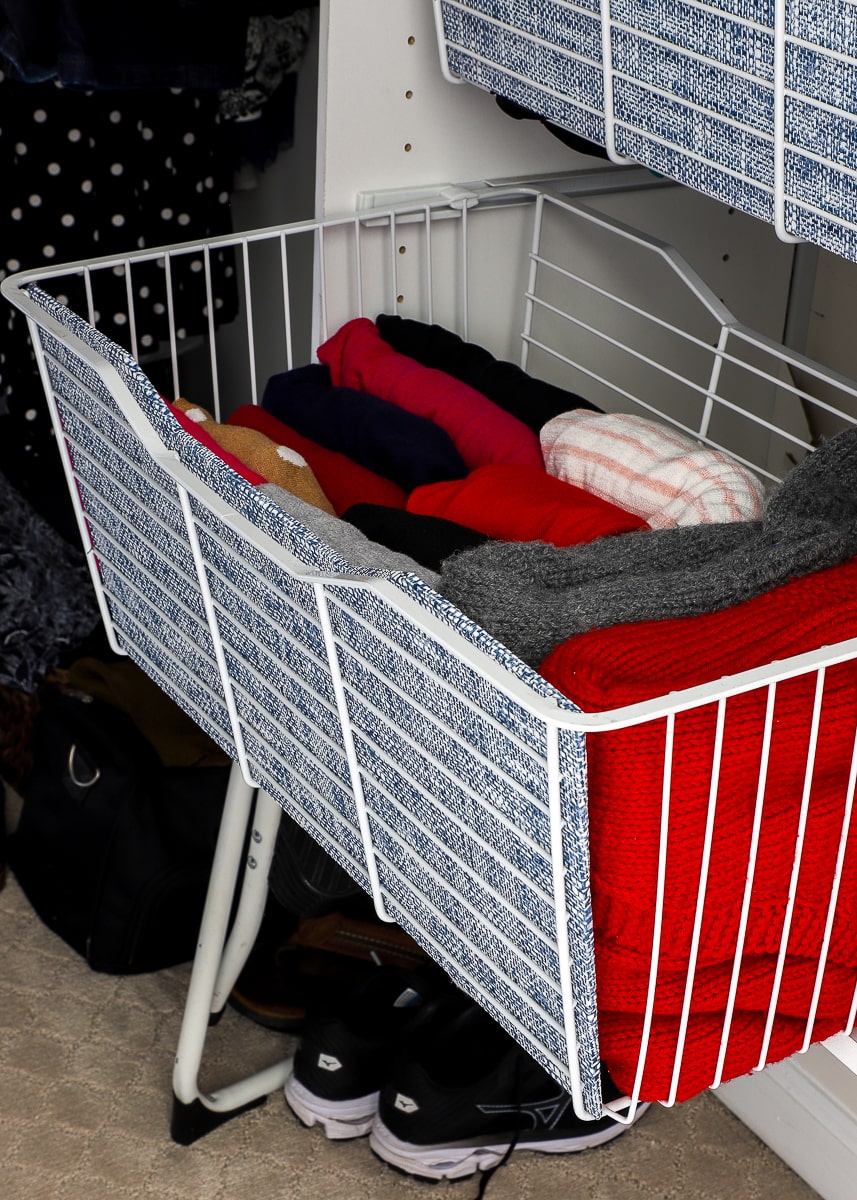
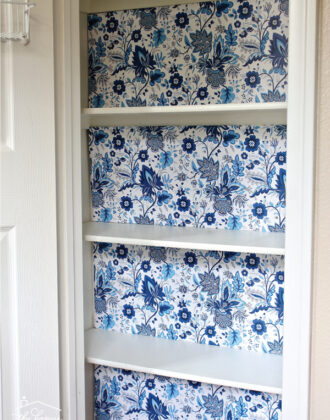
Finally, I added faux fronts to the wire drawers in our master closet.
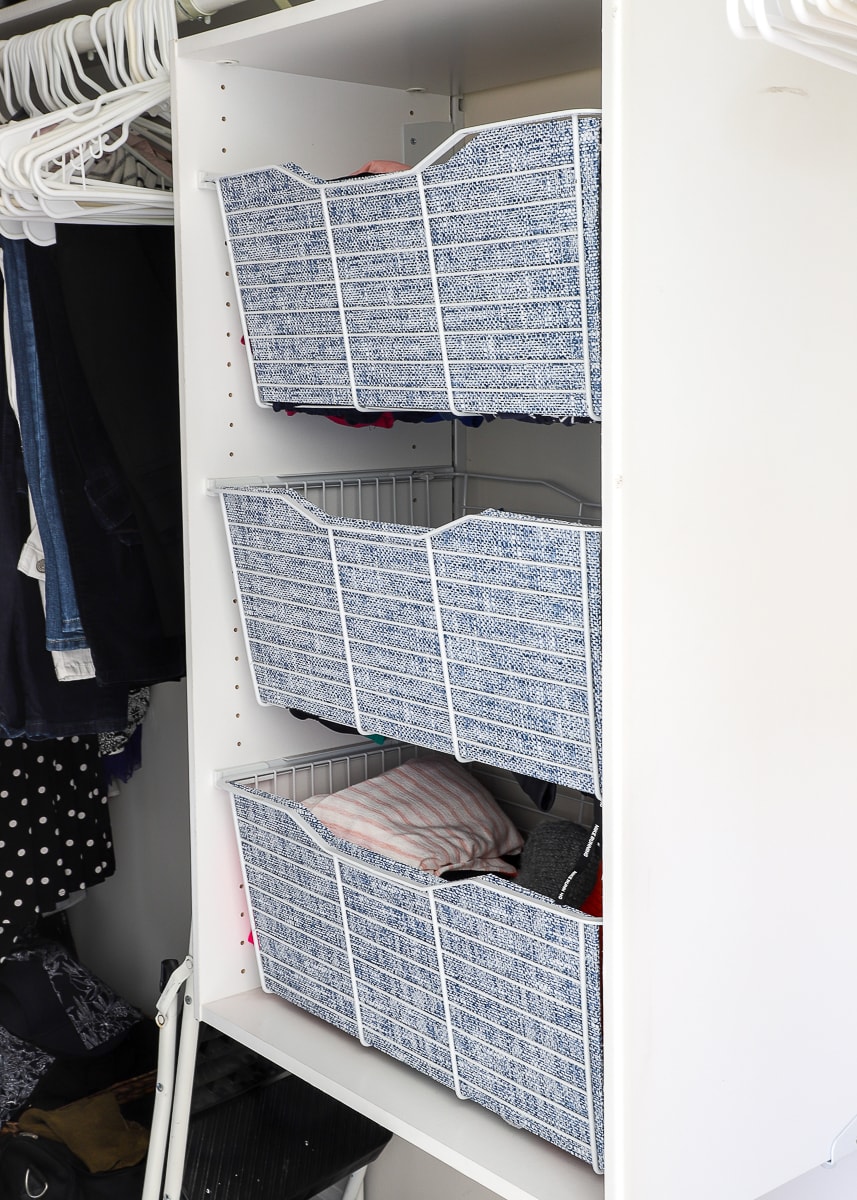
These are foam core sheets, cut down to shape and then wrapped in peel-and-stick wallpaper (this is some of my favorite wallpaper I’ve ever used and I’ll tell you all about it another post here soon!).

Since I’m an adult and don’t interact with these drawers a ton, there was no need to secure them. They just sit along the front of the drawers concealing all the clothes contained within!
You all know that using baskets is one of my main organizing solutions for every area in our home. And I usually advocate using containers with solid fronts for the exact reason that they hide all the contents contained within and look so much cleaner. Although I broke my own rule in the name of style and price this time, I am thrilled (and relieved!) that there is such an easy and inexpensive fix. If you’ve got some baskets that are working great for you but don’t hide the clutter as well as you’d like, give this solution a try! I promise you’ll love the results!
Have a great weekend, friends! I’ll see you back here next week with a Valentine project I am SO excited about, as well as a neat trick for making custom art for your home! See you then!
Megan
7 Comments on “An Easy Way to Conceal Basket Clutter”
Me! Pick me! I can’t stand the visual clutter either! I never understood the advice to just “let go” of the house when babies come along. I feel like that’s when you need it most streamlined, when you’re sitting and staring at it all day feeding, or racing around it looking for goggles/socks/hats, or preventing toddlers from pulling out everything they see while tripping over Legos. I was never so picky about visual clutter until I had kids!
Great idea, Megan!
While “see-through” has its merits, sometimes the visual clutter can be overwhelming. Thanks for the tip! <3
Question about how to keep the metal mesh baskets from scratching the Ikea melamine when they are pulled out? I’ve got the same situation in my closet and thinking of using Felt Sliders … but hard to secure to basket! Better to adhere them to the melamine perhaps … I see a post in the future!
Sorry I’m late to the discussion, found this post through your newsletter!
Hey!
It’s so funny you asked this question today. I JUST saw this pretty clever hack on IG: https://www.instagram.com/p/CQcVvY4gN00/ Since Velcro is self-sticky, you can just run it along the bottom of the basket, and the soft side should slide right in and out. I think you could also do something similar with just strips of felt??
Another thought would be to line the insides of the shelves with something? I noticed our blue ones have rubbed too, but I think it will come off with a Magic Eraser??
Hope that sparks some ideas for you!Megan
Clever!
Megan
This is another great tip. I love your blog bc you are always thinking of such useful and creative ideas, in decor, crafting etc.
I love your ideas and I’m not trying to be critical for no reason – maybe just offering a suggestion. I cringed at the before picture, but not because of the baskets – because of the cord clutter. Collecting the cords into a cord wrap and then tacking them and the surge protector to the wall behind the console (so you can’t see them underneath) would make a bigger impact to me than what you did with the baskets.
Otherwise, I think it’s all great.