Easy Star Wars Valentines You Can Make with a Cricut!
This is a sponsored conversation written by me on behalf of Cricut. The opinions and text are all mine.
I am so excited Cricut asked me to come up with a Valentine project this year because I am usually SOOOO behind on getting Henry’s class Valentines done. In fact, we are often finishing them up the night before the class party, and I never get to share them here on the blog #reallife. So when I sat down to create some Cricut Valentines for this year, I not only wanted really fun and clever cards that Henry would be more than thrilled to give his friends, but I also wanted them to be super quick and easy to pull together…especially since I suspect most of you are scrambling last minute like me! These Star Wars Valentines just might be one of my favorite Cricut projects ever because 1) they couldn’t be easier, 2) they are so darn cute, and 3) the envelope designs are just too fun. Let me show you how these awesome little Valentines come together!

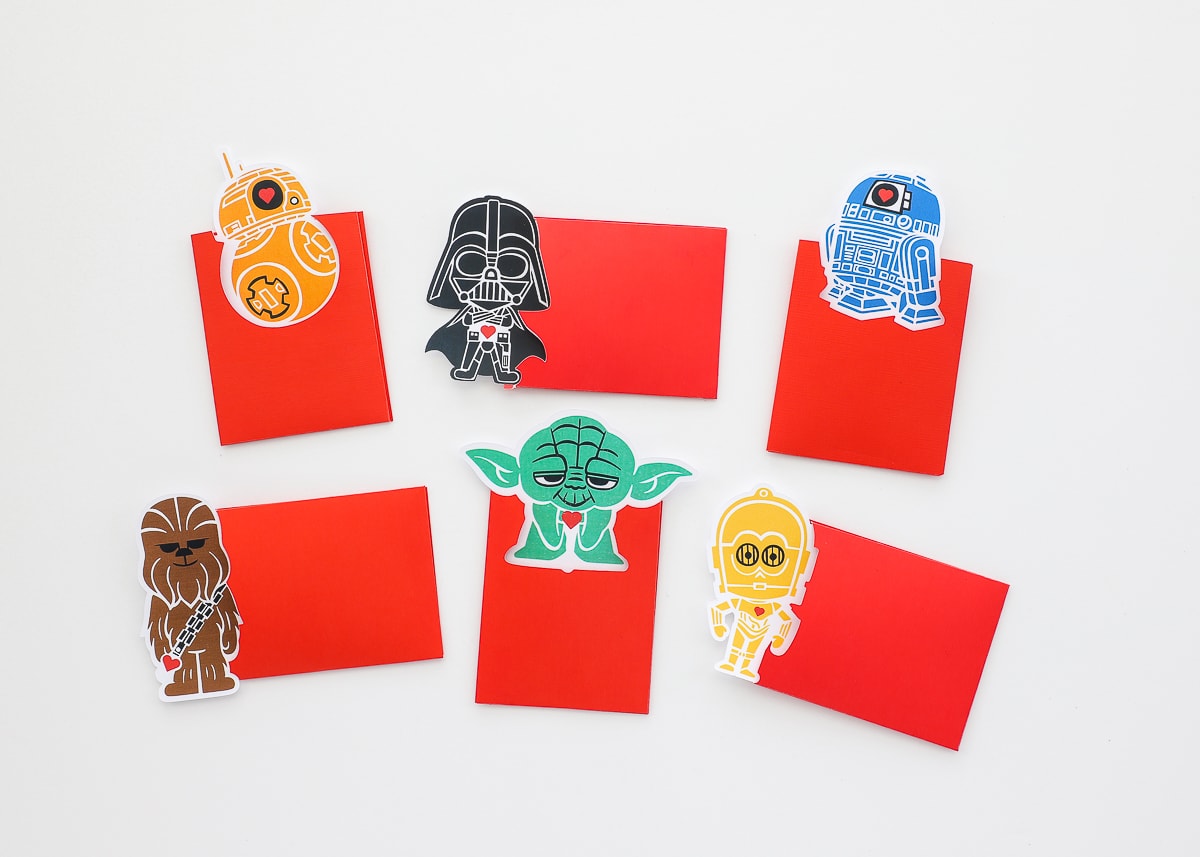
My original plan was to come up with a single Yoda-themed Valentine. And then as you guys well-know about me by now, I got carried away and I ended up with a full collection of Valentines that include all the Star Wars friends! In the end, I think C3PO is my favorite!
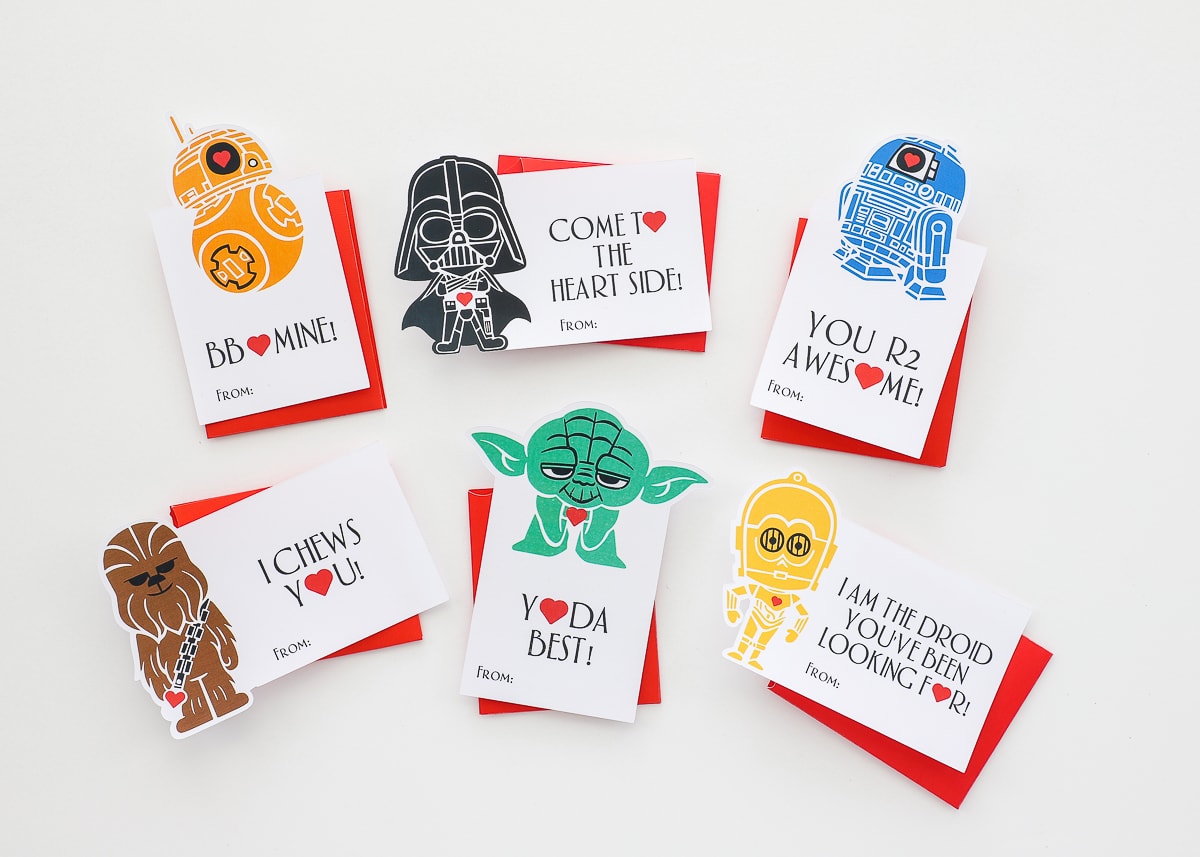
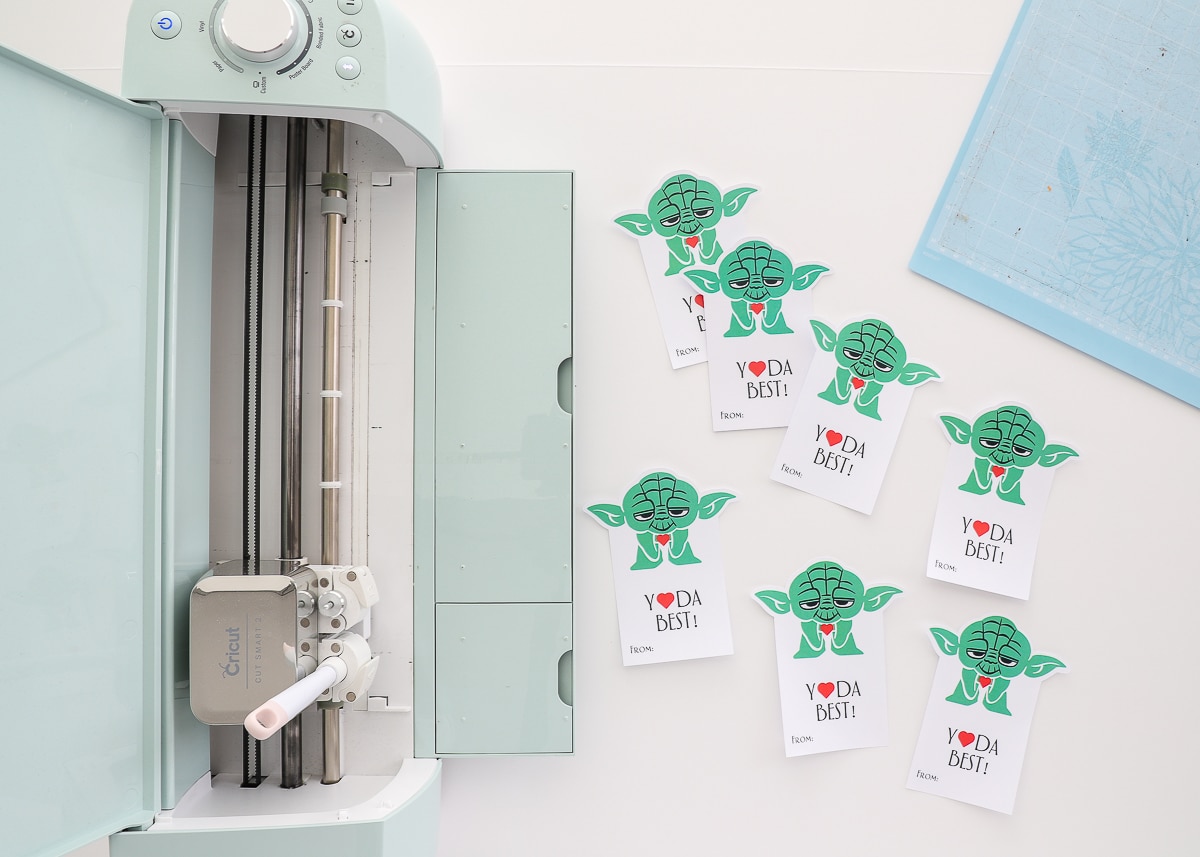
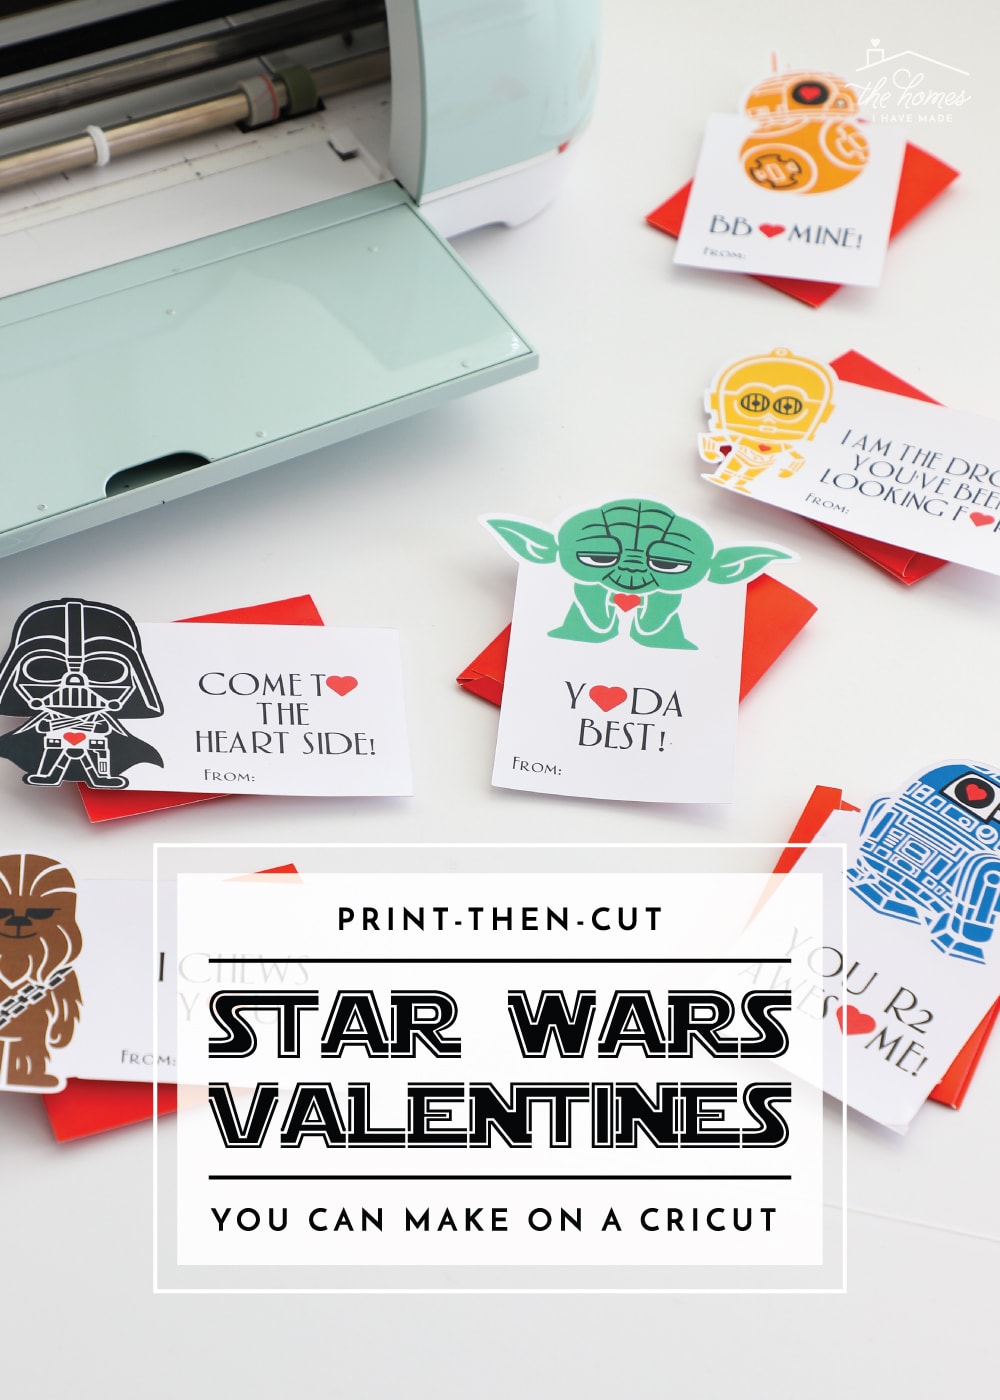
Paired with festive hearts and punny phrases, these print-then-cut Star Wars Valentines are sure to bring smiles to all your friends’ faces!
You might be thinking, “Those sure are adorable, Megan. But they don’t look easy at all!” But I’m here to say they couldn’t be simpler since they utilize the “print-then-cut” feature on your Cricut machine (both the Explore and Maker models)! What does that mean? All you have to do is take my ready-made designs, print them off on your home printer, and then use your Cricut to cut them out. Whether you just want to use one Star Wars friend or the whole gang, you can have them printed and cut in mere minutes! Seriously!

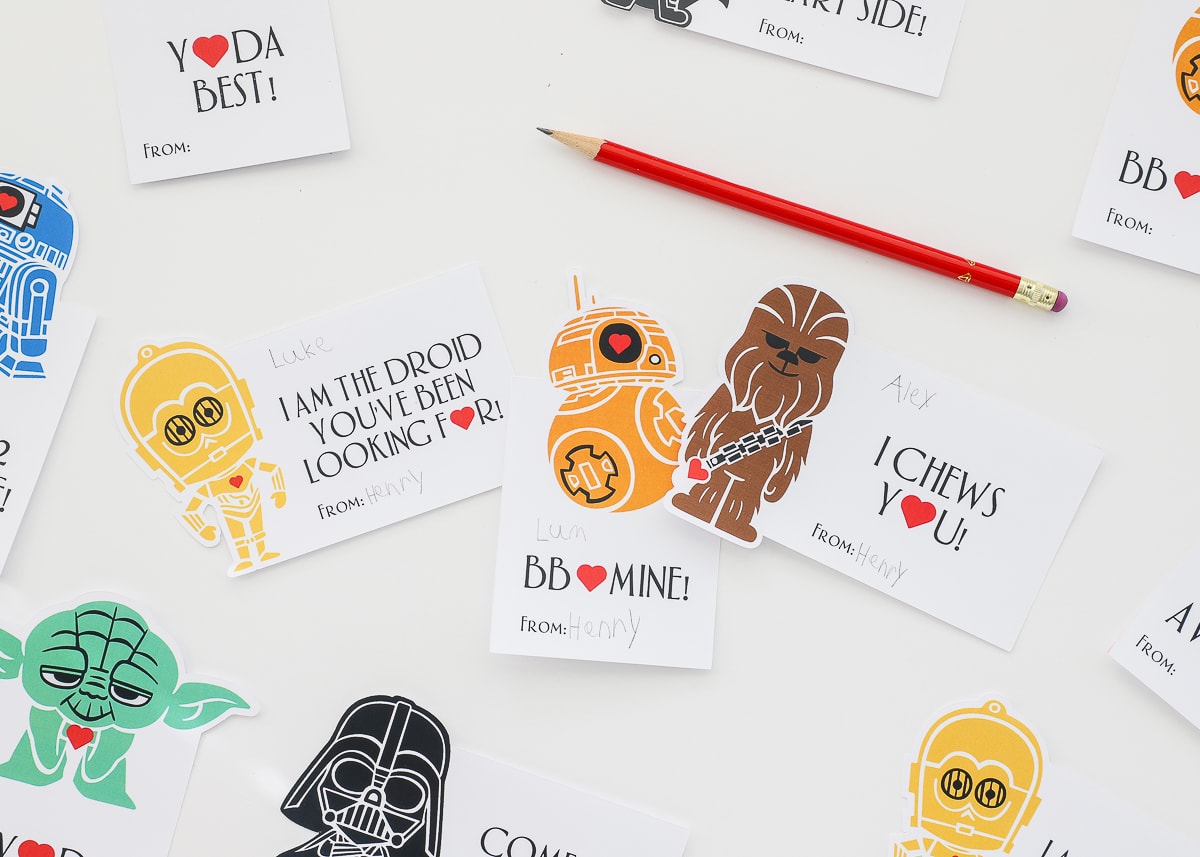
I specifically designed these Star Wars Valentines to be a one-cut project…meaning there are no layers, no assembly, no glue, nothing fussy! You can really just print them, cut them, and hand them over to your kiddo to fill out for all their classmates!
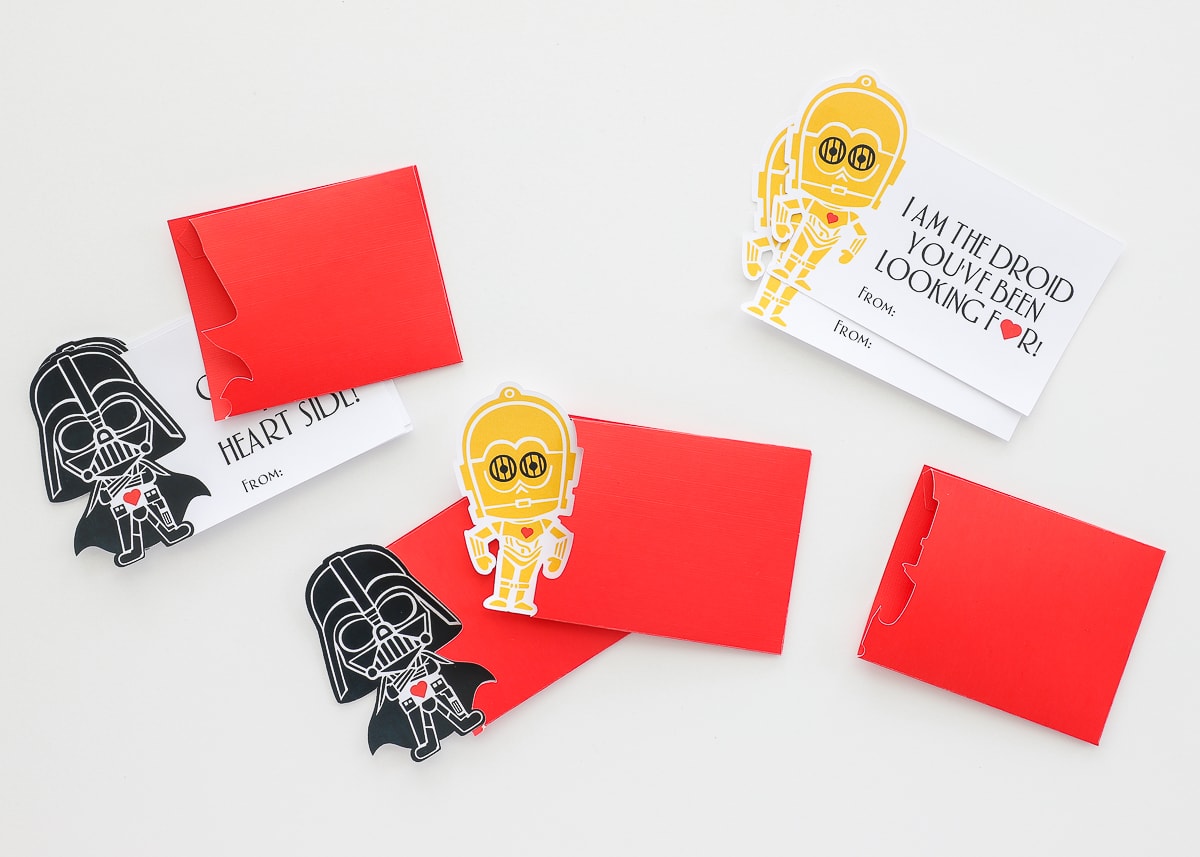
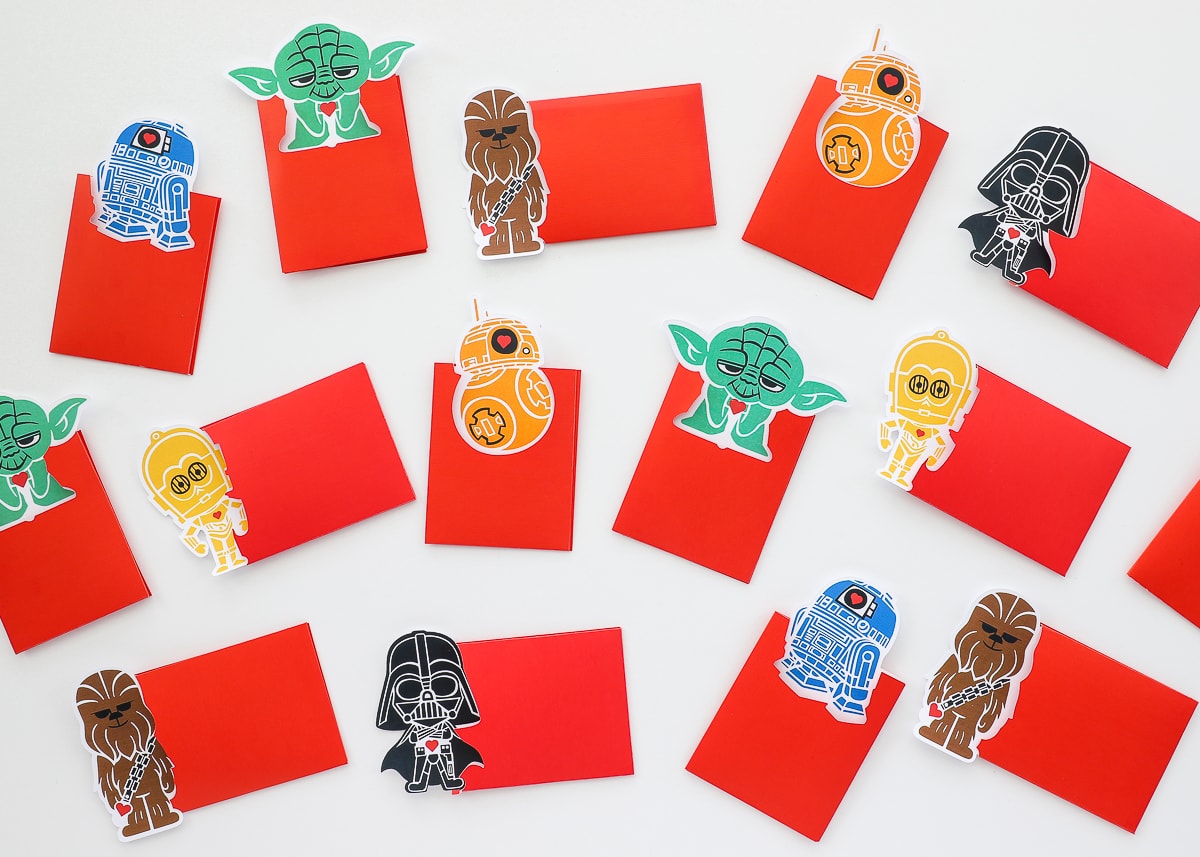
Buuuuut…if you’re like me (who loves paper crafting) and/or want to take these Star Wars Valentines up a notch, you can also assemble their matching envelopes. Yep! Each little Star Wars friend has their own cut-out envelope. Meaning you can slide each card in to conceal the message, but the little friend sticks out the top/side!
These couldn’t be more fun to assemble or play with…around here, we all can’t stop playing them! Want to see Darth Vader in action?
So fun, right? And although the envelopes require just a smidge more work than the Valentines alone, they also come together pretty easily since I’ve done all the slicing and sizing for you!
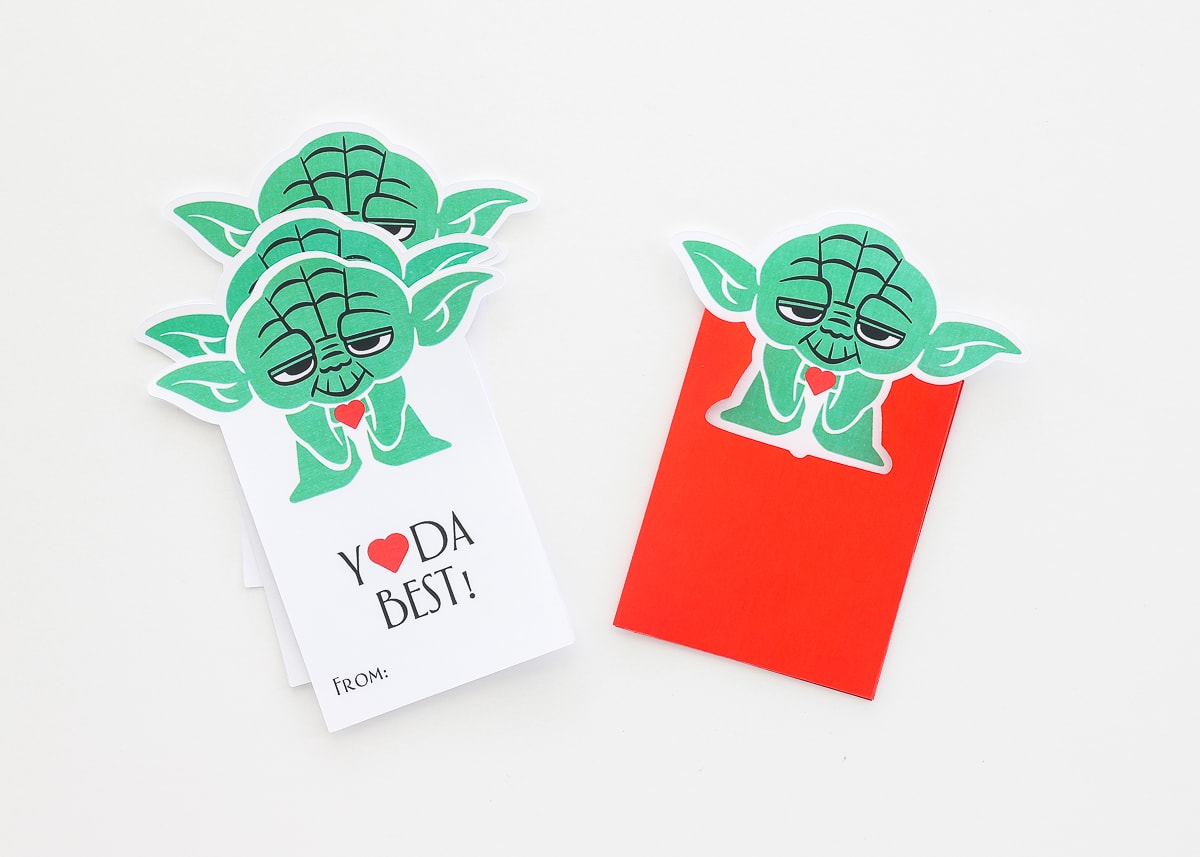
Alright! Are you ready to see how these Star Wars Valentines come together? Let me walk you through how to make the Yoda valentine and the matching envelope!
Materials Needed
Here’s the really exciting thing. If you’re just making the Valentine (no envelope), all you need is printer paper or white cardstock – no glue, no stack of colored paper, no scissors! That said, if you want to include the envelopes, you’ll need a few extra things. Here’s the full supply list:
- Star Wars Valentine design – I’ve done ALL the design work for you! So you can just open up this link and get printing/cutting right away!
- NOTE: I have been informed by readers that access to the Star Wars images may be affected by location. Non-US users may not be able to access these images due to Cricut licensing requirements.
- White printer paper or cardstock
- Color printer
- Cricut Explore or Maker machine
- Fine Point Blade – comes with both machines
- Scoring Stylus (Explore models) or Scoring Wheel (Maker) – *for envelopes only
- Colored cardstock – *for envelopes only
- Roller adhesive or craft glue – *for envelopes only
Opening the Star Wars Valentines In Cricut Design Space
As I mentioned above, these designs are ready to go. So if you don’t have any time or interest in adjusting them at all, you can really just open the file and click “Make It.”
That said, there are a few things you might want to know about the file itself.
First, I want to mention that each Star Wars friend will cost you $1.99, even if you have a Cricut Access membership #bummer. So if you don’t want to buy each one, simply pick one or two and then delete/hide the rest!
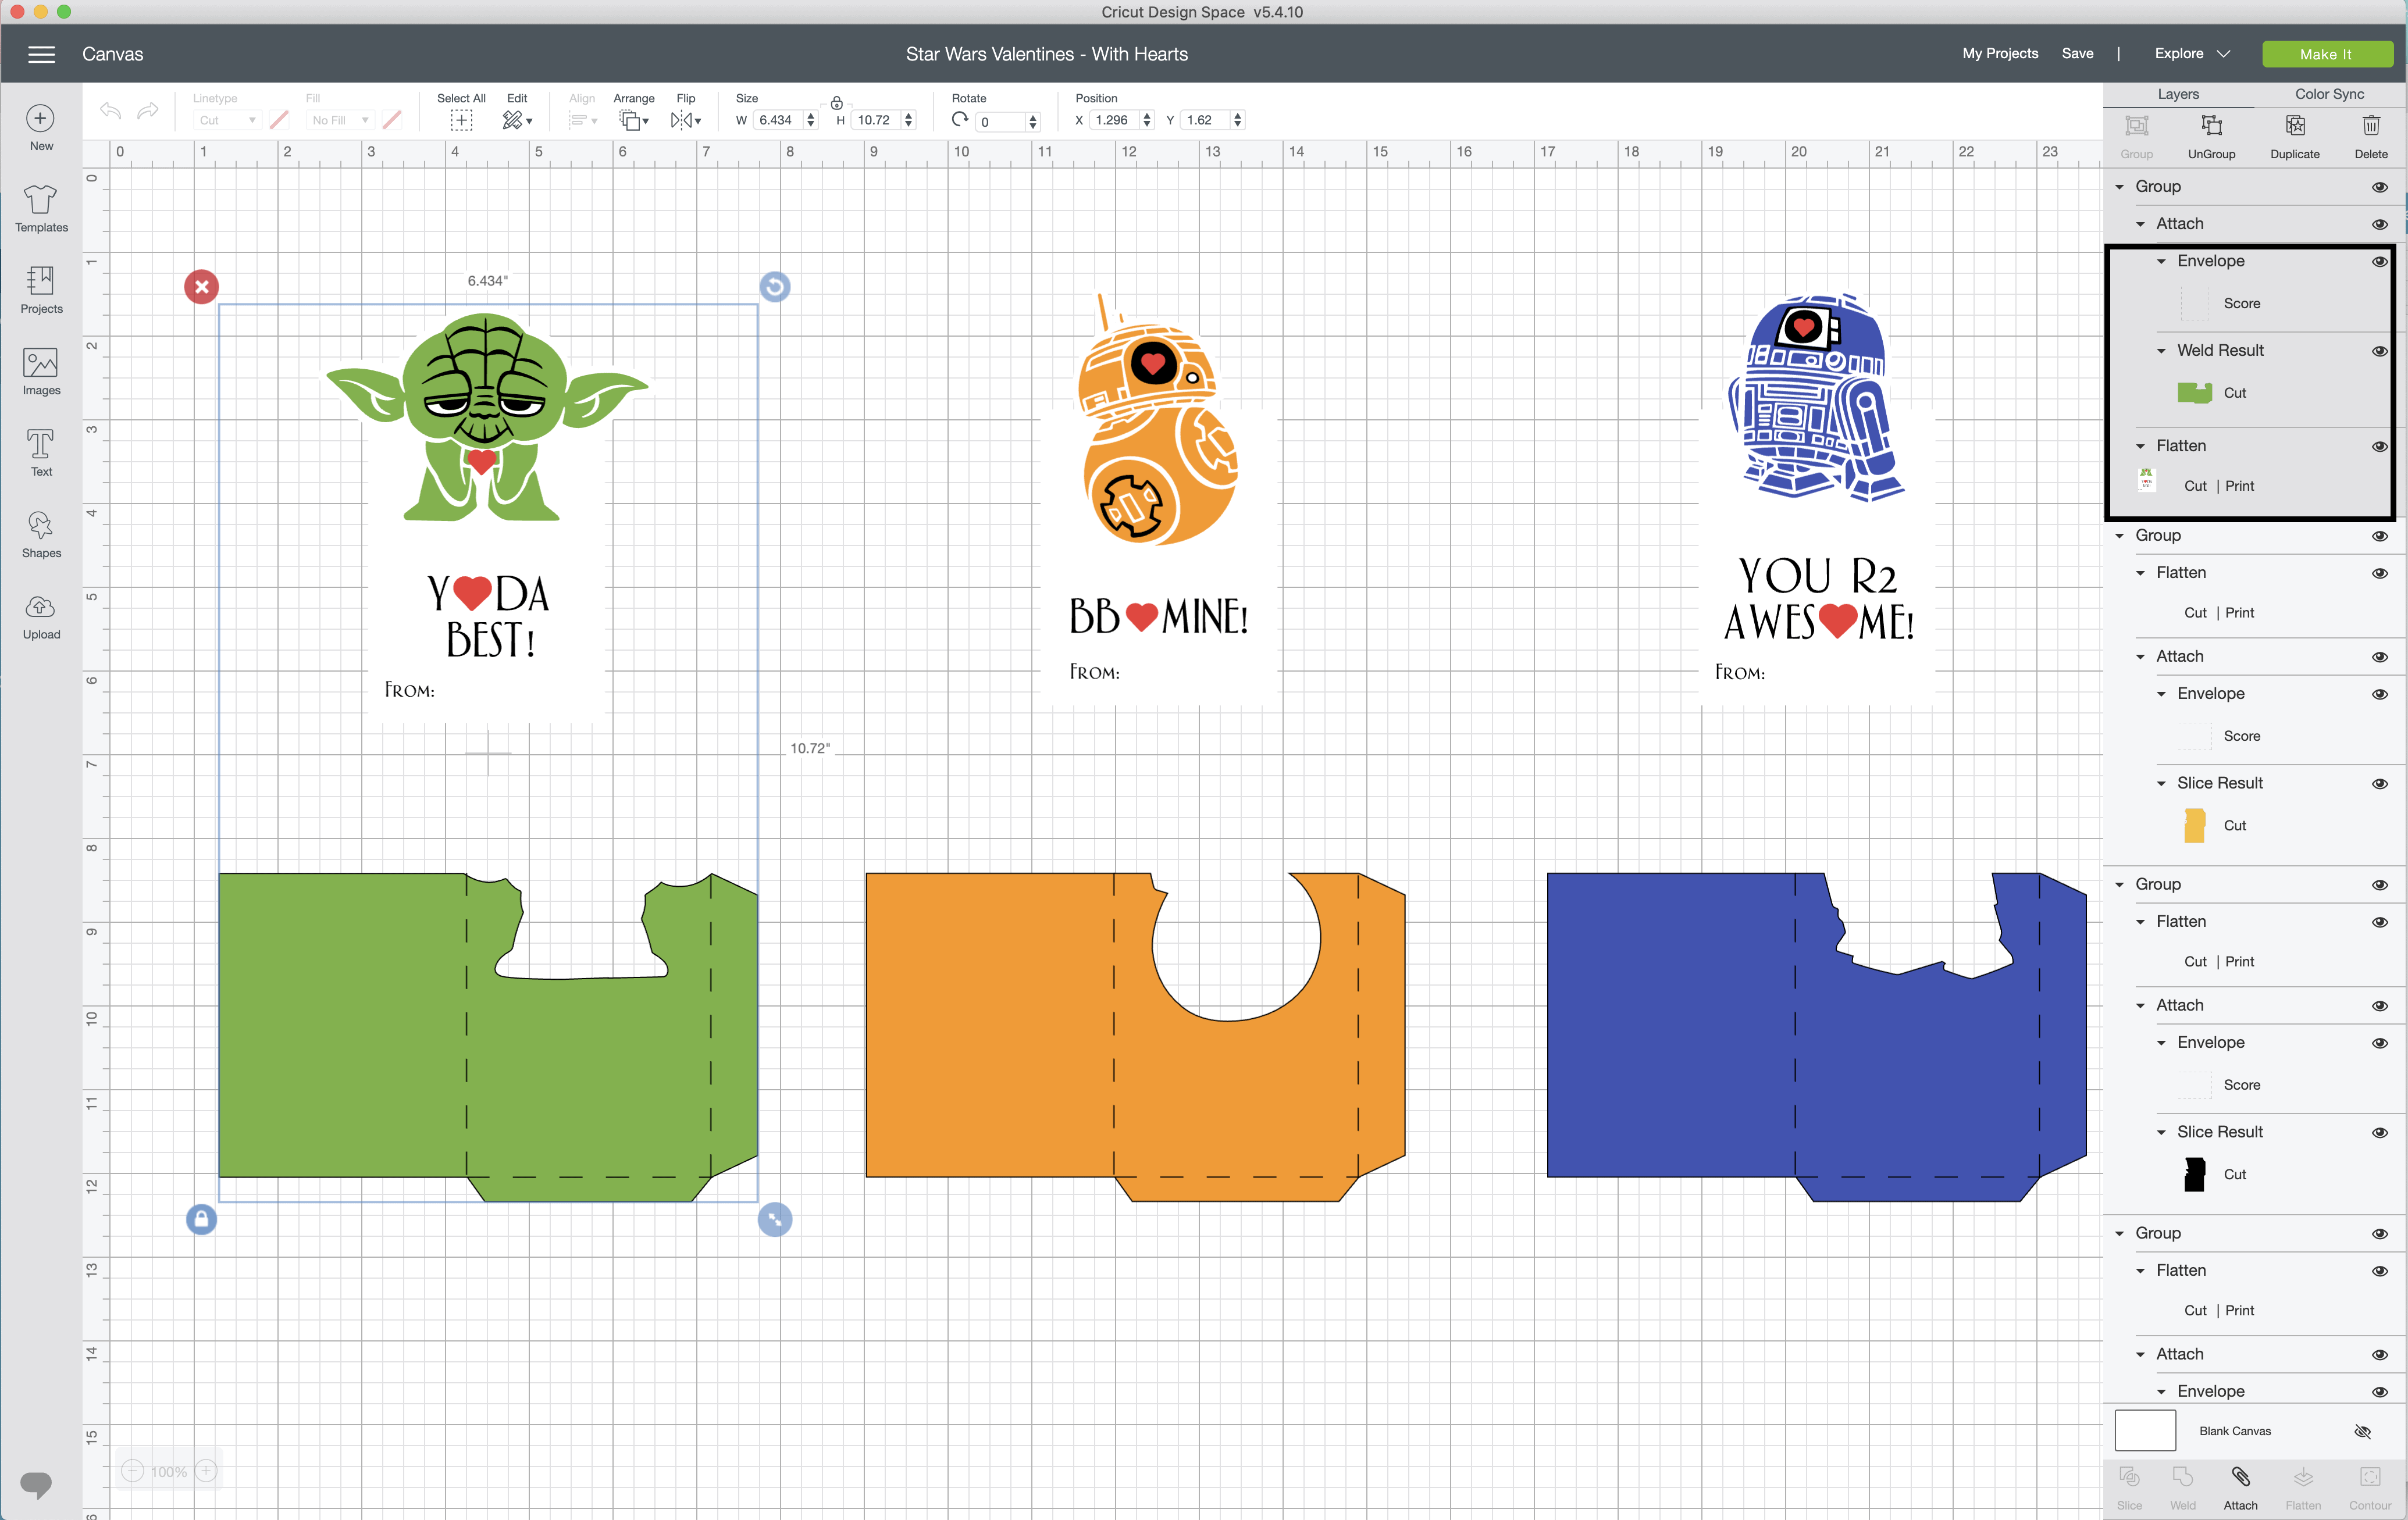
Second, here is how the file will look when you first open it. Notice that I have each envelope color-coordinated with each Valentine. That’s just to help you know which one is which, but you can certainly change colors as you see fit!
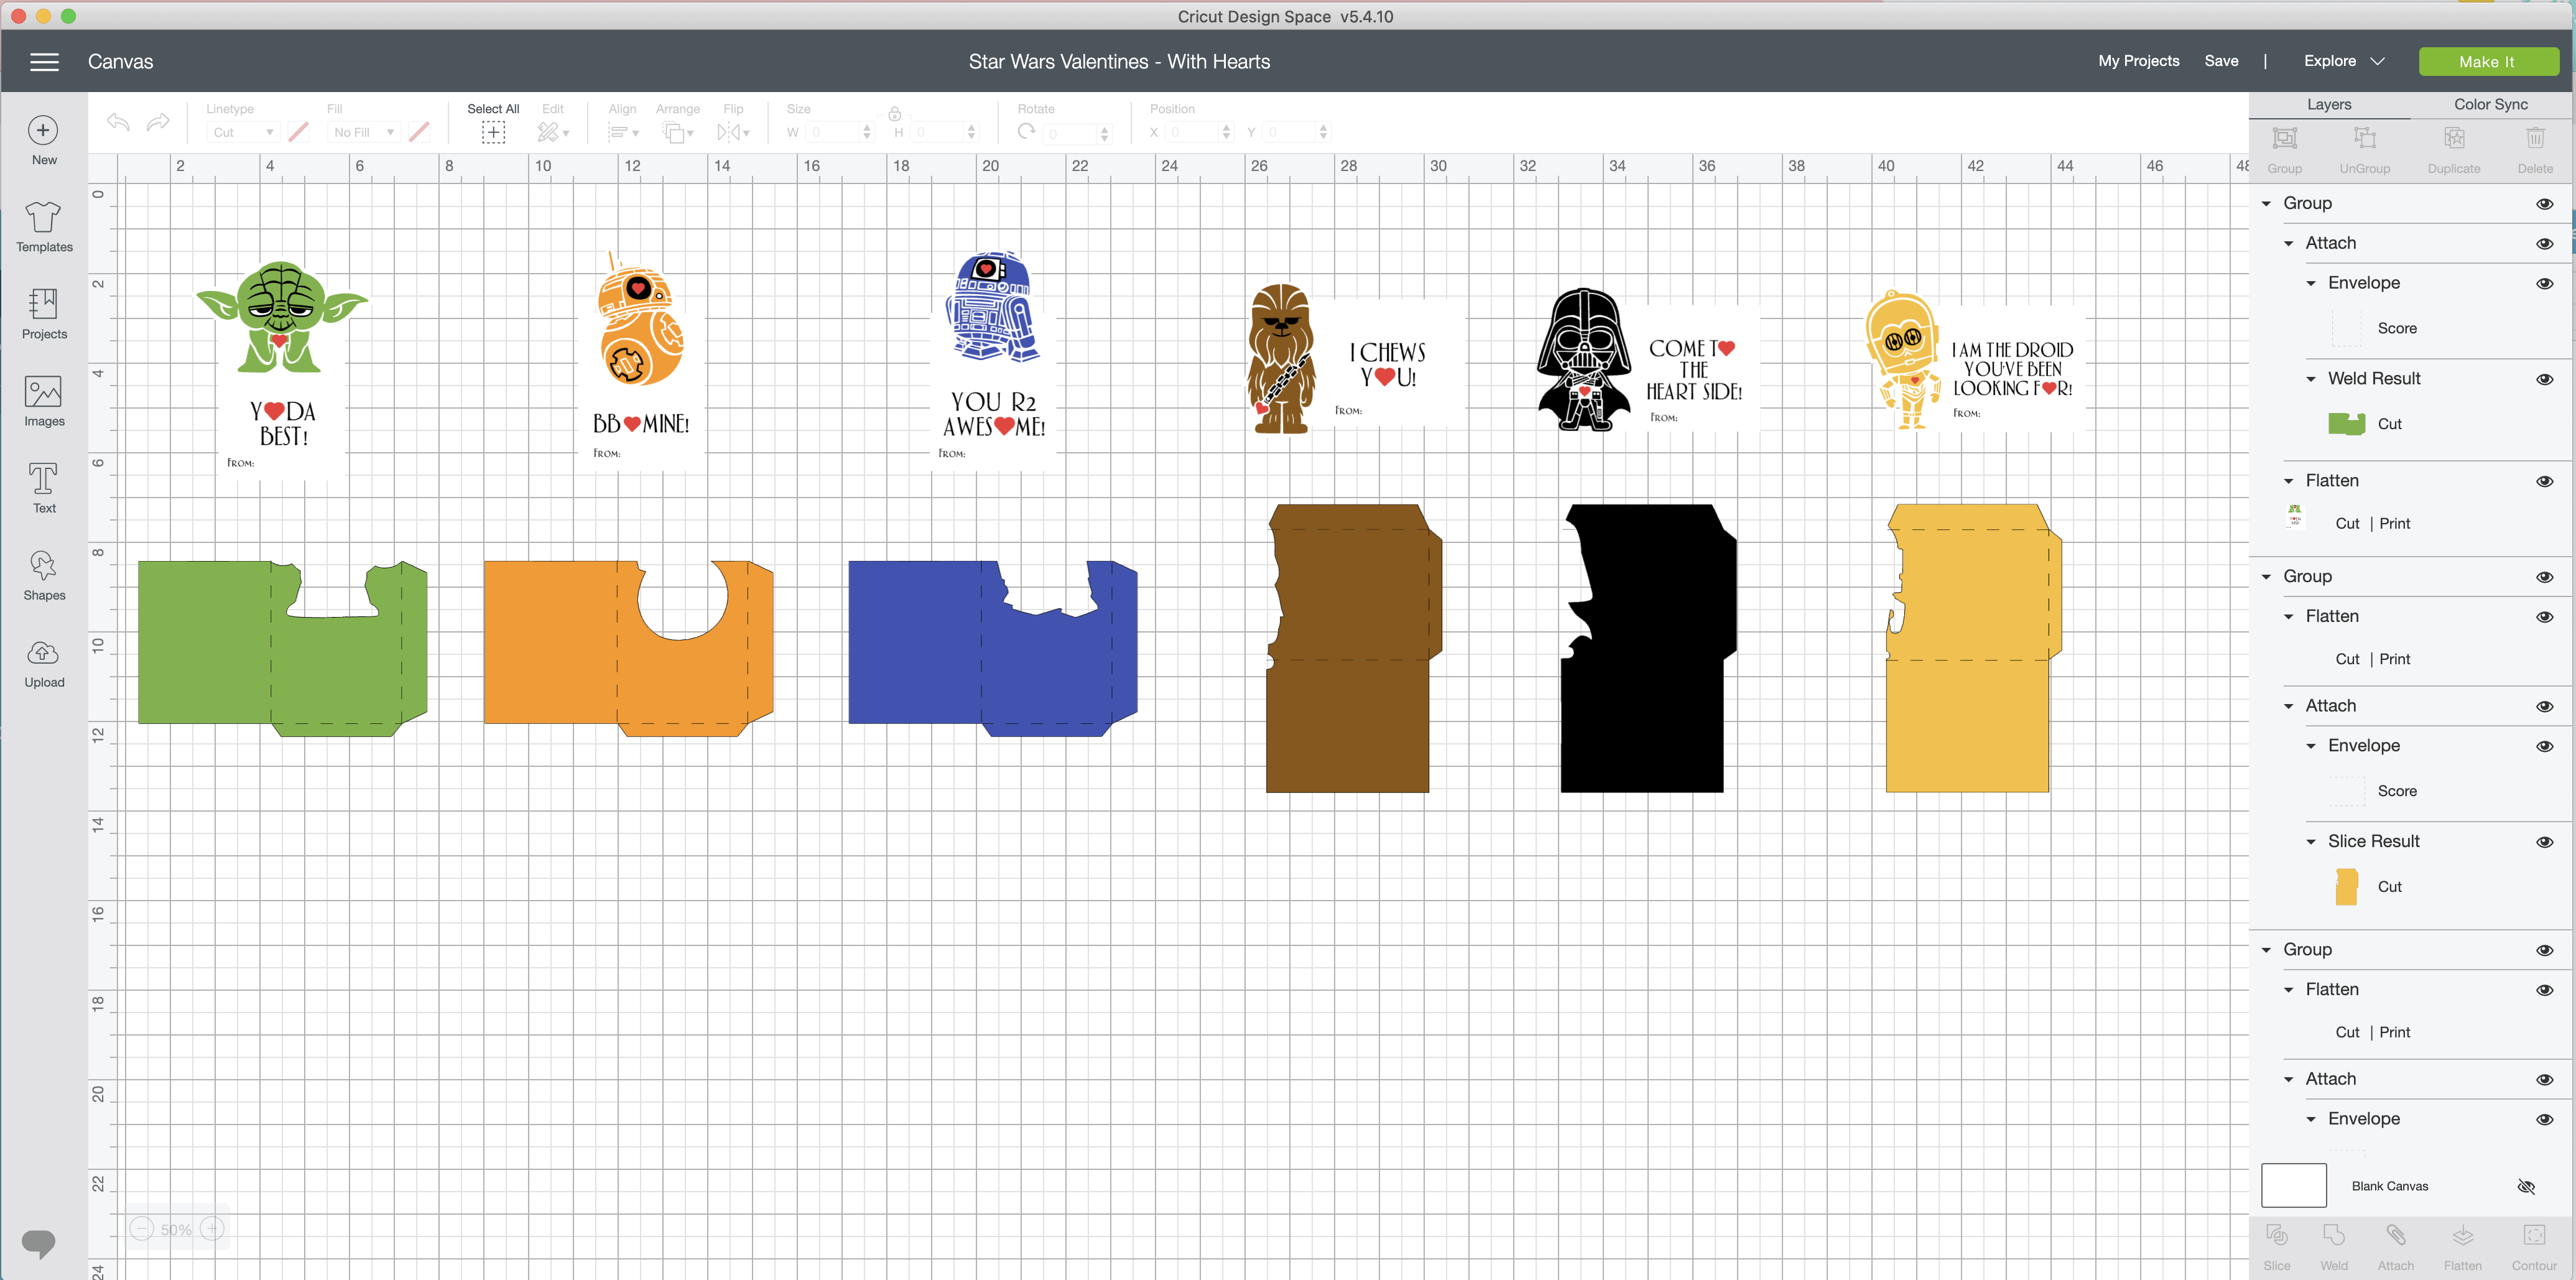
Next…if you’ve never done print-then-cut, let me highlight a few things. If you click on Yoda and the envelope (which are grouped together), you will notice that the design is designated to do three different things. In looking at the righthand side bar, you will see that the envelope is set to “Score” and “Cut” while the Yoda Valentine is set to “Cut | Print.”
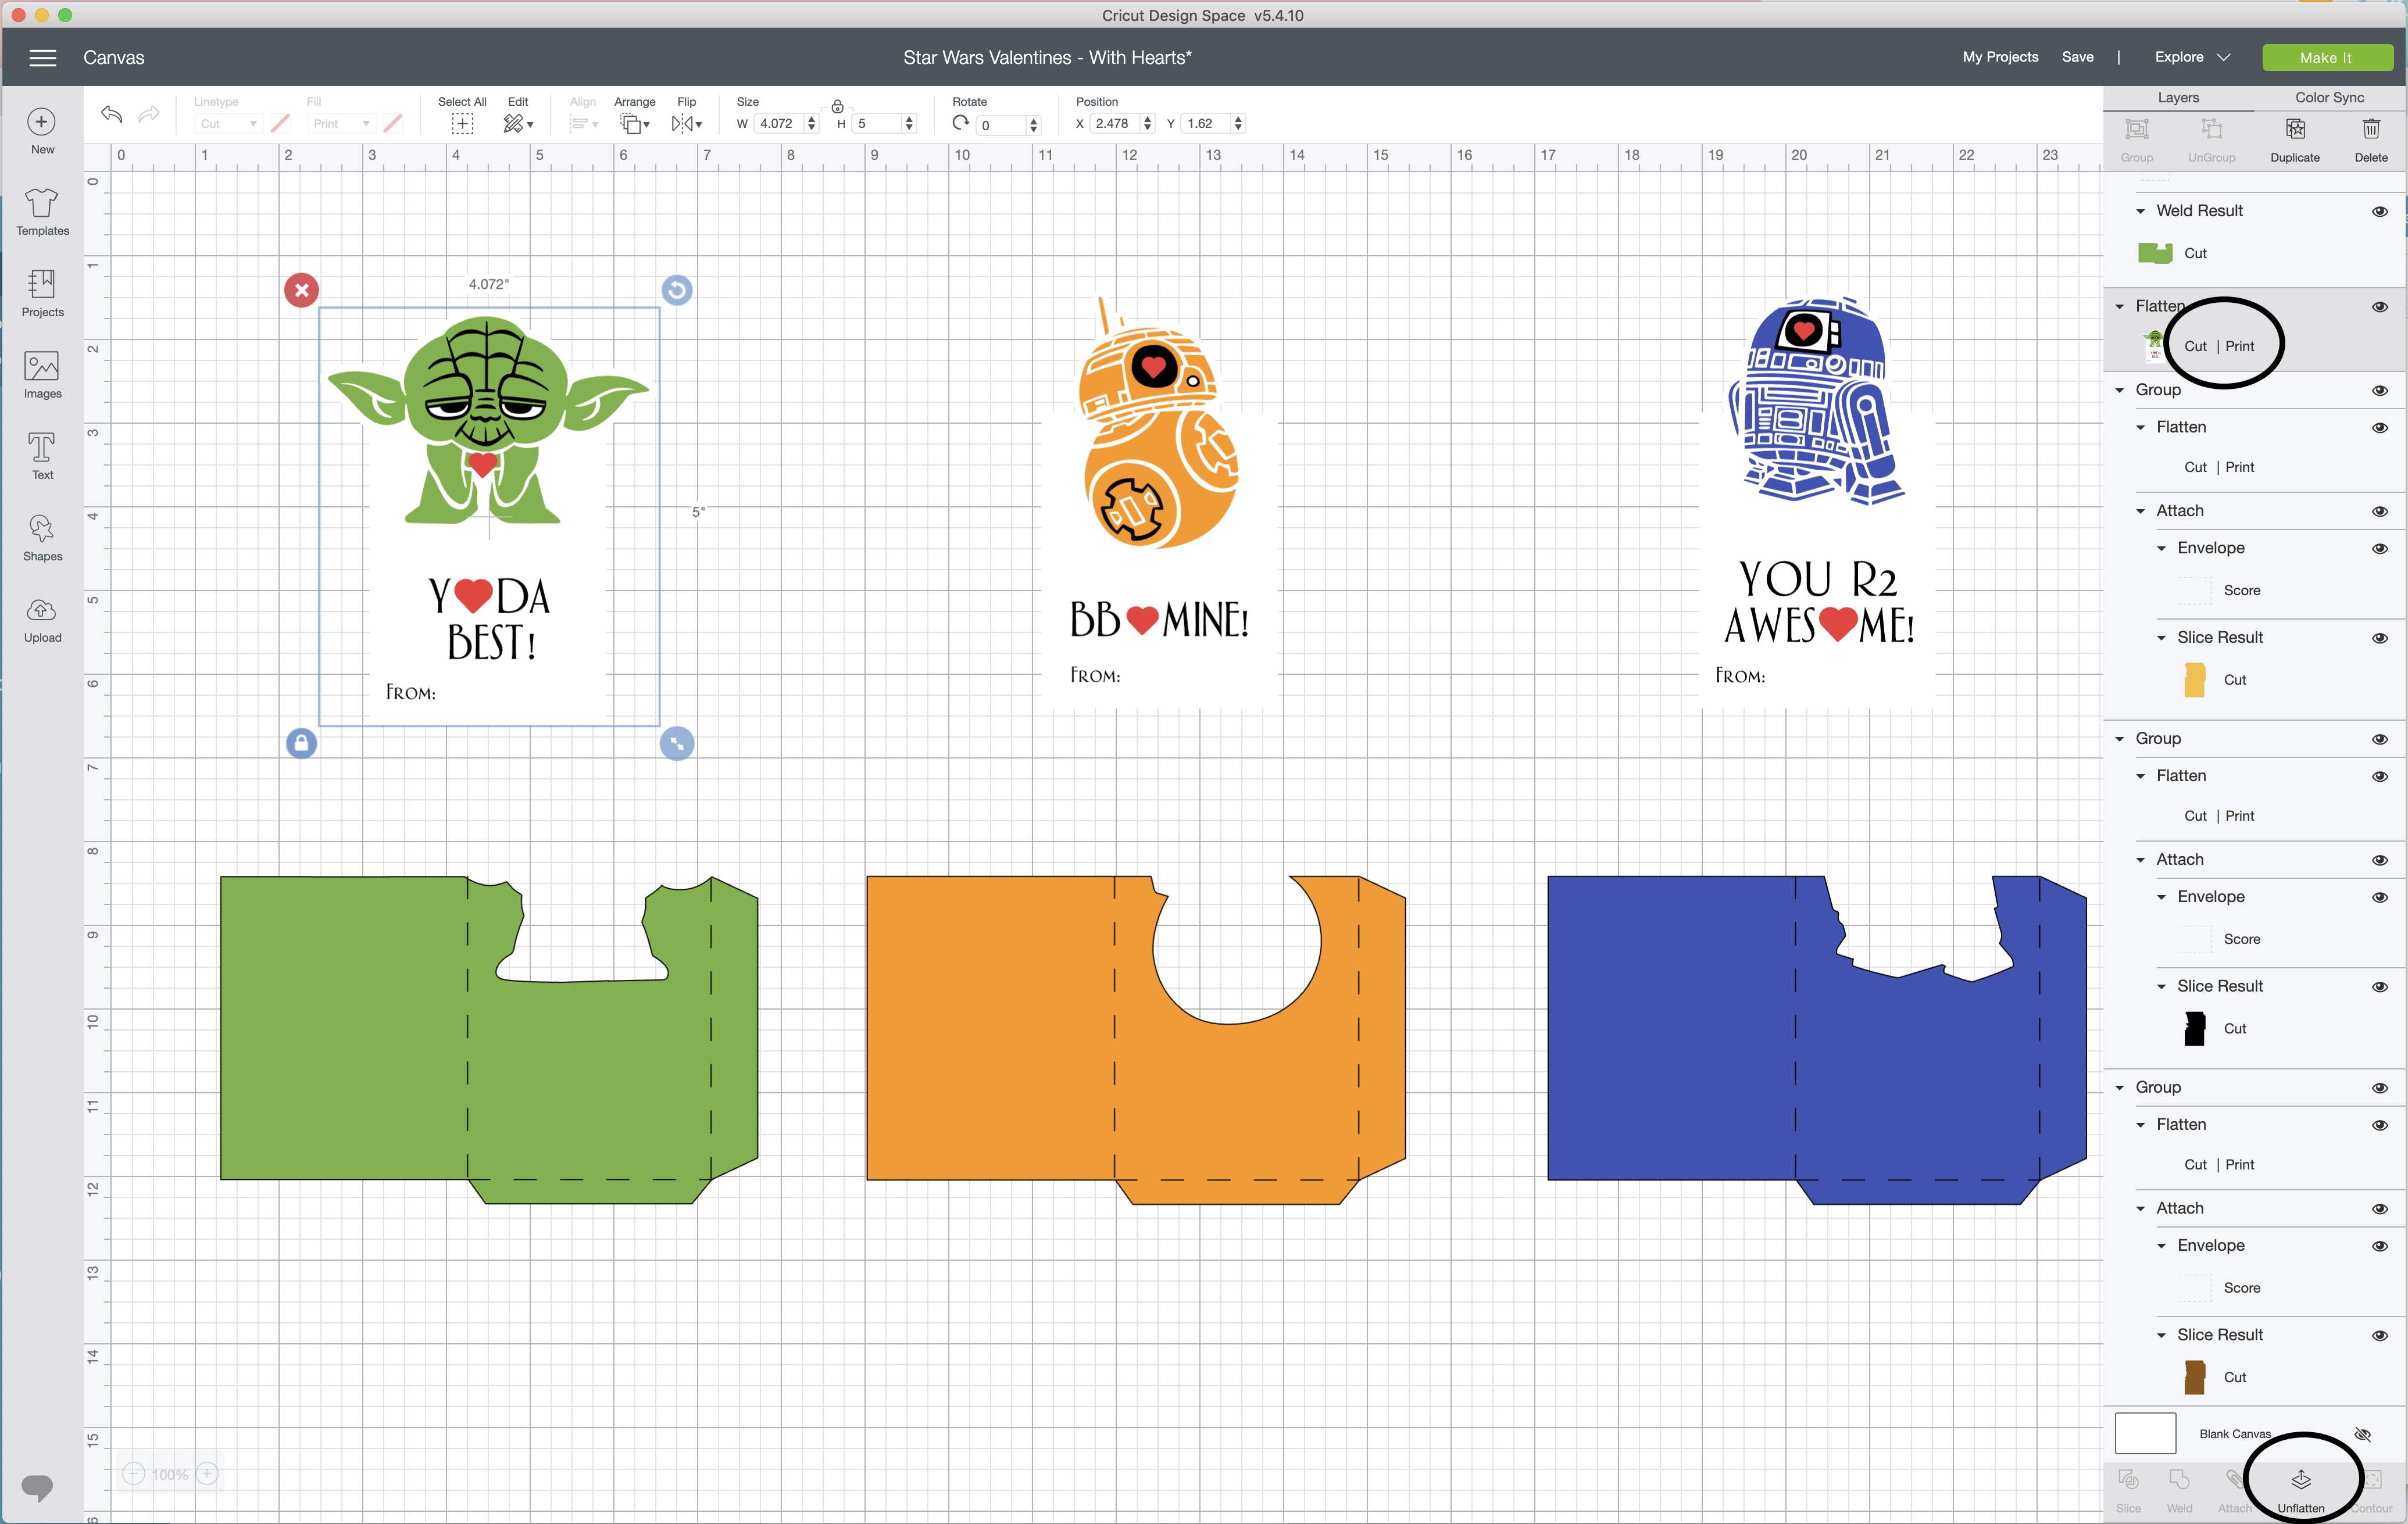
TIP! Here’s something really important! These Valentines ARE changeable! For example, you can easily change the size as you would any other design (using the corner arrow). But you can also change the font (if you want to change it to one you already have), text, and colors. If you select any of the Valentines, notice along the bottom of the righthand panel it will say “Unflatten.” Click that, and then keeping “unflattening” until you have the card layer, the Yoda layer, and the text layer all separate. Once you do that, you can adjust the text, fonts, and colors to anything you want (like if you want to put “From: Your Child’s Name” in printed text). Once you are done, just be sure to select the entire Valentine and click “Flatten” again (along the bottom righthand panel) to change it back into a print-then-cut design!
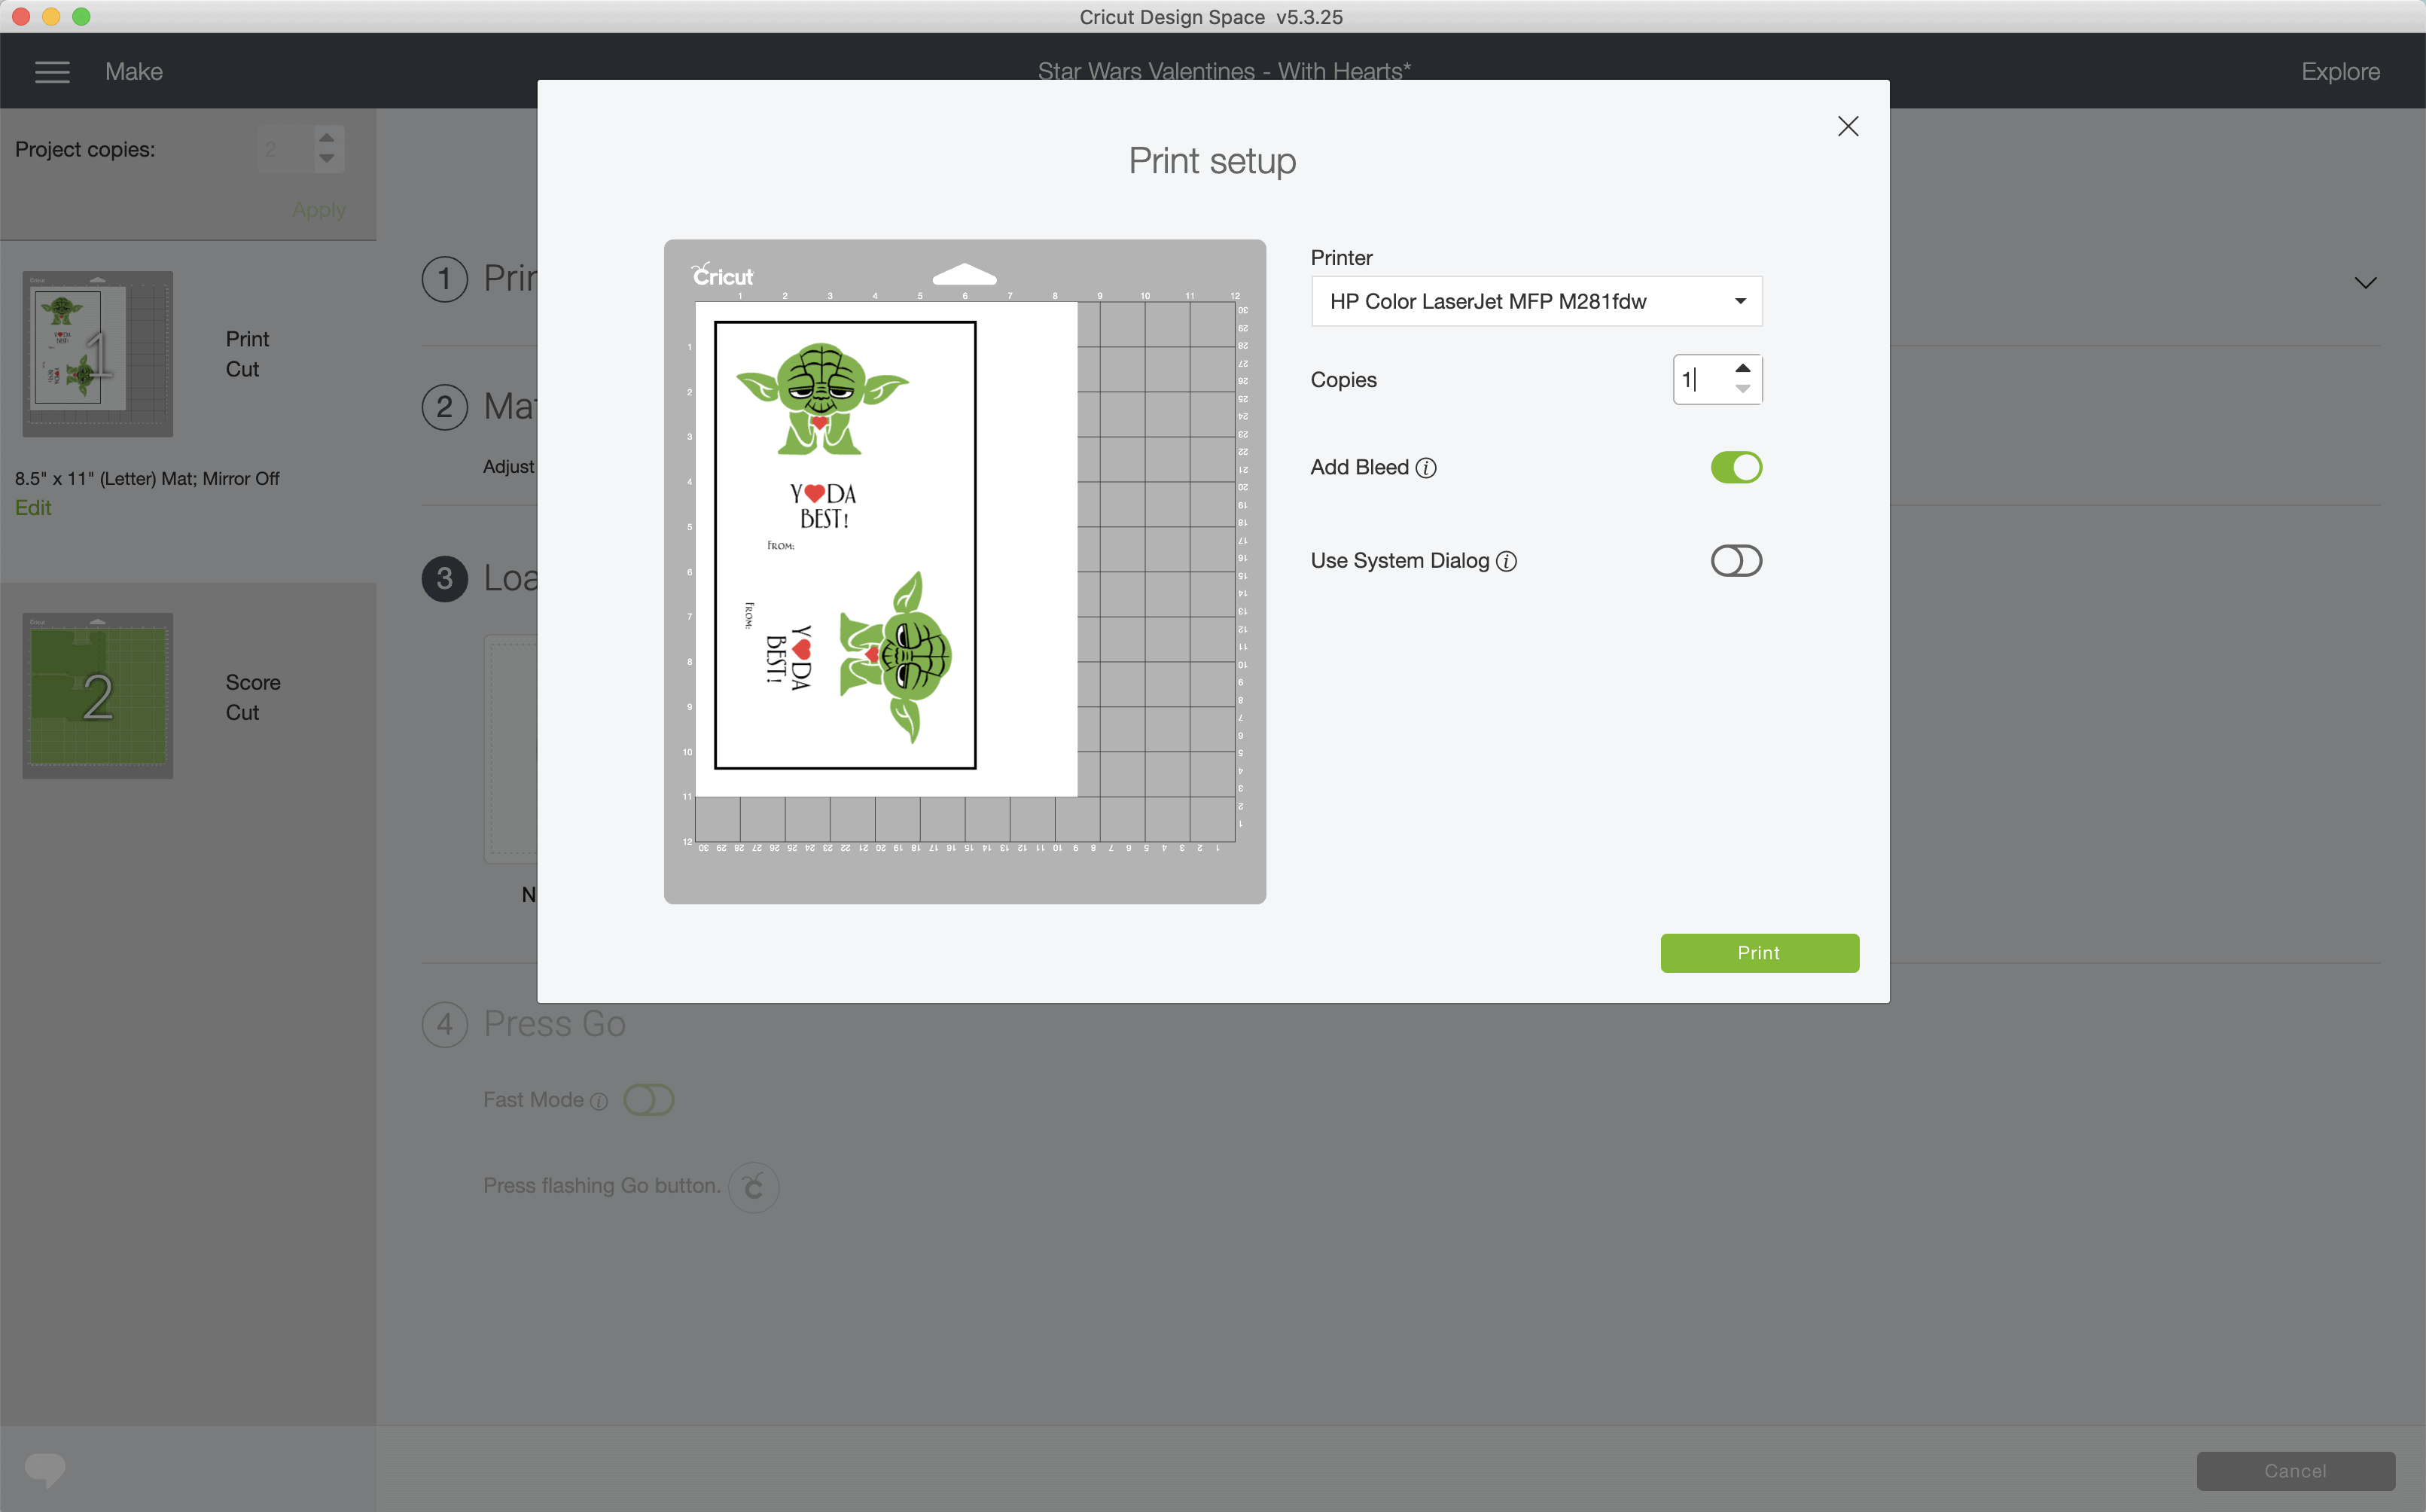
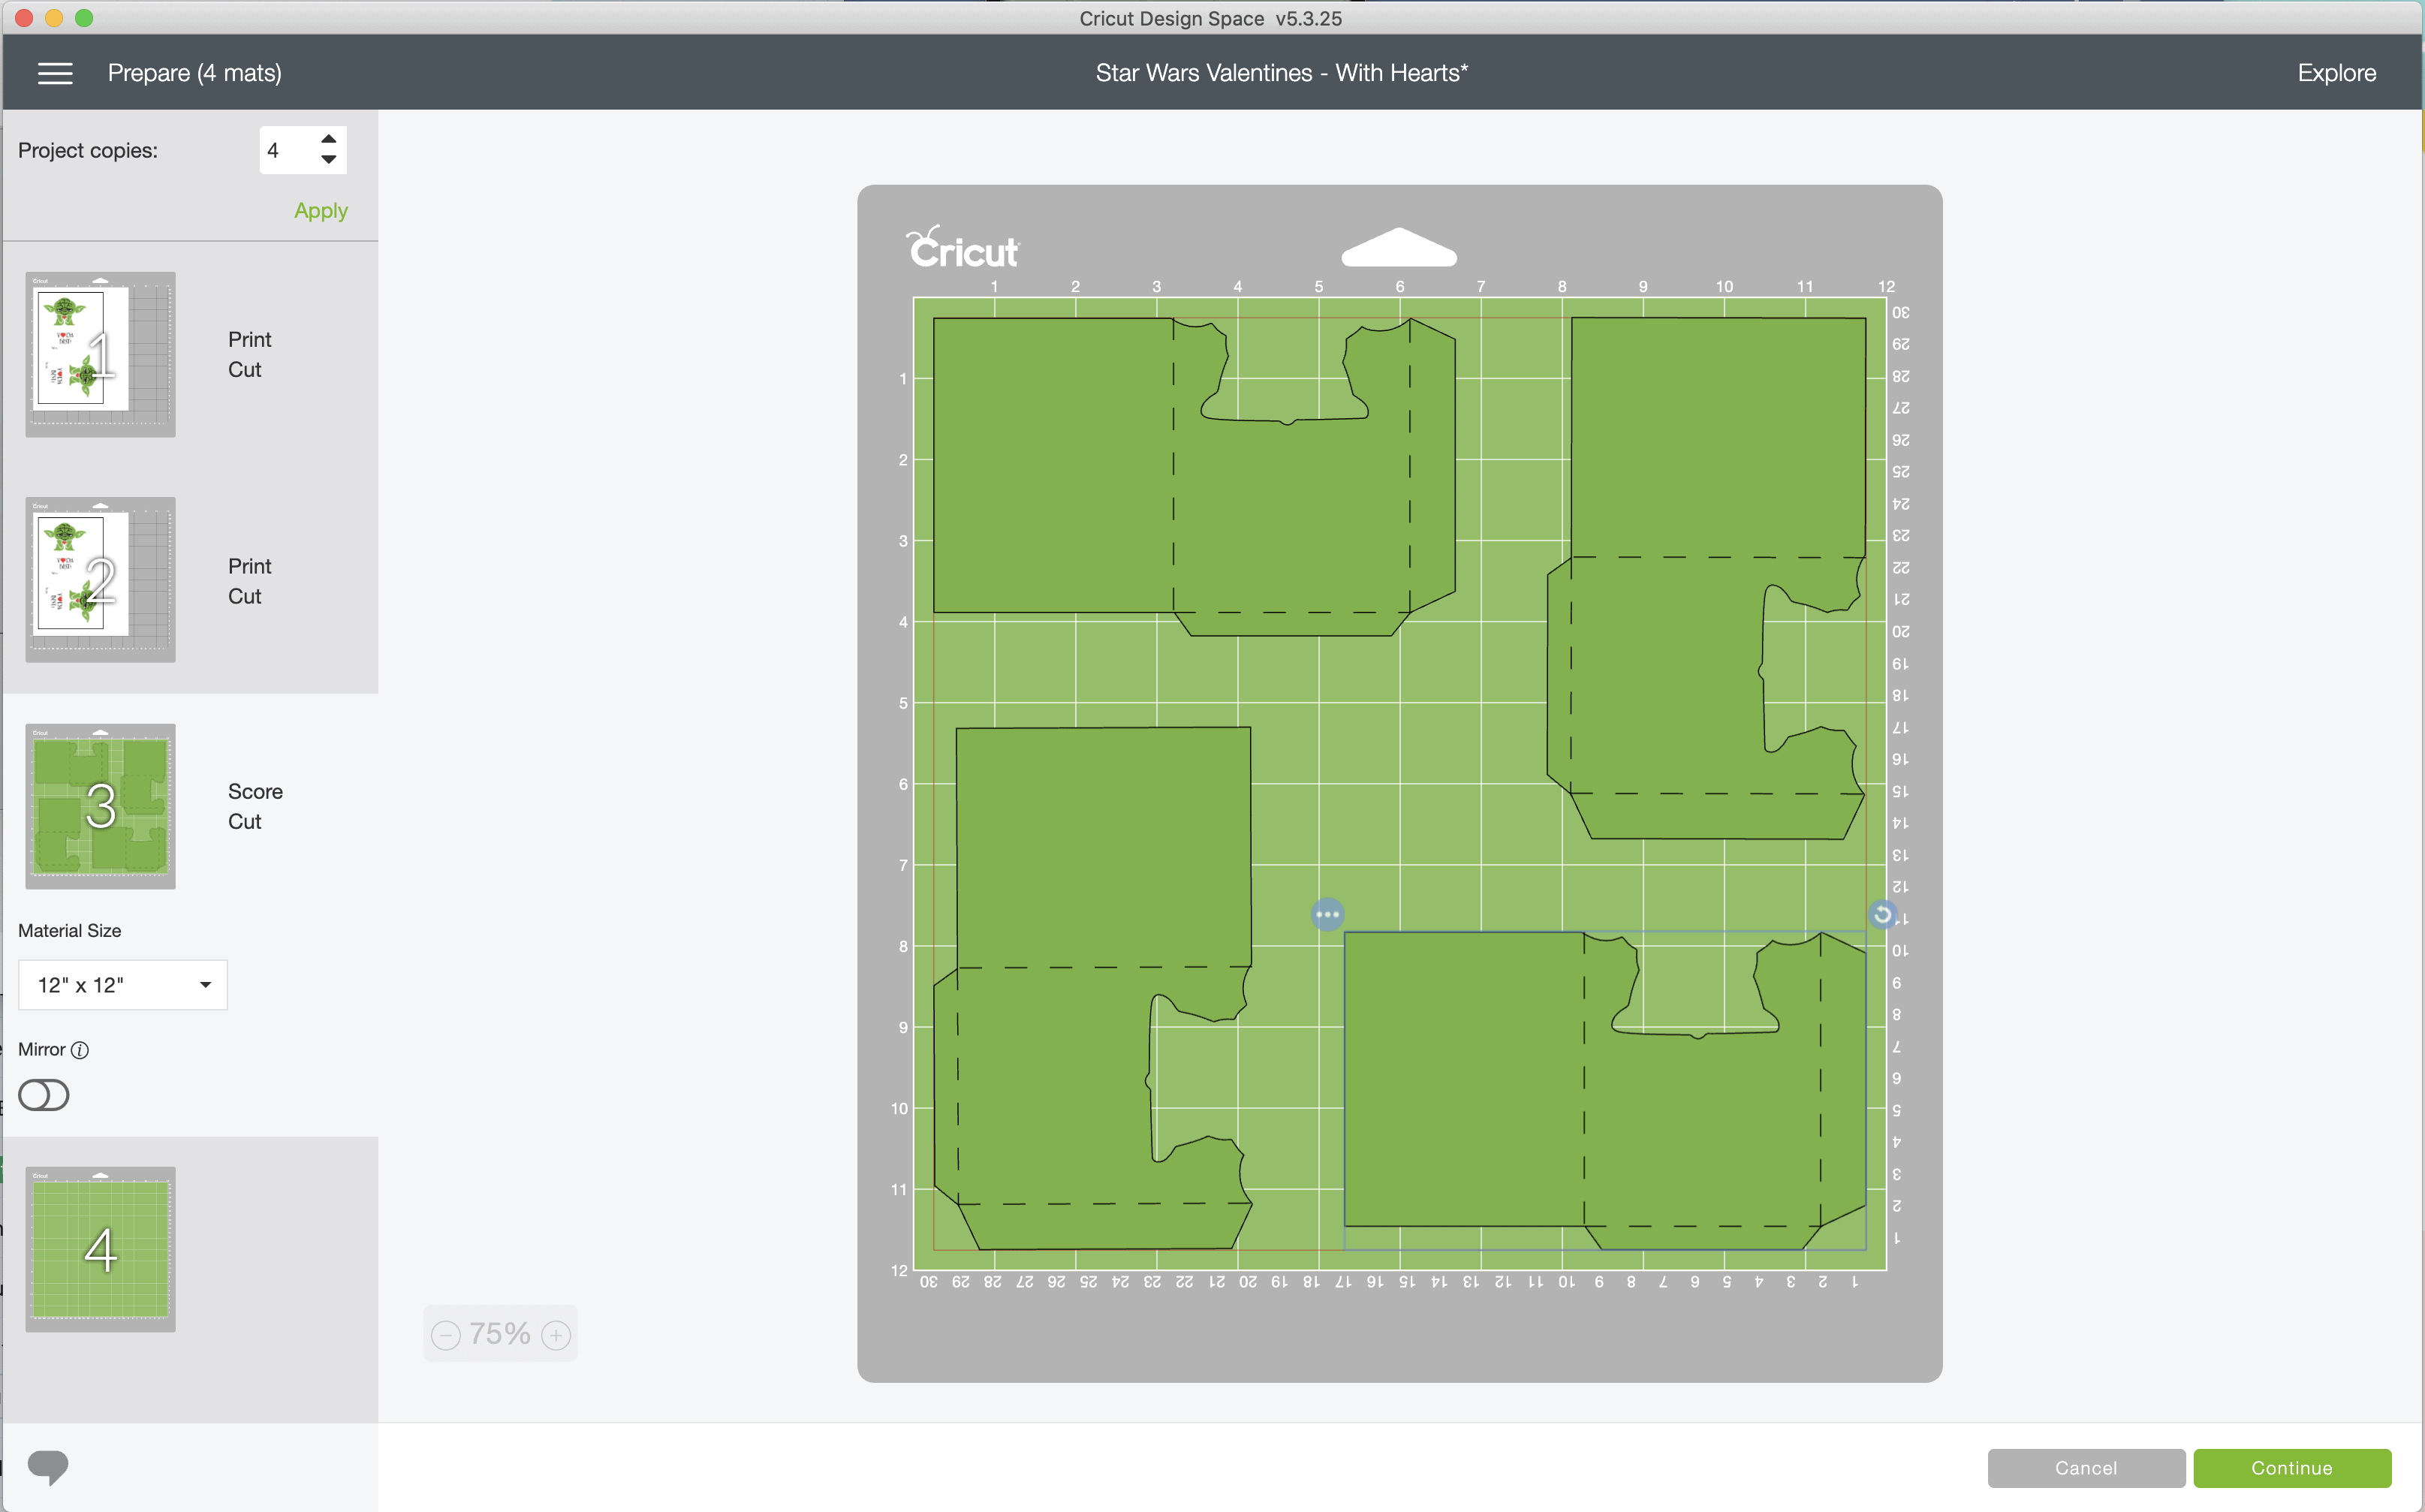
When you are satisfied with your design, click the green “Make It” button and you will move to a screen that looks like this below. Notice how the mats are separated out by your Print | Cut design and your Score | Cut design.
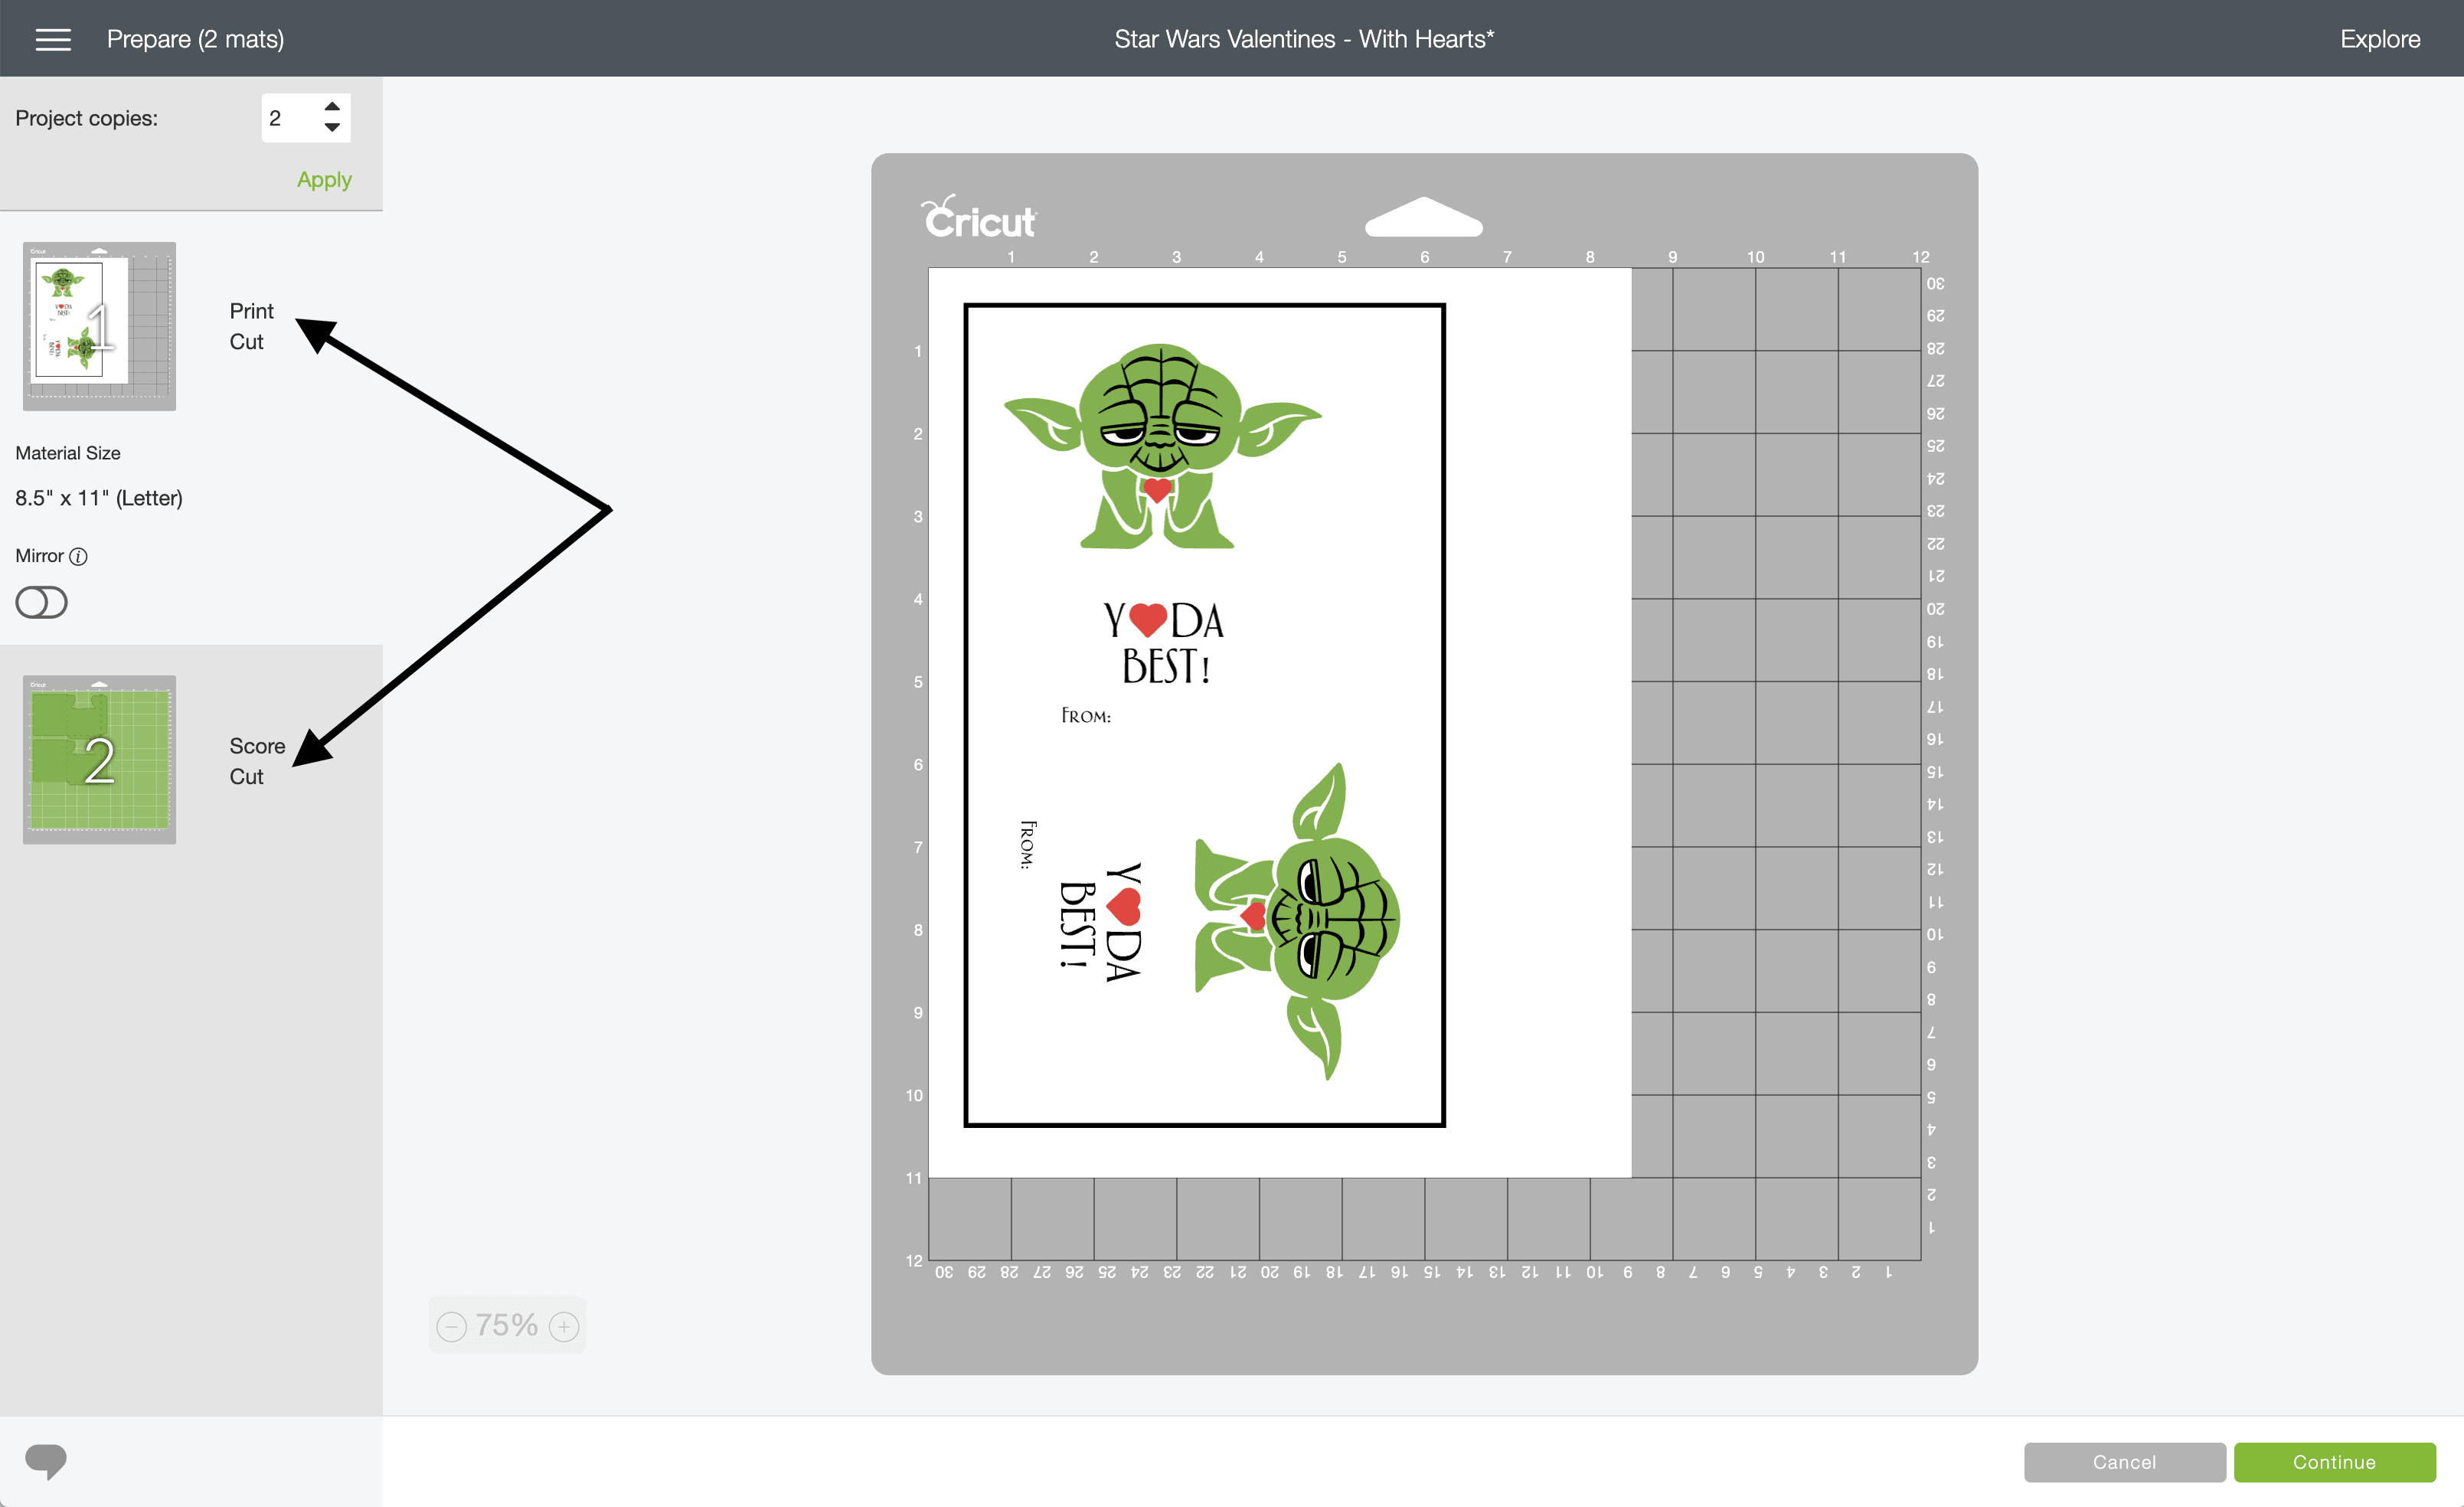
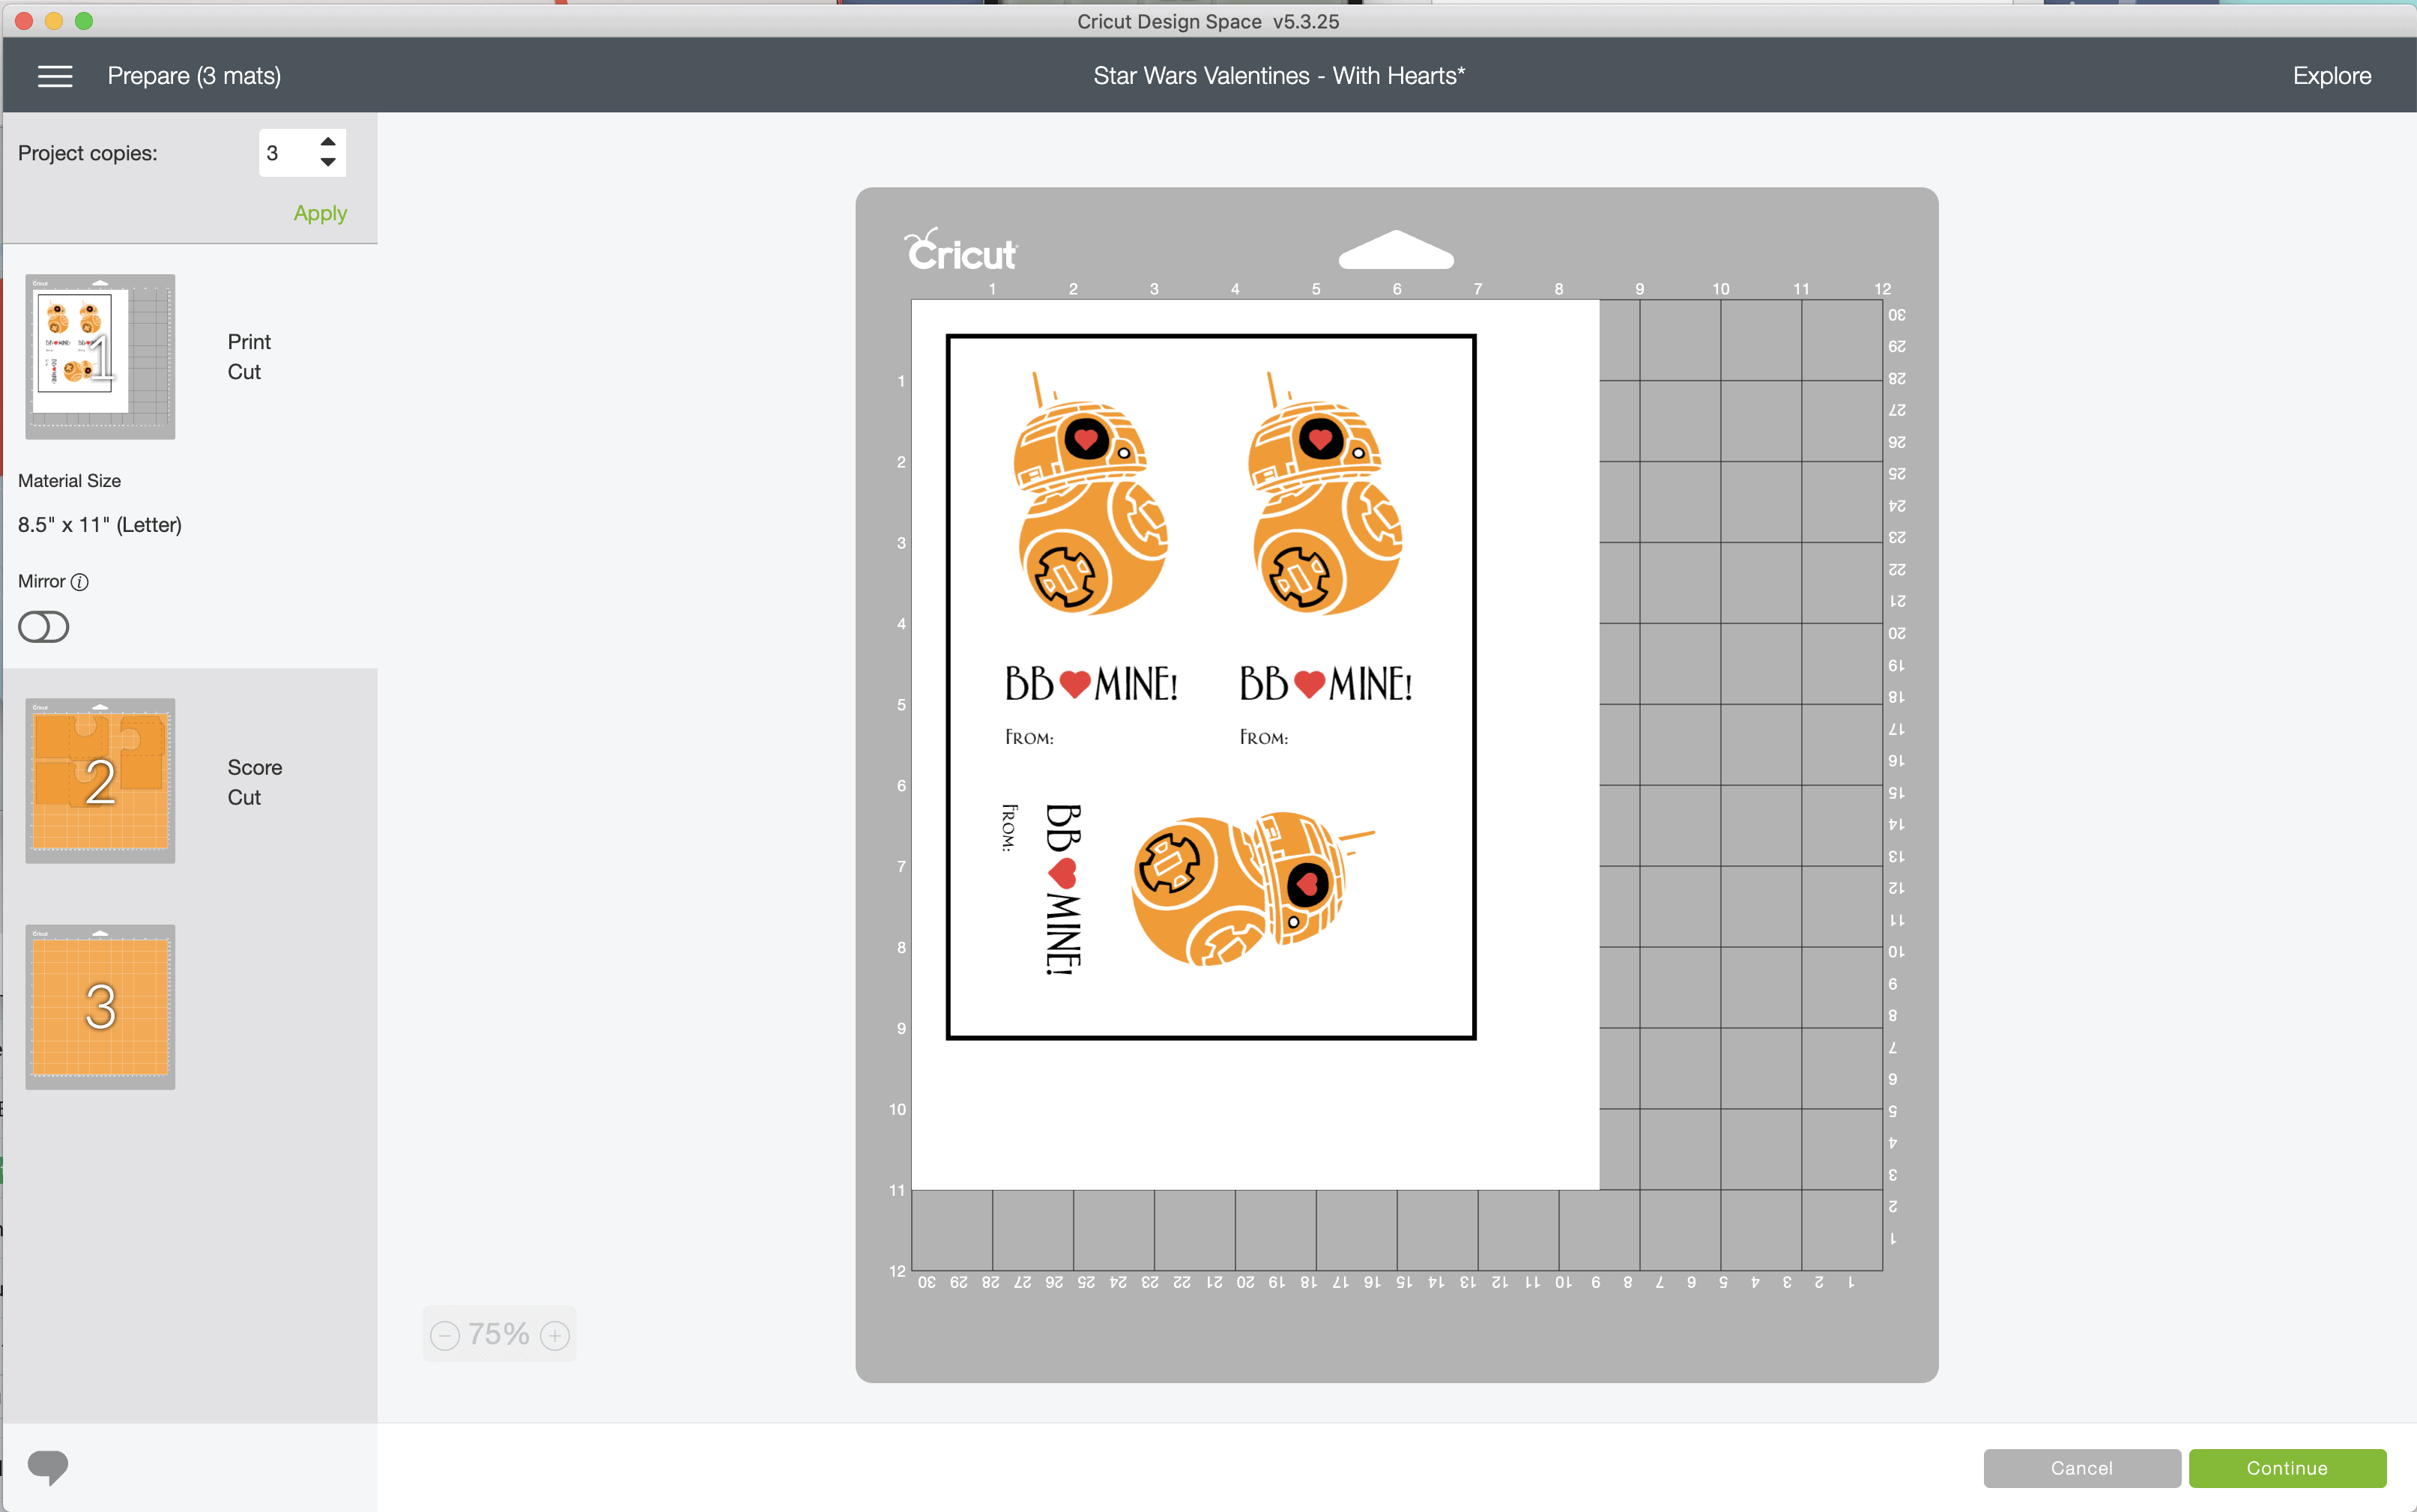
I also want to highlight that as they are currently sized, you can get either 2/page (Yoda, Vader, Chewie and C3PO) or 3/page (BB-8 and R2-D2) by adjusting the project copies along the top of the lefthand toolbar. If you want to get more Valentines/page, just decrease the design sizes back on the canvas. (If you are making the envelopes, be sure you adjust the size of the Valentine and envelope together so they still fit correctly!)
Once you hit Continue, you will be prompted to print the Valentines first via a Print dialog box (below).
TIP! If you’re making a lot of Valentines, go ahead and print as many copies as you need here!
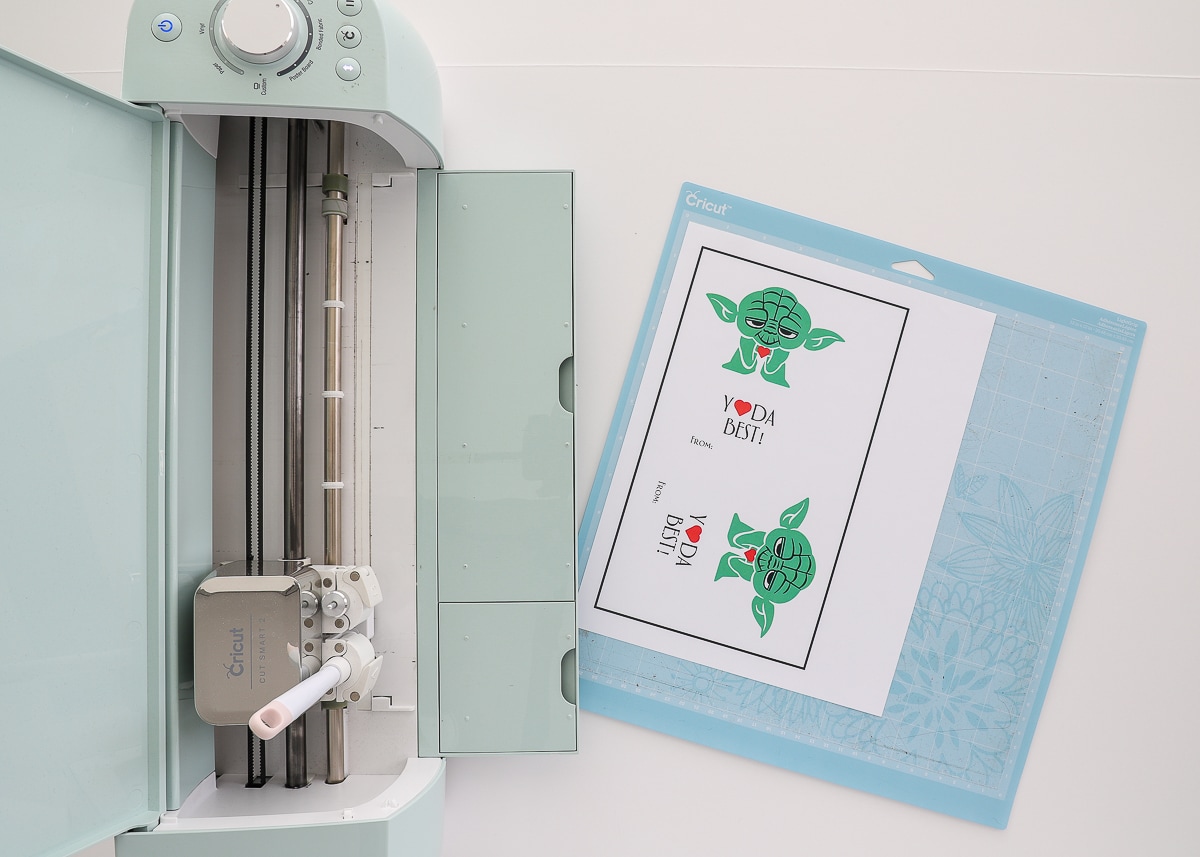
Once you have your page(s) printed, load up one of the printed sheets onto your mat, aligning the paper to the top lefthand corner as shown below. Now you are ready to cut out the Valentines!
Want to save this post?
Cutting Out the Star Wars Valentines
Once your design is printed, Cricut Design Space will prompt you every step of the way to cut it out. So go ahead and just follow the prompts to load the mat and cut out the designs.
(Pssst – Doesn’t seem like your machine is cutting right away? When doing print-then-cut, the machine will spend some time scanning the black box around the design and then will cut out the design!)
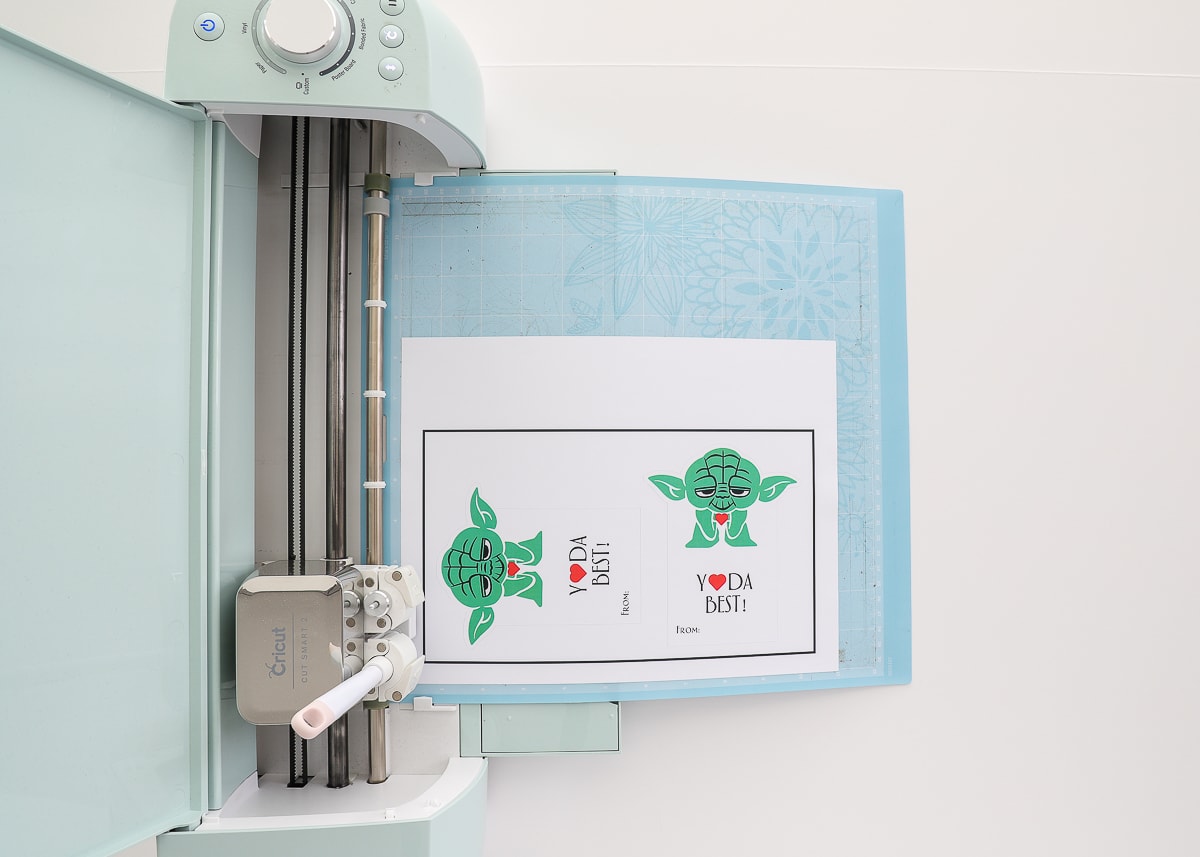
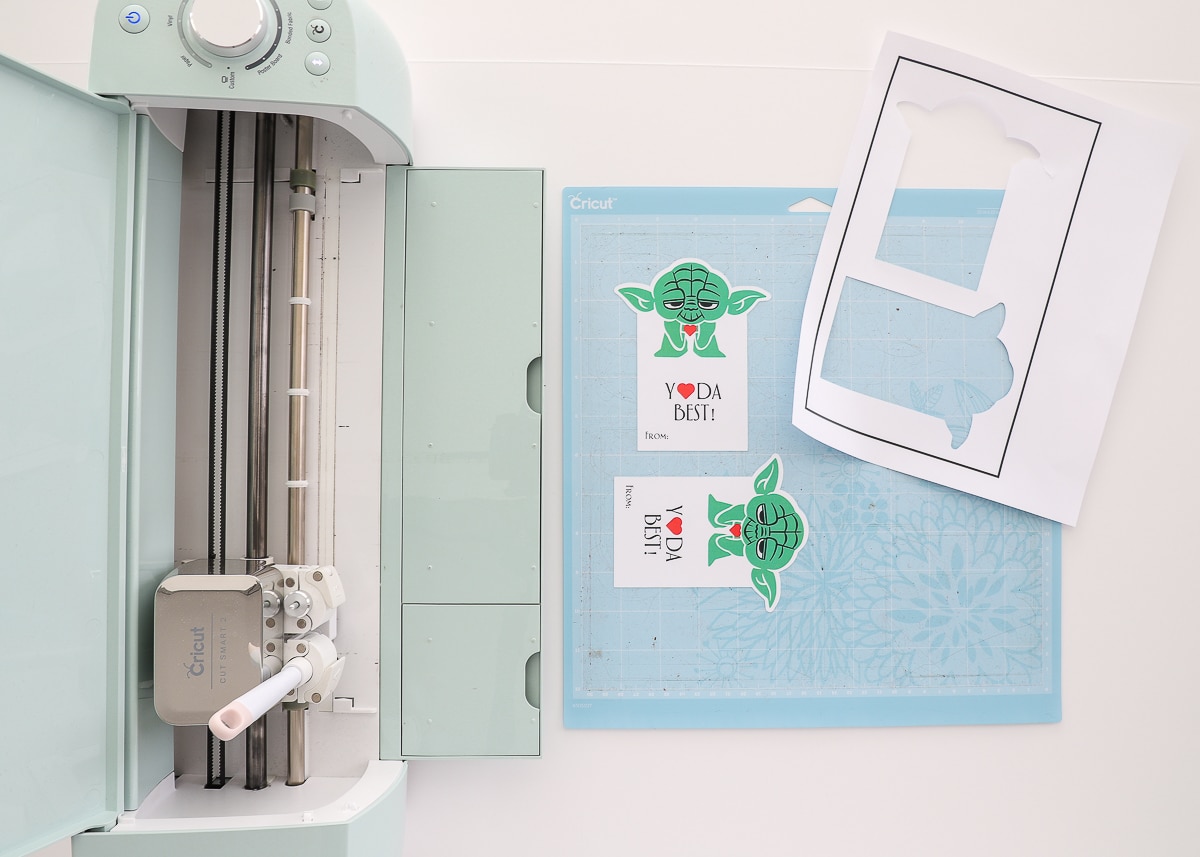
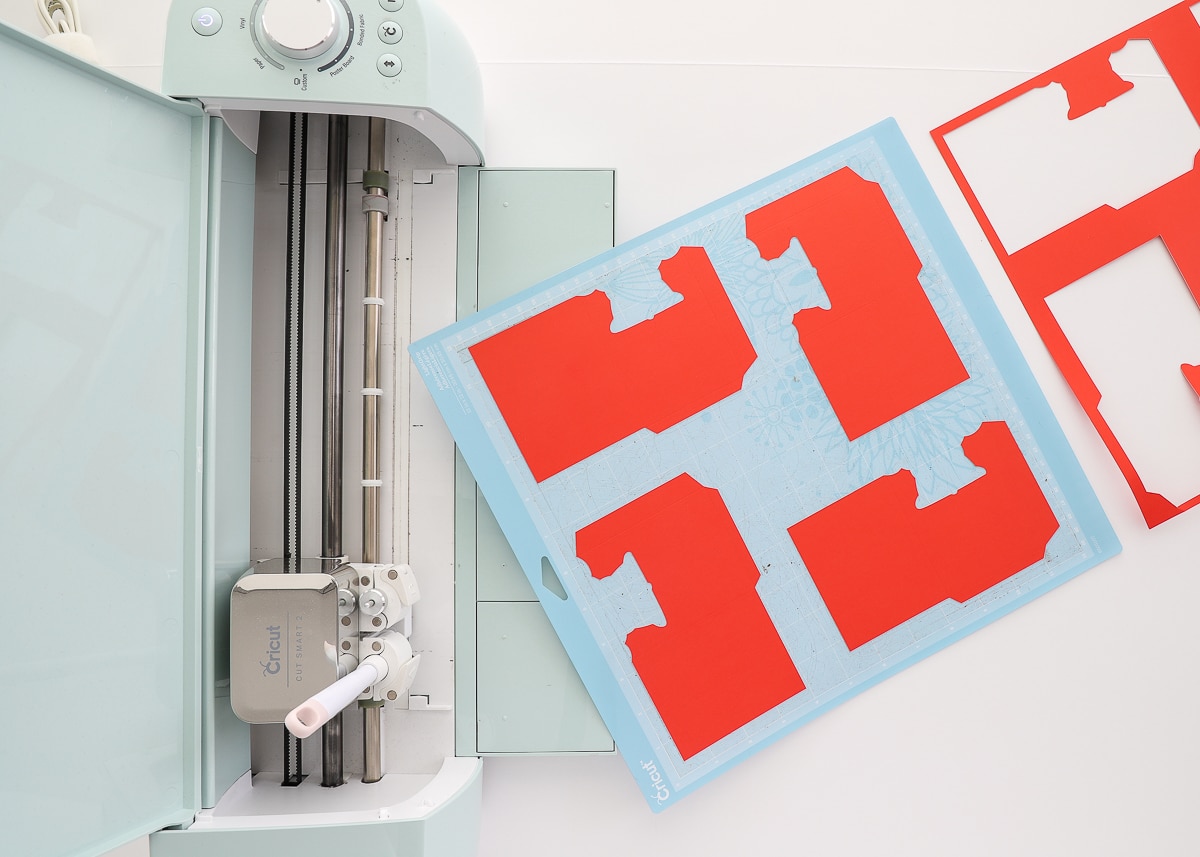
After you unload the mat and remove the excess paper, you’ll be left with perfectly cut out Yodas (or other Star Wars friends!).
At this point, you can keep loading your pre-printed papers and cutting them out, just be sure that the printed design you’ve loaded on your mat matches your cut screen in Cricut Design Space.
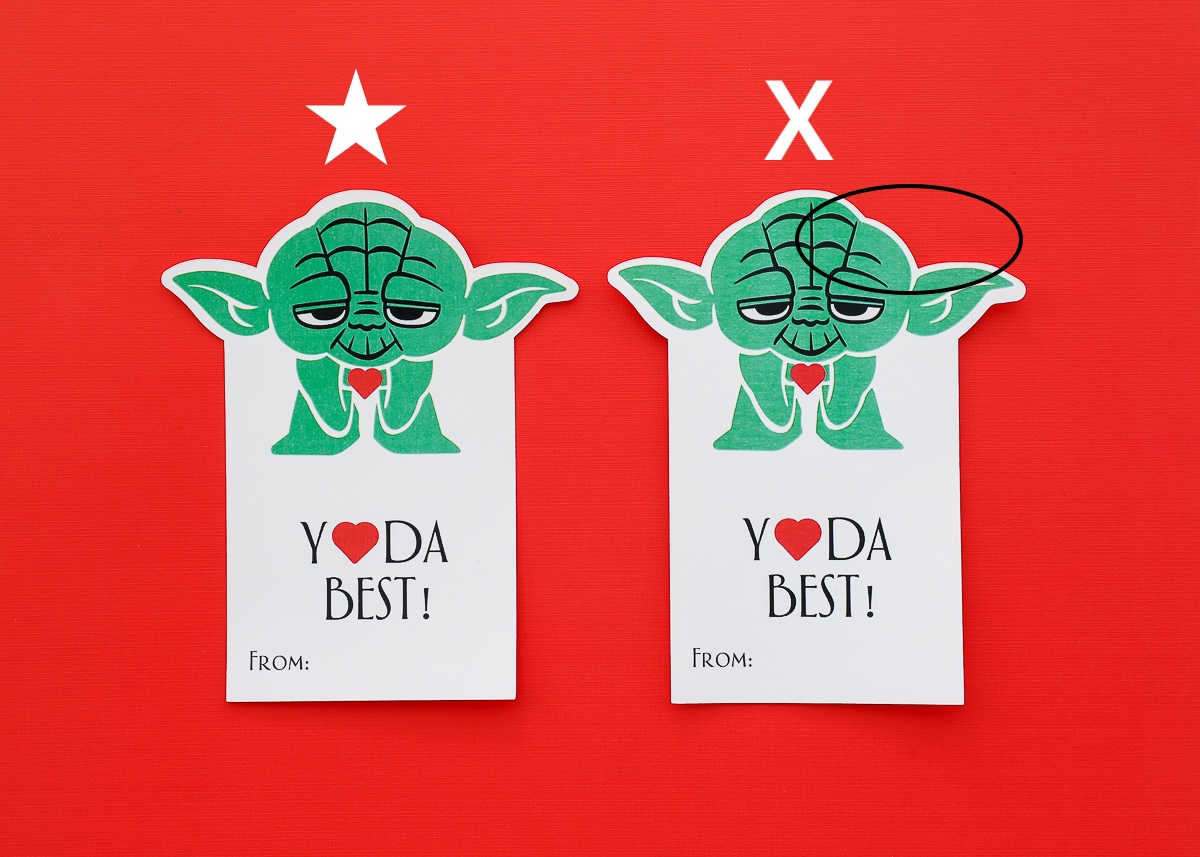
TIP! These Valentines are designed so that there is a perfect margin of white around each Star Wars friend. If you cut out the design and the margin is not the same all the way around (below right), you likely need to re-calibrate your machine. This is super easy. Just click the 3 horizontal lines in the upper left corner of your screen in Design Space and then select “Calibration.” Follow the instructions in the wizard until your machine is perfectly calibrated!
If you are going to make more than one Star Wars friend, I do recommend doing all the Yodas at once, all the Vaders at once etc. It’s a little more efficient and will keep your paper waste to a minimum!

Making the Star Wars Valentines Envelopes
With the Valentines made, let’s walk through how to make the matching envelopes!

Back on the Cricut Design Space Cut Screen, turn your attention to the envelope mat, which should be designated as “Score | Cut”. This means your Cricut (either the Explore or the Maker) will score the envelope lines and then cut out the envelopes.
TIP! Cricut Design Space will only auto-populate 2 envelopes onto a 12×12″ mat. But you can manually adjust the envelopes by rotating them in order to fit 4 at a time!
With the envelopes formatted on your cut screen, load up a singe piece of 12×12″ cardstock onto a mat. If you are working on an Explore, ensure you have both the Fine Point Blade and the Scoring Stylus loaded into the clamps (as shown below). If you are working with a Maker, follow the screen prompts to alternate the Fine Point Blade and Scoring Wheel as necessary.
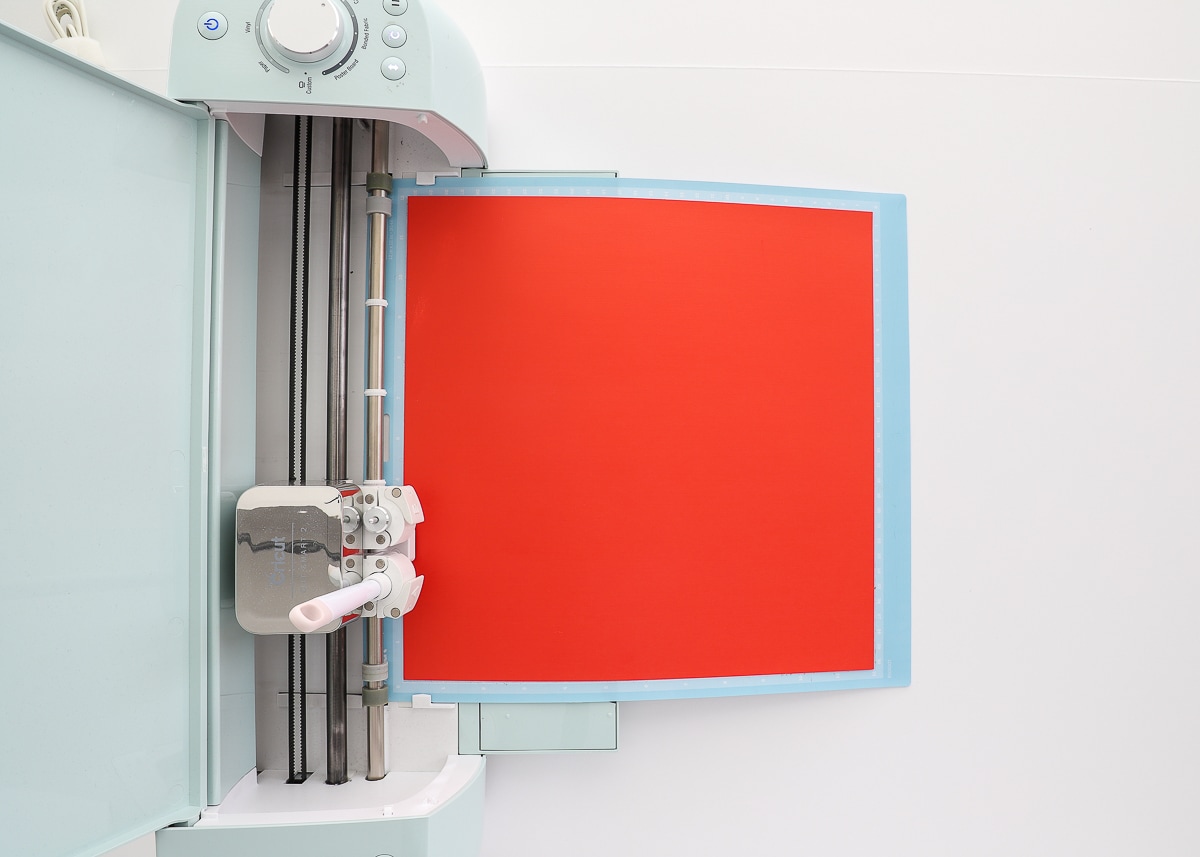
Once you hit “Go,” the machine will both score and cut out your envelopes.
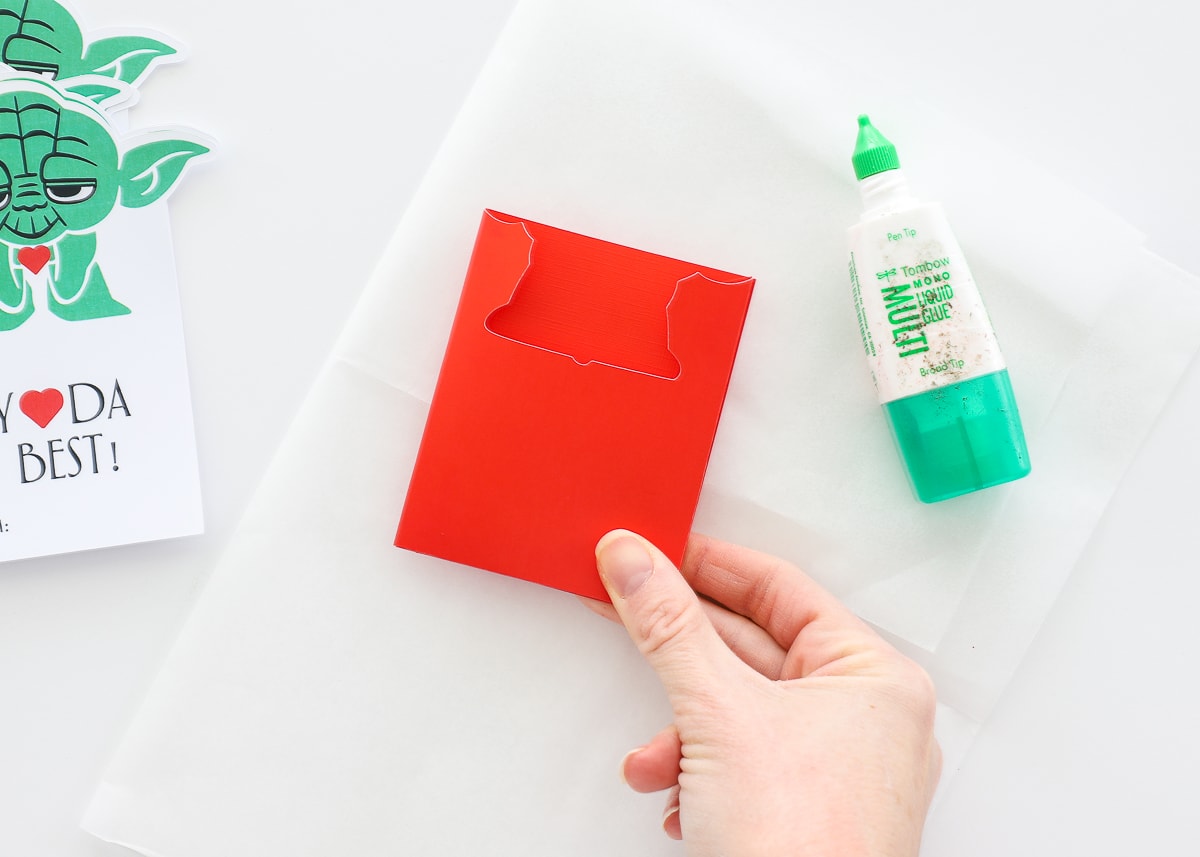
To assemble the envelopes, fold along the three scores lines…
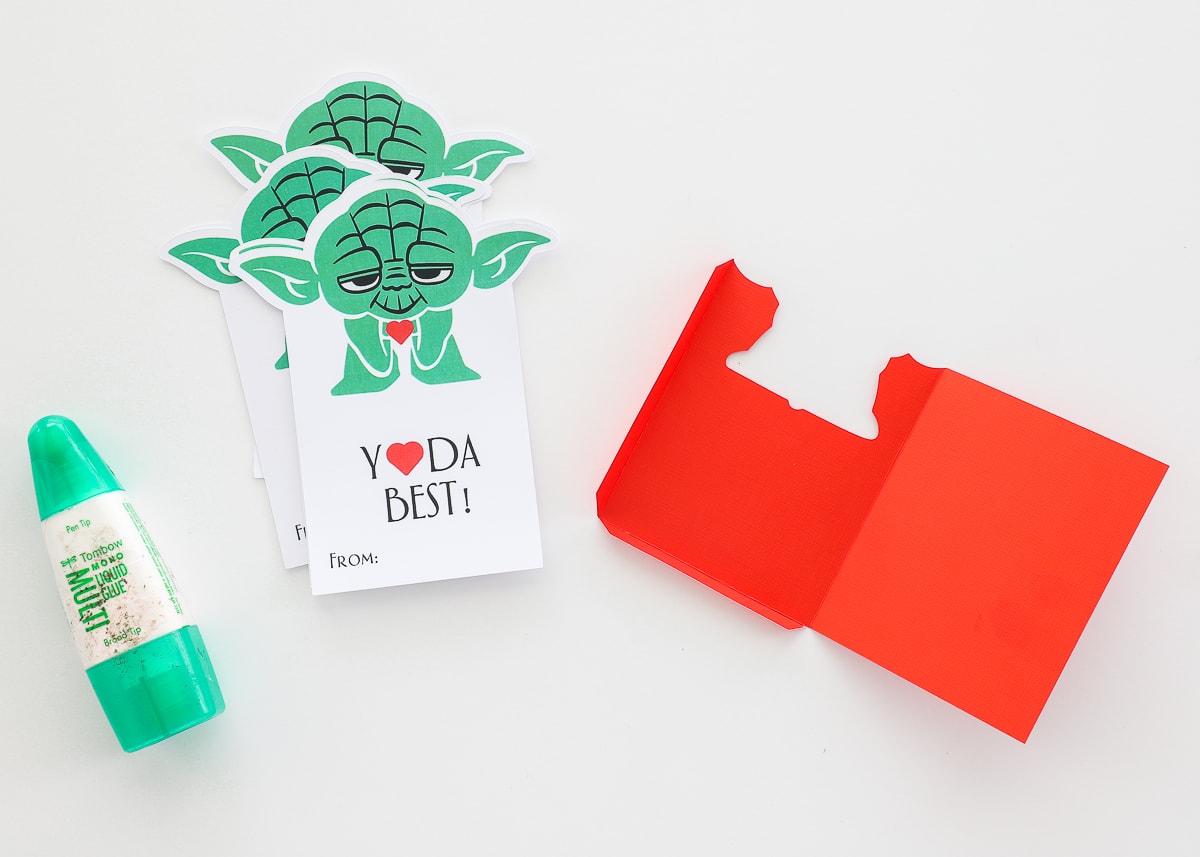
Then use glue or strong roller adhesive along the bottom and side tabs…
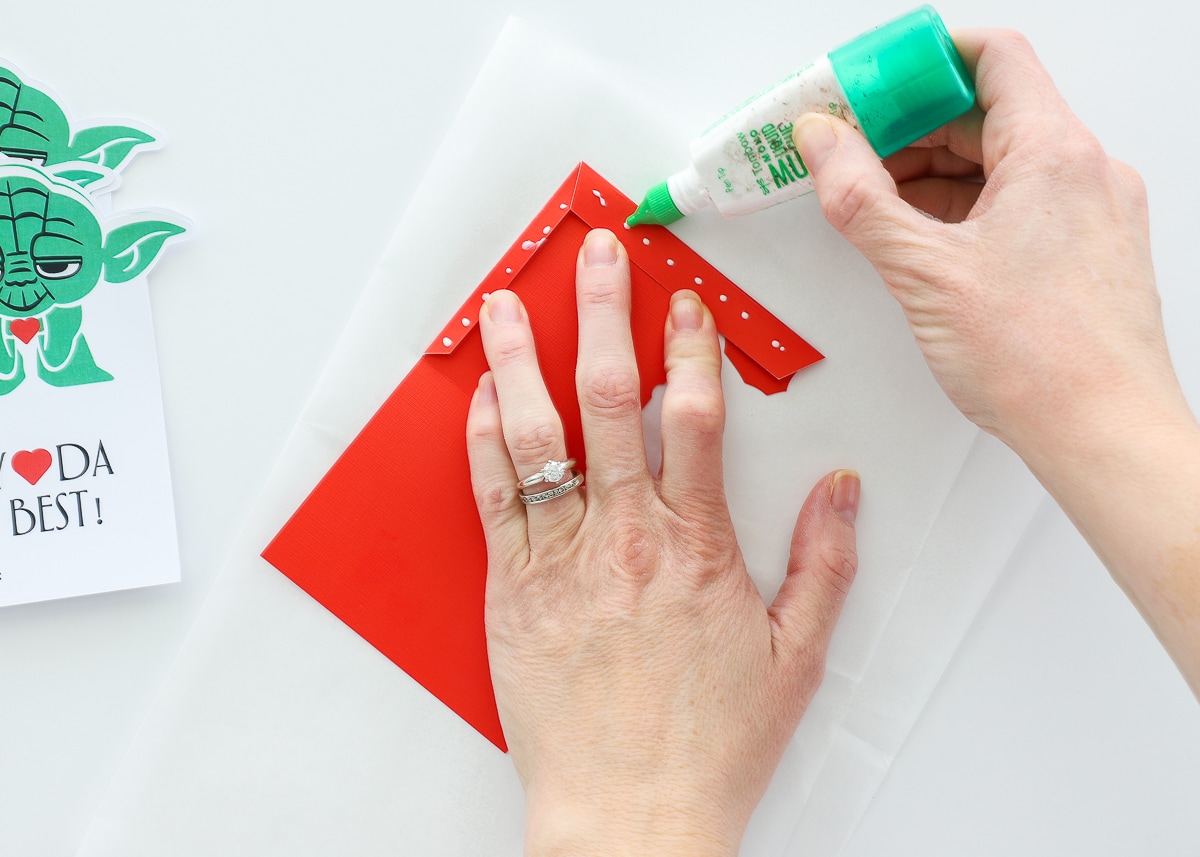
…and fold the back of the envelope onto the tabs. Press firmly to hold in place.
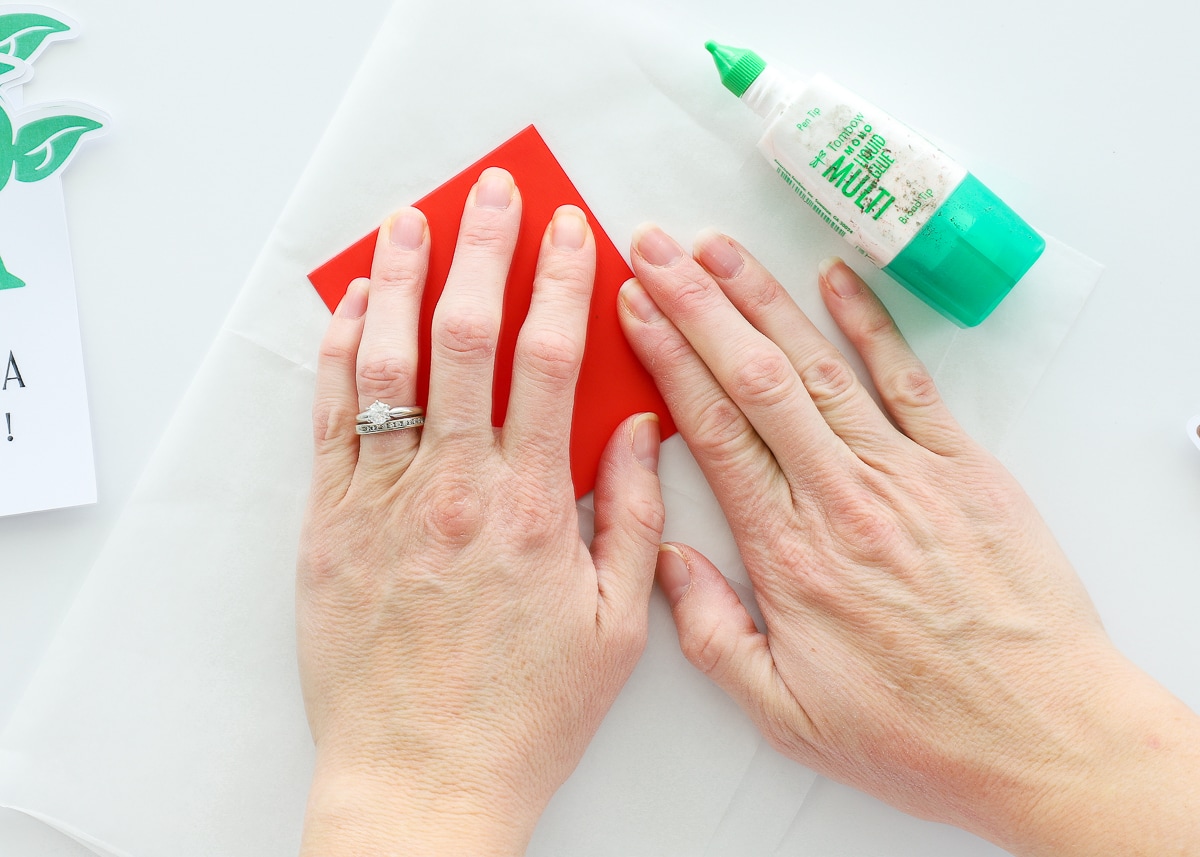
And just like that, the envelop is complete!
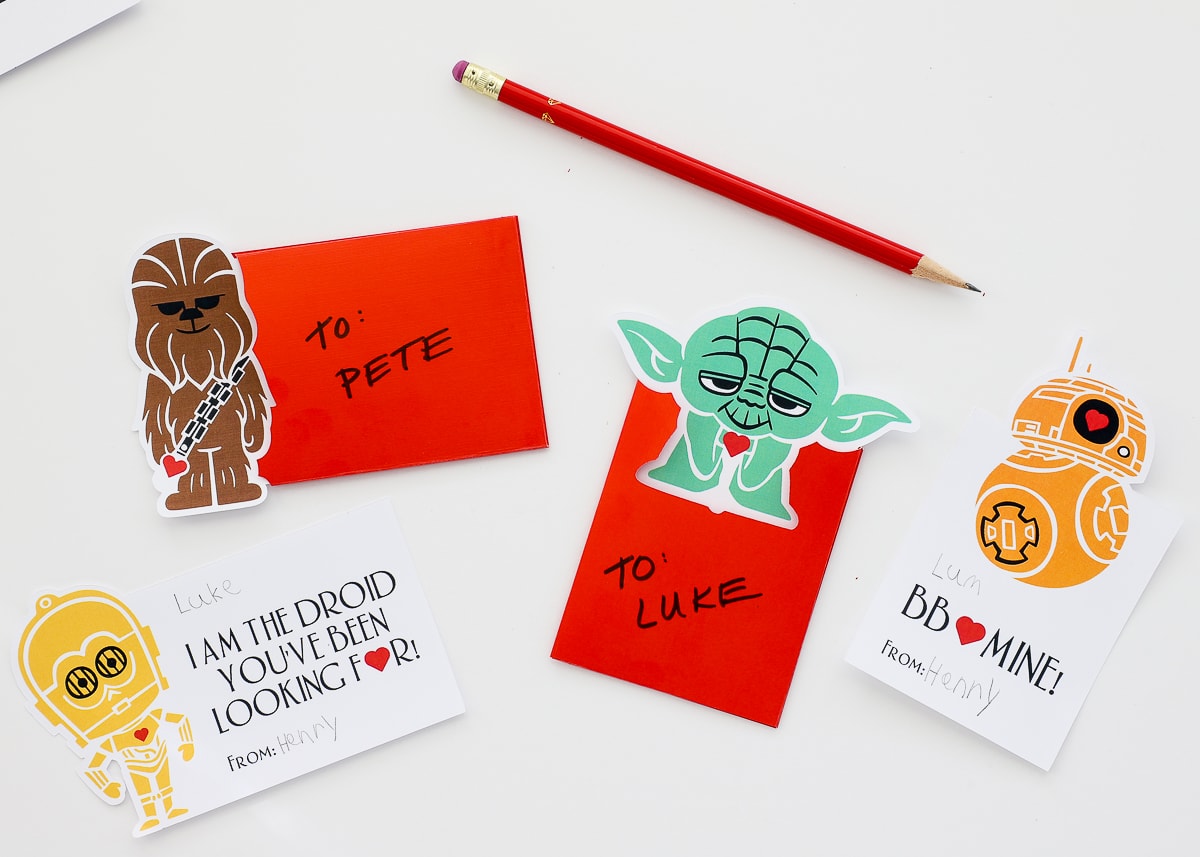
Now, slide Yoda in and get ready to gift him to your favorite Valentine!
Henry and I had lots of debate about what color the envelopes should be. He first wanted each envelope to match the character (e.g., green envelopes for Yoda, black for Vader, etc); but when they didn’t feel very Valentine-ish, we switched to red. Star Wars paper, glossy black, or even patterned Valentine paper would all make for cute envelopes!
If you do make the envelopes, consider labeling the outsides so kids can quickly hand them out! Also, the envelopes are just roomy enough to add a piece of candy or other treat too!
You guys know I have a habit of making things just a tad complicated in the name of cuteness, but if there’s one thing I want to emphasize here…these are EASY! I’ve done all the hard work of slicing and splicing and sizing for you so all you have to do is literally open the design, edit (only if you want), print them on your home printer and load them into your Cricut machine! Henry is absolutely over-the-moon about these, and if you too have a Star Wars lover in your home, I promise these will be a big hit!
And can I just say it? It feels sooooo good to have our Valentines done for this year and it’s not even February yet! #happydance!
Looking for another fun Valentine idea to make on your Cricut? Check out these popular Pencil Arrow Valentines!
![]()
Megan
29 Comments on “Easy Star Wars Valentines You Can Make with a Cricut!”
I don’t have a Cricut but do have grandkids. These are wonderful and your directions look great! Maybe I need a Cricut …
I would Love Love Love to make these. But no matter how hard I try I cannot find these in Cricut Library. Are these restricted access to USA only? I am in Scotland. Any assistance will be very well received. x
Hi Marie!
Hmmm….I don’t know but I don’t think so! When you click directly on this link, what happens? Does the project open in the new desktop version of Design Space?
Let me know what you see and we’ll try to get you up and running!Megan
I am unable to get them either in Australia
These are the greatest! As a Cricut newbie, I’ve been struggling with even the basics of use, but these designs were my salvation. Not only do I now have handfuls of adorable Valentine’s cards for my family (who says you have to be a kid to enjoy giving these out??), but while making them I learned so much about print and cut designs, making multiple copies to save paper and time, and customizing! And the mistakes I made were easily remedied while adding to my learning. At last I feel like I can use my Cricut with confidence, and go on to learn more difficult techniques. Thank you so much, Megan!
Hi! I absolutely love these cards! But what I’d love even more is to see Baby Yoda (Grogu) added. Would you ever consider doing this? 🥰
Hi Teresa!
Thanks so much for asking! Unfortunately, I made these using artwork available in the Cricut Design Space library, and Grogu isn’t included in this set of images.
I’ll certainly update the instructions if I ever add him!Thanks,Megan
Thanks for this – they are adorable and my 3 Star Wars-loving boys will love these for Valentine’s Day. When I go to check out on Cricut Design Space, it appears I’m getting charged $4.99 for the Aphasia BT font, but I already have that font on my system. Any idea how to address? Thanks!
HI Jackie!
Hmmmm…that definitely doesn’t sound right. I would log out/log back in to start. Then make sure your DS is fully updated.
If it’s still trying to charge you, you can always “Unflatten” the images and replace the text with one you have for free!
Hope that helps a bit! Have fun with the Valentines!Megan
Thanks Megan. So I purchased 3 of them a couple weeks back, I printed them out on my home printer and now I’m ready to do the cutting, but they are nowhere to be found on my Cricut Design Space! Help! Need to prep them for the boys’ classes this week!
When I click on the link it only opens my Cricut Design Space, it does not give me the project.
Think you so much for this project – it was perfect to do with my 5th grade daughter! She can’t wait to share them with her classmates! (We are currently in France but she attends an American school, so we couldn’t just go buy little cards – we needed to make cards in English and this was absolutely perfect and took a stressful thing and made it fun!!!) Thank you!!!
I am so glad to hear they worked out for you!!! Thanks for circling back around and sharing your experience!
Happy Valentine’s Day to you guys!
Megan
Hello! I am loving these valentines! I purchased all of them, but I am having a couple of problems. First, I’ve needed to close and restart Design Space a couple of times. In order to open up the project, the only way I’ve been able to do it is to come to your blog and use your link. Is there not a way for this to show up under “My Projects” in Design Space?
Also, I increased my project quantity to 3, and was able to print and cut the first four pages just fine. But, now I am continuously getting the error message saying that my Cricut cannot read the guide lines / the square around the artwork. I’ve been on some FB Cricut groups, and people have a variety of suggestions, all of which I have tried. I’ve tried calibration, closing the lid while scanning, turning off all of the lights in our room, shining a flashlight on the light, etc.
Have you had any issues like this? I am using a Cricut Explore Air 2. I appreciate your help and am loving the design!
Hi Sarah!
Thanks so much for reaching out. To answer your questions:
First, you can always “Save As” to keep the project in your projects. That way you can make changes, save them, and re-open from your own DS whenever needed.
As far as the print lines…that usually only happens to me when my printer is low on black ink. (I actually haven’t heard or used ANY of the suggestions you mentioned.) Usually once I re-print, I don’t have any issues with my machine reading the lines. Have you updated Design Space and checked for any firmware updates for your machine?
I’ll keep thinking if there’s anything else you can try!Megan
SUPER CUTE and WAY easier then it looked. Thanks for this, my son loves them 🙂
I have a Maker, but am a total newbie. Do I print using my maker and those pens that you can get with it or do I print it on my actual printer? Thanks!!
Hi Danielle!
Using the “Print Then Cut” feature means you print on your home printer and then cut out the designs with the Maker. You can see a full explanation of how it all works here: https://thehomesihavemade.com/2020/09/how-to-use-print-then-cut-on-a-cricut/
Hope that helps a bit!Megan
Incredibly disappointing. This was the first thing I wanted to make on the Cricut Maker I just ordered, and at no point had I seen *anything* indicating that content could be limited by country, but sure enough – this isn’t available in the UK. Has really put me off, tbh.
Hi Heather,
I am really sorry for your disappointment. While I had anecdotally been told by readers the Star Wars Images weren’t widely available across all countries, I am not familiar enough with Cricut’s licensing policies to make a blanket statement regarding availability. However, after your feedback, I will put a note in the directions to make others aware of the possibility.
Sorry again for the confusion, but I do think you will still find lots of amazing things to make with your new machine!
Thanks,Megan
Could you tell me what font you used? I bought this on my Maker and my machine said I could not use this font because I did not have it and it would default to Arial.
Hi Vicki!
The original font is a Cricut font: Aphasia BT.
You can also add in new text/font that you own/like and then re-flatten everything together!
Hope that helps and good luck with your Valentines!
I ordered these and did not adjust, just started with Make It. When it tried printing, it kept cutting off the top inch or so of the paper. I reloaded the paper and tried again… same. I was using 8×11 card stock. Any suggestions?
Hello! These are ADORABLE! I do not have a cricut, but I would love to have these. Is that possible to do? Or would I need a cricut? Thank you!
Hi Audrey!
Thank you so much! Unfortunately, these particular Star Wars images are proprietary to Cricut, so they have to be made with a Cricut machine (and there is no way for me to provide them in other formats.)
So sorry!
Megan
Hello these are adorable and I think they are perfect for the young man I work with. However I don’t own a Cricuit. Is it possible to just print it on a colored printer? Thanks
Hi!! I love this project! I was wondering where did you get these images? I want to get Spidey and Friends as well. Let me know! Thanks.
Hi, I am in a jam….. my printer has decided that it doesnt want to print on my cardstock anymore and I am 3/4 of the way through my project. Can you please tell me how I would take these images to someplace like kinkos or fedex and print them on the cardstock? Is there a file or something you can send me? I am so lost right now lol Thanks!!!
Hi Haylee!
Yes, you do have an option. On the “Print Screen,” there is an option to open/save PDF. If you do that, you can save the PDF to your computer, then send/take it to a print shop. Just know that you’ll need to keep the designs arranged on the cut screen exactly the same in Design Space in order for the pre-printed lines to match! (And you might need to save each “mat” separately).
Let me know if you have any questions or need some screenshots for help!
Good luck!
Megan