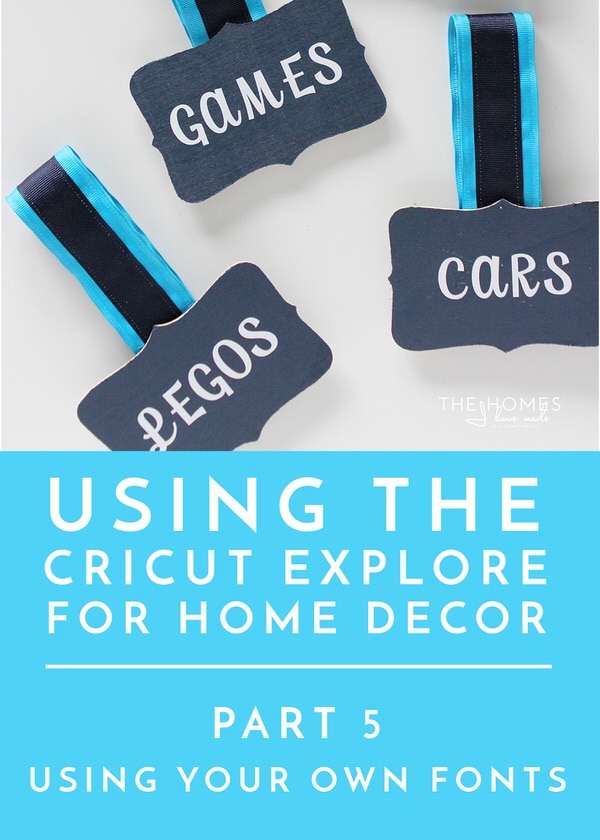
Cricut Explore for Home Decor | Part 5: How to Use Your Own Fonts in Cricut Design Space
This post about How to Use Your Own Fonts in Cricut Design Space is sponsored by FontBundles. I take great care to only work with companies and brands that are a good fit for me, my home, my blog, and my readers. All opinions are my own. Affiliate links used; you can read my Policies & Disclosures here.
You all know I rely on my Cricut Explore for a variety of projects around our home. And while I find the Cricut Explore and the corresponding Design Space software pretty intuitive, the overwhelming response to my “Using the Cricut Explore for Home Decor” tutorials tells me otherwise. I’ve really enjoyed breaking down the various techniques I use to make all my own projects into easily digestible steps (so far we’ve covered: The Essentials | Working with Vinyl | Importing Your Own Images | Mastering Attach); and so many of you have found them helpful! Today I want to show you how to import and use your own fonts within the Cricut Design Space platform!
Years ago, before I bought the Cricut Explore , I had one major issue with my old Cricut Expressions machine: I could only use the fonts that either came with the machine or I had bought (and back then, a font cartridge cost anywhere from $10-$30!!!) I watched my friends and family who owned Silhouette machines (Cricut’s main competitor) make awesome typography artwork projects, labels, and more using any font they had on their computer, and I was incredibly jealous. In fact, this functionality alone almost made me jump Team Cricut to the Silhouette platform. Thankfully, the people over at Cricut realized the attractiveness of this capability; and when they released the Cricut Explore line of machines a few years back, you no longer had to rely on purchased Cricut fonts and could instead use/cut any font installed on your computer! I’m not lying when I say that this one update (among many they made) kept me on Team Cricut for the long haul! As many of you know, cutting text with my Cricut Explore is the primary way I make labels, artwork and even gifts; and I love being able to use any font I find!

DIY Typography Artwork | Magnetic Basket Labels | Battery Case
Where to Find Cool New Fonts
As someone who likes to create a variety of things for my home and business…from artwork and labels to printables, cards, invitations and more…I am constantly on the lookout for cool new fonts to incorporate. There are lots of great free fonts available (DaFont and Font Squirrel are favorite sites), but I’ve been known to also fall pretty hard for an expensive, exclusive font. I hate shelling out big bucks for a font for a single project, so when FontBundles approached me and asked me to explore their font offerings, I was intrigued! Dozens of great fonts for just dollars? Count me in!
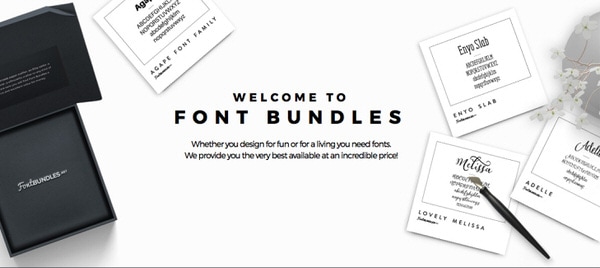
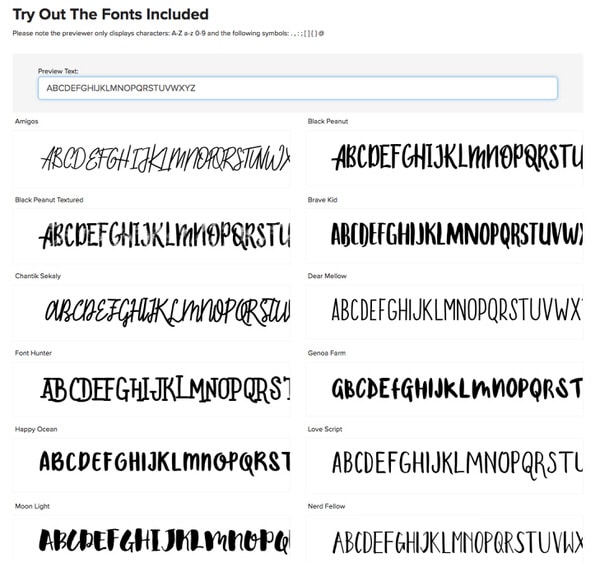
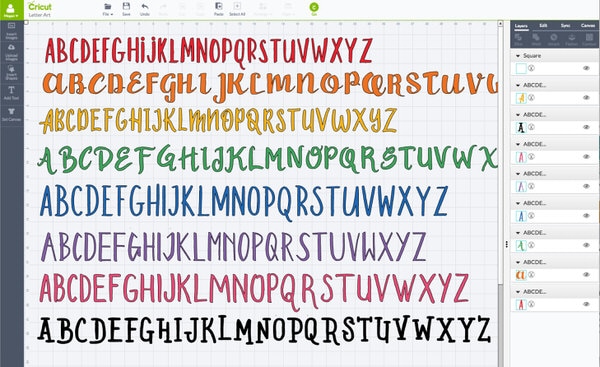
Not only does FontBundles have a ton of really awesome fonts (and other design elements too!) at really great prices, but they run regular bundles where they group dozens of fonts together for a deeply discounted price. I decided to play with the Design Font Box Bundle, where I got access to 21 fonts, 21 symbol fonts, 85 digital textures and 50 logo templates for just $24! Here is a sample of the fonts I got in the bundle…I love that you can type in any phrase and see how it looks in all the different fonts at once time!
If you’re a font junkie like I am, I highly recommend you check out FontBundles for great (rotating) deals. This Design Font Box bundle is only available until March 20th, but you can always check out the most current bundles here! In addition to the bundles, FontBundles also shares a FREE download each week! You can see what’s currently available for FREE here and get reminder email each time one is released by creating an account.
How to Install Fonts on a Mac Computer
It’s been years since I’ve worked on a Windows computer, so I apologize that I can only provide instructions for installing fonts on a Mac computer. If you’re a Windows user, you can reference this page!
So you found/bought some awesome fonts that you want to use with your Cricut Explore to make your next awesome project. Before you can get designing and cutting with the font(s) though, you need to install them on your computer. Here’s how to do it:
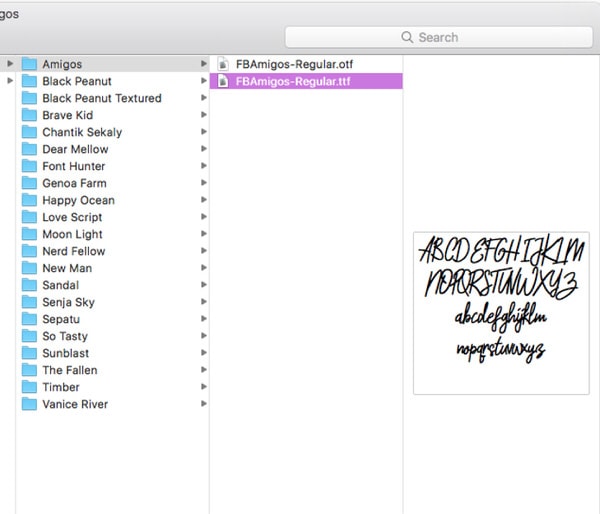
Find the font(s) you want to use for your project and download them to your computer. Usually there is a “Download” button at checkout or on the free site. Once you’ve downloaded the font(s), find the folder, file, or zip folder on your computer (usually in your downloads folder). If the fonts are zipped into a single file, double click to “un-zip” the folder. If there are multiple fonts to install, it will usually look like this:
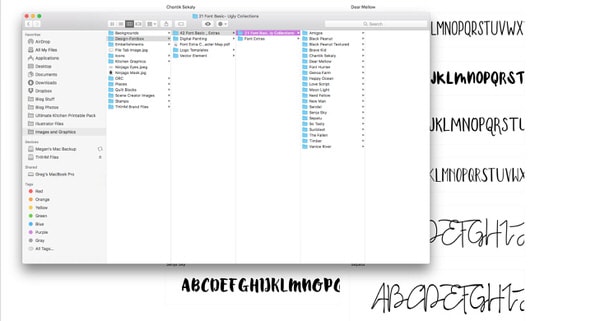
Notice there is a folder for each of the 21 fonts from the Design Font Box bundle. When you select one of the folders, you will notice there are two file options (.otf and .ttf). I’m not too savvy on which file you should install and why (you can read more for yourself here); I’ve used both with equal success.
 To install the font, simply double click on the font file (.otf or .ttf), and your computer’s Font Box will open with a dialogue box like this one:
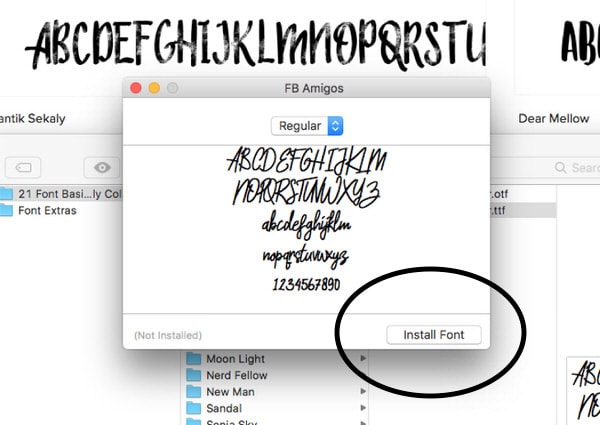
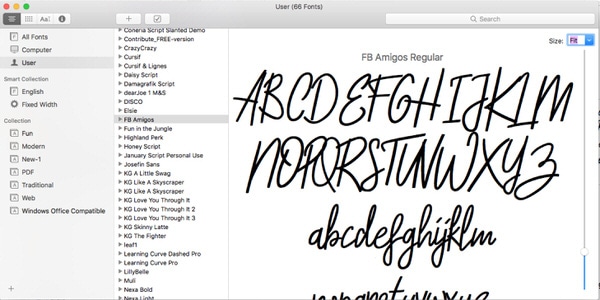
Simply click the “Install Font” button, and the font will be installed on your computer. You can verify it’s installed when Font Box shows the font as so:
Whether you download a free font from a site or have fonts included in some sort of bundle you purchase, the installation process should look just as I outlined here! With new fonts installed, you’re ready to use them in Cricut Design Space!
How to Use Your Own Fonts in Cricut Design Space
Once your fonts are installed on your computer, you are ready to use them in Cricut Design Space! To do so, start by inserting some text into a new canvas. Do this by selecting the Text tool on the left-side panel (the one with the big T) and type whatever you want. You’ll notice the default text is typically Cricut Alphabet, which is a Cricut font that comes free with the software (I think).
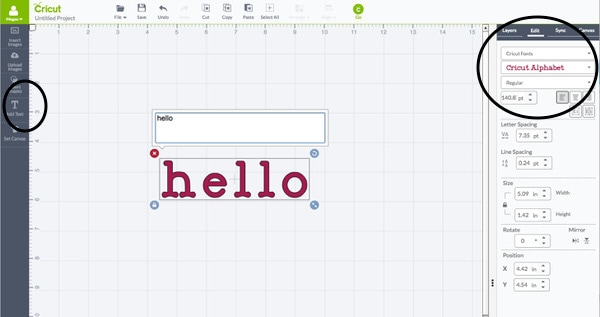
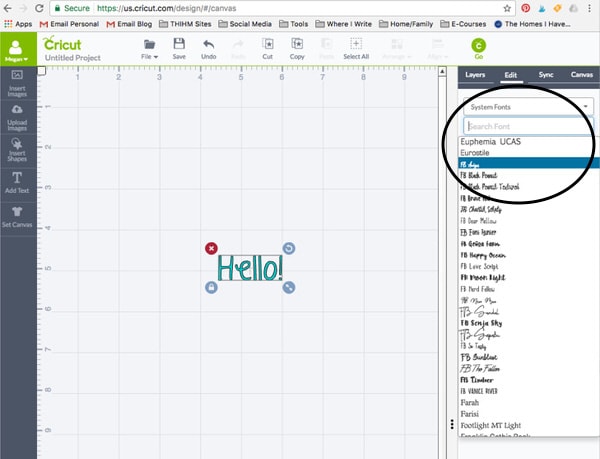
To change the font to one on your computer (a non-Cricut Font), make sure your text is selected. Then change the top drop-down menu under the Edit panel on the right-hand toolbox to “System Fonts” (rather than “Cricut Fonts”). When you change to “System Fonts,” you’ll then see all your computer fonts in the second drop-down menu. In the image below, you can see all my new Font Bundle fonts (denoted by the FB before each font). Once you select which font you want to use, your text will automatically change to that font in a “cuttable” format (rather than a written format).
Want to save this post?
Fixing Spacing for Script Fonts
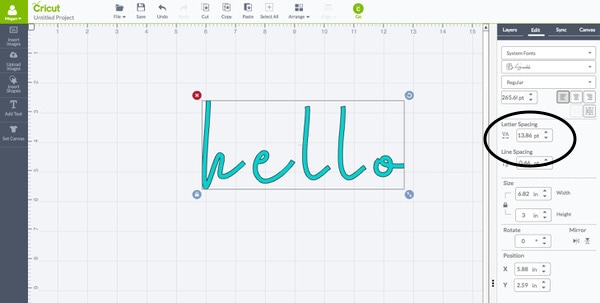
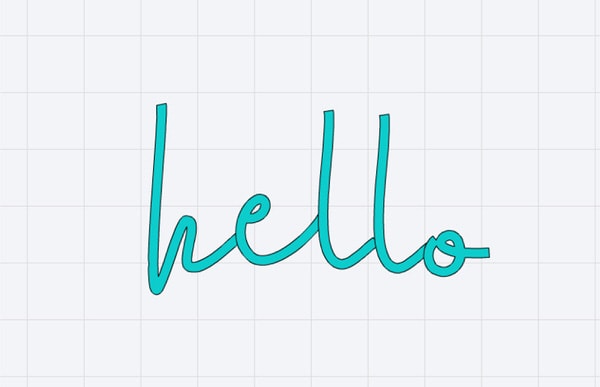
In playing with LOTS of different fonts in Cricut Design Space, I’ve noticed that sometimes non-Cricut fonts don’t translate perfectly to the Design Space platform. Specially script fonts, that when used in a word processing program are joined together to look like a conjoined/cursive word; but when they are loaded into Design Space, they are too spread out. For example, when I change my “hello” to the Sandal font (a simple script font), notice the letters do not touch and would therefor be cut as individual letters rather than one long, cursive word.
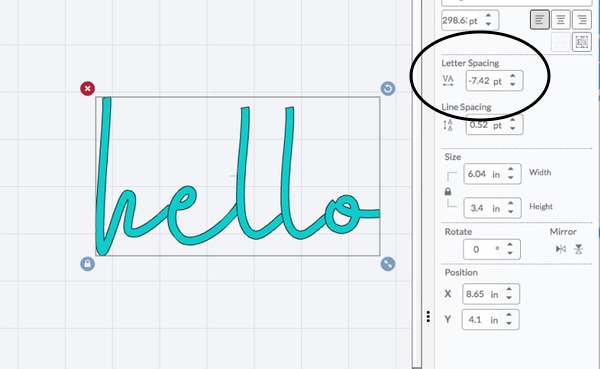
There are two ways to fix this! The first, is to decrease the letter spacing between each letter using the Edit panel in the right-hand toolbox. For this font, I had to take the letter spacing down to -7.42 in order to get the letters to touch. Notice, however, the letters are still separate images and will still be cut separately. I’ll show you how to fix that in a minute.
Although decreasing the distance between letters is quick and easy, it doesn’t always result in spacing I like. As such, I use another option for fixing the spacing. This time, select the word and then right click to “Ungroup” the letters…
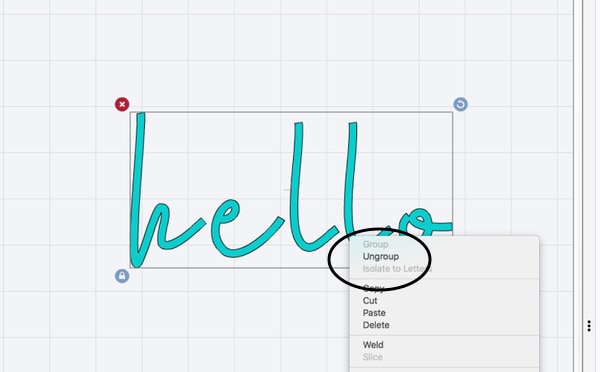
Ungrouping the letters allows you to move the letters around exactly as you please. Notice each letter is it’s own cut image, as shown in the Layers panel on the right:
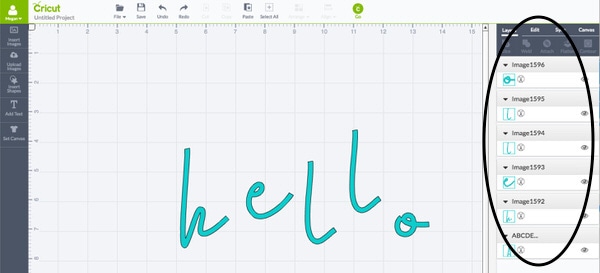
With each letter as a stand-alone image, you can then space them exactly as you want.
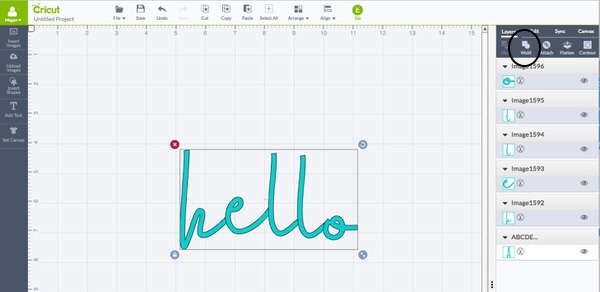
Once you have the spacing right (using whichever method you prefer), select all the letters together and hit the “Weld” button on the Layers panel.
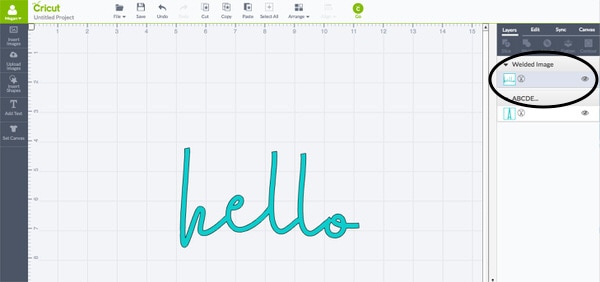
This welds the letters into a single, solid cut file by eliminating all the lines between each letter. The new welded image is shown as a single image in the Layers panel on the right.
Sneak Peek!
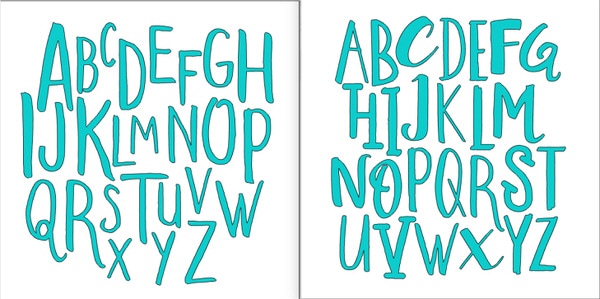
I couldn’t resist playing with many of the various fonts included in the Design Font Box bundle, using the technique I showed above…
By ungrouping the letters in all the different fonts, I was able to arrange letters in all the various fonts into some really neat artwork ideas for our playroom:
I’m going to show you the entire tutorial for this project here on Friday (yes, two posts from me this week!), but here is a sneak peek! (You can now see the full tutorial for this Alphabet Artwork here!!!)
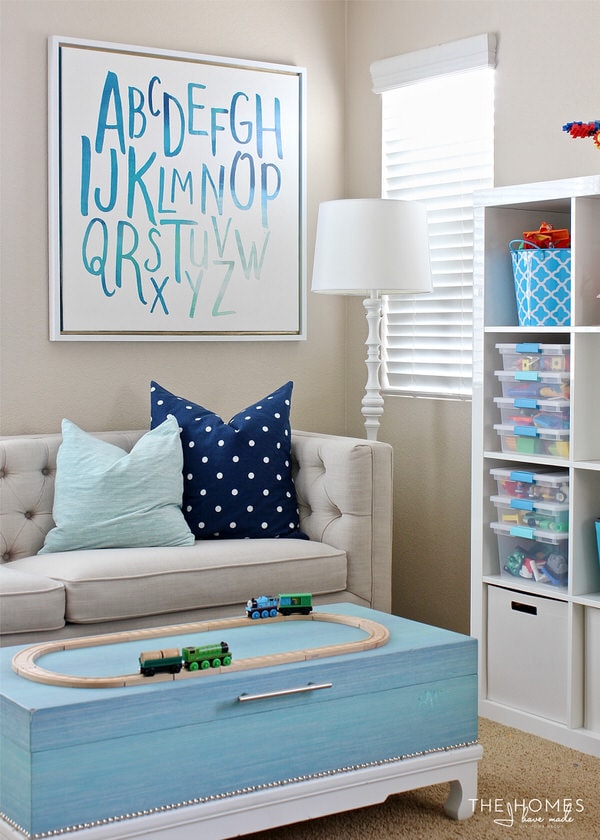
I hope you found this tutorial helpful – I can’t wait to show you how I put this technique into action for our playroom artwork project. I’ll see you back here Friday with all the details!

READY TO CREATE MORE WITH YOUR CRICUT?
Explore these other helpful resources by clicking below!


Megan
4 Comments on “Cricut Explore for Home Decor | Part 5: How to Use Your Own Fonts in Cricut Design Space”
I can’t wait to see how you made that gorgeous artwork for your playroom! Great tips! (Fellow Team Cricut girl here!!)
>> Christene
Keys to Inspiration
I would like to do more stenciling for home dec projects and have been frustrated that it is difficult to find good creative and italicized stencil fonts. Have you done stenciled word projects with your circuit? I would appreciate any suggestions for good fonts to use that I do not have to do a lot of reworking with to avoid the problem with the middle of letters such as A, B, D,O, P etc..
Hi Megan, love your tutorials. They have helped a lot learning my new Cricut Maker. I was wondering if you’ve tried flat embossing using the Cricut?
Hi Jenny,
I actually haven’t tried that yet! Sorry I can’t be of more help on that one!
Thanks for writing!
Megan