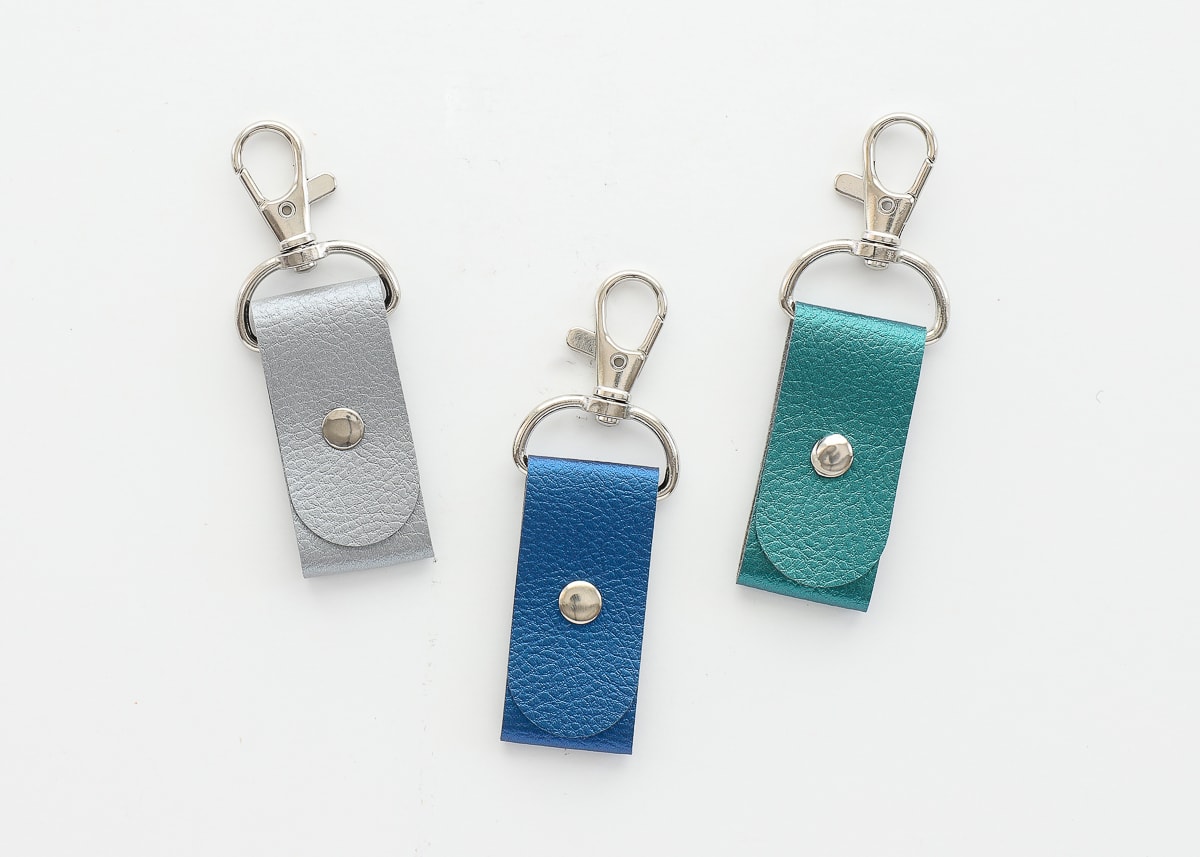
DIY Faux Leather Keychains with a Cricut
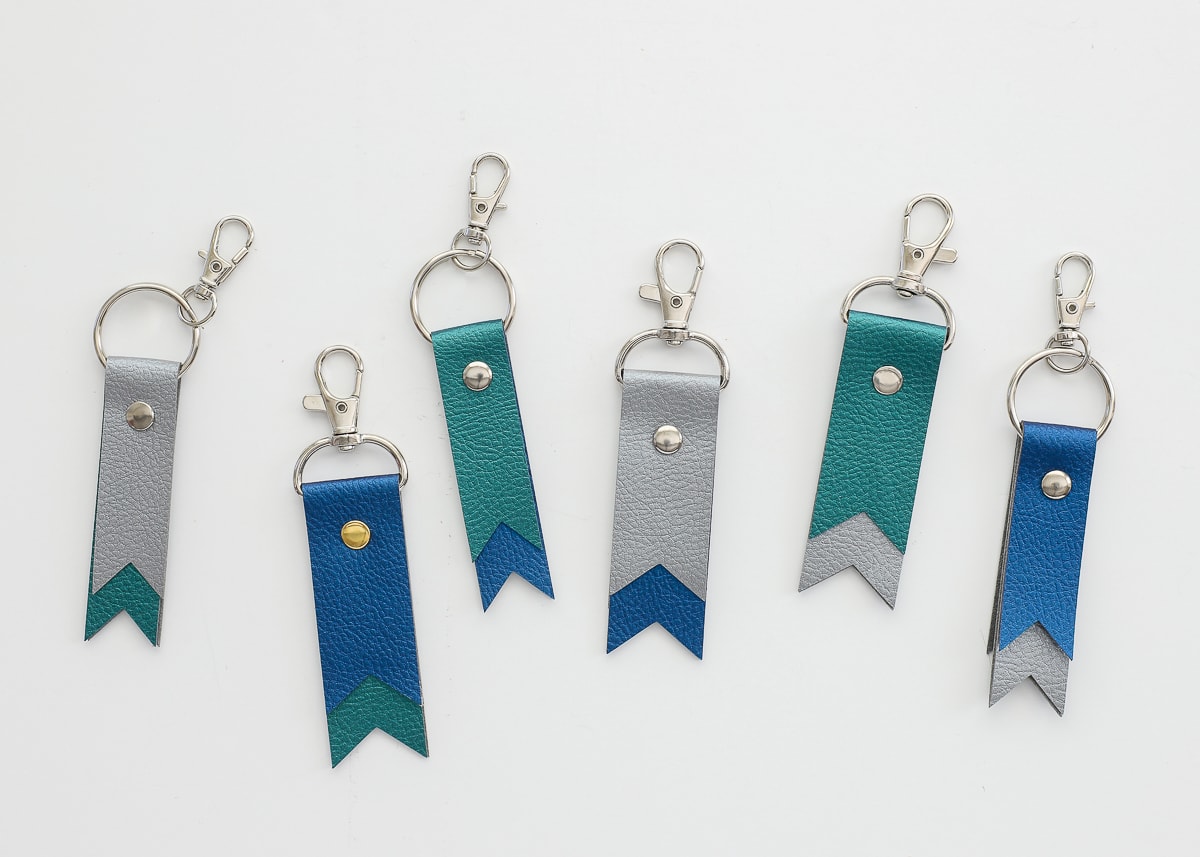
Fitting work into our “stay at home” life has certainly been a challenge these last few months, so more often than I like, I am usually working right up against tight deadlines. An unfortunate consequence of this is that I rarely have time to just sit and craft, be creative and let ideas flow. Recently however, I decided to ignore put aside some looming deadlines to instead work on a project I’ve had in mind for months (seriously…MONTHS)! In no time, I found myself waaaay down the rabbit hole of making DIY faux leather keychains with a Cricut. Not only do these keychains look ah-mazing, but they couldn’t be any easier (most come together in mere minutes!). I have 7 different styles to share with you today, and after you see how these come together, I just know you’ll be running to make a whole collection for yourself, friends and family too!
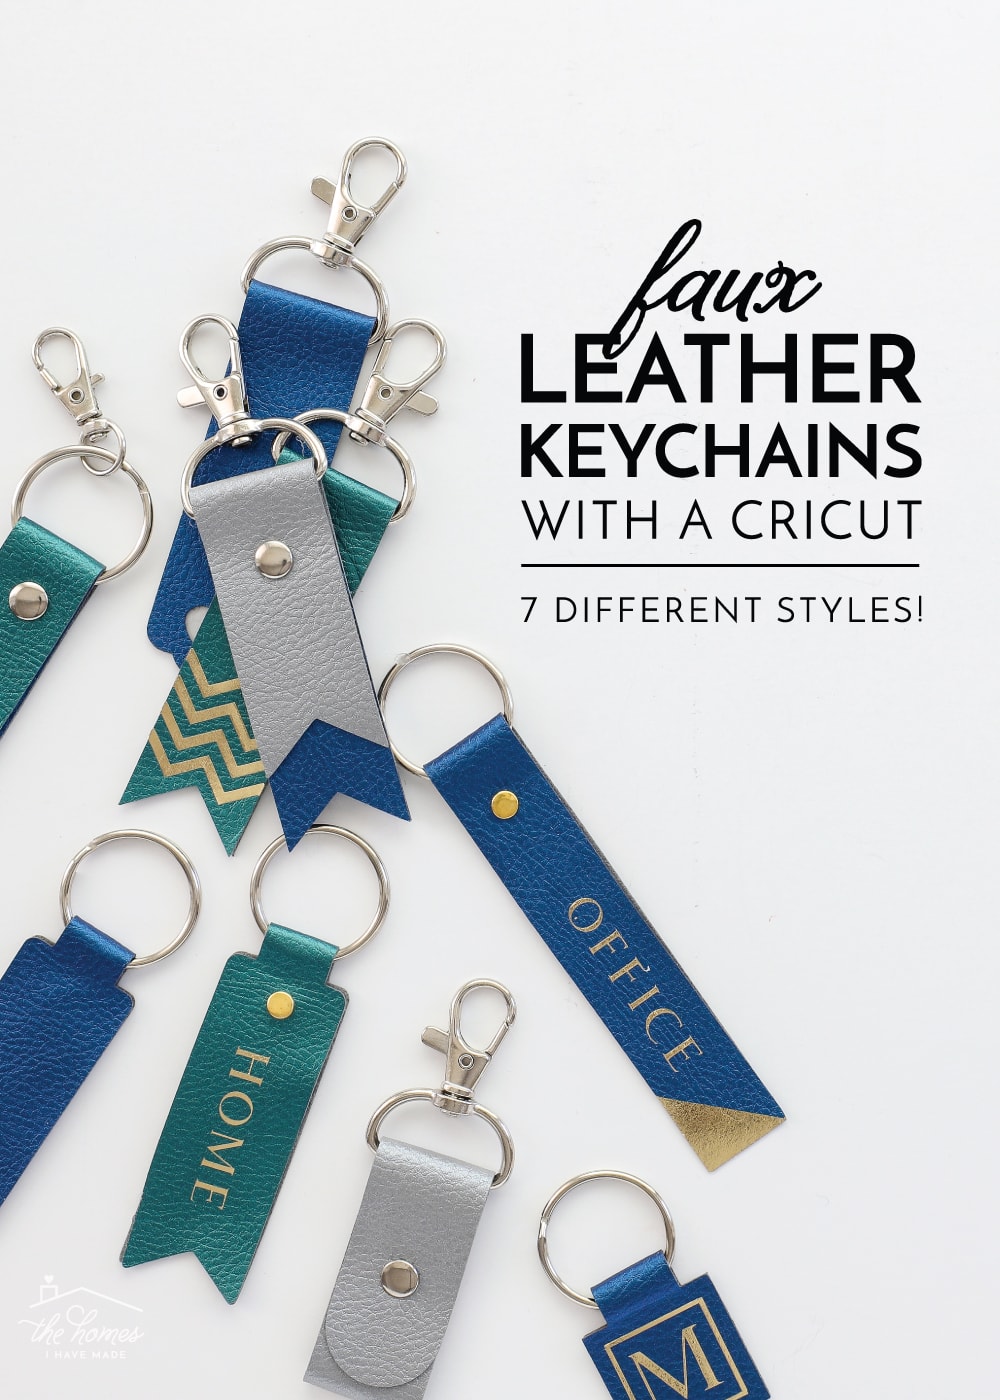
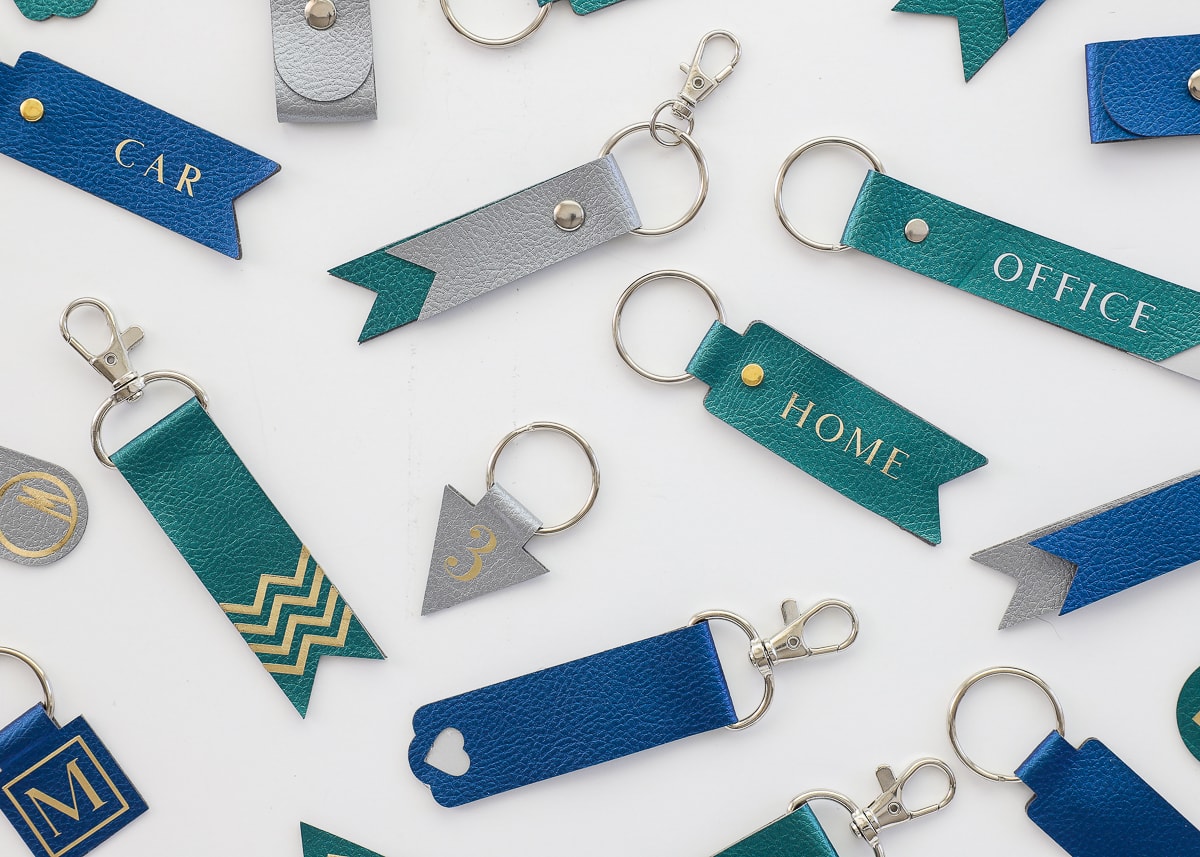
Making faux leather keychains with a Cricut isn’t really a new concept in the DIY world. However, I took the project up a notch by starting with some basic label shapes and adding a bunch of really chic iron-on details to make them unique and personalized. The result is a collection of keychain styles that look professionally made and have infinite possibilities!

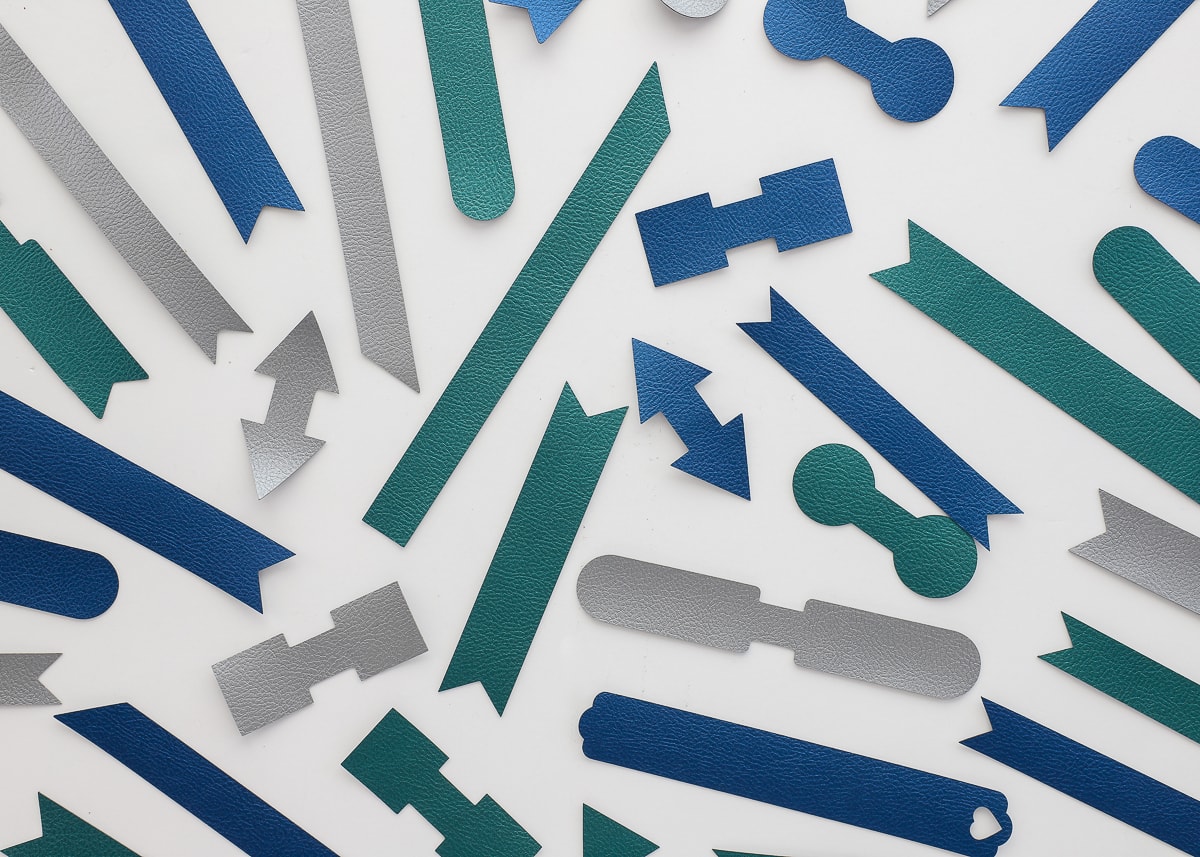
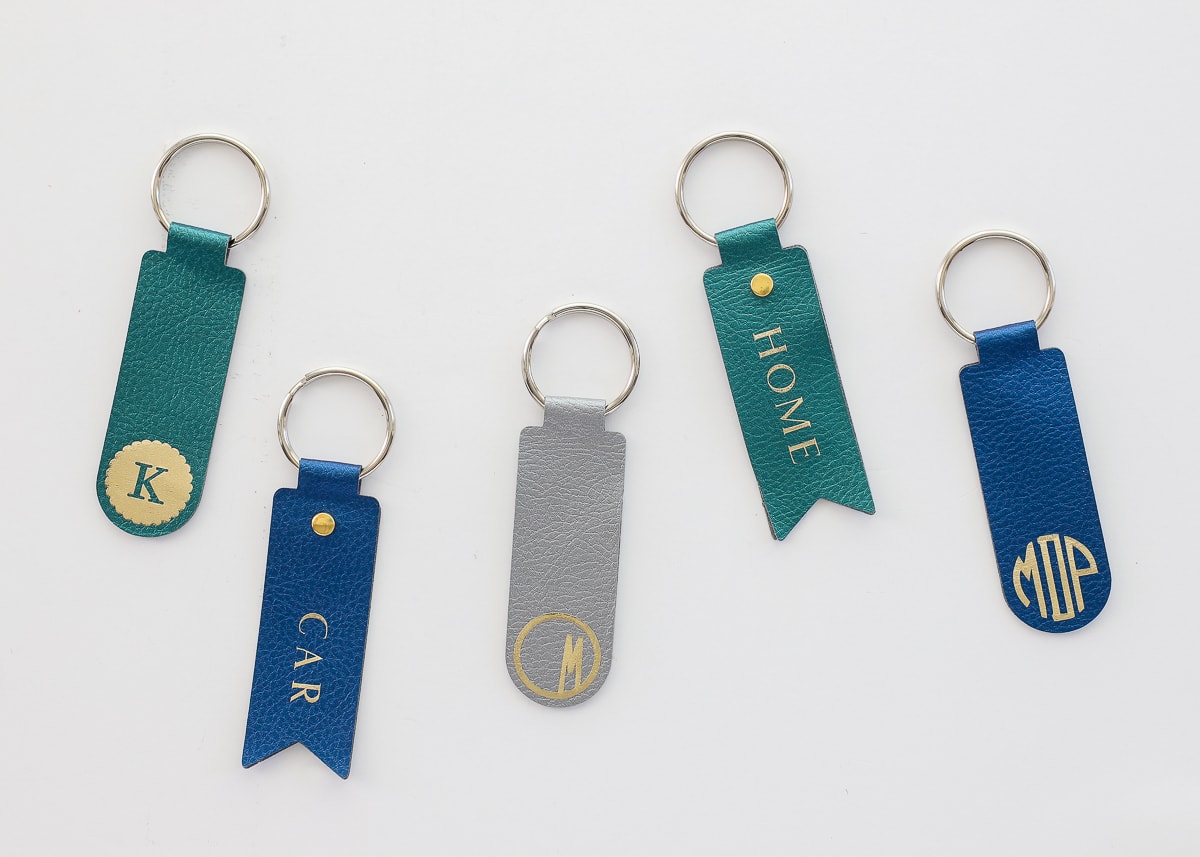
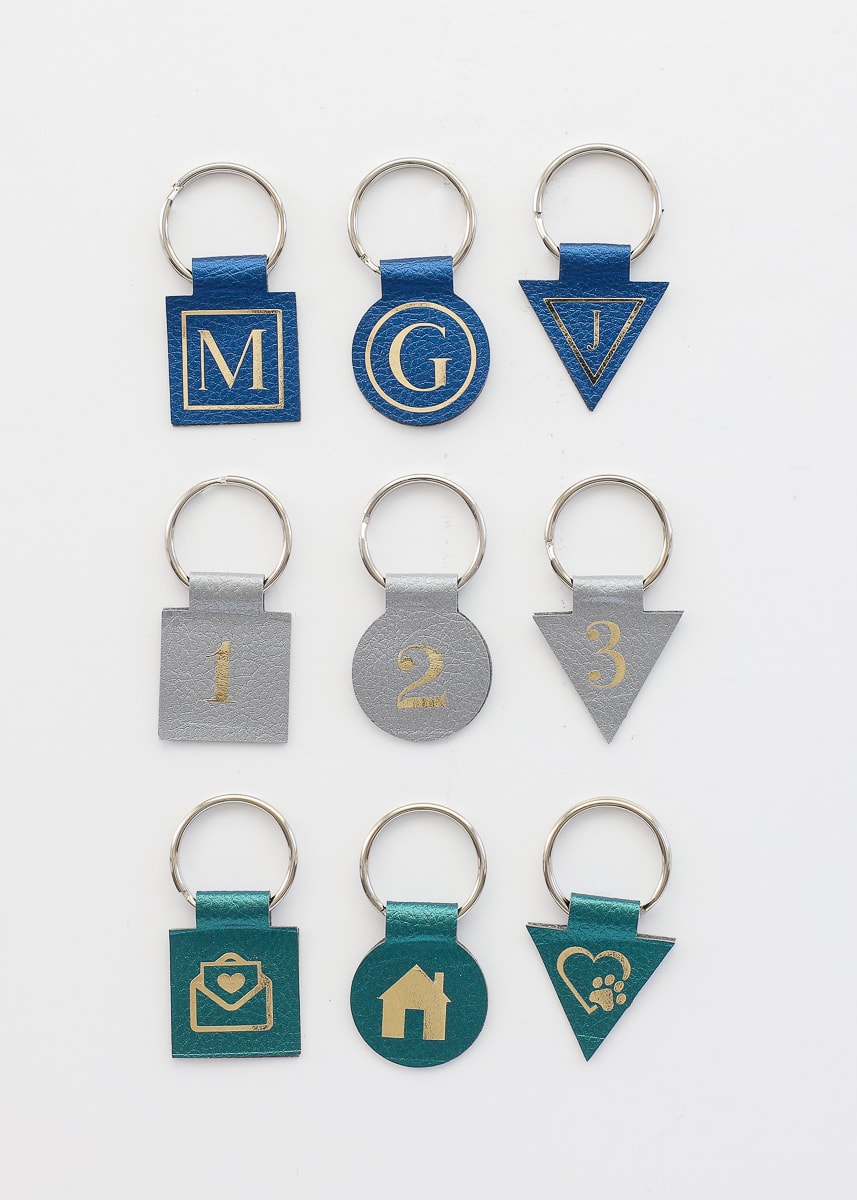
I’m not kidding when I said I fell deep down the rabbit hole making these keychains with a Cricut. They come together so fast, I had dozens made in just an hour or so! I mean…look at all that labeled goodness 😍
Supplies Needed
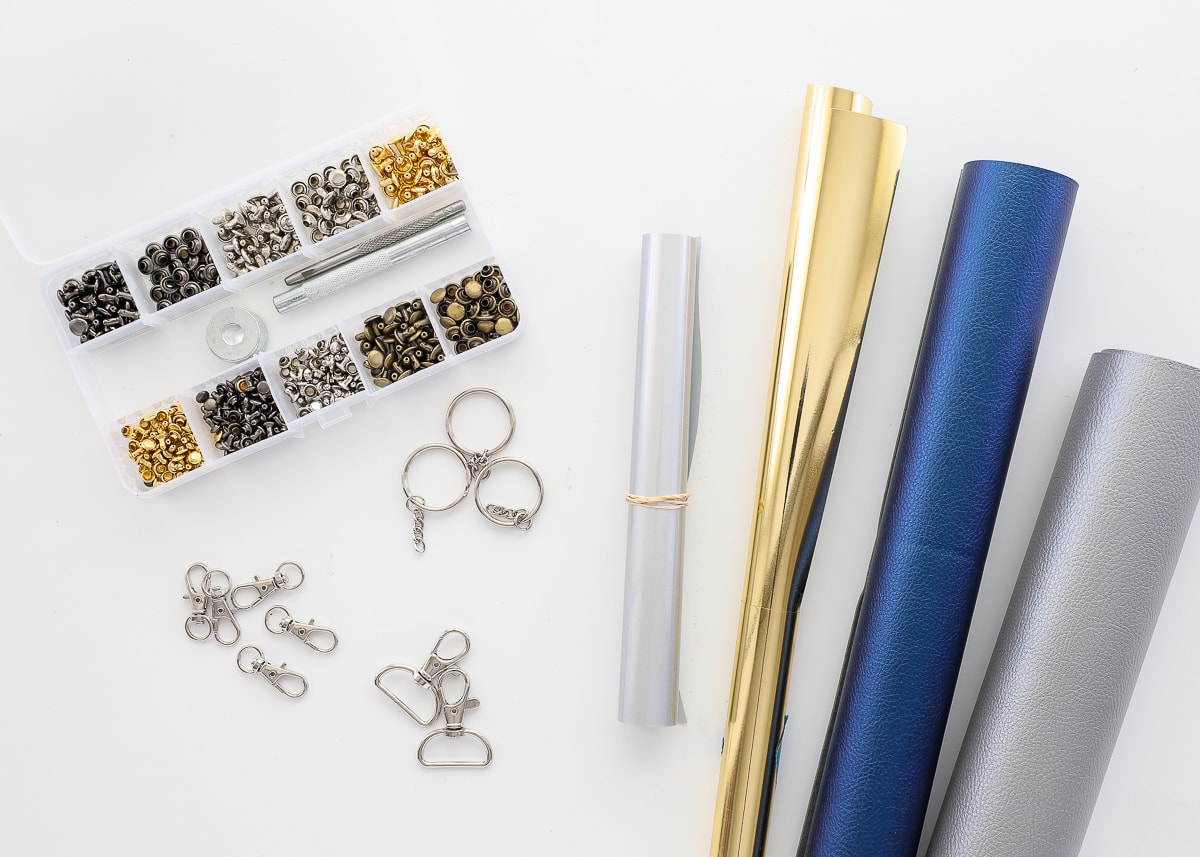
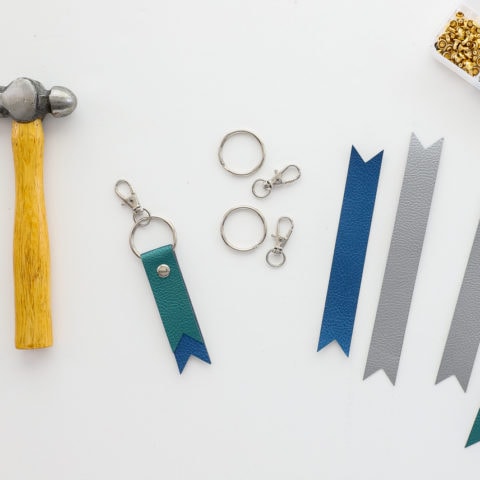
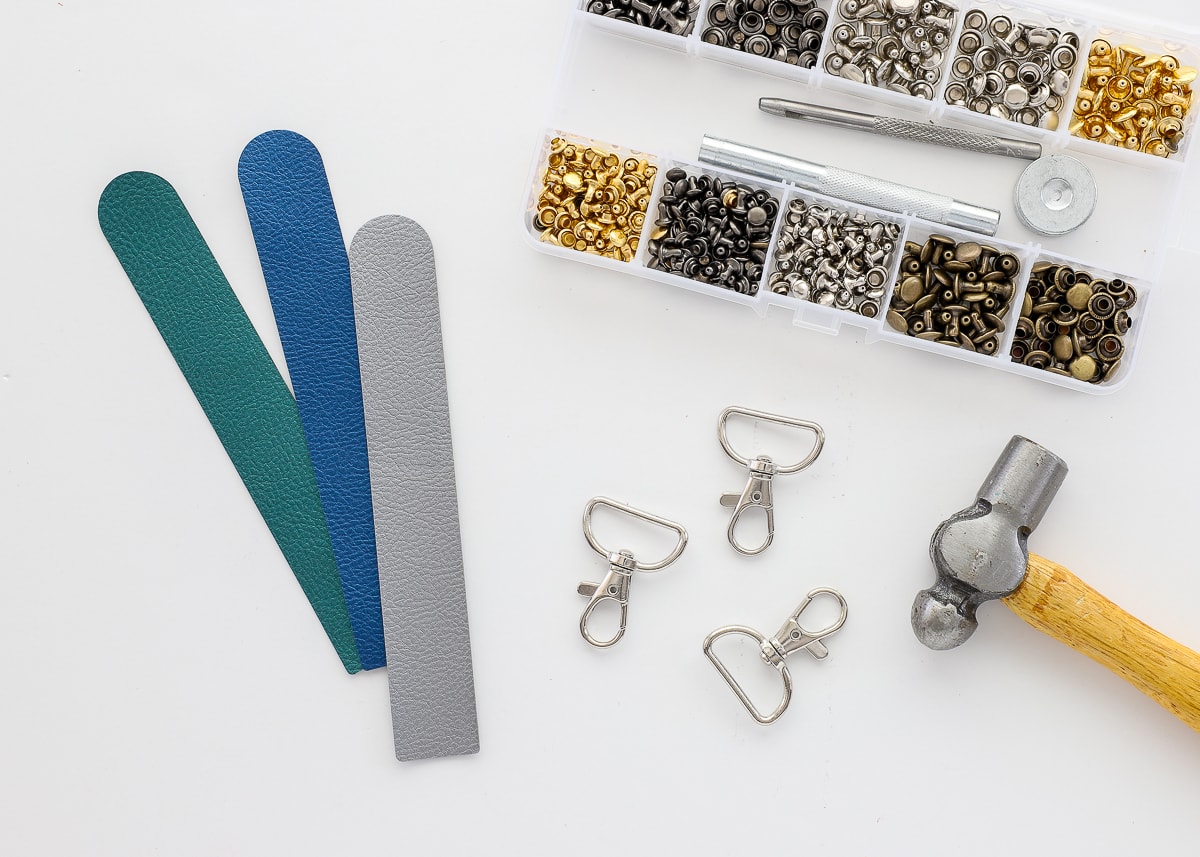
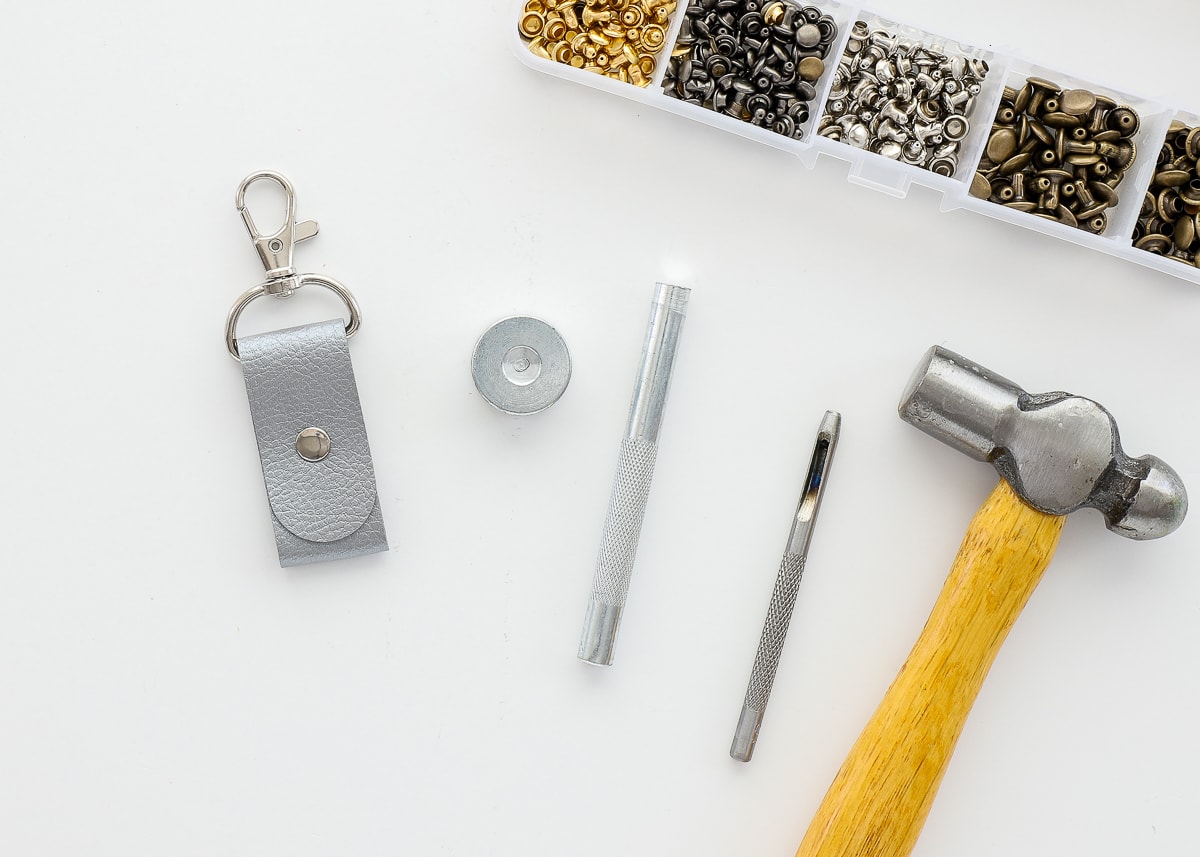
These DIY Faux Leather Keychains with a Cricut require just a few budget-friendly supplies, as well as some basic craft tools! Here’s what you need!
MATERIALS
- Cricut Faux Pebble Leather – Okay, you guys. I LOVE this stuff and have a bunch of projects coming up using it (so buy it now so you can craft along later!) I suggest buying a variety pack to get different colors, but it’s available on the roll too.
- Sampler Pack on Cricut.com
- By the roll.
- By the roll on Amazon (looks like the sampler pack on Amazon is unavailable but hopefully will be in stock in the near future!)
- Rivets
- Keychain Hardware:
- Round Shape with Swivel Clasps – better for slender keychain designs
- D-Ring Shape – better for wider keychain designs
- Iron-On Vinyl (optional) – for creating decorative details and labels (refer to this post for specific directions) I really love the foil versions for super chic-looking metallic details.
TOOLS
- Cricut Machine (you can use either an Explore, Maker, or Joy for this project) or another e-cutter
- Hot Glue Gun
- EasyPress Mini + EasyPress Mat (optional) – the small footprint of this EasyPress is ideal for adding tiny details.
- Keychain Cut File in Cricut Design Space – I have everything designed and ready for you to get cutting right away!
Rivets | Swivel Clasps | Round Keychain Hardware | D-Ring Keychain Hardware | Foil Iron-on | Faux Pebble Leather
Cut with Cricut
Cutting the keychain shapes from the faux pebble leather is super easy. You can cut this product on either a Cricut Explore or Maker, and you don’t need any special blades or mats (both the Standard Grip Mat and Fine-Point Blade are sufficient). Just make sure you select “Faux Leather (Paper Thin)” from the Custom Materials menu, and load the leather wrong-side (soft side) up…
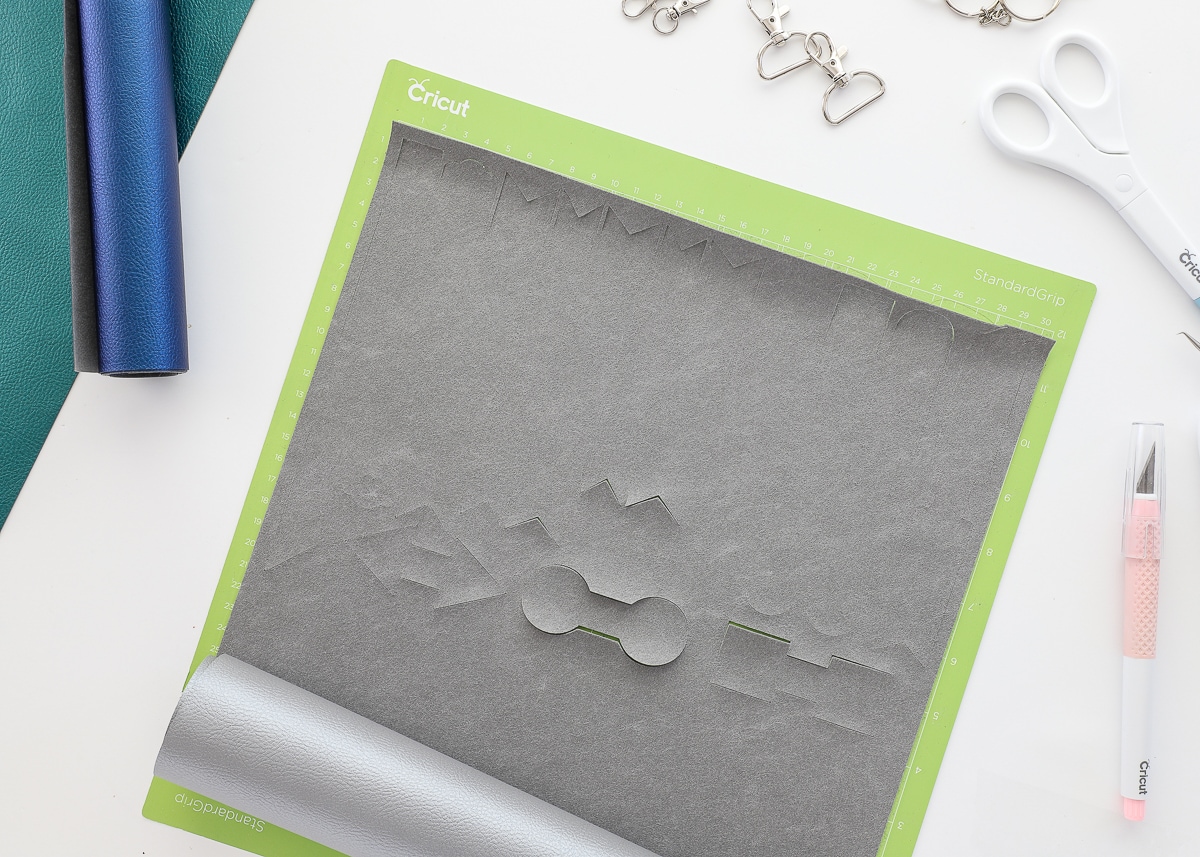
Cut as many shapes, designs and colors as you wish!
Design & Assembly
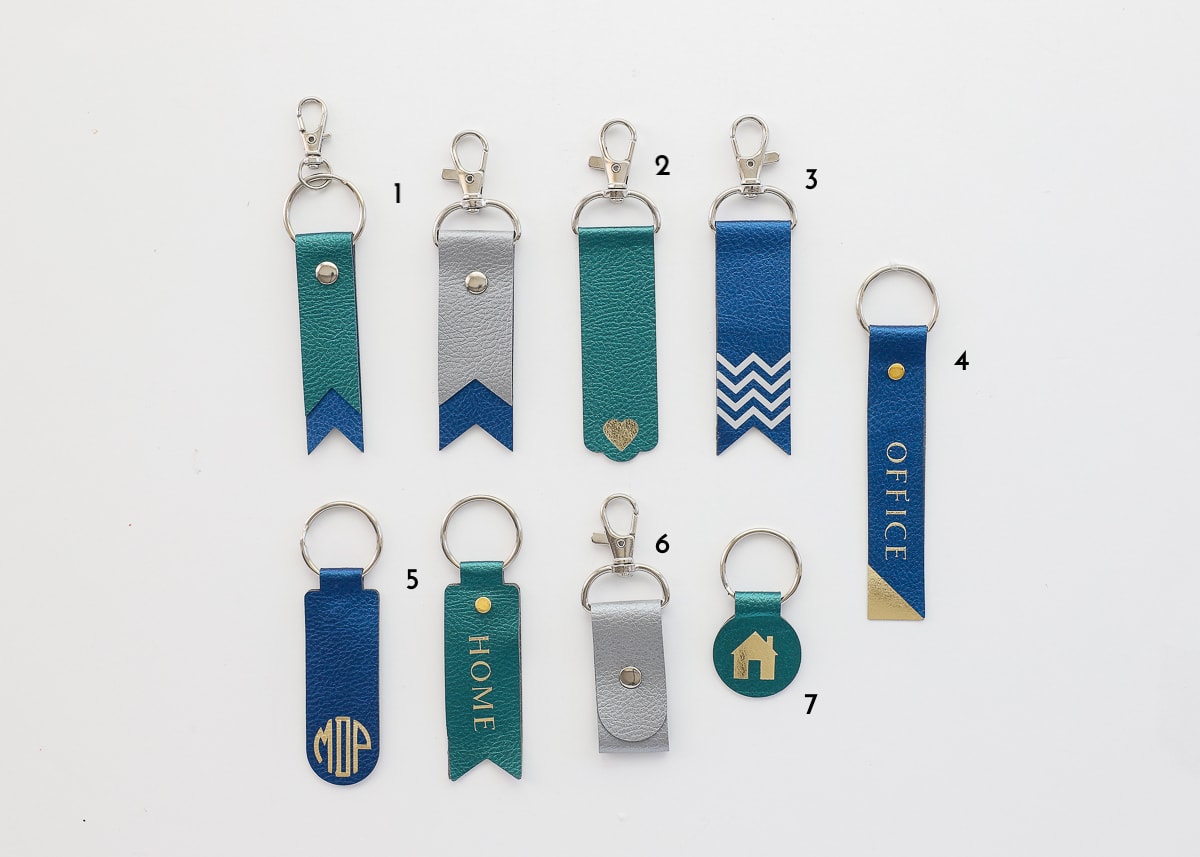
Cricut users can access my exact keychain designs HERE. I came up with all sorts of fun designs…7 different ones in fact! Once you have picked the keychain design(s) you want to make, send them to your machine to be cut. Although it’s likely pretty obvious how they come together, let me show you each one in a bit more detail!
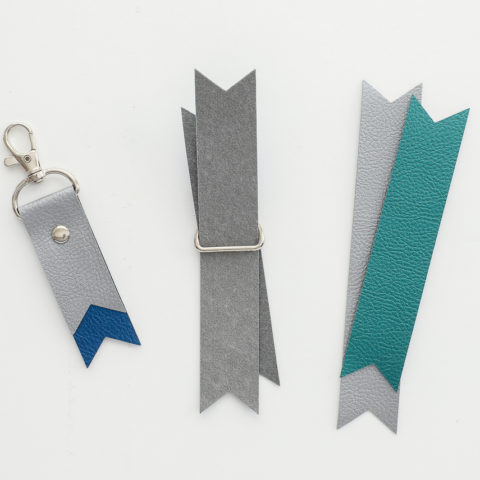
1. Layered Pennant Keychain
This layered pennant design is simple and classic. You can change up the width and colors to make all sorts of different versions!
- Layer the shorter pennant over the longer pennant, lining up the side edges and ensuring the shorter one is in the middle of the longer one.
- If desired, use a Hot Glue Gun to secure the top pennant to the bottom pennant. (This is optional, I didn’t do this and instead just used the rivet to hold all the layers together).
- Loop the stacked pennants through keychain hardware and match up the bottoms and sides. The wider versions fit better in the D-ring shape (below top, left) while the skinnier pennants work better in a round keychain (below top, right).
- Place a coordinating rivet through all four layers, just below the keychain hardware. The rivet set will come with instructions (don’t worry, it’s super easy!)
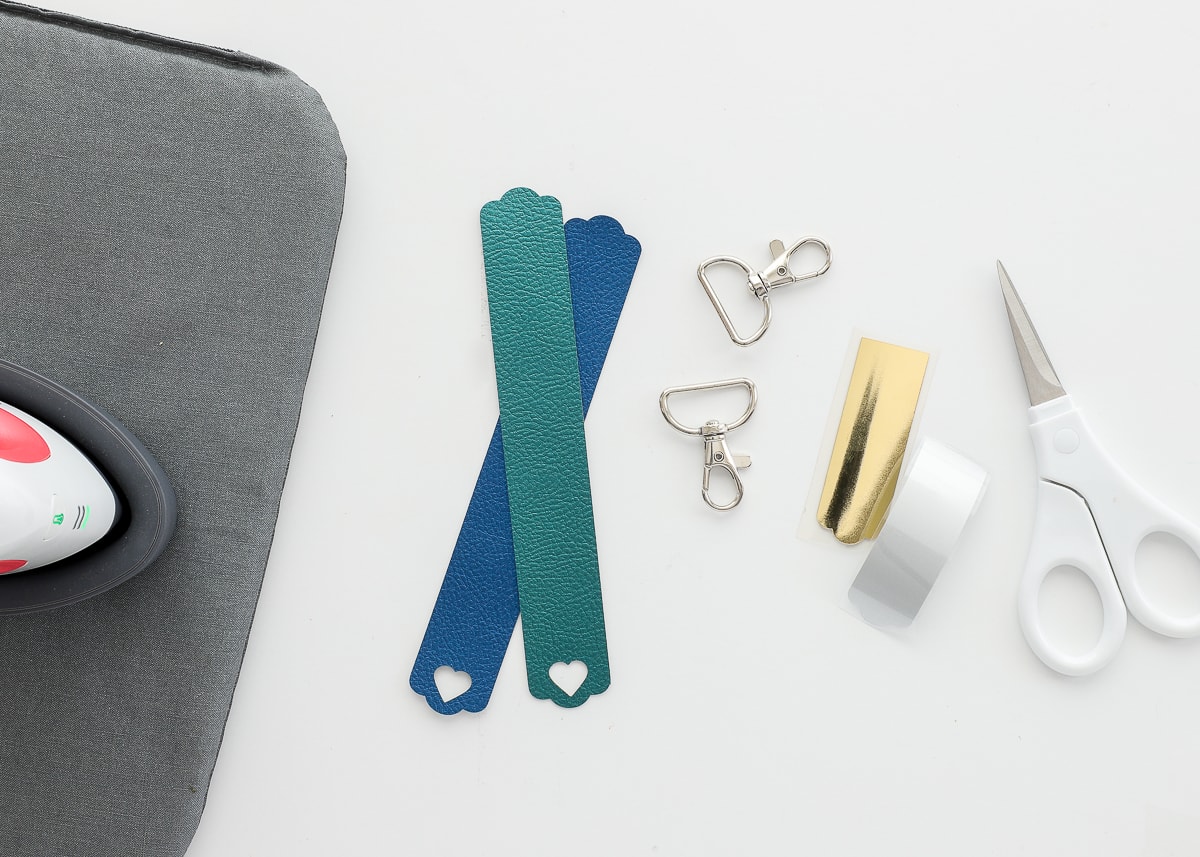
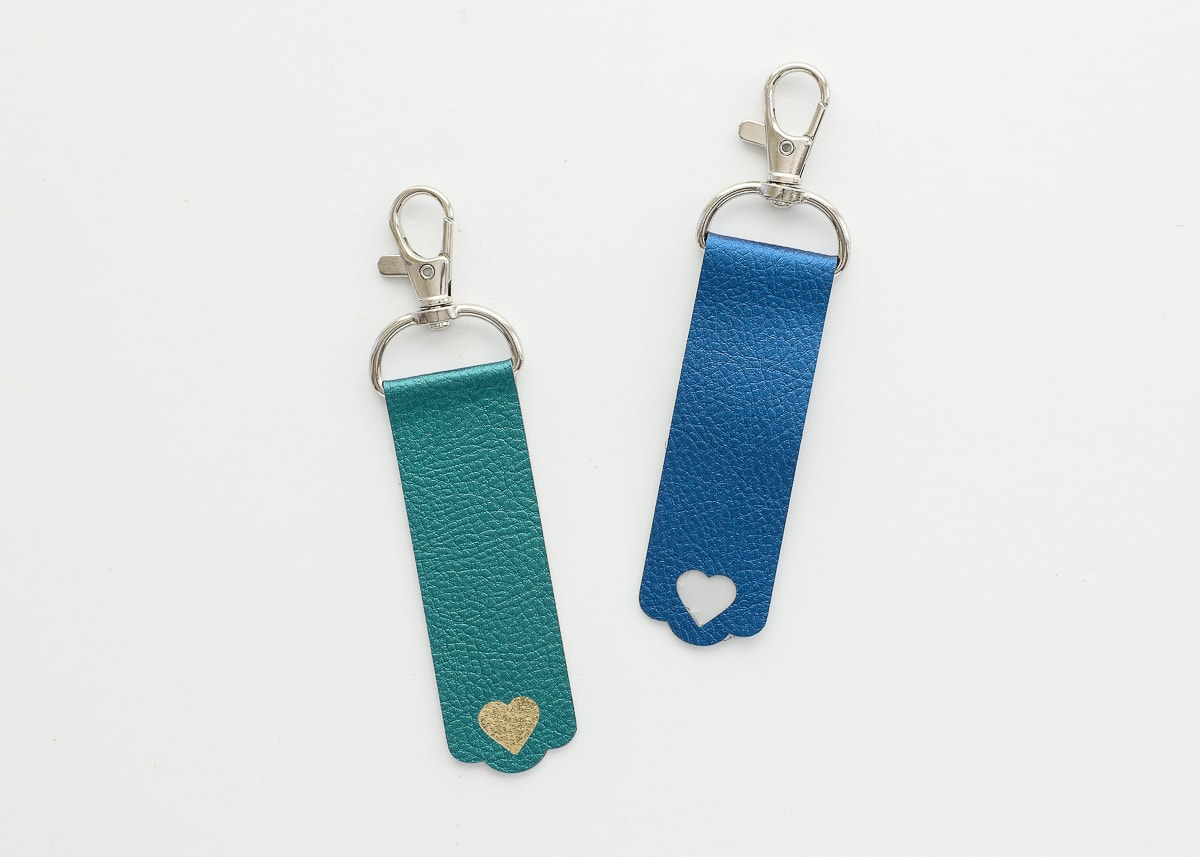
2. Peek-a-Boo Heart Keychain
This next keychain features a simple heart cutout, under which you can layer any color iron-on vinyl to color the heart detail.
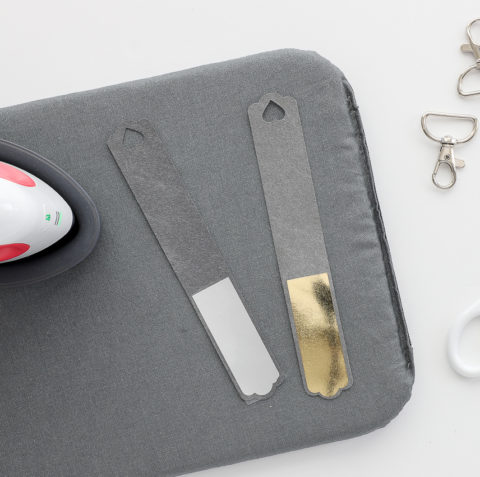
- For each keychain, you’ll need a single keychain cutout, plus a small iron-on insert and the D-ring hardware (below, top).
- Start by attaching the iron-on to the non-heart underside of the keychain (below middle, left).
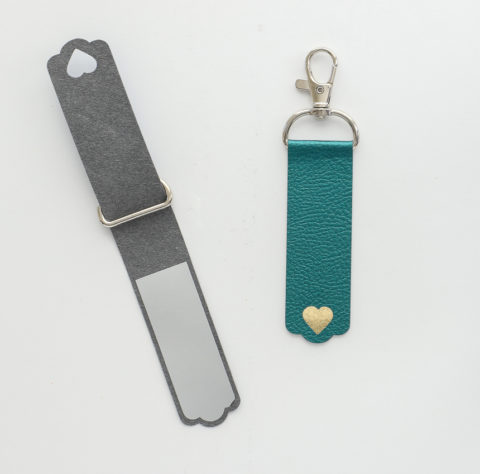
- Next, slide the entire keychain through the D-ring hardware (below middle, right).
- Finish by folding the keychain in half over the hardware, aligning the bottom and side edges, and glueing in place with a Hot Glue Gun (bottom).
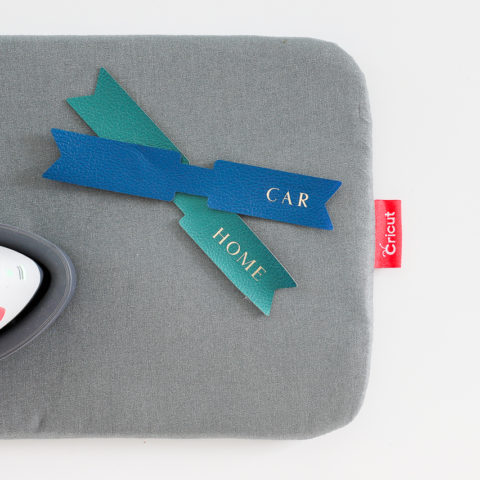
3. Chevron Keychain
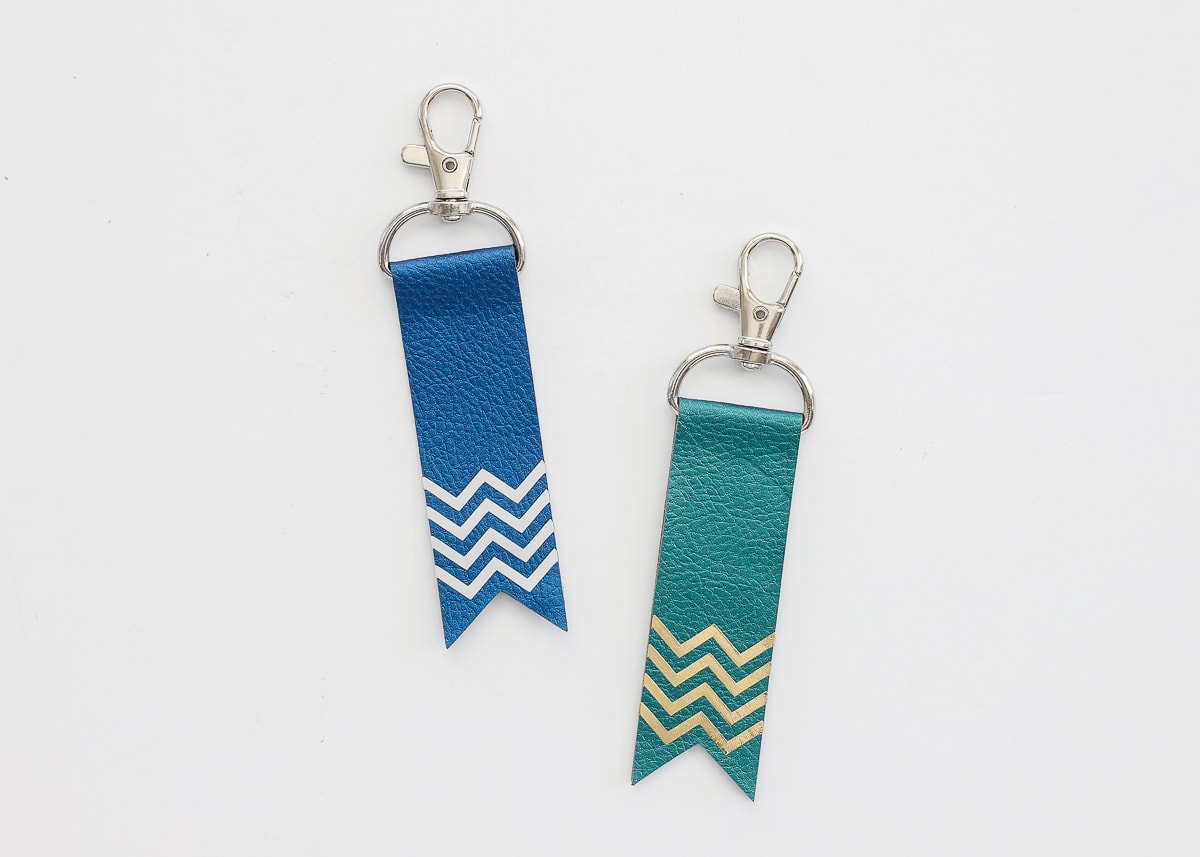
The subtle gold details on this simple keychain design make it one of my favorites!
Want to save this post?
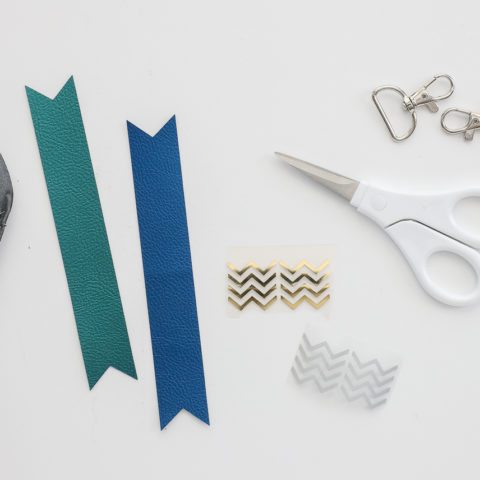
- Cut the keychain design from the faux leather and the chevron design from iron-on (below top, left).
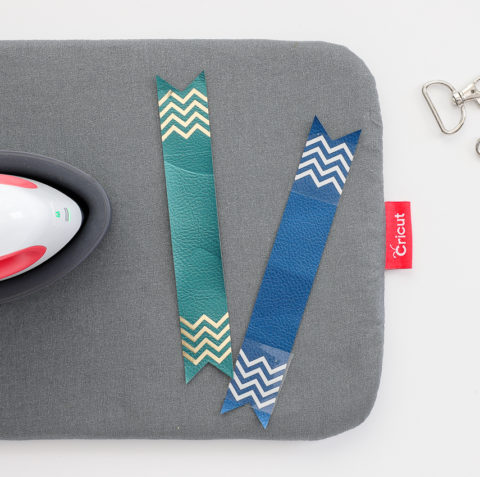
- Iron the chevron detail on to both ends of the keychain, lining up the pattern to match the cutout in the keychain (below top, right).
- Finish by folding the keychain in half over the hardware, aligning the bottom and side edges, and glueing in place with a Hot Glue Gun (bottom).
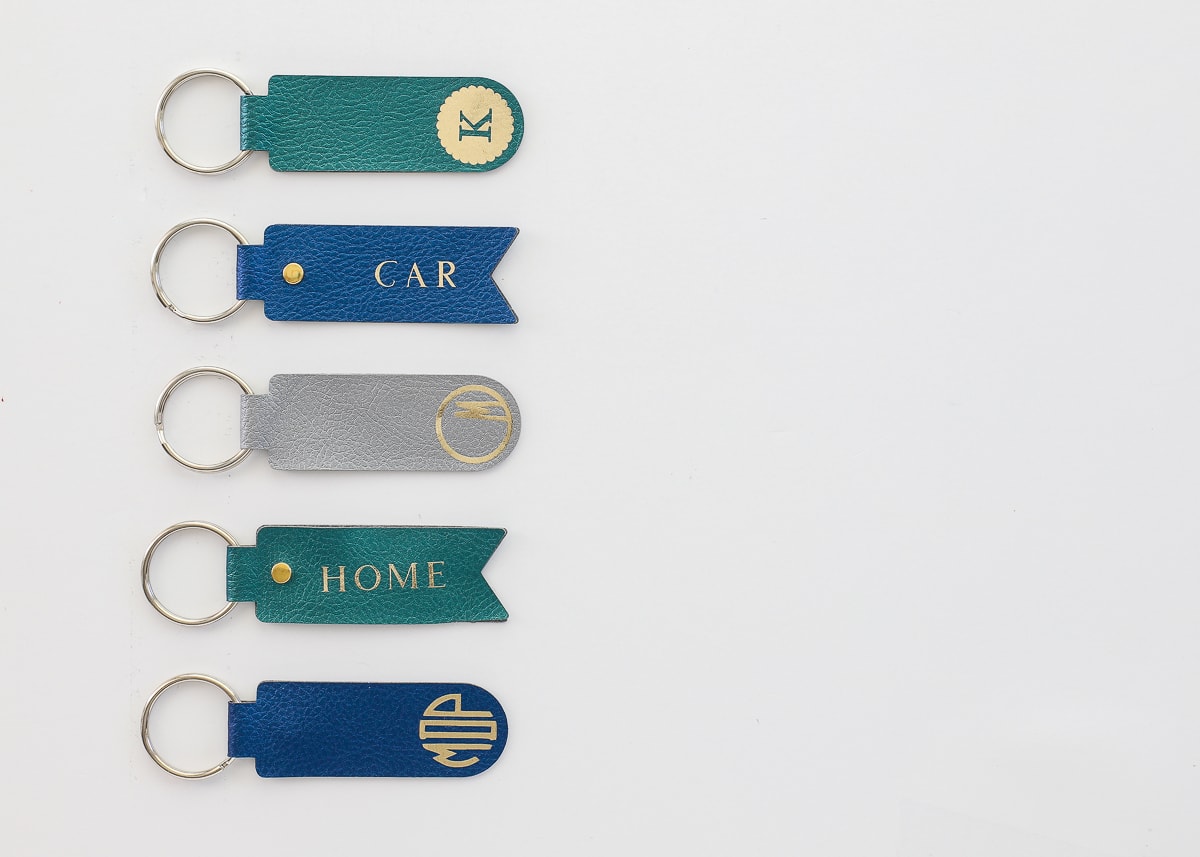
4. Angled-Edge Keychain
This chic and simple design is perfect for making labeled keychains for house-sitters, pet-sitters, common-use bathrooms and more!
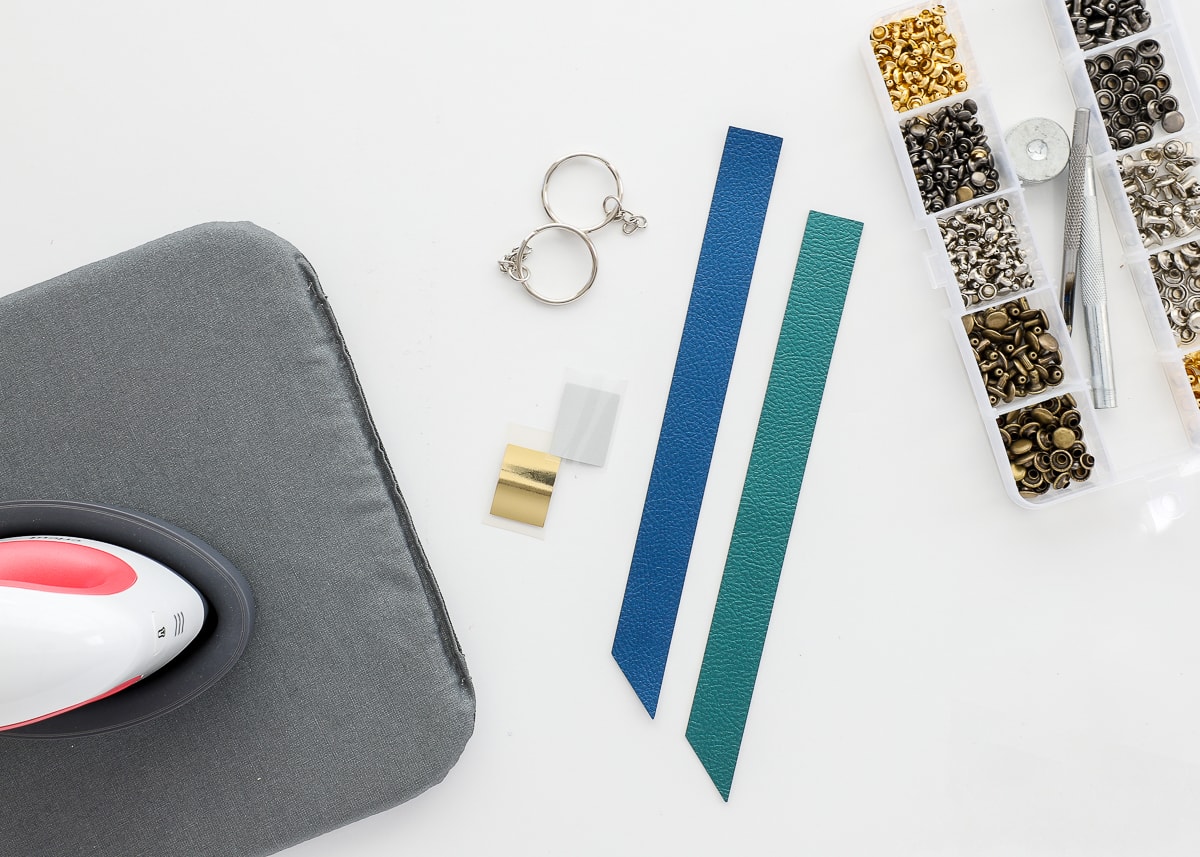
- For each keychain, you’ll need the long rectangle shape cut from faux leather, the small square details cut from iron-on, and round keychain hardware. (below, top)
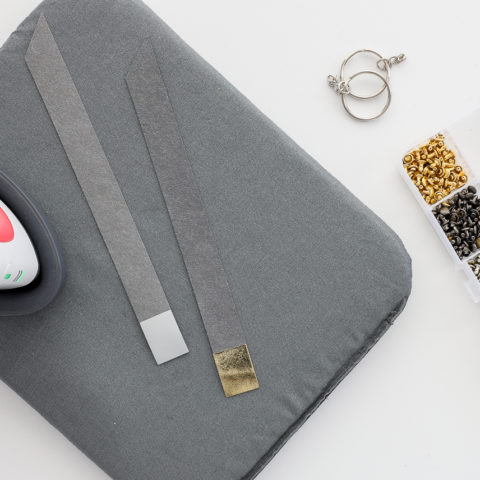
- Iron the square detail to the inside square end of the keychain (below middle, left).
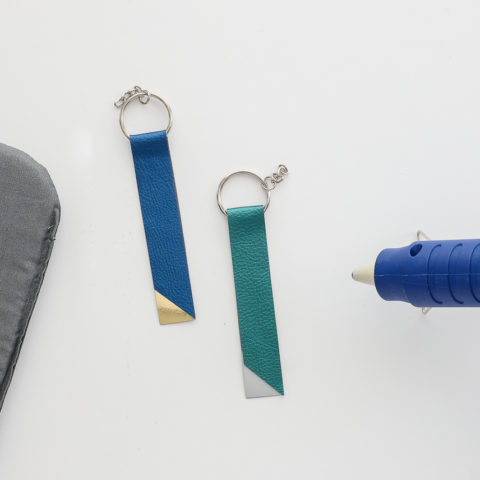
- Fold the keychain in half over the round hardware, aligning the bottom point and side edges. Glue in place with a Hot Glue Gun (below middle, right).
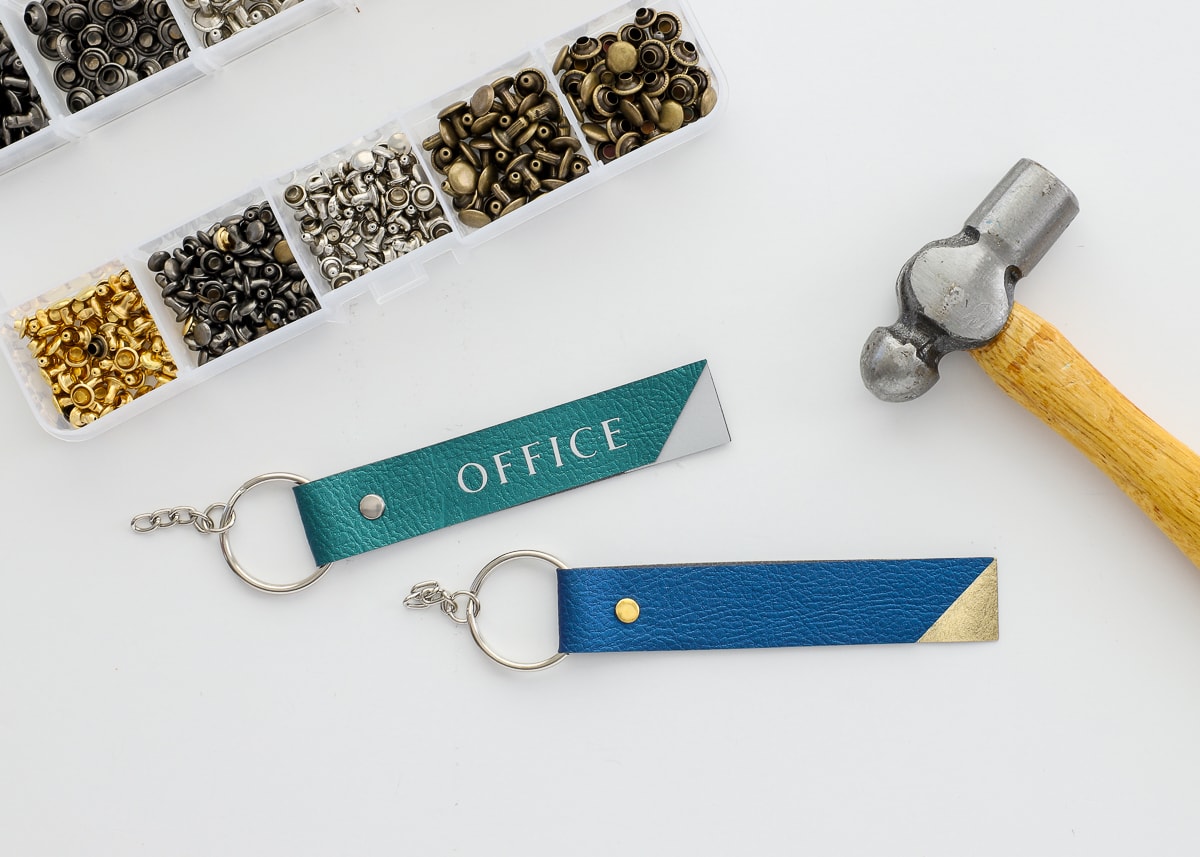
- (Optional) Add a decorative rivet just below the hardware and/or iron on a descriptive label down the length of the keychain (bottom).
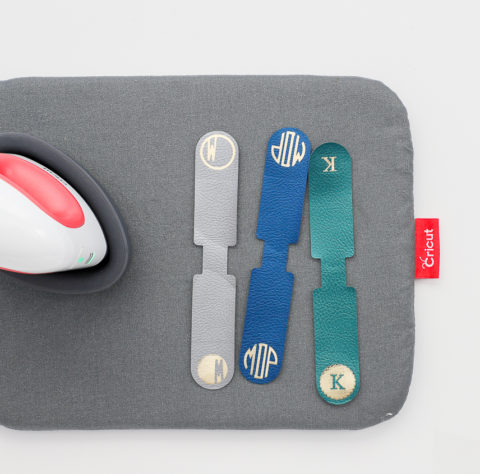
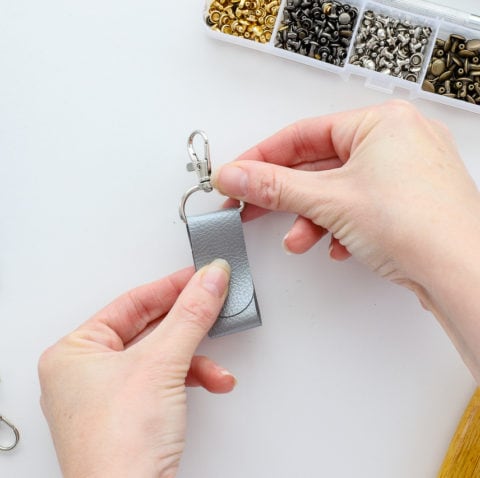
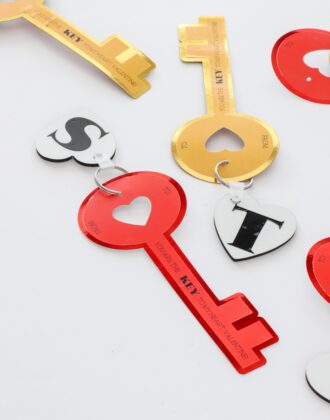
5. Tabbed Keychains
These simple tabbed keychains are some of my favorite in the bunch! The shapes are actually cord label designs that I blew up and decorated with monograms and other words!
- Cut the keychain shapes out of the pebbled leather and the monograms/labels out of iron on (below, top).
- Iron the monograms, words, or decorative details to the keychains (below middle, right & left).
- Fold the keychain in half over round hardware, aligning the bottom curves and side edges. Glue in place with a Hot Glue Gun (bottom).

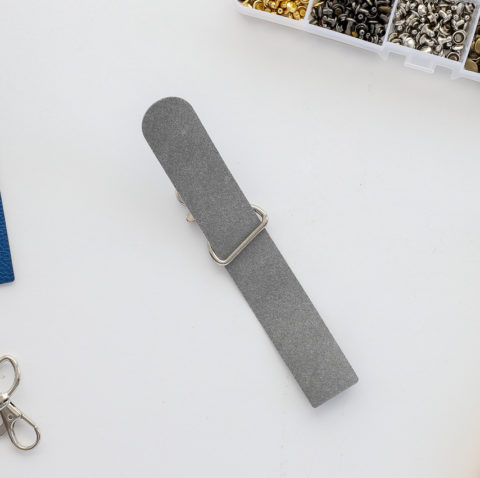
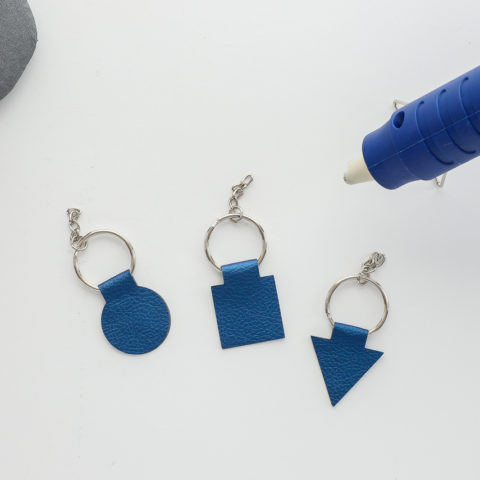
6. Fold-Over Keychain
This keychain design is definitely the easiest of the bunch! No glue or iron-on needed!
- For each keychain, cut the long rectangle shape with the single rounded end. Pair it with coordinating rivets and D-ring hardware (below, top).
- Thread the rectangle through the D-ring (below middle, left).
- Fold the square end up and the round end down (over the square end), lining up the sides (below middle, right).
- While holding the entire keychain stacked together, place a rivet through all 3 layers, just below the keychain hardware (bottom).
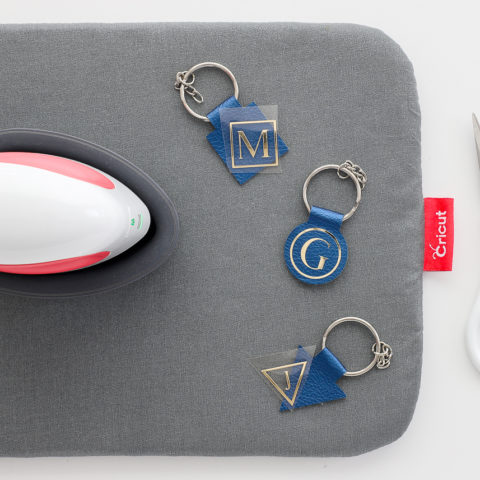
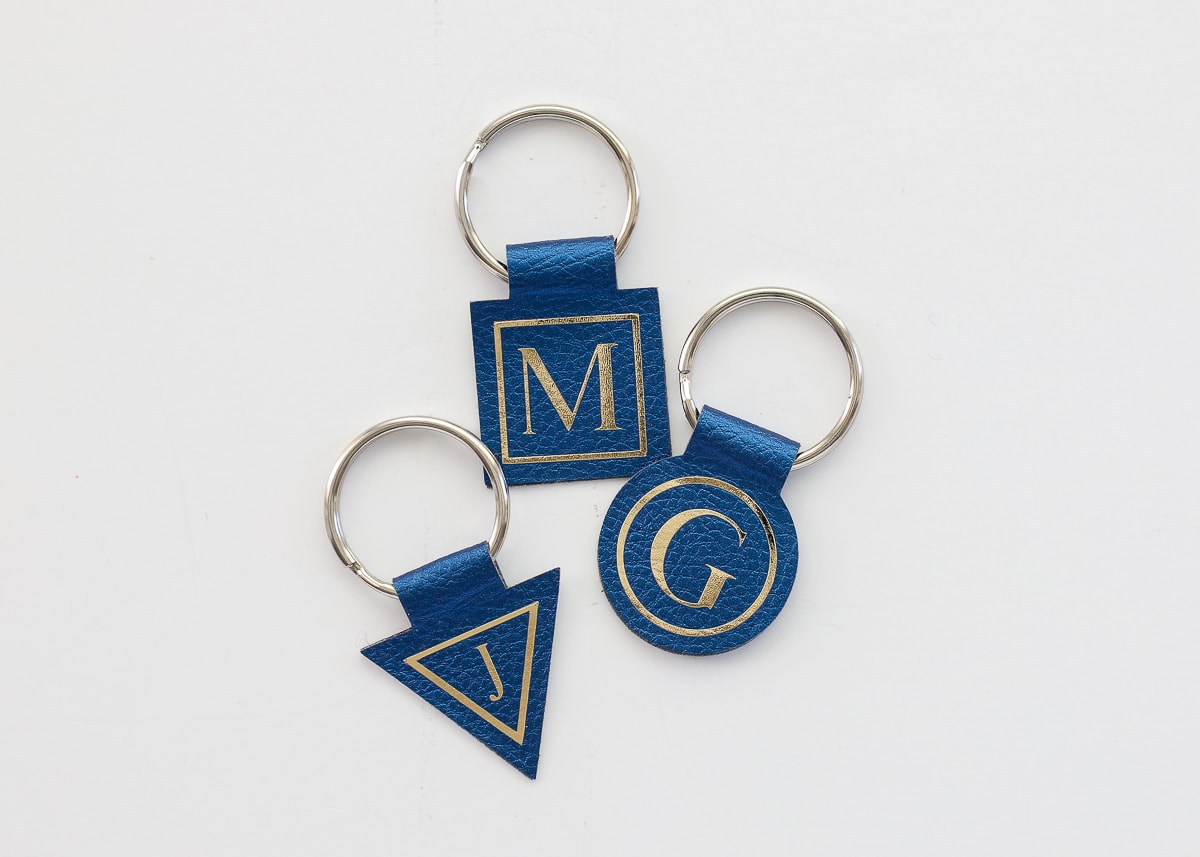
7. Mini Monogram Keychains
These mini keychains are another design that were intended to be cord labels. Adding a chic monogram or picture decal makes them ideal for mailbox keys, pet sitter keys, or labels for matching backpacks, pool bags, etc!
- Cut the keychain shapes out of the pebbled leather and the monograms/labels out of iron on (below, top).
- Fold the keychain in half over round hardware, aligning the bottom curves and side edges. Glue in place with a Hot Glue Gun (bottom middle, left).
- Iron monograms, words, or icons to the keychains using an iron or EasyPress Mini (below middle, right).

Other Fun Faux Leather Projects!
If you’re looking for even more great projects to make with faux leather and your Cricut, check out these other goodies:
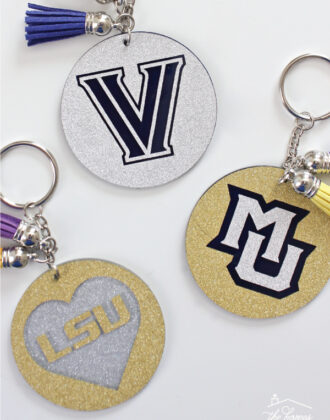
This project is the perfect way to make labeled keychains for yourself, housecleaners, nannies, pet sitters etc. Or, you could use them to decorate bags or purses, as party favors, door prizes, scout/bookclub projects, or even grad gifts (hello school colors and logos/mascots!). I know I say a lot of things are “quick and easy” but these really, truly are! I hope you give them a try. Just be forewarned: you’re not going to want to stop making these!
Megan
23 Comments on “DIY Faux Leather Keychains with a Cricut”
Very cute! I’ve been considering making embroidered keychains for awhile now, but was wondering how to cut them on my Cricut for a more professional look! One question/comment – where did you get the rivets? The link you provide goes to the pebbled leather page on Cricut. Thanks for all the inspiration!
Ack! I’m so sorry about that – thanks for letting me know! You can find them here: https://rstyle.me/+WhPG_Nr2_YXmkFUXHwivcw!
Have a great rest of the weekend!Megan
Hi! Do you have a post explaining how you make your circle monogram? I’m making the keychains from this post (this post is actually what pushed me over the edge to finally ask for a cricut for my birthday!!) and those are some of my favorites. I’d like to make the circle monogram for the iron on vinyl but not sure how you did that part!
Thanks!
Jenny
Hi Jenny!
I am thrilled to hear you dove in a got a Cricut! Woo hoo! You’re going to love it!
I actually had to make that circle monogram myself because I didn’t like any of the monogram fonts within Cricut Design Space.
It’s been so long, but I’m fairly certain I used this monogram maker tool: https://www.markandgraham.com/shop/make-your-mark/apply-products-to-make-your-mark/?PRESELECT=true&MONOTYPE=mono3&MONOCOLOR=000&MONOSTYLE=mono540&INITIALS=MPD&N=4294965249+4294965309.
This one is another option: https://suncatcherstudio.com/monogram-maker/ (this one you can download the SVG which is best for Design Space)
Once you get the files downloaded, you’ll need to upload them to Cricut Design Space!
Hope that helps! Let me know if you run into any other issues!Megan
Love this idea! Def. would love to try make this as gifts =)
I tried clicking the link to take me to Design space but it says CONTAINS EXCLUSIVE CONTENT and it doesn’t give me the option to customize or make it.
Hi Riza!
The link has been fixed and you can access it here: https://design.cricut.com/landing/project-detail/5f4fbf45478d5c09f090ba67
Please Note: the decorative elements were the issue and have been deleted out, so you will need to add those back in as you desire!
Have fun!
I have tried to link to your patterns for the key fobs but it will not let me use them. It says CONTAINS EXCLUSIVE CONTENT and it doesn’t give me the option to customize or make it. how can we access them?
i Judy!
Thanks so much for reaching out, and I am so sorry to hear it’s not working for you. Are you by chance outside the USA? I’ve done a couple tests using the link (and have had some friends test the link as well) and it appears to be working. However, I know another reader who lived in Australia couldn’t open the file either. I suspect it has something to do with permissions for various graphics. I’m still troubleshooting, so if you could let me know, I’d appreciate it!
Thanks, and hopefully we’ll get this sorted out soon!
Megan
Any luck in resolving this issue? I’m also getting the same message.
Hi Carol!
The link has been fixed and you can access it here: https://design.cricut.com/landing/project-detail/5f4fbf45478d5c09f090ba67
Please Note: the decorative elements were the issue and have been deleted out, so you will need to add those back in as you desire!
Have fun!
Hi! I love this and like others am having issues accessing the files. I’m in the U.S. and when I click the link I also get the exclusive content warning and it asks me to sign up for the monthly access. Would you be able to share the dimensions for the simple circle and simple square cuts so I could build them in Design Space myself?
Hi Angela!
The link has been fixed and you can access it here: https://design.cricut.com/landing/project-detail/5f4fbf45478d5c09f090ba67
Please Note: the decorative elements were the issue and have been deleted out, so you will need to add those back in as you desire!
Have fun!
Hello-
I love these but I have a silhouette. Is there a way to get the files for it?
HI Kelly!
Thanks so much for writing. Unfortunately, I designed these within Cricut Design Space (using their images) so I don’t have SVG files for this project.
Sorry I can’t be of more help here!Megan
Thanks so much for this quick project! I am a Cricut newbie so I need these step by step projects with supply lists. You always make the cutest things! I’m going to make some of these ASAP! Thanks Megan!
Thanks so much, Barbara!
This one is DEFINITELY a fun one, so I hope you give it a try!!!
Keep me posted how they turn out!Megan
Hi! I really like this craft. I am thinking of making them for my senior residents for Mother’s Day & Father’s Day! I was wondering if you had the dimensions you used for the tabbed keychains. I’m going to use a different hook/d-ring product and the dimension across (where I’d lay the leather over) is .79 inches. Any advice for sizing these properly? Also, how big did you make the monograms/text boxes? I’m new to Cricut and trying to figure out sizing is probably the hardest part for me. Thank you.
Every link to the keychain design says “project not available”!
Where can I find the Cricut project for it?
Thanks! xo
Hi Sylwia!
The Cricut Design Space File is HERE.
Some people have had trouble getting the file to work; let me know if you experience any trouble!
Have fun making keychains!
~Megan
I also get a message saying the file is not available when I try to open it in the app. Does it need to be opened on a pc?
Thank you for sharing.
Hello. I loved your ideas. I made some to give away but sadly two people have told me that the htv rubs off. Is this normal. What I can do. I wait your answer
I like all your luggage Tags, and the keychain too, well done you….