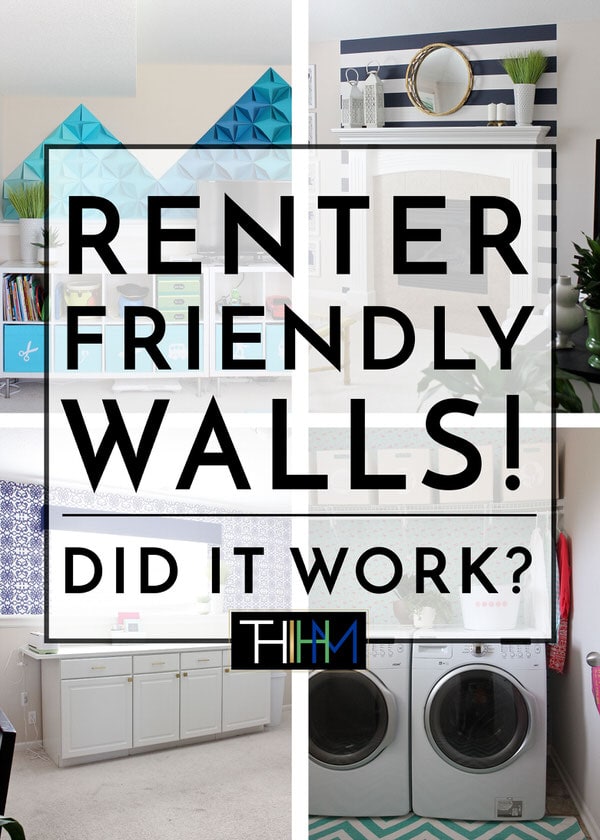
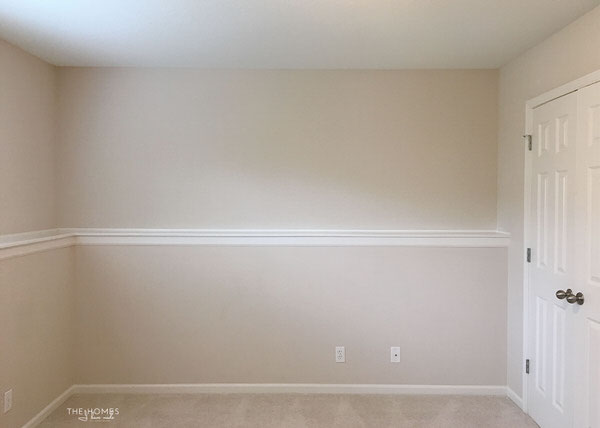
Hit or Miss? Renter-Friendly Walls
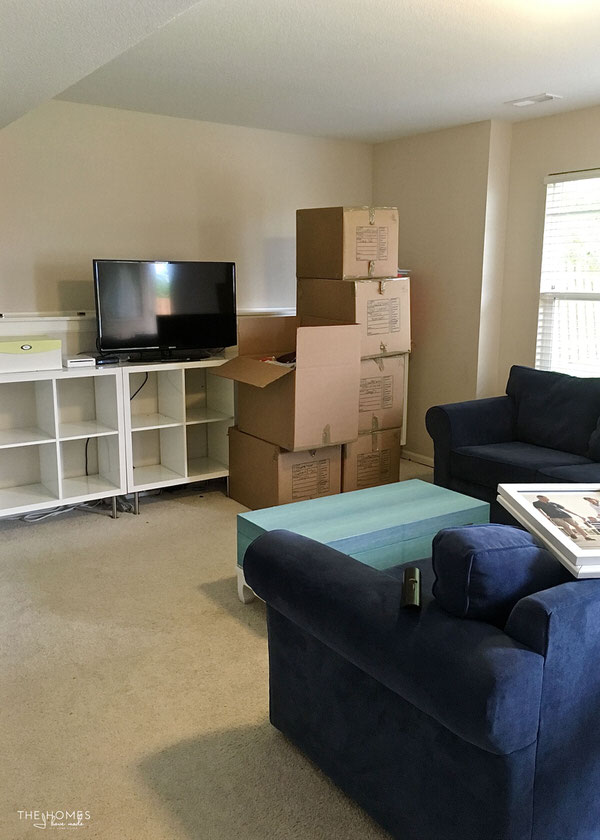
Now that I’ve shown you how our entire Kansas house came together, it’s time to start showing you how it all came apart! It’s always hard to see the rooms I worked so hard to create come down, be disassembled piece by piece, and boxed up and shipped off to our next home. But that is our reality, and one that we’ve become very, very used to. In fact, the removability and movability of everything we own and do drives most of our design decisions and furniture purchases. Many of you recall when we moved into this home last Fall, I took on a friendly bet to not paint any walls. But rather than just live with bland walls for a year, I took the bet one step further and challenged myself to see what all I could do without paint. Over the course of the year, I did 5 different renter-friendly walls treatments in our home using (1) removable wallpaper, (2) regular wallpaper, (3) wrapping paper, (4) cardstock, and (5) fabric. Each of them accomplished the mission of providing color, pattern, and/or visual interest to the space, but the question always remained: was the wall treatment truly renter-friendly? As in, did it easily come down and leave the walls in “like new” condition? Today, I’m showing you how each wall treatment came down and sharing a few tips, tricks, and things to consider if you want to try these renter-friendly walls treatments in your own home!
1. Removable (Peel & Stick) Wallpaper
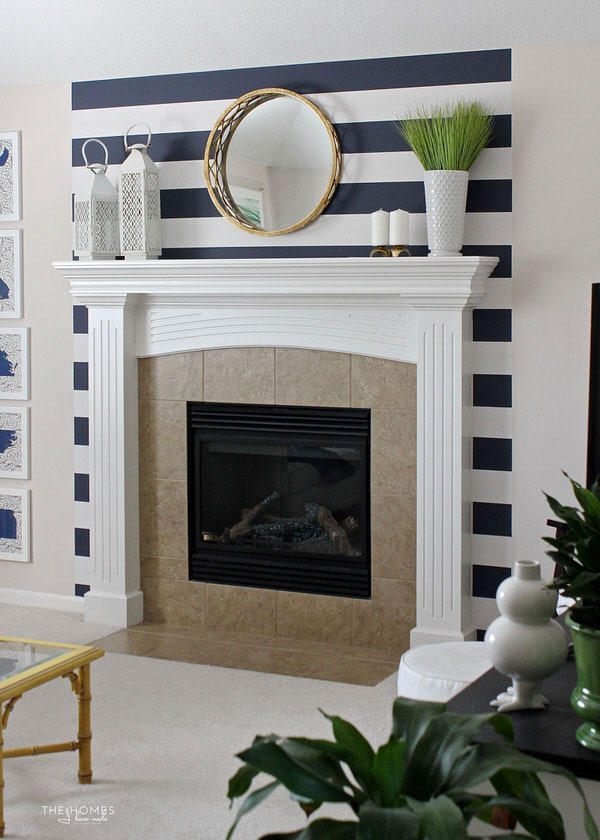
The very first project I did when we moved in last Fall was to apply this removable peel-and-stick wallpaper around our fireplace. You can read the full tutorial HERE!
The results were pretty spectacular…stripes just have a way of packing a powerful punch in any space! They were easily one of the most asked about things in our home when guests came over and really helped the room feel complete. You can see the final Living Room HERE.
Taking the peel-and-stick wallpaper down was as easy as I expected! Just like peeling shelf-liner off a shelf or drawer, it came off easily and in single sheets, although considerably wrinkled and stretched. I have been asked by a lot if peel-and-stick wallpaper is re-usable, and this experience confirmed my suspicions that removable wallpaper is a one-time use product (at least this version from Target). Not only would you need to hold onto the paper backing in order to roll it back up…but like vinyl, this type of wallpaper pulls and stretches pretty easily, making it pretty difficult to use again with a good result. My used wallpaper went into the trash!
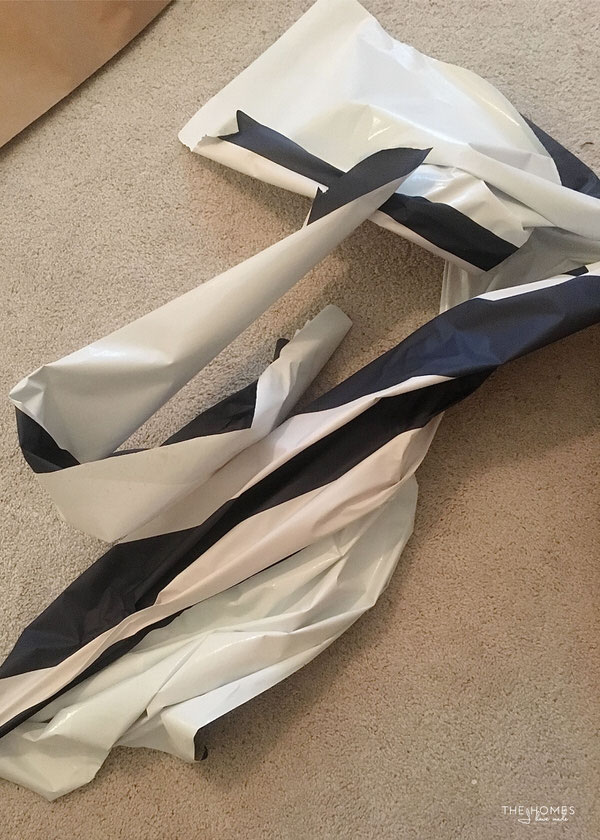
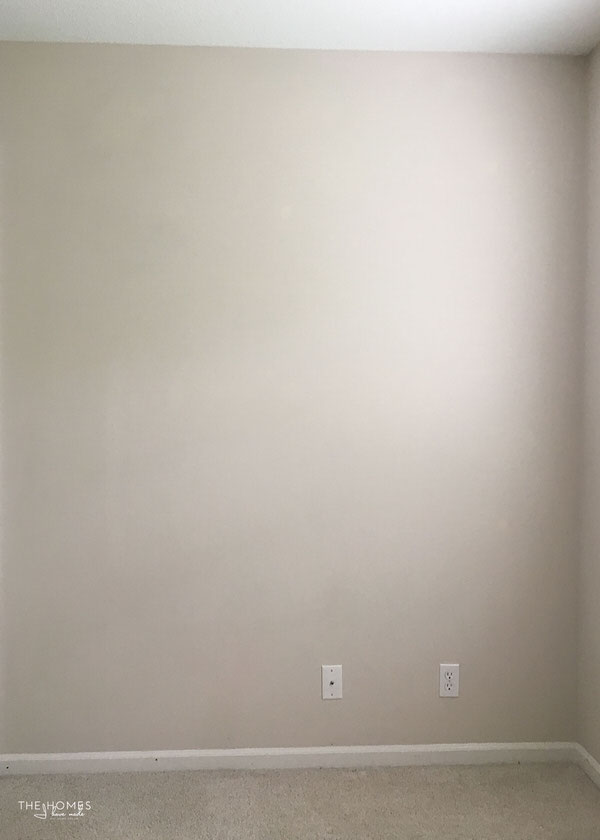
And the walls? Pristine. No peeled paint. No tacky residue. No discoloration. Not a lick of evidence that there was something on this wall. This peel-and-stick wallpaper was indeed 100% renter-friendly!
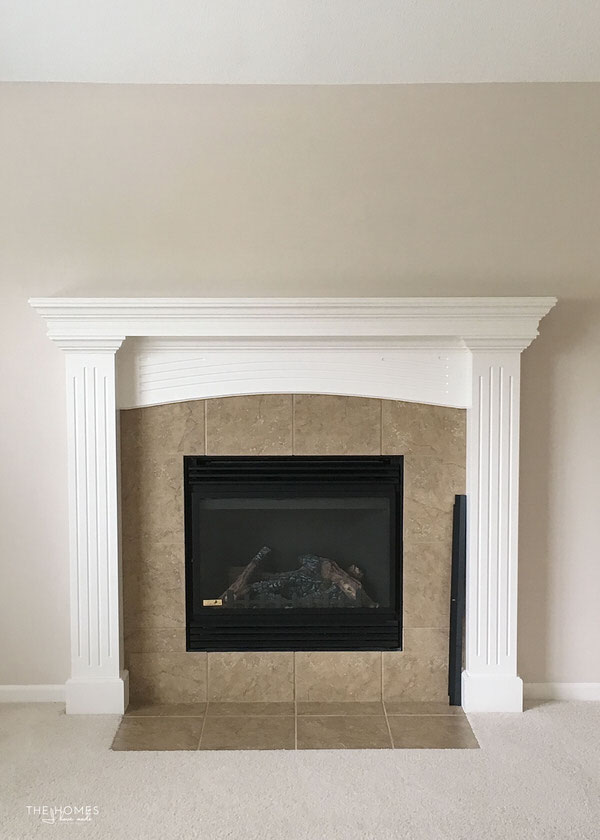
Would I do it again? Absolutely. It looks great, is somewhat easy to install (although you will likely need a helper!), is available in SO many colors and patterns, and comes down perfectly. To me, the only downside is the cost for something that is a one-time use product and doesn’t cover very much wall space. This roll of wallpaper was $15 on clearance but is regularly $30…and I had JUST enough to do this feature around the fireplace. If you want to wallpaper an entire wall or an entire room, it will be a significant investment. I personally think peel-and-stick wallpaper is great for smaller projects like a feature wall (as I did here), in a small nook, or on a piece of furniture. Overall, it’s a great renter-friendly walls treatment solution!
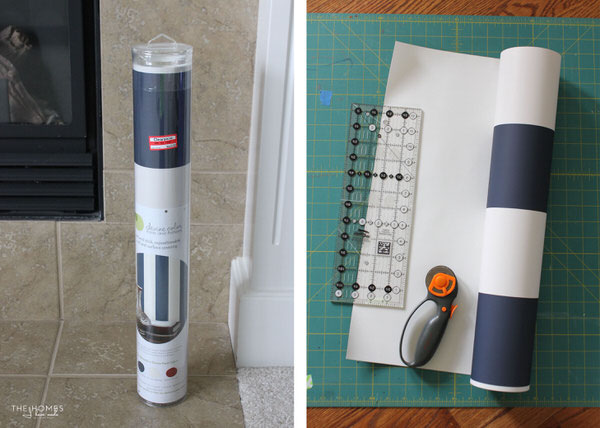
2. Regular Wallpaper with Liquid Starch
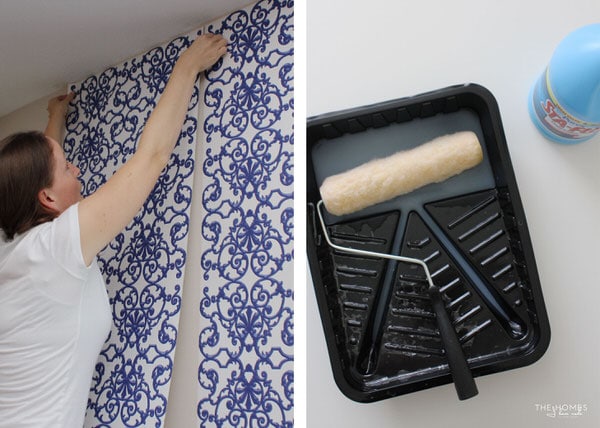
I was determined to come up with a way to hang regular wallpaper in a renter-friendly way. I had seen the trick of using liquid starch and fabric on walls, so I figured it would also work with regular (NON-PASTED) wallpaper. After some experimenting on a small section first (always, always test before doing an entire wall/room!), I determined liquid starch would indeed work! You can read the full tutorial HERE.
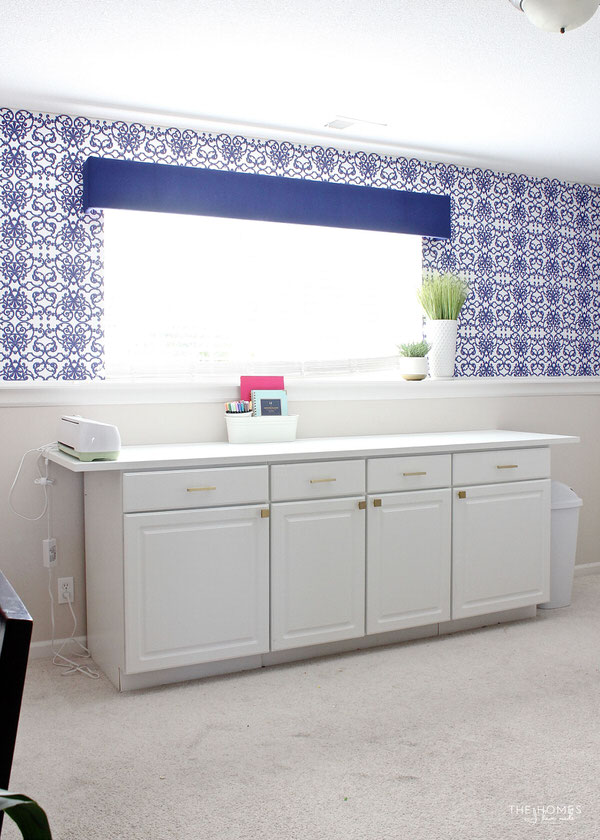
I wallpapered the top 1/2 of my office walls using just 2 rolls of regular wallpaper; and to say the effect was transformative is an understatement! You can see the full office reveal HERE!
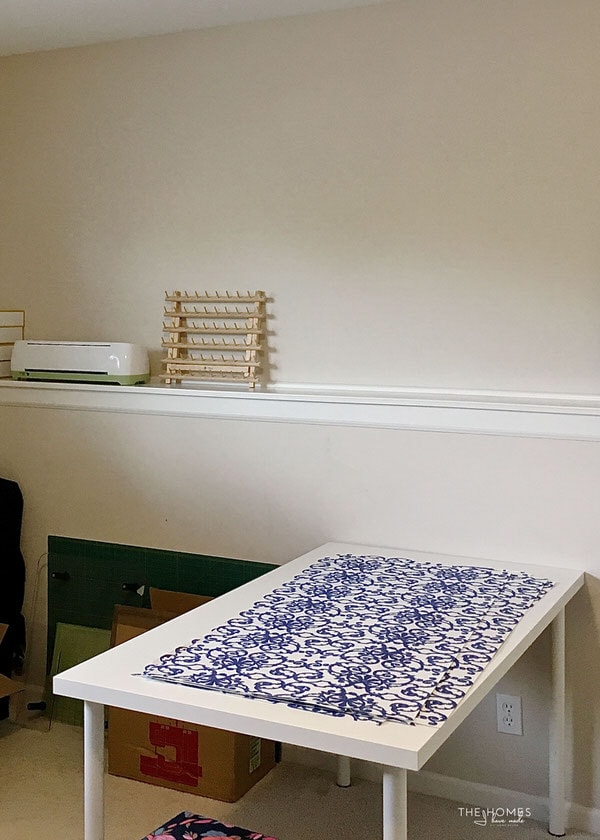
A few weeks ago, I shared a video of how quickly and easily the wallpaper came down. You can see the wallpaper removal in action HERE – I’m still so giddy over how it worked! In a nutshell, the wallpaper peeled off cleanly and in perfect sheets. In about 5 minutes, I had all the paper down in the entire office; and unlike the peel-and-stick versions, the sheets were flat and wrinkle-free. I was able to stack them up, roll them up, and box them up for our next home!
And the walls? CLEAN…with no evidence of the liquid starch OR the wallpaper! I peeled off the wallpaper and did nothing else to the walls. Here is the room the day we moved out:
Would I do it again? Absolutely. As I mentioned when I shared the removal video, compared to everything else I’ve done in previous homes and in this home, this renter-friendly walls treatment method is by far the easiest and my favorite. We’ve repainted a lot of walls, which I don’t find too hard. But to have a room look this great for the whole time we were here…to then peel off the paper, pack it up, and walk away without having to paint, clean, patch or peel anything else was nothing short of truly, truly awesome. Now…regular wallpaper can be expensive. But the rolls tend to be longer than their peel-and-stick counterparts, and since you can use the paper over and over again, the investment is a little easier to swallow. Keep your eye on flash sale sites (like Joss and Main and One Kings Lane) to find good prices; and pretty, pretty, pretty please use NON-PASTED paper only and test a small area before doing an entire wall/room in your own home!
3. Wrapping Paper
The next method I tried was to hang wrapping paper in our laundry room. To do so, I originally started with double-stick tape but finished the job with thumbtacks because it was easier. You can read the full tutorial HERE.
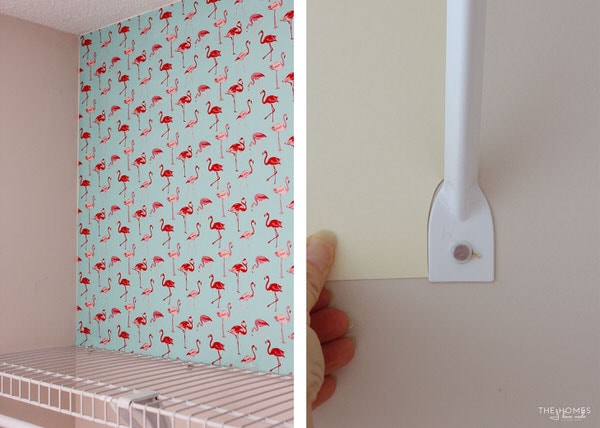
A lot of you love the story about Greg being the one to encourage me to keep going with the flamingos when I was tempted to pull it all down midway through the project. He was so right, the flamingo paper detail turned out to be so good in this little space. You can see the full laundry room reveal HERE.
Want to save this post?

Somehow I missed getting some pictures of the paper coming down and the final result, so you will just have to visualize how it went. While the wrapping paper can be a bit unwieldy (because of its width and length), pulling out the tacks and pulling off the double-stick tape were both quick and easy. The double-stick tape was easy to get off the walls and the paper; and as you might expect, the thumbtacks did leave teeny tiny holes in the wall. Unlike nails and screws, the tac holes were so tiny you could barely see them…so we didn’t bother filling them. That said, if you live in a strict all-holes-must-be-filled rental, then you may want to go the double-stick-tape route for installation.
Would I do it again? Sure! Wrapping paper is not only easy to find and available in pretty much any pattern and color, but it is super, super cheap. I used two rolls for this laundry room wall, each about $3.50. We got a lot of personality and pizzazz for less than $10! BUT…wrapping paper does not have the durability that wallpaper does. It rips easily, creases easily, and is not at all resistant to water splashes. Also, if you use tacks or tape as I did, the paper will not cling to the wall the way wallpaper does, so mentally prepare for a somewhat different look. That said, it is a great way to dress up small rooms, backs of closets, drawers, and other small spaces and is another great renter-friendly walls treatment solution!
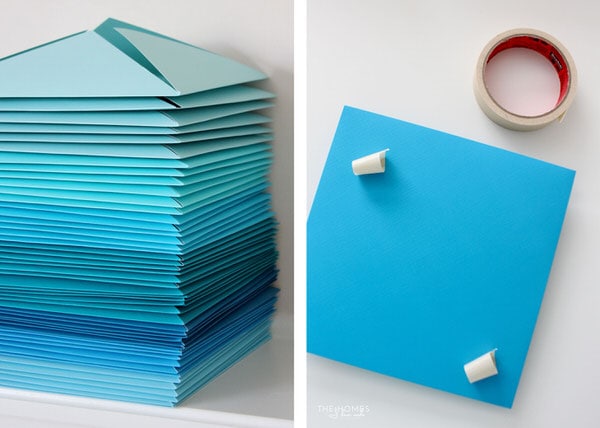
4. Cardstock with Masking Tape
What started as an art installation project turned into an entire wall feature on a whim. To give our playroom a major dose of color, I took a stack of ombre cardstock, folded them in at each corner, and secured them to the wall in a mountain-scape design using plain ol’ masking tape. You can read the whole tutorial HERE.
While a bit wild and crazy, even for me, this $10 wall treatment certainly provided a major WOW factor in our downstairs playroom. You can see the full playroom reveal HERE.
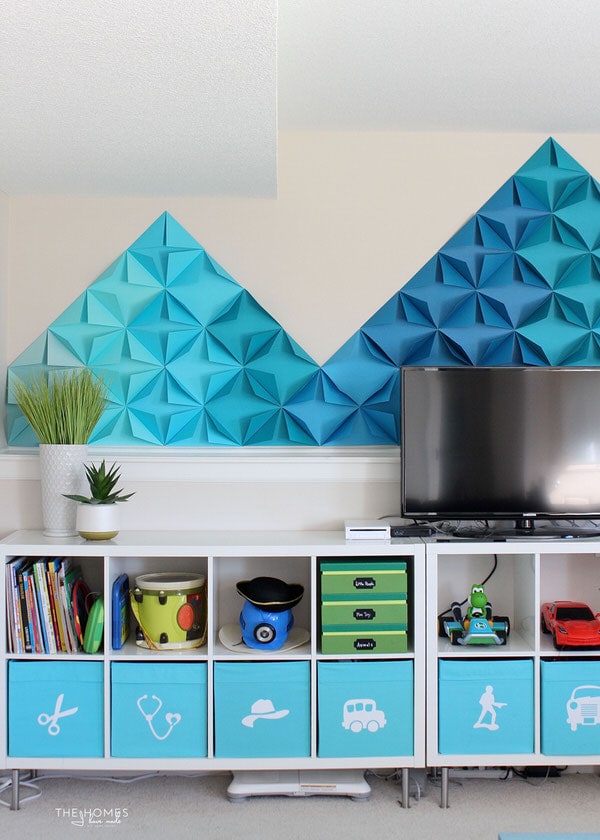
Pulling the squares down was easy and mindless work. It only took me a bit of time because I was pulling the tape off each square and stacking them to save for future use (because a brilliant reader had the suggestion to use them as party table or photo booth backdrop!!!) Originally, I used masking tape because I had it on hand. In the end, however, it was the perfect solution because it held wonderfully (not a single square ever fell off the wall!) and it pulled off cleanly, leaving no residue behind.
Would I do it again? Sure! Admittedly, this wall feature was casual, fun and playful but not something I would do in a “real” home or for the long term. I think the concept is great for play spaces, kids rooms or for party displays, but lacks the sophistication the other wall methods provide. Still…we got a lot of totally temporary color and pattern on the walls for just $10. It all came down clean, and I was able to pack them up and keep them for future use. If you’re looking for a creative and super cheap renter-friendly walls solution to color up your walls, go for it!
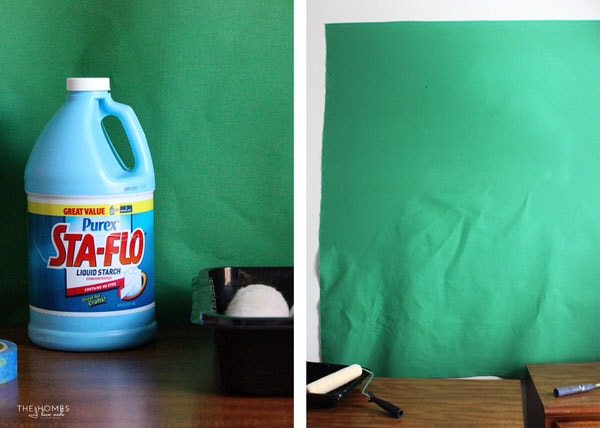
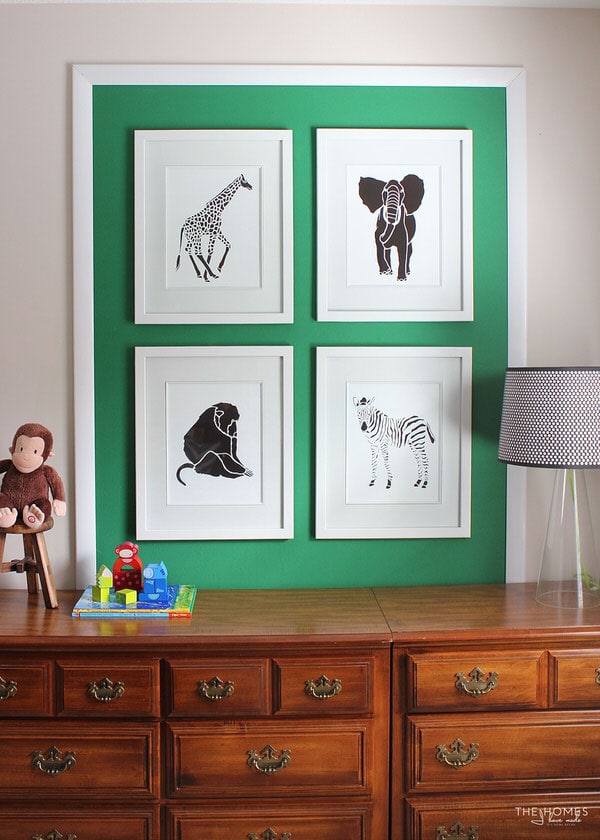
5. Fabric with Liquid Starch
Last but not least, I finally gave the liquid starch + fabric trick a try (all these homes and I’ve never tried it!). To create a feature spot in Henry’s bedroom for his jungle prints, I used a two-yard length of $7/yard duck cloth in a jungle green color. I used liquid starch to secure it flat to the wall…creating a wallpaper effect but with a fabric texture. You can read the full tutorial HERE.
Aesthetically, I LOOOOOOVED this spot in Henry’s room. The bright green texture on the wall, framed out with basic trim, really helped his prints pop and created such a nice display above his dressers. As we sat in bed and read books every night, I would look at this display and just smile because it looked so fresh, sharp and smart! You can see the full bedroom reveal HERE.
However, I am sad to report that the removal of the green fabric didn’t go nearly as well as I hoped or expected. Yes, the fabric peeled right off without any trouble, and no paint peeled off with it. I was able to run the fabric through the wash (to get all the starch out), fold it up, and pack it up with the rest of my fabric for a future project. However, the wall was a pretty good mess. I tried my hardest to capture it in photos…hopefully you can see that the fabric left behind hundreds of tiny green pills and threads across every single inch that was covered. Further, the green fabric combined with the liquid starch left a slight green tinge and a few smudges on the walls.

I probably spent more time scrubbing this section of wall (with water and a textured sponge) than I did removing every other wall treatment COMBINED! It was frustrating and somewhat unproductive work, as I’m not sure I ever got the wall fully pristine again. However, we did pass inspection without an issue, so I guess it was still a renter-friendly “success.”
Would I do it again? Maybe, but probably not. I think there are a couple of factors here that lead to the pilling and color smudges. Although I washed my fabric before applying it to the walls, maybe Duck cloth wasn’t the best fabric choice? The walls were also painted with flat paint (eeek!) so they didn’t wipe clean the way semi-gloss walls may have. At least in my experience with these 5 different wall options, this one proved the biggest headache by a long shot.
Although my experience wasn’t the best, I’m not sure fabric on the walls is completely out as a renter-friendly option. It is somewhat inexpensive (compared to wallpaper) and easy to work with (compared to wrapping paper). The colors and styles are endless, and fabric is easy to find. If you’re in a rental that will get freshly painted no matter what (like base housing often is)…sure…give it a go! I think if I were to use fabric on the walls again, I would probably secure it with staples and a staple gun (like I did below!) rather than using the liquid starch trick.
All in all, I have to say that my renter-friendly walls challenge proved a very successful one! I was able to satisfy my need for color in our home by using an array of methods other than paint. And most of them came down quicker and easier than repainting a wall would have been. I still believe that painting your walls remains one of the quickest, easiest and cheapest ways to get color in your home. But when that isn’t an option, take heart that there ARE indeed other good alternatives!
If avoiding painting walls is your priority, here are a couple of other ideas on how to create feature walls without paint (some more permanent than others)!
I’d love to hear which renter-friendly walls method was your favorite! And if you have tried one (or more!) of these methods since seeing a post here on THIHM, I’d love to know your experiences. Share in your comments below!
Megan
12 Comments on “Hit or Miss? Renter-Friendly Walls”
Love the feedback on the ideas. Looking at it makes me want to do some fun stuff to my house. I always want to do something, just finding the time and extra motivation to tackle a project and see it all the way through. Summer is rough!
Thanks for the tip on the paper backdrop. I’m doing a baby shower next week. Need to get working on something like this!
Dear Megan;
Hi there – just wanted to say thanks for the results. I never would have been brave enough to try removable wallpaper unless somebody I trusted told me it would really come off! I’m contemplating using it on my kitchen back-splash. Original counters were formica that curved up the wall, and when the granite was installed with a four inch back-splash a really ugly transition area was left exposed. We ended up covering that with carved wood molding (that looked so cute in the store!) that just does not combine well. After that, I was afraid to contemplate any kind of tile back-splash-it’s already a fight to keep counters clear – who needs another hard surface on the wall! But maybe a nice soft wallpaper paper will smooth the transition. Thanks for your inspiration!
Aloha,
Tenney
Hi Megan,
I love your different wall treatment options! They are such great ideas and they all looked fabulous in your home!
Have you found any renter-friendly ways of cleaning painted walls? I am in a new rental now and the walls get marked up so easily. I haven’t found a way to get the marks off the walls without also taking the paint off. I would appreciate any ideas you can offer.
Thanks so much!
Elizabeth
I have a old wallpapered wall in a rental. I’d love to change the color for the 2 years we have left there. Any suggestions on what may be the most gentle method that you have used.
Hi Jennifer,
I would say the best method I’ve used to cover walls is peel-and-stick (adhesive-style) wallpaper. It can be costly, but does the least damage, is the easiest to put up, and is available in the most patterns and colors. Devine-brand from Target is my favorite!
Hope that helps,
Megan
Hi Megan, I’ve been a serial renter for 20 years and I love your wall challenge ideas. Next time, in going to use the non-pasted wallpaper idea.
I’ve used the fabric and starch technique and found the same removal issues. Here’s what I’ve learned as a solution: pre-wash the fabric, of course, in HOT water. Then, as you prepare to roll out the starch, add a cup of white vinegar to the starch bottle. I frame-out my fabric the way you did, but instead of taking the starch all the way to the edge, I left the last half-inch loose. The starch on the edges of the fabric really makes it grab those little pieces.
I also learned that quilting fabric, instead of Cotton duck, doesn’t pull apart as easily in the dismount.
Lighter colored fabric leaves less (if any) hue. I used a sweet white with pink mini roses fabric in my friend’s nursery. It pulled off flawlessly.
I hope this helps!
Amy Renee
Oorah my fellow Marine wife! I’m finally in my long term home since my husband’s retirement from the corps. Your ideas are fabulous and so useful for anyone. God bless
you, your family and your Marine. Fair winds and following seas!
This was so inspiring to my already decor ADHD lol I am currently in the process of trying to liven up my dull renter walls but the cost to use removable wallpaper would be ridiculous so I have gone the wrapping paper route but now I’m interested in trying black butcher paper . I’m curious have you ever used any before and do you think the starch method would work on this ? I ask because I want to put it in my bathroom and I’m worried about the constant temp changes and moisture. Someone suggest I use polyacrylic over it but I wonder would it be easy to pull up after ? Any suggestions greatly welcomed and thanks for an amazing post!
Hi Tierra,
Thanks for writing and I’m so glad you found my post helpful. I’ll also suggest that you read this post, as you might find some other useful tips.
As far as your specific question, no, I’ve never tried to use butcher block paper, and honestly, I’m not sure how it would handle the liquid starch, it might unevenly discolor your paper (like wet stains?). You’ll never know until you try, so you could always do a small test on your walls to see.
Sorry I can’t be of more help on this one, but if you try it, please let me know how it turns out!
Megan
thanks for the tips
This is exactly what I was looking for. GREAT IDEAS!!!
Love your ideas think I’ll try the fabric and starch..Let you know how it goes