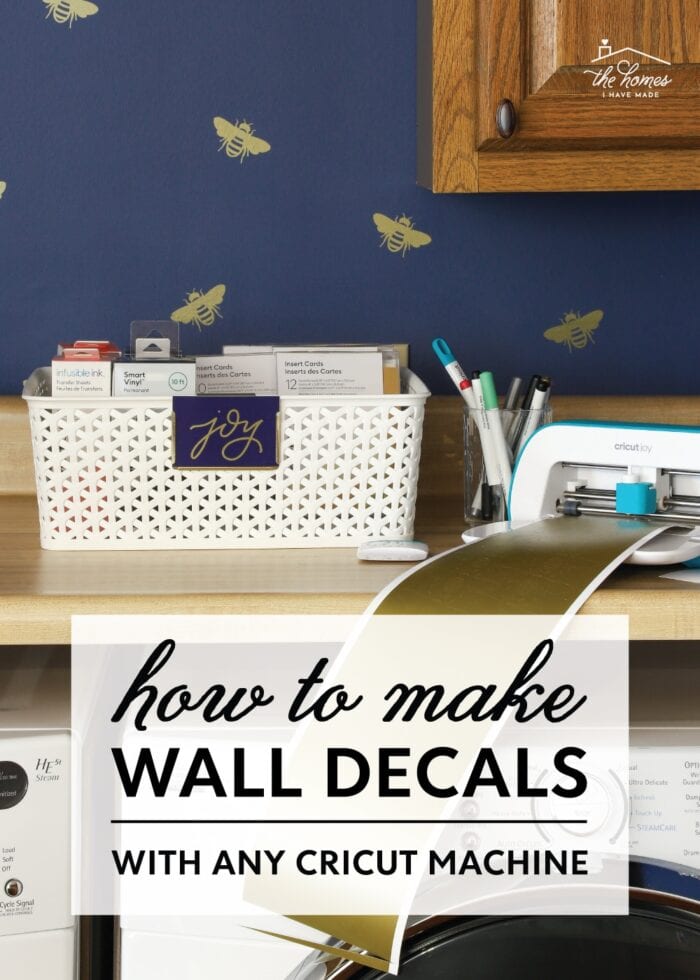
How to Make Vinyl Wall Decals With a Cricut
Without a doubt, one of my favorite ways to update our rental walls is with peel-and-stick wallpaper. However, there are times when I am just not up for the time- or cost-investment of a full wallpaper installation…which is when I turn to one of my other favorite products: custom wall decals! These “wall stickers” are usually made from removable adhesive vinyl in any size, shape, color, and sheen. They can be placed wherever you want to create either an organic display or unique pattern, and are actually super inexpensive AND simple to make. Today I’m breaking down exactly how to make vinyl wall decals with a Cricut so you too can completely change the look of a room in just about an hour (yep…an hour!)
Oh The Things You Can Do…with Vinyl Decals!
One of my favorite things about making my own wall decals with a Cricut is that I can create a wide variety of truly custom designs for our walls quickly, easily, and inexpensively. Rolls of vinyl are cheap, they come in millions of different colors, and the decals can be placed in a wide variety of ways. In fact, with enough patience (and vinyl!) you can even create what looks like wallpaper but is really just a bunch of removable stickers!
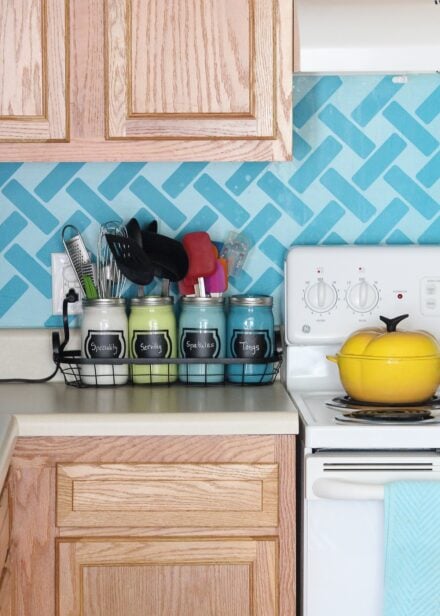
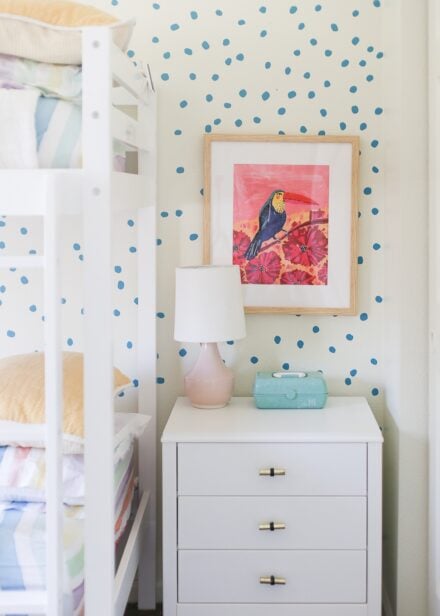
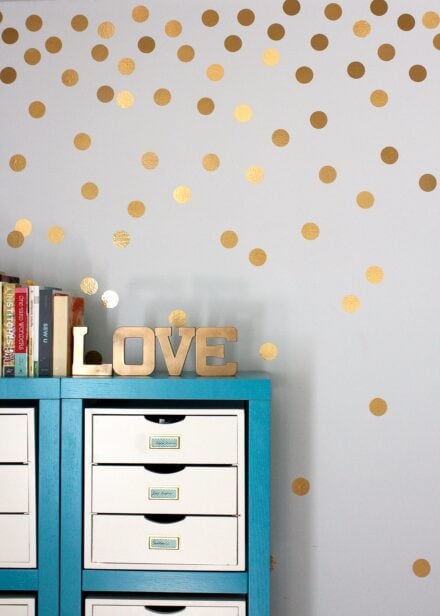
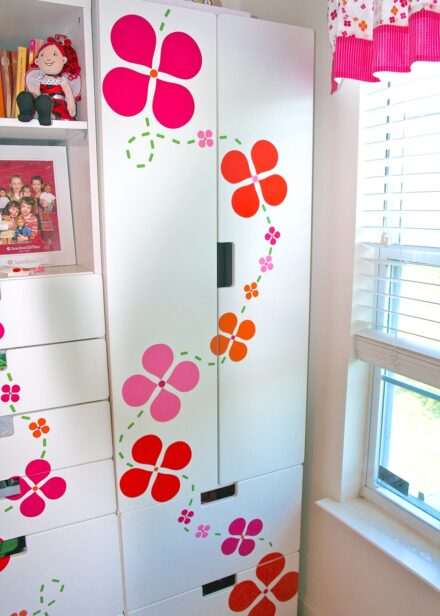
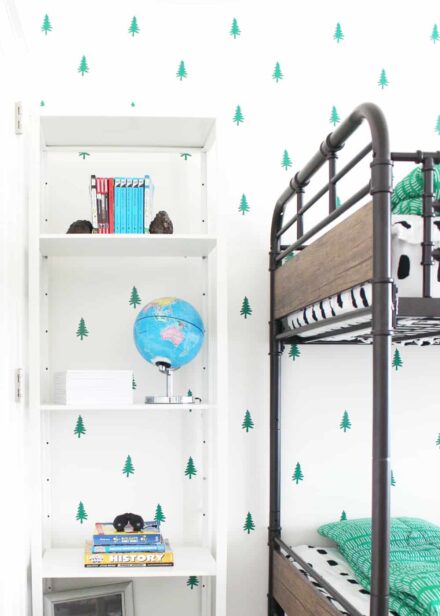
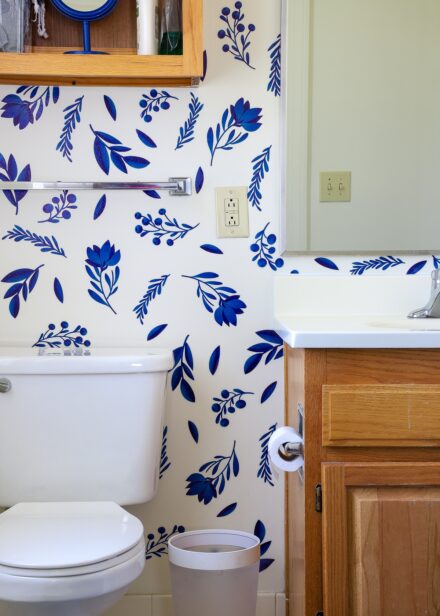
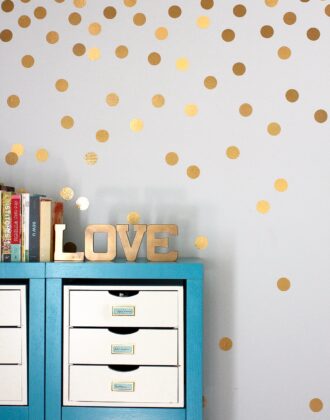
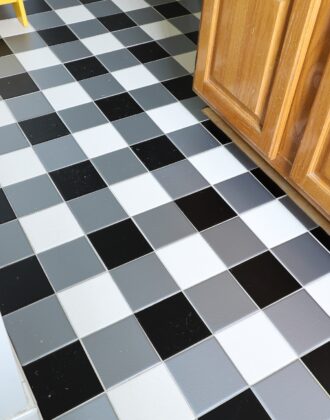
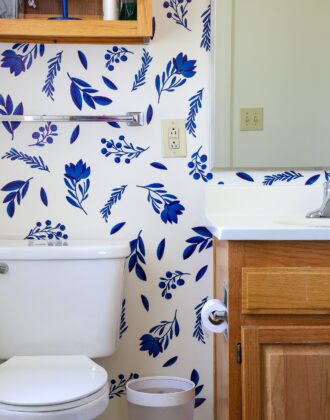
Here are some amazing designs all made with vinyl wall decals!
Why DIY Your Own Vinyl Decals?
There are two major benefits to making your own vinyl decals (rather than buying them pre-cut from a speciality shop): customization and price.
Customization
As I’ve mentioned, vinyl rolls now come in countless colors, sheens, and even patterns. With so many options, there is a very good chance you’ll be able to find the exact color(s) you want for your specific space.
Further, when made with an electronic cutting machine (such as a Cricut Joy, Cricut Maker, or Cricut Explore), you can literally make decals that look exactly as you want them. Whether you want small and simple or large and complex…single color designs or multi-layer creations…all one image or a mix-and-match of graphics…the possibilities really are endless!
Price
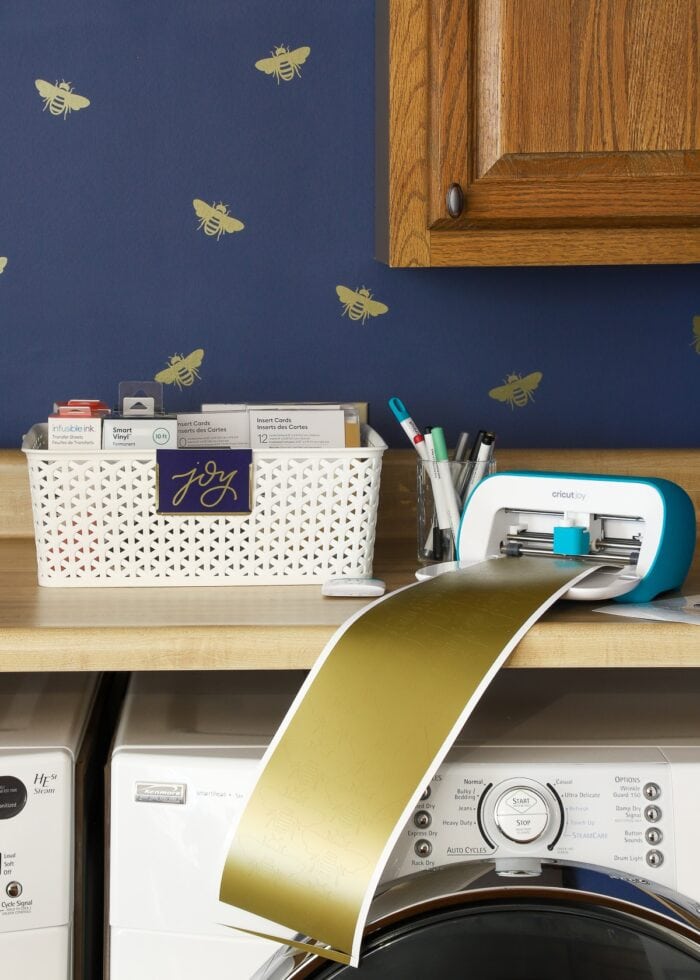
In my mind, purchasing vinyl decals can be fairly cost prohibitive…especially if you’re trying to do a large wall or entire room. For example, this listing of 30 2″ bee decals runs $18; and there’s a good chance a single set won’t be enough (decals never go as far as you think they will!). A full wall or room could cost well over $100.
In contrast, the 2 rolls of vinyl I used for our laundry room cost about $15 total with lots left over. Sure you have to put in the (one-time) cost of investing in a cutting machine; but in time, the cost savings of making your own decals can be significant.
Video Tutorial
Before I dive into the full tutorial in pictures, check out how truly quick and easy it is to make vinyl wall decals with a Cricut in this video below!
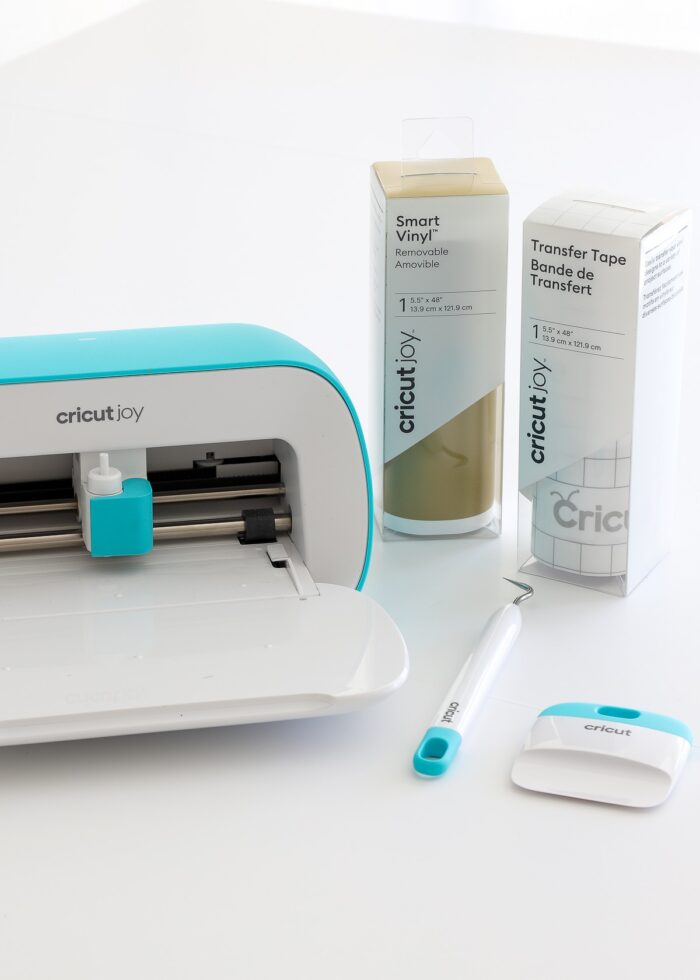
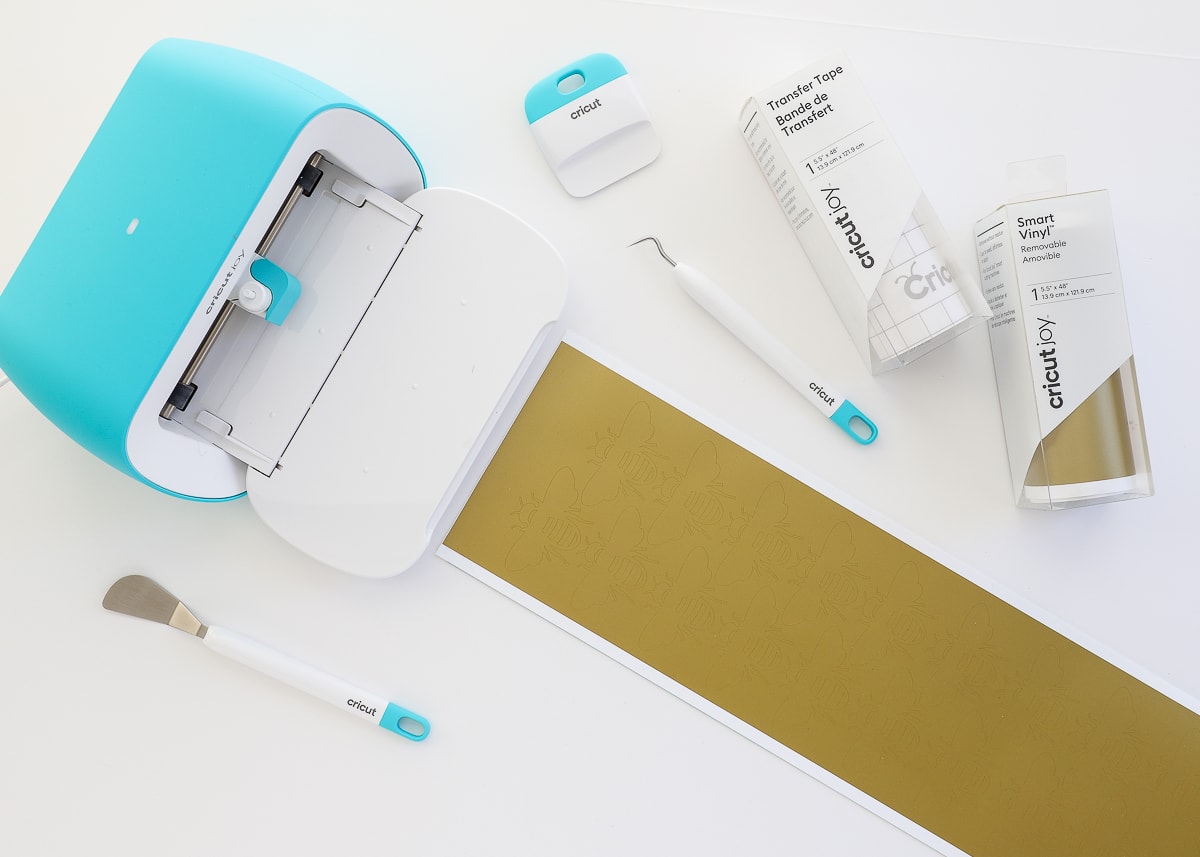
Supplies Needed
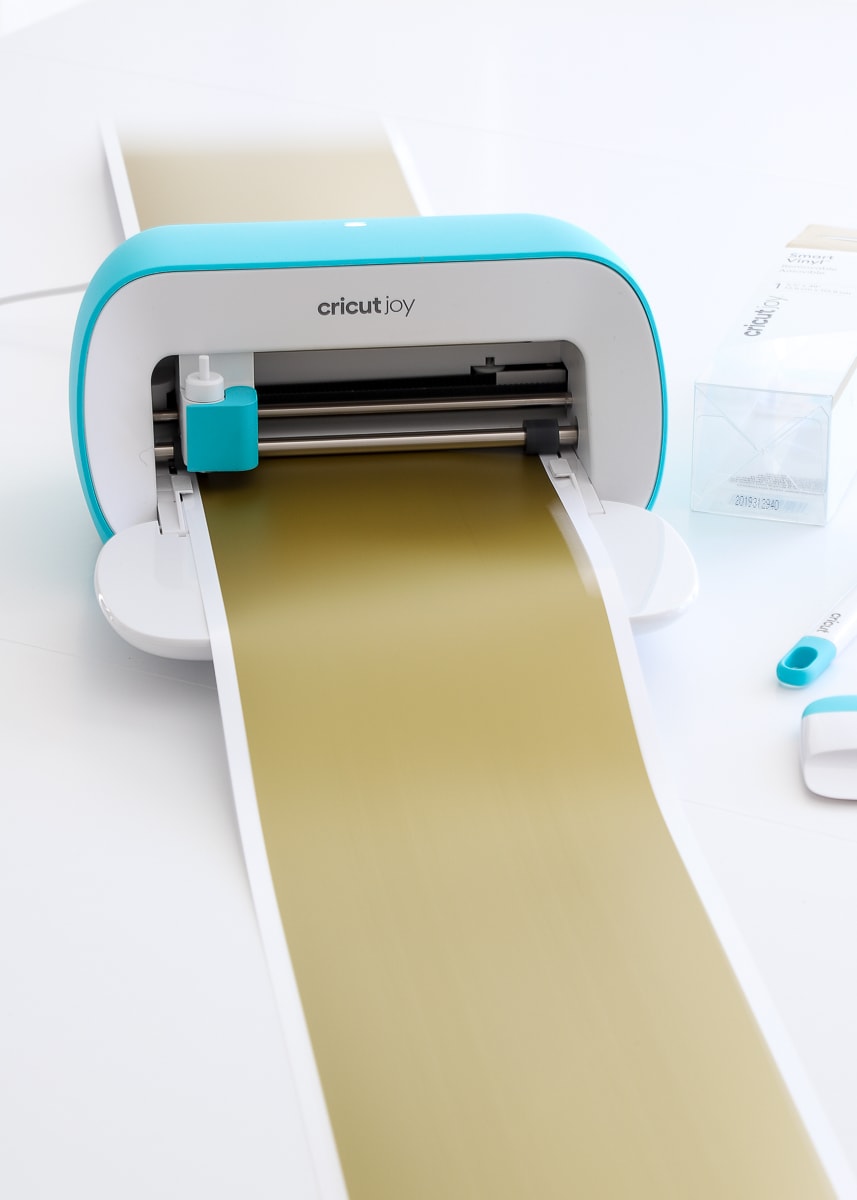
- Cricut Machine – This project can be done on any Cricut machine, but I do recommend using either a Cricut Joy, Cricut Explore 3, or Cricut Maker 3 since they are compatible with Smart Materials (which will make this project even quicker!)
- Rolls of Vinyl in your desired color(s) – I suggest buying more rolls than you think you’ll need and returning leftovers.
- If using a Cricut machine that is compatible with Smart Materials, I recommend using Smart Vinyl for this project. This will allow you to cut more decals at a single time which can save a lot of time, especially when doing a large sticker installation.
- Weeding Tool
- Scraper
- Transer Tape
- Other Supplies – If doing a very precise sticker installation, you may also need a tape measure, level, and painter’s tape.
Step 1: Design Your Decal in Cricut Design Space
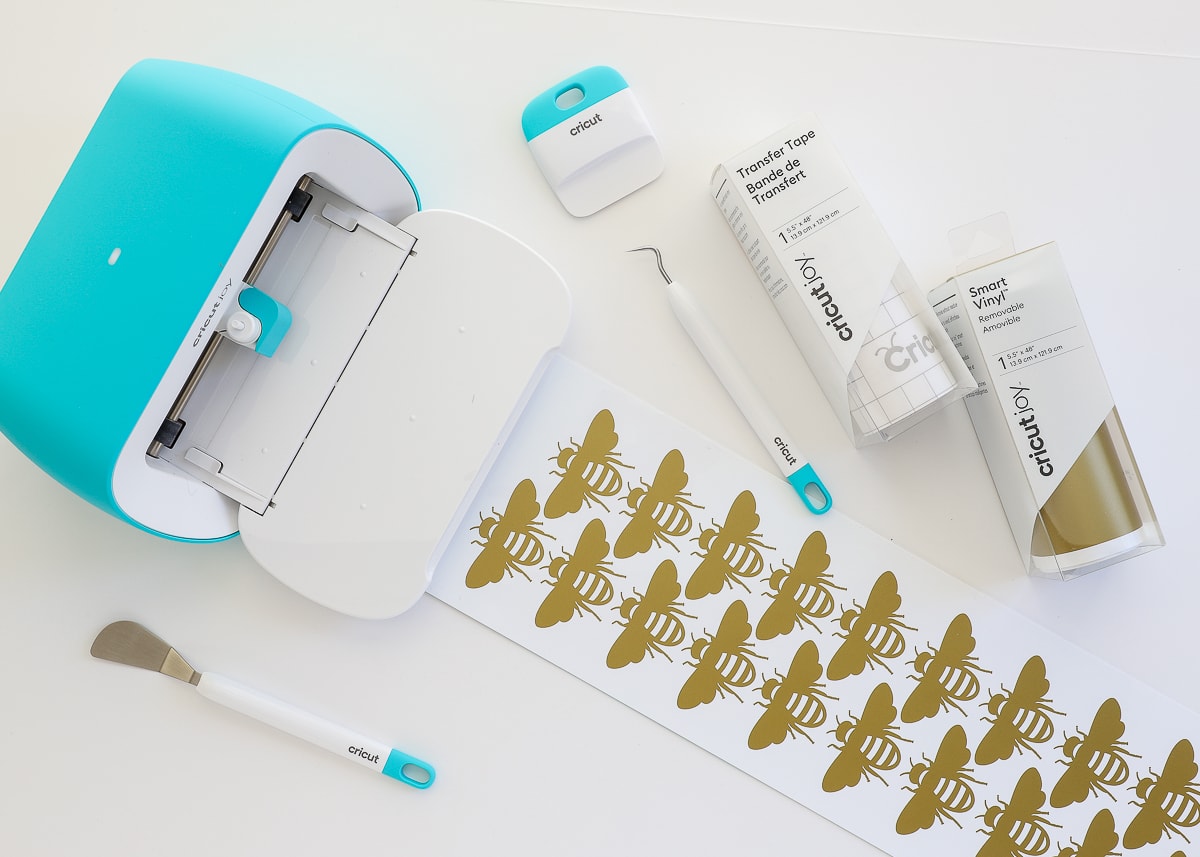
Just like with every Cricut project, start in Cricut Design Space. Find a design for your wall decal in the Image Library or upload one you love. I chose this simple Honey Bee for its modern yet playful aesthetic, and sized it to about 2.5” wide.
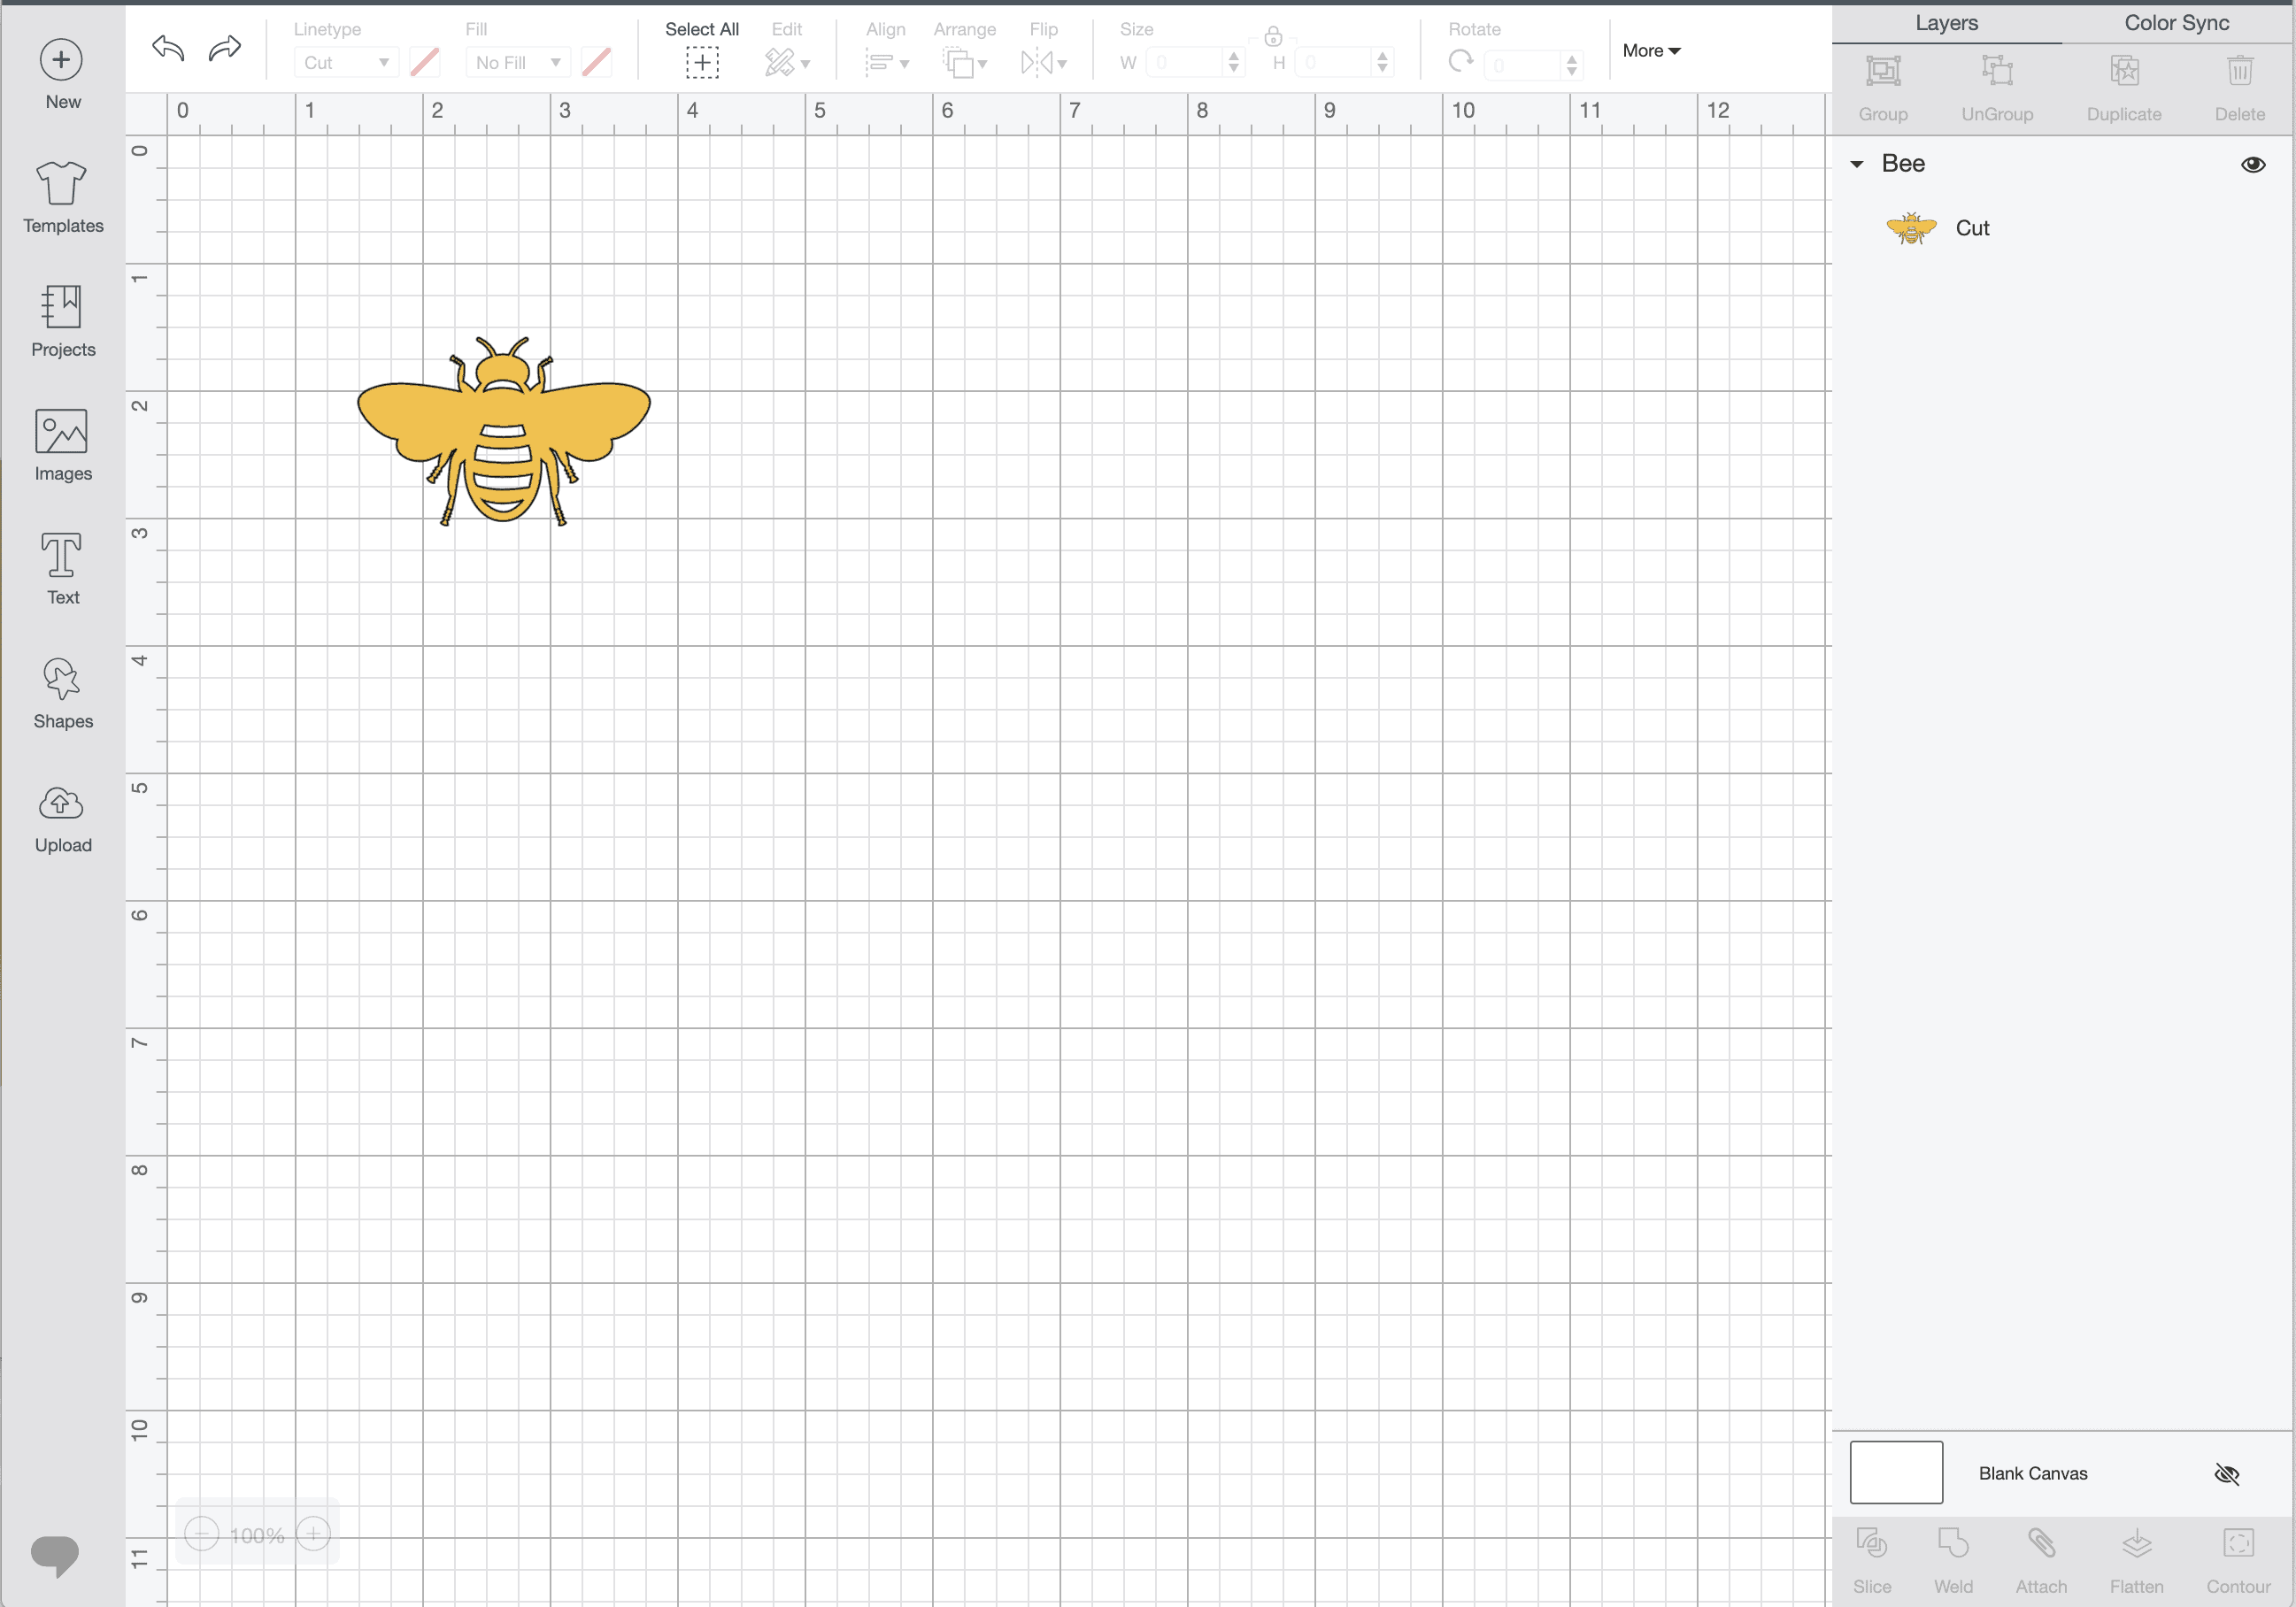
Once you have an image you like, hit the green “Make It” button.
Since you will need a lot of decals, adjust the Project Copies to a higher number (I chose 30). But then notice how much wasted vinyl there is when the copies auto-populate.
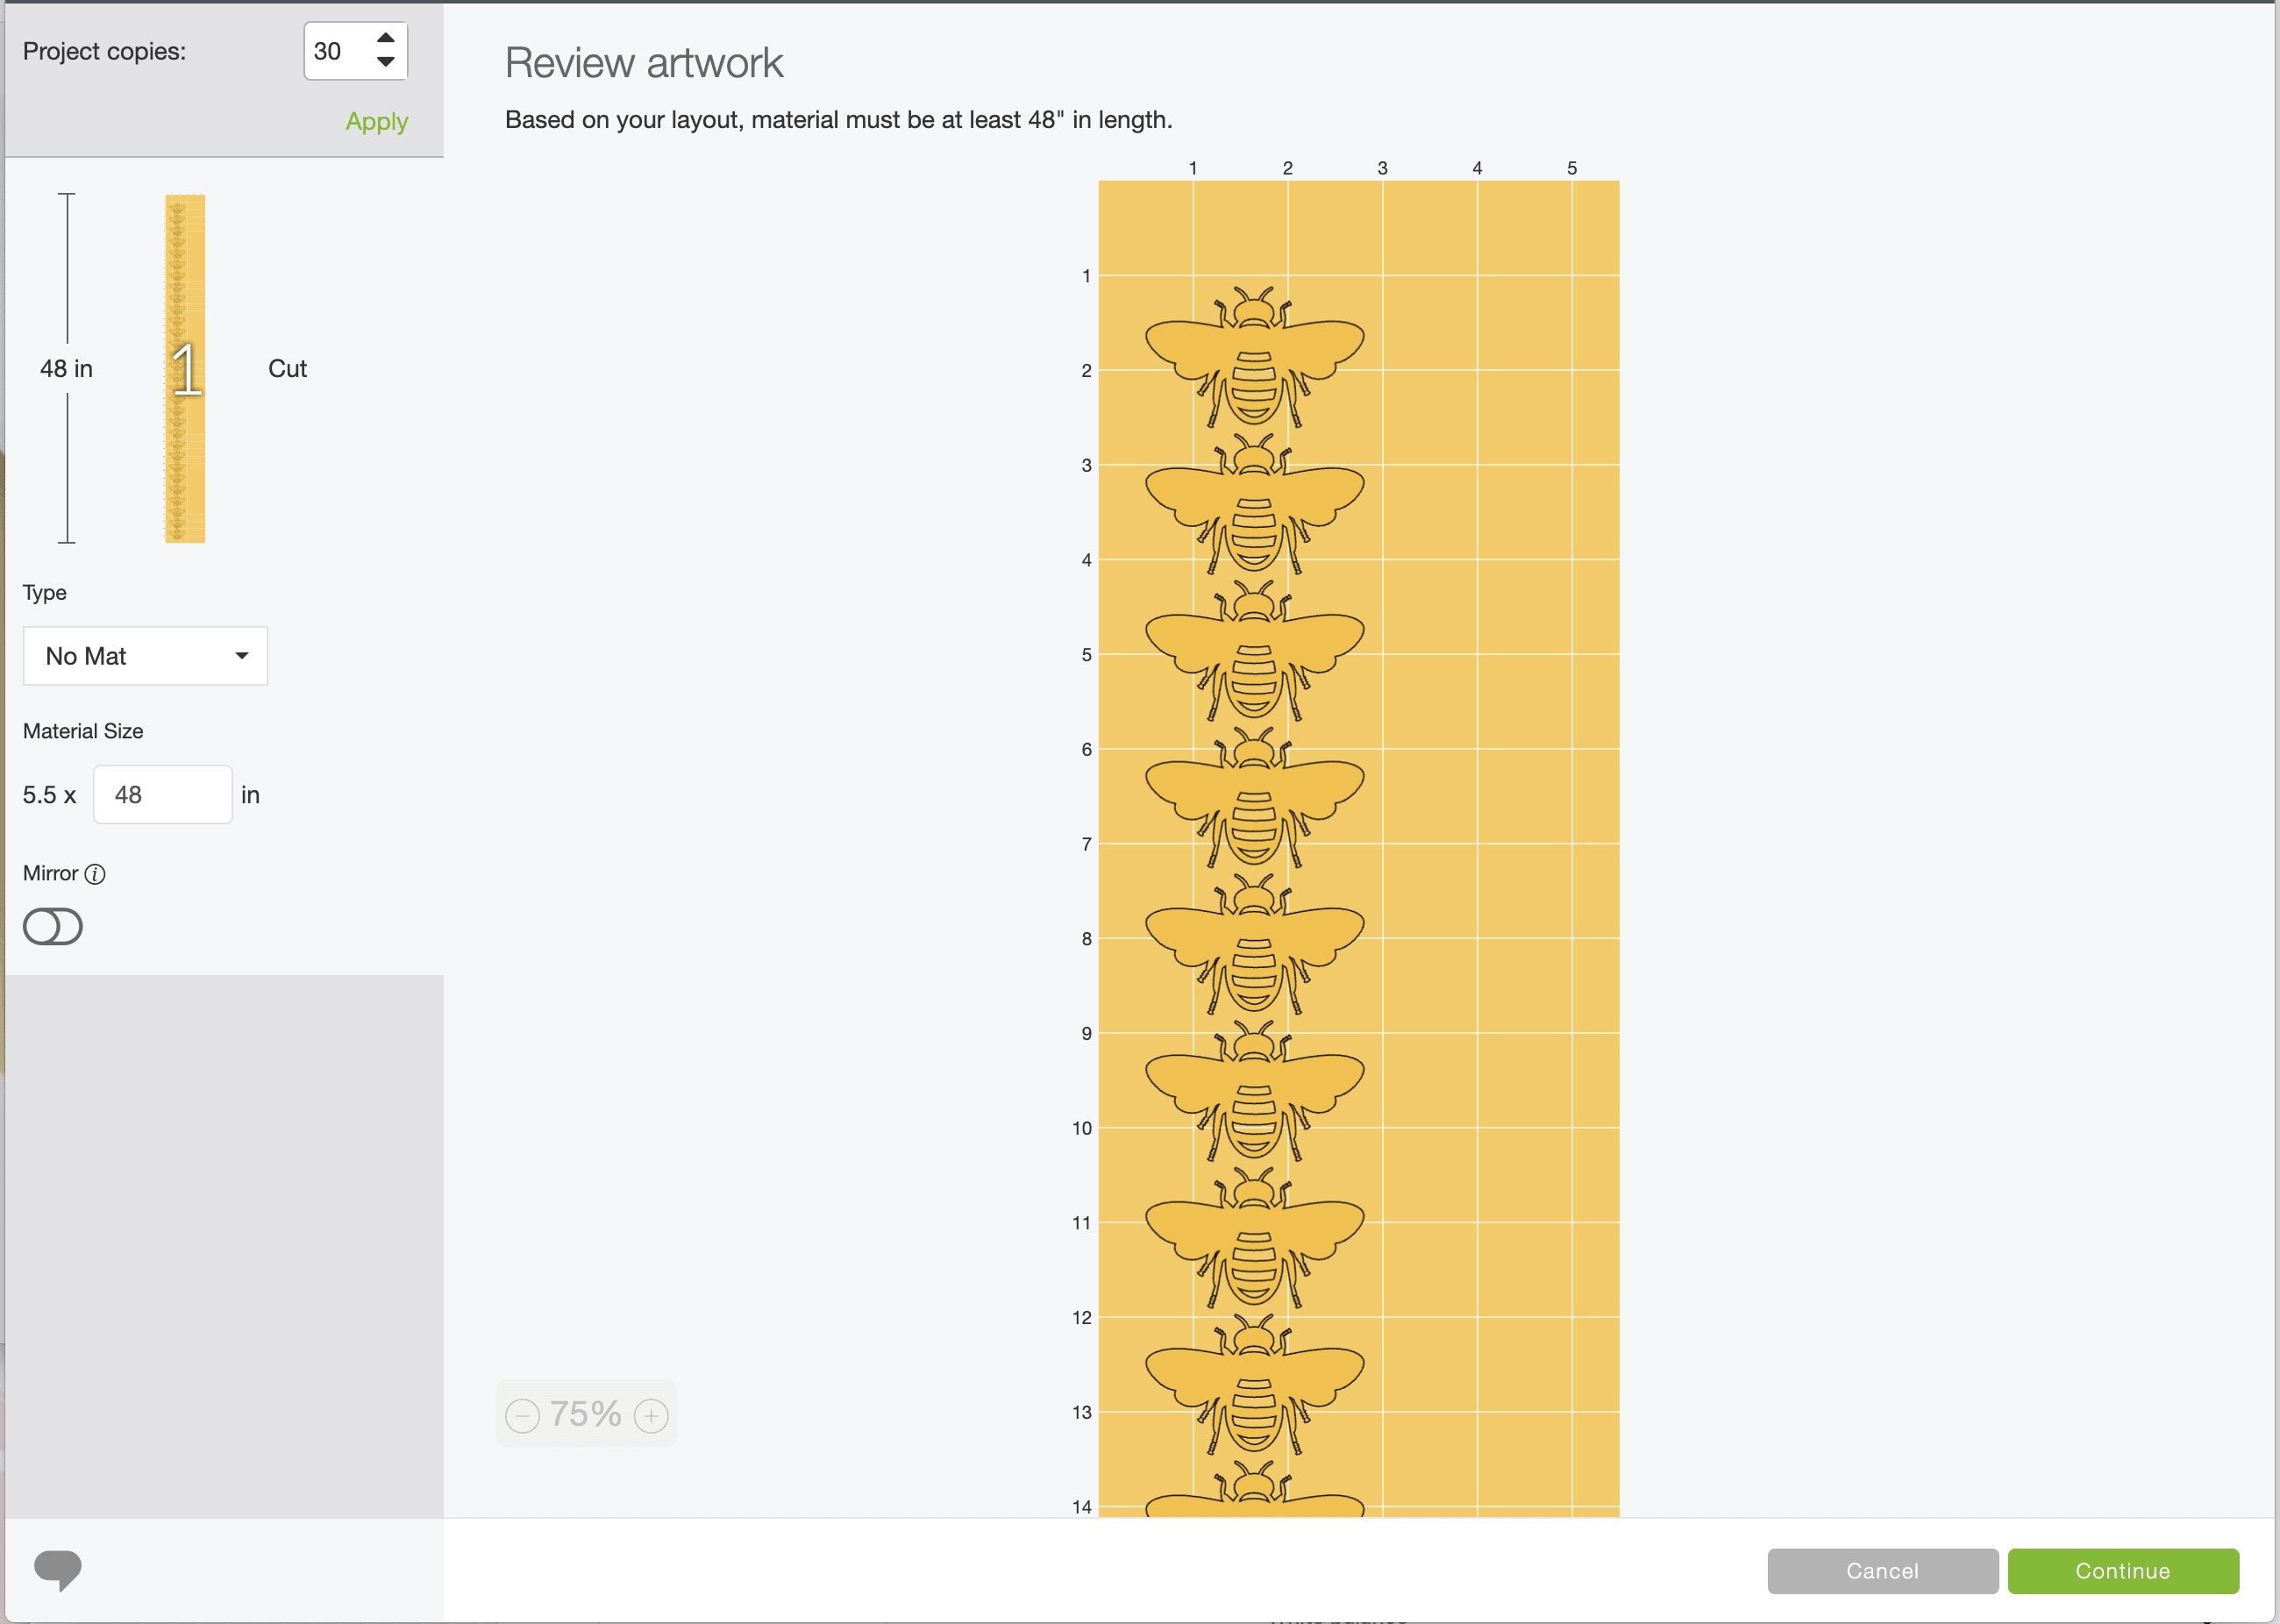
For big projects like this, you’ll want to save as much time and material as you can. Let me teach you an easy trick to better utilize your materials.
Step 2: Optimize Cutting Layout to Conserve Materials
To fit as many decals as you can on a particular mat or length of vinyl, you’ll want to take advantage of the full available width:
- Cricut Joy machines: 4.5″
- Cricut Explore and Cricut Maker machines: 11.5″
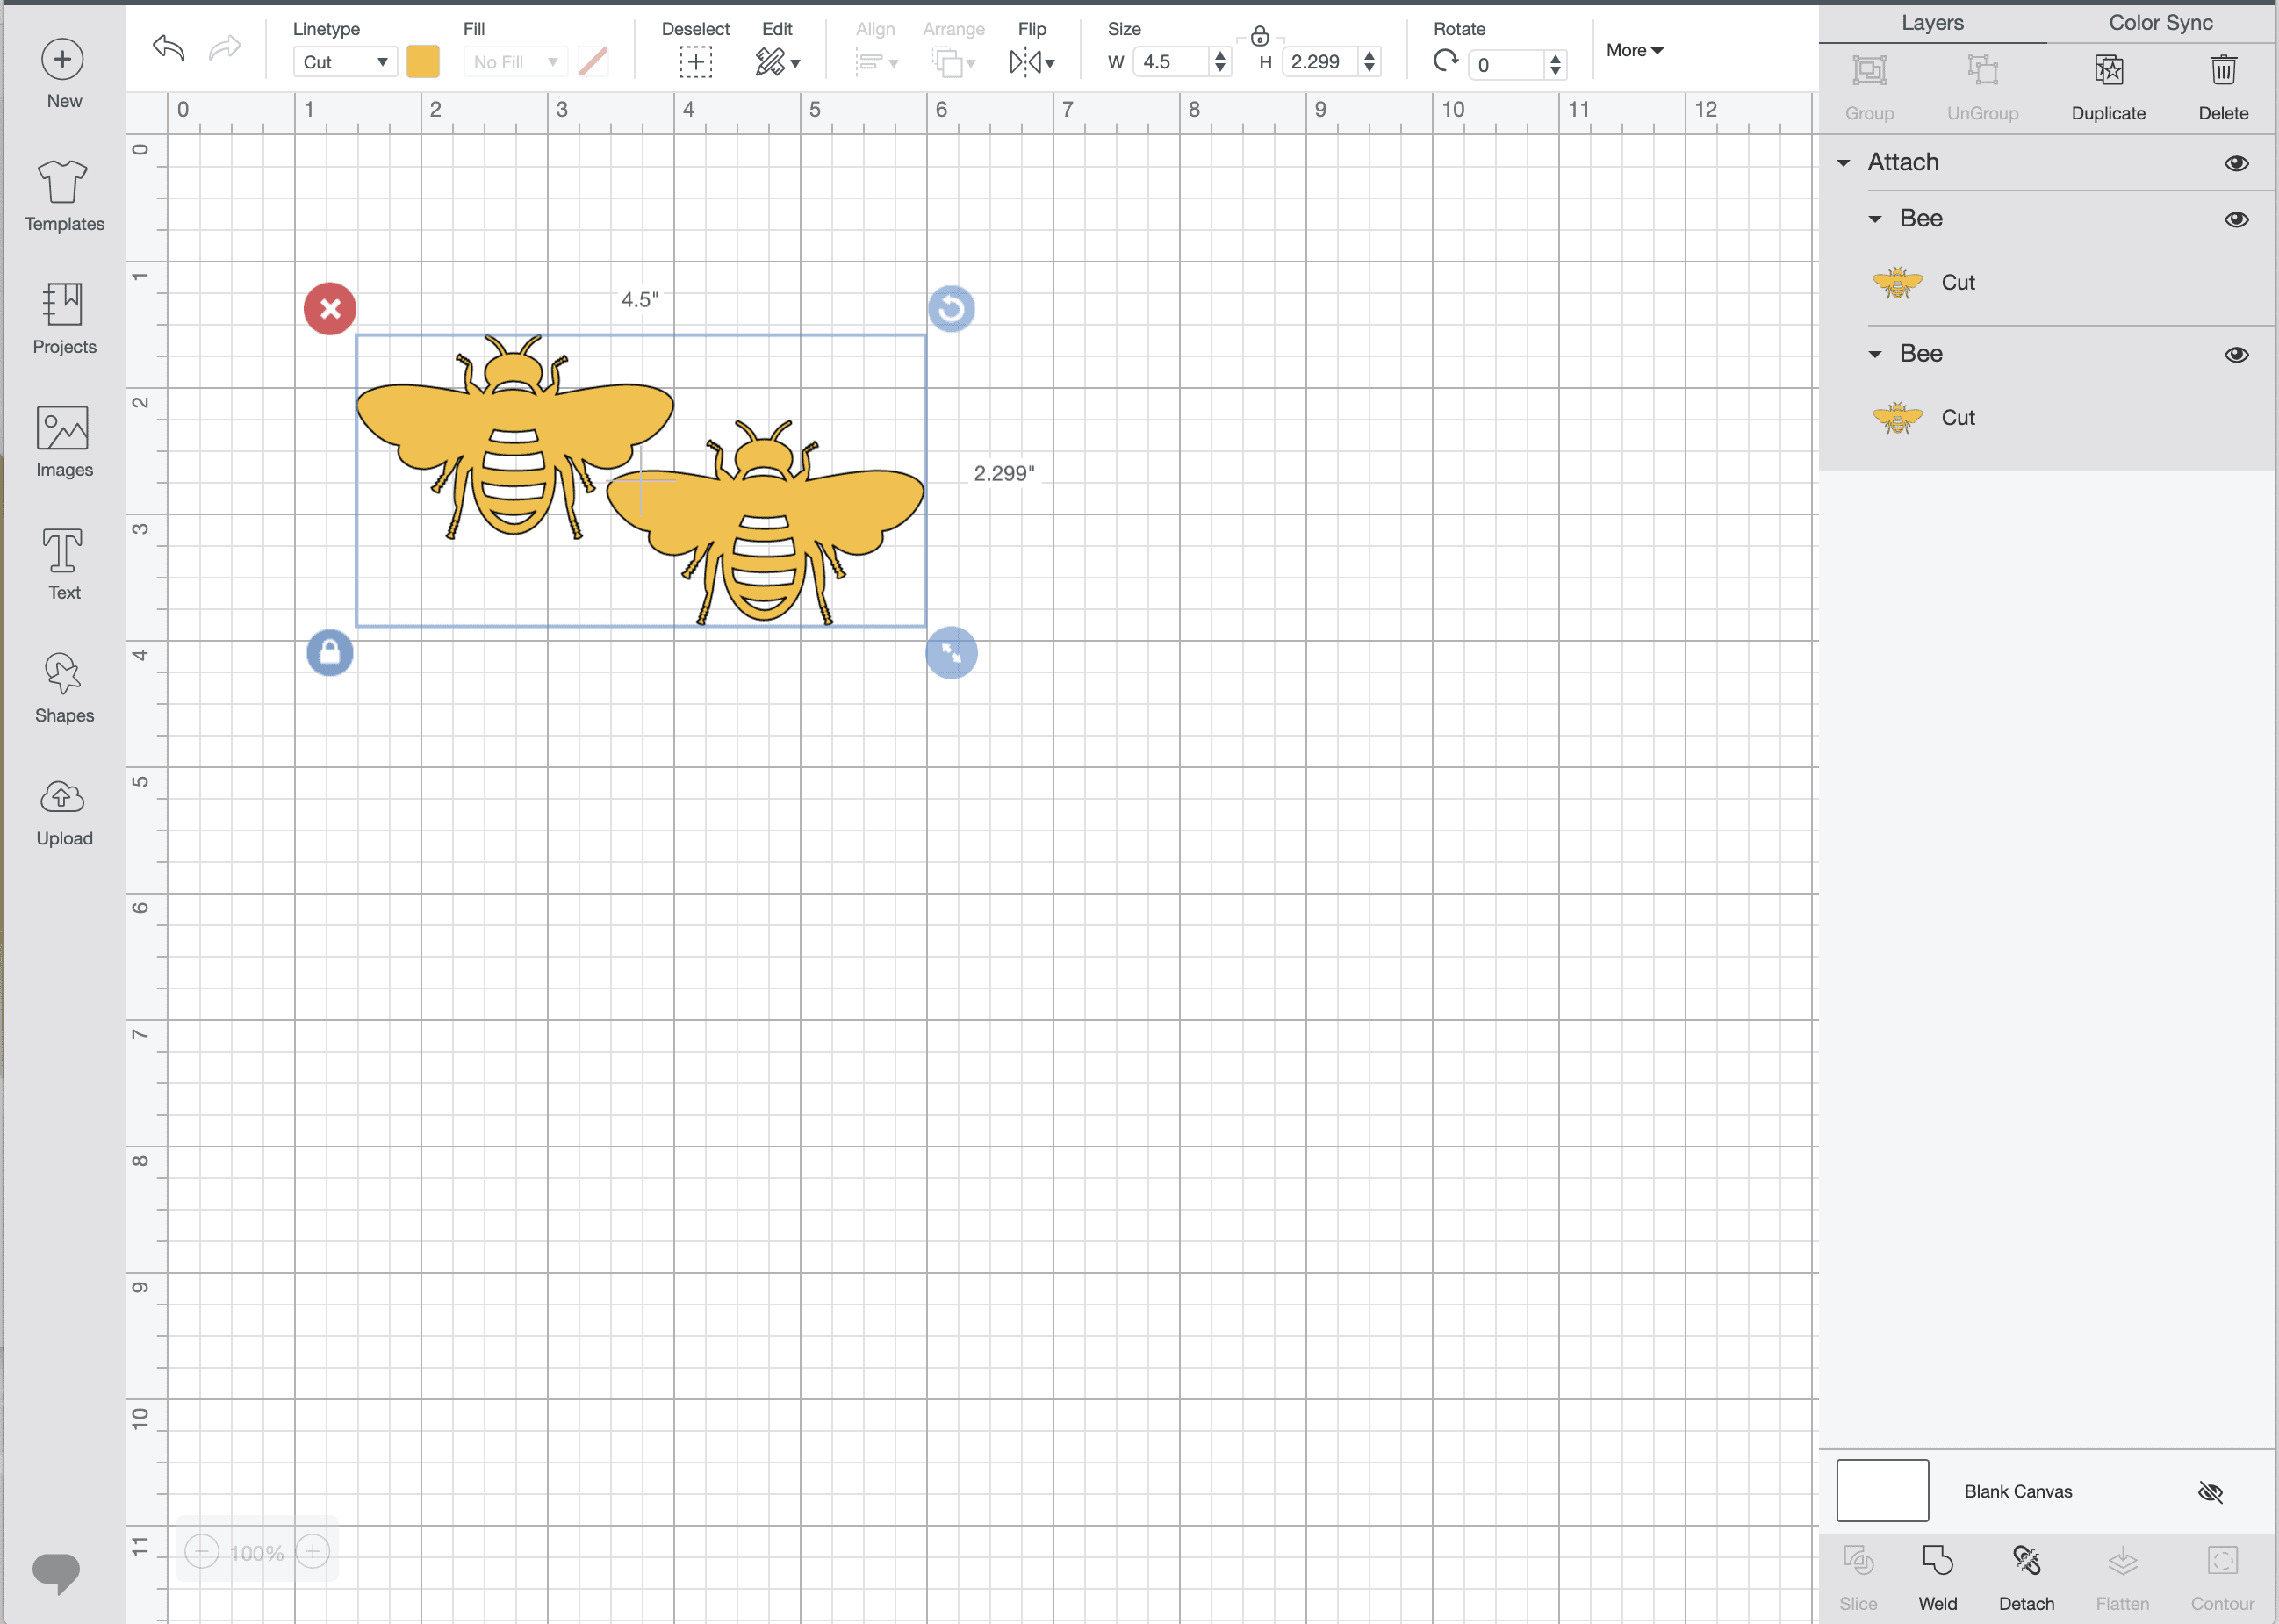
Back on the design canvas, duplicate your decal and play around until you find an optimum layout that takes advantage of the full mat/material width.
For example: I duplicated the bee and attached the two together. After ensuring the pair measured no bigger than 4.5” wide (the widest I can cut on Cricut Joy Smart Vinyl), I sent it to cut once again.
This time, you can now see I have a lot more bees on the same length of vinyl! But…there is still a lot of wasted space between each pair. Currently, Design Space tells me I need almost 30” of material for 12 sets of bees:
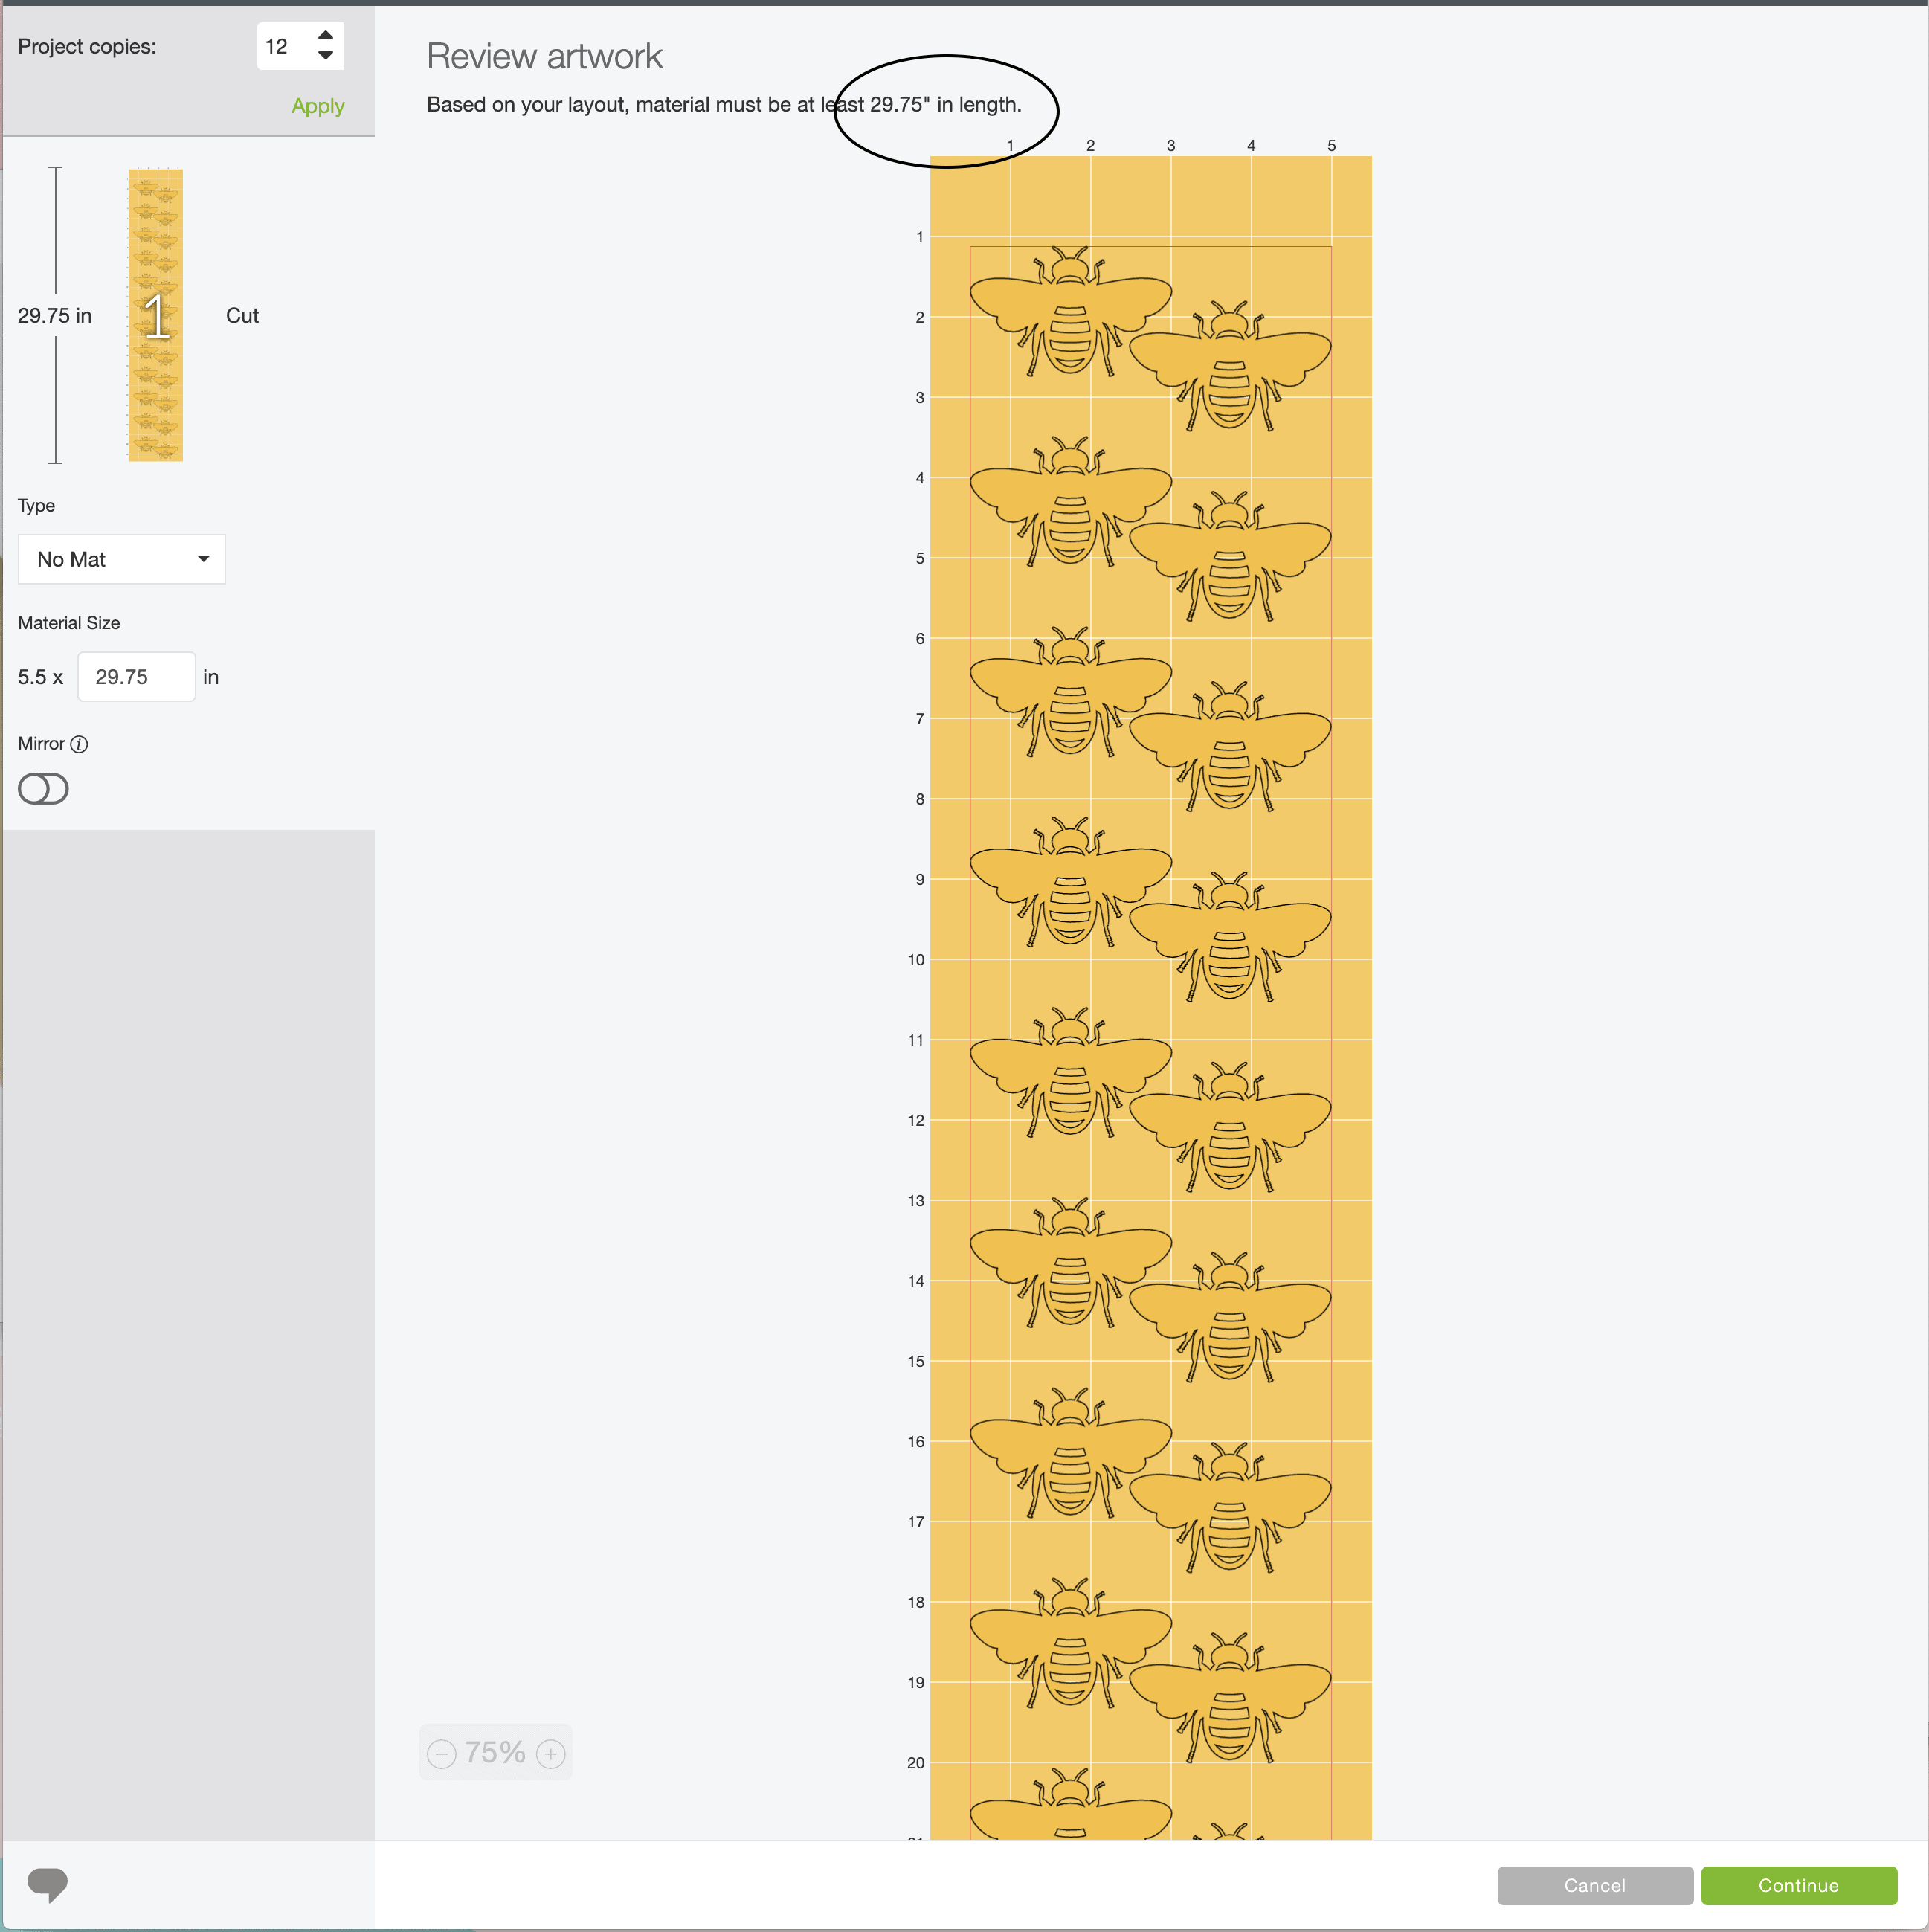
But by manually tightening up the bees (just drag and drop right on the Cut Preview Screen), I can now fit 12 sets of bees in 22” of material! This material savings will really add up when you have lots and lots of decals to cut!

Want to save this post?
Step 3: Cut the Custom Decals with Your Cricut Machine
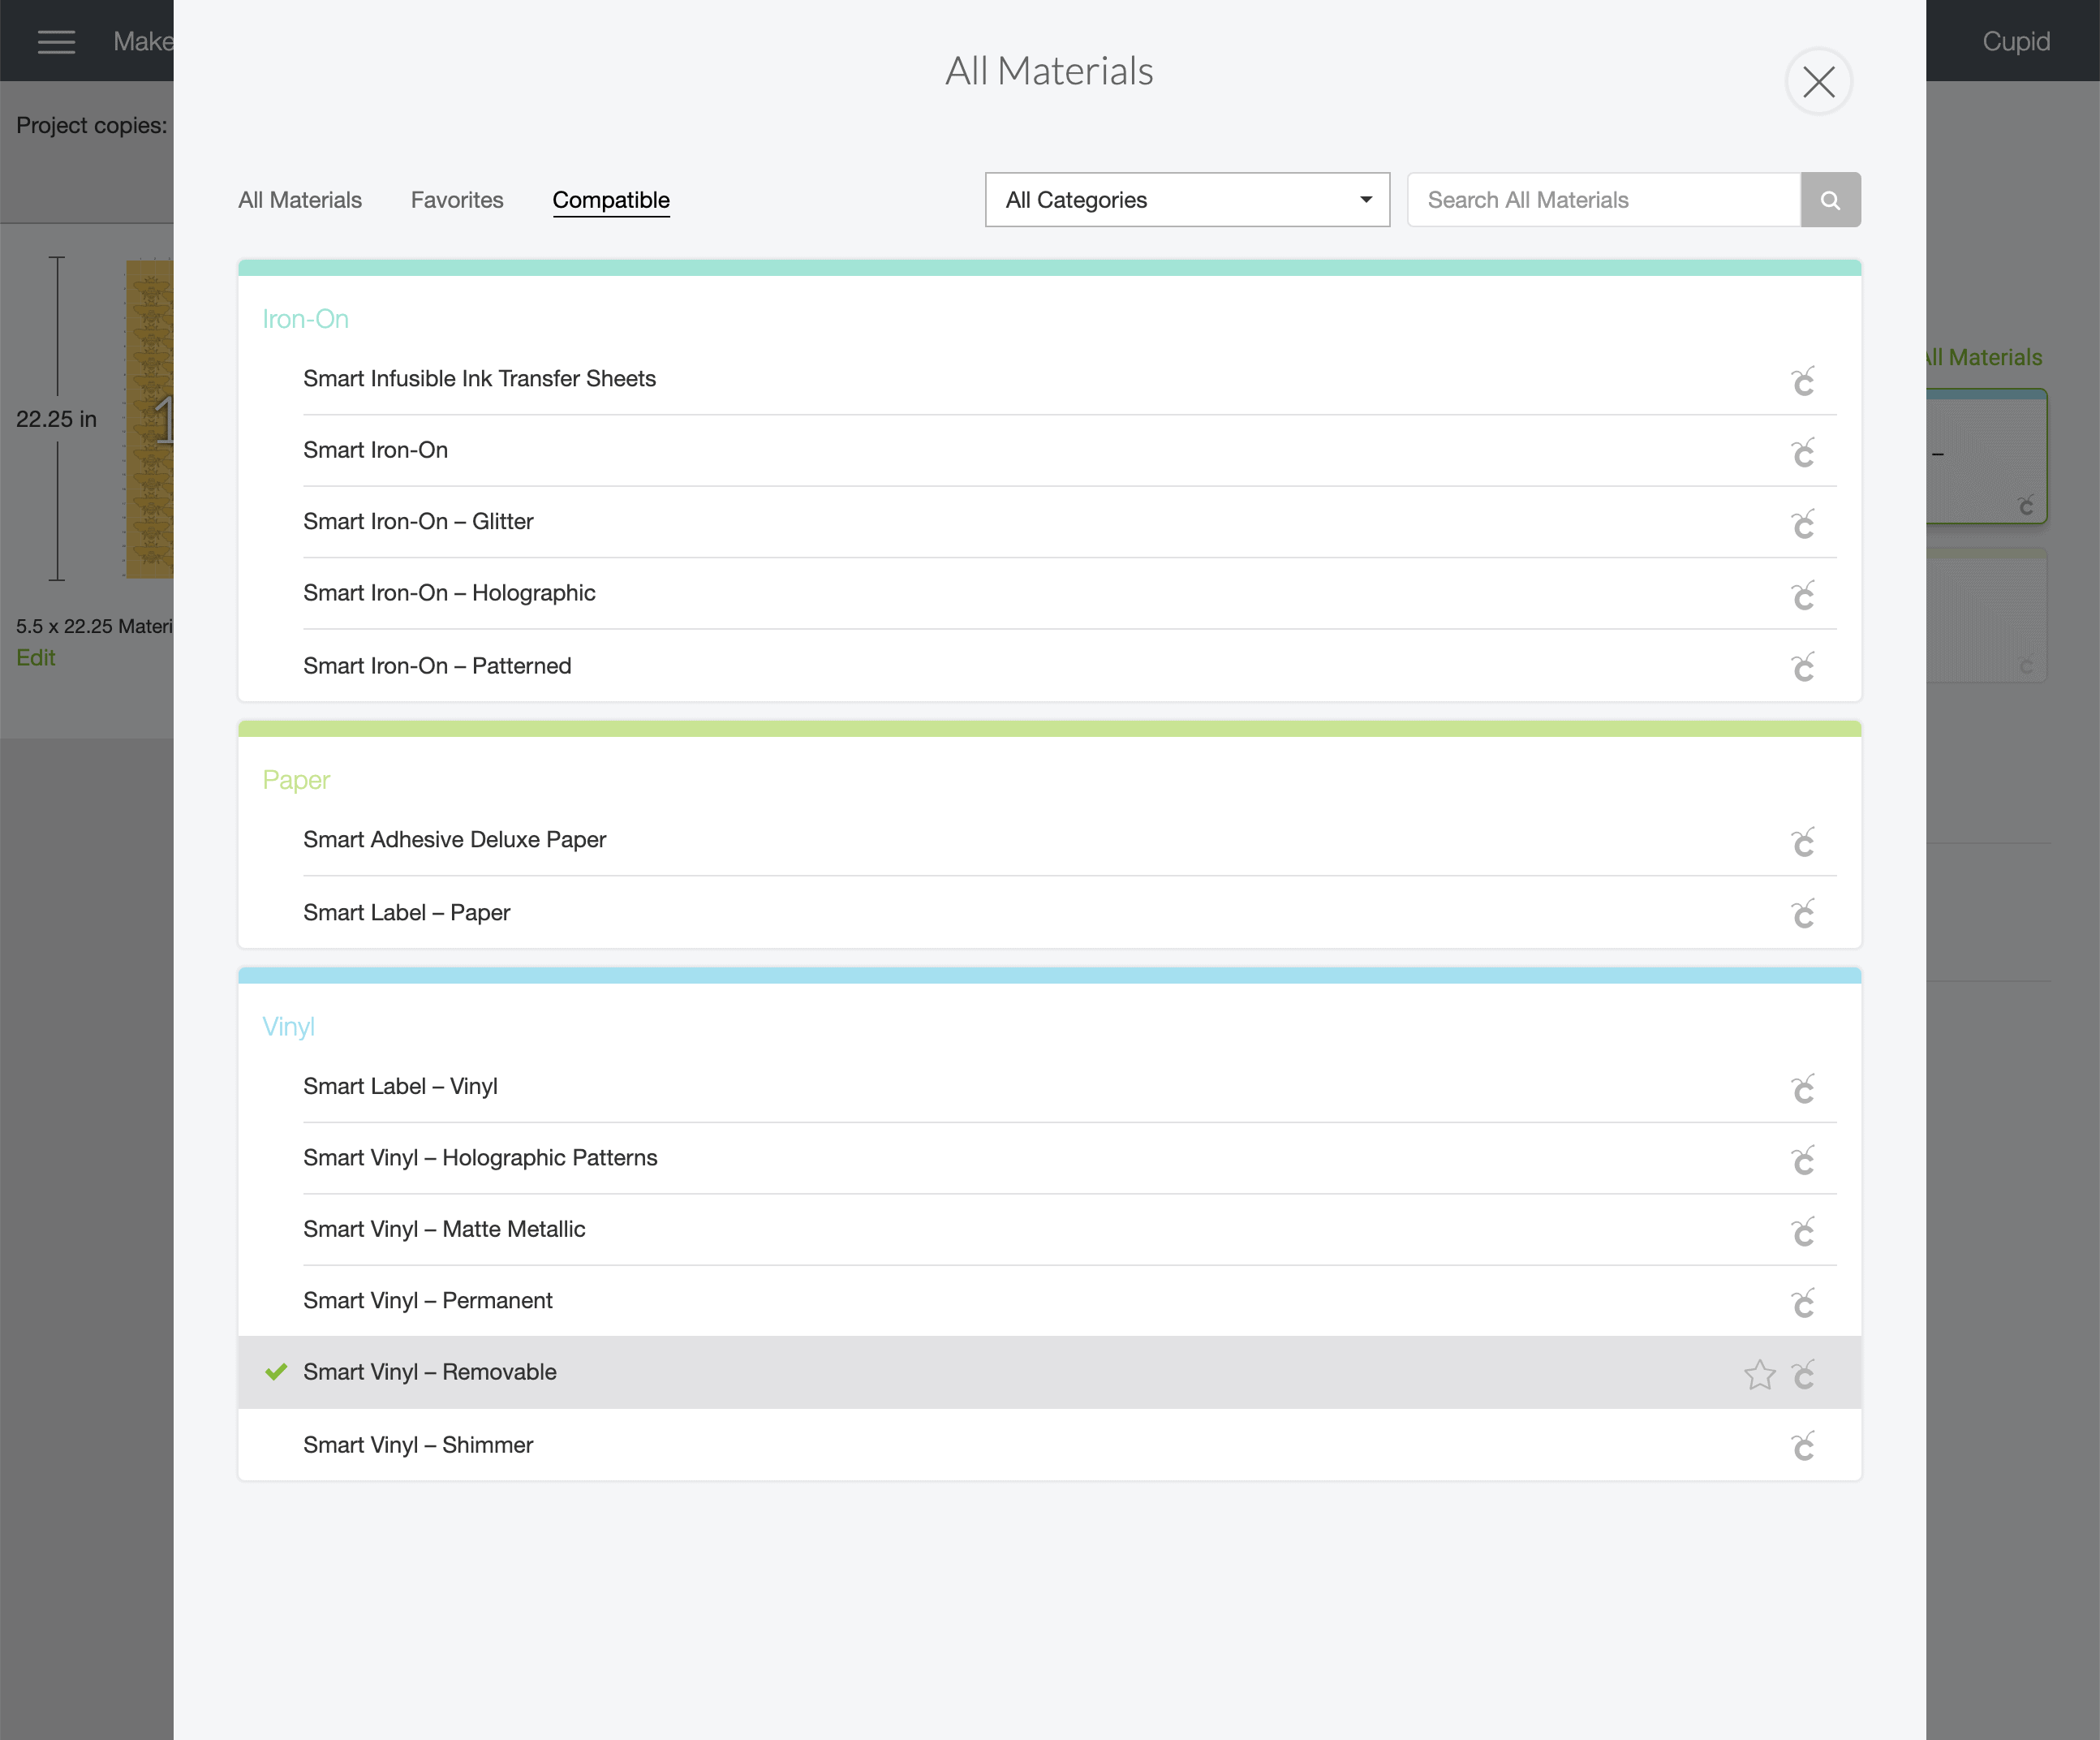
Once you are satisfied with the layout of your decals on the vinyl, click “Continue,” and you will be prompted to select your material. Choose whatever vinyl you are using (or the best match).
With the material set, you will be prompted to load your material either onto a cutting mat or directly into the machine (depending on what machine you are using). Simply refer to the on-screen prompts to guide you.
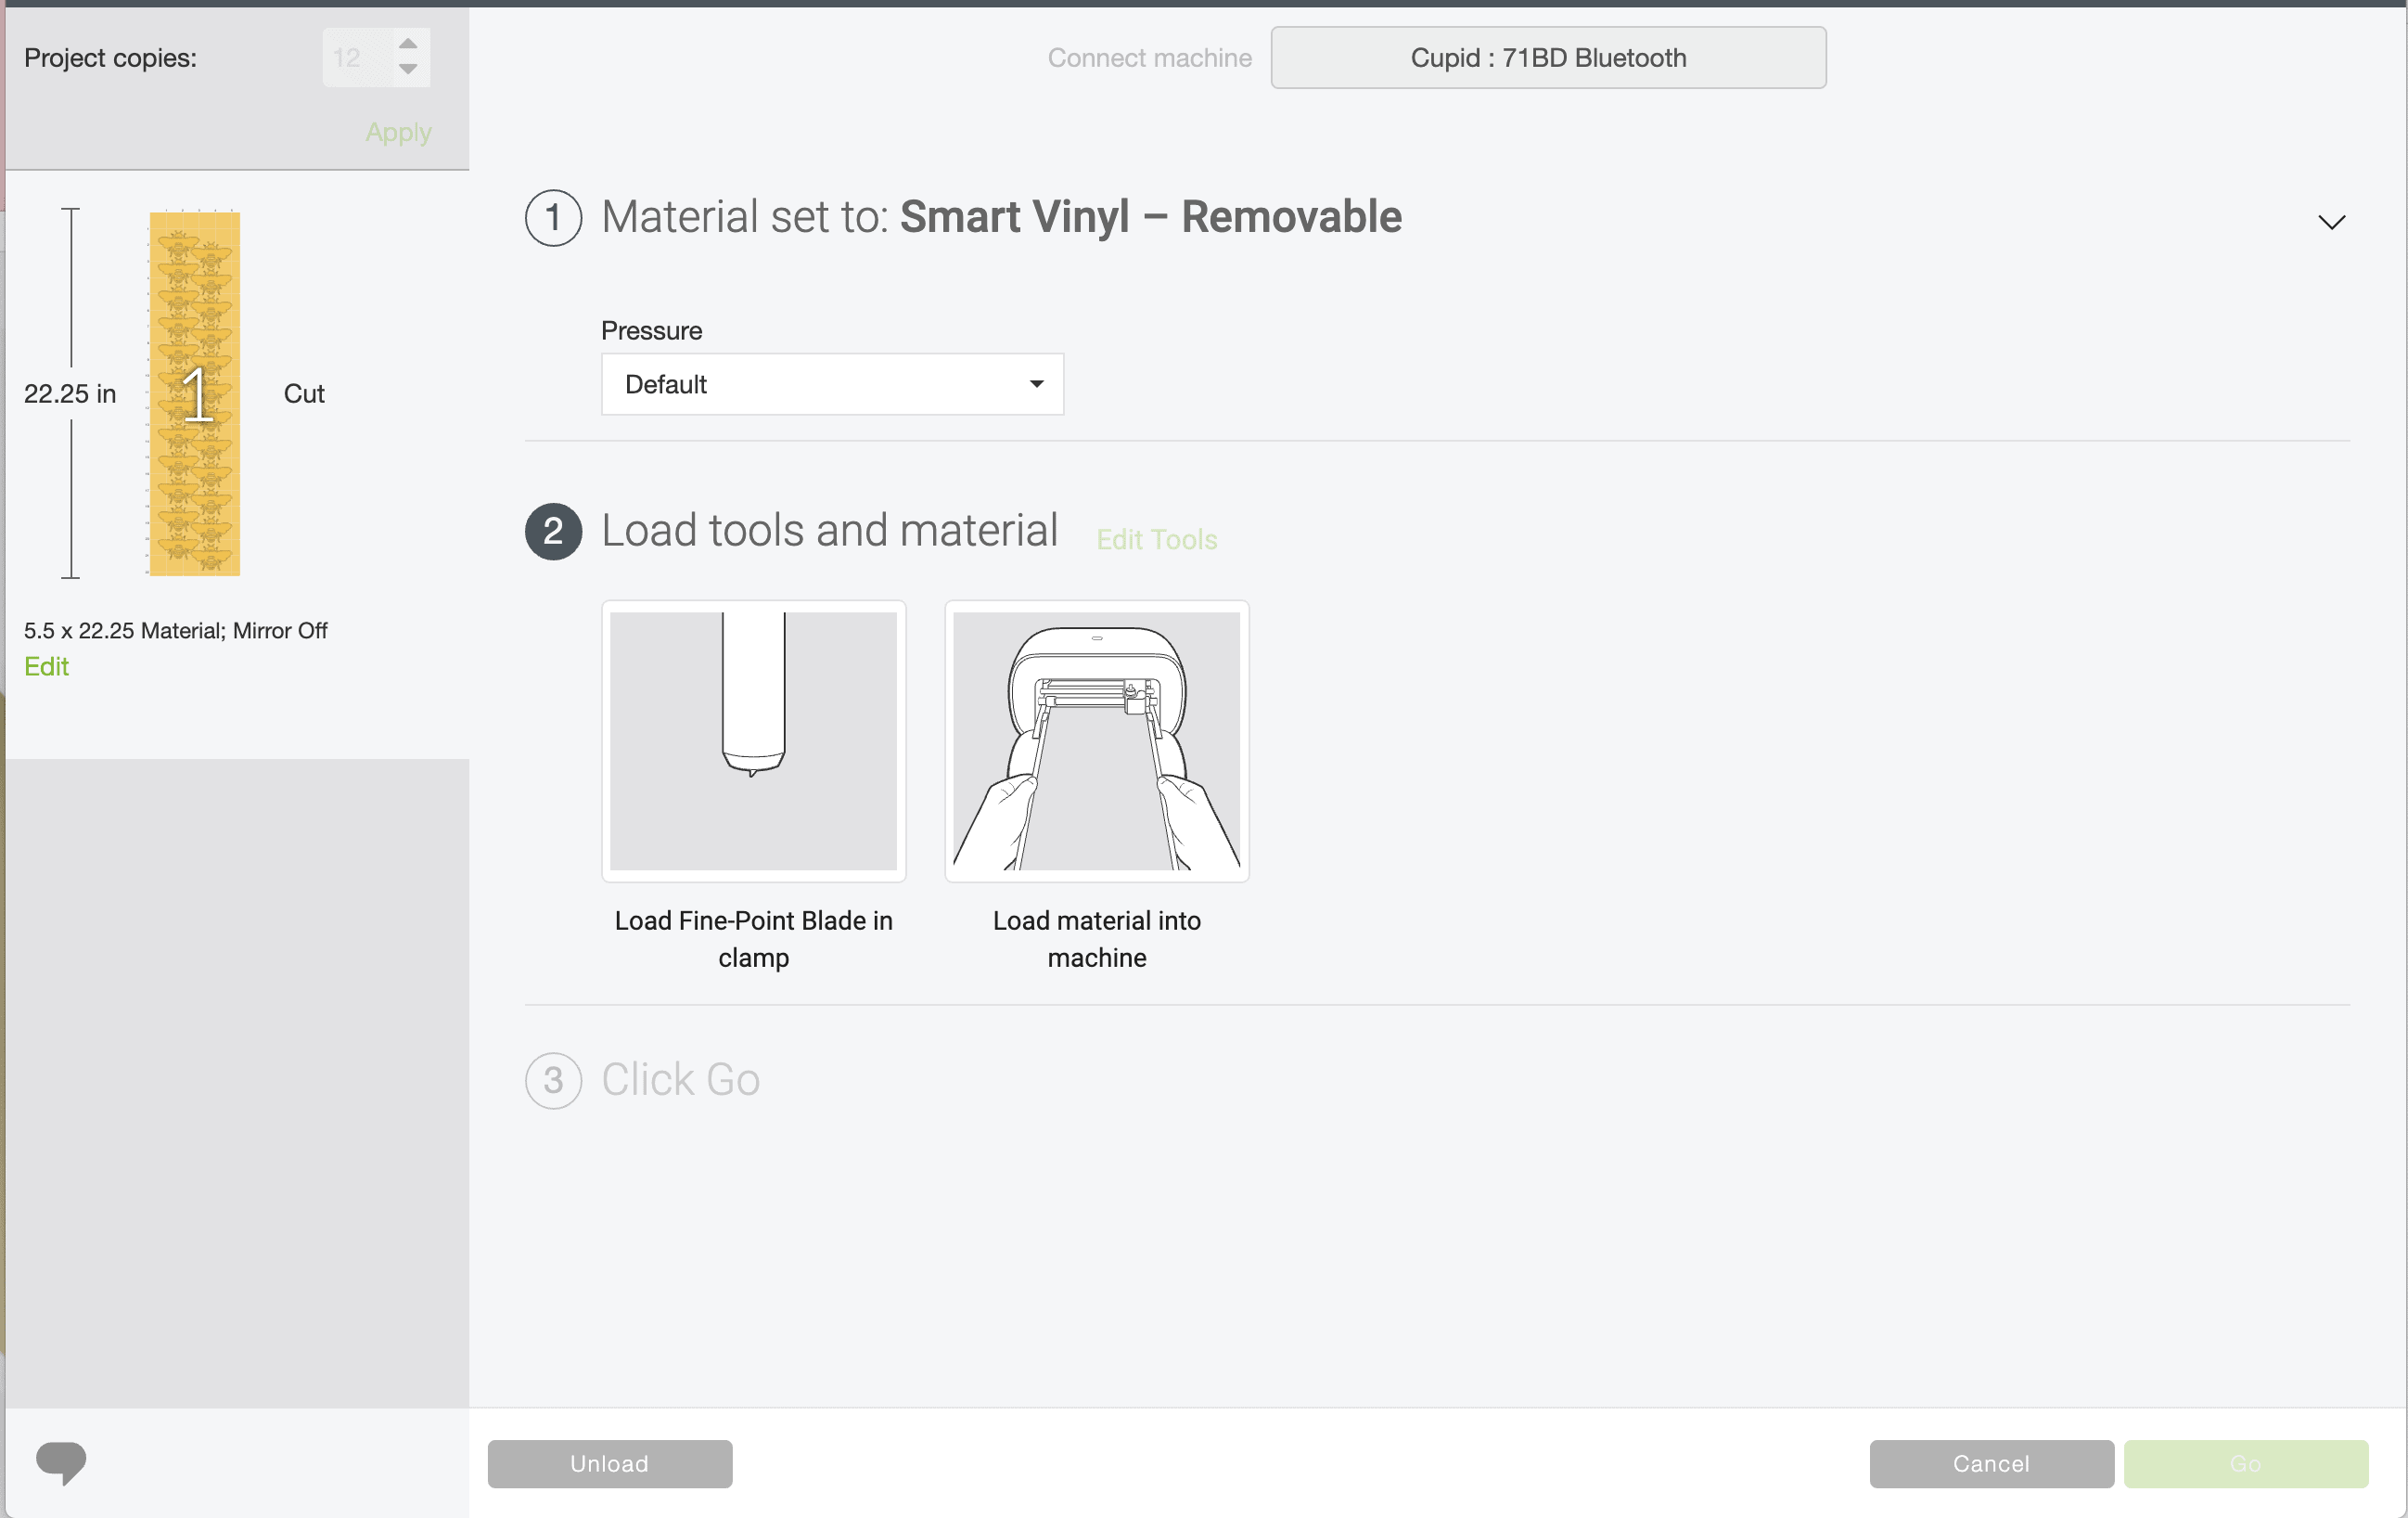
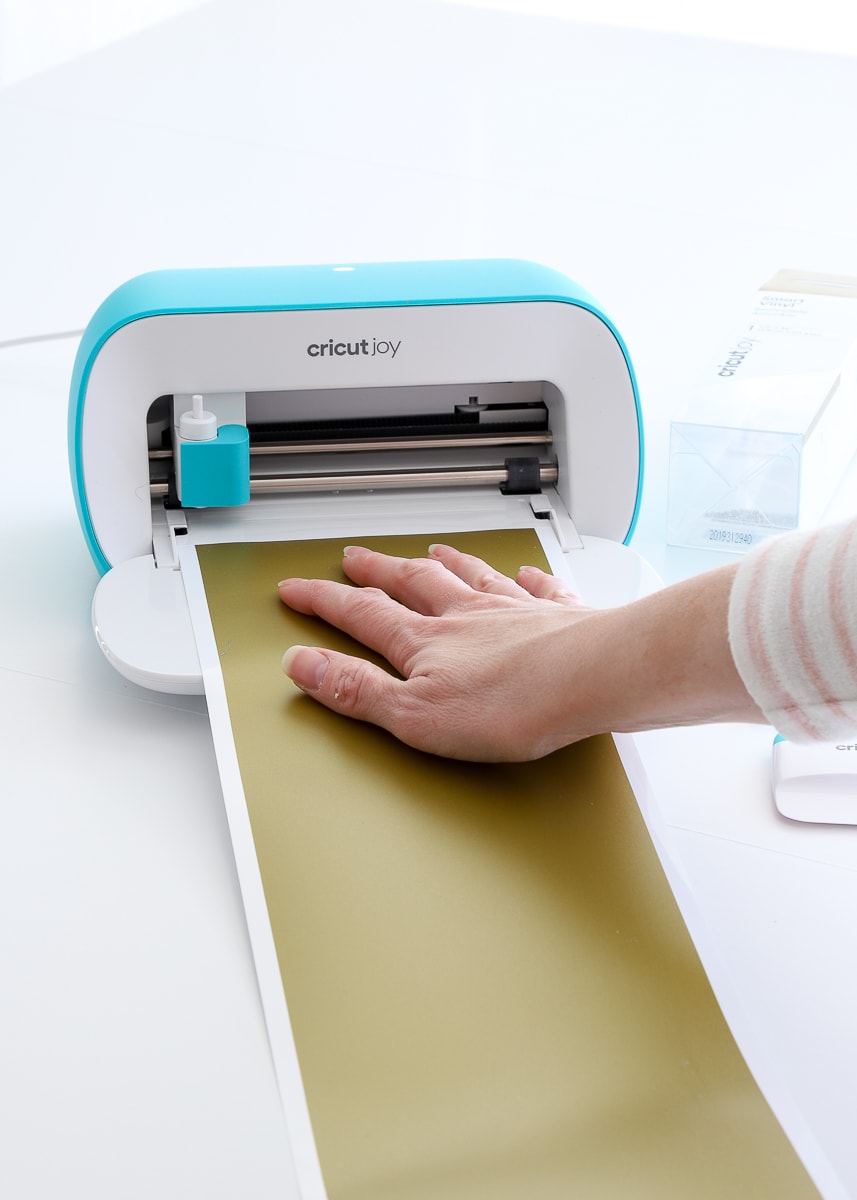
Once your material is loaded into the machine, you will be prompted to start the machine cutting.
Once complete, unload the mat/material from the machine.
TIP! Unfortunately, there is no way (currently) to save your specific arrangement on the Cut Screen within Design Space. So instead of exiting out after your first cut, I recommend running ALL your vinyl through your machine and cutting ALL the decals you think you’ll need, before clicking “Finish.” This will save you precious time not having to adjust the cut spacing every single round.
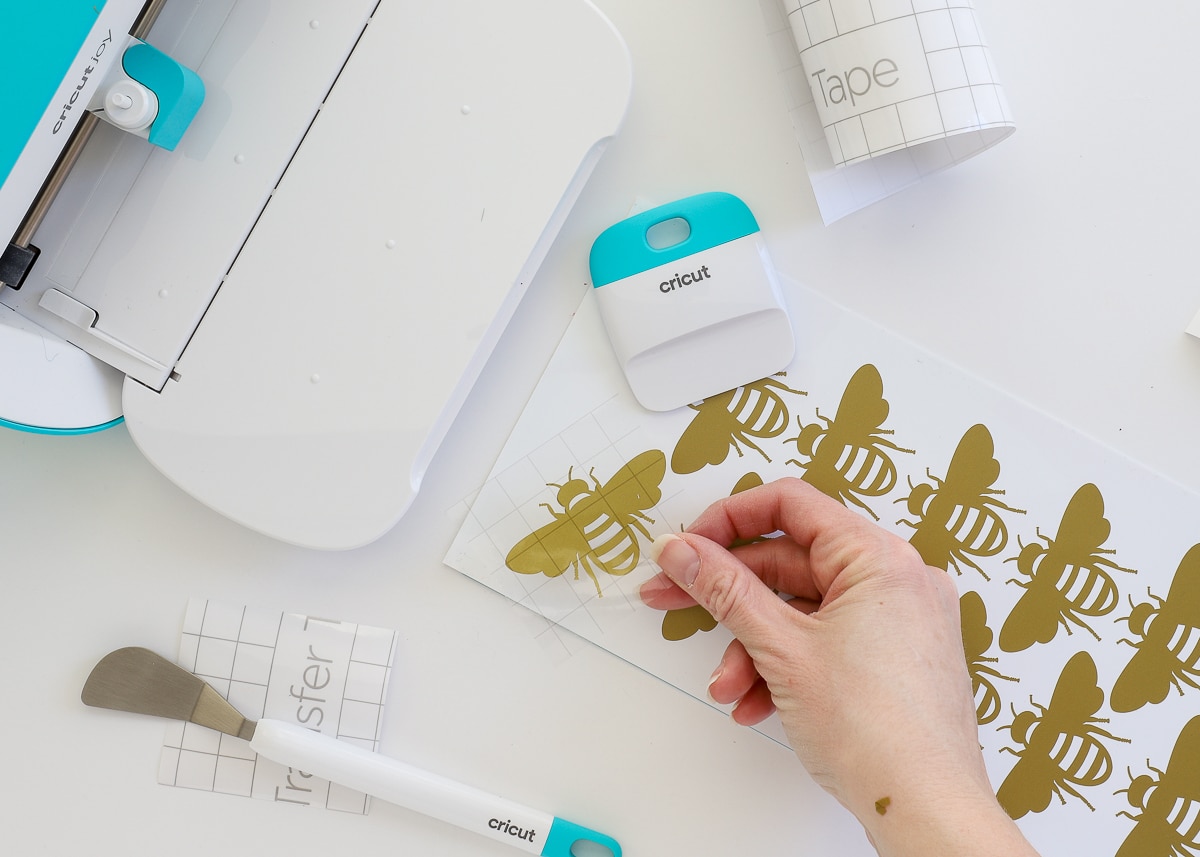
Step 4: Weed the Vinyl Decals
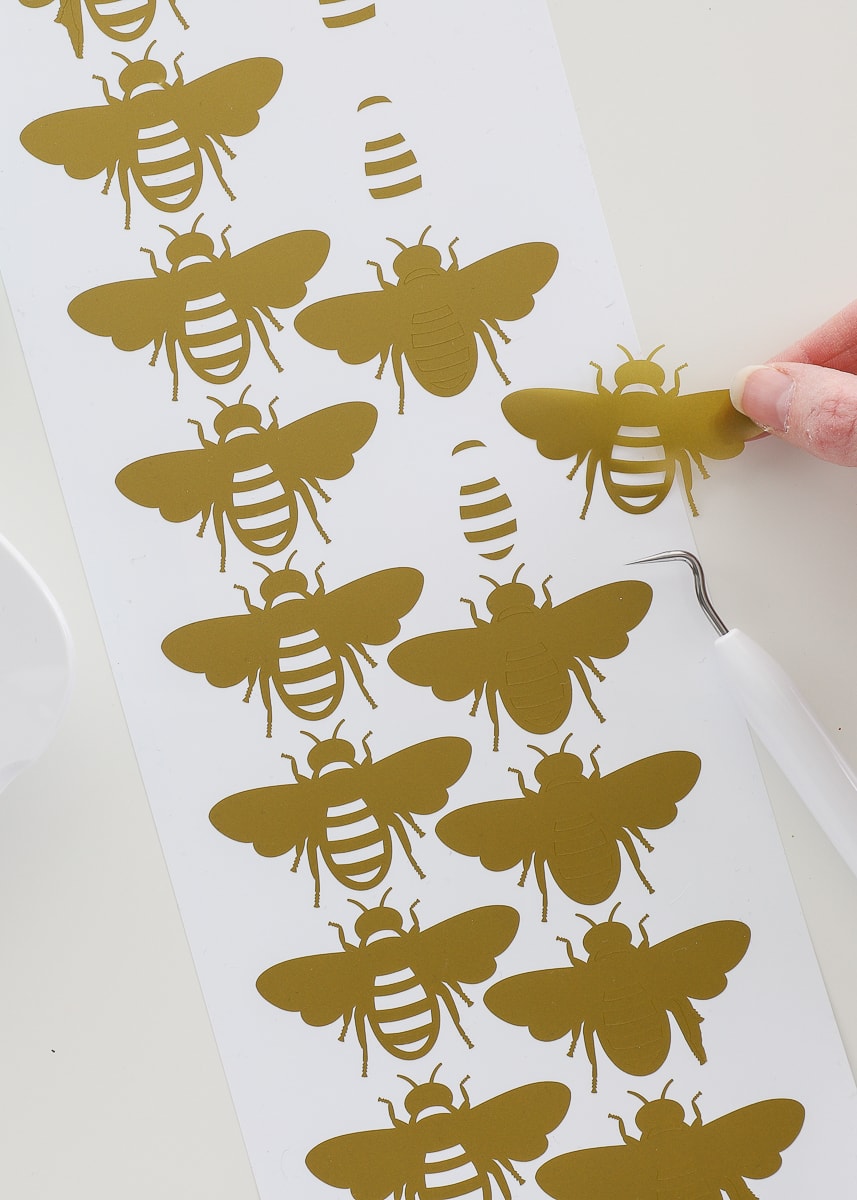
Once your decals are cut, you will need to remove the negative aspects of your design (the unwanted elements) using a weeding tool.
TIP! If you have a lot of decals with some intricate pieces to remove, settle in with a good TV show or Podcast and knock them all out at once!
Step 4: Pick Up the Vinyl Decals
Next, you will need to remove your freshly cut vinyl decals from the paper backing so that you can stick them to your wall. There are two different ways to do this, depending on how intricate and large your decals are.
Without Transfer Tape
If your decals are fairly small and not too intricate, you can likely pick them up just with your fingers. In fact, my bees were sturdy enough that I could peel them off the paper backing using the weeding tool (without even weeding!).
TIP! Using the weeding tool to “start” pulling up the decal off the paper can prevent the leading vinyl edge from rolling under or wrinkling.
With Transfer Tape
However, if your design is larger or has lots of disconnected details, you will have much better luck moving it from paper to the wall (without bubbles or wrinkles!) with transfer paper. Although not hard, this process can be a little tedious. Here’s the gist of it:
- Cut a piece of transfer tape just big enough to cover a single decal.
- Place the transfer tape, sticky-side down, onto a single decal. Rub it vigorously with a scraper.
- Lift up the transfer tape + decal combination off the paper backing.
If you need more help with this, head here: How to Layer Vinyl with Transfer Tape
Step 5: Apply Vinyl Decals to the Wall
The final step is to take your cut, weeded, and picked-up vinyl decal and place it on your wall! Based on the look you’re going for, there are lots and lots of different ways to do this.
Detailed Pattern
If you are trying to create a very precise pattern on your wall, you will likely need to determine and measure out your spacing ahead of time. Here is a great tutorial that shows exactly how to do that with a measuring tape, painter’s tape, and a pencil to mark decal locations.
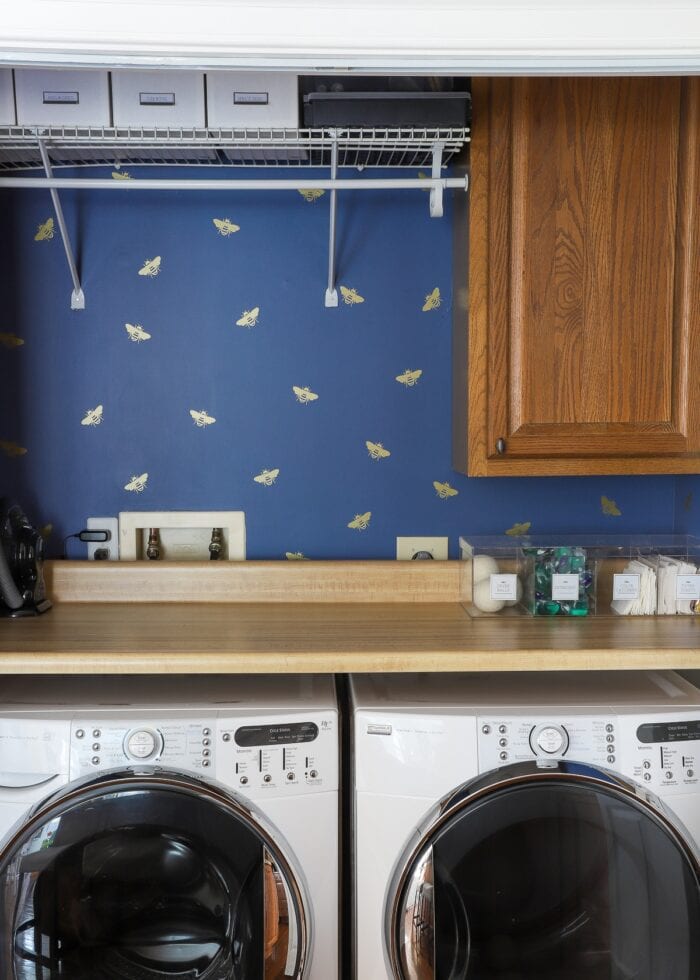
Random Placement
Because I’m usually trying to keep things quick and easy, I tend to use a random placement method for our wall decals (just like I did on this polka dot wall). To do this, start placing stickers wherever you want, and then continuously step back to check placement. Because these decals are essentially stickers, it’s easy to peel one up and move it to a better spot as needed.
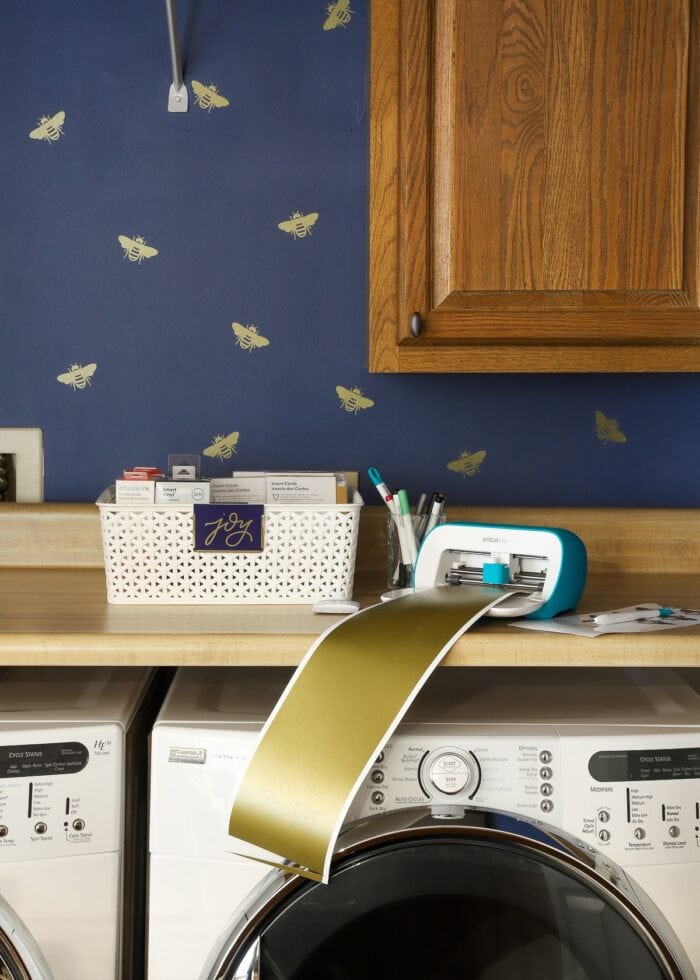
Literally, in less than an hour, I had our laundry room decals designed, cut, weeded and applied to our laundry room wall. Not only do I love that I was able to create a wall design exactly as I wanted it; but more so that this DIY project is so easy, cheap, and 100% removable!
Megan
4 Comments on “How to Make Vinyl Wall Decals With a Cricut”
Hi Megan,
I’m planning a similar project, but have a couple of questions:
How long can you keep the removable vinyl in your wall without it starting to peel off?
If you want to change it up, does the removable vinyl leave no trace when removing?
If you plan on keeping the design for several years, would you recommend permanent vinyl?
Thanks in advance!
Birthe
Hi there!
Thanks for reaching out with these great questions!These decals were on our wall for just over 2 years. We didn’t have a single one fall off the entire time!When you remove the decals, the vinyl will leave no adhesive behind…at least in my experience.In all honesty, I don’t see a huge difference in removable versus permanent vinyl when it comes to this specific project. Sure, the permanent might last a bit longer, but both will work just fine! That said, I’ve found the new 13″ wide “Smart” removable vinyl isn’t as “sturdy” as the non-smart kind. So if you are using Smart vinyl for a Maker/Explore 3, I recommend going with Permanent (it just cuts and applies nicer). If you’re buying rolls to cut on a mat or with Cricut Joy, either product is good!Hope that helps!
Megan
Megan,
I love all these decal ideas, but especially the wall decals. When I saw the bees, I fell in love. Where can I find this decal? Have been looking for one with it’s simplicity and ease of use and this one fits the bill.
All of your projects have inspired me and am having the best time of my life.
Thank you,
Desiree
Where did you find this honey bee template. I’d love to use this design on a couple of items.
Thank you,
Desiree Garrison