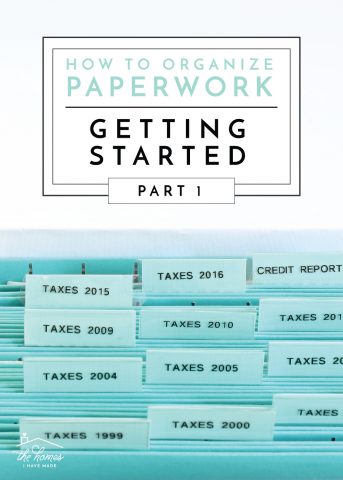
How to Organize Paperwork | Part 4: Crafting Papers
Welcome to Week 4 of the How to Organize Paperwork series! We’ve been plowing through piles and piles of paperwork over the last month, and hopefully you are feeling more confident in your paper decluttering methods and storage solutions. While we still have some more “important” paper types to work through in the coming weeks, I thought we could take a bit of a mental break and tackle something a little more fun: crafting papers! Depending on your hobbies and available space, you may have no crafting papers at all (so this week is a break for you!) or this may be your biggest paper hurdle yet! Regardless of where you fall on the craft paper hoarding spectrum, today we’re going to work through it all from paper stacks and pads to rolls and more. Here we go!

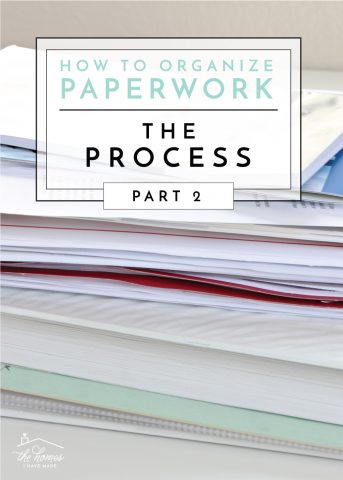
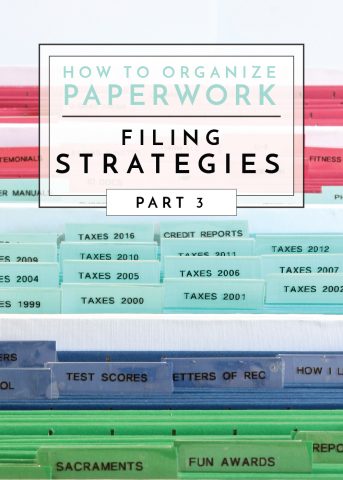
Pssssttt – Each and every post in this How to Organize Paperwork series builds on the previous one. As such, if you are just joining the series, I strongly suggest you review Part 1, Part 2, and Part 3 before diving deep into this post.
This Week We are Sorting…
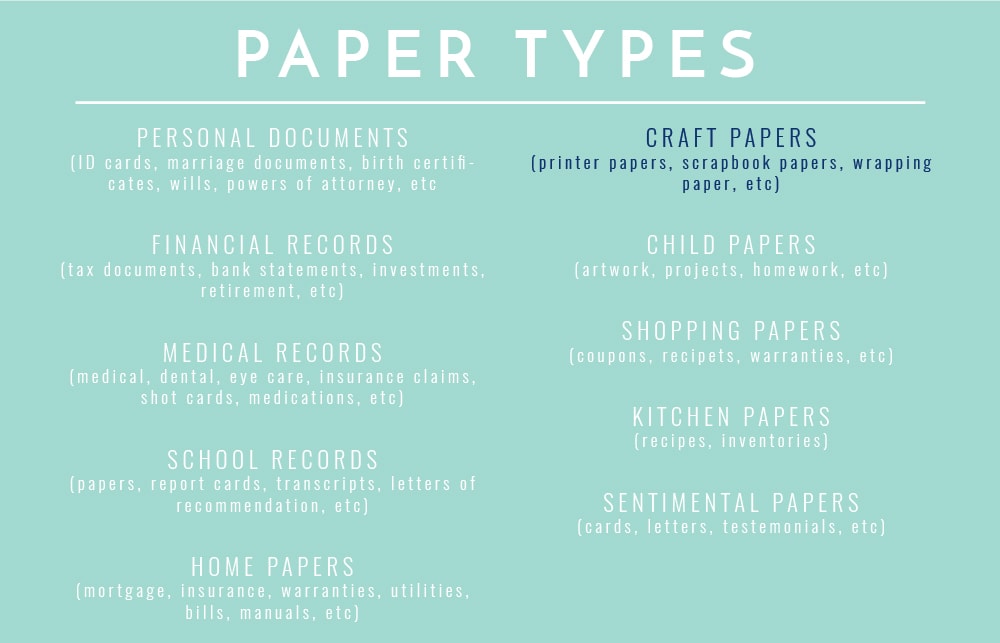
As I outlined in this post, I recommend breaking down all the paper in your home into various Paper Types to keep from feeling overwhelmed, discouraged, and stuck in your paper decluttering work. Not only does this method break down the task into logical and manageable chunks, but by focusing hard on a particular Paper Type, you will better be able to make sense of it all and identify the right solutions to keep it well organized and perfectly accessible. Today, we are going to tackle the Craft Paper Type, and this includes any type of papers you would use to make projects. This Paper Type includes obvious papers such as cardstock, scrapbook paper, and paper packs and pads as well as printable labels, specialty papers, photo papers, paper rolls (such as vinyl, wrapping paper, etc) and more!
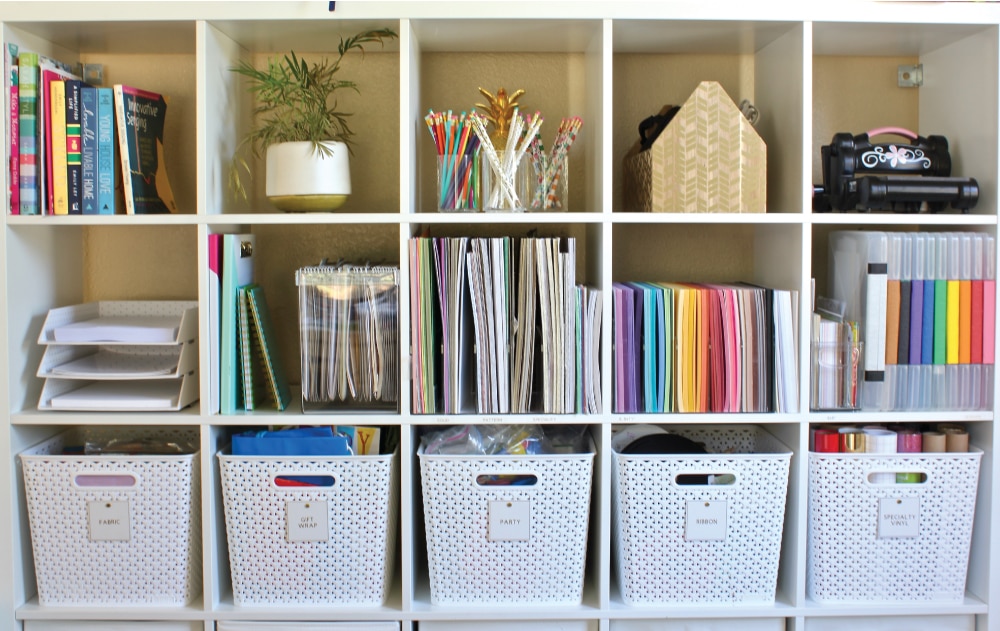
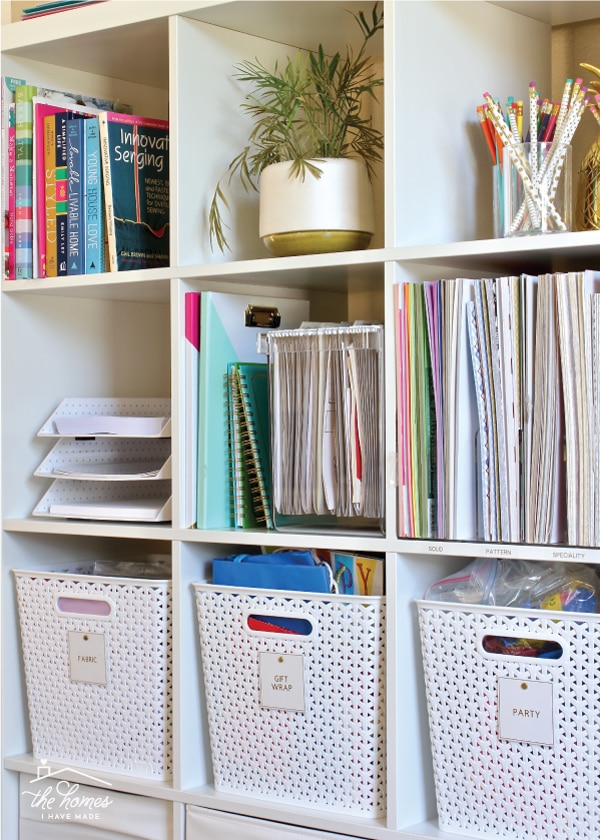
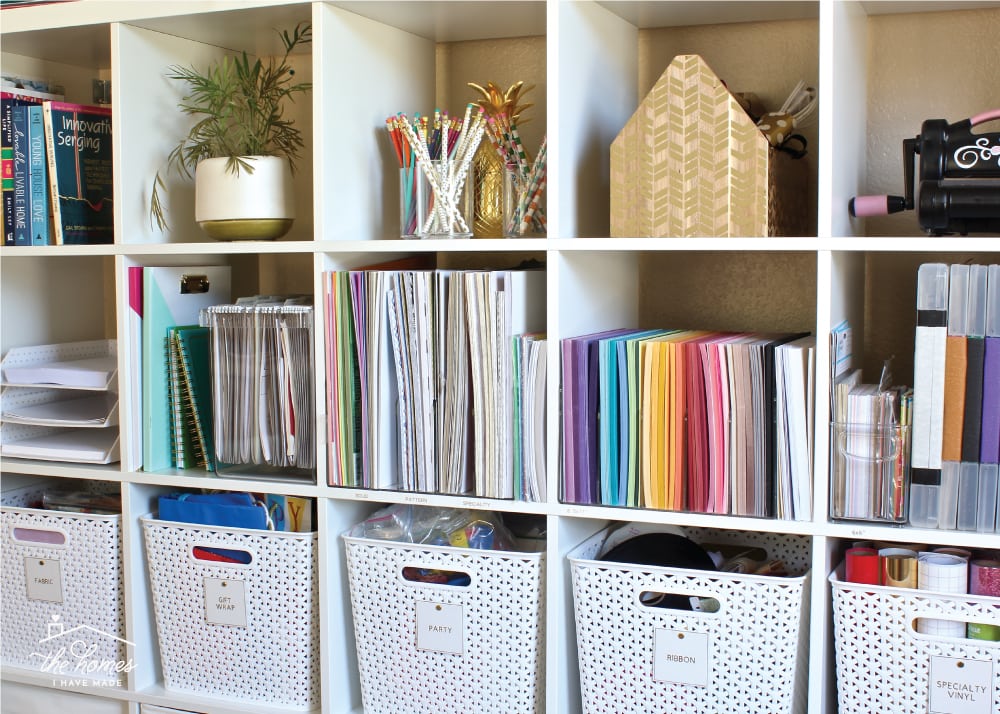
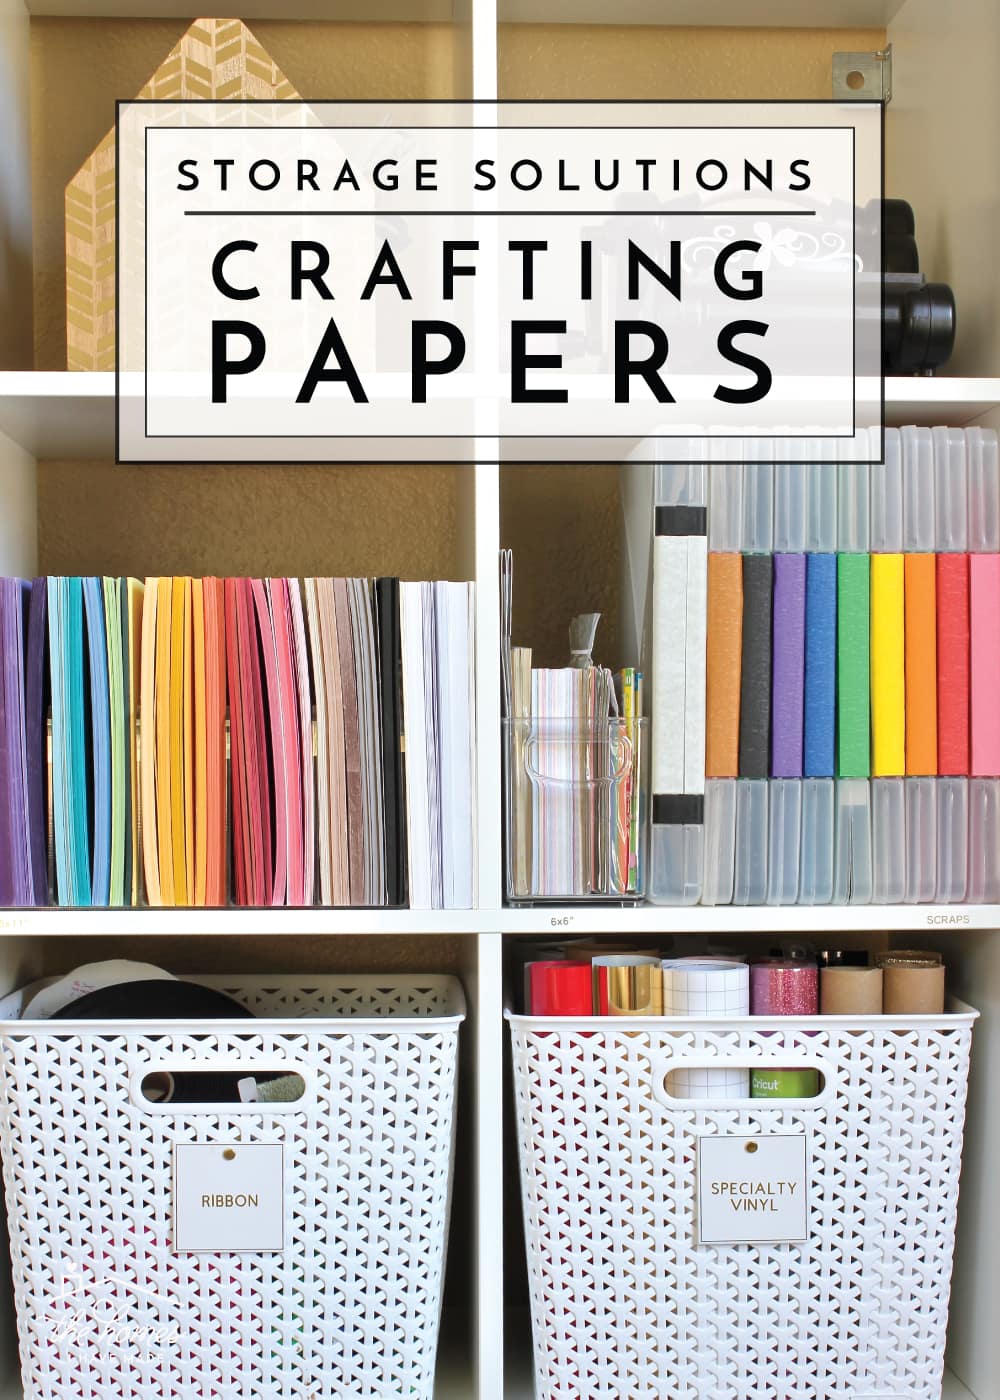
Between paper crafting on my Cricut and creating (and using!) organizational printables on a regular basis, paper is one of the supplies in my office/craft room that gets used the most. As such, I’ve taken great care to make my sizable crafting papers collection as neat, tidy, and accessible as possible. With the exception of rolls, all of my craft papers are stored along the second shelf in my office (shown below); and after I walk you through how to Sort, Purge, and Assess such papers, I’m going to break down each unique storage method in detail. I’ve got lots of solutions to share, so let’s get to work!
S (Sort) – P (Purge) – A (Assess)
If you are not yet familiar with my S-P-A-C-E decluttering method, I recommend you first read this post.
Your first step in tackling your craft papers is the same as it has been for our previous Paper Types: Sort, Purge, and Assess. If you’ve been working through this series in order, these steps might start to sound redundant, so I will be brief today!
Sort
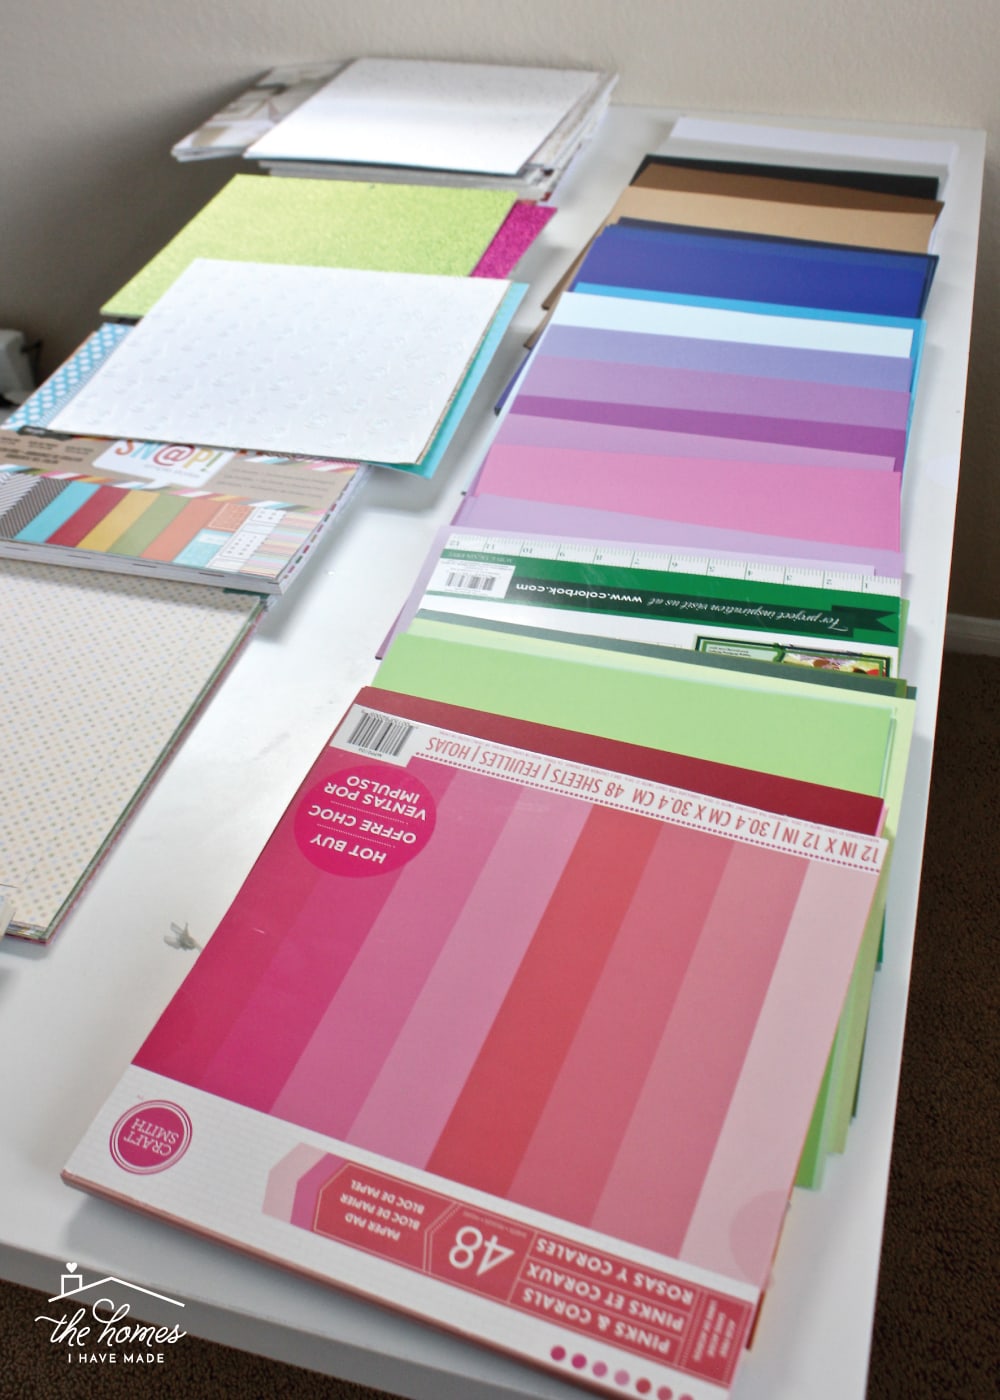
Start by gathering every last paper that falls into this Paper Type from around the house. Yes – all of it. From your craft closet to the home office to your child’s craft box, pull all of your crafting-type papers together.
Next, you need to identify 3-8 simple sorting categories to help make sense of all the different types of papers you may have. While I always suggest that you pick initial sorting categories that resonate with you, today I am going to strongly suggest that you sort your crafting papers by type. Not only do we often use/choose our papers by their quality, but the paper type also directly influences which storage system will work best. As such, I suggest initially sorting your crafting papers into the following broad categories (if you have them, of course):
- Crafting Papers (cardstock, scrapbook papers, paper pads and stacks, scraps, etc)
- Specialty Papers (photo paper, sticker paper, printable labels, etc)
- Manuals
- Patterns
- Rolls
Purge
As you sort papers into the basic type categories, purge out anything you don’t want or need.
Now…when it comes to purging craft papers, it can be HARD! Everything has potential…anything can be turned into a project. My best piece of advice is to get real with yourself. While anything can be used for projects, you likely have papers in your stash that you have never nor will never use. Whether you bought paper for something specific and never got to it, the papers came as part of a pack, or your tastes and preferences have simply changed, there’s a good chance you have papers you pass over time and time again. Here is your chance to re-examine each and every last paper and determine if it’s something you will genuinely use.
Assess
With all of your papers sorted down by type and fully purged, you will likely need to sub-categorize further in order to make your collection truly organized and useful. As I said before, while you are welcome to sub-categorize in any way that makes sense to you, I recommend narrowing each pile down by paper size and then by color/type. Here is how I have my paper collection broken down. It works so wonderfully that if you don’t have a good sense of where to start, start here:
- Crafting Papers
- 8.5×11″
- Solid Cardstock > By Color
- Patterned Paper > By Color
- 12×12″
- Solid Cardstock > By Color
- Patterned Paper > By Color
- Specialty > By Type (glitter vs. foil, etc)
- Small
- 6×6″ Pads
- Other
- 9×13″ pads
- Construction Paper
- Scraps > By Color
- 8.5×11″
- Specialty Papers > by type (magnetic paper, sticker paper, etc)
- Manuals > by crafting category
- Patterns
- Store-Bought Patterns > By Item (Tops, Bottoms, Dresses, Bags, Decor, Quilts, Baby, Kids, etc)
- Printed > By Item (same as above)
- Rolls
- Vinyl
- Wrapping Paper
- Contact Paper
- Wallpaper
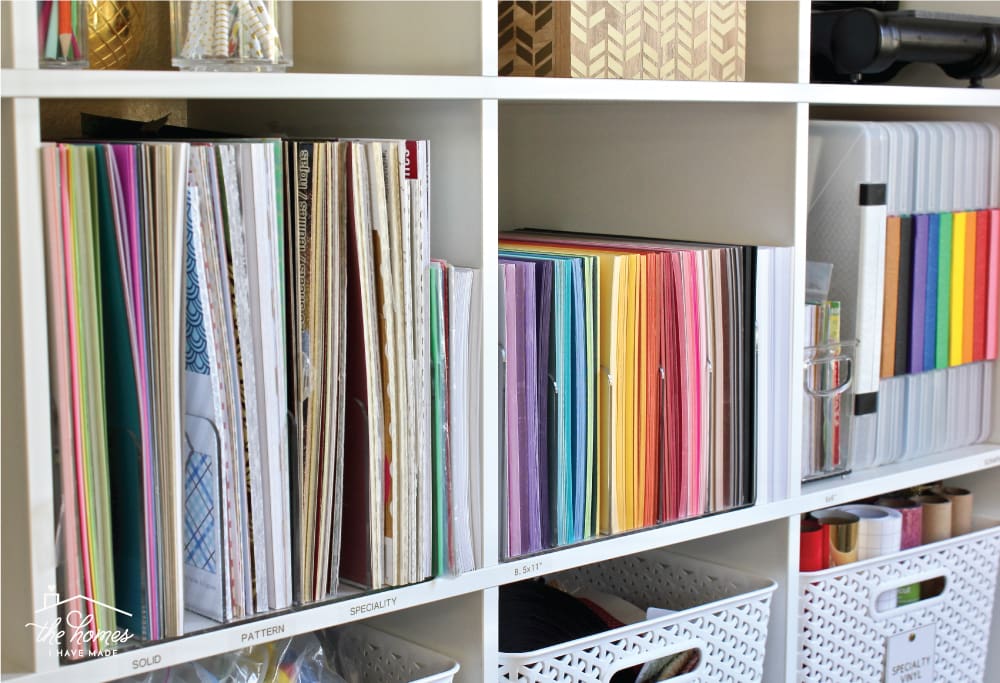
All of my 12×12″ paper categorized by pattern vs. solid and then further sorted down by color.
C (Contain) & E (Embellish)
If you are not yet familiar with my S-P-A-C-E decluttering method, I recommend you first read this post.
Once you have your papers sorted, purged and sub-categorized in a way that makes sense to you, it is time to find the right storage solutions for all of it. As I’ve said several times throughout this series already, there is not a one-size-fits all solution for all paper; and that’s especially true within the Crafting Paper Type. Rolls will require a different solution than scraps; 12×12″ paper will need something different than 6×6″ papers, etc. Let’s go category by category so I can show you the various ways I store my various papers!
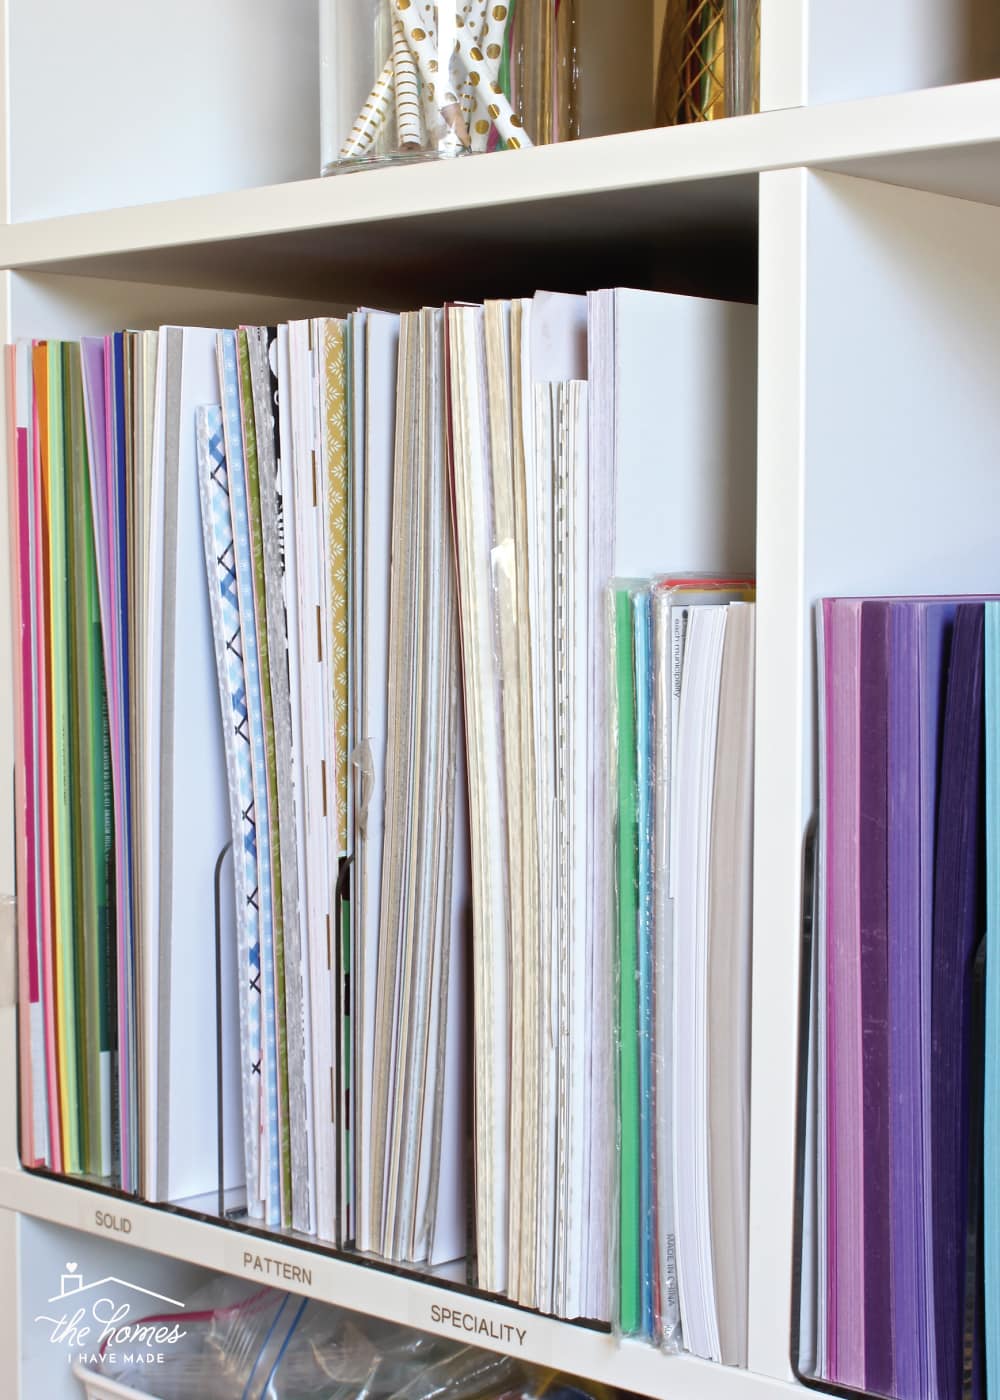
The picture below shows my entire “Crafting Papers” category, moving from largest (12×12″) to smallest (scraps) as you move from left to right…
Cardstock & Scrapbook Paper
Over the years, I have experimented with countless ways to store cardstock and scrapbook paper. From boxes and drawers, to files and shelves, I feel like I have tried every solution out there. Yet it wasn’t until I landed on my current solution that I felt like I truly had something that fully worked.
TIP! Notice that all of my storage solutions are clear or white. Not only do these neutral products blend/disappear into the background (allowing your entire system to appear more streamlined and less cluttered) but they are easy to customize with colored tapes, labels and more!
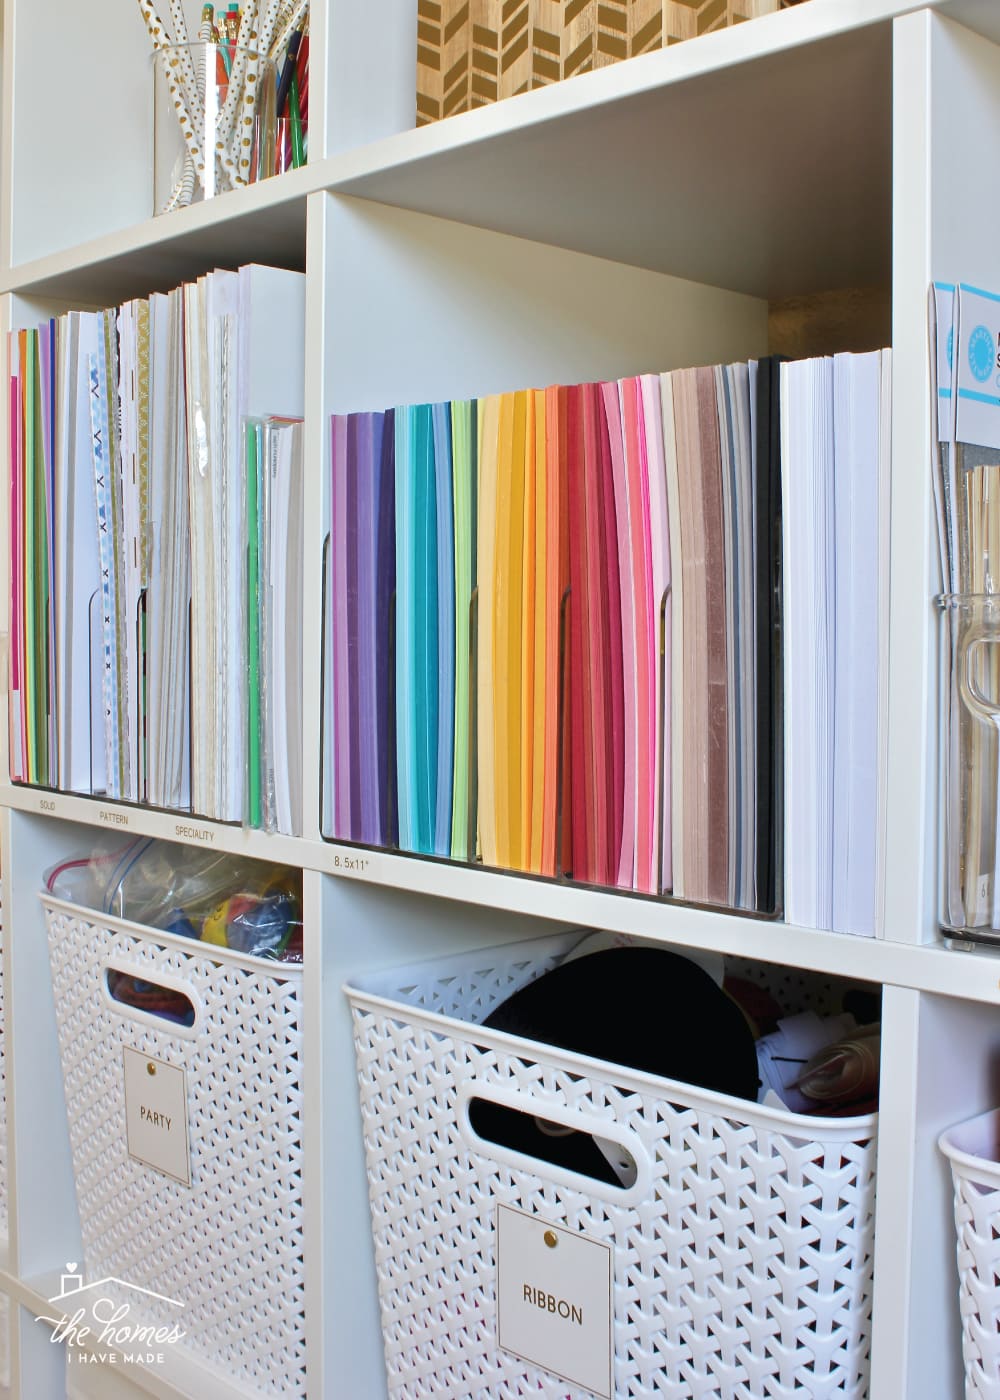
I am currently using acrylic dividers to hold, store and sort both my 12×12″ and 8.5×11″ paper. Worried that the paper would eventually bend, warp, rip or become messy, I’ve been reluctant to share this solution. However, I’m going on two years of storing my cardstock like this and couldn’t love it more.
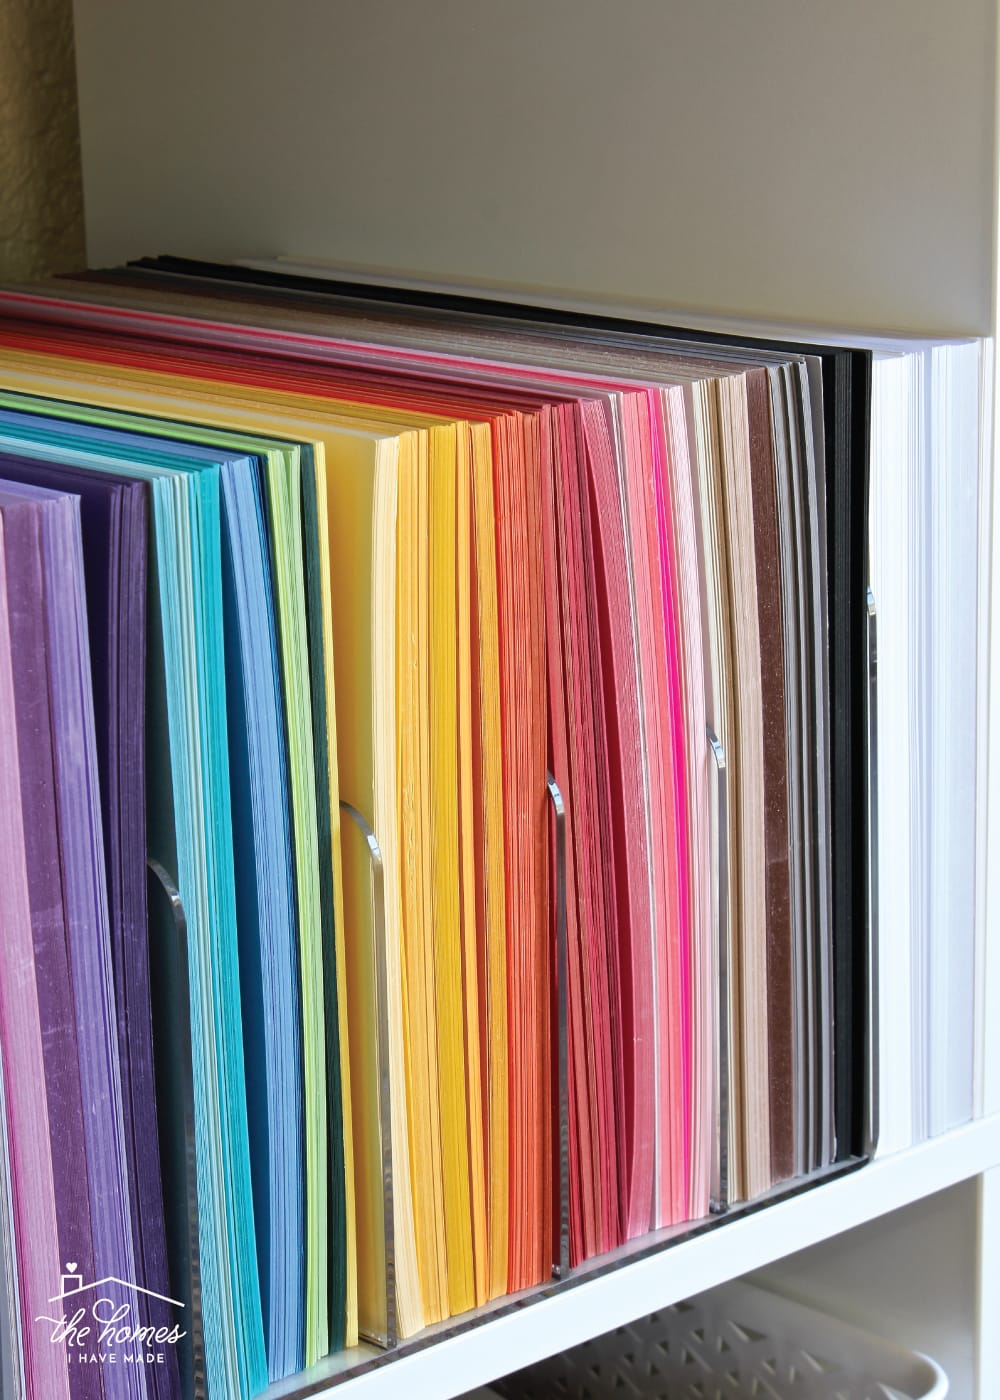
They key to using dividers to store paper in this way is that each section needs to be pretty “full” in order to prevent papers from bending and becoming too unwiedly. Still, even in sections that aren’t tightly packed, I haven’t had issues with any papers becoming un-usable. Further, by having everything lined up like library books, it is so quick and easy to find exactly what I’m looking for (and put everything back) without 1) taking up a lot of space and 2) having to open/close various boxes, drawers or folders.
TIP! When organizing by size and color, you likely don’t need to over-label. However, simple tags adhered right to the shelf help me (and friends and family who come over to craft) find items quickly and easily!
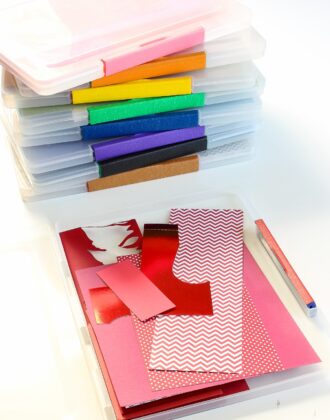
Small Stacks
Just beyond the dividers filled with cardstock and patterned papers is a small tub containing my smaller stacks of paper. Tucking these mini stacks into the dividers would almost guarantee they’d get lost or shoved to the back. This little container helps me find them quickly and pull them down easily when needed!
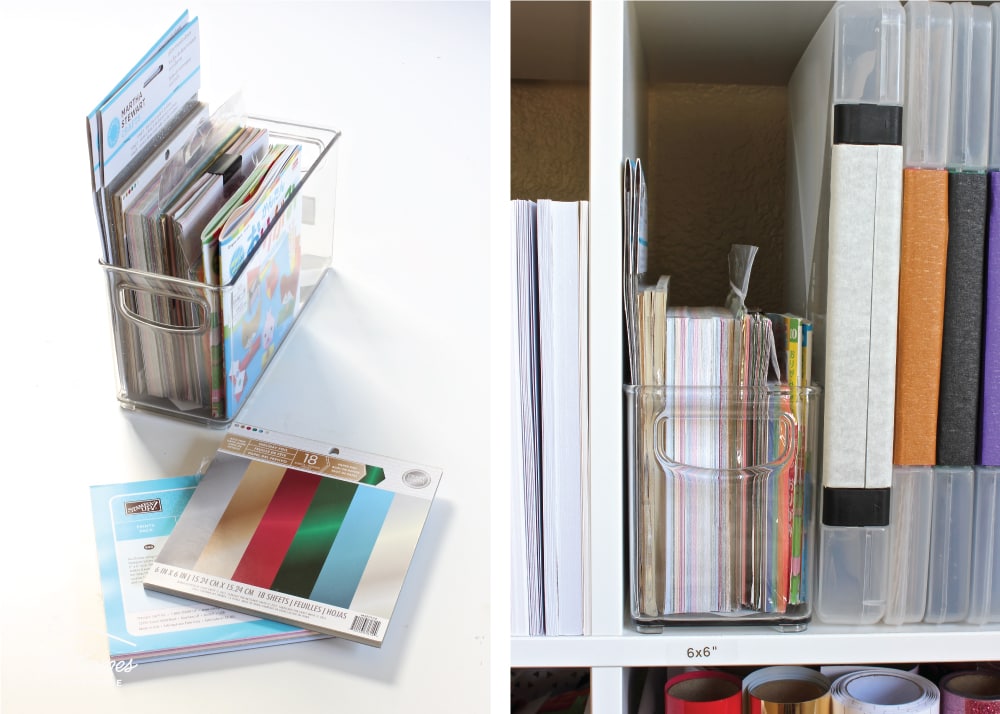
Scraps
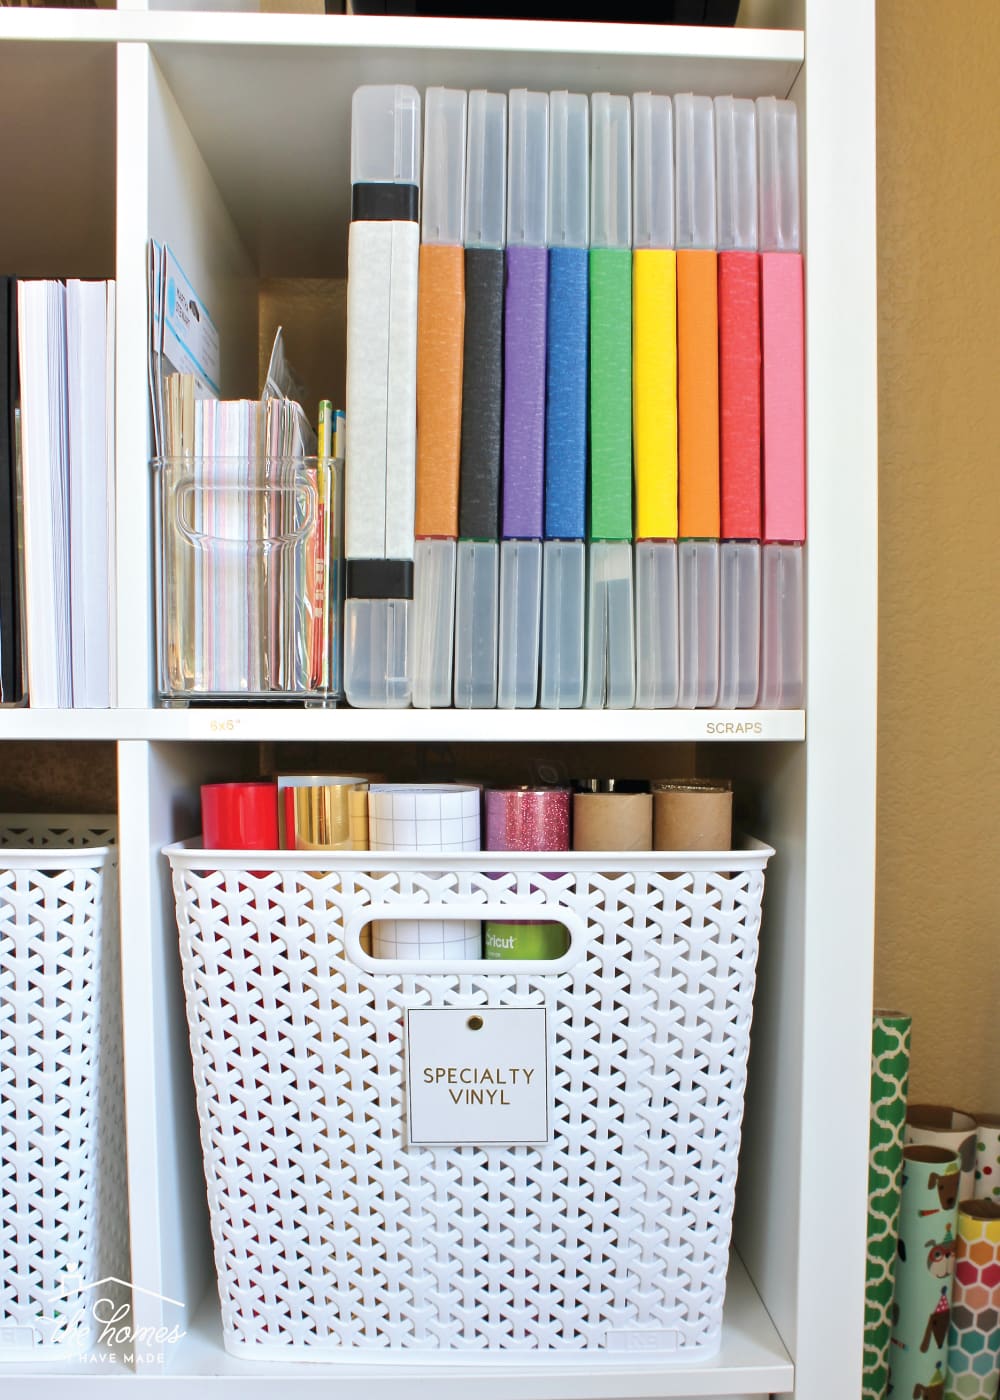
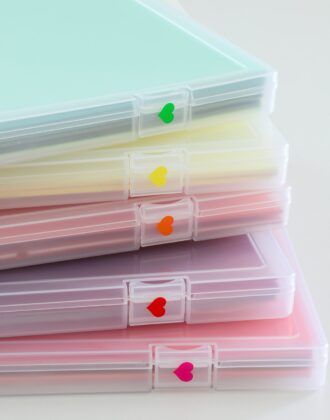
Next to the 6×6″ stacks, are 10 plastic paper boxes that hold all of my scraps sorted by color. Friends, I know dealing with paper scraps can be an exasperating endeavor. I’ve been using this system for YEARS and love, love, love its ease of use!
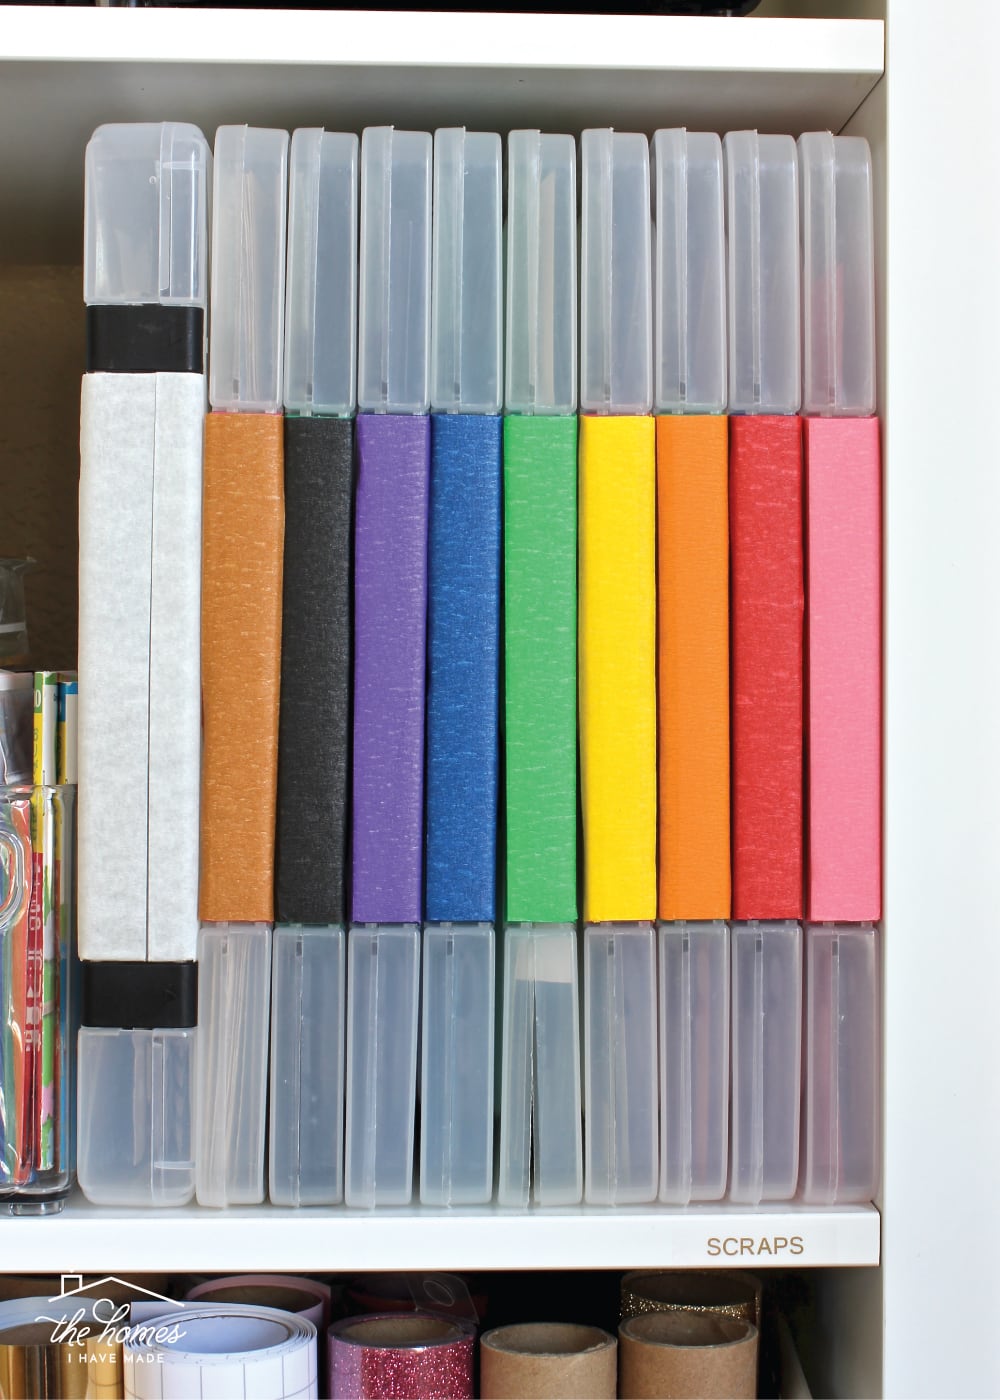
Years ago, I picked up a dozen or so of these A4-sized paper boxes (while living in Okinawa). Their 1″ depth made them ideal for holding collections of scraps of paper. So that I could quickly and easily identify which box contained which scraps, I sorted them by color and then used colored masking tape on each box’s latch.
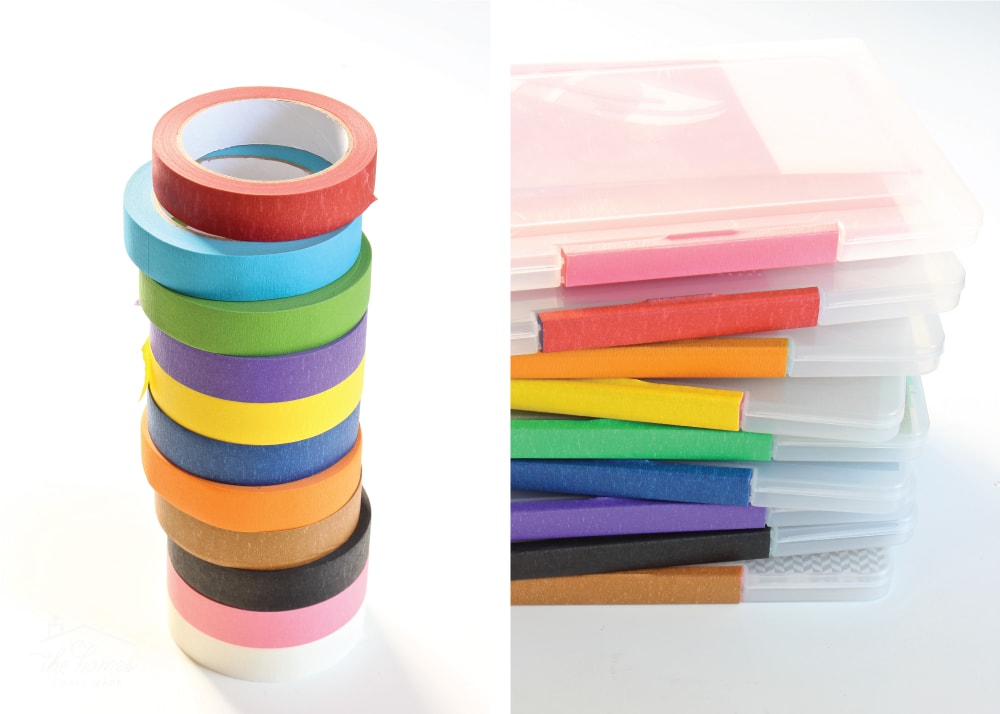
When I have or need a scrap of red paper, all I need to do is pull out the red box. No rifling through a huge box of random paper, no useless little bits all over my office. If a piece of paper is large enough to be used again, it gets immediately tucked right into its colored box. When a box gets too full, I go through and clean it out (although I rarely have to do that). If there’s one paper storage solution you take away from this post, it’s this one. You guys – this works SOOO well to manage scraps!
See More: How to Sort and Store Scrapbook Paper Scraps
Want to save this post?
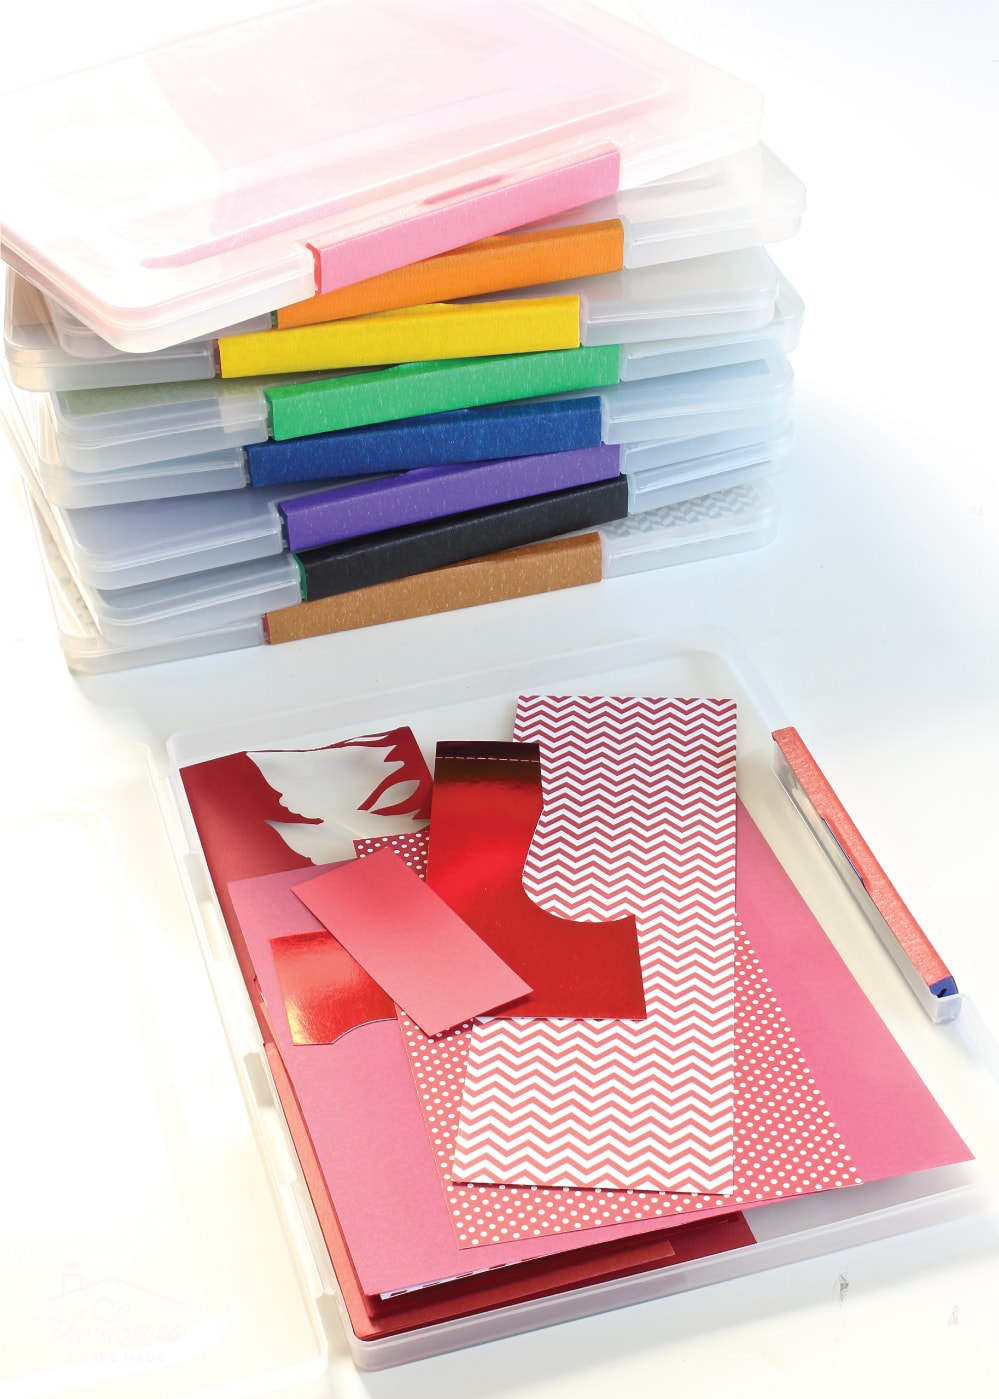
From itty bitty to full, large sheets, every peiece of crafting paper I have is right here. And getting it all in and out is effortless…which means I’m more likely to use it and put it all away when I’m done!

Specialty Papers
The far left cubbies on this same shelf holds the “Specialty Papers” I use often.
I use a lot of specialty papers such as photo paper, printable labels, sticker paper, magnetic paper, laminating sheets and more. And since these papers are all the same type, shape, and color, it makes most sense to store them all together but sort them by paper type…
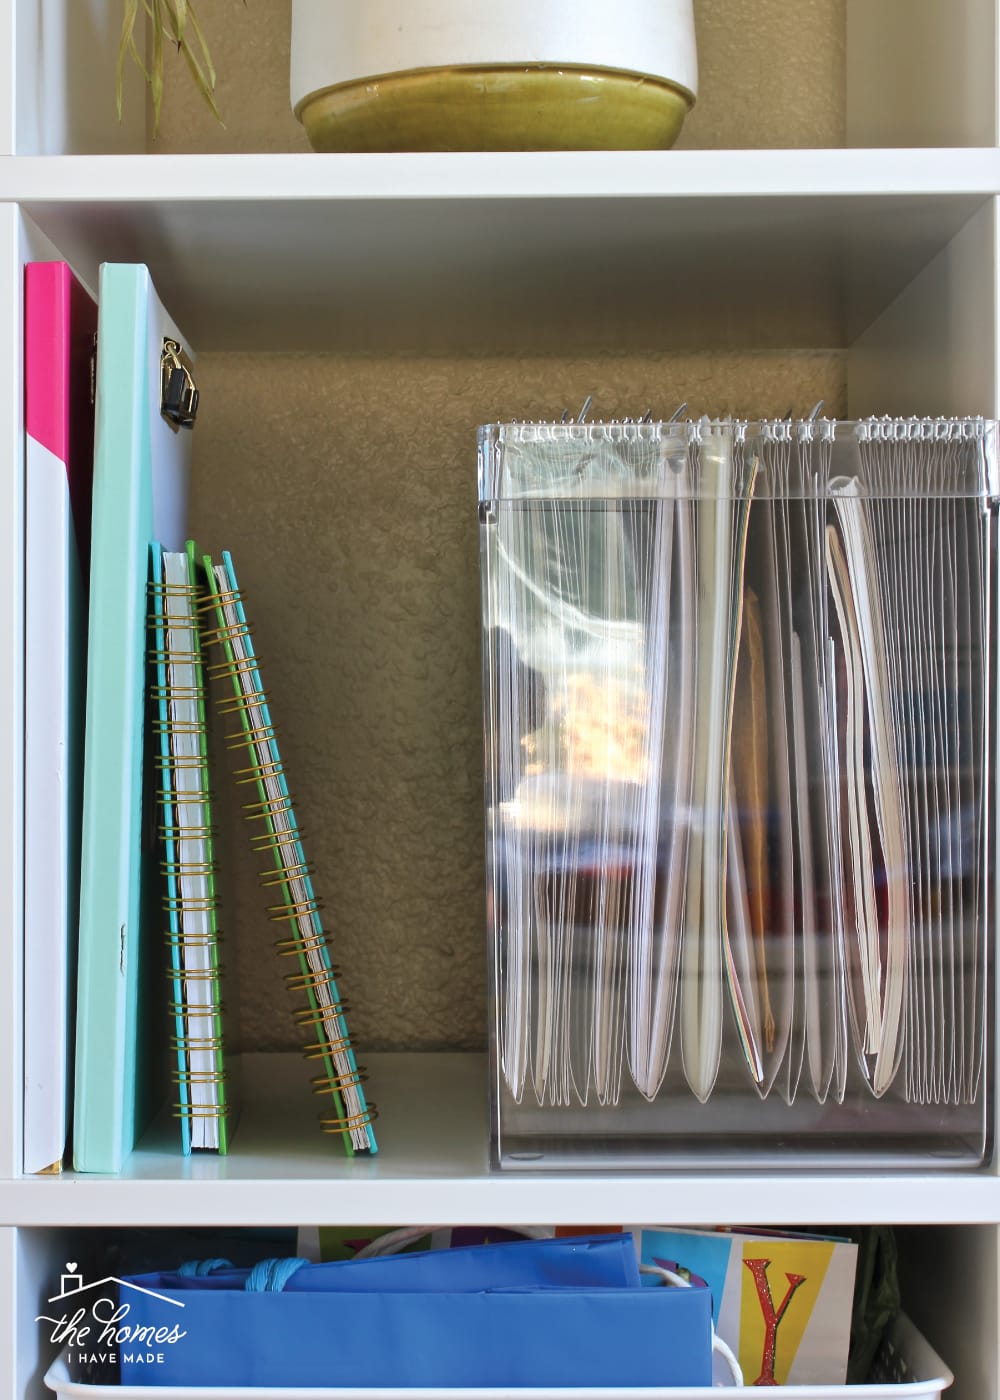
This acrylic file box holds all of these Specialty Papers, as well as other paper-related items I keep in my office/craft room (e.g., manuals, sewing patterns, etc). I used to keep these items in binders, but they were way too cumbersome to access. With each paper type given its own folder, I can quickly and easily find whatever it is I am looking for!
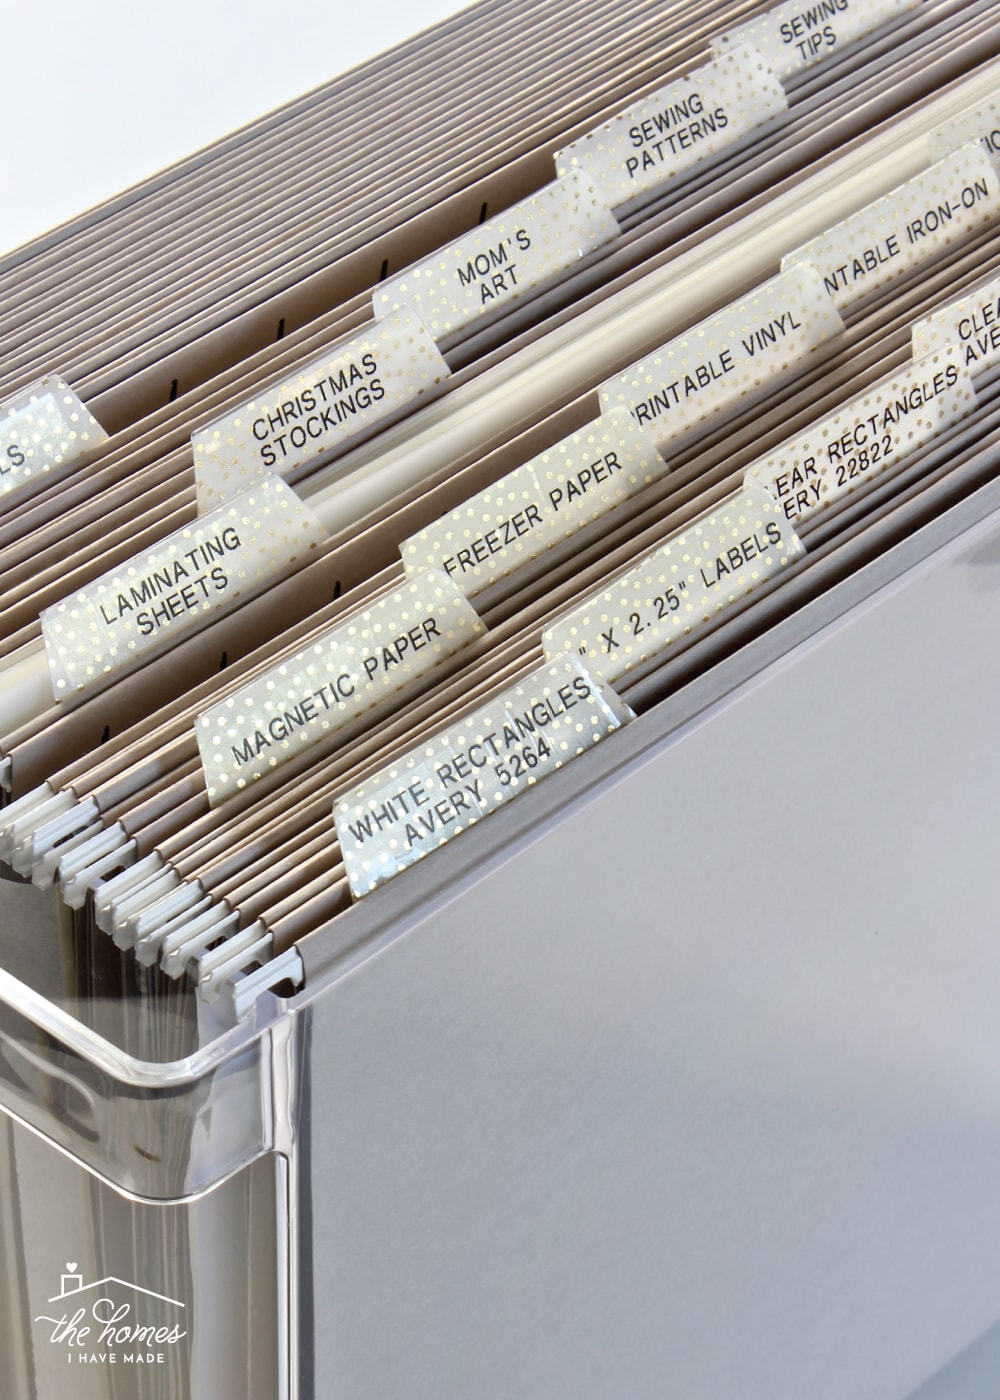
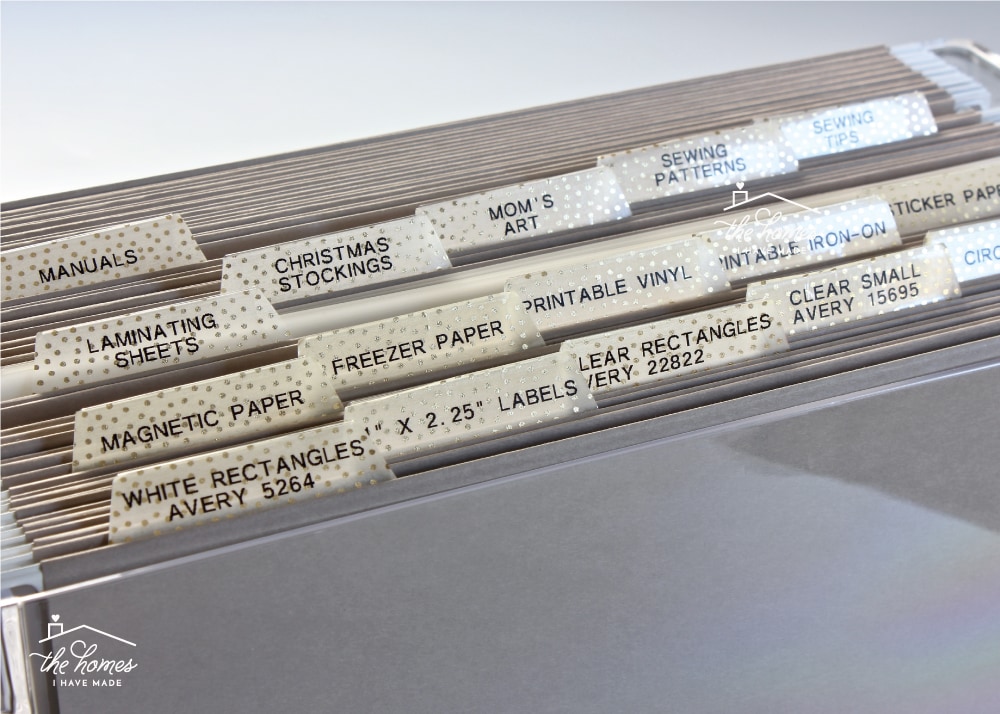
You will likely notice that I employ many of the same filing strategies I outlined here (one paper type per hanging folder, clear labels, consistent color scheme) but to jazz up these file labels a bit more, I used washi tape in conjunction with my trusty labelmaker…
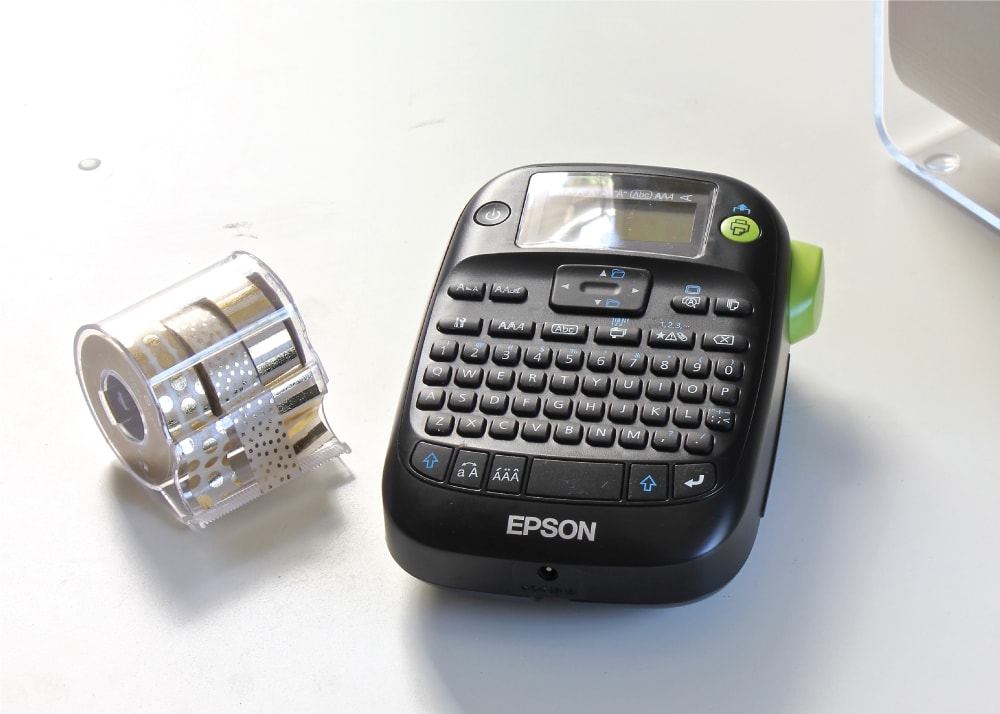
I simply stretched a length of the gold dotted tape across each plastic file tab and trimmed it down with scissors. I then printed a descriptive label in black on clear tape. Using washi tape is not only a quick and easy way to add some pattern and personality to your files, but adding another file tab is just a matter of tearing off another stretch of tape!
While almost all of my “Specialty Papers” are contained in the hanging folders, there are three kinds of paper that I use so frequently that it made sense for me and our household to separate them out.
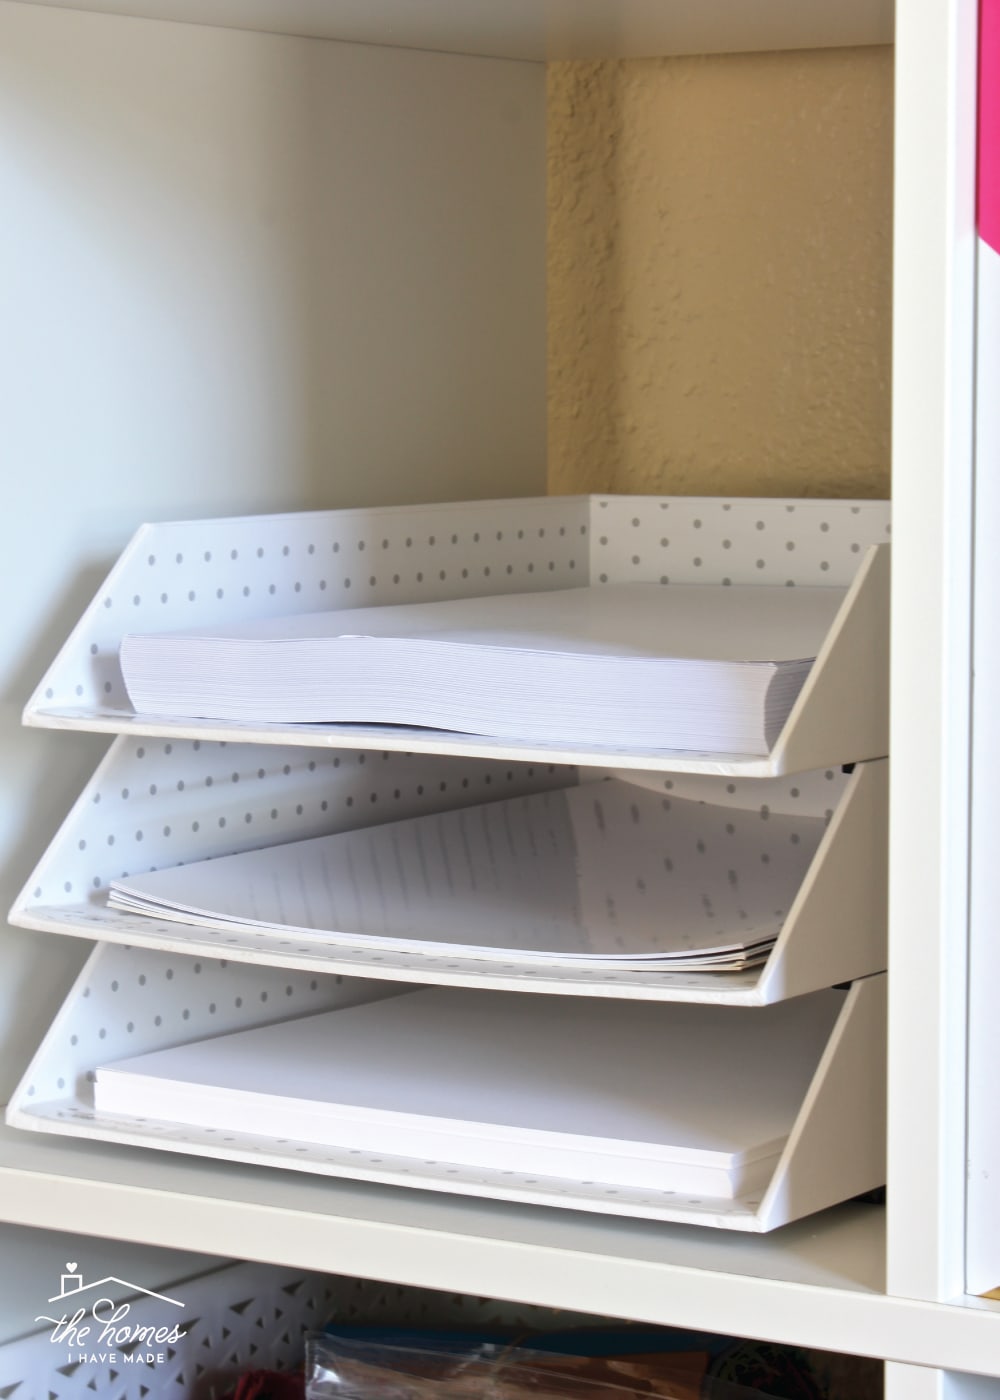
I keep white printer paper, white photo paper, and white cardstock loaded into a basic paper sorting tray for easy access. Gold-foil labels help the rest of the family identify what’s what when loading the printer!
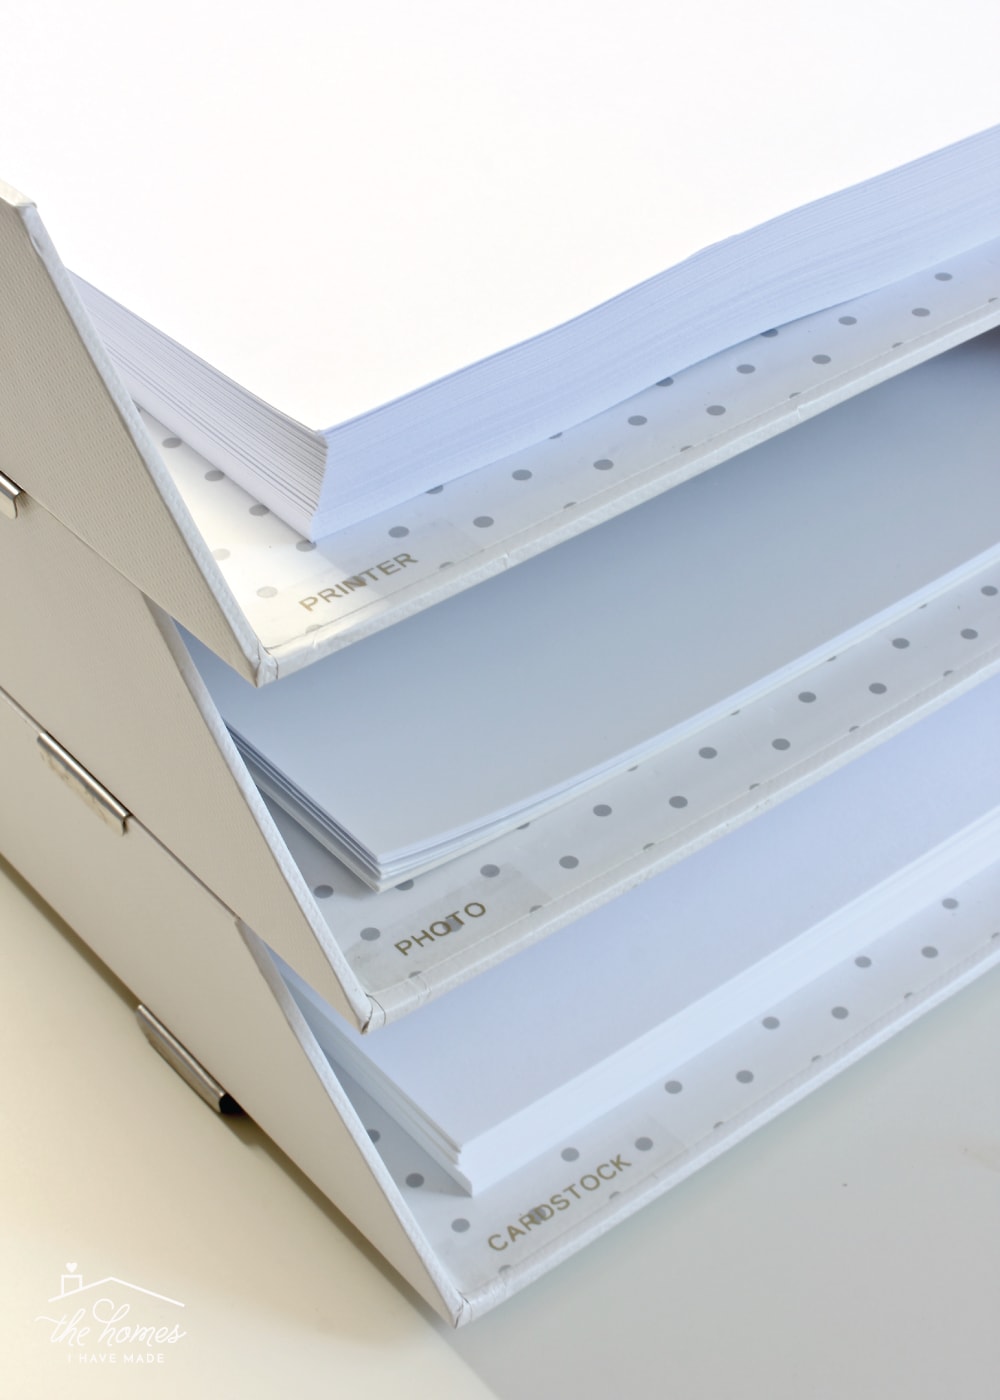
All together, pretty much anything that we’d feed into our printer is right here, labeled, and easily accessible!

These 5 cubbies store a majority of my crafting papers using dividers, boxes, hanging files and a paper tray. But none of these solutions work for rolls of paper!
Rolls
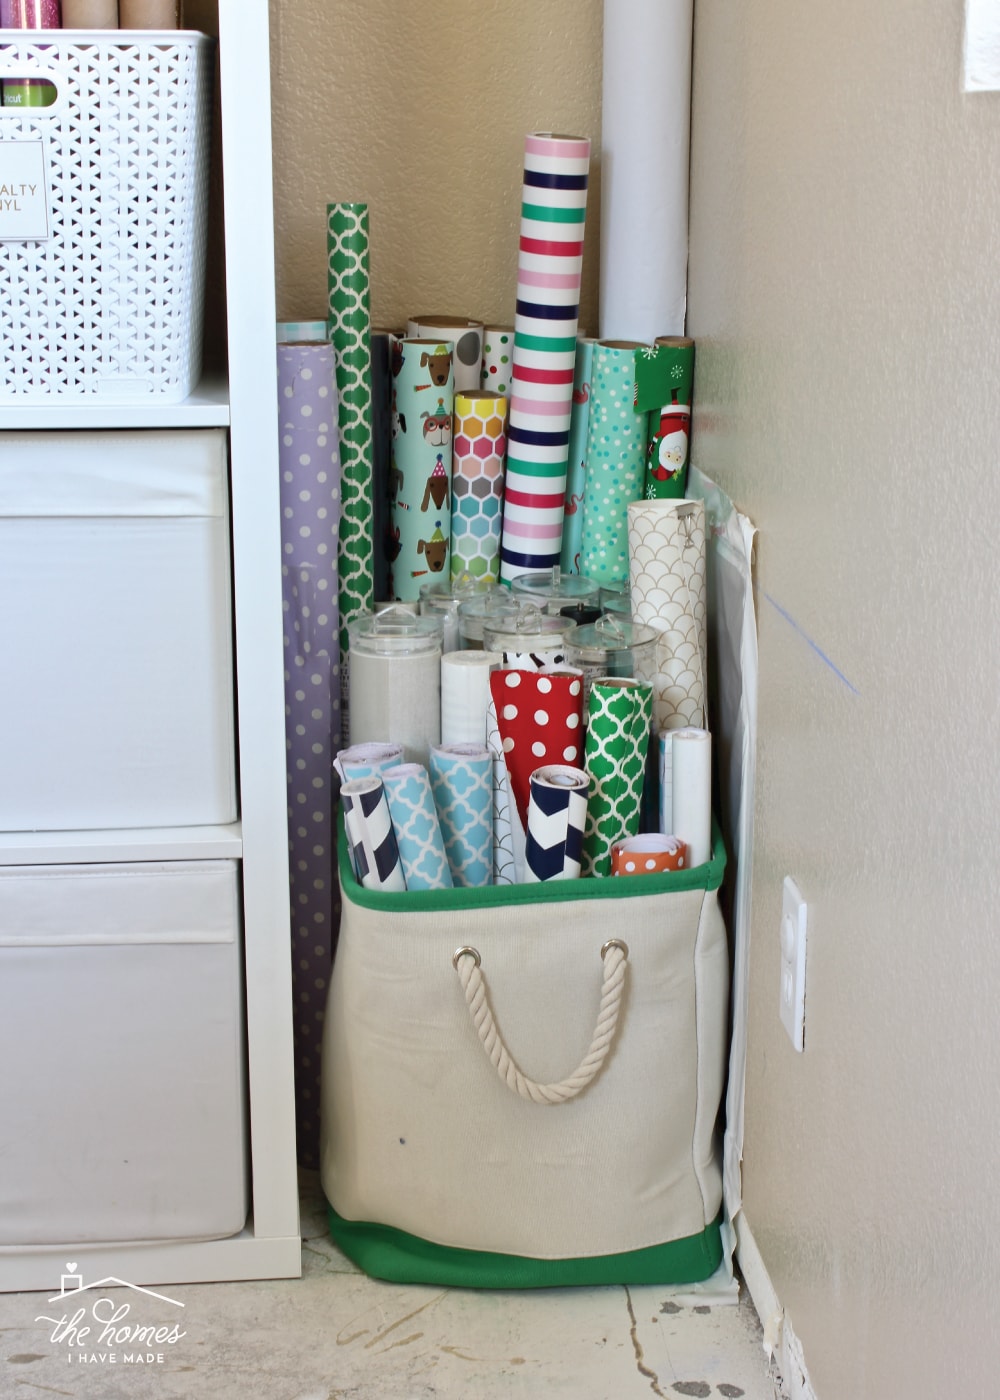
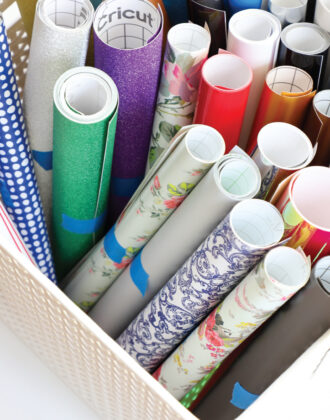
It likely doesn’t surprise you that I have a VERY sizable vinyl collection. Since these rolls are short (typically 12″), they can easily be stored vertically in baskets. I keep my specialty vinyls (heat transfer vinyl, transfer paper, etc) in one basket and all my standard vinyl rolls in another.
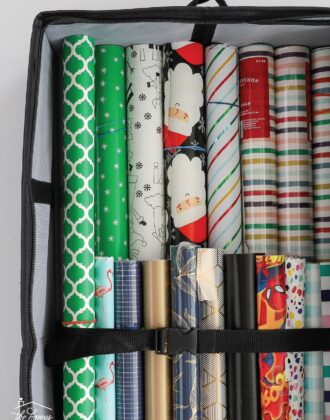
Shorter rolls are great in baskets because they can be easily tucked out of sight, but (unfortunately) the same isn’t true for longer rolls of paper. While I’d love to have a fancy wall-mounted system for my wrapping paper and wallpaper, my collection is so fluid (constantly expanding and then decreasing) that a simple sturdy basket just can’t be beat! At a glance, I can quickly tell what I have, and rolls couldn’t be easier to get out. And the best part? If I can’t get it all to fit into the basket, something has to go!
Products I Love
In My Craft Room
Here are the products I use (and truly LOVE) for storing all my various craft papers!

Here are some other storage solutions that might work for your family!
8.5×11″ Paper Storage
12×12″ Paper Storage
Sewing Pattern Storage

Other Craft Paper Storage Strategies to Check Out. Every household has unique needs and requirements for their craft paper sotrage. As such, I’ve rounded up some of the best article and tips I could find from my friends and fellow bloggers. If you need more ideas for organizing your craft papers, check out these posts below:
- Sewing Pattern Storage Ideas
- PDF Patterns via Jessica at DIBY Club
- Store-Bought Patterns via Sarai at Colette
- Cardstock and Scrapbook Paper
- Plastic Envelopes via Wendy at My Scrapbook Blog
- Gorgeous Paper Files via Nicole at Inspired Paper Crafts
- Cardstock in a File Box via Nicki at Creativity Lives Here
- Amazing 12×12″ Paper Storage Tower DIY via Jennifer at Jennifer Maker
- DIY Paper Sorter via Jen at I Heart Organizing
- Wrapping Paper
- Gift Wrapping Station via Abby at Just a Girl and Her Blog
- DIY Wrapping Paper Holder via Diane at In My Own Style
- Wrapping Paper Organization Station via Jen at I Heart Organizing
 Homework. I know many of you are ready to dive in right now, so I will give you a “Homework Assignment” of sorts each week. Take the next 6 days to accomplish everything I have outlined here. Then tune in next Friday for the next step on your paper decluttering journey!
This week:
- Review and/or learn the S-P-A-C-E process outlined in this post. The more intuitive this process is, the quicker your sorting will go.
- Identify if you need to tackle this Crafting Paper Type. (Even if you have a modest craft paper stash, it may be worth sorting through!)
- Use the S-P-A-C-E method to Sort, Purge, Assess ALL the Crafting Papers in your home.
- Once your papers are fully sorted, use the Contain and Embellish strategies outlined in this post to identify the right storage systems for each category of crafting papers you have.
- Extra Credit: Snap a photo of your organized crafting papers and share it on Instagram using #THIHMpaperorganization(and don’t forget to tag me so I’ll see it!)
- Extra Credit: Visit the tag #THIHMpaperorganization to encourage and motivate each other!
How to Organize Paperwork Blog Series

I know sorting and organizing craft papers can be a big job; and I also realize that based on your unique crafting styles, you may need a variety of organization solutions in order to get it all under control. It is my hope that by sharing the solutions that are working so well for me, as well as a host of other ideas used by other bloggers and crafters, you will be able to identify systems and solutions that will allow you to easily access what you have whenever the creative mood strikes!
Megan
6 Comments on “How to Organize Paperwork | Part 4: Crafting Papers”
This is very timely for me and has given me a lot to think about. I REALLY love how all your paper is like library books and can just be plucked off a shelf or grabbed out of a bag. I’m going to try and find a way to implement it in my own house…
I’m not a crafter and don’t even have lots of paper, but I loved this post! So many great–and great-looking–storage solutions!
One thing I’ve learned the hard way is that paper absorbs moisture from the air. That may not be a problem if you are not running your paper through a printer, or if you don’t live in a humid environment.
My solution are these 9×12 zip top bags: https://www.amazon.com/dp/B003ZZWGNQ/ref=cm_sw_r_cp_taa_-HpABbB88E814 I first ordered them for organizing my sewing patterns — the fold over comics bags were not working for me.
I “file” my bagged paper in magazine files much like Megan’s file sorters. My sewing patterns are organized the same way. It makes the whole thing 1000% easier.
I love this post! I am new to the cricut world and have a lot of rolls of vinyl and was wondering where you got your baskets to store the rolls !
Thank you
Hi Taylor!
Sorry for the late reply here, but I buy all my Y-weave baskets from Target HERE!
Hope that helps!Megan
I was hoping to read the blog post about organizing store bought sewing patterns but the link doesn’t work 😞