Quick & Easy DIY Ornament Wreath | 2 Methods
I simply adore the look of Christmas “ball” wreaths. The combination of textures, the modern aesthetic, and aaaalll the sparkle and shine just make it the ultimate holiday decoration! But these wreaths always struck me as expensive and complicated; and for a gal who tends to change out her holiday decor regularly, I didn’t want something that was permanent or I had to store year over year. So I figured out how to make a DIY ornament wreath that was not just quick AND easy, but also “un-doable” (so I can easily re-make it each year in fresh color schemes!) The unique “cluster” technique I’m going to show you today is completely glue-free and quite different from other ornament wreath tutorials around the web. As a result, this version is something anyone can do (no matter how crafty you are!)…and the results are just so good! Let me show you how this is done!

My Ornament Wreaths Over the Years
I’ve probably said it a dozen times here on the blog: “Making wreaths just isn’t my thing.” Sure, I’ve been able to fake it here and there. But wreath making is definitely not something I consider fun, quick, or easy; and I’ve been known to have to start over a time or two (or twenty!).
But if you take a look at the various ornament wreaths I’ve made over the years, you’d think I was hiding some serious wreath-making talent. But the truth is, I figured out an all-too-easy trick for making DIY ornament wreaths years ago, and I’ve simply repeated it season after season. Here’s just a sample of the ornament wreaths I’ve made!
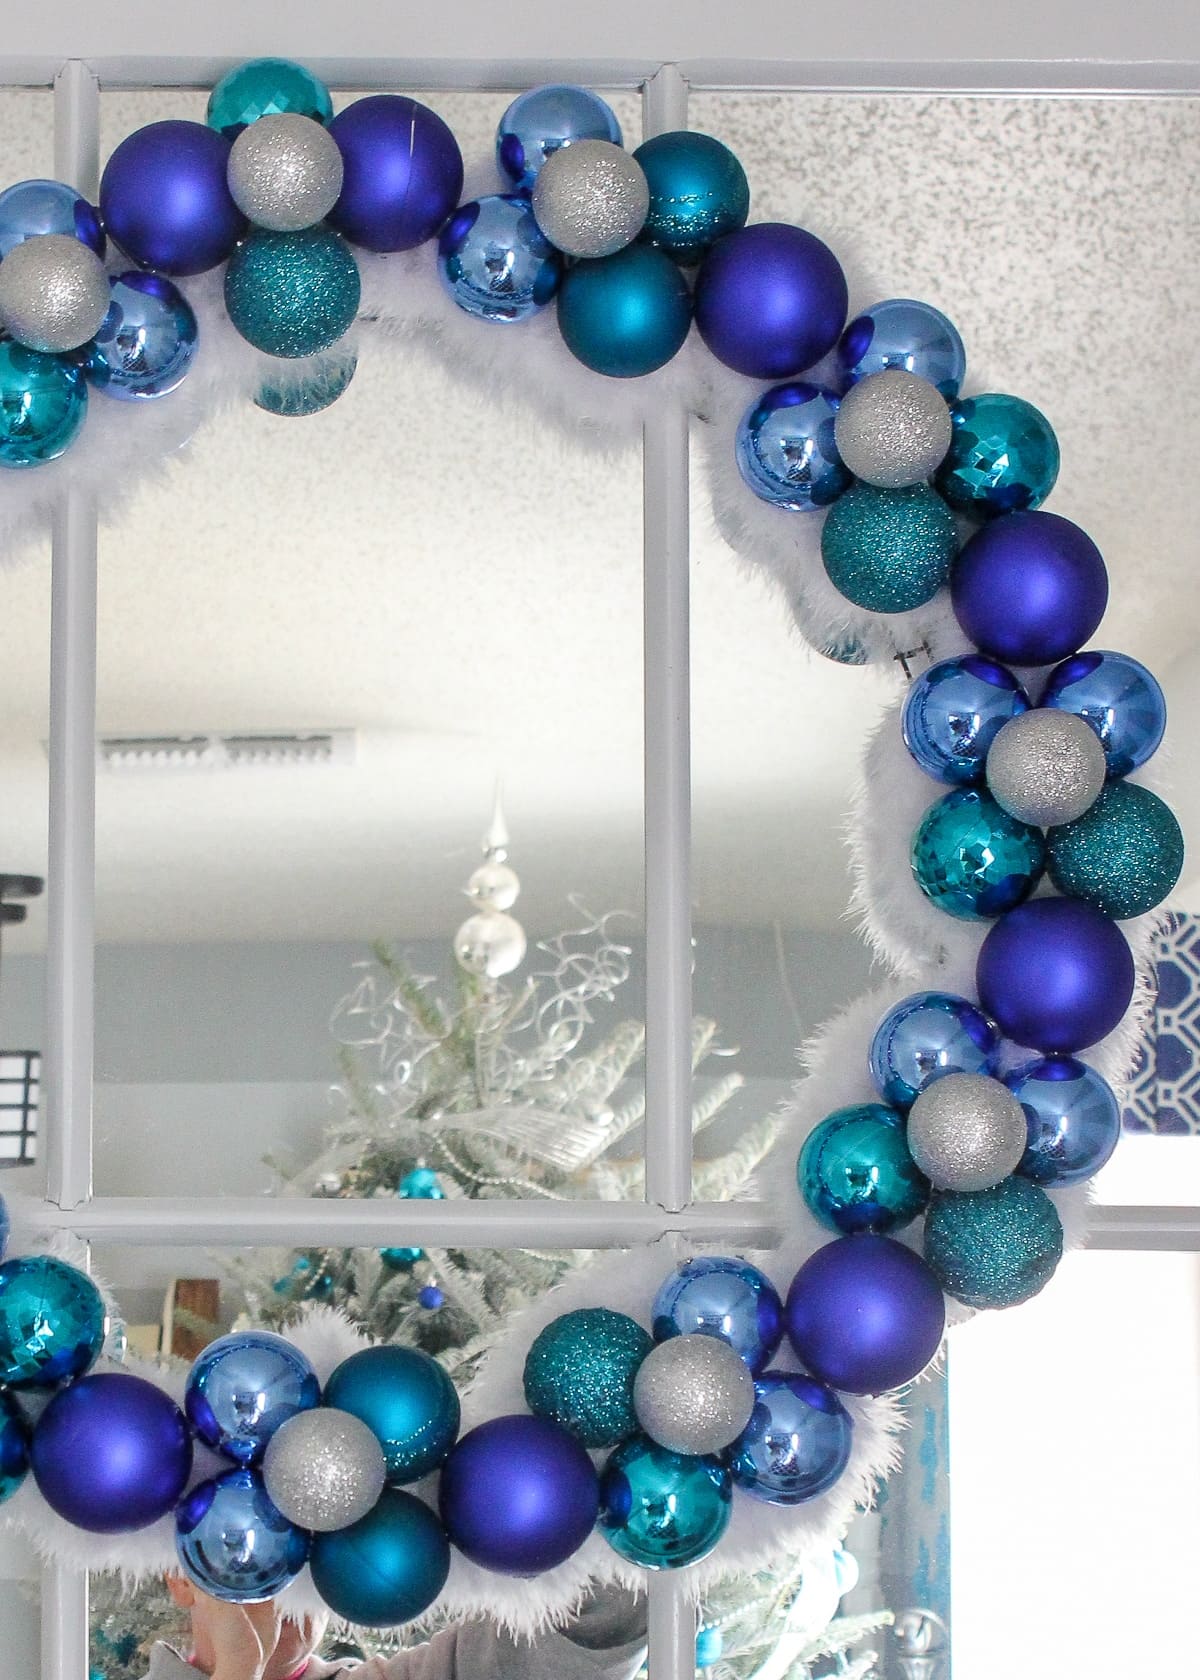


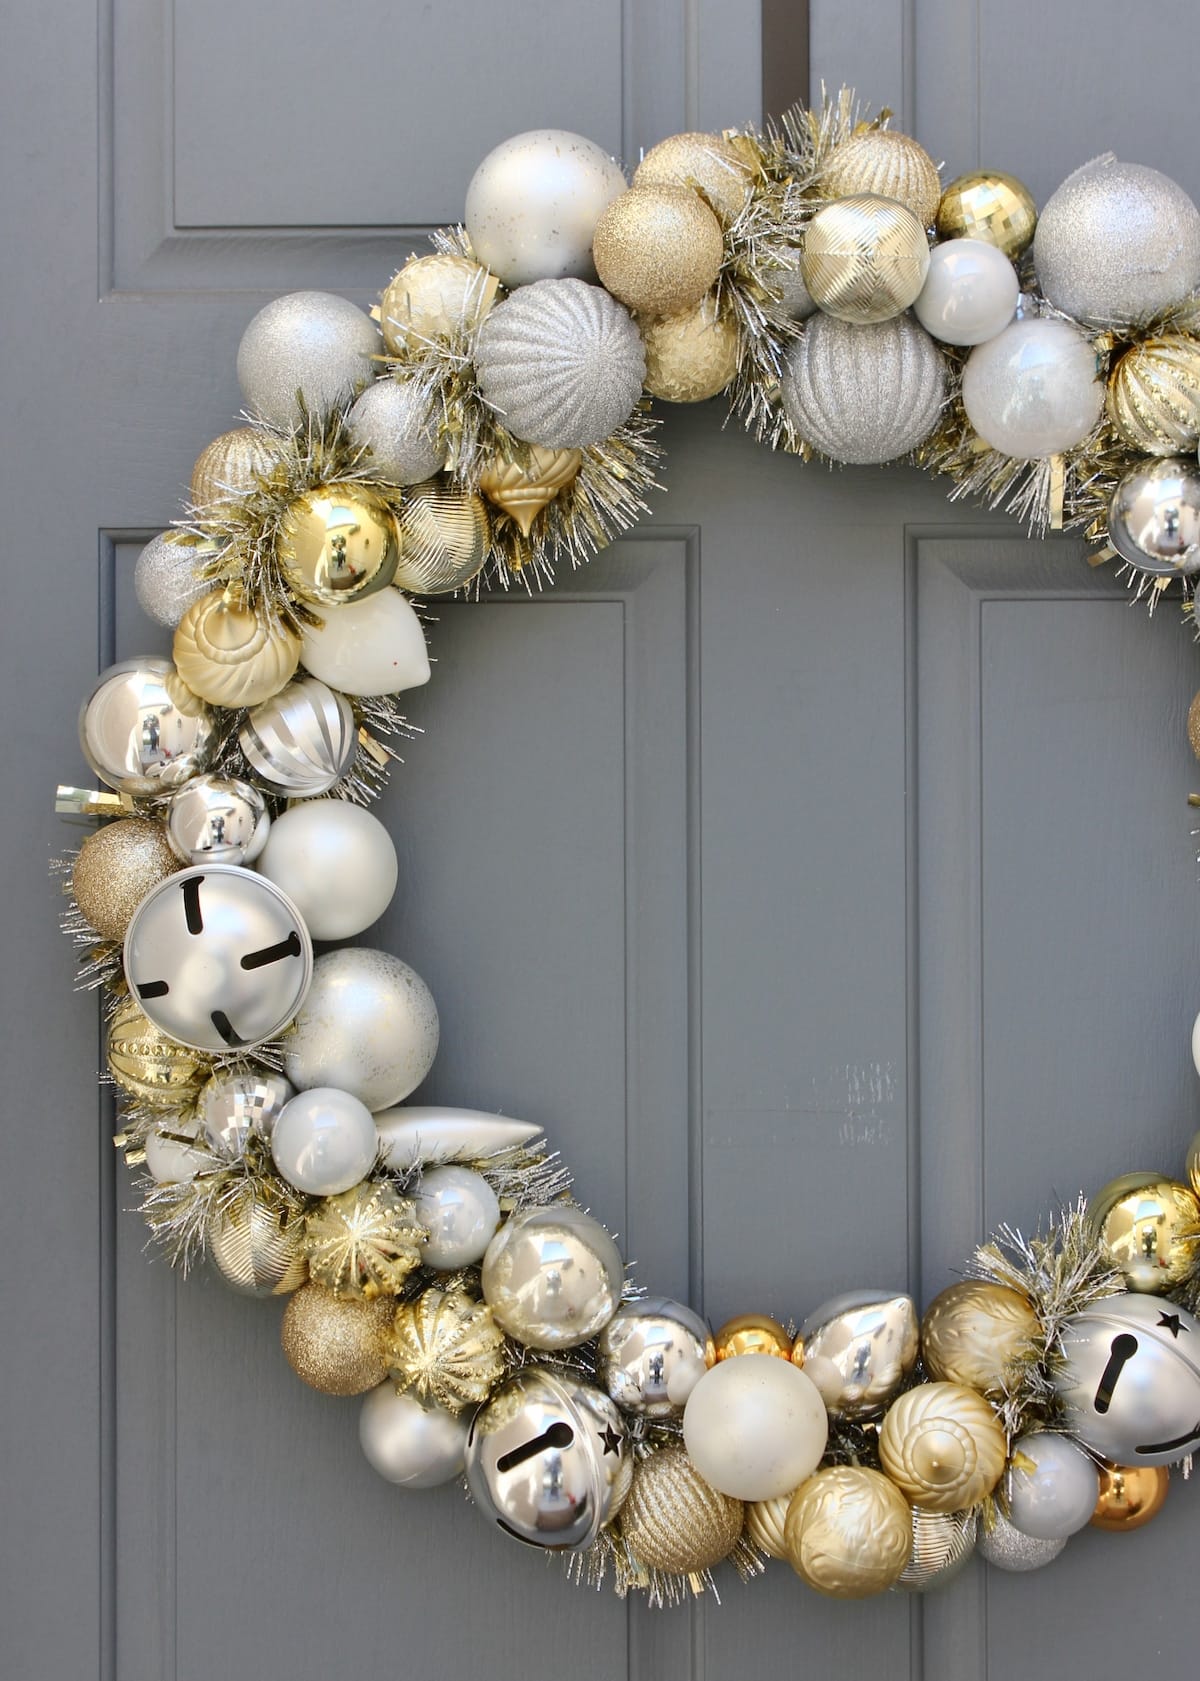
Believe it or not, all of these wreaths use the same assembly technique I’m going to break down today! Let’s dive in, and make a gorgeous ornament wreath!
Supplies Needed
Here is what you need to make your own DIY Ornament Wreath:
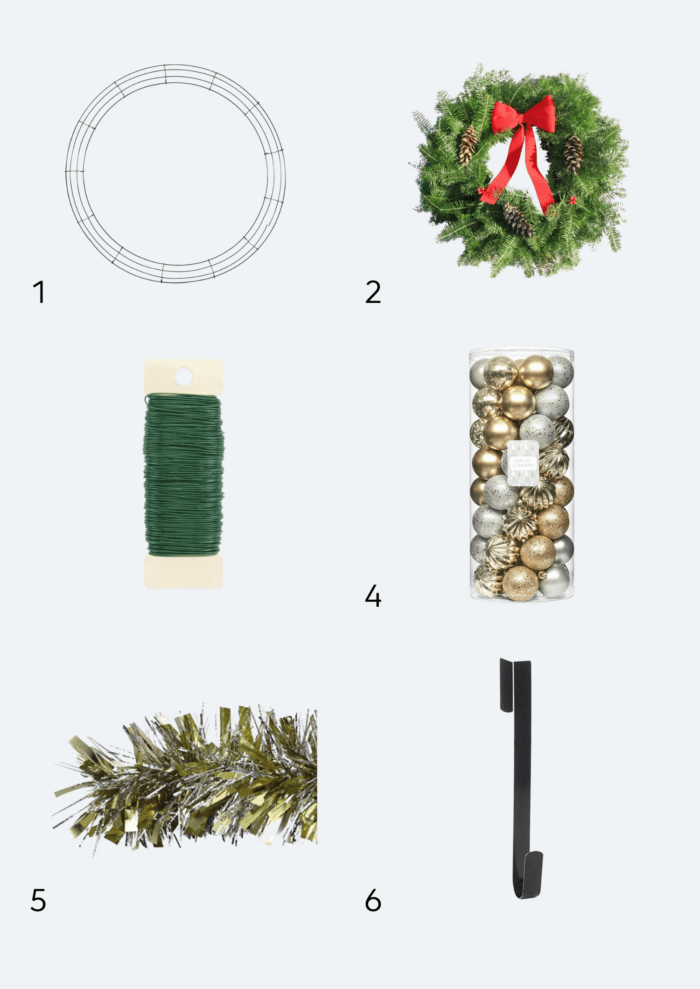
- Wreath Form – Wired – For the All Ornament Version, you will need a wire wreath form. These can be found in any size, at any craft or floral store; common sizes are 12″ | 18″ | 24″
- Wreath Form – Fresh – For the Pine+Ornament Version, you will need a fresh pine wreath, usually sold at floral centers, hardware stores, and anywhere else fresh trees are sold.
- Floral Wire – Floral wire is key to keeping your ornaments secure yet “positionable.”
- Ornaments (in your color scheme) – More on this below.
- Tinsel Garland (All Ornament Version Only) – Although optional, this really adds fullness and texture to your wreath. Michaels carries garlands in various color combinations such as Silver/Gold | All Red | Red & White | Silver & Blue | Rainbow | All Silver; and you can shop a wide variety of tinsel garlands on Amazon too.
- Door Hanger – An ornament wreath can get quite heavy. I don’t recommend peel-and-stick hangers and suggest over-the-door hangers instead.
What Ornaments to Use for Your Wreath
What ornaments you use will (quite obviously) determine what your wreath ultimately looks like. And while you don’t need anything fancy, there are some things you should consider when picking ornaments specifically for a wreath.
Variety
You will need an assortment of ornaments to create a visually interesting and full wreath. Gather up ornaments in different shapes, sizes, colors, and textures (e.g., matte, glitter, frosted, etc). I also recommend having some large statement ornaments, as well as some mini ornaments to fill in small spaces, as necessary.
Shatterproof
I highly recommend using shatterproof ornaments for this project. Not only are they lighter weight; but if/when your wreath falls down, you won’t have a front porch covered in shards of glass! #beentheredonethat
Color Scheme
I recommend picking just a few colors (or even all one color!) to create a really chic wreath. Mixing metallics will work with almost any holiday scheme or style; while colored ornaments usually work best when combined with whites, silvers, and other neutrals.
Where to Get Ornaments
I’ve had the best luck finding inexpensive, shatterproof collections of ornaments from both Walmart and Amazon. I particularly love sets that include different sizes of ornaments in lots of different color combinations. Here are some great options to check out:
- 86 Count Ornament Set in single color boxes – my pick!
- 100 Count Ornament Sets in a variety of sizes and colors
- 50 Count Ornament Sets in either 2.5″ and 2.75″ sizes
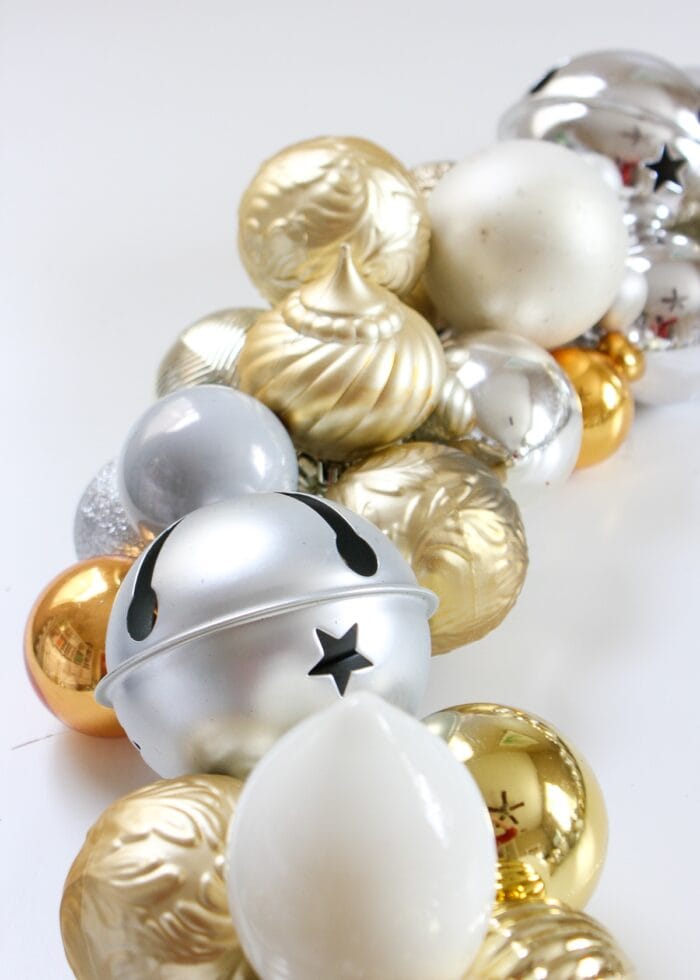
In addition to a sizable collection of coordinating ornaments, I also recommend adding in some unique “accent ornaments” like bells, vintage ornaments, etc.
How to Make an Ornament Wreath
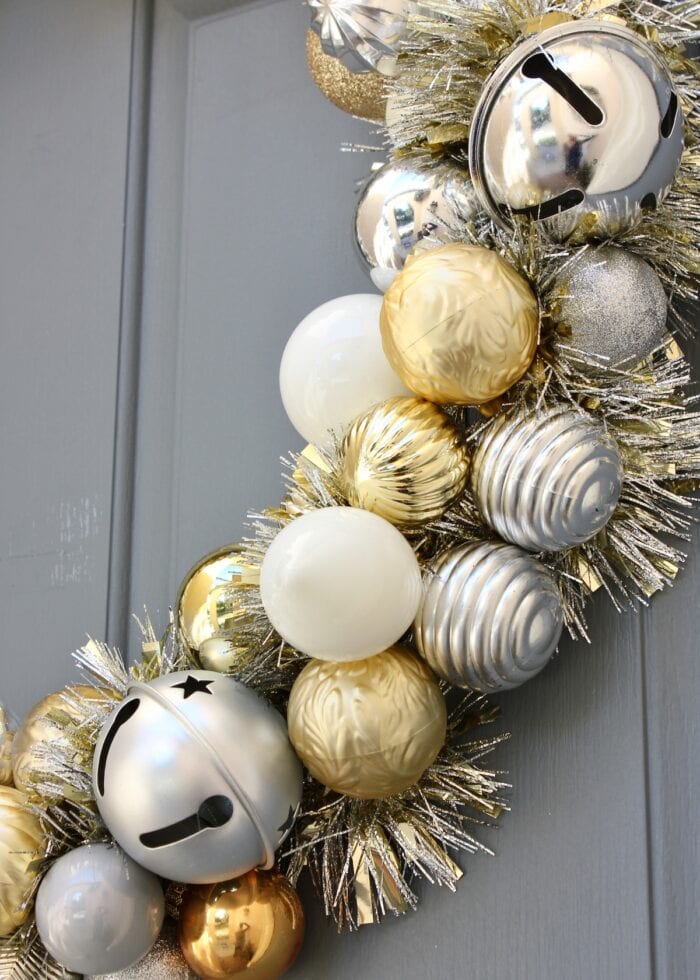
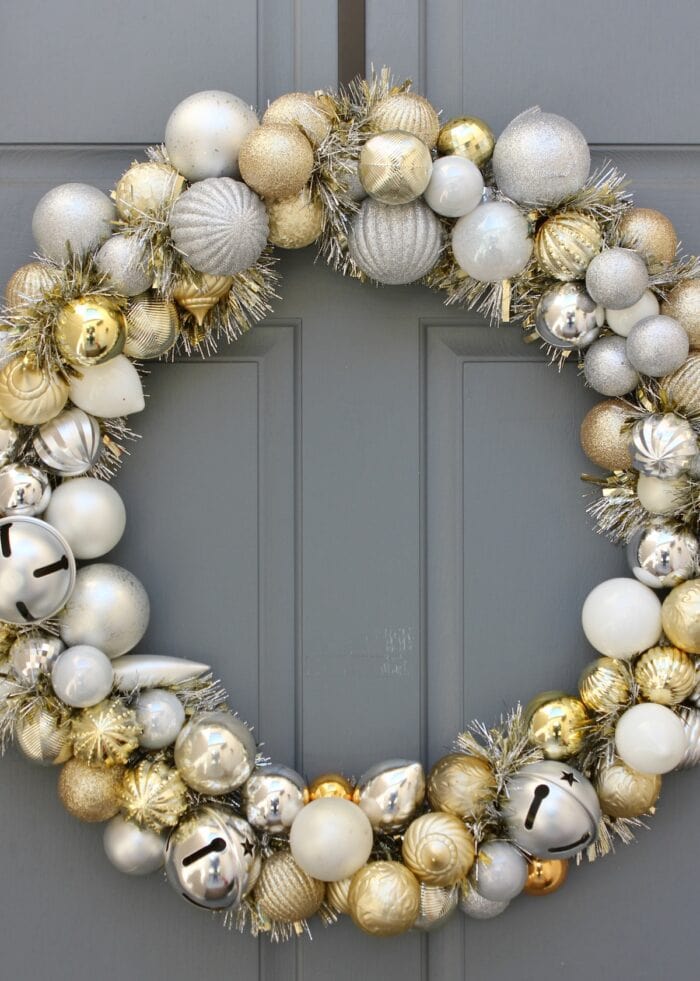
Let’s start with the All Ornament Wreath design because it’s just stunning!
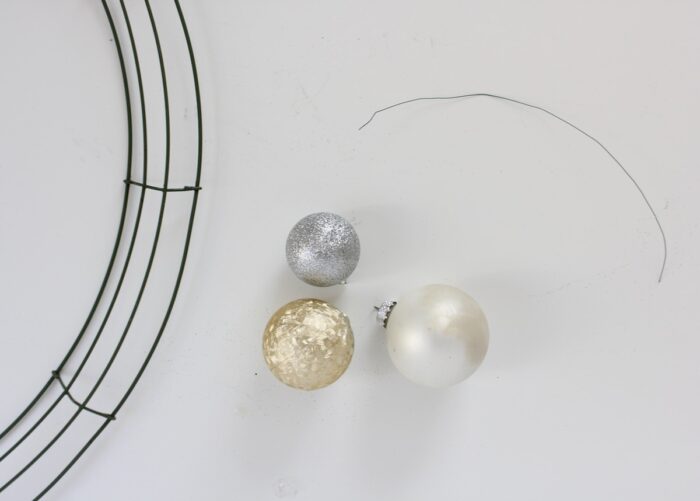
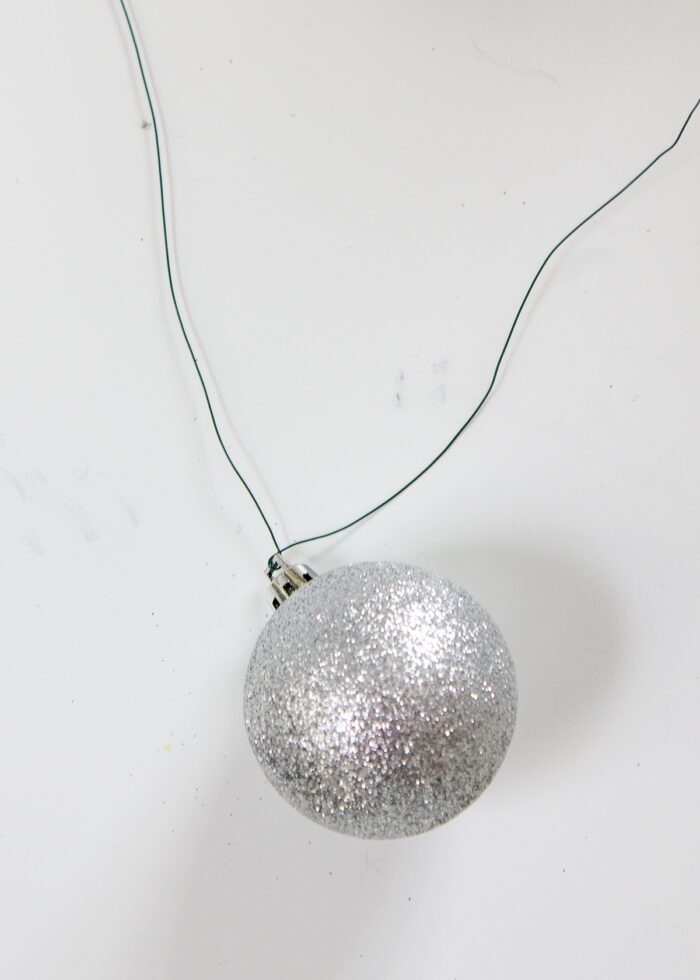
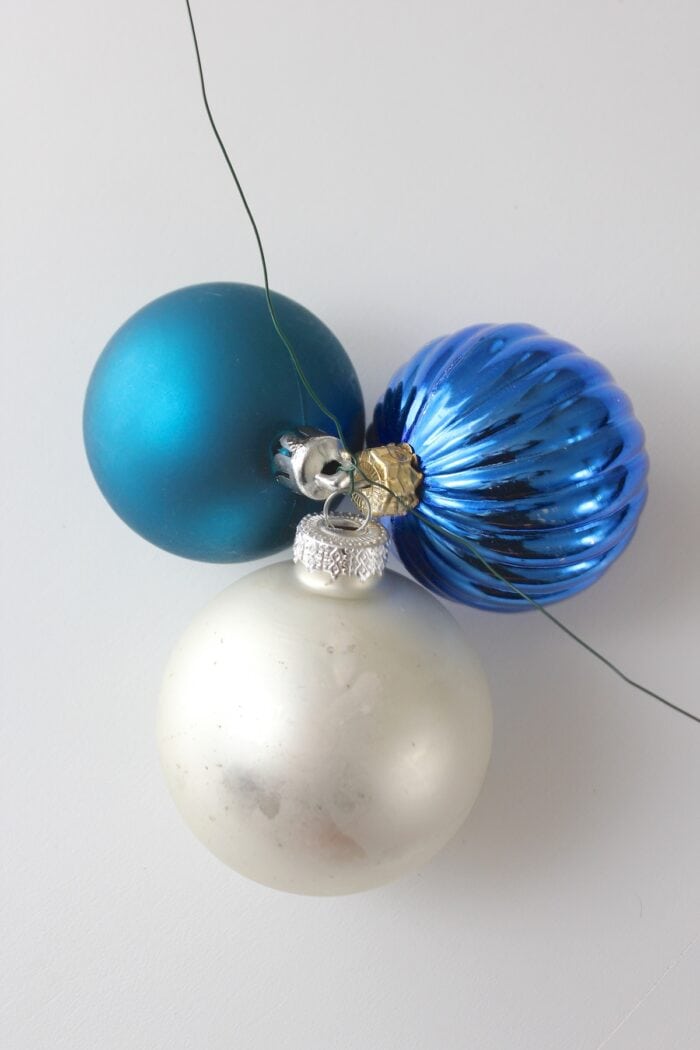
Step 1: Select Your Ornaments
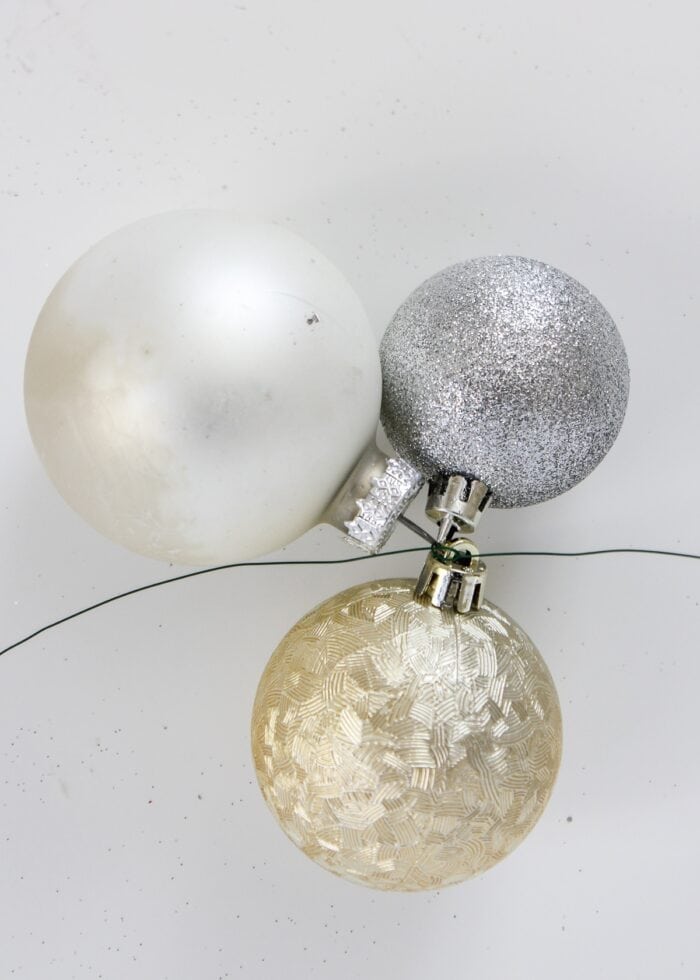
Pick three ornaments in various colors, sizes, and textures and cut one 8-10″ piece of floral wire.
Step 2: Create an “Ornament Cluster”
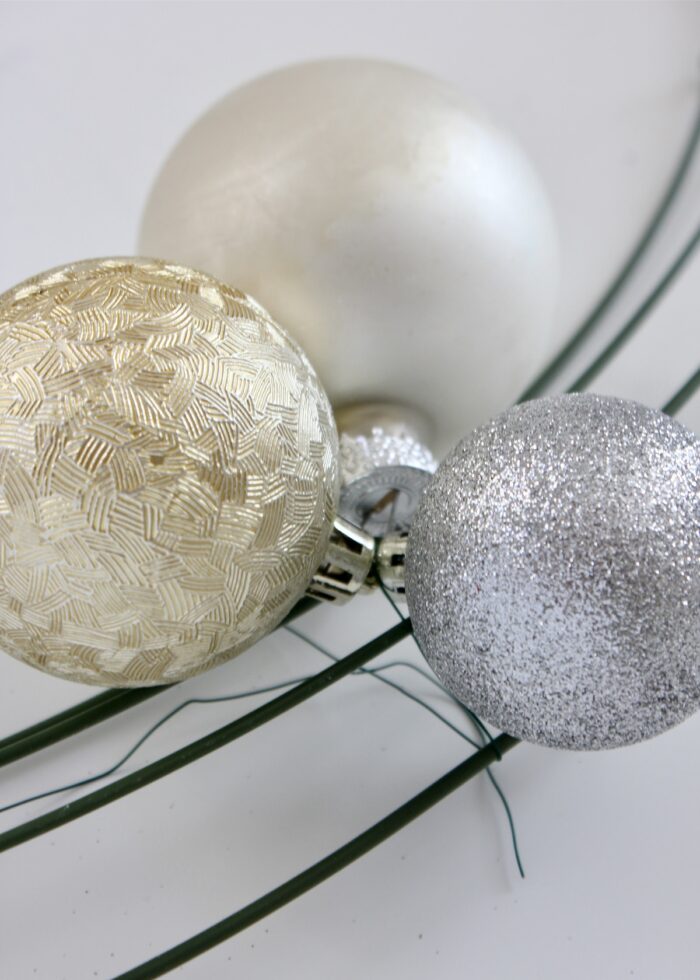
String the three ornaments onto the wire (the order doesn’t really matter)…
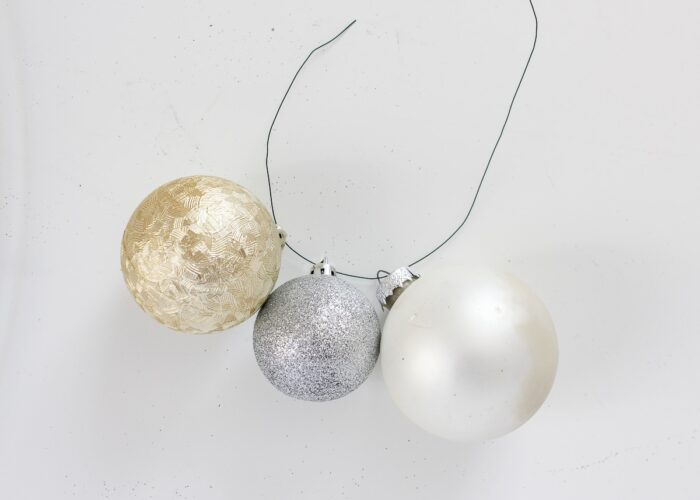
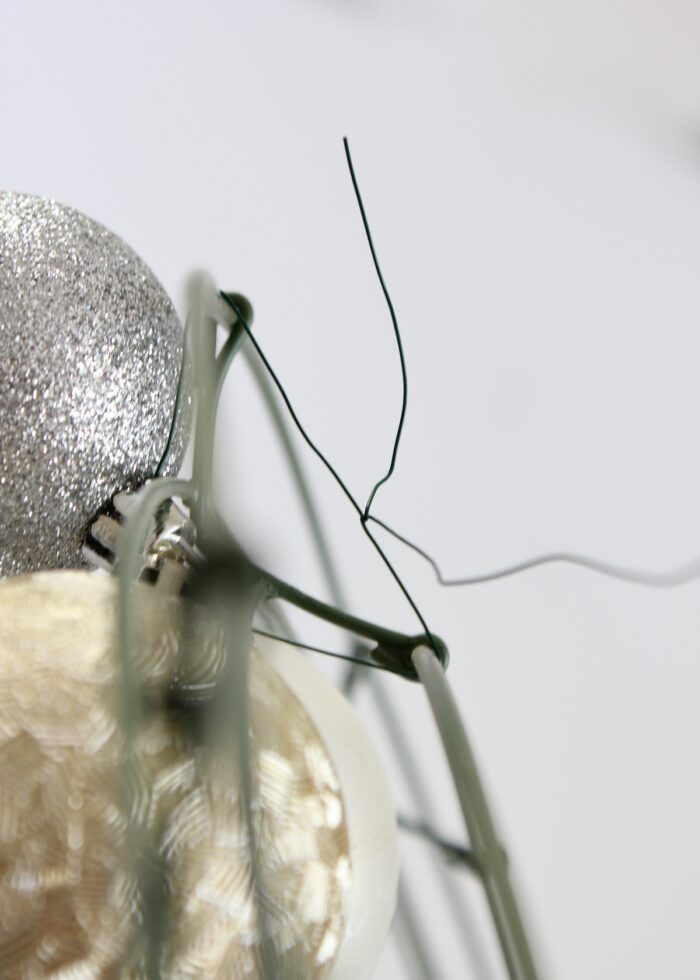
Then, twist the wire together tightly at the tops of the ornaments to create a “cluster.”
TIP! Sometimes when you cinch the ornaments together really tight, they can pop out of their pronged tops (the metal pieces with the hooks). If this happens, I recommend using a hot glue gun to more firmly secure the ornaments into their hook toppers.
Step 3: Secure the Cluster to the Wreath Form
Place the cluster on top of the wreath form (below left) and wrap the wires around to the back.
Twist the ends of the wires together a few times on the underside of the wreath frame to secure the cluster (tightly) to the wreath. Then snip off the excess wire.
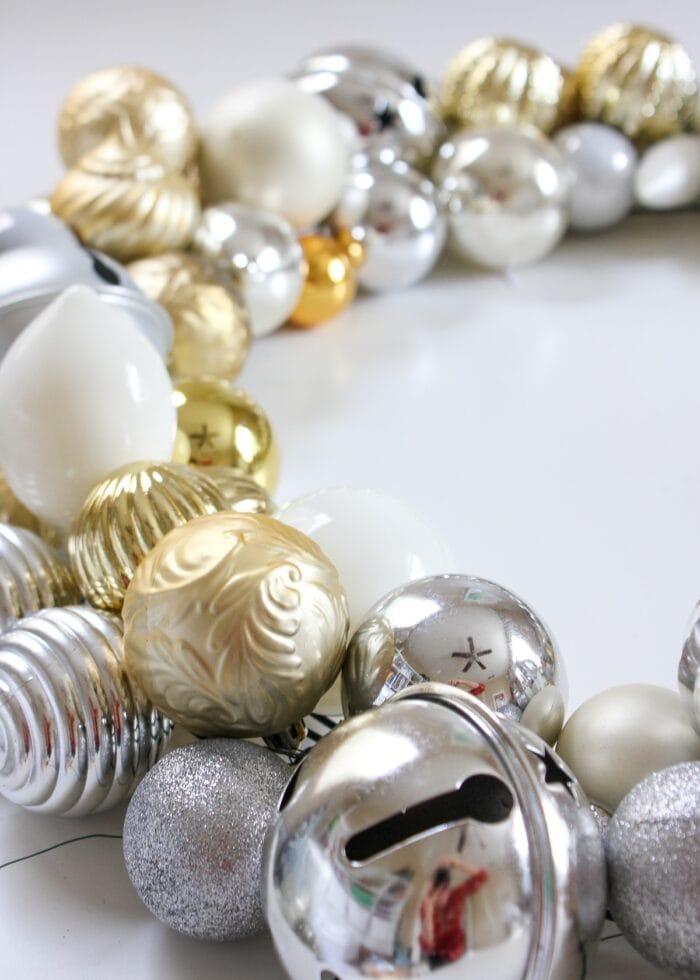
Step 4: Work All the Way Around
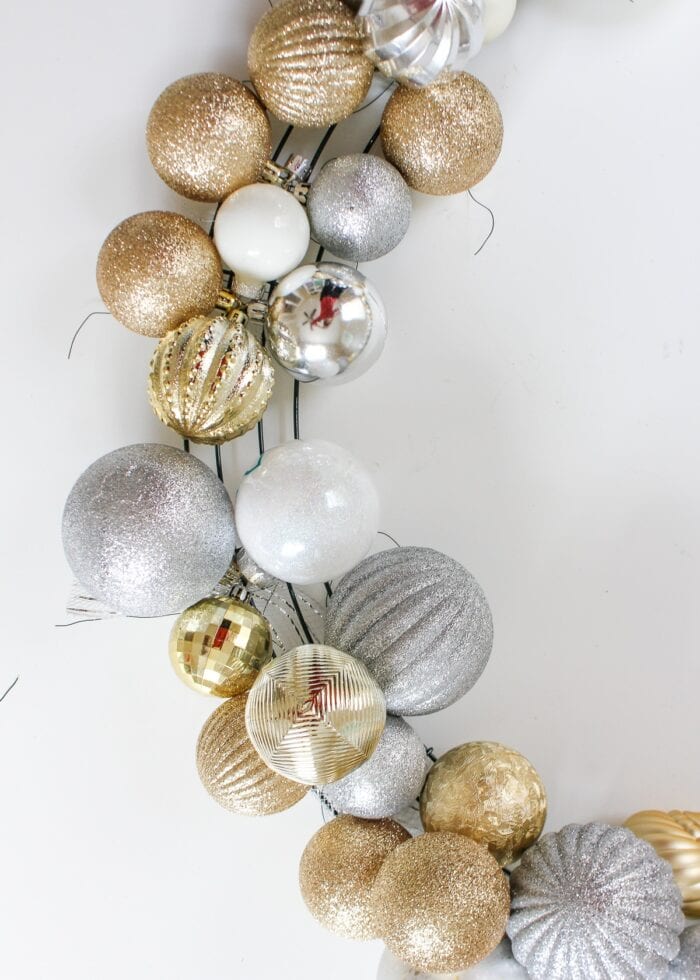
Repeat the process over and over and over again, placing each bundle of ornaments nice and tight against the previous bunch. Be sure to vary colors, sizes, and textures of the ornaments as you work your way around.
Step 5: Fill In Gaps
As you bunch and place clusters of ornaments next to each other, they will start to overlap and fill in gaps. However, you may find that you still have large, hard-to-fill holes in your arrangement.
Want to save this post?
To fix this, use the same method as before, but with one (smaller) ornament instead of three.
Fill in larger gaps between clusters with these smaller ornaments until your wreath is full and balanced.
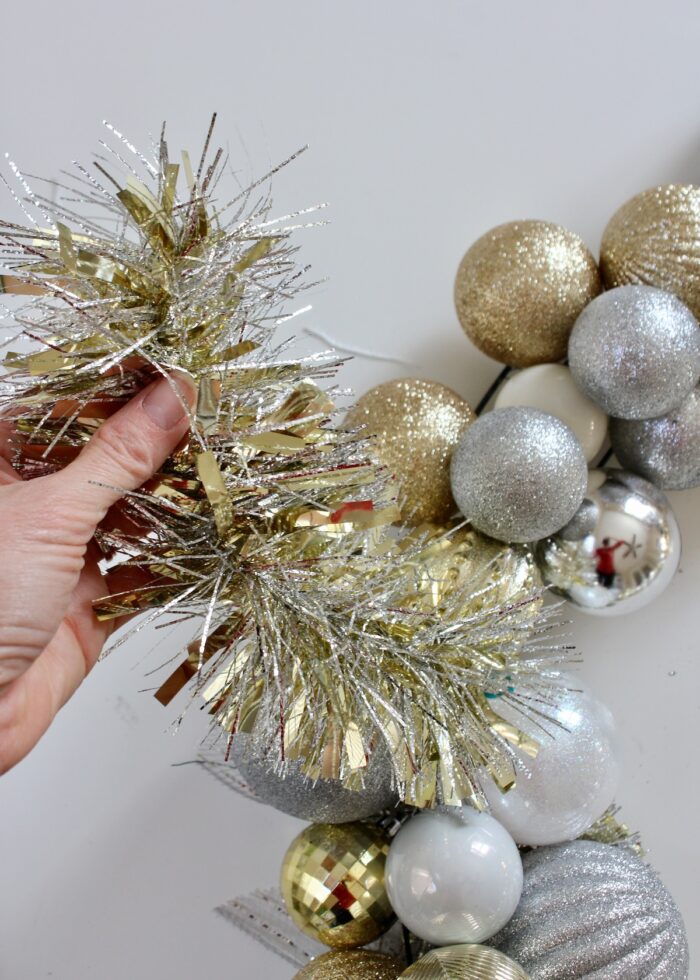
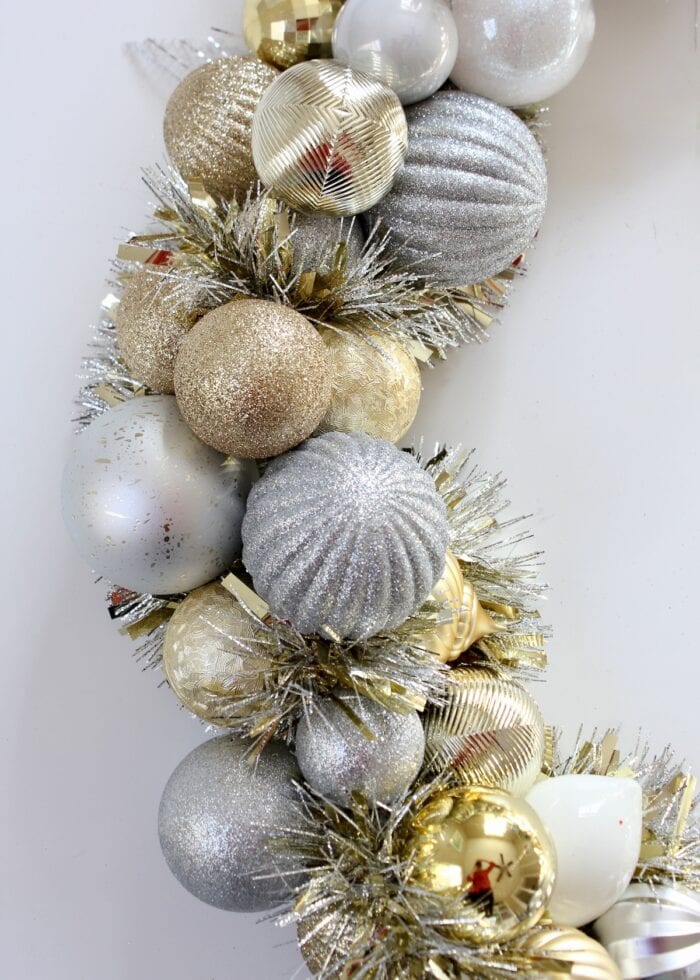
Step 6: Add the Tinsel Garland
NOTE: Although I say this step is “optional,” I HIGHLY recommend it! The tinsel garland completely transforms the All Ornament Wreath design, giving it a fuller, more lush appearance.
I was 100% prepared to place my wreath on my door with just ornaments. However, I didn’t love that the wire frame was peeking out in spots. When I spotted this silver and gold tinsel garland at Michaels, I knew it was the key to creating a slightly fuller wreath while camouflaging the wire frame underneath!

Adding in the garland couldn’t be easier! Simply thread it through, under, around, and over the ornaments…wherever there are gaps or frame showing.
Don’t overthink it. Just thread it through. I found this garland durable and able to withstand some decent tugging and pulling, and it didn’t shed or break at all. The 6′ length gave me more than enough to work around the 24″ frame.
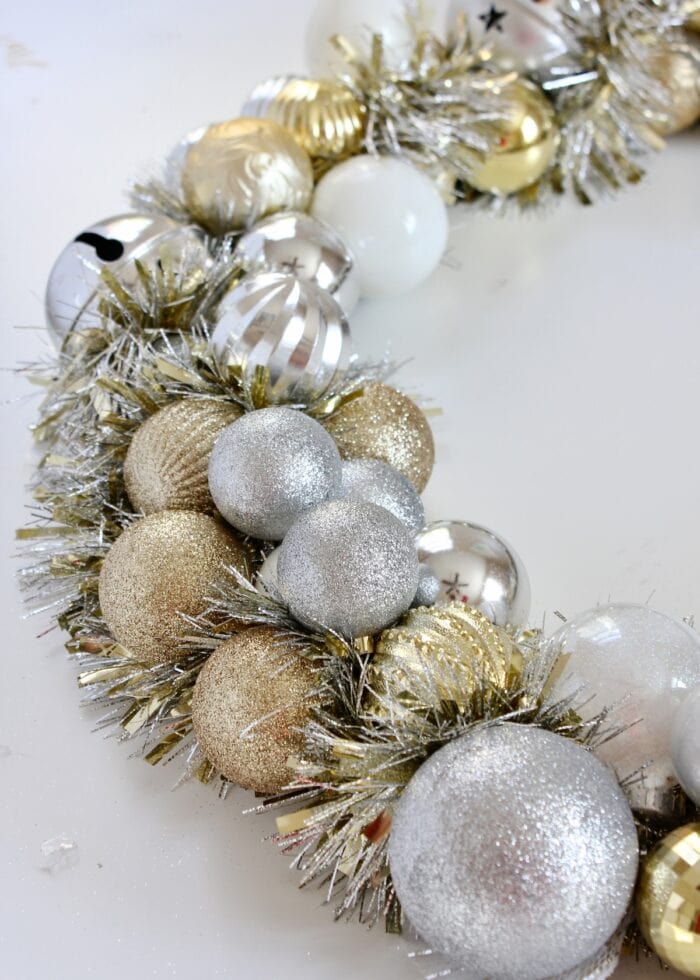
The garland can also be easily tucked in or pulled out if more or less is needed in certain areas. Just keep playing with it until you get a fullness you like!
Once your garland is worked in all the way around the wreath and the ends are tucked in, your wreath is done and ready for hanging!
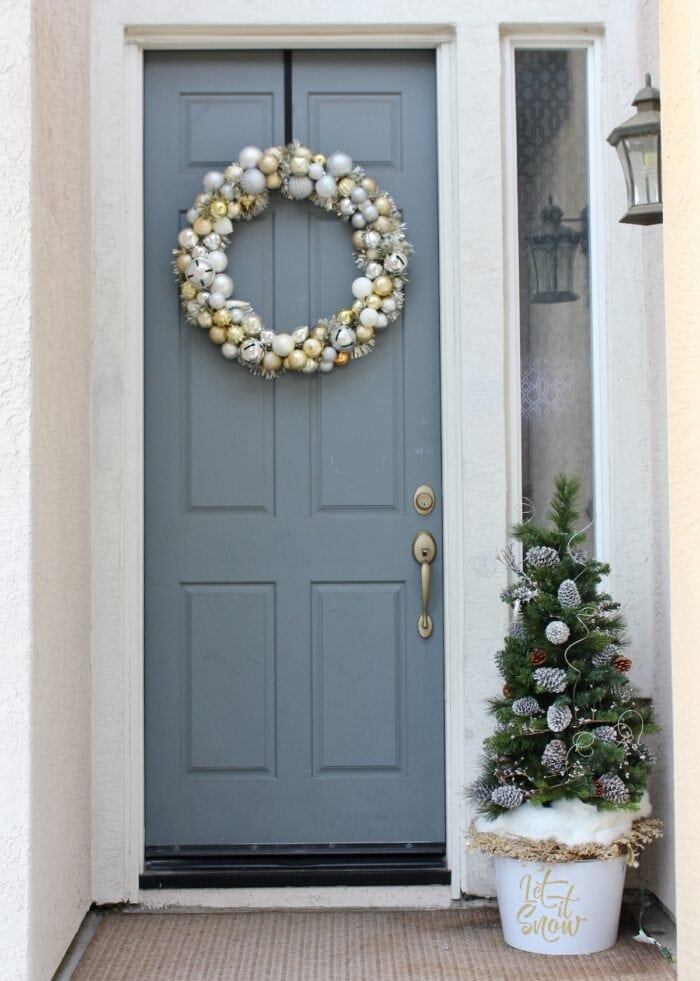
Step 7: Hang Your Wreath On Your Door!
I’ve used peel-and-stick hooks in the past to hold our wreaths; but I’ve found that intense sun can melt the adhesive (leaving my wreath on the ground). I now rely on over-the-door hangers…especially for ornament wreaths that tend to be heavier and can easily sustain damage if they were to fall down.
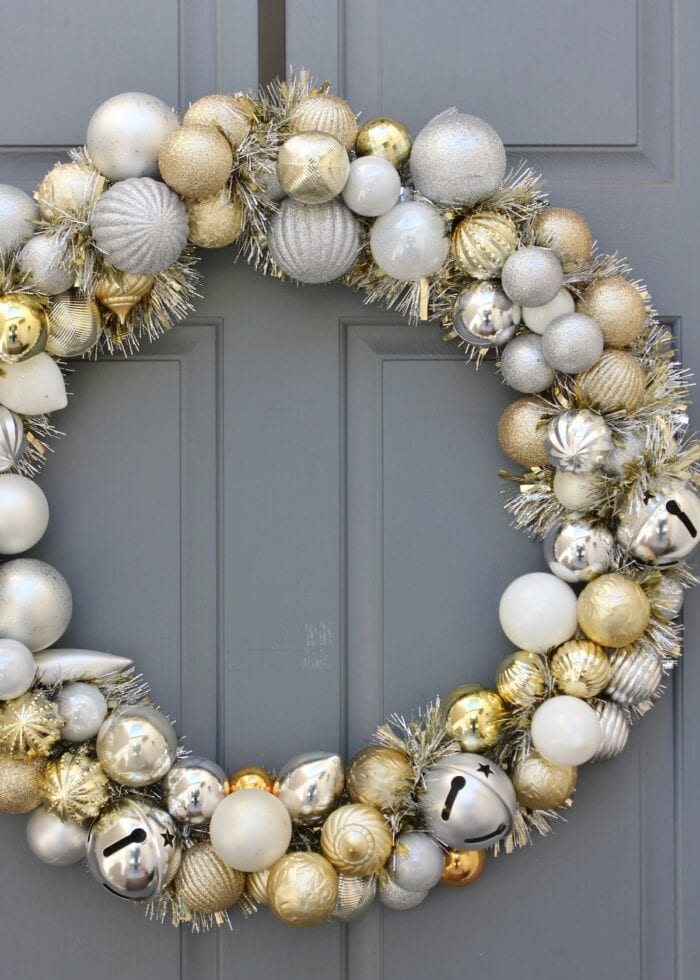
The 15-Minute DIY Ornament Wreath
I simply adore the All Ornament Wreath (shown above), but it does take more time (just about an hour) and ornaments to create a really full wreath.
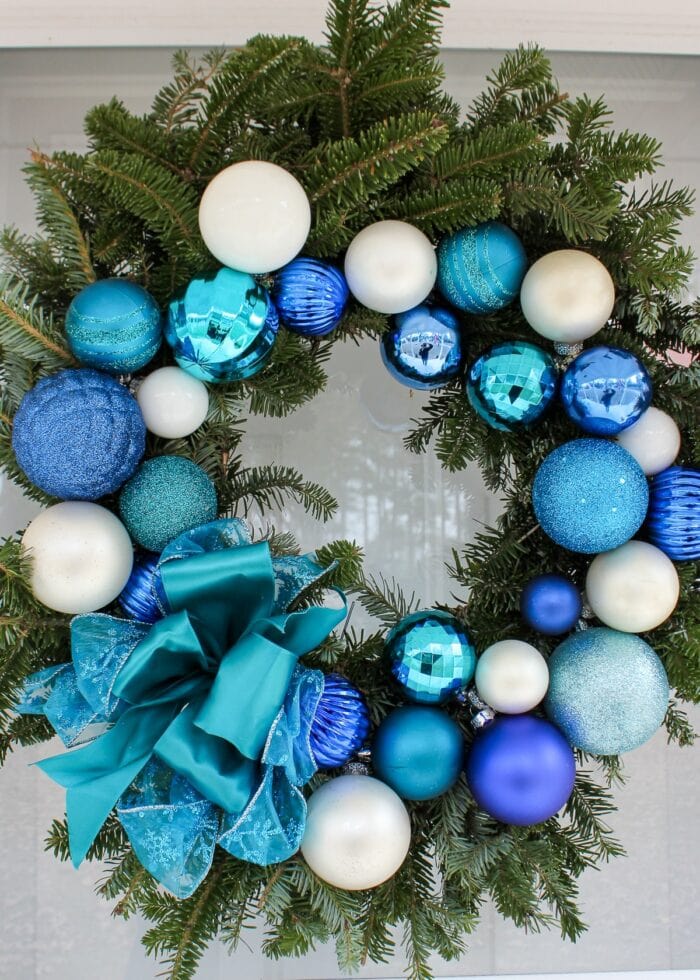
When I am in a hurry or want to add in some natural texture to our holiday display, I will use the same “cluster” technique but on a fresh pine wreath as my base (instead of the wire wreath form). This version requires less ornaments and comes together in just about 15 minutes! (Seriously!)

Step 1: Prep the Pine Wreath
Most Christmas tree farms (or any place that sells fresh trees) will likely also sell fresh pine wreaths. These wreaths usually come with some (wimpy) ornaments, pine cones, and a simple ribbon bow. Thankfully, they are all held on with simple wires and are easy to remove.
Step 2: Create the Ornament Cluster
Just like before, create an ornament “cluster” with 3 ornaments in different colors, shapes, and sizes. This time though, string them onto a longer floral wire (~15″) to reach all the way around the bulkier wreath.

With three ornaments strung onto the wire, pinch the wire together and twist it around itself several times to create a tight and sturdy cluster.
Step 3: Secure the Cluster to the Pine Wreath
Place the ornament cluster on top of the pine wreath and wrap the excess wire around to the back, twisting it tightly to secure the baubles in place.

Repeat with additional three-ornament clusters around the wreath, leaving about a 6″ gap for a bow.
Step 4: Add a Matching Bow
Purchase or make a bow with coordinating ribbon… (Need help making a bow? Check out this tutorial!)

…and then secure it to the front of the wreath with more floral wire (wrapped across the top of the bow and around to the back).

The contrast between the fresh pine needles, sparkly ornaments, and lush bow really create a visually interesting display! And truth be told…when I am short on decorating time, this is usually the way I go!


If you need a quick, easy, and oh-so-stunning wreath for your door or mantel, I really hope you give my “ornament cluster” method a try! Whether you make the all-ornament version or pair the baubles with a fresh pine base, I think you’ll love how easy making a DIY Ornament Wreath really is. I just know this is a method you’ll return to year after year!
Megan


16 Comments on “Quick & Easy DIY Ornament Wreath | 2 Methods”
Super cute!
I have stuff I put out, but instead if sun I have to worry about wet. And cold. It’s always something. But I can’t stand for a naked porch so there will always be something out there!
I love this idea and it really does seem super simple! Just might have to give it a try!
I saw this post and really wanted to try it. My biggest problem is that the metal part, where I string the wire through the ornament, keeps popping off when I attach the wire to the wreath. So the ornament falls off the wreath and just the metal hook part stays attached to the wire. Any ideas?
Hi Kristen!
That can happen, especially if you have the ornaments bunched really tightly. I’ve always used hot glue to secure the ornament back onto that metal fixture.
Hope that helps a bit!
Megan
Thank you for addressing this!!! I was having the same issues and I got really frustrated at my project. Now that I know we need to hot glue the ornament to the hook prior to wiring, I think that’s what I’ll do today. Thank you!!!!
I made a wreath and your instructions were perfect! Thank you!
i am not a crafter but i am trying to make the ball wreath. the bundles of balls keep moving behind the wire wreath. i can’t get them to stay tight.
what am i doing wrong? I am really trying to get this done for the holiday
HI MEGAN, I AM NOT CRAFTY AT ALL. I AM TRYING TO MAKE THE WREATH BUT MY BALL CLUSTERS KEEP MOVING AND SWINGING TO THE BAKSIDE OF THE WIRE WREATH. WHAT AM I DOING WRONG?
HOW DO I SOLVE THIS ISSUE?
Hi Margaret,
THanks for your comments, and I am sorry to hear you’re having trouble.
I’ve never really experienced what you’re describing so let me get a few clarifications from you. Are you assembling the wreath on a flat (table) surface? Do you have ALL the ornaments (all the sets) bunched tightly together? Are you twisting the floral wire really tight?
Typically, once you have ALL the ornaments in place, I can’t see how they would swing to the back. So maybe send me a picture and I can help you troubleshoot further.
Thanks,Megan
Thanks for the clever tutorial! Now I know what gift everybody’s getting for Christmas this year! LOL 😄
I’m having the same problem as Margaret…. The clusters keep swinging around to the back. Do you wrap the wire around the entire form or just a couple of the form rings?
Hi Annette!
Yes – you want to tie the wire (tighyl) around the ENTIRE wreath frame (all three/four wire circles). Once you get enough ornament bunches in place and everything is tight, they shouldn’t move at all!
Hope that helps!Megan
I’m not incredibly crafty but I had some old ball ornaments that I was going to throw away. I wanted to see if I could repurpose them instead and came across your tutorial.
I will say that I also had the issue at times with some of the balls wanting to slide to the back of the frame. I think maybe the clusters were not tight enough so the weight of the balls was causing the wire to slide one way. Because I noticed the clusters that were really tight didn’t seem to have that issue.
I did manage to get them to stay and then wound some garland in the gaps and that made it very sturdy.
For a first try I think it’s lovely – and only cost me $15 to make. I’ll definitely be making more!
Thank you so much for this post! I have an el cheapo faux pine wreath I bought last year that is a good size, but I wanted to find a way to make it look nicer so I could reuse it this year rather than buying an expensive already decorated one. I had considered adding ornaments but wasn’t quite sure of the best way to do it. I like the results of your method better than when I tried just hot gluing the ornaments. I just couldn’t get them to stick right with the hot glue. This wire cluster method was much faster, easier, and doesn’t look like something I made (which means it actually looks good!).
Hi Do you use one container of ornaments per wreath? I’d like to do this as a group craft activity, so need an idea of how many ornaments I’ll need. Thanks!
The ornaments kept flopping around, so ultimately I used the garland on the wire frame first to create some fuller structure. Also, I found that pipe cleaners rather than wire worked best bc the fur on the pipe cleaner added texture to stabilize the ornaments.