How to Make a Family Yearbook – The (Really) Easy Way!
I may be crafty, but I learned years ago that scrapbooking was not my gift. I think I got about 4 pages into our wedding album before quitting, and about 2 pages in Henry’s baby book (I didn’t even attempt with the other two boys!) But for a while now, I’ve really, really loved the idea of making a Family Yearbook: a single, printed photo book that captures our favorite family memories from the year. But as much as I wanted to make this one of our family traditions, the process always seemed so complicated, tedious, and time-consuming. Nonetheless, I finally gave this project a go; and boy was I pleasantly surprised! Not only was the process fairly simply and quick, but our books have already become treasured possessions (for all of us!). Let me break down my really easy method for making Family Yearbooks, should you be wanting to give this idea a try too!
Why Make Family Yearbooks?
In recent years, it’s occurred to me that long-gone are the days of our kids finding troves of old family photographs in boxes in the basement. More than likely, they’ll happen upon a box of dated and powerless smart devices, and will be lucky to even find the correct cord to power one up! Once they do, they’ll have to wade through thousands and thousands of screenshots and memes and 300 versions of the same shot just to find the true family gems.
The concept of the Family Yearbook puts (good!) physical photographs in our hands and on our shelves, but in a way that is modern, compact, and sustainable while still meaningful, thoughtful, and personal. It’s a great way to organize and print the very best of the photos on your phone, and easily gift your family memories to be paged through at holidays, visits, and other special occasions.
Although I loved the concept of Family Yearbooks, the idea of sorting through the photos on my phone and formatting everything together simply overwhelmed me. Then last year…when I think we were all trying to figure out creative ways to capture and remember such a unique time in history…I decided to just give it a try. After all…I could always abandon the project if it got too tedious.
Spoiler: It was quicker and easier than I ever imagined!
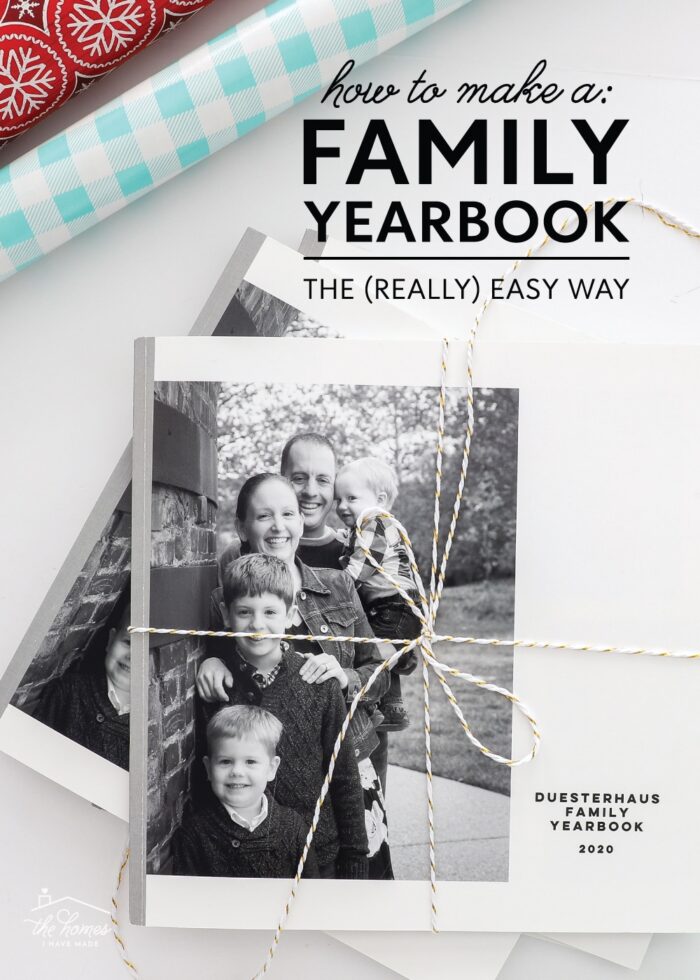
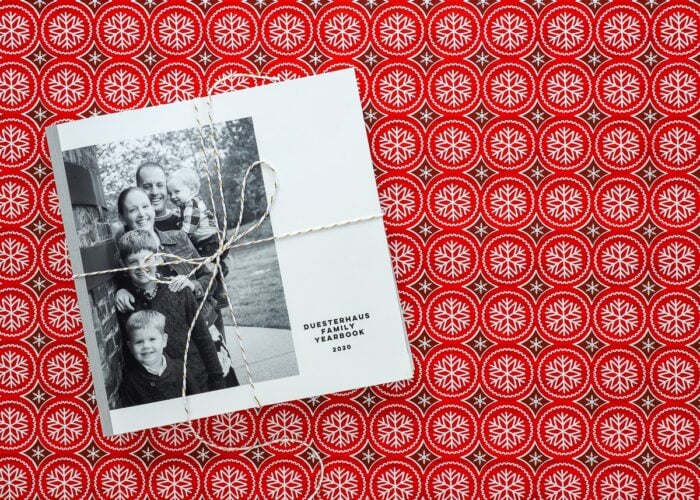
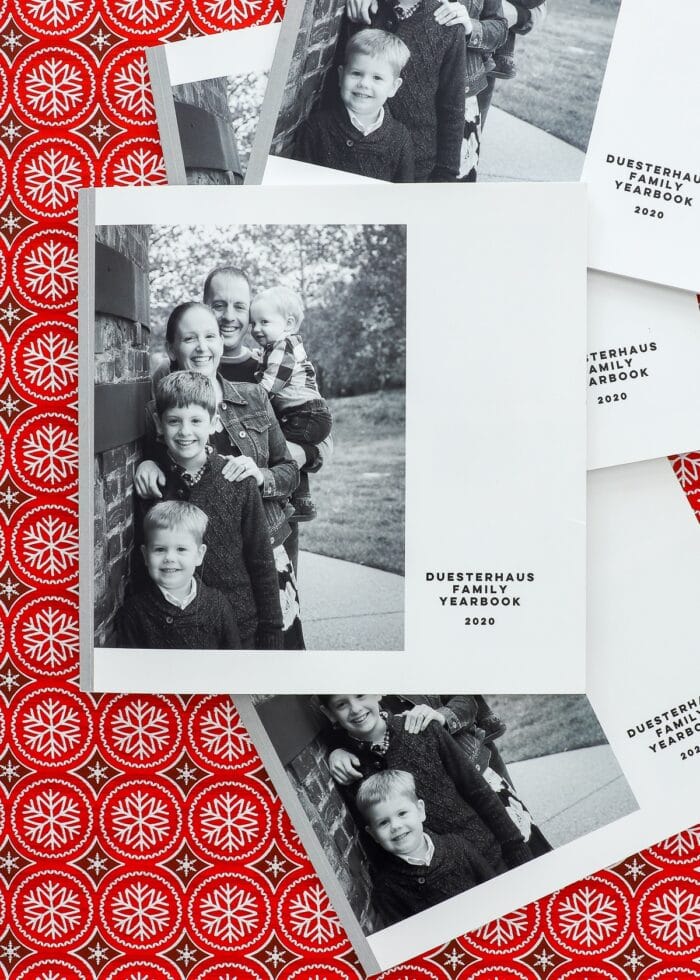
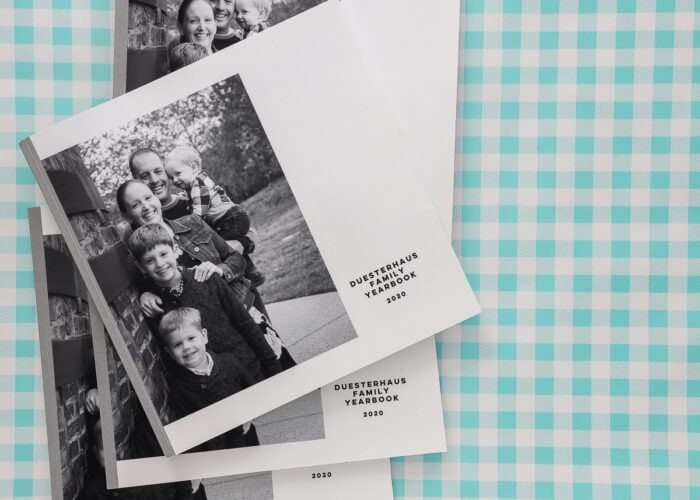
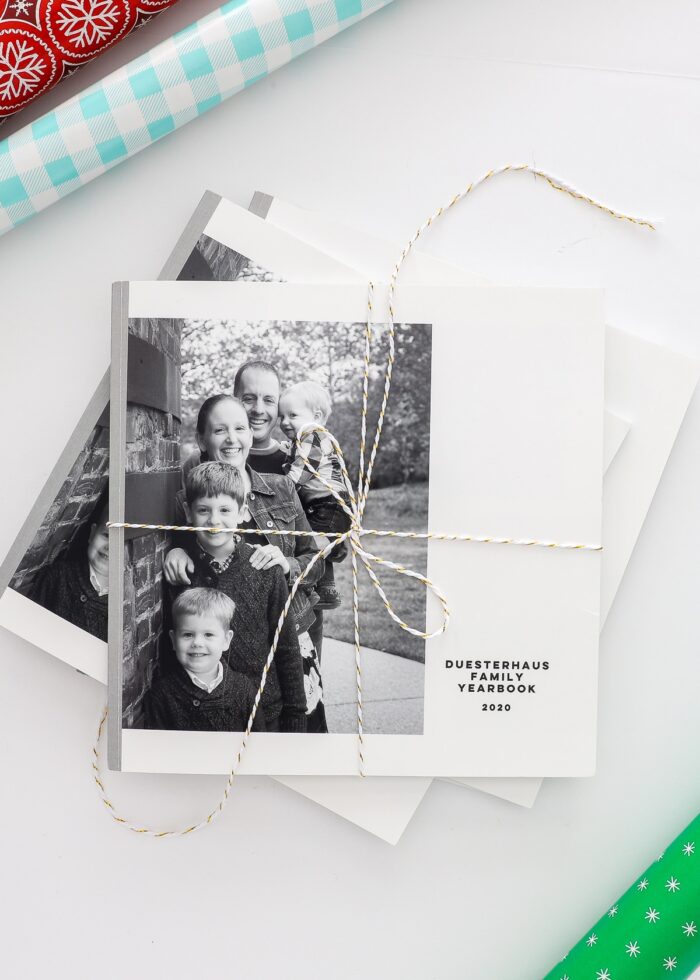
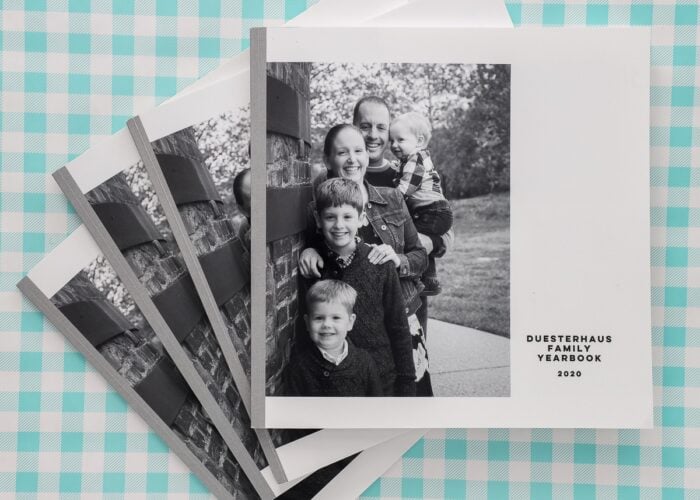
My original plan was to make a single Family Yearbook every year. But then it occurred to me: who gets the books once Greg and I are gone? So instead…I printed 4 of the exact same book. Each boy will build their own collection over the years, and Greg and I will have our own set. It’s certainly an investment, but based on how much our boys have loved looking through these books, I consider it well worth it.
I’m going to break down exactly how I made these books from start to finish (and spill lots of handy tips!), so you too feel ready and confident to give this fun project a try!
Why Shutterfly?
These days, there are TONs of photo book apps available. And especially during the holiday season, you’ll see all sorts of companies featuring countless options at a wide range of price points.
I ultimately made our Family Yearbooks with Shutterfly for a few reasons:
- I already had an account and am really comfortable with how their platform works.
- They offer regular promotions and sales, which can really make a difference when you’re making books with lots of pictures.
- And most importantly: they’ve been around for ages, which means they’ll likely be around for a good long time to come (fingers crossed!) If you’re planning on making a collection of Family Yearbooks for years, picking an established photo printing company will decrease the likelihood you’ll have to find a new printer later down the road!
All that said, other companies you might want to look into include: Artifact Uprising | MixBook | and Chatbooks
Timing Your Family Yearbook
Family photo books are a super popular Christmas gift, and for good reason! What a fun time to reflect on the entire year gone by. But if you gift these books for Christmas, it can be tricky to actually include Christmas pictures on the pages! One way to avoid this is to make these books well after the year is over, but I have another trick!
For our 2020 book, I covered Christmas 2019 through Thanksgiving 2020. I had 99% of the book done and ready to go before Thanksgiving. Once Thanksgiving was over, I slid in a few final pictures and submitted my order. I had my books in plenty of time for Christmas!
FUN FACT! While I did indeed order and receive our books in plenty of time for Christmas, I completely forgot about them! It was actually on New Year’s Eve when I jumped up and said “Oh my gosh – I have one more Christmas present for you boys!” It turned out to be such a happy accident. What better way to wait for midnight of the coming year than to look through pictures of the previous one. I now plan to give our boys their books every New Year’s Eve!
Family Year Book Organization
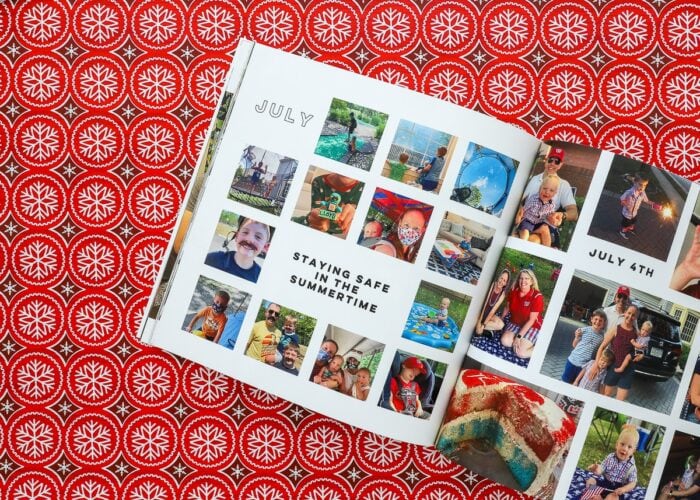
Photo album projects are often over-complicated. I, for one, overthink and overanalyze how everything should look…but if there’s one thing I learned from this project, it’s to keep it as simple as possible (if you want it to get done). Don’t agonize over how best to present every family memory: simply go month-by-month.
While there will certainly be specific events you want to highlight in more detail than a single photo on a monthly spread, going chronologically will help you methodically work through your photos, keep you on task, and condense the book down to a reasonable number of pages!
Alright…lets dive into exactly how to pull your Family Yearbooks together!
Step 1. Find & Organize Your Photos
The very first step in making a Family Yearbook is likely the one that feels the most overwhelming: finding and organizing all your photos. But guess what?! I’ve got a few tips and tricks to make this so much easier!
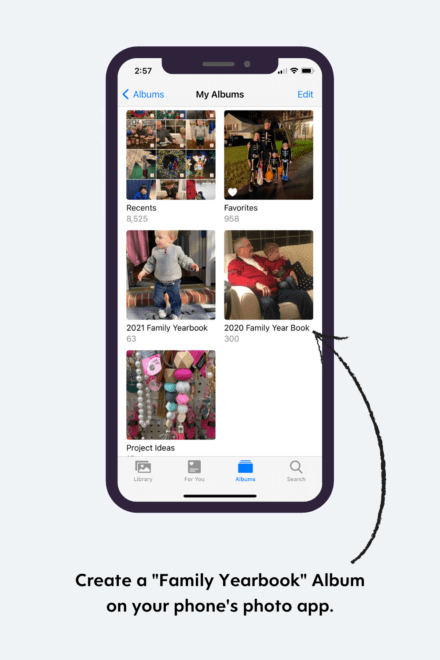
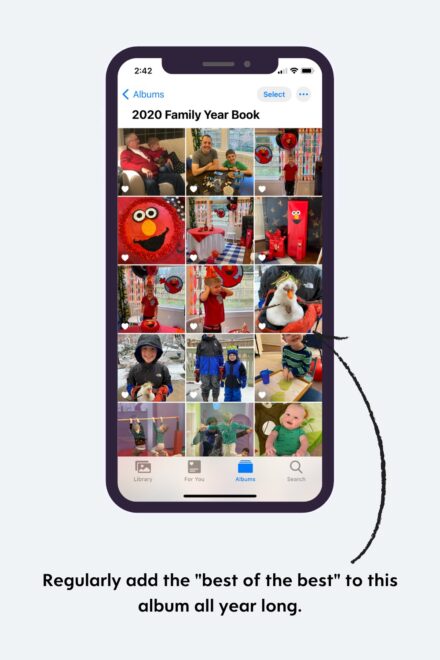
Create a Dedicated Album on Your Phone
These days, a vast majority of the photos we take are on our phones. As such, the best place to organize photos is right on the phone itself (I use iPhone Photos). No matter what photo storage app you use, I suggest making a dedicated album for your Family Yearbook. This can be the same album year after year, or you can create a fresh one every round. As you take pictures you love, be diligent to save/tag them for that specific Family Yearbook album.
Cull Photos Regularly
If your phone is jam-packed with photos, and the mere idea of wading through every single one is enough to shut this entire project down, here are some things that can help:
- Every time you take a bunch of pictures, spend an extra 2-3 minutes identifying the very best ones and save them to the Family Yearbook album.
- Pick a dedicated day each month to go through that month’s photos and weed out the good/bad ones. (The 1st is always a good one because it’s easy to remember!)
- Use your downtime at sports practices, long car rides, or in the carpool line to wade through photos. (This is how I do it!)
- Pick a day and get it done. If the “little at a time” approach just doesn’t work for you, pick a day and make it your project until it’s done!
Check Text Strings and Social Media
When you’re gathering up photos for your Family Yearbook, don’t forget to check your text strings and social media accounts like Facebook and Instagram. Oftentimes, friends or family members will send along and/or tag great photos of you or your family that you’ll likely want to include. If you’re always the one taking photos, this is a great way to make sure you’re in some of them!
Include Formal Photos
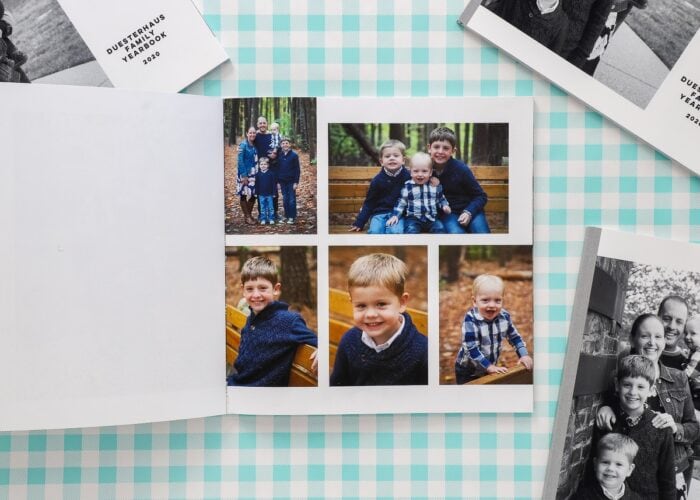
You don’t have to only rely on only snaps from your phone. If you did any family photo shoots or other formal pictures throughout the year, be sure to save digital copies to your Family Yearbook album on your phone so they can be included too.
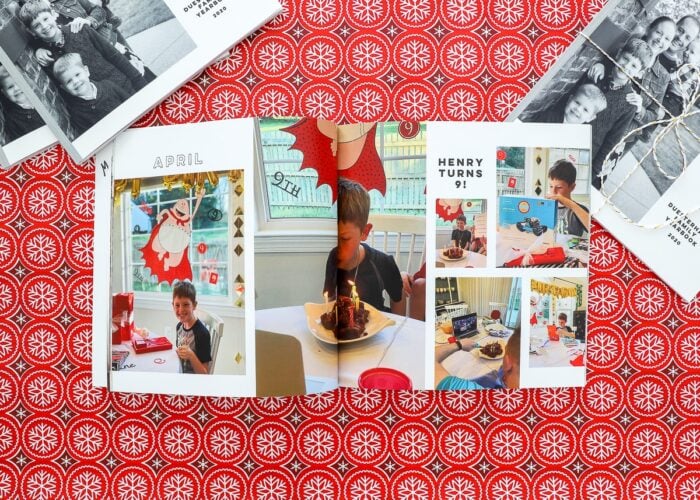
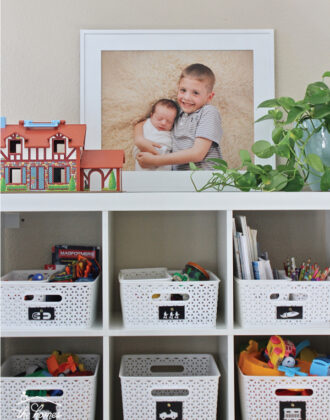
I placed our yearly family photos on the first page so we always have these images printed and preserved too!
Crosscheck with Your Planner
Finally, if you (like me) often forget to take photos, it can be helpful to review your planner or calendar from the past year. This will alert you to events that you didn’t capture on your own phone but you’ll want to include if possible.
Want to save this post?
Step 2: Upload Photos to the Shutterfly App
NOTE: I want to highlight that I recommend using BOTH the Shutterfly App and Shutterfly.com (on a computer) for this project. While the Shutterfly App is ideal for uploading and organizing your photos; the desktop version is much better for formatting the actual book.
In order to get your photos from your phone into Shutterfly, I highly recommend using the Shutterfly App exactly as follows:
- Download the Shutterfly App to your phone and create an account if needed.
- Click “Upload” along the bottom toolbar.
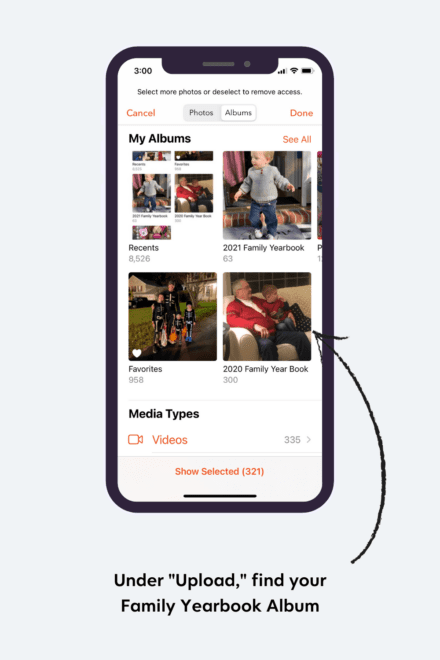
- Next to Device Photos, click “Access More Photos.”
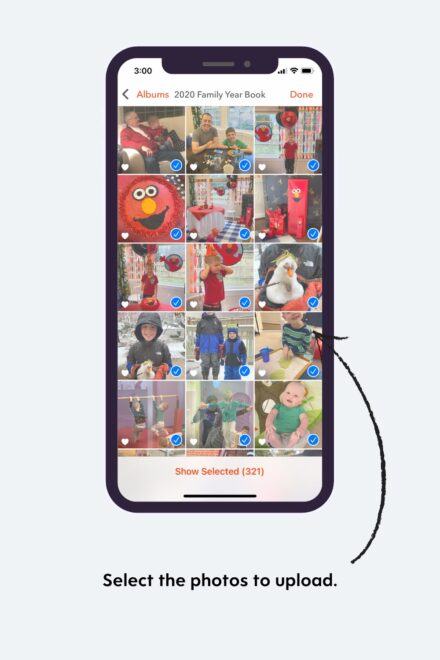
- Select “Albums,” and then find your dedicate Family Yearbook Album on your phone.
- Select all the photos from that album and click “Done.”
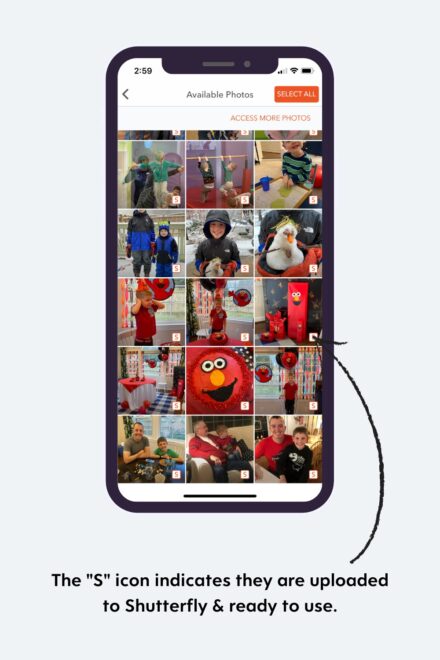
- Navigate to “Available Photos.” Click the orange “Select All” button, and then click “Upload.
- All photos uploaded to Shutterfly (and therefor ready to use in your Family Yearbook) will have an “S” icon.
*Go ahead and upload your entire Family Yearbook Album at one time; don’t worry about organizing them beyond that!
Step 3: Build Your Family Yearbook
TIP! At this point, I recommend switching to your computer (if you have one), as the book formatting is much easier on a larger screen and with a mouse.
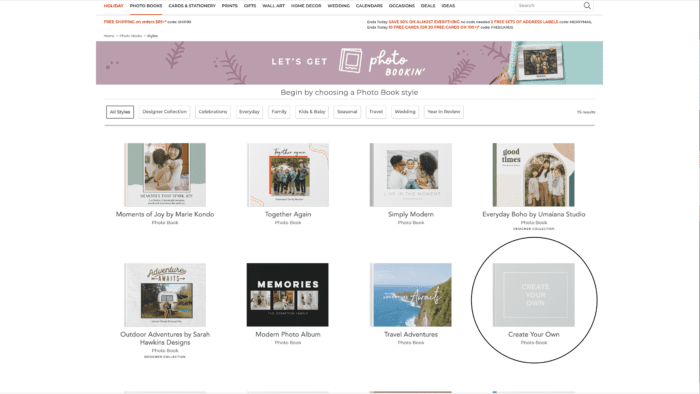
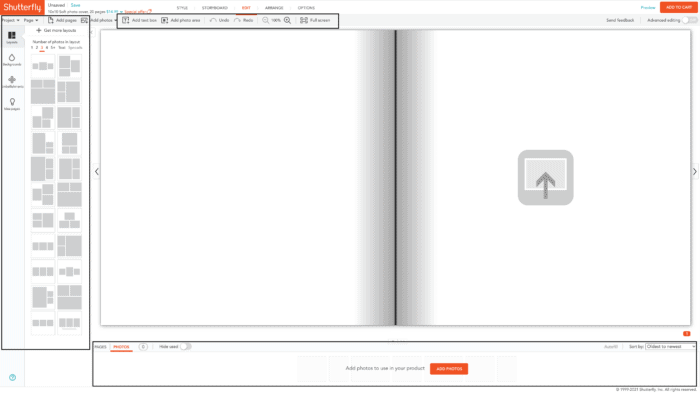
Navigate to “Photo Books” on Shutterfly.com. There are lots of book layouts and styles available, but I recommend picking “Create Your Own” so that you have full control over how everything looks.
Select Your Family Yearbook Layout
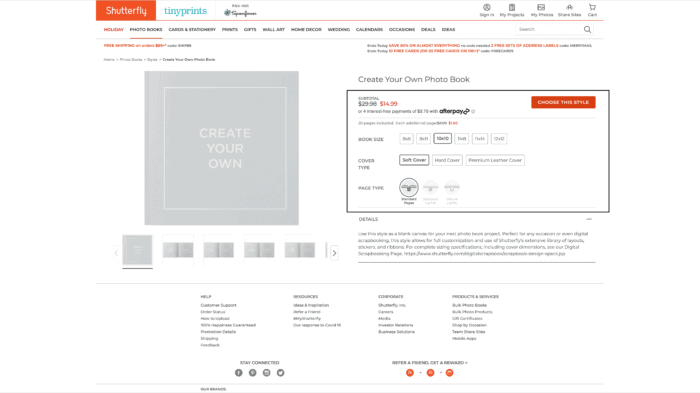
You will immediately be prompted to make a variety of selections for your book, including size, cover type, etc. These choices will directly influence the price, so I suggest finding a good balance between how you want your book to look and how much you want to spend.
Once you proceed, you’ll be forwarded to an impressive and VERY easy-to-use drag-and-drop page builder. Every page can be populated with a wide variety of layouts (with just a simple click!); you can also add text, background colors, and more…all from this main screen.
NOTE: Honestly, this layout builder is so darn easy to use…which is why I recommend going with “Create Your Own” rather than pre-filled pages. In a few clicks, you can find just the right layout and add any elements you want…no design skills necessary!
Add Your Photos
Here is my absolute favorite thing about Shutterfly’s album builder:
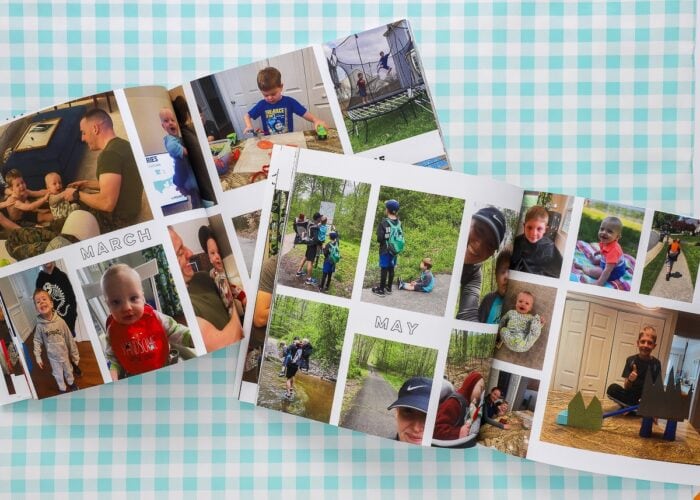
I was honestly dreading have to sort and organize my photos to figure out what goes where. But the best thing about using our phones to take most of our photos is that every single one is date stamped. And Shutterfly (and other programs too, I would imagine), automatically sorts your photos by date.
This means when you go to “Add Photos” to your Family Yearbook project, you can select photos from a specific month…
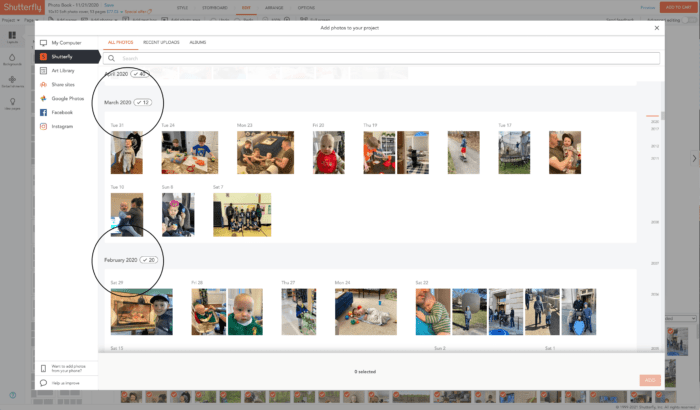
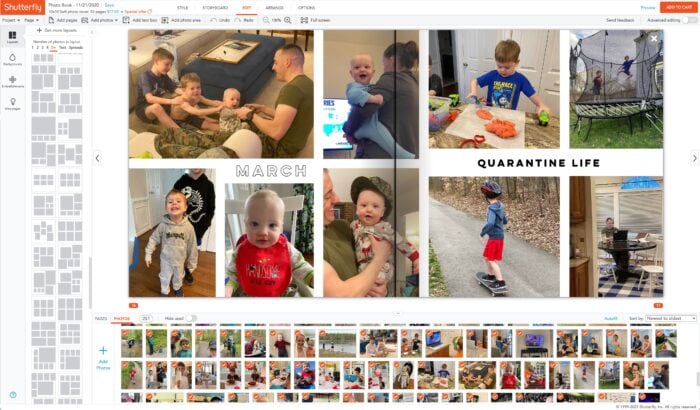
This makes it SO easy (and fast) to simply move one month at a time and make sure everything ends up in chronological order. My workflow looked like this:
- New page = new month.
- Add Photos > pick all photos from the right month.
- Select a layout that accommodates the number of photos for that month.
- Drag and drop that month’s photos into the image placeholders.
- Repeat for all 12 months.
TIP! If you do NOT chose “lay flat pages” for your book (where the album will open flat), I do NOT recommend using the photo layouts that span the page. A lot of the photo gets lost in the spine, resulting in an awkward photo display!
Add Text & Embellishments
Only once you have all your photos laid out do I recommend going back and adding in text and other design elements. Any image can easily be re-sized to fit words, captions, and anything else you want to add.
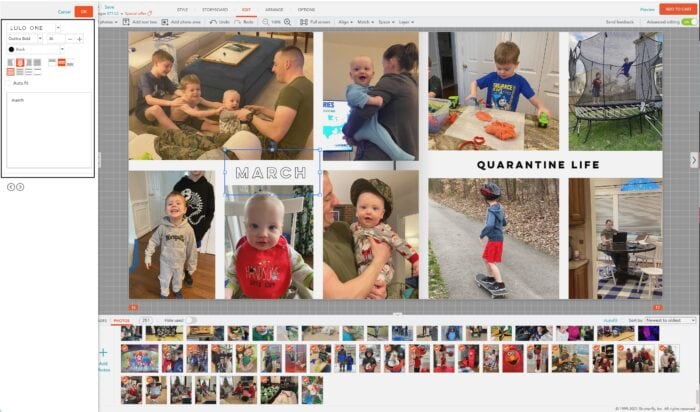
TIP! You’ll notice all my text is short and sweet, and I didn’t include any decorative elements. Again, my primarily goal was to actually finish this project, so I chose to keep it as simple as possible. I knew if I tried adding in too many stories, dates, or anecdotes, I’d quickly get bogged down. Try to keep things easy so you can keep moving forward!
Step 4: Order
Once you are satisfied with your album, all that’s left to do is order your copy (or copies)! I do recommend playing with all the different specifications (e.g., album covers, paper weight, etc) and waiting for really good coupons to get the best price possible.
Step 5: Repeat Year After Year
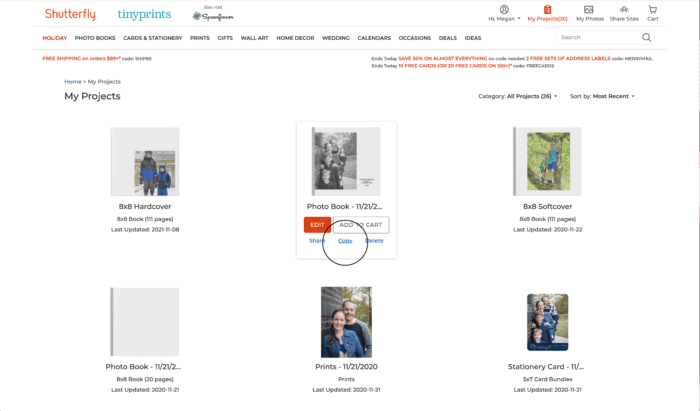
If you look closely, all of these pictures and screenshots are from our 2020 Family Yearbook. But here’s one final thing I’m pretty excited about: to make our 2021 book, I can simply Copy last year’s book, delete out the photos, and start fresh. Although I may have to adjust some layouts and text here and there, I love that I can have the same simple design year after year without much extra effort.
If you just can’t fathom such a big project every year, take heart that you’ll likely just need to design/format the book the first time. Then, it’s just a matter of staying on top of your photos and remembering to fill the book each year!
I will admit, I embarked on this project more for me than the boys. Sure, I figured they’d appreciate them years down the road, but I never expected how much they’d look at them now. They LOOOOOVE pulling these books out and looking through them…which definitely makes the time and cost well worth it.
I’m actually pretty proud of myself that I finally gave this project a try after years of putting it off. Since I’ve been able to simmer the process down to really simple, manageable steps, I have every confience I’ll be able to keep this tradition alive for years to come!
Megan

11 Comments on “How to Make a Family Yearbook – The (Really) Easy Way!”
Thank you Megan! I’ve been looking forward to this post since you mentioned it last week! This is something that has also been on my to-do list for many years (married 11 years, my oldest is 7). Thank you for really breaking it down! What I have successfully done since my oldest was born is create a yearly calendar for my parents and us, also using Shutterfly. Their calendar creator is even easier as it allows you to drag photos into specific months and then it takes care of coming up with the layout! Super easy! I keep hoping they do something similar for books, but your method of adding photos one month at a time does make it easier. Great idea! It is also good to remember that ‘simple and done’ is better than ‘fancy and not done’ when I feel that I need to use fancy colored pages, fancy text, stickers and captions (and then get overwhelmed and quit). Your clean and simple version looks great!! And MOST important, done! This will definitely be going on next year’s powersheets, using your method!
Yes, Kristin!!!!! I’m so happy that message came across. As you probably well know, I have a tendency to make projects bigger and more complicated than they need to be. I really had to force myself to keep this as simple as possible or I knew it would get derailed.
I’m really thrilled to hear you found this helpful, and you’ll definitely have to keep me posted if you give it a try!~Megan
Thank you for posting on this topic…. My mom’s an avid scrapbooker, but I don’t have any of the gear nor the patience! My oldest is 6 so I have some catching up to do, but your tips make this feel so doable. Many thanks!!
So glad you found this helpful Ashley!
My big boy is 10…and this is the first book he got. And you better bet I agonized if I should start now or start back on the year he was born. I knew going back would hold me up and I figured getting started now was better than not getting started at all! In reality, I don’t think it would be all that hard or time consuming to go back, but I don’t want it to keep me from moving forward either. Hopefully someday, I’ll have the time to revisit those early years!
You’ll have to let me know if you ever give this a try!Megan
I love scrapbooking and I LOVE everything about this post! I did want to give you my opinion on the text. I totally get where you are coming from about moving along and getting the book FINISHED, because done is better than perfect! However, please consider putting in even minimal details somewhere on your pages with full names of people who appear, and ages of everyone in the family. These WILL be treasure troves for a future family member who loves history and wants to know these people! If you don’t want to type in a lot of the stories, consider leaving some blank space where you can add details in your own handwriting later – another beautiful detail that makes a family keepsake really valuable.
Hi Melissa!
This is such a great point! While names and dates all still really fresh for me right now, it didn’t occur to me that we won’t remember certain things years down the road! I will definitely be keeping this in mind as I put our books together this year.
Thanks for your “pro” insights!Megan
You are so right, Melissa! I commented below about the books I made, and I don’t do too much commentary/journaling, but I have some. At your suggestion, I will go back and handwrite some detail in there (there are pens that write on those slick photobook pages without smudging). It could be a fun activity to do over the Christmas holiday!
This is a fantastic post! I have made many photobooks through Shutterfly over the years and use a very similar workflow. I started when my oldest was a baby (he’s 15 now). I was trying to do a family year book, as well as individual year books. Right now, my main focus is making sure each kid has a book devoted to them each year. For example, from birthday last year to birthday this year, they each get a book. I do a spread of two pages for each month by picking out the top 8-10 pictures of each kid. I figure I can hand them a stack of books when they graduate from high school! I have three children and I am caught up to 2020.
Now my family year books are a different story. I haven’t done one since 2008, I think? I really should get on them. I made the family books into a much bigger project than needed, so using your method (along with mine!) I should just pare down and get it done! Otherwise, when these kids leave, there will be no physical pictures to look at!
What a great idea! I also take pictures of favorite art work to include in the books.
I absolutely LOVE all of these ideas – I am so overwhelmed with this part of parenting that I haven’t done anything. I just had a question about using shutterfly – I noticed they have a 111 page max for books – so you just have to limit pictures you add each year and for each month I would imagine? I’m sure I can dial it down to that many, but am not sure how possible that truly is with a larger family – thanks for your time and help.
I’ve been doing yearly photo albums for at least 10 years, but I have not made a dedicated album on my phone for the yearly pictures! That’s a great tip, and will make the process so much easier!