Easy Paper Star Ornaments to Decorate Your Christmas Tree
Making homemade ornaments has to be one of my favorite Christmas crafts to do this time of year. Whether you make them with fabric, wood, paper, or paint, there are just so many fun and easy options for decorating your tree the DIY way! Last year, I made these gorgeous paper star ornaments for our boys’ mini Christmas trees. Not only were they easy to make with the help of my Cricut machine, but they truly have a stunning effect once hung on Christmas tree branches. Let me show you how these come together!

These paper star decorations are an example of paper folding at its finest! Each one is just a single solid cut of paper that comes together to create the modern facetted design. The included holes make them ideal for turning into ornaments or stringing onto a garland.

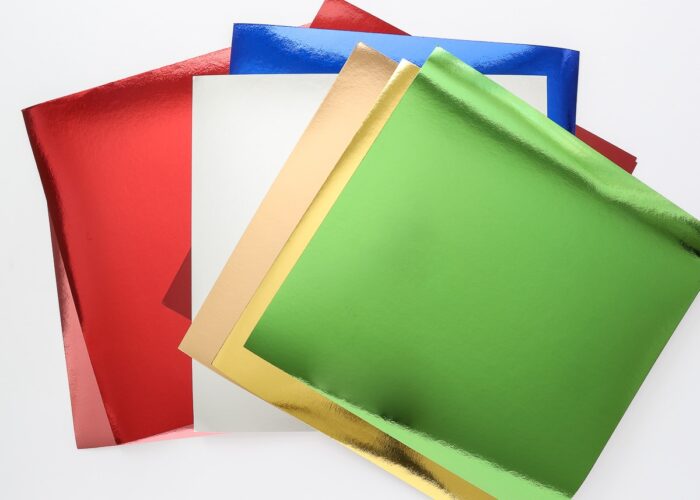
What makes these ornaments so gorgeous (and sturdy!) is that they are made with foil Kraft board. This material is slightly thicker/firmer than posterboard, and the foil coating is near reflective. Foil Kraft Board comes in a wide variety of colors including metallics and bright colors.
When folded into the modern star shape, the result is a paper ornament that shines from every angle but is still sturdy enough to be packed away every year!
Although I made my paper star ornaments with a Cricut machine, you can actually make these with any e-cutter you have (e.g., Silhouette, Scan-n-Cut) or even just a pair of scissors and a bone folder (if you have a lot of patience!). Let me break it all down for you!
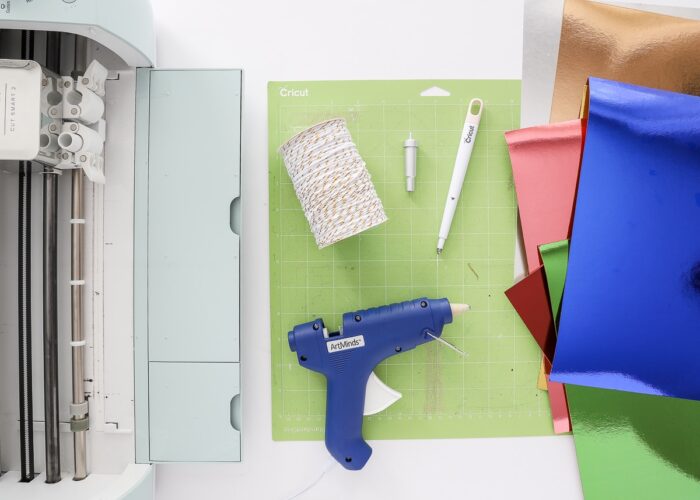
Supplies Needed
Here is what you need to make these paper star ornaments:
- “Star Shaped Box” template from TemplateMaker.nl – you can download this template for free in any format that works for you (e.g., PDF, SVG, etc).
- Cricut Machine – both the Cricut Maker and Cricut Explore models will work for this project. The Cricut Joy cannot be used for this project since it doesn’t support the Scoring function.
- Fine-Point Blade – comes with any Cricut machine
- Scoring Tool (Cricut Explore models) or Scoring Wheel (Cricut Maker models)
- Standard Grip Mat
- Foil Kraft Board in your preferred colors – metals | primary colors | neons | pastels
- Metallic String
- Glue Gun with Glue Sticks
TIP! If you have a choice of Cricut machines, I recommend using a Cricut Explore because you can load the Scoring Tool and Fine-Point Blade at the same time, making cutting/scoring this project much more efficient (which is really helpful if you’re making a lot of ornaments). You can most certainly make this project on a Maker model, but it will require swapping the Scoring Wheel and Fine-Point Blade between operations which can be slightly annoying when mass producing.
If You Don’t Have a Cricut Machine
Although this tutorial will go in-depth on how to make these ornaments with a Cricut machine (or other e-cutter), you CAN make these same ornaments with a pair of scissors and a bone folder (although, it will take a fair bit of time and patience!). Here’s how:
- Print the template (linked below in Step 1) onto cardstock and cut out with a scissors.
- Trace the template onto the back of a sheet of Kraft board with a pencil and cut out with a scissors.
- Use a ruler and bone folder to create the score lines in accordance with the template.
- Jump down to Step 4 to see how to assemble your cut and scored paper star!
Step 1: Download the Paper Star Ornament Template
Start by visiting TemplateMaker.nl and downloading the FREE “Star Box” template.
- If you are making these by hand, download the PDF file.
- If you are making these with an e-cutter, download the SVG or Cricut file.
Step 2: Upload the Template to Cricut Design Space
Upload
In order to cut the paper stars out with a Cricut machine, you will first need to upload the template into Cricut Design Space. If you need help with the upload process, see my tutorial here: How to Upload Images Into Cricut Design Space.
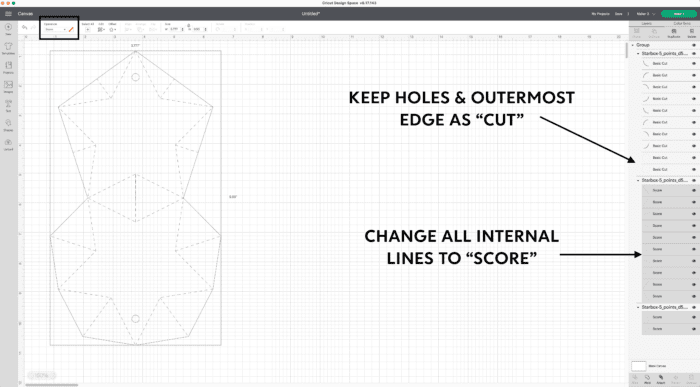
Adjust Operations for Interior Lines
Once uploaded, place the star template onto a blank canvas. When you do this, it’s important to note that every single line will automatically be designated as “Cut.” You will need to change this in order for your ornaments to turn out right!
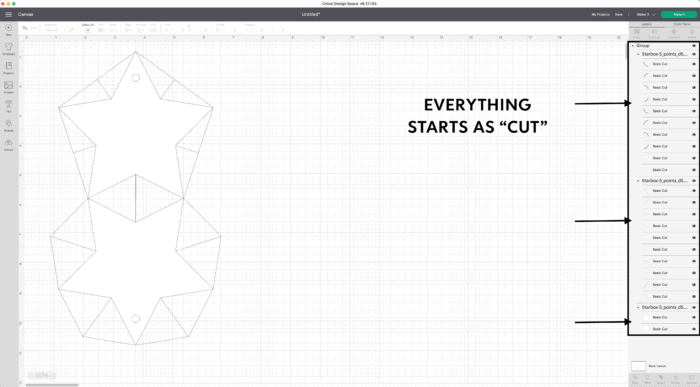
As you click on different lines of the template in the right-hand Layers Panel, you will get a sense of what line is located where.
For this paper star ornament to come out correctly, you will need to keep the outermost boundary lines as “Cut,” but change all the interior lines to “Score.” Use my screenshot below to help you.
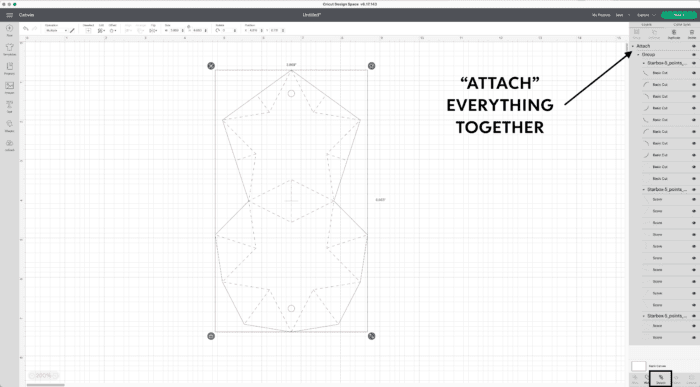
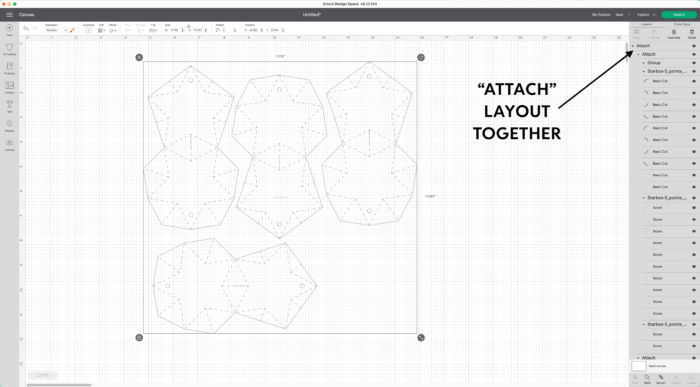
Attach
Once you get all the lines designated as the correct operation, select the entire image and click “Attach” in the bottom right-hand toolbar. Learn why here: Everything You Need to Know About Attach.
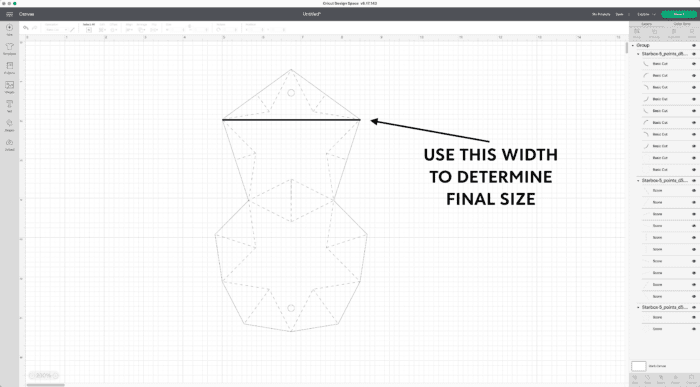
Re-Size
Before you send your ornament to cut, you will want to adjust the size so it comes out exactly as you want it. Do not use the entire template width. Rather, use the interior width of the smaller star to determine your final size. Since I was making these ornaments for mini trees, I set my finished width to 3.5.”
TIP! If you’re not sure how big you want your ornaments, I recommend making a few with scrap paper to see how big they turn out once folded up.
Set Cutting Layout
Lately, Cricut Design Space has been…ahem…stubborn in letting you decide what gets cut where on your mat. So to ensure you can cut as many ornaments at one time as possible, format them first on the canvas before sending them to cut.
To do this:
- Place an 11.5” square on your canvas (this represents the available cut space on a 12×12” mat)
- Duplicate the star template and rotate/arrange as many as you can to fit within the 11.5” square. In my case, I could fit 4.
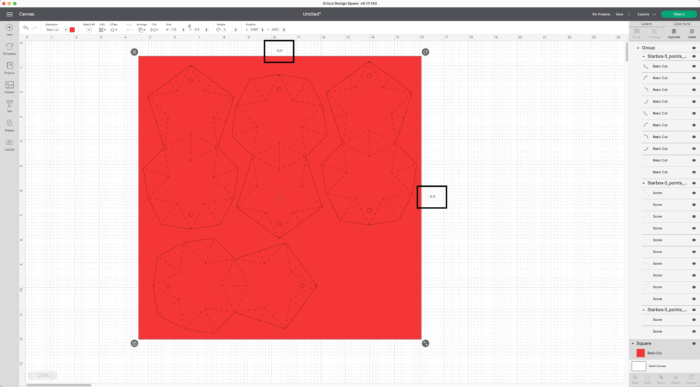
Once you are satisfied with your layout, delete/hide the large square, and attach all your star templates together.
When you click the green “Make It” button, you’ll notice your templates are in the exact layout as you designed on your canvas.

Step 3: Cut Out the Paper Star Ornaments
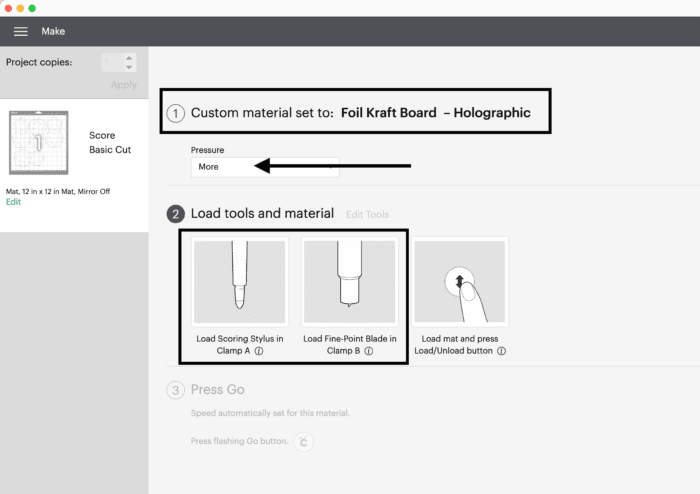
On the final cut screen in Cricut Design Space, select Foil Kraft Board as your material. I also recommend switching the Pressure setting to “More” to ensure the thicker material gets cut all the way through. Finally, note which tools it tells you to load when (as this will change based on what machine you are using).
Want to save this post?
Next, secure a single sheet of Foil Kraft Board to a (very sticky) Standard Grip Mat.
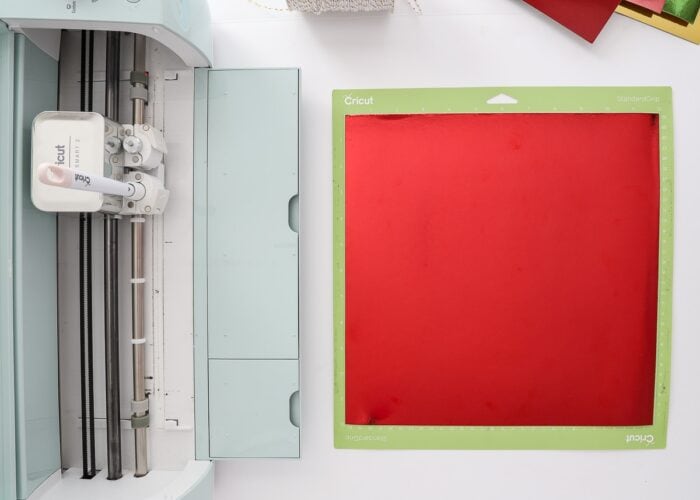
Then ensure you have the correct tools loaded into the correct clamps, as shown below (or as designated on the final cut screen within Cricut Design Space).
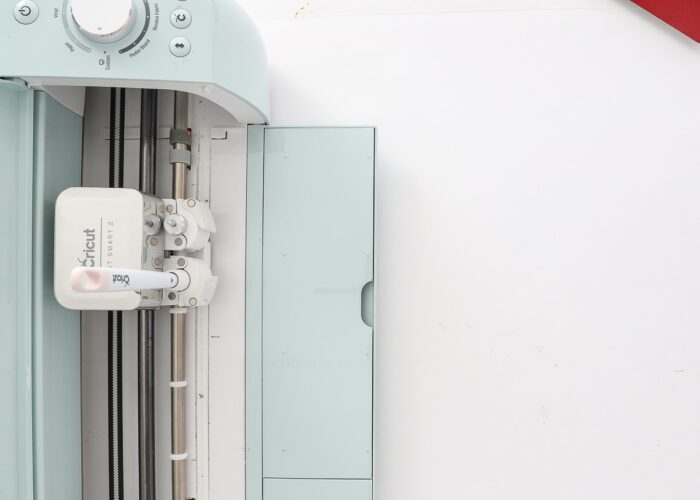
Load the mat into your Cricut machine and allow it to run both the Score and Cut operations for your paper stars.
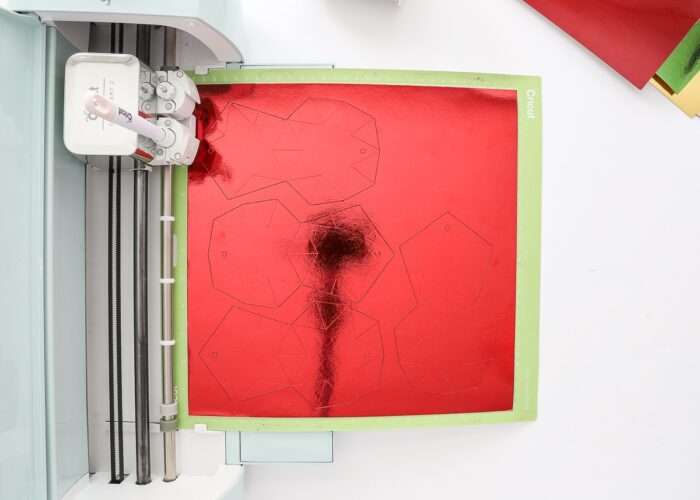
TIP! Before unloading the mat from the machine, gently lift up a corner of material to ensure the project cut all the way through. If your cuts are not clean, re-run the project before unloading by pushing the Cricut/Go button one more time. You should be able to pull off the excess paper around each template cleanly without much effort!
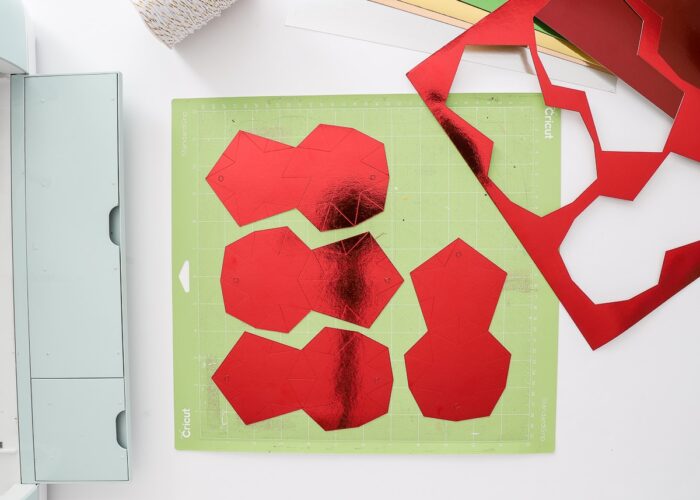
Step 4: Assemble the Paper Star Ornaments
To assemble your cut templates into 3D stars, you will need a glue gun (with lots of glue sticks) and some metallic twine.
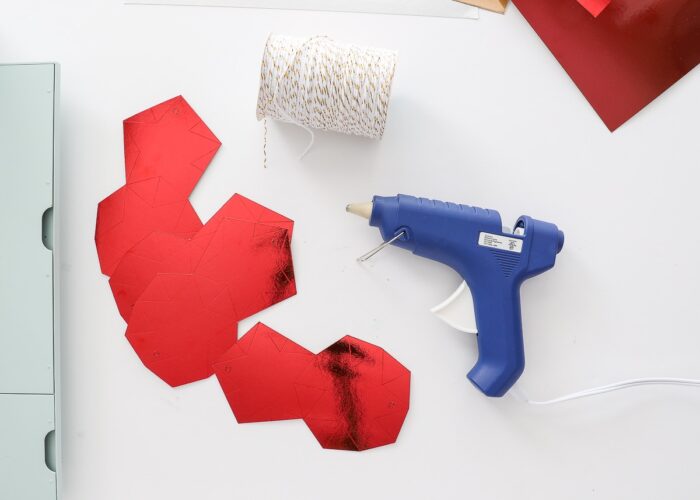
Fold Up Ornament
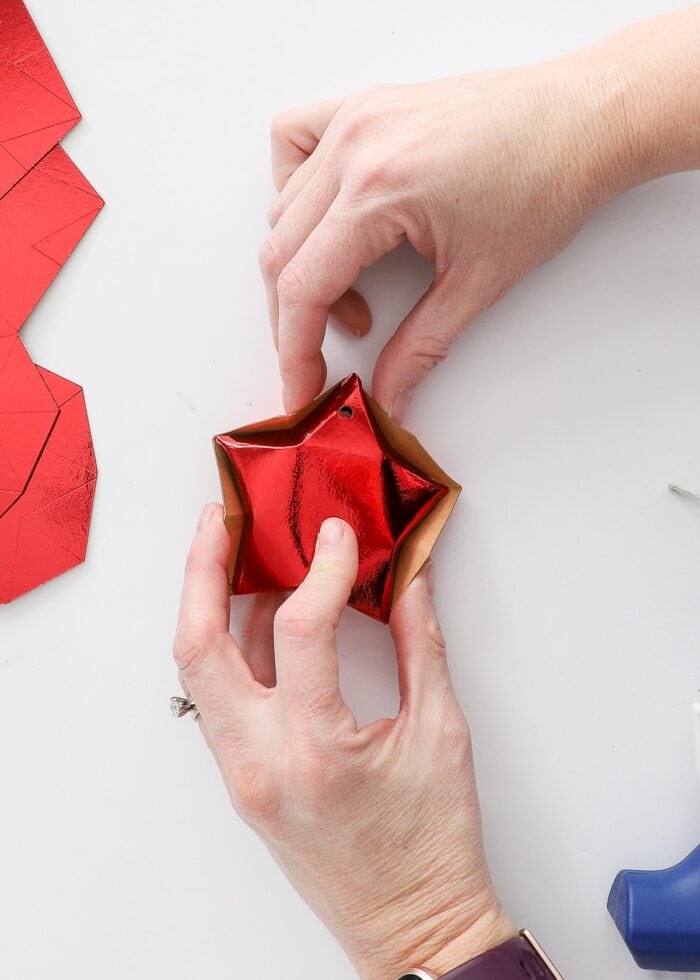
Start by folding the template along every score line. To get nice creases, I recommend folding gently in both directions if possible.
Admittedly, because of the unique design of these stars and the extra-thick Kraft board, it can be difficult to get sharp creases on some of the folds. Do the best you can, as you can always sharpen the creases once the ornament is glued together.
With all the score lines bent, you will be able to fold the ornament in half, bringing the smaller star inside the back of the larger star.
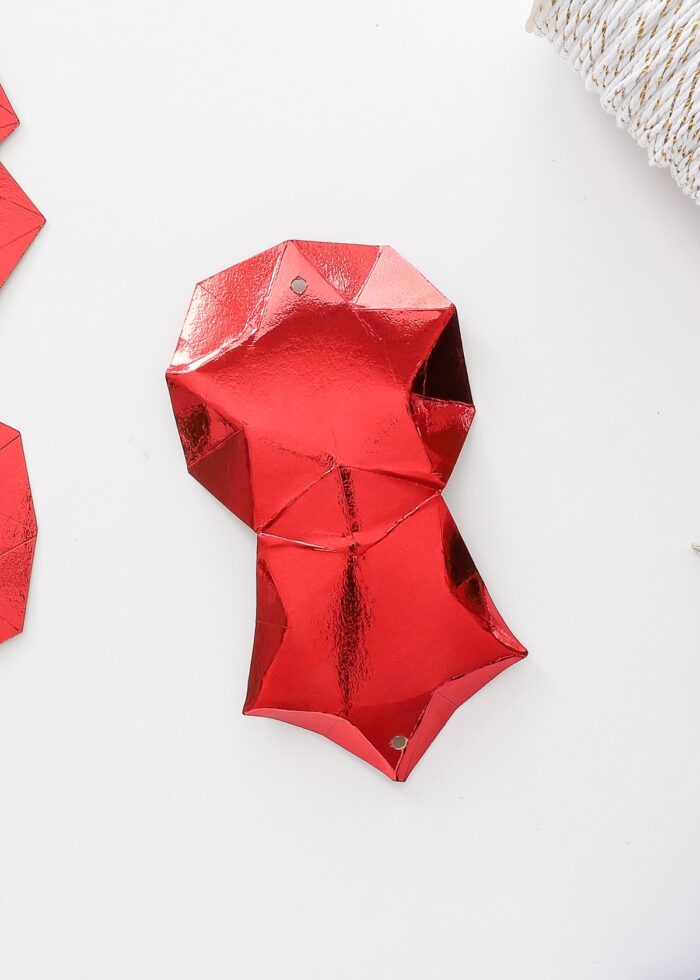
Glue Ornament Together
To glue the ornament together, I recommend holding the ornament mostly folded together, and dropping large dollops of hot glue into each pocket at the corners.
You will want to work quickly to place the glue and fold in the flaps on each side.
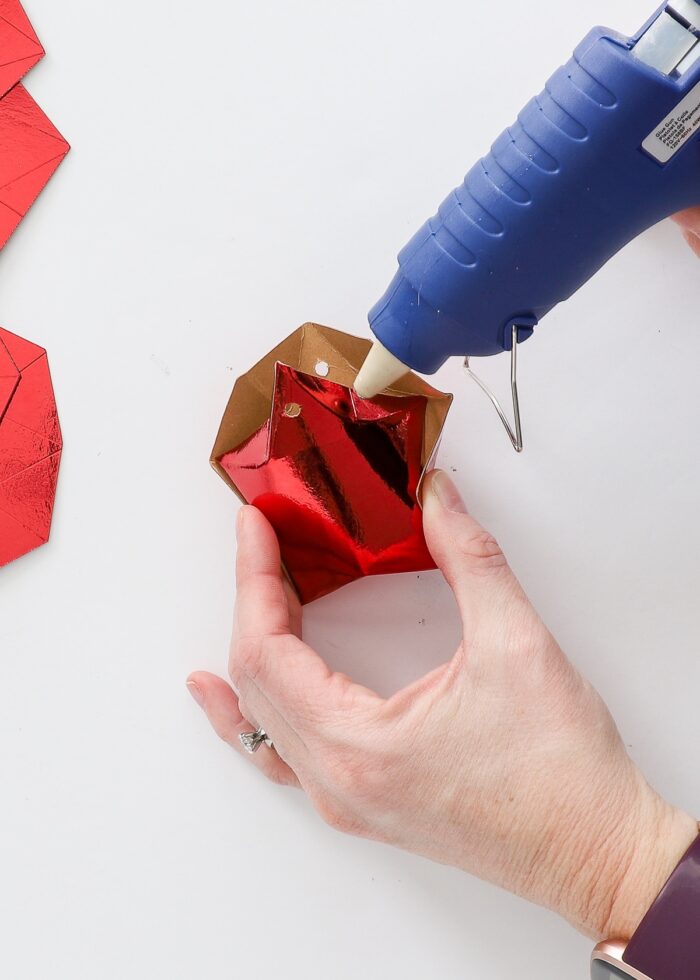
Because the Kraft board is thick and therefor strong, you will need to hold the ornament together firmly until the hot glue completely cools. Or else you run the risk of your ornament unfolding and having to start over again.
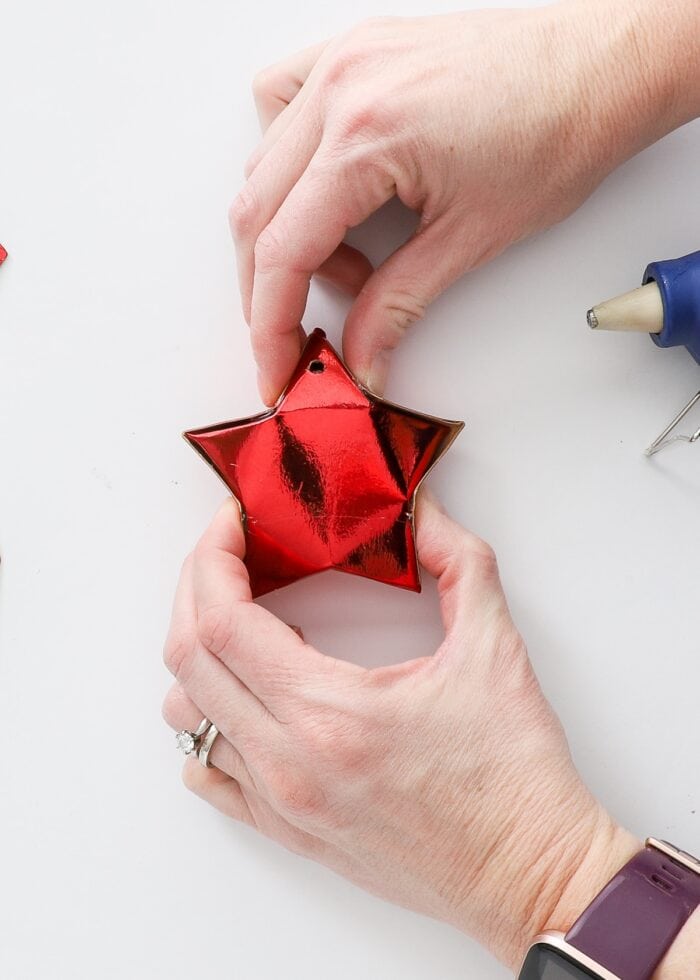
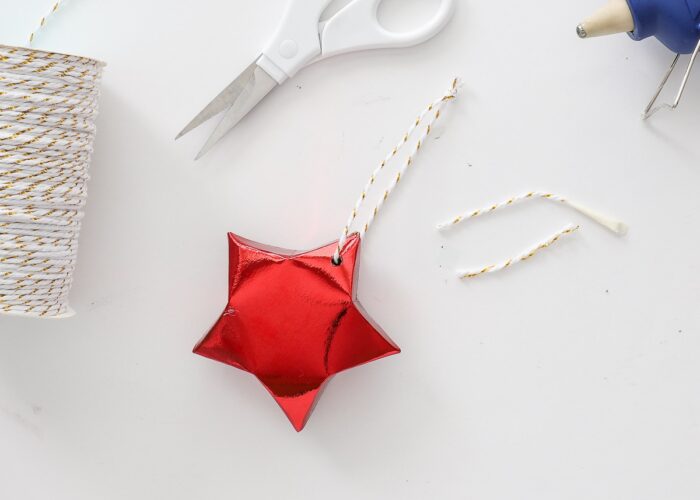
Once the glue is cool and your ornament is tightly folded up, all that’s left to do is thread a string through the hole!
Add String
In order to feed a thin string through the holes on both sides of the paper star ornament, I recommend using either a needle or covering one end of twine with tape.
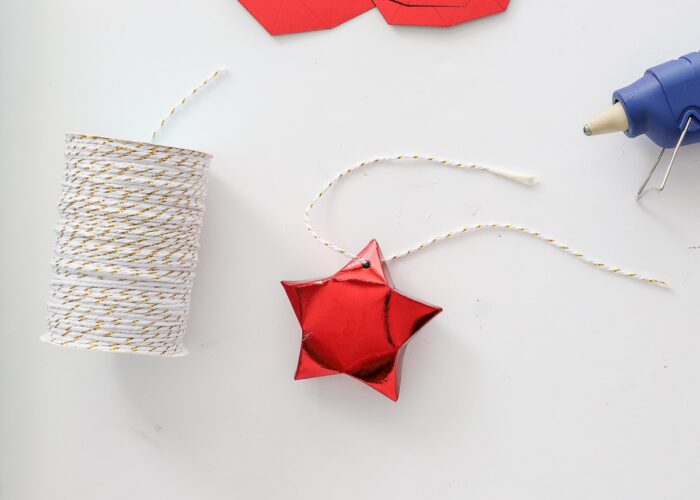
Once through both holes, simply knot the end and trim off the excess to create a loop that will fit around tree branches.
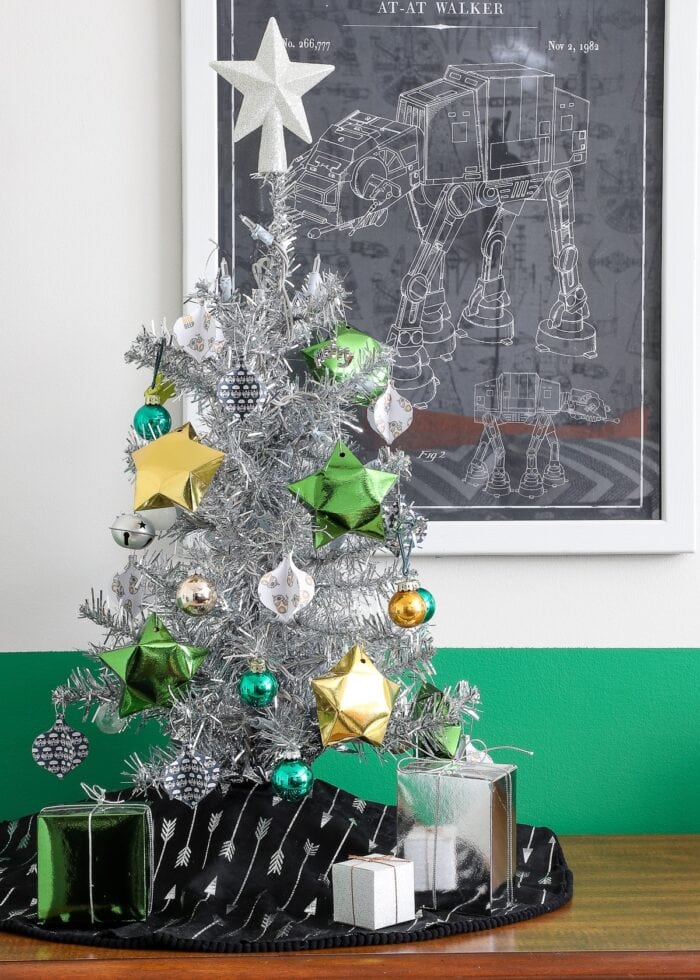
Now repeat in all the colors to make a whole collection of gorgeous paper star Christmas ornaments!

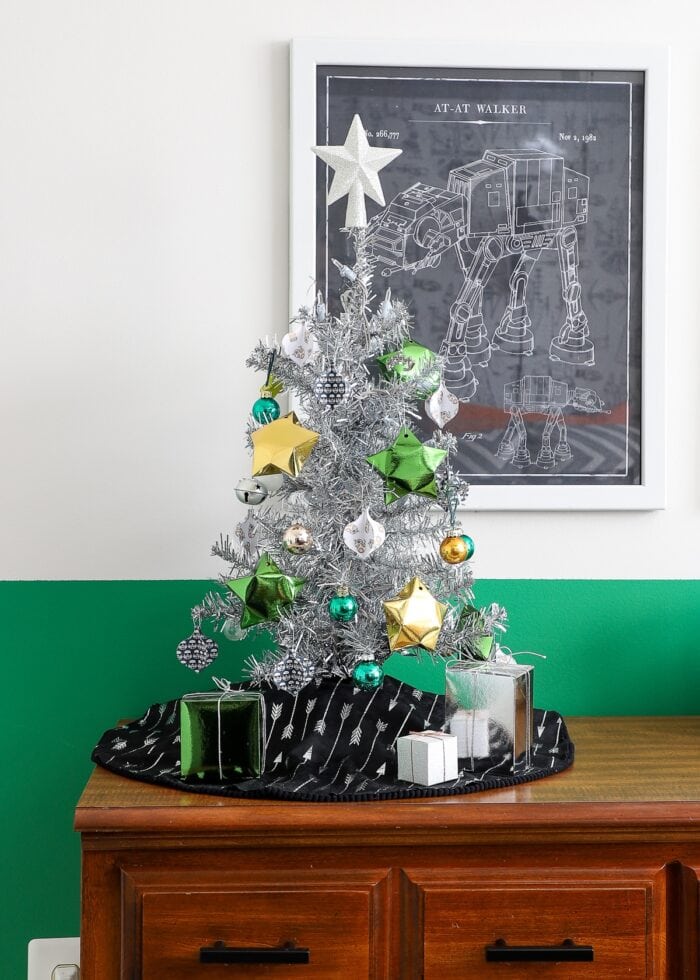
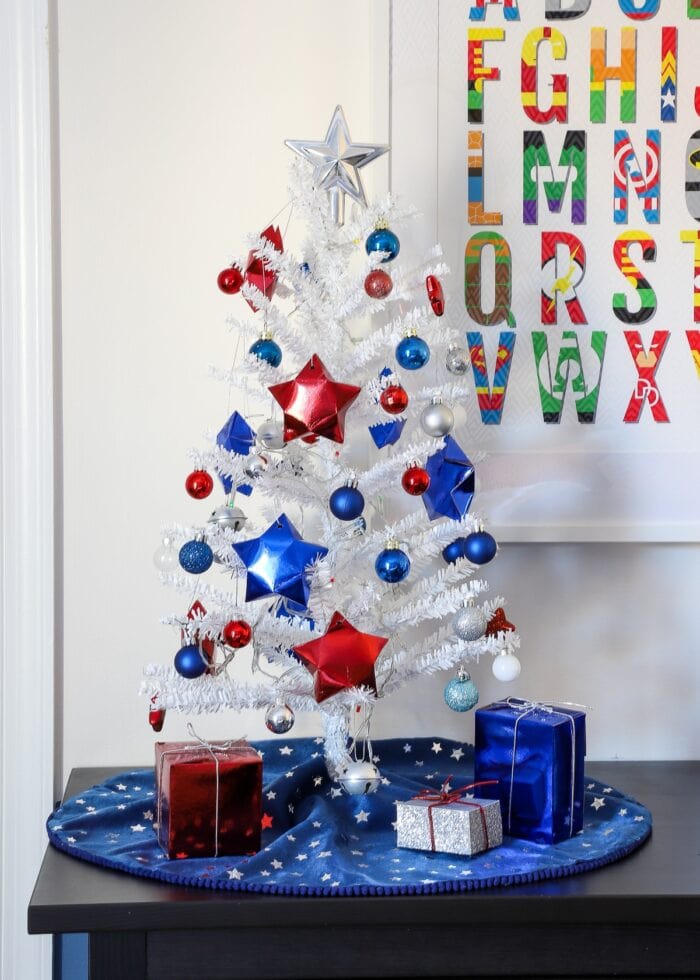
The final step is to hang the paper stars on your Christmas tree! I made all different colors to match the different schemes in each boy’s room.
Henry got all gold and green stars to go with his Star Wars bedroom…
While Sam’s Super Hero bedroom got red, blue and silver stars on his patriotic tree!

Who knew paper could be folded and glued in such a way to make such gorgeous ornaments, right?!? If you do give these paper star ornaments a try, I recommend plopping down in front of a good Christmas movie as you make them. Although they are easy, the folding can be tedious and tough on the hands. But I promise you…the final result will be oh so worth it!
Megan


2 Comments on “Easy Paper Star Ornaments to Decorate Your Christmas Tree”
These are so cute! I totally want a garland out of these. Now trying to figure out where to put it. 🙂 These may not make my list for this year, but I will have a whole year to work on some. Plus I have a weakness for stars. The red white and blue tree is so cute!
We used to make these at work for lei, because lots of times you don’t have enough flowers at the last minute, or colors and you wanted one that would last. Then the person who folded them the best left, and I had forgotten about them. Thank You!