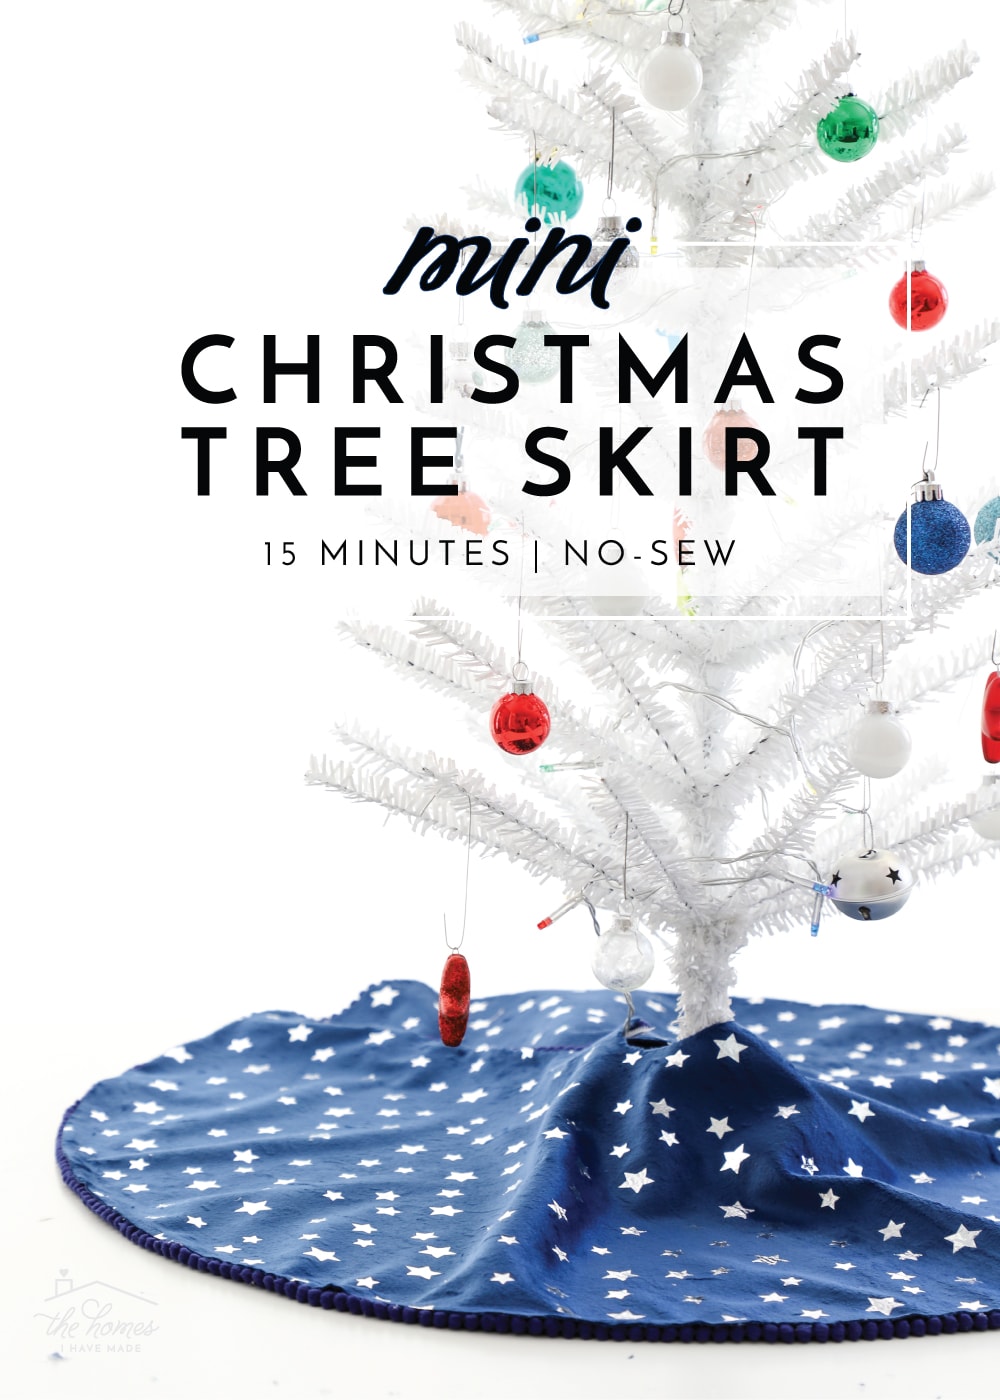
DIY Mini Christmas Tree Skirt – A 15 Minute, No-Sew Project!
Every year, we put a mini Christmas tree in each of the little boys’ bedrooms. Not only do we adore the soft glow it gives the room all season long, but the boys have so much fun decorating their own personal tree. Finding miniature Christmas trees is easy enough, but we had a tough time finding “just the right” tree skirts to go with them. Thankfully, tree skirts are super easy to make, and I knew whipping up a mini version was something I could easily fit into the busy holiday season! If you’re looking for a fun way to personalize and customize a small tree in your home, this 15-minute, no-sew mini Christmas tree skirt is just the ticket!
Why DIY a Mini Tree Skirt?
In our experience, finding mini tree skirts isn’t exactly easy. Each season, stores carry just a few styles, and they tend to sell out quickly. But by making your own mini Christmas tree skirt, you can customize it to perfectly match your home, style, or holiday scheme by using any fabric, trim, and decorations you like!
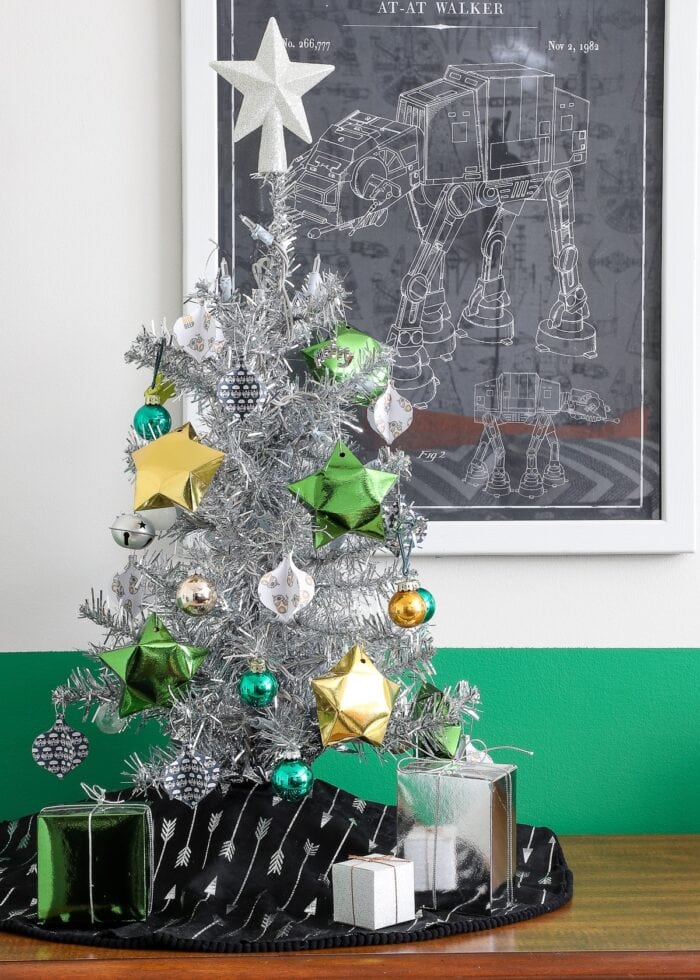
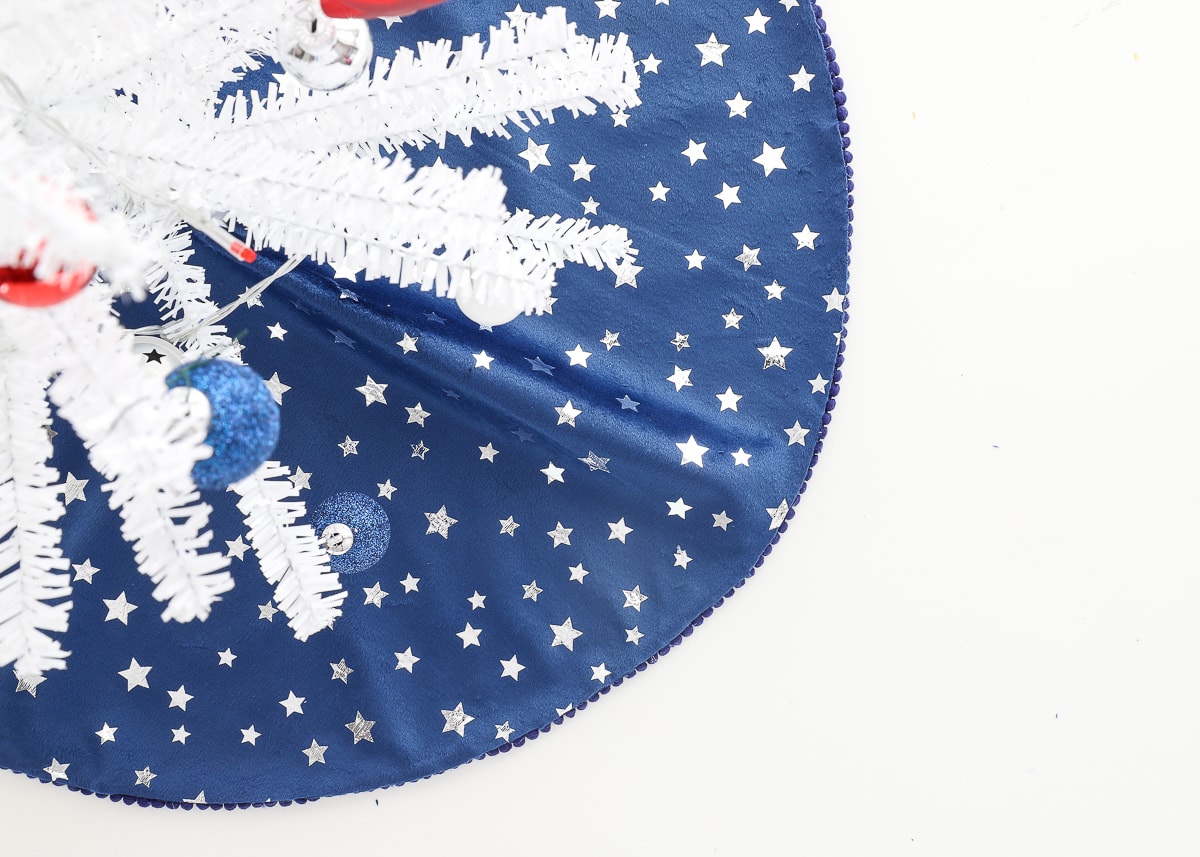
For example, the navy blue star fabric I picked for Sam’s room and the black arrow fabric I used for Henry’s don’t exactly scream “Christmas.” Yet the metallic details feel very festive while matching their bedroom schemes perfectly!
With less than a yard of fabric, some pom-pom trim, and about 15-minutes, you can whip up a customized mini Christmas tree skirt to match any room in your home! Let me show you how easily this project comes together!

Need a large tree skirt?!? See the tutorial here: Easy DIY (Extra-Large) Christmas Tree Skirt
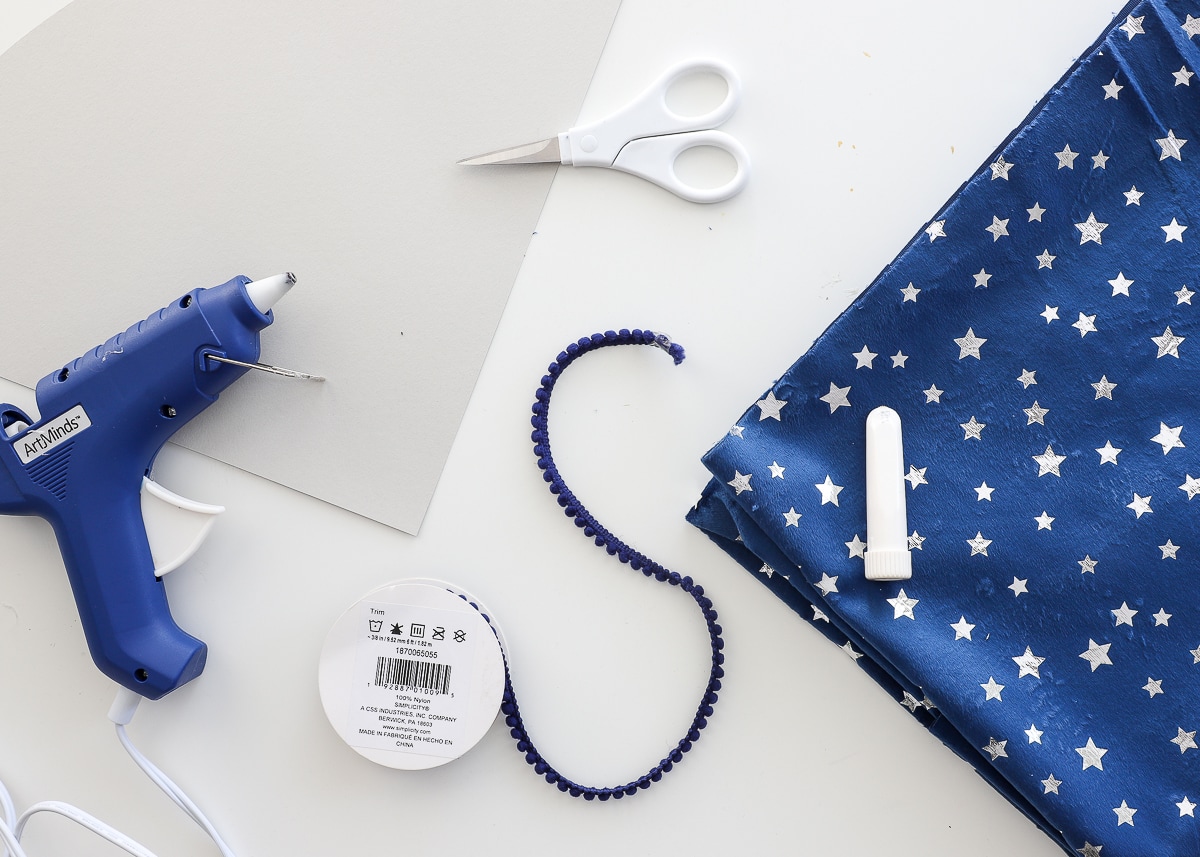
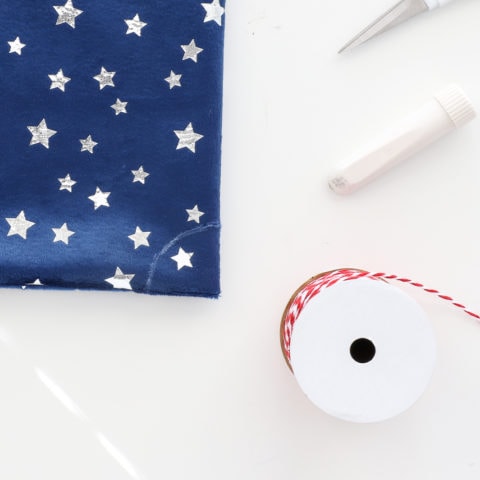
Supplies Needed
To make one mini Christmas tree skirt, you will need:
- 2/3 Yard of No-Fray Fabric (more on this below)
- 1 Spool of Mini Pom-Pom Trim in a coordinating color (optional)
- 12×12″ Sheet of Cardstock (to make a pattern)
- Tools: Chalk Roller or Fabric Marker | Scissors | Hot Glue Gun
- Optional: Velcro Strips or Dots
Selecting the Best Fabric For Your Mini Christmas Tree Skirt
The key to keeping this project easy and no-sew is to pick fabric that doesn’t fray or need hemming. Good options to consider are felt, fleece, flannel, minky, fur, and some costume fabrics.
I used two metallic minky fabrics from JoAnn Fabrics; unfortunately, they are no longer available. But here are some fun new fabrics to check out:
Keep in mind…every year, the fabric stores are filled with festive prints that feature snowflakes, stars, trees, and other great designs. So if you can’t find something you love online, it might be worth a trip to the store to see what great fabrics you can find!
TIP! This time of year, all these cozy fabrics are frequently on sale; and when you combine the sale with a coupon, this becomes a very budget-friendly project indeed!

Step 1: Make a Mini Tree Skirt Pattern
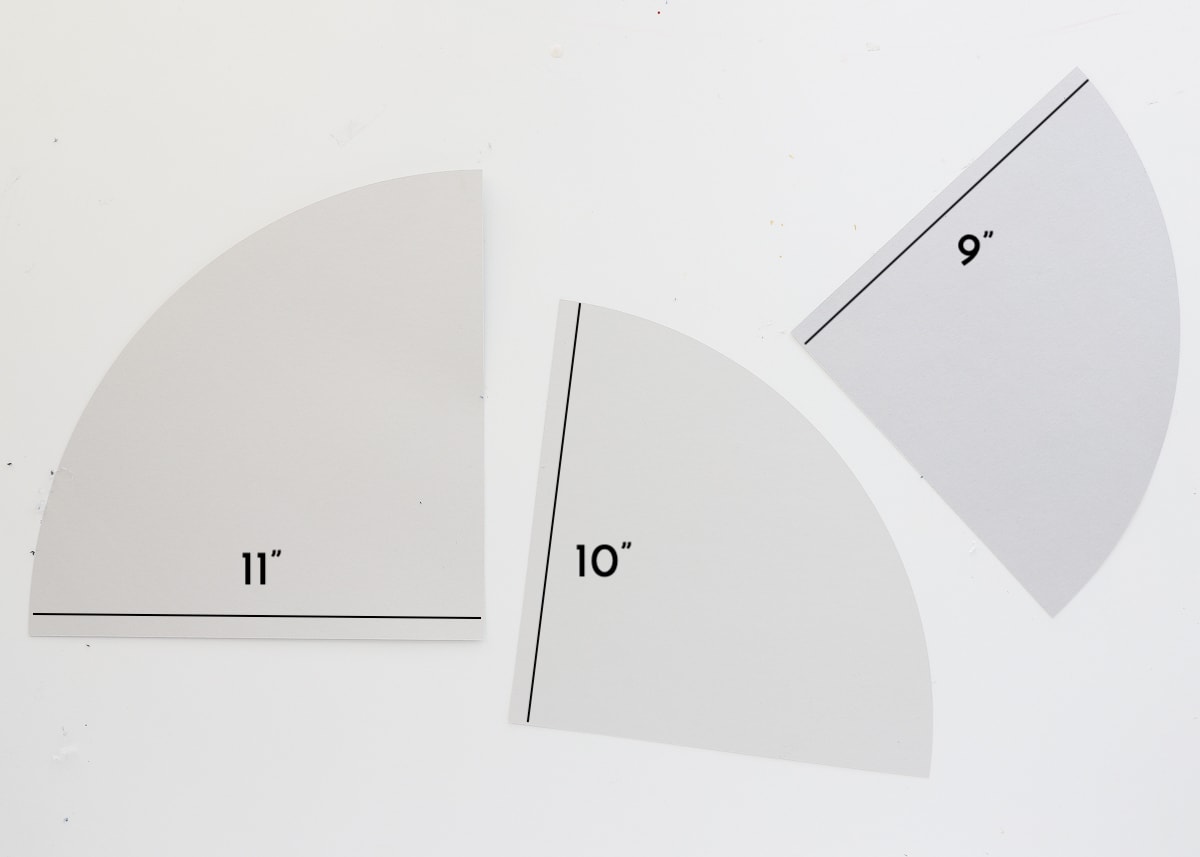
I don’t know about you, but cutting a perfect circle by hand is not something I find easy. So to ensure you end up with a perfect circle for your mini tree skirt, I suggest making a simple pattern using a piece of cardstock.
Before you do so, first decide how big you want your mini Christmas tree skirt to be. The typical miniature Christmas tree skirt measures 18″, but if you have a slightly bigger or smaller tree, consider adjusting your measurements.
Using a pencil on a string, create a quarter circle with a radius of either:
- 9″ = 18″ tree skirt
- 10″ = 20″ tree skirt
- 11″ = 22″ tree skirt
- 12″ = 24″ tree skirt
TIP! Do you have a Cricut or other e-cutter machine? Use it to quickly cut a perfect quarter circle in the precise measurements you need!
Once you have your perfect quarter circle, cut it out of cardstock to serve as your pattern!
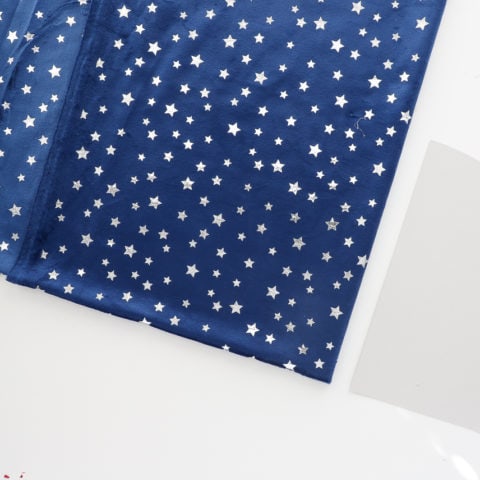
Step 2: Cut out the Mini Tree Skirt
To cut out a circle from your fabric using the pattern, follow these steps:
- Fold your fabric in half (length-wise) and then in half again (width-wise) so that you have a point with folds on both sides.
- Line up the point of the template with the point of your folded fabric.
- Use a fabric pen or chalk roller to trace the curve of the template onto the fabric.
- Cut along the drawn line with a scissors through all layers.
- Before unfolding your tree skirt, use a smaller object (a glass, spool, or vase all work great) to trace a smaller quarter circle at the pointed tip of the triangle.
- Cut this smaller quarter circle out as well.


Want to save this post?
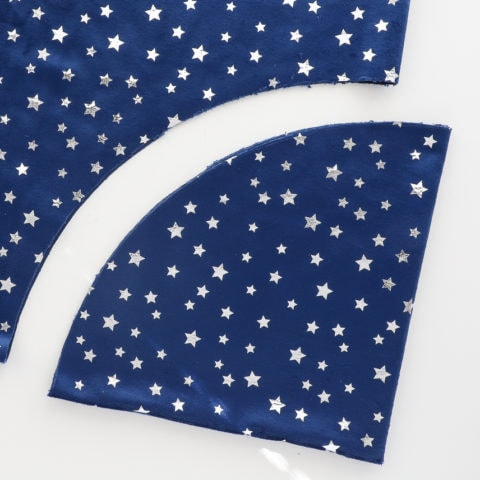
Once you un-fold the fabric, you will be left with a perfect circle tree skirt and a smaller circle cut out of the center!

Step 3: Create a Slit in the Mini Tree Skirt
Next, use a scissors to slice up one side of the tree skirt so that you can easily wrap it around the tree’s base. Keep this in mind:
- If you want your tree skirt to be really full with waves and ripples, just make a single, straight-line cut.
- If you want your tree skirt to lay perfectly flat around your tree, remove a wedge of fabric that is approximately 2-3″ wide.
Don’t overthink your cuts here, just slice up the side of the skirt!

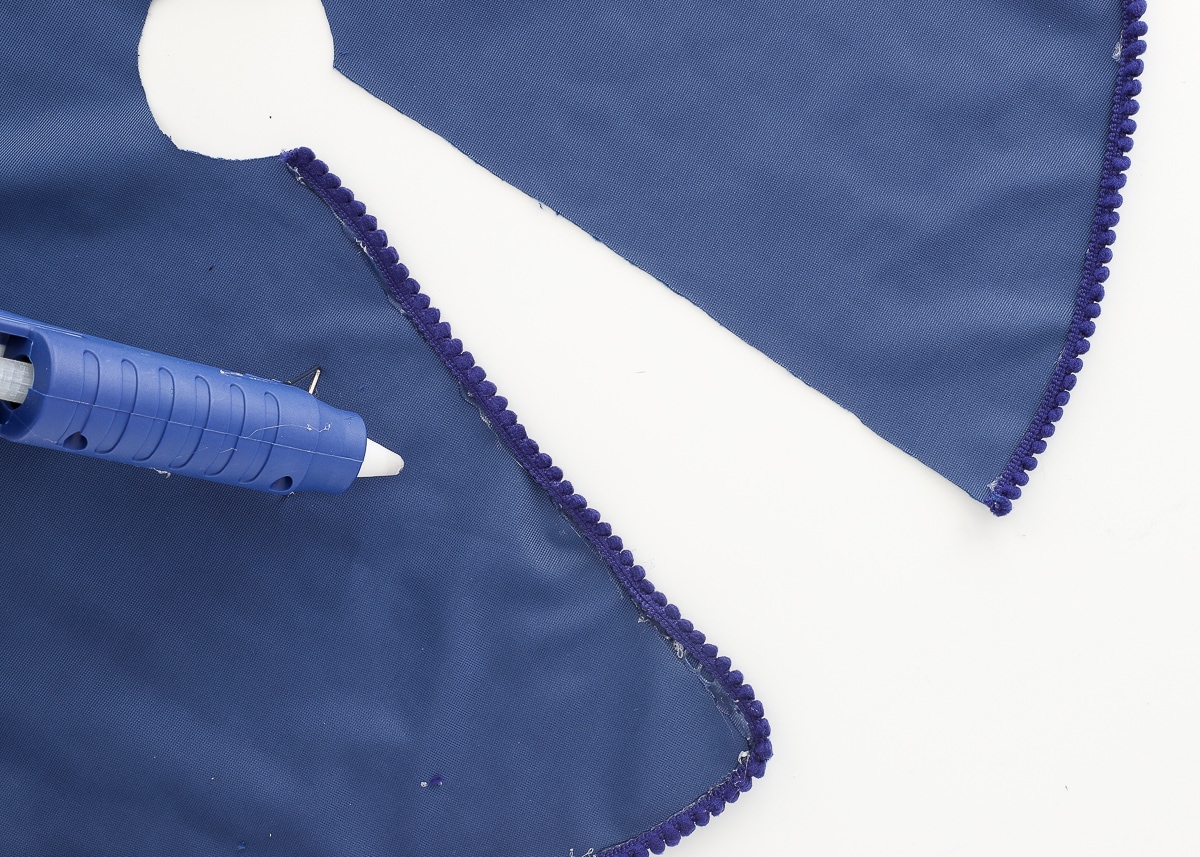
Step 4: Add Pom Pom Trim (Optional)
If you’re really in a hurry, you can stop there. You can toss the skirt around the base of any mini tree and get decorating with ornaments, lights, and other accessories!
However, with just a few more minutes, you can give your skirt a more finished, festive look with some mini pom-pom trim.
Using a hot glue gun, secure the pom-pom trim to the edge of the underside of the skirt with the pom-poms extended out over the edge, as shown below. (When you flip the mini tree skirt right side up, the pom-poms should peek out from under the raw edge of fabric…it’s such a fun finishing touch!)
TIP! Take your time…working with hot glue in a detailed way around curves like this can be a little messy and frustrating. Thankfully, all the ugly glue will be on the underside of the skirt!

If you make your skirt to be 22″ like I did, a single roll of pom-pom trim will be just enough to go up one slice of the skirt’s opening. This doesn’t bother me since the two flaps overlap (thereby concealing the raw edge on one side). But if you want your pom-poms to cover all your edges, you will need a second roll.
Step 5: Add Fasteners
With the pom-pom trim glued on all the way around (and all the annoying glue strings removed), there is one final (optional) step. Most tree skirts have some sort of hooks or buttons along the opening to keep it closed behind the tree. However, you can achieve the same function in mere minutes with some tabs of Velcro held on with more hot glue along the flaps.
Over & Under
When placing Velcro, pay attention to how the mini tree skirt overlaps and closes. You will want to place one side of the Velcro on the top of one flap (without the pom-pom trim) and the other side of the Velcro to the underside of the other flap (with the pom-pom trim), as shown below:
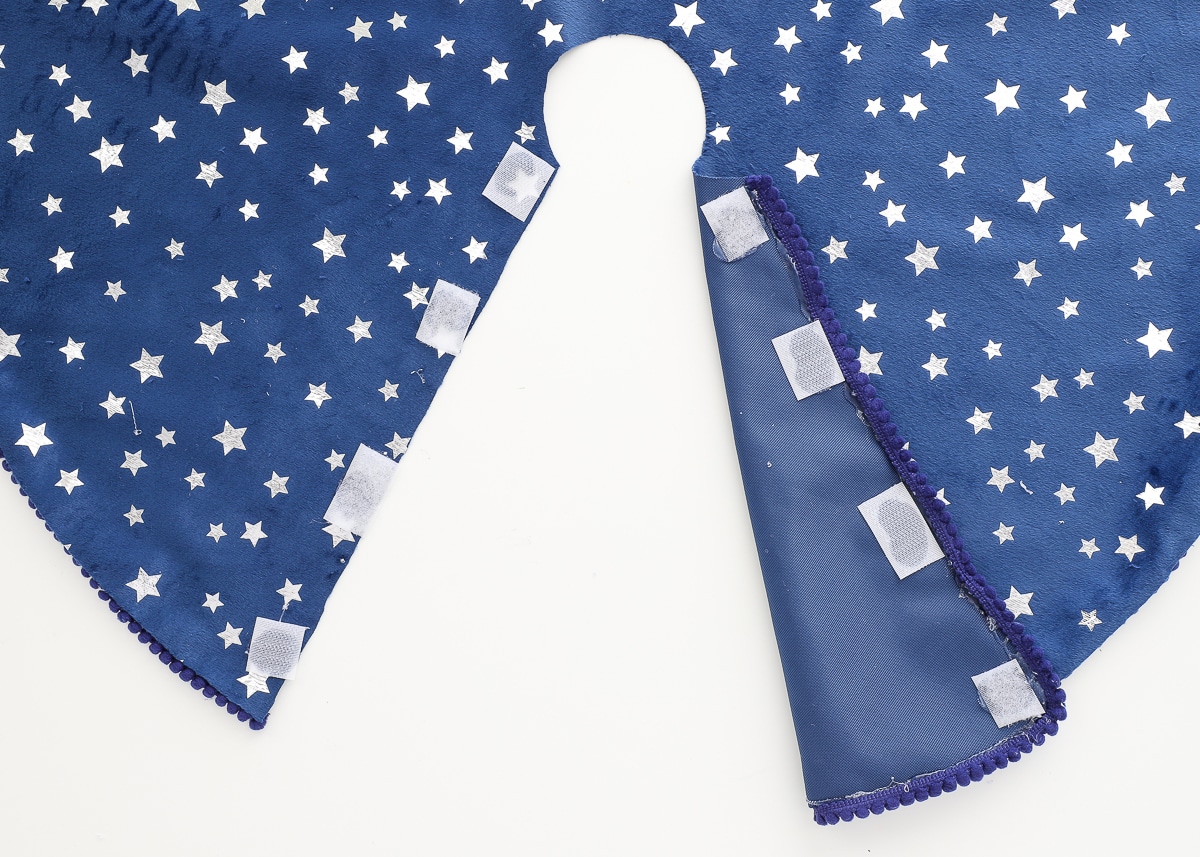
This way, when you close the mini tree skirt, the pom-pom edge overlaps and covers the non-pom-pom edge!
TIP! If you don’t like the Velcro option (or don’t have any on hand), you can also hot-glue small ribbons to both sides of the opening and tie the mini Christmas tree skirt shut with pretty little bows.
NOTE! You don’t have to do anything to close up the skirt. Since it’s such a full circle, you can overlap the panels in the back of your mini Christmas tree, and it likely won’t pull apart!

Now you’re mini tree skirt is done! Go ahead and place it around any small tree to give it a more festive and polished appearance!

Although I didn’t set off to find these darker, metallic fabrics, when I came across them, I had a hunch they would look so so good in the boys’ rooms this time of year. The edginess of them actually feels really fun and fresh for young kids, especially boys. And I love that they now have their own unique tree and set of accessories that they can pull out each year to help celebrate the holidays!
TIP! Every year, we pack away the mini tree skirt with the coordinating ornaments and presents bagged together, so it’s easy for each boy to decorate their tree on their own!

This mini tree skirt project is actually an adaptation of my extra-large tree skirt, which is just as easy and almost as quick. So whether you need one really big or really small, I hope you give this tree skirt project a try! It really is a fun and festive way to decorate your tree base and get it ready for aaaaaaalll the presents!
Megan


One Comment on “DIY Mini Christmas Tree Skirt – A 15 Minute, No-Sew Project!”
Love this! You give us such clear instructions and a very nice glimpse into your life as a mom. Thanks.