Countdown to a Military PCS | Our Moving Timeline
I frequently get asked about the weeks and months leading up to our moves. Beyond the timing of basic logistics, readers often ask how much time we leave for purging, packing, and returning our home to its original condition. Although no two moves are ever the same and there are always odd circumstances to plan around, we’ve moved enough times (this next one will be #9) to know when to start doing what and how much time everything takes. Whether you’re executing a military move or not, I hope you find this moving timeline (alongside some insights about why things should happen when) helpful in your pre-move planning process.
I outline a broad, general moving timeline in this post. To get a detailed checklist of every single task that should to be done prior to moving, check out the Smooth Move Printable Pack.
As Soon As You Get Orders | 3-6 Months Out
As you’ll soon see, most of the tasks on our moving timeline happen in the final 2 months before the moving trucks arrive. However, there are some things you can do when (and if!) you get plenty of advanced notice on where you’re headed next. These tasks can be done the minute you find out where you’re moving to and will help inform the rest of your moving process.
Start Researching
If you’re moving somewhere you’ve never been, start researching instantly. Google, Facebook Groups, base websites, and even social media channels can help you get to know the local area, culture, climate, etc. Try to collect information on:
-
- Potential neighborhoods to live in (including the average rent/home prices, local BAH, and potential commute times)
- Work opportunities/locations
- Good school districts
- Things to do
- Service providers: doctors, dentists, hair dressers, handyman/contractors
Reach Out to People You Know
Even if your research yields a pretty good understanding of your new neighborhood, the most reliable information will come from those who currently live there. Reaching out to people you know in the area will not only gives you the true inside scoop, but also reconnect you with those who might be able to offer you shelter (when you’re tired of living in a hotel), meals (when you’re sick of eating in restaurants), friends (for you and your kids), and items to sustain you before your moving truck arrives. Start to rekindle relationships early to establish communication and make plans to get together once you arrive.
Plan a Visit
If you are able to, planning a visit to your new town will give you the best insight on housing, schools, commutes, and more. Although a lot can be learned online, there are have been times when we simply couldn’t make a decision until we drove around the community.
Make a Housing Decision
As soon as you can, make a decision about where you want to live, specifically on or off base (Read More: On Base versus Off Base | How We Decide).
Then…
- On Base – Submit your housing application as soon as you possibly can, as most base housing areas have lengthly waitlists.
- Off Base – Find a realtor (or local housing agency) and/or setup Zillow search filters to help you identify neighborhoods and homes to rent/buy. (Read More: How to Find a Good Rental Home From Far Away)
Having an address will make the rest of the moving process much easier, so do your best to lock on housing as early in your moving timeline as possible!
Make Moving Arrangements
If you are executing a military move, submit your moving details to DPS (Defense Personal Property System) so they can begin identifying and scheduling a moving company to handle your relocation. The earlier in your moving timeline you do this, the more likely you will get the dates you want.
If you are not doing a military move, this is the time to reach out to moving companies to get estimates/quotes and lock on moving date(s).
Initiate Any Time Sensitive Maintenance
Are there issues with your current home that need to be remedied before you move out AND they require sufficient time in order to be fixed? Make sure you initiate these things with plenty of time for completion.
Examples include:
- Regrowing grass, plants, or other landscape features
- Tackling large-scale construction projects
- Any maintenance tasks your property management will do prior to final checkout but will charge you for if discovered during final inspection
Make a Final List of Fun Things to Do in Current Location
Without fail, we always find ourselves in the last few months with dozens of things “we meant to do” but never got to. This is the time to sit down as a family and decide what places and events you still really want to check out before moving. Get them on the calendar now so you’ll be sure to do them amidst the chaos of the next few months!
1-2 Months Before Moving Day
About 6-8 weeks before your moving date, planning and preparations start to pick up. The main focus during this period of the moving timeline is knocking out tasks that can be done well in advanced, simply so they are off your plate and you don’t need to worry about them closer to your move (when there is a lot more to do and the days fly by fast).
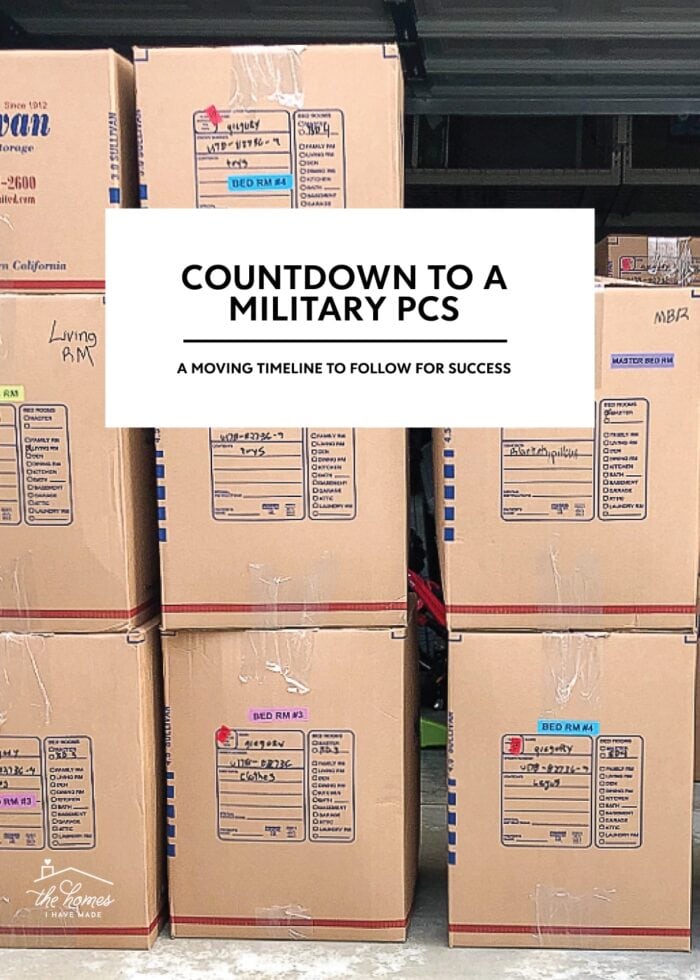
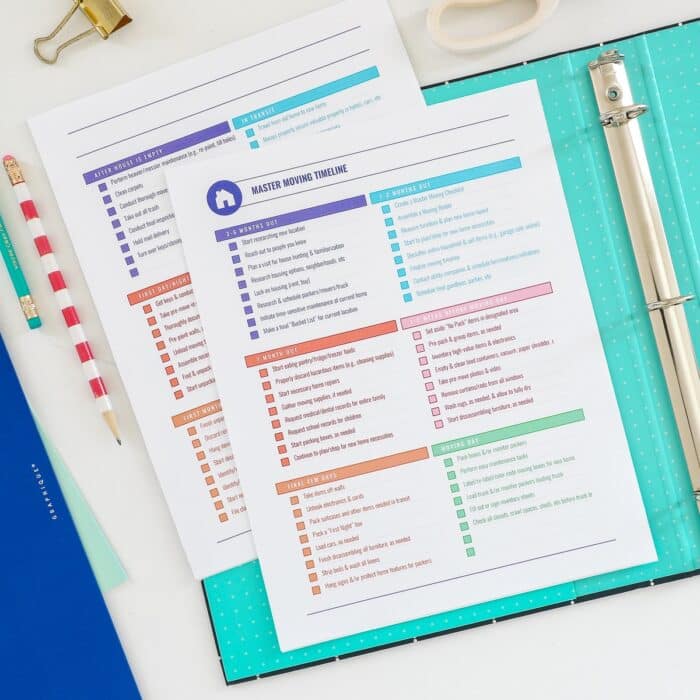
Create a Master Moving Checklist
This is the time to make a Master To Do List for everything that needs to get done in order to move your family from point A to point B. This list should include very large tasks (e.g., find a house), very small tasks (put phone chargers in the cars), and everything in between.
We use the resources in my Smooth Move Printable Pack to organize all of our moving tasks. The Master Moving Spreadsheet is a comprehensive digital checklist that we use move after move, and includes mainly tasks that are not location specific (e.g., pickup school records, file travel claim, schedule household goods delivery, etc).
We then primarily use the room-by-room checklists from the Smooth Move Binder to detail out everything that needs to happen in our specific house to prepare for final inspection. These checklists include items like repaint walls, fill holes in walls, re-hang closet doors, etc. By using these two systems together, we are able to track every last thing that needs to get done, where, and by whom.
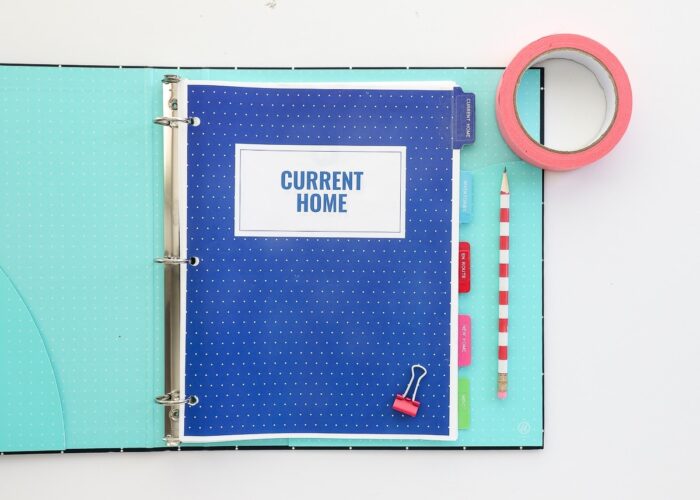
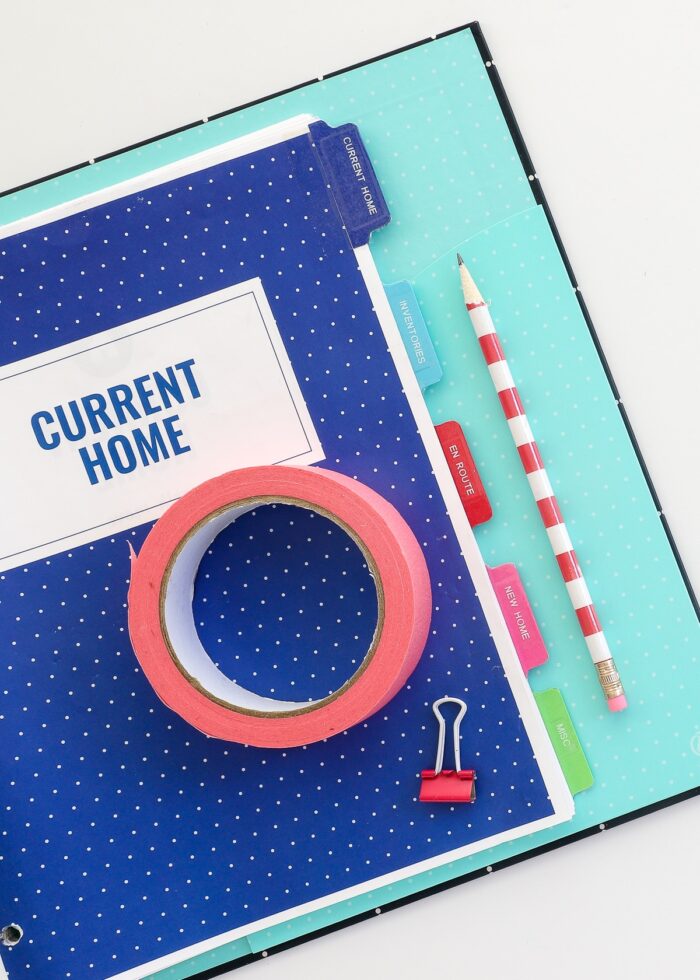
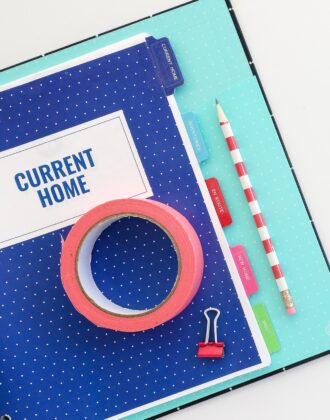
Assemble a Moving Binder
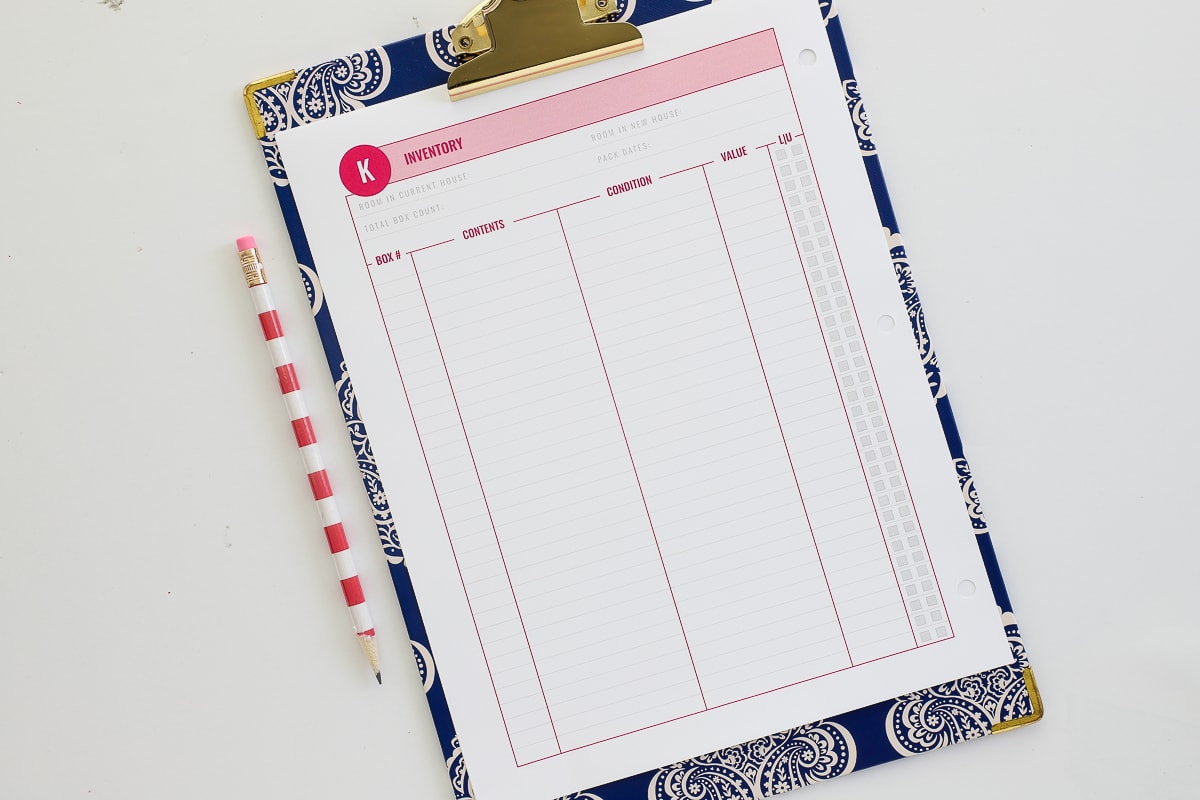
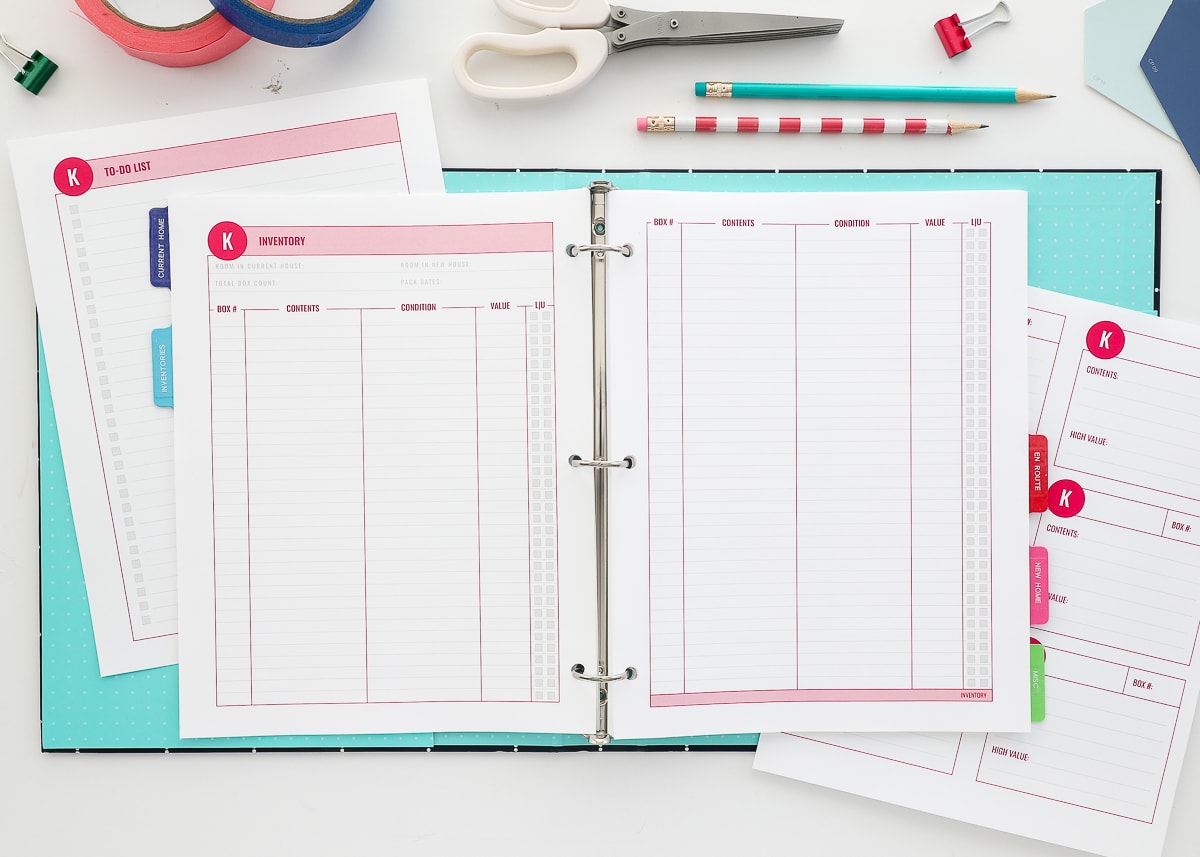
Beyond creating a checklist, I recommend going one step further and setting up a dedicated Moving Binder. In addition to holding any paper checklists, it becomes the ideal place to take notes, record phone numbers/addresses, collect receipts, store copies of your lease, hold inventory sheets, and so much more. (Read More: How to Assemble a Moving Binder)
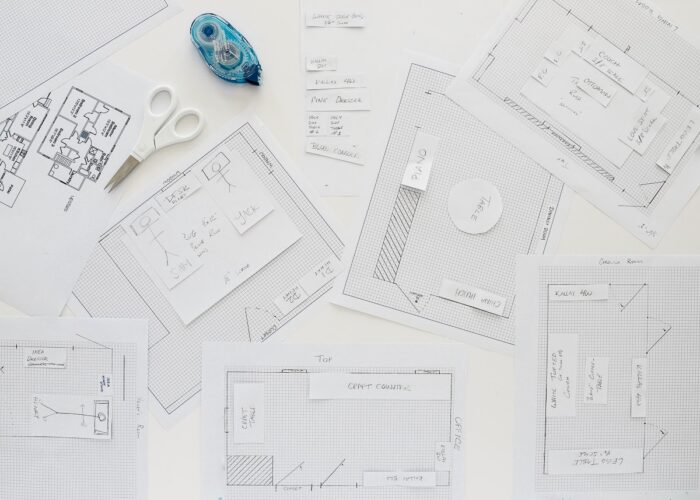
Plan Your New Home’s Furniture Layout
In the event you have access to the layout of your new home, I highly recommend pre-planning your furniture layout early in your moving timeline. Not only will this help you make keep/purge decisions (more on this below), but it will also expedite your move into the new home since you’ll know where everything goes! (Read More: How to Plan Your Furniture Layout When Moving Into a New Home)
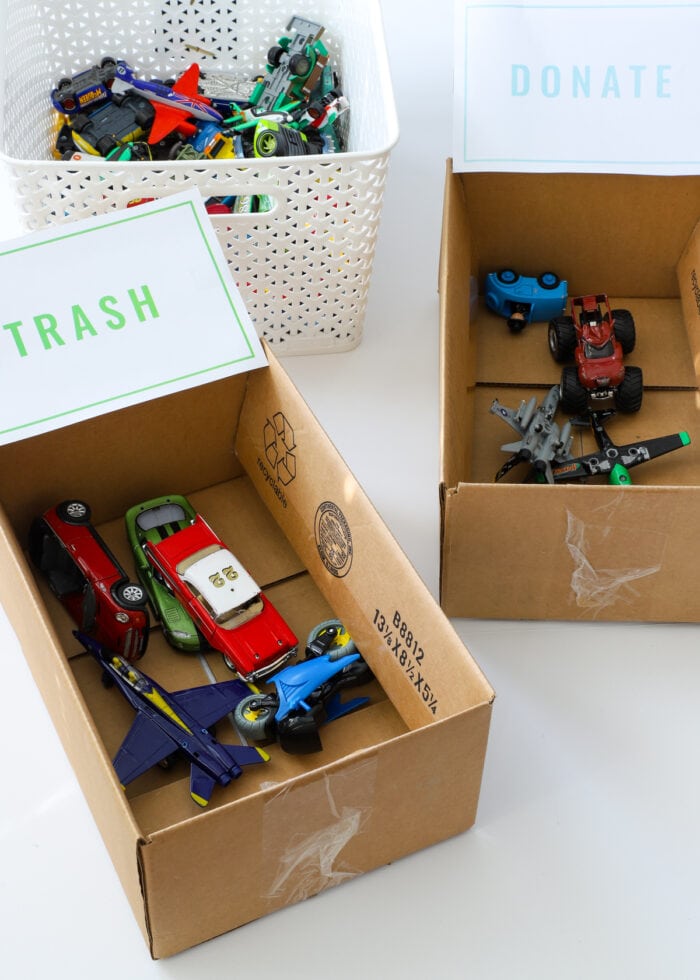
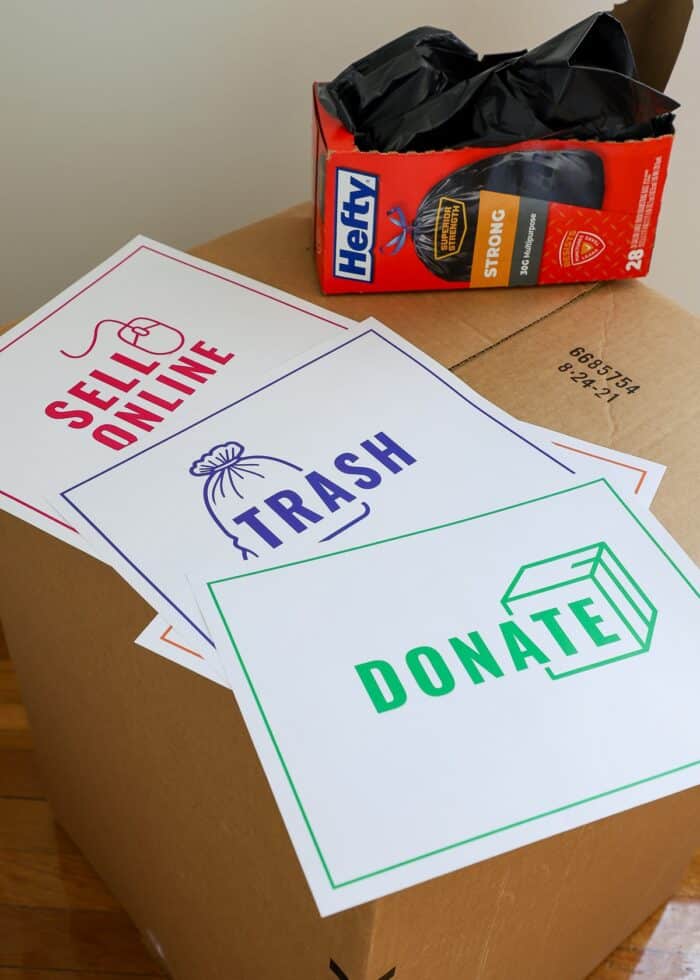
Purge Unwanted Items
I am a really strong believer in purging unwanted things on BOTH sides of a move (before and after). There are certain things in your current home that you may not use, but they might perfectly fill a certain spot/need/function in the next home. Keep these items and get rid of them on the other side if/when you determine you don’t actually need them. That said, there are likely certain things in your home right now that no matter how big a home you’re moving into, you just won’t want/need/use them again. These are the things you should get rid of before you move.
If you are packing, hauling, and loading things yourself, then you certainly don’t need to waste your energy on items you don’t want. But even for those of us whose moves are paid for and packed for us, it is still a waste of time and money for all involved. It’s too hard to purge when you’re filling boxes or the movers are knocking on your door…so give yourself plenty of time to go room by room and get rid of the excess clutter.
Sell Unwanted Items
Moving is SO expensive. From moving supplies and hotel fees to setting up utilities and buying new things, it often feels like you bleed money for a good few weeks before, during, and after a move.
I have lots of strategies for generating extra cash before a move, but one of my favorite tactics is to sell the items we no longer want. We like to sell large items on Facebook Marketplace and almost always hold a pre-move garage sale to get rid of the little things. Yes…a yard sale is a lot of work during what is already a busy and stressful time; but we always find the few extra hundred dollars (and less items to pack!) well worth it!
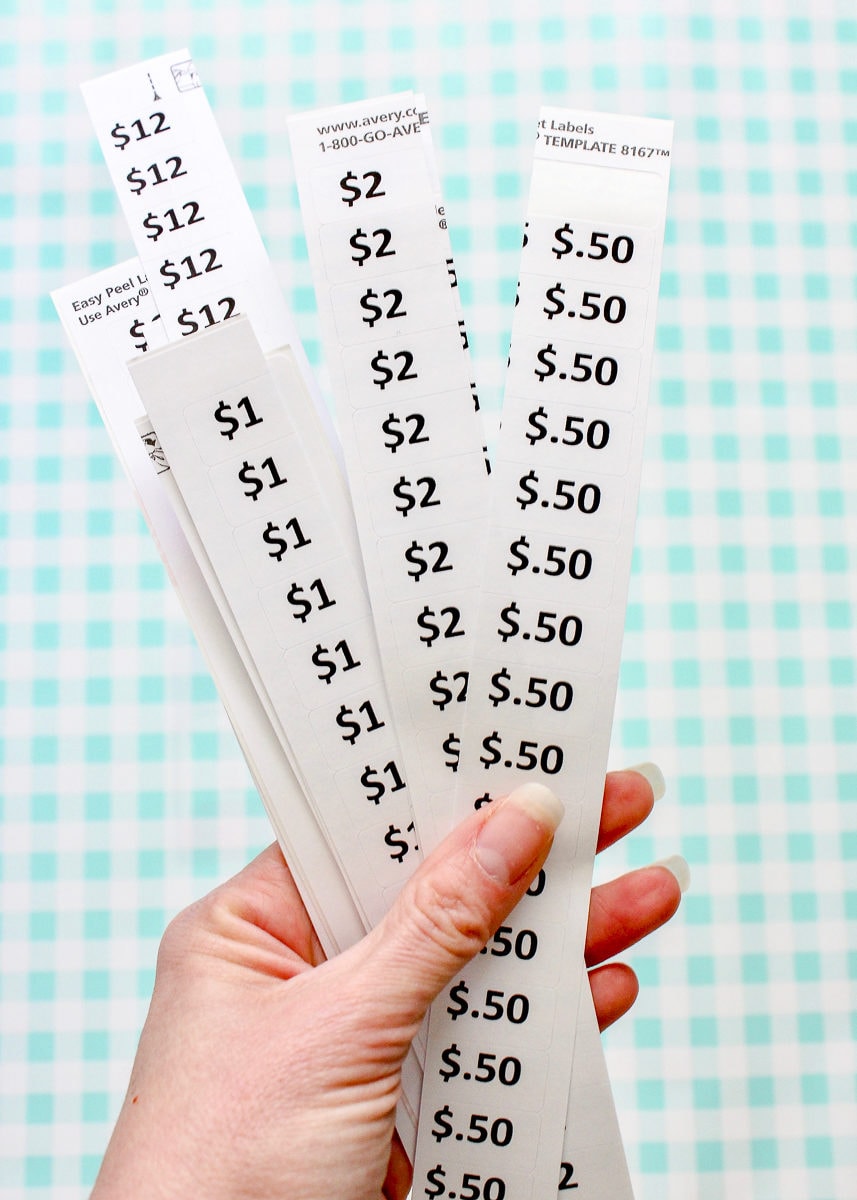
Printable Garage Sale Price Tags
Finalize Moving Timeline
Your moving timeline is most certainly going to change it unfolds; but around now, you should be able to settle on a general schedule for your relocation, including when packers will arrive, what day you plan to turn over the keys, etc. As you assemble your moving timeline, make sure you are aware of important dates (e.g., holidays, last day of school, etc) as well as any time-bound restrictions (e.g., 30 days notice to vacate). Once your moving timeline is set, notify all affected parties (e.g., landlord, schools, your employer, etc).
Contact Utility Companies
You don’t want to pay for utilities you don’t need or forget to cancel them all together. As such, contact all your service providers (e.g., electric, gas, internet, cable, etc) in the 6-8 weeks prior to your move out date to schedule termination and setup a final billing plan.
Schedule Final Goodbyes
Saying goodbye is never fun, but it’s even worse to leave town without doing it. All too often, I assume there will be plenty of time for one last hangout. But the final few days before pulling out of town are really busy, and all-too-often we end up leaving without that one last hug.
We have learned that it’s really helpful to schedule final gatherings with your favorite people. And, when you make those visits…acknowledge that it’s the last time you’ll see each other and get your hugs and tears out of the way.
Don’t book yourself up too tight near the end, and don’t promise to squeeze in one last visit with someone you’ve already said goodbye to. It’s not mean or impersonal. There’s just too much to get done. So say your goodbyes early, and then focus your remaining time on getting your stuff and your family out of town.
1 Month Before Moving Day
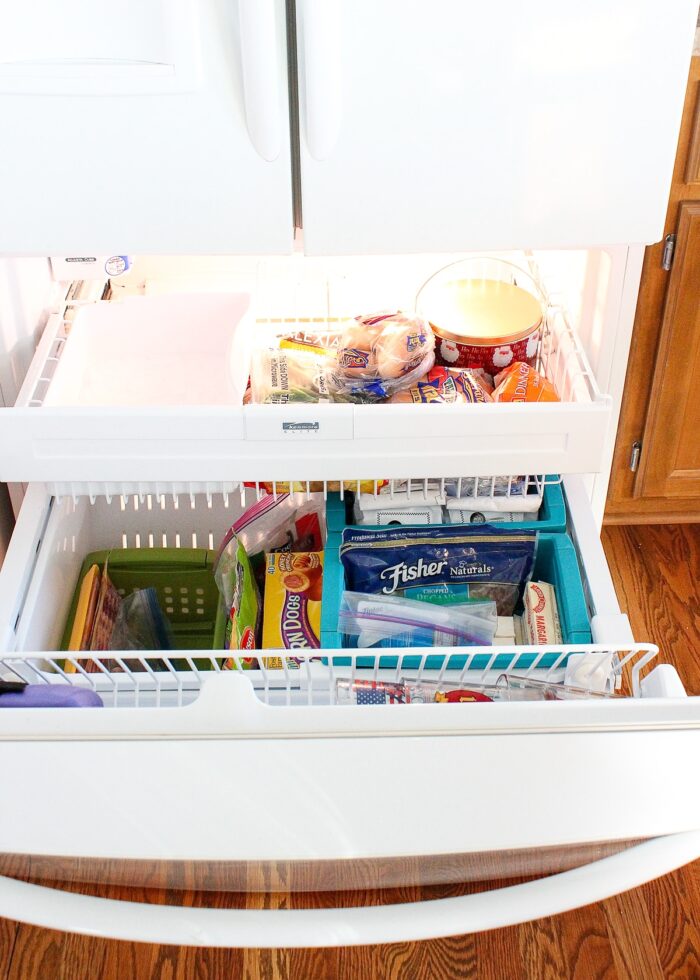
Start to Eat Up Pantry and Freezer Foods
So that you don’t have to dump a ton of good food (or secretly stash it so the movers will unknowingly pack it), this is the time to empty your pantry, refrigerator, and freezer. Start baking to use up that flour, oil, and sugar; and plan meals that specifically use the items you still have on hand.
Want to save this post?
TIP! Use your pantry staples to create freezer meals that you can eat in the final days when cookware is packed up or you’re too tired to cook. Just make sure you use disposable containers.
Now is also a time to curtail your usual grocery shopping habits. Instead of buying the large mustard, buy the small bottle. Instead of 20 chicken breasts, buy 5. With some planning and forethought, you can greatly reduce how much has to be thrown out at the very end.
Use Up Non-Movable Consumables
In the same way that you should start proactively eating up your food, this is also the time to start using up your propane (grill up all your frozen meats!), gasoline, cleaning supplies, paint, and other hazardous items that can’t be moved and are tough to get rid of. Sure, you can give, sell, and trash these items; but by using them up in the remaining weeks, you’ll get your money out of the products and be less wasteful.
Start Preliminary Home Repairs
As you’ll see down below, we like to save most of our home repairs and cleanings until after the moving truck pulls away and the house is empty. That said, if/when you have the time in the month before your move, you can start to tackle “less intrusive” cleaning and maintenance projects such as taking down peel-and-stick wallpaper, replacing light fixtures, and repainting closets, laundry rooms, or other small nooks that don’t have a lot of furniture in the way.
I don’t like to live in chaos any longer than I have to, so I only recommend tackling projects that cause minimal disruption to your home and household.

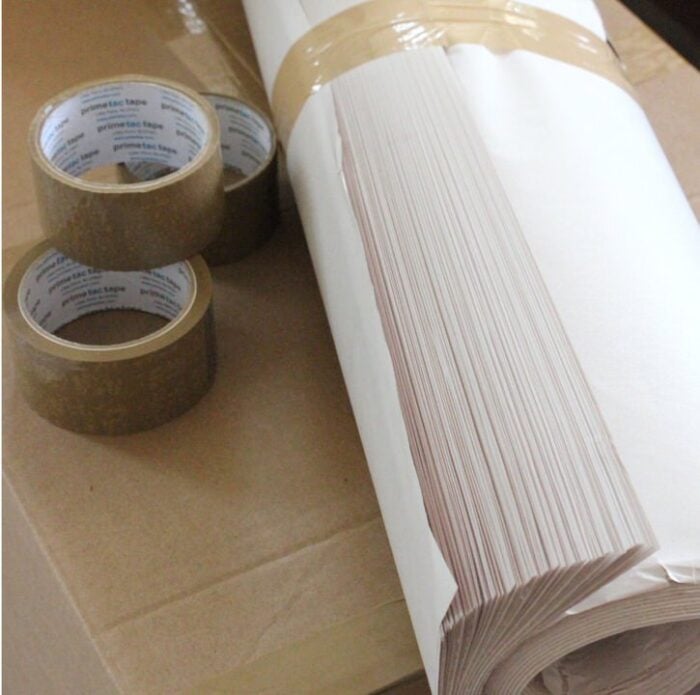
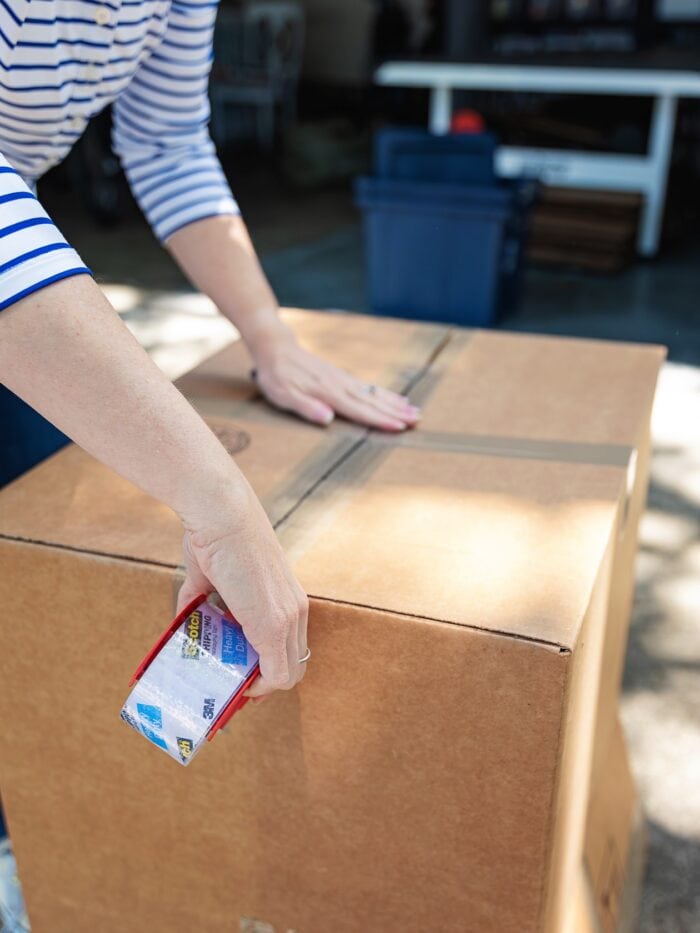
Gather Moving Supplies
If you are not using a professional moving company for your relocation, this is the time to start gathering up all the boxes, paper, bubble wrap, floor coverings, and tape that you need to pack boxes.
Prepare For the Transition
This is also the time you want to more proactively prepare for the transition of your life from one area to another. Beyond just packing up your moving essentials, it’s time to pick up medical records, military documents (e.g., orders), school records, prescriptions, veterinarian records, etc. Hand carry these files in your Moving Binder or store them in your “No Pack” zone.
1-2 Weeks Before Moving Day
This is the part of the moving timeline where the packing and preparations really shift into high gear. In our experience, there are lots of things that can’t be started until this final stretch (otherwise, you just make the disruption longer and more widespread), but it does mean these final two weeks are a bit chaotic!
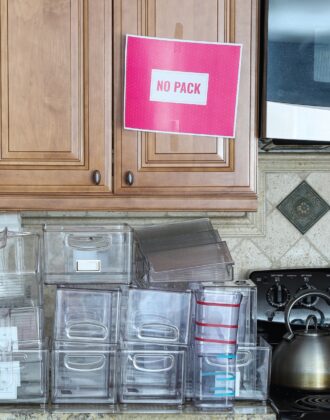
Identify & Set Aside Your “No Pack Items”
Military moves are notorious for being long and unpredictable. You never quite know how long you will go without your belongings. As such, we always recommended keeping a host of moving essentials with you at all times.
You can see exactly what we consider our moving essentials here; but what’s more important is where you put them. It’s imperative that you designate a “No Pack Zone” (usually a closet, spare bedroom, or even your cars) so these essentials don’t get accidentally packed into boxes.
“Pre Pack” What You Can
One of my favorite moving strategies of all time is to “pre pack” small collections of items into Ziplock bags. This includes everything from small office supplies and toys, to baby clothes, crafts, and kitchen utensils. If smaller items are not bagged up, professional movers often just dump them into large boxes or wrapped in large sheets of packing paper…which means they are a huge mess when the boxes eventually get emptied.
Order a variety of Ziplock bag sizes and work around the house to start packing up any small collections you won’t need access to until after you’re in your next home.
Identify & Inventory Valuable Items
Whenever you (or a professional moving company) relocate expensive items, it’s really important that you fully document them so you can file claims in case they go missing or get damaged. Before everything is boxed up, inventory the brand, size, serial numbers, and other defining features for all your high-value items (e.g., jewelry, electronics, antiques). Be sure to also take pictures of the item(s) condition, which can be helpful when filing claims.
The Last Few Days Before Packing Up
Take Items Off Walls
From art and shelving to curtain rods, mirrors, and more, there is indeed a lot of things to take off the walls. But experience has taught us that you should take these things off the walls at the very last minute. Especially if you have kids, you don’t want to be preciously walking around breakable items leaned against walls. We tend to take curtain rods down earlier but almost always leave frames, mirrors, and TVs up until the night before the packers arrive.
Group Items to Be Packed Together
Movers will come into a room…let’s say Bedroom #1…pack everything up and label the boxes “Bedroom #1.” Then they will go into the Nursery, pack everything together, and label the boxes “Nursery.” But let’s say in your next house, you’re combining the Nursery and Bedroom #1 and want everything boxed up together.
While you can certainly re-label boxes after they are packed, it’s often easier to pre-stage items as you want them to be boxed. Although this might mean spending time moving items around your current home, it also means they’ll come out of boxes in the right spot on the other side!
During Pack Out
Moving day has finally arrived, but there is still much to be done! Here is how we usually fill our days while packers are busily boxing up all our belongings.
Monitor Packers
Even though you can’t help, it’s always recommended that you monitor the packers. Not only will your presence ensure items are packed to your liking, but you can also answer questions and mitigate problems as they arise.
TIP! We always make slice-and-bake cookies for our packers. Keeping them happy keeps our stuff safer; and warm cookies are easy to make and provide a morale and energy boost for everyone!
Perform Easy Maintenance Tasks
I can never just stand still and watch packers handle all my stuff, so I usually busy myself with tasks I can do while staying out of the way. As rooms get packed up, you can move in to remove peel down wallpaper, fill nail holes, clean, etc.
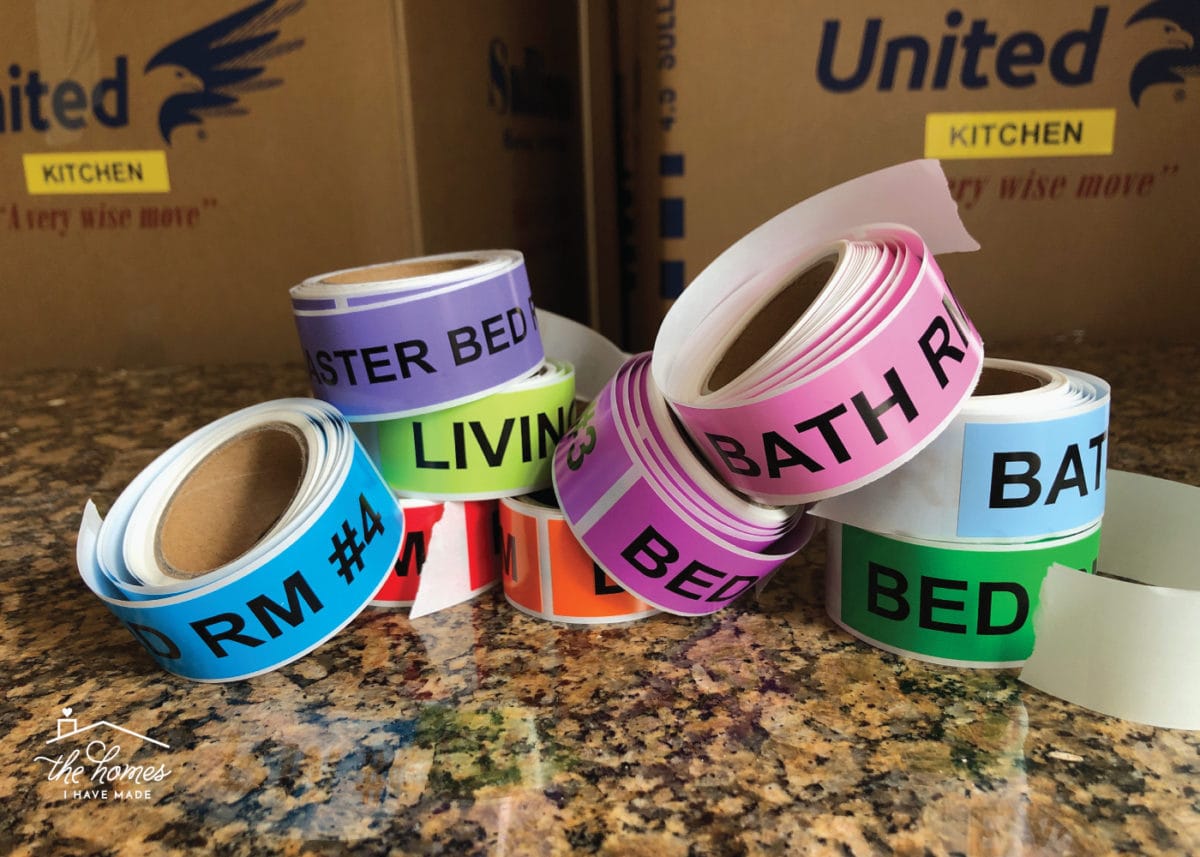
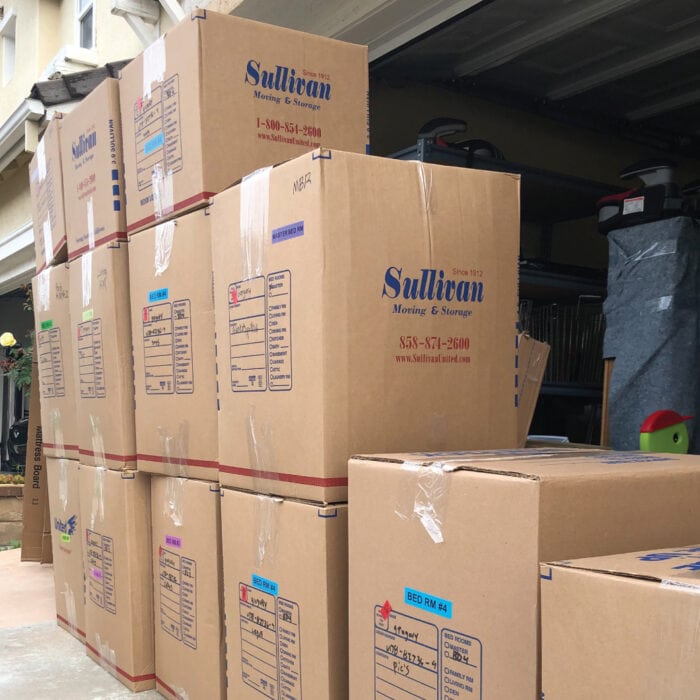
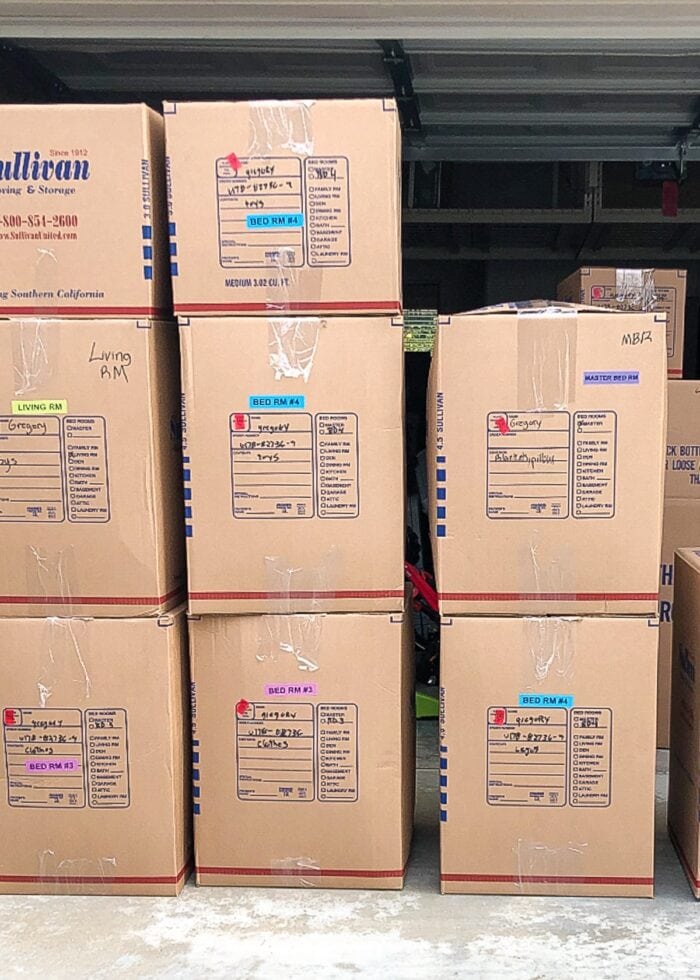
Re-Label Moving Boxes
Once the movers finish packing your boxes, I highly recommend taking time to revisit them and re-label for your new home if necessary. Again, packers will label boxes for the current home, which may or may not help you as they come off the moving truck at your new home. So while everything is still in place and the memory of what is where is still fresh in your mind, use brightly colored markers, Duck tape, or color-coded moving box labels to re-label your boxes in a system that makes sense for you!
After the Packers are Gone But Before You Leave
Perform Heavy Maintenance Tasks
Typically, it’s only after our homes are completely empty that we tackle large maintenance tasks like re-painting walls, cleaning carpets, cleaning the house, etc. It is much easier to do these things with a house empty of both stuff and people. As such, we try to build in a 2-3 day buffer between when our stuff is packed out and when we have to turn over the home to the next residents.
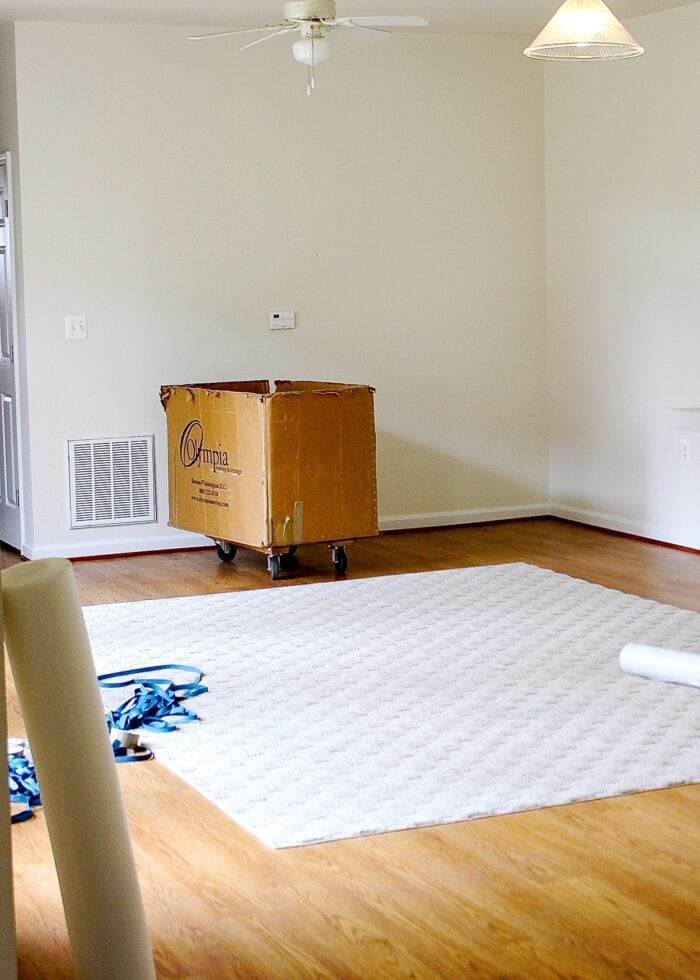
Final Close Out of Your Current Home
Before you can officially set sale to your next destination, you must first officially close out of your existing home. This usually includes a closing (if you’re selling) or a final inspection walk through with a landlord or property manager.
Also, before you get too busy setting up your new home, make sure you close the final loops on getting back your security deposit, stopping rent payments, and officially starting mail forwarding to your new address.
Printable Moving Timeline Worksheets
Looking for all this information in an easy-to-print format? You can now get this fully editable printable Moving Timeline worksheet as part of the Smooth Move Printable Pack!
Do You Have a Move Coming Up?
Check out my comprehensive collection of moving resources!
- The Complete “Smooth Move” Printable Moving Binder System
- Countdown to a Military PCS | Our Moving Timeline
- How to Declutter Your Entire Home Before a Move
- These are the Moving Supplies You (Really) Need
- Easy Ways to Generate Extra Cash for a Move
- The BEST Moving Advice From Experienced Military Spouses
- Moving Essentials | What You REALLY Need Moving From One Home to Another
- Planning Your New Home Furniture Layout - Online Tool
- Planning Your New Home Furniture Layout - Paper Tool
- How (& Why) To Color Code Your Moving Boxes
- The Easiest Way to Pack Jewelry for a Move
- What to Do With Plants when You Move
- How to Fill Nail Holes In Your (Rental) Walls

For those of you facing a relocation, whether it’s a long-distance move or just down the street, I hope you find this moving timeline (and coordinating insights) helpful. Moving is indeed a lot of work, but with proper planning in a timely fashion, you can save yourself a lot of time, stress, and money. Be sure to check out my moving archive for even more tips; and for my fellow military spouses or frequent movers, please share your favorite tips and tricks in the comments!
Megan

18 Comments on “Countdown to a Military PCS | Our Moving Timeline”
We just moved, and it was actually my first move of my adult life. The house we lived in was the one I moved into upon graduating from college 16 years ago. I was so excited to move and did binders and lists and everything – and it was all going SO well until we ended up moving a MONTH EARLY. What!?!? So what I learned from that was to start packing early because you never know when you might be glad you did. So many of my friends made serious fun of me for starting to pack in February for an April move. They stopped laughing when we moved in March!
Don’t forget to frantically see all the sites around your current home that you’ve neglected to see!
Where are you moving to?
Hi Laura!
We haven’t yet shared where we are moving to here on the blog! For safety and security, we prefer to “reveal” it after we’ve moved…so you’ll just have to keep an out eye in the coming months 😉
Thanks for stopping by!
Megan
Hi Megan
What a lovely post you offer us today
We moved a lot in the past years so I completely understand what you fées and thanks a lot to share alll your deep feelings with us
Two posts a week is a great gift as you will have so many things to do
Have à Nice week
Michèle
Thank you so much Michèle! I appreciate everyone’s support and understanding as we head into this very busy time!!!
Hope you’re enjoying the kitchen printables!
Megan
Can’t wait to find out where you’re going and see the “final” photos of your current home.
Hi Casey!
I can’t believe it’s time to wrap up this house! I swear we were just moving in! Final room reveals will start popping up in coming weeks, and then I’ll do a final home tour in a month or so! Then onto the next “mystery” home 😉
Thanks for stopping by today!
Megan
Sweet Megan… These are great moving prep and survival tips even for non military! Love that you want to keep us (your readers) up to speed and do posts twice a week… It’s okay to take a week off – we understand! of course I will miss you… Be careful not to burn out. Enjoy the last few weeks of Kansas, be safe… Looking forward to your posts, and yiur new location!
Hi Laurie!!!
Thank you so much for the support and encouragement! This blog is my baby (and oftentimes my sanity and my lifeline, lol!) so I want to make sure I am prepared as possible to keep it afloat during our transition. We are taking some family vacations in the middle of it all too…so I will get some R&R…but I have so many ideas for a post…I don’t want to stop all together! Readers like you keep me going…thanks for stopping by today!
Megan
I can’t wait to see what you do over the next few weeks. Enjoy the new few weeks. Make sure to have lots of fun with your family and friends. I know I’ll keep checking Tuesday/Thursday/Saturday because I love reading your posts. 🙂
Thank you for always being one of my biggest supporters and cheerleaders! It’s the best feeling in the world to know I have readers out there excited to see what I post next! Thanks for always making room for me in your busy week, and taking the time to leave the sweetest comments! It means a lot 🙂
Megan
I just found your blog, love it…….best thing I found when moving was to pack each individual days clothes into a plastic bag for the travel days, that way when we got to the hotel, you could just grab a single plastic bag out for the night, and leave the suitcase for later!
Enjoy the move….my generally favourite part of military life!
I have endless admiration for what you do! My husband and I have moved locally 4 times in 4 years of marriage and I simply can’t imagine frequent moves between states. We are moving across the state in a couple months (and hoping to STAY PUT for a good long while!) and I will absolutely be using your tips.
Thank you so much for this note, Megan!
It’s certainly not easy (or fun at times 😉 but it’s part of our adventure. I think no matter how close or how far you’re moving, it’s still a huge ol’ headache! So much to do and just a huge life disruption! I hope you do indeed find yourself staying put for a while!!! I’m totally jealous 😉
Hope you had a nice week!
Megan
I always like these posts, as much as I can’t relate I always love reading on a more personal level. Those are also great tips! I know you will get everything done and be well on your way before the movers get there! Good luck 🙂
Lauren | Lovely Decor
xx
I enjoy your blog. We moved 3 times in 3 years and never again! Very unsettling when you are in your 70’s. Your organization and creativity make moves easier and each home is warm and cozy. Thank you to your husband for his years of service and to you and your children for adapting so well. Stay safe.
Megan,
As a 16 move now retired Army officer’s wife, why didn’t I find you 25 years ago!? One of our bathrooms was always designated as a no pack zone and our kids, dogs, cats, jewelry and valuables lived in there, usually sitting in the bathtub eating Mickey Ds! ! Plus overseas moves (Germany, Hawaii) required several different packing categories…hold baggage, storage, main move…that was always hardest for me. I hand carried jewelry and my wedding silver overseas with me…pre 9/11. Also I use your baby sewing tutorials now for my grandchildren and friends. You are a genius! Good luck with your move! Thinking of you!