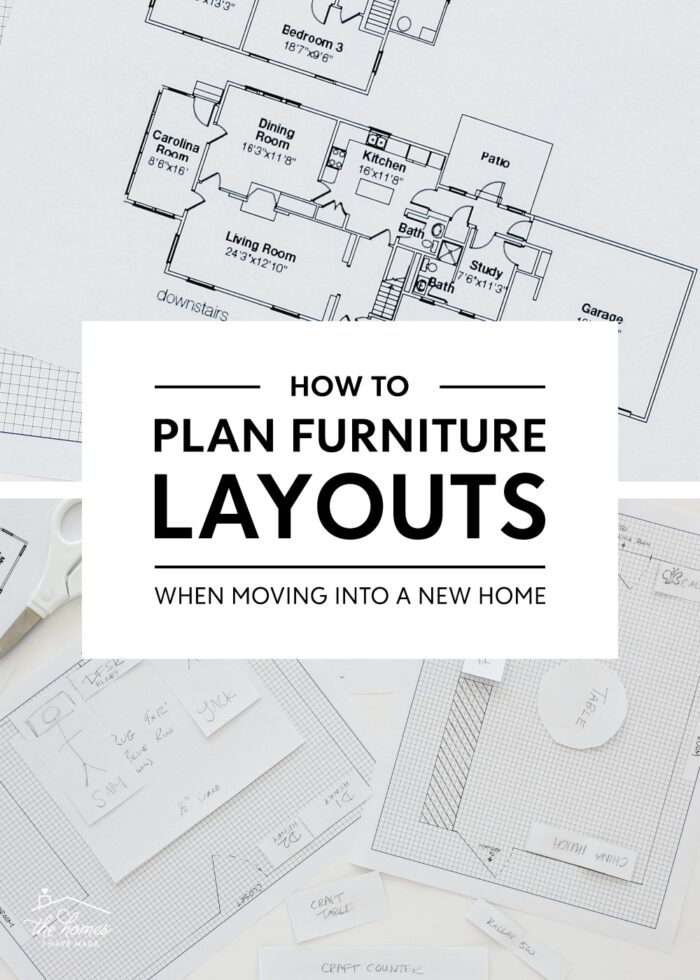
How (& Why) to Plan Your Furniture Layout Before Moving Into a New Home
I am really excited to share a recent planning activity Greg and I did for our upcoming move: we planned out where (most of) our furniture will go in our next home. This is an activity we loosely do each time we move, generally deciding (ahead of time) where each couch, bed, and dresser will go based on available floor plans and photos. However, this is the first time we are downsizing from one home to the next, and I’ve been growing anxious about how and where everything will fit. So we broke out the tape measure, graph paper, and scale ruler to space plan the furniture for every room in our new house. This exercise was as fun as it was useful, and I’m now convinced it’s a “must do” before any big relocation. Let me break down exactly how to plan your furniture layout before a move (and why I think it’s so helpful!)
What Is a Floor Plan/Furniture Layout?
Even if you’re not entirely sure what a “furniture layout” is, you’ve likely seen them on your favorite design shows, blogs, mood boards, and magazines. You might have even done a rough version that last time you re-arranged your living room.
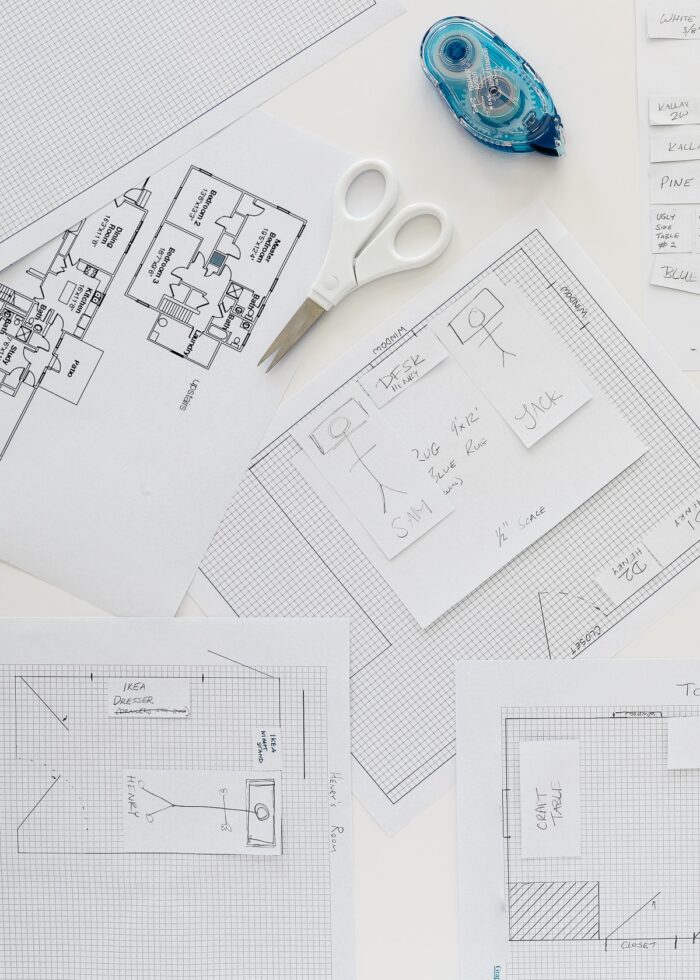
A furniture layout is essentially a 2D, top-down representation of a space, created to scale, in order to give you an idea of how a room’s furniture can be laid out. Not only do these furniture plans help you visualize what items can fit where, but they also show how much space there will be for walking, sight lines, etc.
While you can use an online room planner, I am such a visual person that I wanted to be able to see large-scale representations of our rooms and easily move furniture around from space to space. Although a little tedious, drafting everything out onto graph paper was both easy and super effective in helping us find locations for most of our furniture (some of it in very unexpected places!)
Why Plan Your Furniture Layout Before Moving Into a New Home
Planning a furniture layout can be a valuable exercise anytime you want to buy new items or do a room makeover. But it’s an exceptionally helpful endeavor when you’re trying to visualize how all your current furniture will fit (or won’t) into a new home. Here are some benefits to a pre-move furniture planning session:
- Helps the Pre-Move Purge. Almost every relocation is charged in terms of weight. So to keep your weight as low as possible, we recommend getting rid of items you know for certain won’t get used in the next home. This planning activity helps you determine which items to get rid of before the movers even arrive, ultimately saving time and money throughout the entire moving process.
- Expedites Move In. There’s no reason you can’t rearrange furniture after you are unpacked and settled, but it’s worth knowing exactly where every item will go so that you can direct movers/helpers to place things as they come off the truck. This ultimately helps you get settled faster, and reduces the likelihood you’ll have to beg neighbors/friends to help re-arrange heavy items down the road.
- Reduces Move-In Surprises. A furniture plan can reveal items that are the wrong size for certain spots, as well as gaping holes that will need filling. This helps alleviate surprises on move-in day and also allows you to budget for items that might need replacing in order to fit in the new space.
What You Need to Create a Furniture Layout
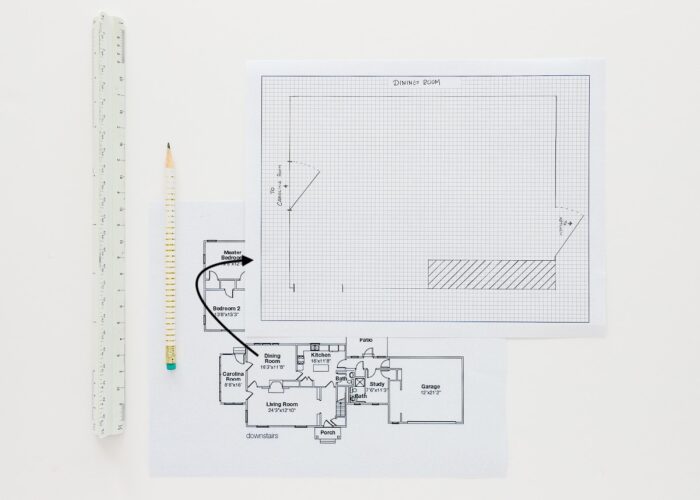
1 – A Floor Plan
So that you can create truly realistic (and therefor, helpful) renderings of your actual space, it’s imperative you have an accurate floor plan…or at least really precise room measurements. Floor plans are often available from the homeowner, property manager, or rental management office (and are also sometimes shown on Zillow listing too).
If you are taking your own measurements, be sure to note all windows, closets, bump outs, nooks, fireplace walls, and air vents/returns, as they will all effect where certain furniture items can get placed. Camera photos/videos of the room can also be helpful when a floorpan leaves certain features a little vague.

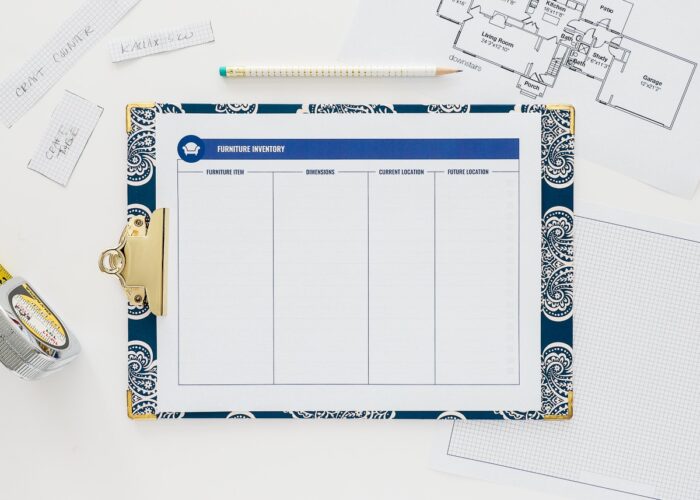
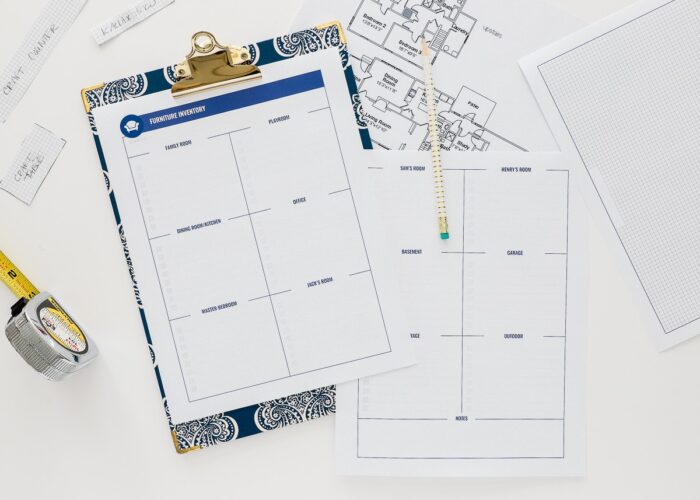
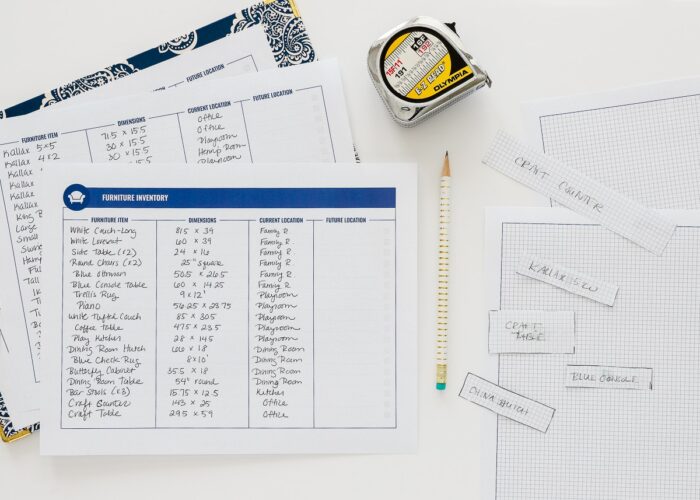
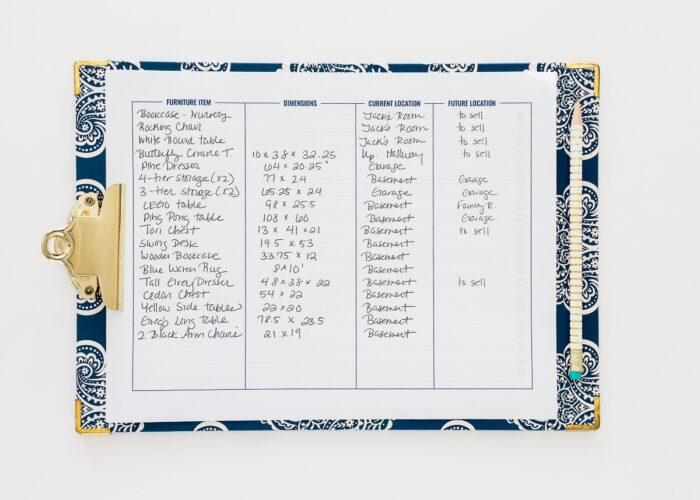
2 – Furniture Inventory
Next, you will need a list of every furniture item in your home with their dimensions. How you organize this list (e.g., by room, furniture type, most-favorite to least-favorite) is completely your preference. This list can be made on scratch paper, in a notebook, on a spreadsheet, or even in an app. I used the printable pages directly out of my Smooth Move Printable Pack.
3 – Printable Graph Paper
You will also need some printable graph paper. You can easily find this online, and I also have several versions available inside the Smooth Move Printable Pack as well. We like the 1/8″ graph paper size, as it’s small enough to fit (pretty much) everything on a single page, while large enough to draw and see things easily.
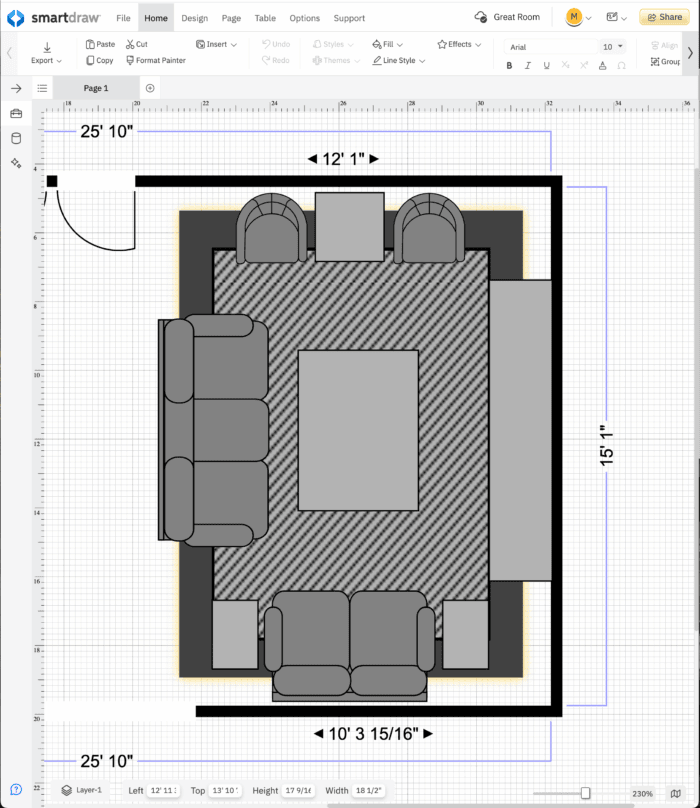
Pssssst – Want to skip the arts and crafts? There’s now an online tool you can use too! I explain what it is and how to use it here: Figuring Out What Goes Where In a New Home
4 – Other Supplies
Finally, you’ll need a few basic measuring and drawing supplies to complete your furniture layouts, specifically:
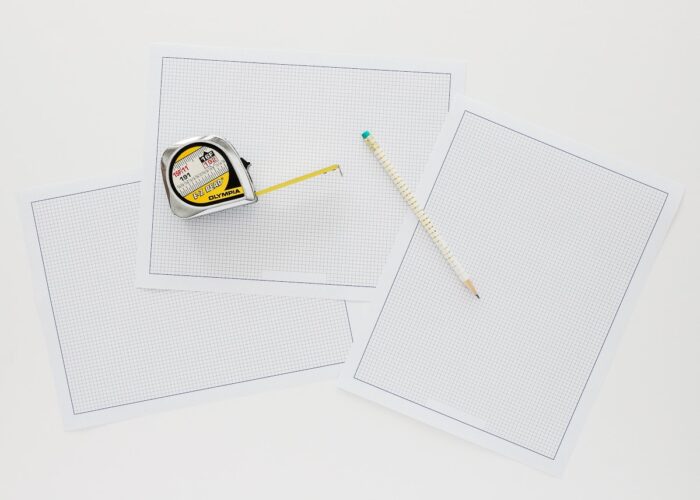
- Measuring Tape
- Clipboard (it’s really helpful when moving around the house to take furniture/floor measurements)
- Ruler (a Scale Ruler can be helpful but not necessary)
- Pencils
- Removable Roller Adhesive or Light Double-Stick Tape (for securing layouts in place)
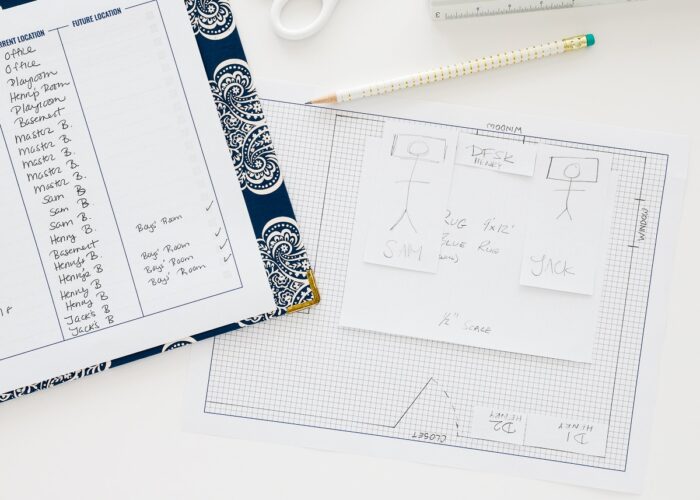
Step 1 – Determine Your Scale
The first thing you must do is determine the scale for all your room design and furniture renderings. Essentially, you need to set how many blocks on the graph paper = how much physical space in real life. Whatever scale you choose, it should be used consistently across all your mockups.
For almost all of our renderings, we used 1/2″ = 1′ scale, which translates nicely to 4 blocks = 1′. When using most printable 1/8″ graph paper, this will allow you to create renderings up to ~20′ feet long x ~15′ wide.
In the event that your room dimensions will not fit nicely onto a single sheet of graph paper at this scale, you can always adjust it. We have one room in our future home that measures 24′ long, so we adjusted our scale to 3/8″ = 1′ in order to get it to fit on a single sheet (shown below).
TIP! If you need to adjust the scale for just one room, be sure you also adjust the scale of all the furniture that will go into that room (and mark it all accordingly). Whenever possible though, try to keep all of your renderings in the same scale so you have the flexibility to move items from room to room, knowing they are sized correctly.
Step 2 – Translate Floor Plans to Graph Paper
Once you have your scale determined, you will need to translate your floor plans (or measurements) to the graph paper, working room by room. Representing general lengths and widths of a room’s size is fairly straight forward. However, determining precise window, door, closet, and bump-out locations can be tricky from a floor plan alone. Try to get specific measurements for these details from the room itself; when that isn’t possible, use standard estimates (e.g., door frames are generally 36″ wide) and photos to help with placement.
TIP! You may be tempted to omit windows, doors, and other features along the side of the room in your renderings, but these items influence where you can place furniture. Whenever possible, always include these features on your layouts.
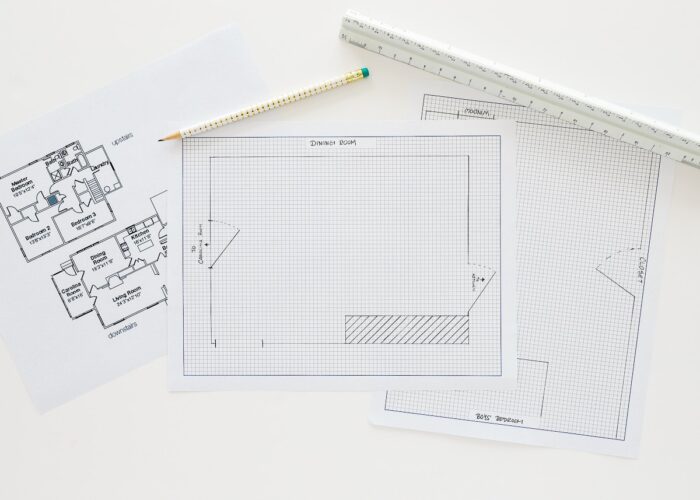
In full transparency, Greg is a drafting wizard and did all of our room illustrations. A straight-edge and some patience are all you really need in order to get solid working layouts for each room in your new place.
TIP! You only need to draft up rooms that will have furniture in them. We didn’t bother creating renderings for the bathrooms, laundry room, foyer, etc.

Step 3 – Inventory & Measure Your Furniture
Next, compile a complete inventory of every piece of furniture you own along with their measurements. You will (at least) need width and depth numbers; you can also record the height of each piece if you anticipate it needing to fit under particular home features.
We found it easiest to go room-by-room with a tape measure and clipboard. Greg measured and called out the numbers, while I recorded everything on our furniture inventory pages.
Want to save this post?
TIP! You will want to record everything that will take up floor space. This includes small furniture items like side tables and stools, but not necessarily decor items (such as lamps, artwork, etc). However, do include area rug measurements on your list. Although they aren’t furniture, it’s helpful to visualize how they will fit in a space too.

I do recommend inventorying/measuring everything, even pieces you already know won’t get moved to your new home. Having measurements handy makes it easier to list things for sale; and a complete list of every item in your home ensures you make a plan for each and every one.
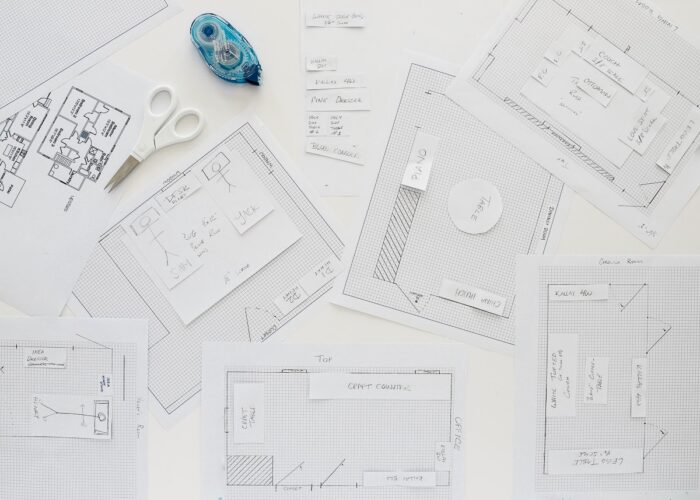
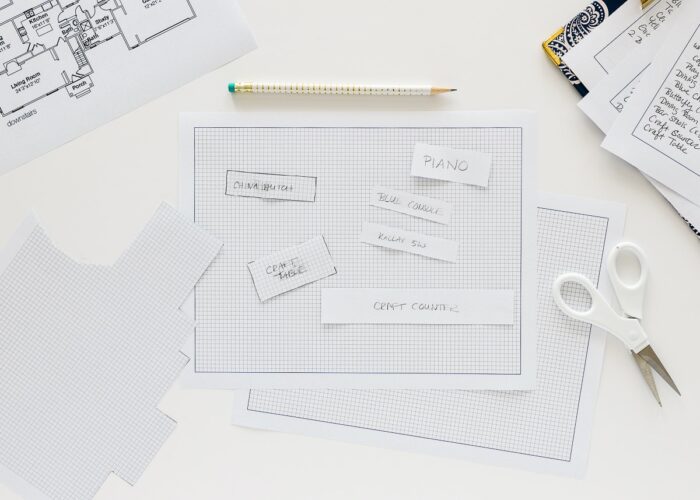
Step 4 – Create Furniture Mockups
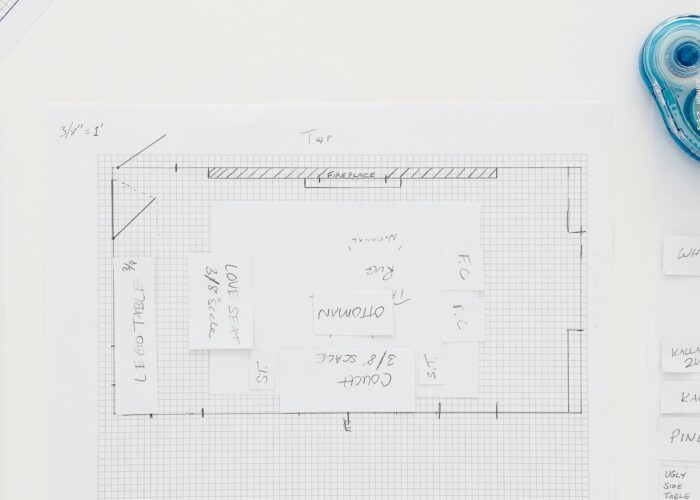
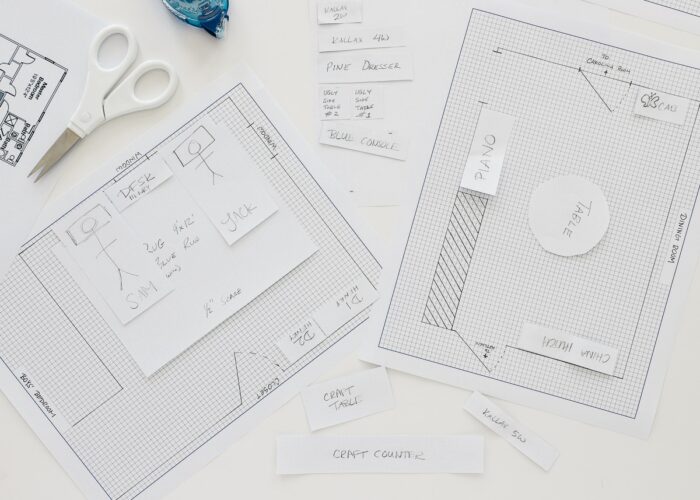
With all the measurements in hand, you will next create paper mockups of each furniture item in the same scale you used for the room layouts. I found it easiest to translate all the measurements onto some blank graph paper and then cut them all out at once.
This is actually quicker and easier than you might think. If you’re using the same 1/2″ scale we did, use this equation to figure out how many blocks each item is:
Measurement in Inches / 4 = # of Blocks (on 1/8″ graph paper)
Our White Loveseat = 60″ x 39″ = 15 x 9.75 blocks (round up when needed)
Make sure you label each item as you cut it out, and include descriptive details if items are similar (e.g., Black Armchair versus White Accent Chair).
TIP! Although you will use the graph paper side to determine your measurements and cut out the furniture mockups, we found it easier to see each item on top of the room layouts with the white side up. So once you cut everything out, add labels to the back/white side too!
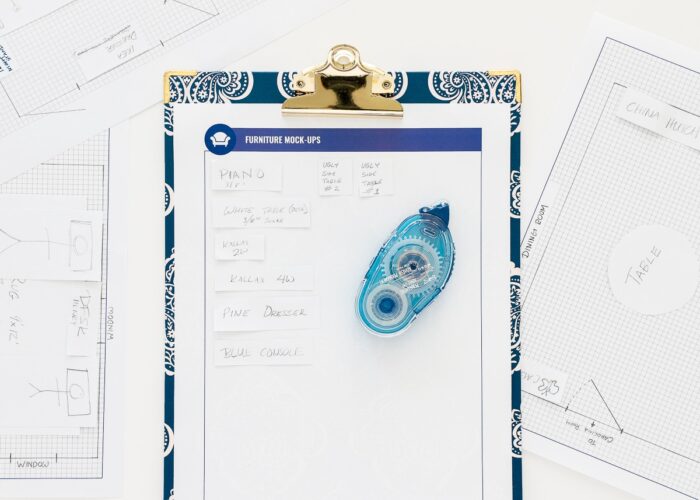
Once we started cutting out furniture, it didn’t take long for us to start losing them amidst the trash and extra graph paper. So that you can keep track of all your furniture items as you cut them out and move them around, consider making a “carrier” sheet.
Place a tiny bit of removable roller adhesive/double-stick tape on the back of each item and stick it to a centralized paper. You can move various items on/off the sheet as needed, and they will also stick in place on the room layouts as you finalize your designs.
Step 5 – Experiment with Various Furniture Layouts
Once you have all your rooms and furniture in properly scaled mockups, it’s time to start experimenting with different layouts…this is the fun part! There are no rules here, simply move items around until you find great combinations that work for your particular furniture, home, and needs.

TIP! One thing that REALLY helped us was to abandon our “preconceived notions” of what was “supposed” to go where. Once we started looking at items purely by scale and function, we came up with layouts that would have never occurred to us otherwise. Really challenge yourself to “just try things” to see what might work. The beauty of this exercise…after all…is that you aren’t actually moving any heavy furniture around…just scraps of paper!
Step 6 – Account for Furniture on Inventory
As you start to identify “final” spots for each item, I recommend checking them off your furniture inventory list. Accounting for just a few pieces of furniture isn’t hard. But when you’re working through lots of furniture and lots of possibilities, it gets easy to lose track of what ended up where.
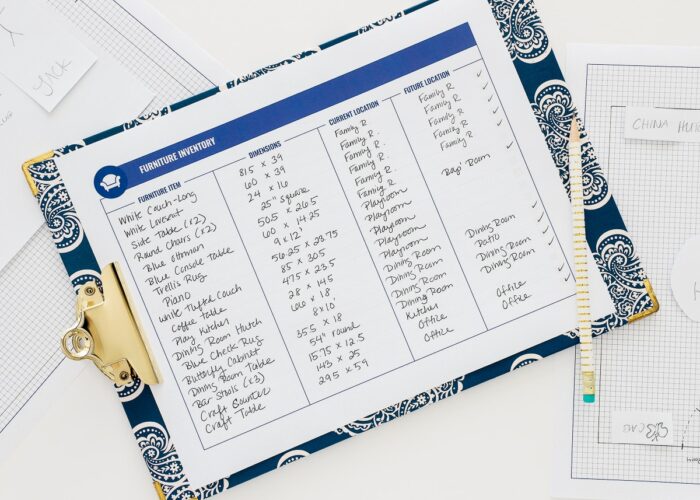
One of the best parts of this entire exercise is that by the end, it became very clear to us what we did and didn’t have space for. Anything that wasn’t given a proper home was easy to see by the lack of check mark and “Future Location” assignment. With these furniture items identified, we can now more efficiently decide if we want to keep them in a storage unit or garage or sell them off before moving.
Step 7 – Keep Furniture Layout Plans Handy
Finally, once you’re finished with this exercise, don’t just chuck everything in the trash. Whether you move frequently like we do or not, it’s worth keeping all your room and furniture mockups well after your move is over. Should you need to move again, you won’t have to start creating furniture mockups from scratch; and if you ever want to rearrange or re-imagine your home after you’ve moved in, you can return to these renderings to brainstorm new ideas.
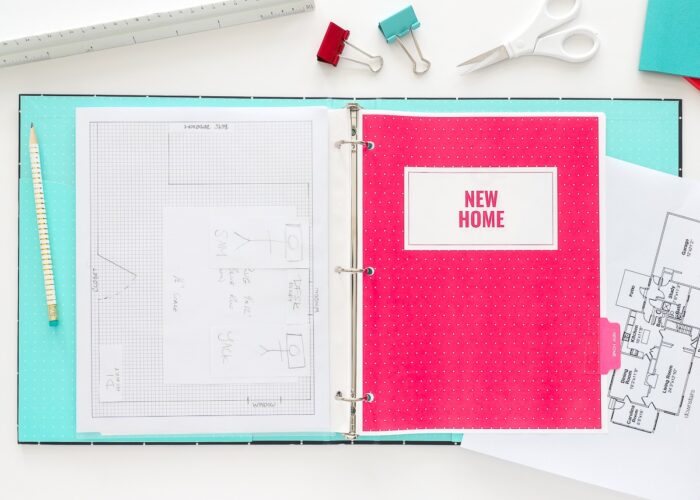
I placed all of our room layouts and furniture items into a page protector and tucked it into our Smooth Move Binder. This way, we can easily reference them throughout the moving process and adjust them the next time around!
Planning a Furniture Layout Is More Art Than Science
Finally, I want to mention one more important consideration. Because your floor plans are based on actual measurements, they should theoretically match up in real life. However, 2D paper mockups will not perfectly translate the “room feel” you’ll experience in real life.
This exercise will definitely give you a good sense of how and where everything will fit together. But if you just can’t figure it out on paper (or…as is our case…you identify furniture that doesn’t seem to fit but actually might)…then just wait until you are physically in the space with your furniture. Don’t pressure yourself to find a home and/or make a decision for every last item you own. While there is much you can figure out on paper, you might also find there are some things you just need to see in real life!
And if you end up with items that just don’t fit, figure out what to do with them here: Furniture Doesn’t Fit In Your New Home? Clever Solutions For Storing It!
Do You Have a Move Coming Up?
Check out my comprehensive collection of moving resources!
- The Complete “Smooth Move” Printable Moving Binder System
- Countdown to a Military PCS | Our Moving Timeline
- How to Declutter Your Entire Home Before a Move
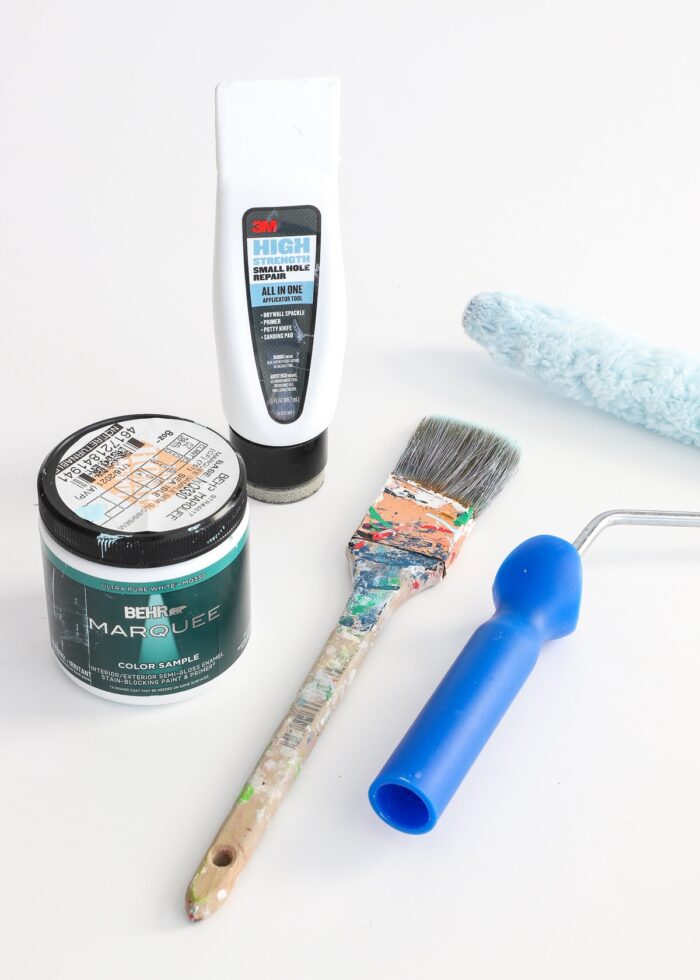
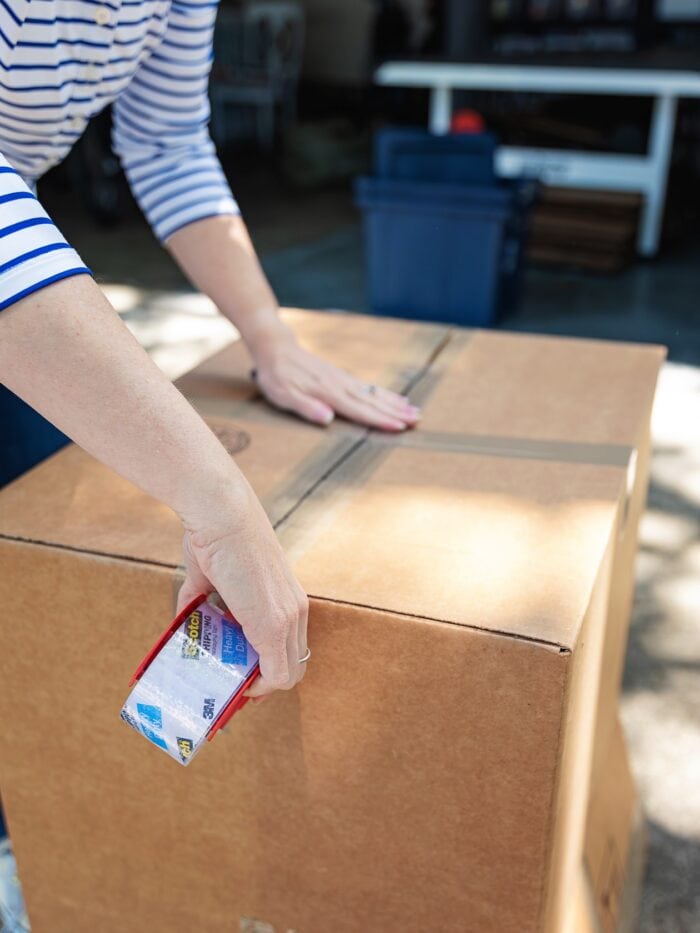
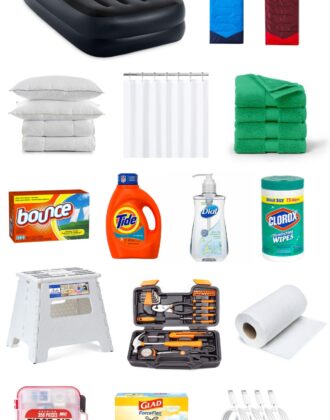
- These are the Moving Supplies You (Really) Need
- Easy Ways to Generate Extra Cash for a Move
- The BEST Moving Advice From Experienced Military Spouses
- Moving Essentials | What You REALLY Need Moving From One Home to Another
- Planning Your New Home Furniture Layout - Online Tool
- Planning Your New Home Furniture Layout - Paper Tool
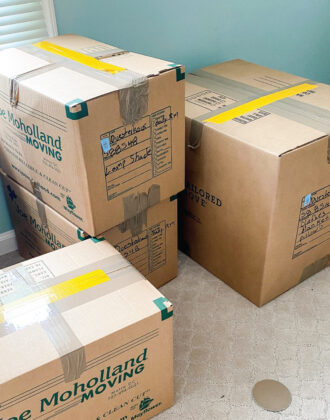
- How (& Why) To Color Code Your Moving Boxes
- The Easiest Way to Pack Jewelry for a Move
- What to Do With Plants when You Move
- How to Fill Nail Holes In Your (Rental) Walls

If you have a move coming up, I can’t recommend this furniture planning exercise enough! After spending a rainy Saturday afternoon plotting out our next home with all our furniture, we found places for far more than we expected. In fact, I’m not sure we can consider this move as dramatic of a “downsize” as I first thought. While we do have one room still to figure out and a few beloved items that don’t seem to work anywhere, we are much more confident about which items will (and won’t!) be coming with us on the moving truck and where they will all land when we get there!
Megan
4 Comments on “How (& Why) to Plan Your Furniture Layout Before Moving Into a New Home”
I did this when my husband and I moved into our house last August. I was in my first trimester of pregnancy and we didn’t know anyone in our new area. Plus some of our heaviest items ended up needing to go in the basement. It was so wonderful to be able to tell the movers exactly where to put things and not have to try to move them later ourselves!
I’ve been doing furniture layouts since leaving for college 20+ years ago. It is VERY helpful, and saves a lot of unnecessary shifting around. One additional things I’ve done at times has been to color the furniture (not really specific, just general brown, black, blue, etc) to give a visual as to how the colors of the pieces work (or don’t work) together. And another lesson has been to remember it is 2D not 3D, and that a short 2 shelf bookcase may look the same in my floorplan as the 6 foot bookcase, but the visual impact can be VERY different.
Awesome post, Megan!
And now I know what project I’m going to be working on this week!!!! We won’t know our floor plan until we arrive at our next duty station (Okinawa) but I can definitely get our furniture measured. Then after we arrive & are waiting for our HHG we can measure the house. I guess that’s one benefit of moving overseas & having to wait months for your stuff!
Have you ever taped out furniture placement?
I’ve done this system to rearrange various rooms (and even plan out a shed!) but now as we’re preparing for our new move I did the same thing using Adobe Photoshop instead of using a paper version. I simply turned on the grids, allowed each block to equal 4″, and away I went. Game changer!! I could duplicate shelving, beds, etc without having to cut each one out or keep all the pieces safe. I can also print up multiple copies for when we set up the rooms later. I love the idea of planning out rooms!