How to Sew Boxed Corners
If you tuned into Instagram this past weekend, you saw that I spent many hours seated at my sewing machine! I’ll show you what all I made on Thursday, but today I wanted to pop in with another installment of my Home Decor Sewing School series. This series is all about breaking down common techniques and projects that are used to make basic home decor items. I am not an expert sewer, but mastering these basic techniques has allowed me to create unique and perfectly-tailored items for our home, time and time again. We’ve covered how to make piping and pillows shams. Today I want to show you how to sew boxed corners, allowing you to transform a flat piece of fabric into a 3-dimensional one that can fit onto cushions, tables, and more!

Why Would You Need To Sew Box Corners?
Some of you may be scratching your head thinking “Why is it so handy to know how to sew box corners?” Well…mastering this one, very simple technique opens up a whole possibility of projects for your home. Even if you’re not following a specific pattern or project tutorial, understanding how to give a flat piece of fabric dimension via corner seams allows you to make really tailored fabric items such as slipcovers, cushion covers, sheets, tailored table cloths, and more! Here is just a sample of projects I’ve done in our homes over the years that have all used the boxed corner technique.
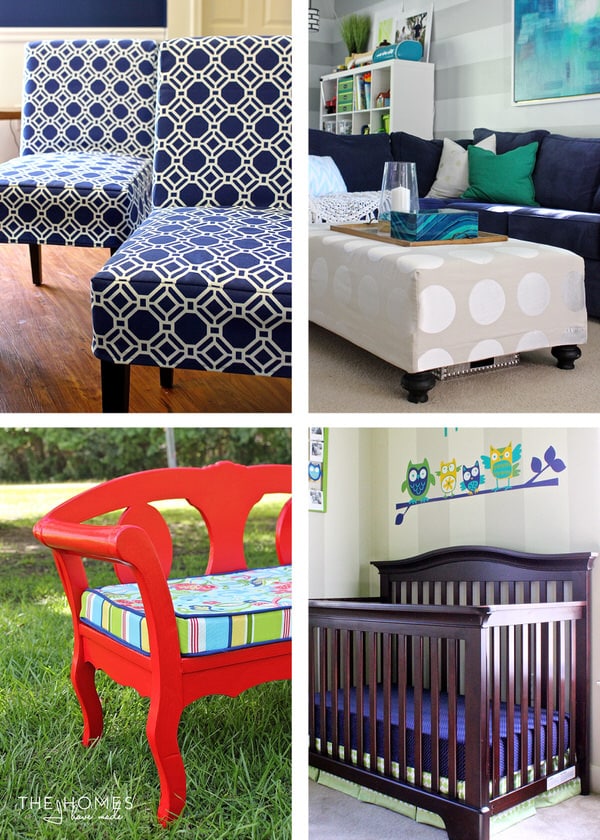
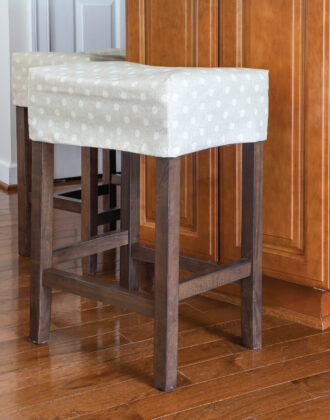
Chair Slip Covers | Ottoman Slip Cover | Boxed Cushion Cover | Crib Sheets | Barstool Slipcover
Materials Needed
Once you understand how to sew fabric together to make a simple corner seam, your eyes really will be opened to the various projects you can now do. I promise this one is a simple one…here is what you need to get started:
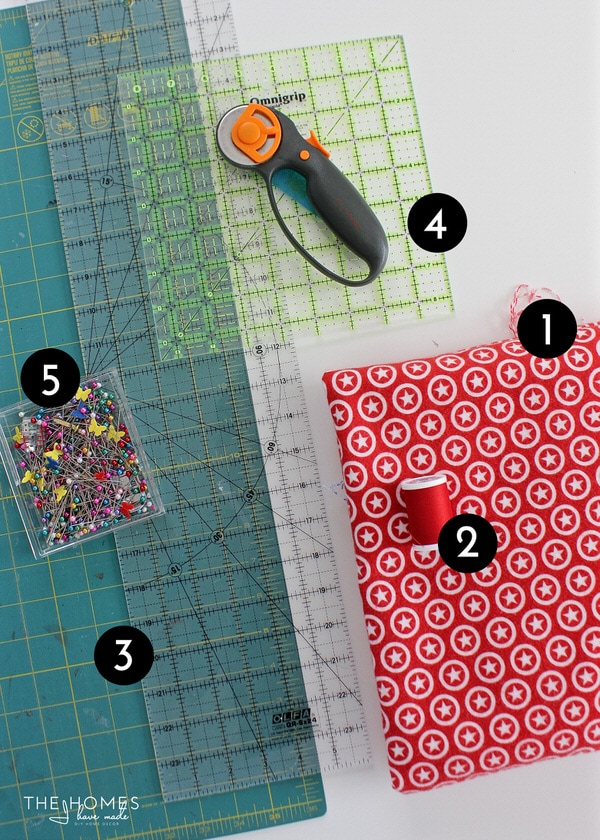
- Fabric
- Coordinating thread
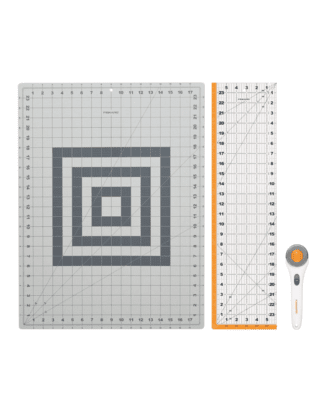
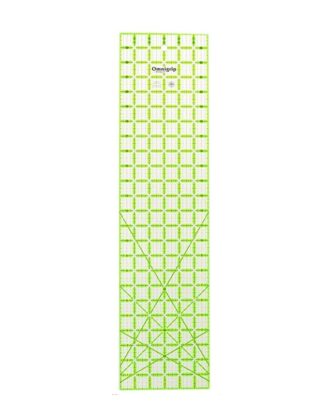
- Rotary cutting set
 including a self-healing mat, long ruler, and rotary cutter
 - Square cutting ruler (optional)
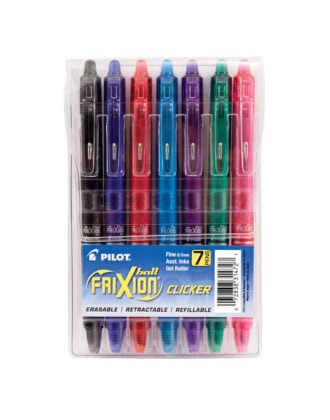
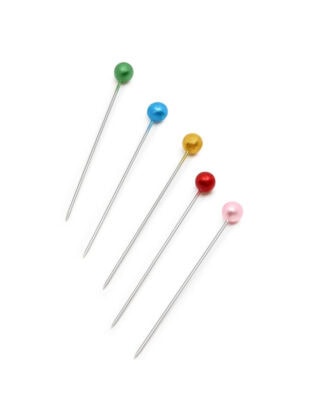
- Pins and sewing machine (not pictured)


Measuring and Cutting Your Fabric for a Boxed Seam
I’ve shared with you all before that I’m not really one for following patterns. I like to make things up as I go; I tend to look at my item and figure out how to get the look I want. That’s why understanding this technique is so handy! But since I don’t have a specific project I’m sharing this technique for, I’m going to speak in some generic abstracts. Let’s say you want to make a tailored table cloth, an ottoman slipcover or even a stool cover, you will need to measure your specific item that you are covering as described below to figure out how much fabric you need AND exactly what dimensions to cut the fabric down to:
A note here on letter C – the amount needed for hem and/or seam allowance. This measurement is somewhat up to you based on what you are doing and how much of a hem/seam allowance you like to work with. If you’re making a table cloth or slip cover, a 2-3″ hem is probably sufficient. If you’re going to be attaching another piece of fabric along the bottom (to make a full cushion cover, for example) then you may need only 1/2″ extra for seam allowance. Think about your project and how much excess fabric you will need here!
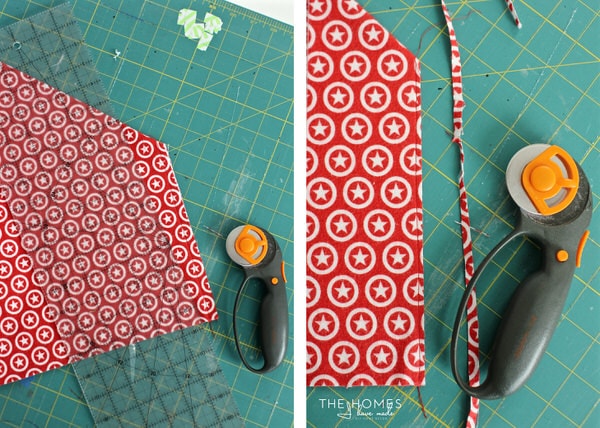
Once you figure out your dimensions for your specific project as described above, cut the fabric down using a rotary cutter and ruler…

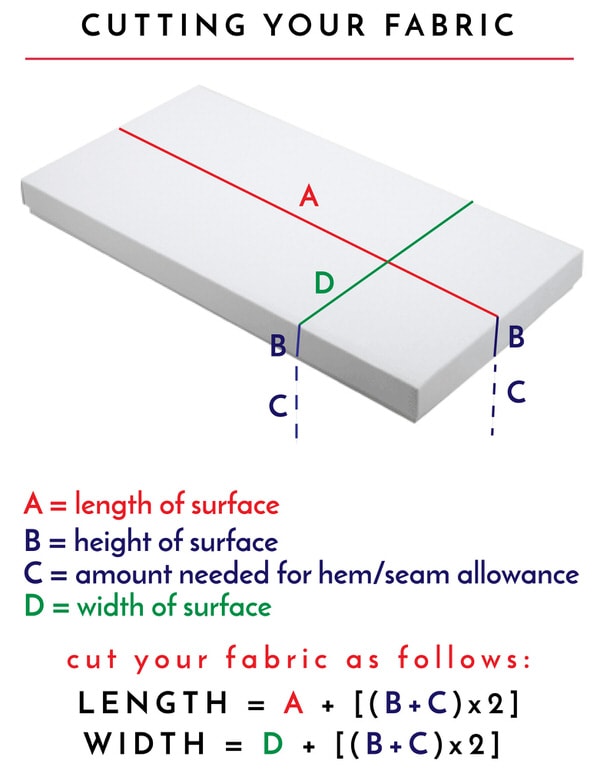
Next, you will need to determine how much fabric to cut away in order to make a perfectly-fitting corner seam. Use the graphic below to help you:
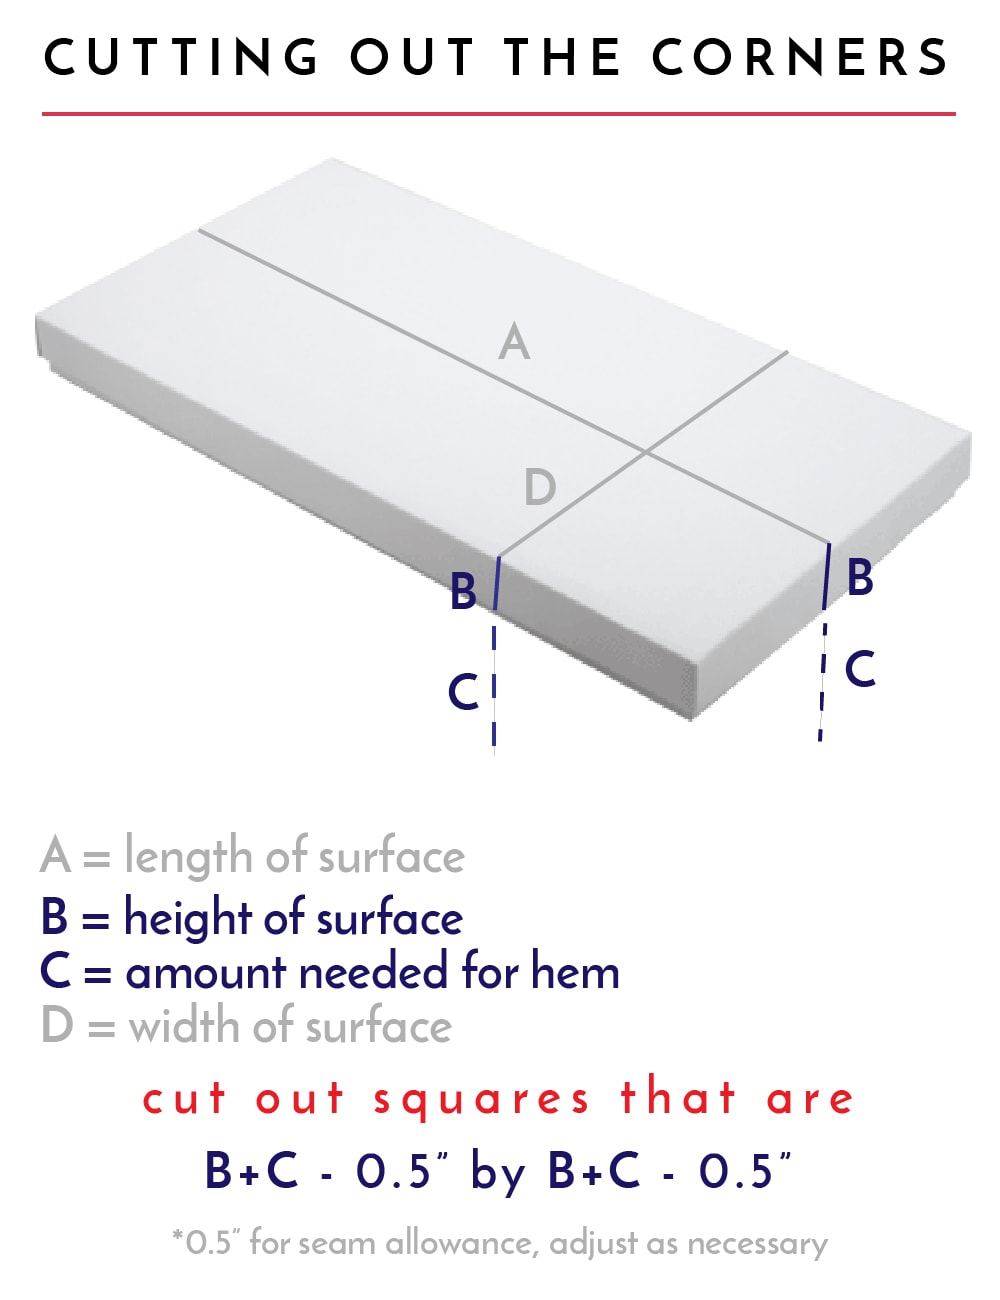 Update 6/2020: After some reader’s comments and experimentation myself, this equation has been slightly adjusted. I now recommend subtracting 0.5″ from your corner measurements to allow for seam allowances and ensure your cover fits your object perfectly. This seam allowance is for the surface of the cover (rather than the hem), so subtract it no matter the length of hem you use. The equation above has been edited to reflect this change!
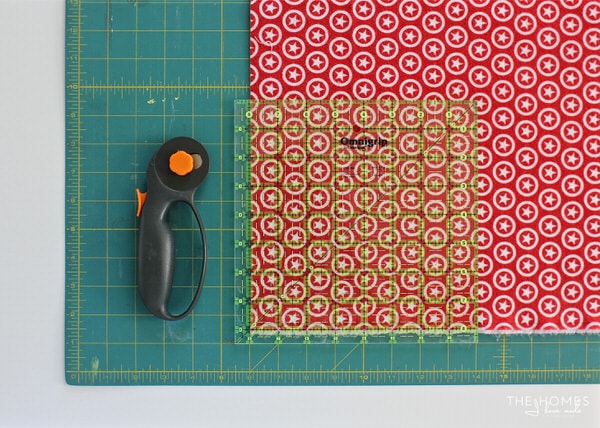
In my sample project, the item I am covering is 6″ high (B). I then decided to give myself 2 inches for hem (C). As such, I used my square ruler to cut out 8″x8″ squares from all four corners of my fabric. If you don’t have a square cutting ruler, you can use a regular ruler and a pen to mark your dimensions.
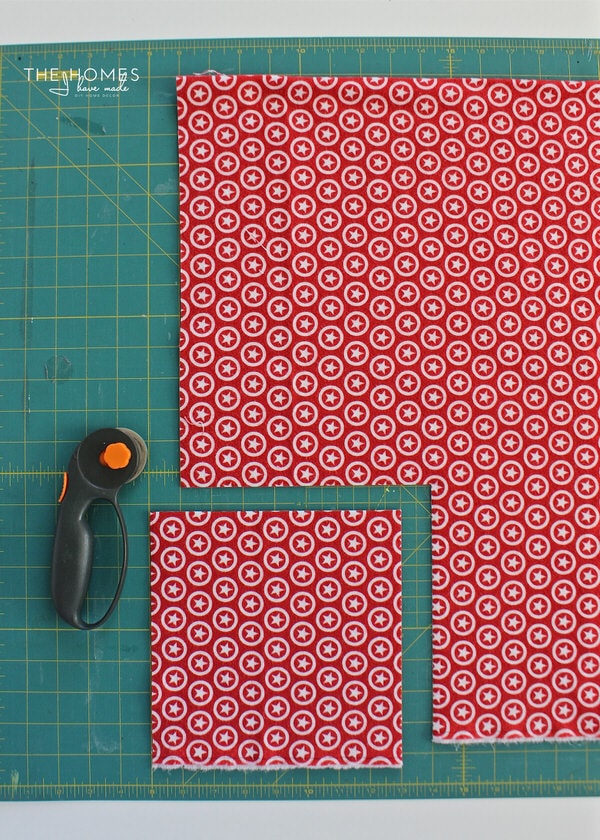
Next, cut out the square according to the dimensions you determined above!
How to Sew Boxed Corners – Method 1 (The Really Easy Way)
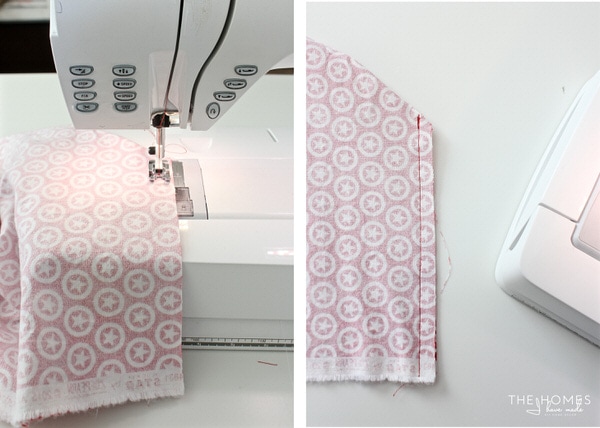
With your square of fabric cut away, it’s time to sew up your corners! Simply bring one of the cut out edges to the other (on the same square).
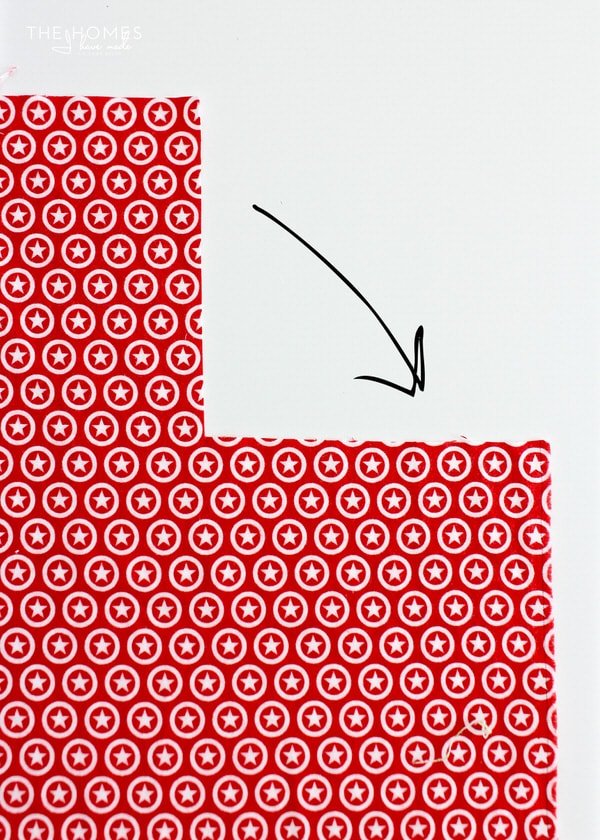
For this method, you’ll want to make sure your RIGHT sides are together and the top and sides line up perfectly. You may certainly pin this seam in place if you need to.

Using your sewing machine and coordinating thread, sew the two edges of the cut-out square together using a 1/2″ seam allowance.
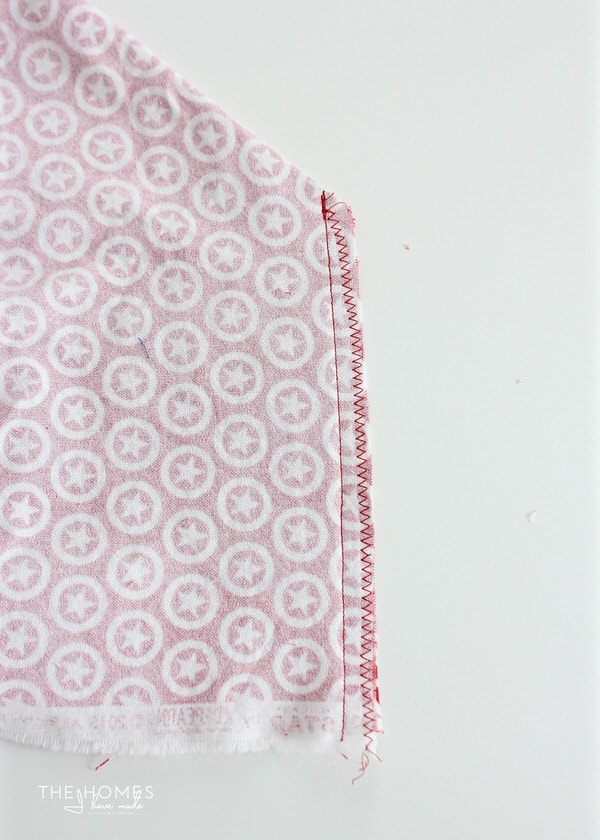
If your fabric frays or you want to keep the edges from rolling, you can either use a wide zig-zag stitch or a serger to finish the raw edge. Repeat the process on all four corners of your project.
Want to save this post?
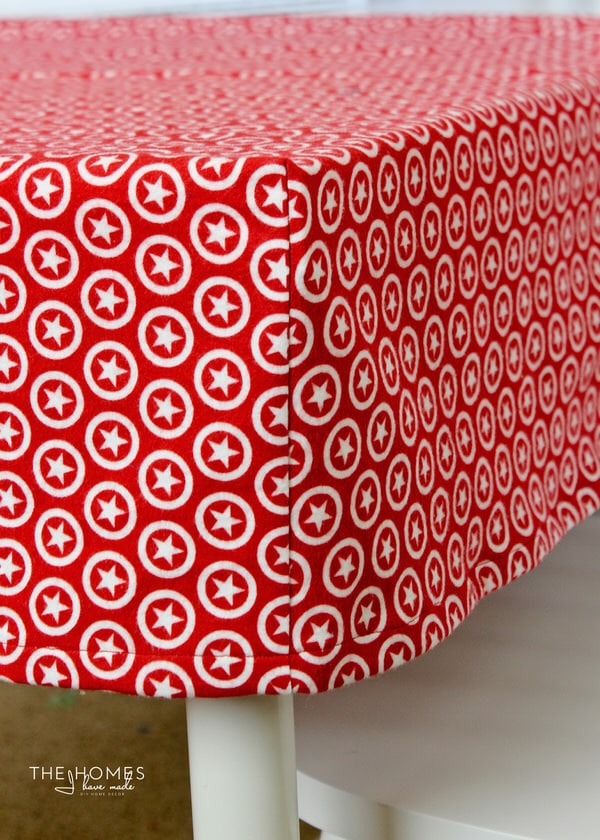
Once turned right-side-out and pressed, you’ll have lovely corner seams that allow your fabric to now fit perfectly over a table/cushion/whatever!
How to Sew Boxed Corners – Method 2 (French Seams)
The method I described above is super simple, friends. I mean it. You can have all four corner seams done in about 10 minutes. This next method (French seams – ooo la la!) is almost as easy and almost as fast; it just has a few extra steps to help make your seams a little more durable and polished!
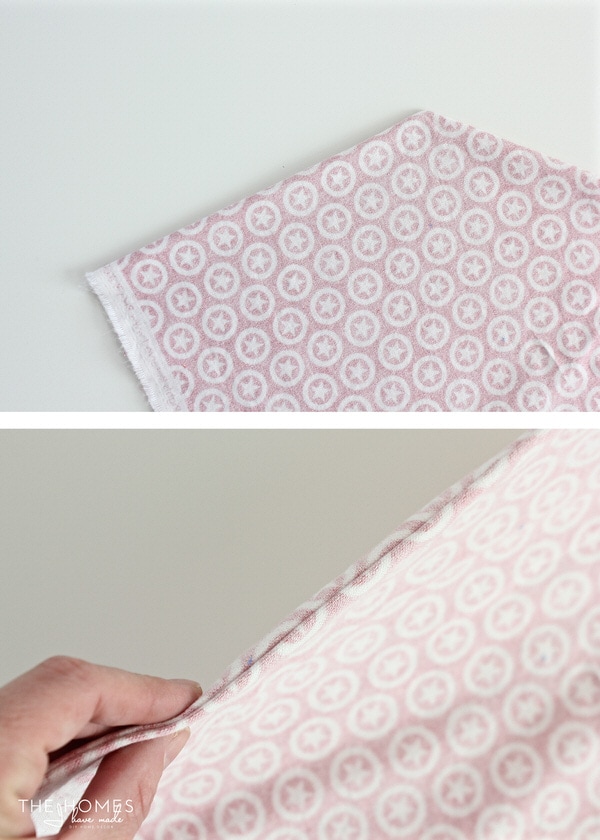
You will cut out your fabric and corners exactly as described above. This time, however, instead of bringing the RIGHT sides of fabric together, you will bring the WRONG sides of your fabric together. It’s still the two edges of the cut-out square, just brought together the other way.

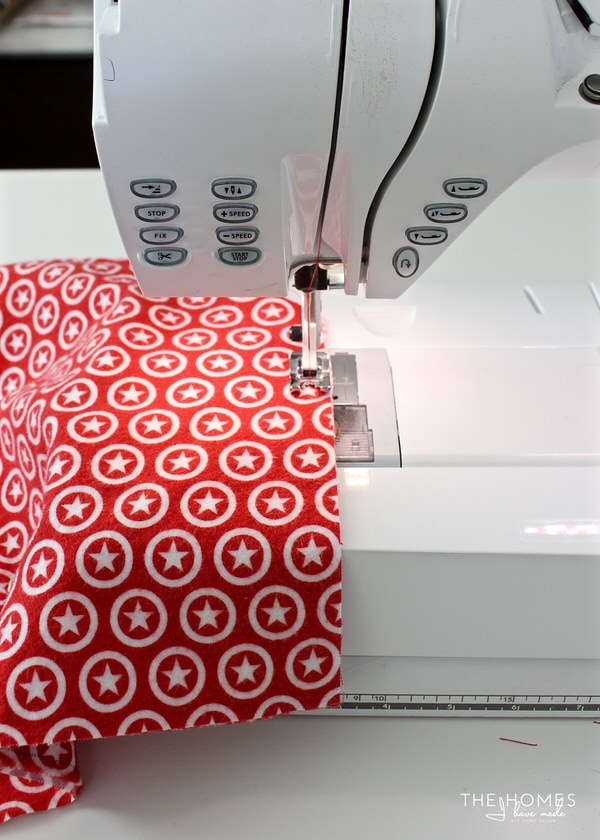
This time, sew the seam with a 1/4″ seam allowance…
Next, use a ruler and rotary cutter to trim away 1/8″of that seam allowance (essentially trimming it down by half).
Now, take that same seam and turn your fabric inside-out so that your RIGHT sides are finally together. You’ll notice below that this essentially flips your first seam to the inside. Press this seam with a hot iron to make sure it’s nice and flat.
Go back and sew the seam again, this time with RIGHT sides together but again using a 1/4″ seam allowance.

When done, you will notice that the raw edges are caught in between the two seams, meaning you don’t need to serge or zig-zag to clean up any raw edges.
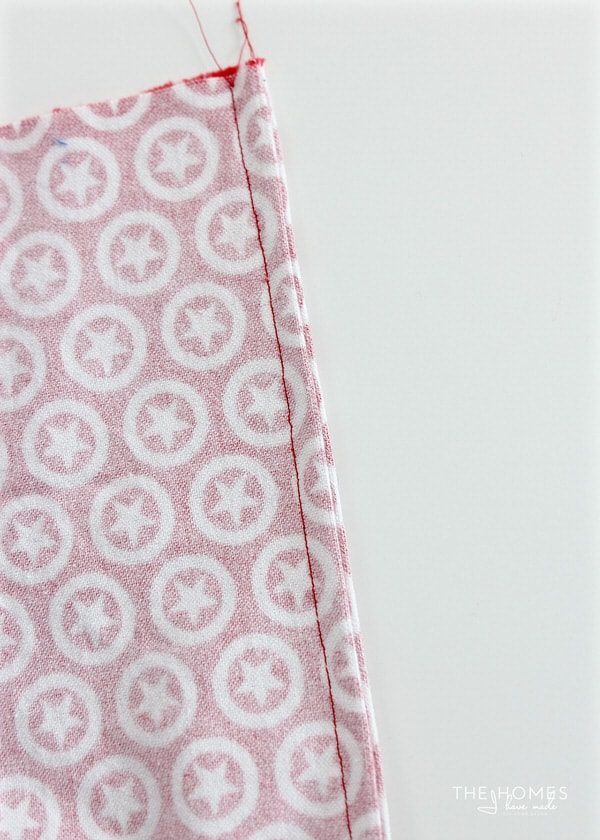
Again, once turned right-side out, you’ll end up with a lovely boxed corner seam!
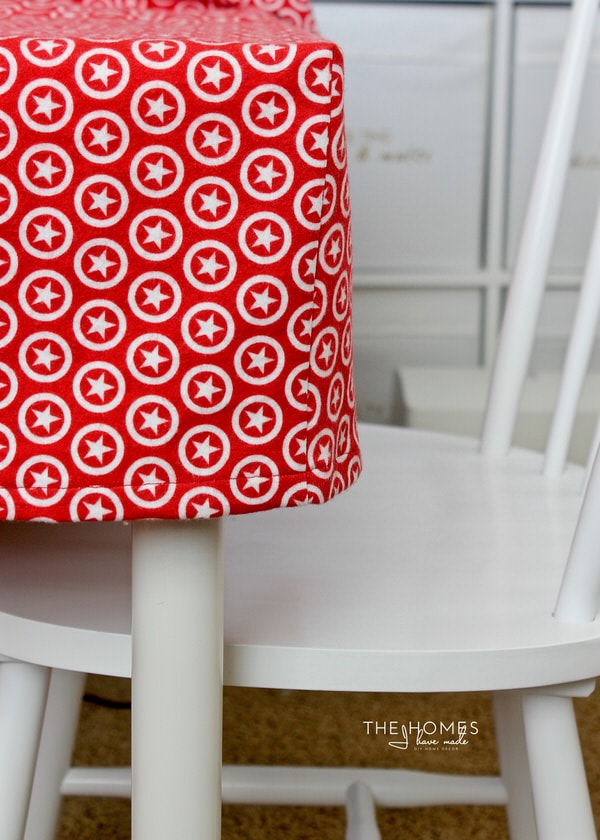
How To Select A Sewing Method
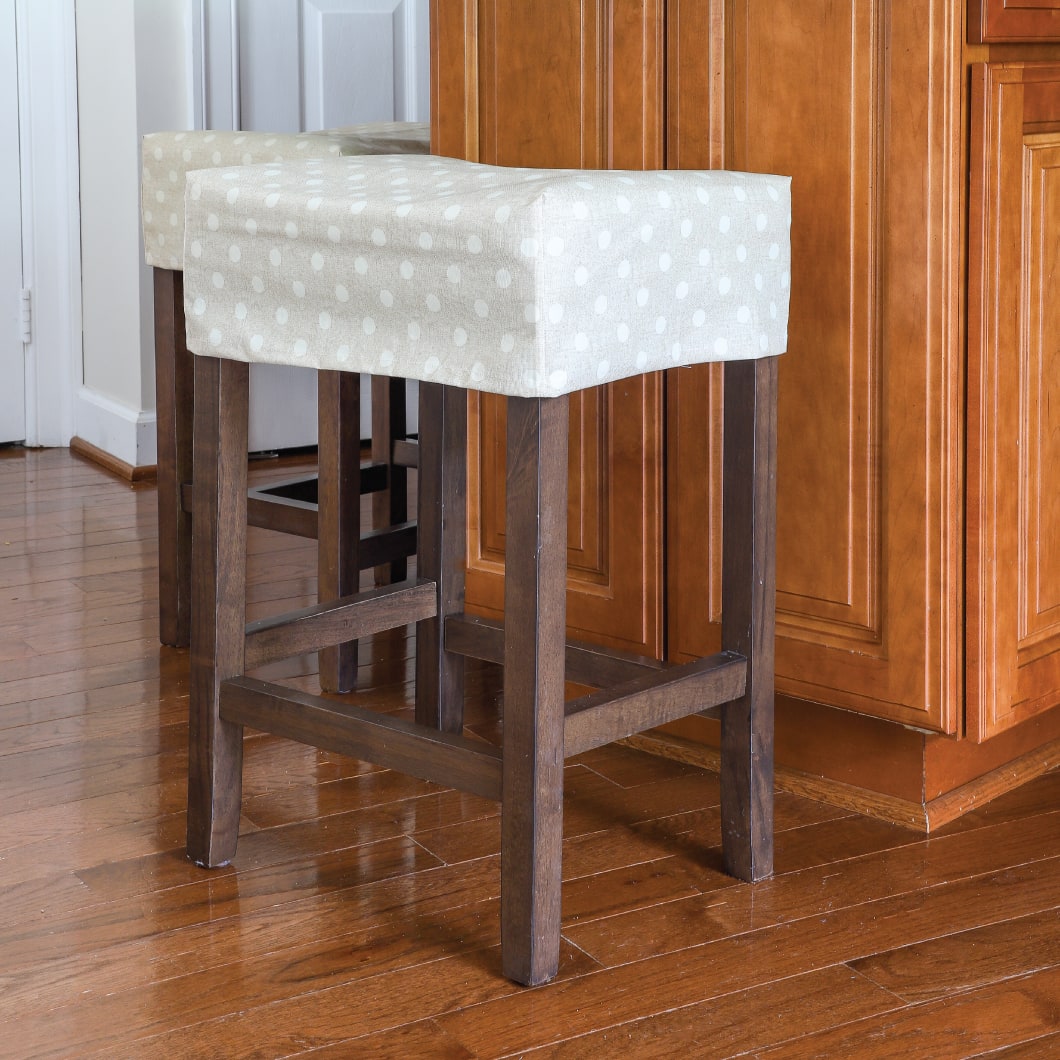
Which method to use is mostly a matter of preference and the type of fabric you’re using. This red star fabric is a flannel that frays like crazy. And since it’s going to be washed a ton, I chose to use Method 2 which enclosed the raw fabric edge into the seam. This way, with the loads and loads of washing it’s sure to get…I don’t need to worry about the fabric (and therefore the seam!) ultimately washing away! Sneak peek:

More Cushion Resources
If you’re using the box corner method to make new cushion covers, here are some other tutorials that may help:
Other Home Decor Sewing Projects to Try
Ready to make even more of your own stylish home decor? Here are some other easy projects to try next!
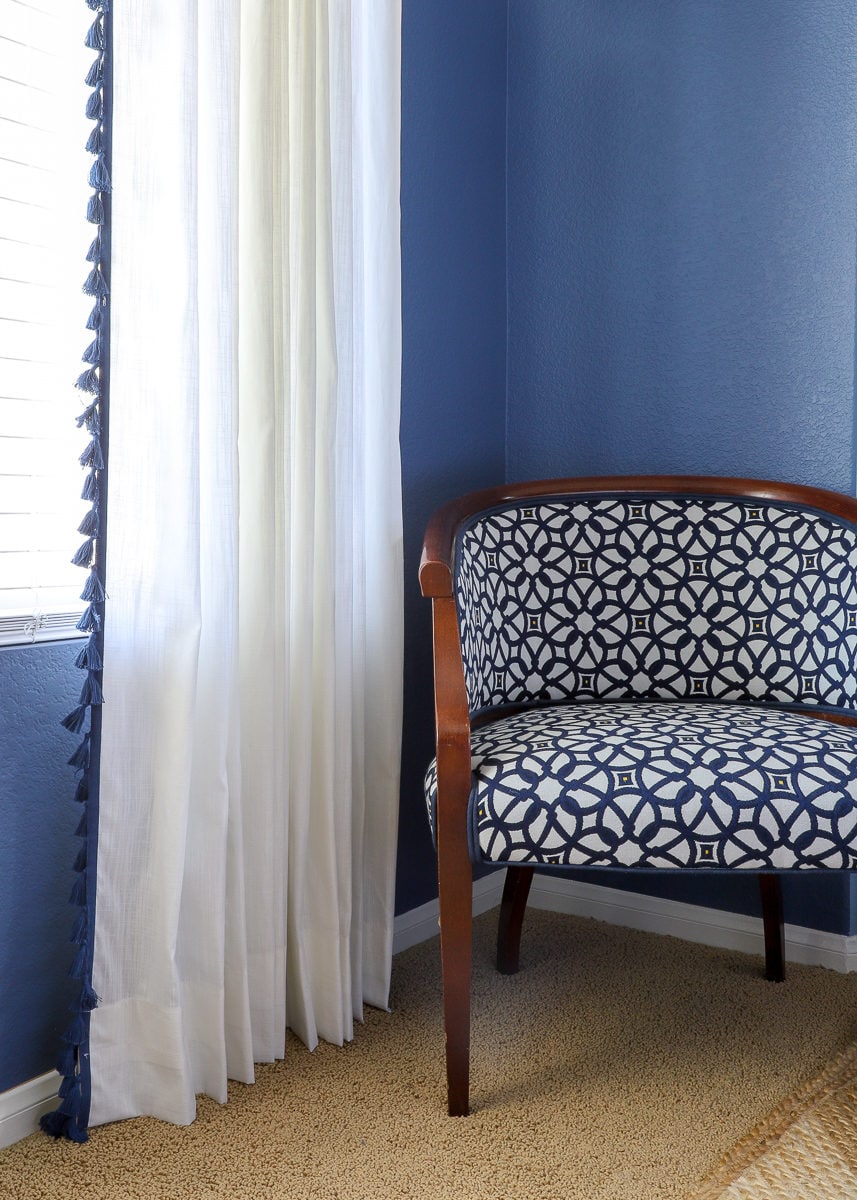
- How to Hem Curtains | A Foolproof Method!
- How to Sew a Pillow with an Invisible Zipper
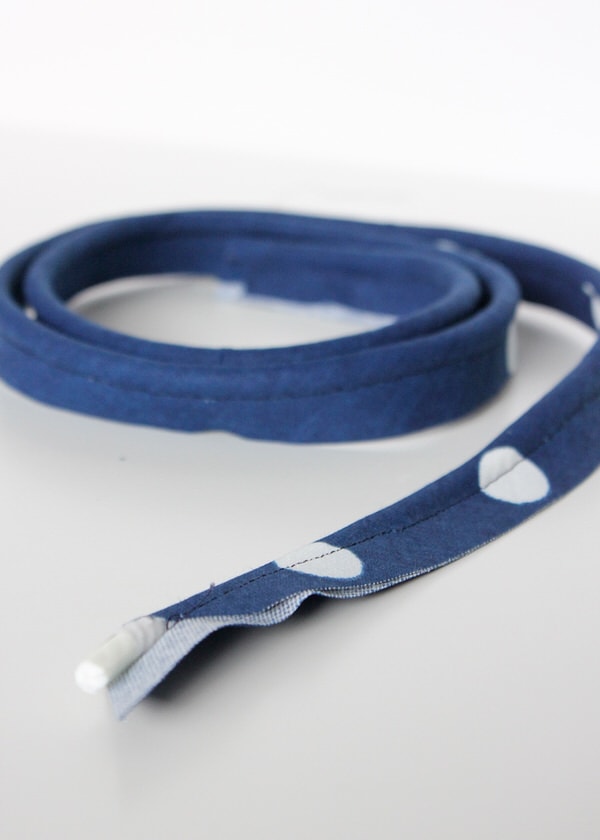
- How to Make Piping
- How to Sew Boxed Corners
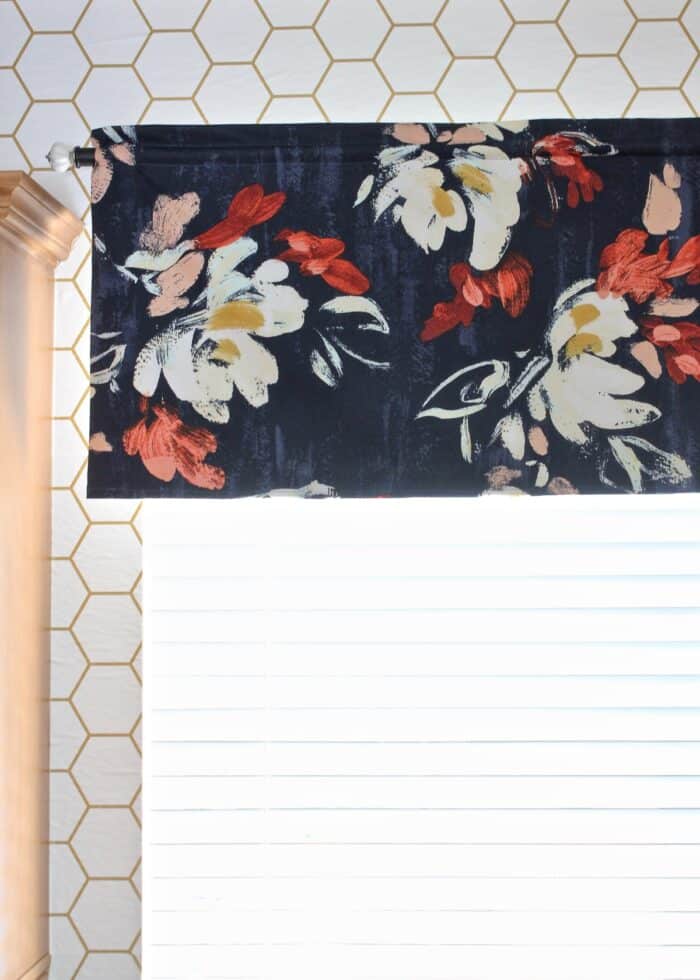
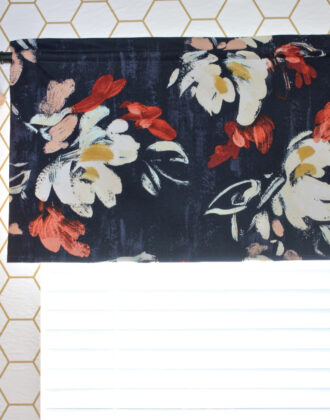
- How to Sew a Window Valance
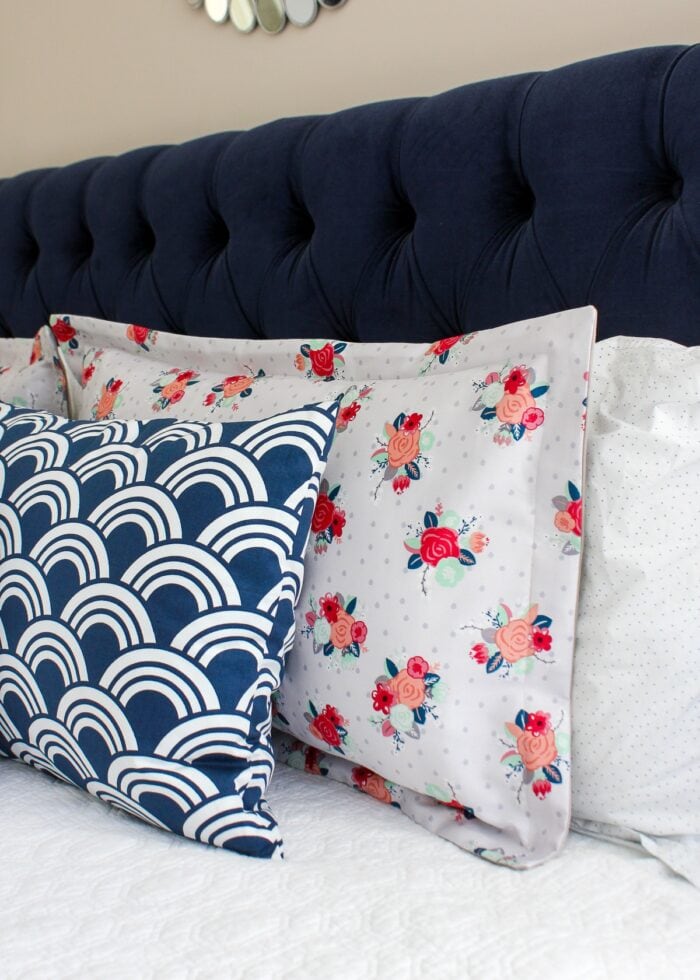
- How to Sew a Pillow Sham
- How to Gather Fabric (The Right Way)
Once you master how to sew boxed corners, I swear your eyes will be opened to potential projects all over your home! With some precise measuring and cutting, you can make tailored covers for just about anything. Sure there are other ways to create covers like the ones I’ve shown here, but this most-basic technique will get you off and running in no time!
Back here on Thursday, I’ll show you more details on what I was making here as well as LOTS more fun fabric projects for baby. See you then!
Megan
41 Comments on “How to Sew Boxed Corners”
OOOOH my eyes are open! New project to try this weekend. Thanks for the motivation!
i love your sewing projects and ohhh the posibilities. I can sew straight lines and easy projects like that. Would you please do a post about 101 keeping care of your sewing machine? Maybe include the basic funtions about the sewing machine. I had mine for a while and still sometimes I do not how what is what and how to use it. The different icons, type of needles, etc. That will be so very helpful. THANKS!
Loved these sewing projects!! I was wondering how to make the perfect fitted crib sheet with the elastics underneath them to hold those cornes, your link shows about the crib skirt. Do you have any other posts about sewing fitted crib sheet? I love all of your projects,the instructions are pretty clear that anyone can try without fear!
Thank you
Anju
Hi Anju!
Thank you so much! I don’t have my own tutorial to make crib sheets, but this is the one I always use: http://www.prettyprudent.com/2011/01/baby-kid/crib-sheet-tutorial-part-2-2/
Hope that helps and good luck!
Megan
This is perfectly timed for me. I am making a tablecloth for a friend, and she mentioned a boxed corner. While I was thinking of the right idea, it’s nice to see the steps involved. It looks easy to do. Yeah! I need some easy in my life. 😉
I tried this 15 years ago and failed so gave it up. Now I am pumped to make boxed corners for things in all rooms! Thank you.
PErfect timing. I need a boxed corner cushion and I was about to just skip the boxed corners and make it rounded due to lack of knowledge. This seems simple so I am going to try it today!
I will be using your “formula” and techniques for creating a wire kennel cover for my little pup Bachi. Many purchased patterns have failed me in the past. Wrong sizes and failed instructions. Your article will allow me to create something special for him. I will also put in a little window for him on the front (his request)!
Thank you for posting. I did come across one issue that you might want to correct so that nobody wastes their ‘good’ fabric. Luckily, I did a test first out of scraps because I couldn’t understand the math. My test was too small for the rectangle I was trying to cover, so I had an engineer go step-by-step over my math to see where I went wrong.
I let him measure the box and then do the math and he was stumped also. It turns out that the problem was in the cutouts. The instructions say they should be B+C by B+C, but because of a 1/2″ seam allowance (a concept that was hard for him to understand), the formula had to be (for 1/2″ seam allowance; adjust accordingly if you use a different allowance).
B + C – 1/2″ by B + C – 1/2″
Then it worked perfectly. 🙂
Thank you again for posting. I’ve been wanting to know how to do this for a long time.
Sara is correct. I suspect that the method mentioned in the instructions usually works due to the flexibility of the foam and a slight stretch in the fabric. But it would technically be correct to cut it as Sara states.
I think “C” IS the seam allowance… so I think B + C actually is correct: you’ll end up with a vertical side that is B (the desired height) + C (the desired seam allowance)…
That’s it! I just ruined my material and have to find/pick out some new material for my ottoman. It looked beautiful, but the whole time I was sewing, I knew I hadn’t allowed for the 1/2″ seam allowance. It didn’t fit. Sure wish I would’ve read this comment before beginning.
My material was not stretchy, plus I had made the frame myself years ago, and it had some hard wooden corners that were only covered with batting. Will practice on some cheap material next time. Thanks.
sara is correct – thehomesihavemade, please correct your instructions – i just ruined hand painted canvas!!!
I appreciate your clear directions with clear pictures. Thank you very much!
Do you hem the bottom of the fabric before or after you do the cutouts?
Hi Rachael,
Typically you do it after you make the cutouts.
Good luck!
Megan
Is it possible to use this method if you are covering a boxed foam shape ie. for a cushion?
Yes – there are various ways to cover a box cushion, but you could start with this method (which will give you 5 sides) and then add a cover or bottom for the 6th side.
Hope that helps!
Megan
I believe there is an error in these instructions. Cutting squares for the corners the size indicated would give twice the depth cover that you want.
Haha!! Back in the late 80’s, and way before Pinterest, we had three small boys. My worst nightmare was imagining one of them accidentally performing “the magic tablecloth trick”!! What I did was to make a box corners on my vinyl tablecloth!! It worked beautifully!!
Hello Megan,
Super tutorial! I have a question. If the item you wanted to make this for would be up against a wall and you needed to save on costs. Could this be configured to have different cut outs on the corners to accommodate the shorter drop /height in the back? I think I figured out the math, I just wondered have you ever done something like this. I’m thinking the side that would be against the wall would have the smaller square pieces removed from the respective right and left corners.
One more thing, should I reduce the square size by the seam allowance as Sara posted below?
Inches per Yard 36
Fabric Width 56
Table Measurements
Surface Length 36
Surface Width 24
Drop/Height – Front 30
Drop/Height – Back 15
Hem 2
Calculated
Cut Fabric Length 100
Cut Fabric Width 73
Cut out for Corners – Front 32
Cut out for Corners – Back 17
Hi Megan! Thank you so much for the simplest, most informative step by step guide on boxed corners! Thanks to you my old ikea sofa has new covers 🤩
I sew “a bit”, but have no clue how to decipher the math equation first. Is there a simpler way to explain that step? Or maybe just skip it if I know I have enough fabric?
Hi Darlene,
It’s not just about determining if you have enough fabric. In order for your final “boxed square creation” to fit your object, you need to cut your fabric down to those specific measurements.
I am not quite sure which part is unclear. Start by identifying YOUR A, B and D measurements by measuring your object. Select your own seam allowance for C…then just plug those numbers into the equation.
Hope that helps!Megan
I’m really glad that I tried this out on scrap fabric, too, because my tablecloth turned out too small for my table! 🙁 I followed the modified directions for the corner cuts, but I have a couple of questions about them. First of all, in the written directions beneath the modified corner equation, a 6+2 equation is included, but I’m wondering why the 1/2” isn’t subtracted. Why isn’t it a 7.5”x7.5” box cut out of the corners instead of the 8”x8” mentioned? Also, I’m a beginner sewer, so I’m still learning, but with other projects I’ve done, I’ve ADDED fabric needed to accommodate seams. Why is there subtraction involved? I’m wondering if this is why my tablecloth is too tight. I’m holding off on this project with my good fabric until I know what I did wrong with my scrap project. Thanks for any insight.
Hi Nancy,
I am not sure I can be of much help. I stood by my original instructions for a long time, but after getting several emails that the equation was wrong, I practiced again with the adjusted equation and determined the subtraction element was correct. I updated the graphics, but your comment made me realize I never went back and updated the actual instructions. (Although, it really doesn’t matter since the equation is meant to help you figure out your own measurements.)
My best suggestion would be to try it without the subtraction (my original equation didn’t include the subtracted seam allowance). However, I do recommend trying scrap fabric again to be sure!
Hope that helps a bit and good luck!Megan
How do I print this out?
I require a legible printed format so I can follow along as I complete the task. Please advise.
Hi there!
There is no good easy way to print blog posts in PDF format. My best suggestion is to copy and paste everything into a Word document.
Hope that helps a bit!Megan
Thanks so much for this post! Being hopeless with numbers i found it clear and easy. I managed to make dust covers for my husbands electrical tools and then made one for my sewing machine. So very grateful.
Hi Judith!
I am so glad to hear this tutorial worked for you! The math can be certainly tricky (I even needed to tweak this tutorial a few times until I got it right!). But once that part is sorted out, the process of sewing it together is pretty simple!
Congrats on your new covers!
Hi
Thank you very much for the artistic and valuable teaching of this sewing. Great🙏🥰
You are most welcome, glad you found this tutorial helpful!
~Megan
Thank you so much Megan for sharing this. Love it. Will surely try it out.
Hi Megan, First off I want to let you know how awesome your website is. Your instructions are easy to follow and the projects give me the confidence to make things on my own. I have a quick question…I am sewing a dust cover for my sons guitar amp. The corners are slightly rounded. To accommodate for those curves, would I just sew a slight curve on the raw edges of the cut out square? Thank you so much!
Hi Elaine!
Thanks so much for reaching out on this, and I’m glad you found this tutorial helpful.
Yes, sewing in a curve should make rounded corners instead of pointed ones. That said, you might want to consider making a “test” out of inexpensive fabric (if you have any) to make sure you get the curve just right.
Good luck and keep me posted!
Megan
Ar one point do you sew your hem around the boxed project. It goes from cutting the piece to sewing the corners to inside out finished photo. So for us beginners when do we do the hem? Thank you for the instructions.
Well, it took me two tries but I got it! What a great tutorial! I’m just lousy at math!
I want to make a cover for a piano bench. I am using a 2″ piece of foam on top of the bench but it is not fastened to the bench. Will this boxed slip cover keep the foam from moving on the bench? I was going to try and figure out how to use straps to fasten the cushion to the bench but this would be easier if it will keep the foam in place.
Fabulous directions and finished product.
Thank you very much.
Glenda
Thank you for the boxed corner tutorial! There are a lot of videos using the term which are only boxed bottoms for bags or sacks. Your instructions are clear and easy to follow. This is exactly what I needed. Now I’ve got a plan for making a new top cover for our hassock.