How to Make a Pillow Sham | Easy Step-By-Step
While I certainly don’t consider myself an expert sewer (trust me, I am far from it!), there are skills and tricks I’ve mastered over the years that have allowed me to quickly and easily make my own home decor (rather than relying on costlier store-bought versions). One of my favorite items to make is custom pillow shams because they are quick, easy, and allow me to add a “custom” flair to our bedding arrangements. Even if you’re an inexperienced sewer, this is a great project to try because it only requires a few straight lines. Let’s get started!

Why Make Your Own Pillow Shams
Making your own pillow shams, whether they’re for a bed, couch, bench, settee, etc, is an easy way to add some custom decor to your home. Since you get to pick the fabric, fit, and style, you can get exactly the look you want at (usually) a fraction of the cost.
Making your own pillow shams also allows you to add contrasting colors, patterns, or styles without having to invest in an entire bedding set. As such, it’s a great way to change out your bed display for the seasons or as your mood changes!

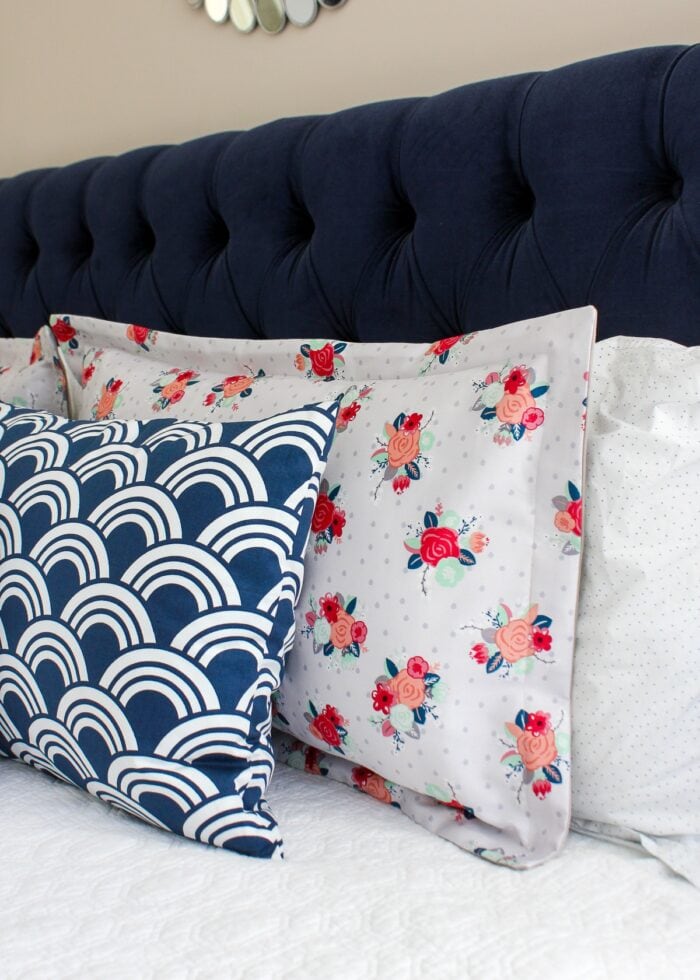
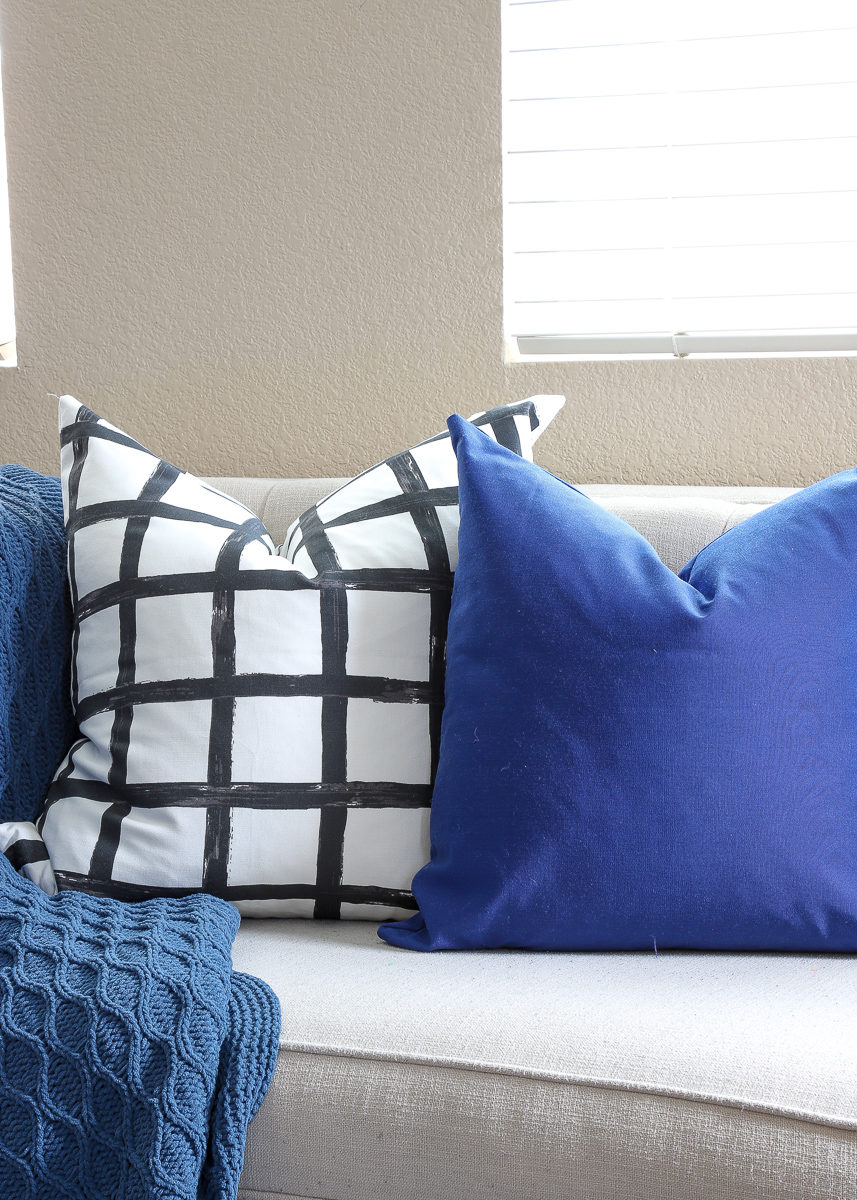
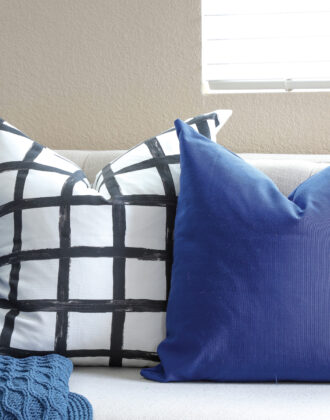
The Envelope Pillow Sham (with Flanges)
The pillow sham that I’m going to demonstrate today is especially easy because it doesn’t require any hand stitching or zippers to close up the pillowcase. Rather, this pillow sham pattern features an “envelope-style” closure, which essentially means the back panels overlap and you slide the pillow into the hemmed opening.

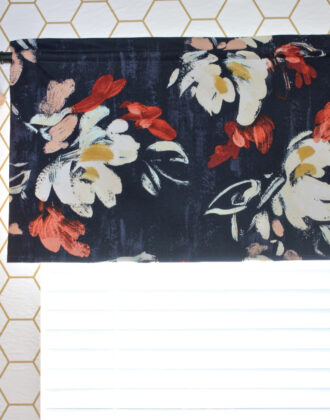
Further, my flowered pillow shams feature flanges, which are the 2″ (flat) border all the way around the pillow. While optional, these flanges give your pillow case a bit more heft and presence, delineating them as decorative pillows (rather than sleeping pillows).

These flanges are nothing to be scared of…in fact, you will be shocked to see how easy they are to achieve. And the result is a professional-looking pillow sham that will add layers of interest to your bedding arrangement!

Supplies Needed

Here are the supplies required to make a pillow sham.
- Pillow Front Fabric – How much you need depends on how big and how many pillows you are making. Refer to the cutting guide below to determine how much fabric to buy.
- While not required, thicker/heavier home decor fabric will allow your flanges to sit up straighter.
- Pillow Back Fabric – This fabric can be the same as the front fabric or coordinating pattern/solid. Again, how much you need will depend on how big and how many pillows you are making.
- Coordinating Thread
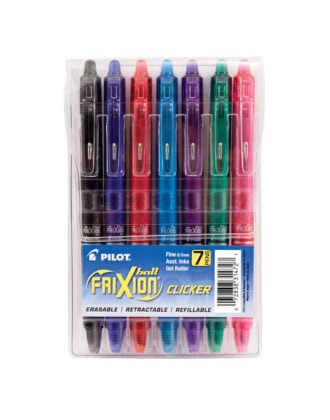
- Disappearing Fabric Pen or Chalk Roller
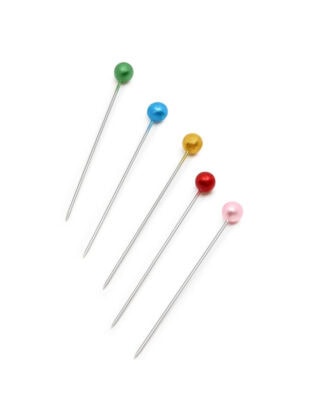
- Pins
- Ruler or Seam Gauge

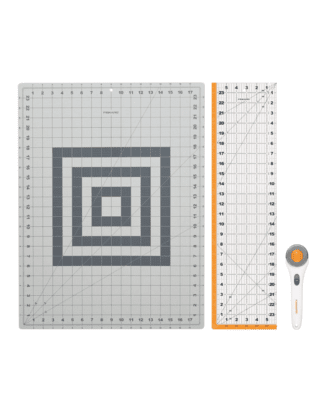
- Cutting Tools – Both a rotary cutting set and a scissors will come in handy
- Sewing Machine
- Iron

How to Sew a Pillow Sham
Step 1 – Determine Measurements
The first step is to determine your fabric measurements based on your pillow size and desired final look.
One of the BEST things about making your own pillow shams (besides picking your own fabrics) is that you can make them as big or as little as you want them. If you want a grander look, make larger flanges, if you want them slight, make small (or no) flanges.
Use the equations and diagram below to determine your fabric cuts.
The example shown here is for a standard size pillow with a 2″ flange. Be sure to adjust the measurements based on your pillow size and desired flange width.

Step 2- Cut the Fabric
Once you’ve determined your measurements, cut one front piece and two back pieces. A long, clear ruler and rotary cutter make this a breeze!
On the back panels, use a pin to mark which sides are the “height” and which sides are the “width,” as these measurements can often be quite close and hard to keep straight.

Step 3 – Hem the Back Panels
Set your front panel aside, as we’re going to start by hemming one side on each of the two back panels. On one “height” side of one of the back panel pieces, fold over the edge 1″ and iron in place.

Fold the edge over again another inch, iron flat, and then pin in place down the entire edge.

Using a sewing machine, sew a straight line 1/8″ from the folded edge to secure the hem in place.

Repeat the same hem process on the second back panel. When done, you should have two back panels each with a single hem on one side.

Step 4 – Assemble the Pillow Sham
With the two back panels hemmed, it’s time to assemble your pillow sham! Yep – already (I told you this was easy!)
Start by placing your pillow front panel RIGHT SIDE UP on your work surface, as shown.
Want to save this post?

Next, place the pillow back panels RIGHT SIDE DOWN onto the pillow front, aligning all the raw edges and putting the hemmed edges of each panel toward the center.

The two hemmed edges should overlap about 8-10,” and all the other raw edges should line up with the pillow front panel.

Next, pin all the way around the pillow sham.
Be sure to pin all the layers together where the two back panels overlap to ensure you catch the inside panel in your stitching.

Using your sewing machine, sew a 1/2″ seam all the way around the perimeter of the pillowcase. You don’t need to leave any openings…go ahead and sew all four sides shut!
Step 5 – Trim Corners
At the corners, you can either drop your needle down, pivot the pillowcase, and keep sewing in the next direction OR sew right off the edge, trim your threads, rotate, and start sewing again (shown below). My Mom taught me to do the latter as it makes for stronger corner seams.

Whichever method you choose, carefully clip the corners with a sharp scissors to reduce bulk once the pillowcase is turned right side out.

Step 6 – Turn the Pillow Sham Right Side Out
Speaking of right sides out, it’s time to flip the case out! Open up the envelope backing made by your two overlapping back panels and pull the pillowcase through the opening.

Press out the corners and smooth all the seams flat.

Step 7 – Sew the Flanges of the Pillow Sham (Optional)
The final (optional) step is to sew the flanges to create a nice border around your pillow.
Start by ironing out your pillowcase and making your seams nice and crisp. I recommend pinning all the way around the pillowcase to keep all the layers together as you proceed with sewing the flanges.

Next, use a disappearing fabric pen or chalk roller to draw a border around your pillowcase, on top of which you will sew to make the flange edges on your sham.
Using a ruler, measure in your flange size from the outside edge on ALL four sides. My desired flange is 2,” so I drew a border 2″ in from each edge.
At this point, your pillowcase is likely quite a bit bigger than your pillow. Besides adding a decorative detail, the flanges also create a tighter case for the pillow to sit in. As such, the rectangle you draw with your pen should roughly equal the actual size of your pillow.

Next, top-stitch around the pillowcase (though all layers), following the line you just drew. This time, you will need to drop your needle and pivot at each corner to make clean angles.

To finish, use an iron to remove any pen marks and press out the border created by your stitch lines.

Step 8 – Insert Your Pillow Into the Sham
Lastly, insert your pillow through the opening in the back and place on your bed!


Other Home Decor Sewing Projects to Try
Ready to make even more of your own stylish home decor? Here are some other easy projects to try next!
- How to Hem Curtains | A Foolproof Method!
- How to Sew a Pillow with an Invisible Zipper
- How to Make Piping
- How to Sew Boxed Corners
- How to Sew a Window Valance
- How to Sew a Pillow Sham
- How to Gather Fabric (The Right Way)

Making custom pillow shams is something I have done for years. Not only do I love bringing in different fabrics other than the ones that come with my bedding, but they are such a quick and simple way to refresh our bedroom display for the seasons!
I know I say “quick and easy” a lot…but I promise…this project really is a quick and easy one. Next time your bedroom is needing a refresh, I hope you give this tutorial a try!
Megan
32 Comments on “How to Make a Pillow Sham | Easy Step-By-Step”
Wow!! I never would have guessed it would be that easy. I can’t wait to try it. Thank you for the tutorial. I do have a quick question….Do you wash/dry your fabric before making the shams??
Hi Ashley!
I am so excited you feel motivated to try this project – it really is an easy one!
As far as washing, I don’t typically wash home decor fabrics. Not only are they sometimes “dry-clean only,” but the items I make with them aren’t frequently washed. When it comes to cottons or anything I make for kids or will be washed regularly, I always pre-wash!
Hope that helps and be sure to let me know how it turns out!
Megan
Great!! Thank you for the tip!! Good luck with the move!!
Hi, Compliments on a great tutorial. I like my flanges to be stiffened as I hate them flopping all over the place. So, I cut a piece of iron on medium weight interfacing just shy of the width of the width of my border and this also gives me a great guide line to machine around. Another tip is to add a different fabric as the flange and this can be incorporated in the pillow seam which again gives a brilliant finish.
Hope this is useful, if not too technical!
How can I download this tutorial?
Great tutorial, thanks for sharing your knowledge. Cute pillows, love them!
I LOVE YOUR SHAM FABRIC WAS IT IN THE UPHOLSTERY FABRICS TRYING TO FIND IT BUT CAN’T. ALSO FROM ONE WOMAN TO ANOTHER YOUR HUSBAND GOT A REAL GEM WHEN HE MARRIED YOU ALL YOUR HOMES ARE SO WONDERFUL AND WARM… KEEP IT UP
JUDY IN SOUTHERN CALIF ALSO
Thank you so much, Judy! I am glad you like the tutorial, and thank you for such a nice comment!
The floral fabric was found at Hobby Lobby. I haven’t been in in a while, so I am not sure if they still carry it. Sorry I don’t have a name for it!
Hope you have a great night!
Megan
Thank you for this wonderful tutorial. I made my sham pillows 25×16″ and cant wait to put them on my bed! ( I’m yet to make my own sheets with the same fabric) and yes it was so easy ( I’ve a 3.5 month old baby) to make too!cheers!
I always thought they were complicated to make. It’s great to have a tutorial with an envelope opening too. Need to find some fabric now (any excuse!!)
My mom and I tackled this project yesterday! I bought expensive fabric, so our nerves got in our way a little bit, so it took us a little longer. And we had a few glasses of wine along the way 😉 Thanks to you, and my mom, I have beautiful custom shams in my guest room!
I’ve done this once before, but years ago. MY mom helped me, but, She has since passed. I’m not that great at sewing or math, so I was just wondering, if I make my pillows the same size as yours how much fabric would I need? The front and back would be the same fabric and I would be making two pillows.
This is a great tutorial! Thanks so much.
Excellent instructions. I’ve made these but forgotten how beautiful they are and simple. Thank you!
You are a genius! Thanks for helping me repurpose a bedspread into pillow shams. Your directions were simple to follow.
And, we are proud of you as a Marine wife ….You have a difficult job.
Clare
GREAT TUTORIAL!!!
I’v been sewing a long time, but like to check tutorials out just to make sure I’m approaching everything with the right thinking. Your tutorial is clear and photos are awesome! Thanks!
I’m so glad to hear it! Thanks for the feedback!
Happy sewing!
Megan
I’ve just been getting started sewing, and I’m so excited to make this next! Question: what kind of fabrics should I look for for this? Machine washable is a must, since I’ve got a little one running around
Thank you! Your instructions for the pillow sham were super easy to follow! I made a pillow out of a tea towel that my daughter brought me from France.
It came together so quickly that I didn’t realize I was done! Thanks again!
Wonderful tutorial thank you so much. I will be definitely be attempting to learn from you. I have just retired and wanting to learn to sew. I read your tutorial and will certainly try to make these pillow shams. So looking forward to reading your other tutorials and hoping to learn a great deal from you thank you
Jana
Lovely case. I am going to tackle it next week. I doubt I can finish in 1 hour, more like 5.
Is there a method to make the flange stiff?
Hi Marty!
Yes! First, if you start with stiffer home decor fabric, the flanges will stand up on their own. If you want them even stiffer (or if you use not-so-stiff fabric like I did), you can iron some interfacing into the flanges before sewing together.
Hope that helps!
I love your instructions!!! Your descriptions are so clear and easy, you take the stress out of trying a new project. Thank you so much.
Hi Megan. Thanks for sharing this great pattern. Question: You indicate sewing a 1/2″ seam all the way around prior to turning the sham inside out? What is the purpose of a 1/2″ seam please? I’m a quilter so we use 1/4″ seams. Since after turning the sham right sides out we are sewing all the way around by 2″ for the flange, I’m curious about the purpose of the 1/2″ seam to sew it together as I have one yard of 44″ WOF and want to get two shams out of it. Thank you!
Hi Cherie!
What a great question! In general, I use 1/2″ seam allowances for most of my home decor sewing (not sure if there’s a reason, just how I was taught!)…but yes, you are certainly correct! Since you are going to sew the flange shut anyway, you can easily get away with 1/4″ seam. (Especially if you’re trying to fit it all on fabric!)
Good luck with your shams – hope they turn out great!
Megan
In your post, you promote the Hobby Lobby as the place that you purchased your fabric.
This raises is the issue of whether you’re unaware of how terrible the company is, and the extent to which they are haters who are anti-GLBT. So it makes me wonder if you are as well. Torturing people over their sexual identity, something that is not a choice, but is a natural part of human personality is never acceptable.. If you don’t believe that why don’t you try changing your sexual identity for a year see if suddenly you find that to be an easy switch. I doubt you would find that.
By promoting hobby lobby you are aligning yourself with haters. If you’ve done that accidentally, which seems unlikely, then please fix it. if you hate folks like they do then good luck with your Christian identity because Christianity is absolutely not about hating or rejecting people. And please be especially aware that the rate of suicide among gay teens is much higher than for heterosexuals. These poor kids kill themselves because folks like Hobby lobby have made them feel so bad, and so unaccepted, and so awful that they’d rather be dead. When you promote hobby lobby, you’re helping increase the suicide among gay teenagers. There are plenty of great places to buy beautiful fabric from people who do not promote hate judgment and rejection.
Your rant is totally speculative! She merely sai DD that’s where she bought her fabric. Quit assigning motives.
This was so easy and very helpful, everything was explained so well, how can I print the instructions
I’m a visual learner. It would be great to have a YouTube tutorial.
Many thanks Ernette
Love your choice of fabric, and your pillow shams turned out so pretty! Today I’ve featured your project on Crafts on Display – hope you enjoy it! https://craftsondisplay.com/sewing/envelope-style-pillow-shams-150158/
Hi! Thanks for the tutorial, I found it very helpful when I inherited some Euro pillows without washable covers.
A quick note – in step 4 you write that the back cover pieces should overlap by about 8-10″. My math is that the overlap should be more like 2″, since we only are adding 5″ to the width of the pillow when we cut out the back pieces. This lines up with how the pillowcase looked when I made it as well.
Thanks again for the great tutorial!