A Strong Dose of Pattern
I’m not quite sure how I do it! I “pin” all these gorgeous pictures of calm, neutral spaces; I vow to my husband that there will be no dramatic decor schemes and no wild patterns; I paint my house soothing shades of grey, white and blue; I promise to keep designs simple and easy to work around…and mostly, I promise to keep the DIYing urges tempered!
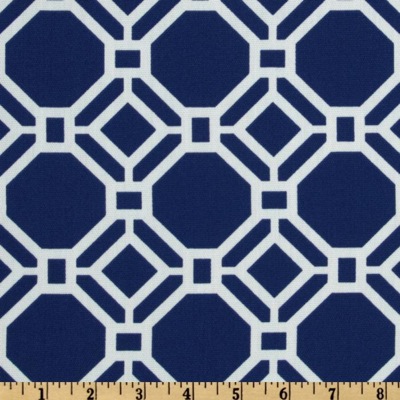
And then I receive a fabric swatch in the mail that looks like this:
…and I fall in love. Not only because of the striking geometric pattern (I am such a sucker for bold patterns!), but also because it matched my new royal sapphire walls SO.darn.beautifully. Pretty much as soon as I received this fabric swatch in the mail, I knew it would be the theme fabric in my living room and dining room (as reflected on my Inspiration Boards!).
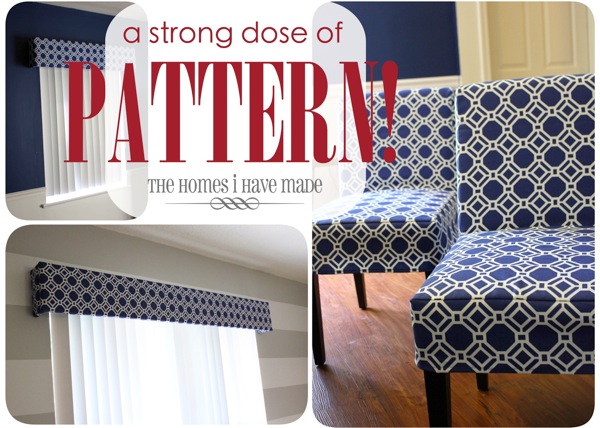
Here’s the thing…an 8″ square swatch is a lot different than large swaths of fabric…and as soon as I unrolled the 7 yards (yes…7) I was shocked to see how “busy” the pattern was. But since I NEVER shy away from a bold fabric, I decided to plow forward with my design plans…and suddenly my calm, neutral spaces were given a VERY strong dose of pattern…
There’s lots more pictures after the jump!
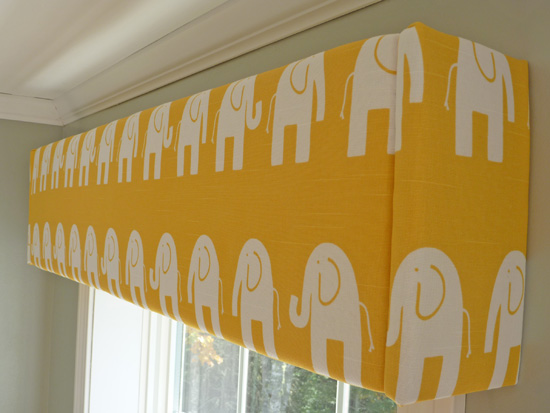
As I started to collect inspiration pictures for our new house, I found myself being drawn to cleaner and crisper lines. I was no longer inspired by luscious window treatments and excessive accessories, but instead was drawn to things such as cornice boxes, roman shades, white accessories and less clutter! When I stumbled upon this image and tutorial, I instantly knew I’d be incorporating cornice boxes in our new home.
I’m not going to show you the step-by-step photos because Erin does such a wonderful job explaining how they go together! I followed her directions exactly, with the exception of mounting our side boards BEHIND the front panel versus next to it. To unify the Living Room and Dining Room, I did the same window treatments in both spaces!
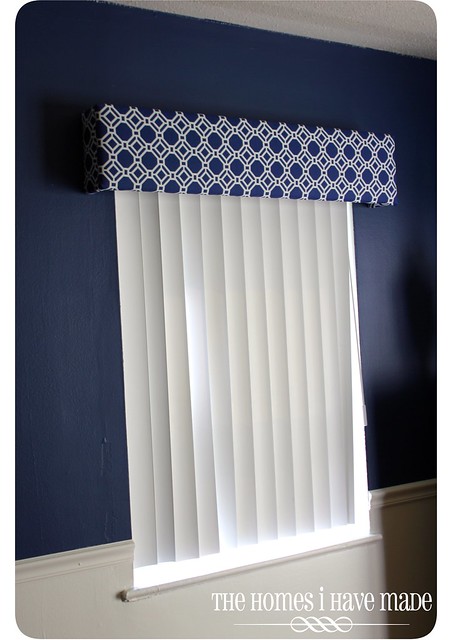
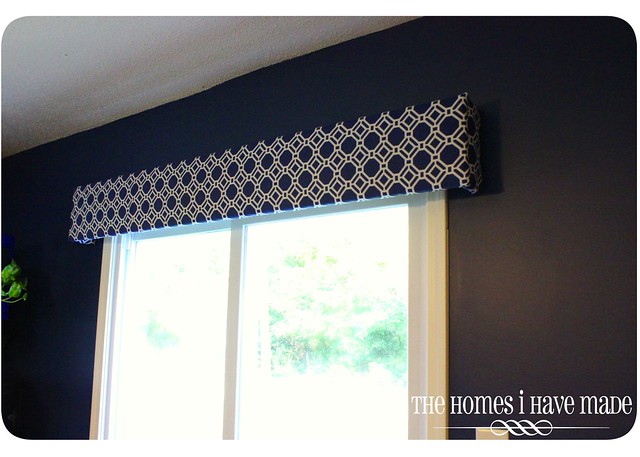
Here are the two windows in the Dining Room. This is the skinnier of the windows; the final cornice box width measures about 44″. We decided to keep the blinds in the windows for now. They are not the most attractive things ever, but they provide much needed privacy and came with the house (meaning: one less thing to buy!)
Another cornice box hangs over the double glass doors and measures 71″ wide. We decided to take the blinds down from this door. Our house backs up to woods, so we don’t need to worry much about privacy, and it’s so nice to have a huge dose of sunlight coming in during the day! (Plus, less blinds for Henry to pull down and to keep clean!)
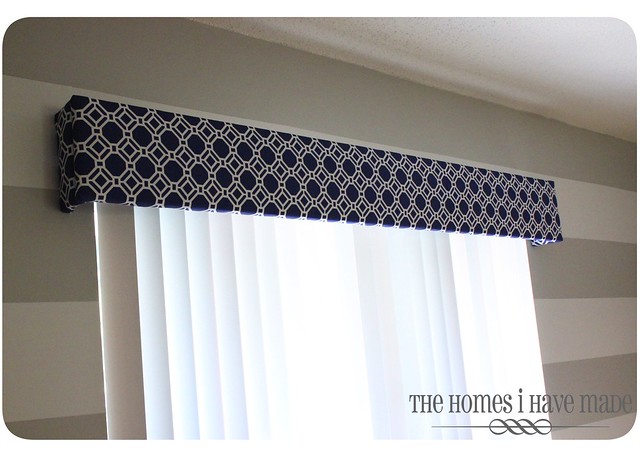
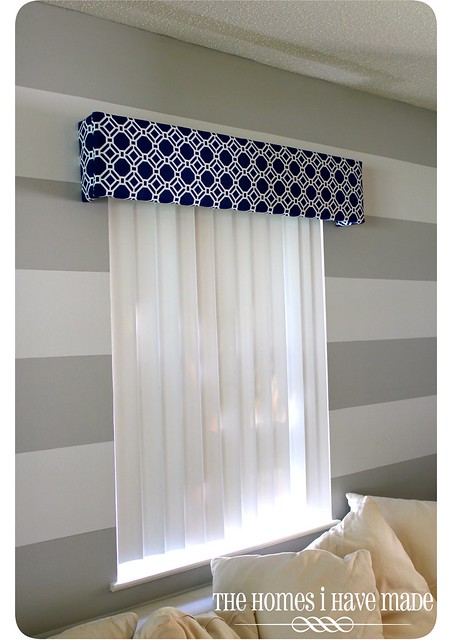
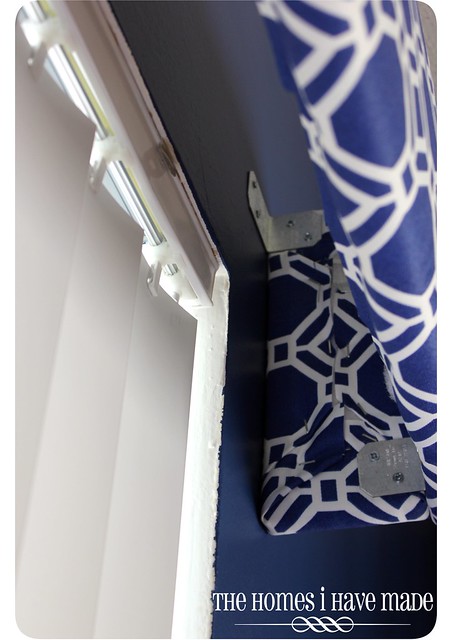
As I mentioned, we used the same window treatments across the dining and living rooms to unify the space. At first, I was a little worried about the graphic pattern up against the stripes (even for a gal who loves patterns, this was a lot going on!)…but in the end, it all works! This cornice is the longest of our four, measuring 79″ across our front window. We were worried about the stability of such a long unit, but the L-brackets on the sides were so sturdy, there was no need for a brace in the middle.
The other window is smaller, measuring the same as the one in the dining room at 44″.
Again, I’m not going to show the step-by-step, but if you’re thinking these look way too hard to try….believe me…they aren’t!! I was actually SO surprised at how simple they came together. The “upholstery” part (all done with a staple gun) took longer than the actual mounting above the windows. And thanks to an abundance of L-brackets…both assembling the cornices and attaching them to the wall required minimal tools and minimal parts! And best of all, I feel like these were much more economical than drapes. The plywood, L-brackets, and screws were pretty cheap, and these upholstered boxes required A LOT less fabric than drapes (drapes require A LOT of fabric which is where the $$ racks up!). In fact, I did all four of these boxes with 3 yards of 54″ wide fabric! I can’t give you an exact final tally (because truth be told, I am really bad at keeping track of costs), but I would say all four cost around $50!! I think I’m hooked!
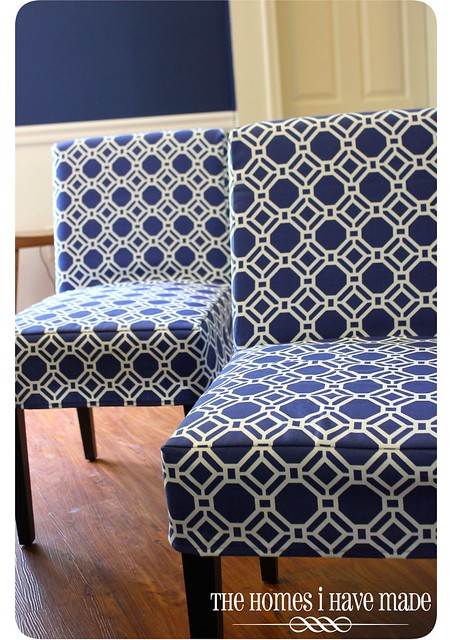
I just mentioned that I bought 7 yards of the blue geometric fabric. I used 3 on the cornice boxes and planned on using the other 4 yards to make slipcovers for our dining room chairs (each chair cover requires one yard). Again, when I saw how “busy” this fabric actually was, I started to panic on the inside. Oddly enough though, as we added MORE of this fabric to the room, the less busy it became. My eye was no longer pulled by one strong pattern up high on the windows; instead the whole room came together and it seemed like I noticed the pattern less. Yes…my ideas of a serene, calming space were long gone…but I find this bold design energizing and exciting!
If you are wondering how I “magically” knocked out four seemingly-perfect-fitting slipcovers in just a little while, I have two secrets. One is my mom. All the cornice boxes and the chairs were accomplished with her help while she was visiting. Not only was it so nice to have someone to work alongside late at night, but getting these two big projects done took half the time!
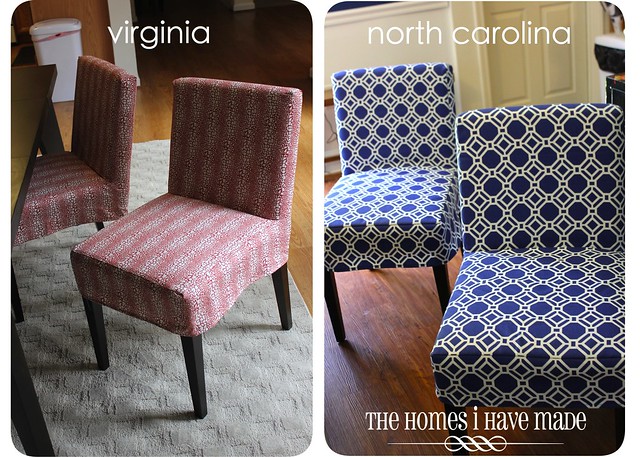
The other secret is that I had made these exact slipcovers before. JUST before I started blogging last year, I went through the pain-staking process of figuring out how to slipcover my West Elm dining room chairs. I used old fabric and made three different trials until I had the perfect fit. Lucky for me, I kept all the measurements, so getting these made was ALMOST simple. The only thing that complicated matters was the darn geometric pattern! We did our best to match patterns, but it’s practically impossible to match every seam all the way around the chair. Lesson learned: next time (and there will be a next time because I find this one of the EASIEST ways to update the dining room), I need to use an all-over pattern with no noticeable repeat! Oh..and I can give you the cost tally on these: the fabric was $8.98/yard and I used 4 yards total. Yes-sir-y…I made four dining chair slipcovers for $36!
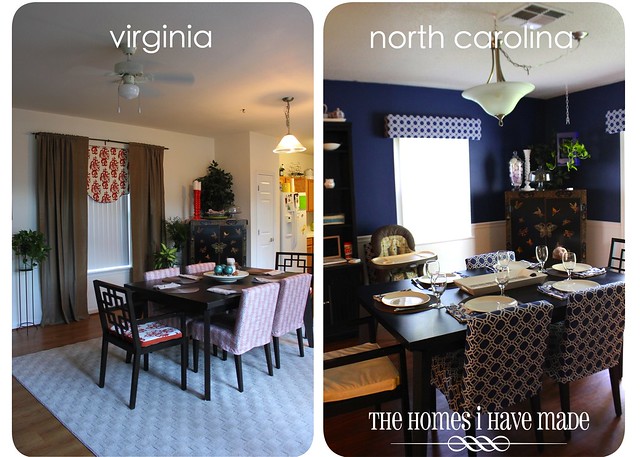
Because “before and after” photos are fun, here’s our exact same dining room chairs from our last house and now in this house!
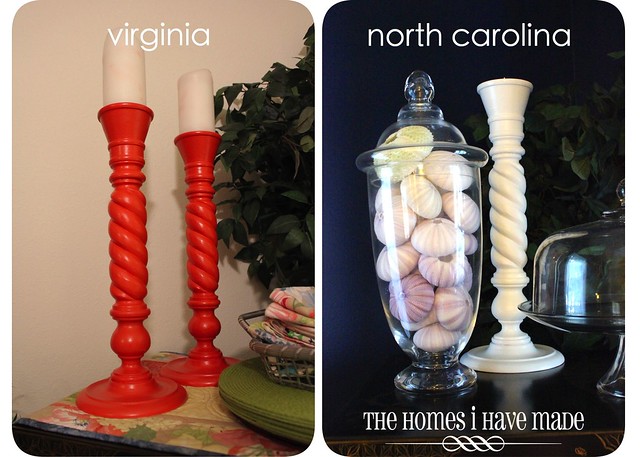
We’ve also accomplished a few other small updates to help bring this space together! First, I painted our bright orange candlesticks a nice glossy white using some Rust-oleum Universal Spray Paint. (I’ve also been going around the house eliminating all traces of orange! I am happy to report that for the first time in almost 5 years, there is NO orange in my house!)
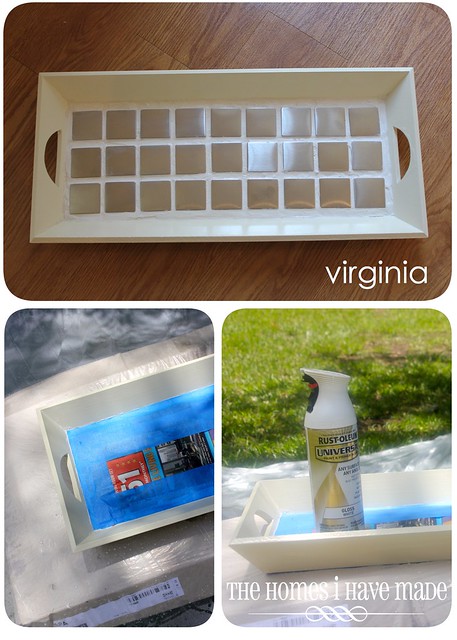
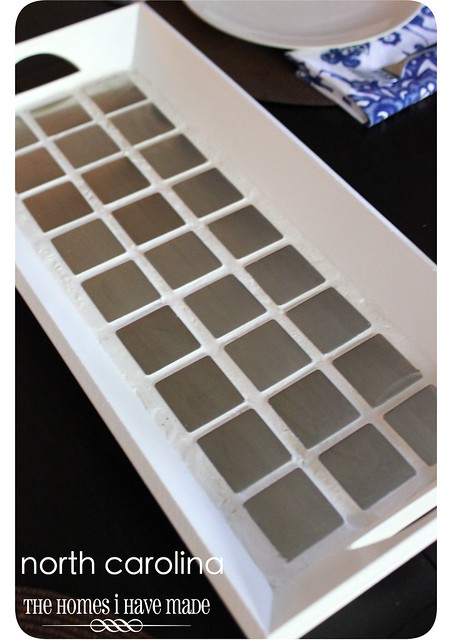
I also sprayed the ivory tile tray I made bright white to match the rest of the dining room. If you’re wondering how I sprayed the tray without touching the tile, I covered the bottom with newspaper and painter’s tape and then sprayed the rest!
I realize it’s not the most dramatic difference, but in a room full of crisp white, the ivory tray looked yellow! Besides, I always wanted it bright white…it was painted ivory last fall because that’s what I had on hand!
And here’s one more “before and after” shot for you! We aren’t quite done yet, but it’s a quick look at where we’re at! Notice that it’s all the same furniture, even the same layout! But with different paint and fabrics, it’s a completely different vibe in the room!
Hope everyone’s having a great week. Check back and see me on Friday – I have another quick project from this Dining Room space for you to check out!
See You Soon!
Megan
Megan



12 Comments on “A Strong Dose of Pattern”
I love the bold pattern!!!
You are so talented!
Love the blue!! Beautiful!! Thank you for sharing. Visiting from 36th Ave. Would love it if you would share this at my Make it Pretty Monday party at The Dedicated House. http://thededicatedhouse.blogspot.com/2012/08/make-it-pretty-monday-week-9.html Hope to see you at the bash! Toodles, Kathryn @TheDedicatedHouse
Looks fantastic! The bold geometric print in that gorgeous blue hue… wow! Beautiful!
Chrissy
@Everyday with the Jays
I LOVE that pattern and think you did a wonderful job, especially on the chairs. Enjoy your beautiful space!
Wow, I love the geometric pattern! I've been crushing on that deep royal blue lately. Where did you get the fabric from for such a great price?
Kathleen
projectsatthepicketts.blogspot.com
Love that royal color, Megan! You did a gorgeous job!
Okay, we have like a krillion windows in my house + haven't been inspired thus far to engage in window treatments, but those boxes take the cake. I'm def. gonna check out that tutorial you mention so we can implement them in our house. Now I'm off to look at patterns…
Loved the dining room and colors. I couldn't find the tutorial you mentioned. Can you give me a little more information. I've done several cornices, and the corners are always the hardest. Also, any additional information on making slip covers? Couldn't figure out the profile, so just did the anonymous. Thanks for your help.
Hello! I am sorry I am just now getting back to you. The tutorial I used for my cornice boxes is here:
http://www.domesticadventure.com/2010/10/diy-cornices/
As far as the corners, I fold the corners like I am folding a present, making sure it looks nice and tidy from the outside. As I mentioned, I figured out the slipcovers for these chairs long before I started blogging – but my number one tip is to measure precisely…and my number two tip is to make one (if not several) mock slipcovers out of cheap fabric. That way you can get all the measurements just right and figure out how best to sew it together before you use your good fabric! Good luck!
Did you use a pattern for the slip covers. I am just getting into sewing and I want to make slip covers for similiar chairs.
Pingback: HOME DECOR SEWING SCHOOL | HOW TO SEW BOXED CORNERS - Annered