How to Install a Floating Bookcase (To Save On Floor Space!)
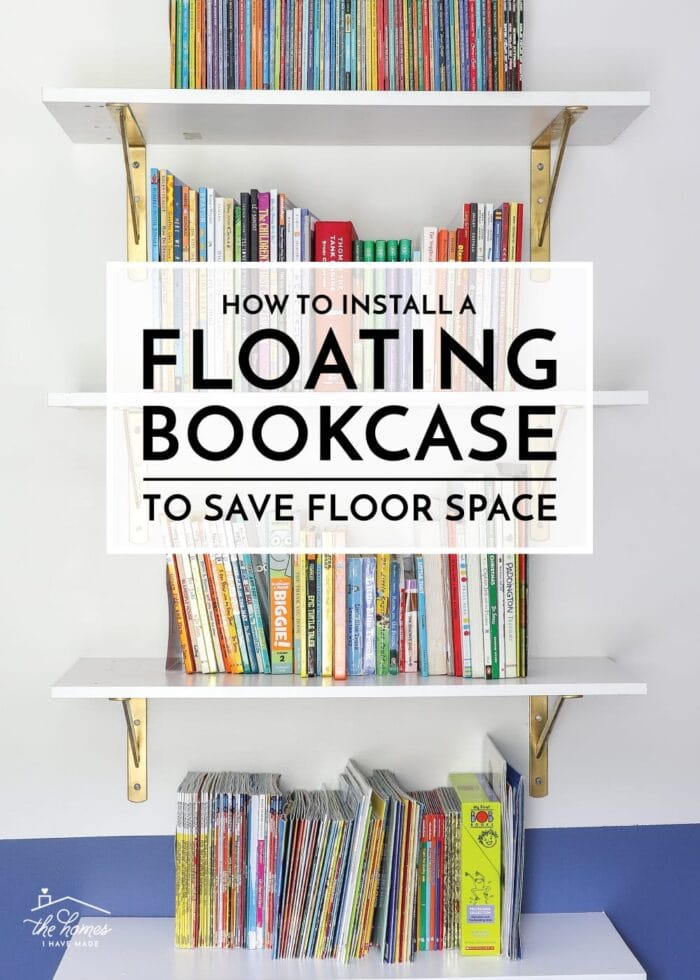
I am really excited to share one of my favorite space-saving solutions today! This “floating bookcase” concept is one I’ve had in the back of my mind for ages, but we never really had the need or space to make it happen. In this home however, we have one really tiny bedroom; and I knew taking advantage of the wall was the only way to get the storage we needed without loading in more bulky furniture. Installing a “floating bookcase” is not only easy and rather inexpensive, but it’s also totally customizable based on how much space you have and how much storage you need. Let me show you what I mean!
I love shopping for furniture when I’m moving into and/or making over a space. And although I’ve become a pro at re-using and re-imagining items from home-to-home, there are times when investing in an expensive (and more importantly!) bulky piece of furniture just doesn’t make sense.
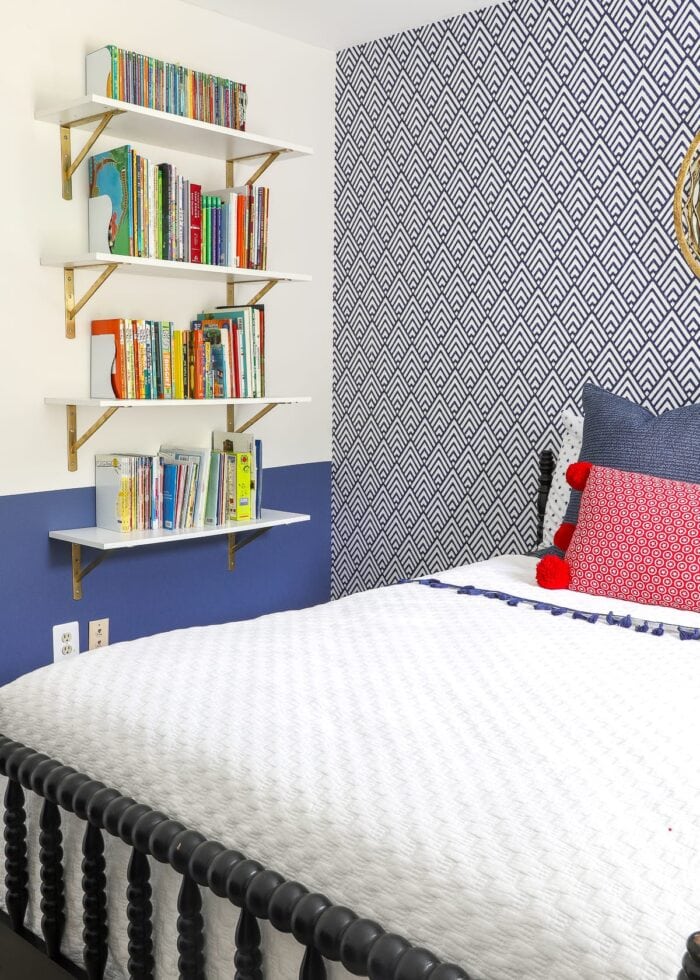
Our middle son’s room is small…very small. I really wanted to put our full-size vintage Jenny Lind bed in there, which left just enough room on either side for small side tables. However, at 4 years old, he didn’t have much need for two side tables; but he did have a serious need for book storage. So we nixed the idea of symmetrical side tables and instead figured out a better way to use the small stretch of side wall.
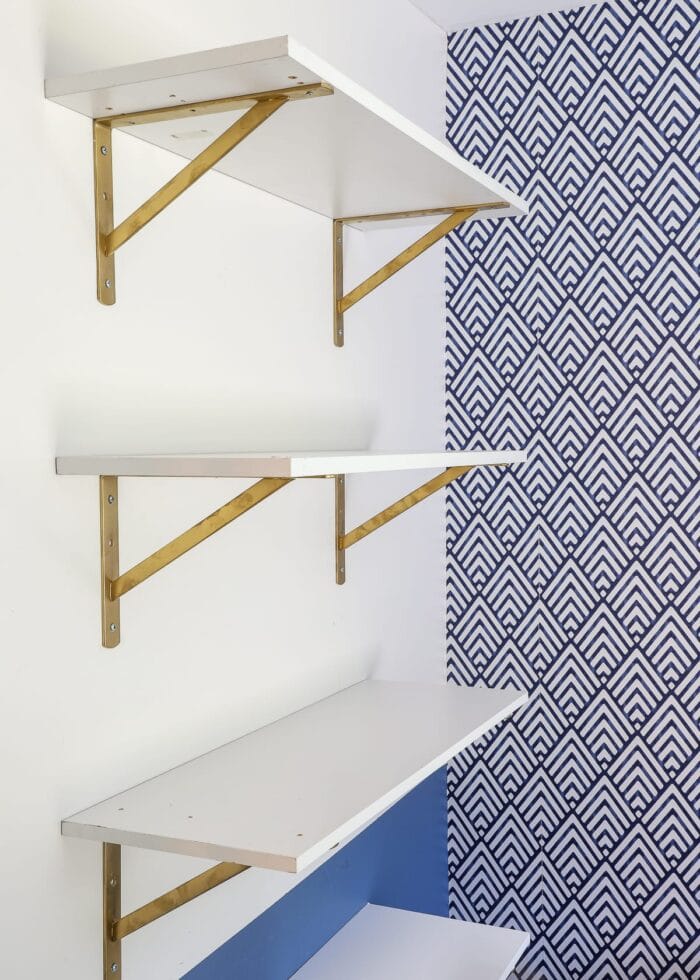
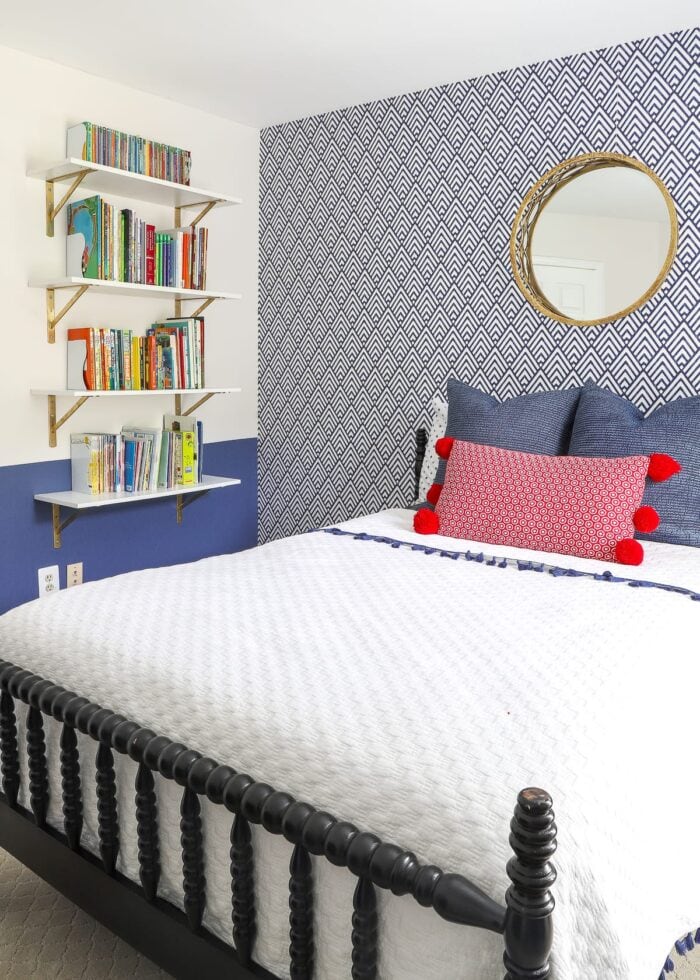
The distance between the bed and the wall is tight…just over 3 feet. While we certainly could have put a slender bookcase here, it would have really crowded up the room and eaten up precious floor space (which is everything to a little kid!) We already had tons of metal brackets and white shelves from previous homes, so we repurposed them into a completely custom floating bookcase!
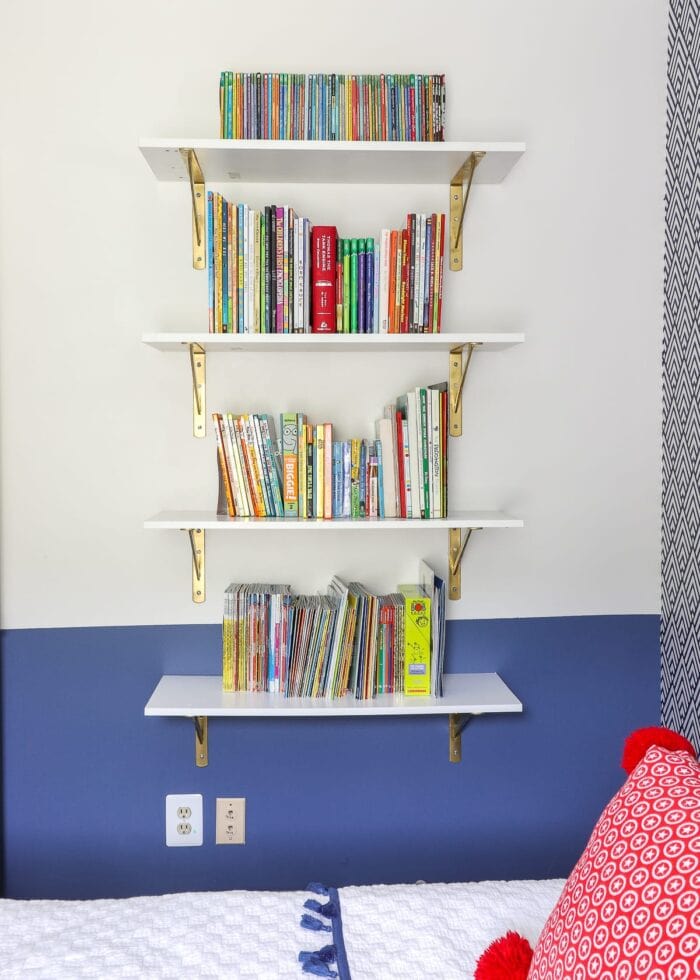
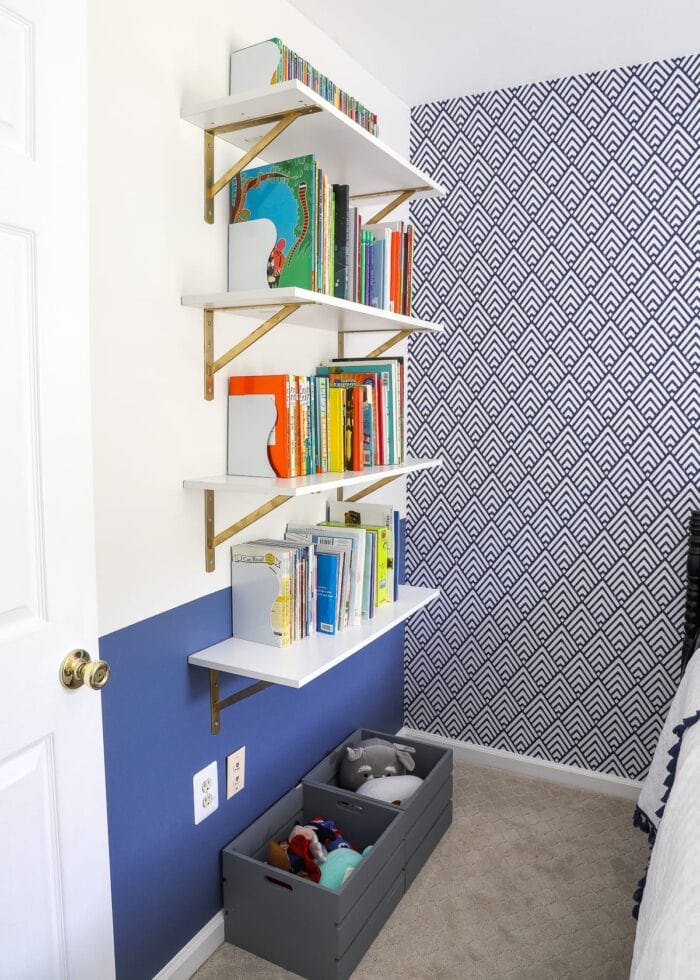
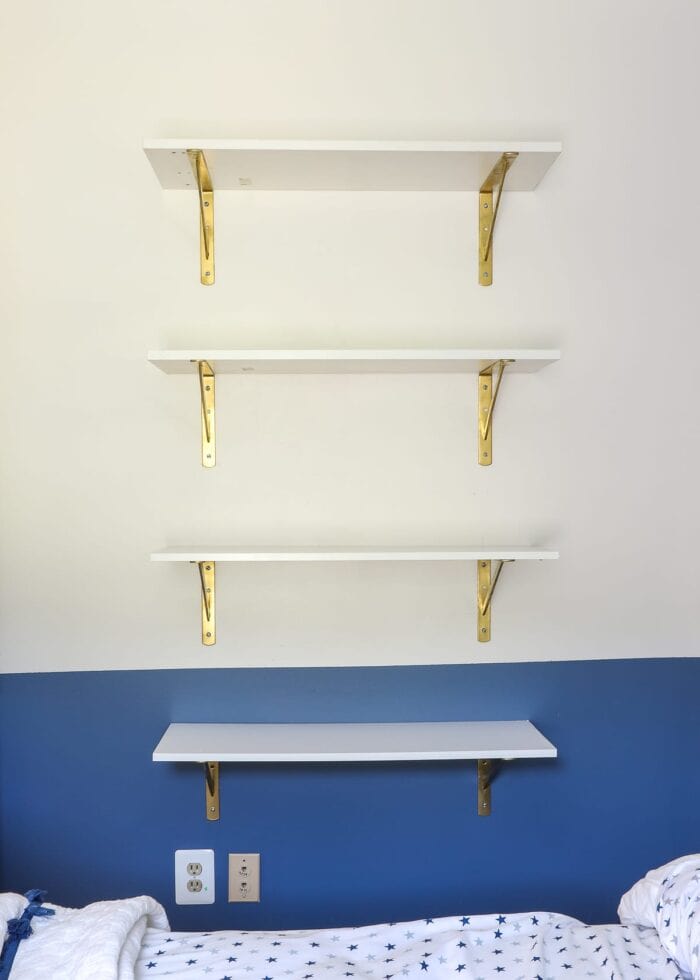
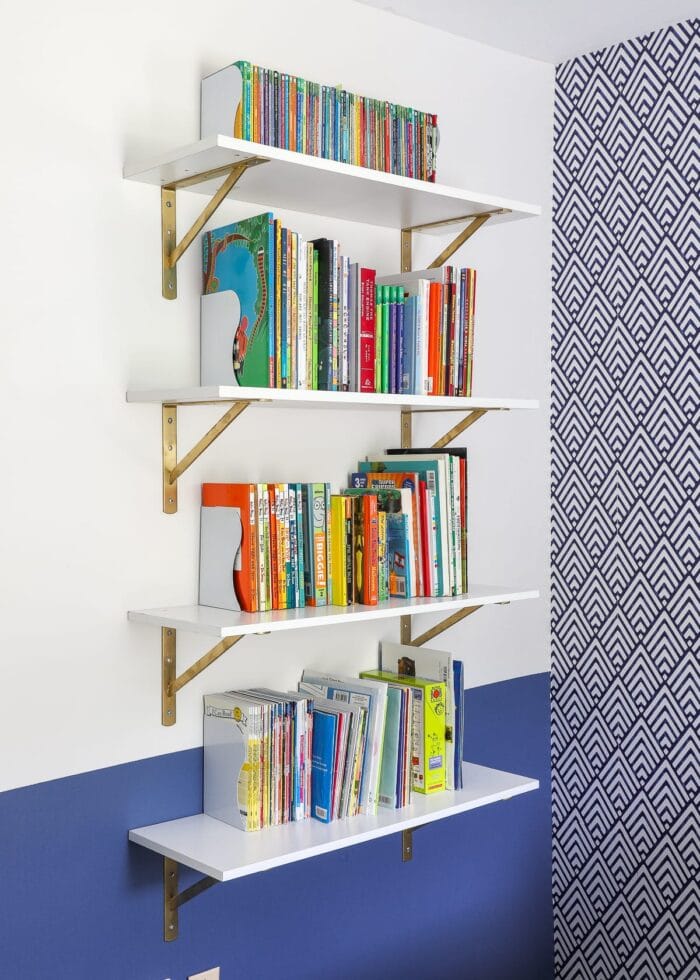
The open design of this floating bookcase doesn’t take up a ton of visual or physical space, which helps make the entire room feel more open and less cluttered. We intentionally spaced the four shelves to accommodate kids’ books of all shapes and sizes (since a lot of kid books can be really tall or wide). And with the lowest shelf about 30″ up from the floor, we were able to provide a nice open spot for play.
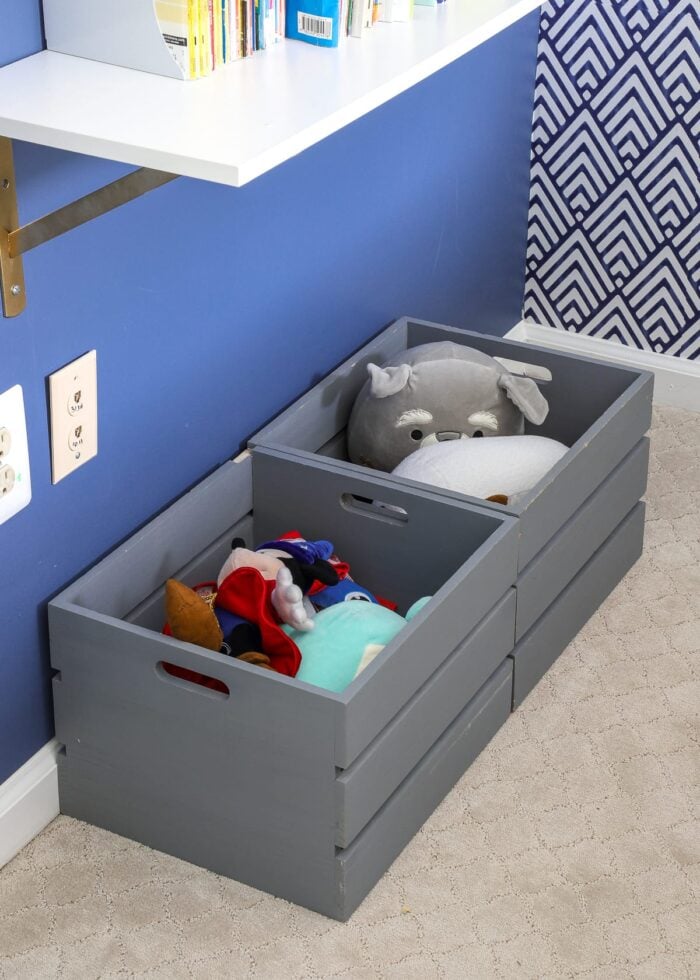
These crates were originally put here as a temporary solution, but it’s actually been really helpful to have open bins to catch toys when we’re cleaning up. I originally thought this spot would stay empty for play space and/or for a bean bag. Ultimately, we can evolve this floorspace as we need it since we’re not committed to a certain furniture footprint.
There are so many things I love about this “floating bookcase” solution:
- You can put it anywhere you have a blank stretch of wall and need some storage. This could work in a playroom, a dining nook, a nursery, an office…anywhere!
- You can make it any size (i.e., any width, any height, any number of shelves, any distance between shelves.)
- It’s sturdy. When you use studs and drywall anchors, you can load up these shelves with heavy items like books, dishes, toys, frames, and more.
- By swapping bracket and shelf colors, you can match the overall look to any space.
- It’s inexpensive. These shelves and brackets can be found at most home improvement stores and will add up to less than a larger bookcase.
- It’s easier to move and re-use. This might not be important for many households, but it’s of the utmost importance to us. We’ve re-purposed these brackets and shelves over and over in countless different ways, so it’s a more practical solution for us than a bookcase that may or may not have a place in our next home.
Materials Needed
Here are the supplies needed to make a floating bookcase similar to ours.
- Wood Laminate Shelving – These boards come in a variety of colors and lengths, but they can also be trimmed down as needed.
- Metal Brackets – In general, each shelf will need two brackets. Really wide shelves that hold heavy items might require more.
- Hardware – get white if possible to camouflage against the brackets
- #8 1.25 – 1.5″ screws for securing the brackets to the wall
- #8 5/8″ screws for securing the brackets to the shelves
- Drywall anchors – we like these.
- Tools
- Levels – Both a long and short one will be handy
- Stud Finder
- Measuring Tape
- Drill with drill bit
- Electric screwdriver or screwdriver bit
- Optional
- Iron-on laminate edging – if you need to cover raw edges
- Spray primer and spray paint – if you want to change the color of the brackets
- Contact paper or shelf liner – if you want to wrap the shelves
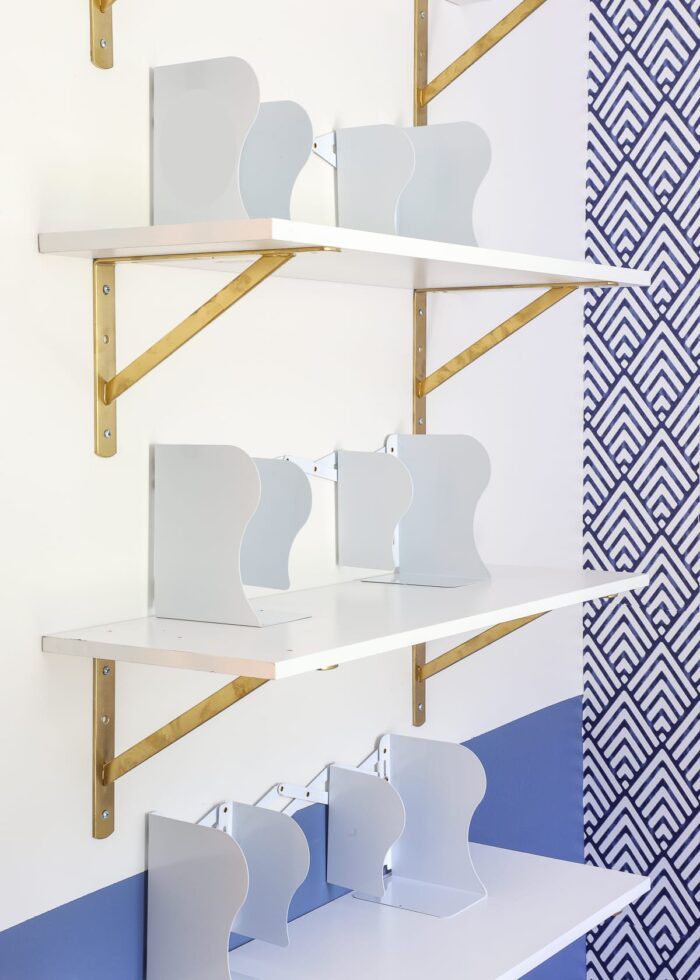
- Bookends – if you’ll be placing books on the bookcase
How to Install a Floating Bookcase
Determine Bookcase Layout
Based on how much wall space you have (both horizontally and vertically), determine the layout for your floating bookcase. Take into consideration how many shelves you want, what kinds of things you want to place on them, and how wide/tall you want the entire installation. It can be helpful to use strips of painter’s tape on the wall to visualize and plan out your arrangement. We settled on 4 shelves at 32″ wide, spaced 16″ apart (again, mainly to accommodate tall kids books.)
Prep the Brackets
The metal brackets primarily come in white and black. If you’d like to give them a fun splash of color or contrast, you will want to do so before you start installing.
I’ve painted these metal brackets so many different colors over the years. My favorite way to do it is with spray paint: this primer first, followed by Rustoleum-brand spray paint (this is the gold I used). When you paint the brackets, make sure you move around the bracket a lot to get every single exposed edge. Let them dry and cure at least 24 hours before handling them (to prevent smudges like you see on mine).
Prep the Shelves
The laminate shelving typically comes in widths of 36″, 48″, and 72″ in white, various woodgrains, and grey/black. You can certainly stick to these sizes and finishes, but the boards are also really great for customizing. You can wrap them in contact paper or peel-and-stick wallpaper to add color or pattern to your installation; and they can be easily cut down with a circular saw. If you do cut the shelves down, you will want to adhere some iron-on laminate edging to any raw/exposed edges that are in view.
Hang the Shelf Brackets
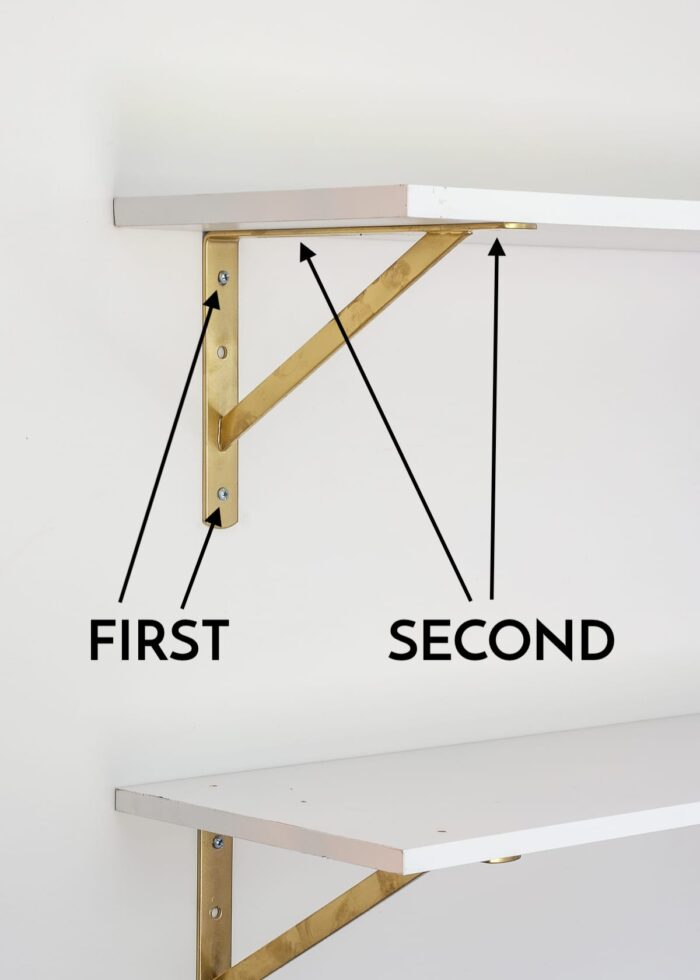
If you’ve never installed these kinds of shelves before, they can be a little frustrating. Taking time to measure and pre-drill holes can go a really long way in making sure everything ends up level, flush, and secure. In general, you are going to secure all the brackets to the wall first, and then attach the shelves to the brackets second.
If you have some flexibility on placement, I highly recommend using a stud finder to place the brackets. Using studs will make the installation go a little easier, and of course help the entire arrangement be much more secure. If you can’t use studs for all the brackets (because of size or spacing), try to at least place one side’s brackets in studs if possible.
It will be easiest to work from the bottom shelf up the wall…doing all the brackets on one side, and then all the brackets on the other:
- Identify the location of the first bracket. Using one of the brackets as a template (with a level alongside it to ensure it’s straight), mark top and bottom holes.
- Use a measuring tape and level to mark the hole placements of all the brackets above that first bracket. If you want your shelves evenly spaced, make sure the distance is the same between every “top” hole and every “bottom” hole.
- With all the bracket locations marked on one side, use a long level to mark holes for all the brackets on the opposite side of the shelf.
- Once all holes are marked, hang each bracket with dry-wall anchors and (at least) 2 of the longer (1.25 – 1.5″) screws per bracket. Before tightening the screws all the way, place a level alongside the bracket to ensure it’s perfectly up-and-down.
Secure the Shelves
Once all the brackets are installed, place your cut/prepped shelves on top of each set. Center the first shelf between the two brackets, and then use a long level to ensure each shelf lines up with the one below it.
The final installation step is to use the 5/8″ screws to secure each shelf to the brackets from underneath. Pre-drilling short pilot holes will make this attachment step easier, especially since you are working from under the shelf.Make sure each bracket and shelf is flush; if not, remove the screw and re-tighten until everything is together.
Filling Up the Floating Bookcase
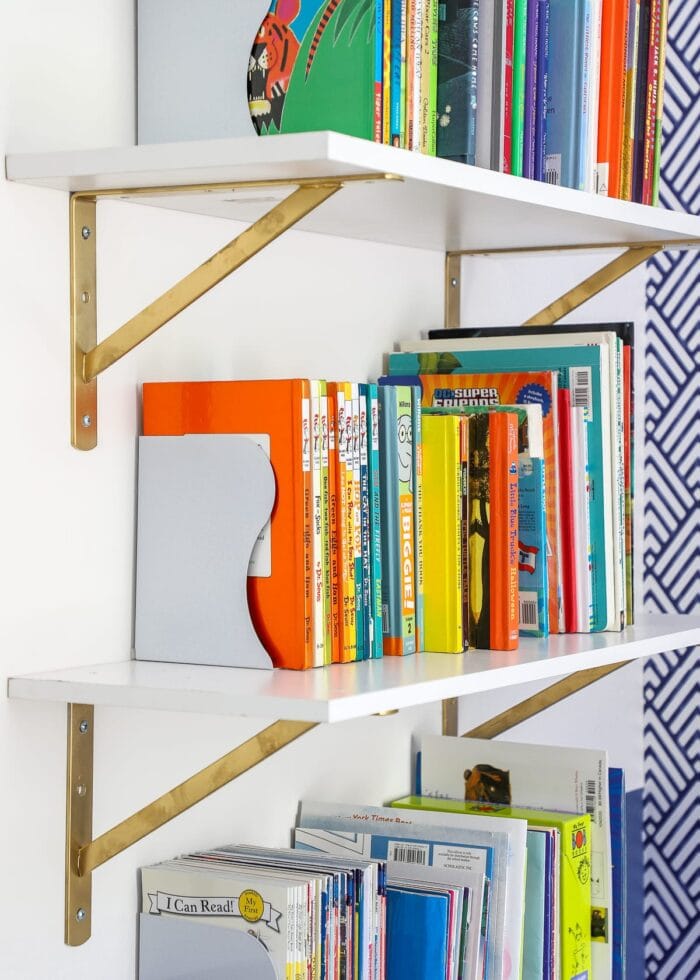
In a traditional bookcase, there are sturdy sides that help hold up books and other precarious items. Since these shelves don’t have sides, you may need to consider adding bookends, baskets, or solid decorative accessories to hold up books (this obviously isn’t necessary if you’re storing dishes or other large items.)
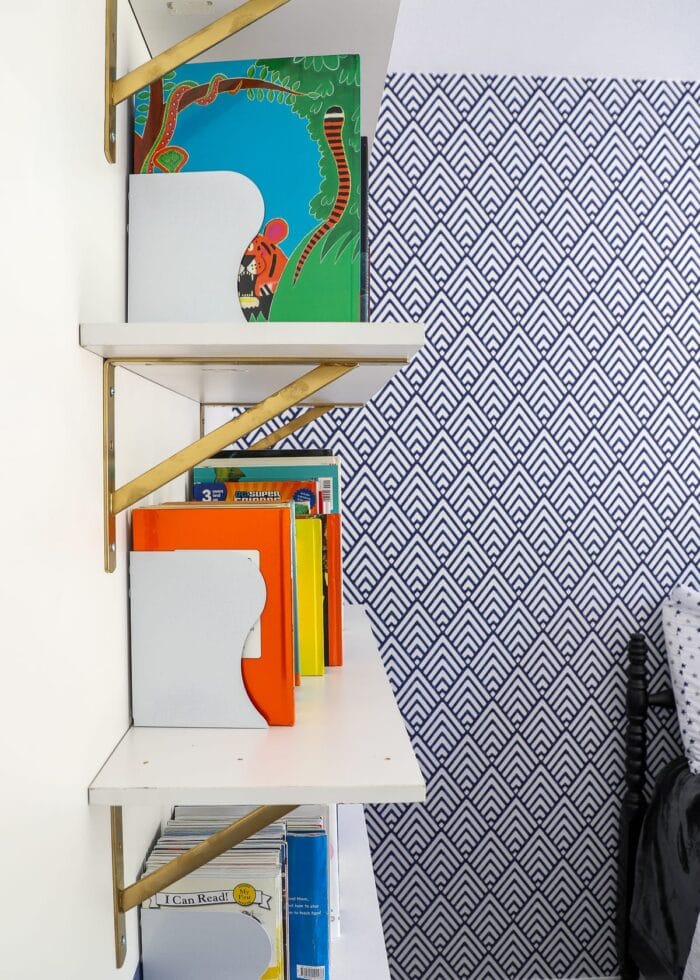
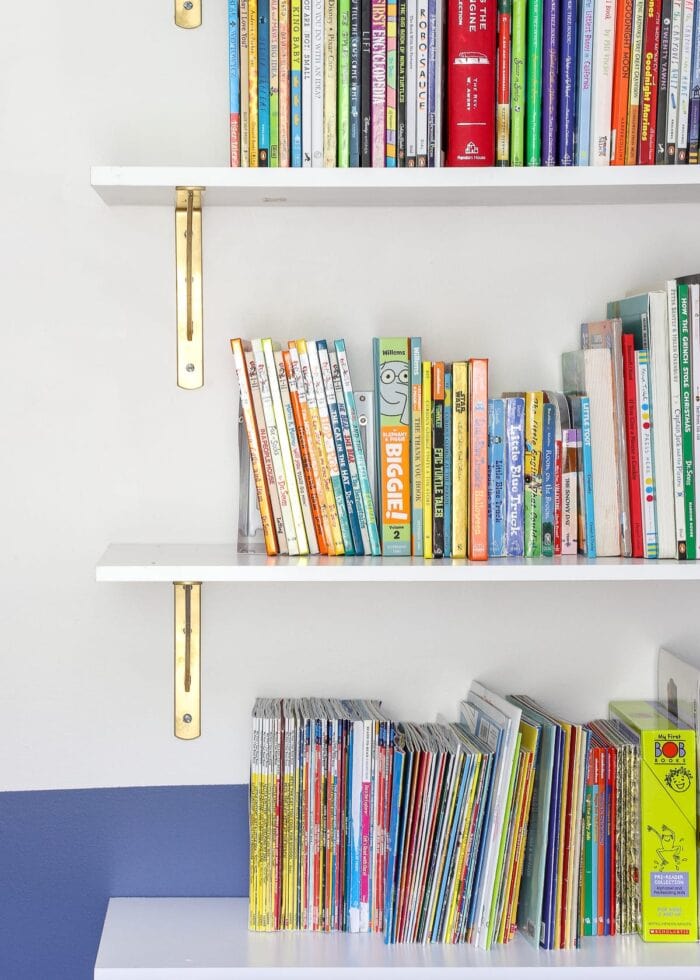
We originally tried to use taller books up against the brackets to hold up smaller books in the middle, but it just became too hard to keep flimsy or odd-shaped books from sliding all around. After experimenting with a few different options, these expandable bookends (that are connected in the middle) have worked great for holding up all the books no matter their size, shape, or weight. The compartments they create are especially handy for skinny, slippery kids books too!
Because these shelves are as decorative as they are functional, you’ll want to take time to “style” them a bit so they look nice. This is easily the best part of the entire project!
We have small, thin books along the bottom shelf, since those usually need to be “rifled” through when picking out stories. Bigger and hard-cover books with recognizable spines are on the next two shelves up, since our son can easily see which books are where from the floor. The very highest shelf holds books he’s not quite ready for, so they are well out of reach and out of eye sight!
We’ve had these shelves up for over 2 years now. Although we’ve swapped books out a few times, the shelves haven’t budged; and it has continued to be one of the best things we did in this tight room.
If you are tight on floor space and/or just don’t want to hunt down the perfect piece of furniture for a certain spot, I encourage you to give this solution a try. Not only is in inexpensive and fully customizable, but the open shelves also provide a great way to “fill up” blank walls while adding valuable and useable storage! This solution is definitely going in my “Will Use Again” for future homes!
Megan



4 Comments on “How to Install a Floating Bookcase (To Save On Floor Space!)”
How can I make door inserts very light and removable to my Kallax wall unit. This wall unit is the large one with 25 cube spaces for my art, sewing, crafts supply material. I’m always organizing everything in all king of storage organizers I buy very cheap or I make the with different material I recycle. So I don’t like to see things/items displayed everywhere. Even when declutting, if I see these items at a simple look, it creates me a mental clutter. My Kallax Wall unit shows everything on each cube space and creates this clutter.
How can I create these removable door inserts to this wall unit? I need them removable for when I move since I’m renting. I don’t want them to be install them with hinges or screws nails. I considering making them myself but don’t find anywhere the very light plastic/particle board, material to make them and remve at the same time. Cabinets or bookcase doors are very expensive and heavy for moving with the whole wall unit. Any suggestion?
Hi Alicia,
This might be “too temporary” but I would try Foam Core board (like Science Fair board). You can cut the board in a way that it doesn’t go all the way through the paper covering, so it makes a hinge of sorts. You can then just Duck tape it to inside of the Kallax. I’ve done it in the past (just as an experiment) and it actually worked pretty well. Maybe give one a try and see if it works in the way you need!
I’ll keep thinking for you!
We installed floating shelves similar to these above our printer stand in our home office. They look nice and are very sturdy. The only drawback I have found is that we hit our head on the corner of the bottom shelf when we’re fooling with the electrical outlet behind the printer stand, which happens frequently due to a very annoying temperamental printer:( I’ve hung a long dangly decoration from that corner but I don’t always notice it…..and those shelf corners hurt! How do you prevent your little ones from hitting their heads when they’re playing or getting things out of the storage crates underneath? I’d love to hear your solution to implement it myself.
Hi Cynthia!
You know what’s funny, my middle guy (who’s room it is) never seems to hit his head. He’s just tall enough. But my little guy is now getting taller and I’ve noticed him come close to those corners a few times. We haven’t really had to do anything yet, but I would maybe add some of those foam corner protectors if it becomes an issue.
I wonder if you could add some bright tape to the edge that you might notice more??
Sorry I don’t have a better answer on this one, but I’ll keep you posted if we change anything up!