A Tour of Our Organized Pantry From Top-to-Bottom
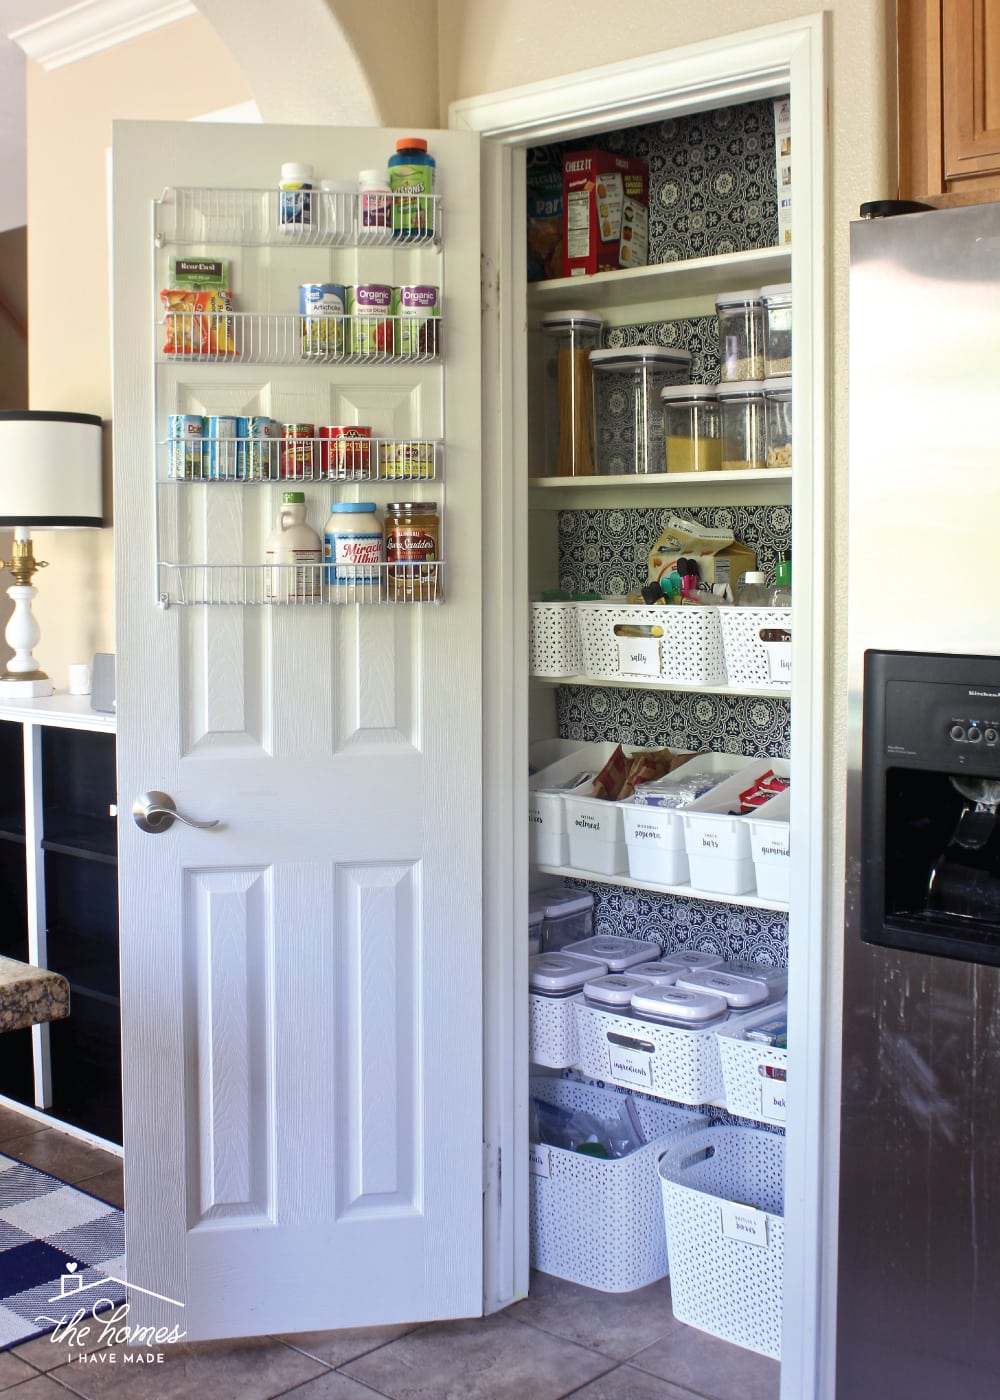
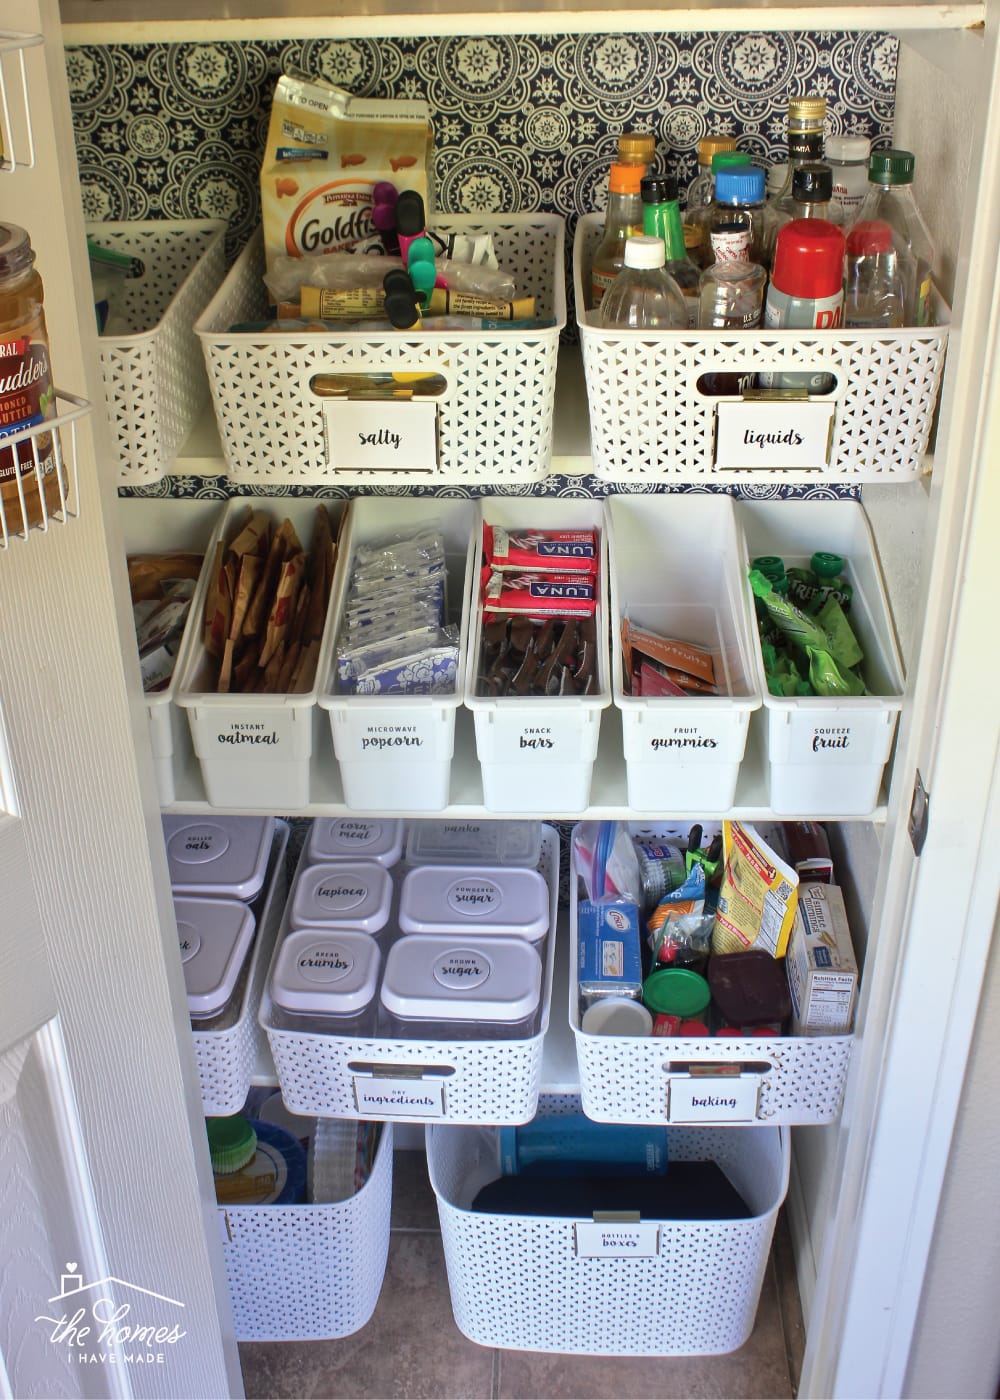
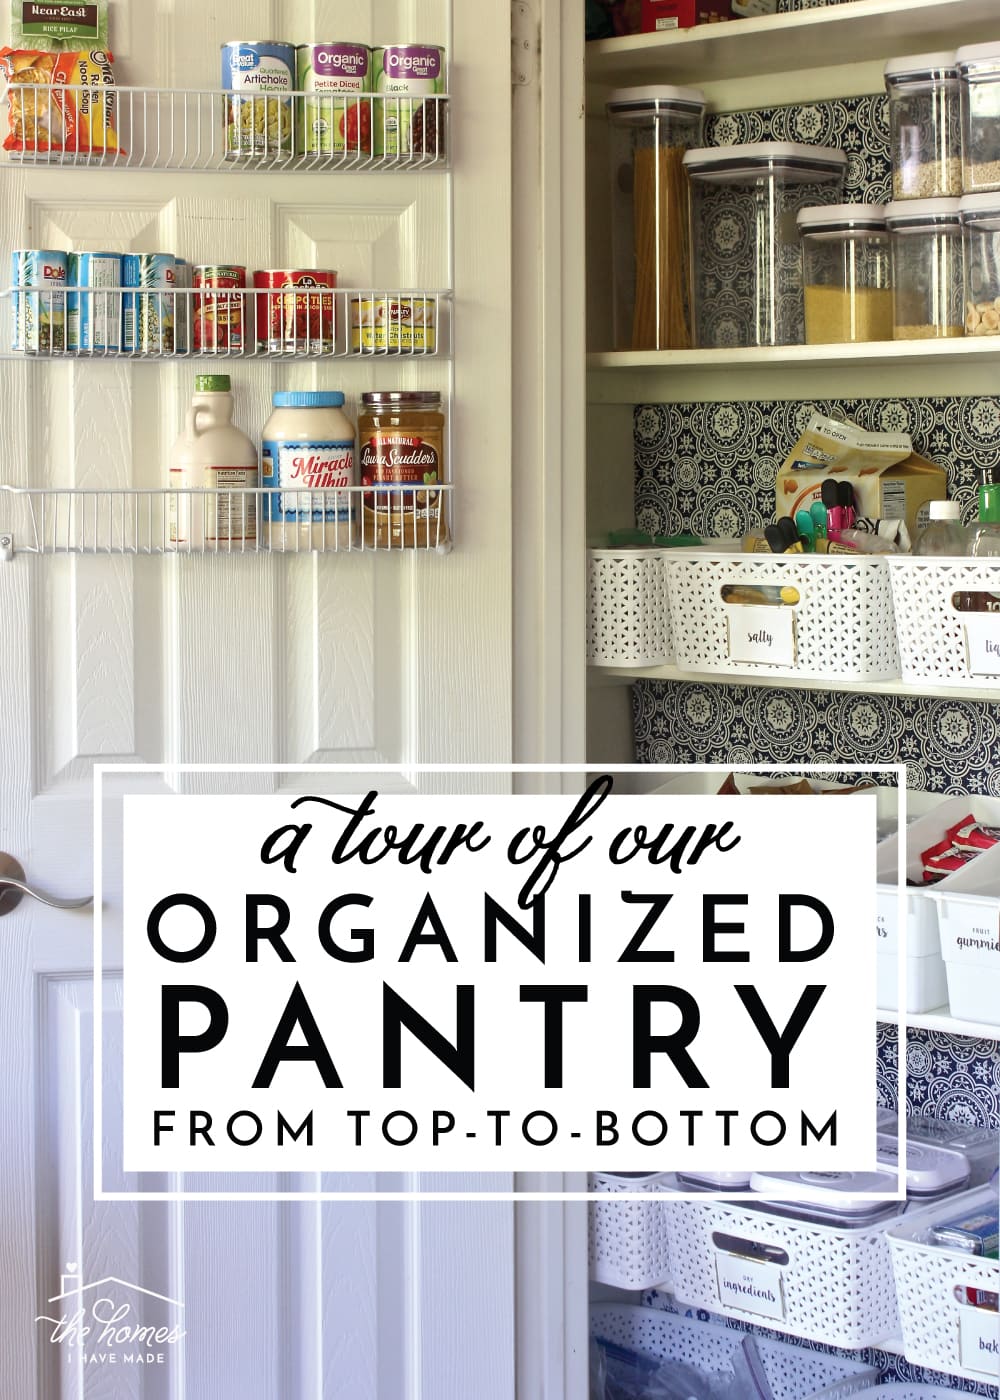
I am so thrilled to be giving you guys the full tour of our fully organized pantry today! Every time I share just the tiniest glimpse of this space either here on the blog or on social media, I always get questions about where I got this, that, or the other. It took me a little while to pull the last few details together, but I am finally ready to give you the full tour and share where I got each and every one of my storage solutions. It was a process to get this pantry juuuuust right; but my perseverance paid off because I think this is the best functioning pantry we’ve ever had (and also the prettiest)! We’re going to go top-to-bottom today so I can show you where and how every last food item is stored! Let’s get to it!
Getting the pantry right in each house we live in is always a project that takes some real time, trial and error, and experimentation. In the 7 different homes we’ve lived in, not once have we had a similar shape, style or size pantry, requiring me to re-figure it out each and every time. You wouldn’t think pantry storage is that complicated; but since it’s a place you interact with countless times a day, it becomes abundantly clear when something isn’t quite right or is a downright nuisance. We’ve now lived in this house for two years and I’ve finally settled on a combination of storage solutions that make this the most organized pantry we’ve ever had and the easiest to maintain. A few decorative details sure make it easy on the eyes, too!
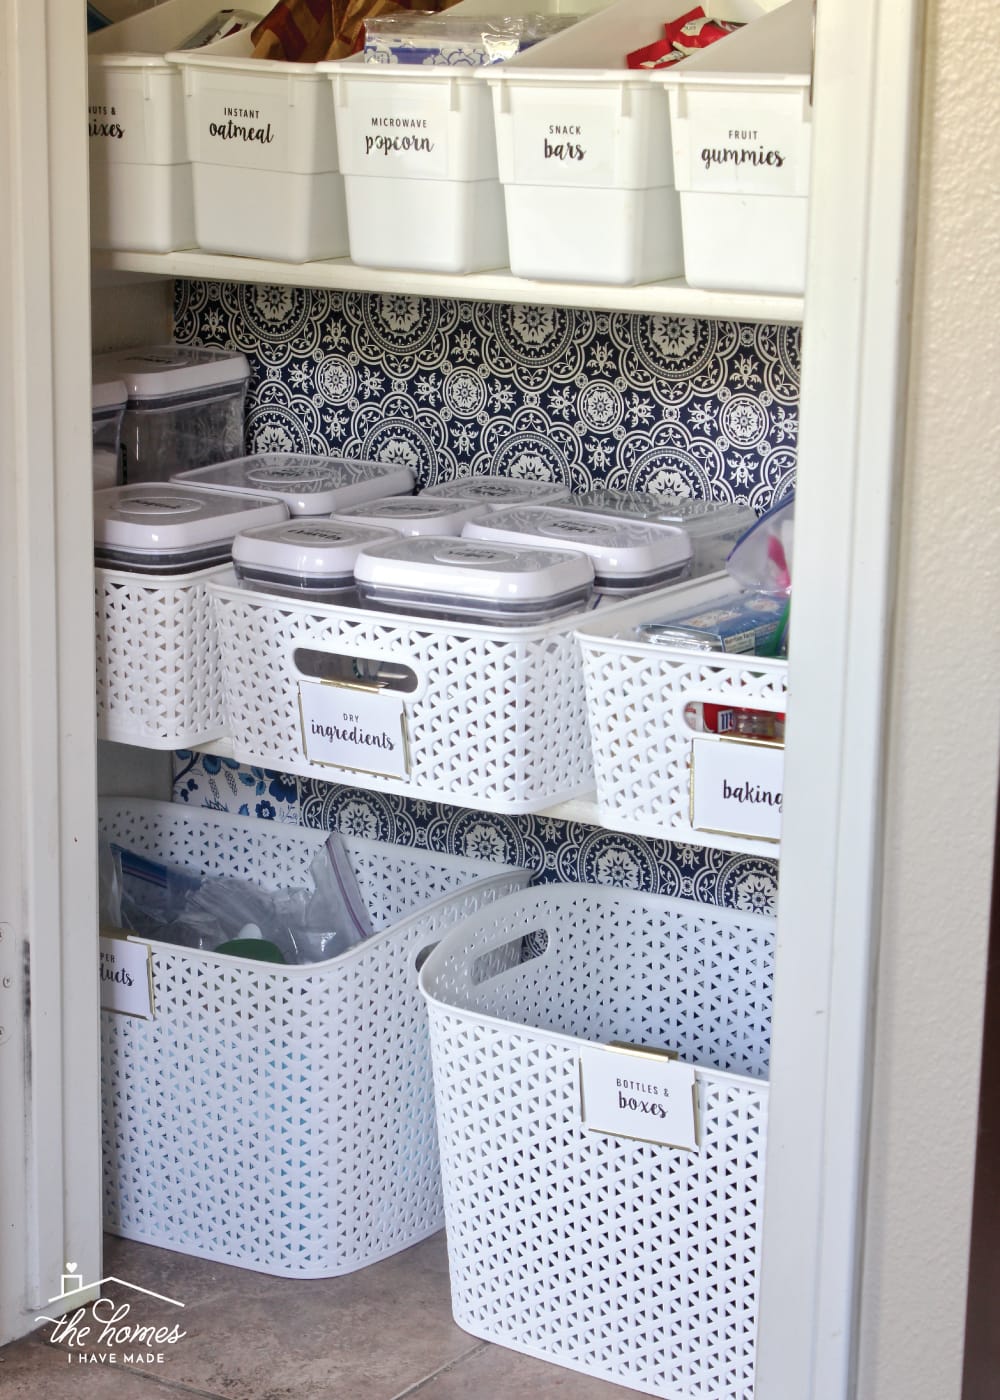
Before I dive into the nitty gritty details of our food storage, I want to highlight three small details that help this pantry look as good as it works! The first is my use of all white storage containers. Don’t get me wrong, I love colored bins and baskets as much as the next gal, but I’ve learned that sticking to simple, clean white baskets creates a display that is easier to look at…especially in a pantry where there are so many different colors of boxes, bags, and labels.
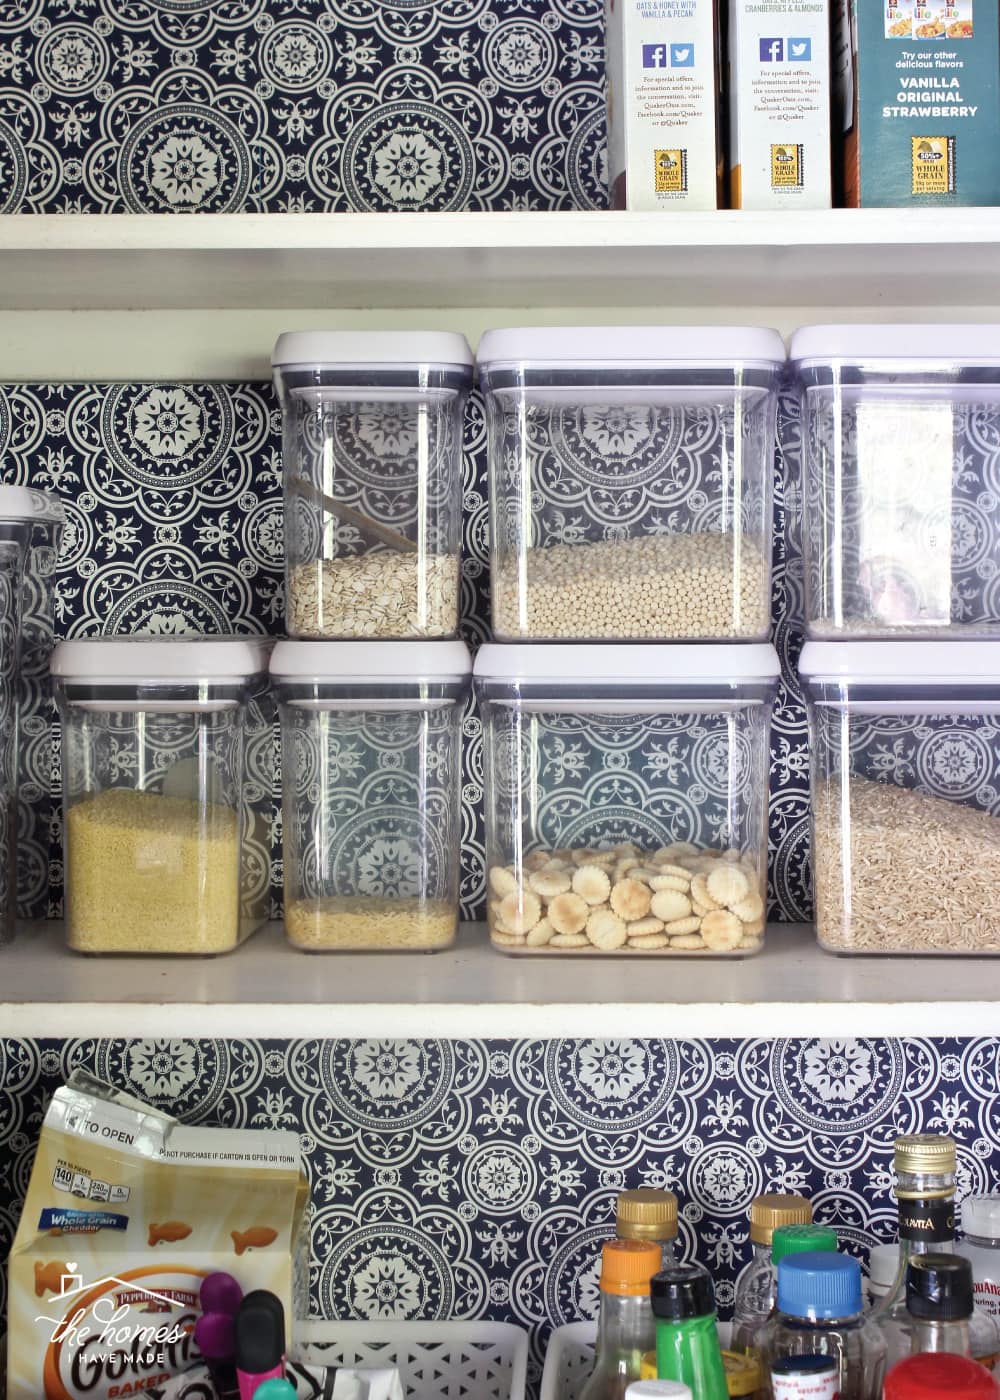
Another swoon-worthy detail is the application of a patterned paper along the back of each shelf. And because of my white storage containers, I can easily change the look, color, and style of the whole display simply by swapping out the paper. In fact…if you’re a longtime reader, I promise you’re not going crazy. Yes, this blue-and-white paper is different from what I originally showed you here. As the color scheme in my kitchen began to drift away from my original design plan, I found myself yearning for something with less color variation. I found this simple blue-and-white medalian wrapping paper at The Container Store; and because of my clever and unique installation method, swapping out the paper took me less than an hour (seriously!). I literally just cut down the paper and re-wrapped each cardboard insert. With it that easy, I might as well change it out for the seasons 😉 #justkidding #maybe
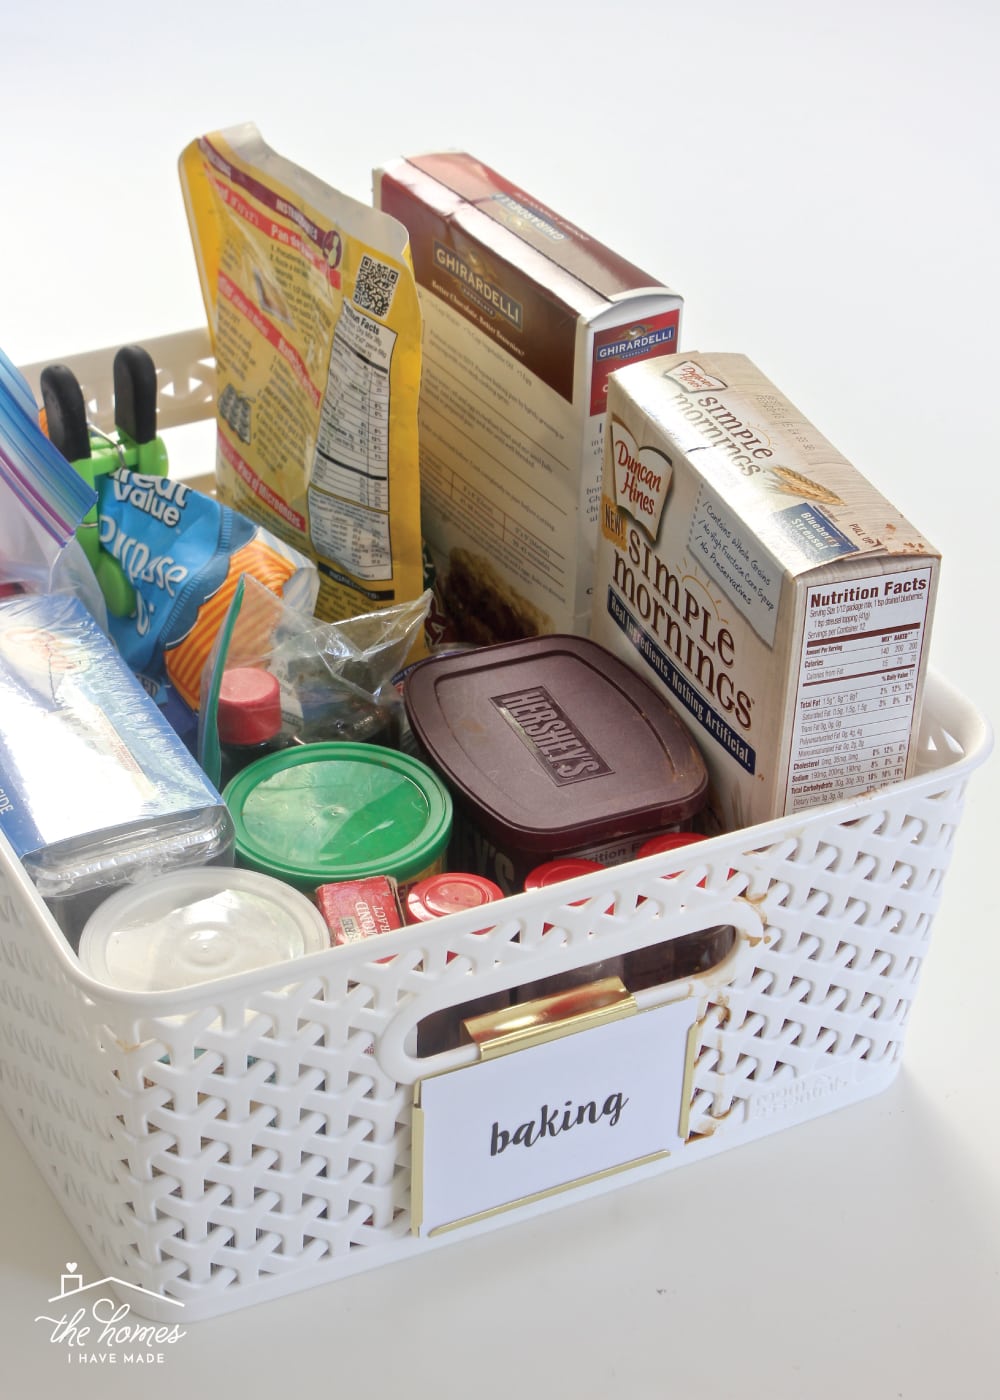
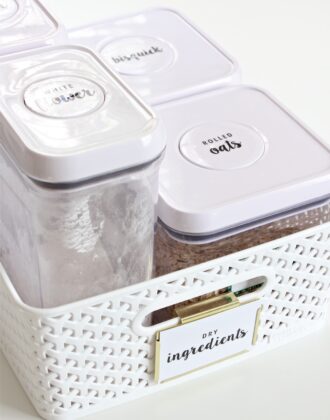
The final decorative detail I get asked about all the time are the gold label holders used on all my Y-weave baskets. Although they are a touch pricey, they provide such a clean yet sophisticated way to add labels to any basket. I love that they can be attached to pretty much anything and provide just enough “bling” to a utilitarian space. To make the labels, you just write or print onto white cardstock and slide them in – no adhesive or complicated mechanisms required! (You can learn more about my print-and-go pantry labels here!).
Alright! With those three details out of the way, let’s examine each of the different storage solution a little closer.
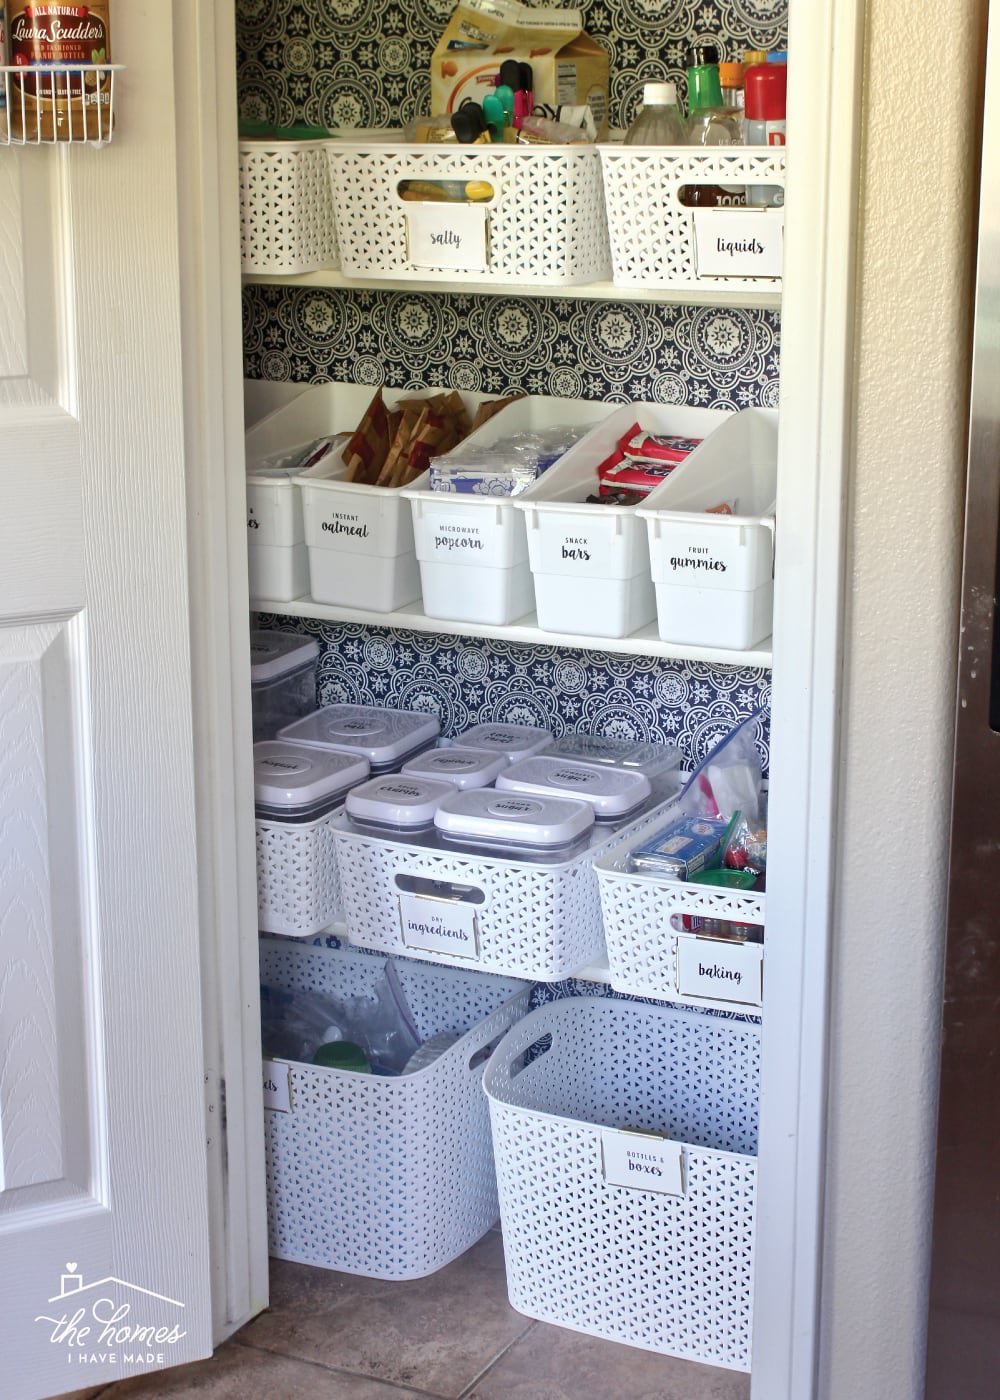
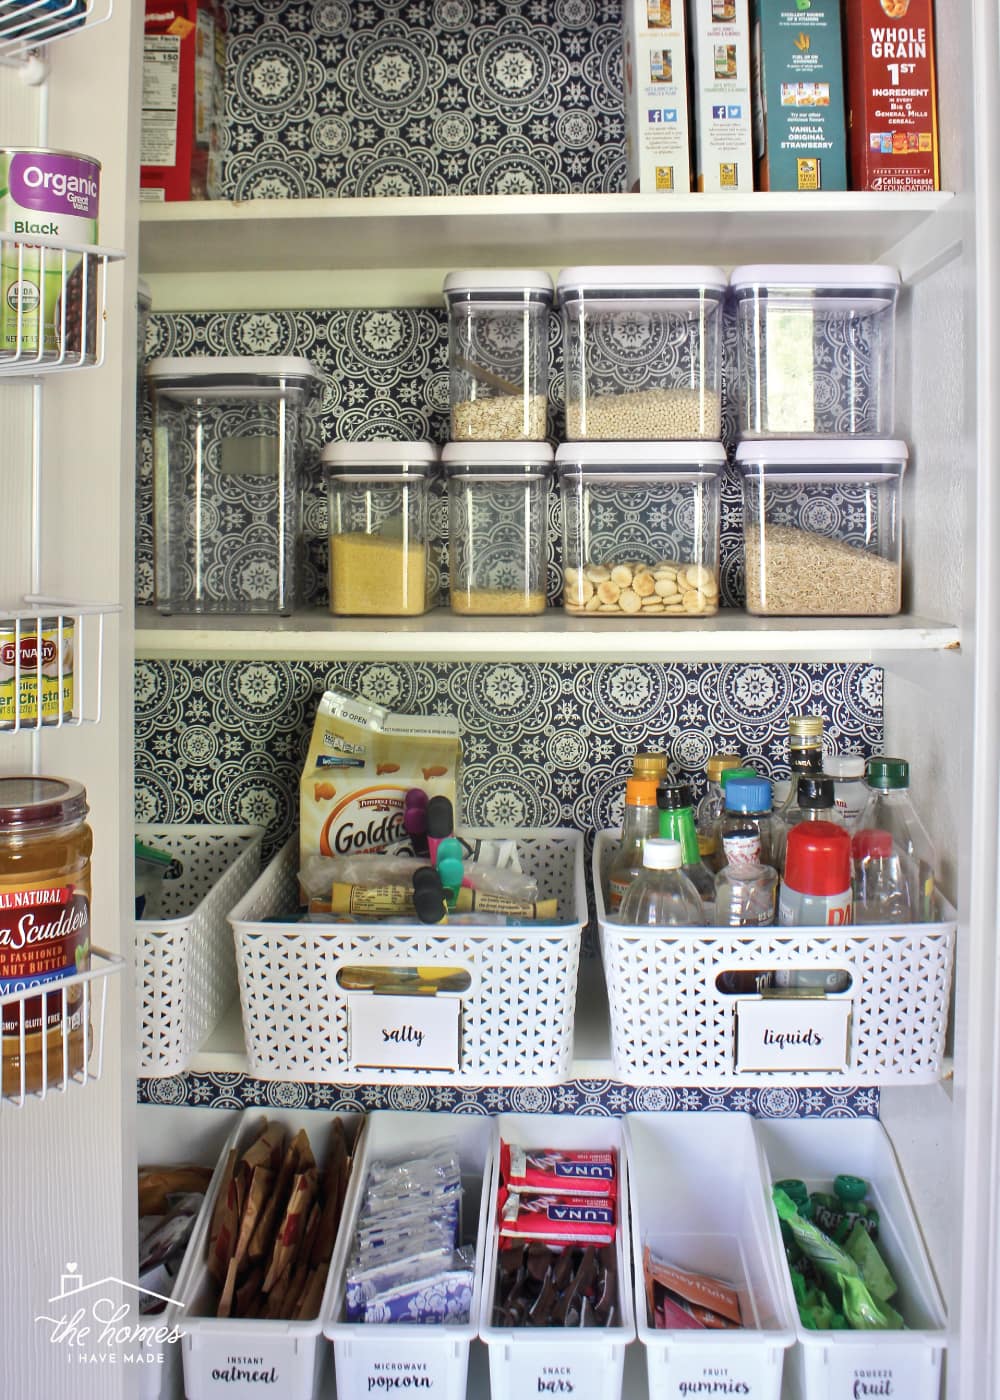
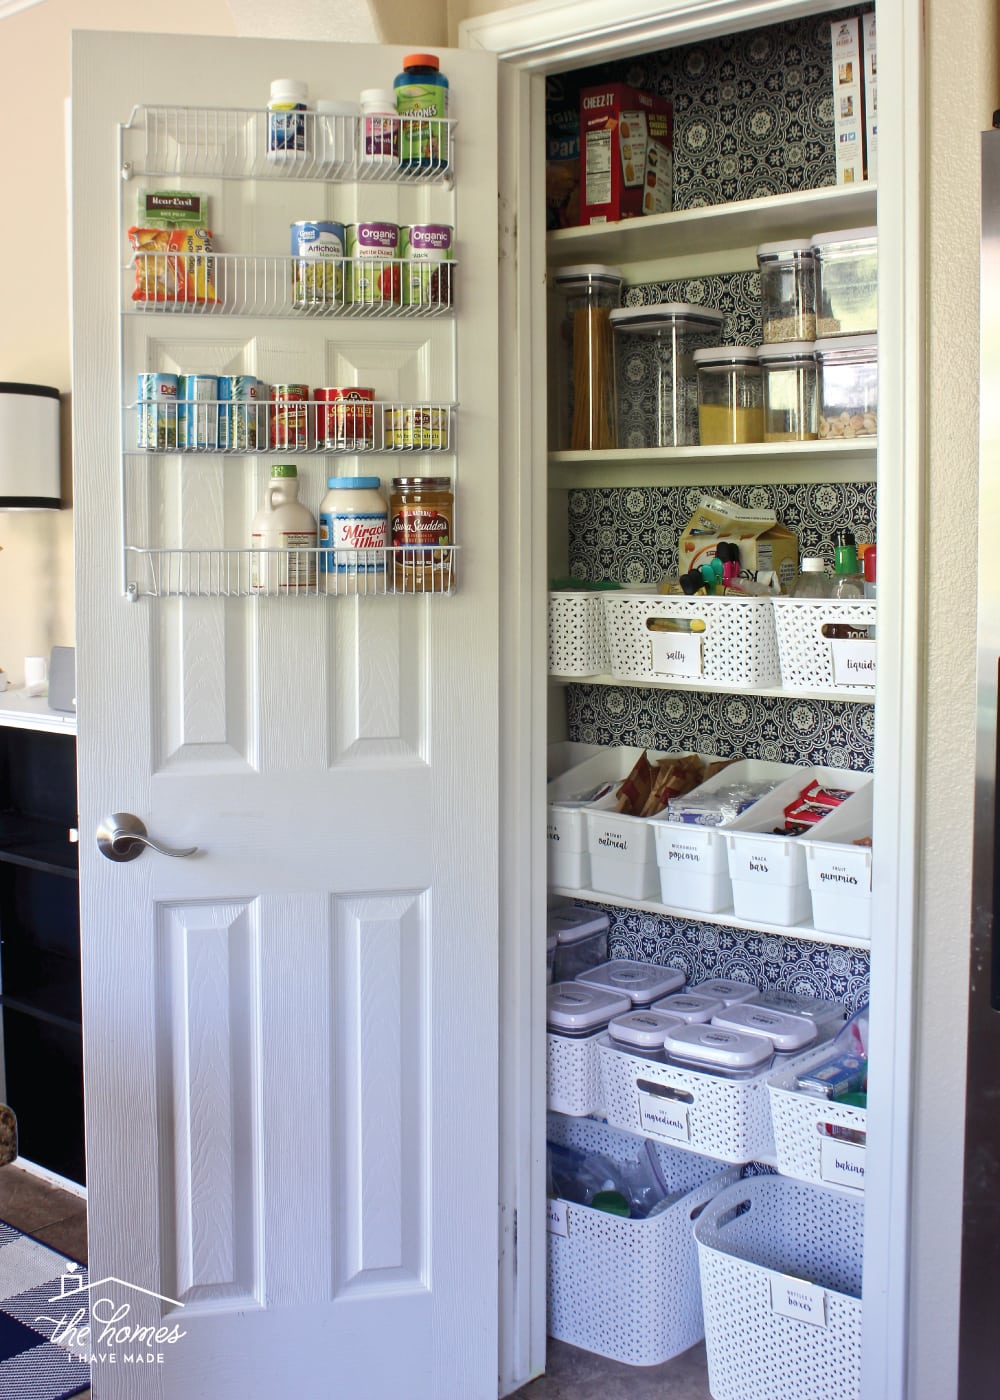
The title of my post says “from top to bottom,” but we’re actually going to move from bottom to top. On the pantry floor, I have two large Y-weave baskets from Target (my fav) that quite nicely hold various odds and ends that were floating around the kitchen. The basket on the right holds all of our lunch boxes and water bottles. We were having some difficulty finding a spot for these bulky items and this large basket made for the ideal catch all.
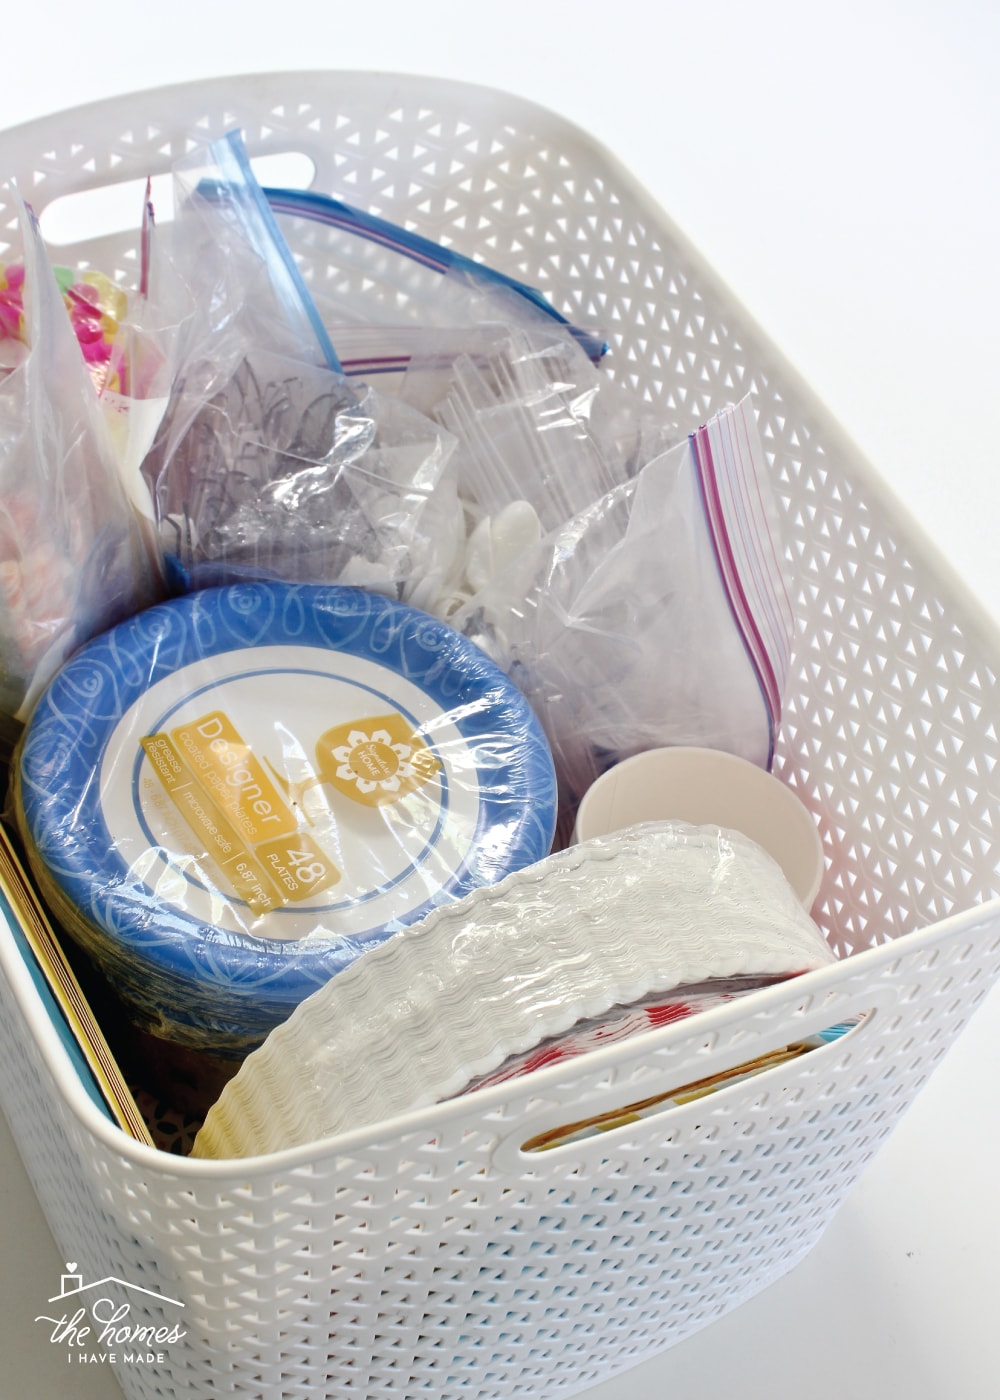
The other large basket on the floor holds all of our paper products. From plates and cups, to napkins and plasticware, anything we need or use that falls into the “disposable” category gets placed in here. Again, the really generous size of these baskets allowed me to put everything into one tidy, easy-to-access spot!
TIP! Besides finding baskets that fit a certain space, also think about how easy they are to move around. While you want to maximize the space you have, there is no use in storing items in a basket you can’t easily reach or pull out. I could have possibly fit three smaller baskets here, but they would have been cumbersome to access. While I now have about 8-10″ of horizontal wiggle room here, both of these sizable baskets are easy to get in and out…meaning everything actually gets put back where it goes!
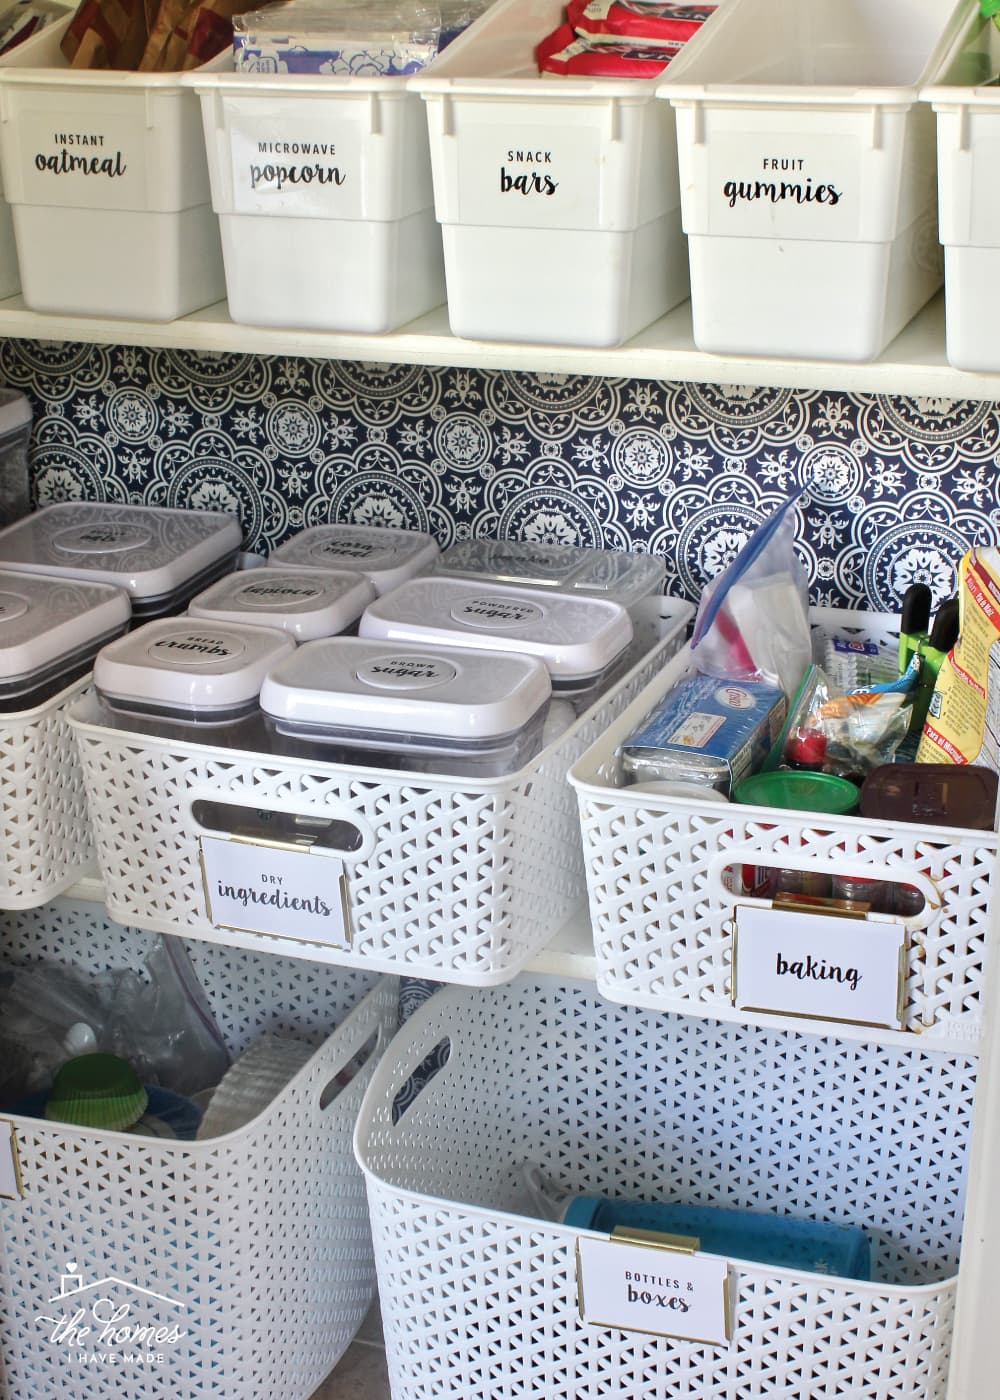
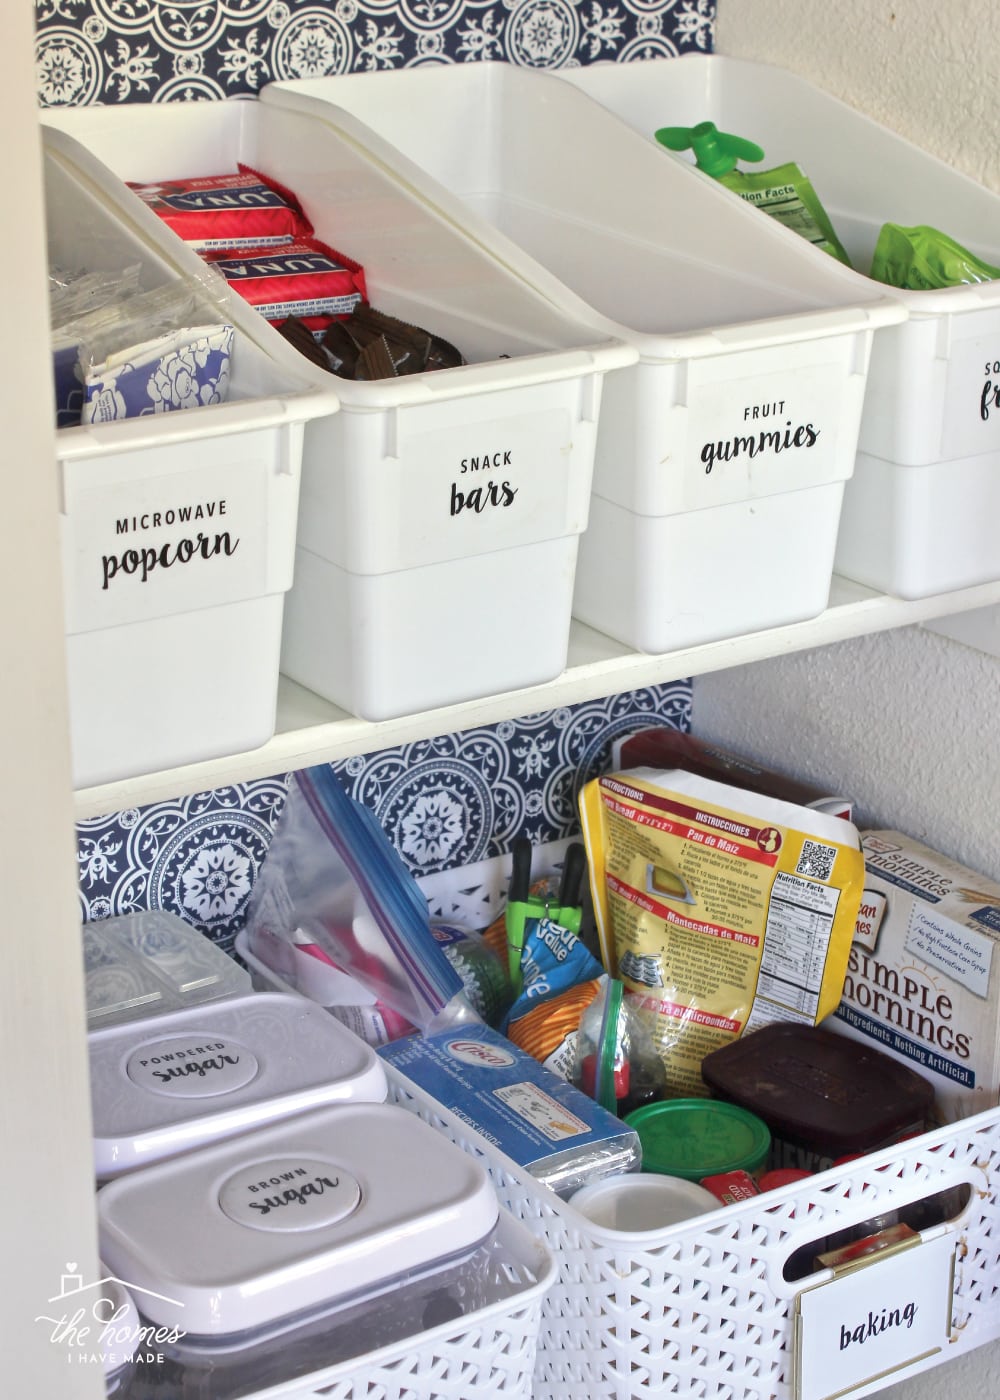
The next shelf up holds all of our baking supplies and/or dry ingredients such as flour, sugar, pancake mix, etc. I’ve employed a unique storage solution here that at first glance may seem like storage overkill (containers within a basket) but it’s actually one of the best things I’ve done in this whole pantry! Hear me out!
I will admit that the containers within the baskets sure make my organizing-loving heart skip a beat, but I swear this arrangement has some functional wins too.
First, our pantry shelves aren’t the deepest. If you look closely, you’ll see there is no way I’d be able to place containers 3-deep without the front one dangling precariously off the shelf’s edge. Sure, I could stack them (like I do on the higher shelf); but since this shelf is so low, it’s really nice not to have to crouch down to dig through everything. Using the baskets allows us to fit more on this shelf!
Second, the baskets themselves function almost like drawers. So instead of having to get low to find the sugar, I can slide out the basket, as I would a drawer, and pull out just what I need.
Finally, because baking often requires many dry ingredients, during big jobs, we just remove the baskets entirely and place them on the counters. This way we have everything we need in one spot and then can quickly and easily put everything right back when we’re done.
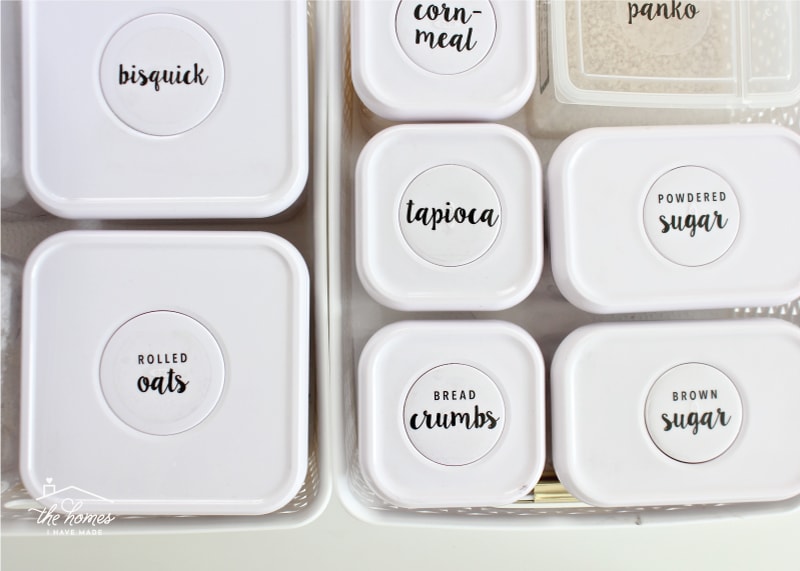
The fact that these Oxo containers fit so nicely within my beloved Y-weave baskets was a pure organization miracle. And labeling the tops (instead of the sides) was a stroke of genius even I can’t believe occurred to me!
Love my labels? See how to make your own here!
I am going to chat more about “decanting” pantry items next week, but it may be obvious by these pictures that I use a combination of decanting some items and not others. While most of our dry ingredients are poured into Oxo containers, some of our smaller, pre-packaged baking-related items all get loaded into the third basket on that same shelf. Again, not only is it really easy to grab a single basket during baking sessions, but it also gives a dedicated place for these random yet related items to land within the pantry.
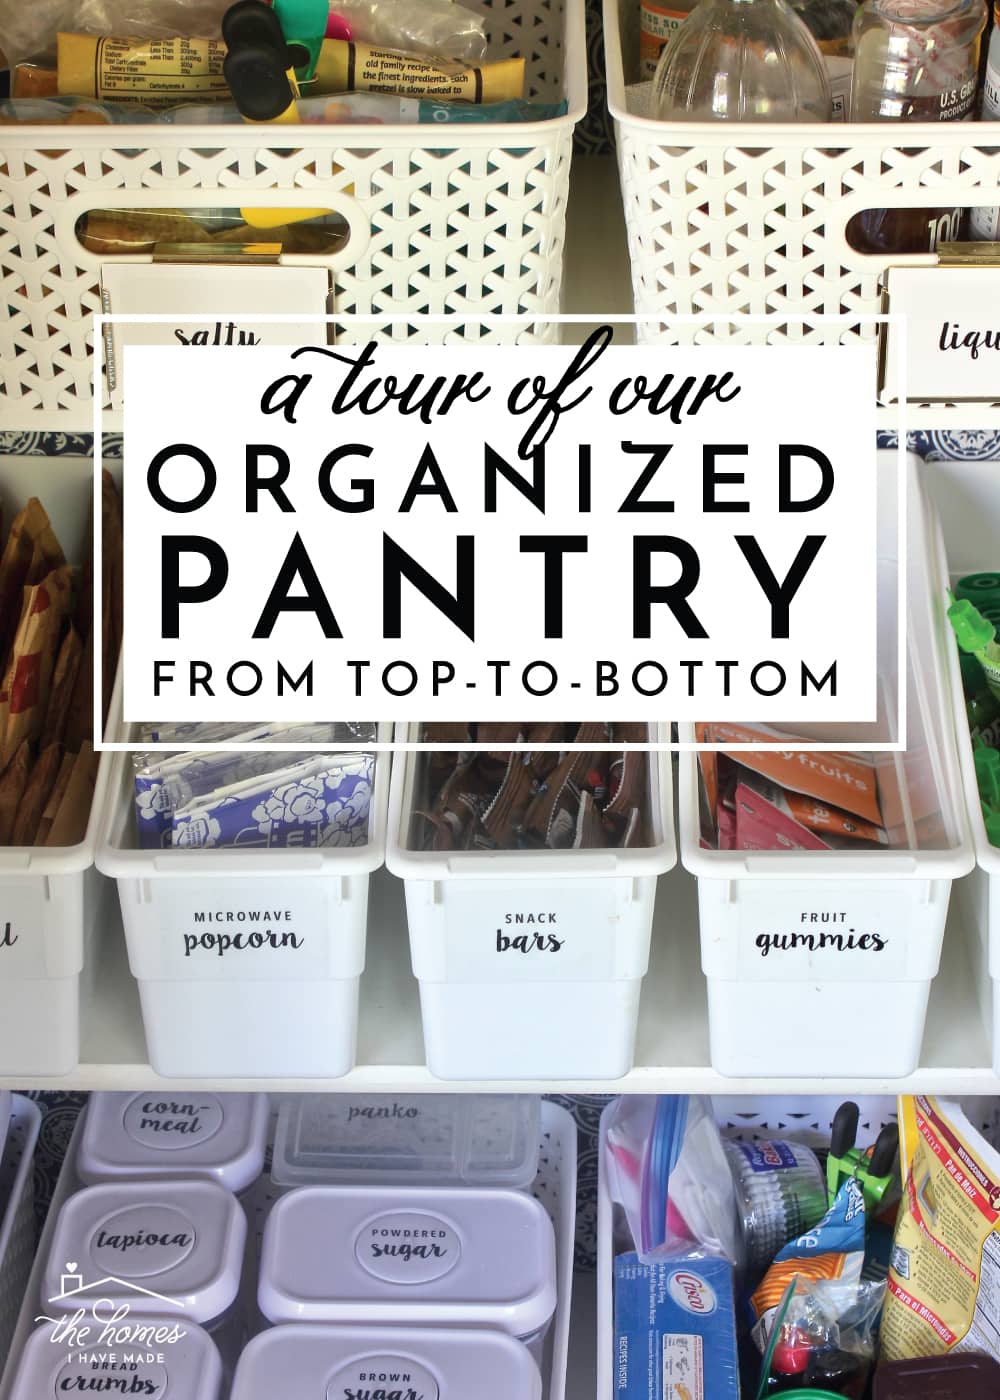
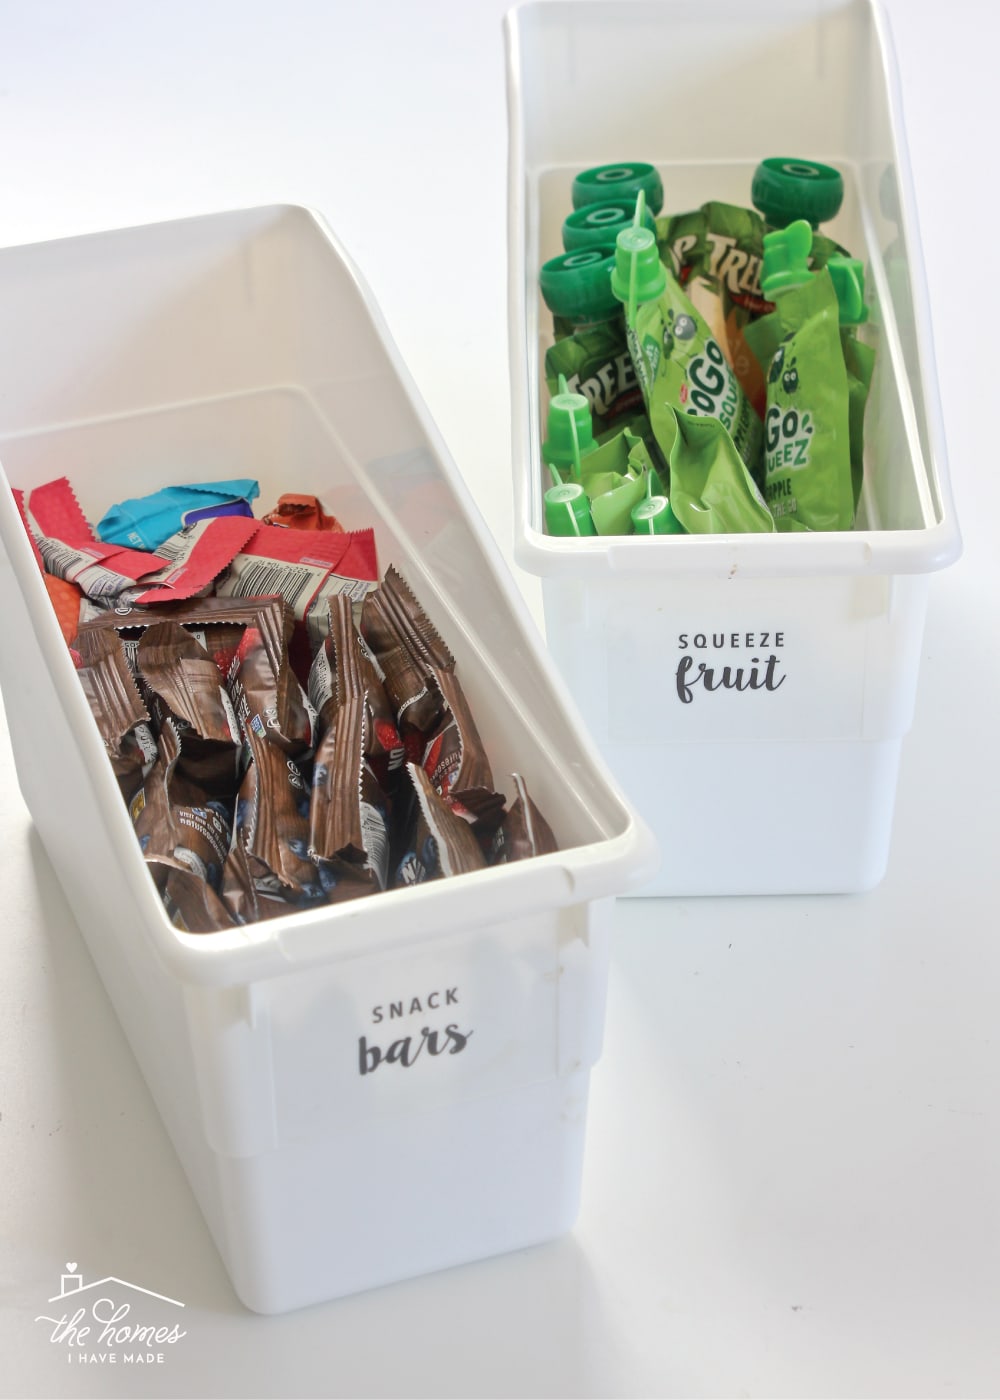
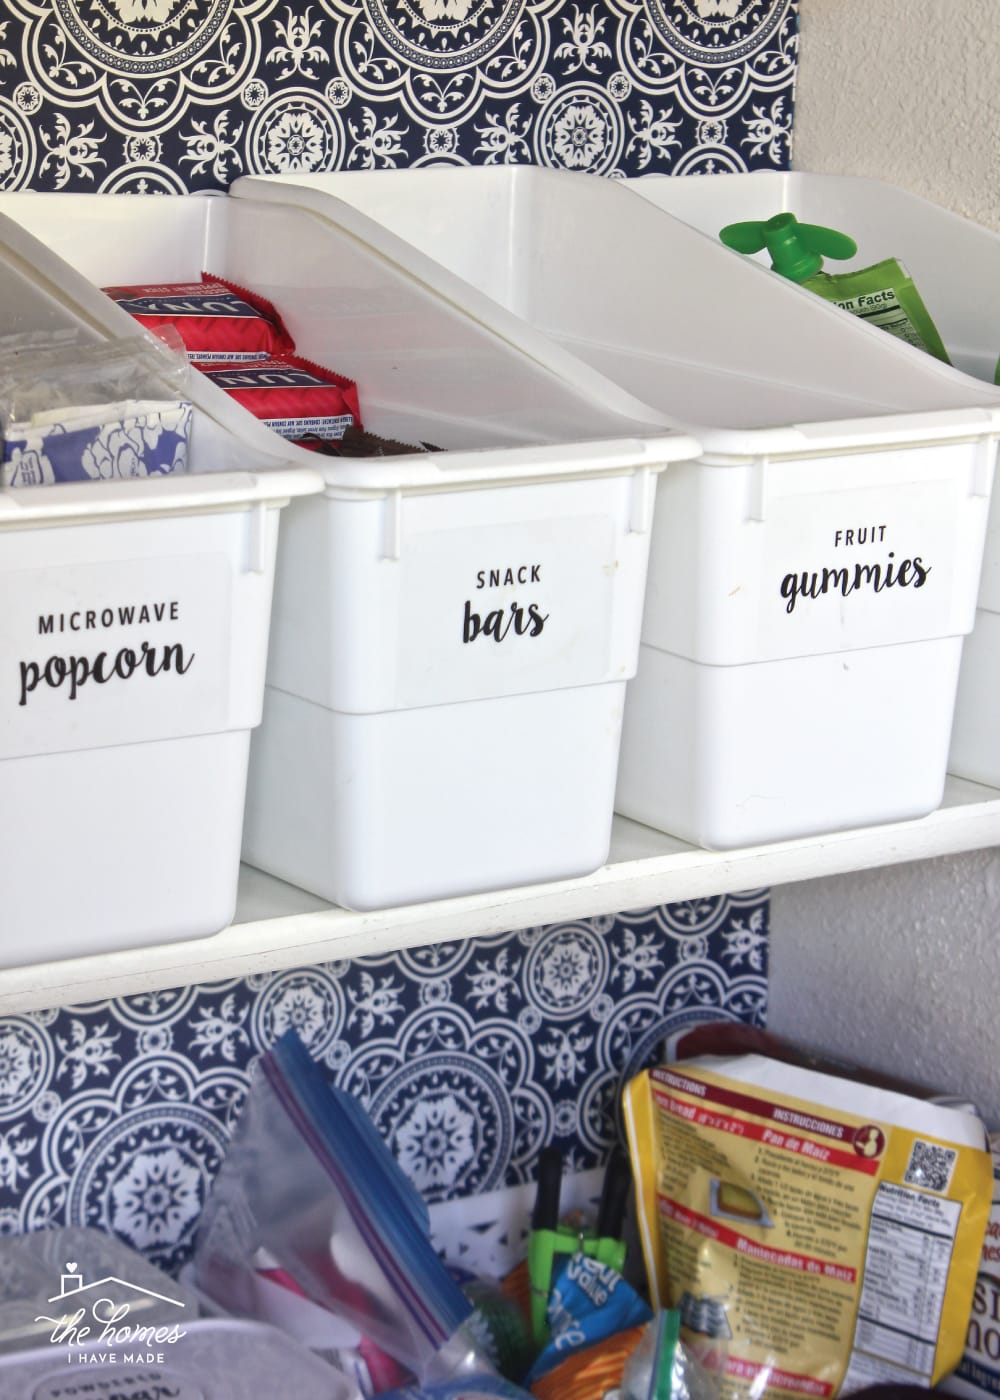
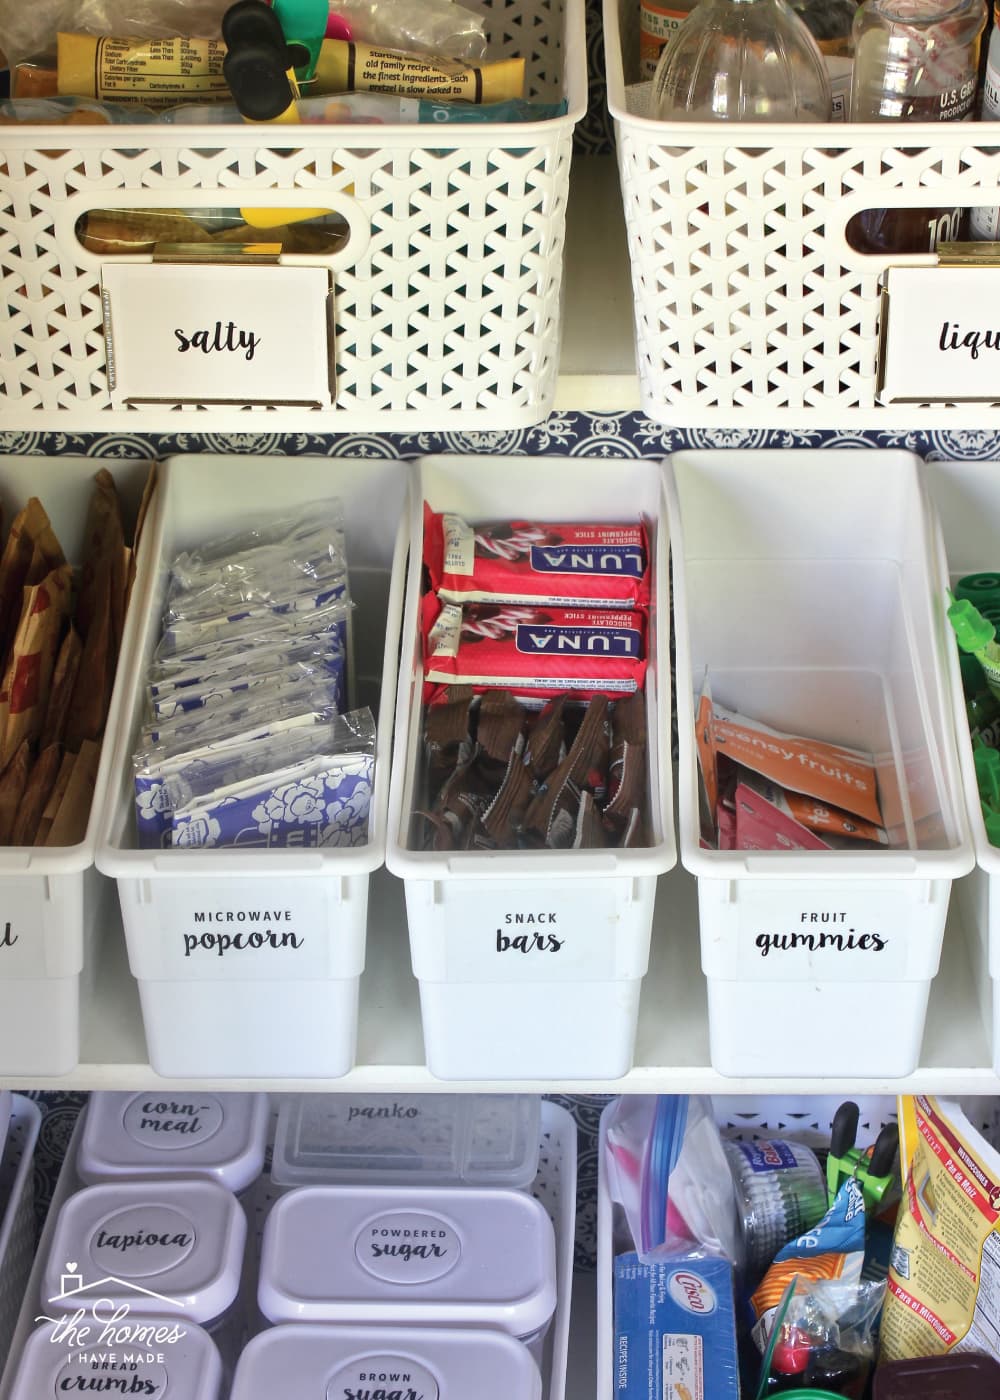
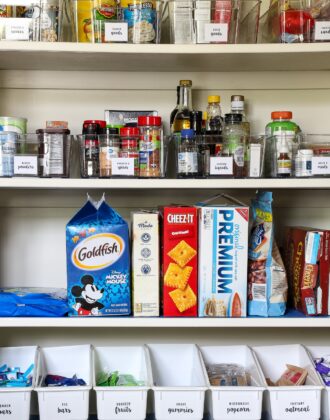
Moving up, let’s chat about our snack bins! Not only are they my favorite detail in our entire pantry, but I get asked about them the very most! Yes, my friends…those are book bins…like what teachers use in the classroom to organized books and other school materials. And they might very well be the smartest pantry organization idea I’ve ever had! I first started using three in our pantry in Kansas and just loved their functionality. When I went to expand our collection, I had trouble finding the same ones so I took it as an excuse to upgrade.
I want to make this as clear as possible because I get asked about these bins all.the.time. The book bins I use in our pantry are these. They are more expensive than the ones you can find on Amazon or Target. However, these were the ONLY white book bins I could find (and I looked and looked). Although a bit pricey, what’s really nice about these specific ones is that they come in a set of 12, in almost any color you can think of, and they have a flat front ideal for labeling. That said, I also have these cheaper ones in two different colors and they look, fit, and work just as well…they just don’t come in white!
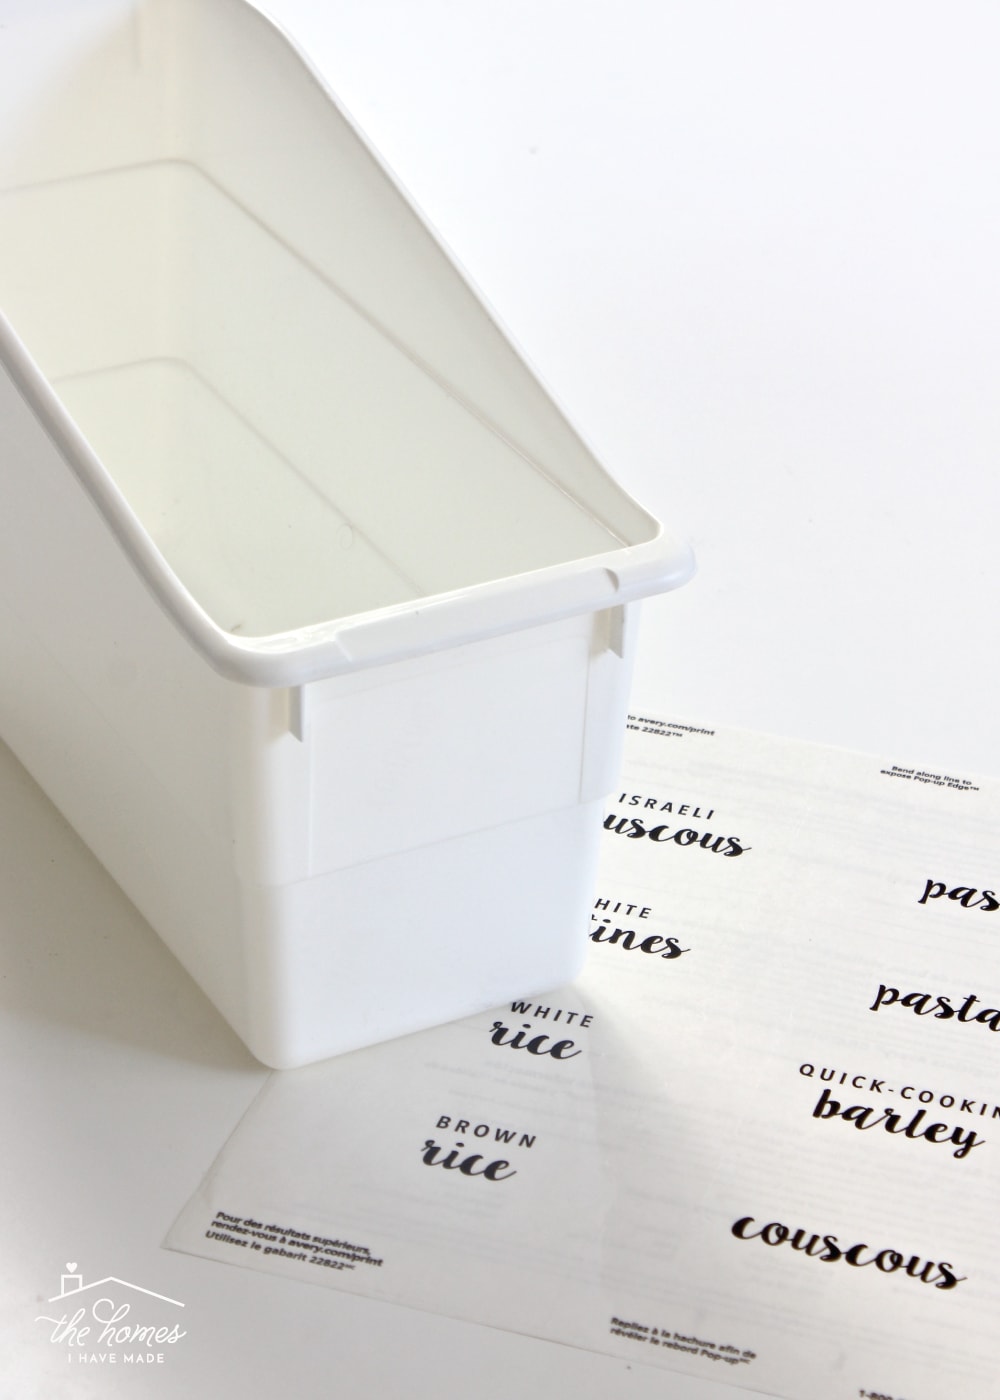
If you can’t already tell, I love happy coincidences when it comes to organizing, and you better bet I did a happy dance when I realized my pre-formatted pantry labels were the perfect fit on these book bins. No cutting or spacing required…I just print my files onto my favorite clear labels and stuck them right on! Couldn’t be easier!
We have 7 of these bins across a single shelf in our pantry. I LOOOOVE that, at a glance, I can see what’s running low and what’s in ample supply. And for the most part, I LOOOOOVE that kids can reach in and get what they want whenever they want it.
That said, these snack bins are at just the right height for Sam to pull them down, often leaving me with applesauces and granola bars and gummie packets all over the floor. We’ve recently installed a pantry lock to keep Sam out. So…while I adore these bins for our snacks, if open baskets will cause more trouble for your family than it’s worth, you might want to consider something different! #keepingitreal
The next shelf up, the middle shelf, holds three more Y-weave baskets.
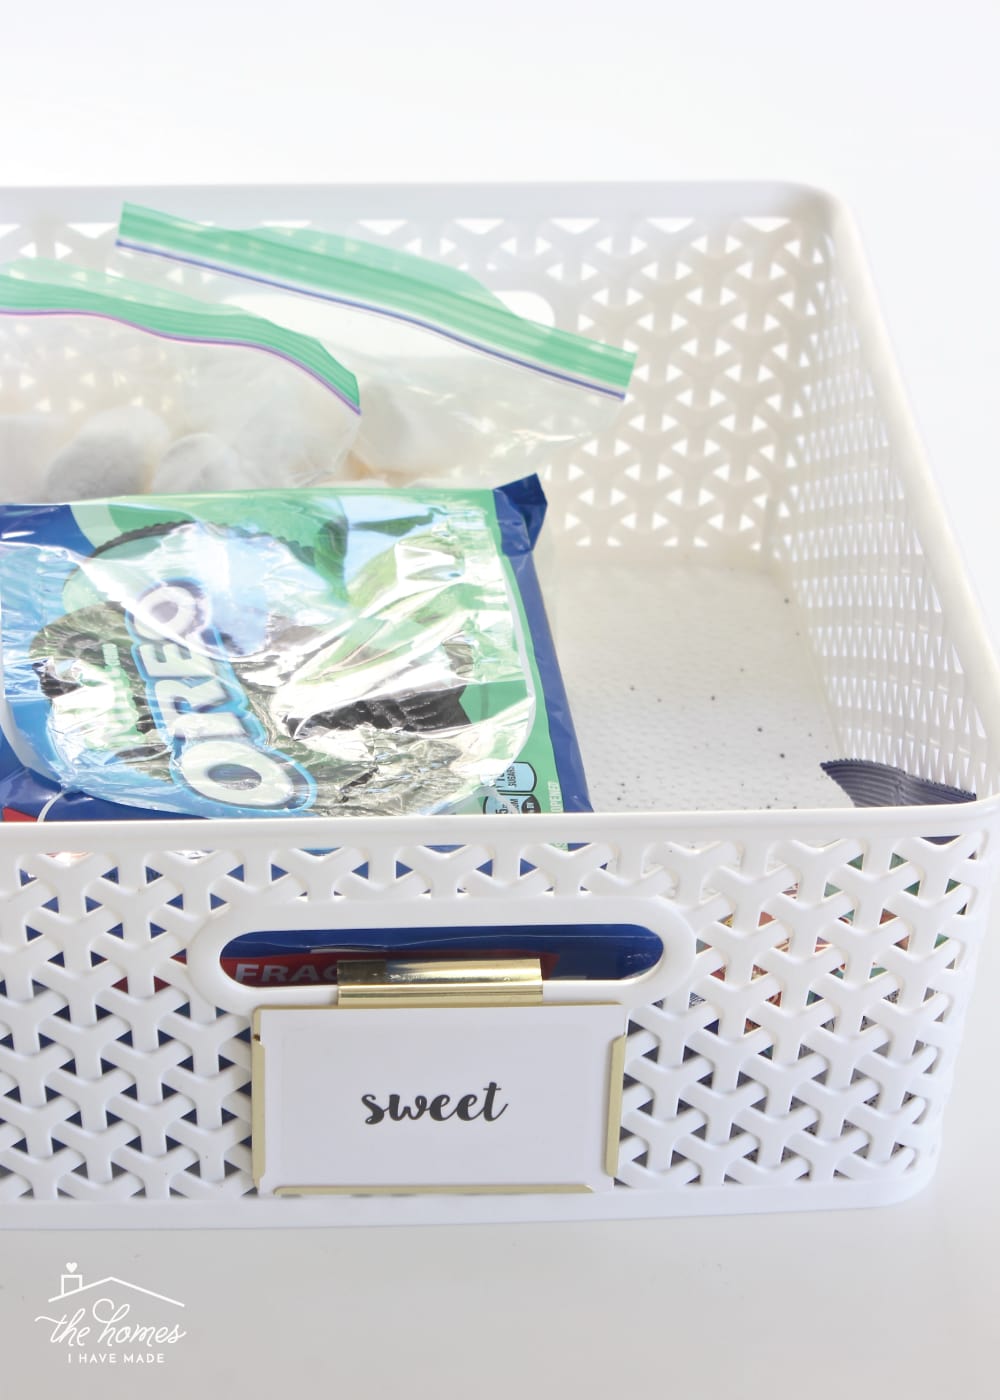
Back to the left, where you can’t see, is our “Sweets” basket..into which gets placed our cookies, candy, and other sweet treats. There is a reason it’s tucked back where you can’t easily see or reach it 😉
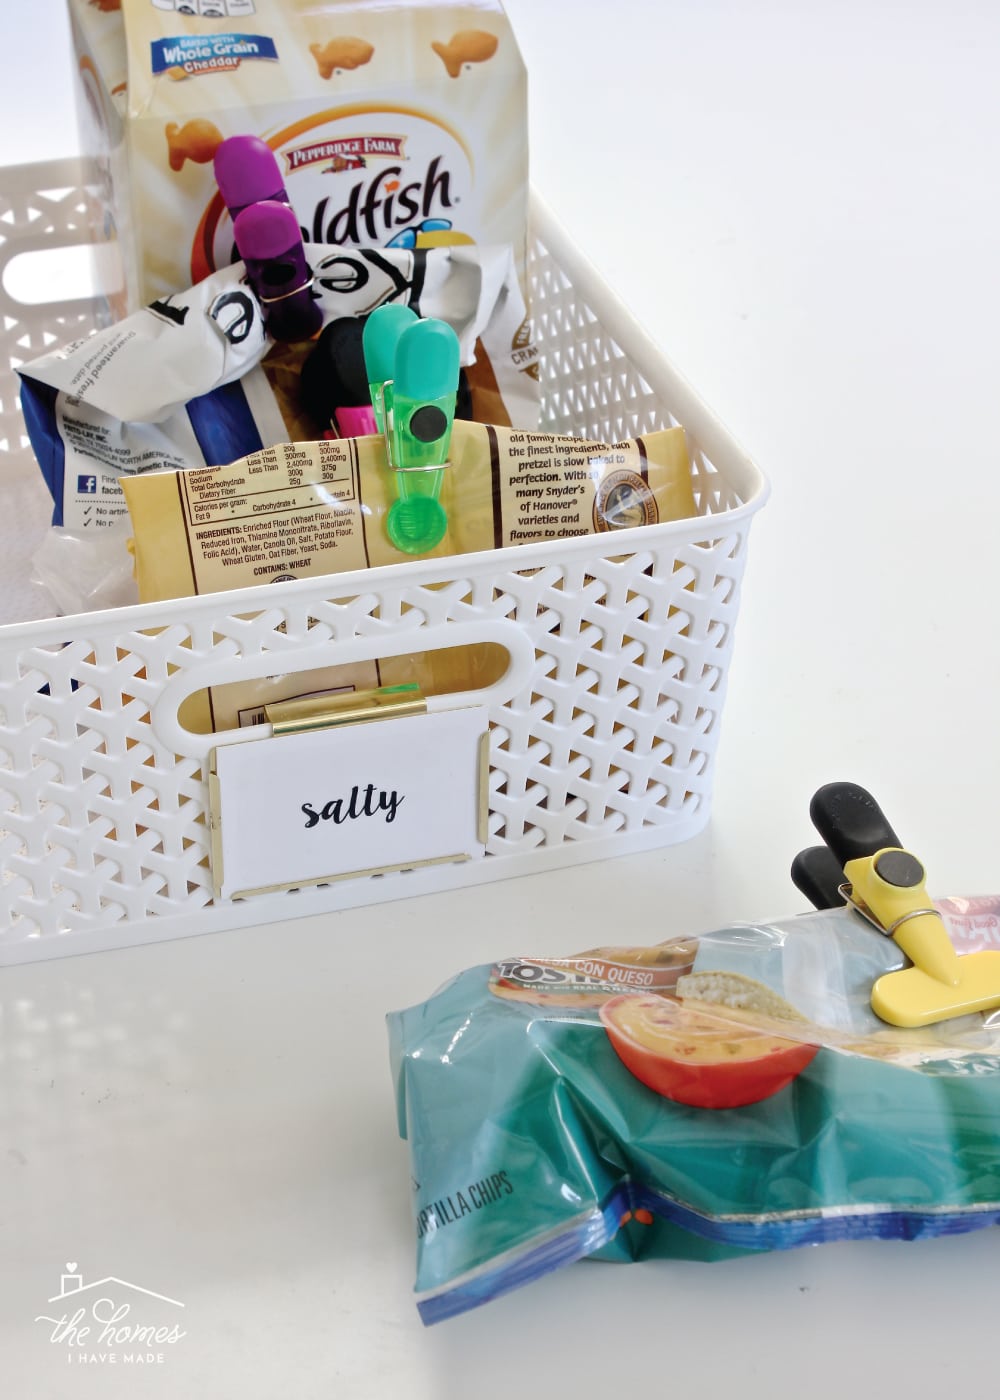
The middle basket holds our “Salty” snacks. We try very hard to limit the amount of snacks we have open at any given time and prefer to buy large bags rather than snack-sized bags. While this basket may seem small to some, it actually helps us reduce how much is open at once. A few larger, un-opened bags do get placed up on our top shelf, but anything open gets placed here. Again, I’ll go into decanting next week, but as you can see from these photos, we mainly rely on original packaging and clips for these food items since they rotate so fast and so regularly.
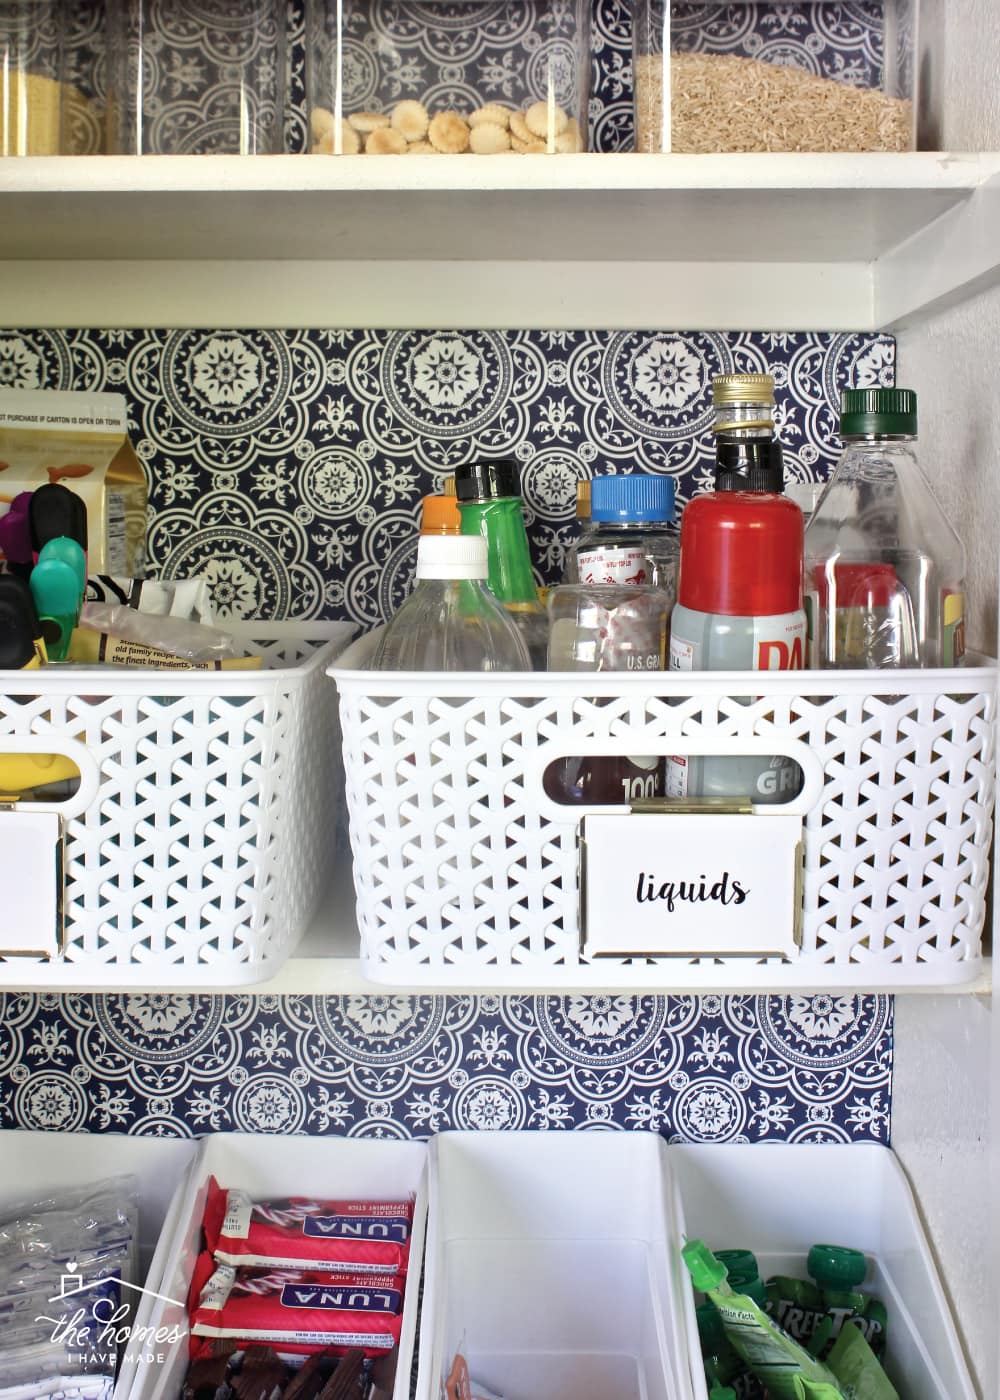
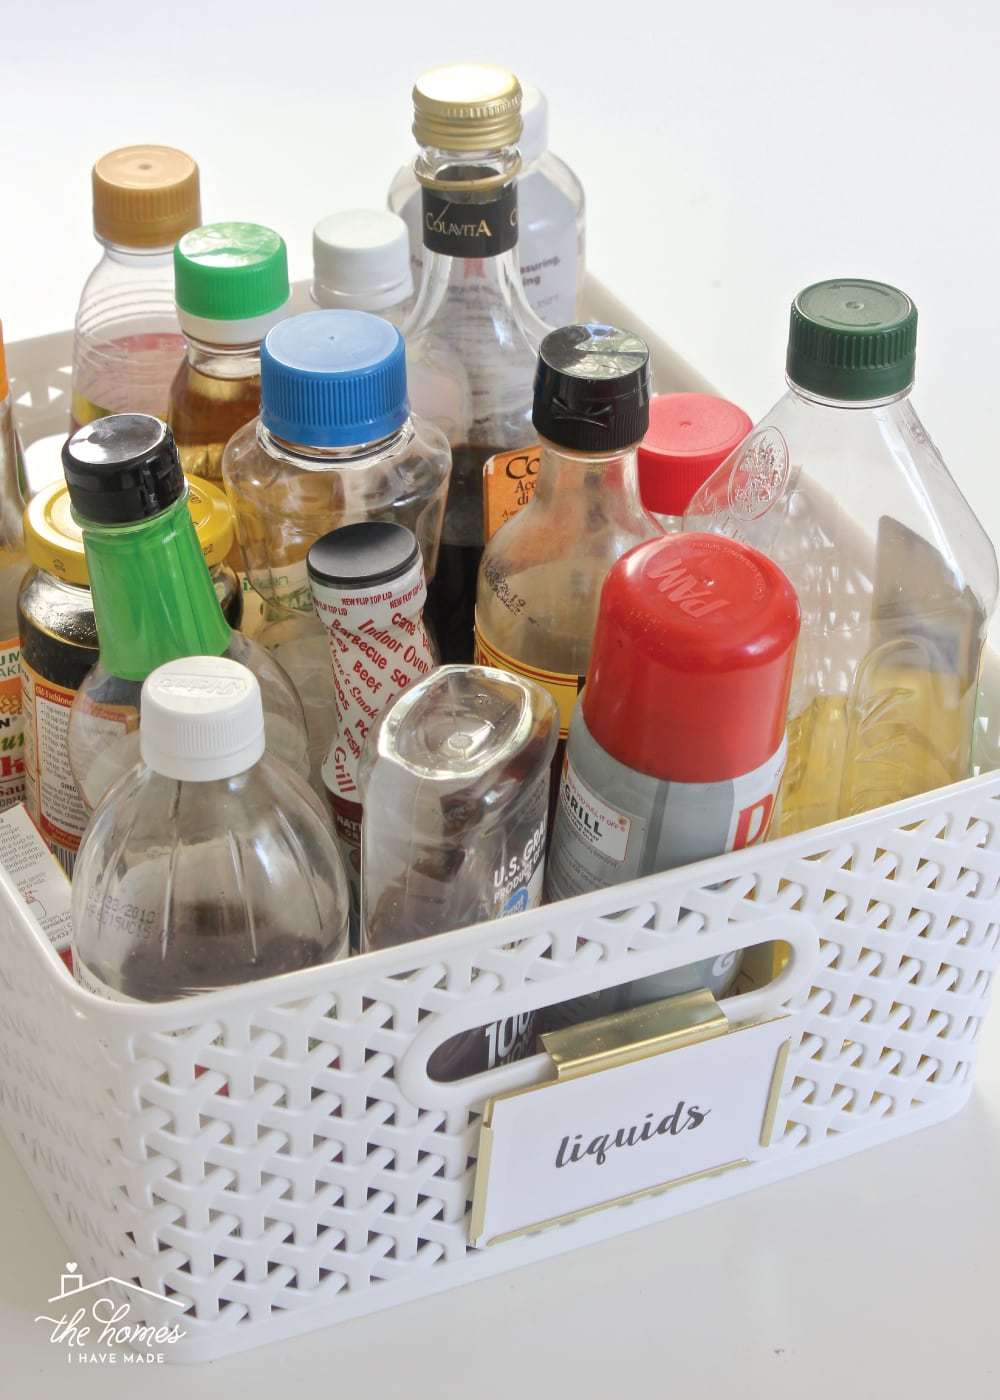
The final basket holds all of our liquids. From oils and vinegars to sauces and syrups, if it’s an on open (non-refrigerated liquid), it goes here. Not only do I like that the basket forces us to keep our collection of liquids to a realistic size, but just like dry ingredients on the bottom shelf, this basket also acts like a drawer. Instead of placing these items on a shelf or turntable where they can get lost or tip, we can easily get out exactly what we need by sliding the basket right out or off the shelf entirely.
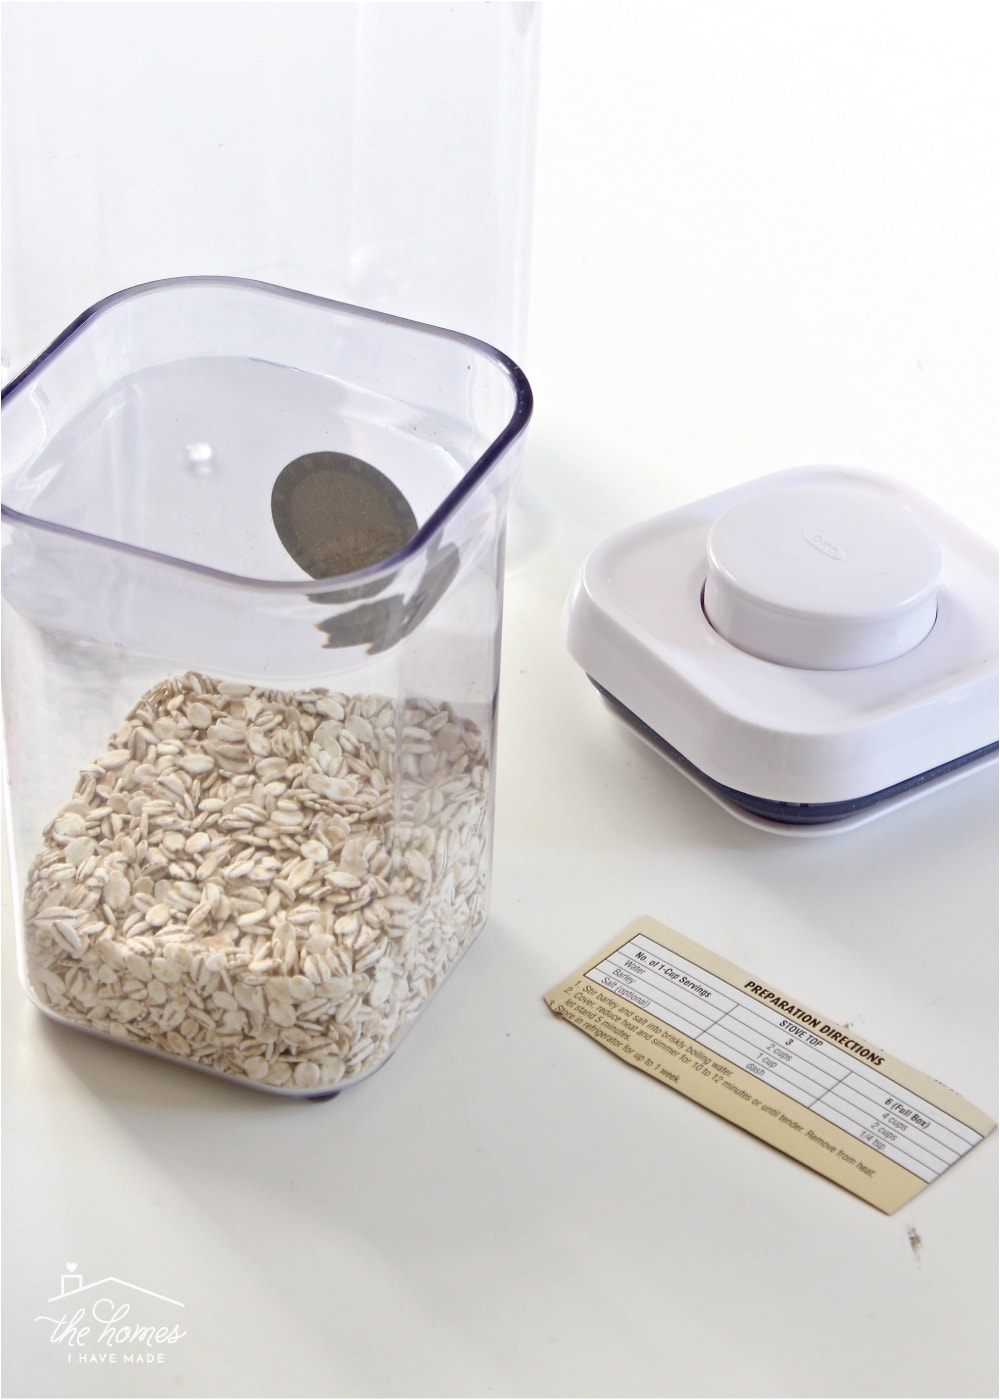
The next shelf up holds 8-10 more Oxo containers which we (mostly) use for our dry grains and pastas. While we do have some items that are constant (brown rice, couscous), there are others that phase in and out based on what recipes I’m making. You’ll notice that I’ve abandoned labels on these containers. Not only are these containers clear (so you can obviously see what’s in them), but the contents rotate so frequently that I wasn’t keeping up with swapping out the labels.
While I know how to use/prepare almost everything on this shelf, every now and then I will buy something “exotic” that I don’t know how to cook. In these cases, I will simply cut out the directions and throw it right into the container with the grain itself.
Somehow I didn’t get a great shot of the top shelf, but you may have noticed that it’s pretty empty. We usually store a few back-ups of larger items (such as bags of tortilla chips or boxes of La Croix), along side a few boxes of cereal. Like our snacks, we try to only keep one or two boxes of cereal in rotation at a given time to keep it from going stale.
Last but not least, let me show you how we store our canned and jarred foods…
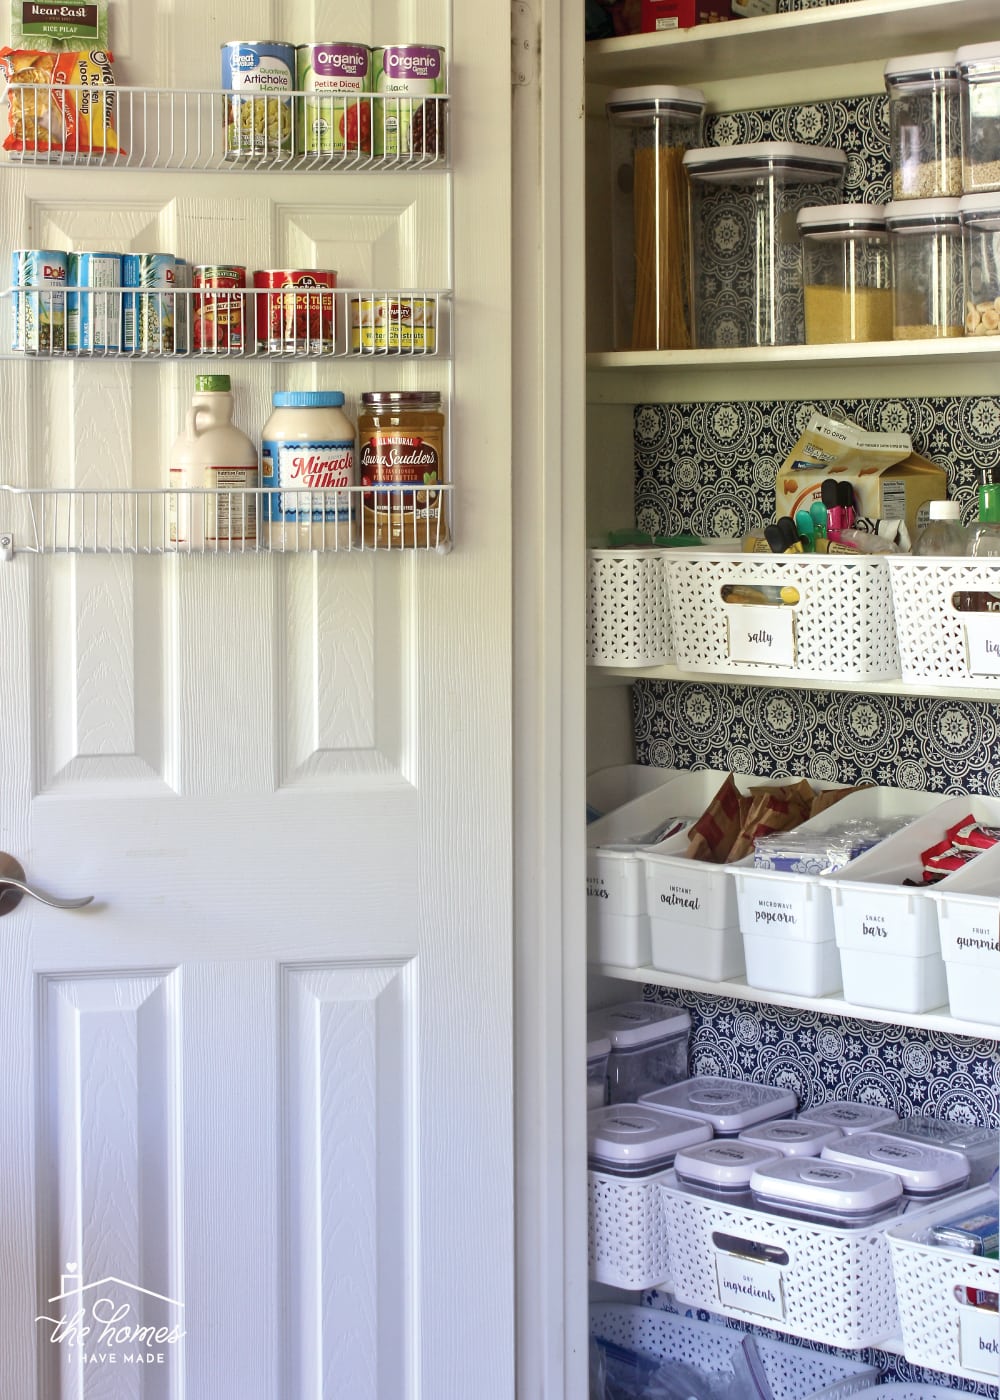
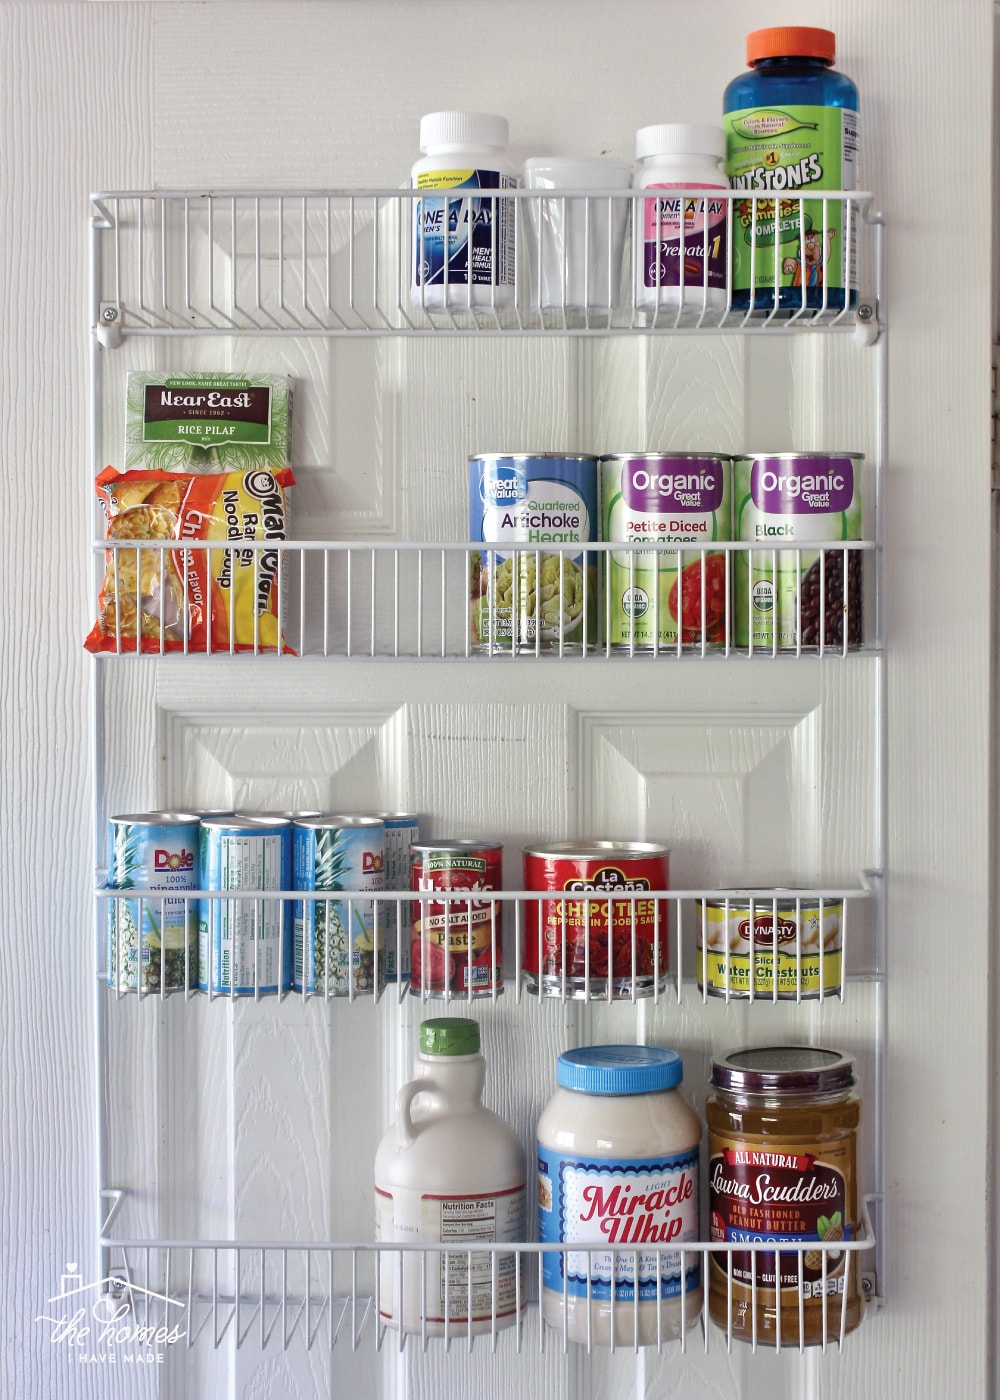
On the inside of the pantry door is a basic wire organizer. Admittedly, I didn’t like this thing one bit when we first moved in (it was already installed by the owner). Over time though, I’ve come to appreciate it as an out-of-the-way place to store jarred and canned goods (thereby freeing up precious shelf space). We don’t use too many of these items, and I usually shop for only what we need for the week, so this amount of space is ideal for us.
I absolutely love the way this pantry is functioning for us. Although it took me a little while to get the final few details in place (mainly, the new paper along the back), we’ve been living with this arrangement for quite some time. I can safely and surely say that the amount and type of storage we have has been perfect for the various foods we use and eat most. At a glance, I can quickly tell what needs to be re-stocked, and getting groceries put away is quick and easy thanks to intuitive and simple categories and clear labels. I worked hard to get this pantry right, and it was well worth the effort!
When it comes to organizing your own pantry, I can’t emphasize enough how much you need to consider the size and shape of your shelves, how you like to store various foods, and what you need accessible and where. That said, below are the products we’re using and loving to keep our pantry nice and tidy!
I hope you all have a great weekend! I’ll see you back here next week!
Megan




13 Comments on “A Tour of Our Organized Pantry From Top-to-Bottom”
I like the OXO containers for dry ingredients, but can they hold a 5 lb bag of flour? I decant these types of items too and am looking to replace my current glass containers, but not being able to hold the entire bag of flour would be a turn-off.
Hi Gretchen!
I personally do not have one that is big enough for a 5 lb bag of flour. It IS annoying, but to get around it, I just buy smaller bags of flour as I need it. Oxo does make this really big size that might work, but I can’t visualize it using just computer images so you’d have to hunt one down and compare it to the bag of flour!
Hope that helps!
Megan
Hi Megan
What a lovely pantry, it gives me ideas even if we don’t have a pantry but only little little deep cabinets. I have to find a way to make the things to be seen !
Have a great week-end.
Michèle
OMG I’m swooning! Can I just hire you to come do mine? I have a pantry in the kitchen, and that one is totally fine and then I have a large walk-in pantry and that is a hot mess. I just get overwhelmed but I think you may have inspired me! And I like the idea of just using one color.
I love this! I’m off to stalk your blog for other pantries…ours is a nightmare for me because it’s very deep and so things go in and never come out.
Love how your pantry looks. This style pantry was like what we had at our old house, but our new house ‘s pantry is a large walk in, but I hate it. The shelves look like they were built as an after thought and the back shelves are way too deep and the shelves aren’t tall enough to put a large box of cereal, so while my kids are capable of making their own breakfast they can’t reach the cereal on the top shelf. I’m ready to take a sledgehammer to it and start over. I did buy a bunch of wire baskets, which I like except that the bottom of the insides isn’t perfectly flat so bottles and small boxes want to tip. Anyway, your post is inspirational and now I need to go “wallpaper” the backs of my shelves…
It’s wonderful and envy-producing!
Any tips for what to do with crazy DEEP shelves (when you can’t afford to add the pricey pull-out inserts)? I have one very narrow but deep tall cabinet and then a weird wide and so deep open closet we use as a pseudo pantry. Help!
Hey Caroline!
I totally get it – we had one like that too. Have you by chance checked out the pantry in our last home? (You can see it here: https://thehomesihavemade.com/2015/10/organize-this-storage-solutions-for-a-skinny-pantry/) The main way we kept it organized was to create a “channel” of sorts in the middle through which I could pull out everything. That combined with baskets that I used like drawers helped things from getting buried/lost in the back! It worked really well for us for the time we lived there!
Hope that helps a bit!
Megan
Love this post, Megan! Following your blog the past year or so has really helped me make some headway in my house. I wonder what you do with bulk purchases? For instance, I buy our fruit snacks from Costco, and a full box won’t fit in a book bin (*love* – we use these for small toys in my daughter’s room but I’d never thought to use them in the pantry!). Same with some spices that are just a better deal in larger amounts, and those special stock-up deals on other things.
Great ideas. Even though I don’t have pantry. Trying to incorporate them into kitchen cupboards.
I love what you have done and what you do. You are very talented, also. Thank you for all you do.
Betty Petersen
Where did you get the gold plates that holds the labels for your snack bins. I have baskets and need something like these plates as labels won’t adhere.
The best I have seen.