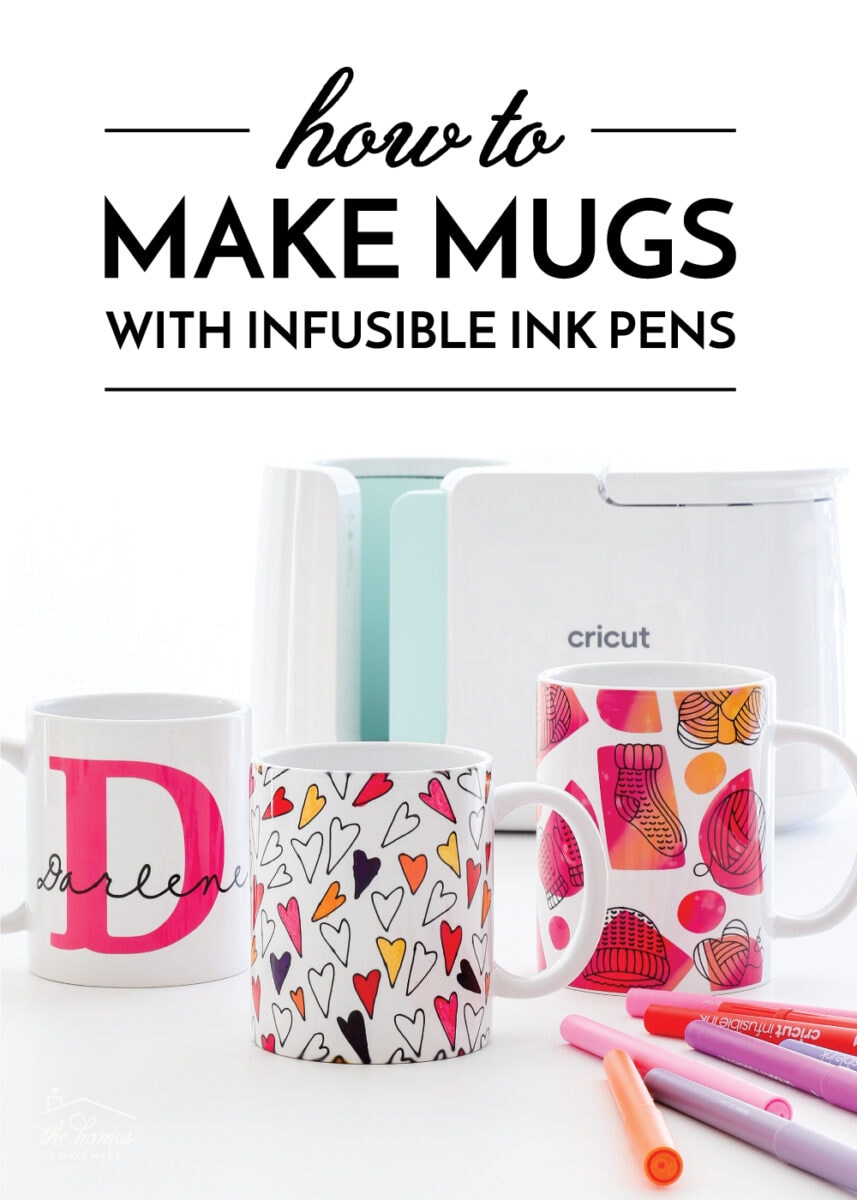
How to Make Mugs with Infusible Ink Pens and the Cricut Mug Press
Last week, I showed you how to make custom mugs by cutting out designs from Infusible Ink Transfer Sheets. Today, I’m going to show you how to make mugs with Infusible Ink Pens. By drawing, writing, and/or coloring onto regular printer paper, you can create super detailed images and infuse them right onto mugs with the Cricut Mug Press. I’ll tell you out front, this is a total game changer for your mug designs, so let me show you exactly how to do it!
Series: Getting Started with the Cricut Mug Press
I am so excited to share with you a bunch of tips and tricks for creating flawless mugs in mere minutes with the new Cricut Mug Press! Here is everything you need to know to start making mugs today!
- About the Cricut Mug Press
- How to Make Mugs with Infusible Ink Transfer Sheets
- How to Make Mugs with Infusible Ink Pens – you are here!
- Tips and Tricks for Desinging Your Own Mugs
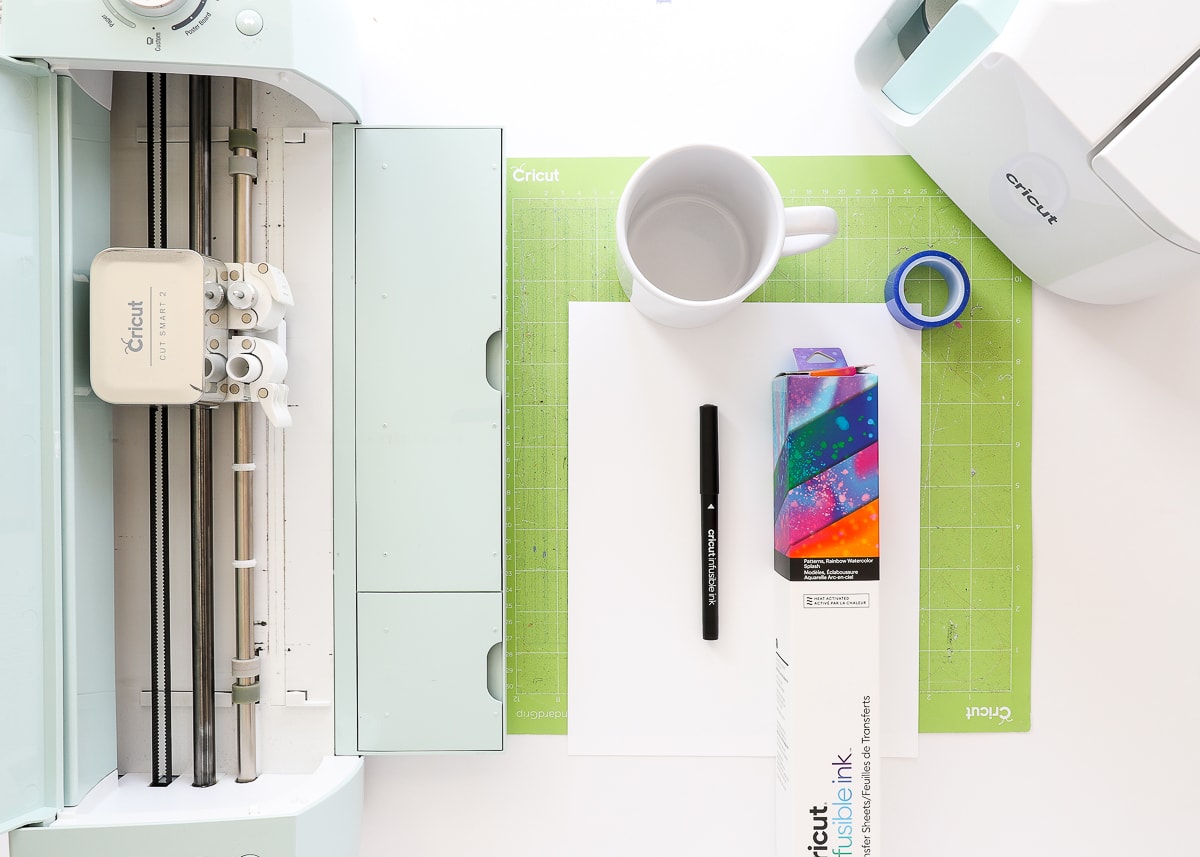
Supplies Needed
To create drawn designs on your mugs, here are the supplies you will need:
- Cricut Mug Press
- Cricut Machine – Cricut Joy, Cricut Explore Air, and Cricut Maker will all work for these projects
- Cricut Infusible Ink Pens or Markers – You MUST use Infusible Ink pens in order for your designs to transfer; if you are using a Cricut Joy, make sure you use the Joy-specific Infusible Ink pens.
- Fine Point Pens (0.4 weight) – Best for outlines and detailed drawings
- Markers (1.0 weight) – Best for thick links and coloring
- Freehand Markers (2.0-3.5 weight) – Not to be used in Cricut machines, best for freehand coloring and drawing.
- Standard white printer paper
- Butcher Paper – Butcher paper comes in most rolls of Infusible Ink. If you don’t have any on hand, you can buy it in bulk HERE.
- Standard Grip Mat
- Cricut Mug Blanks (either 12 oz or 15 oz)
- Heat Resistant Tape
- Lint roller or cloth
- Design Space Mug Designs – if you want to access these exact mug designs, use the links below
All Cricut Mug Press supplies are now available at Cricut.com, as well as Target, Walmart, Amazon, Michales, JoAnn, Hobby Lobby, and HSN.
There are two different techniques for making pen designs on your mugs: Pen Only and Pens+Transfer Sheets. I’m going to teach you both today!
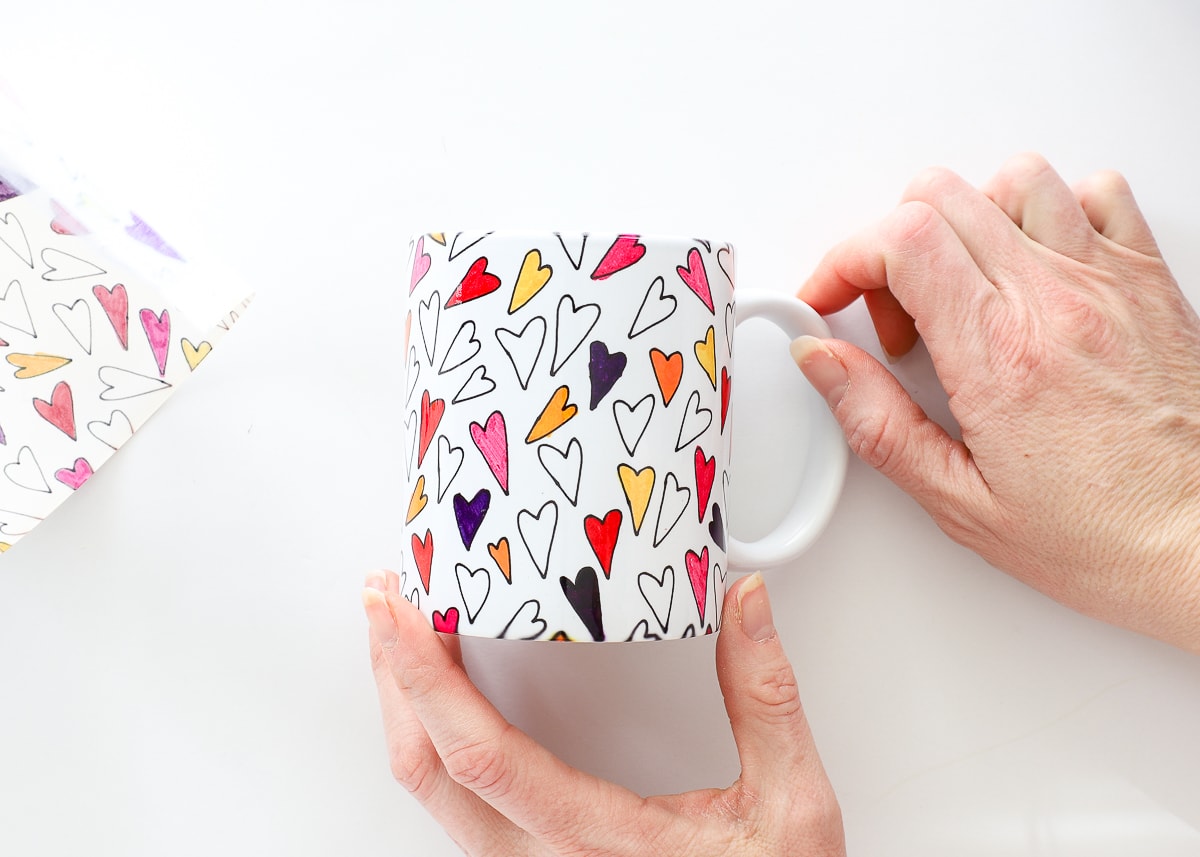
Technique 1: Pen Only Designs
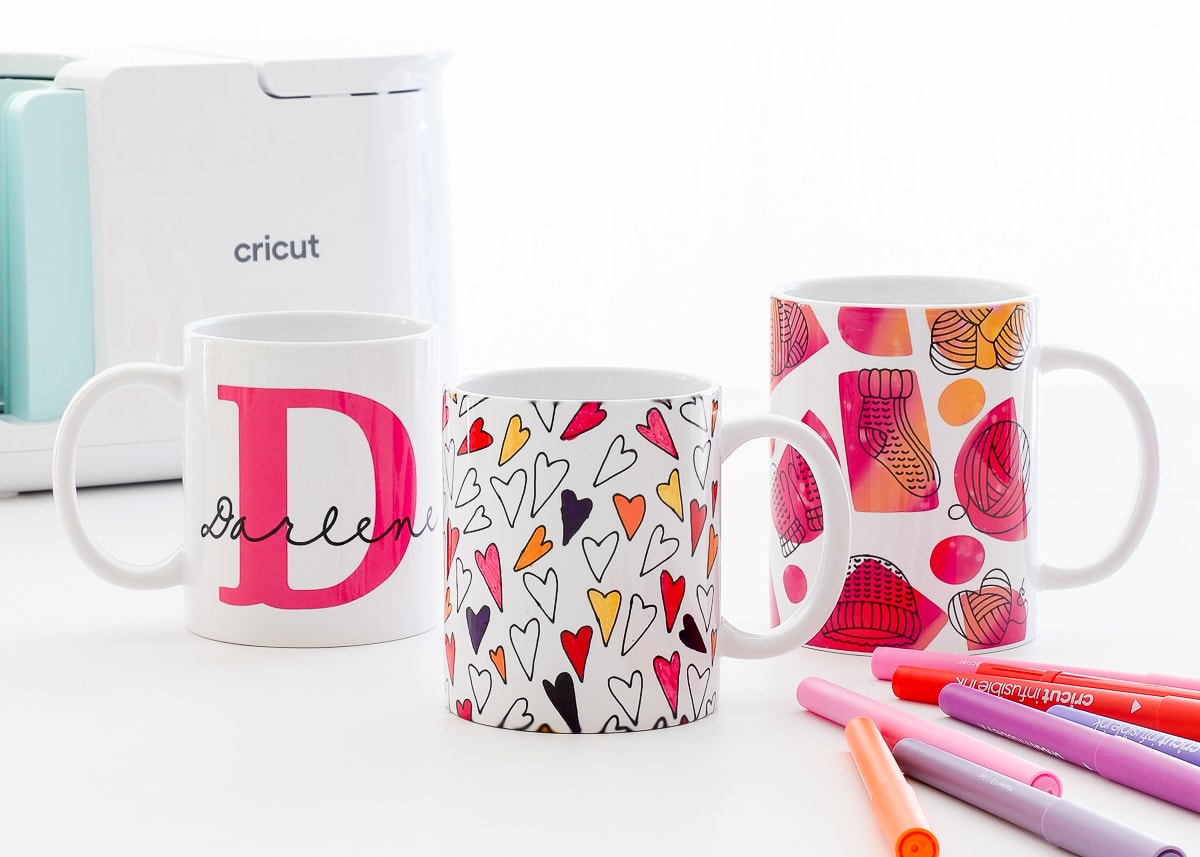
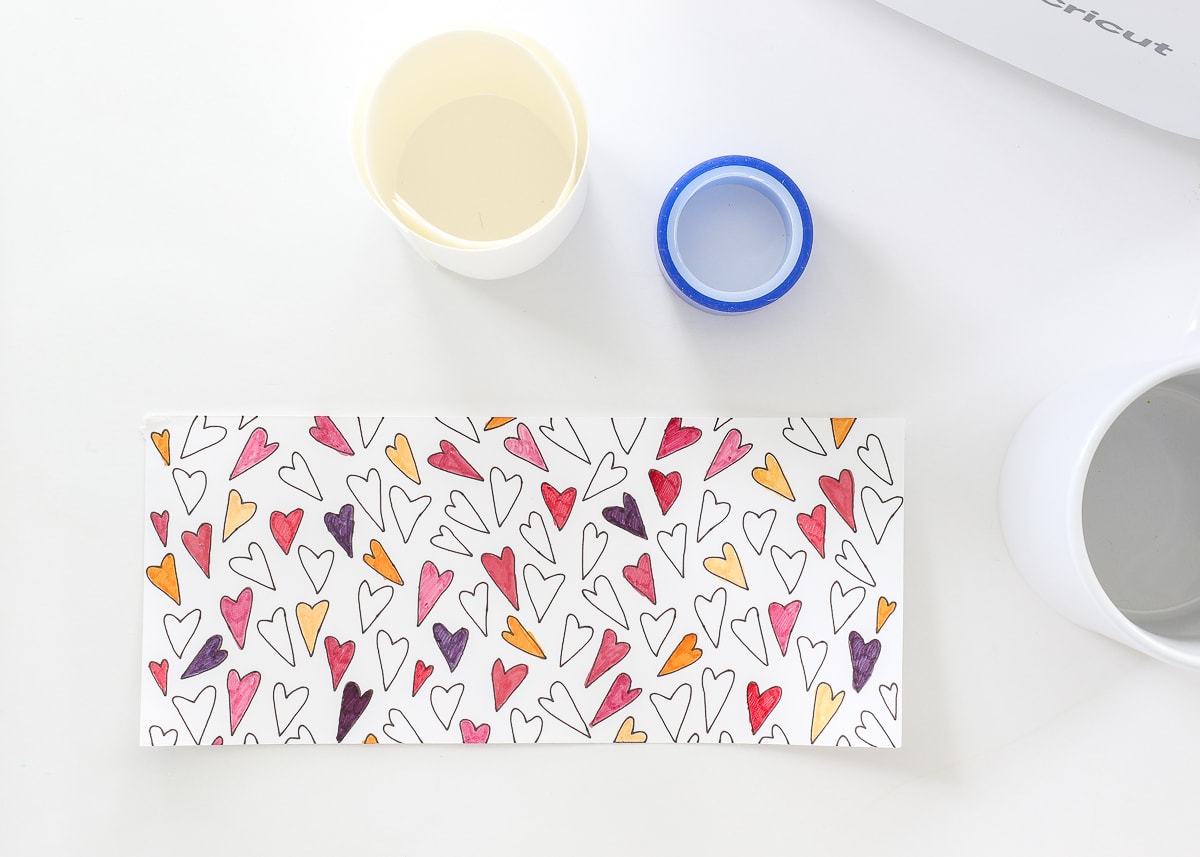
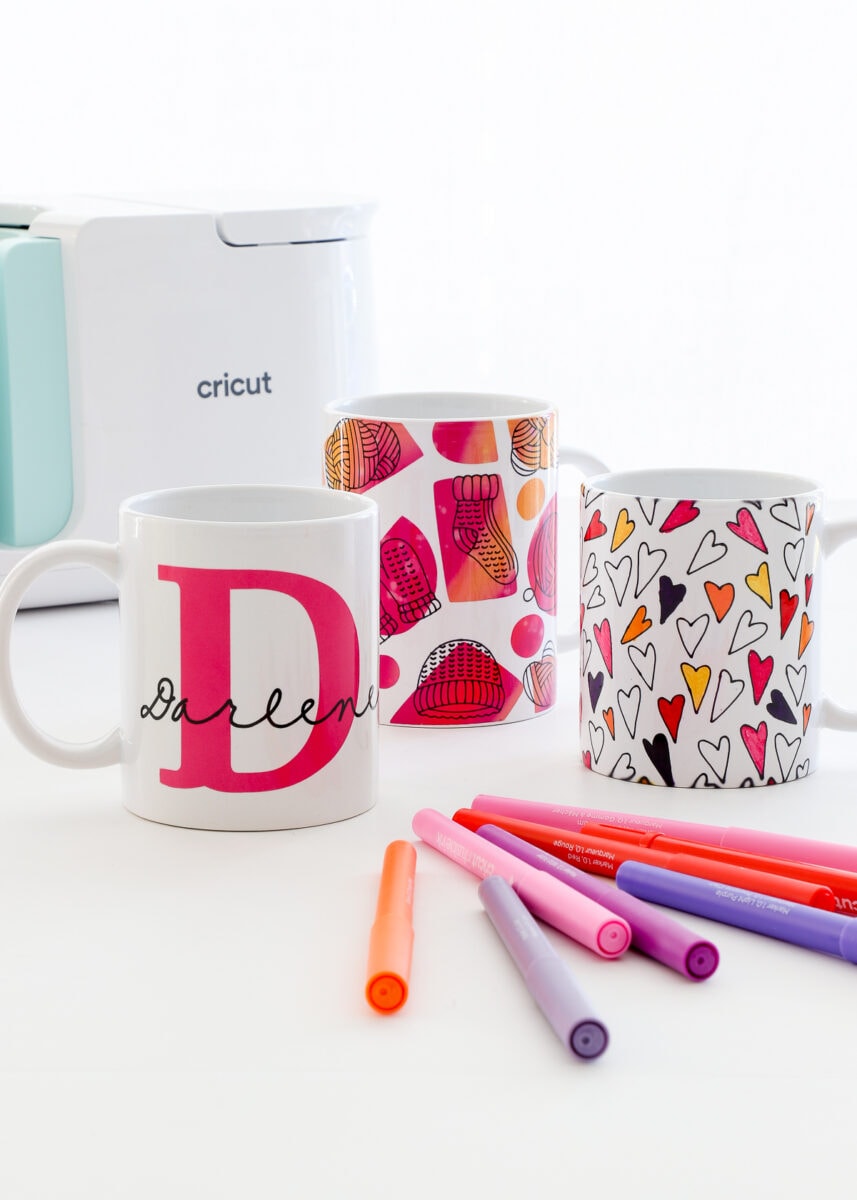
The first technique I want to teach you is the “pen only” method, which was used to create the heart mug below. In this instance, you don’t cut ANYTHING out of the Infusible Ink Transfer Sheets and instead create 100% of your design with the Infusible Ink Pens.
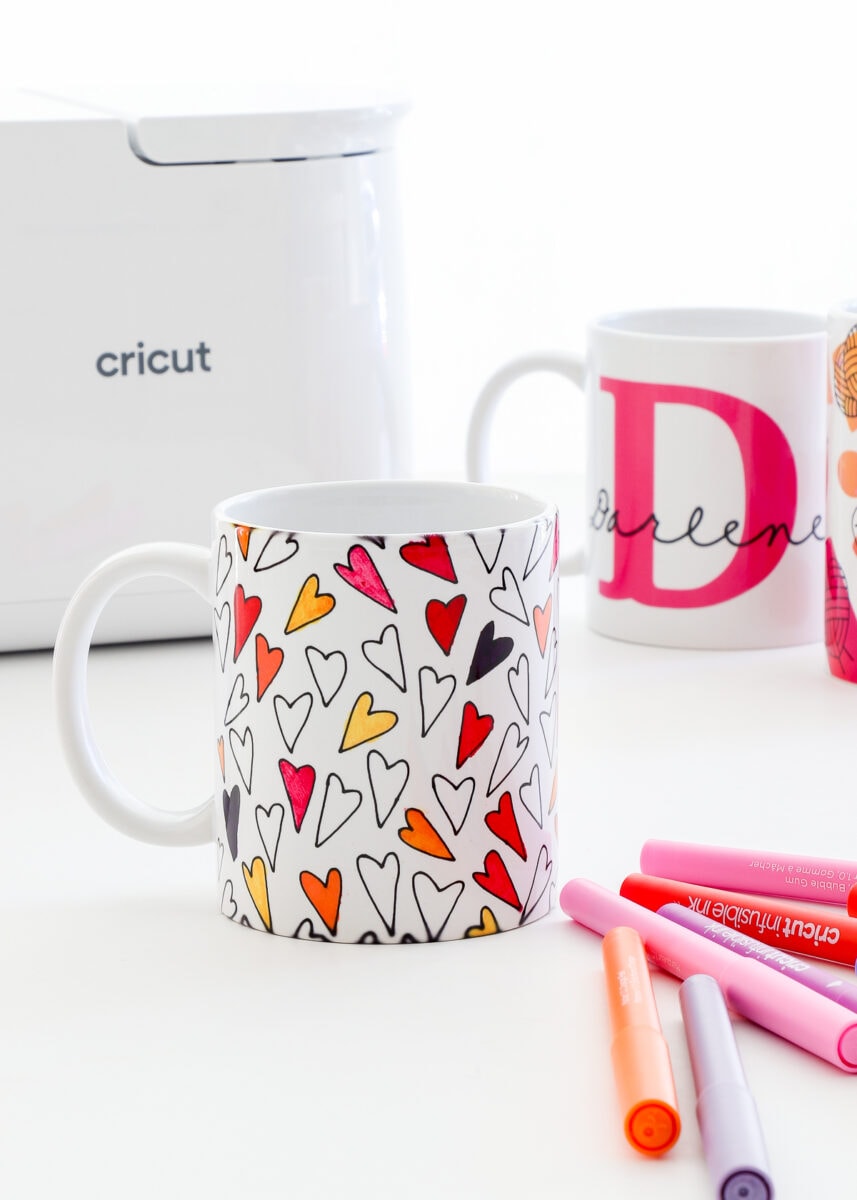
Here are the specific materials I used for the Heart Mug:
Cricut Explore Air | Cricut Mug Press | Standard Grip Mat | White Printer Paper | Butcher Paper | Fine Point Infusible Ink Pen in Black | Array of Infusible Ink Markers | 12 oz Mug Blank
Designing Pen Images for Your Mugs
When creating pen designs for your mugs, it’s very important that any design you create in Cricut Design Space is set to “Draw” rather than “Cut.” If you are unclear about creating pen-friendly designs, see my full Cricut Pen Tutorial HERE.
Start with the Mug Design Setup project file in Cricut Design Space and select your preferred size and edge:
![]()
Search the Image Library for “Draw” designs (you can filter for pen-only designs using the left-hand menu buttons) and add them to your mug template. Ensure you do not put any drawn design outside the edge, toward the tabs. On my heart design below, see how all the hearts are within the straight vertical edges on either side.
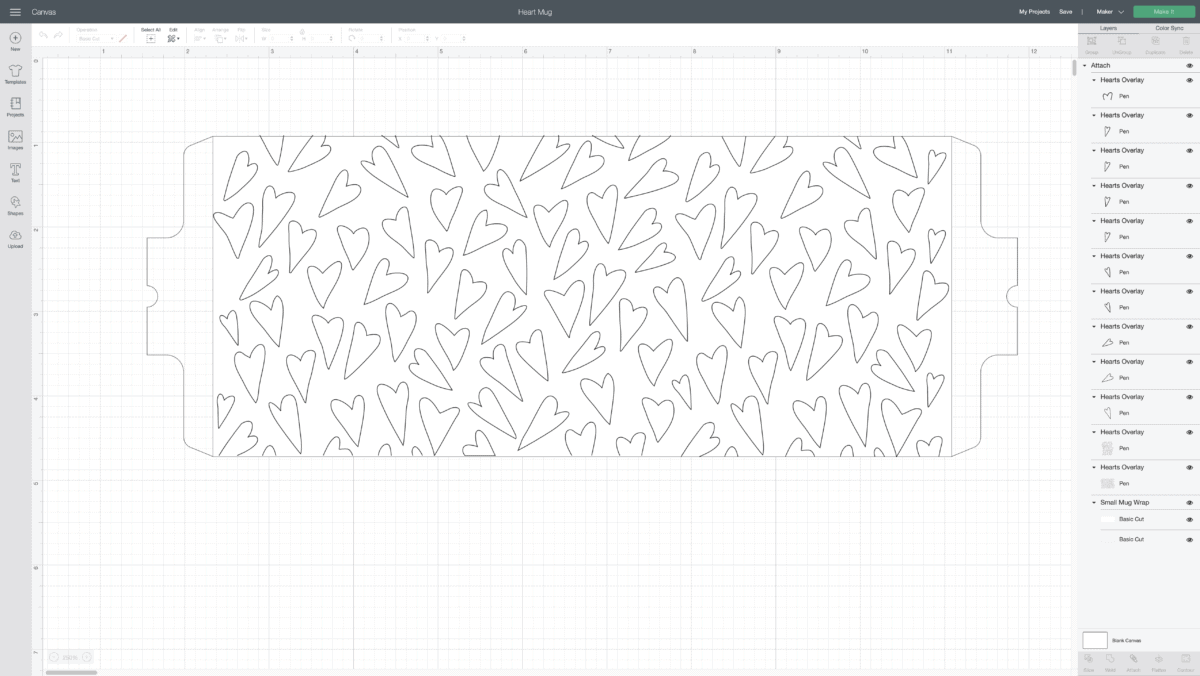
If you’d like to use my Heart Mug Design, you can find it HERE.
TIP! If you want to use different color pens for various parts of your design, you can learn how to do that HERE.
When you are satisfied with your mug design, Attach everything together, and send the design to cut.
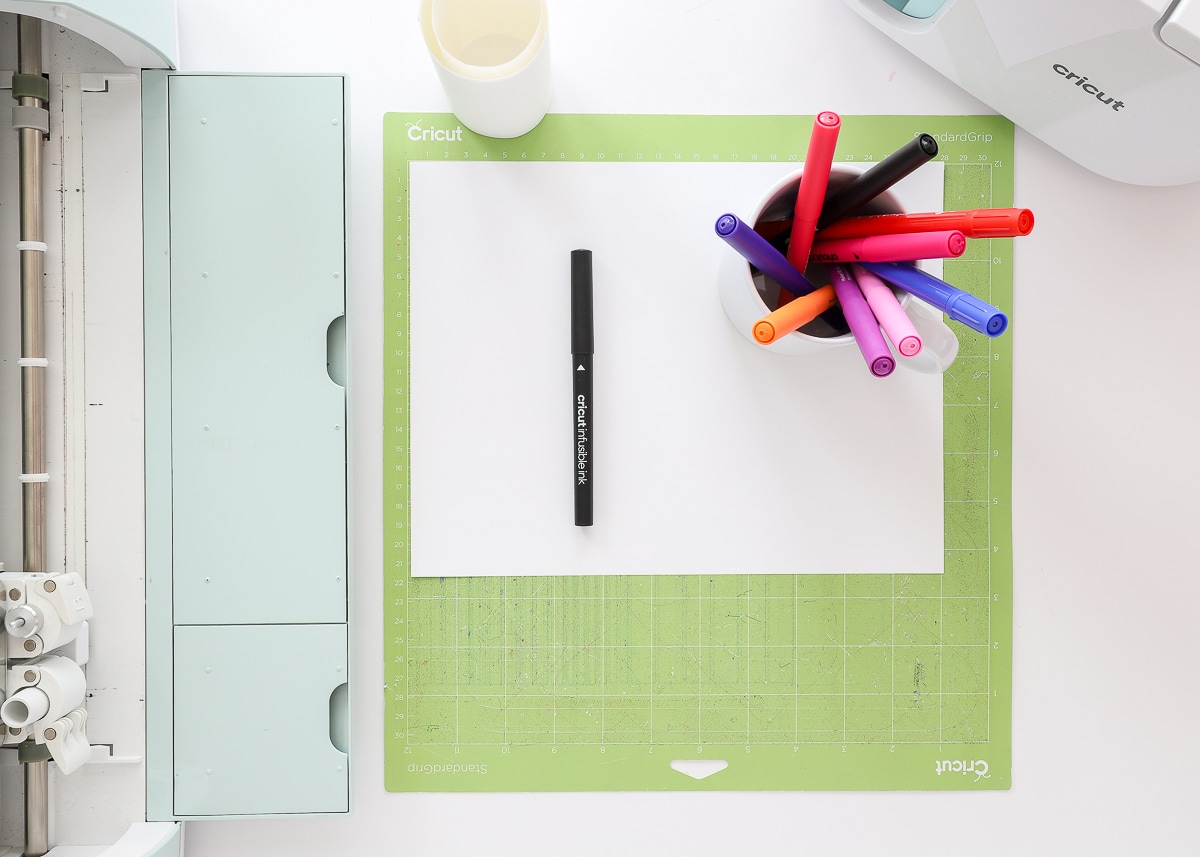
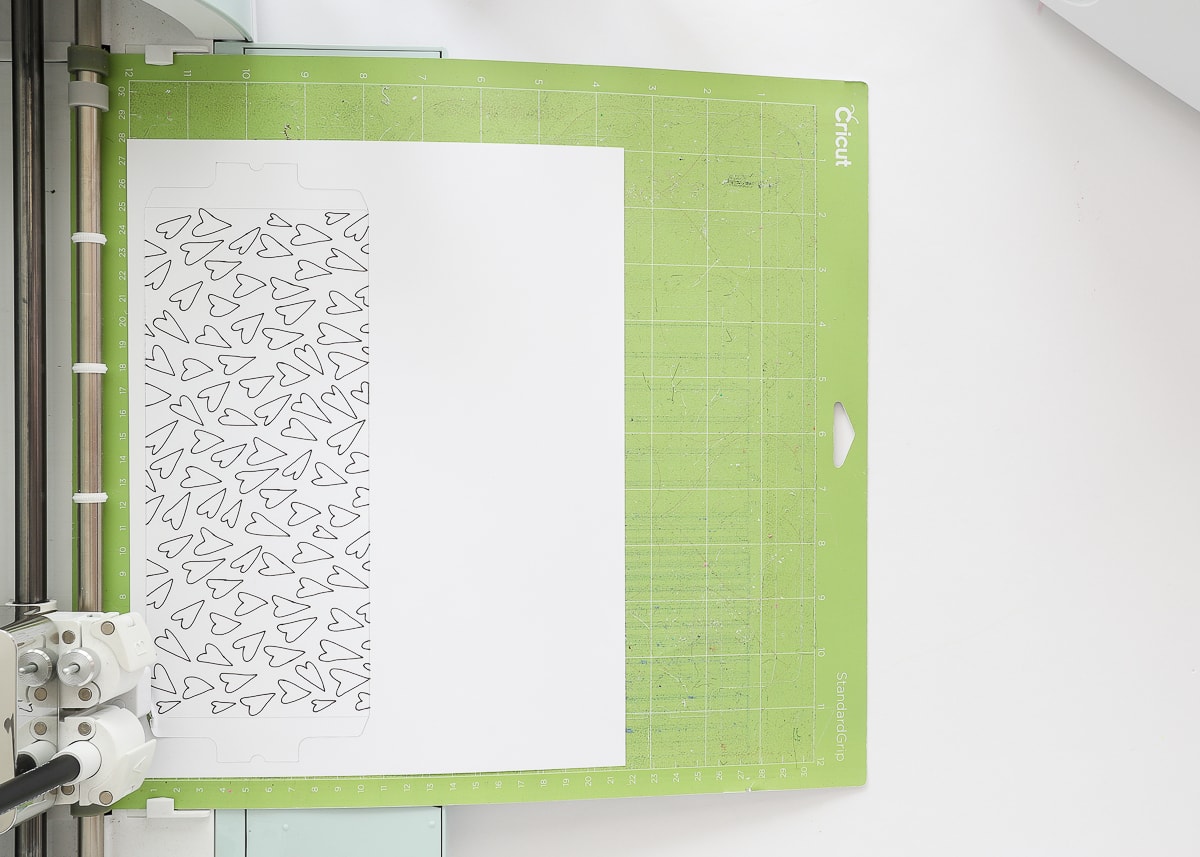
Cutting Your Drawn Designs
Before sending to cut, be sure to use these specifications:
- “Mirror” your design. (Even if you aren’t using text, get into the habit of mirroring your designs every time.)
- Choose Laser Copy Paper from the Custom Materials settings.
- Load the correct pen into your machine according to the prompts within Design Space. (For any designs with small details, I HIGHLY recommend using the Fine Point Pens.)
Once you click the flashing button on your machine, the Cricut will first draw your mug design and then cut out the mug template shape onto plain white printer paper.
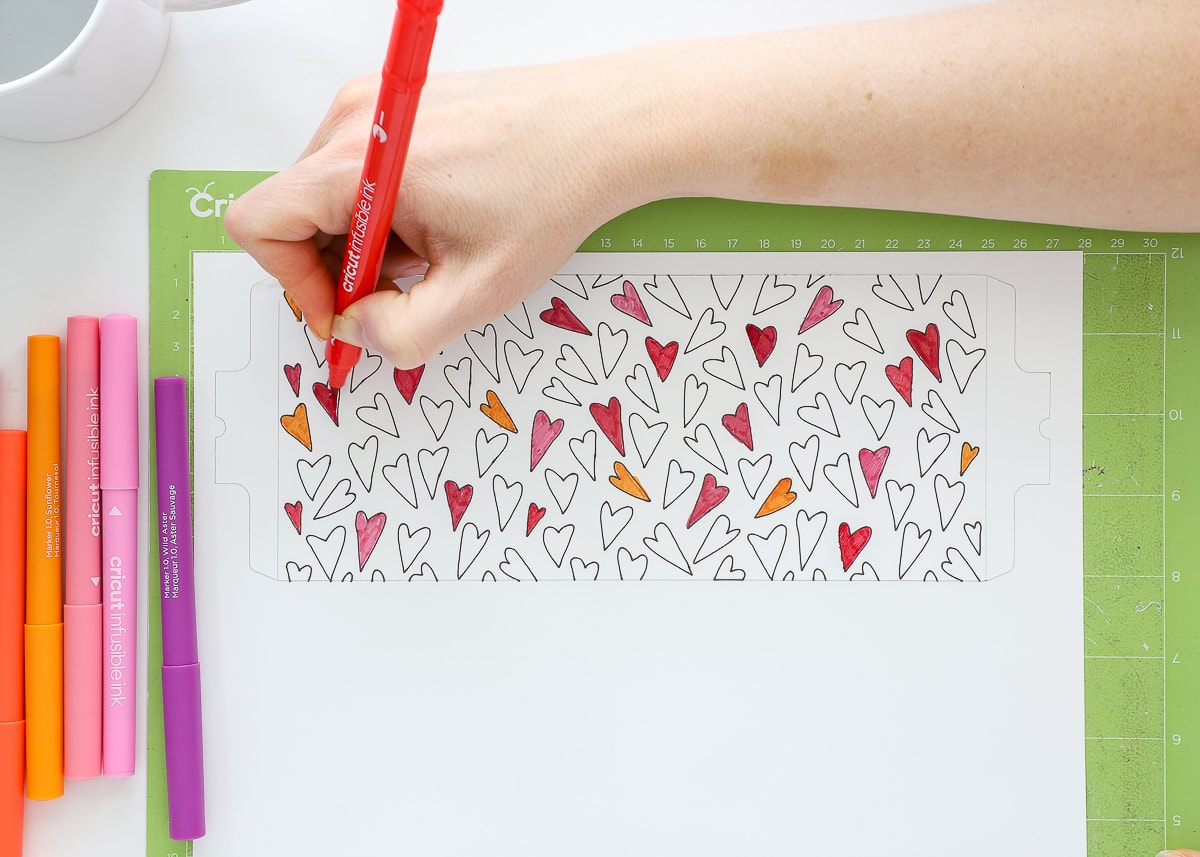
Coloring & Drawing By Hand
Here is something that is SO SUPER FUN about using Infusible Ink Pens. Not only can your Cricut machine draw some incredible designs, but you can then color them in however you wish! I highly recommend using the Fine Point Pens (0.4 weight) for drawing, and the Infusible Ink Markers (1.0) or Freehand Markers to color in any designs.
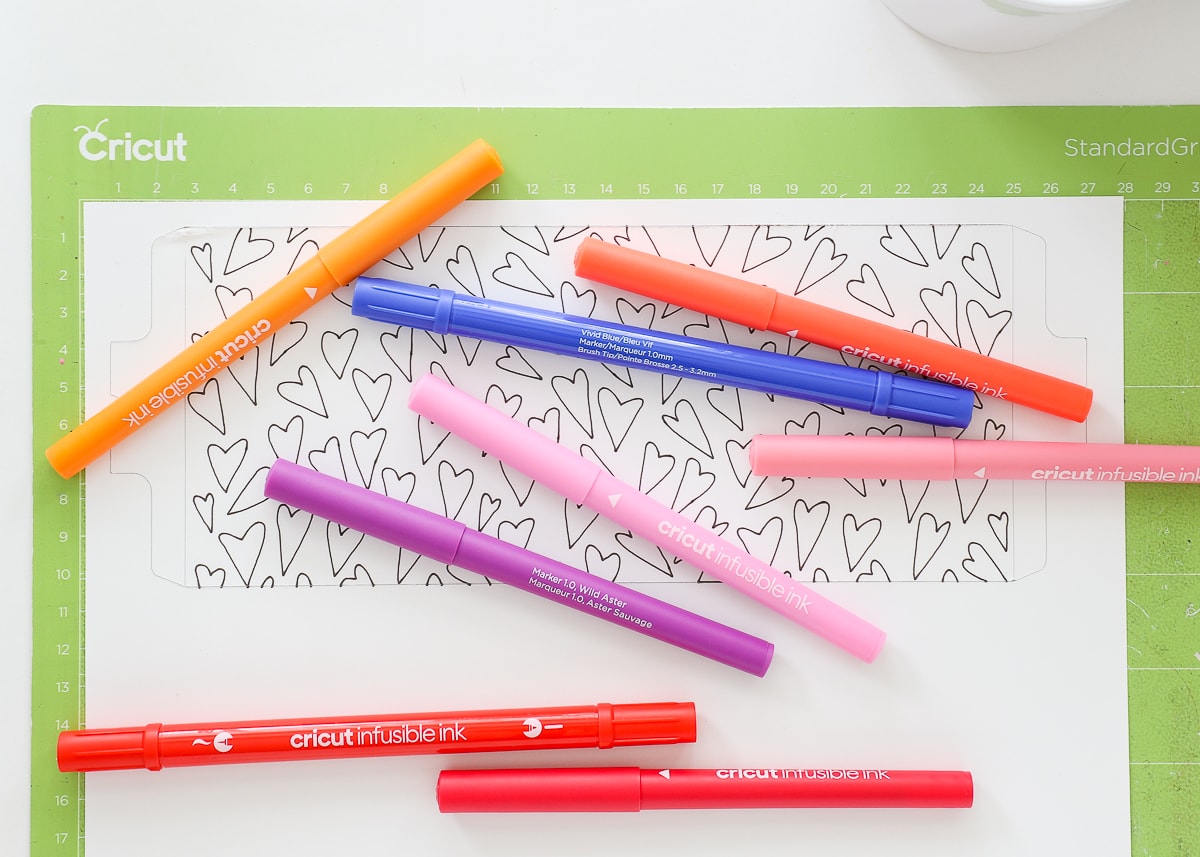
Think of all the possibilities here! You technically don’t even need a Cricut machine in this instance! If you’re an artist or want your kids to make their own designs, just use Infusible Ink Pens to draw and color right onto plain paper (just make sure it fits on the mug)!
Transferring Pen Designs to Your Mugs
Once you’re happy with the pen design, it’s time to transfer it to the mug! You will need the butcher paper and Heat Resistant Tape for this step.
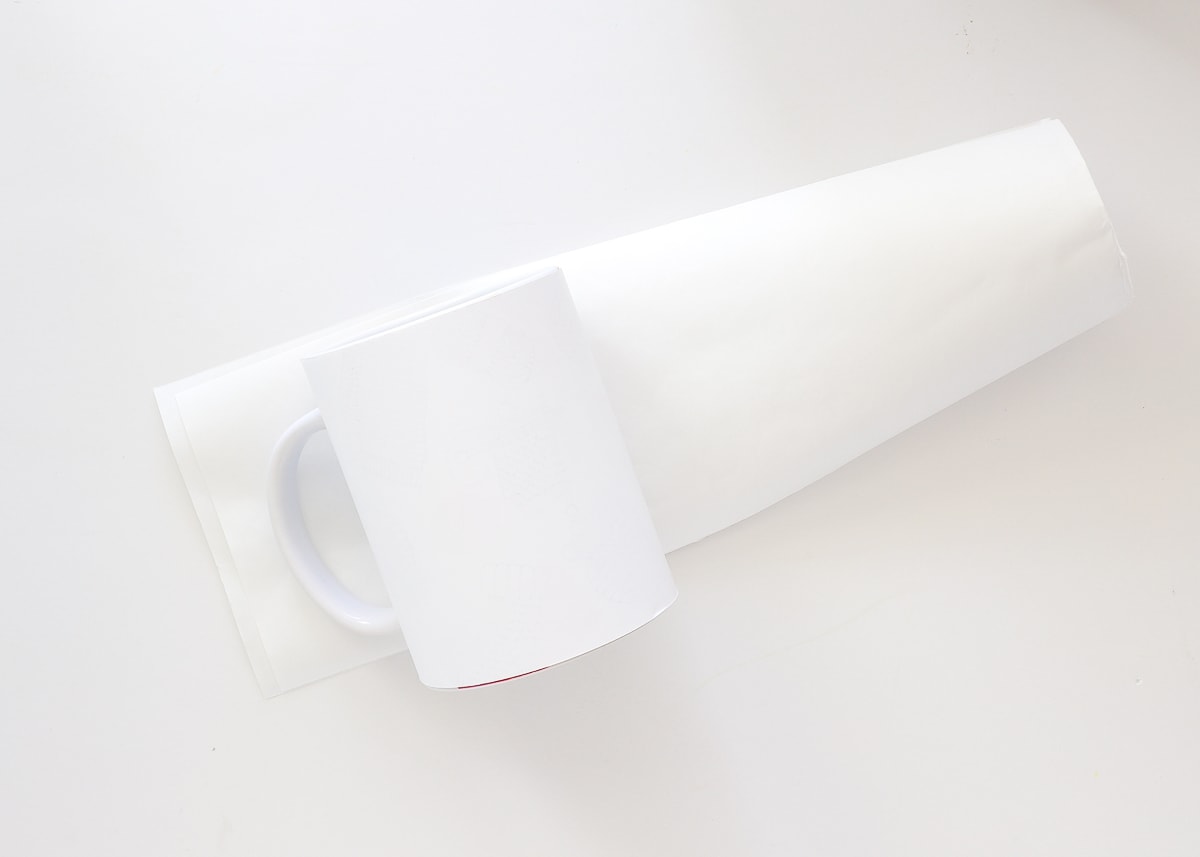
Start by cleaning your mug with a lint roller or cloth (not shown). Then, decide where you want your design on the mug and tape it in place, ink-side down, using Heat Resistant Tape. Remember to not place any of your design under the handle since the Cricut Mug Press doesn’t reach that far around.
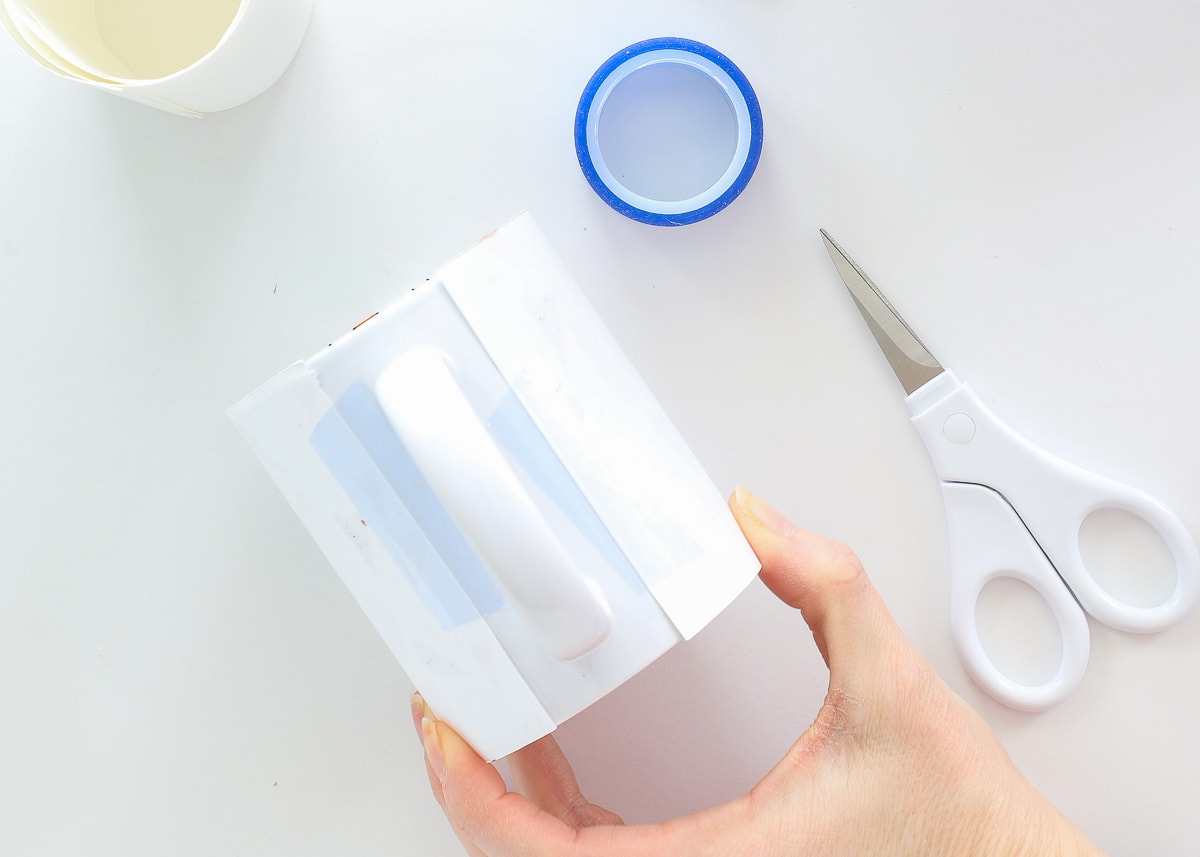
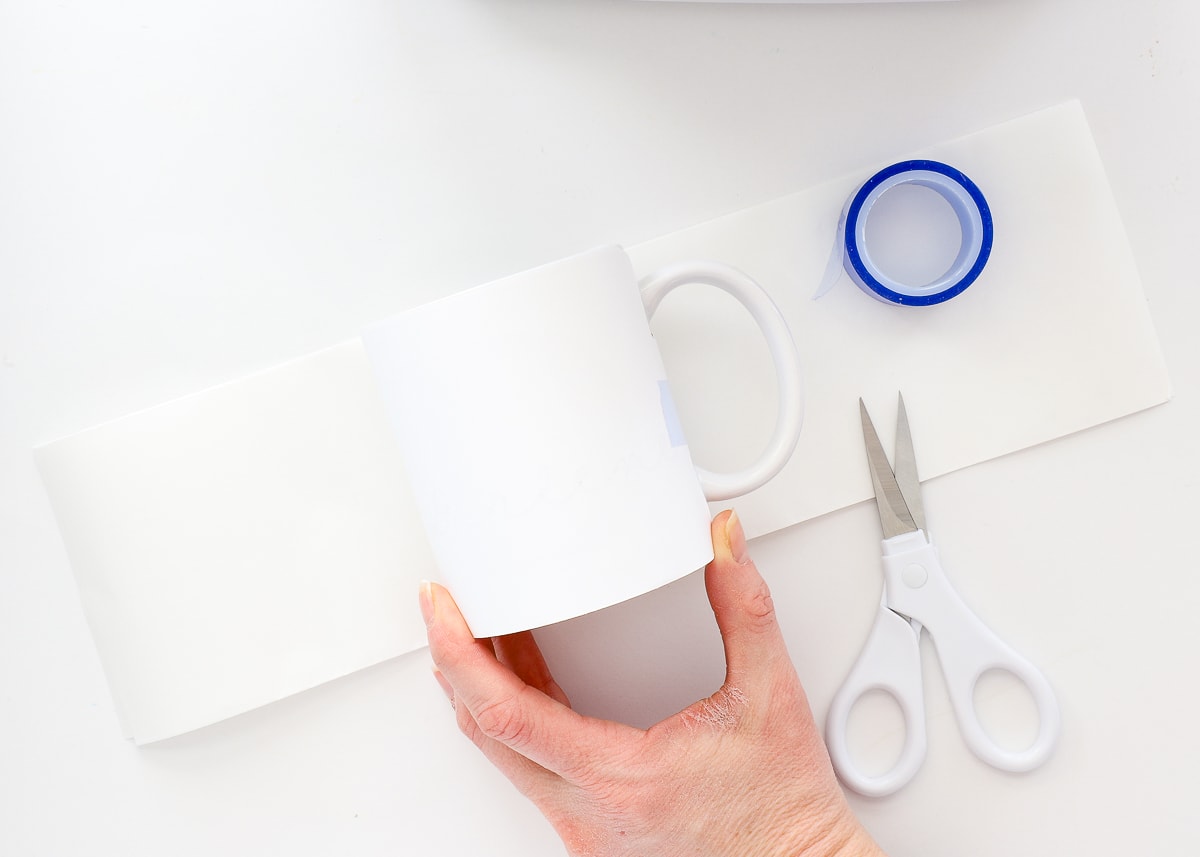
THIS STEP IS VERY IMPORTANT: Next, wrap the mug in 3 layers of white butcher paper and secure with more Heat Resistant Tape.
Why? You applied the Infusible Ink Pens to plain ol’ printer paper. When heated, the ink will bleed, A LOT, through the paper. If you do not wrap the mug in 3 layers of butcher paper, the ink will stain the interior channel of the Cricut Mug Press, making a mess and potentially affecting future designs.
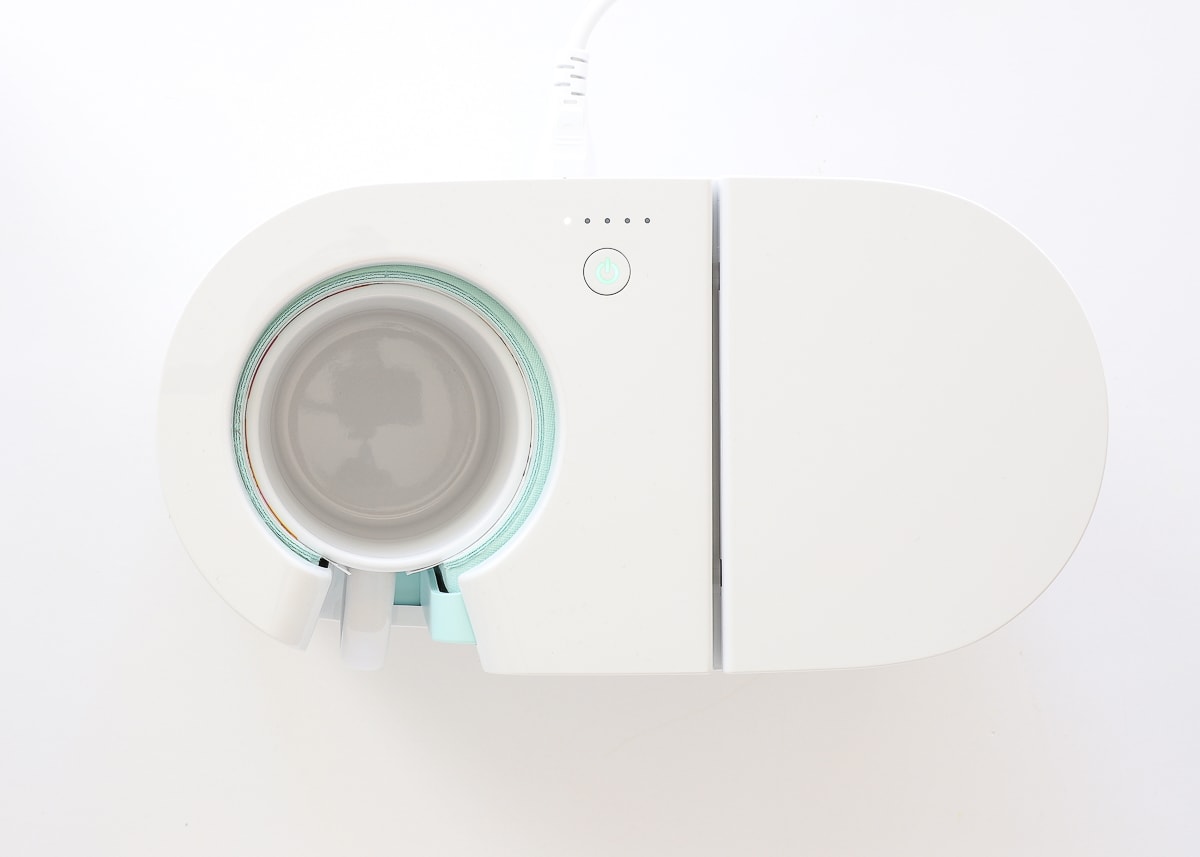
Once wrapped, place your mug into the Cricut Mug Press, close the lever, and wait until the machine beeps (which should take about 5-8 minutes).
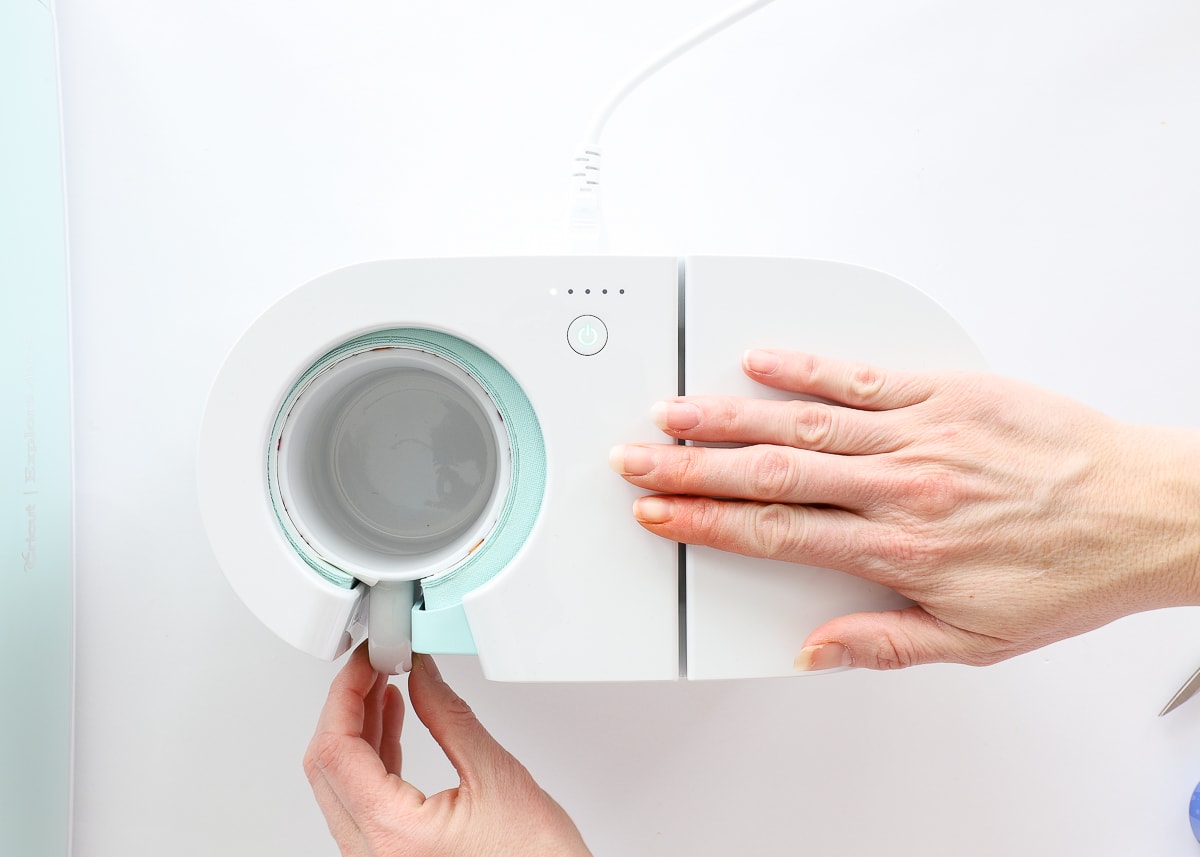
When the machine beeps, remove your mug by opening the lever and lifting the mug out by the handle. Remember, the mug will be VERY hot but the handle will be cool. Place the mug on a heat-safe surface for about 15-2o minutes to cool before handling.
Once cool, take all the paper layers off the mug. In the picture below, I’ve only removed the butcher paper. See how much ink transferred onto it! If you didn’t wrap your mug in butcher paper, that ink would be all over the inside of your Cricut Mug Press!
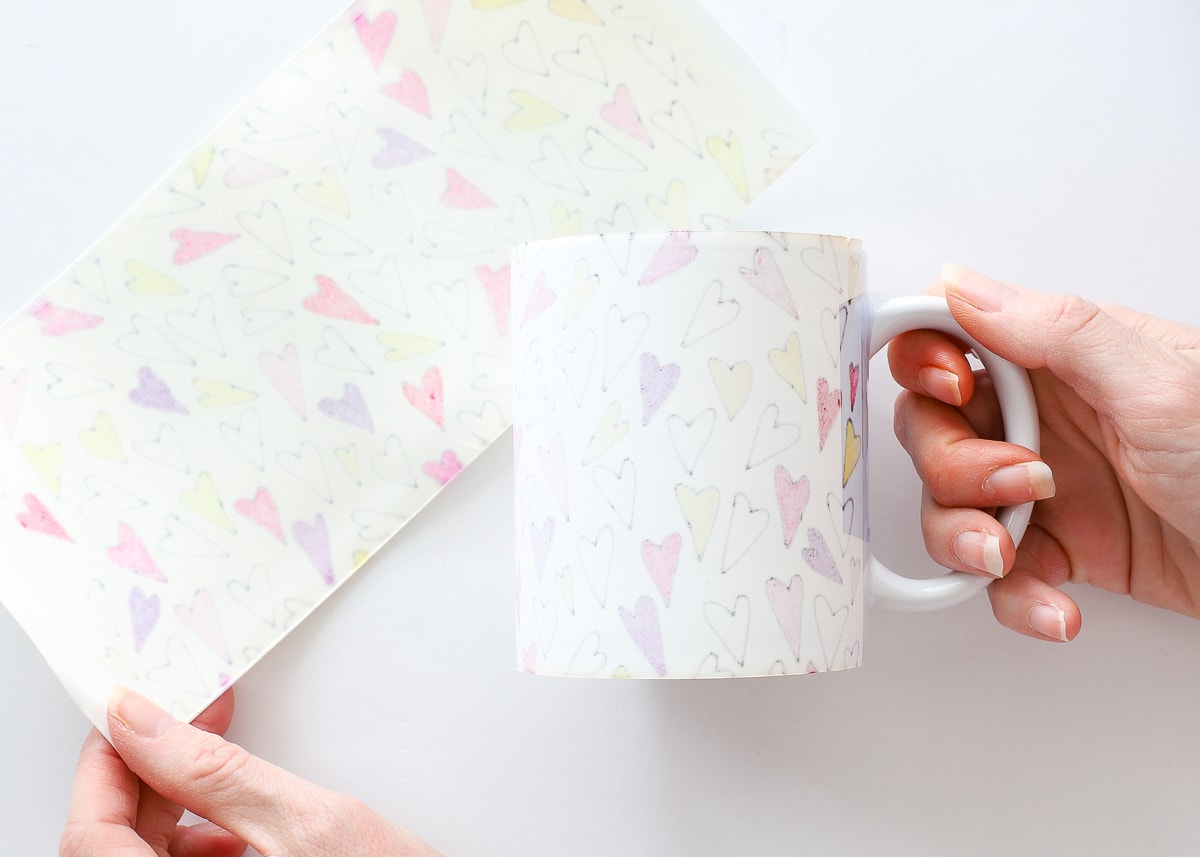
When you remove the printer paper layer, you’ll reveal a vibrant design made from Infusible Ink Pens! I adore the hand-colored effect of this one!
TIP! Notice how at the very bottom of my mug, the design “ghosted” a bit (meaning it smudged). That is because I didn’t tape the paper to the mug (like I emphatically state in this tutorial). If you have a mug design that goes all the way to the edge…made with either Pens or Transfer Sheets…always, always, always tape the design around the bottom of the mug!
Technique 2: Pen+Transfer Sheet Designs
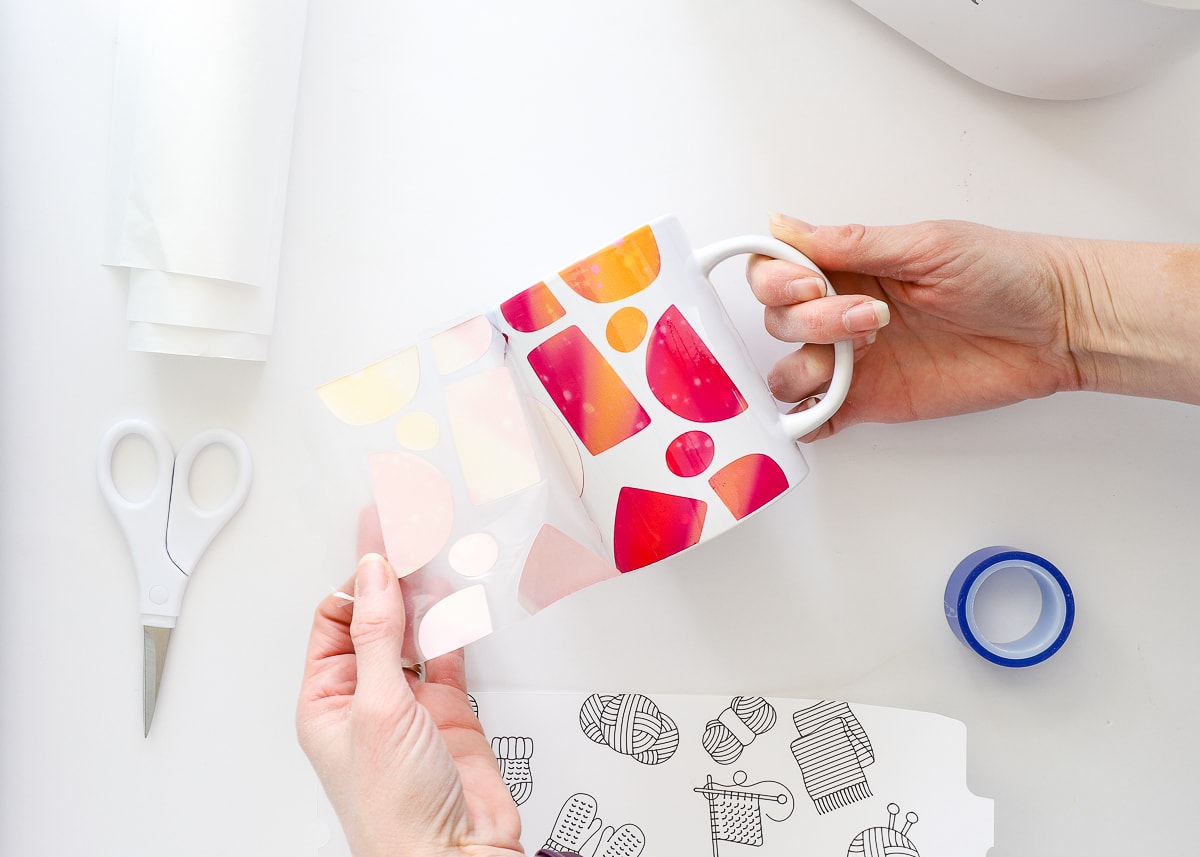
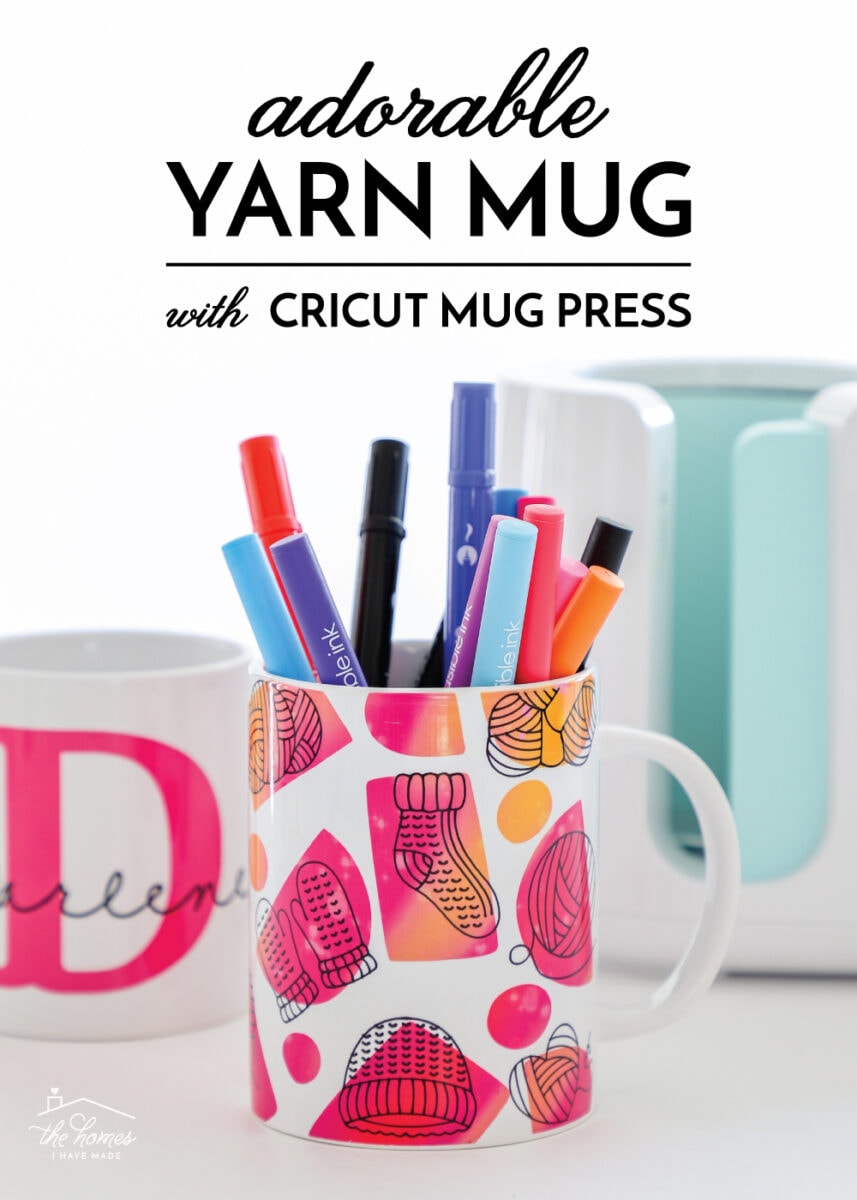
The other way to use the Infusible Ink Pens is to layer drawn designs over images cut from the Infusible Ink Transfer Sheets. This is exactly how I made my most favorite design yet: the Knitting Lover Mug! 
Here are the specific materials I used for the Knitter Mug:
Want to save this post?
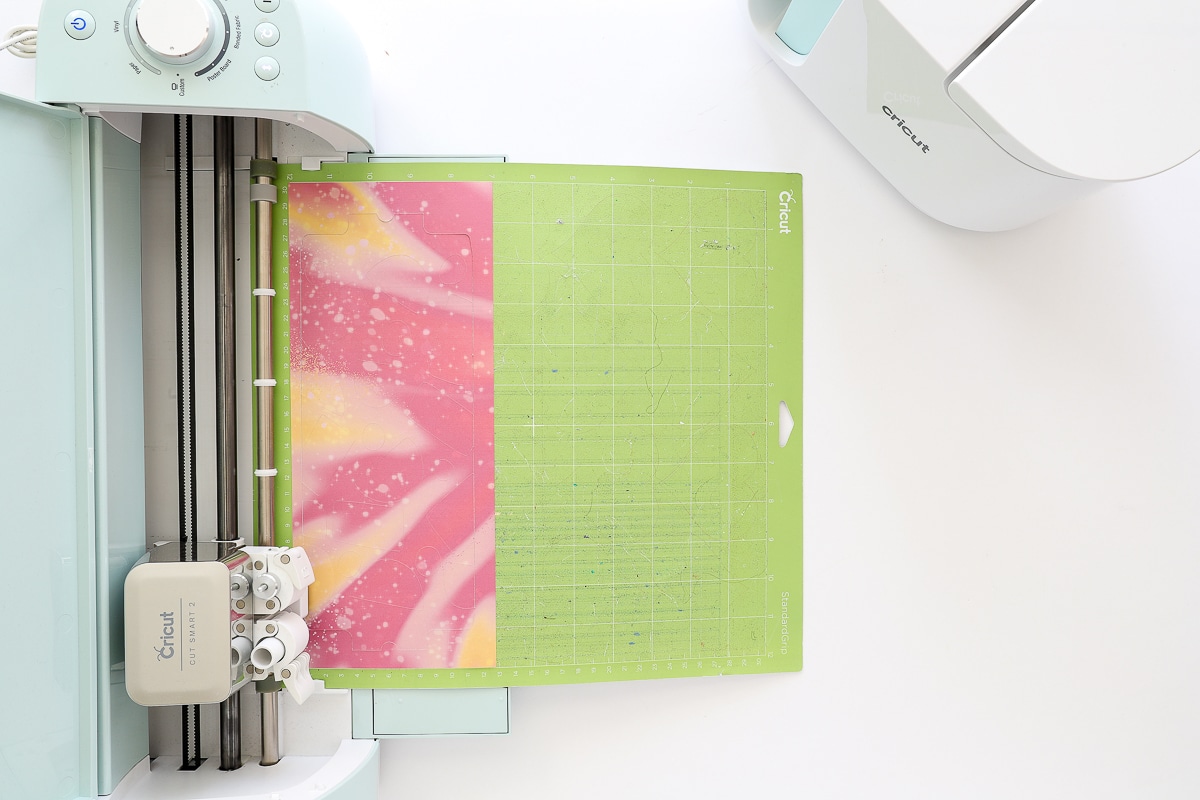
Cricut Explore Air | Cricut Mug Press | Standard Grip Mat | White Printer Paper | Butcher Paper | Fine Point Infusible Ink Pen in Black | Rainbow Watercolor Splash Transfer Sheet
Designing Pen+Transfer Sheet Images for Your Mugs
The design process for this two-step mug is very similar, but in this case you will add BOTH a “Cut” design and “Draw” design to your mug template. You can start with the Mug Design Setup file (like we did before) or you can use one of the pre-made designs in the Design Space Library.
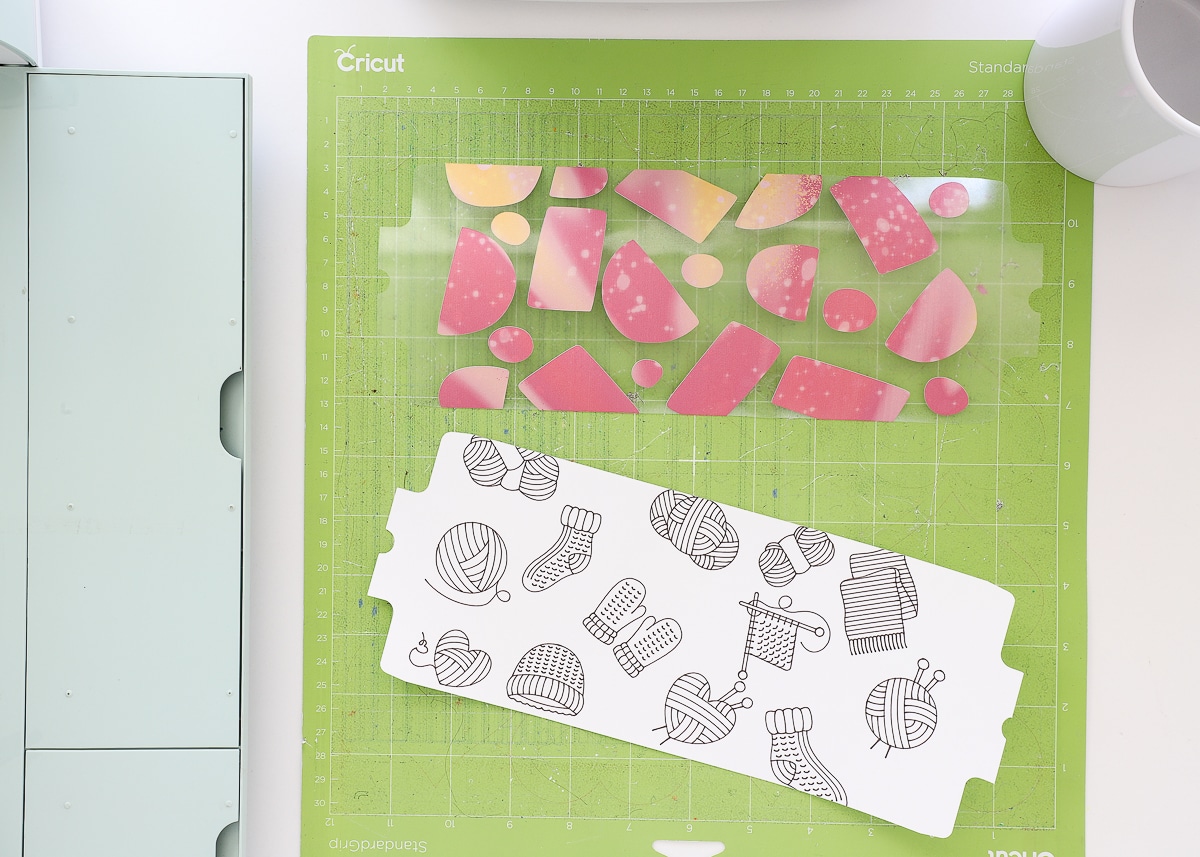
For my Knitting Lover Mug, I started with the Large Painted Shapes Mug Design (#M1D0152B8) design and then layered individual “Draw” images from the Knitting Set over each blob.
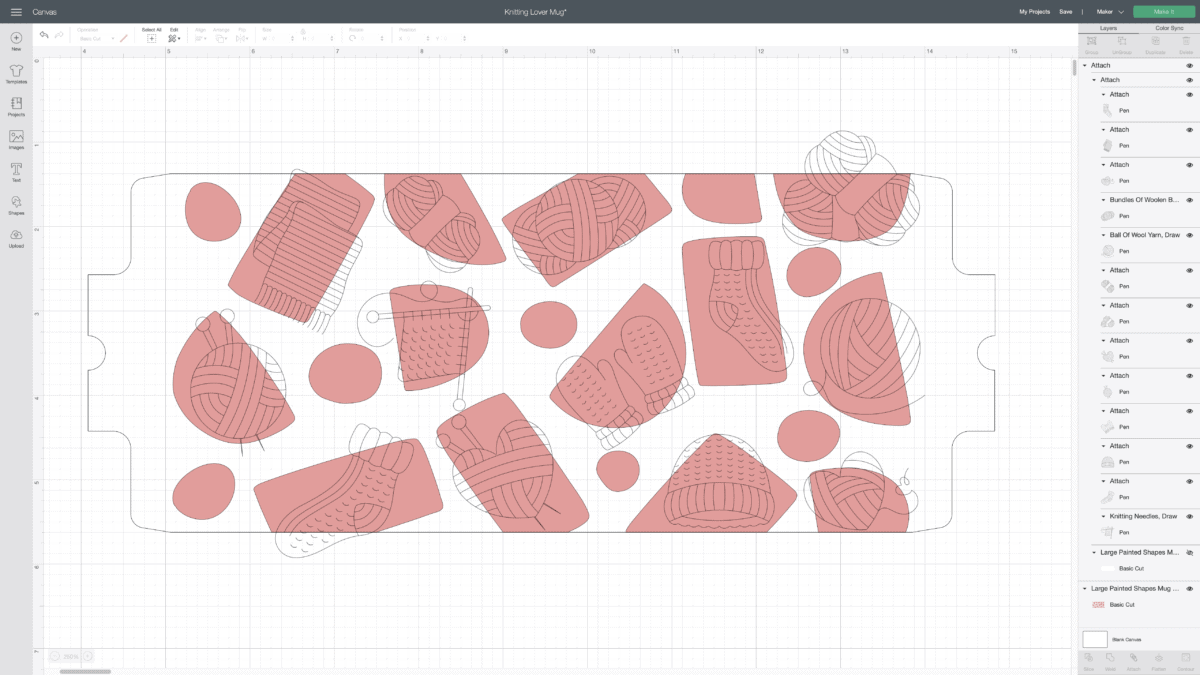
If you’d like to access this specific mug design, click HERE.
The biggest thing to remember is how to designate each element of your design:
- Any part of your design that you want created from the Infusible Ink Transfer Sheets should be set to “Cut”
- Any part of your design that you want drawn with the Infusible Ink Pens or Markers should be set to “Draw”
Cutting Your Pen+Transfer Sheet Designs
Before sending to cut, be sure to use these specifications:
- “Mirror” your design. (Even if you aren’t using text, get into the habit of mirroring your designs every time.)
- Use these Custom Materials settings:
- For your “Cut” layer: Infusible Ink Transfer Sheet
- For your “Draw” layer: Laser Copy Paper
- Load the correct pen into your machine according to the prompts within Design Space (For any designs with small details, I HIGHLY recommend using the Fine Point Pens.)
Once you click the flashing button on your machine, follow the machine prompts to both “Cut” and “Draw” your designs.

Once done, remove both mug designs from your mats and weed as needed (if you need help with this step, click HERE).
Transferring Both Designs to Your Mug
You will transfer the two layers of your design separately, so this heating process is a little longer than all the other mugs we’ve made.
You will start with transferring the Infusible Ink Transfer Sheet design. For detailed instructions on how to do this, click HERE.
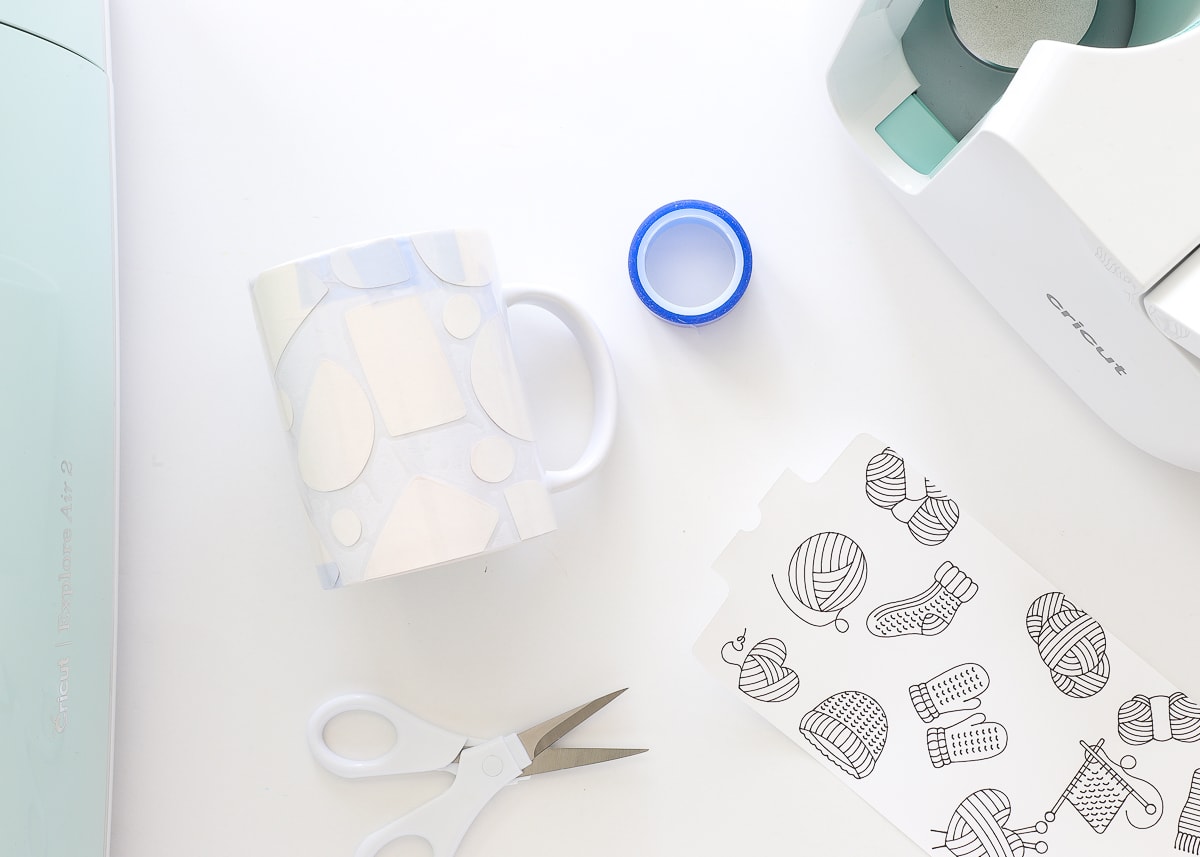
After you cleaned your mug and taped the design in place, insert it into the Cricut Mug Press and heat fully.
NOTE: ONLY the Infusible Ink Transfer Sheet design is on the mug at this point.
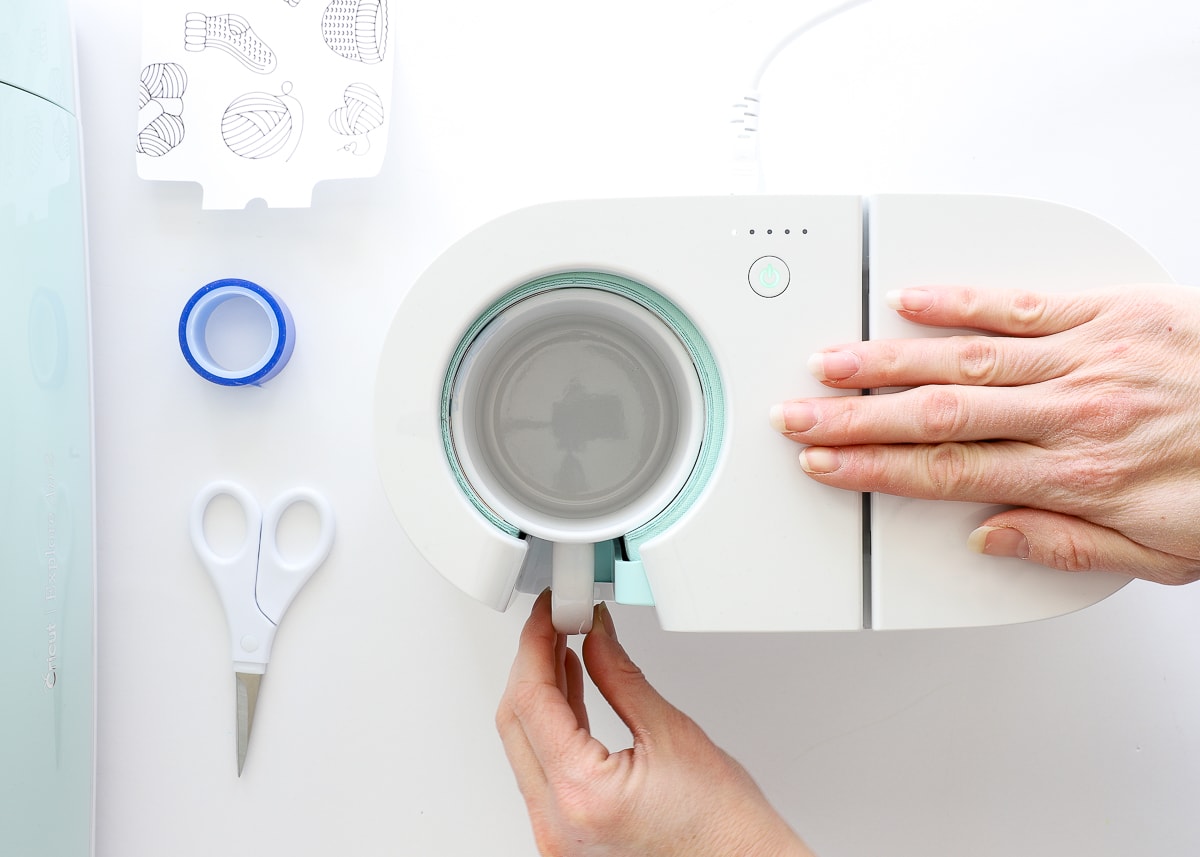
Once the Cricut Mug Press beeps, remove the mug by the handle and place it on a heat-safe surface to fully cool. Once cool, remove the Infusible Ink Transfer Sheet to reveal your base design.
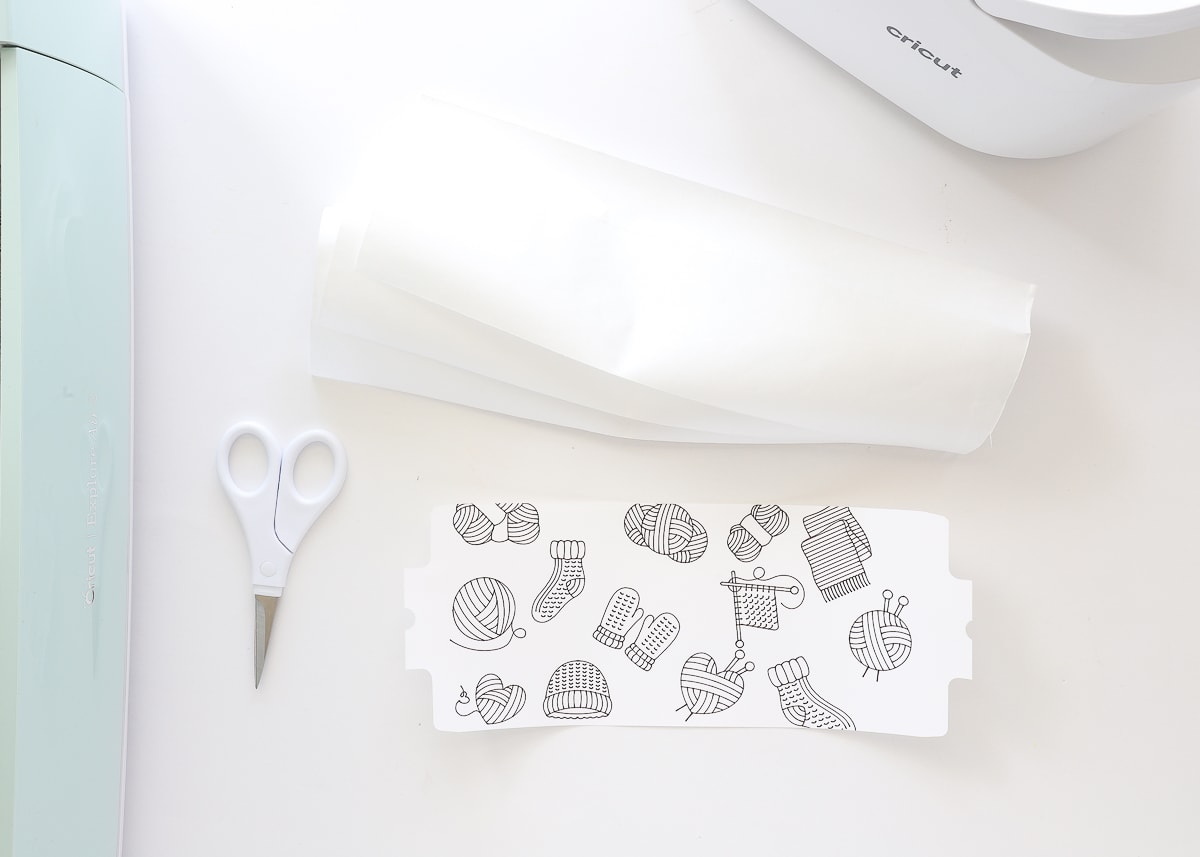
Next, add your “Draw” design on top. Just like we did with the pen-only design, wrap the mug in the laser copy paper first (with the pen designs toward the mug) and then cover it with 3 layers of butcher paper.
You will then re-heat the mug, fully, to transfer the pen design to the mug on top of the existing design.
After the machine beeps, remove the mug, and let it cool. Then remove the butcher paper and laser copy paper to see the pen design transferred to the mug!
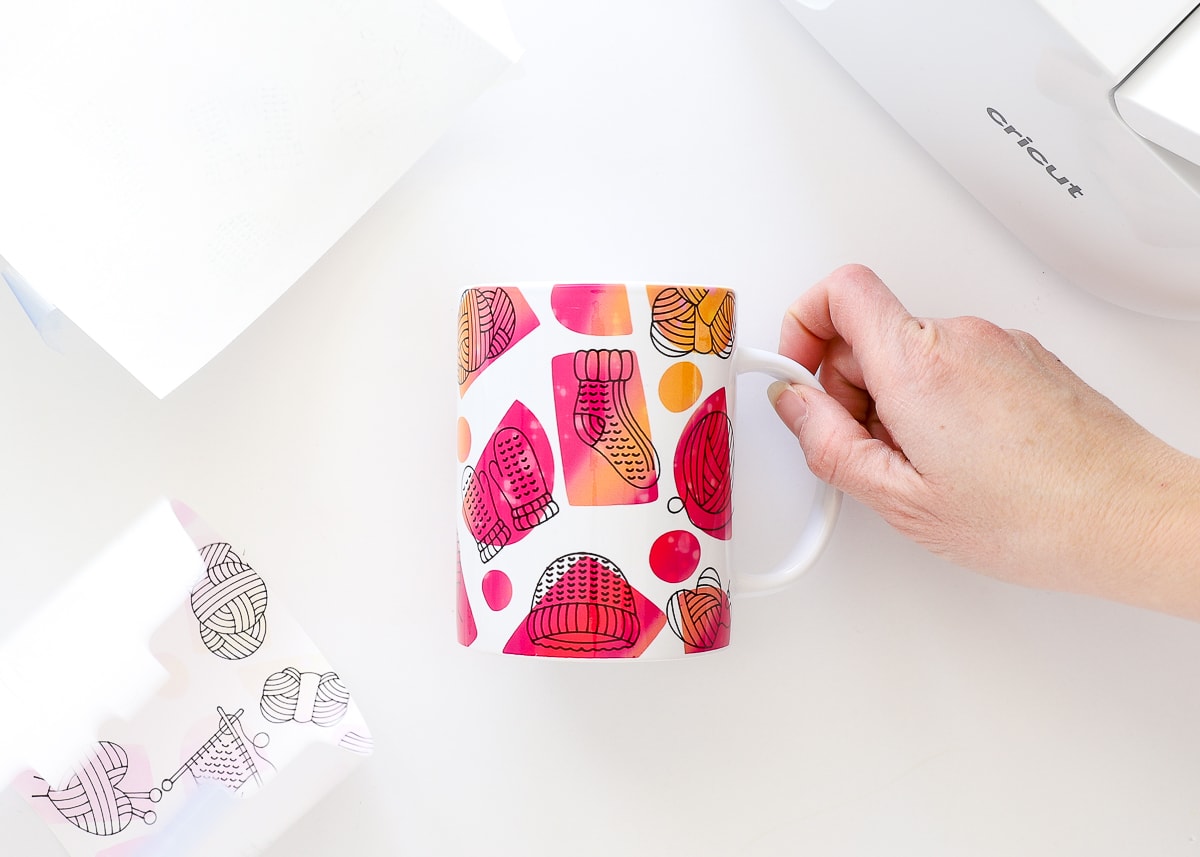
Take note of the discarded laser copy paper in the image above (bottom left corner). See how a tiny bit of the pink/orange blob designs bled onto the paper? When you double-press mugs, your first layer will loose just a smidge of its vibrancy. As such, this technique is recommended for brightly-colored, highly-saturated Transfer Sheets and Pens.

This double-press method is also how I made the monogrammed mug below…
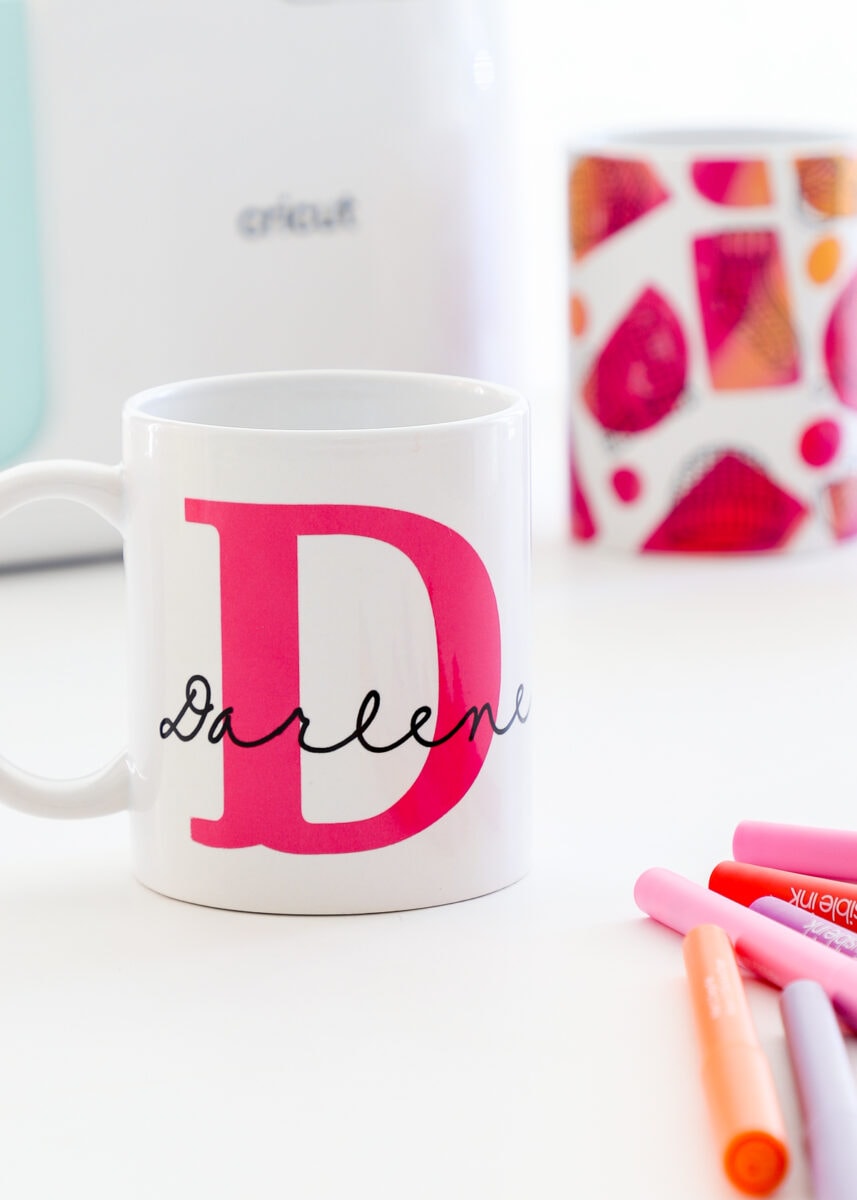
In this instance, I cut the “D” from a hot pink Infusible Ink Transfer Sheet, and wrote the script name using (the thicker) Black Infusible Ink Marker.
Just as I described with the Knitter mug, I first transferred the D…
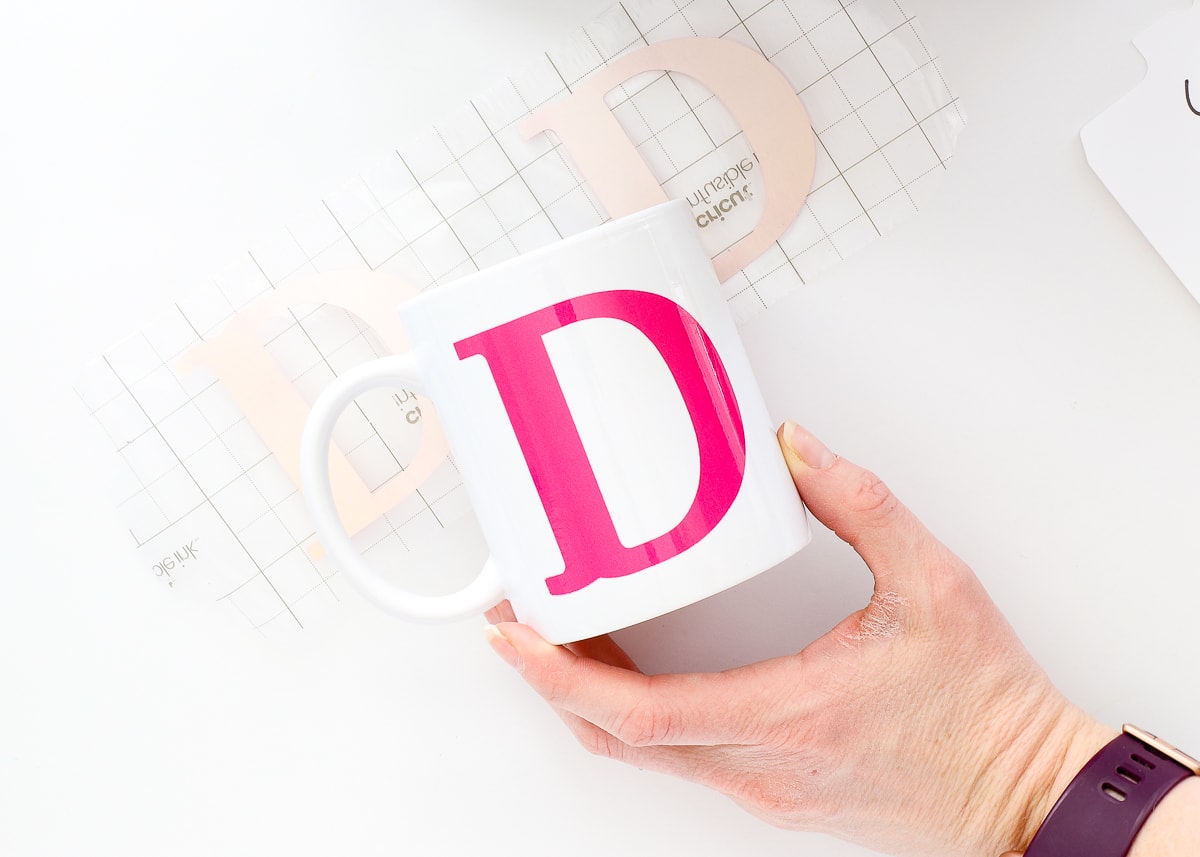
…then pressed the mug again with the drawn name design over top.

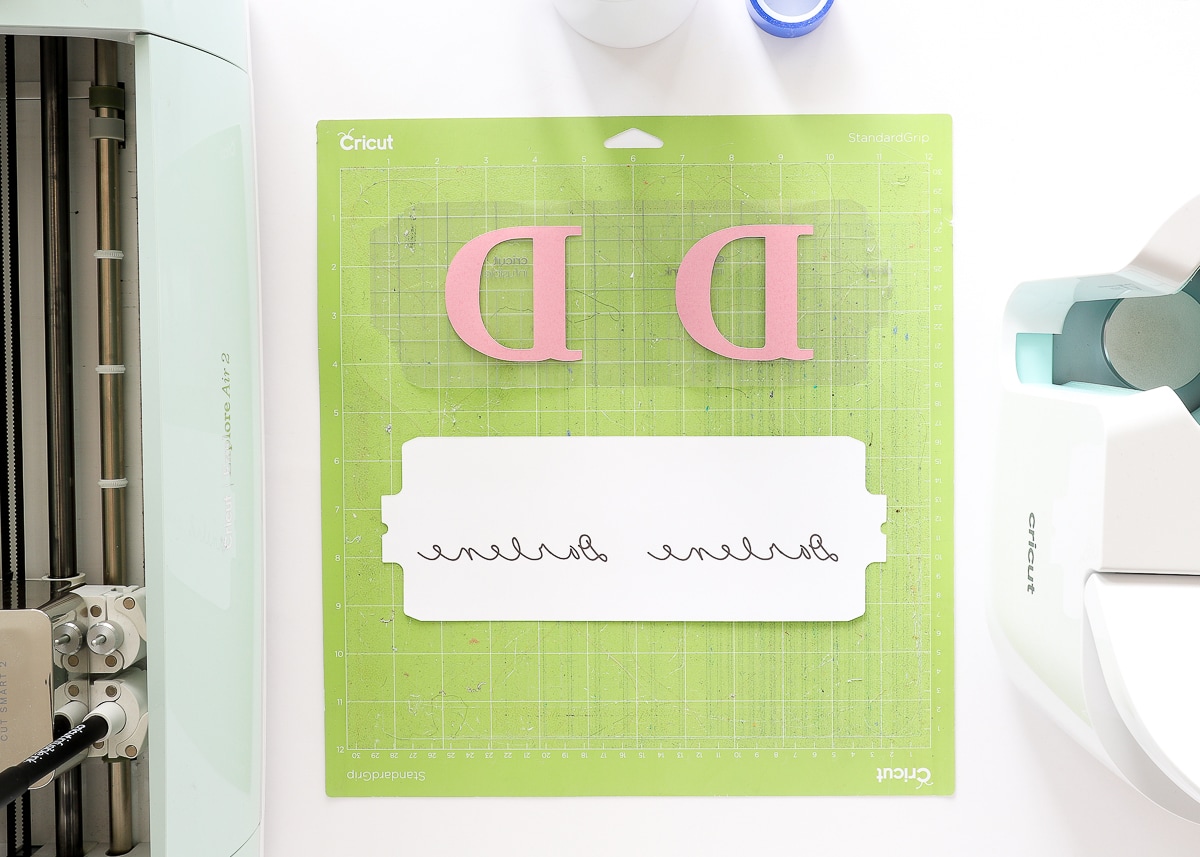
TIP! When double-pressing your mugs, I HIGHLY recommend using the full mug templates for your designs. Not only does this ensure you line up your designs just right, but it also makes sure the entire design is covered when re-pressing. In the example above, if you cut the name on a smaller scrap and just taped it over the “D” with Heat Resistant Tape (instead or wrapping the entire mug), the tape lines could distort your original “D.”
I must admit, making designs with BOTH the Infusible Ink Transfer Sheets and the Infusible Ink Pens is my absolute favorite method. The contrast between the larger, patterned images with the refined pen details results in mugs no one will believe you made yourself!
Now that I’ve fully covered how to make mugs with Infusible Ink Pens, let me know what questions you have in the comments!
Megan


21 Comments on “How to Make Mugs with Infusible Ink Pens and the Cricut Mug Press”
Thanks for the great tutorials. Would you share which fonts you used on the Darlene mug please. I hope that you will be doing more mug press projects in the future!
Hi Debbie!
Pretty sure it was: Yours Truly Normal.
Hope that helps!Megan
Thank you!
And what font did you use for the “D”?
Great information. Thank you. Exactly what I was looking for. I’m pretty new to all this, but having fun. When I go to set up the machine to “draw” there is not an option for infusible pens. Do I use gel setting or regular or does it matter?
Hi Mary!
So when a certain design element is set to Draw with a Pen, you don’t technically have to set the pen type since the machine doesn’t really know what pen you insert. So theoretically, you can use any pen setting in DS and just insert the Inf Ink pens into your machine.
That said, it can be helpful to set the specific pen types, so if you use different color pens for different elements, DS will prompt you to load the right pen at the right time. To see more of what I mean, please see this guide: https://thehomesihavemade.com/2019/05/how-to-use-cricut-pens-a-comprehensive-guide/
You can select Infusible Ink pens in DS:
Set an Item to Draw with Pen with the Operation menu
Click the colored box next to the Operation menu
Select a particular pen type (I chose 0.4) and scroll all the way down until you see Inf Ink options.
Like I said, it’s not necessary, but selecting the right pen is helpful on designs when you use multiple pen colors or weights.
Hope that helps!Megan
I can’t seem to get my infusible markers to stick to my cricut mug. I have pink butcher paper
So nice to be able to read instructions rather than watch a video! Thank you!!
I’m so glad you find the pictures helpful! That’s how I learn best too!
When you use infusible ink markers on infusible ink sheets can you use different colors or would you just recommend black marker? Like I want to use a green marker on a yellow transfer sheet will it change it he color when I go to press it on my mug machine ?
Hi Holly!
The hardest thing to remember when working with Inf Ink is that they blend like ink/paint would; they don’t layer like vinyl or iron-on. So yes, there is a very good chance that a green pen on a yellow transfer sheet will look blue.
Hope that helps a bit!Megan
Thanks for the great tutorial, excited to try my new mug press which I’ve been a little leary of to try since I’ve bought it. A design I’ve selected that I uploaded, I understand the difference between draw and cut line type, but when the image is in cut, it looks perfect, but when I switch to draw, it would only draw the outside lines of the design, my question is how would I get “draw” to fill in the lines how it looks as the cut out option? The design is very detailed and would be extremely tedious to attempt to go back and hand fill-in all those lines, I was hoping there is a simple solution, because if it turned out great, I would likely be making more. Thanks in advance.
Thank you so much for all the details!! I can’t wait to get started!
I love your tutorials, and your ideas for designs are great!!!! I do, however, have probably two rather naive questions,
1) Should the Butcher paper be unwaxed
and uncoated? (It feels almost like stiff
Typing paper?)
2) And does the double pressing of the
mug in any way compromise it so that the
mug cannot be used for drinking?
Hi Marlene!
Your questions aren’t naive – it’s good to fully understand before you start these kinds of projects because they aren’t easily fixable.
1 – I have to admit I’ve only used the butcher paper Cricut provides. (It comes in every box of Inf Ink Transfer Paper, as well as in bulk HERE). It’s pretty lightweight and does have a shiny side and a dull side.
2 – No, double pressing will not affect the stability of the mug at all. While the press does get incredibly hot, I can’t imagine a scenario in which the mug would crack.
Hope that helps a bit!
Good luck with your mug project!
Megan
Thank you for your detailed information. I am new using Cricut in general and this by far is the best I’ve read for how to do something with my Cricut. Thank you so much. I was beginning to loose hope.
Are you able to draw directly onto the mug and put it in the mug press?
Hi Kathy!
Thanks for reaching out with this question.
I personally have not tried what you’re suggesting. Cricut’s instructions are to put the design on paper first, then transfer it to the mug. So…you can hand draw directly onto white printer paper and then transfer it…but directly on the mug itself isn’t recommended.
I’m not sure why the process is the way it is, but I know Cricut does rigorous testing, so I suspect drawing directly on the mug will not give you very good results. If you choose to give it a try, I would wrap your mug in LOTS of layers of parchment paper so it doesn’t bleed onto the mug press.
Sorry I don’t have a better answer for you!
Megan
I tried the Pen only design. I used Cricuit Fine Point Infusible ink pens (0.3 and 0.4) on standard white printer paper. My design printed fine but when my mug cooled, there was nothing on the mug. It was blank. They are not cricut mugs, but they are mugs I’ve used with infusible ink transfer sheets and never had a problem. Do you have any suggestions?
Hi! If I wanted to write my name directly on the printer paper (so it looks like my handwriting)-
Does it have to be written backwards/ mirrored?
Or will it bleed through to the paper onto the cup facing the correct way?
Hope that makes sense.
I love your mug design and have seen it in Design Space, but until now I was always wondering how it was made. Thanks for sharing the info and the fantastic design!