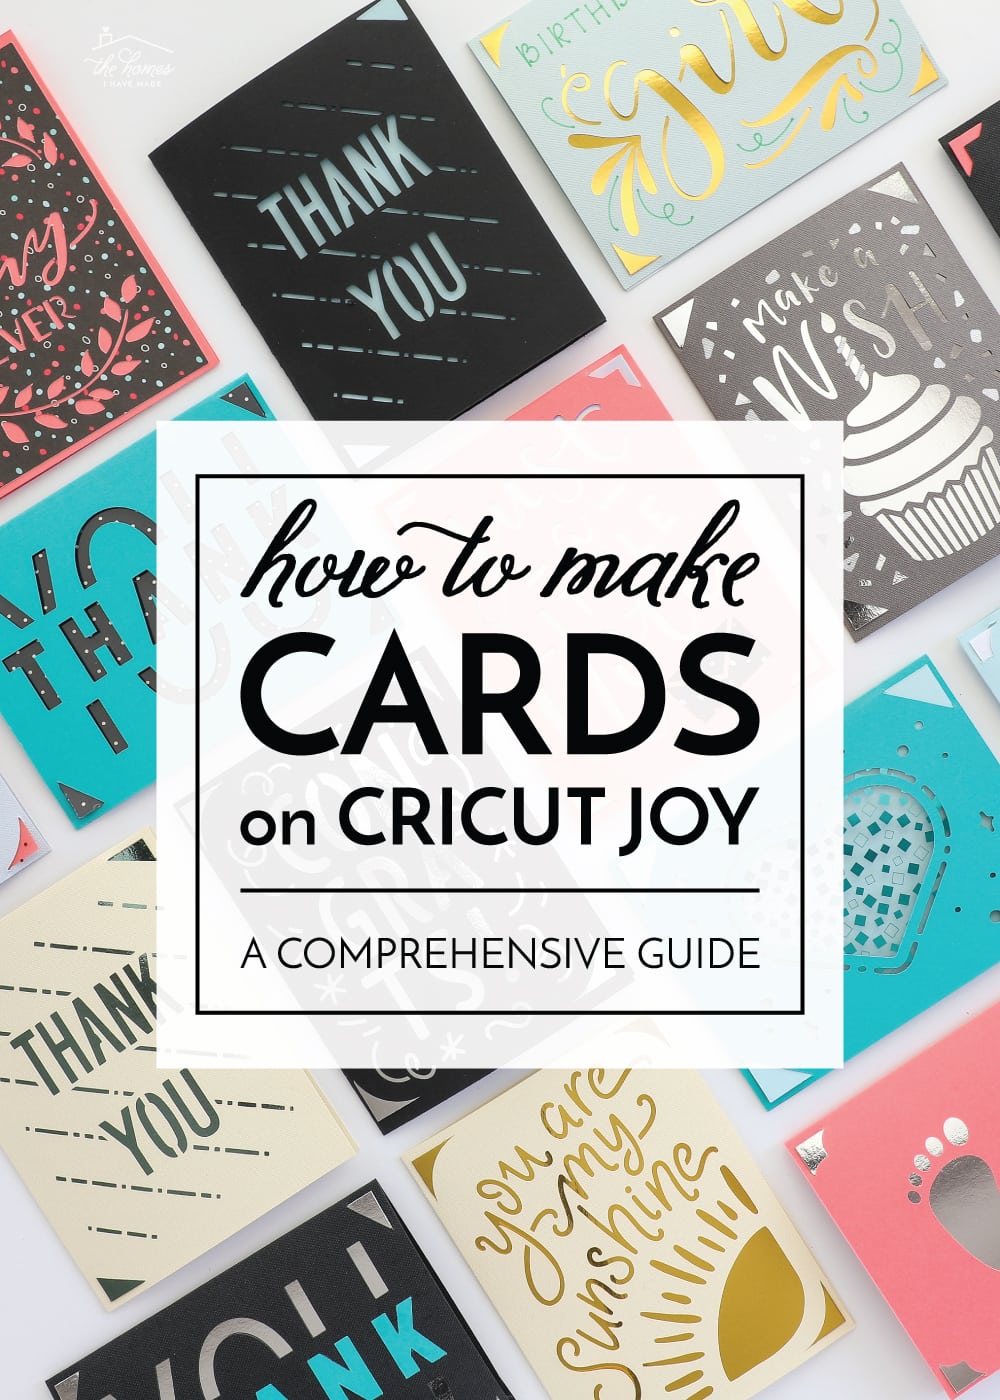
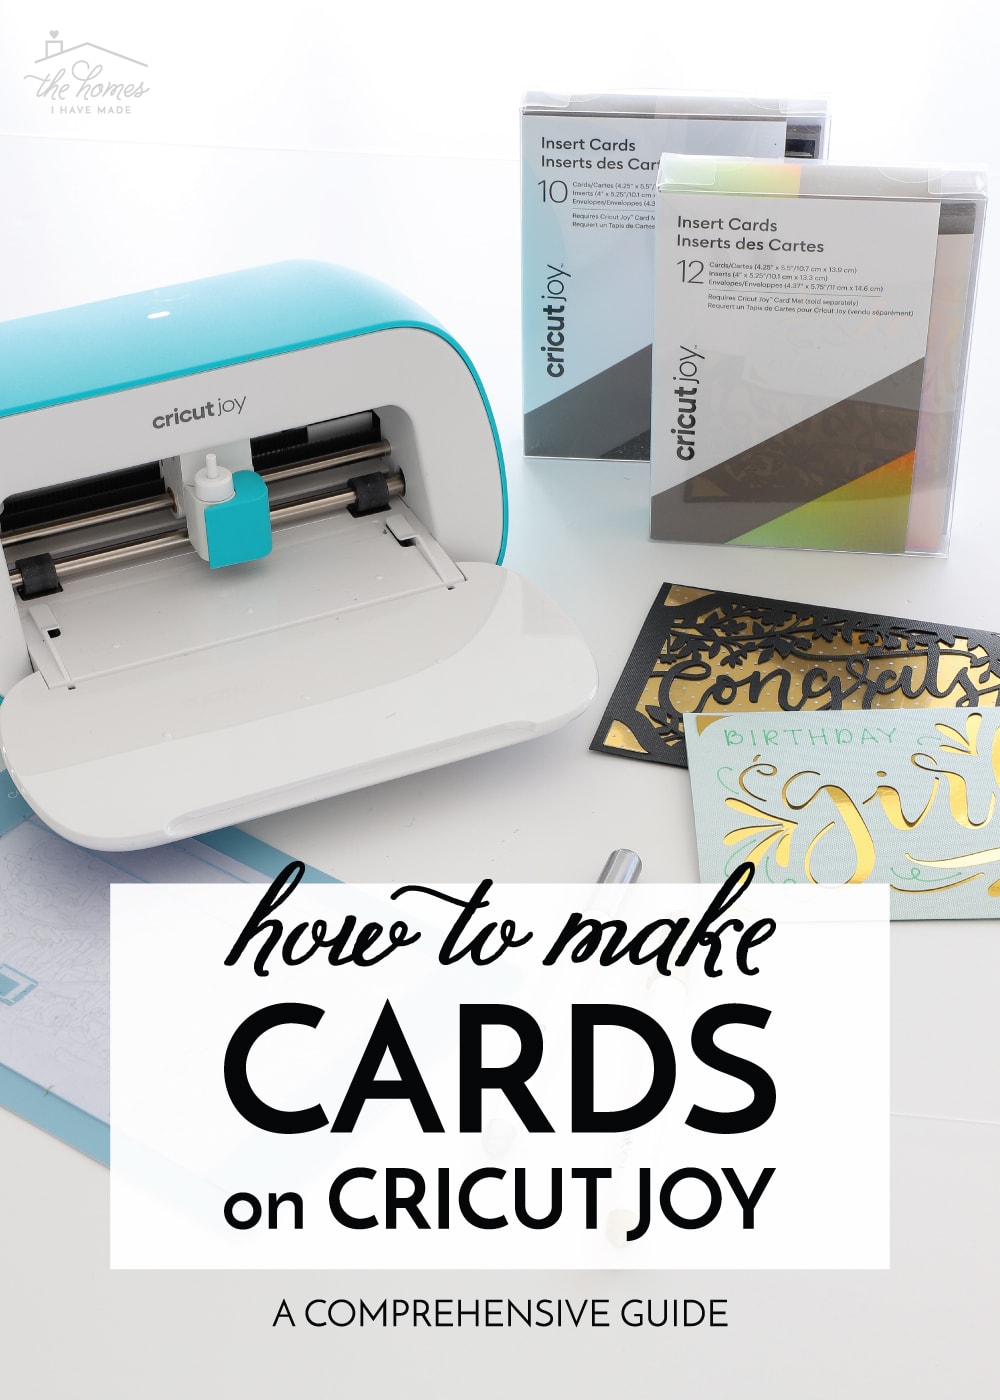
How to Make Cards on Cricut Joy
Okay…question for you! When’s the last time you made a homemade card? Can’t remember? Me either (until I met Cricut Joy, that is!) You see…card-making has never really ever been a specialty or interest of mine. Between the papers and the glue and the cutting and the stamps and the glitter and the everything else…DIY cards just always felt like a lot of work. Then the folks over at Cricut rolled out the incredibly brilliant Cricut Joy Card Mat to go with the new Cricut Joy…and let me just say that I’ve made more cards in the last month than I probably have in my entire life. Why? Because it is now easier than ever (and so darn fun!) to make gorgeous homemade cards using Cricut Joy. So fun, in fact, that I kinda can’t stop. Today, I want to teach you how to make cards on Cricut Joy…and then I dare you to try and not make aaall the cards too!
There are hundreds of card designs in the Cricut Design Space library, but I will admit, I’ve never cut a single one. However, I’m pretty sure I’m alone in that. Cards are actually one of Cricut’s most popular projects, so they were determined to figure out a way for the itty bitty Cricut Joy to cut standard sized cards.
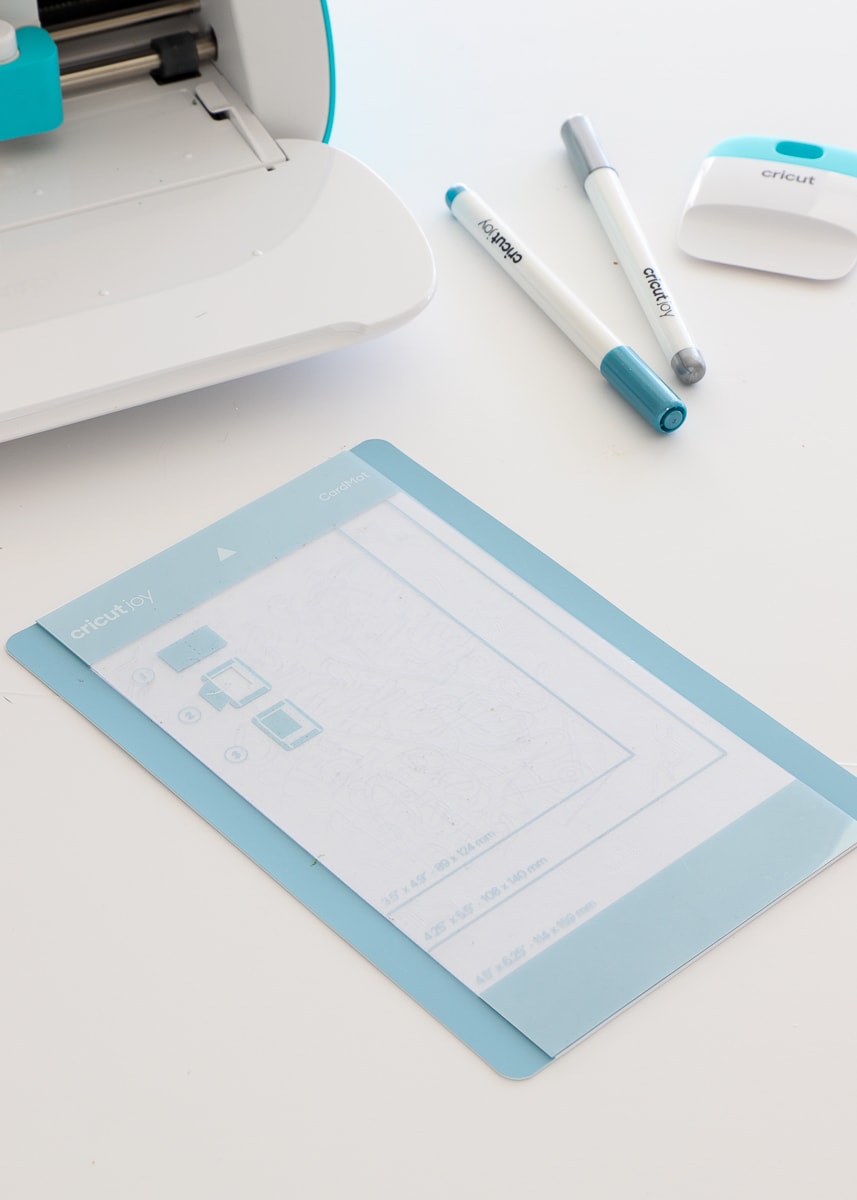
To do so, they developed the Cricut Joy Card Mat. This mat allows you to create 3 different standard size cards (3.5 x 5″ | 4.25 x 5.5″ | 4.5 x 6.25″) in a really unique way (which I show you down below). The Cricut Joy Card Mat is easily one of the most brilliant things to roll out of the Cricut factories, and if you didn’t think you wanted/needed a Cricut Joy before…you likely will after seeing this mat in action!
NOTE: The Cricut Joy Card Mat is exclusive to Cricut Joy and cannot work with other Cricut machines.
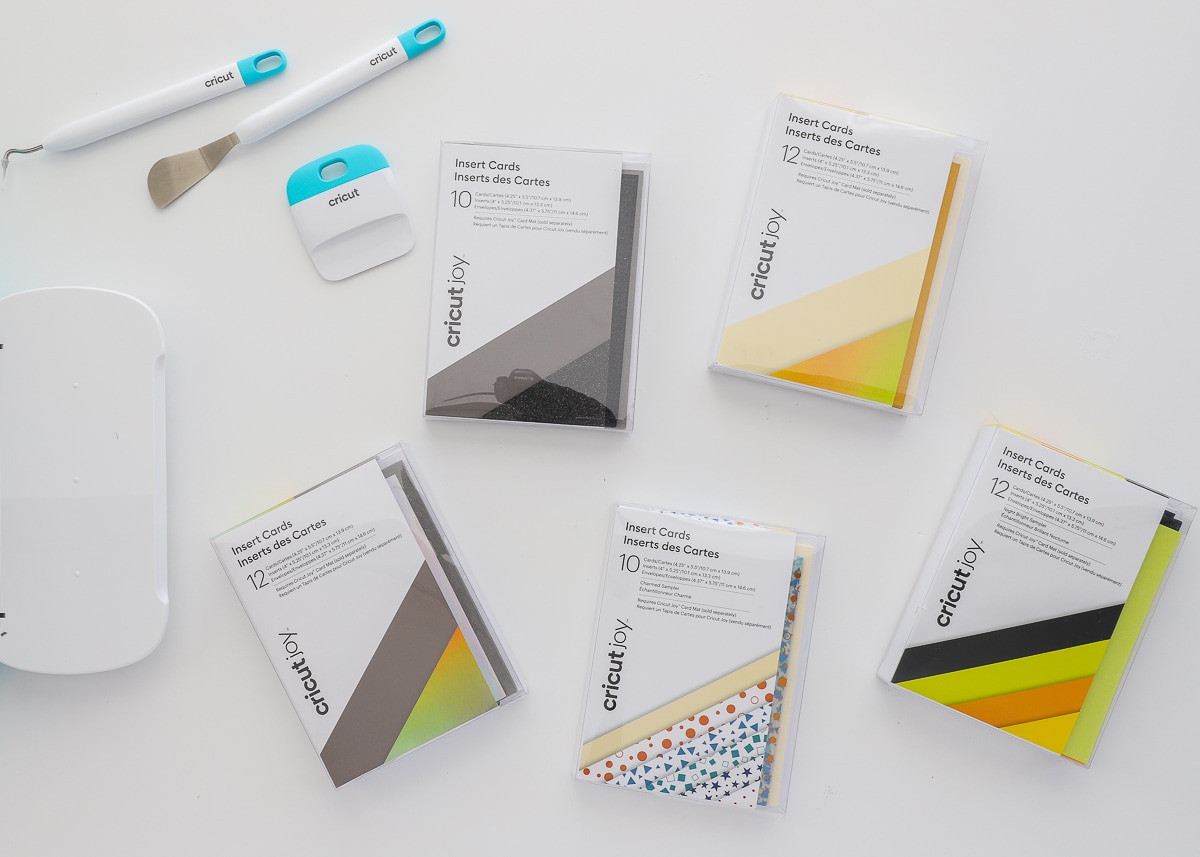
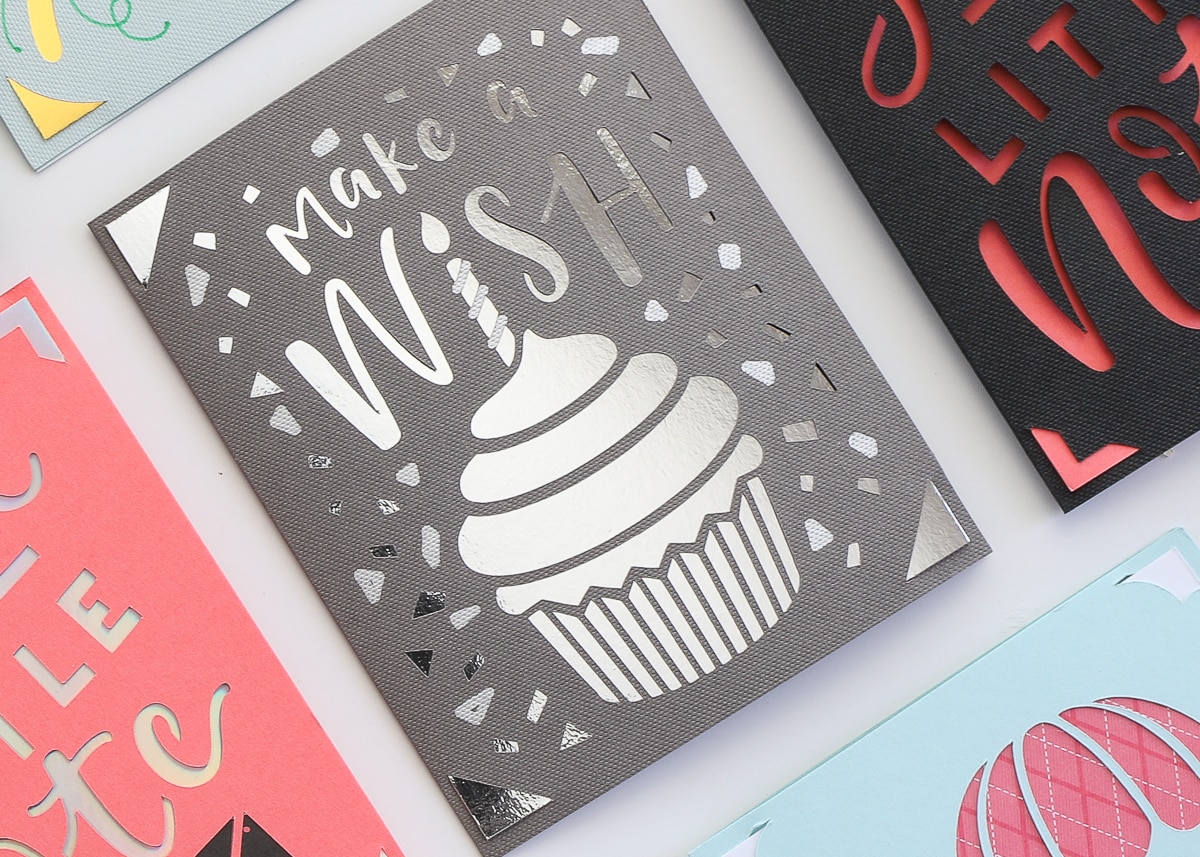
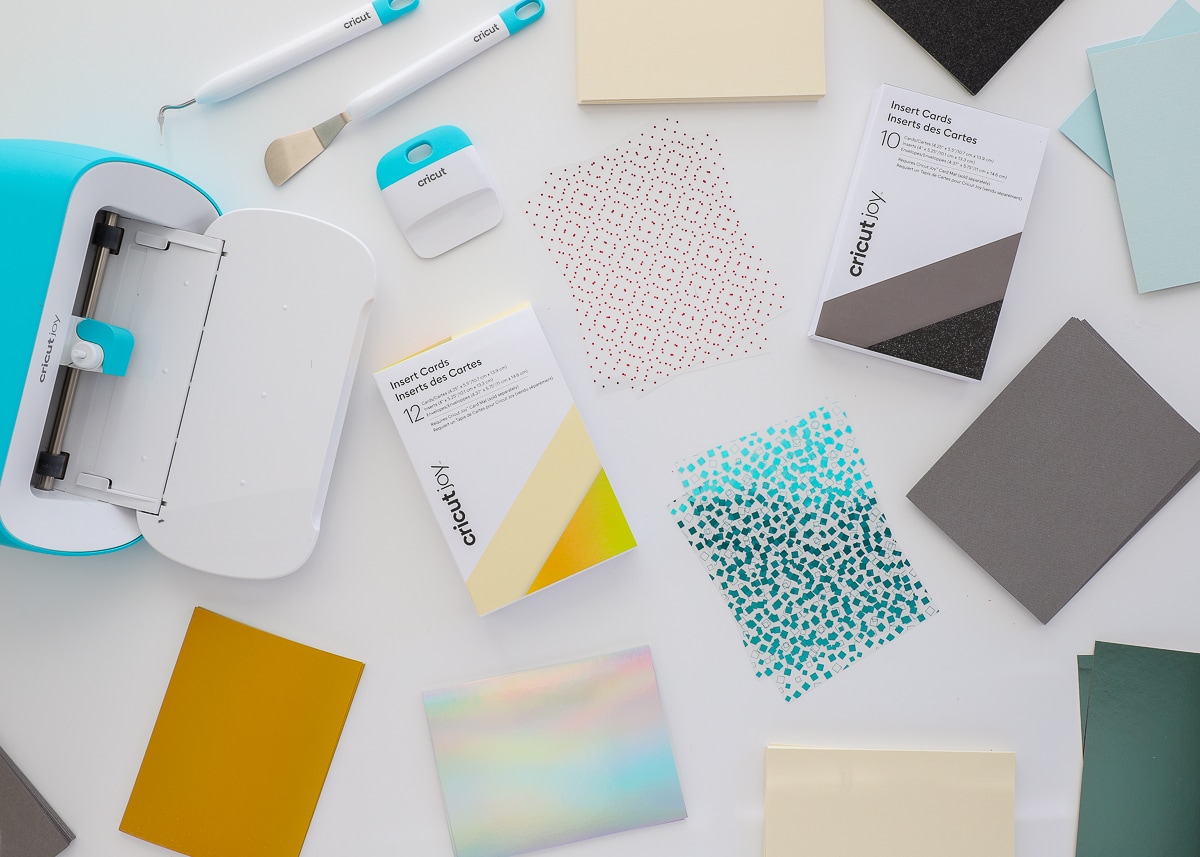
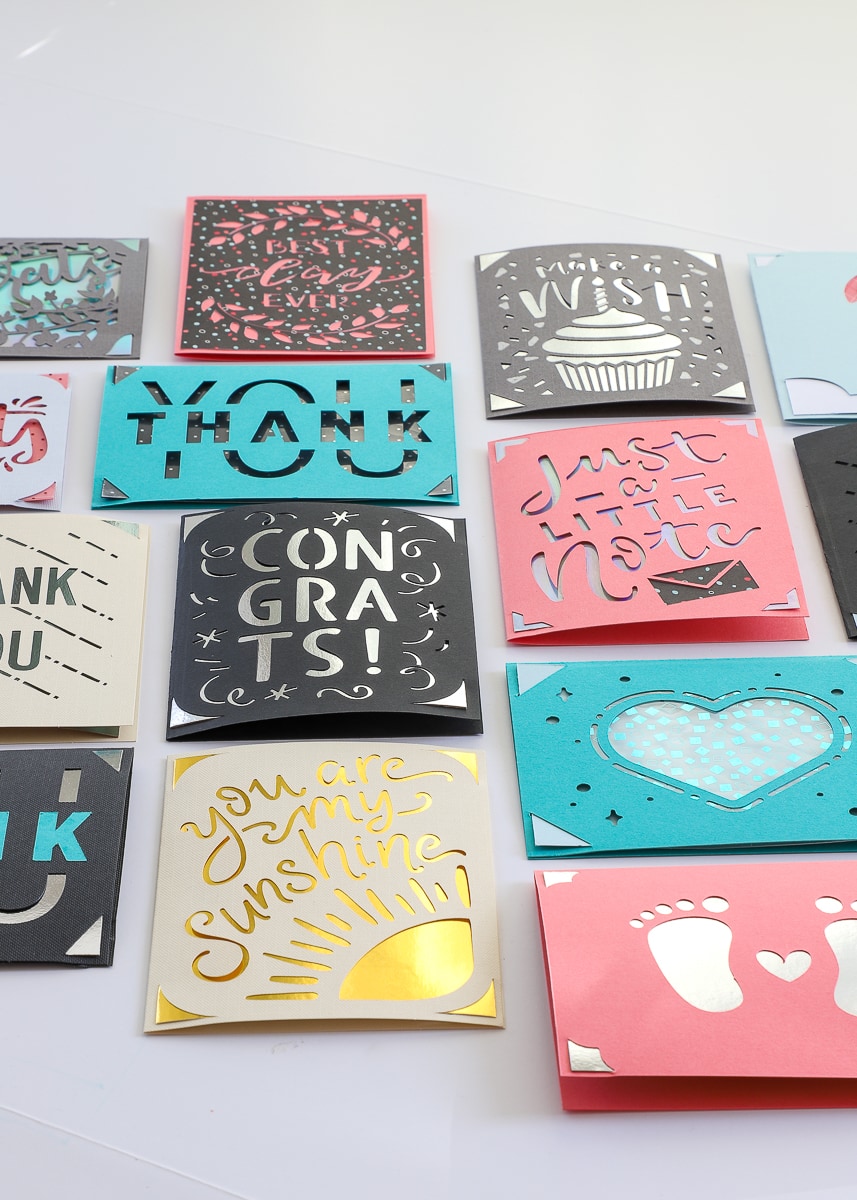
It’s not just the Cricut Joy Card Mat that makes cutting cards with Cricut Joy a real snap. Alongside it, Cricut is also rolling out pre-cut card and insert packs that contain everything you need to make gorgeous cards…all matched, cut, and ready to go! These card packs include 10-12 cards with coordinating inserts, as well as envelopes! If you don’t trust yourself to match papers that will result in gorgeous cards, don’t fret. Cricut has done all the work for you. I mean…look at all these gorgeous options!
With a handful of card packs, the Cricut Joy Card Mat and a Cricut Joy machine, you can not only sit down and make a whole slew of cards in just an hour or so, but you can also crank one out in the minutes before leaving for a party. Let me show you this fun process in action!
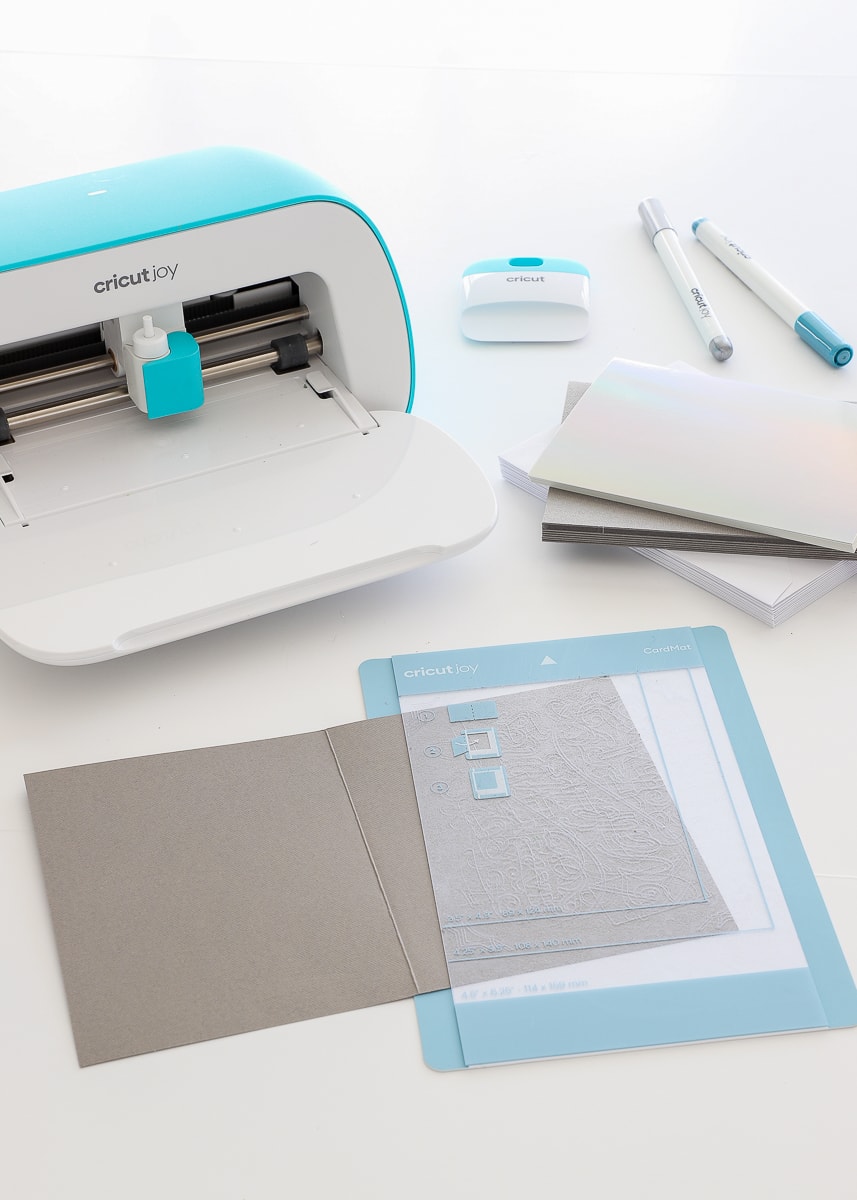
Supplies Needed
- Cricut Joy machine
- Cricut Joy Card Mat
- Insert Cards
- Cricut Joy Pens
- Metallic markers
- Scraper tool
- Adhesive-Backed Paper
How to Make Cards on Cricut Joy
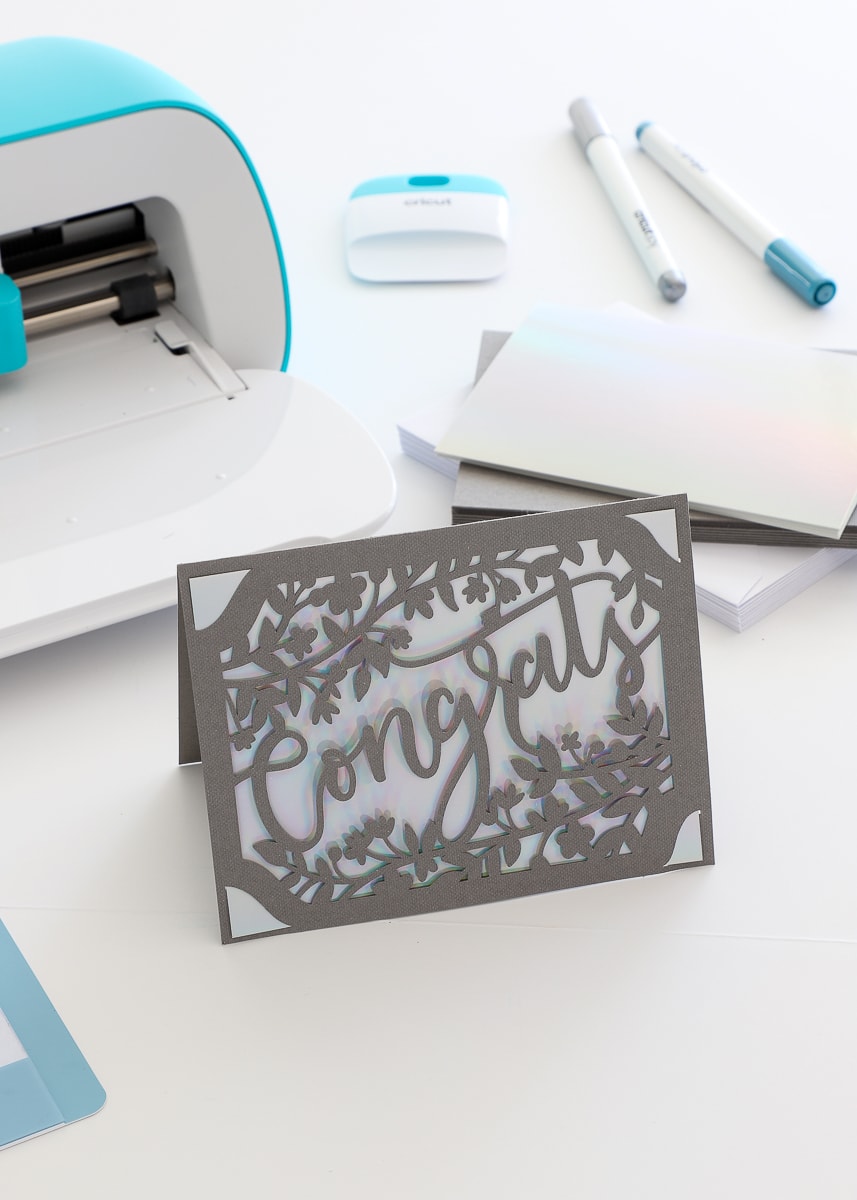
To make cards on the Cricut Joy, you really just need the Cricut Joy machine, the Cricut Joy Card Mat, and some cardstock. However, the Insert Cards and pens will definitely take your projects up a level AND make them even easier!
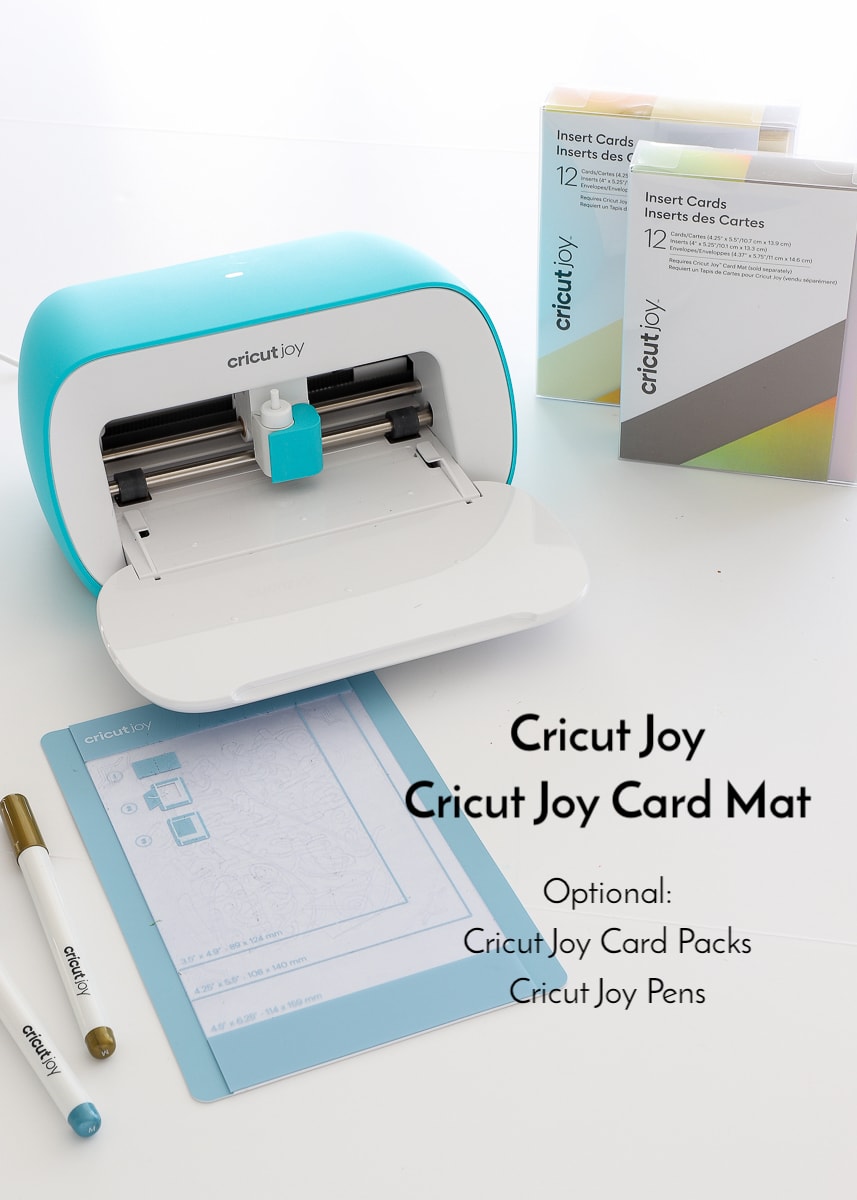
Cricut Joy | Cricut Joy Card Mat | Insert Cards | Cricut Joy Pens
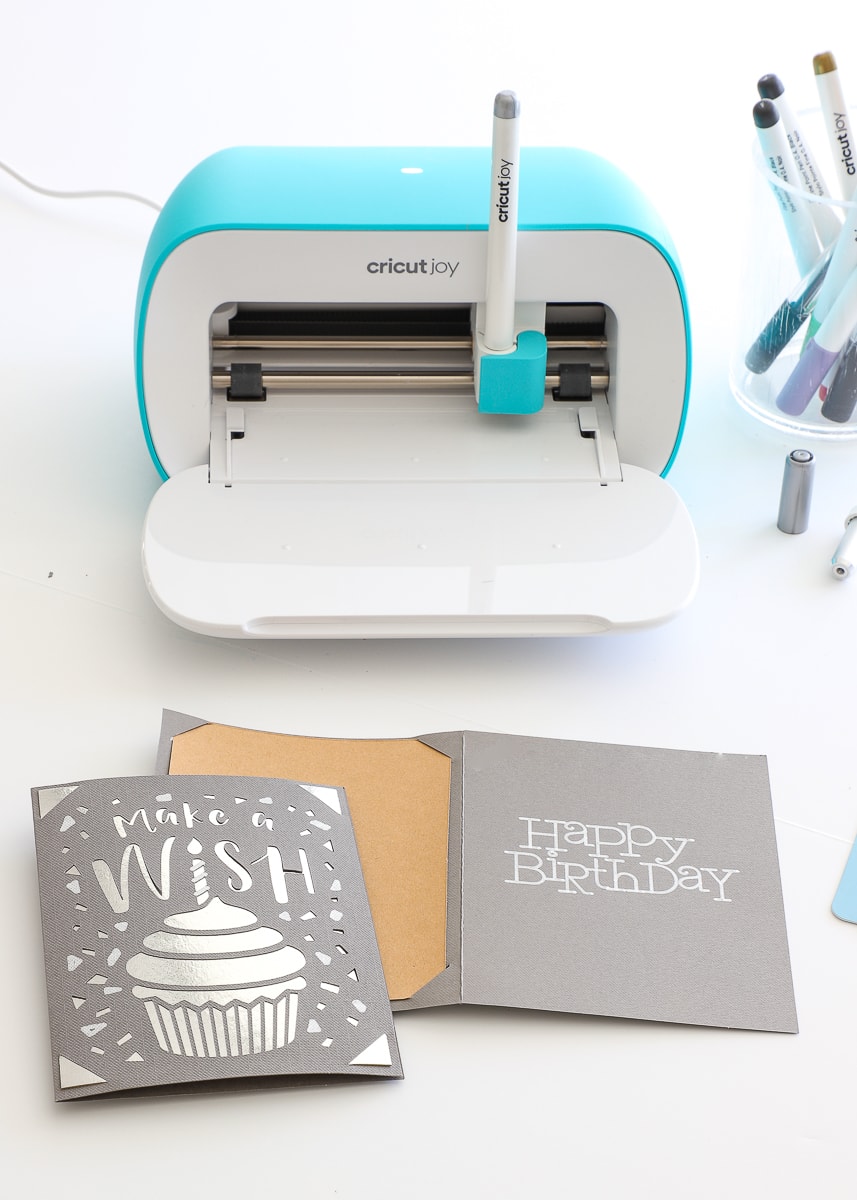
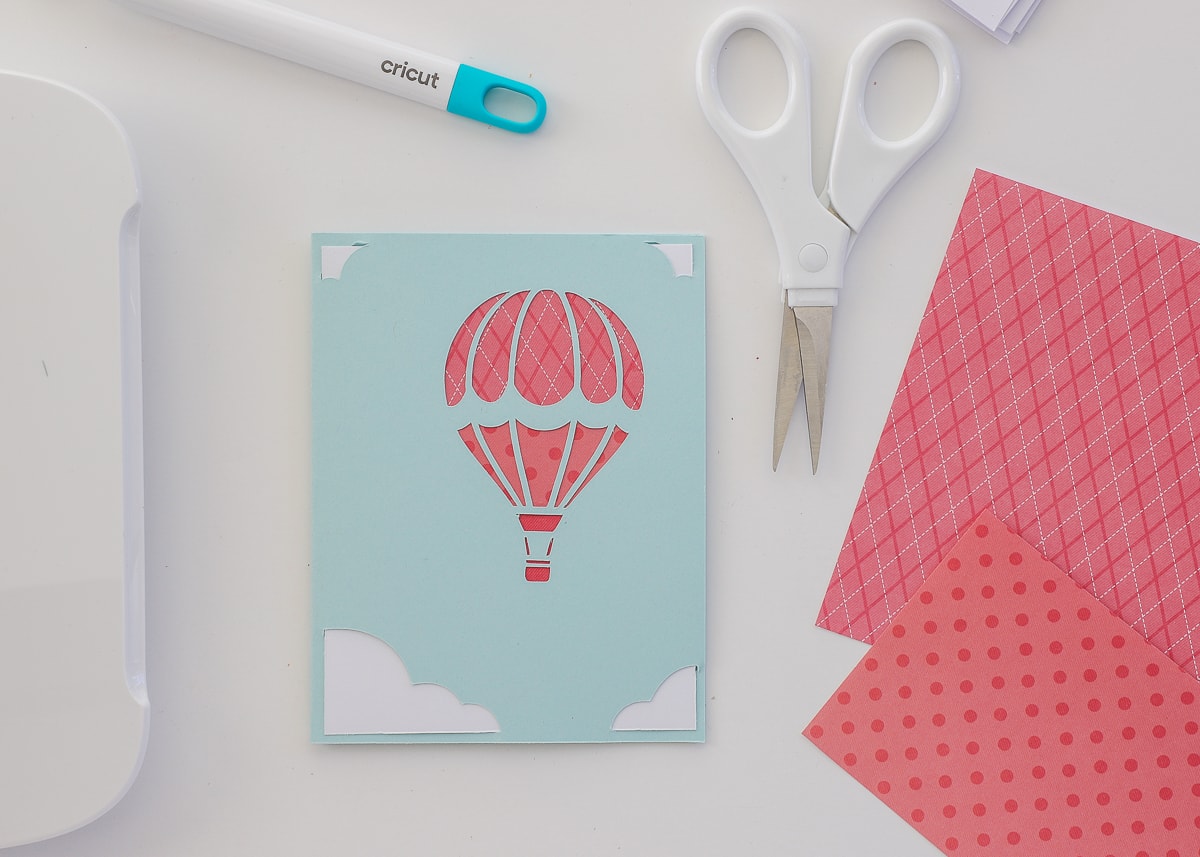
These made-in-minute cards utilize a clever corner cut design. This means the entire design is cut within four corners. When you slide a contrasting insert sheet into those corners, the cut design is revealed.

Step 1: Select a Card in Cricut Design Space
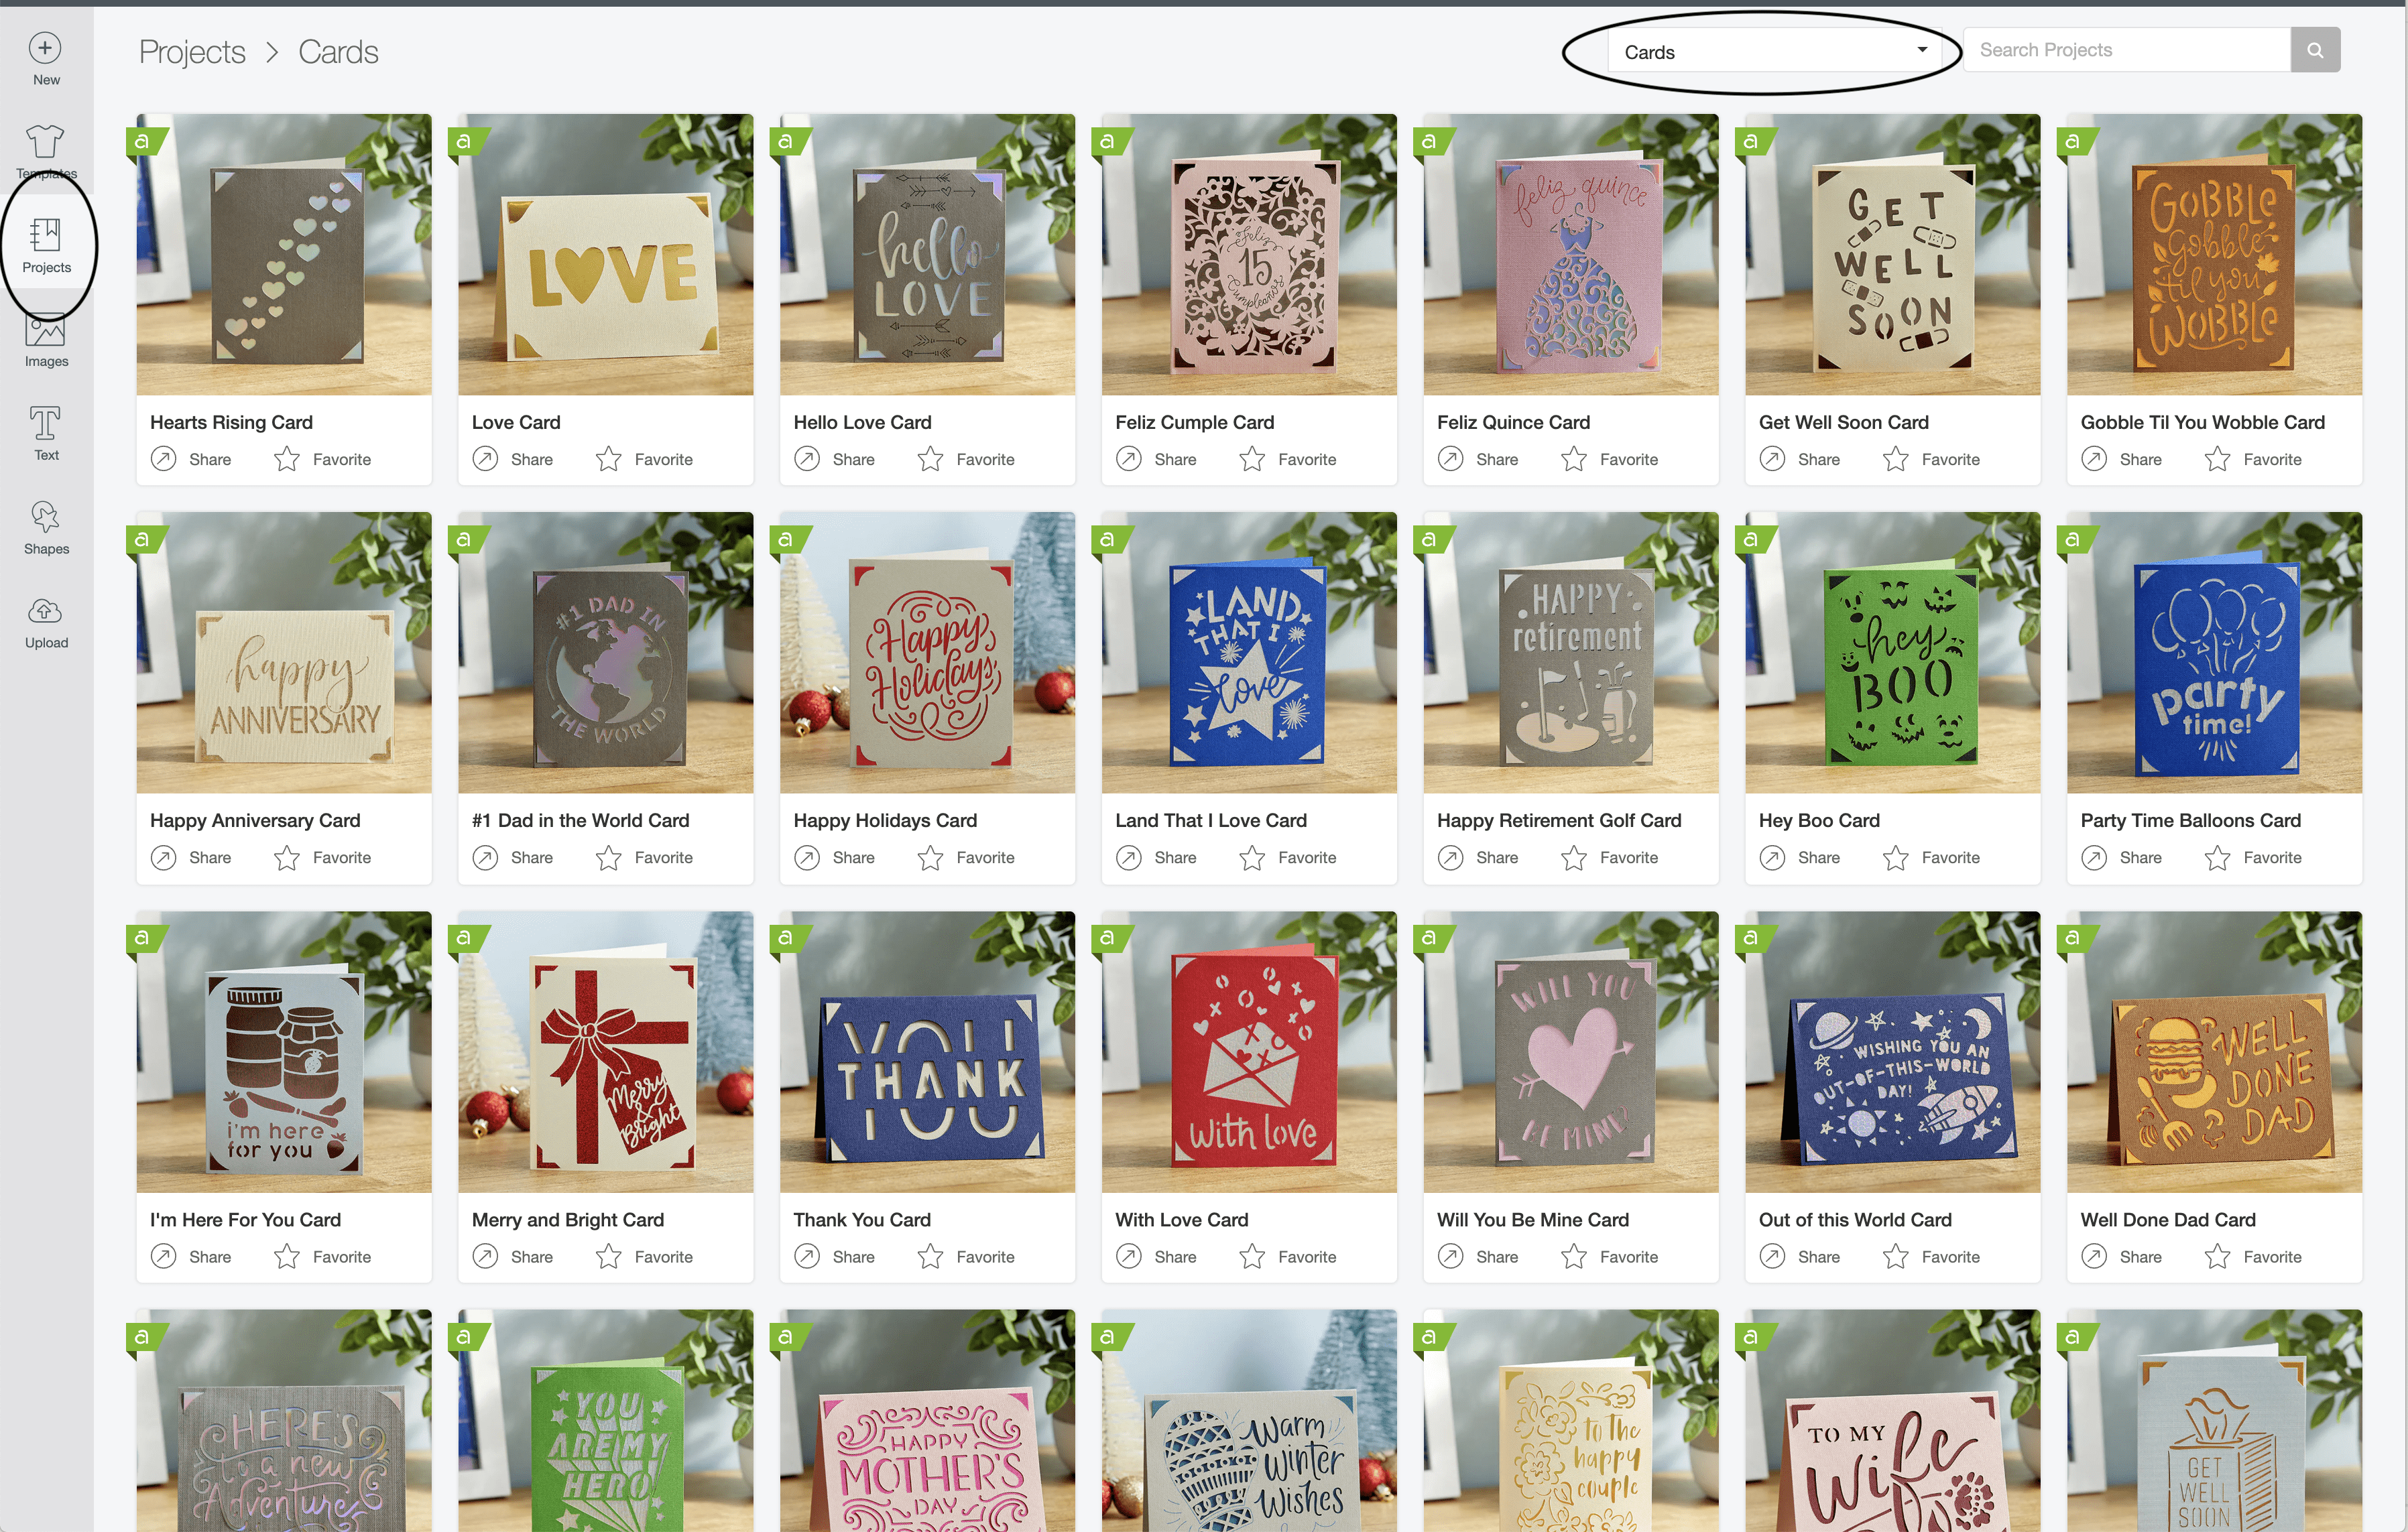
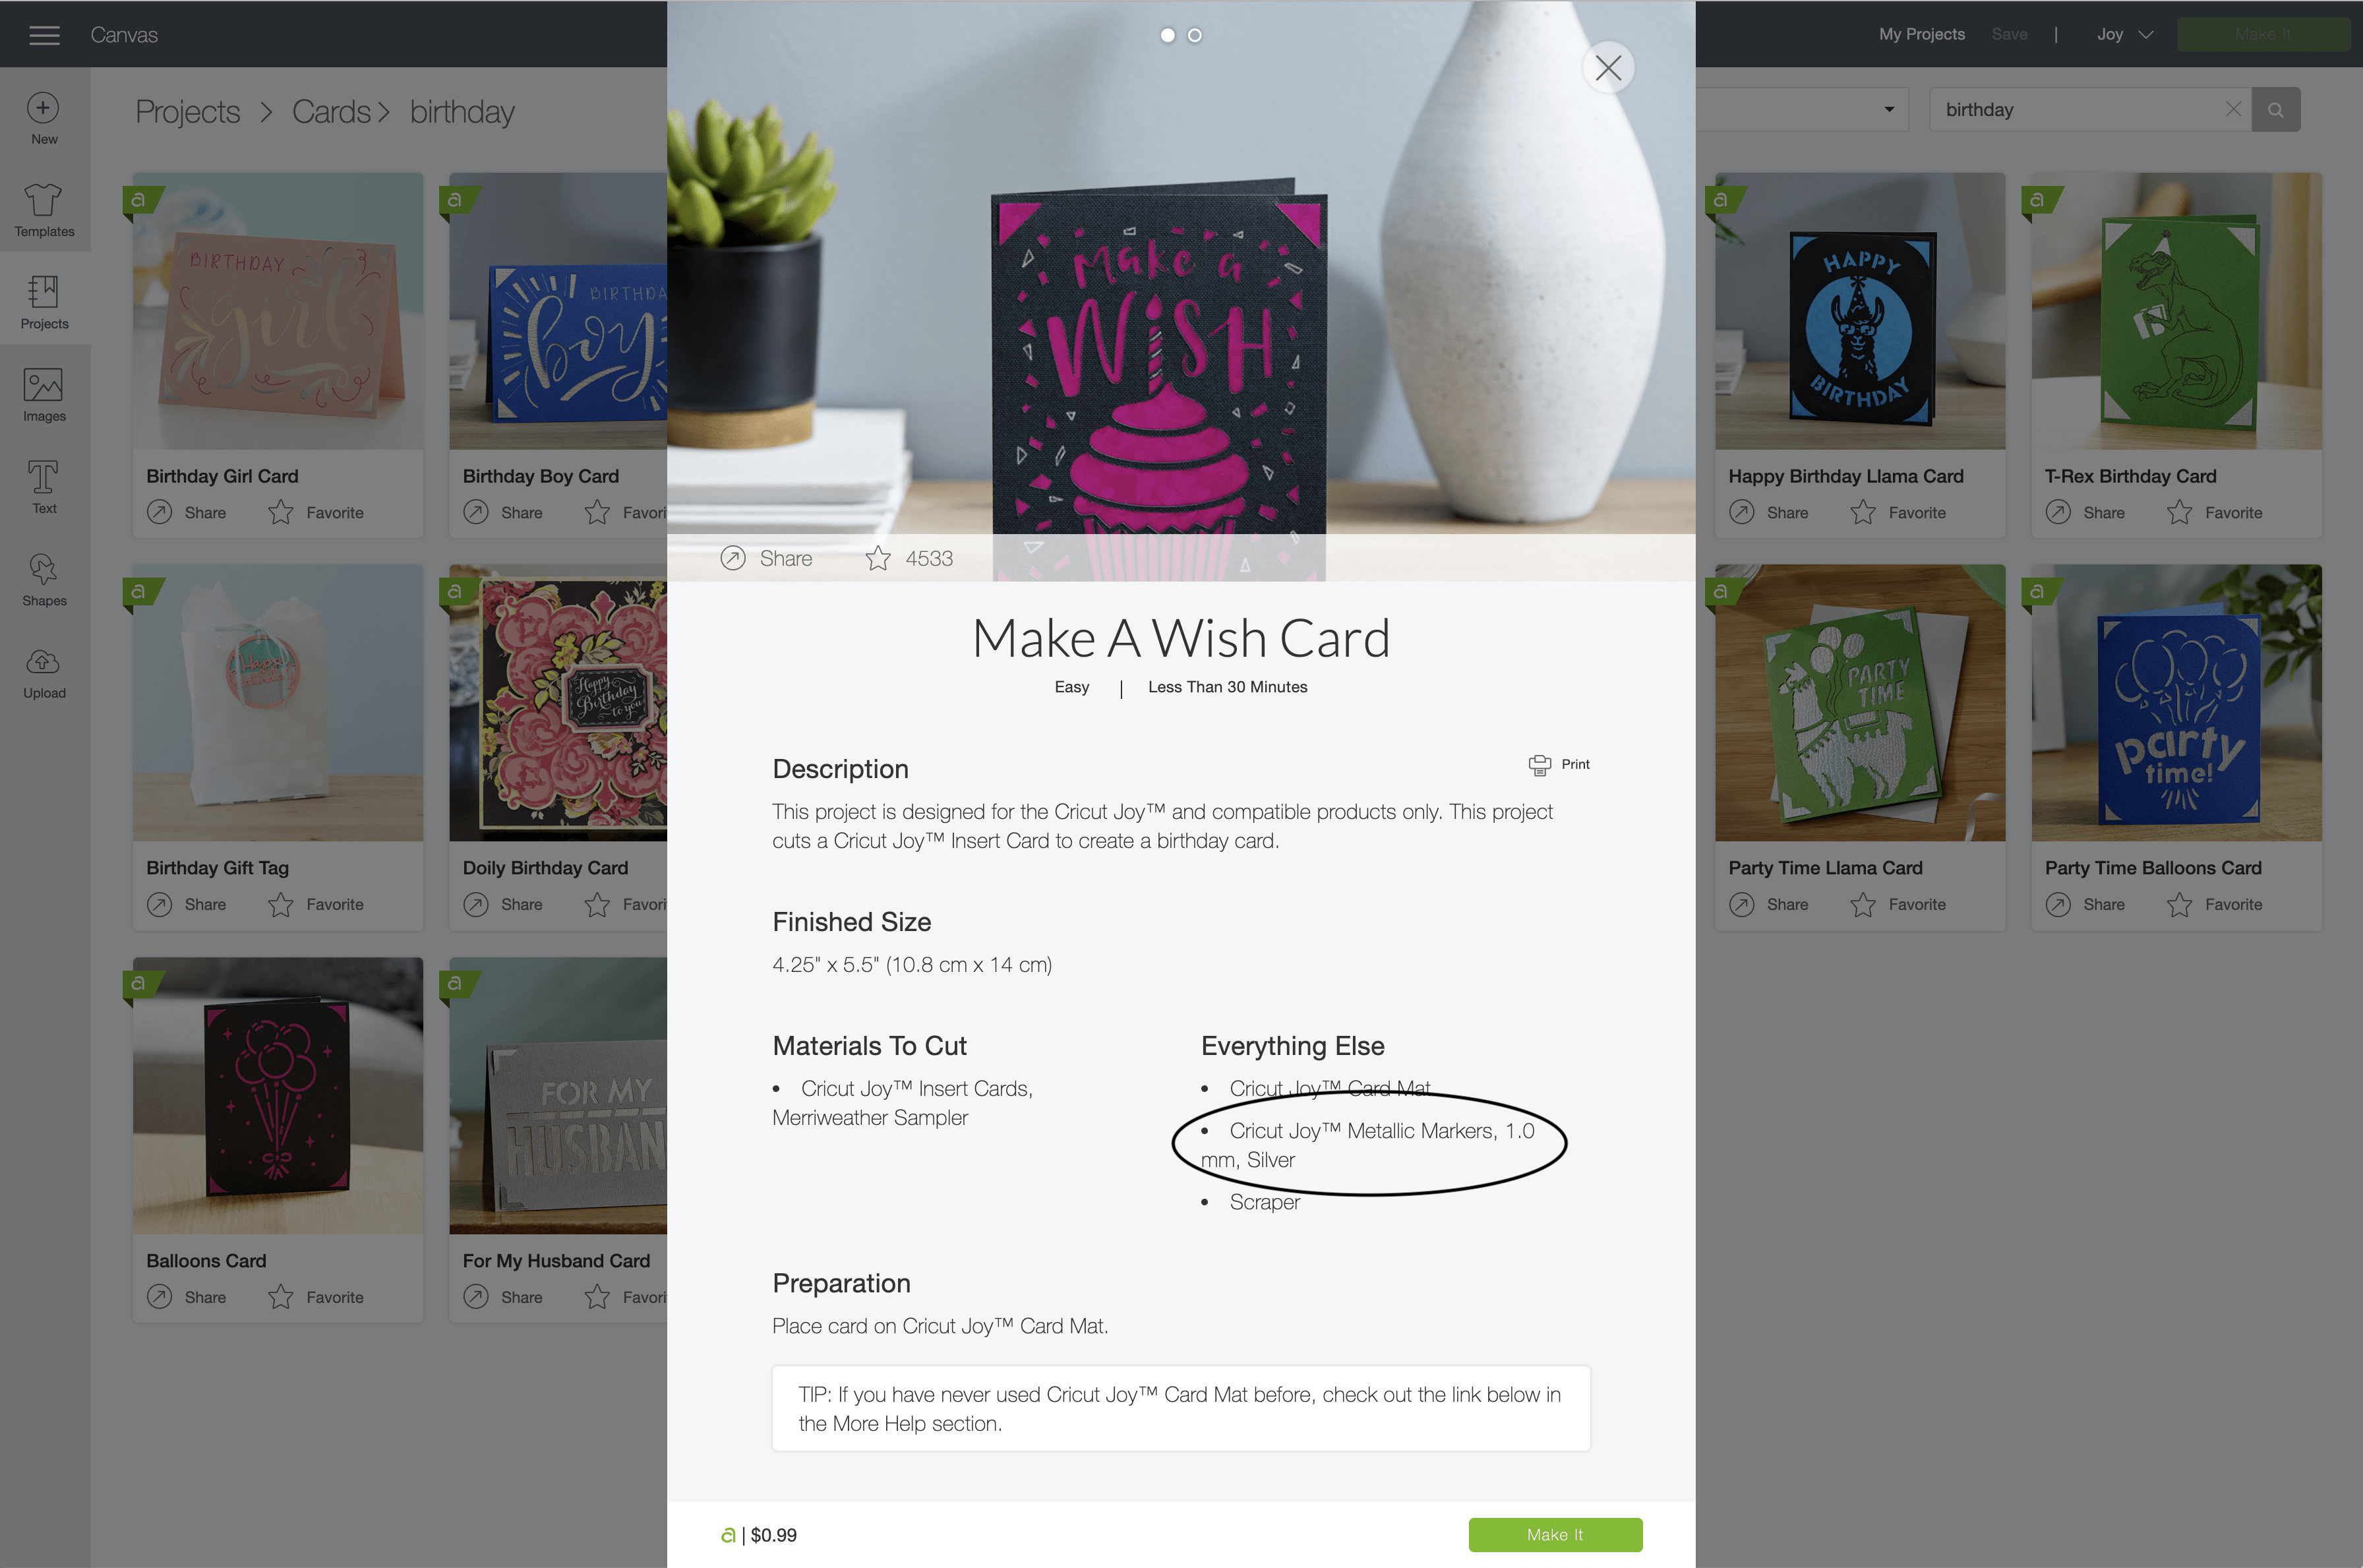
There are dozens and dozens of corner cut card designs available for every occasion and holiday you can think of! When looking for cards to making using the Cricut Joy Card Mat, simply open the Projects tab within Cricut Design Space (along the lefthand toolbar) and select “Cards” from the top dropdown menu:
Once you select a card, click on the picture to open up its instructions. Here you can see what materials you need, as well as instructions for this specific project. From here, click the green “Make It” button.
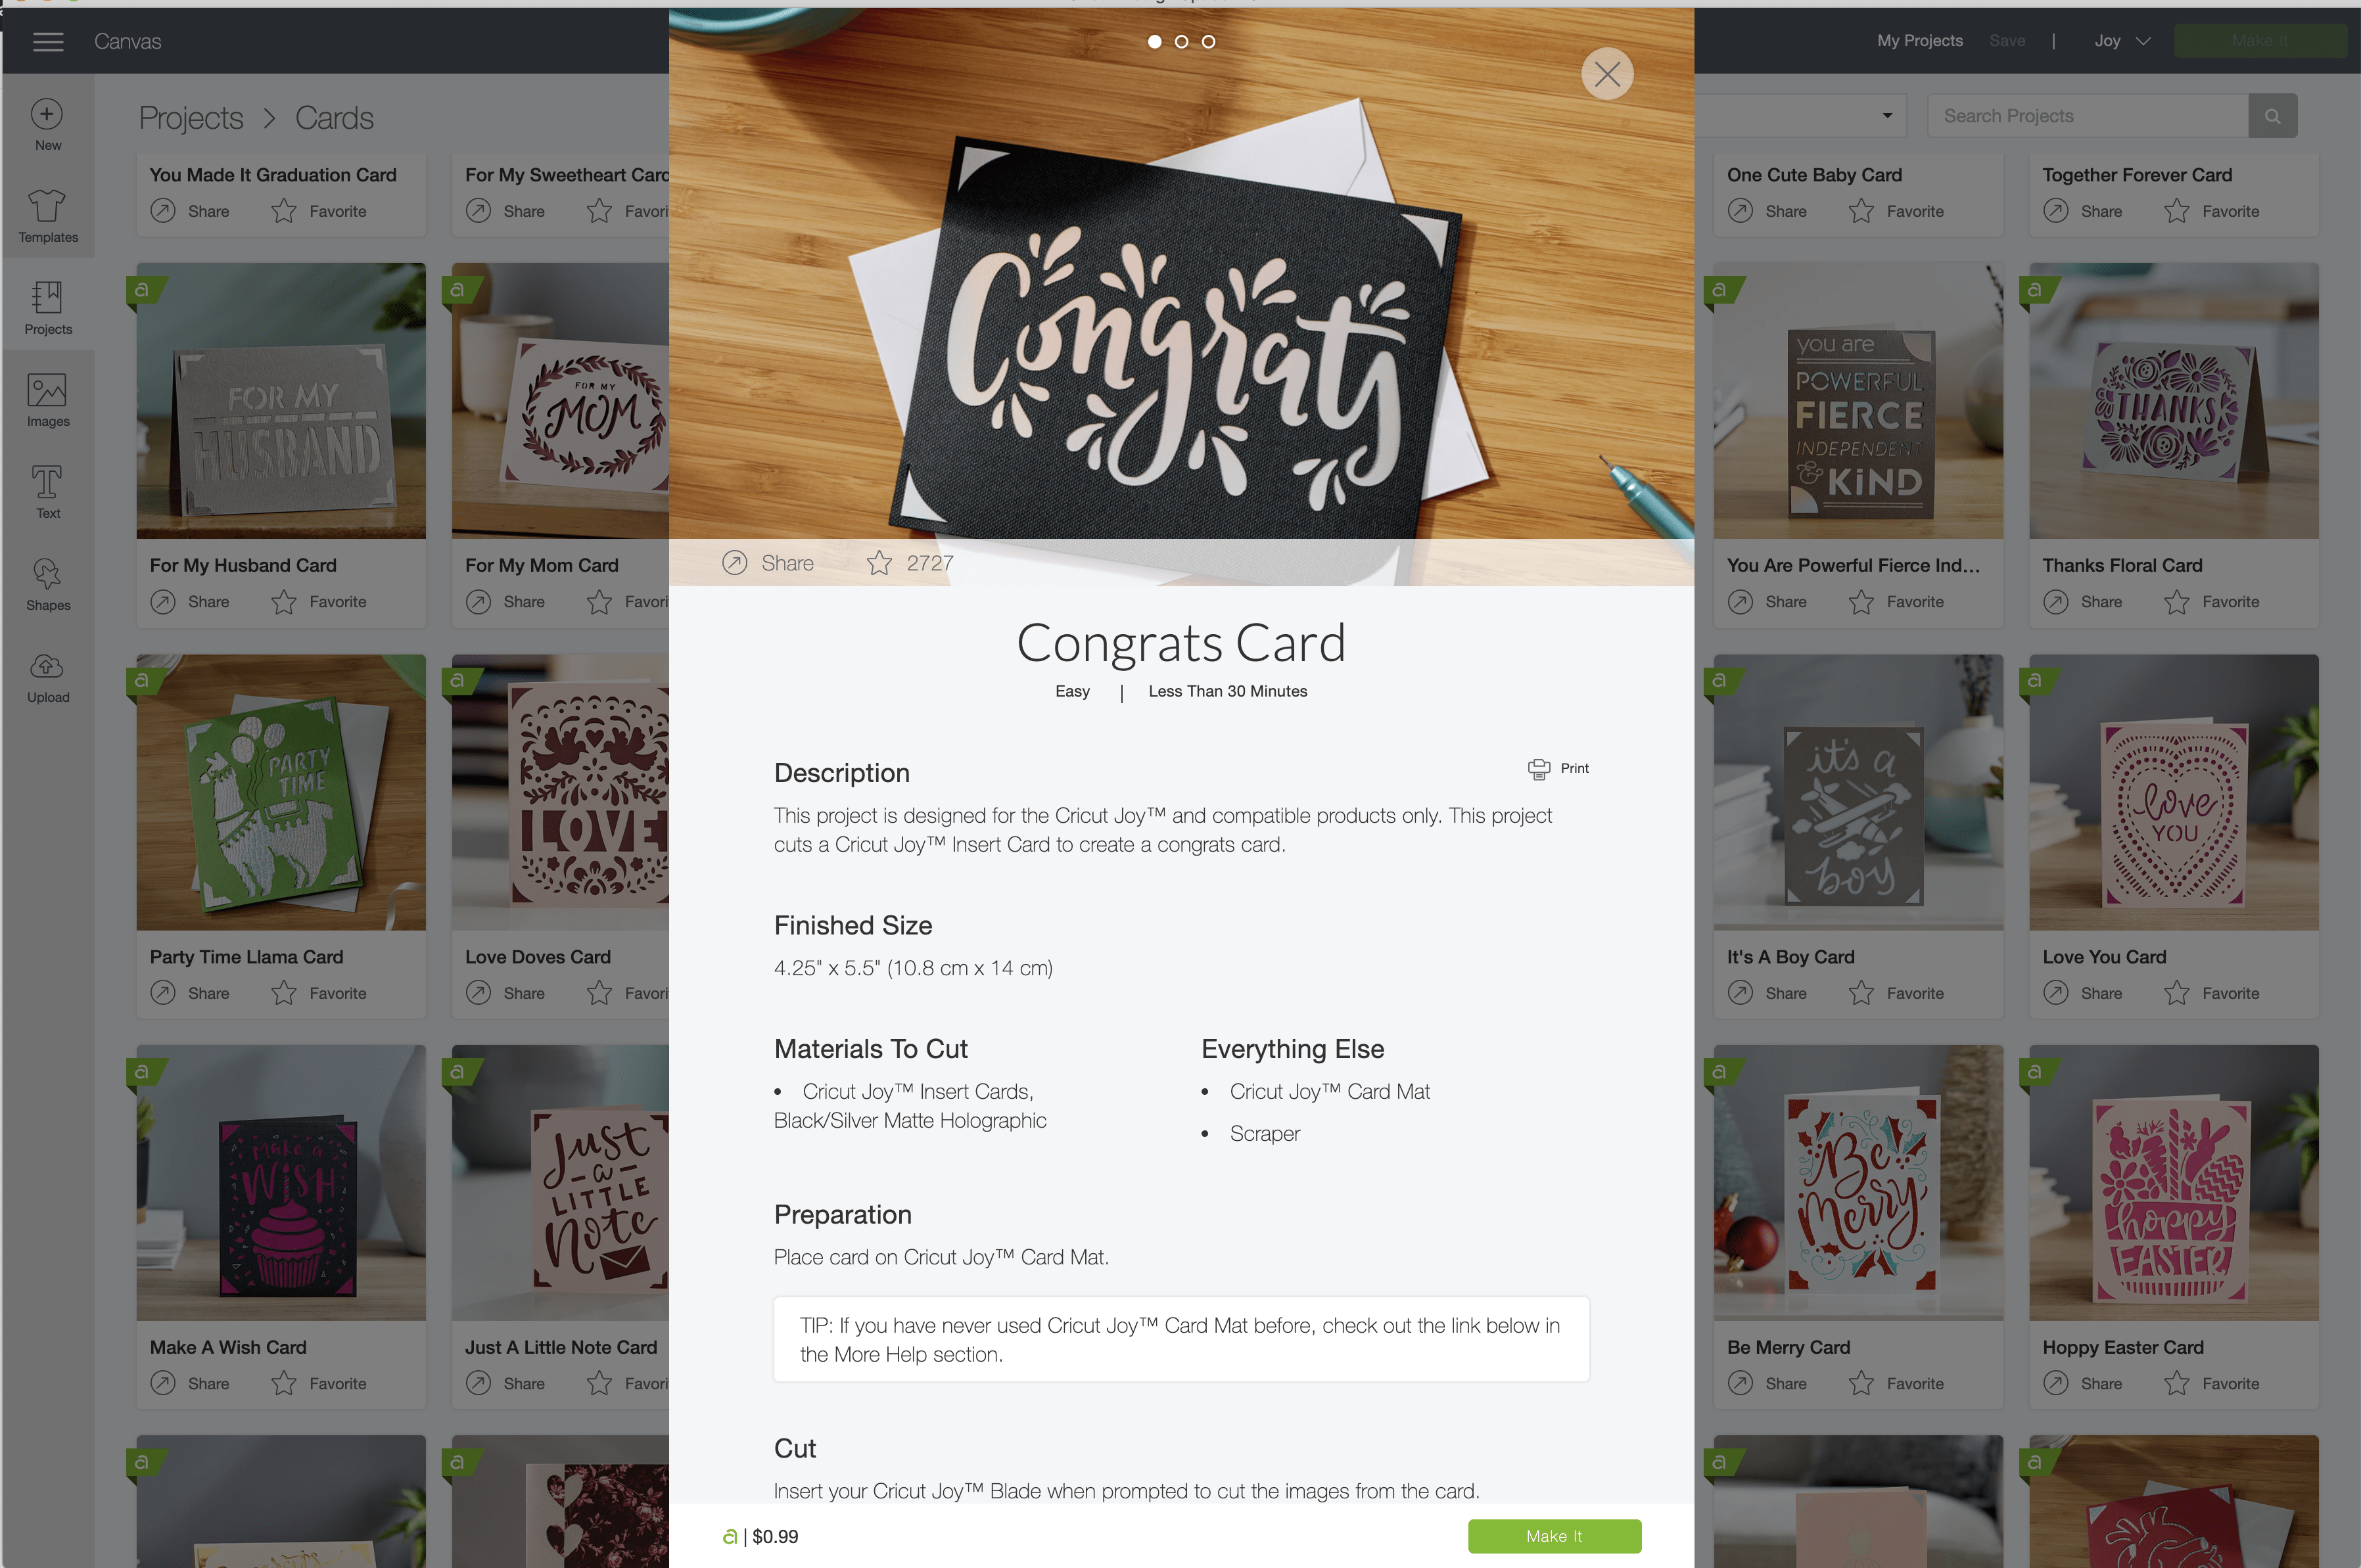
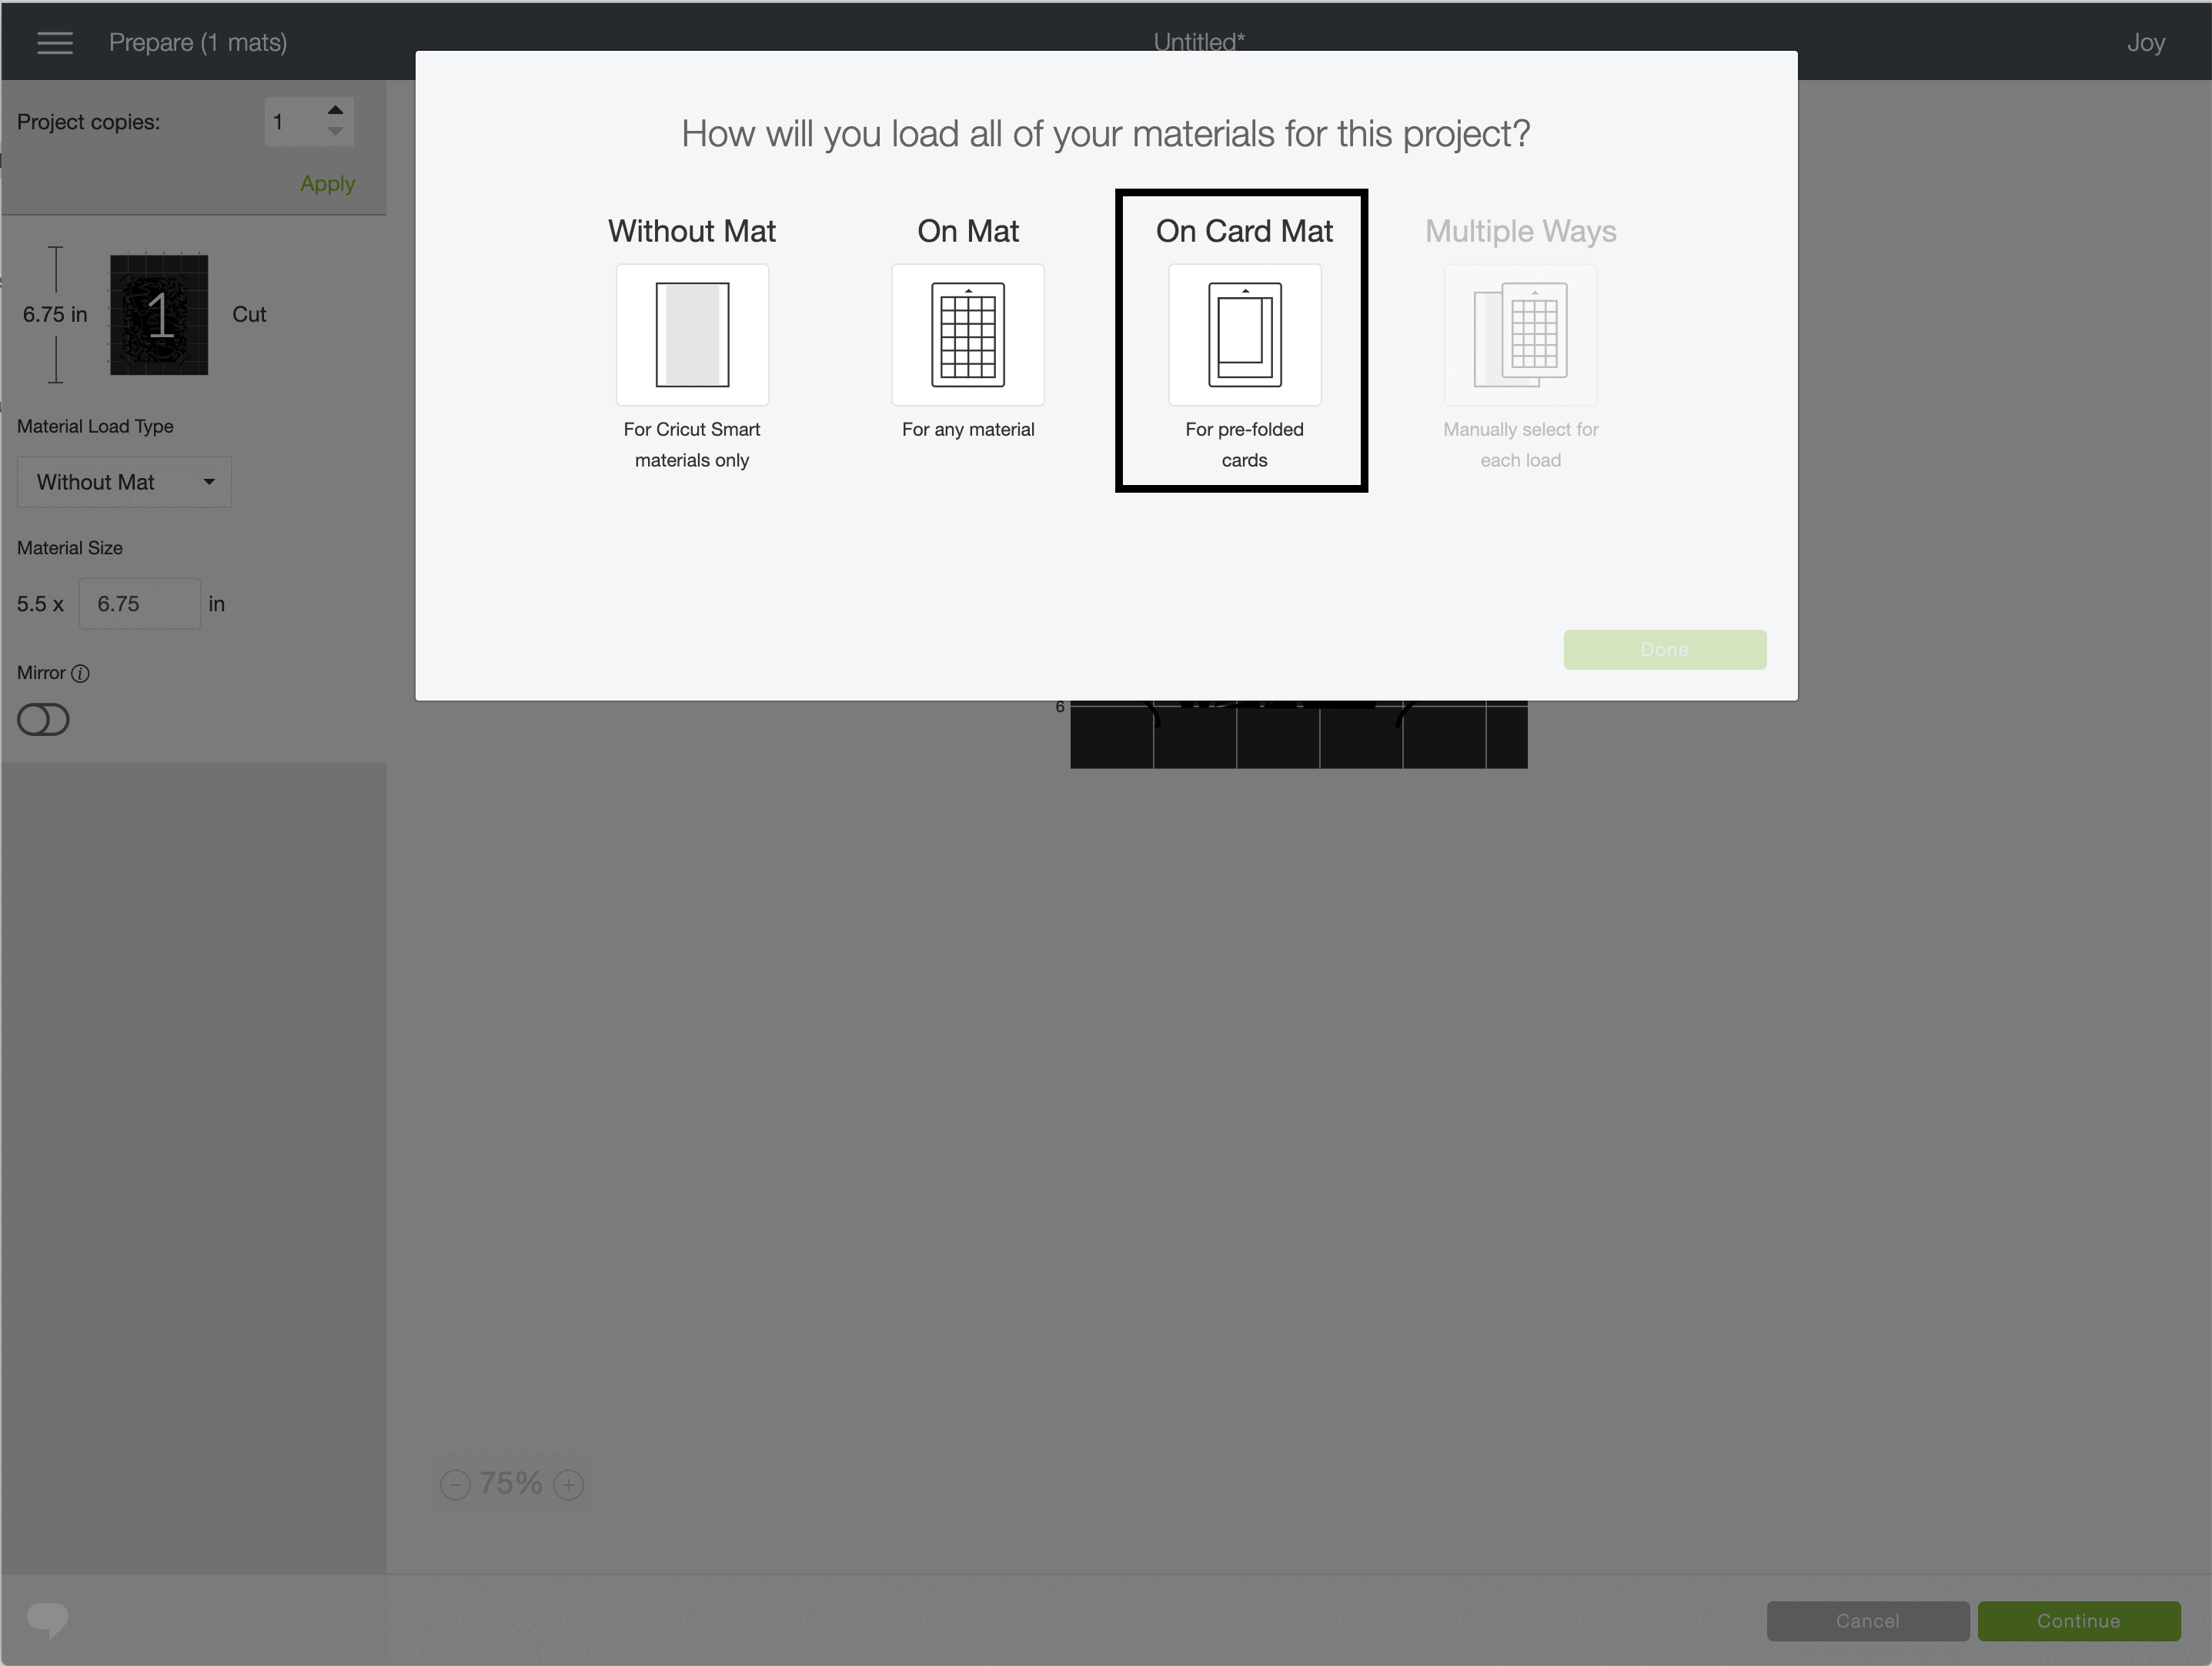
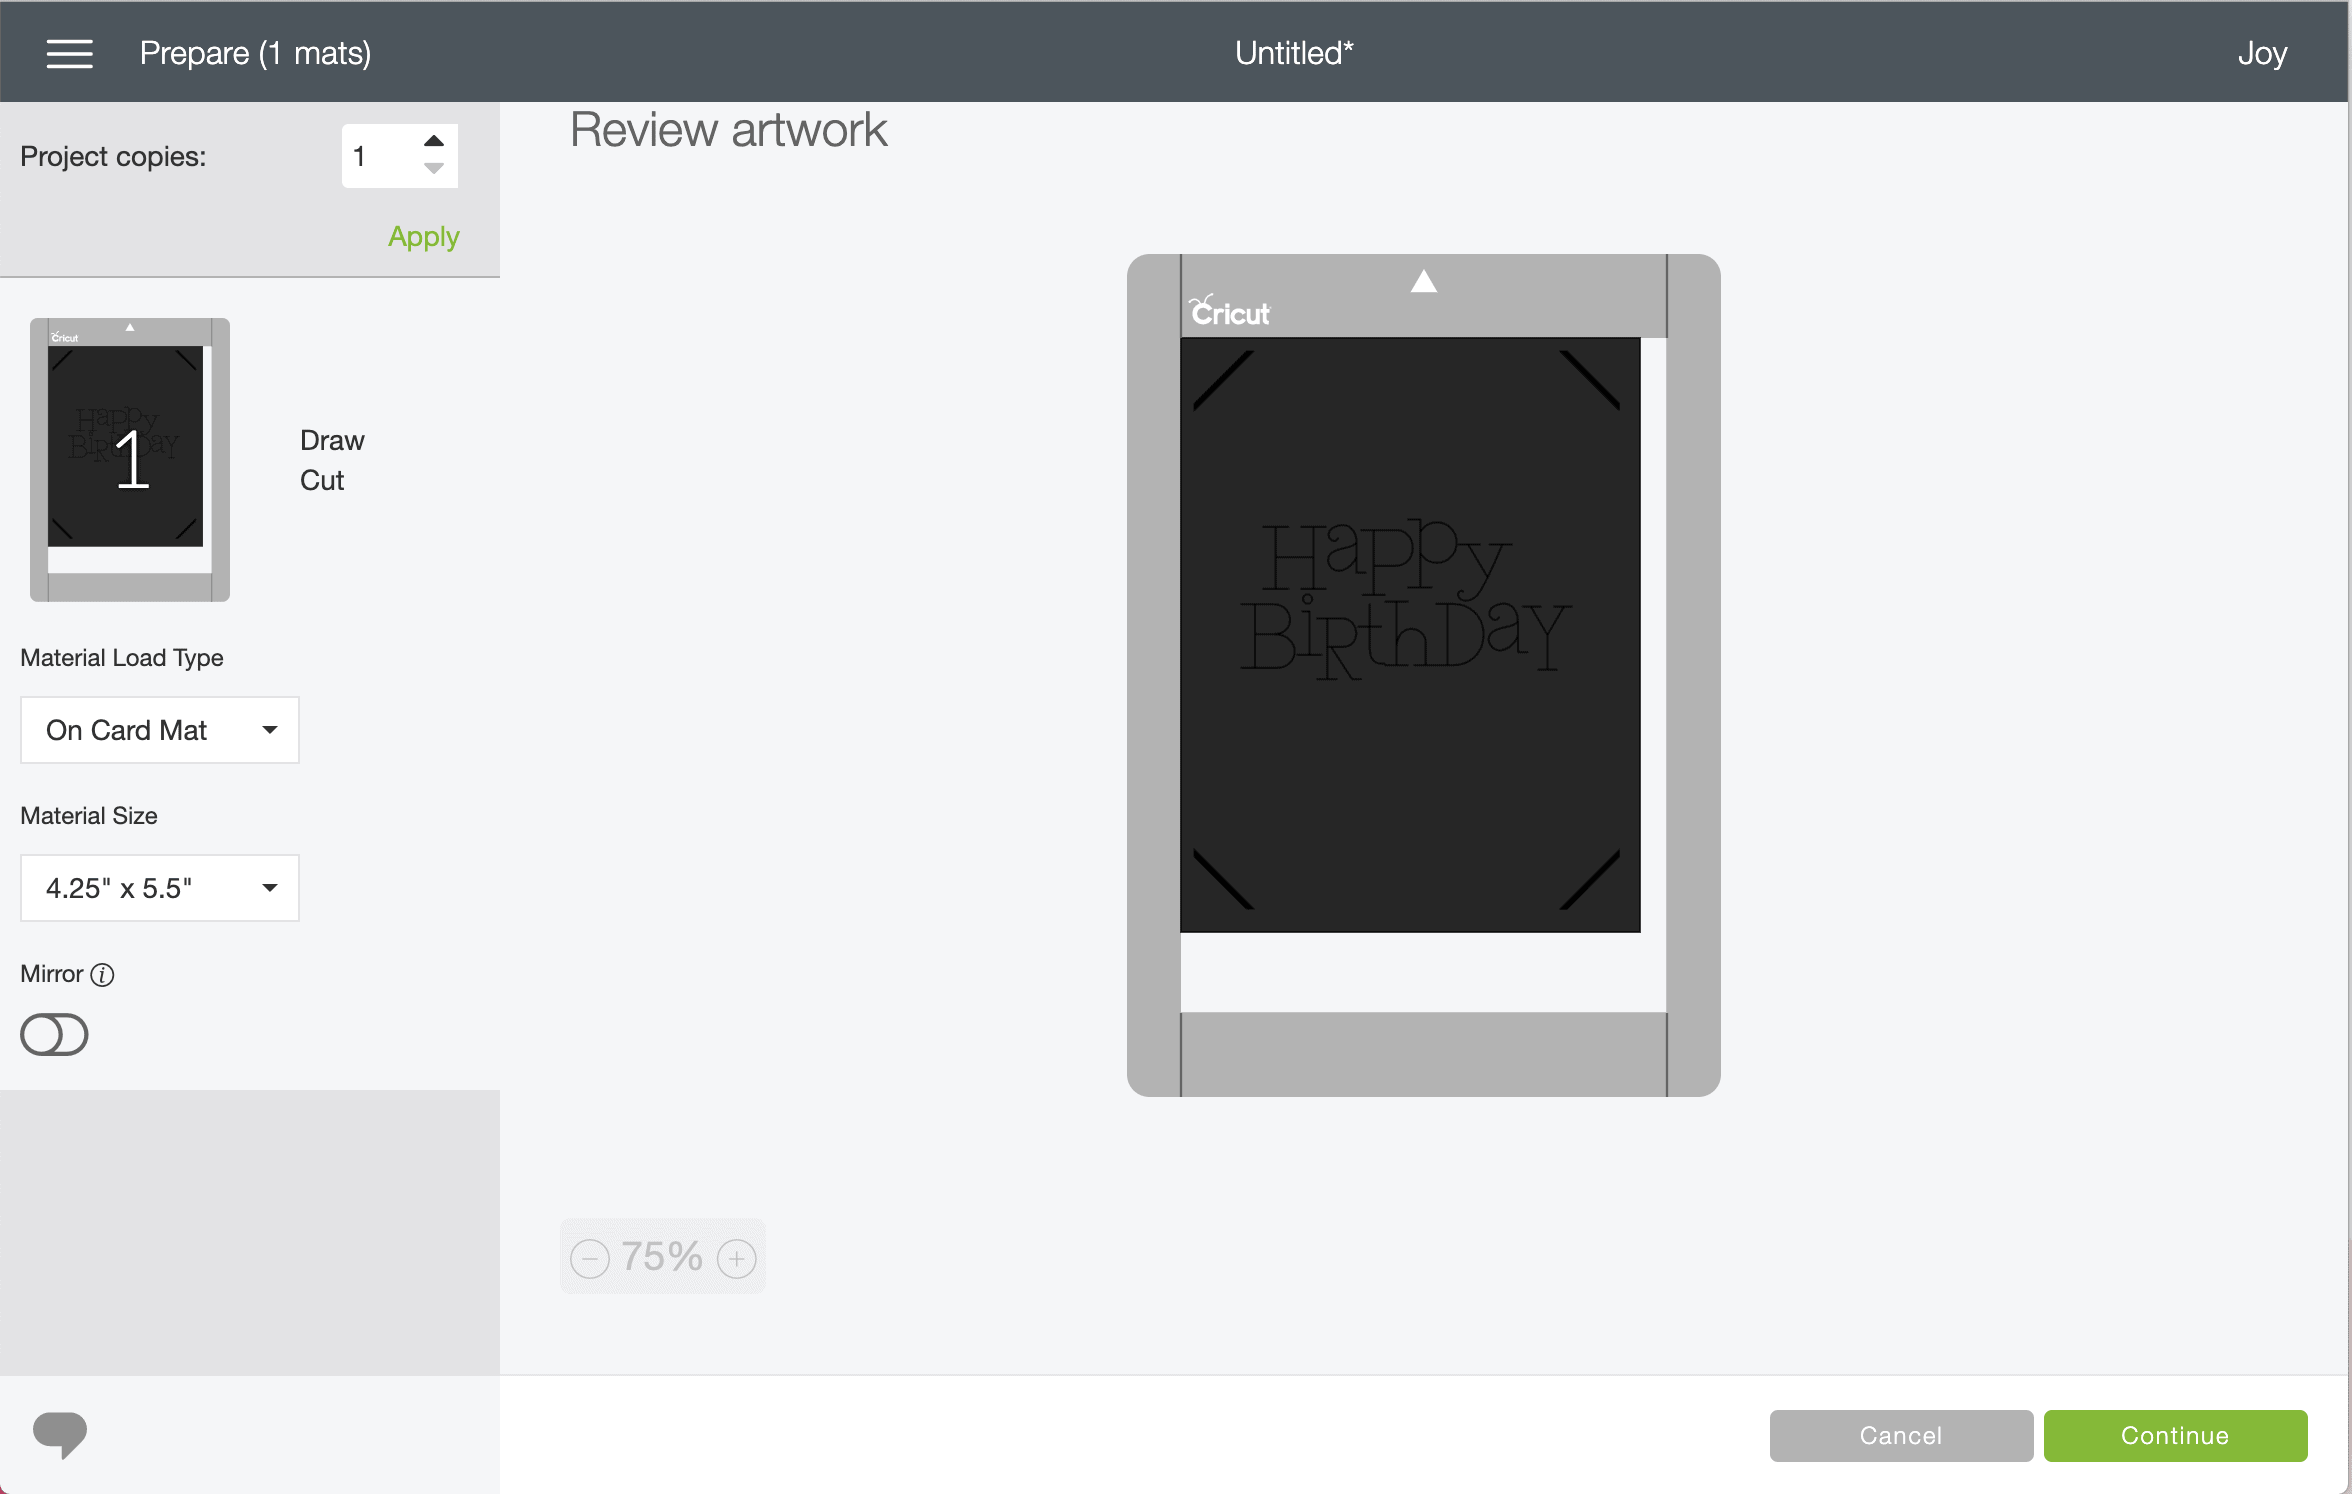
IMPORTANT NOTE! These Cricut Joy cards were designed to be as simple and foolproof as possible. Meaning, after you click the Make It button, you will be immediately directed to the cut screen in order to make your card. You CANNOT drop these images onto your Design Canvas in order to manipulate them. Additionally, they are designed to be cut with the Cricut Joy Card Mat, so you will not need to make a specific mat selection.
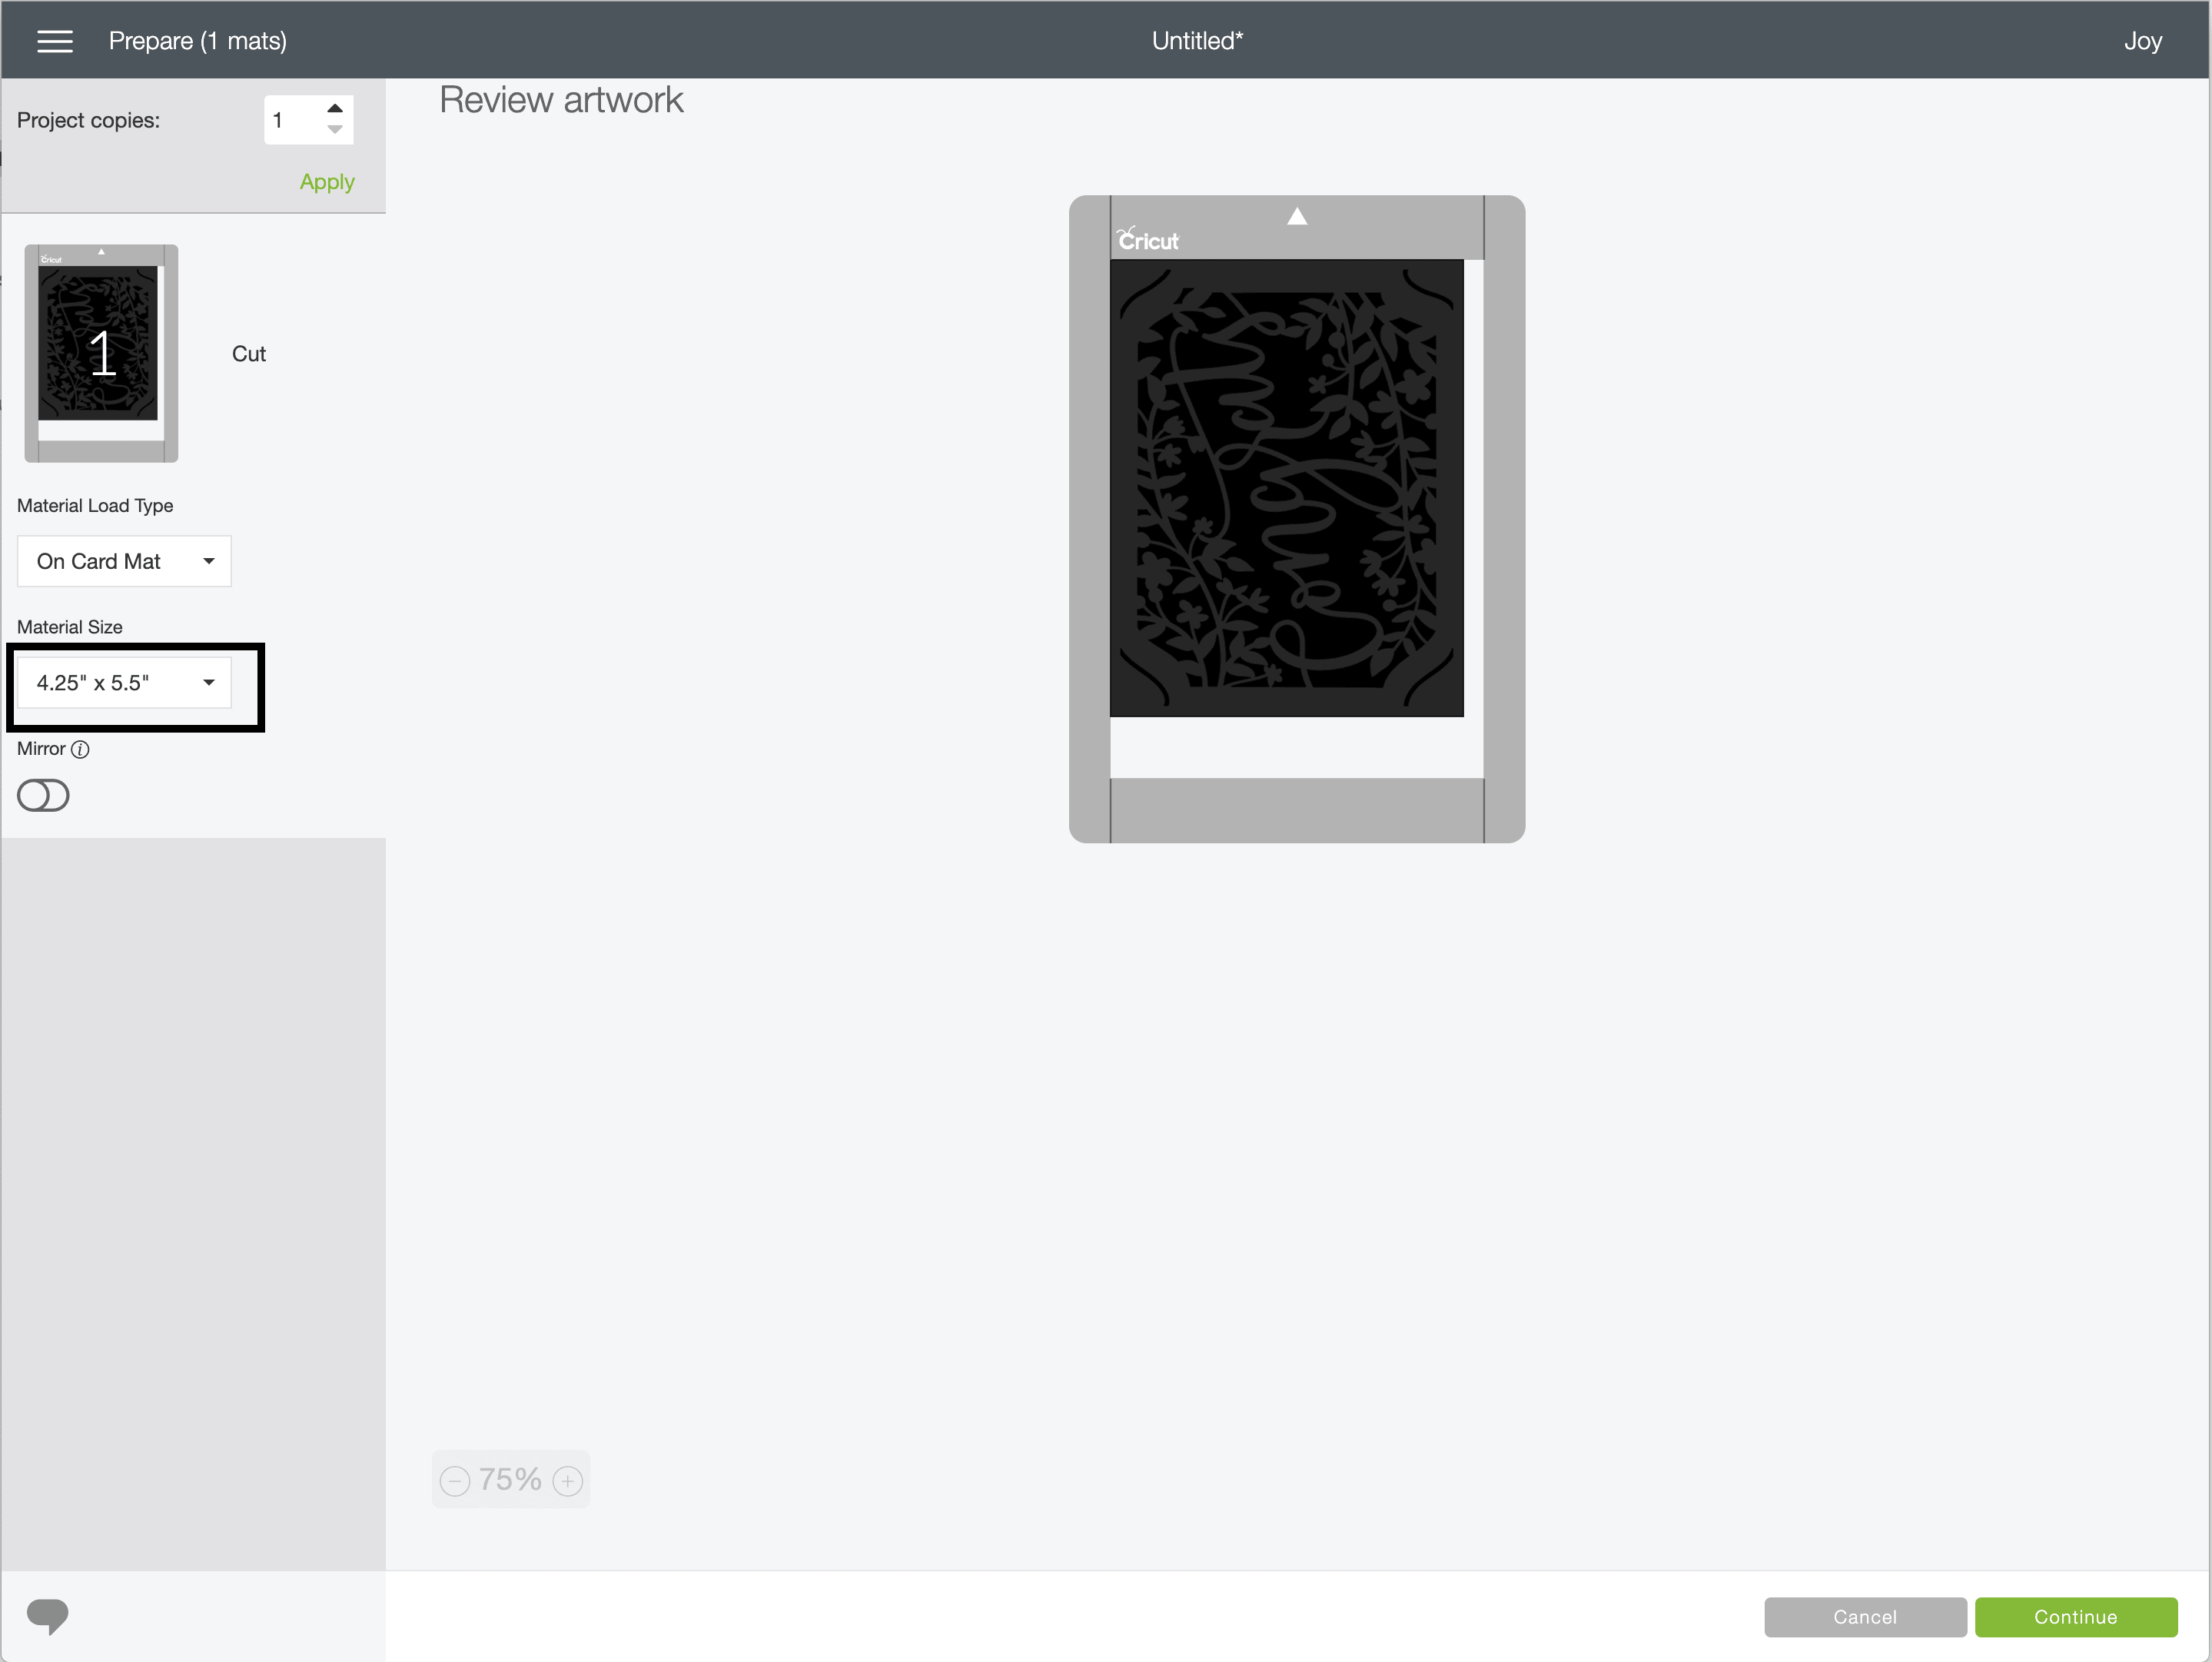
Automatically, you will find yourself on the If you are using a standard half sheet of paper or the Insert Cards kits, make sure the 4.25×5.5” size is selected.
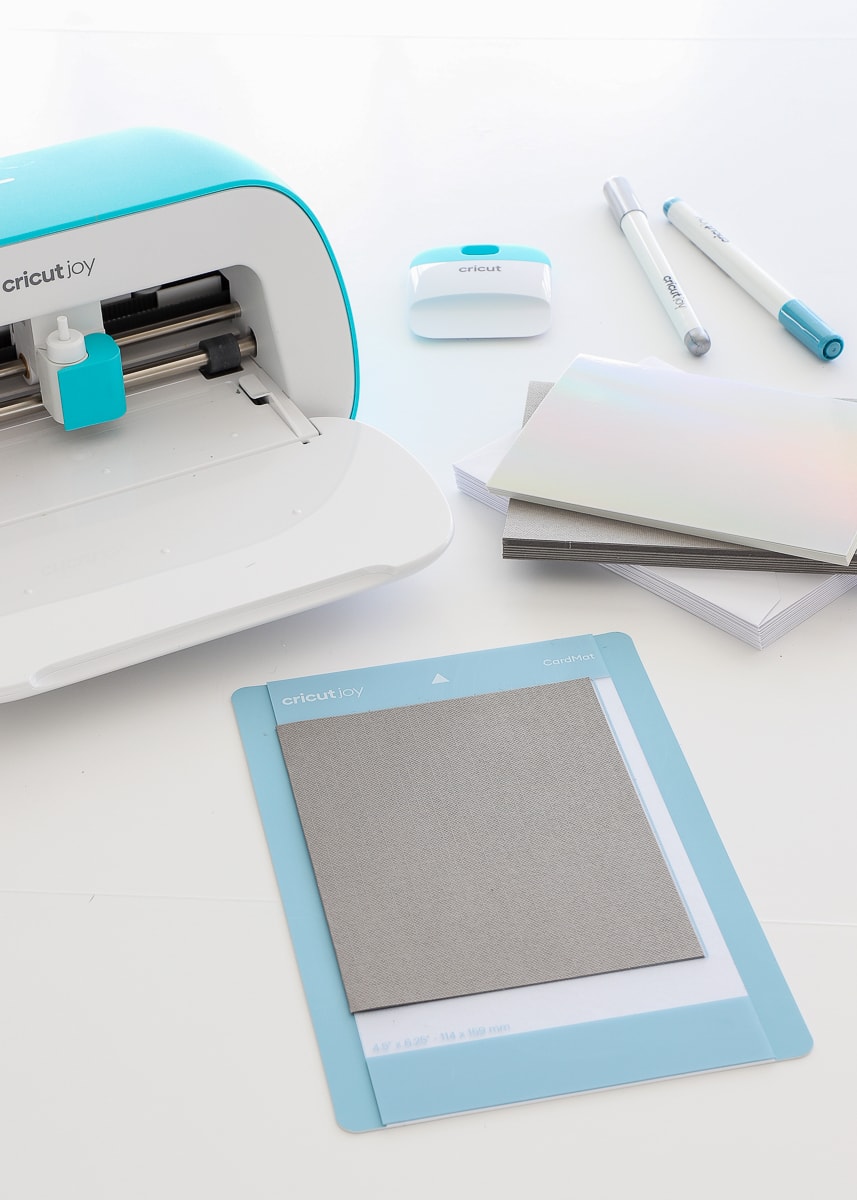
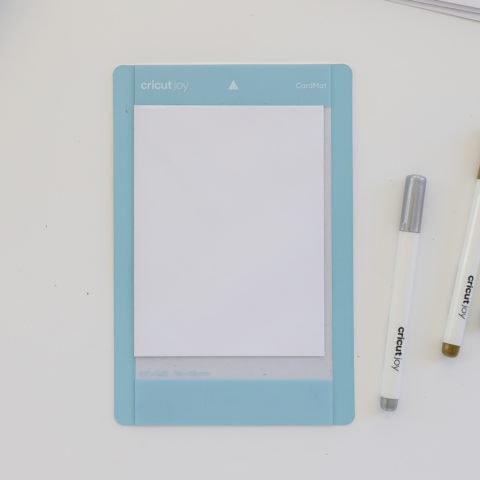
Step 2: Prepare Card Mat
The next step is to load the pre-cut card onto the Card Mat.
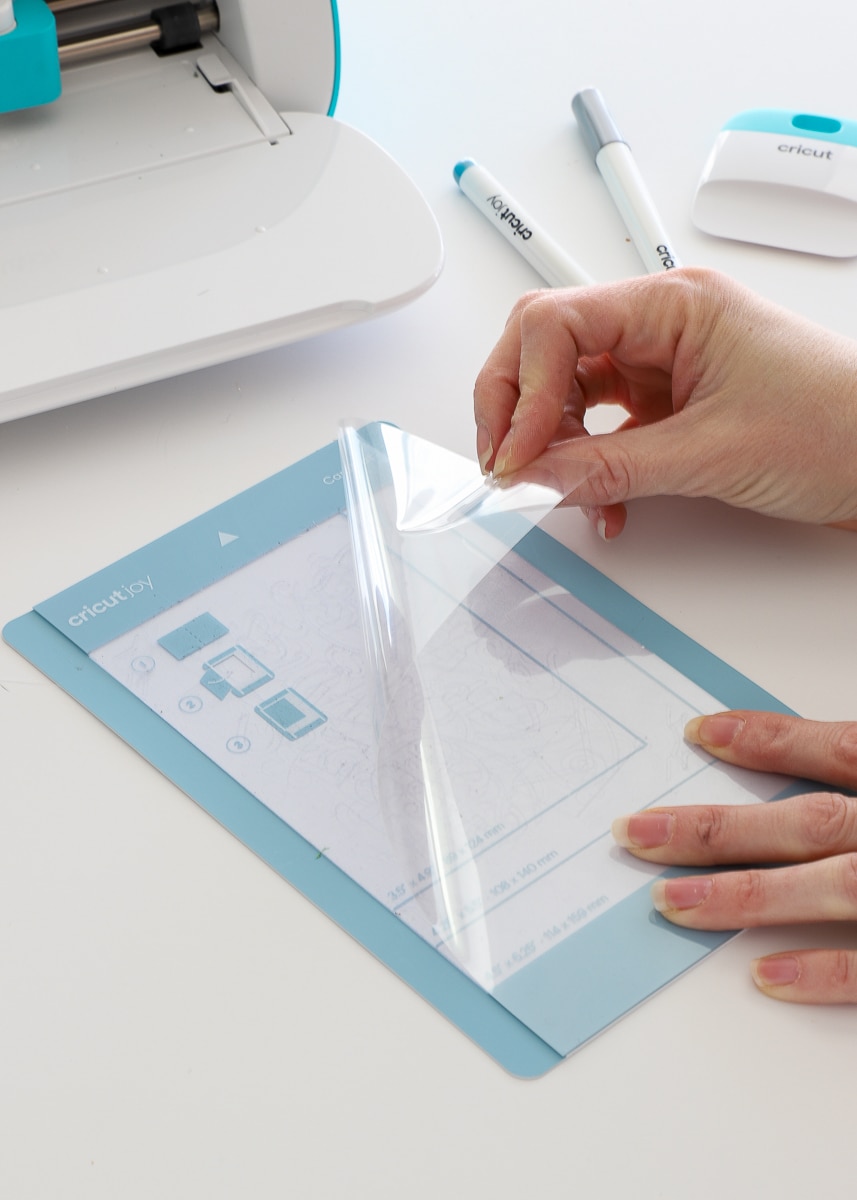
NOTE: The Cricut Joy Card Mat has a very small, thin liner on top of the mat. Be sure you remove this liner before loading your card and cutting your project!
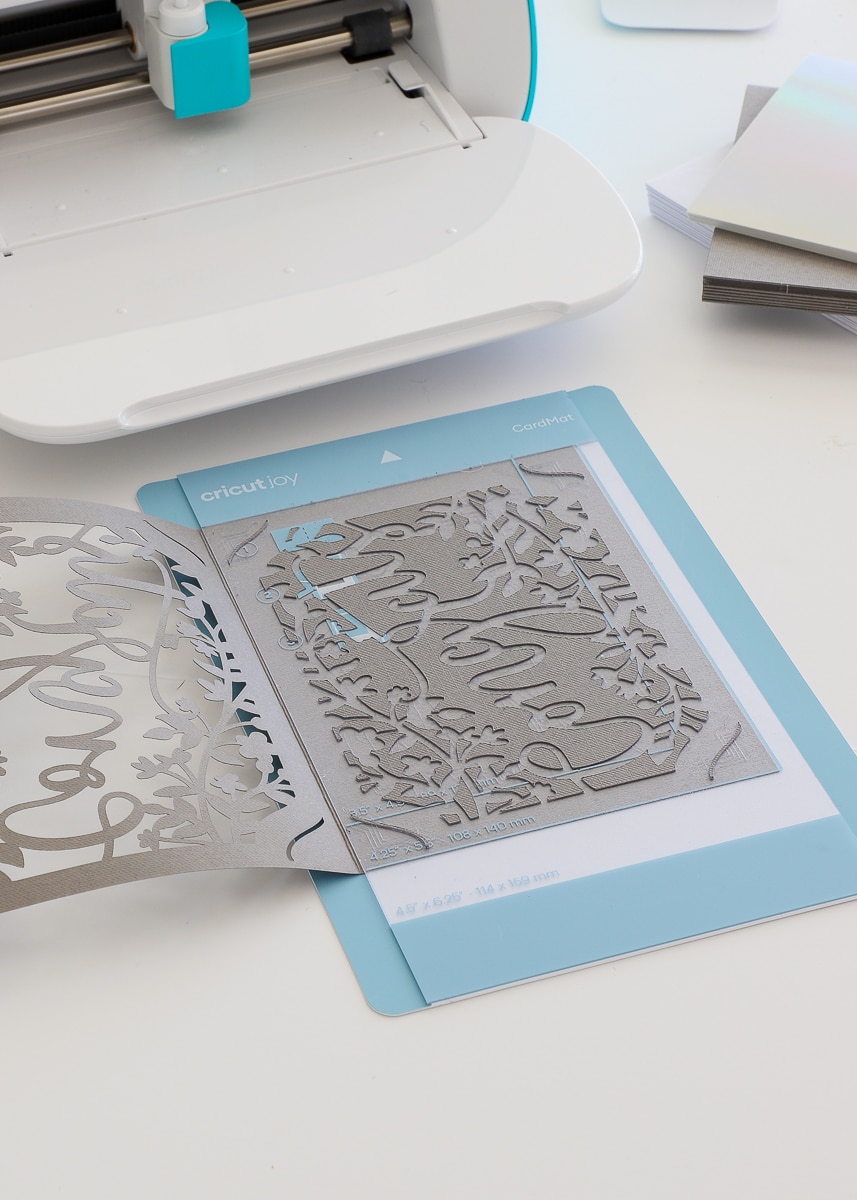
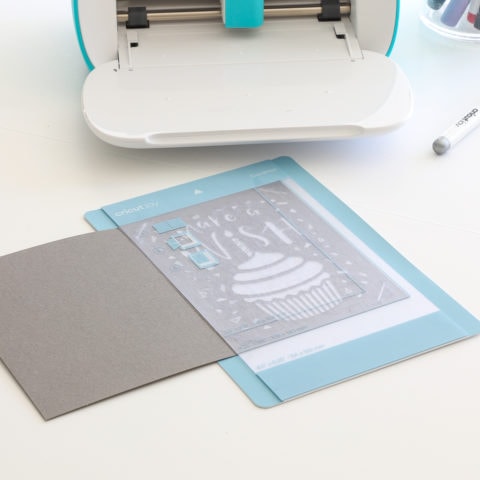
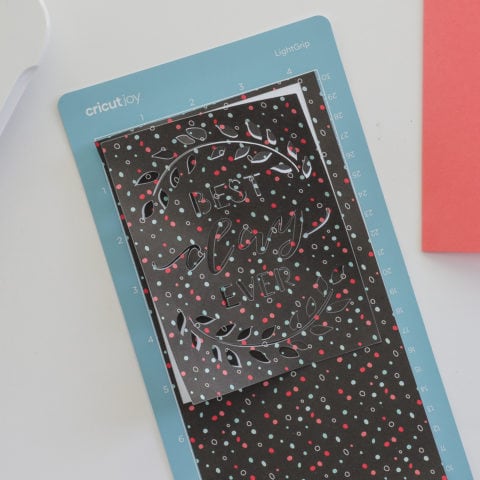
Cricut Joy isn’t big enough to support a card completely flat. So here is why the Cricut Joy Card Mat is so brilliant. You simply load the already-folded card under the top layer of the mat.
That top layer is sticky just like a Light Grip Mat, so you can then fold the top of the card onto itself and press down.
TIP! Make sure you take the time to line up the folded card with the pre-printed lines on the Card Mat. This will ensure your design ends up perfectly centered!
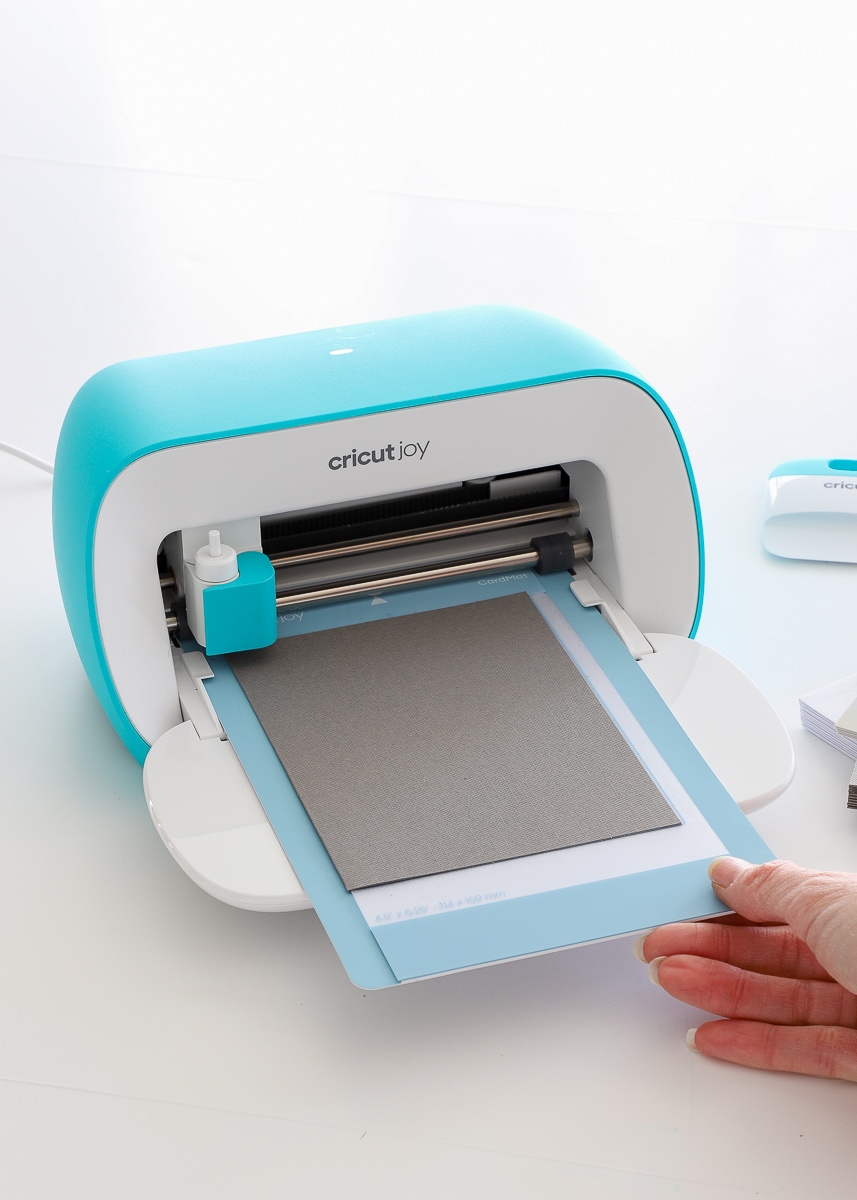
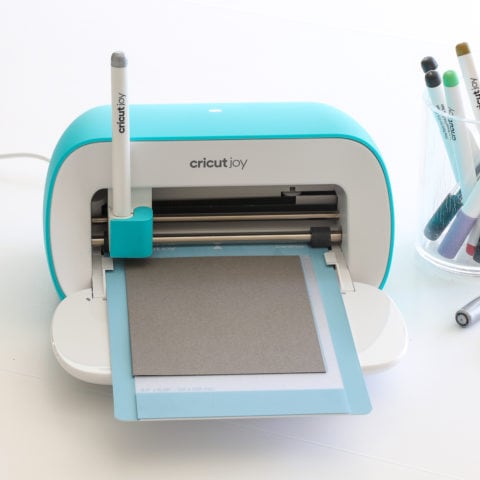
With the card on the Card Mat, load it into Cricut Joy by feeding it directly under the rollers.
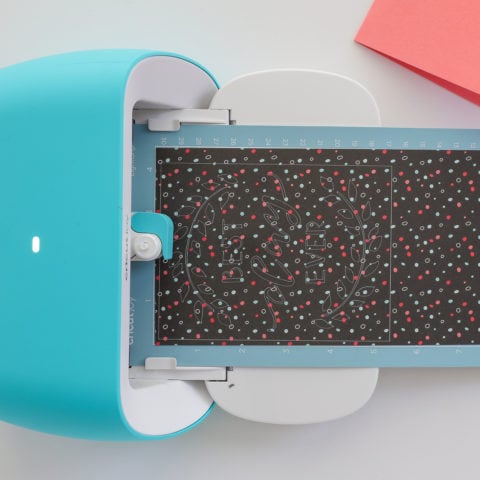
Step 3: Cut Card Design
Once you hit “Go” on the software/app, Cricut Joy will cut out the card design!
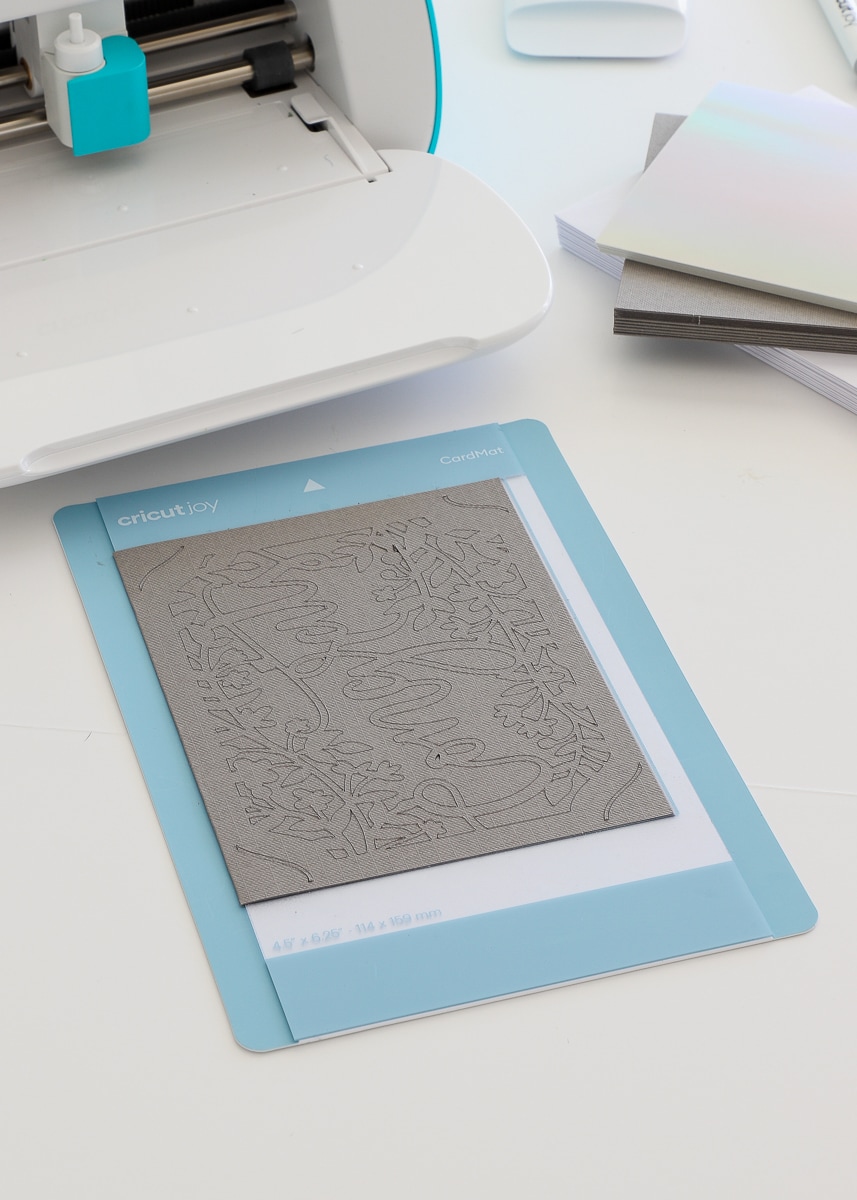
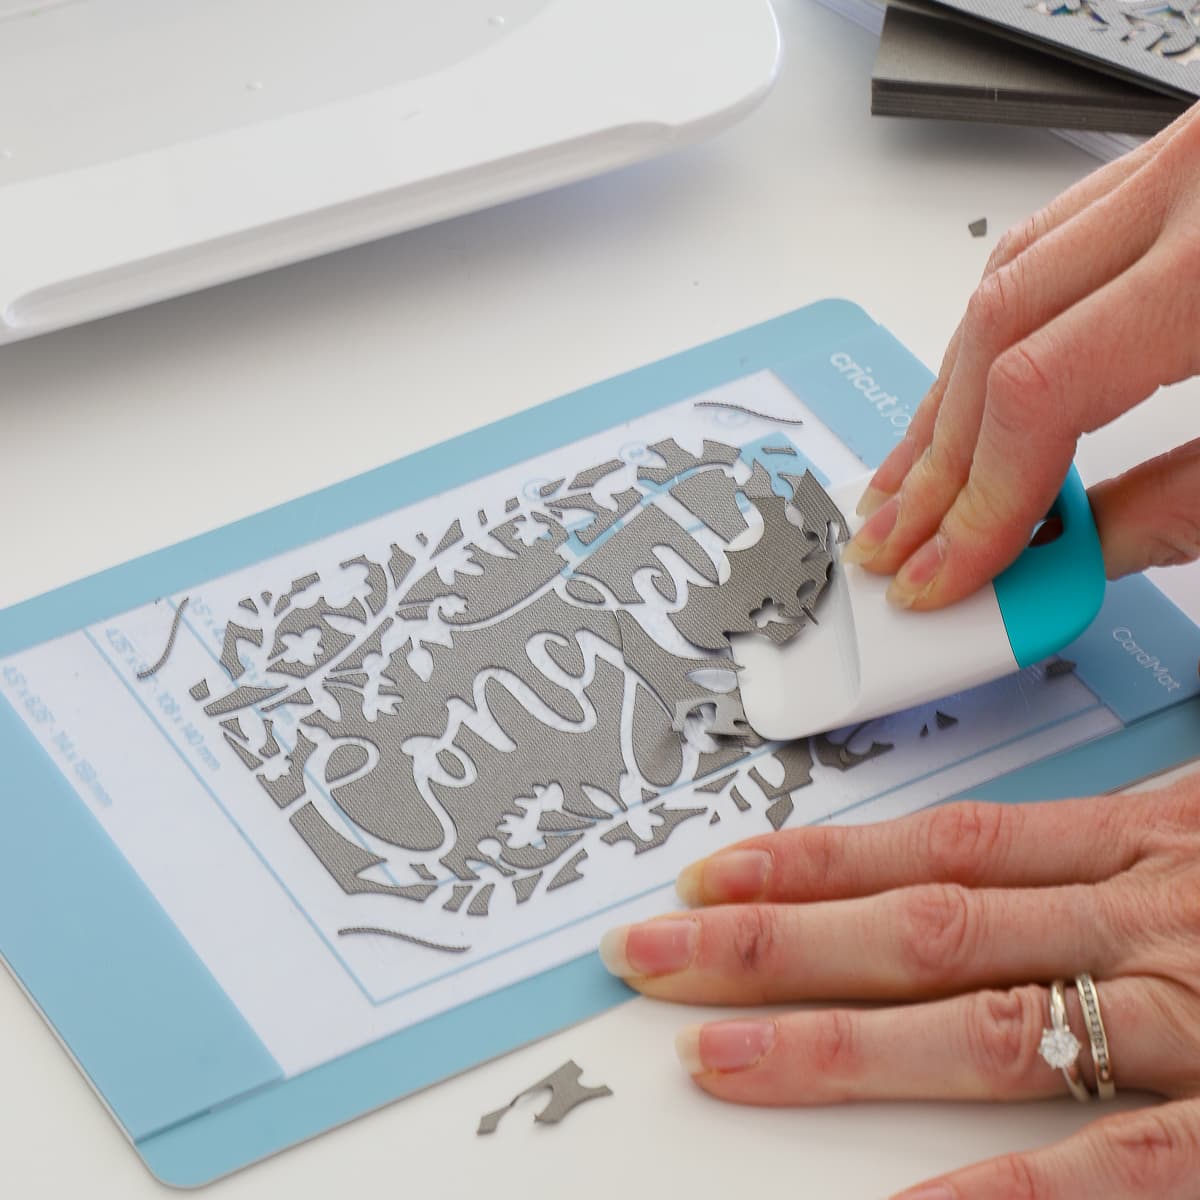
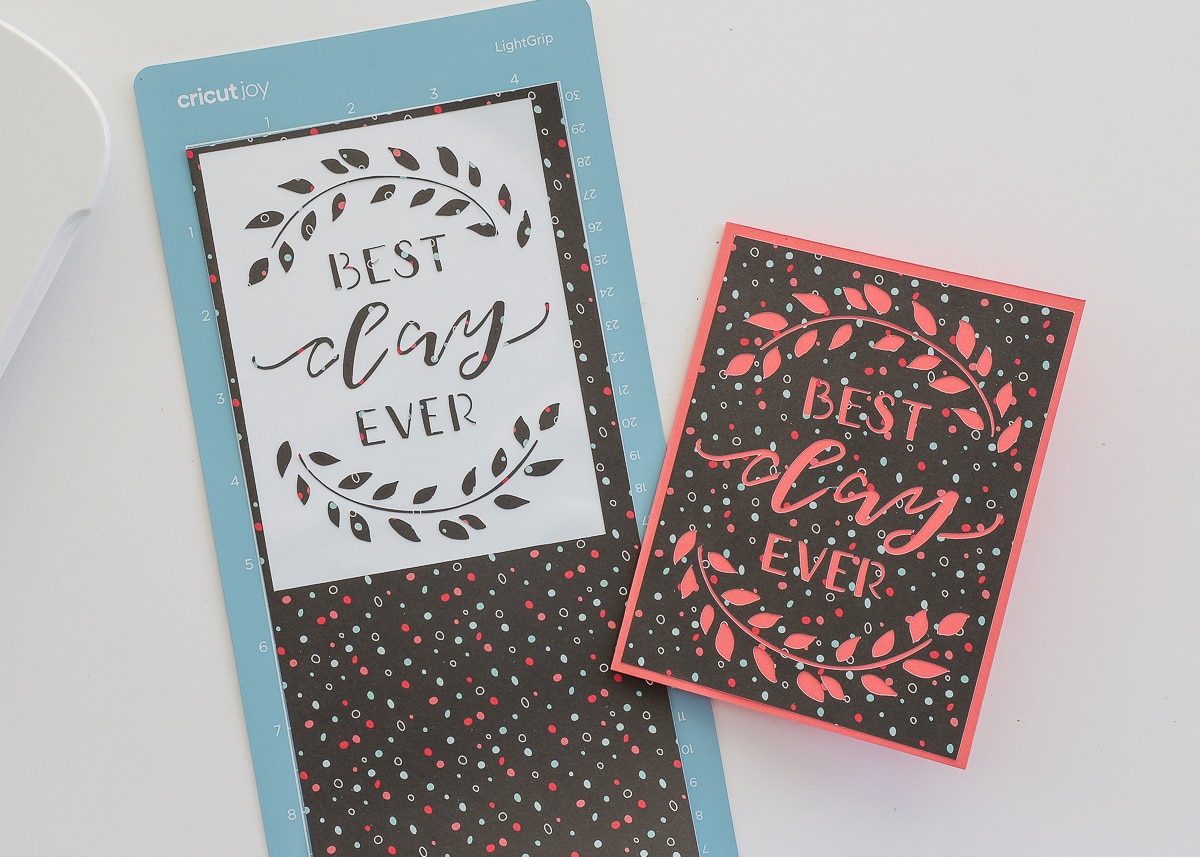
Here’s where things get really exciting! These corner cut cards are designed to “self weed,” which means all you need to do is gently pull back the card top, and all the negative/unwanted elements will be left stuck to the Card Mat.
Step 4: Assemble Cricut Joy Card
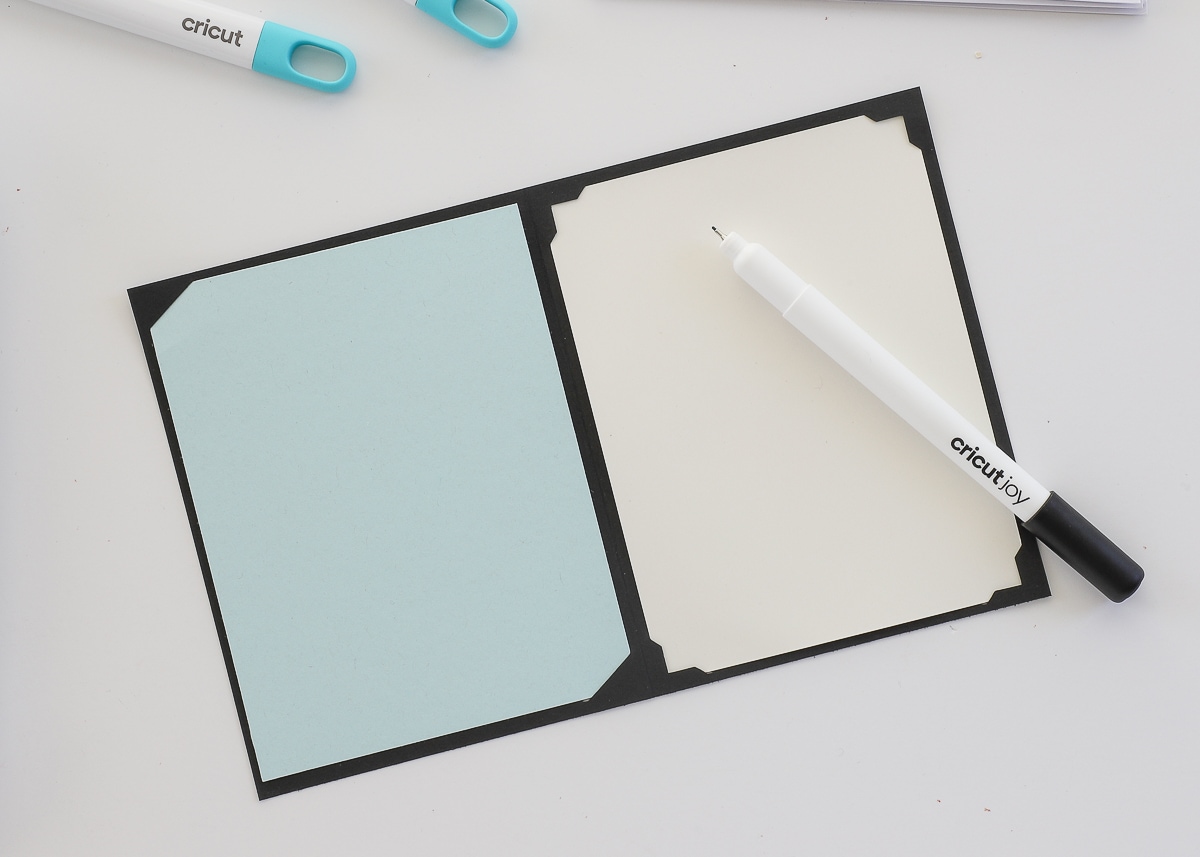
The top of the card is now cut out, so to finish the design and add some color, you simply slide an insert into those four cutout corners.
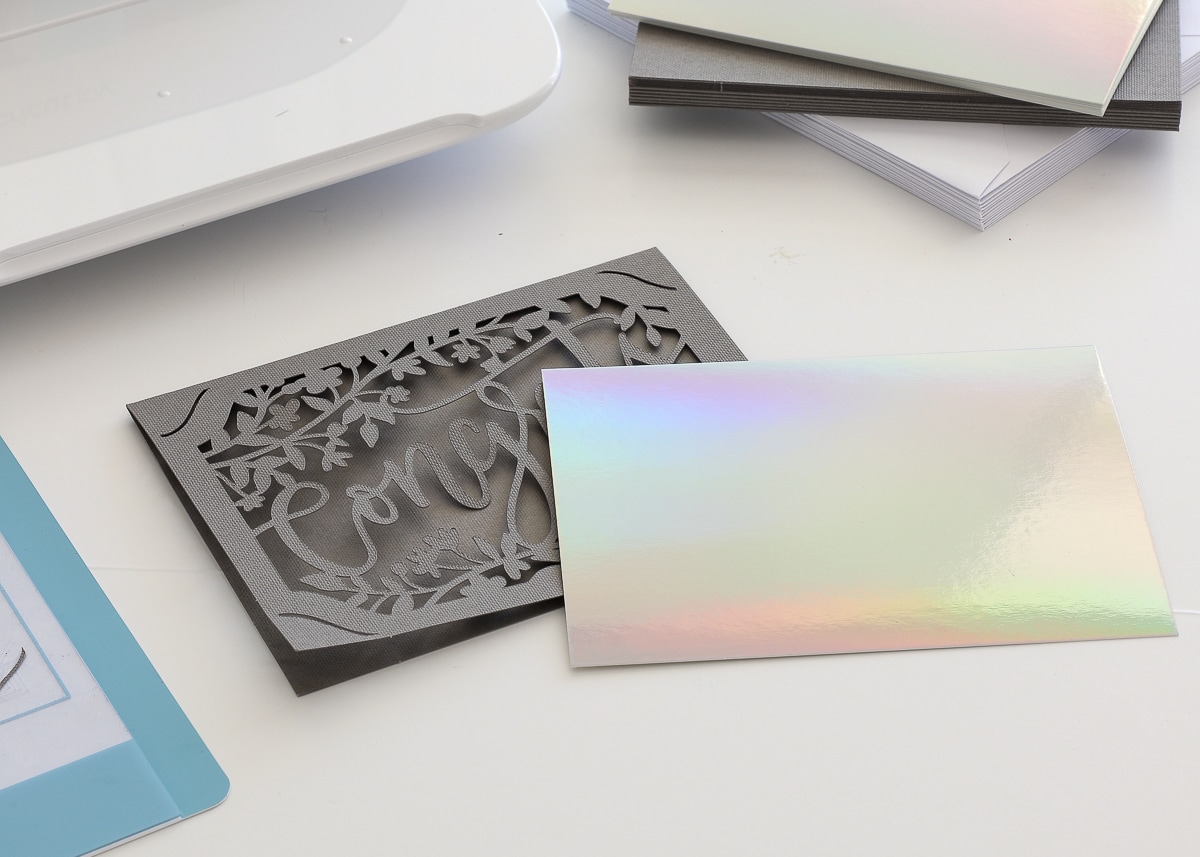
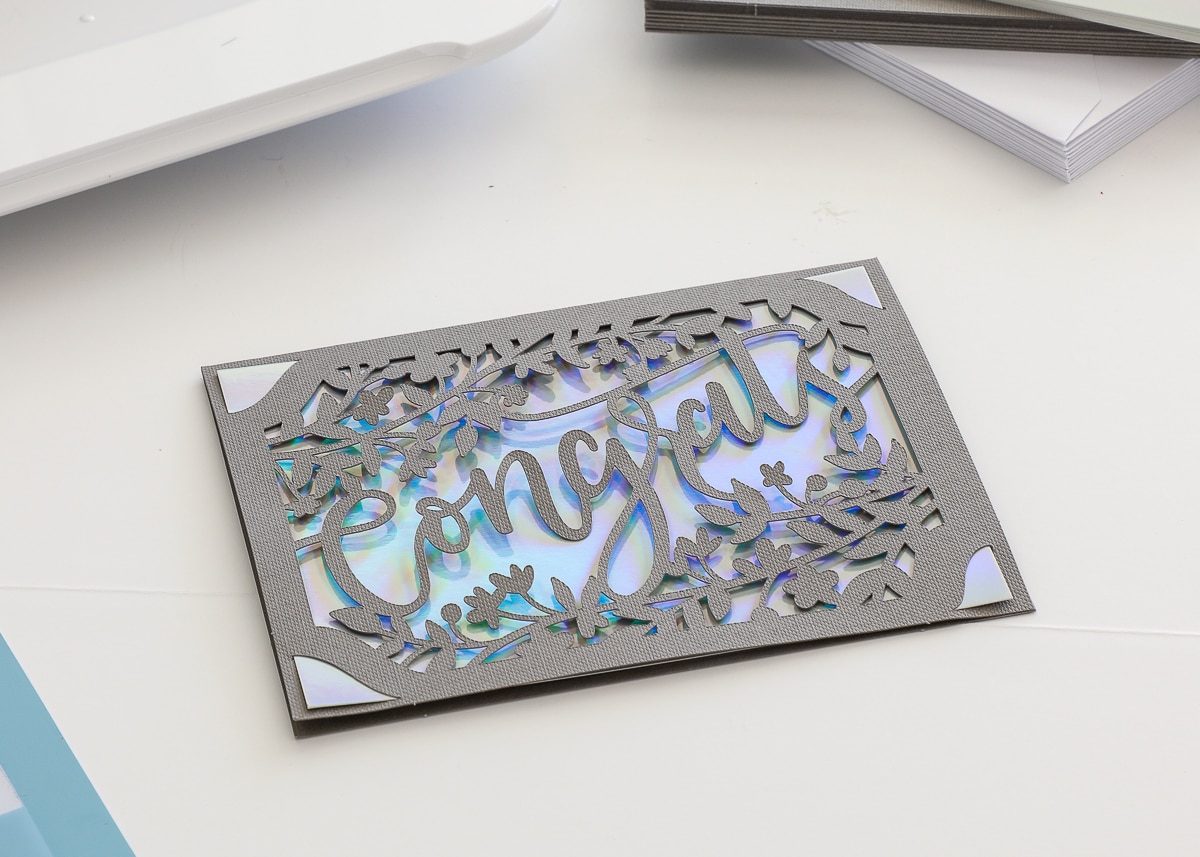
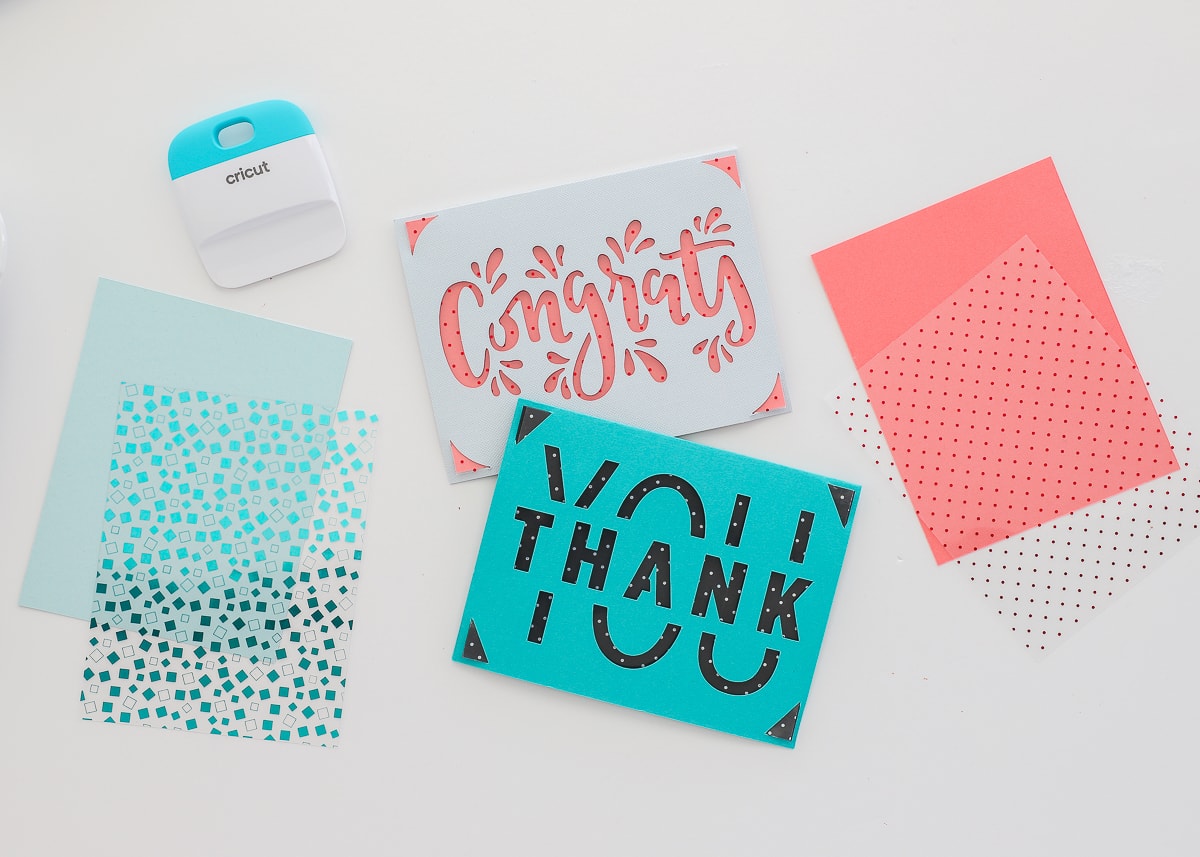
By using contrasting paper, you end up with a gorgeous, color-coordinated card that comes together literally in minutes…without scissors, glue or mess!
Oh…and about all those pieces still left on the Card Mat? Simply use the scraper tool to quickly slide it all off so you can re-load and make more cards!
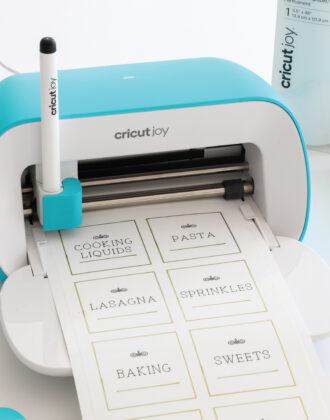
Using Pens with Cricut Joy Cards
Some of the card designs include pen details. This means Cricut Joy will both draw and cut the design for you! Not all of the Cricut Joy cards have drawn designs, but a lot of them do. To determine if the card uses a pen, you can not just look for pen details on the sample card itself, but the directions will also note a Pen or Marker is needed:
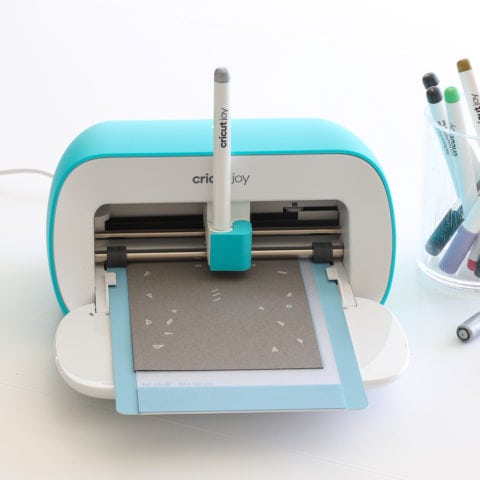
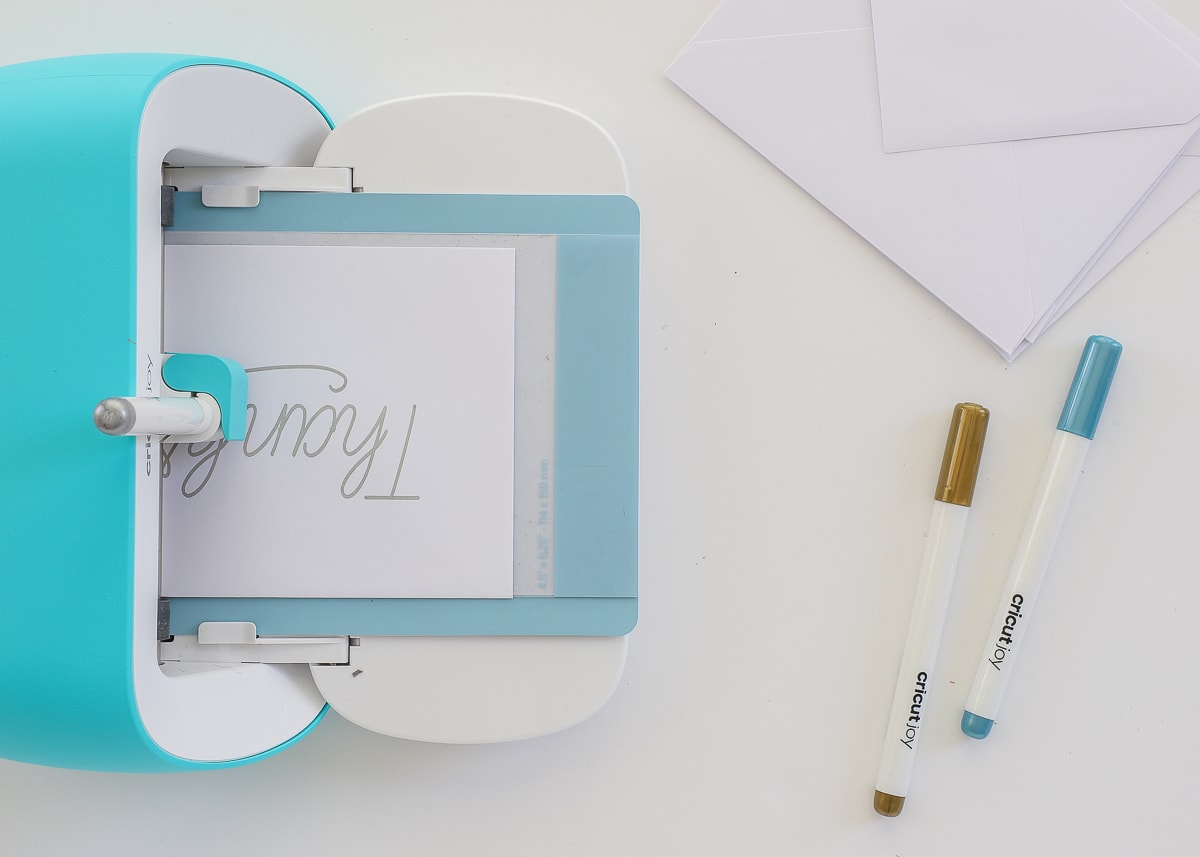
When you load the Card Mat into Cricut Joy, the software/app will prompt you to first load a Cricut Joy pen into the clamp (rather than the Fine-Point Blade).
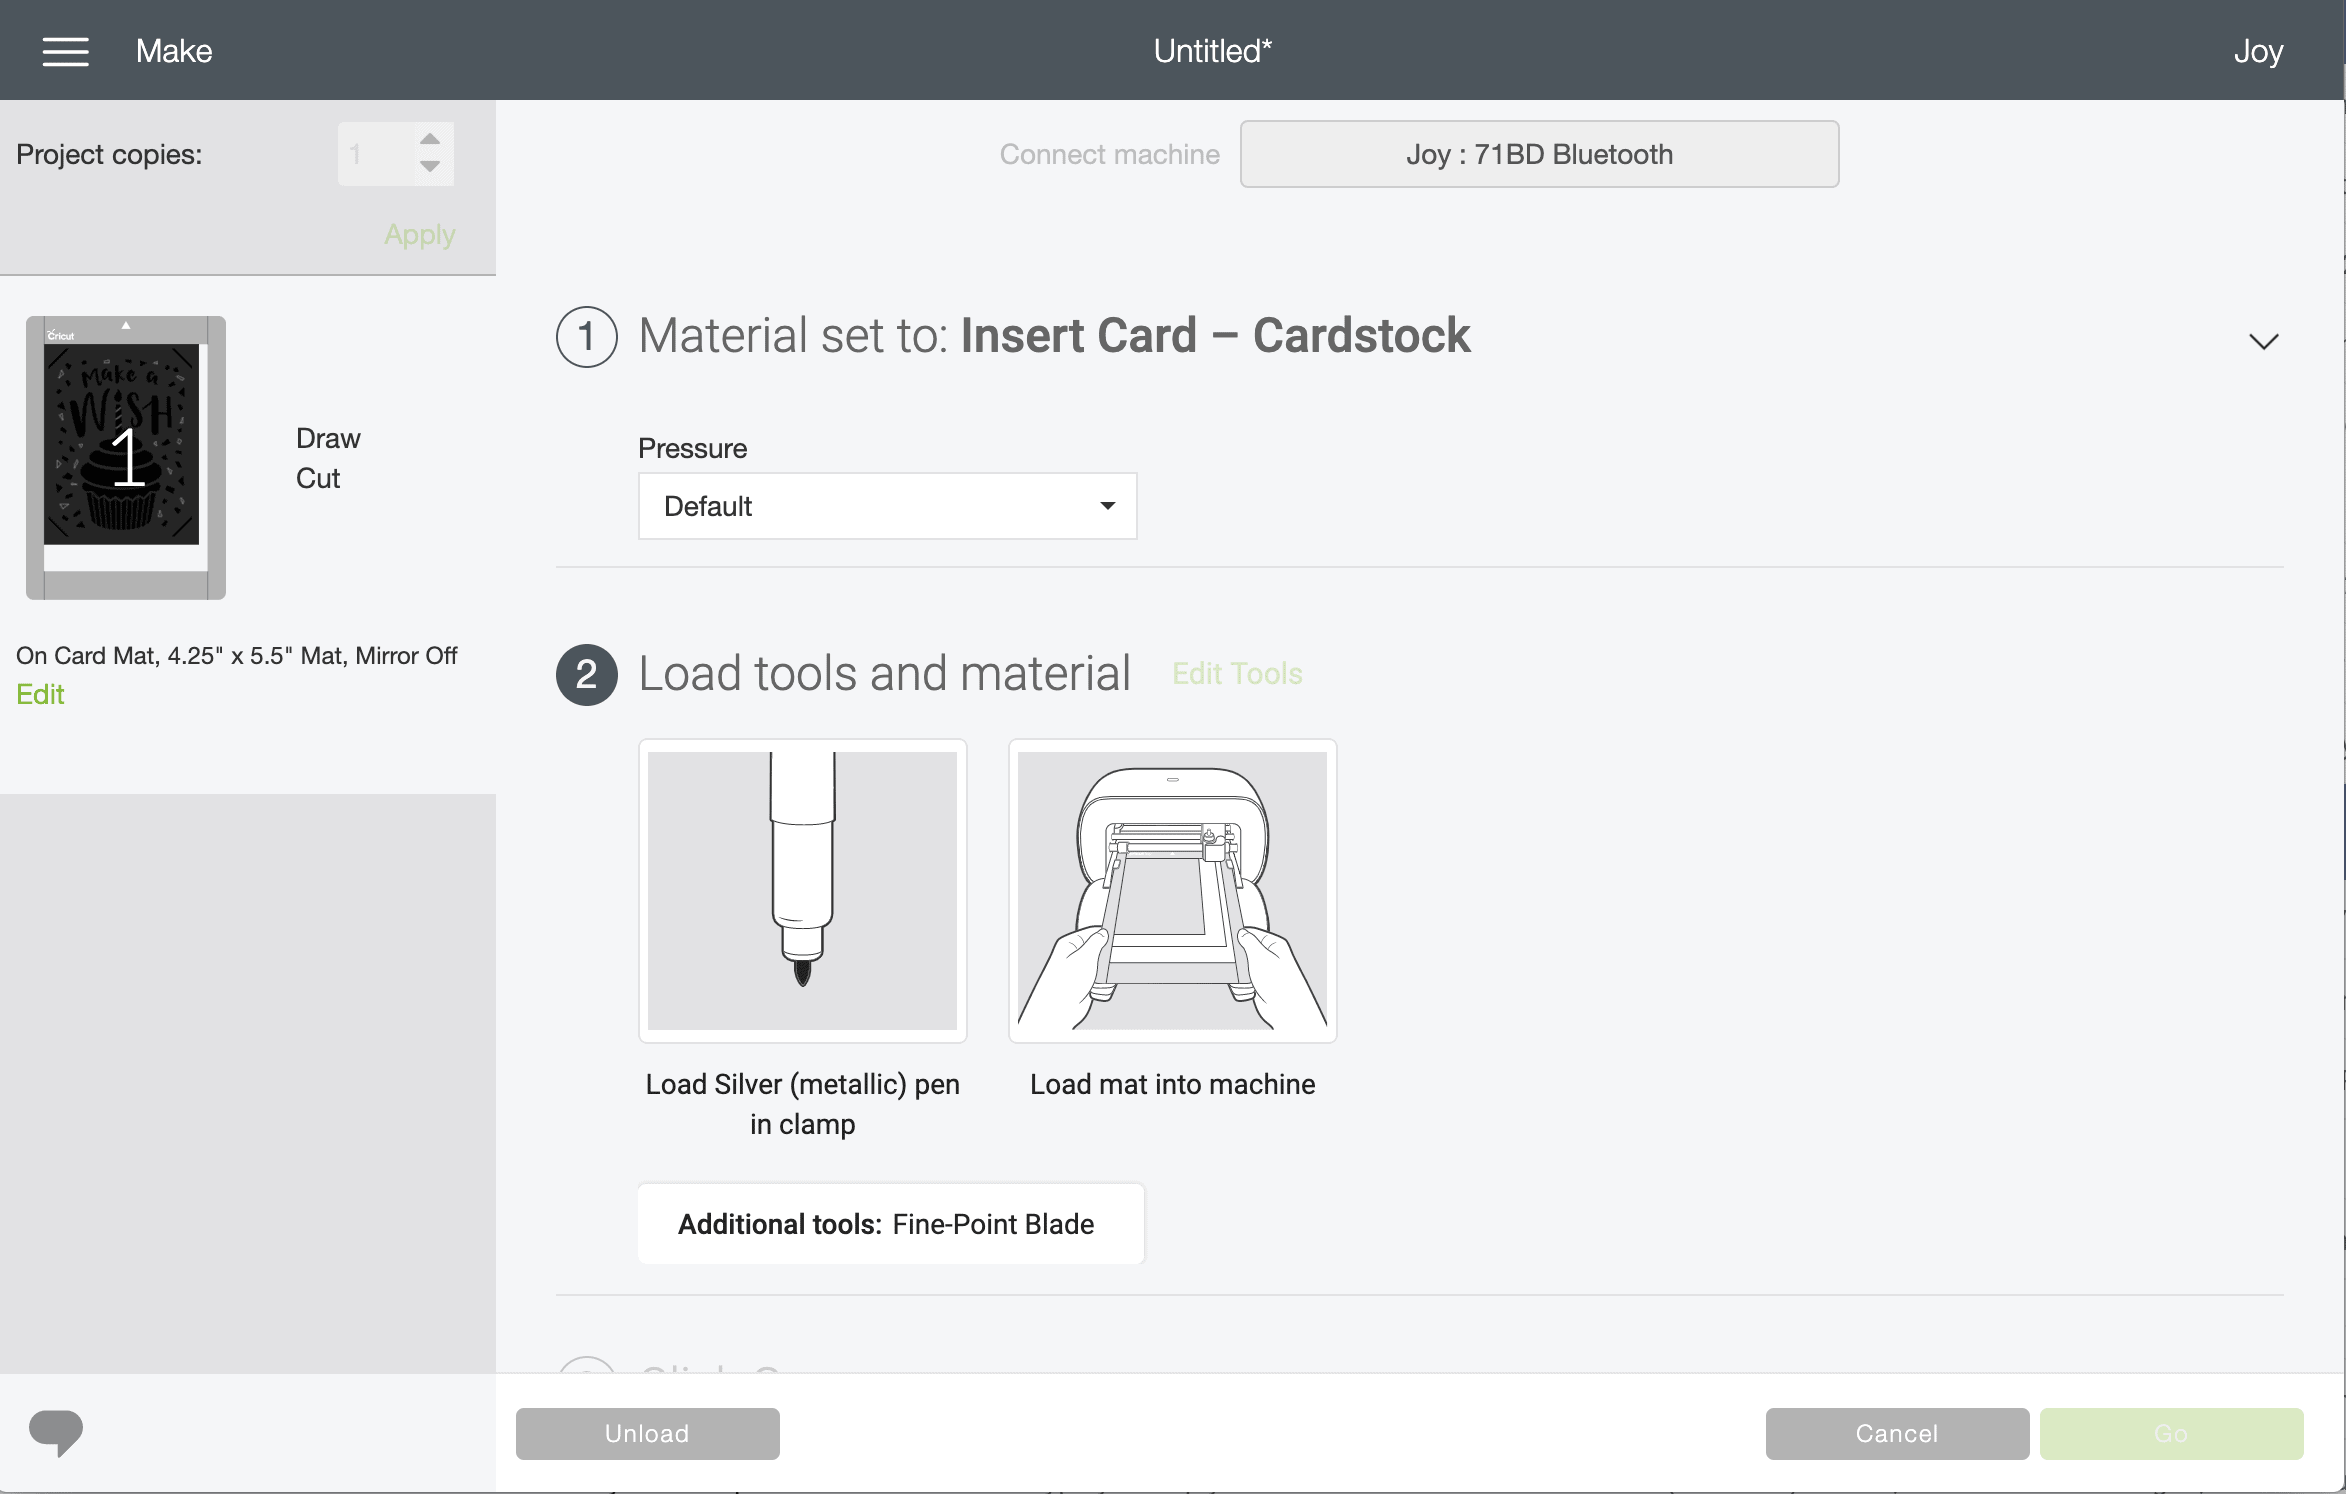
Cricut Joy will first draw the pen elements (below left), before prompting you to change to the Fine-Point Blade to cut the rest of the design (below right)!

Take Your Cricut Joy Cards Up a Notch
Cricut Joy, in conjunction with the Cricut Joy Card Mat and the Insert Cards, have really streamlined the card-making process. It really is SO quick and easy that you can make a year’s worth of birthday cards while watching an episode of your favorite TV show.
But don’t let that simplicity fool you. These cards are gorgeous on their own, but there are also lots of fun “hacks” you can do to take these cards up a notch!
Let me show you a few!
Write on the Inside of the Card
You can use the Cricut Joy Card Mat to write on the inside of the card too! However, centering your designs can be a bit tricky. Here’s how I like to do it:
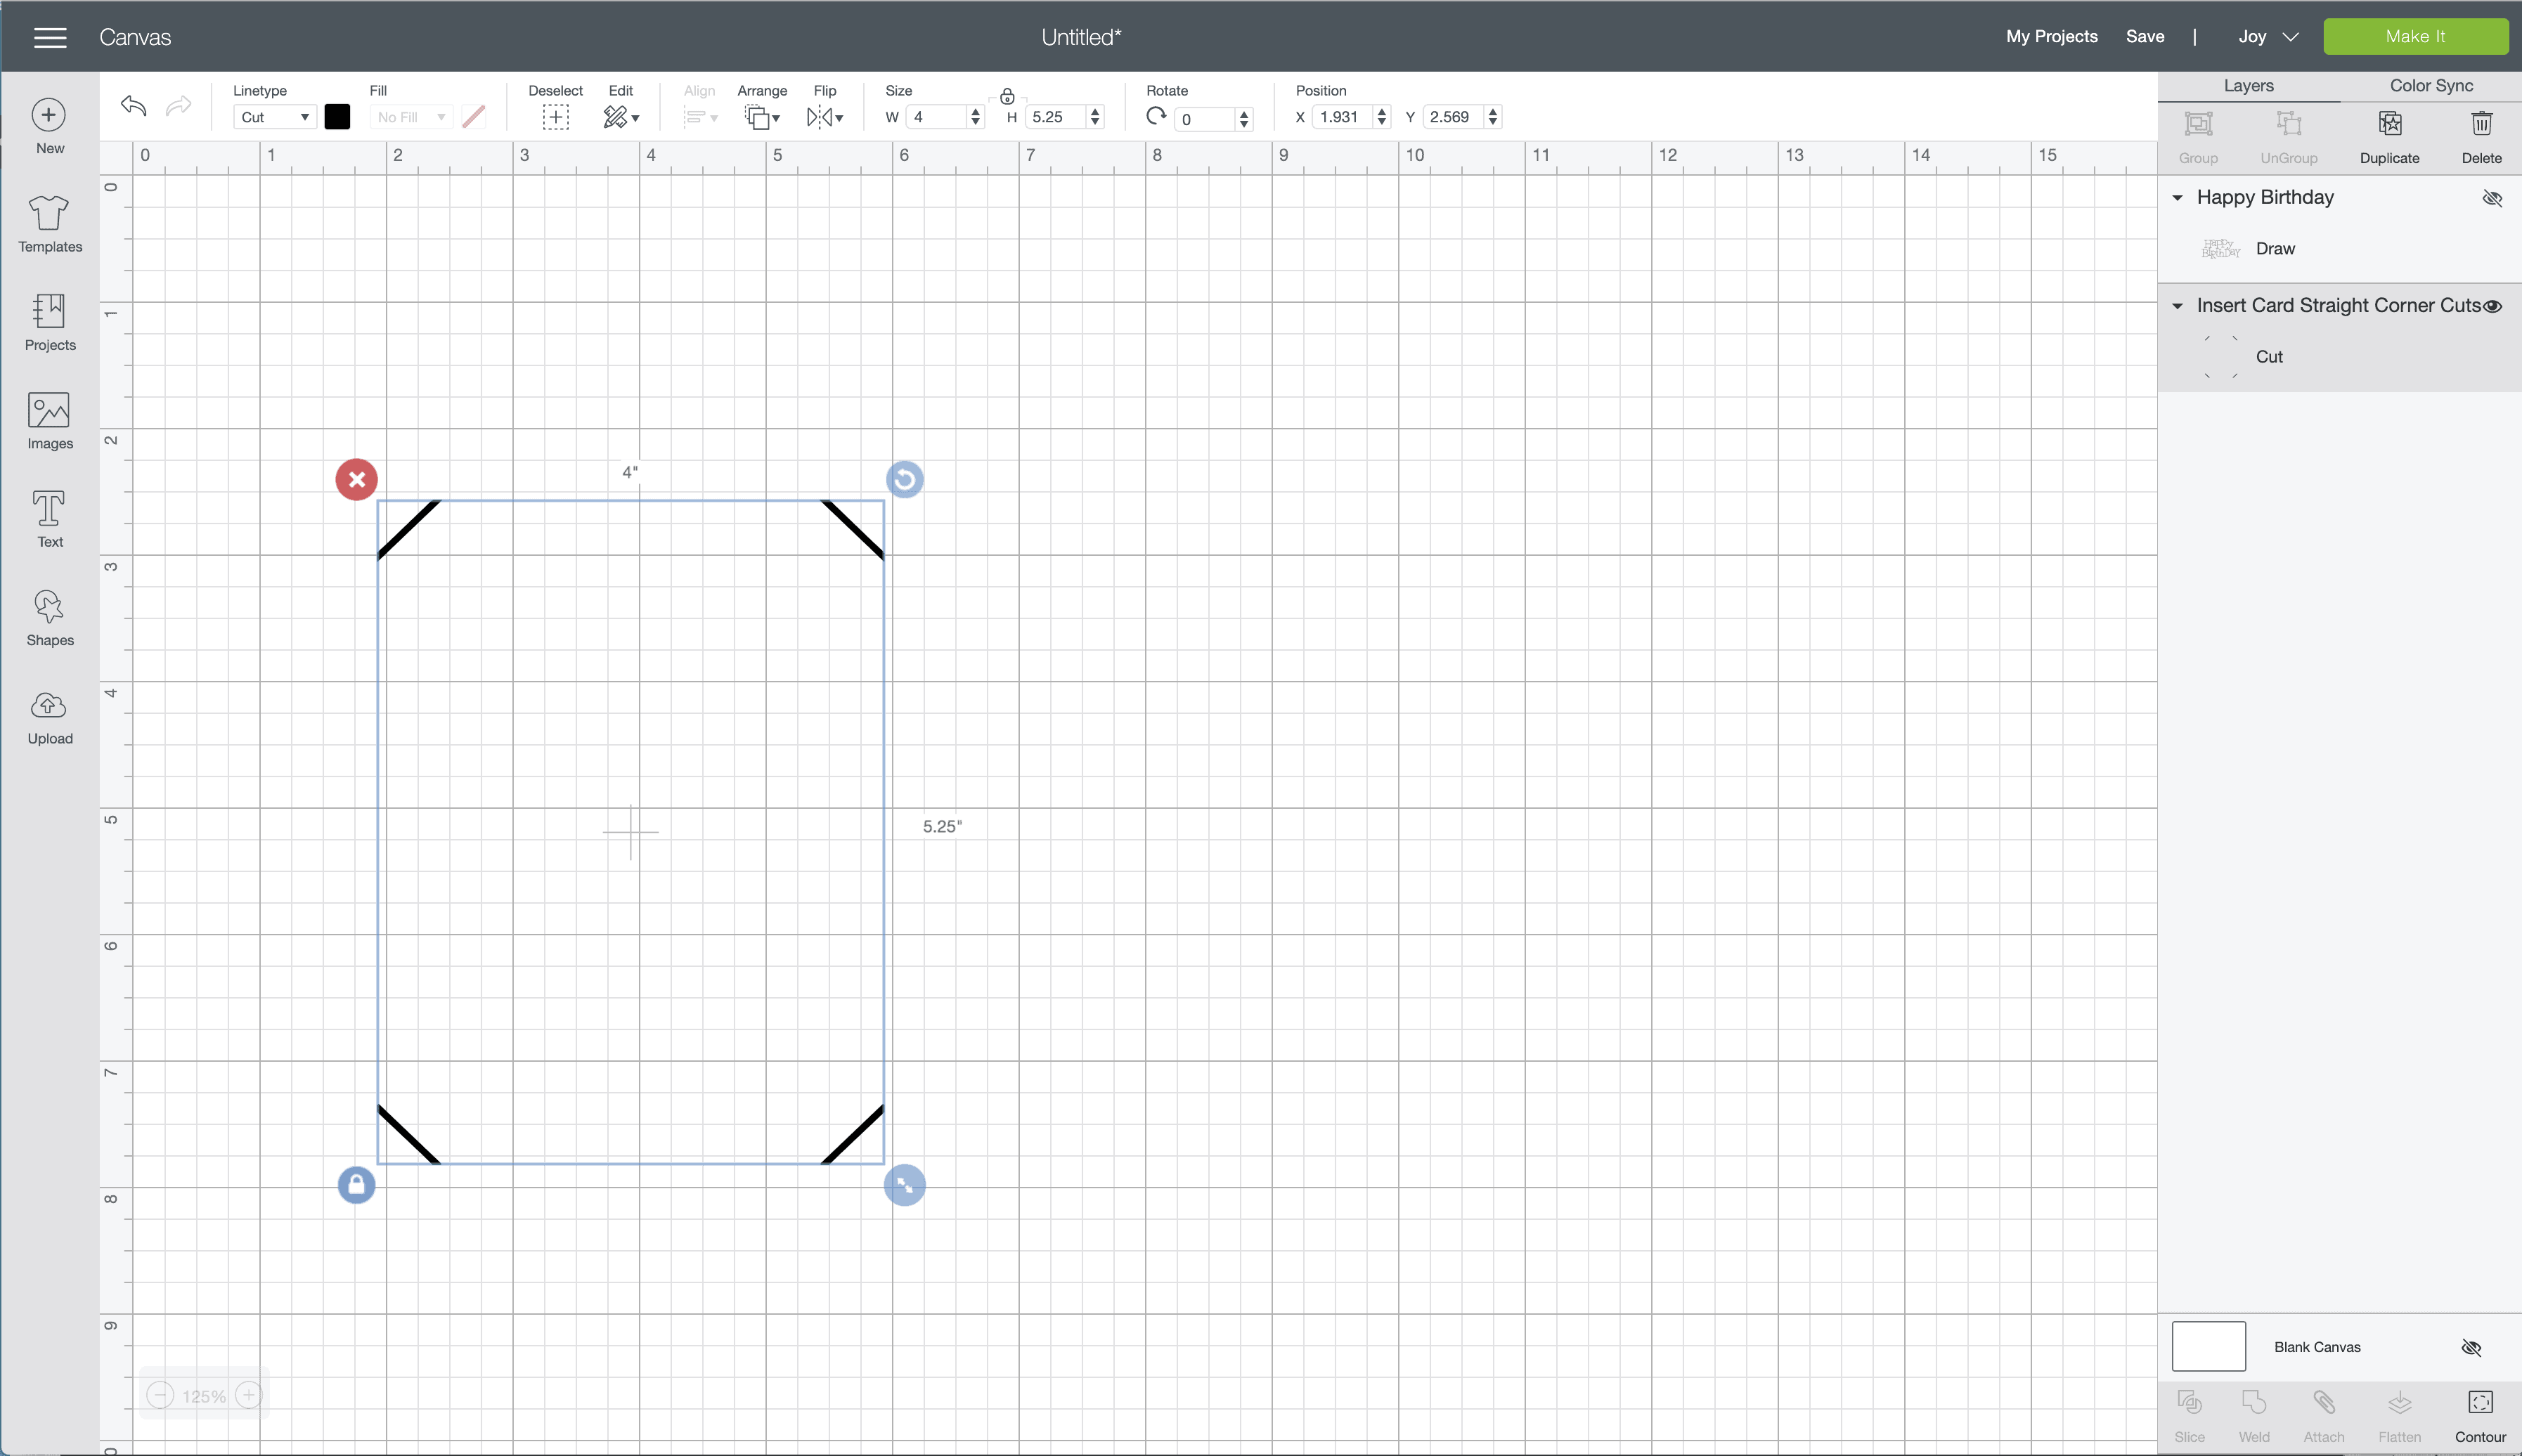
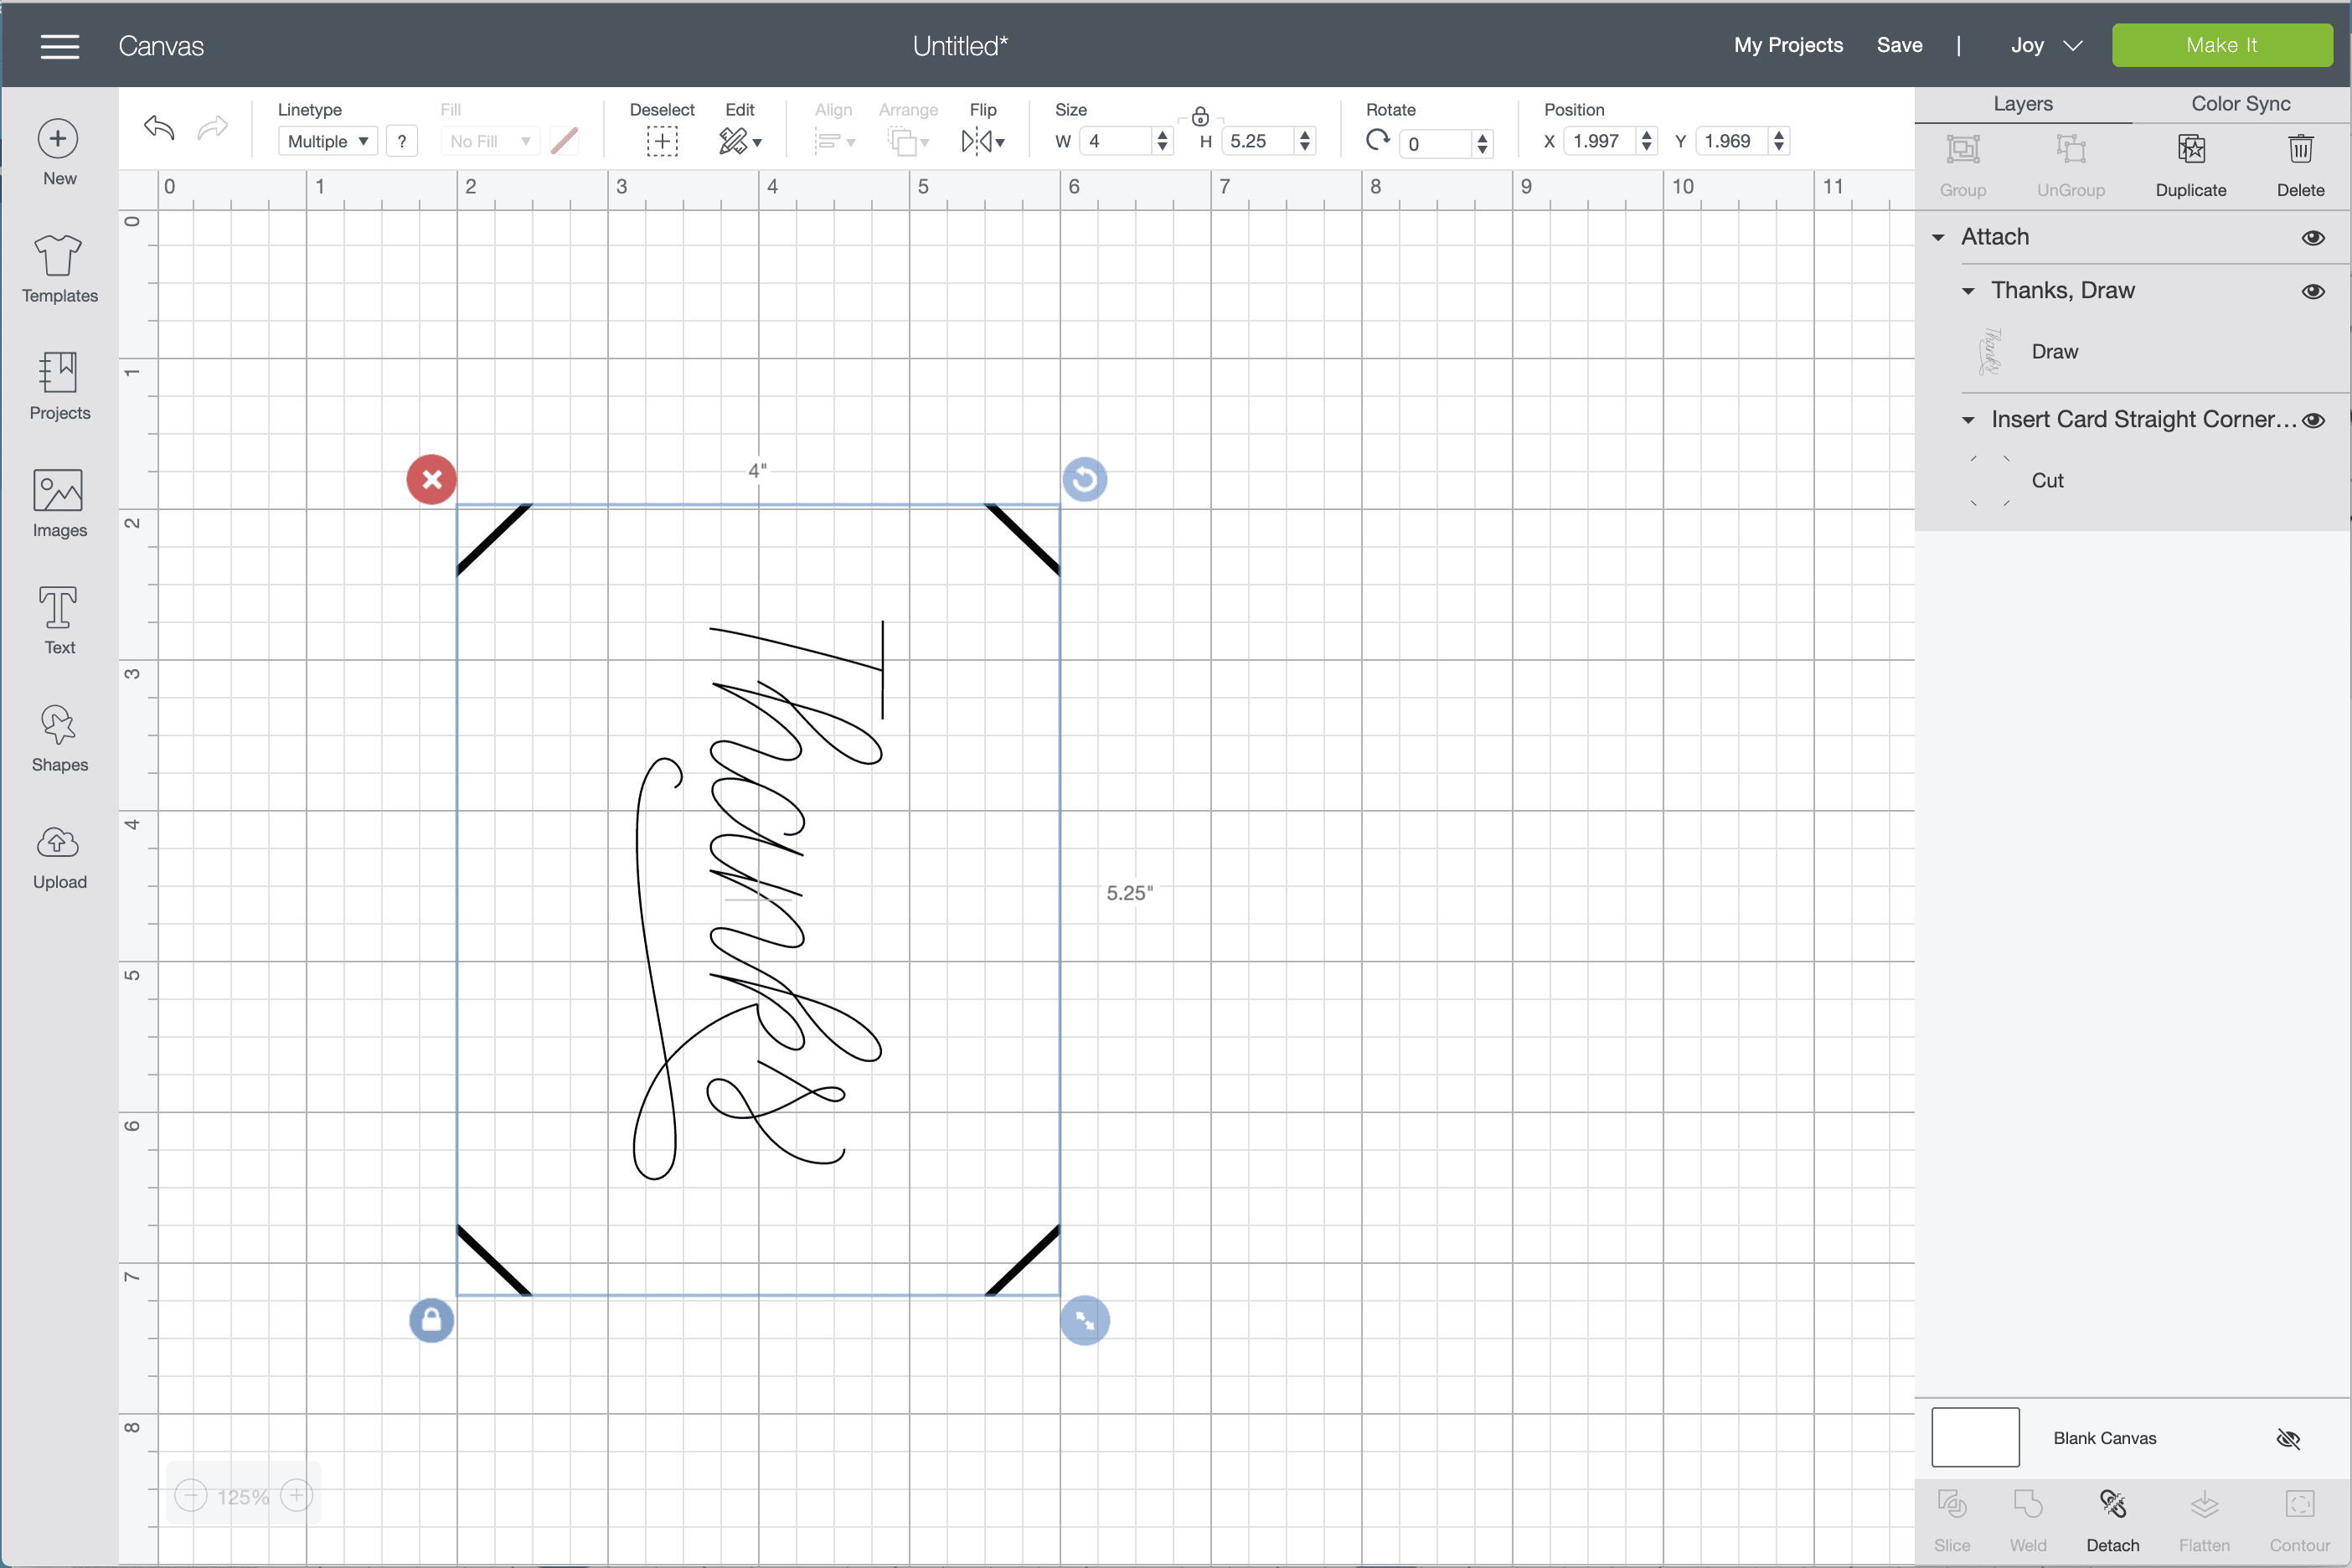
Back in Cricut Design Space, find the cartridge called “Insert Card Corners.” This set features 17 different corner cut designs, into which you can place other designs to be cut with the Cricut Joy (in the same way the pre-designed cards are!) Go ahead and select a set of corners; it doesn’t really matter which one you use here since you won’t actually cut them!

When you place it on your Canvas, set it to 4″ wide:
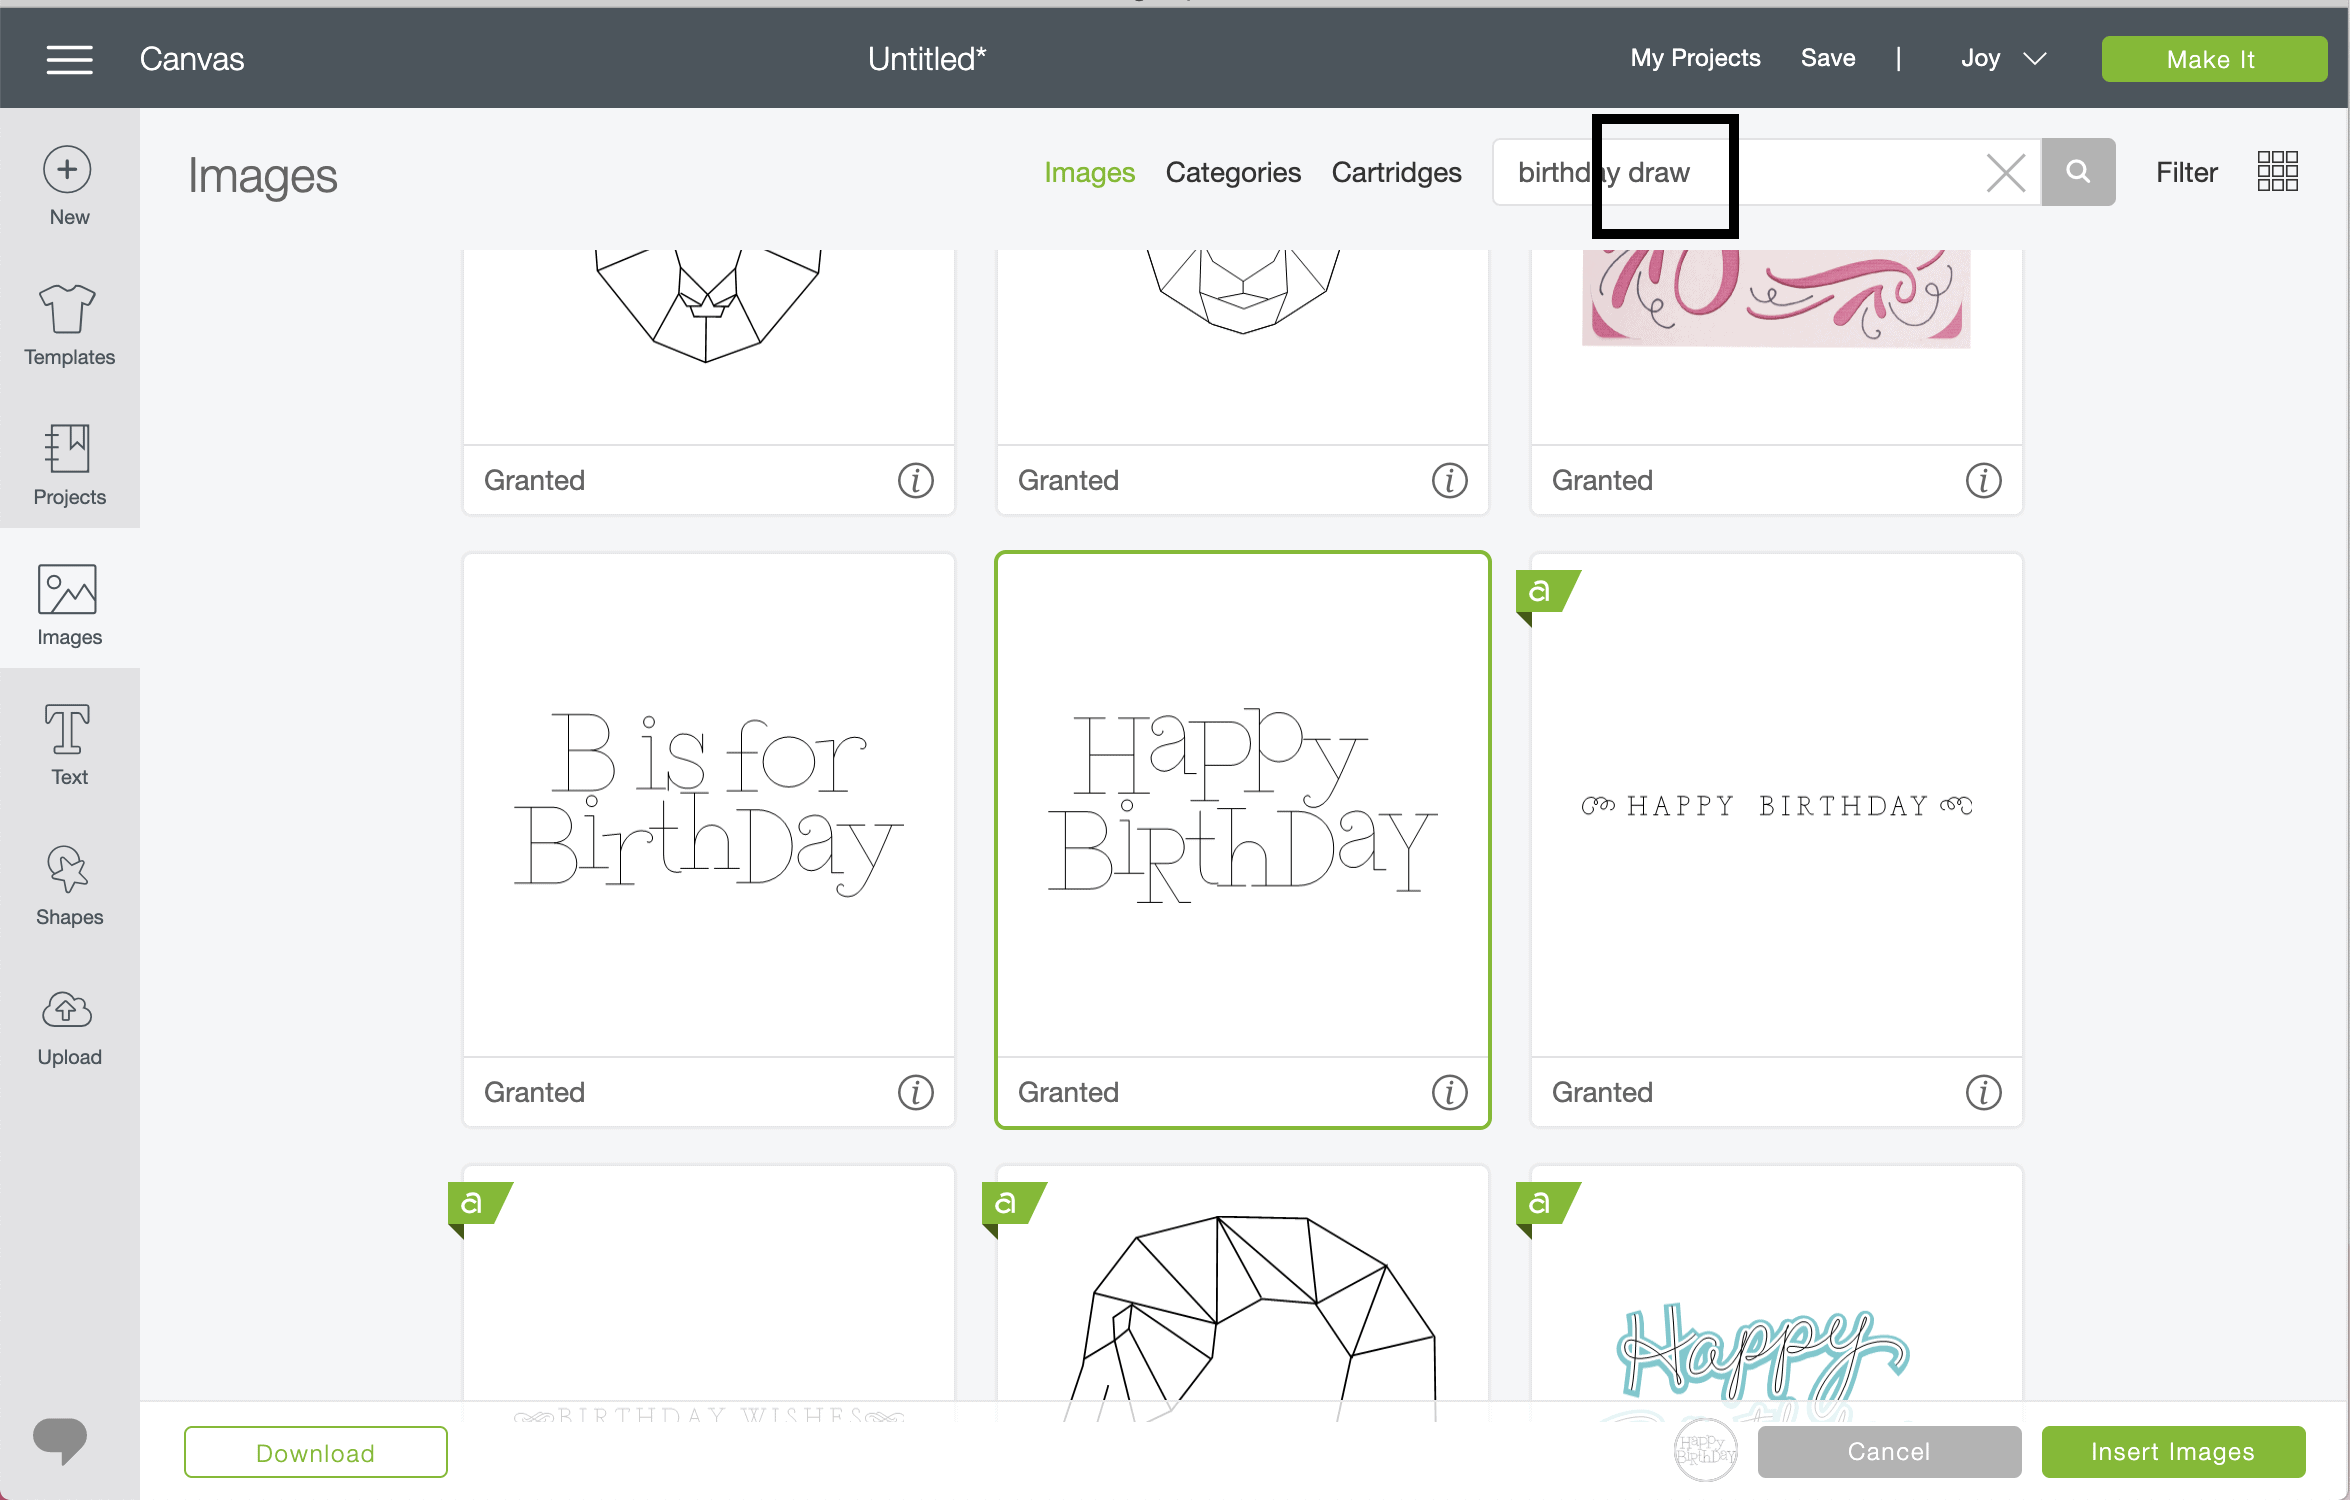
Next, search the Cricut Design Space library for a “drawn” phrase to put in your card. You can also type any words with a “Written” font.
Want to save this post?
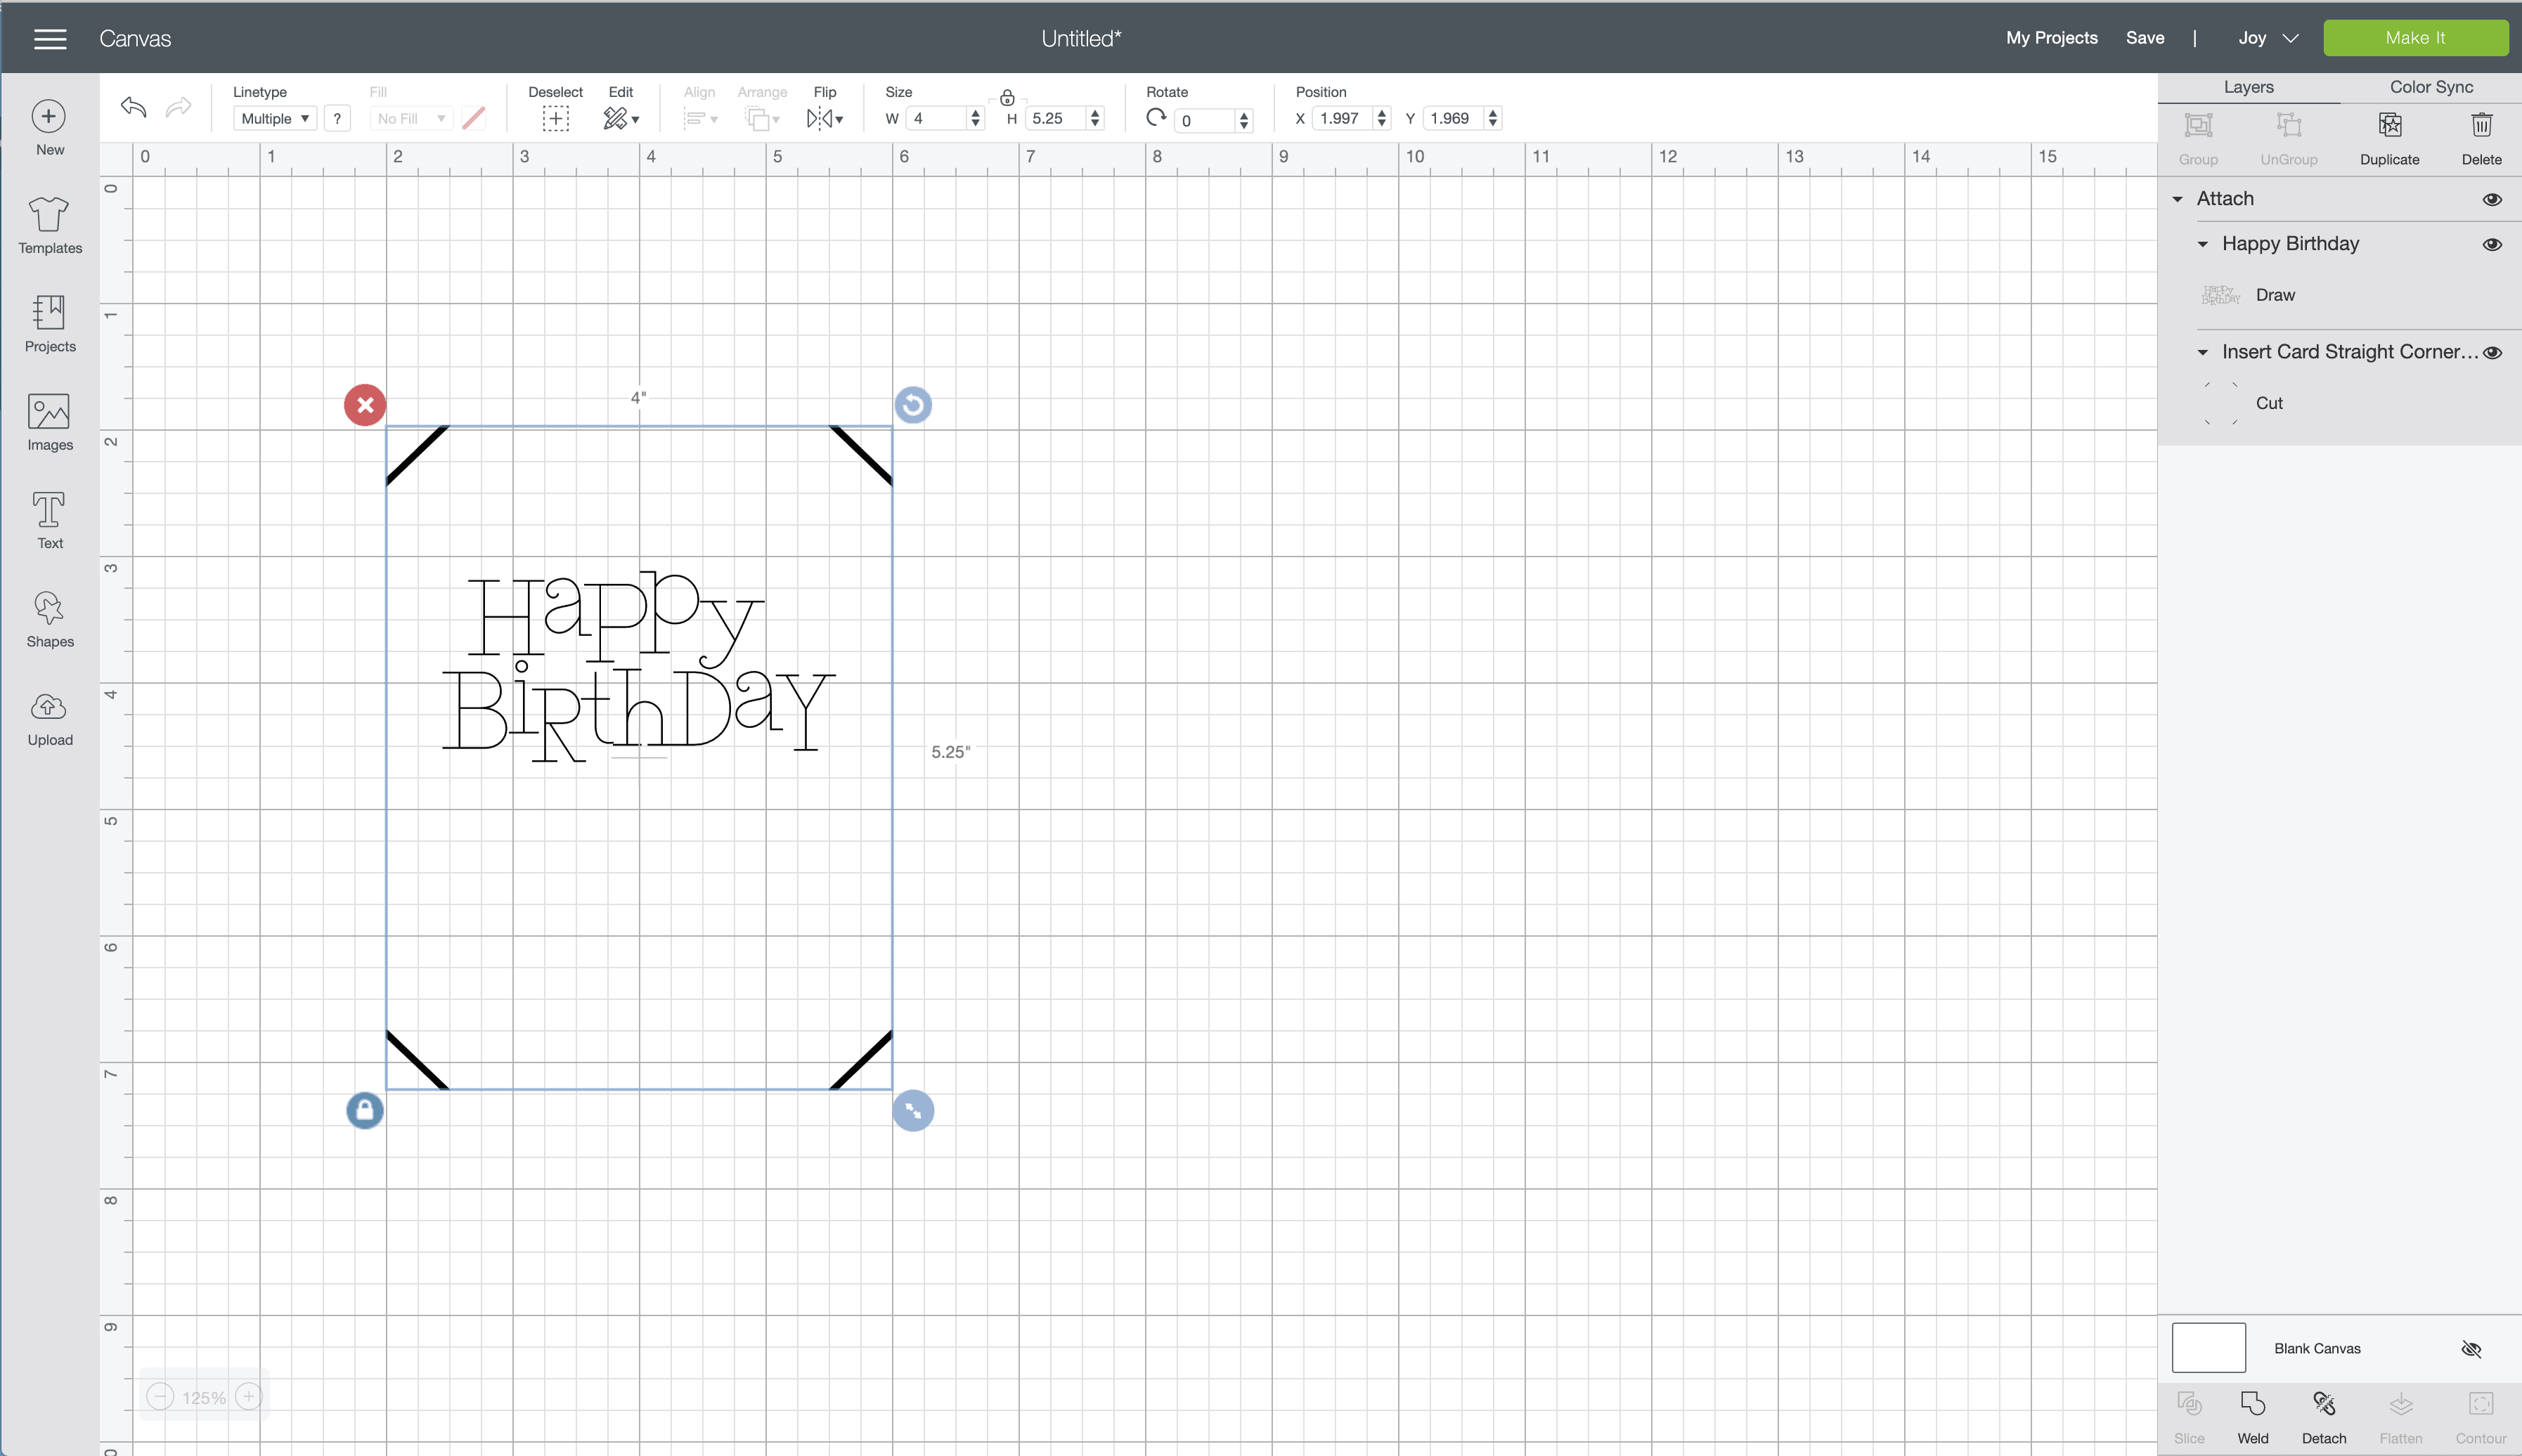
Place your words or graphic into the corner cuts where you want it, then attach the two elements together (using the button in the bottom right-hand corner).
Next, when you send your design to be drawn, be sure to select “On Card Mat” in the mat selection (since it won’t auto-select for you this time!)
By using the corner cuts in conjunction with the words, the corners will allow your words to be exactly where you want them!
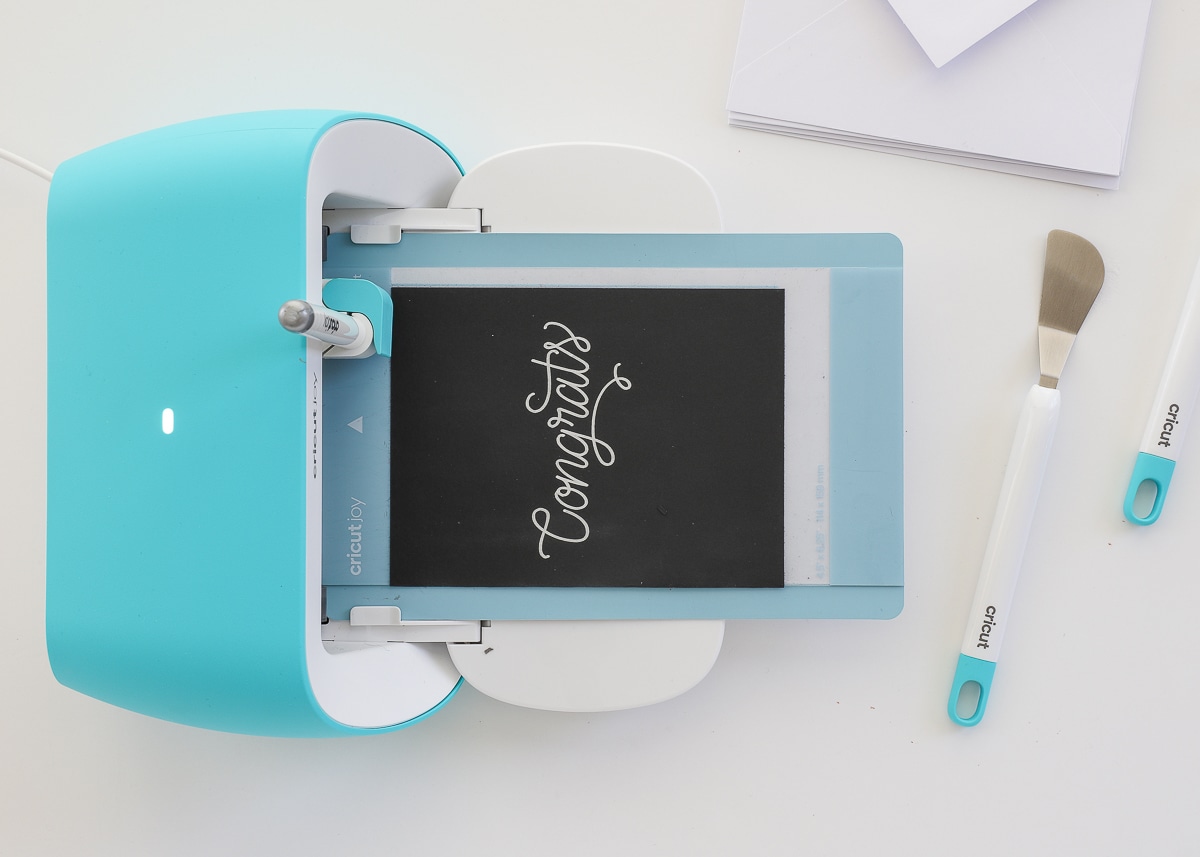
To get your design on the inside of the card, simply load the card onto the Card Mat with the front of the card under the cutting mat (below, left). When you fold the card shut, the inside of the card will end up on top (below, right).
You can then load the Card Mat into the machine to draw your design with the Cricut Joy Pen!
TIP! To prevent the machine from cutting those corner cuts, don’t load in the Fine-Point Blade when prompted and just cancel out the cut!
Mix & Match
The Insert Cards include perfectly matching outer cards and inserts, making your whole card project practically foolproof. That said, don’t hesitate to mix-and-match the cards and inserts across different packs. There are so many gorgeous inserts (foil, glitter, acetate and more!) that all work with lots of different card colors…so stock up and play around to find combinations you love!
Layer It
The Insert Cards with the acetate is my absolute favorite set. The foil acetate inserts are so gorgeous, and are ideal for layering over solid inserts to create a lot of interest in your cards! Both my cards below have a clear acetate dot insert layered over a solid insert. You know I love that pop of pattern on the cards!
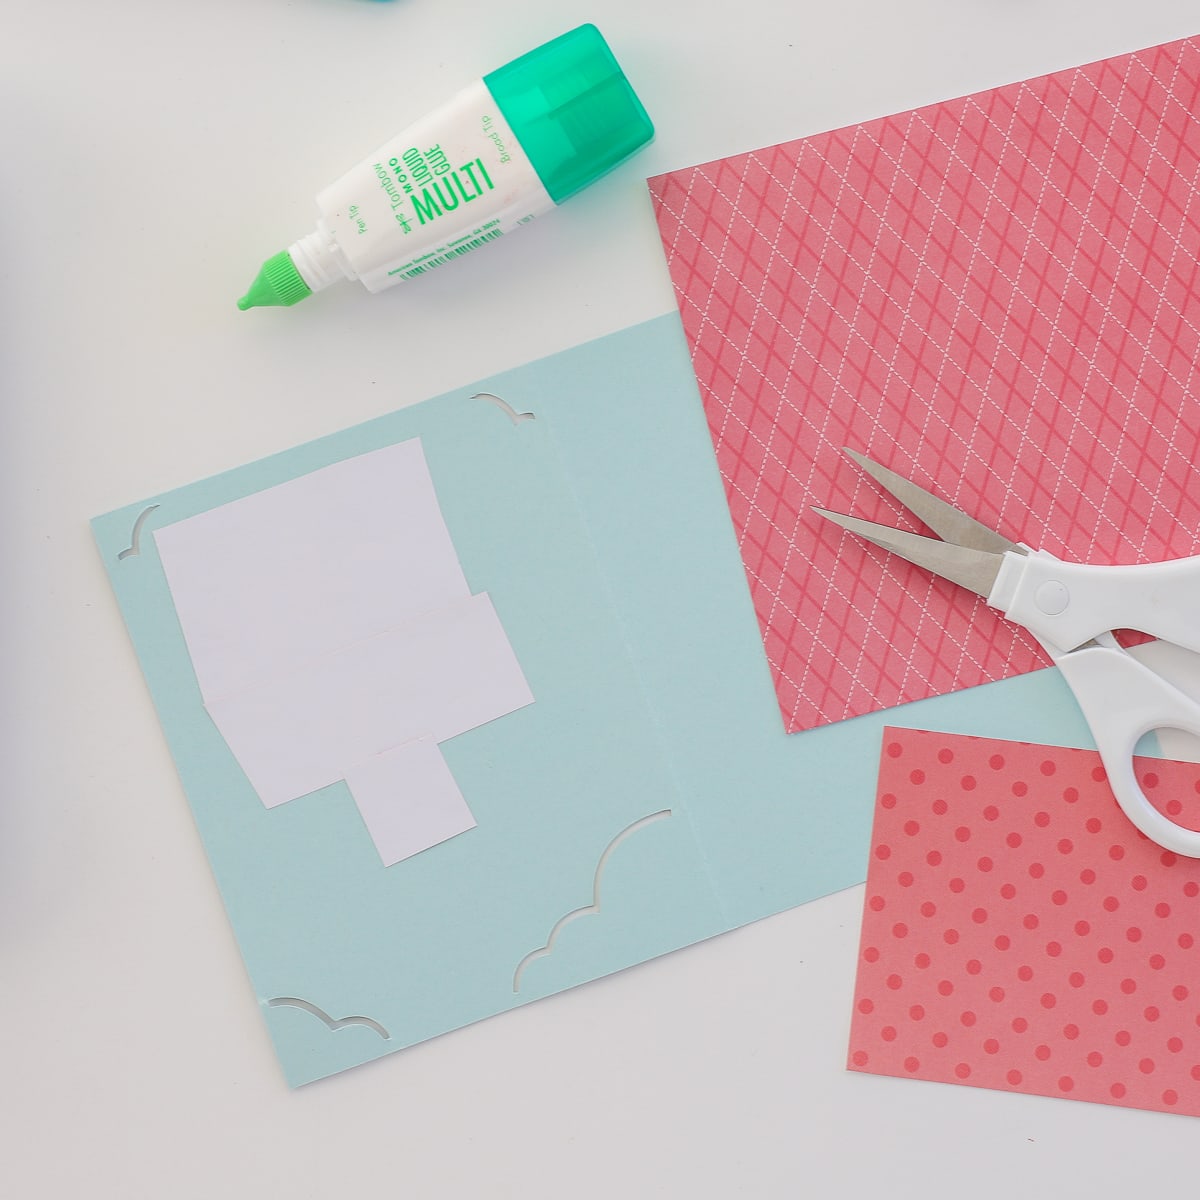
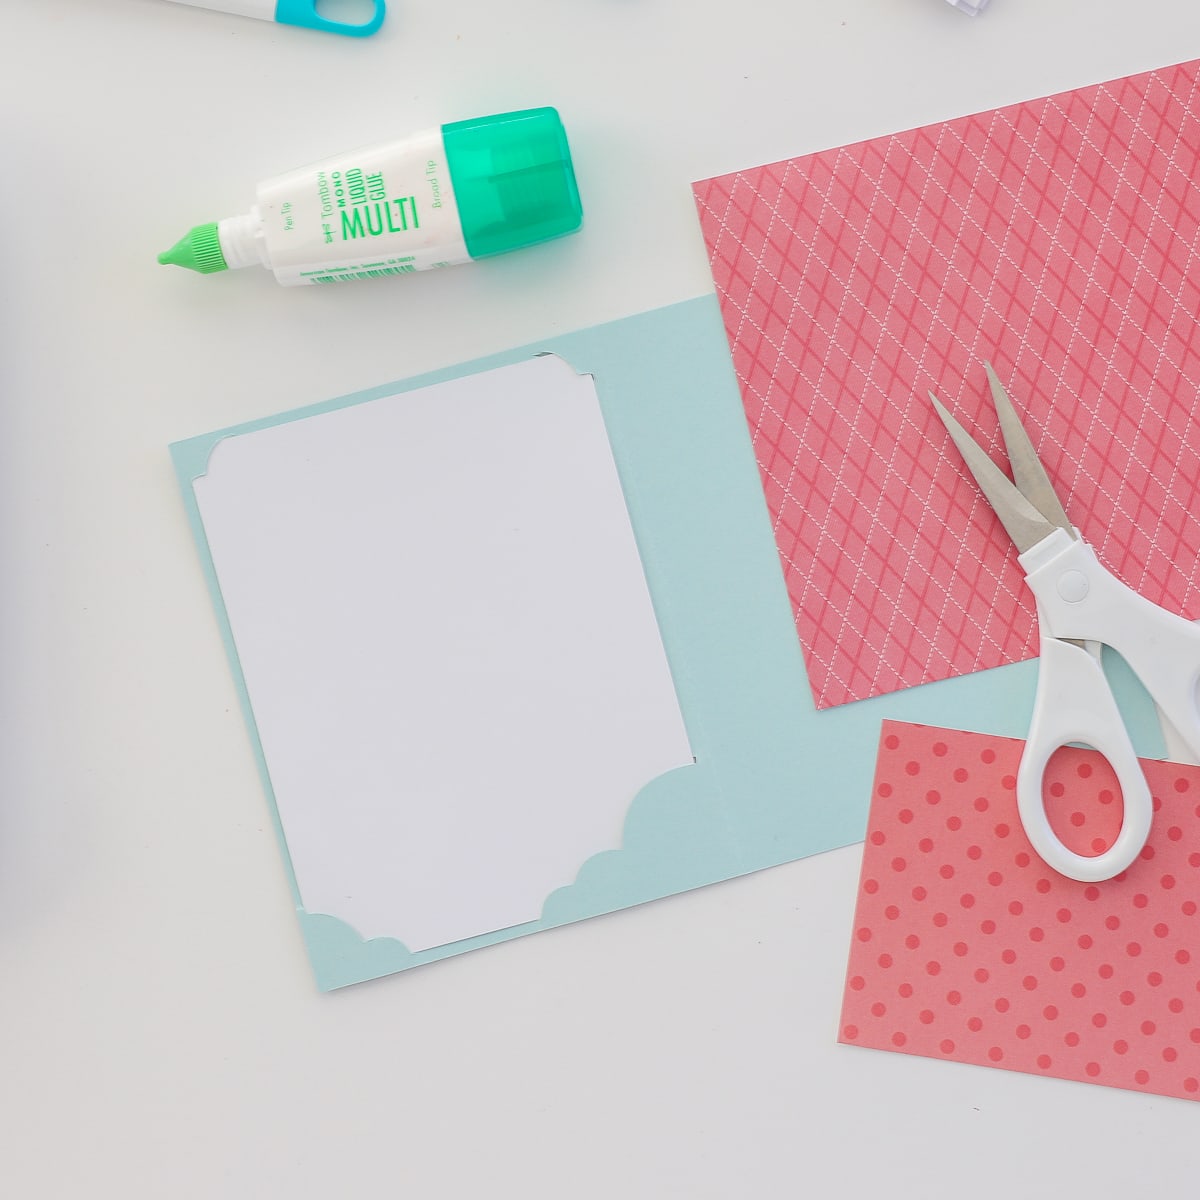
Use Your Own Paper
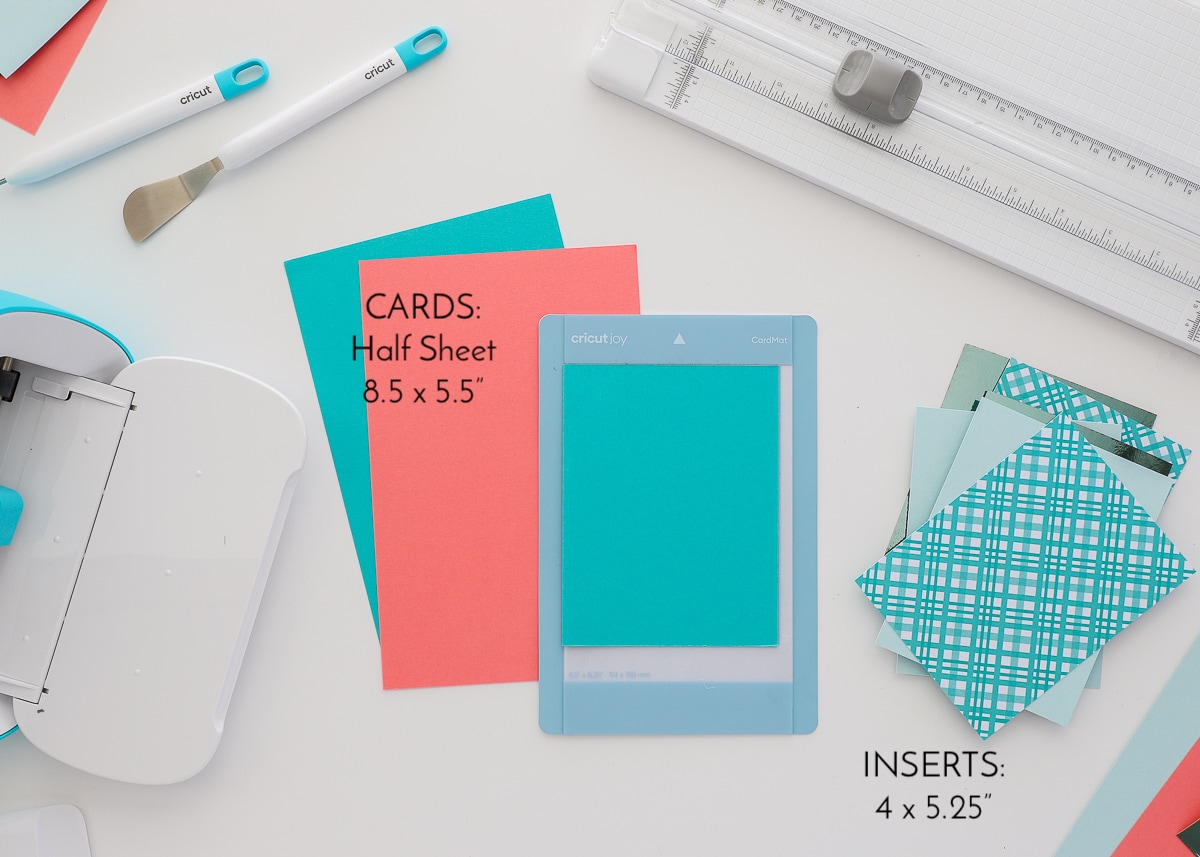
I want to highlight that you don’t have to use the pre-made Insert Cards (although they do eliminate the need for matching, measuring, and cutting). You can absolutely use any paper you have in your stash. To make cards just like the ones in the Insert Cards kits, cut 8.5×11” cardstock in half (for the cards) and 4×5.25” rectangles for the inserts.
Decorate the Details
Instead of adding pattern to the entire insert layer, consider highlighting different parts of the card design with coordinating/contrasting paper.
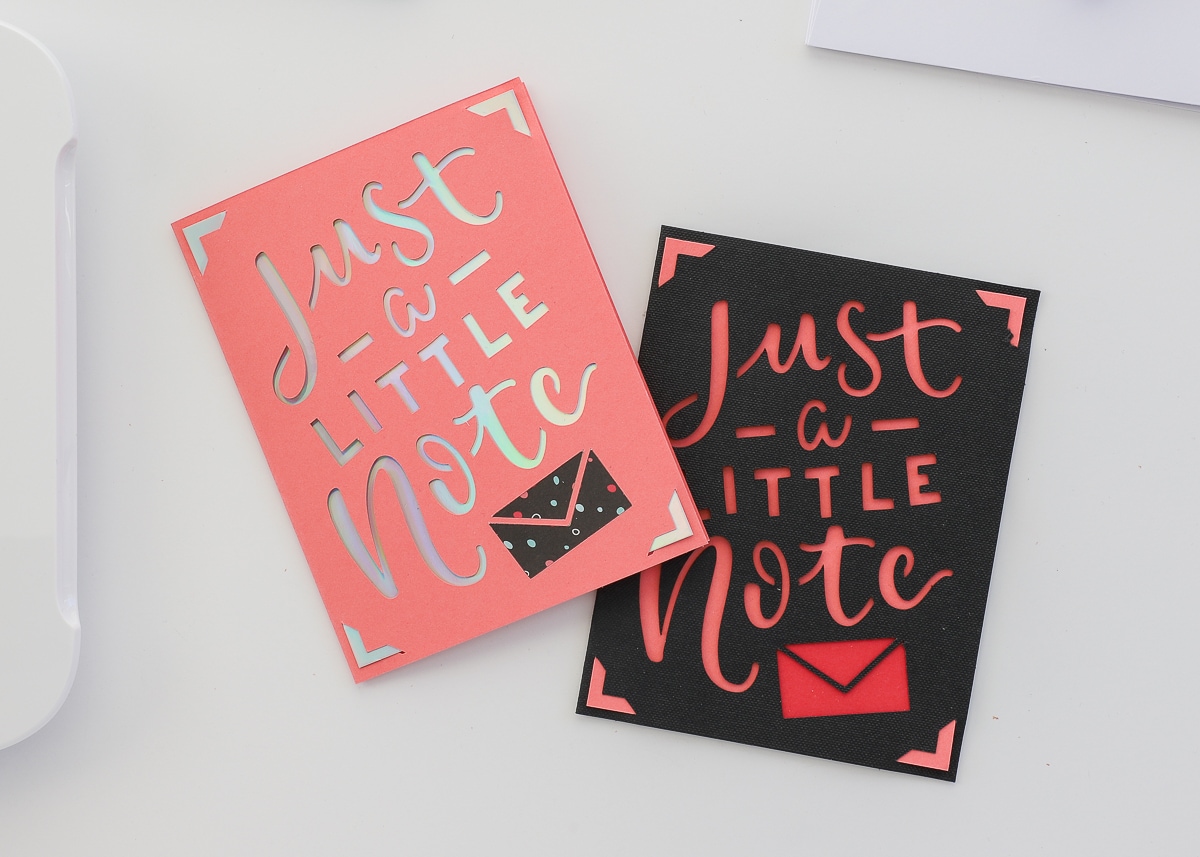
For the “Just a Note” cards, I used Adhesive-Backed Paper stuck directly to the top of the insert layer (no glue needed!) You can cut the relief design out or just place a rectangle under any element you want to highlight.
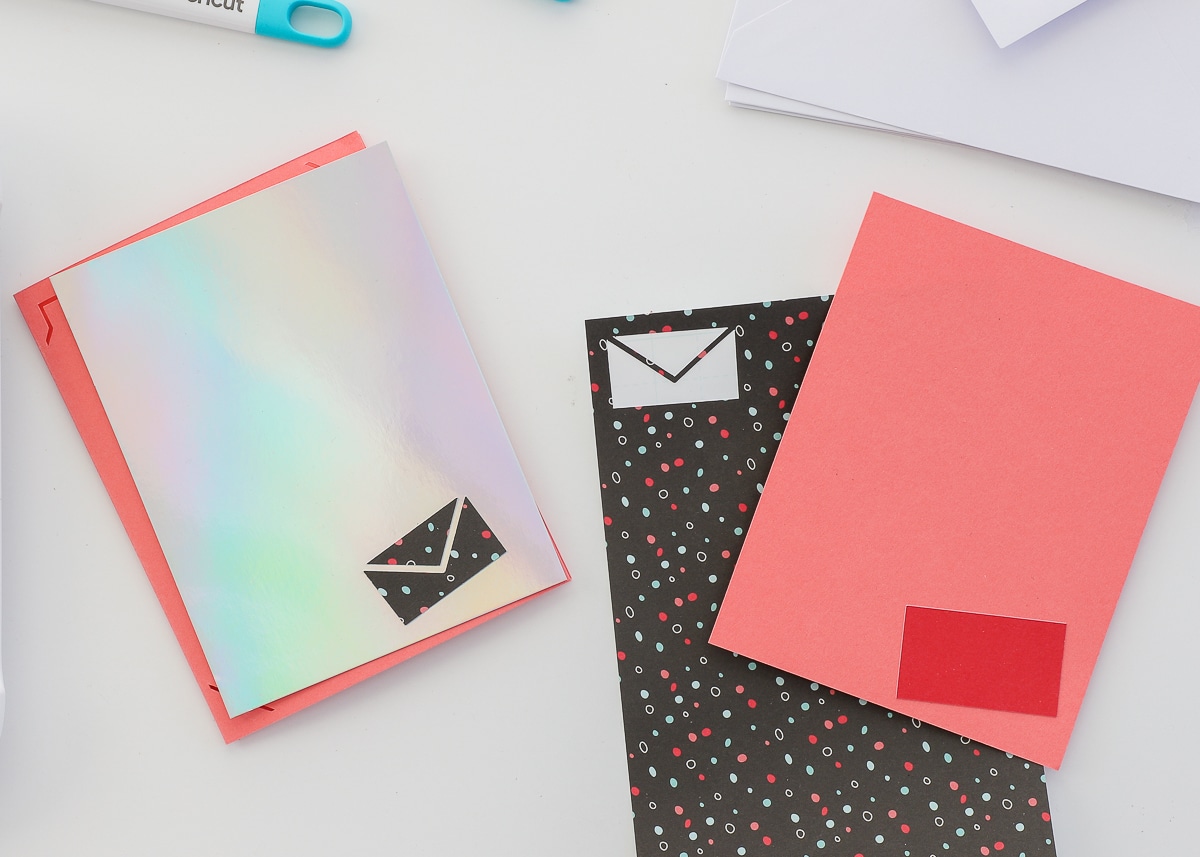
Another way to add patterns to different elements of the design is to trim out various patterned papers and attach them to the back of the card front with adhesive.
Then when you add in that insert layer, all the messy edges are concealed…
…but you end up with a really fun multi-pattern design on the front!
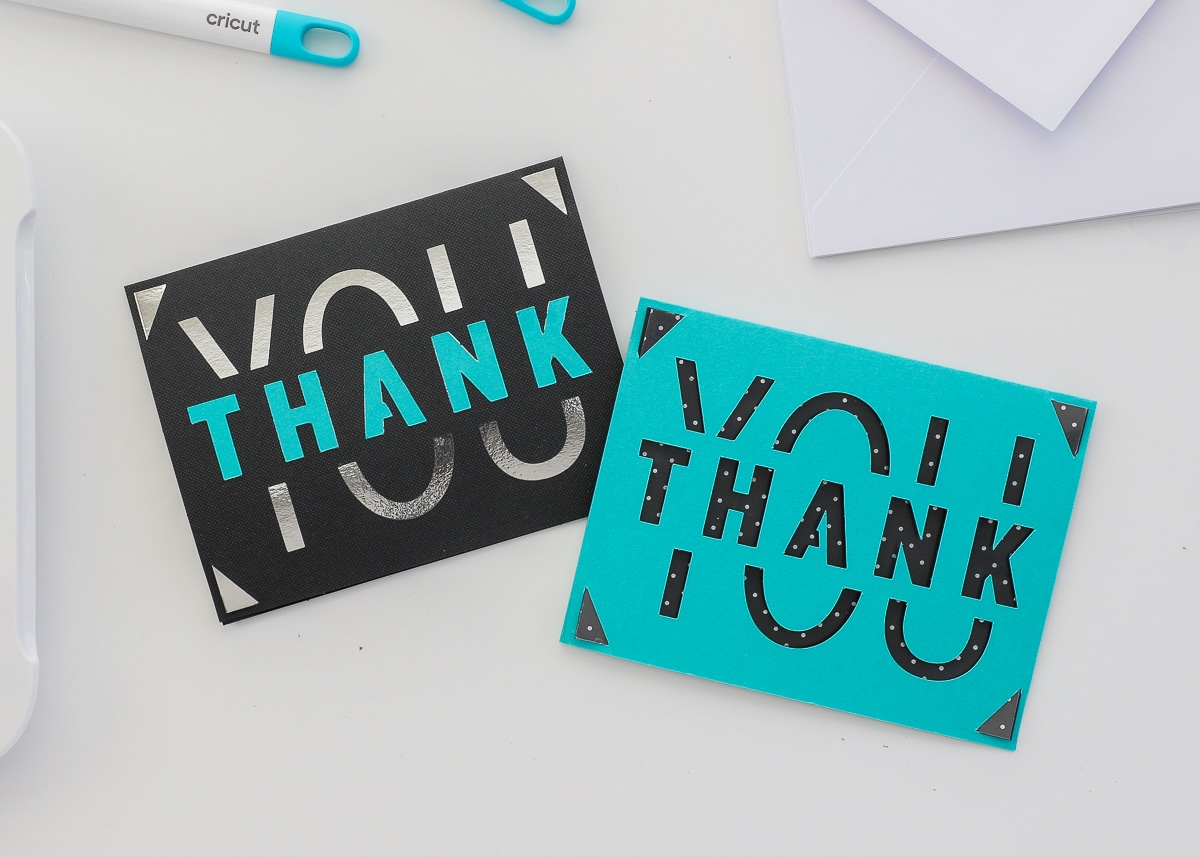
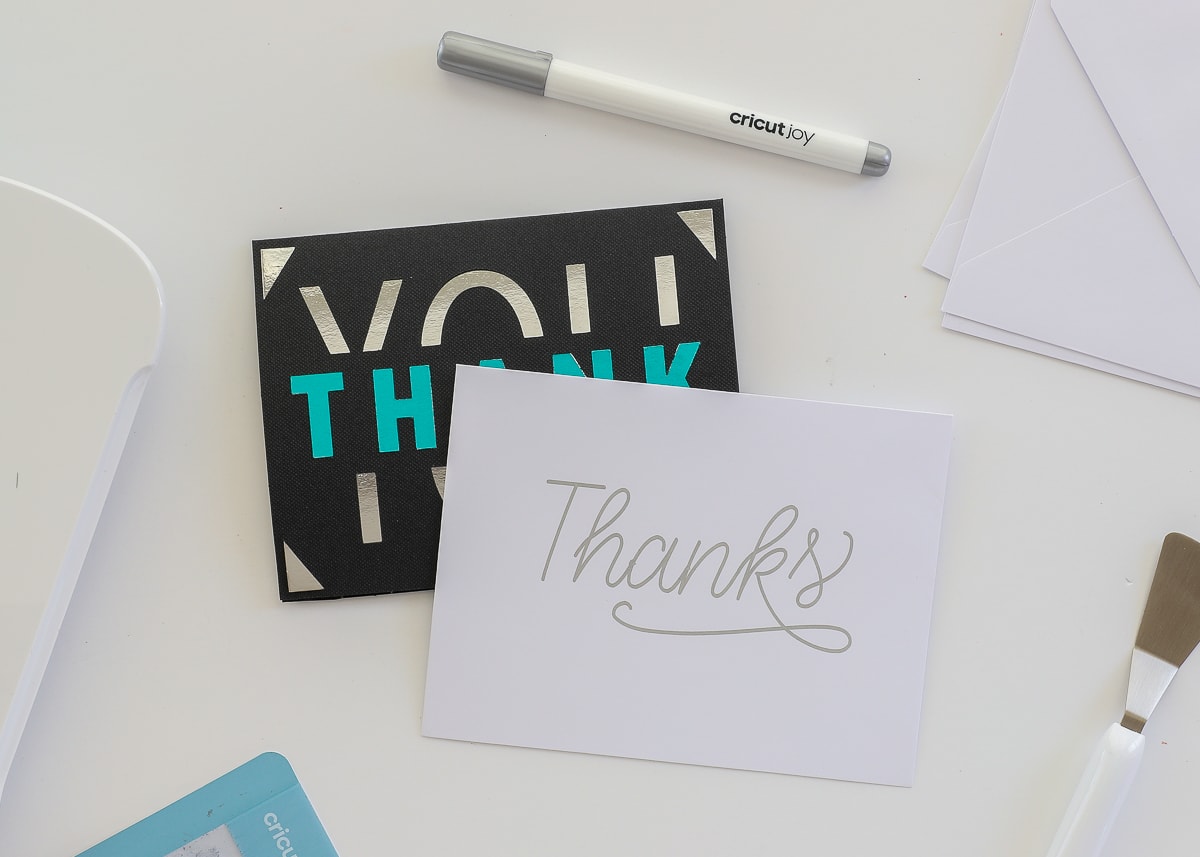
Use the Scraps
Instead of trashing everything left behind on the Cricut Joy Card Mat, consider using the scraps to create contrasting details on another card. Below, I used the leftover “THANK” from the turquoise card to decorate the black card. Keep in mind, you will need to use some sort of glue for details like this!
How to Write On a Black Card
Many of the Insert Cards have black cards. You might be wondering how to actually write on a black card. I have two ideas for you!

First, the metallic markers show up beautifully on the black cardstock. You can use them with Joy to write a message or hand-write your own.
Another idea is to cut an additional set of corners on the inside of the card (using the same technique as writing on the inside).
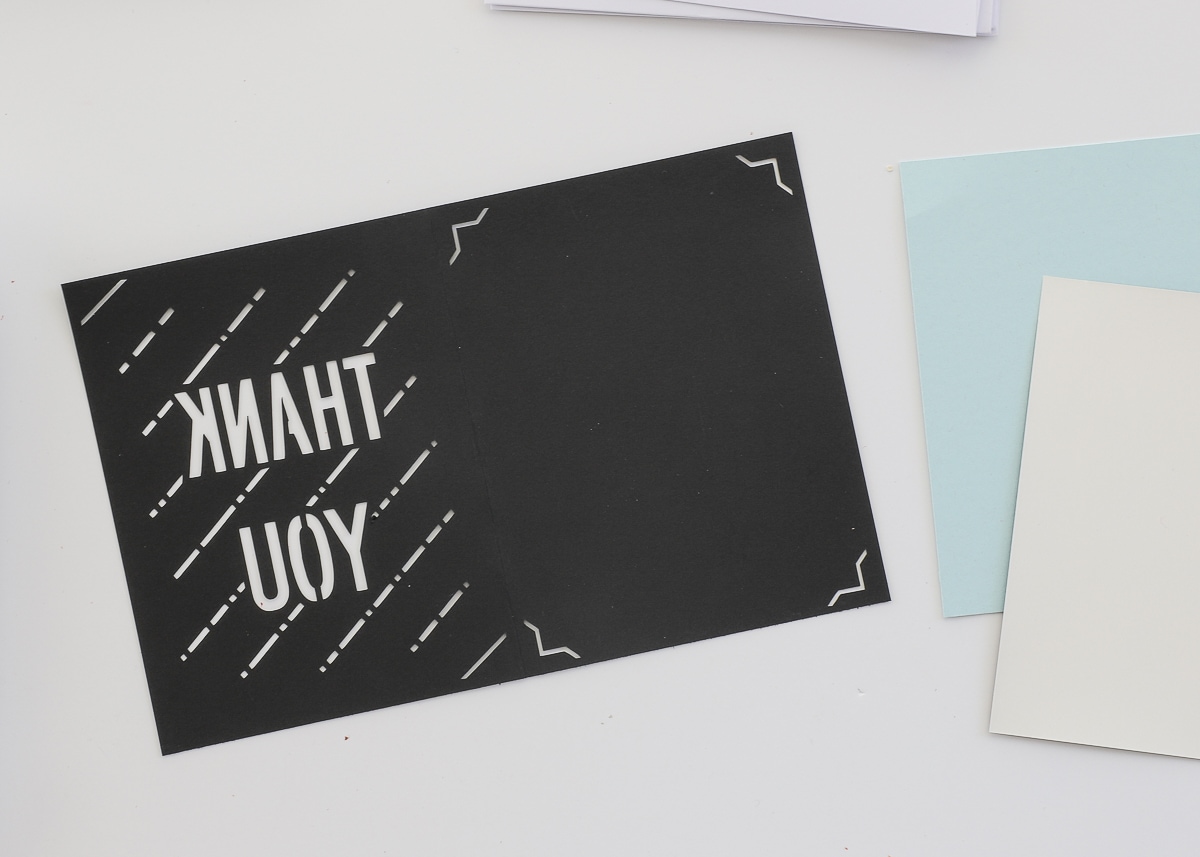
This allows you to add another (light-colored) blank insert on the inside just for writing!
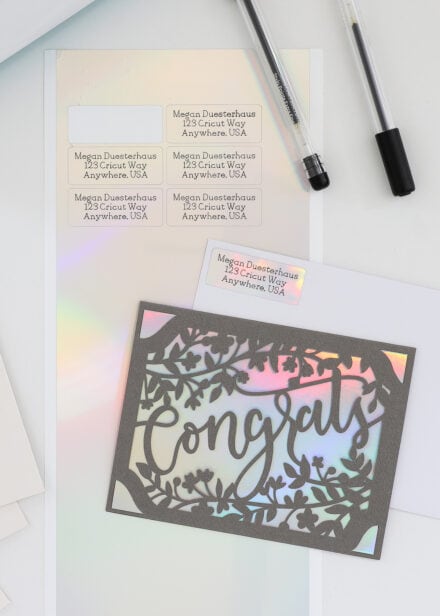
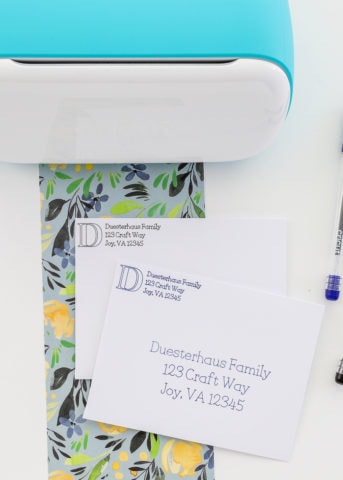
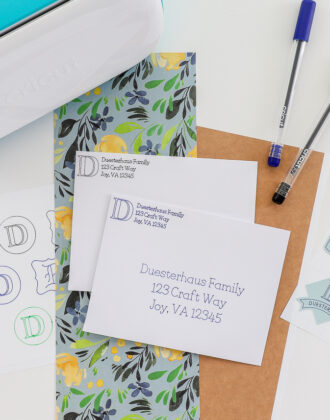
Use Cricut Joy to Write on Envelopes Too!
You can use Cricut Joy to add names, words, and messages to envelopes too!
In Cricut Design Space, use the same alignment trick I used above (pick a word and center it within corner cuts; attach the designs together before sending it to Joy).
Load the Cricut Joy Card Mat with an envelope as shown below:
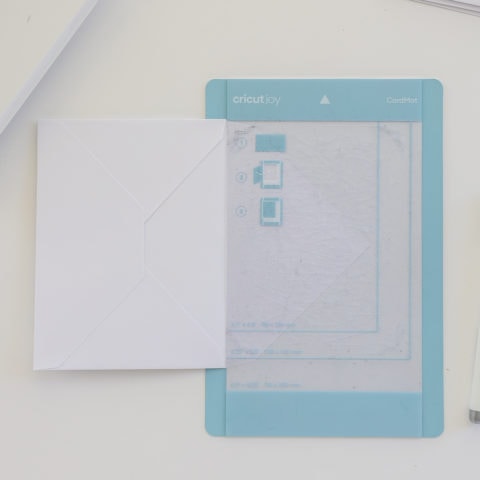
Then feed it into the machine and have Joy write on the envelope the same as it would a card!
Add the Design On Top (Instead of Inside)
As I told you in my Labels post, the new Adhesive-Backed Paper is one of my favorite new products. These are essentially thick, patterned sticker sheets that you can cut into any shape. Below, I “Sliced” the “Best Day Ever” card design into a 4×5.25” rectangle.
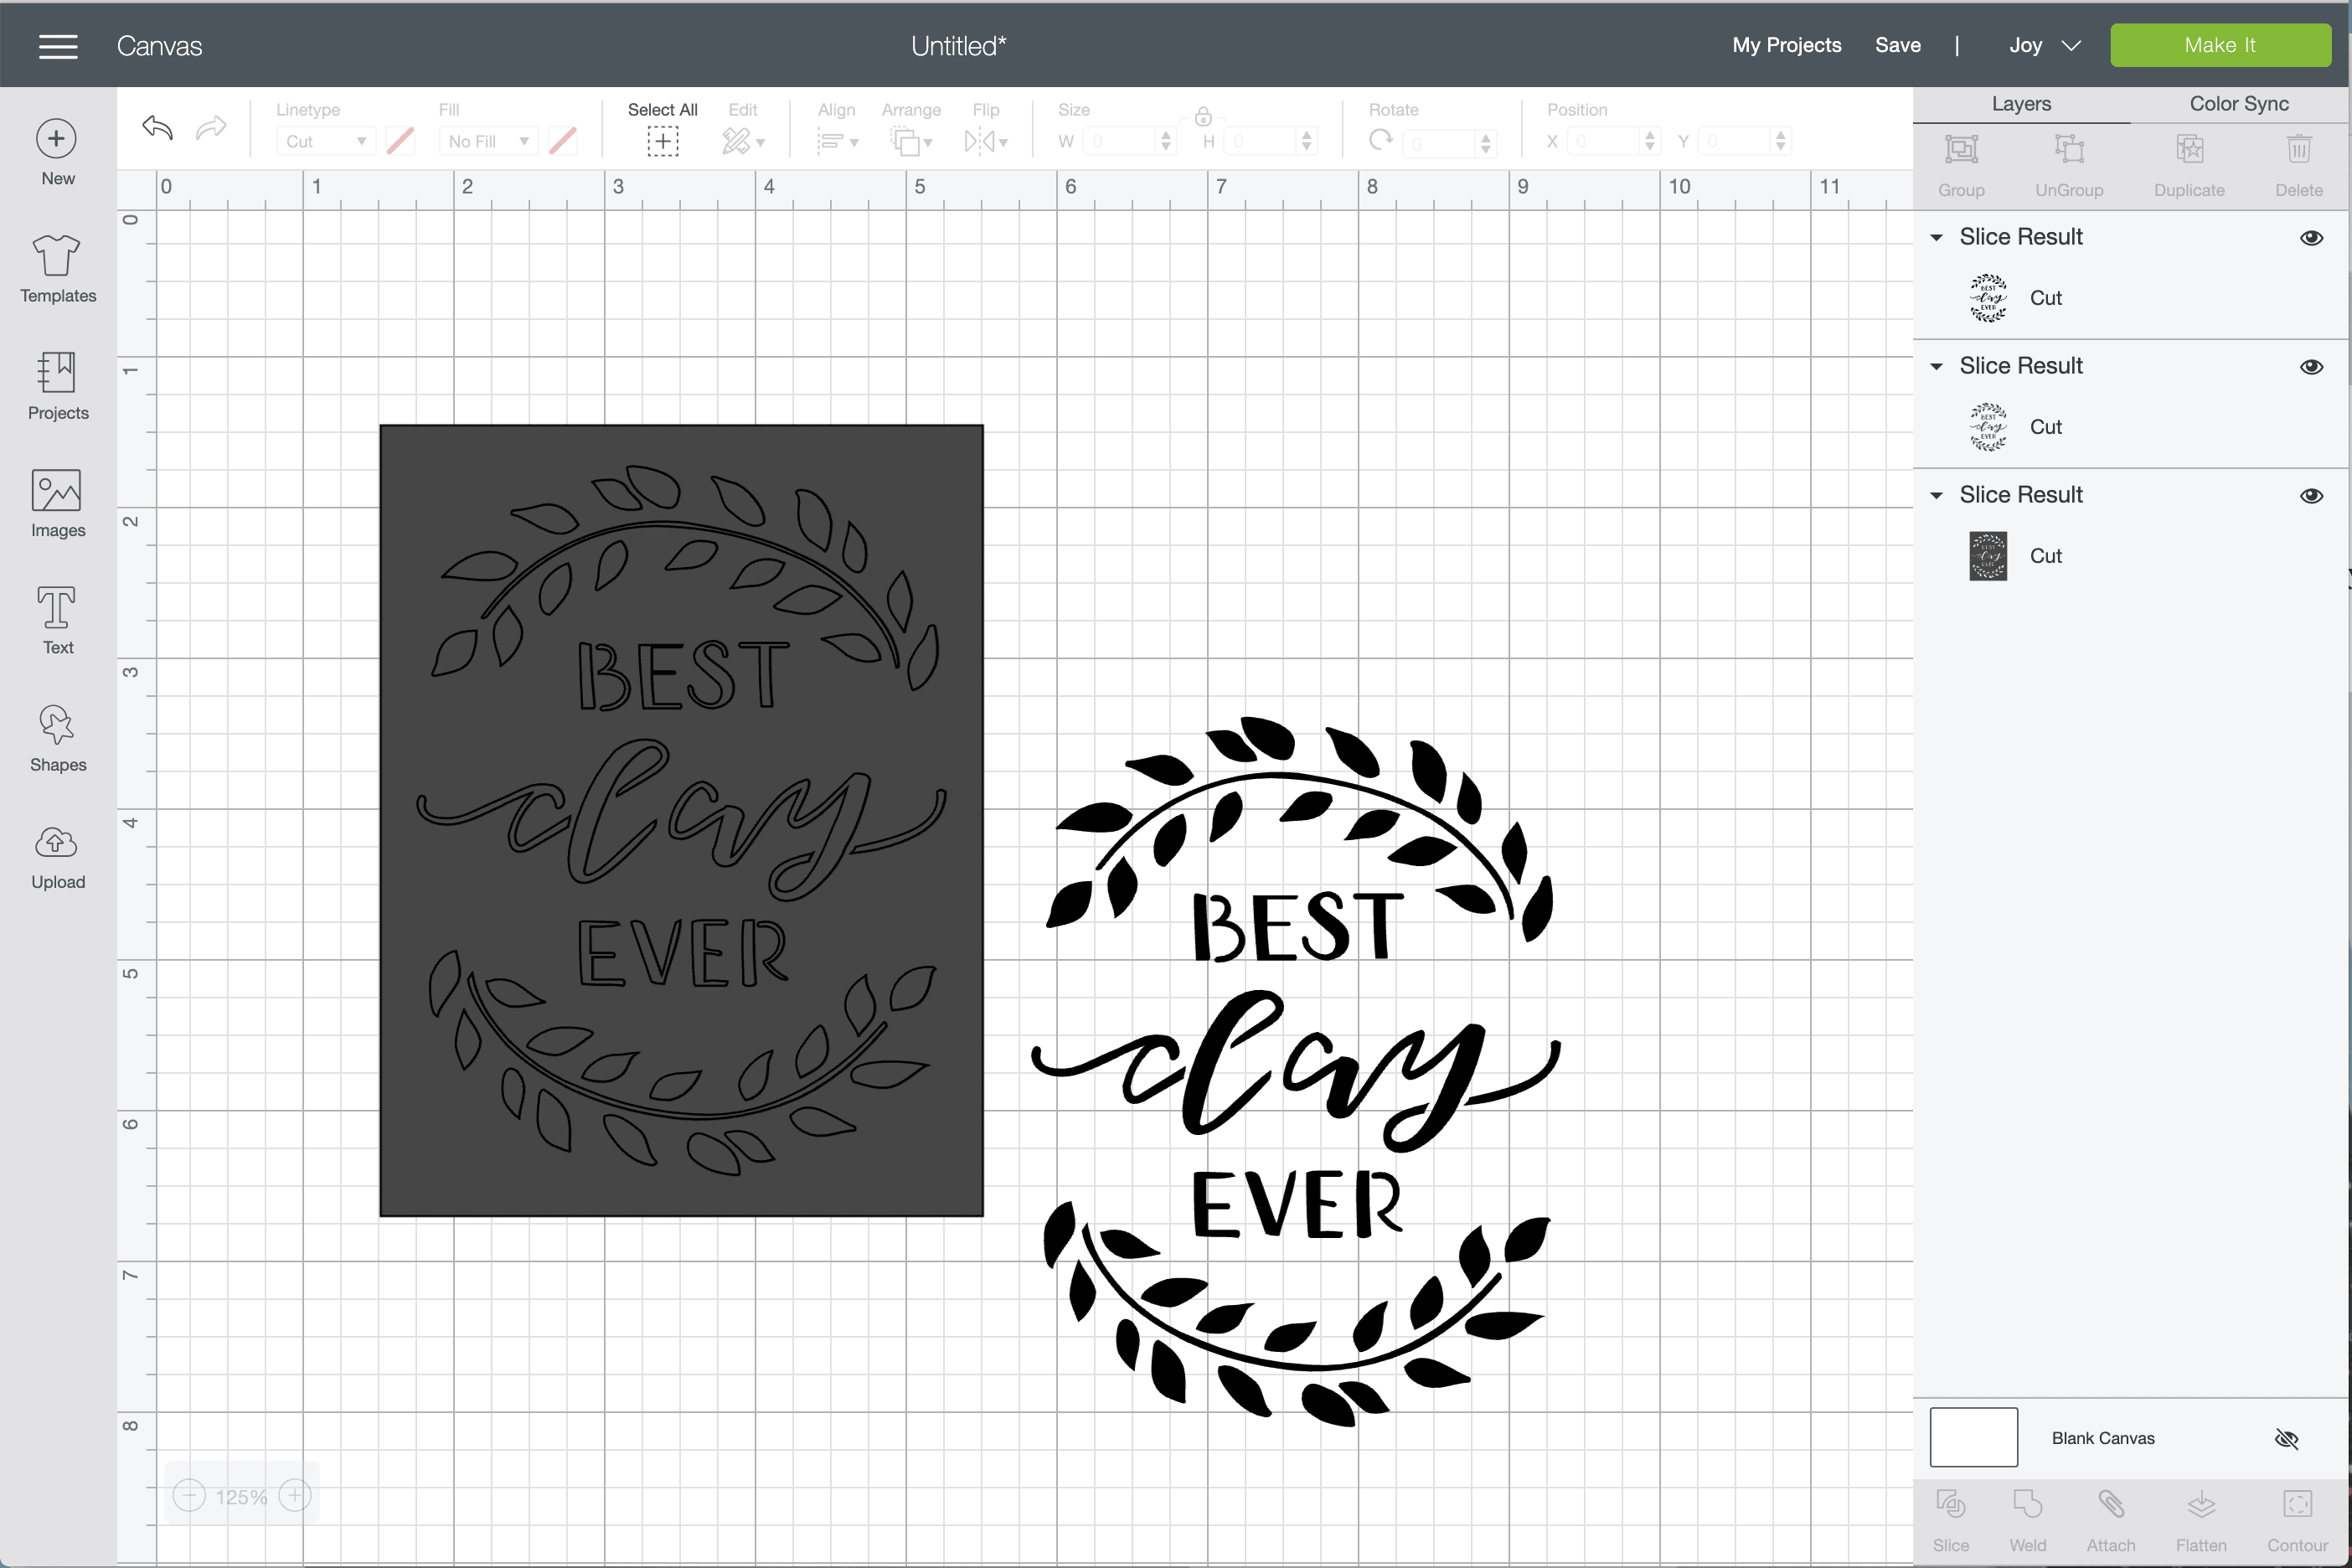
I then cut the design into the Adhesive-Backed paper (loaded onto a mat).
Since this paper is already sticky, I could just peel-and-stick the full design right onto a card front! This is another fun way to make a quick yet-equally gorgeous greeting card!
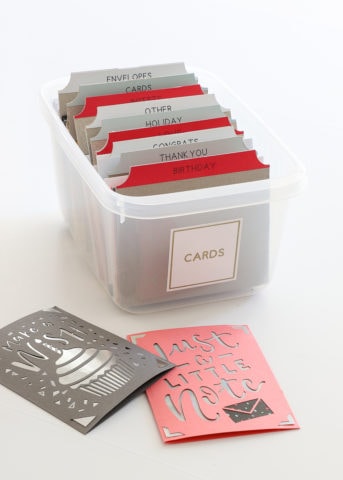
Making cards with Cricut Joy is seriously so much fun. Like I said at the beginning of this post, I haven’t made cards in ages, yet I couldn’t stop running card after card through my machine. There are just so many fun combinations to play with!
I made so many cards that I needed to come up with a new organization solution for them! I outfitted a simple plastic shoe box with some cardboard dividers I made on my Maker and labeled with my Joy. Now whenever I need a card, I’ve got dozens at the ready. And if I don’t have just the right one on hand, making a new one takes just minutes!

Other Happy Mail Ideas!
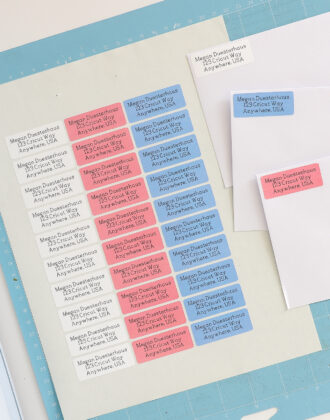
- How to Make Return Address Labels with ANY Cricut Machine
- How to Address Envelopes with Cricut Joy
- A Clever Cricut Joy Envelope Hack
- DIY Card Organizer with Your Cricut Machine

The Cricut Joy Card Mat (combined with the ready-to-go card kits) is seriously one of the most brilliant things I’ve seen Cricut release. The ability to make gorgeous cards, in minutes, without scissors or glue, is such a game-changer. If you love making cards or never seem to have the right ones on hand, you will absolutely love this new system! See you all next time!
Megan
18 Comments on “How to Make Cards on Cricut Joy”
Curious…
Will transfer tape pick up the adhesive backed paper? Thinking that if it does, would made an easy second card with the leftover negative from your “best day ever” card, similar to how you used “thanks”.
Megan, you came up with sooo many good tips and uses. I’ve turned into a Joy junkie already, and have watched/read several blogs and YouTube videos, and you have the BEST ideas–using it in the basic manner as are the others, but already taking it up a notch with new and creative tips I haven’t seen others cover. GREAT JOB!
I already have plans to buy a Joy on Monday (HSN package deal Today’s Special Value for the win!), and can’t hardly wait! This will be my first Cricut and I am so excited!
Thanks for the great tutorials!
Thank you so much, Heather!
I am thrilled to hear that you’ve found my tutorials and ideas helpful! I really think you will LOVE Cricut Joy and don’t hesitate to reach out if you have questions as you get up and running!
Have a great weekend!Megan
Hello! Thanks for the great tutorial. I am trying to add the “quick cut corner cards” to my canvas but I can’t seem to find them. How do you do it?
I’ve created a new project. Inserted an image and searched quick cut corner cards in order to modify like you have in the tutorial!
Also. Any information on the smallest card size? I can’t seem to choose the small option for any of the ore made cards!
Thanks!!
Hi Holly!
Thanks so much for writing. You are actually the second person to ask me this so I reached out to Cricut for clarification. I just heard back and it turns out that the Joy cards have been designed as “Make It Now” projects, so you cannot place them directly onto your canvas as I show in my tutorial. (As part of the Joy launch team, we were given early access to these images and I was under the impression they would be available to everyone the same way. I will be adjusting my tutorial this weekend 😬).
That said, here’s a few things for you:
1) You can still make the cards. Just click the button that says “Projects” along the lefthand toolbar. When you do, you’ll see tons of card images to choose from. You can then just click “Make It” and it will send it directly to your Joy machine.
2) You should be able to access a Cartridge called Insert Card Corners. You can use those corners and put any image into the middle of them. Just be sure to Attach them together before sending them to cut.
3) If the smaller card size doesn’t populate on the Cut Screen dropdown menu…back out and nudge your card design a bit smaller. Once it’s small enough and you go to Make It, the smaller card size should be available in the dropdown menu.
4) As far as the “smallest” size, the mat shows an even smaller option but there is currently no option to select that size in the dropdown menu (it might be coming down the pike, but I’m not sure!) That said, you could always manually position your design to cut on smaller paper.
Hope that helps a bit. Please let me know if something here isn’t clear and/or if you have more questions!Thanks,Megan
This was great information, Megan! Quick question-I’m trying to make the Cricut Joy envelopes. Do you happen to know how to size them on DS? Thank you for all you do!
Hi There!
Thanks for your email. I guess I am not quite sure what you mean by sizing? Like I show in the tutorial, I just position wording in the center of the Cut Corners (and then just don’t cut the corners).
Not sure if that answers your question. If not, send a long some more specifics and I’ll do my best to help!
Thanks,Megan
Thanks for your reply! Since I was wanting to make my own envelopes what size should the envelopes be in DS?
Thank you!
Hi this is great information! I tried making a card but it did not cut the intricate details. I tried to make the “best mom ever ribbon card” and it did not cut the words cleanly. What am I doing wrong?
Hi Eloise,
Hmmm…something definitely doesn’t sound right. Are you using the card mat? With what paper? What setting are you using?
Sometimes I have to play around with adding “More” or “Less” pressure on the final cut screen. Try that first and see if it cuts better!
Keep me posted!
Megan
Hi Megan, this has been very helpful. As I want to use my own cardstock how do I go about scoring the card so that it folds neatly in half. I have the scoring tool and the Maker along with the Joy. I know that I can’t use the scoring tool in the joy. Can you tell me what I need to put in design space to create and make it.
Thanks so much Megan I have learnt a lot.
Glynys
I found this article really helpful and interesting.
I have however struggled to find the corner cut section
I have searched the design space and and looked at your pictures but to no avail.
Is it possible that the feature is only available in the US.
I hope not. Thank you in advance.
Hi,
thanks for this guide of your great works, but I have Cricut maker 3 machine, how could me to make cards (same designs in this guide) with it? I have only regular CardStock, glitter CardStocks, ,smart CardStocks, vinyl, Deluxe papers & foil transfer sheets, are there special instructions I should follow for this machine?
This really IS a comprehensive guide! Thanks you for the tips and taking the time to show us! I just got one on super sale on a whim and had noooo idea where to start. I’ve also recently wanted to jump into card making (and no clue this machine could do this when I bought it). WOW! Thank you again!
Hi Megan,
Thank you for all this super helpful information. I am a complete novice to Cricut. My search brought me to Cricut joy as I have been trying to find a start up device to help me print on to a card, either on the front or insert, so that I can personalise my own creations. However, I am still not sure if this is the right machine for me as I think the Cricut seems to specialise in cutting – or would it be easy enough to set up font to do this?
Any advice would be really appreciated.
Thanks, Mandy
This was so very thorough and helpful! Thank you so much! I was so disgusted that Cricut sent me so many blank cards and I wasn’t sure how to write in them. You answered my question. Also, thank you for showing how to write ont he envelopes, too!
Thanks so much. I’ve had my Joy for sometime, but didn’t use it to capacity. You provided lots of helpful tips and resources. Really appreciate the tip for writing inside the cards. I’ve struggled with that. Now I’m ready to get going again.
Thank you, thank you, thank you!! You have no idea how much I appreciate a written out tutorial versus having to sit through a video. It’s more effective and efficient for me to learn by reading. So much so, I have the time to write a comment and thank you.
Hello Megan, I was reading through this article on making cards and it looks very interesting, however the ads that are popping up are a bit distracting and annoying. Is there any way that I can see this without the ads? Like you cards aren’t really my thing, but your article lit a flame in my imagination and I would like to try it with my Cricut Joy. I like to print articles and instructions so that I can read them at my leisure.