How to Assemble a Picture Hanging Kit
At the beginning of the summer, we had a flood in our downstairs bathroom. And while the repairs and re-construction wrapped up well over 2 months ago, I still hadn’t gone in to re-hang the frames back on the wall. Why? Not because I wasn’t sure where everything would go or how to hang it all up, but because I was too lazy to go dig out the nails and hammer and level to actually do it. And so the frames sat on the floor of our garage..and our walls remained bare…for 2 solid months…for no good reason. Recently, I decided enough was enough. I not only assembled everything I needed to get the three simple frames back up on the wall, but I went a step further and created a handy picture hanging kit! Now everything we need to hang a majority of what we put on our walls is assembled into one, easy-to-grab case, and the sight and functionality of it makes my organizing-heart just so happy! Let me show you!
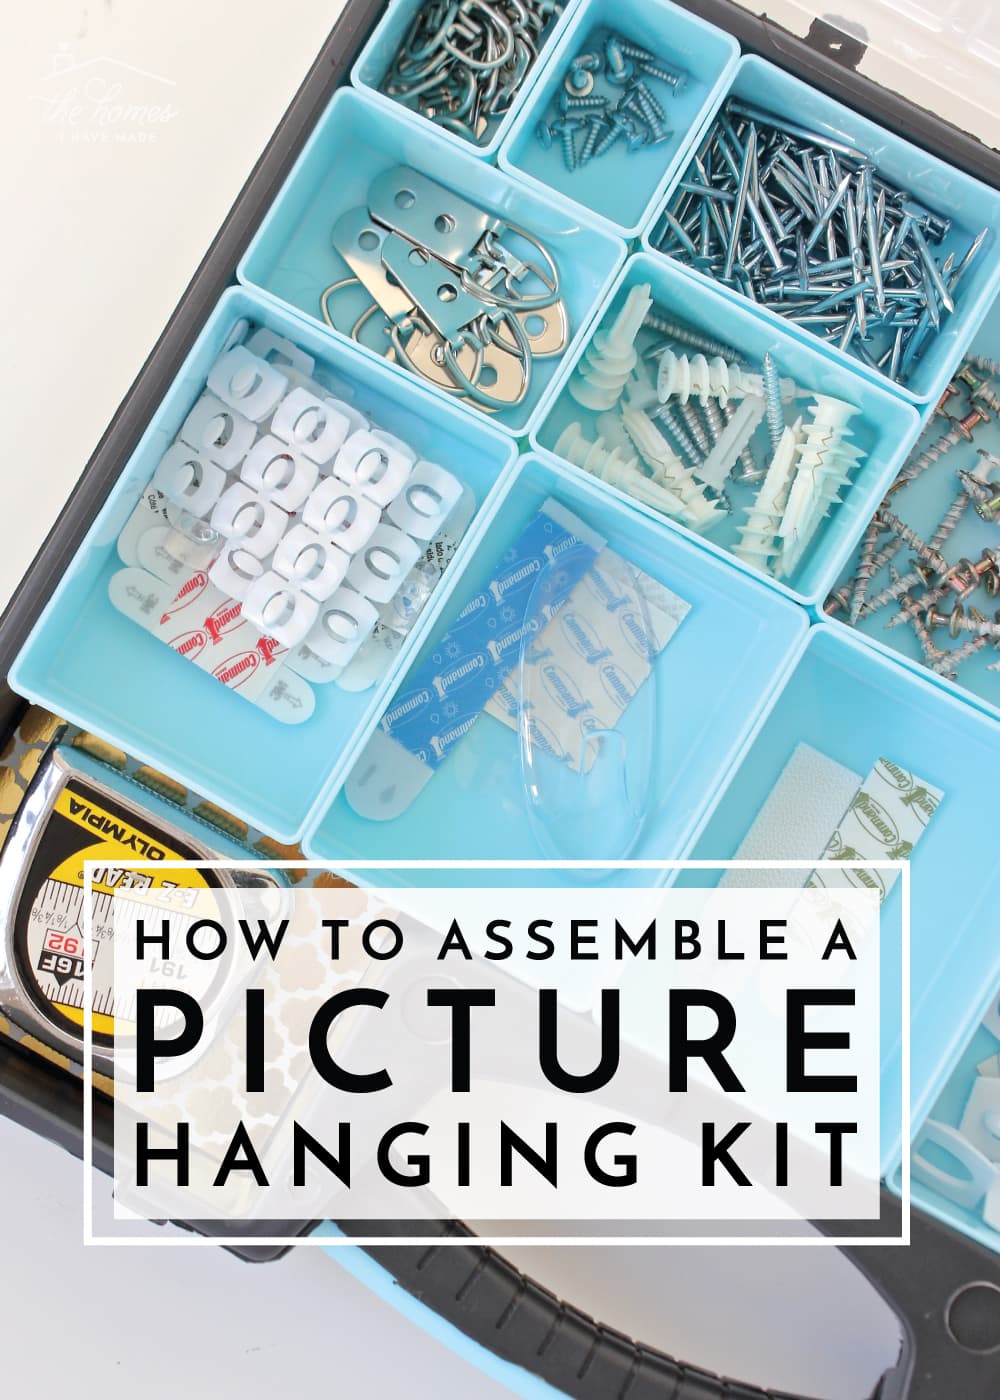
My goal with this kit was to have everything…and I mean everything…necessary to hang (most) items on the wall. Part of what slows me down in getting things up on the wall…like with the bathroom frames…is digging everything out. In reality, it’s not much work and doesn’t take much time, but sometimes just the thought of rummaging through our tools and nails/screws is enough to make me say “I’ll do it later.” With everything in one spot, I’ve eliminated the hassle and the hesitation!
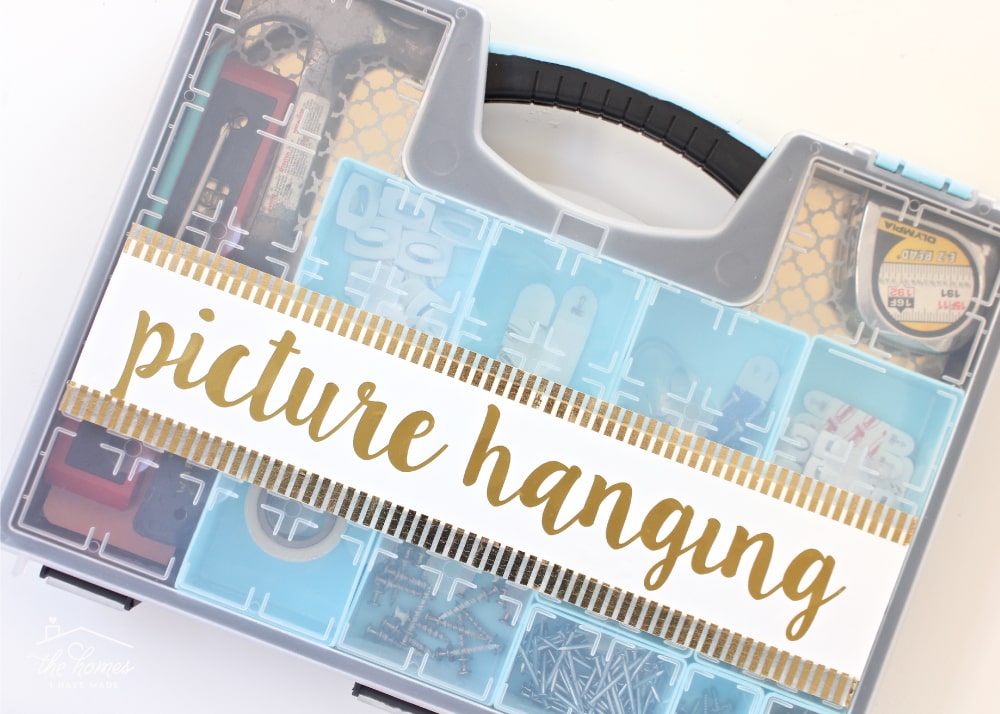
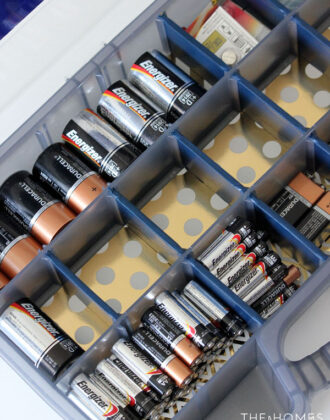
We have had so much luck with our similar battery case, that I wanted to mimic the concept for a picture hanging kit. I had a few criteria: 1) it had to be compact and small just like the battery kit; 2) it needed to have multiple compartments in various sizes to hold lots of different items; and 3) the fit of the lid to the case had to be snug so the nails and hooks couldn’t slip from their designated compartments. When I came upon this large ArtBin case at The Container Store, I knew I had my solution!
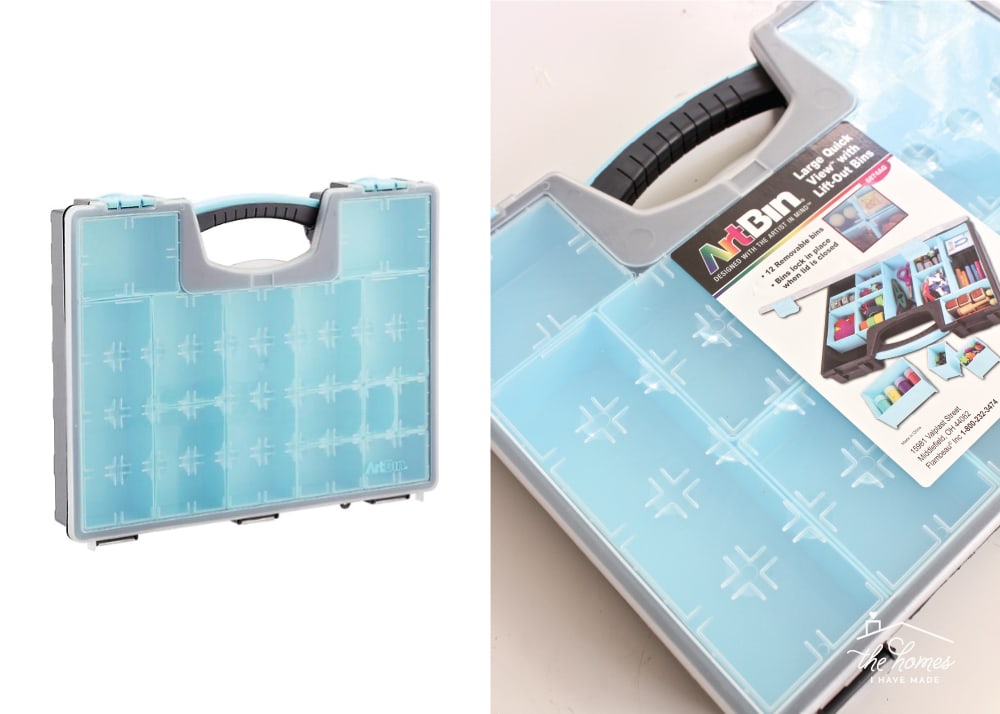
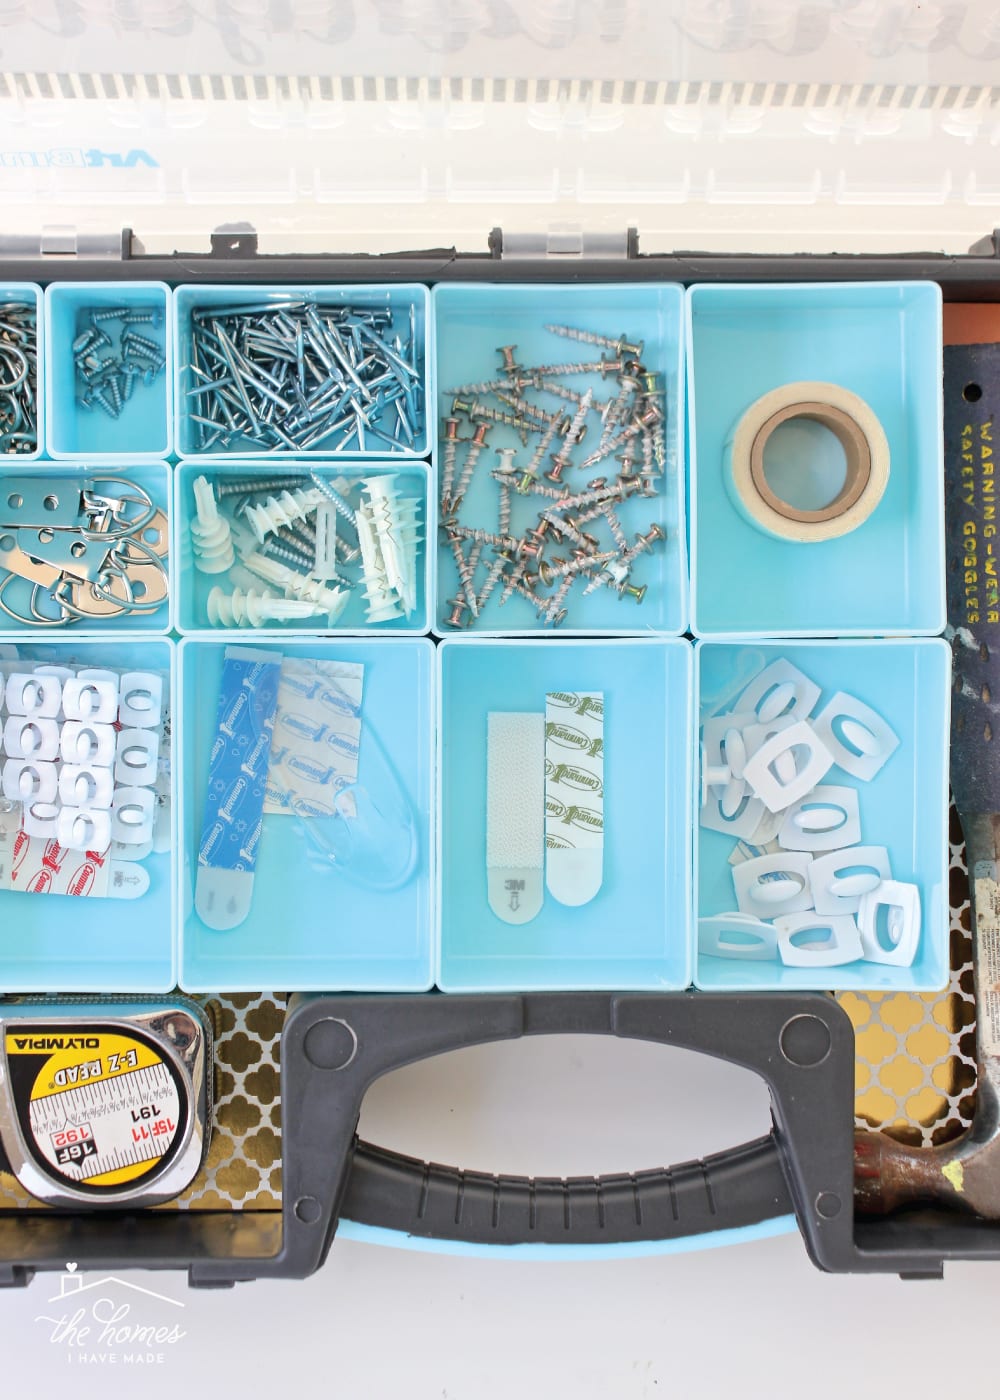
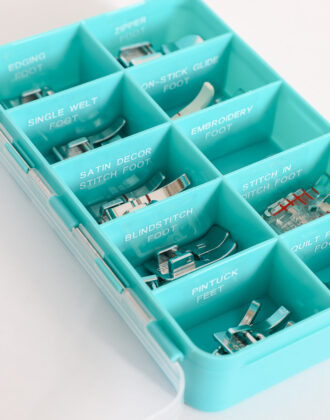
This lidded box comes with 13 turquoise plastic compartments…all of which are moveable and removable. And thanks to the groves on the lid (below right), the turquoise boxes won’t slide around no matter what arrangement you put them in!
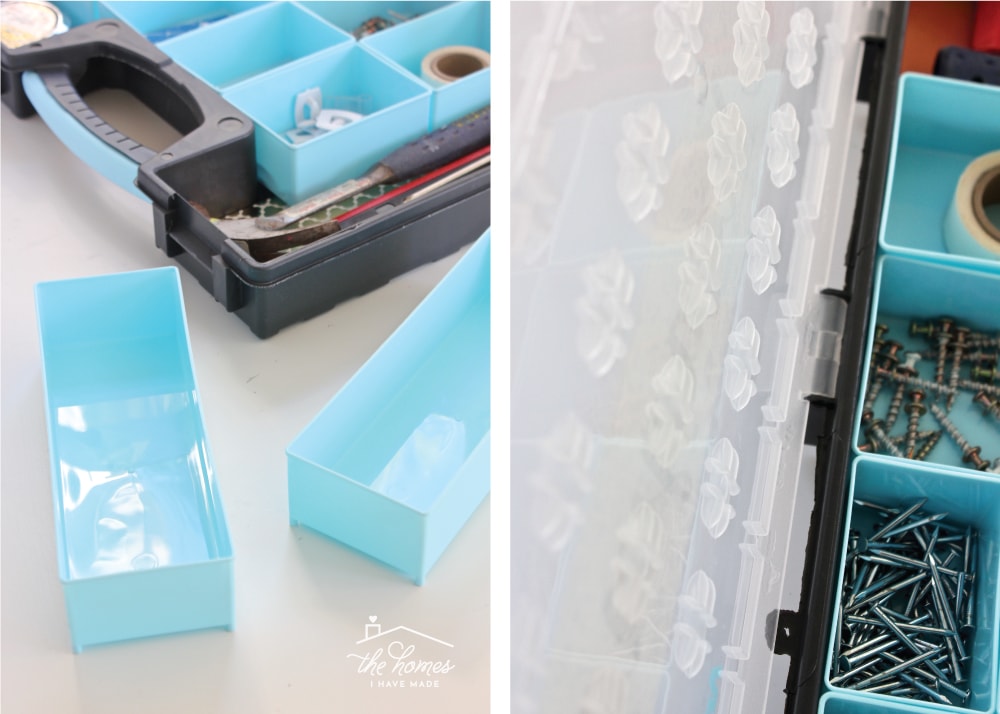
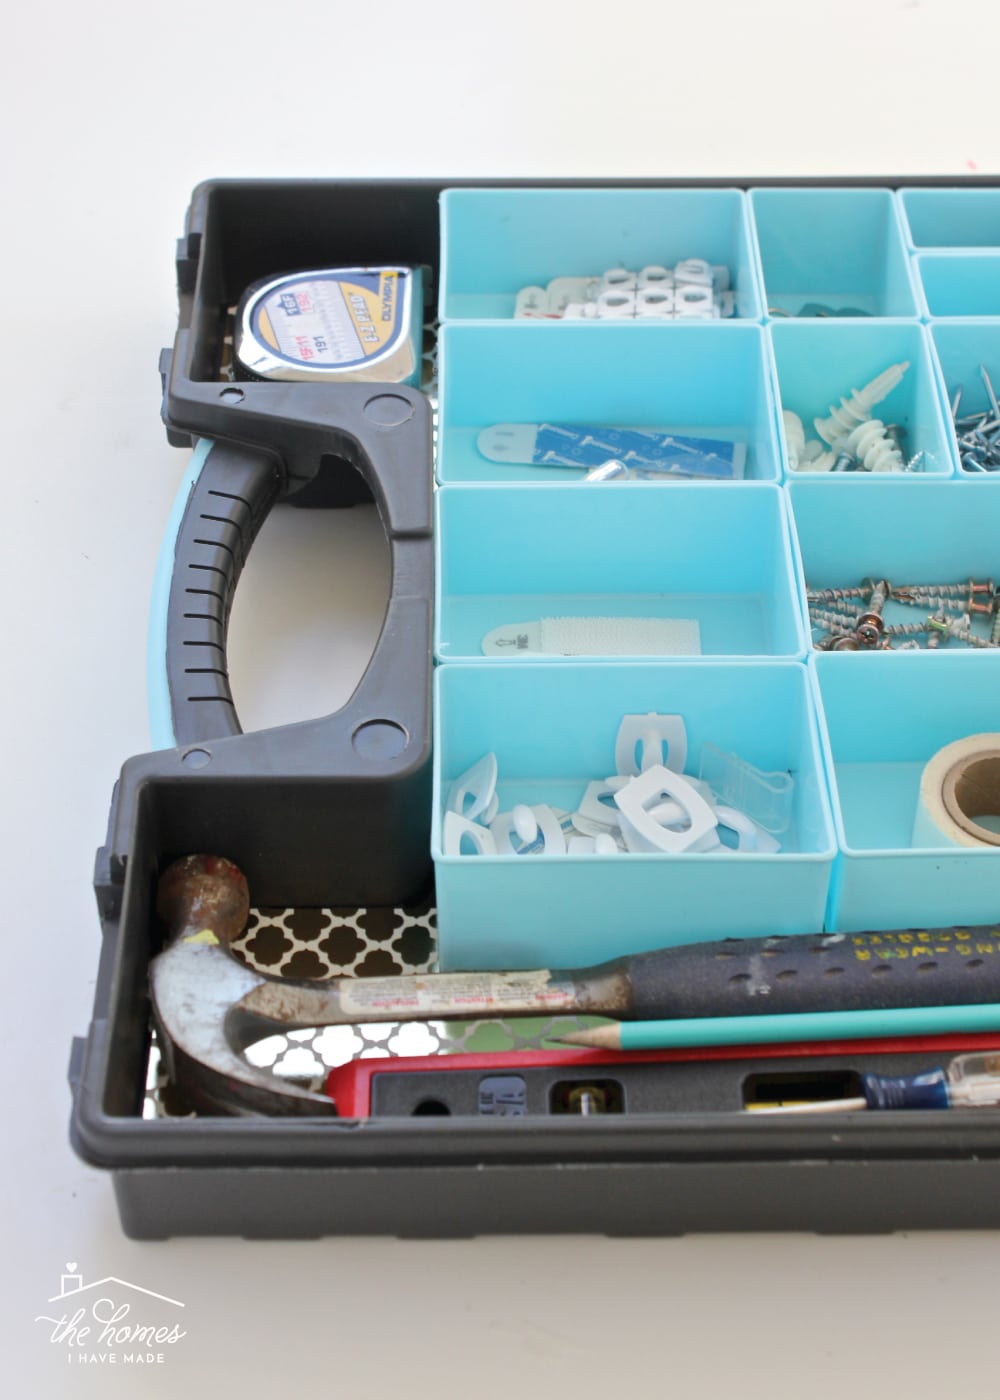
This meant that not only could I arrange the blue containers exactly as I wanted them for my specific supplies, but I could also leave some boxes out without the remaining ones sliding around. After some playing, I determined that by pulling out the two large blue containers and re-arranging the smaller ones, I could hold all of our hooks and strips while leaving room for other picture hanging tools!
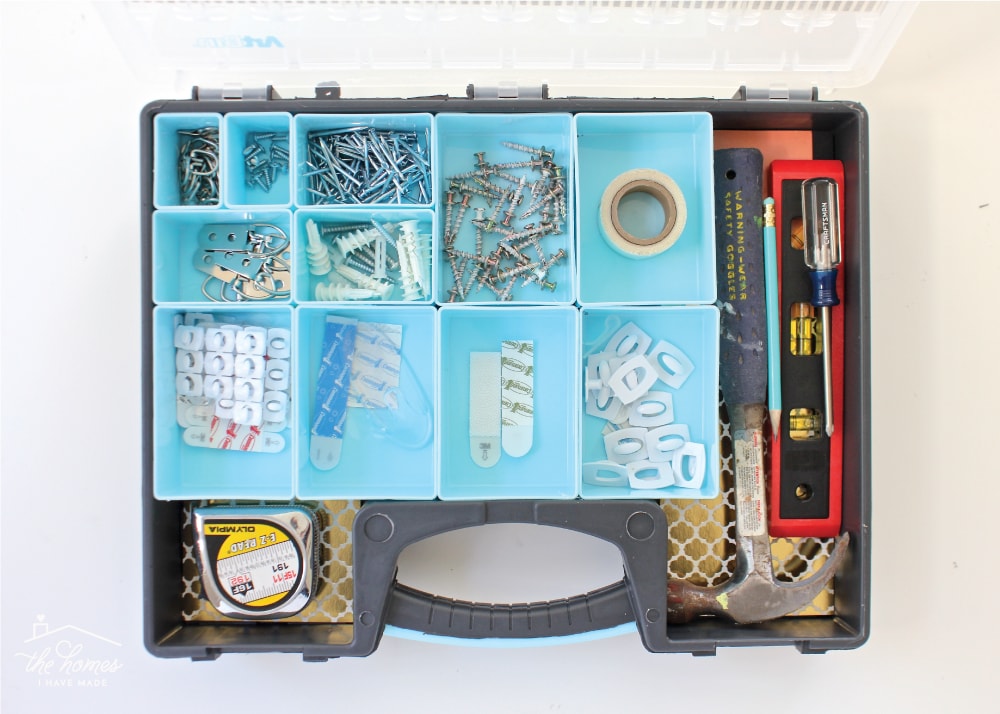
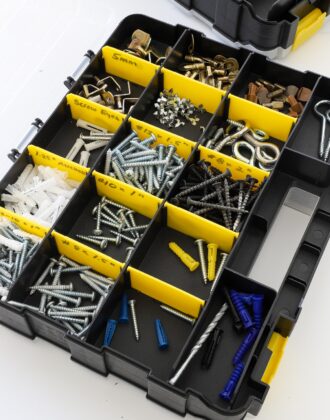
I used the 11 different-sized turquoise boxes to hold the various screws and strips we most often use to hang items on our walls. This is not to say that we never utilize other products for large, heavy, or unique pieces; but on the whole, these are the items we turn to over and over again.
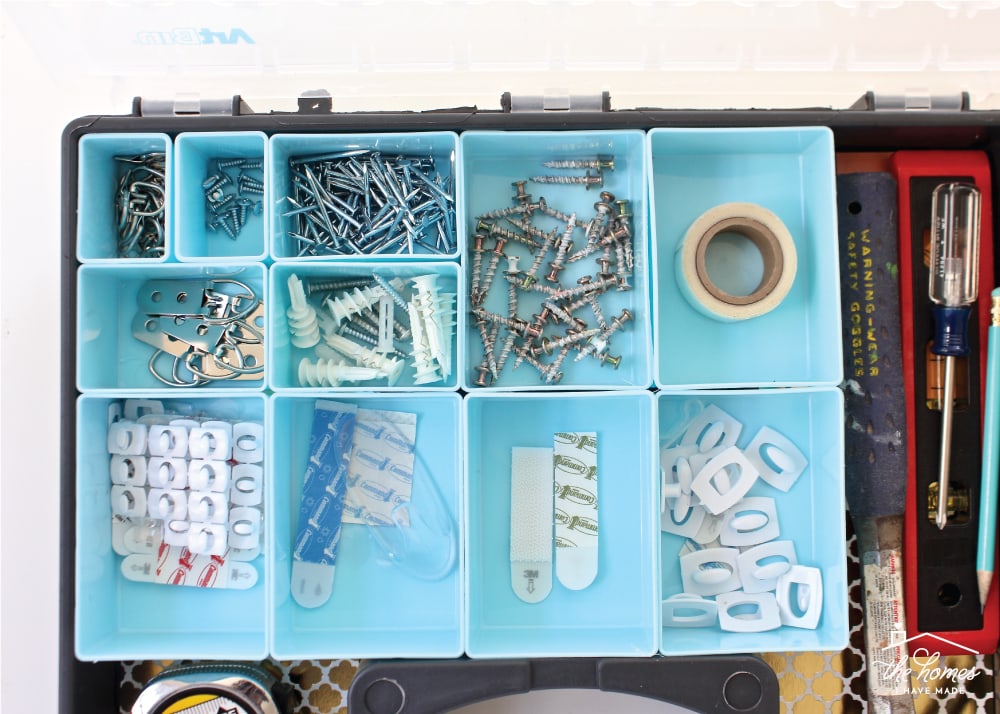
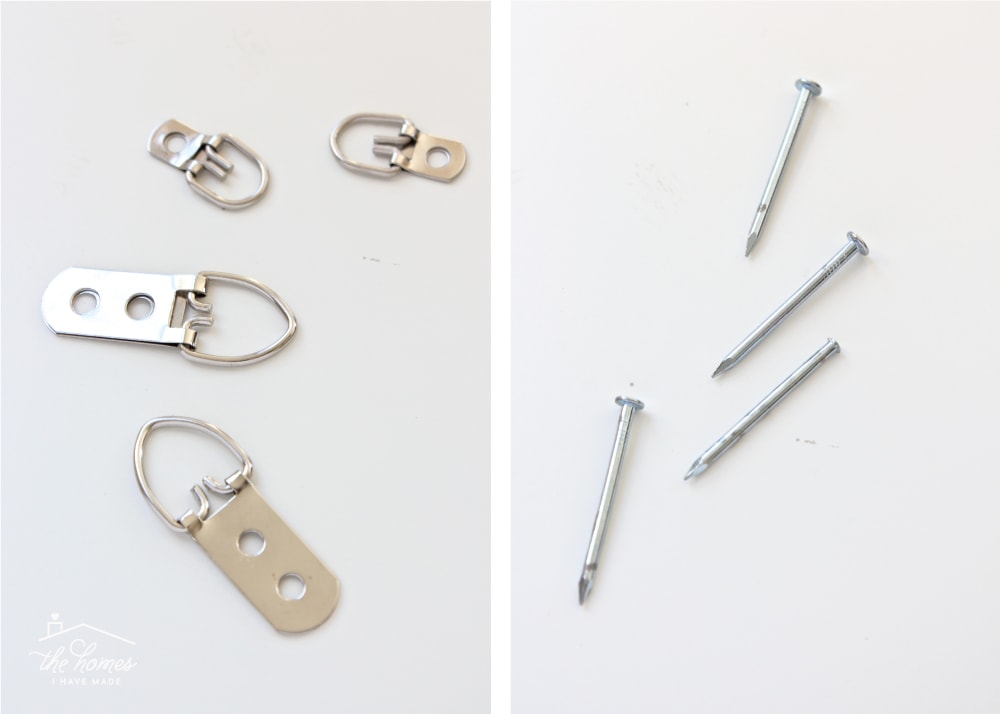
When I make my own frames (like here and here) or a frame doesn’t come with hanging hardware on the back, I will often use the D-ring hooks shown below left. I like that they come in various sizes and can easily rotate on a frame. Most of all though, I like that they are really easy to latch over a hook or nail!
If a frame is nice and light and can’t easily be secured to the wall with Command Strips, we will often use basic nails (below right). These 1.5″ nails are sturdy enough to hold a frame in place but don’t leave huge gashes in the wall. My favorite gold frames are hung on these nails throughout our home.
When it comes to items with more bulk or weight, we typically rely on one of two products. Our all-time favorite way to hang heavier items on the wall is with Bear Claws (below, right). These screws can hold a ton of weight (on their own, without an anchor!) and don’t require any pilot holes. And because they have this unique double head, they are ideal for hooking frames and other decorative items onto. Seriously, we use these practically everywhere in our home!
Want to save this post?
In instances though when a Bear Claw isn’t quite right (like if it’s really heavy or we don’t want that extra flat head sticking out) we will use these self-drilling dry wall anchors and screws (below left). I love that they twist right into your dry wall without needing the drill/drill bits…again, anything that saves steps and time means it’s more likely things will actually get hung!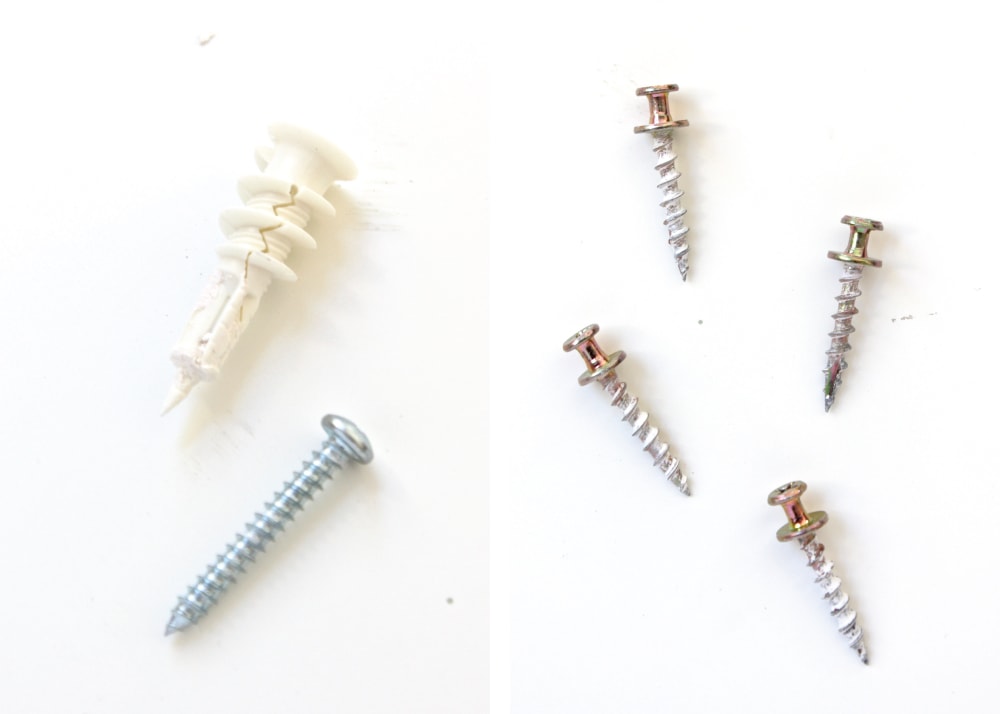
Self-Drilling Dry Wall Anchors | Bear Claws
The other thing we have been relying on more and more are Command Strips and various Command hooks. My stash is running a little low from some recent hanging projects, but I was sure to leave a few dedicated bins for the products we use most. I tend to use the strips mostly for frames (I like to buy these combo packs when I find them at a good price), and the tiny hooks are ideal for hanging things like garlands, banners, window treatments, and Christmas lights!
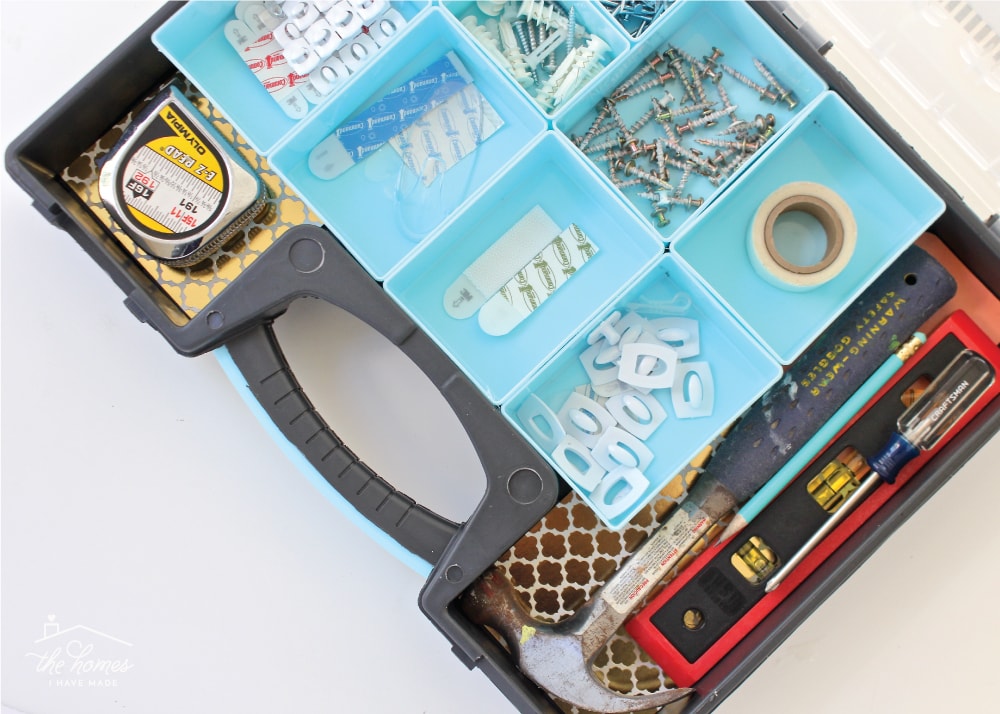
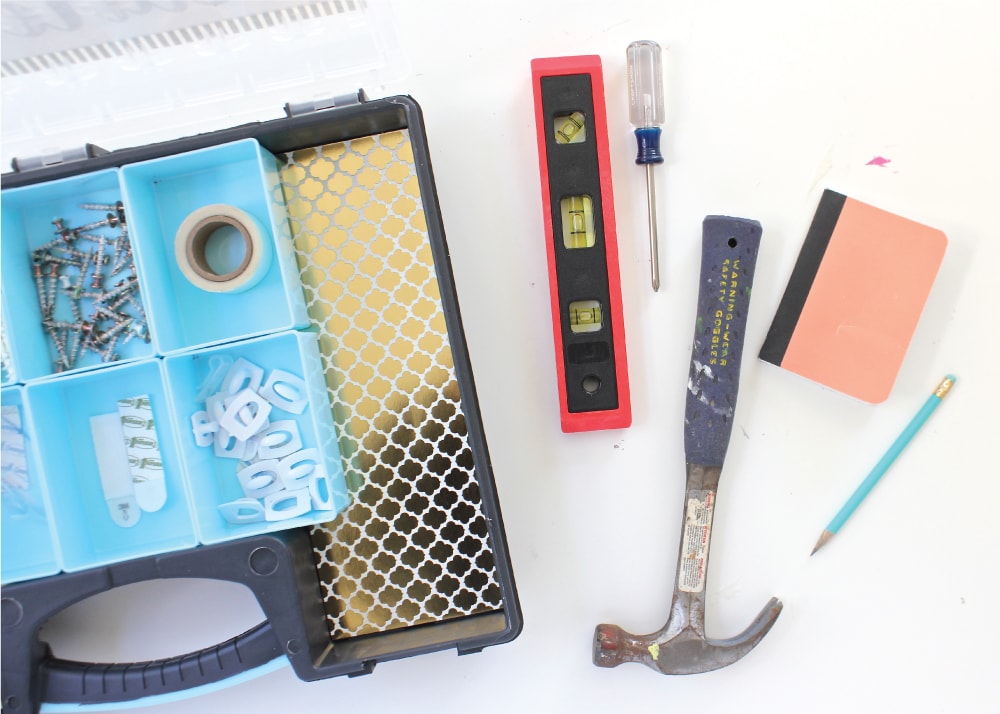
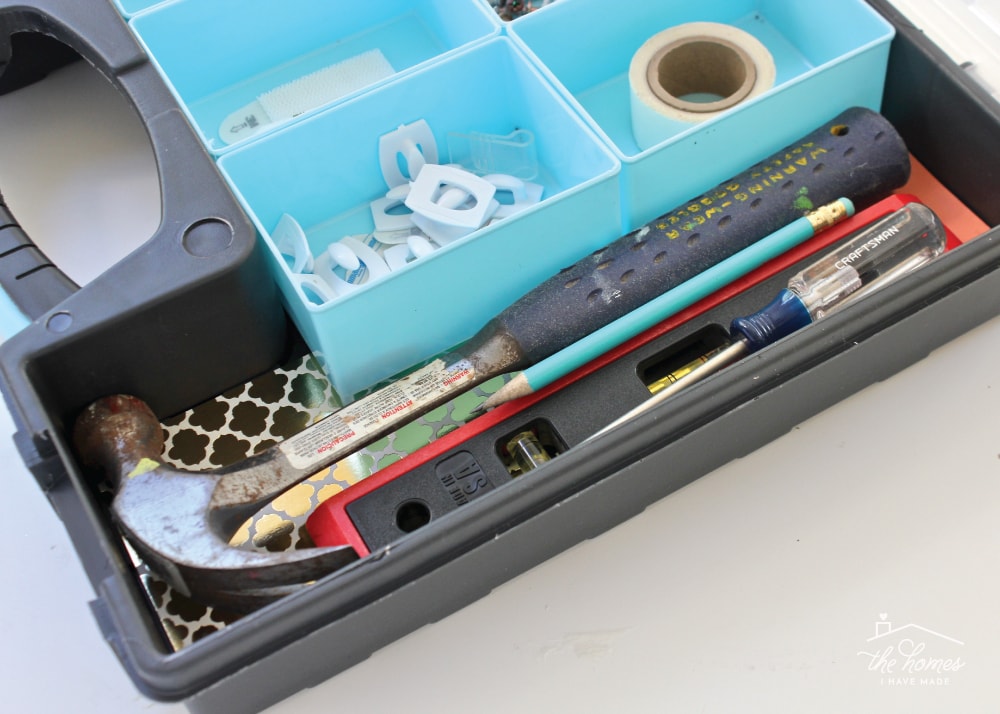
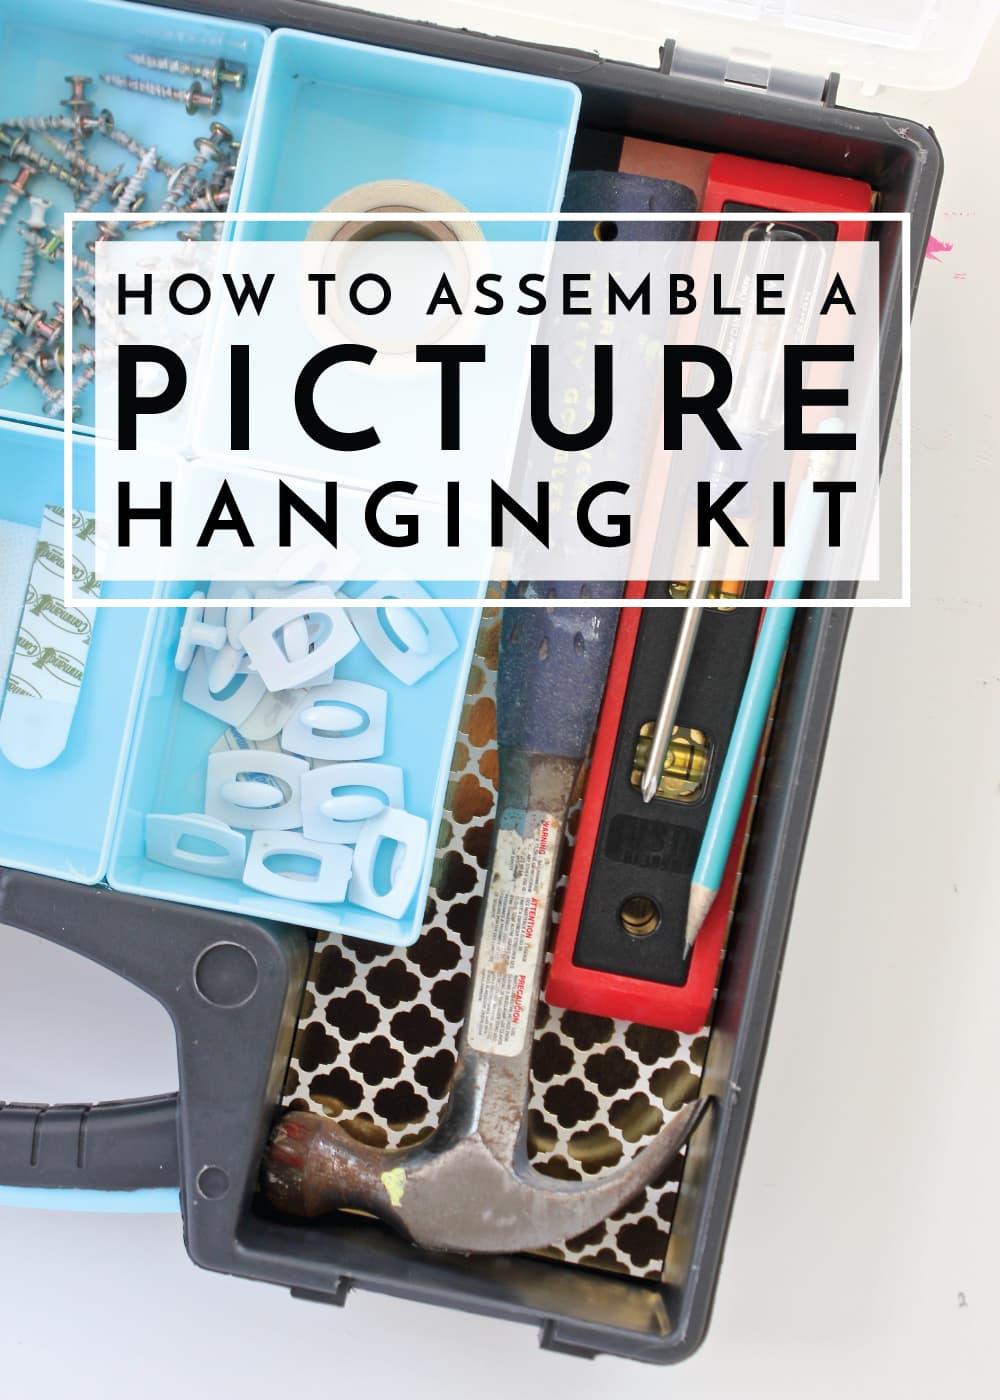
My other main priority with this kit was to include the tools we most often use to get things up on the wall. This includes a hammer and screwdriver, as well as my favorite little level (perfect for placing on top of frames) and a tape measure. A notebook and pencil are also handy for jotting down notes and measurements when you’re trying to figure out how best to hang something!
By luck, everything fit nice and snug along one side of the toolbox…
…and the tape measure fits into the other nook left vacant by removing and re-arranging the blue tubs.
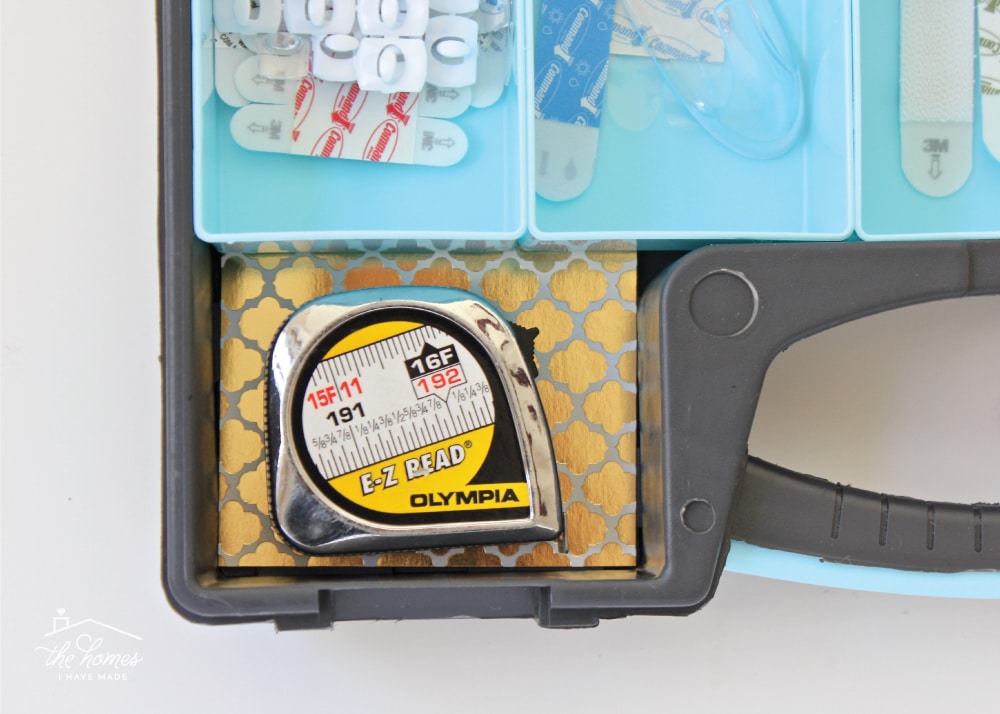
This case is pretty sharp looking to begin with, so I didn’t have to do much of anything for it to look as cute as it works (you may recall I did a bit of work to get our battery case looking so good!) I did slide some gold cardstock into the base of the tray where there are no blue boxes…just because! And I made a simple label out of vinyl for the top, outside of the case.
Assembling this kit took me no time at all since I basically just needed to rummage through the garage and pull everything together. We now store this case right next to our battery case in our upstairs linen closet, and I can’t tell you how convenient it is to have all of our picture hanging supplies assembled and ready to go!
I certainly love how cute and tidy this picture hanging kit is, but it’s really the time and hassle saved by this easy project that has me most excited! If you are often guilty of procrastinating the final step of getting frames up onto the wall, consider assembling something similar for your own home to make it as easy as possible!

Megan
One Comment on “How to Assemble a Picture Hanging Kit”
Great post! But I can’t find the Artbin. The link takes you a a “page not found”. I did a search and still couldn’t find it. Any recommendations for another bin? Thanks!