The Best Way to Make Art with a Cricut
Because we move so much, I am constantly having to re-figure out what goes on our walls. While some things transfer nicely from one house to the next, I am often left with blank spaces, bigger walls or new rooms that call for something…well…different! Since art tends to be pricey and I can never be sure it will work from home to home, I try to DIY my own whenever possible. However, I am no artist, so I often turn to my Cricut to help me! Having made a lot of art for our walls over the years, I’ve come up with a method that is not only foolproof, but also really easy and highly customizable. Today I want to break down the best way to make art with a Cricut so you can get great DIY creations on your walls too!

I recently completed a makeover of our downstairs powder room (you’ll see the full thing next month!), and one of the finishing touches was to hang some frames on the blank wall behind the toilet. I had one piece of printed art that worked beautifully, but I had nothing else to go with it. Instead of going shopping, I knew I could easily create something that not only held some meaning for us, but that also perfectly coordinated with the existing print.
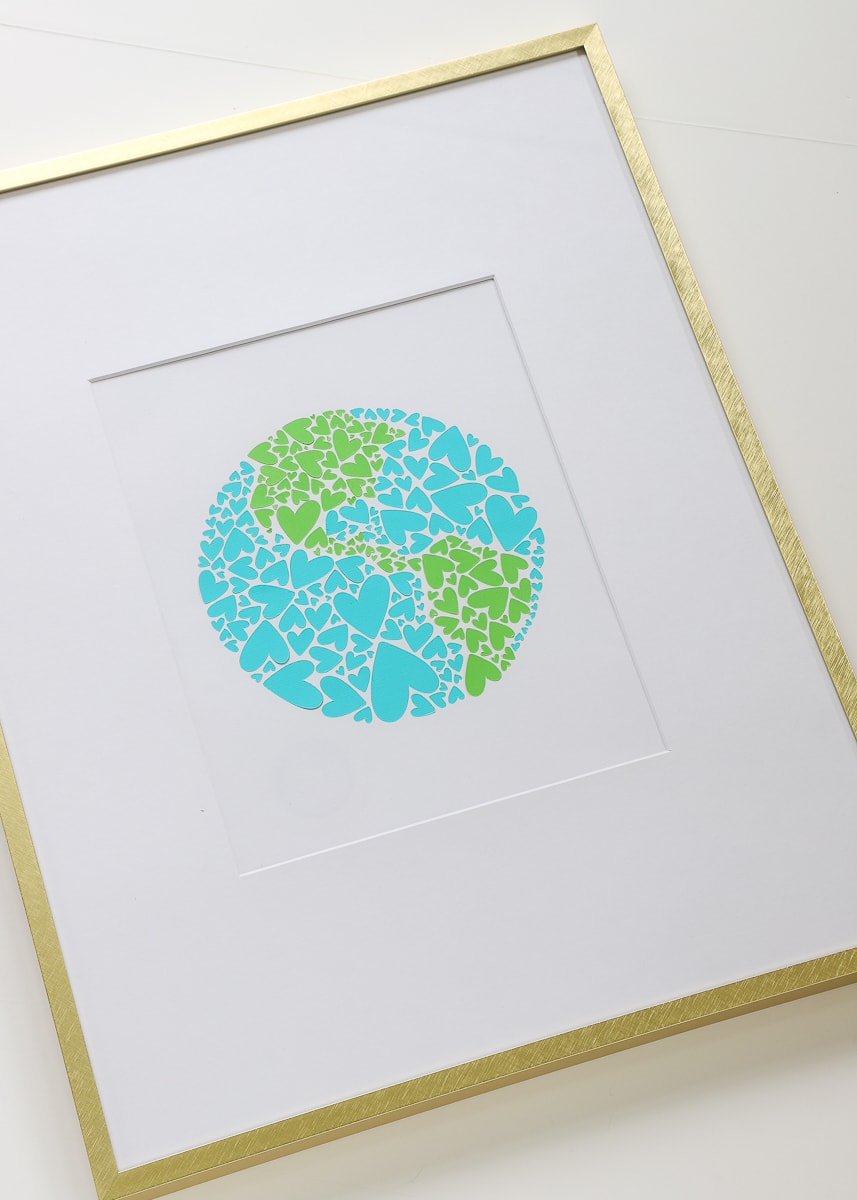
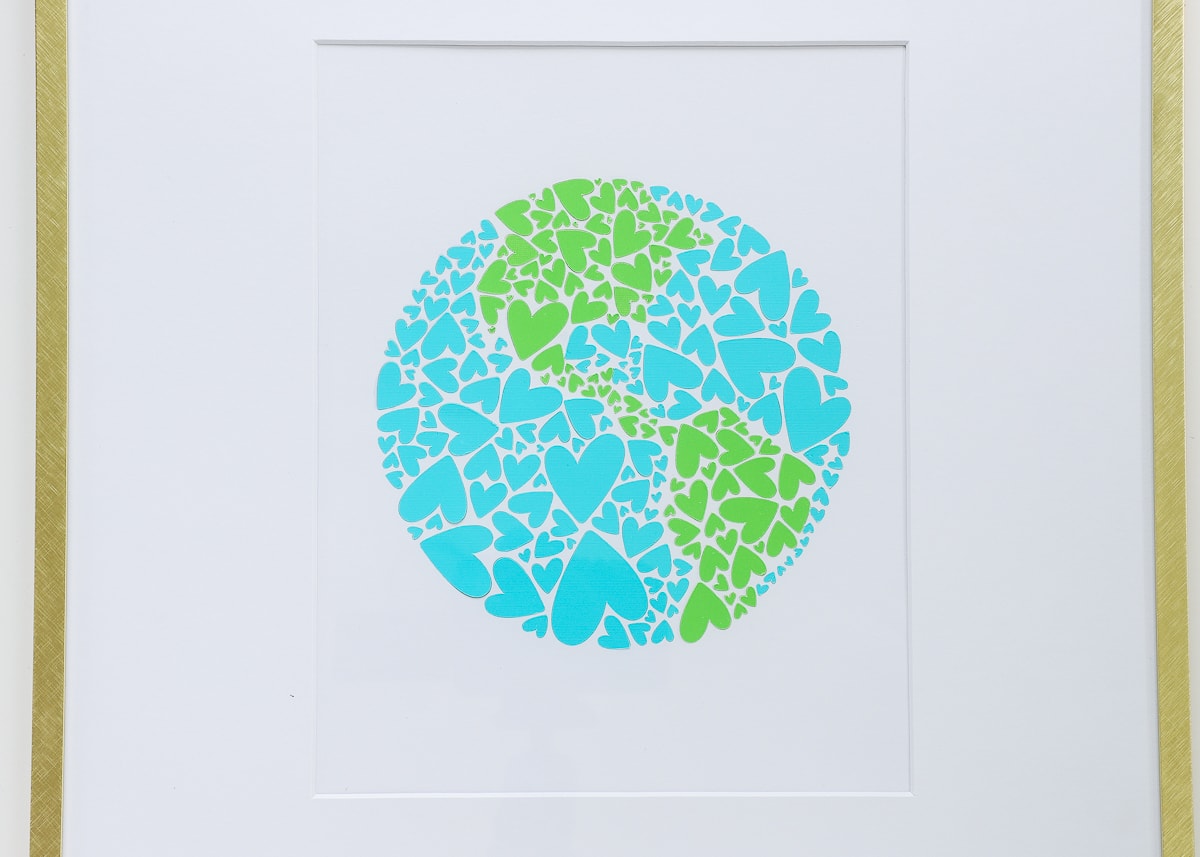
I had been wanting to use this World of Hearts image on something lately…since it reminds me so much of what’s going on in the world right now. When our blank bathroom wall needed something simple and colorful, I knew it was just the ticket. So I ran three sheets of plain ol’ cardstock through my Cricut and within an hour or so, I had a poignant, modern, and free piece of art ready for hanging!
Why Cardstock?
Before I dive into the step-by-step of how I like to make artwork with my Cricut, let me first chat about why I prefer to use paper over vinyl.
To start, paper comes in a much wider variety of colors, textures, patterns, sheens, and sizes compared to vinyl. This expansive variety will ultimately allow you to create artwork exactly as you want it. Trying to match a certain fabric, wall color, wallpaper…anything?!? You will have much better luck with paper than vinyl. Plus…paper tends to be cheaper and more widely available off-the-shelf at your local craft stores.
The other big reason though, is ease of application. If you’ve ever worked with vinyl, especially several colors on a single design, you know it can be a little…um…unwieldy. Yes, there are good methods for laying out and layering vinyl designs, but getting spacing and formatting exactly right is really, really tough no matter how much patience you use. Large designs cut from vinyl are also prone to bubbles, which when placed behind glass in a frame, become even more apparent. And finally, vinyl is a “one shot” medium, once you place it down, there’s really no going back. If you don’t like where something ended up or how it looks, you will likely need to peel it up and re-cut the design.
With paper and glue, you end up with a cleaner, more precise design and have more ability to fix problems as they arise. So while they take a little longer, the effort will be worth it!
Materials & Supplies
To make your own art with a Cricut using my foolproof method, here is what you need:
- Cricut Machine – any machine will work; however, if you want your finished artwork larger than 5″ wide, then you’ll need to use a Maker or Explore.
- Cardstock/paper for designs – these are the pretty papers you’ll use to create your cut images
- Paper backing – this can be inexpensive printer paper, wrapping paper, craft paper, whatever you have on hand. Although, I do recommend it be the same color as your artwork background color.
- Spray adhesive
- Tools: Weeding Tools (various) | Brayer
I created my World of Hearts artwork late at night one night while I was just reflecting, praying, processing this whole crazy situation. To show you how to do it, I re-created the method (in the daylight) using the dandelion image below.
Preparing Your Artwork In Cricut Design Space
This whole artwork method hinges around the concept of “Slicing” your image/design out of a solid background, and then using that design “relief” as a puzzle for the details cut from other papers. Whoa – that was a lot. Let me break down how to prep your design, and then you’ll see how it comes together!
If you’d like to make the World of Hearts or Dandelion Artwork, you can access my Design Space file here!
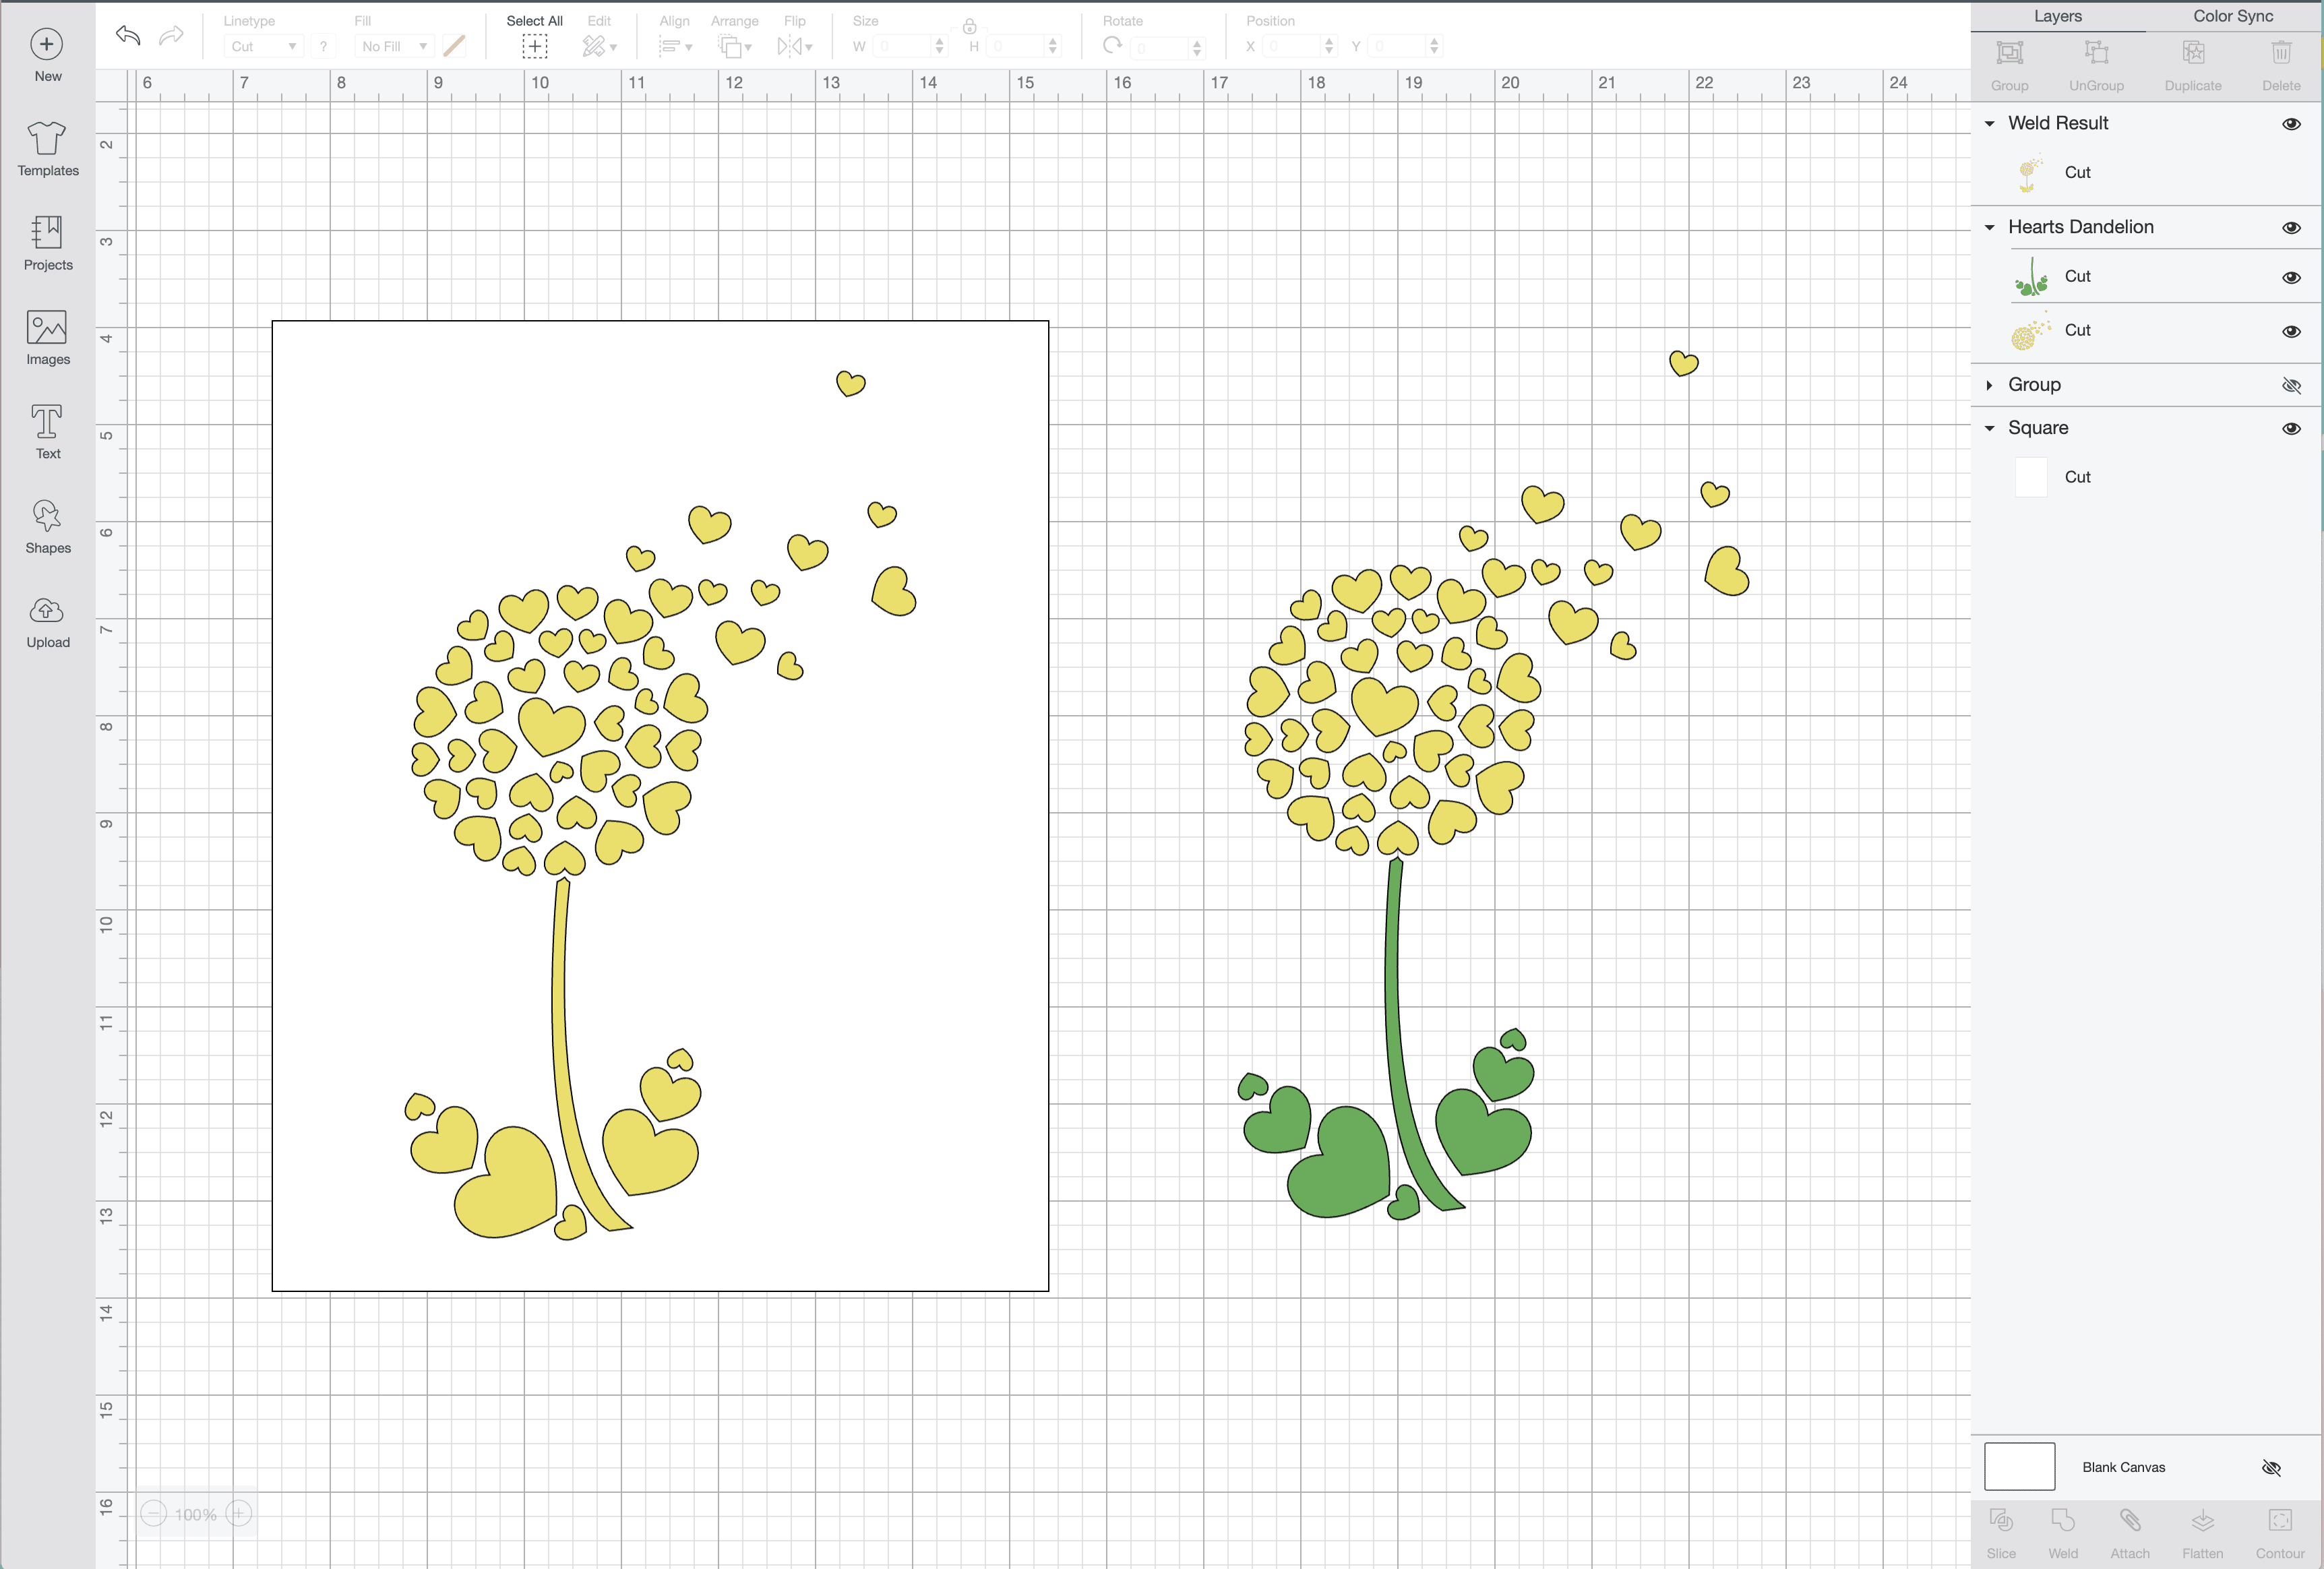
Start by deciding how big you want your finished artwork to be. Place that size square/rectangle onto your canvas and set it to whatever color you want for the background of your artwork. In the example below, I wanted this artwork for a frame with an 8×10″ mat, so I put a white 8×10″ rectangle on my canvas.
Next, place whatever image you want for your artwork on top of that rectangle. Size, orient, and color the design however you want. I chose this very simple dandelion design (dandelions are the flower of the military child!), and centered it using the Align tools along the top toolbar.
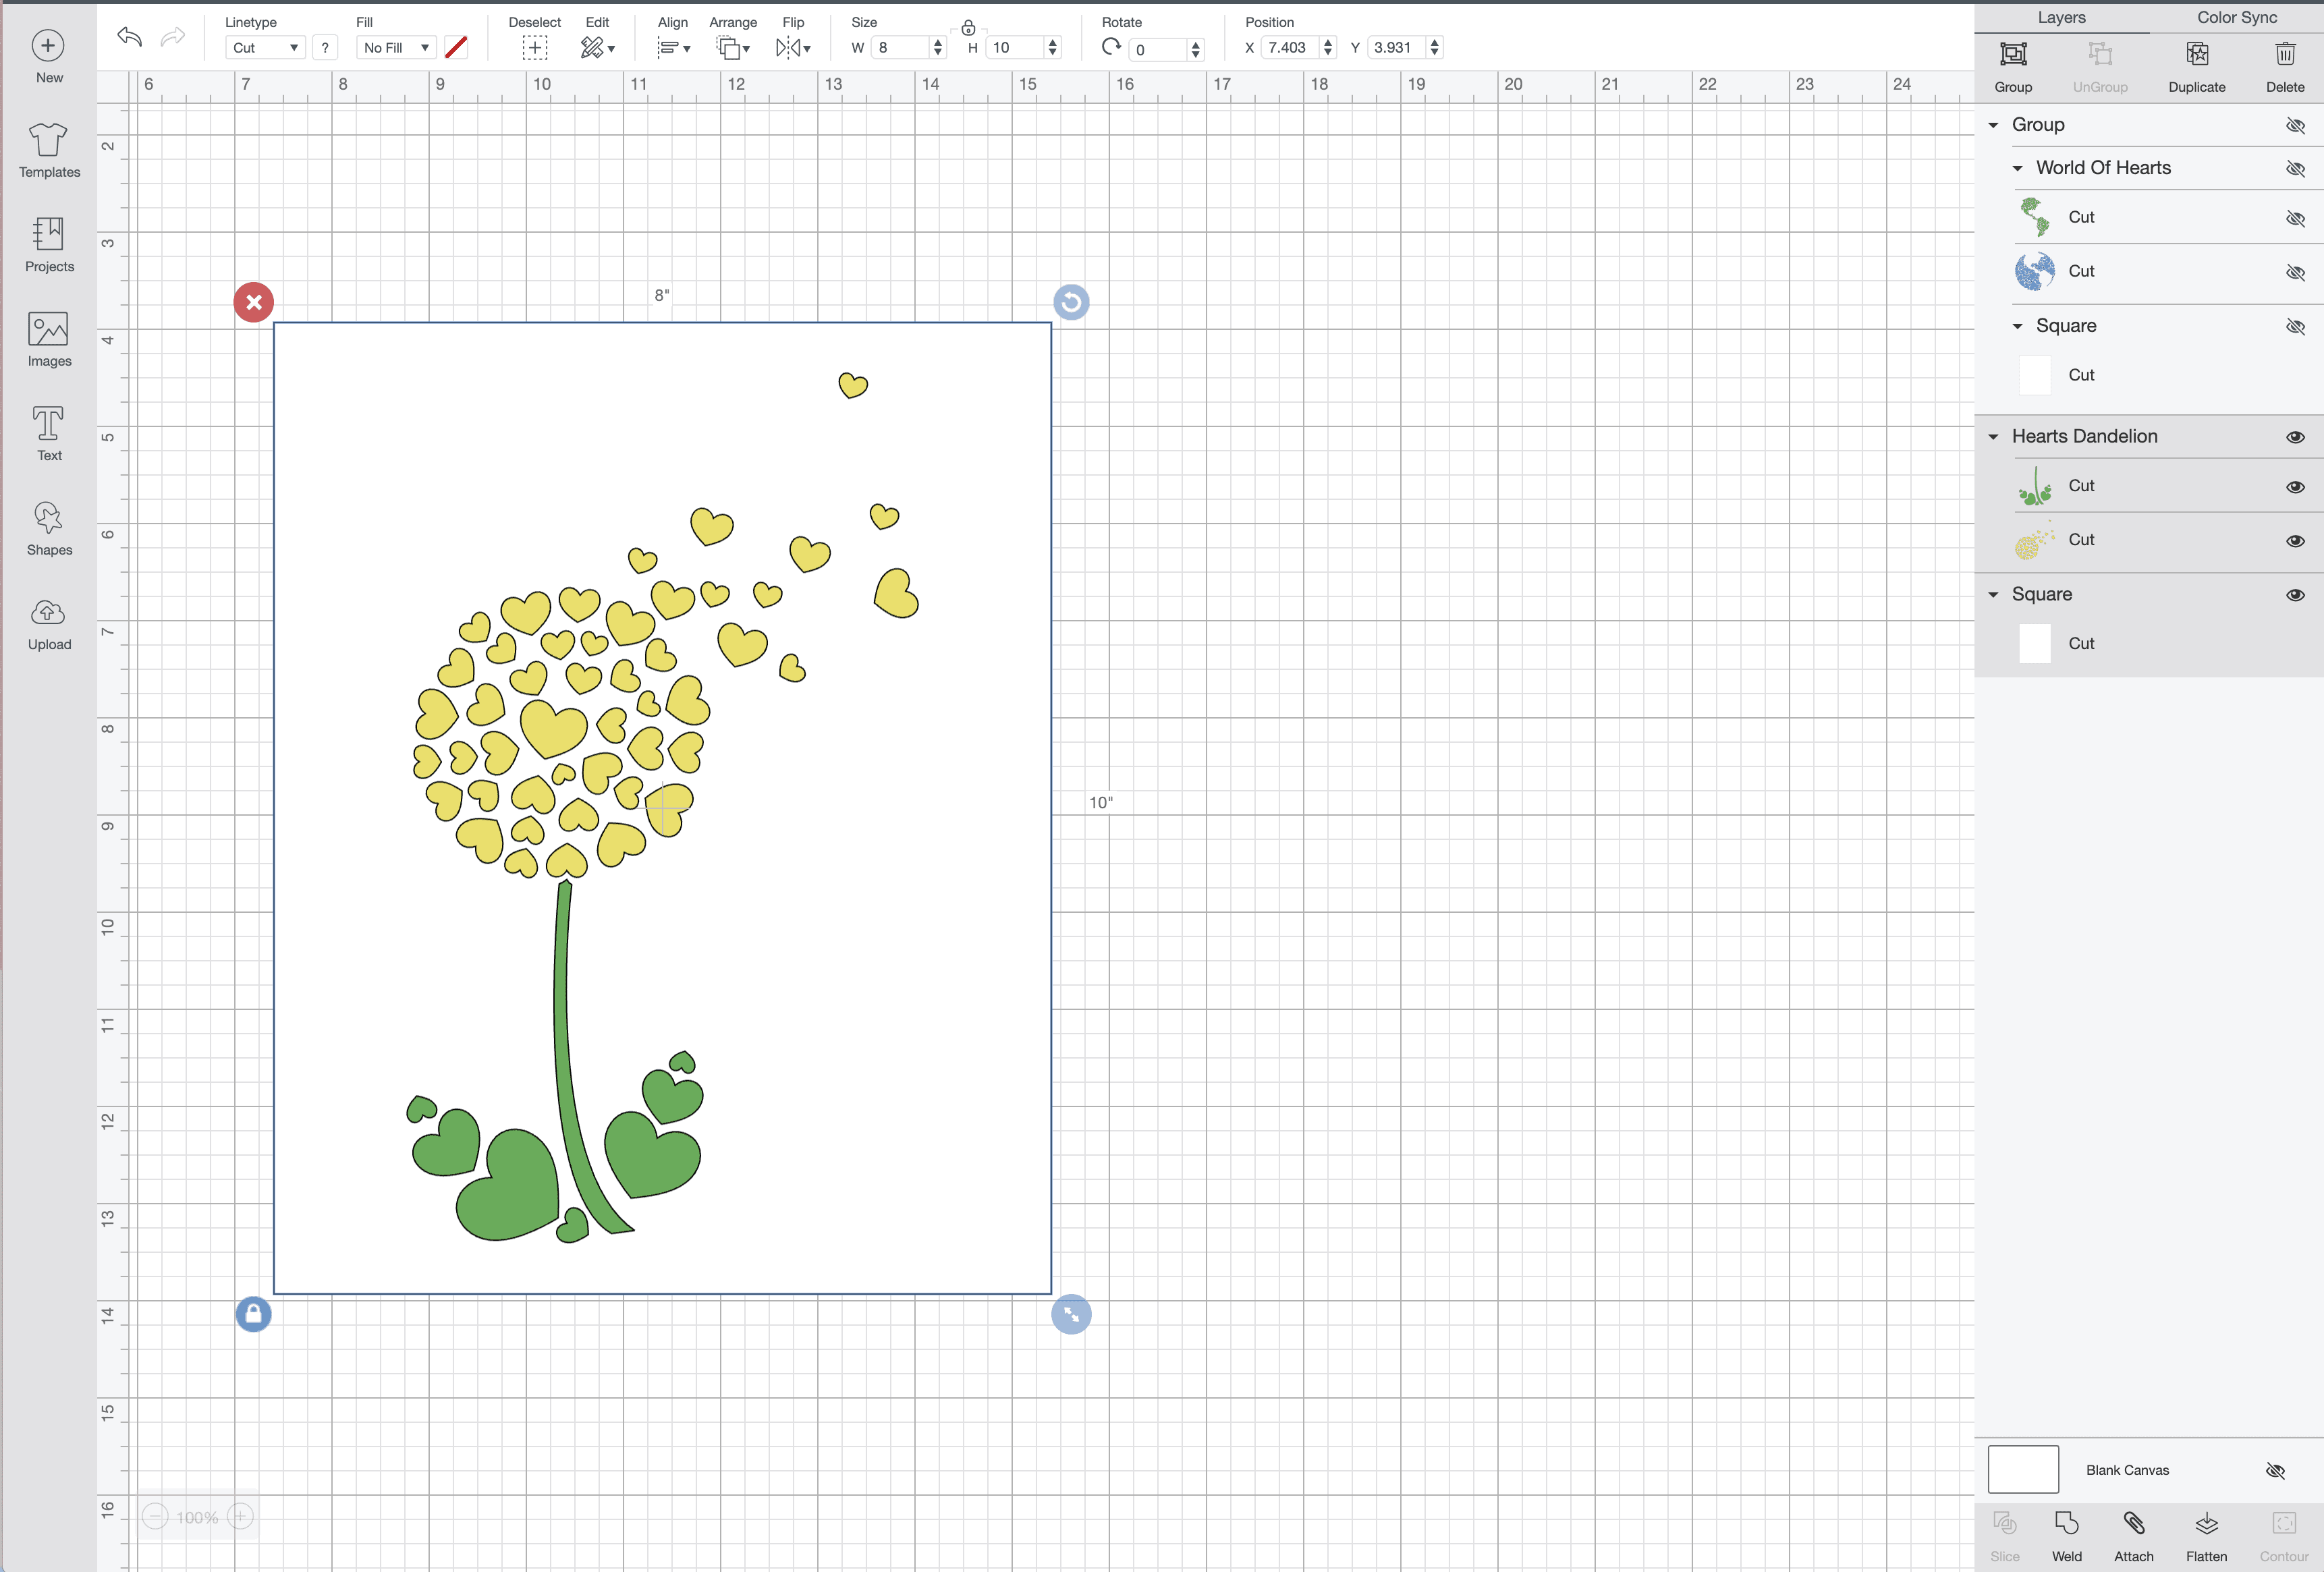
With your placement finalized, duplicate your front image and move it off the background rectangle. In my example, I duplicated the dandelion and moved it to the right.
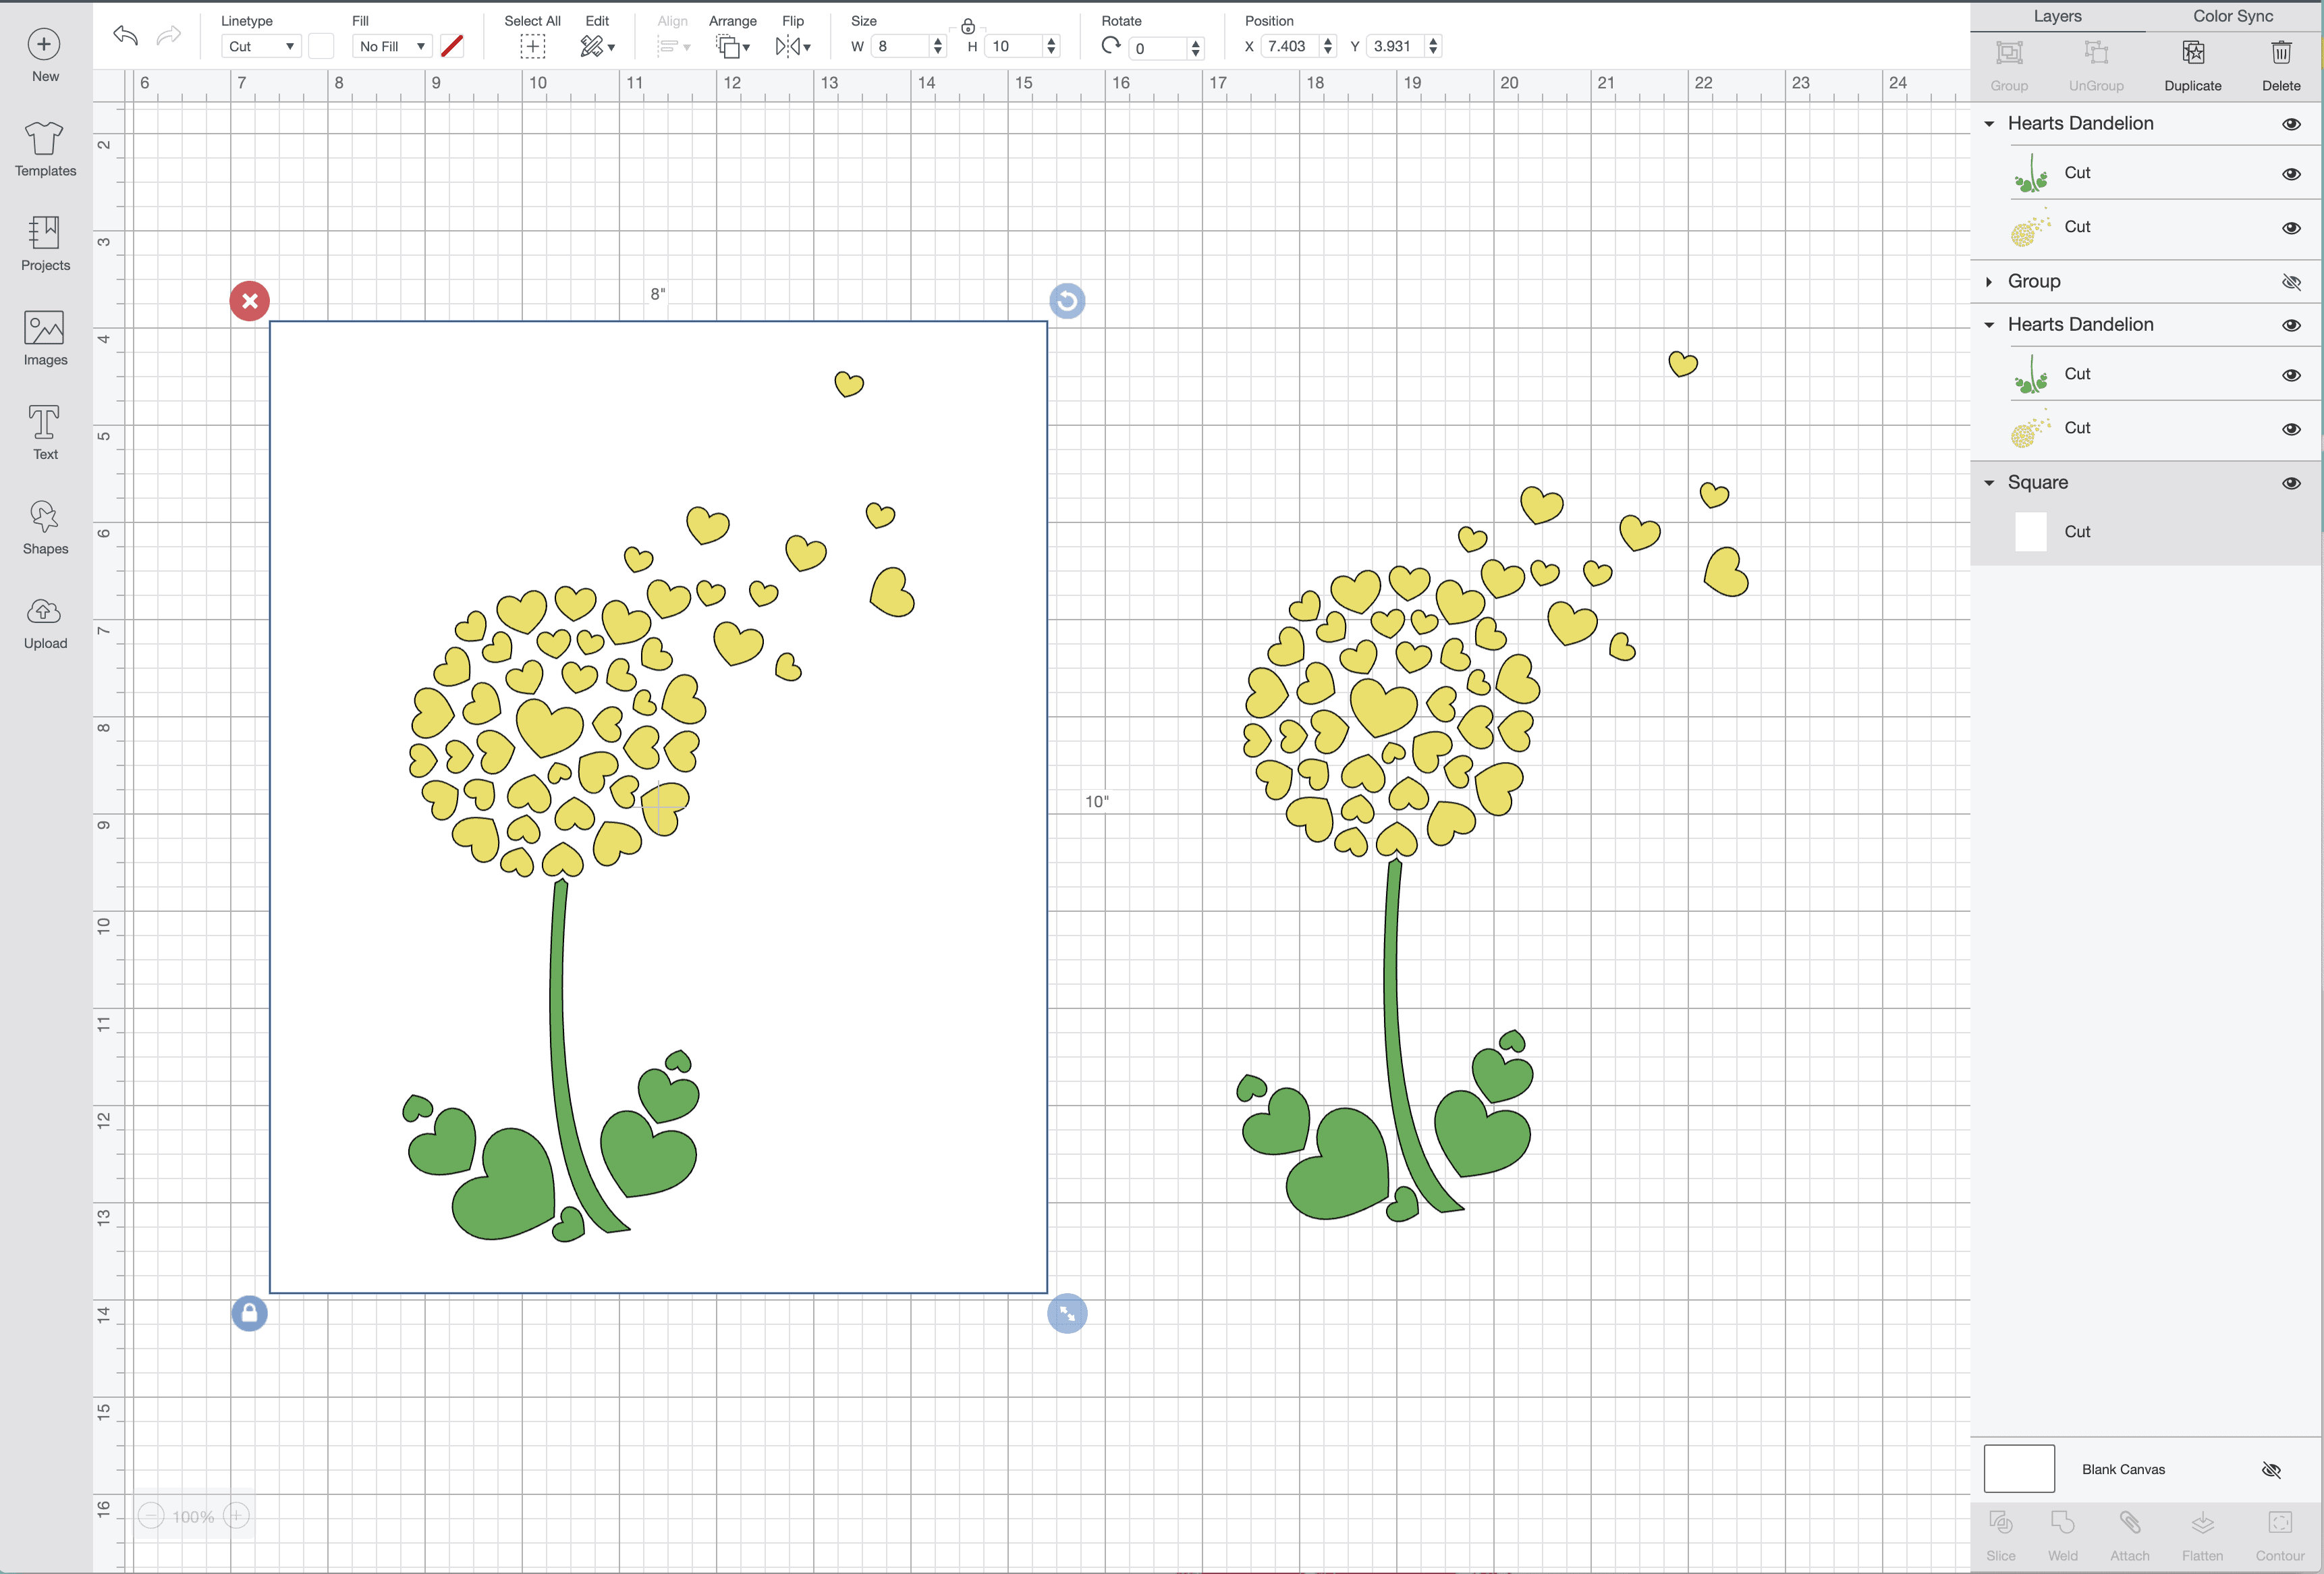
Next, you will “Slice” your artwork design into the white background. If you have a multi-color design, the quickest and easiest way to do this is to “Weld” the image together first. Simply click the design (the one still on your background rectangle) and click the “Weld” tool on the righthand bottom toolbar. You will notice that your multi-color design becomes one, single color, single layer image.
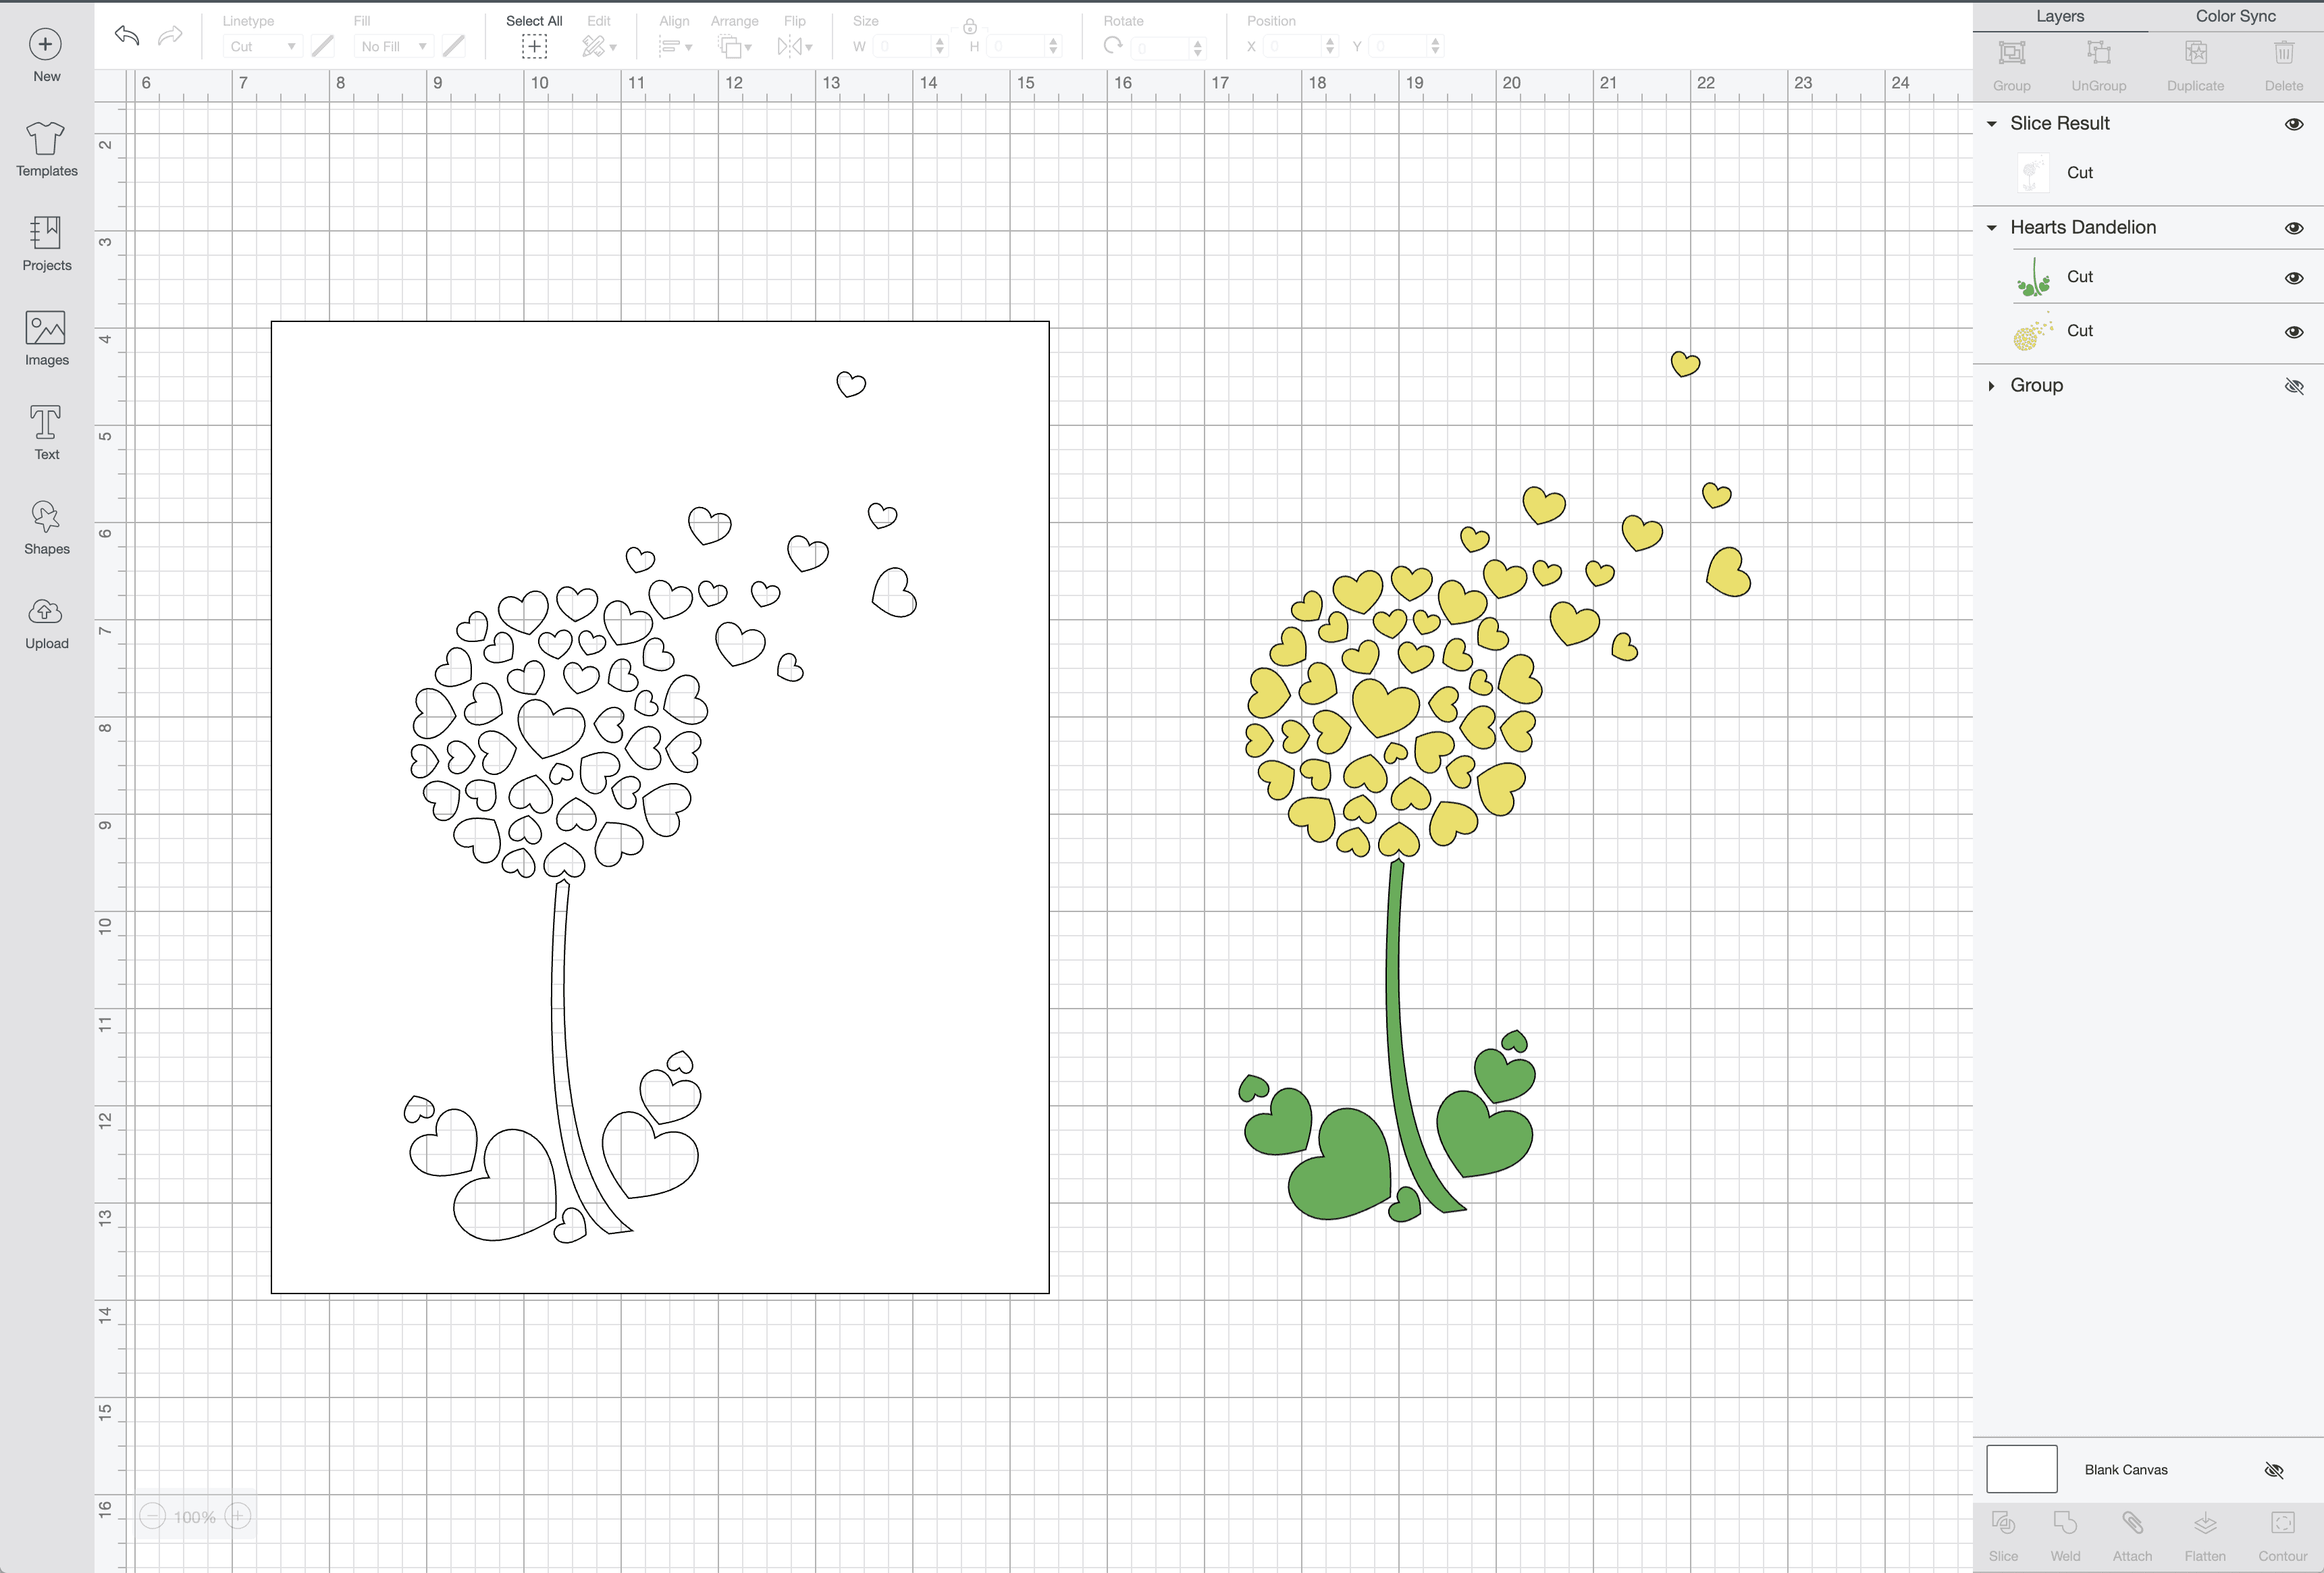
With the image now one single color, select both the design (the yellow dandelion) and the background (the white rectangle) and click the “Slice” tool. Then, delete out the extra layers created by the Slice tool to reveal 1) your background rectangle with your design fully sliced out, and 2) your original, multi-color design (shown below).
NOTE! It’s very important that you don’t re-size anything at this point! You want the colored cuts to fit right into the cutouts on the background. Any manipulation of either or both designs may result in misalignments.
Cutting Out Your Artwork
Next, send your artwork to be cut on whatever Cricut Machine you are using. Be sure to select the correct setting for whatever type of paper you’re crafting with so you get really, really clean cuts.
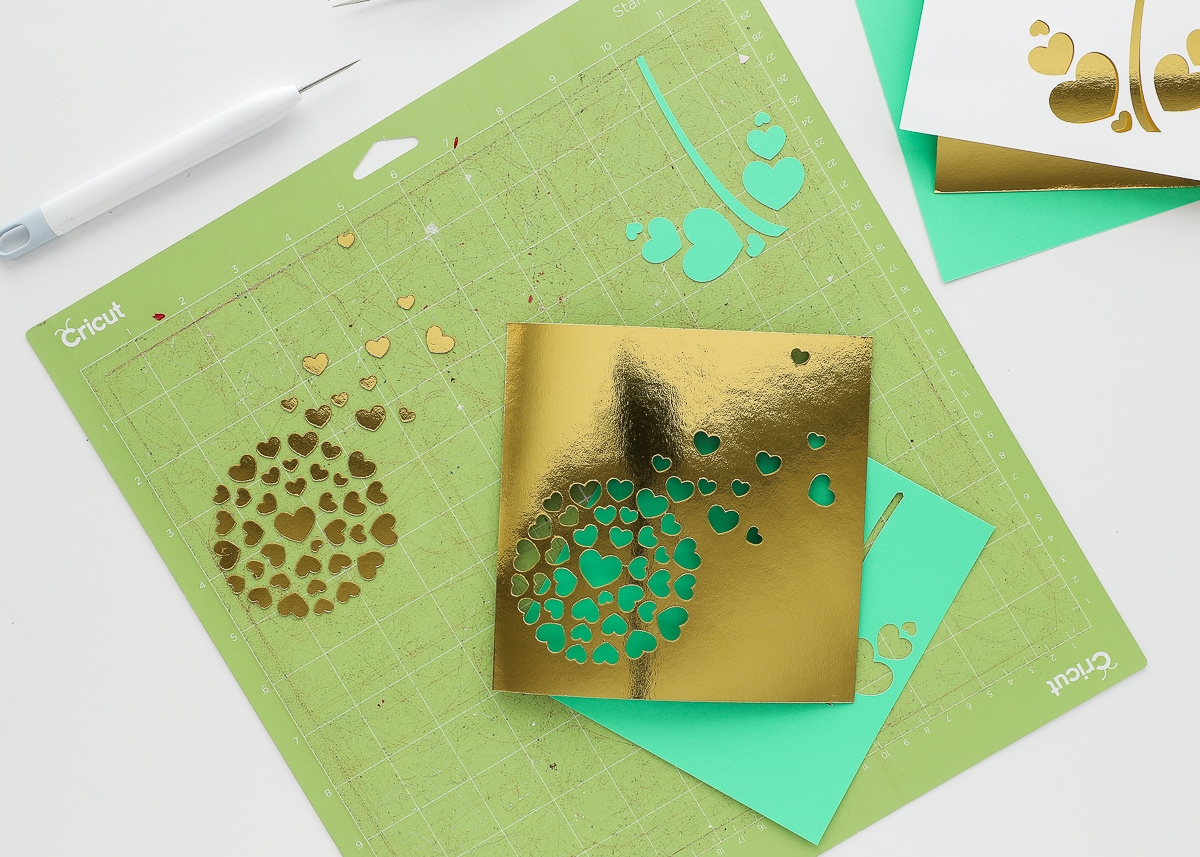
When you are removing paper from your mat, you typically pull away and toss out the surrounding paper and keep the design. In the case of your artwork background, you are keeping the surrounding paper, so be sure to remove it from your mat very carefully (especially if you have really intricate cuts).

Want to save this post?
Inlay Versus Behind
I want to point out quickly that they are two ways you can proceed (but I prefer one way over another). The quickest and easiest method to getting art actually done and on your walls is to simply place colored paper(s) behind your sliced out art (as shown below). I have certainly done this before (here). However, I prefer to cut out the design from colored paper and lay each piece into the sliced-out design. Not only does this give me great control over coloring complicated or tight designs, but it also creates a smooth finished project, making it much less detectable that the artwork was cut from paper (rather than printed).
If you’re thinking “Gosh, Megan, laying in every single cut detail is a lot of work.” Sure…it can be, depending on your design. But it actually comes together fairly quickly and gives you amazing results. Plus, it can be pretty calming and therapeutic…speaking from experience! Here’s the best way to do it:
Assembling Your Artwork
First, when you remove the paper surrounding your colored design elements, leave them ALL stuck to the mat. Not only does this ensure that you don’t lose any pieces, but having them all in their final arrangement will be very helpful as you re-assemble them into the background.
To re-assemble your design, the quickest and easiest way to do it as follows:
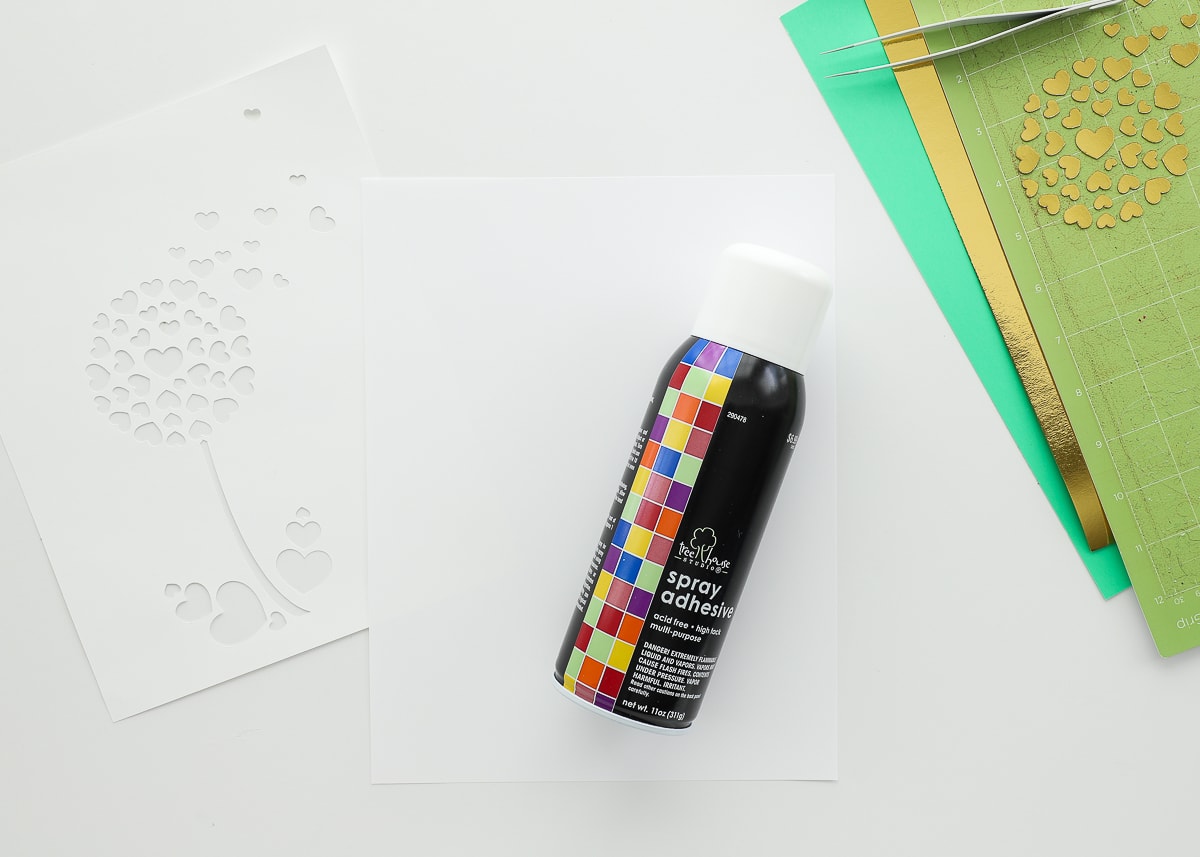
Identify a lightweight piece of paper to be your backing. I usually just use printer paper but if you need something bigger, wrapping paper and poster board both work. If possible, choose a paper backing that is the same color as your artwork background.
Coat this paper backing with liberal amounts of spray adhesive. Although not required, spray adhesive designed for paper will ensure nothing wrinkles or curls up.
NOTE: It’s VERY important to spray the lightweight paper backing and NOT your cut out background. You want the under layer to be sticky! You’ll see why in the next step!
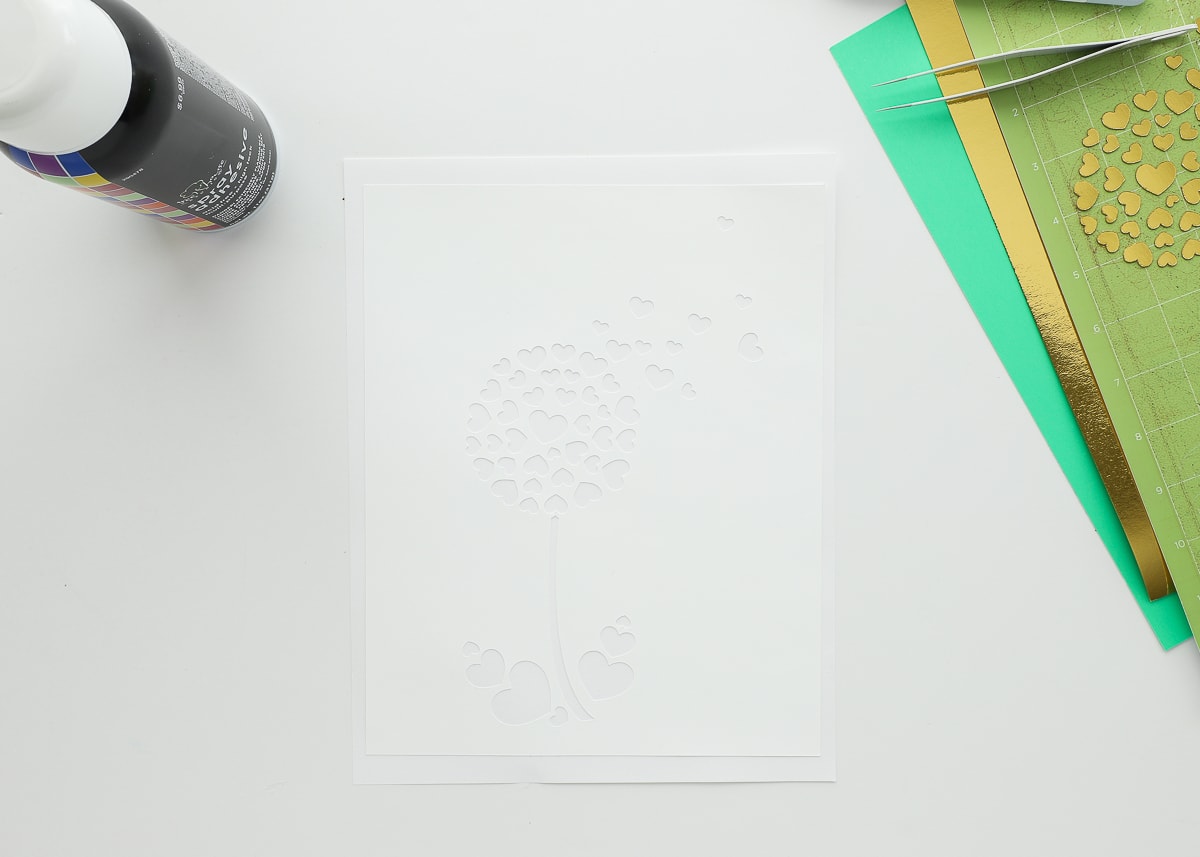
Working (somewhat) quickly, lay your artwork background (the one with the cut out design) onto the plain paper backing and smooth it down, ensuring there are no wrinkles or bubbles.
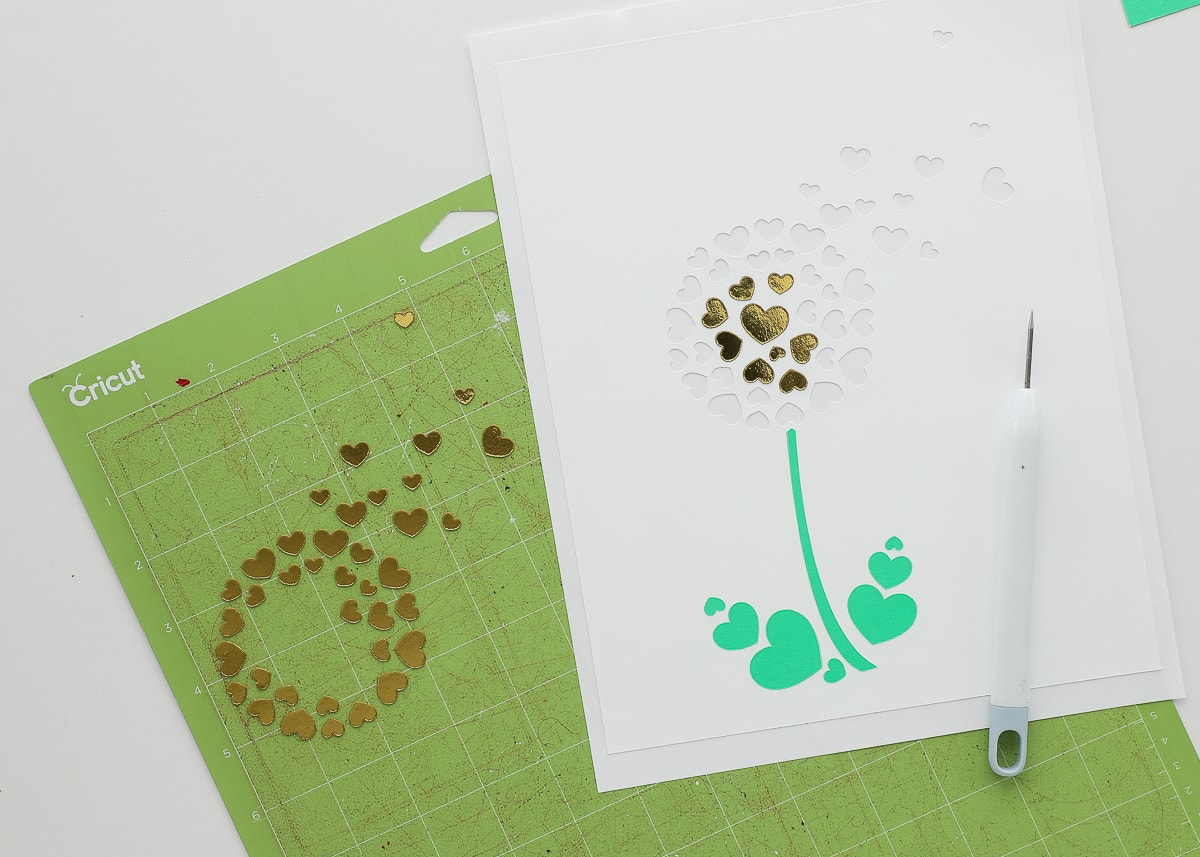
Now, you just have to puzzle your design back together! Since you used spray adhesive on the entire paper backing, it’s already sticky! All you have to do is transfer each element over to the correct “holes.” Weeding Tools can really help with this step. My dandelion came together in just a few minutes. Admittedly, my World of Hearts took quite a bit longer 😉
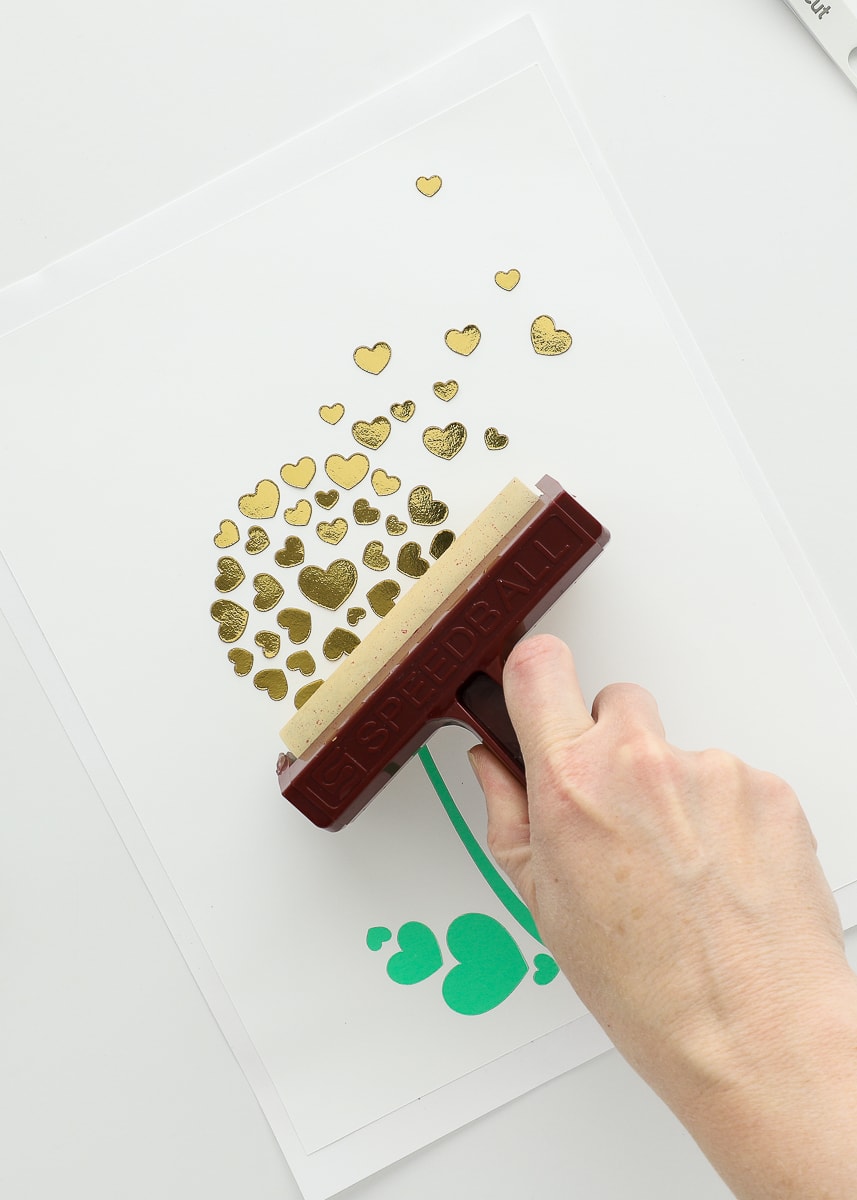
Once you’re done placing in all the details, use a craft brayer to smooth the colored details down onto the adhesive really well.
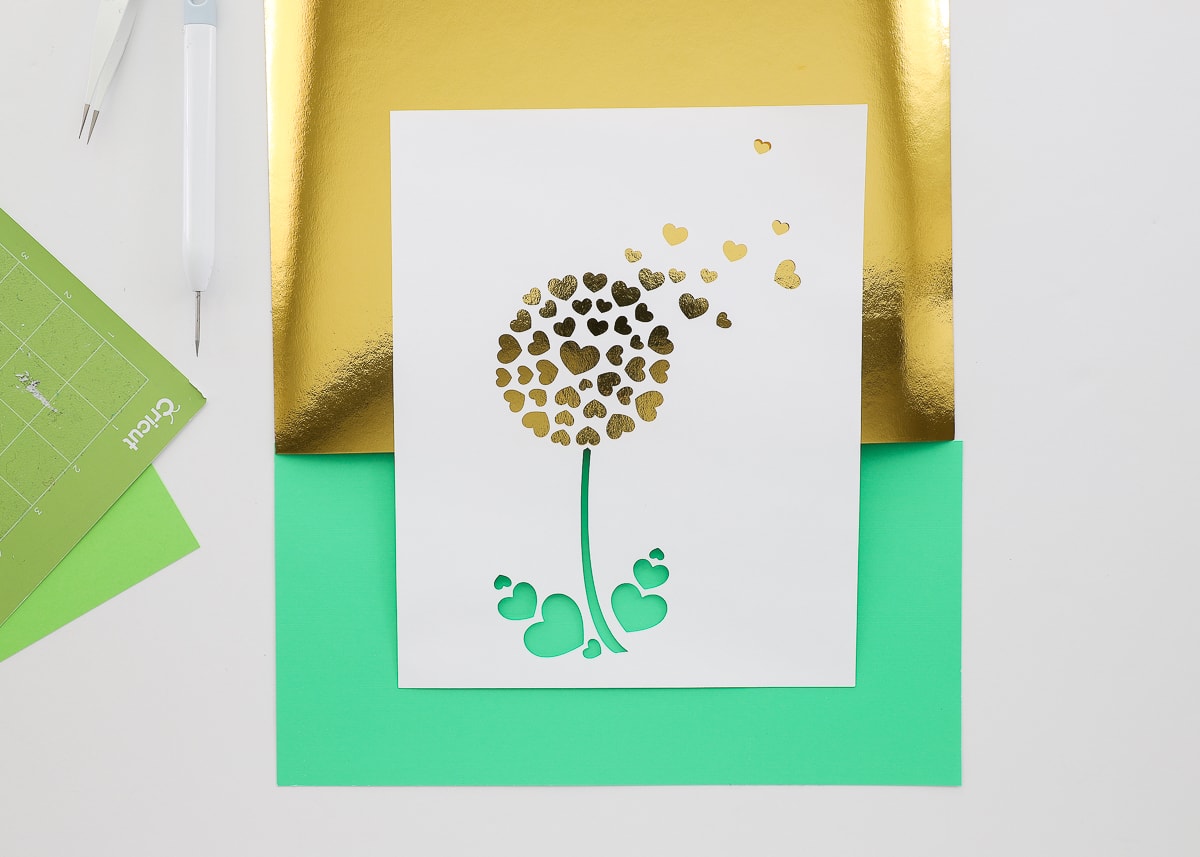
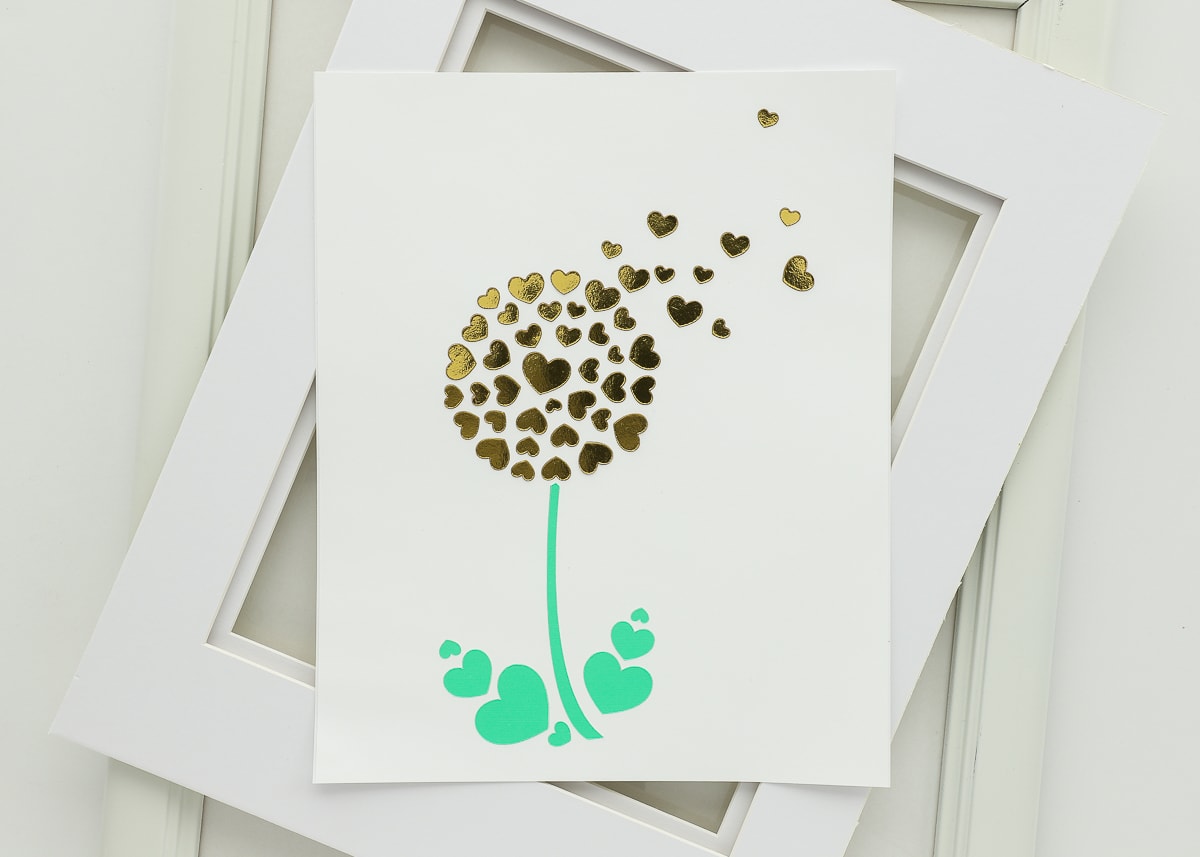
Finally, use a paper trimmer or rotary cutter to trim away the excess paper backing…
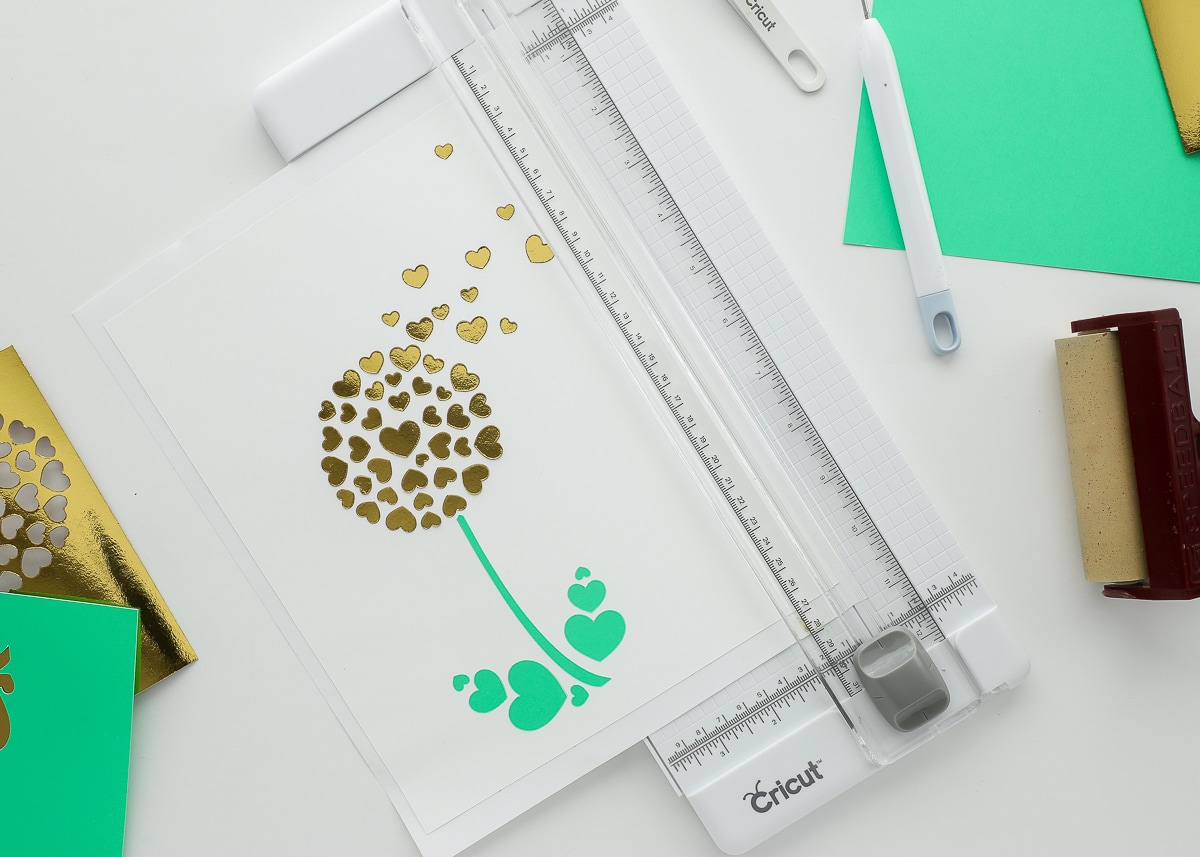
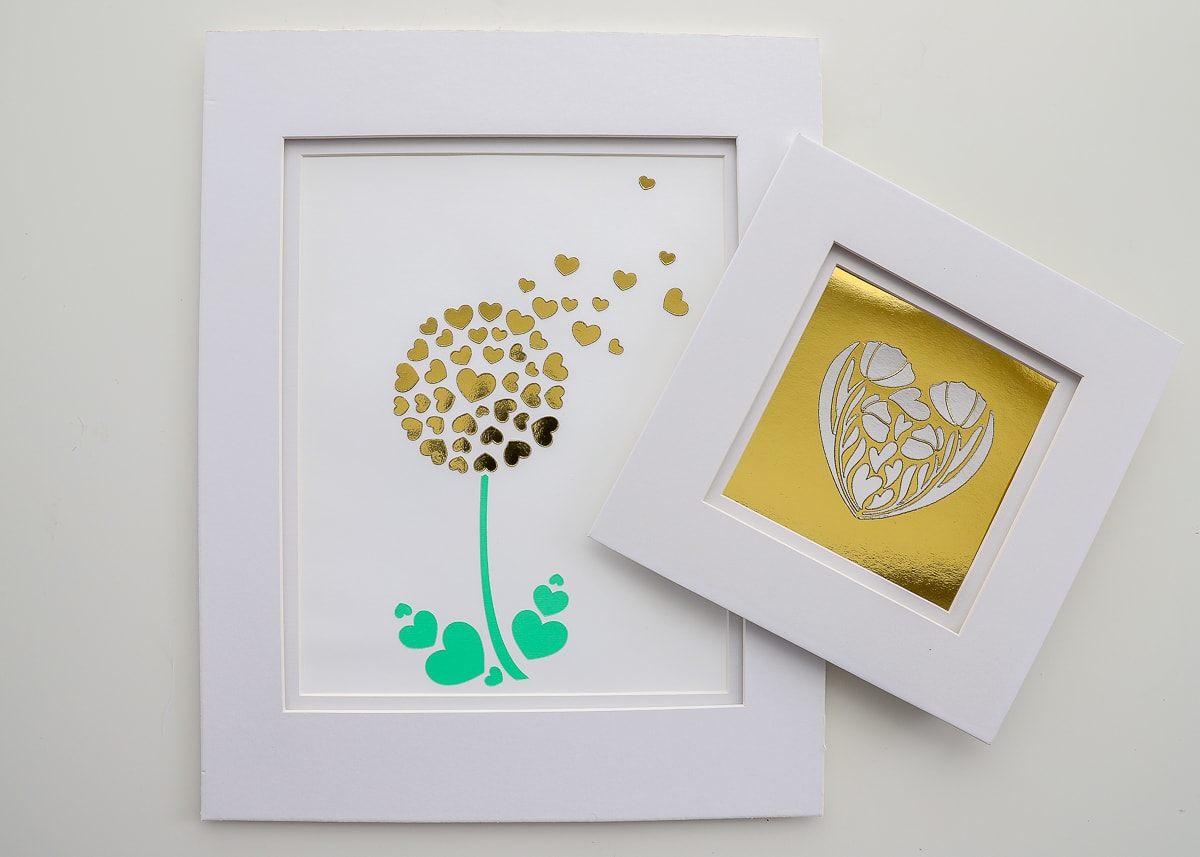
…and load your completed artwork into a frame. A mat definitely helps the whole DIY project look more professional!
Two for the “Price” of One
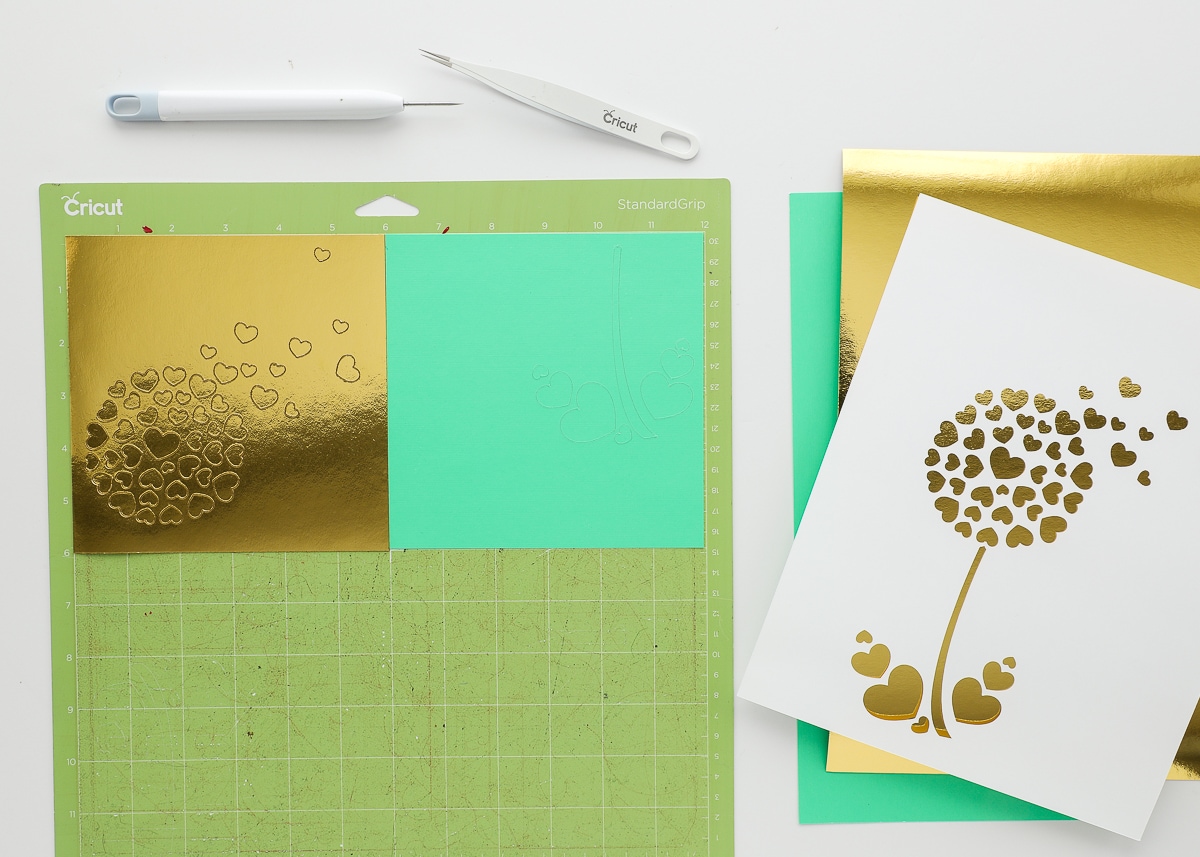
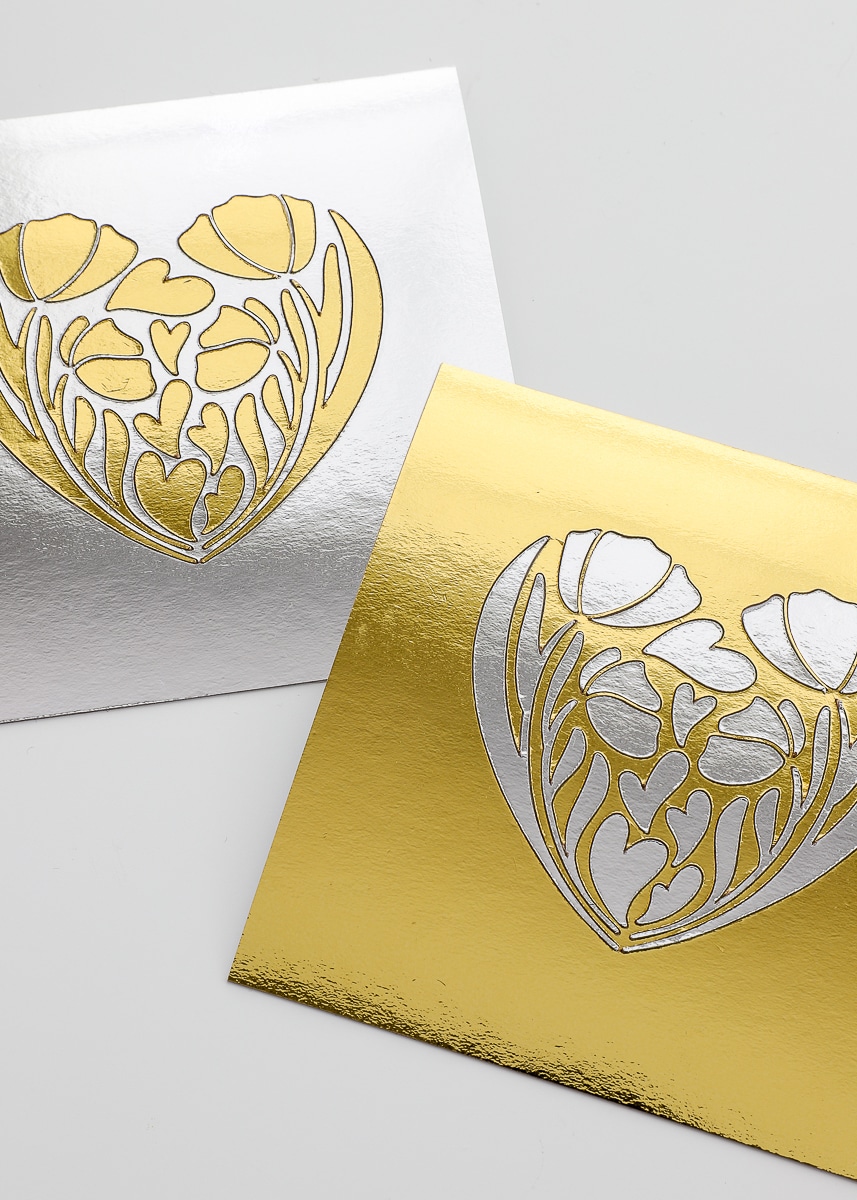
I did want to point out that when a design is cut…any design…there will be parts you use and parts you discard. This method just uses both of those parts to create a single, unified design. In that sense, you can create two pieces of art at once…as long as the design is cut in different colors. Below, I cut the exact same design from both gold and silver Kraft board.
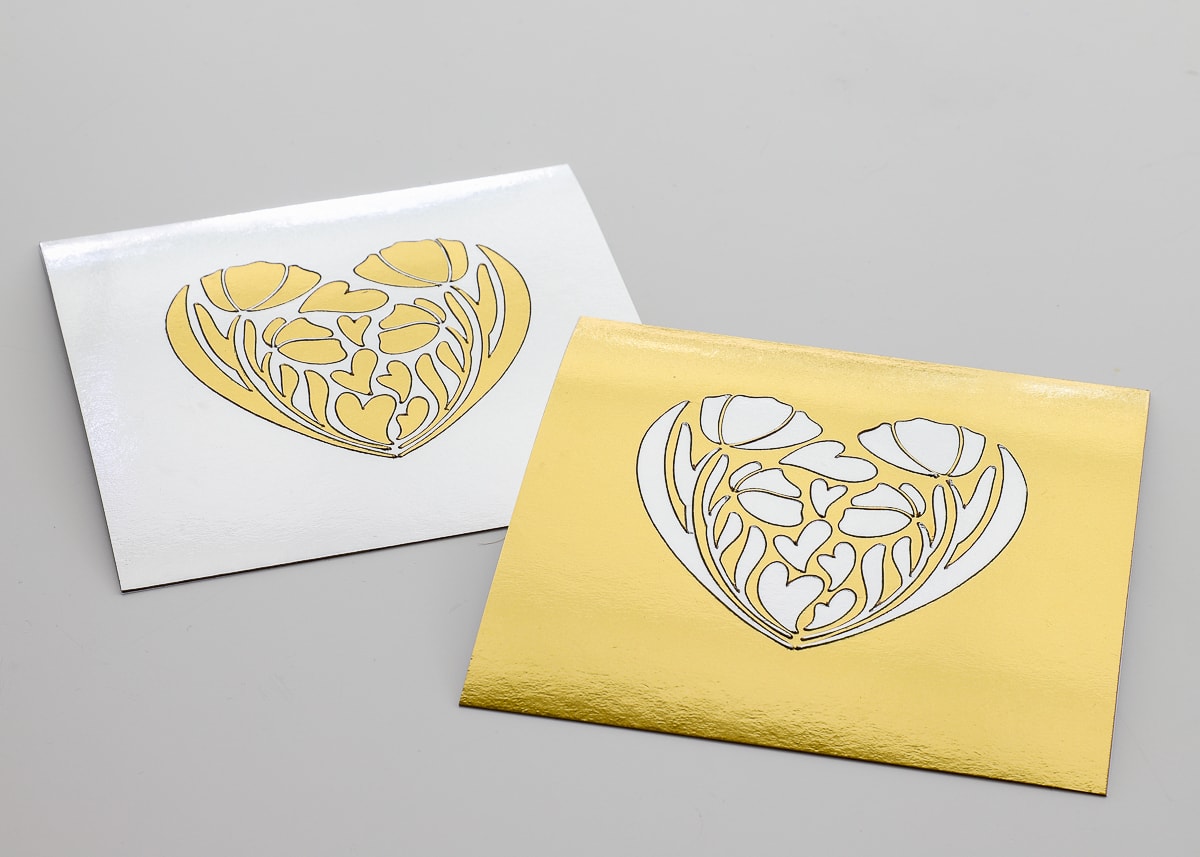
By laying the details into the contrasting backgrounds, I have one to hang on the wall and another to turn into a card!
Although there are technically quicker and easier ways to make art with a Cricut, I’ve found this is really the best way to do it. Not only can you really manipulate the colors any way you want them, but you will end up with perfectly placed designs in a perfectly smooth finish! The examples I’ve shown here are simple two- and three-color designs, but you can use this same “Slice” method for much more intricate designs, just like I did here!
Check out my other Cricut tutorials and resources below! 


Have a wonderful weekend, my friends!
Megan
One Comment on “The Best Way to Make Art with a Cricut”
The idea of doing paper inlays is genius!
I like that it will smooth the design (if papers are roughly of same thickness), and more importantly, it allows precise layout, better than eyeballing the positions.
I like your blog, you give lot of interesting ideas. I am fluent enough with Inkscape to come up with my own designs, you will inspire me.