DIY Star Wars Artwork with a Cricut Explore
The DIY Star Wars Artwork installation is one of the best moments in Henry’s Star Wars bedroom makeover. And in addition to looking amazing, the whole display cost me just $3 to pull together using only paper and my Cricut Explore. Whether you’re a Star Wars lover or not, my method for making big, dramatic, inexpensive artwork can be adapted to any theme or any space! Let me show you how to do it!
When trying to infuse a kids’ space (either a bedroom or playroom) with a “theme,” I often like to do it through budget-friendly and changeable accessories that can be easily swapped when a new theme is eventually requested. So when Henry asked for a Star Wars theme for his new bedroom, I decided on two major projects: a throw pillow for his bed and artwork for the gallery wall above his dressers.
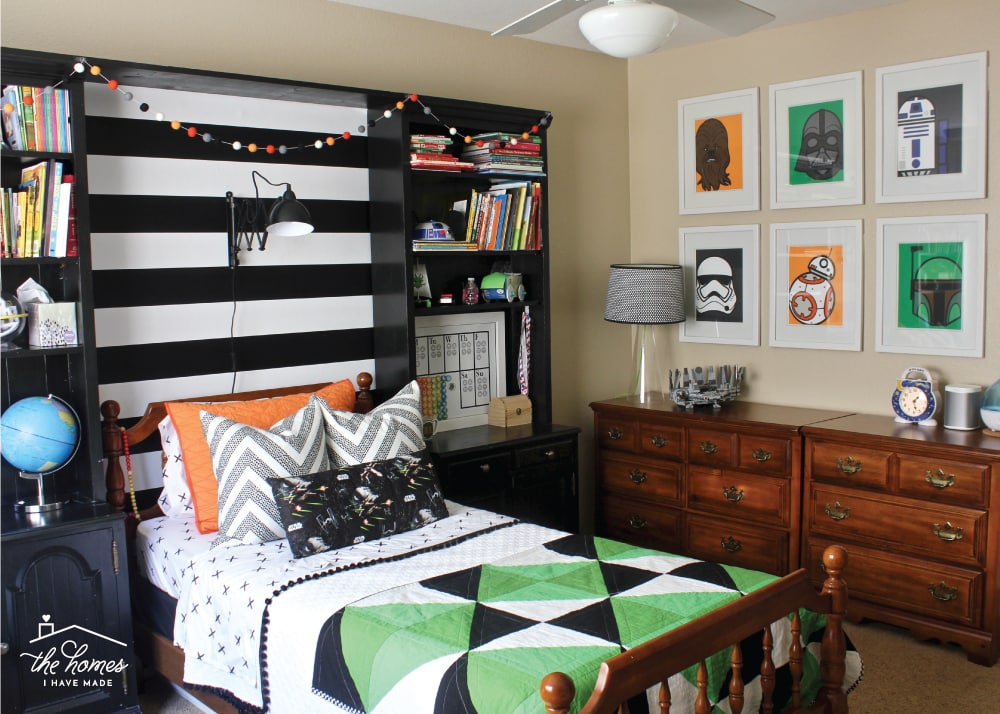
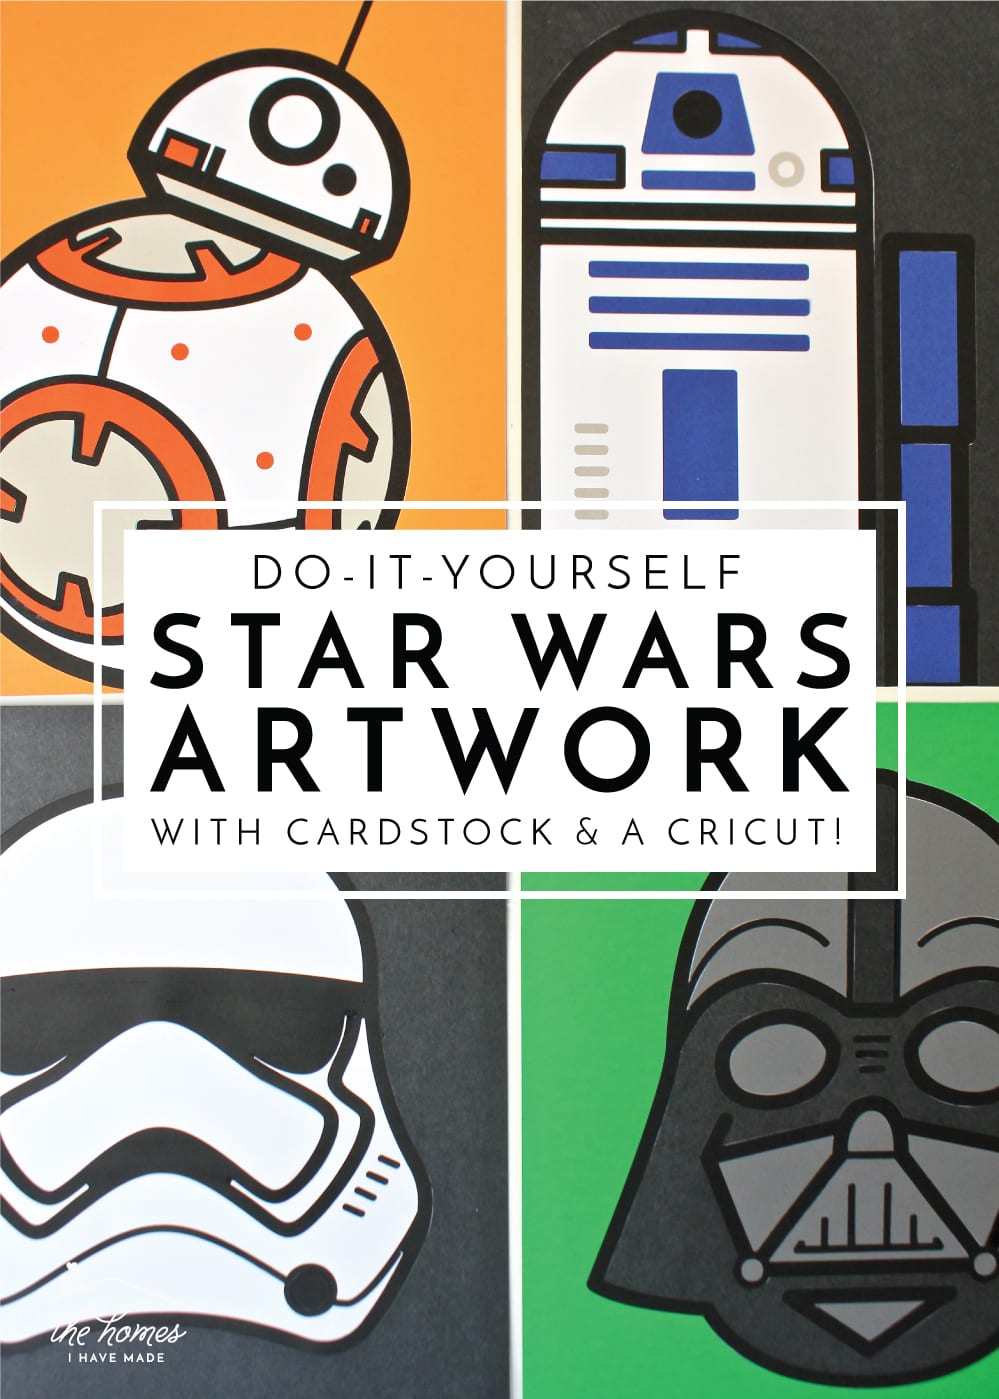
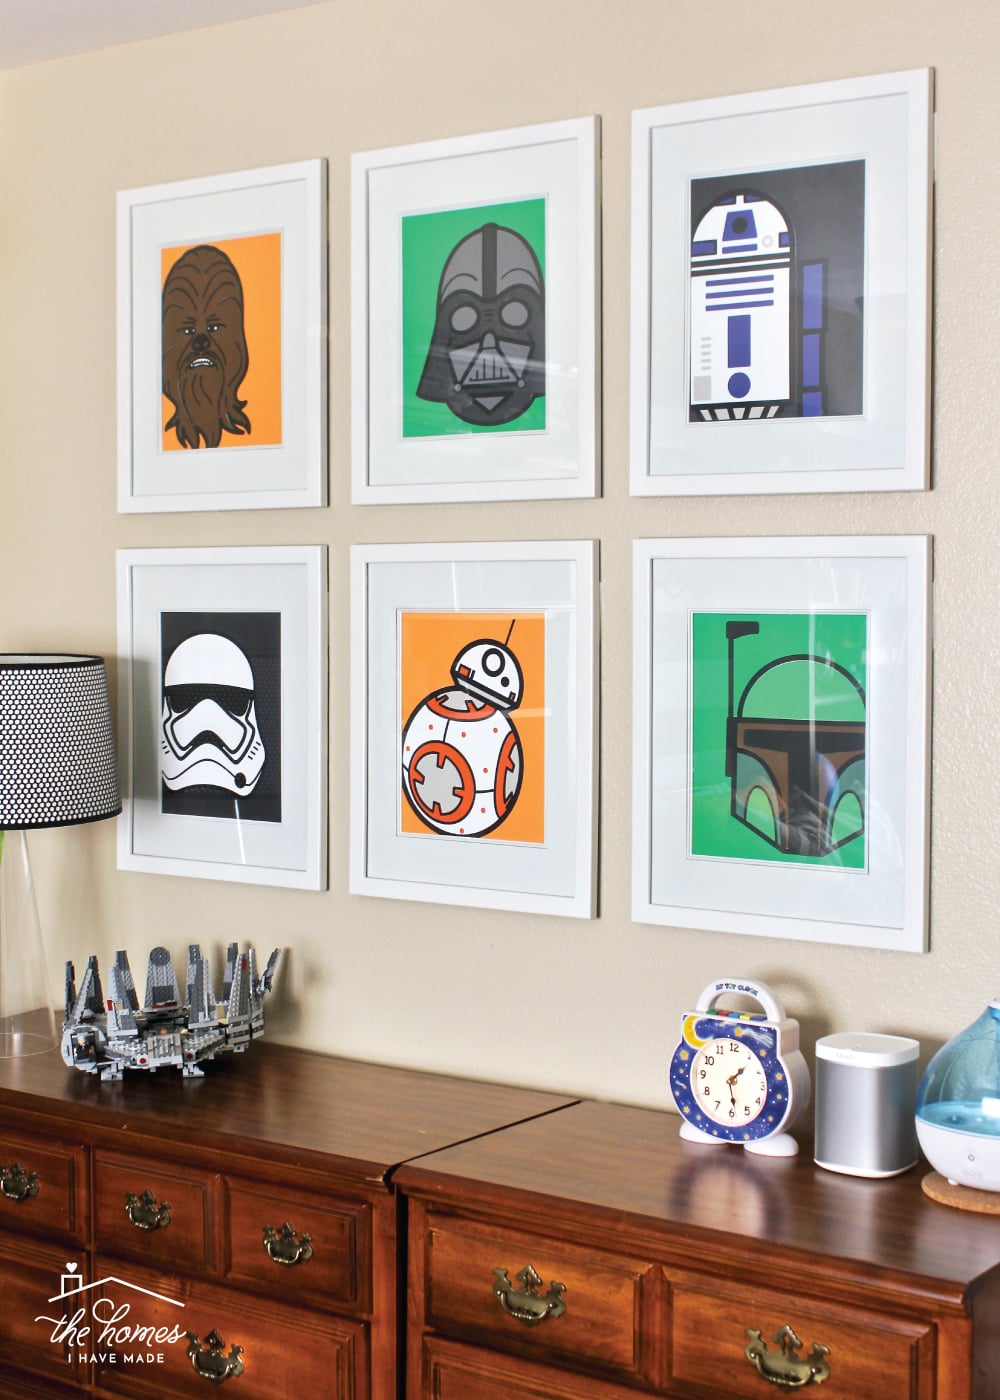
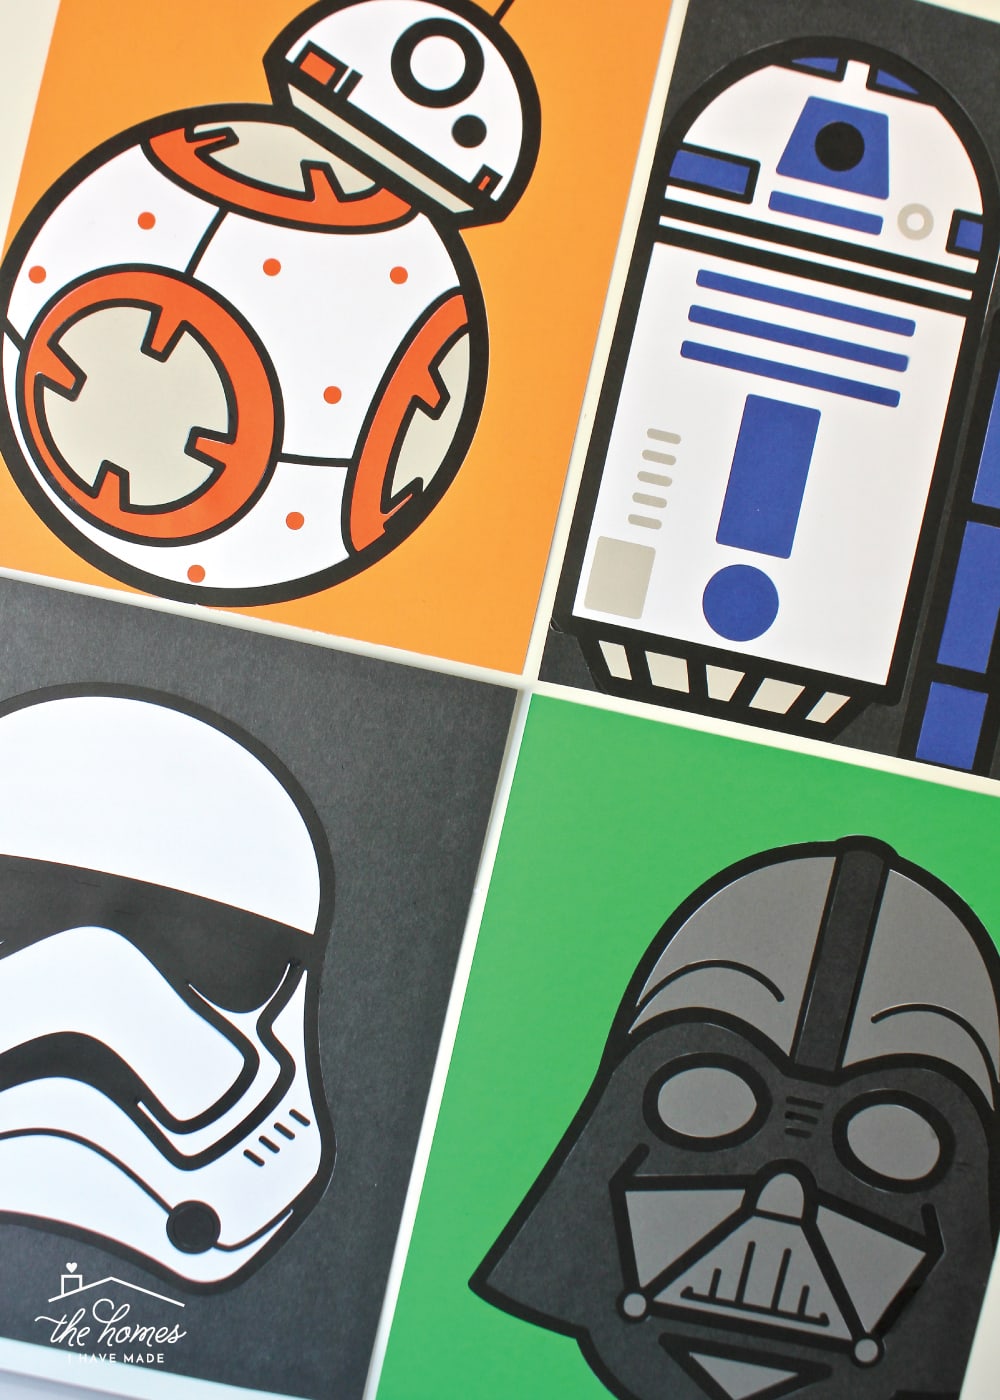
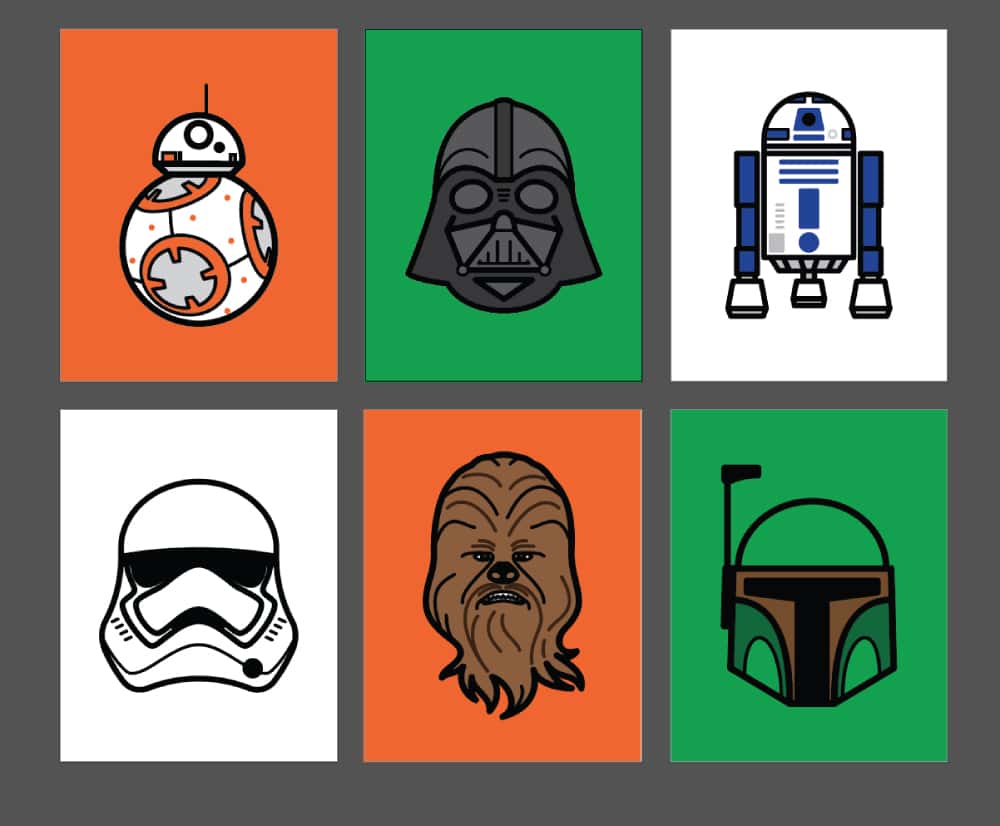
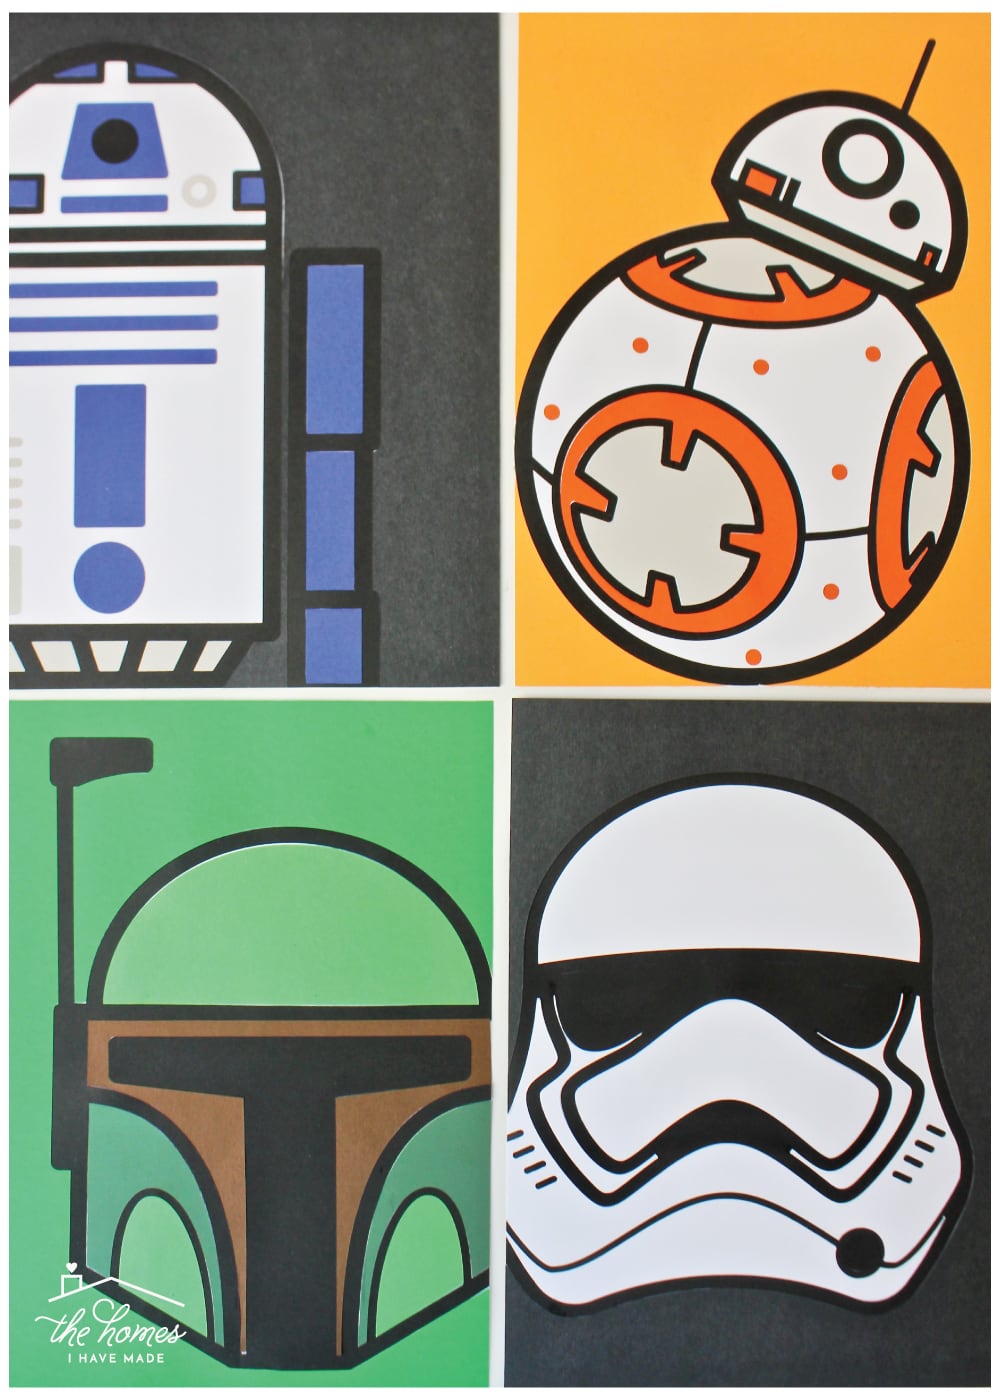
This gallery wall once held animal prints when his room was jungle-themed, and then Lego Ninjago prints when we were heading in a Lego direction…so big, bold Star Wars art was the obvious choice for the new room. However, having just spent good money on Ninjago prints we were no longer using, I decided to DIY my own Star Wars versions with inexpensive paper. Yep – everything you see in those frames is made of cardstock and poster board. And although they were a tiny bit tedious, they came together remarkably quickly and just look so so amazing in person! And wow – what an impact for just $3 in supplies, right?!?
Aside from the benefit of saving a lot of money on large-scale art, making your own artwork from paper really allows you to customize the size, design, characters and (most importantly) colors of each piece. Because cardstock comes in pretty much any color you can think of, the possibilities for customization are endless!
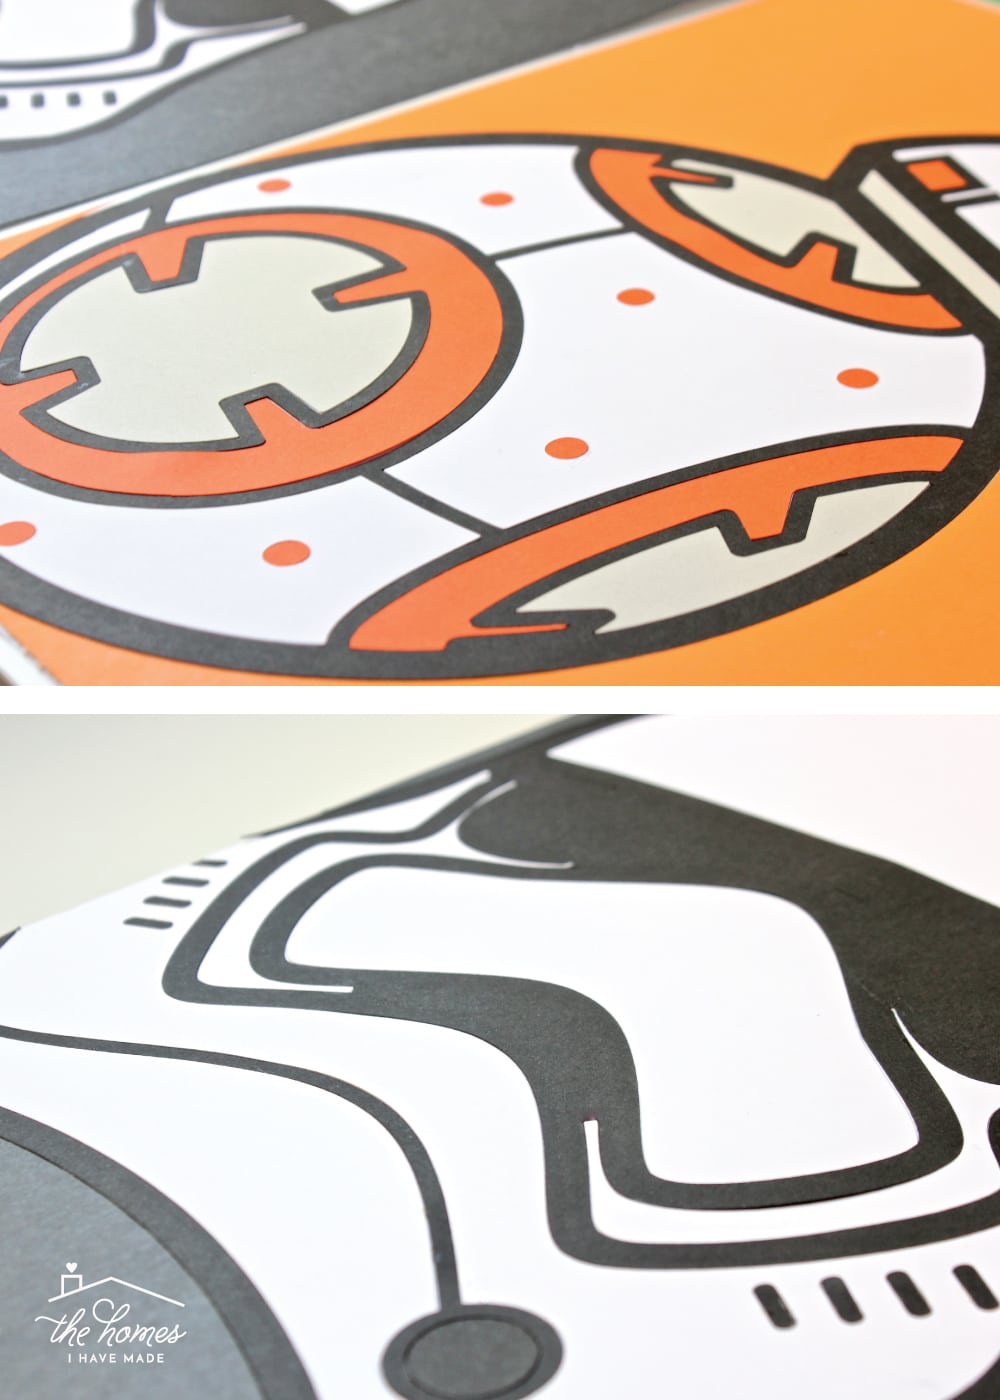
However, paper can also get a bit bulky. So in addition to worrying about tediously layering intricate designs, your artwork (which presumably you want in a frame) can get “tall” or bulky rather than appearing like a flat piece of art. However, I’ve come up with a way that not only makes the precise layering of detailed designs easy-peasy…but also allows your artwork to lay perfectly flat. It may be hard to tell in the photos below, by all my layers are not stacked on top of each other as they would be in a typical paper project…the final product is one flat layer that fits together just right because each layer is “sliced” into the one next to it.
MATERIALS NEEDED
To make your own large-scale paper artwork like what I have shown here, you will need:
- Cricut Explore (or other e-cutter)
- Cricut Design Space software (or whatever you need to operate your machine)
- SVG files for your desired artwork
- Cardstock in desired colors
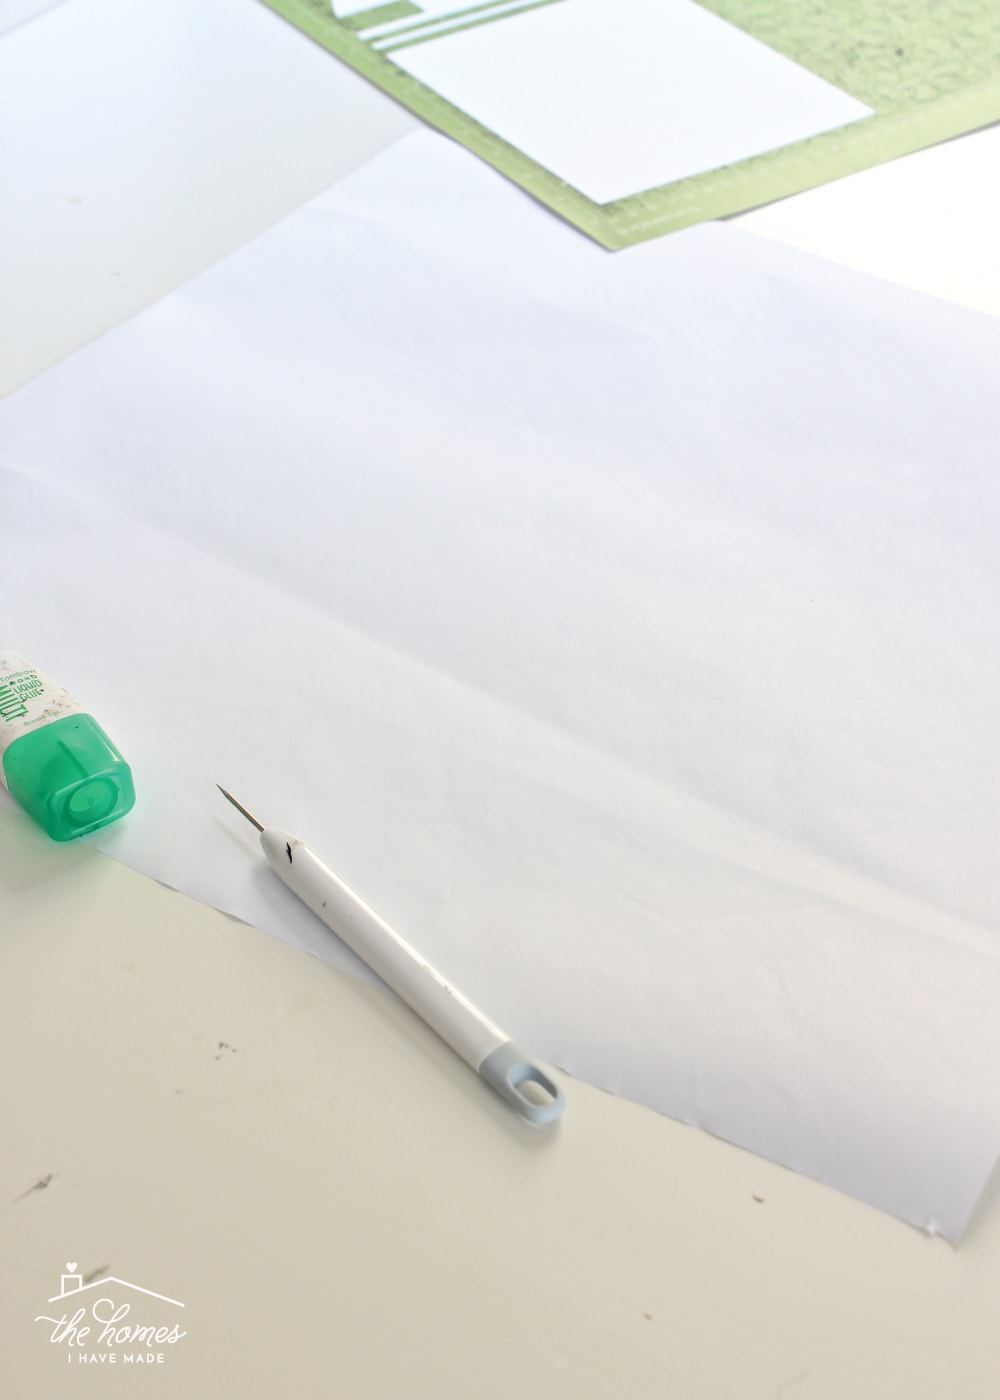
- Thin, large art paper – to glue all your cardstock cuts to
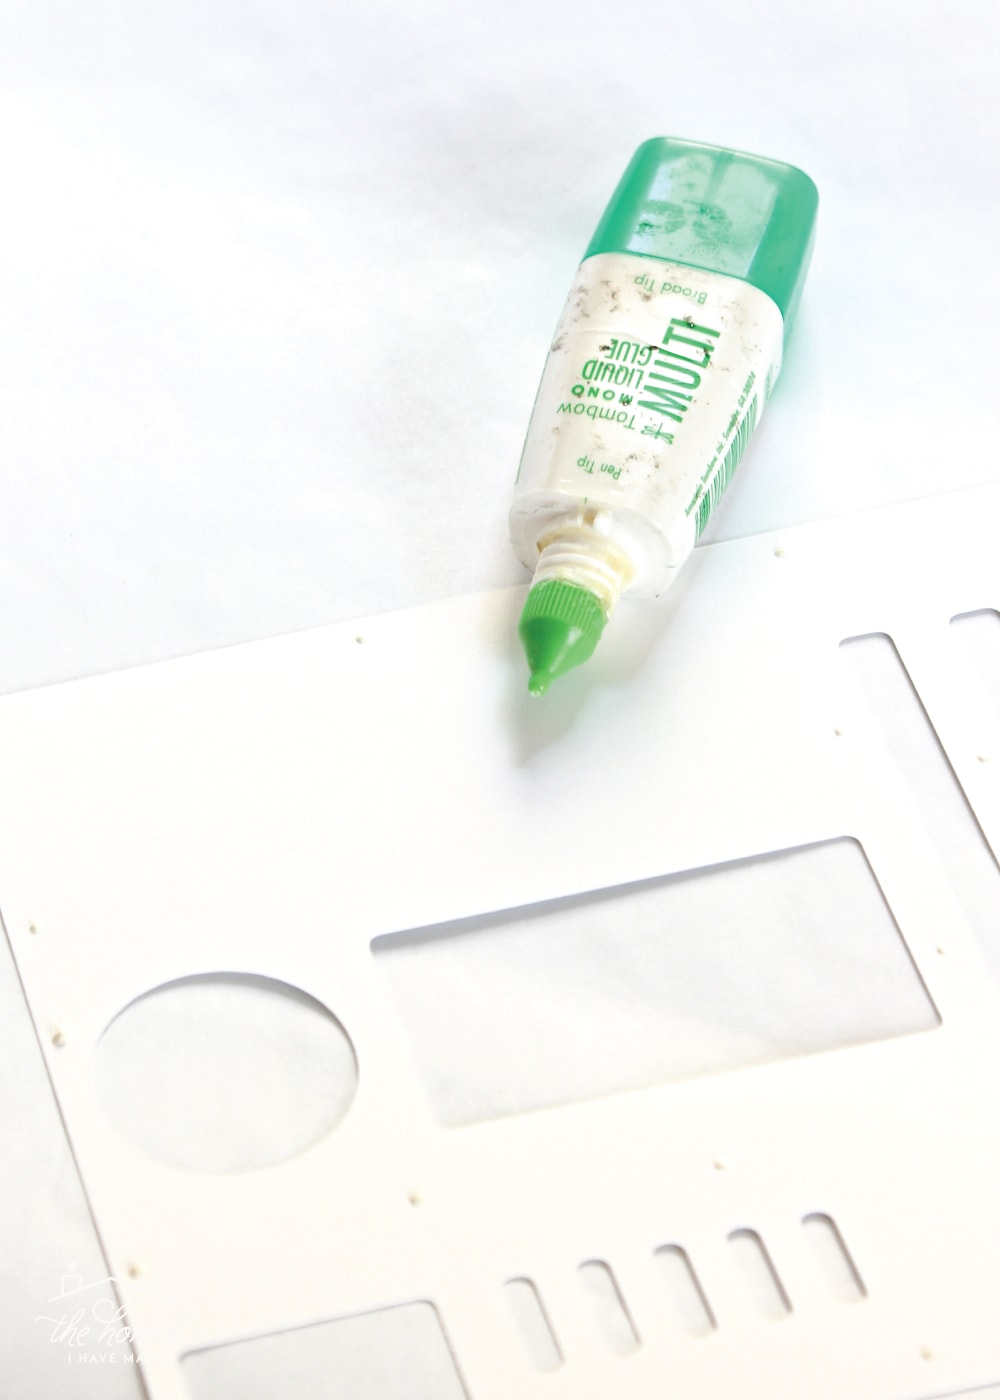
- Craft glue (my favorite)
- Frames
TIP! Most cardstock comes in 12×12″ sheets, so if you want to make really large art (mine are 11×14″), you may need to use different types of paper for the backgrounds. Both Michales and JoAnns sell large sheets of colored paper (look in the canvas and paint section), and poster board is another option if you need basic colors. I had enough cardstock on hand for all my cuts but bought green, orange and black poster board for the backgrounds of each image. One sheet was enough for two 11×14″ cuts.
These prints may look overly complicated, but I can ensure you they are not. From start-to-finish, each one too me about 30 minutes, and much of that time was waiting for my Cricut to cut. I’ll walk you through it all step-by-step so you can use or adapt the process to make stunning artwork for your own home!
Preparing the Designs
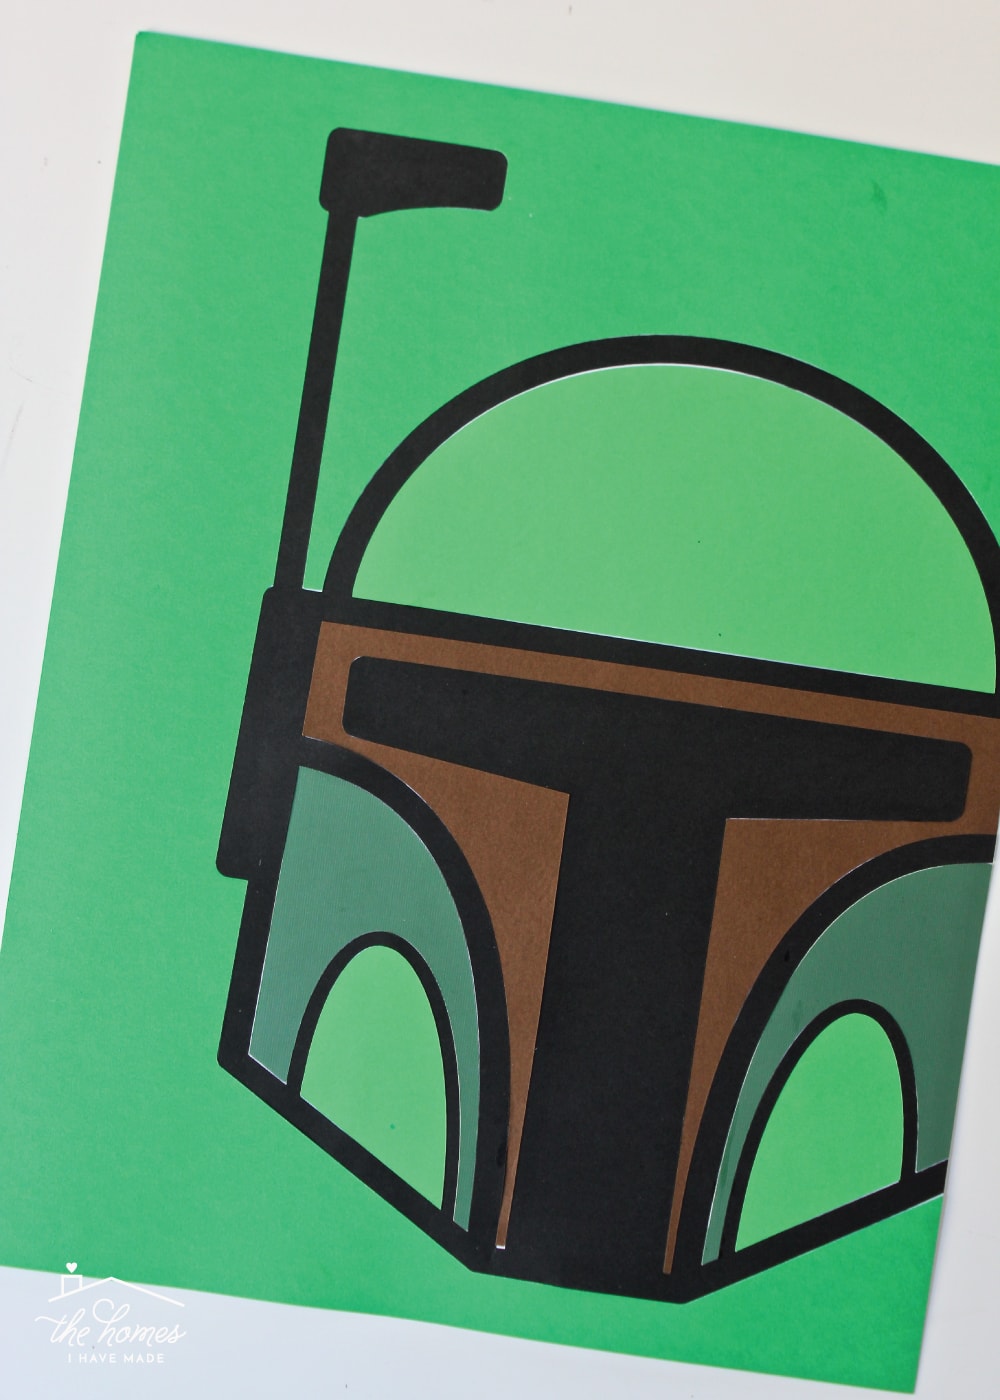
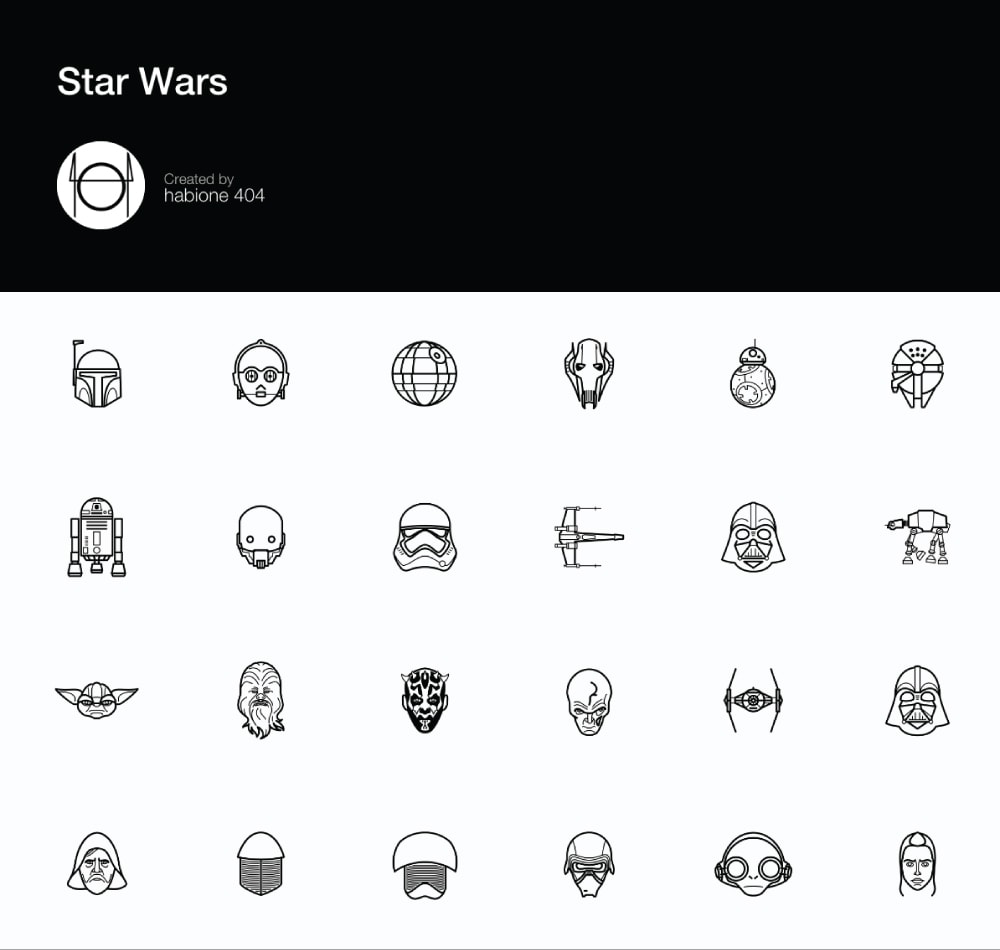
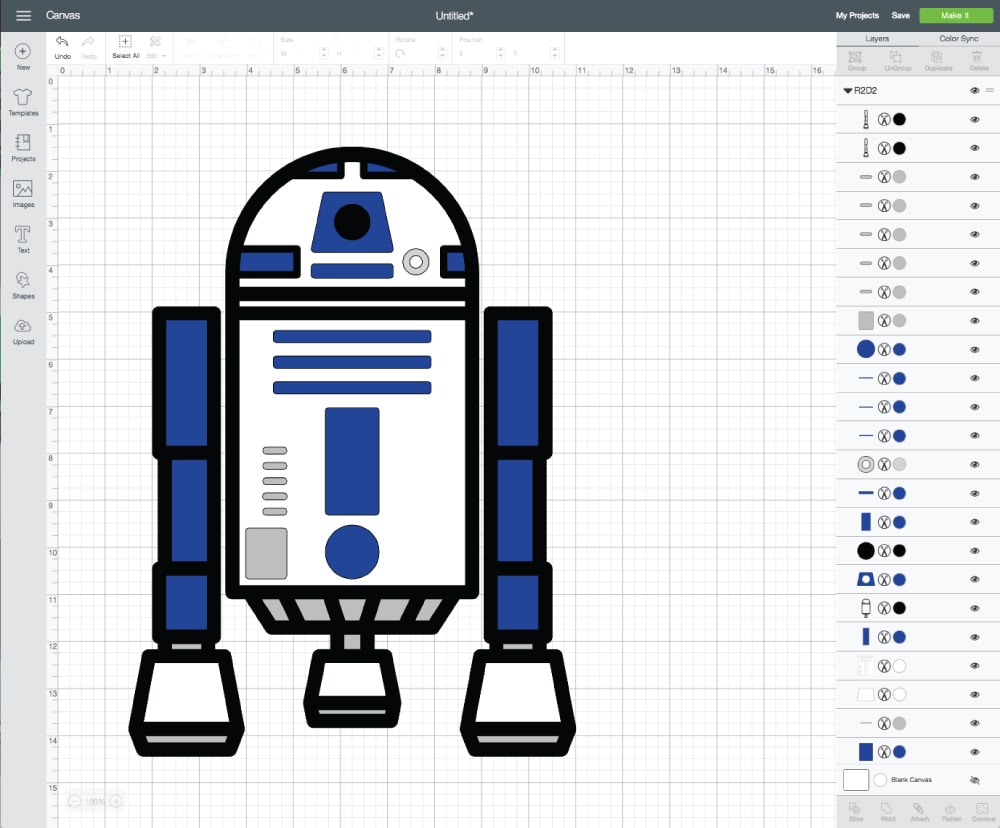
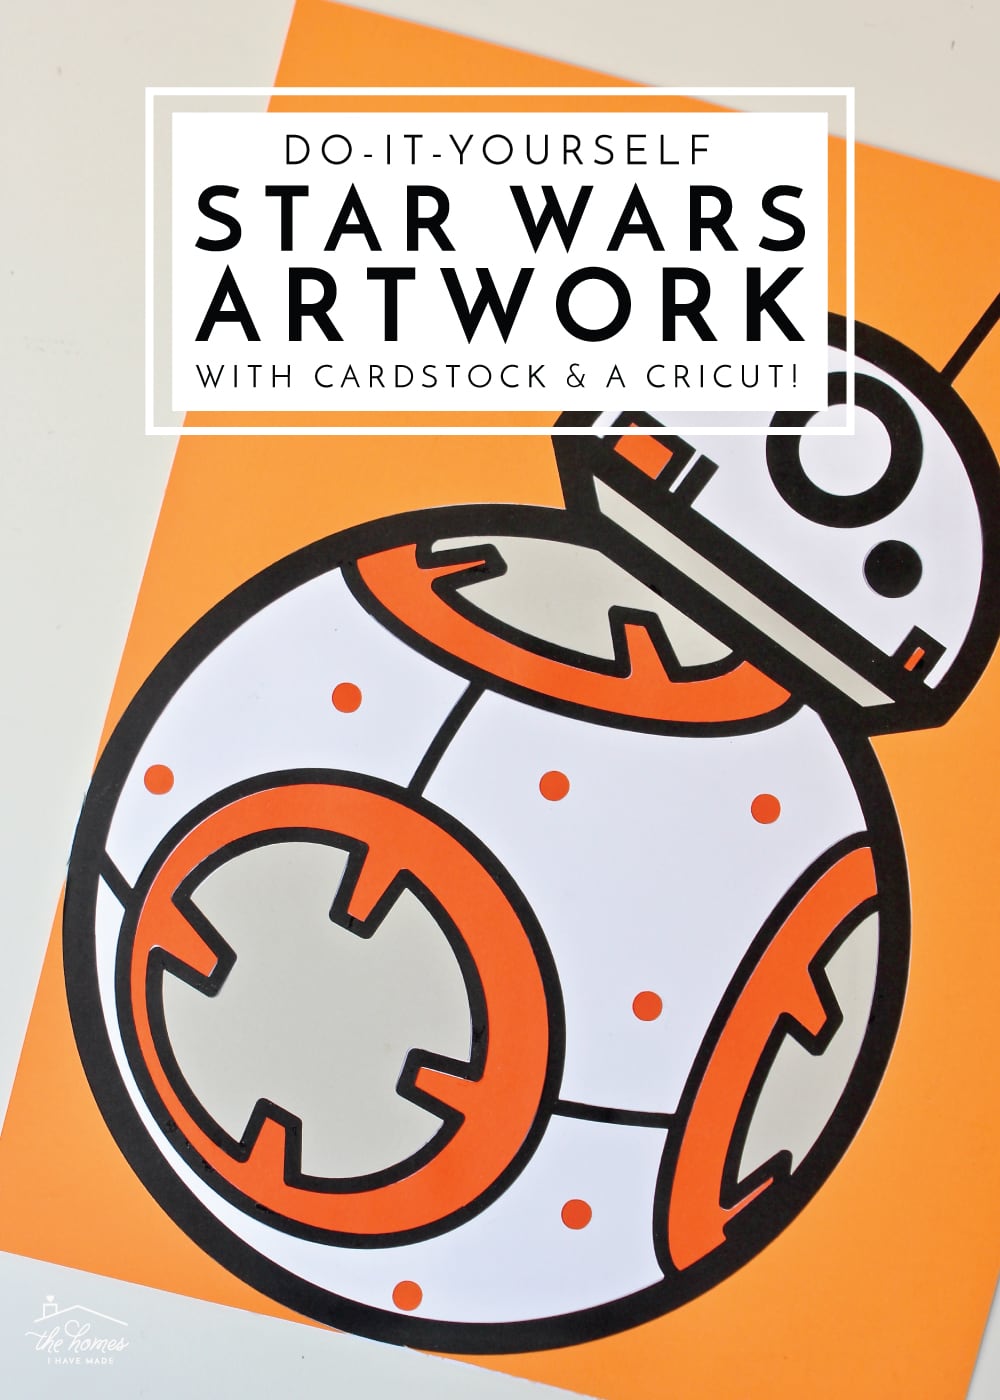
If you’re a Cricut user, the easiest place to go for designs is in the Cricut Design Space Image Library. However, after going through the cartridges available, as well as for-purchase SVG files on Etsy, I just couldn’t find Star Wars images I liked. So I turned to my other, absolute favorite source for SVG files: Noun Project. After looking through all the Star Wars images available, I finally settled on the below set of icons, and picked BB-8, R2D2, Darth Vadar, Boba Fett, Chewbacca, and the Storm Trooper for Henry’s room.
You’ll notice that the above SVG files are just outlines, so you need to fill in all the colors. As I’ve mentioned before, I use Adobe Illustrator a lot…so I imported the SVG files into Illustrator and then used the Pathfinder tools to play with all the colors until I had each character looking just the way I wanted it.
I then exported each character as their own SVG files, so when I imported them into Cricut Design Space, each color was an image ready to be cut.
However, I realize many of you don’t have or use Illustrator, so there is another way to do it…and I’ve already taught you how!
After importing the outline SVG file, duplicate the image (several times based on how many different colors you need) and then use the Contour Tool to swap out the various parts of the design until you have it colored just the way you want it. If you need help with the Contour Tool, refer to this extensive tutorial.

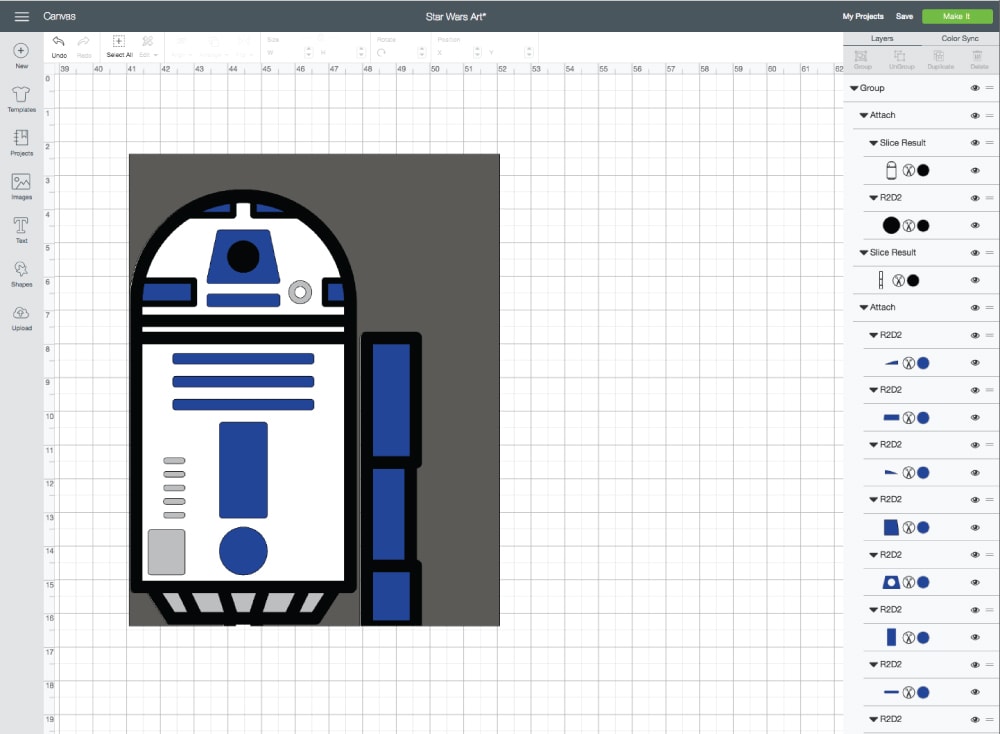
NOTE: To keep from having to place layers ON TOP of another layer, you may have to cut some parts of the design out of others. To do this, use the Slice Tool as I outline in this post. In the example above, I had to slice the black tick marks out of the white layer since I couldn’t Contour them out.
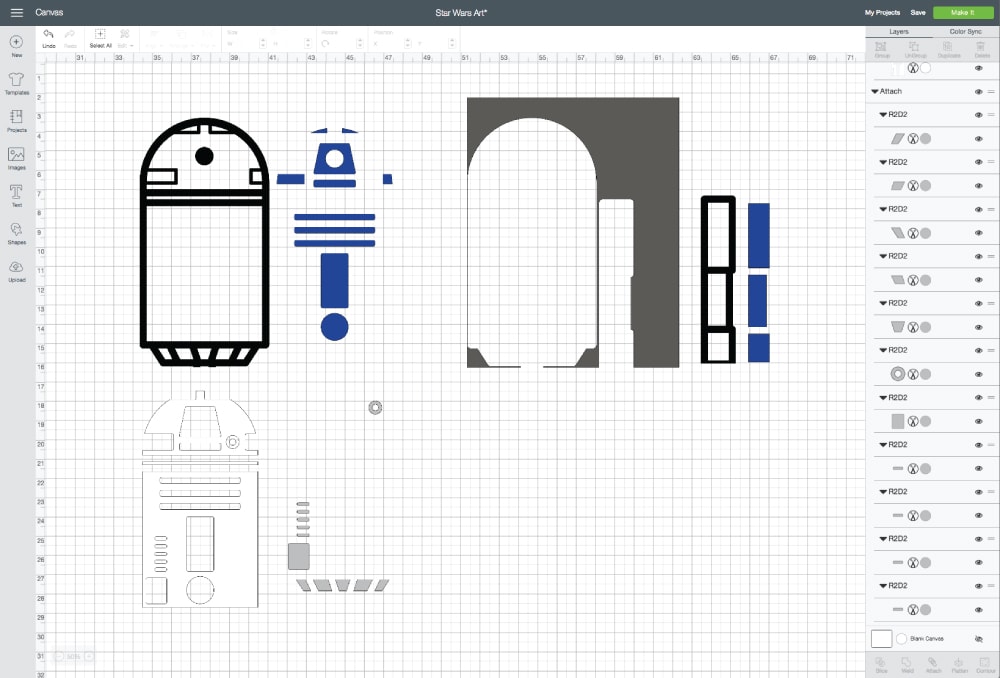
Although it may take you some time to get each design colored just right using the Slice and Contour tools, when you’re done and layer everything back up, you’ll see how all the various cut layers puzzle together to make a solid (flat!) image:

Once you have the entire image just the way you want it, you may want to change it’s position, crop, angle, etc. I wanted my Star Wars friends to look zoomed-in on, so I sliced each one down in different ways.
Finally, you’ll want to add one more layer to be your background color and fill out your frame. I wanted my finished prints to be 11×14,” so I added an 11×14″ block and sliced each character out of it.
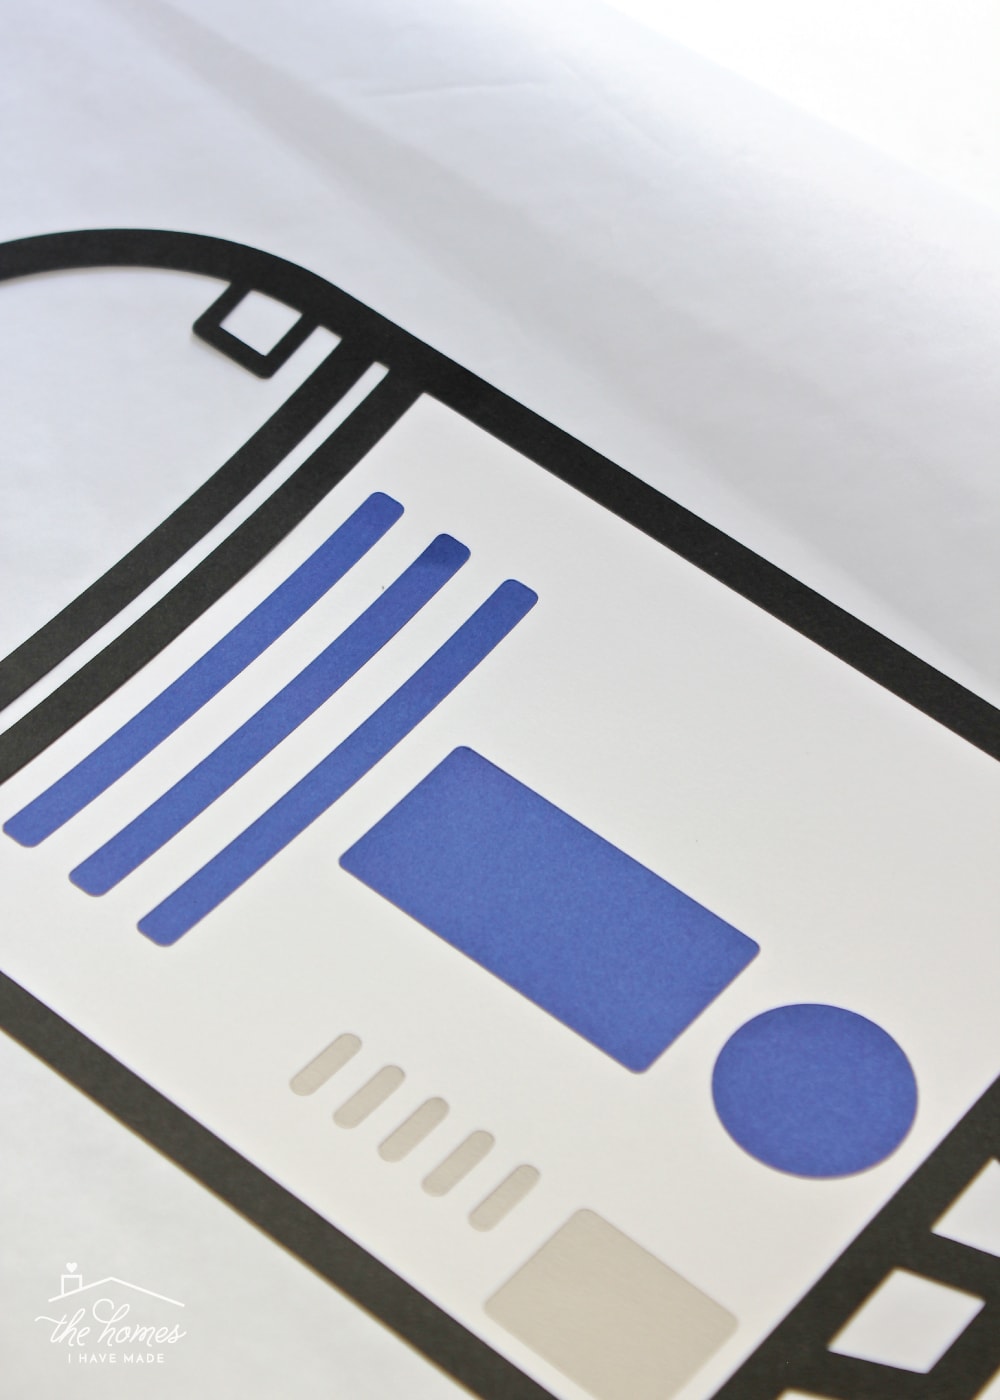
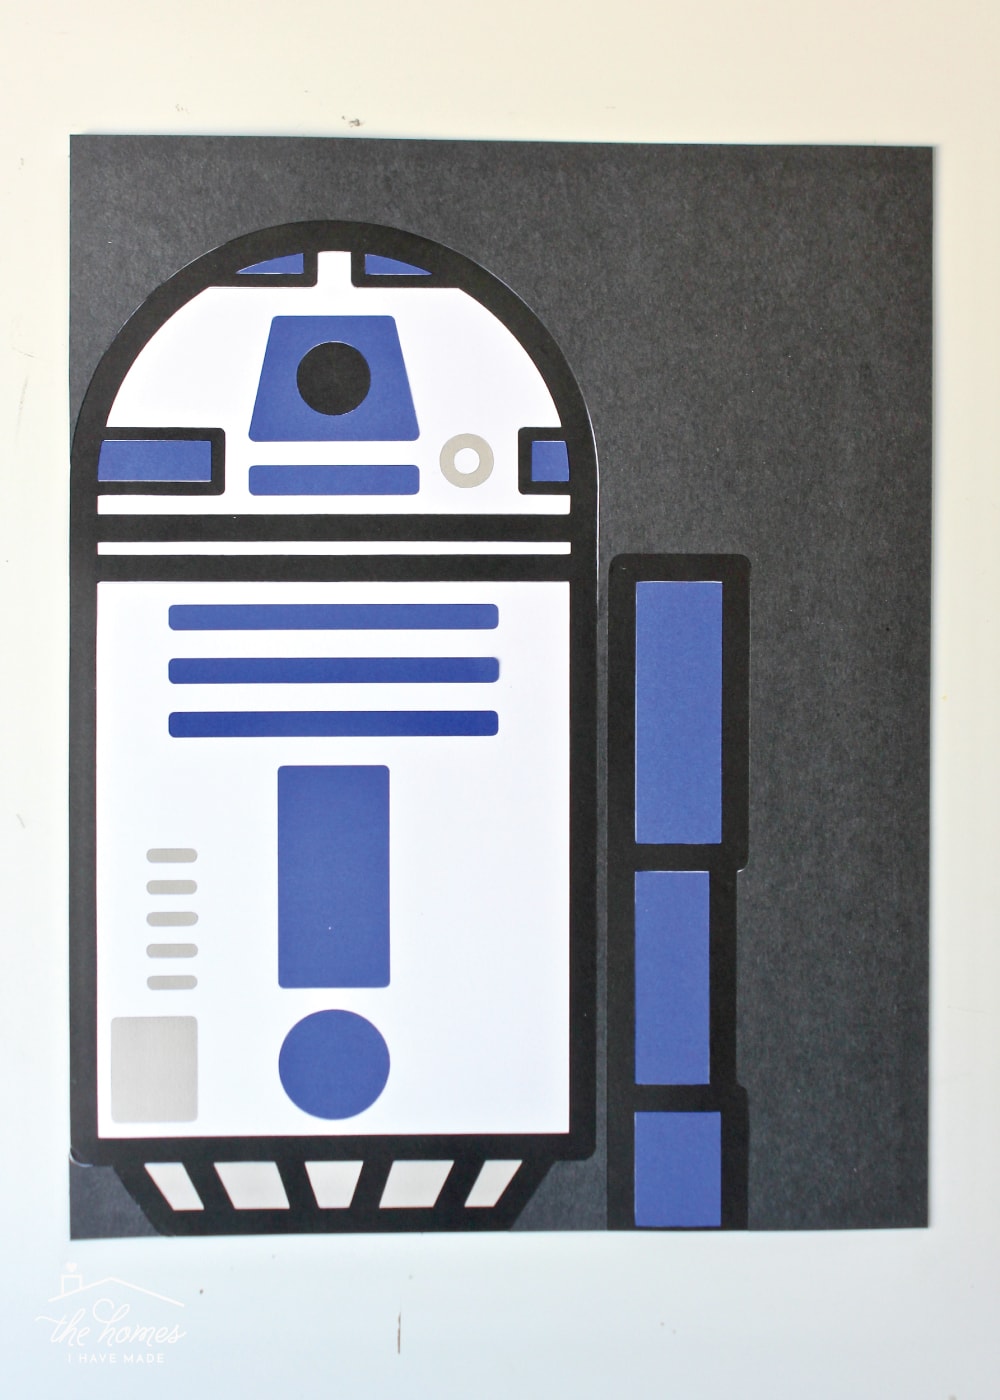
As you can see below, R2D2 is now broken down, by color, into his various components. And because everything is Sliced and Contoured, you’ve essentially created a puzzle that simply needs to be glued back together!
Want to save this post?
Getting the files ready to be cut IS the most tedious part of this whole project; but I promise you, the effort you put into the cut files will be worth it because assembly will be a snap!
Cutting and Assembling Your Artwork
Once your files are colored, sliced, contoured, and sized exactly as you want for your finished artwork, you need to cut them out of cardstock with your e-cutter and then weed them accordingly.
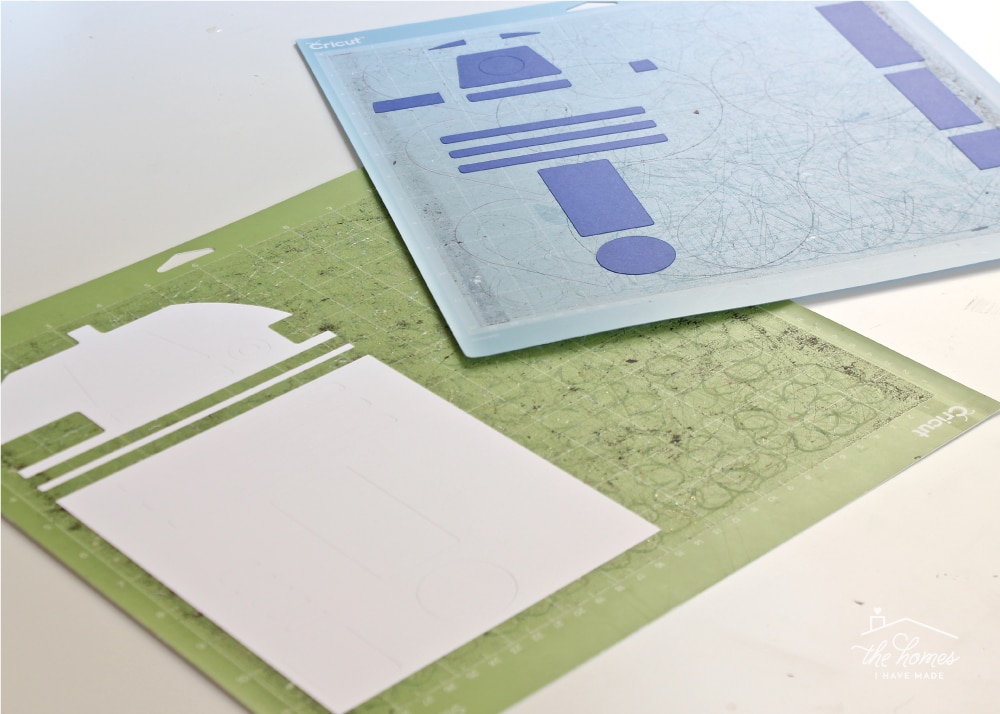
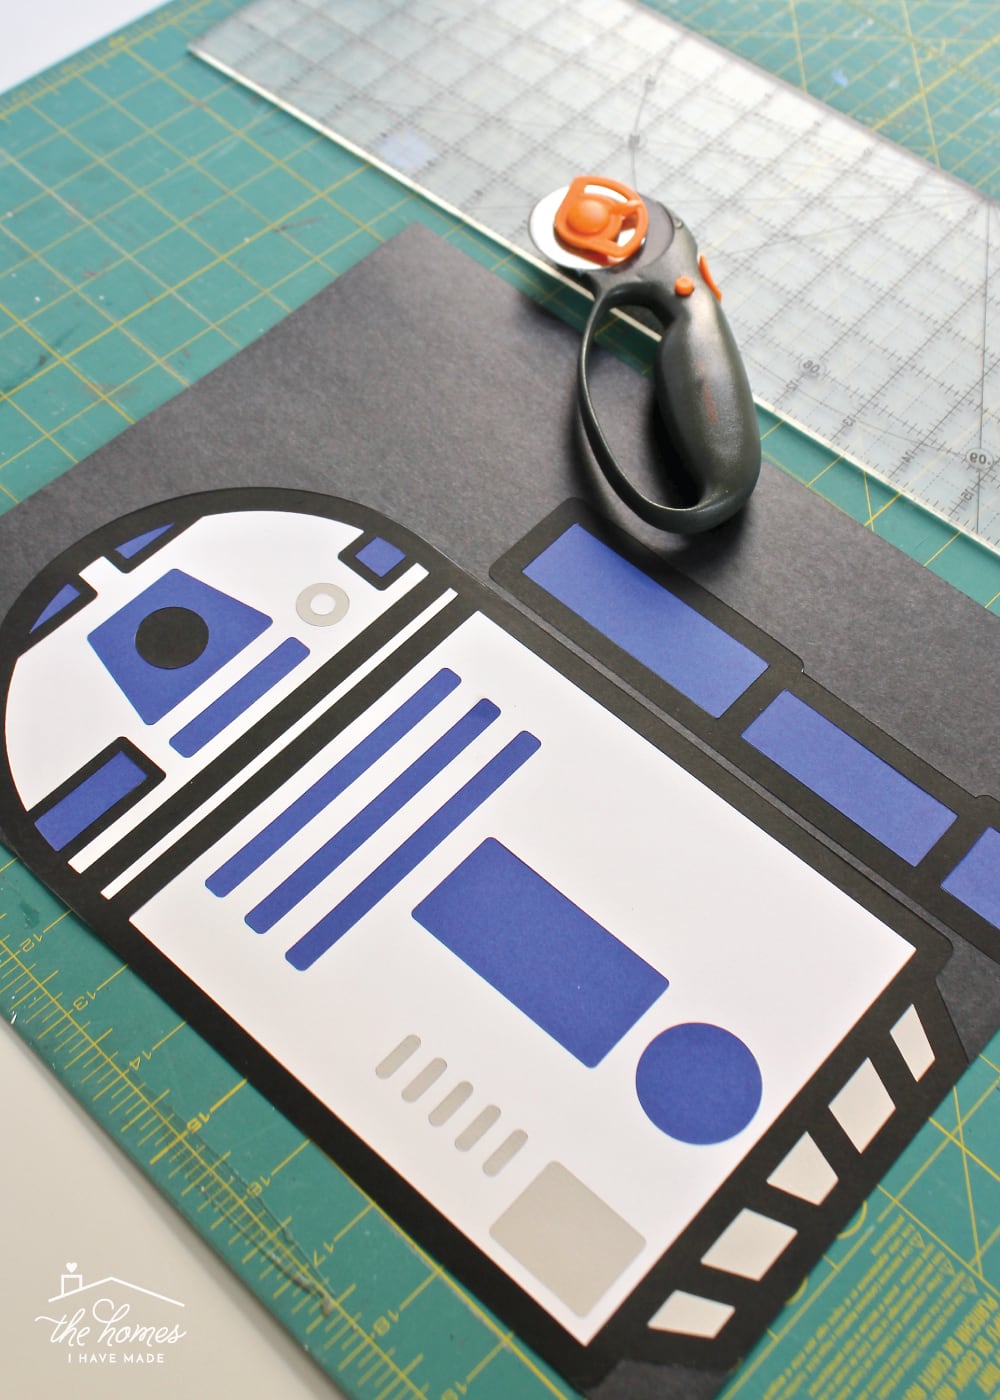
Next, cut down a sheet of inexpensive, thin craft paper (I use rolls of bulletin board paper for large projects) that is larger than your finished project. This is the paper that you will glue all of your cuts to.
After assembling 6 of these art pieces in different ways, I can say for certain that it is best to work from the center of your design out, rather than from the outside of the design in. Although the Cricut is precise, paper is flimsy and there is no guarantee you will glue large cuts down exactly as they should be to puzzle perfectly with the other cuts. So instead of starting with the background color or the black outline cut, I suggest starting with the biggest inside cut you have and working out from there.

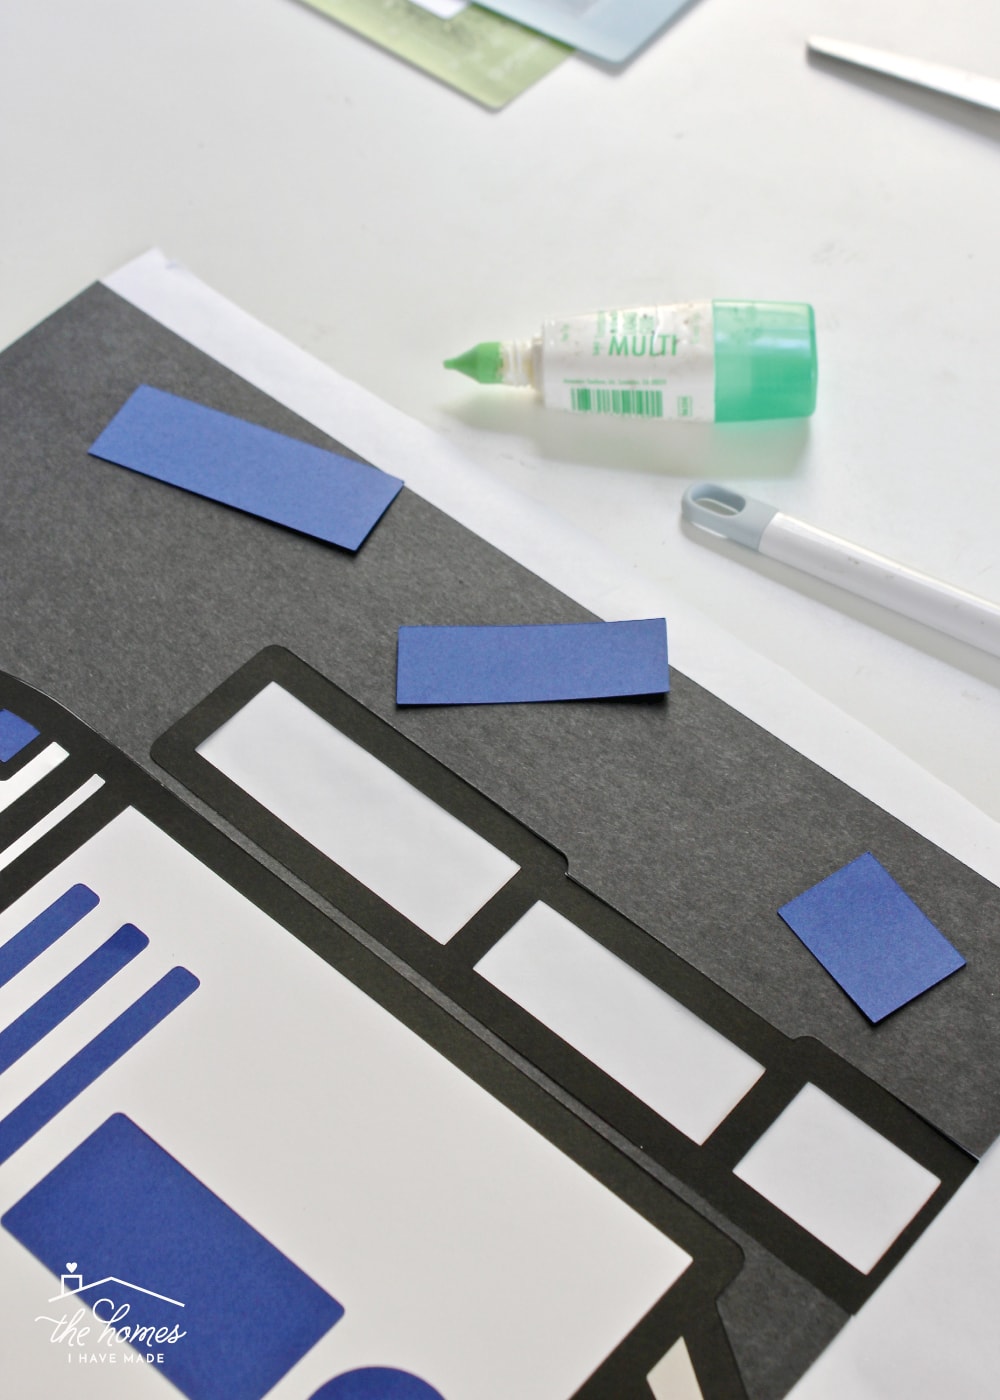
I recommend placing small dots on as much as the cut as possible, especially long, skinny cuts that can come loose.
Smooth the first cut down onto the center of the craft paper and wipe away any beads of glue that come out the sides. From your initial placement, place in all the other cuts. Next, I added R2D2’s white and tan buttons…

…and then moved out from the center, adding the black outline cut.
Continue filling in details and moving outward, just as you would a puzzle.
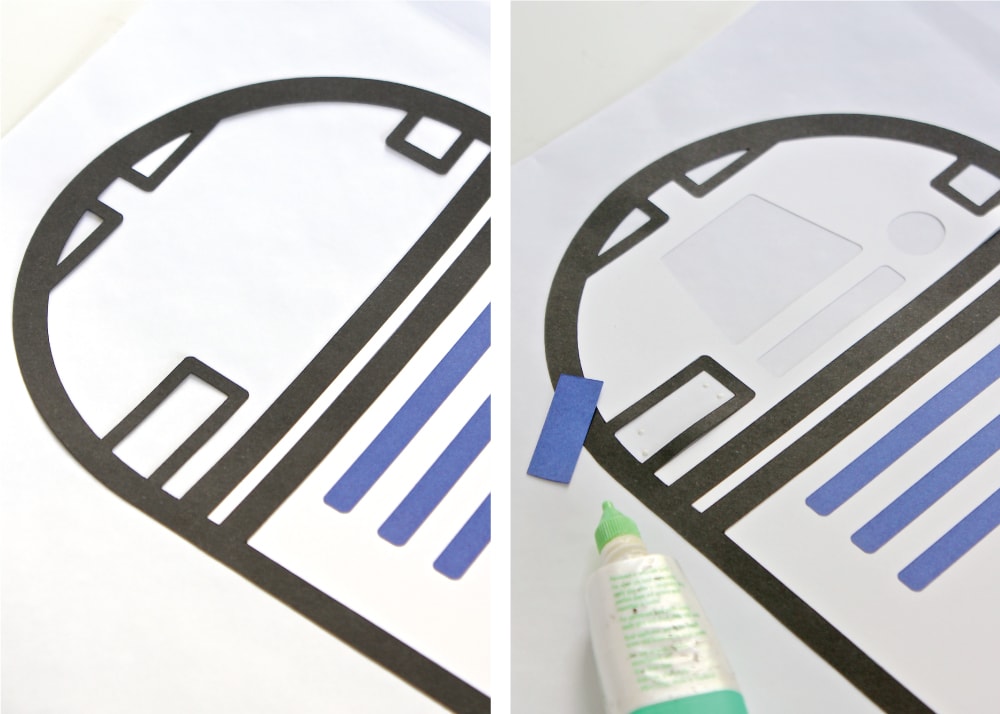
As you move out from the character itself, glue the background around the black outline cut, working as best you can to eliminate gaps and margins.

Assembling the artwork takes almost no skill, and they comes together rather quickly. That’s why the slicing is SOOOO important! No thought or precision is required in getting your designs put back together, and the spacing and placement of each piece will be practically flawless!
The final step is to trim your final piece down to fit your frames. Although each and every piece of paper should fit together perfectly, paper is an inflexible medium and you may not end up with a perfectly square or sized piece. I used my rotary cutter and ruler to square everything up and ensure the final project measured right for my frames.
TIP! I can’t stress enough to work from the center out rather than the outside in. And like I said, even with the most precise of placement, you will likely end with tiny gaps between your cuts. From a distance, these tiny gaps are hardly noticeable; but if you want to avoid them all together, I suggest using a dark sheet of paper as your base layer. Had I layered all my cuts onto black paper instead of white, you wouldn’t see those tiny margins where the slices meet!
I can’t tell you how gratifying these art pieces were to make! Yes, getting the designs just right and ready for cutting took some time…but that’s mainly because I was creating my cut files from scratch. By slicing the layers into each other (instead of placing each layer on top of the next), assembling them was very, very easy. The whole display of 6 “prints” cost me $3 in poster board about about 3 hours! Not too bad for such a striking wall display, if I do say so myself!
Using paper is such an inexpensive way to make art for your walls. Like I said, this idea can be adapted in so many ways (princesses, super heroes, flowers, etc); and if you need even more ideas for using paper to color your walls, check out this post here!
And with that, I’m signing off for the week, my friends! Have a wonderful weekend!
Megan
6 Comments on “DIY Star Wars Artwork with a Cricut Explore”
Omg why aren’t there any comments?!!! Your skill is worthy of huge praise, well done! Those came out beautifully!!
Love from Sheffield UK xx
Ha! Thank you! Yea – I was pretty proud of these and would have loved to see them get a little more traction, but that’s how things go sometimes!
I appreciate your praise!!!Happy New Year!
Megan
Thank you for the inspiration- I cannot find some very specific decorations requested by the birthday boy. Although this year’s party will be different than imagined, your tutorial will help me decorate a celebration customized for him! (Hopefully I’ll convince him to re-use them as bedroom art, too)
Glad you found the artwork helpful! Happy Birthday to your kiddo!
Megan
These are amazing! I’m in awe!! Do you sell them on Etsy or anything? Soo amazing!
Hi Kris!
Oh that’s so nice of you to say! No, I don’t sell my work…I just share the concepts/tutorial so others can make the projects too!
Thanks for stopping by!
Megan